1
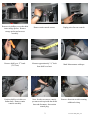
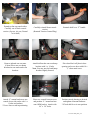
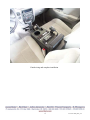
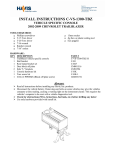
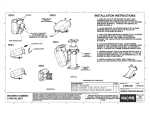
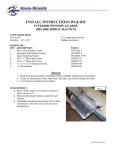
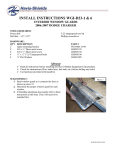
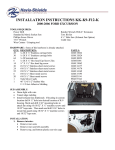
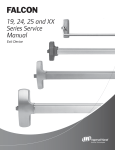
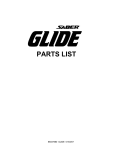
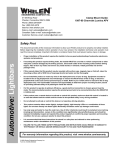
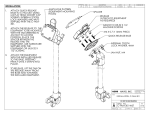
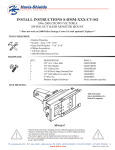
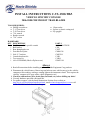
4
INSTALL INSTRUCTIONS C-VS-1300-TBZ
VEHICLE SPECIFIC CONSOLE
2006-2008 CHEVROLET TRAILBLAZER
TOOLS REQUIRED:
Phillips screwdriver
T-15 Torx driver
T-20 Torx driver
7/16 wrench
Ratchet wrench
7/16” socket
HARDWARE:
QTY DESCRIPTION
1 Trailblazer vehicle specific console
1 Bail bracket
1 Rear hump bracket set
1 Duct block off plate
2 Side “L” brackets
1 Console hardware kit
1 Torx screw kit
1 #10x1/2 PPHSMS (Block off plate screw)
15mm socket
Jig Saw or plastic cutting tool
Eye goggles
PART #
C-VS-1300-TBZ-H
C-B1
C-B27
CM001516
CM93594
C-HK
C-HK-1
GSM33194
Always!
Read all instructions before installing any Havis-Shields Equipment Corp products.
Disconnect the vehicle battery. Removing seat bolts on some vehicles may give the vehicles
computer a false reading, causing a warning light on the instrument cluster. This requires the
vehicles’ computer to be reset with a vehicle diagnostics tool.
Check for obstructions (Wire, brake lines, fuel tank, etc.) before drilling any holes!
Use only hardware provided with install kit.
For product support, visit the Install Instructions Section of our website at
http://havis.com/Installation/Installation.html, email [email protected] or call
1-800-524-9900 and ask for technical support.
Remove six phillips screws that hold
inner storage pocket. Remove
storage pocket and arm rest
assembly.
Remove main console screws.
Unplug wires for rear controls.
Remove shift lever “T” knob.
(T15 Torx)
Measure approximately 3 ½” back
from shift lever boot.
Mark Measurement with tape.
Position shift lever in drive or
further back. Remove entire
console assembly.
Note: In order to remove console,
you must reach up inside the shifter
boot and disconnect the traction
control plug.
Remove front trim to aid in running
additional wiring.
2
C-VS-1300-TBZ_INST_9-07
Extend cut line on console sides.
Carefully cut off back console
section. (Jig saw, Air saw, Dremel
or Air drill)
Carefully reinstall front console
section.
(Reattach Traction Control Plug)
Reattach shift lever “T” handle.
Remove inboard rear seat nuts.
(15mm) Place new rear hump
brackets on seat studs under seat
brackets.
Attach bail bracket onto rear hump
brackets with ¼ x ¾ bolts.
Note: You may need to bend hump
brackets slightly forward.
Place duct block off plate in duct
opening and screw down with #10 x
½” sheet metal screw.
Attach “L” mount brackets to new
console lower side tracks with ¼ x
½ bolts and washers.
**Leave loose to aid in positioning.
Place new console between seats
and position “L” mount brackets
onto OEM bracket. Attach with
1/4” x 3/4” bolts.
Position console housing as desired
and tighten all mount hardware.
**Check shift lever in rear position.
3
C-VS-1300-TBZ_INST_9-07
Finish wiring and complete installation
4
C-VS-1300-TBZ_INST_9-07