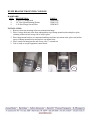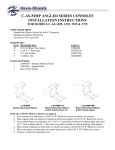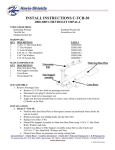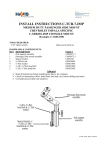
1
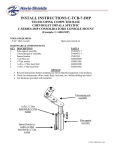
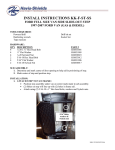
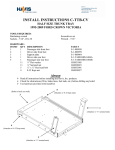
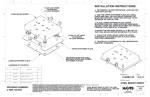
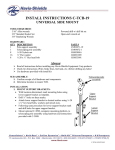
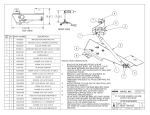
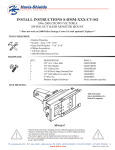
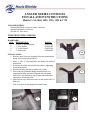
ANGLED SERIES CONSOLES
INSTALLATION INSTRUCTIONS
Models C-AS-1060, 1025, 1325, 1525 & 1725
TOOLS REQUIRED:
Standard and Metric socket set with 6”extension.
Standard and Metric wrench set
#20 and #15 Torx driver
TRAK MOUNTED CONSOLE
HARDWARE:
QTY: DESCRIPTION:
8
¼-20 X ¾”Hex Head Bolt
8
¼” Flat Washer
6
¼” Lock Washer
8
¼-20 Hex Nut
PART #:
GSM33001
GSM31005
GSM31026
GSM30005
2/3
INSTALLATION:
1. Remove inner front seat mounting bolts near transmission
hump. Just loosen outboard bolts.
2. Place ¼ - 20 x ¾” Hex head bolts into under side tracks of
trak mount.
3. Position trak mount in desired location before tightening
down hump mount.
4. Mount rear hump brackets to under side of trak.
5. Place trak with positioned hump mount brackets over
transmission hump and onto front and rear seat mount
studs. Place seat bracket on top of hump mount brackets
and replace seat mount bolts.
6. Slide console up to dash and secure to trak mount with 1/4”
hardware.
7. Unit is ready to accept equipment control heads.
5
4
6
HUMP BRACKET MOUNTED CONSOLE
HARDWARE:
QTY: DESCRIPTION:
4
¼-20 x ¾” Carriage bolt
4
1/4” Flat Nylon Retaining Washer
4
¼-20 Hex Flange Serrated Nut
PART #:
GSM32000
GSM31322
GSM30023
INSTALLATION:
1. Remove front seat mounting bolts near transmission hump
2. Place Carriage bolts into slots from underneath to top of hump mount bracket and place nylon
retaining washer on bolt on top side to hold in place.
3. Place hump mount bracket over transmission hump and onto seat mount studs, place seat bracket
on top of hump mount bracket and replace seat mount bolts.
4. Place console on hump bracket and secure with ¼” serrated nut.
5. Unit is ready to accept Equipment control heads.
2/3
4
C-AS-INST-11-06