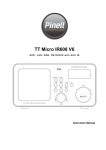
1
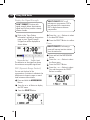
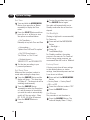
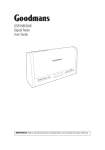
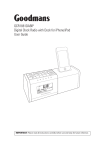
GCR1880DAB Digital Alarm Clock Radio User Guide IMPORTANT: Please read all instructions carefully before use and keep for future reference. Introduction Thank you for buying this Goodmans Digital Alarm Clock Radio. You may already be familiar with using a similar unit, but please take time to read these instructions. They are designed to familiarise you with the unit’s many features and to ensure you get the very best from your purchase. Safety is important Use of any electrical equipment should be undertaken with care. Please read the safety section on page 19 before using this Digital Alarm Clock Radio. This appliance is for household use only. 2 What’s in the box? Digital Alarm Clock Radio Power Adaptor Quick Start Guide The above images are for illustrative purposes only and may differ to the items supplied. Contents 01 Your Digital Alarm Clock Radio....4 07 System Settings.......................14 02 What is Digital Radio?................5 08 Troubleshooting........................15 03 Getting Started...........................8 09 Specifications...........................16 04 Using DAB Radio........................9 10 Warnings..................................19 05 Using Presets...........................10 11 Guarantee................................21 06 Using FM Radio........................11 3 01 Your Digital Alarm Clock Radio Top view SPEAKER Grill t ,u, select Buttons ALARMS SELECT VOL- VOL+ ALARMS Button VOL -, vol + Buttons STANDBY Button SNOOZE Button S N O O Z MODE/MENU Button E MODE/MENU STANDBY lcd Display Rear view DC: 6V - + power in jack 4 aerial lead What is Digital Radio 03 What is Digital Radio? DAB (Digital Audio Broadcasting) is the next generation of radio. DAB was developed in Europe by a consortium of broadcasters and manufacturers. DAB uses digital compression techniques to transform the source material, i.e. music and speech, into digital computer code before it is transmitted. The computer code consists of electronic ‘ones and zeros’ called binary digits or bits. The binary code is then multiplexed or grouped together to create a superior signal, when compared with the older analogue system, with the following key benefits: • Near CD quality sound. Because DAB is binary coded, the receiving equipment is only expecting to receive a series of ones and zeros, so any other interference is ignored, resulting in very high quality audio. • Interference free reception. Analogue systems suffer from an effect called ‘multipath distortion’. This is caused because radio waves do not behave in an orderly fashion, but bounce and reflect off buildings and mountains etc. DAB sees this as an advantage and uses the direct and reflected signals to actually reinforce the end result. • No need to re-tune. A single DAB frequency can be used to cover the whole of the UK, so solving many of the problems experienced with the earlier analogue system. • Scolling text Broadcasters can transmit text to your radio. This way you can read the name of the DJ, artist, song title or any other information that is broadcast. • DAB coverage Check your local coverage at www.ukdigitalradio.com, to check if you are in a DAB broadcast area. 5 03 Getting Started Carefully remove your Digital Radio from the box. You may wish to store the packaging for future use. 1 Positioning your Digital Radio Place your Digital Radio on a flat / stable surface that is not subject to vibrations. Avoid the following locations: •Where the radio will be exposed to direct sunlight. •Where the radio will be close to heat radiating sources. •Where the humidity is high and ventilation is poor. •Where it is dusty. •Where it is damp or there is a possibility of water dripping or splashing onto unit. 2 Adjusting the Aerial The aerial should be extended to ensure you receive the best reception possible in both DAB and FM radio modes. It may be necessary to alter the position of the Digital Radio and /or aerial to achieve the best signal. DC: 6V - + AERIAL 6 Getting Started 3 03 Turning the Unit On/Off Connect the power adapter to the DC Jack on the back of the unit. DC: 6V - + Then insert the power adapter into the wall outlet. Turn the mains power on and then press the STANDBY Button to turn on the unit. ALARMS STANDBY BUTTON S STANDBY SELECT N O O Z VOL- VOL+ E MODE/MENU When you want to turn the unit off, simple press the STANDBY Button again. When you turn on your radio for the first time you will see the image above displayed on the screen. Your radio will then enter standby mode. Simply press the STANDBY Button to have your radio turn on in DAB mode. It will immediately begin scanning for stations. DON’T FORGET. Every few months run a new scan to pick up any new digital stations that may have begun broadcasting after purchasing your radio. 7 03 Getting Started 5 Initial Scan When you first use your radio it will carry out a full scan for all digital radio stations. While scanning, the LCD will display an image similar to that below. 8 Using DAB Radio 04 Selecting a Scan Volume Control If you wish to select a scan at any time: Adjust the radio volume by pressing the VOL - or VOL + Button. 1 1 Press and hold the MODE/MENU 12 Button to access the menu. View Station Information 12 Press the < or > Button to select 2 3 23 Full Scan DON’T FORGET! There is a variety of station information transmitted by broadcasters. 4 34 Press the SELECT Button to 3 5 45 confirm. 6 The 56 Full Scan may take 1-2 minutes to 7 complete. Your radio will then access 768 first station in its storage list. the 78 9 89DON’T FORGET! The DAB stations This radio offers a convenient way for you to view this information. To view information of the station currently playing, follow these steps: 1 1 Press and hold the MODE/MENU 2 Button until it goes into main menu 1 setting mode. will be displayed and stored in alphanumeric order. 9 If a digital signal cannot be found, it may be necessary to relocate your radio. 3 2 Press the > Button twice to 2 14 ‘Display’ the required option, and 3 52 then press the SELECT Button. 41 Changing to another Station 36 Press the < or > Button to 3 25 select from the available station 74 63 information available. 8 1 While playing a DAB station, you 1 2 can shift to another program by pressing the < or > Button to 3 1 browse through the station list. 5 74 Press the SELECT Button to 4 69 58 confirm the option you want your 7 radio to display, such as Program 96 8 Type, Signal Strength, Signal 7 Quality, Scrolling text, Time and 9 8 Date. 4 2 When the station you want to listen 2 5 to is displayed in the list press 3 6 the SELECT Button to select this 4 station. 7 5 8 6 9 7 9 ALARMS SELECT VOL- VOL+ 8 9 S STANDBY N O O Z E MODE/MENU 9 04 Using DAB Radio Display the Signal Strength DON’T FORGET! Stations with signal strength below the minimum signal level will not provide a steady stream of audio. 1 Refer to the ‘View Station 1 2 Information’ outlined on the previous page to view ‘Signal Strength’. 3 A signal bar will be displayed as 4 shown below. 5 6 7 8 9 The indicator on the signal bar shows the minimum acceptable signal level. DRC (Dynamic Range Control) You can set the level of the compression of stations to eliminate the differences in dynamic range or sound level between radio stations. 1 Press and hold the MODE/MENU 1 12 Button. 12 Press the < or > Button to display 2 3 23 the DRC menu. 4 34 Press the SELECT Button. 3 5 45 6 56 7 67 8 78 9 89 9 10 DON’T FORGET! DRC to off indicates no compression; DRC to low indicates little compression; 1DRC to high shows maximum 12compression. 23 43 4 45 56 5 Press the < or > Buttons to select the ideal DRC Mode. Press the SELECT Button to confirm. 67 Prune 78 DON’T FORGET! Performing a 89 prune will remove inactive stations 9from the station list. 1 Press and hold the MODE/MENU 1 12 Button 12 Press the < or > Button to select 2 3 23 the Prune menu 4 34 Press the SELECT Button. 3 5 45 Press the < or > Button to select 4 6 56 Yes, and then press the SELECT 7 Button to confirm. 6 67 8 78 9 89 9 Using Presets Setting Station Presets DON’T FORGET! Preset functionality is the same for DAB and FM radio stations. Your radio can store 10 DAB & 10 FM station presets. The way of storing the current station playing as a preset is as follows: 1 1 12 12 2 3 23 4 34 3 5 45 6 56 7 67 8 17 89 28 91 39 2 4 4 3 5 4 6 5 5 7 6 8 7 9 8 05 Playing a Preset Station To select a stored station: 1 Press the MODE/MENU Button to 1 12 select the mode you wish to play. 2 23 Press and hold the MODE/MENU Button to enter the ‘Preset Recall’ 43 setting. 45 56 Press and hold the MODE/MENU Button until it says ‘Preset Recall’ 67 Press the > Button to select the Preset Store option. 289 Press the SELECT Button to confirm. 718 39 Press the < or > Buttons to select 3 4 your preset number and then press the SELECT Button to confirm. 5 6 7 8 9 Press the < or > Button to cycle through the preset stations store numbers 1-10. Select your preferred preset station number and then press the SELECT Button. ‘Preset # stored’ will be displayed where # is the chosen preset number. 9 11 06 Using FM Radio Using FM Radio 11 2 3 Press the MODE/MENU Button to switch to FM Mode from DAB Mode. Once in FM mode, the radio will play the station at the beginning of the FM 5frequency range (87.50MHz) or will play 6the last FM station you were listening to. 7 4 8 9 Scan Setting By default, FM scans stop at any available station. This may result in a poor signal-to-noise ratio (hiss) from weak stations. To change the scan settings to stop only at stations with good signal strength: 1 Press and hold the MODE/MENU 1 12 Button. 23 Release the Button when the 2 display shows: 431 <Scan setting> 45 2 <Strong station only> 5 Manually change the FM frequency 1 Make sure no other order/system 1 2 setting is being accessed, then press the < or > Button to change 3 the frequency by 0.05MHz until the 4 required station plays. 5 Auto-scan 6 Before performing this, please refer to 7 below ‘Scan Setting’ to make this the function more effective. 8 Auto-scanning can be performed by 9 following these steps: 1 1 Press and hold the > or < Button 2 while FM frequency shows. Your radio will skip forwards or 3 backwards until it reaches the next 4 available station. 5 DON’T FORGET! The display will show the frequency changing until it 7stops on the next station. 6 8 9 12 63 Press the SELECT Button to 3 67 confirm. 4 7 58 Audio Setting 89 6 default, all stereo stations are By 9 reproduced in stereo. For weak stations, 7 this may result in a poor signal-to noise 8 ratio (hiss). 9 To play weak stations in mono: 1 Press and hold the MODE/MENU 1 12 Button 23 Release the button when the 2 display shows: 431 < Audio setting > 45 2 <Forced mono > 5 36 Press the SELECT Button to 3 67 confirm. 4 78 5 89 6 9 7 8 9 Using FM Radio 06 View Station Information DON’T FORGET! There is a variety of station information transmitted by broadcasters, and this radio offers a convenient way for you to view this information. To view currently playing station information, follow this process: 1 Press and hold the MODE/MENU 1 2 Button until the display accesses 1 the main menu setting mode. 3 2 Press the > Button twice to select 2 41 3 the ‘Display’ option, then press the 52 SELECT Button. 41 36 Press the < or > Button to 3 257 select from the available station 4 63 information available. 8 5 74 Press the SELECT Button to 4 96 58 confirm the option you want your 7 radio to display, such as: 9 6 8 7 9 8 9 Program Type, Signal Strength, Signal Quality, Scrolling text, Time and Date. 13 1 07 System Settings 2 3 Set Time 1 Press and hold the MODE/MENU 1 2 Button, then press the < Button repeatedly to display the Time 3 1 menu. 4 2 Press the SELECT Button and then 2 5 3 press the < or > Button to view 6 the options as outlined below: 4 7 5 8 6 9 7 8 9 1 2 <Set Time/date>: Manually set-up both Time and Date <Auto update>: ‘Update from DAB’ and ‘No update’ <Set 12/24 hour format>: ‘Set 24 hour’ or ‘Set 12 hour’ <Set date format>: ‘MM-DD-YYYY’ and ‘DD-MM-YYYY’ 3 Set the time according to your 3 4 personal preference. 5 Set Sleep Time 6 Make sure that no alarm is about to sound when setting the sleep time. 7 18 Press the SNOOZE Button and the 1 29 display will show - “Set sleep time à Sleep off”. The sleep icon will be 3 1 twinkling simultaneously. 4 2 Press the SNOOZE Button 2 5 repeatedly to select the Sleep time 3 6 on, and the amount of time before 4 71 you wish the radio to automatically 5 switch off. You can select - Sleep 82 Off, 15, 30, 45, 60 or 90 minutes. 6 93 3 7 48 59 6 14 7 8 9 Press the SELECT Button to confirm. 4 To view the set sleep time, press 4 5 the SNOOZE Button again. Your 6 radio will automatically turn to Standby mode after the set time has 7 elapsed. 8 Set Backlight 9 (Setting to high level is recommended) For Power-on: 1 Press and hold the MODE/MENU 1 12 Button 23 < Backlight > 2 34 Power On 3 45 Low/Medium/High. For 56 Standby condition, the setting process is the same as ‘For Power-on’ 67 but for energy saving purposes, we 78 recommend that this is set to ‘Medium’. 89 9 Factory Reset A factory reset clears all user settings to their default values, so station settings, time/date and presets are lost. It can be set as follows: 1 Press and hold the MODE/MENU 1 2 Button <3 Factory Reset > Factory Reset? <NO> or YES 1 4 2 Press the > Button to select ‘YES’ 2 5 3 Press the SELECT Button. 3 6 4 7 Alarms Set 5 8 procedure to set the alarm is: The 6 19 Press the ALARMS Button. The 1 7 radio will display ‘Alarm 1 Setup’, 2 8 3 9 4 5 6 7 8 System Settings 1 12 2 32 34 3 45 56 Press the ALARMS button again to set alarm 2. Press the ALARMS Button one more time, and the relevant alarm icon will flash. Using ‘set alarm 1’ as an example, 67 when your radio says ‘Alarm 1 Setup’ 7 81 Press the SELECT Button. Your 1 891 radio will run the ‘Alarm 1 Wizard’. 2 92 Follow your radio’s instructions to 2 3 34 configure the following parameters: 07 Alarm On time This is the time the alarm will start to sound. 1 1 Modify the alarm time using the 12 < or > Buttons. 23 Press the SELECT Button to 2 3 confirm the alarm time. 4 45 Alarm Duration time 56 is the length of time the alarm will This sound for. 6 7 45 Alarm state 56 the alarm On or Off. Sets The 78 alarm sounding duration time can be selected from: 15/30/45/60 and 90 89 minutes. 167 Press the < or > Button to ‘On’ to 1 127 turn the alarm on. 8 1 Modify the duration using the < or 1 12 > Buttons 9 238 Press the SELECT Button to 2 9 34 confirm. 23 Press the SELECT Button to 2 3 confirm the setting. 67 45 Alarm Source 56 alarm can be set to be the internal The buzzer, the DAB Radio or the FM Radio. 6 9 If45‘Off’ is selected, the alarm will be turned off immediately and you will exit 56 the alarm settings. To set the Alarm Off 78 89DON’T FORGET! To turn the alarm off while the alarm is sounding, 9 press the STANDBY button. Refer to the steps 1-2 in “Alarm State”. When the On/Off options appear for Alarm state: 1 1 Press the < or > Button to select 12 ‘Off’. 23 Press the SELECT Button to 2 3 confirm, 4 ‘Alarm Saved’ will be displayed and the 45 alarm will be cancelled. 56 67 78 89 9 4 7 1 781 Press the < or > Buttons to select 12 the alarm source. 89 23 Press the SELECT Button to 2 9 34 confirm the selection. 45 Alarm Frequency The 56 Alarm can be set to operate: Daily, Once, Weekends or Weekdays. 67 17 Press the < or > Buttons to select 1 8 12 the required alarm frequency. 89 23 Press the SELECT Button to 2 9 3 confirm the selection. 4 45 56 67 78 89 9 15 07 System Settings Alarm Volume The Alarm volume can be set to your requirements. 1 Press the < or > Button to select 1 12 the required alarm volume. 23 Press the SELECT Button to 2 34 confirm the volume setting. Your 45 radio will say ’Alarm Saved’. 56 Operate SNOOZE To 67 Setting the snooze time when the alarm is78 sounding inhibits the alarm sound for the set time. when this time has 89 elapsed, the alarm sound will resume. 9 When the Alarm sounds and you wish to activate the snooze: 1 Press the SNOOZE Button 1 2 repeatedly to navigate to the required snooze time, 5/10/15/30 3 1 minutes. 4 2 The radio will go into Standby mode 2 5 and start to count down the set 3 6 snooze time. The Alarm will sound 41 7 again after the snooze time has 25 elapsed, 8 63 If you press the SNOOZE Button 3 9 47 again and it will count down again 8 for the set snooze time. 5 You 96 can press the STANDBY button to turn off the snooze function, and your 7 radio will then play normally. 8 9 16 Get SW Version To display the software version number: 1 Press and hold the MODE/MENU 1 2 Button, and then press the < Button to step to the SW version 3 1 menu setting. 4 12 Press the SELECT Button to 2 235 confirm. 346 You will now be able to view the 3 7 software information installed in 54 8 your radio. 56 679 78 89 9 Troubleshooting 08 Troubleshooting If a fault occurs, first check the points listed below before taking the set for repair. If you are unable to remedy a problem by following these hints, consult you retailer or service professional. WARNING: Under no circumstances should you try to repair the set yourself, as this will invalidate the warranty and may cause injury or death. Problem Possible Cause Remedy No sound 1.Volume not adjusted 2.Power cord is not correctly connected 1.Adjust the Volume. 2.Connect the power cord properly. Unit Buttons 1.Electrostatic discharge are not working. 1.Turn off the unit, disconnect the mains plug, and reconnect after a few seconds. Radio poor reception. 1.Aim the aerial for best reception, and ensure it is fully extended. 2.Keep the unit away from other electrical equipment 1.Weak radio aerial signal. 2.Interference caused by the vicinity of electrical equipment like TVs, Video Recorders, Computer, Thermostats, Fluorescent Lamps (TL) engines etc. Need extra help? Don’t worry we are just at the other end of the phone. If you are experiencing problems using your new product, just call 0871 230 1777 . 17 09 Specifications Power Supply •DC 6V, 500mA via supplied 230VAC/DC Adaptor Power Consumption •3W Speaker Power •1 W Tuner Frequency Coverage •FM: 87.5 -108MHz •DAB: 174 - 240MHz LCD Display •High resolution display Dimensions •172mm x 122mm x 54mm IMPORTANT: Due to continual revision and improvements to our products design, specifications are subject to change without notice. 18 10 Warnings WEEE General Safety This Digital Alarm Clock Radio is labelled in accordance with European Directive 2002/96/EG concerning used electrical and electronic appliances (Waste Electrical and Electronic Equipment - WEEE). The guideline determines the framework for the return and recycling of used appliances. Sound levels Your hearing is very important to you and to us, so please take care when using this Digital Alarm Clock Radio. It is strongly recommended that you follow the listed guidelines in order to prevent possible damage or loss of hearing. Establish a safe sound level Over time your hearing will adapt to continuous loud sounds and will give the impression that the volume has in fact been reduced. What seems normal to you may in fact be harmful. To guard against this before your hearing adapts, set the volume to a low level. Slowly increase the level until you can hear comfortably and clearly and without distortion. Damage to your hearing is accumulative and is irreversible. Any ringing or discomfort in the ears indicates that the volume is too loud. Once you have established a comfortable listening level, do not increase the sound level. This Digital Alarm Clock Radio has been designed and manufactured to meet European safety standards, but like any electrical equipment, care must be taken if you are to obtain the best results and safety is to be assured. Do read these operating instructions before you attempt to use the Speaker System. Do ensure that all electrical connections (including the mains adaptor, extension leads and interconnections between pieces of equipment) are properly made in accordance with the manufacturer’s instructions. Switch off and remove the mains adaptor when making or changing any connections. Do consult your dealer if you are ever in doubt about the installation, operation or safety of your Digital Alarm Clock Radio. Don’t continue to operate the Digital Alarm Clock Radio if you are ever in doubt about it working normally, or if it is damaged in any way. Switch it off withdraw the mains adaptor from the mains and consult your dealer. Don’t remove any fixed covers as this may expose you to dangerous voltages. Don’t leave the Digital Alarm Clock Radio switched On when it is unattended for long periods of time, unless it is specifically stated that it is designed for unattended operation or has a standby mode. 19 10 Warnings Ensure other people in your household are conversant with the Digital Alarm Clock Radio. This Digital Alarm Clock Radio is supplied with a mains adaptor which has been designed for indoor use only. Don’t obstruct the ventilation vents on the Digital Alarm Clock Radio, for example with curtains or soft furnishings. The mains adaptor is a sealed unit. There are no user serviceable parts inside and it does not require any electrical adjustments. Overheating will cause damage and shorten the life of the product. Do not attempt to open the mains adaptor. Don’t allow electrical equipment to be exposed to rain or moisture. If the mains adaptor becomes damaged, or fails to operate your Digital Alarm Clock Radio, it must be replaced and disposed of in a safe and environmentally protective way. Store the Digital Alarm Clock Radio in a clean, dry environment. Do not use any cleaning solutions on the Digital Alarm Clock Radio. Electrical Safety Read these electrical safety instructions carefully before connecting the power adaptor to the mains supply. 20 The mains adaptor is designed to operate on 100 - 240VAC 50 - 60Hz supply. Connecting it to any other power sources may damage the mains adaptor and the Digital Alarm Clock Radio. Guarantee 11 The Digital Alarm Clock Radio is guaranteed for twelve months from the date of original purchase. If any defect due to faulty materials or workmanship, contact the Goodmans Helpline. Have your receipt of purchase on hand. The guarantee is subject to the following provisions: •It is only valid within the boundaries of the country of purchase. •The product must be correctly installed and operated in accordance with the instructions contained in this User Guide. •This Digital Alarm Clock Radio must be used solely for domestic purposes. •The guarantee will be rendered invalid if the Digital Alarm Clock Radio is re-sold or has been damaged by inexpert repair. •The manufacturer disclaims any liability for incidental or consequential damages. •The guarantee is in addition to, and does not diminish, your statutory or legal rights. 21 22 23 0871 230 1777 24 GCR1880DAB-130712-Rev0