1
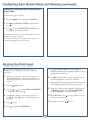
Configuring Auto Nozzle Check and Cleaning (continued)
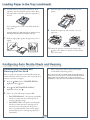
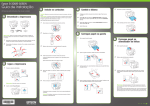
Manually Checking and Cleaning the
Print Head
1
Make sure paper is loaded.
2
Press the
3
Press until NOZZLE CHECK is selected, then
press .
4
Press to select AUTO NOZZLE CHECK, then
press OK to start checking nozzles.
button to display the Ink Menu.
The LCD screen will report any color that has a clog and
prompt if you want to clean it.
If no clog is detected, the message “Nozzle clog was not
detected” will appear on the LCD screen.
Aligning the Print Head
If your prints look grainy or blurry, or you see
misregistration or “ghosting,” you need to align the
print head.
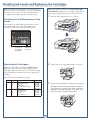
1
Make sure the printer is turned on. Load Epson
Enhanced Matte paper. (You can also use Epson
Doubleweight Matte or Ultra Premium Photo Paper
Luster.)
2
Press the
3
Press the or button until HEAD ALIGNMENT
is highlighted. Then press .
4
Press twice and choose the type of paper you
loaded. Then press , choose a specific paper and
press OK.
Press
3 times.
6
Press
to highlight ALIGNMENT.
Press to highlight AUTO, then press again. UNI-D (uni-directional) is highlighted. This is the type
of alignment to start with.
8
Press , then press OK to start the alignment process.
Each head alignment takes about 7 minutes.
Caution: Make sure you don’t open the front cover or
turn off the printer during the alignment process.
Menu button.
5
7
9
When the uni-directional alignment is finished, press
the Menu button, select HEAD ALIGNMENT, select ALIGNMENT, then select AUTO.
10Select BI-D ALL, press
, then press OK to start the bi-directional alignment.
11When done, press the
5
button.