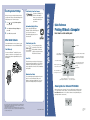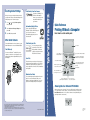
1
Inserting Your Memory Card
See below to insert your memory card:
Loading 4 x 6 " Premium
Glossy Photo Paper
In Basic mode, you can print only 4 x 6" photos on
Epson® Premium Glossy Photo Paper.
CompactFlashTM
or MicrodriveTM
(left)
1
Place the paper against the
right side of the feeder.
2
Slide the left
edge guide
against the
paper.
Customizing Your Prints
In Advanced mode, you can select layouts, match
the paper size and type setting to the paper
you’re using, and adjust image quality manually
or automatically.
Printing a 4 x 6 " Photo
1
Press the Basic/Advanced button to choose
Basic mode.
2
Press
or
to highlight Select Photo,
then press OK.
3
SD (Secure Digital) Card
or MMC (MultiMediaCard)
(middle)
TM
Use
or
to scroll through your photos.
(Press and hold one of the buttons to scroll
quickly.)
1
(To select multiple photos, see your Printer
Basics book for instructions.)
xD Picture CardTM
(right)
4
When the photo you want to print is shown on
the preview monitor, press OK to select it.
5
Press OK again and use
number of copies (1-100).
6
or
to choose the
Press OK, check your settings, then press the
green Print button to print your photo.
When you insert the card, you see a message
indicating that you have inserted a memory card.
The printer reads and counts the images on
your card.
NOTE: The printer recognizes the first 999 files
only. If your photos aren’t recognized, see your
Printer Basics book for troubleshooting
information.
3
For additional changes, scroll down and
select More Options. Select Automatic
Correction, Contrast, Brightness,
Saturation, Sharpness, Filter, or Crop.
(See your Printer Basics book for details.)
7
Press the green
your photos.
Print button to print
NOTE: If you need to cancel printing, press the
red
Stop button.
Paper Type Setting
Paper
Paper Type
setting
Plain paper
Plain
Select the number of copies to print:
Epson Photo Quality Ink Jet Paper
Highlight Copies, then press OK.
Epson Photo Paper
Glossy Photo
Epson Glossy Photo Paper
Epson Premium Glossy Photo Paper
Prem. Glossy
(This option may not be available, depending on
your Select Photo setting.)
Epson Premium Semigloss
Photo Paper
Semigloss
Match the type of paper you loaded:
Epson Semigloss Scrapbook
Photo Paper
Highlight Paper Type, then press OK.
Epson Matte Paper Heavyweight
Use the table in the next column to determine
the correct paper type. Select it, then press OK.
4
6
Epson Premium Bright White Paper
Select the number of copies you want to print
for each photo (1 to 100), then press OK.
SmartMediaTM card
(right)
Select a layout option, then press OK.
Select Photos:
Highlight Select Photo, then press OK.
Highlight the photo number you want to print,
then press OK.
2
Select a layout:
Highlight Layout, then press OK.
For more printing options, press the mode button to
switch to Advanced mode.
Use
or
to highlight a menu name, then press
OK to enter that menu and select settings.
Memory Stick®
(middle)
5
Match the paper size you loaded:
Matte
PremierArtTM Matte Scrapbook
Photo Paper
Epson Premium Luster Photo Paper
Prem. Luster
Epson ColorLife® Photo Paper
ColorLife
Epson Glossy Photo Greeting Cards
Greeting
Epson Iron-On Transfer Paper
Iron-on
Highlight Paper Size, then press OK.
NOTE: If you see unexpected results and you
have made settings in Advanced mode, see
“Resetting Default Settings” on the back of
this card.
Select the size of the paper you’ve loaded, then
press OK.
(This option may not be available, depending on
your Paper Type setting.)