1
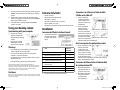
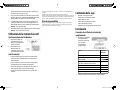
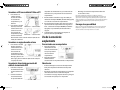
Connecting to a TV using the S-Video or A/V
cable
Box Contents
iPod® Docking Station
Station d’accueil iPod®
Estación de Acoplamiento iPod®
DX-IPD
•
•
•
•
•
•
Docking station
AC power adapter
AV cable (5 feet)
Sync cable (6 feet)
S-Video cable (6 feet)
Universal dock adapter (8)
1
2
Setting Up
Connecting your iPod to the docking station
1
Connect the universal
dock adapter
appropriate for your
iPod to the docking
station.
For…
2
AV cable
AV cable
S-Video cable
S-Video cable
Connecting to an external audio device
1
Use this
adapter…
iPod Mini (4 GB/6 GB)
3
iPod (20 GB/U2 Special Edition)
4
iPod (40 GB)
5
iPod with color display
(20 GB/30 GB/U2 Special Edition)
6
iPod with color display (40 GB/60 GB)
7
iPod Nano
8
iPod Video (30 GB)
9
iPod Video (60 GB)
10
Place your iPod in the docking station.
To connect S-Video,
plug the S-Video
cable into the docking
station and your TV.
To connect standard
video, connect the A/V
cable into the docking
station’s 3.5mm
auxiliary jack, then
connect the yellow
RCA plug to your TV’s
yellow Video In jack.
To connect external
audio, connect the
A/V cable into the
docking station’s
3.5mm auxiliary jack,
then connect the red
and white RCA plugs to
your audio device’s red
and white Audio In jacks.
Connecting power using the USB sync cable
1
2
Plug the AC power
adapter into an AC
power outlet.
Plug the USB sync
cable into the USB
port on the AC power
adapter and the 30-pin
connector on the back
of your docking station.
USER GUIDE
GUIDE DE L’UTILISATEUR I GUÍA DEL USUARIO
DX-IPD.indd 1
4/22/2006 12:00:54 PM
3
4
5
You may control your iPod charging mode using the
ON/OFF switch located on the side of your docking
station.
The LED turns green to indicate that the docking
station is charging your iPod. If you turn the ON/OFF
switch off, the LED turns off.
Your iPod works normally whether the ON/OFF
switch is on or off.
Contenu de la boîte
•
•
•
•
•
•
Station d’accueil
Adaptateur d’alimentation CA
Câble AV 1,5 m (5 pi)
Câble de synchronisation 1,8 m (6 pi)
Câble S-Vidéo 1,8 m (6 pi)
Adaptateur universel de station d’accueil 2,4 m (8 pi)
Using your docking station
Installation
Synchronizing with your computer
Connexion de l’iPod à la station d’accueil
1
2
Plug the sync cable’s
30-pin connector into
the back of the docking
station.
Plug the sync cable’s
USB plug into a USB
port on your computer.
1
•
•
•
DX-IPD.indd 2
Connectez l’adaptateur
universel approprié à
la station d’accueil de
l’iPod.
Pour…
Utilisez cet
adaptateur…
iPod Mini (4 Go/6 Go)
This Class B digital apparatus complies with Canadian ICES-003.
This device complies with Part 15 of the FCC Rules. Operation is subject to the
following two conditions: (1) this device may not cause harmful interference,
and (2) this device must accept any interference received, including
interference that may cause undesired operation.
Dynex is the trademark of Best Buy, Inc. iPod is a registered trademark of Apple
Computer, Inc., registered in the U.S. and other countries. All rights reserved. TV
and stereo not included.
2
1
Disassembling your iPod docking station and AC
power adapter may damage them.
Do not use the docking station and AC power
adapter in a wet environment.
If your iPod does not recharge after 8 hours, contact
Dynex for service.
Keep the docking station away from children.
Disclaimer
1
Pour la connexion
S-Vidéo, branchez le
câble S-Vidéo sur la
station d’accueil et sur
le téléviseur.
Pour la connexion
vidéo standard,
Câble Audio/Vidéo Câble S-Vidéo
branchez le câble
A/V sur le connecteur
auxiliaire de 3,5 mm de
la station d’accueil puis
branchez la prise RCA
Câble Audio/Vidéo Câble S-Vidéo
jaune sur le connecteur
d’entrée vidéo jaune du téléviseur.
Pour la connexion d’un périphérique audio
Warnings
•
Connexion à un téléviseur à l’aide du câble
S-Vidéo ou du câble A/V
2
3
iPod (20 Go/U2 Édition spéciale)
4
iPod (40 Go)
5
iPod avec affichage couleur
(20 Go/30 Go/U2 Édition spéciale)
6
iPod avec affichage couleur
(40 Go/60 Go)
7
iPod Nano
8
iPod Video (30 Go)
9
iPod Video (60 Go)
10
Placez votre iPod sur la station d’accueil.
Pour la connexion audio
externe, branchez
le câble A/V sur le
connecteur auxiliaire
de 3,5 mm de la station
d’accueil puis branchez
les prises RCA rouge et
blanche sur les connecteurs d’entrée audio rouge et
blanc du périphérique audio.
Connexion de l’alimentation à l’aide du câble
de synchronisation USB
1
2
Branchez l’adaptateur
d’alimentation CA sur
une prise secteur CA.
Branchez le câble USB
de synchronisation
sur le port USB
de l’adaptateur
4/22/2006 12:00:55 PM
3
4
5
d’alimentation CA et le connecteur à 30 broches à
l’arrière de la station d’accueil.
Vous pouvez contrôler le mode de charge de votre
iPod en utilisant le commutateur ON/OFF (MarcheArrêt) situé sur le côté de la station d’accueil.
Le témoin DEL passe au vert pour signaler que la
station d’accueil est en train de charger l’iPod. Le
témoin DEL s’éteint si vous mettez le commutateur
ON/OFF sur la position OFF.
L’iPod fonctionne normalement que le commutateur
ON/OFF soit sur marche ou arrêt.
Utilisation de la station d’accueil
Synchronisation avec l’ordinateur
1
2
Cet appareil numérique de la classe B est conforme à la norme NMB-003 du
Canada.
Cet appareil est conforme à l’article 15 du règlement de la FCC. Son
fonctionnement est soumis aux deux conditions suivantes : (1) Cet appareil ne doit
pas provoquer d’interférence dangereuses et (2) il doit accepter toute interférence
reçue, y compris celles risquant d’engendrer un fonctionnement indésirable.
Déni de responsabilité
Dynex est la marque de commerce de Best Buy, Inc. ; iPod est une marque
d’Apple Computer, Inc., déposée aux États-Unis et dans d’autres pays. Tous
droits réservés. Téléviseur et stéréo non inclus.
Contenido de la caja
•
•
•
•
•
•
Estación de acoplamiento
Adaptador de alimentación CA
Cable de AV (5 pies)
Cable de sincronización (6 pies)
Cable de S-Video (6 pies)
Adaptador de acoplamiento universal (8)
Instalación
Conexión de su iPod a la estación de
acoplamiento
1
Branchez le câble de
synchronisation à 30
broches à l’arrière de la
station d’accueil.
Branchez la prise
USB du câble de
synchronisation sur un
port USB de l’ordinateur.
Conecte el adaptador
de acoplamiento
universal adecuado
para su iPod a
la estación de
acoplamiento.
Para…
Utilice este
adaptador…
Avertissements
iPod Mini (4 GB/6 GB)
•
iPod (20 GB/ Edición Especial U2)
4
iPod (40 GB)
5
iPod con pantalla a color
6
•
•
•
Le désassemblage de la station d’accueil iPod et
de l’adaptateur d’alimentation CA risque de les
endommager.
Ne pas utiliser la station d’accueil et l’adaptateur
d’alimentation CA en milieu très humide.
Contacter Dynex pour entretien si l’iPod n’est pas
rechargé pas après huit heures de charge.
Garder la station d’accueil hors de la portée des
enfants.
(20 GB/30 GB/Edición Especial U2)
2
DX-IPD.indd 3
3
iPod con pantalla a color (40 GB/60 GB)
7
iPod Nano
8
iPod Video (30 GB)
9
iPod Video (60 GB)
10
Coloque su iPod en la estación de acoplamiento.
4/22/2006 12:00:56 PM
Conexión a un TV con un cable de S-Video o A/V
1
2
Para conectar el
S-Video, conecte
el cable de S-Video
a la estación de
acoplamiento y a su
televisor.
Para conectar el video
Cable de A/V
Cable de S-Video
estándar, conecte el
cable de A/V al toma
auxiliar de 3.5 mm
de la estación de
acoplamiento, luego
Cable de A/V
Cable de S-Video
conecte el conector
RCA amarillo al toma amarillo “Video In” (Entrada de
video) de su televisor.
Conexión a un equipo de audio externo
1
Para conectar el audio
externo, conecte el
cable de A/V al toma
auxiliar de 3.5 mm
de la estación de
acoplamiento, luego
conecte los conectores
RCA rojo y blanco a los
tomas rojo y blanco “Audio In” (Entrada de audio) de
su equipo de audio.
Conexión de alimentación por medio del
cable de sincronización USB
1
2
Enchufe el adaptador
de alimentación CA en
un tomacorriente de
CA.
Conecte el cable de
sincronización USB
en el puerto USB del
DX-IPD.indd 4
3
4
5
adaptador de alimentación CA y el conector de 30
terminales en la parte posterior de su estación de
acoplamiento.
Puede controlar el modo de carga de su iPod por
medio del interruptor ON/OFF (Encendido/Apagado)
a un lado de su estación de acoplamiento.
El indicador LED se ilumina color verde para indicar
que la estación de acoplamiento está cargando su
iPod. Si mueve el interruptor ON/OFF (Encendido/
Apagado) a la posición OFF, el indicador LED se
apagará.
Su iPod funciona normalmente sin importar la
posición del interruptor ON/OFF.
•
Mantenga la estación de acoplamiento fuera del
alcance de los niños.
Este aparato digital de Clase B cumple con el ICES-003 canadiense.
Este dispositivo satisface la parte 15 del reglamento FCC. Su operación está
sujeta a las dos condiciones siguientes: (1) Este dispositivo no puede causar
interferencia dañina, y (2) este dispositivo debe aceptar cualquier interferencia
recibida incluyendo interferencias que puedan causar una operación no
deseada.
Descargo de responsabilidad
Dynex es una marca comercial de Best Buy, Inc. iPod es una marca de Apple
Computer, Inc., registrada en los Estados Unidos y otros países. Todos los
derechos reservados. No se incluye el televisor o el estéreo.
Uso de la estación de
acoplamiento
Sincronización con su computadora
1
2
Conecte el conector
de 30 terminales del
cable de sincronización
en la parte posterior
de la estación de
acoplamiento.
Conecte el conector
USB del cable de
sincronización en un puerto USB de su computadora.
Advertencias
•
•
•
El desensamblaje de su estación de acoplamiento
iPod y del adaptador de alimentación CA puede
dañarlos.
No utilice la estación de acoplamiento y el adaptador
de alimentación CA en un ambiente mojado.
Si su iPod no se recarga después de 8 horas, póngase
en contacto con Dynex para su reparación.
4/22/2006 12:00:56 PM