1
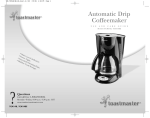
Automatic Drip Coffeemaker
Cafetera Automática
OPERATING INSTRUCTIONS
INSTRUCCIONES DE USO
CE23609 - 120V 60Hz
BEFORE YOU USE YOUR COFFEEMAKER
Before preparing coffee in your new coffemaker, thoroughly clean the
carafe, carafe lid, removable filter basket, and water chamber cover in
hot, sudsy water. Rinse and dry. Clean the inside of the coffeemaker by
brewing two full carafes of tap water (see “Brewing Instructions” on p.7).
Do not place coffee in filter basket for this initial cleaning. Note: at the
end of first cycle, turn coffeemaker off and wait ten minutes. Turn unit on
and brew second carafe of water. Replace disassembled parts.
SPECIAL CARE FOR YOUR CARAFE
A damaged carafe may result in possible burns from hot liquid. To avoid
breaking the carafe:
n Do not allow all liquid to evaporate from carafe. Do not heat carafe
when empty.
n Discard carafe if damages in any manner. A chip or crack could result
in breakage or contaminate liquid contents with glass particles.
n Never use abrasive scouring pads or cleansers as they may scratch
and weaken the glass.
n Do not place carafe on or near a hot gas or electric burner, in a
heated oven, or in a microwave oven.
n Avoid rough handling and sharp blows.
COFFEE FILTERS
Cone-shaped paper filters are available locally at grocery stores and
where coffeemakers are sold. Standard #4 filters should be used.
Permanent gold filters may also be purchased, eliminating the need for
disposable paper filters.
The use of basket style paper filters is not recommended, since they do
not conform to the shape of the filter basket and may cause coffee to
back up and spill over during brewing.
BREWING INSTRUCTIONS
1. Plug coffeemaker into AC electrical outlet which meets the voltage
indicated on the appliance.
2. Fill carafe with cold tap water and pour into water chamber. Markings
on the carafe indicate level of water required to brew desired number
of cups.
NOTE: The amount of brewed coffee will always be less than the
amount of water placed into coffeemaker, since about 10% is
absorbed by coffee ground and filter.
3. Place coffee filter in filter basket. Measure one level tablespoon of
drip or regular grind coffee for each cup of coffee to suit your taste.
4. Return filter basket to closed position.
5. Place carafe on warming plate.
6. Switch control to on. The on light will indicate unit is in operation.
7. Upon completion of the brew cycle, wait about one minute until the
brew drip from the filter basket into the carafe has stopped. Carafe lid
should be kept in place to facilitate safe serving and help keep coffee
at proper serving temperature.
8. To keep coffee hot, return carafe to the warming plate after serving.
The warming plate will automatically cycle to maintain ideal serving
temperature as long as the coffeemaker is on.
9. Switch control to off when carafe is empty or when unit is not in use.
10. To brew another carafe of coffee, turn unit off and wait 10 minutes to
allow heating element to cool. Important: If unit is not allowed to cool
before immediate repeated use, water placed in water chamber may
become overheated and a spray of steam could be released from
opening, creating a risk of burns.
BREWING A SECOND POT OF COFFEE
As mentioned above, it is recommended that the coffeemaker should be
in off position for 10 minutes between cycles, in order to allow unit to
cool. While unit is in off position, dispose of used coffee filter basket in
water. Place a fresh filter in basket. Repeat brewing procedure.
HINTS FOR GREAT TASTING COFFEE
n A clean coffeemaker is essential for making great tasting coffee.
Regular cleaning, as specified in “Care and Cleaning of your
coffeemaker”, is highly recommended.
n Always use fresh, cold water in your coffeemaker.
n Finer grinds, such as drip and ADC coffee, promote fuller extraction
and provide rich, full-bodied coffee. Regular grind will require slightly
more coffee per cup to provide the strength of a finer grind.
n Store coffee in a cool, dry place. Once coffee has been opened, keep
it tightly sealed in the refrigerator to maintain freshness.
n For optimum coffee, buy whole beans and grind them finely just
before brewing.
n Do not re-use coffee grounds since this will greatly impair coffee
flavor.
n Reheating coffee is not recommended. Coffee is at its peak
immediately after brewing.
n Small oil droplets on the surface of brewed, black coffee is due to the
extraction of oil from the coffee grounds. Oiliness may occur more
frequently of heavily roasted coffees are used. Overextraction may
also cause oiliness, indicating a need to clean your coffeemaker.
POLARIZED PLUG
This appliance has a polarized plug (one blade is wider than the other),
as a safety feature, this plug will fit in a polarized outlet only one way. If
the plug does not fit fully in the outlet, reverse the plug. If it still does not
fit, contact a qualified electrician. Do not attempt to defeat this safety
feature.
CARE AND CLEANING OF YOUR COFFEEMAKER
Always make sure coffeemaker is unplugged and warming plate is cool
before attempting to clean. After daily use, the filter basket and carafe
should be washed in hot, sudsy water. Wipe exterior with a damp cloth to
remove superficial stains. For stubborn stains, use a nylon or plastic pad
with a non-abrasive cleanser.
Do not use metal scouring pads or abrasive cleansers.
Special cleaning of your coffeemaker is recommended at least once a
month depending on frequency of use and quality of water used in the
unit. If water in your area is especially hard, the following cleaning
procedure should be performed every two weeks, since minerals in water
can detract from the flavor of the coffee and possibly lengthen brew time.
1. Fill carafe with one part white vinegar to three parts cold water. Pour
water and vinegar solution into the water chamber.
2. Place a paper filter in the filter basket and swing to close position. Place
carafe on warming plate. Switch control to on. During cleaning, more
steam will occur than during normal brewing.
3. KEEP THE COFFEEMAKER ON UNTIL CARAFE IS HALF FULL.
Switch control to off. When liquid stops dripping from filter basket into
the carafe, remove the basket and carafe and allow liquid to cool in
the carafe for 15 minutes. When cooled, pour liquid back into the
water chamber.
4. Replace basket and return carafe to hot plate.
5. Switch control to on. Repeat procedure, allowing all the cleaning
solution to empty into the carafe. After dripping has stopped, discard
contents of carafe.
6. After allowing coffeemaker to cool for 10 minutes, rinse it out by
brewing a carafe full of cold water. Make sure to insert a fresh filter
into the filter basket before brewing.
7. At end of brew cycle, switch control to off. Discard water in the carafe.
Remove used filter and wash carafe and filter basket in hot sudsy
water. Dry parts.
8. When coffeemaker has cooled, wipe exterior with a dry cloth.
Any servicing requiring disassembly other than the above cleaning
should be performed by an authorized service representative.
QUICK SERVICE INFORMATION
This appliance should be serviced by properly trained repair technicians.
Consult your yellow pages under “Appliance-Household-Small-Service
and Repair” for your nearest authorized service center.
CUIDADO ESPECIAL DE LA GARRAFA (CARAFE)
PARA EVITAR ROTURA DE LA GARRAFA:
n No permita que los liquidos en la misma se evaporen totalmente.
n No use la garrafa si está dañada en cualquier forma.
n No use materiales abrasivos para lavarla, nada que pueda rayar o
debilitar el vidrio.
n No coloque la garrafa en hornillas de gas, electrica, horno o microonda.
n Evite manipulación brusca o golpes fuertes.
FILTROS PARA CAFÉ
Use filtros de papel cónicos standard #4.
El uso de filtro tipo cesta no es recomendable por no tener la forma del
cesto del filtro, pudiendo resultar que se derrame el café durante su
cocción.
INSTRUCCIONES DE USO
1. Enchufe el cordón eléctrico en el tomacorriente, de acuerdo al voltaje
indicado en la cafetera.
2. Llene la Garraga con agua y viertala en el tanque de la cafetera. La
garrafa está marcada con el nivel correspondiente al número de tazas
que se desea colar. Nunca menos de dos tazas es recomendable.
3. Coloque el filtro de papel en la cesta de filtrar. Mida una cucharada
de sopa de café por cada taza que se desee colar.
4. Ponga la cesta de filtrar en posición cerrada.
5. Coloque la Garrafa en la placa de calentamiento.
6. Apriete el botón para encender (ON). La luz prendida indicará que la
cafetera está en operación.
7. Cuando el ciclo de colada ha terminado, espere un minuto hasta que
el goteo del café en la Garrafa ha terminado. Mantenga la tapa de la
Garrafa cerrada parar servir el café con mas facilidad y mantener el
café a temperatura adecuada.
8. Para mantener el café colado caliente, deje la garrafa en la placa de
calentamiento, la cual trabaja automáticamente mientras la cafetera
esté encendida.
9. Antes de hacer subsiguientes coladas deben apagar la cafetera y
esperar 10 minutos como mínimo, pues el agua en el tanque puede
recalentarse y crear escape de vapor que resulte en quemaduras a
su cuerpo.
SUGERENCIAS PARA HACER EXCELENTES COLADAS
n Una cafetera limpia es esencial para una buena colada.
n Use siempre agua fresca y fría.
n Cafe molido fino produce un café más sabroso y de mayor
rendimiento.
n Guarde su café en un lugar fresco y seco. Una vez abierto guárdelo
en el refrigerador.
n Para óptimo resultado, compre el café en grano y muélalo fino antes
de hacer su colada.
n Nunca reuse el café que ha sido colado.
n Cafe recalentado no es recomendable. El máximo sabor es cafe
recien colado.
LIMPIEZA Y CUIDADO DE SU CAFETERA
El Siguiente Procedimiento Es Recomendable Una Vez Por Mes:
1. Si el agua en su área es dura debe hacerse cada 2 semanas.
2. Llene su Garrafa con una parte de vinagre blanco y dos partes de
agua fría y échelo en el tanque de la cafetera.
3. Ponga un filtro de papel en el cesto de filtrar y ciérrelo. Ponga la
Garrafa en la placa de calentamiento y encienda la cafetera.
4. Mantenga la cafetera encendida hasta que la Garrafa esté media
llena. Apague la cafetera. Cuando el líquido acabe de gotear del filtro
dejelo enfriar por lo menos 15 minutos. Una vez frío, vuélvalo a vertir
en el tanque de la cafetera.
5. Vuelva a poner el cesto de filtrado y la Garrafa en la placa de
calentamiento.
6. Encienda la cafetera y repita el procedimiento hasta que la solución
haya pasado totalmente a la Garrafa y bote su contenido.
7. Despues que la cafetera se enfríe, ponga un nuevo filtro de papel,
llene la Garrafa con agua fría, viértala en el tanque y haga un ciclo
completo de colada.
8. Al terminar este ciclo apague la cafetera, bote el agua de la Garrafa y
el filtro usado. Ponga el cesto de filtrar y la Garrafa en agua y jabón.
Enjuáguelos bien y séquelos.
9. Cuando la cafetera este fría, límpiela bien con un paño seco.