1
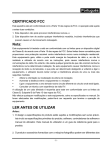
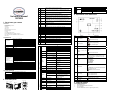
1
Strap hook
Hook for attaching the wrist strap to the camera.
TV- Out
2
Shutter
Press this button to take photographs or to start/stop recording a short
video clip.
USB
3
Power on/off
button
Self-timer
indicator
4
Instruction manual
DC8000
5
Flash light
6
Macro
switch
8
USB
interface
AV port
9
Lens
7
1. Get to know your camera
1.1 Features
High resolution digital camera
8X digital zoom
Video clips
Audio record
Web camera
Built-in Microphone Voice recorder
Built-in flash Light
TV output
2.0" LTPS high density display
Internal 16MB flash memory and SD card support
Driver free for Windows 2000/ME/XP and MAC 9.x and X.x
Macro mode
LCD screen
Busy LED
Left/ display
Menu
Mode
UP
OK
Right/flash
17
light
18 Down
19 Playback
20 Delete
21 Battery door
22 SD card slot
Tripod
23
connector
10
11
12
13
14
15
16
1.2 Specifications
Press it to delete the photo in playback mode.
2xAAA alkaline batteries
SD card slot.
To fix the camera on tripod.
Scene mode
Exposure
value
4. Explanation of the status icons
1
Function
Description
The batteries are full.
Battery indicator
The batteries are empty.
Setting for photographs taking
2
8.0M pixel resolution
5.0M pixel resolution
3.1M pixel resolution
1.3M pixel resolution
VGA resolution
Fine(Default)/Standard/Eco
nomy
Auto(Default)/Sport/Night/P
ortrait/Landscape/Backlight
+/-2, +/-5/3, +/-4/3,
+/-2/3,+/-1/3 +/-1, 0(Default)
Auto (Default)
Daylight
White
balance
Cloudy
Tungsten
Fluorescent
ISO
SET
Color
Saturation
Sharpness
Self timer
Auto(Default)/100/200
Standard (Default) / Vivid /
Sepia / Monochrome
Normal(Default) / High / Low
Normal(Default) / Hard /Soft
2s
10s
10+2s
Date Input
4
1
3
1
Time Stamp
6
Format
Language
7
Setup
5 67 8
1 11 1
2
1
1
1
0
1
5
4
3
2
1
2. Functional parts:
Note: The camera will remain the last setting when it is turned off.
Item
Down & Digital zoom out
Press it to enter playback mode.
Quality
Windows 98SE/2000/ME/XP/VISTAor above
Mac 9.x or X.x
Pentium II or above
At least 64MB
USB port
4x speed CD ROM or above
CPU
RAM
Interface
CD
Use the built-in flash to give the subject extra lighting if it is in dark
surroundings (the best flash distance is recommended within 1.5m.).
Macro mode: Select this mode to take close-up photographs (distance
11cm - 18cm).
Normal mode: Select this mode to take photographs from 0.5m - infinity
Via this connection, you can download photographs and video clips to a
computer.
For television connection.
Records the image to be taken.
Note: Keep the lens clean. Dirt and fingerprints will affect the quality of the
picture.
Display photographs, video clips, camera setting and menu.
When the blue indicator is lit, the camera is busy.
For menu LEFT selection, and LCD display on / off.
For camera setting.
Press it to select different mode.
UP & Digital zoom in
Press it to confirm changes.
For menu right selection, and selection of flash light mode.
Size
1.3 System requirement
Operating System
Blinking when the self-timer function is operating.
American and Japanese video format
European video format.
Work as a web camera.
Act as a portable disk.
Connect to printer
Recording mode
3. Details for camera setting
Capture
8.0 Mega pixels: (3264x2448)
5.0 Mega pixels: (2560x1920)
3.1 Mega pixels: (2048x1536)
Image resolution
1.3 Mega pixels: (1280x960)
300K pixels: (640x480)
300K pixels: (640x480)
Lens
F/2.8 f=8.5mm
Focus range
0.5m. ~ Infinity
Macro mode
11cm – 18cm
Sensor
(2560x1960) CMOS sensor
Digital zoom
8x
Flash strobe
Built-in (Auto/force/off)
LCD display
2.0" real color LTPS TFT
White balance
Auto/Daylight/cloudy/Tungsten/Fluorescent
Video mode
30fps@QVGA &20fps@VGA
Built-in memory
16MB Flash memory
VGA: (640x480) --138 Pictures
Picture Capacity in 16M 1.3M: (1280x960) -- 54Pictures
memory (The quantity of
3.1M: (2048x1536) -- 28 Pictures
pictures varies and
5.0M: (2560 x 1920) -- 21 Pictures
depends on the
complexity of the scene) 8.0M: (3264x2448) -- 14 Pictures
12M: (4032x3024) --3 Pictures
External memory card SD card supports up to 2GB
File format
Picture: JPEG, Video: AVI, Voice: WAV
Self timer
2/10/10+2 seconds
PC interface
USB 1.1
TV-out
NTSC/PAL
Power source
2xAAA alkaline batteries.(Rechargeable battery is not recommended)
Press this button to turn on, press again to turn off.
NTSC
PAL
PC Cam
Disk Drive
Printer
9
1
0
2
1
2
2
2
3
2
8
9
Auto power
off
Sys. Reset
LightFrequency
(Flicker)
Off(Default)/Set
Off(Default)/Date Only/Date
& Time
Execute/cancel
English(Default)/T-Chinese/
S-Chinese/French/German/
Italian/Spanish/Portuguese
3264 x 2448
2560 x 1920
2048 x 1536
1280 x 960
640 x 480
3
Date stamp
Displays the date day/month/year
Indicates memory or SD card
4
Picture quality set
Memory
indicator
or
SD
:Pictures stored in built-in memory
card
:Pictures stored in SD card
Scene set
Level of exposure
Automatic light balance
Light balance selected for daylight
surrounding
Light balance selected for cloudy
surrounding
Light balance selected for tungsten
lighting
Light balance selected for fluorescent
surrounding
Sensitivity select
5
Photo / Video counter
6
Selected
Photo mode :No. of balance picture can be taken;
Video mode: Balance of recording time in second;
Playback mode: The No. of pictures or video clips
12M= 4032x3024;
8M= 3264x2448;
5M=2560x1920;
3.1M = 2048x1536;
1.3M=1280x960;
VGA=640x480;
: Force flash.
7
Flash indicator
Color setting
Saturation setting
Sharpness setting
Set the delay time at 2s to take a picture
Set the delay time at 10s to take a
picture
Set the delay time at 10s to take a
picture, and then every 2s to take
pictures automatically.
DD,MM,YYYY
Show the date and / or time on the
pictures
Format the memory card.
Select display language
Execute/cancel
50Hz
Auto power off in1min, 3min(default) or
5 min if no operation
Restore default setting
Main European electricity frequency
60Hz
Main American electricity frequency
1/3/5 min and Off
Setting for videos capture
: Auto Flash: The camera determines if the flash
must be used or not.
: No Flash: The flash is turned off.
The quality is fine(Default).
8
Picture quality
9
Brightness Alert
Alert user to hold the camera steadily.
10
Normal / Macro
mode indicator
Normal mode (0.5m – infinity)
Macro mode (11cm –18cm)
11
View center
The quality is standard.
The quality is economy.
5. Using the camera
5.1 Installing the batteries
1.
2.
3.
Open the battery door.
Insert 2 AAA alkaline batteries into the camera.
Turn on the camera.
Press the POWER button to turn it on (press it again to turn off).
5.2 Inserting a memory card (not included)
5.9 Playback photographs
6.3 Connecting the camera
This camera has built-in internal memory. This memory can be extended with a SD memory
card (not included).
Follow the instructions given below to insert the optional SD memory card into the camera.
1.
Turn off the camera first.
2.
Insert the SD card into the camera.
Note: There is only one right direction to insert the SD memory card into the slot. Do not force
the card into the slot, or else it may damage both the camera and the SD memory card.
Note: The SD memory card must be formatted before taking photographs. See the following
sections for more information.
1.
2.
3.
4.
The camera can be connected to the computer in two different modes: Mass Storage Device,
or as a PC camera for video conferencing on the Internet.
5.3 Formatting the memory or SD card
1.
2.
3.
4.
Press Menu button
Select Setup setting by right key.
Press OK to confirm and select by up or down key.
Press OK to format the card or memory.
5.4 Setting the resolution
The camera can be set to different resolutions.
1.
Press MENU to set proper resolution.
Resolution: VGA(640X480),1.3M(1280x960) 3.1M (2048X1536),
5M (2560 x 1920), 8M (3264x2448), 12M(4032x3024)
2.
Six different resolutions will be displayed. Select the desired resolution by using the ▲
or ▼buttons and then press the OK button to confirm the selection.
5.5 Taking photographs
1.
2.
3.
4.
5.
6.
Turn on the camera by pressing the ON/OFF button.
Press MODE to set the camera to photo mode ( ).
Depending on the distance to the object being photographed, use Macro switch to
adjust the distance. Select the flower symbol ( ) if you wish to take a close-up
photograph (11cm –18cm).
If you wish to take photograph of surroundings or people (0.5m - infinity), set the Macro
switch to Normal mode ( ).
If you are not sure if there is enough lighting, turn the automatic flash (
) on by pressing
the flash button. (If the battery power is too low, the flash won’t be activated).
Use the LCD screen to aim the object you wish to photograph.
Press Shutter button and hold the camera steadily for 2 to 3 sec, until the LCD display
turn on again.
Press PLAYBACK button, press
or
to select the video clip or photo.
Press OK, it will go to 2x zoom, press OK again to 3x zoom…… up to 8x.
to shift the image.
Press ▲,▼, or
Press MENU to select SLIDE SHOW, and then press OK to confirm. The pictures saved
in your camera or your SD card will be displayed in sequence automatically.
5.10 Playback video clips
1.
2.
3.
When video clips are displayed, press OK to play, and press DOWN key to stop.
Press OK to pause the playback
Press PLAYBACK key to exit.
5.11 Recording voice
1.
2.
Press MODE button to select the voice recording mode,
Press SHUTTER to start voice recording and press it again to stop.
5.12 Delete photographs and video clips
You can choose to delete a single photograph / video clip, or delete all the photographs / video
clips in the memory.
5.12.1 Delete photograph
Follow the instructions given below to delete photograph.
1.
Press PLAYBACK to enter the playback mode.
2.
Press the MENU button and select Delete One/Delete All, press OK to confirm.
3.
If you select Protect picture, your current file or images can not be deleted.
4.
Press MENU to exit.
NOTE: Select ‘Deleting All’ and Press OK to confirm, all the pictures will be deleted.
5.7 Taking photographs using self-timer function
You can use the self-timer function when you wish to take a photograph for yourself or when
you wish to photograph for an object where the camera must be as still as possible, for
example on the stand.
1.
Set the camera to photo mode.
2.
Press the MENU button. The quick menu will appear.
3.
Press ▼ to self-timer mode, press OK and ▲or ▼ to set the delay time: 2seconds / 10
seconds / 10+2seconds or off.
4.
Press the OK button to confirm. The self-timer function is now ready for use.
5.
Aim at the object you wish to photograph.
6.
Press the SHUTTER button to take a photograph.
7.
The self-timer indicator LED in the front will blink.
8.
The photograph will be taken after the timer reaches the delay time that you pre-set, and
the camera will beep once.
5.8 Recording video clips
1.
2.
3.
Press the MODE button to select.
Press the SHUTTER button to start recording video, press the SHUTTER button again to
stop recording. The video clip will now be saved as an AVI file in the camera memory.
Press MENU to set proper resolution, EV and WB, and press OK to confirm.
When you connect the camera as a PC camera, you can use the camera as a web cam for
video conferencing on the Internet by using Windows NetMeeting or Windows Messenger.
(You must install the driver before connecting the Digital Camera to your computer.)
1.
Turn the camera on by pressing the ON/OFF button.
2.
Press MENU button and press RIGHT key to select the Setup setting.
3.
Press▼ button to chook USB connection.
4.
Press▲or ▼ button to choose the PC camera mode.
5.
Press OK to confirm.
6.
Connect the camera to the computer.
7.
Windows will automatically detect the camera. You can use this camera as a web
camera.
7. Trouble shooting
Problem
Cause
Solution
Photos can not be saved
when taking pictures.
The memory card or
built-in memory hasn’t
been formatted properly.
Format the memory in SETUP
mode of the camera. Please refer
to section 5.3.
Cannot find removable disk
after connecting the camera
to the computer.
1. Connection failure.
2. The mode of the
camera is not set to
removable disk
properly
1. Make sure all cable connections
are secured and restart the
computer if necessary.
2. Set the camera to removable
disk mode, refer to section 3
(system setting, USB
connection).
There is a chance for a conflict between the new driver and an existing driver in the computer.
In that case, it is better to remove those drivers before installing the new driver.
1.
Enter Windows ‘Safe Mode’ (press F8 when starting Windows and then select ‘Safe
Mode’ from the menu which will be displayed).
2.
Click on ‘Start – Settings – Control Panel’ and double-click on ‘Add/Remove Programs’
icon.
3.
Find all the programs for similar, old devices and remove these by clicking on the
‘Add/Remove’ button. When in ‘Safe Mode’, it is possible for some programs to appear
twice. In that case, remove all the programs which appear twice.
4.
Restart the computer.
Flash does not work.
Battery Power is too low.
Replace with new ALKALINE
battery.
The batteries used up very
fast.
Use wrong type of
battery.
Replace with new ALKALINE
battery.
Set the flash light to force
Set the Flash light to Auto
mode
in bright
environment.
mode
6.2 Installing the driver for Windows 98 / Windows ME /
Windows 2000 / Windows XP
The photos are blurry
1. The camera is not held
steadily
2. The lens of camera is
dirty
1. Hold the camera steadily until it
beeps when taking photo.
2. Clean the lens with soft dry cloth.
Note: Make sure all other programs are closed during the installation process.
Get a warning message:
“Capture device was not
detected” when trying to
open PC cam.
1. Conflict with another
camera or video
device.
2. The mode of the
camera is not set to
PC cam mode
properly.
1. Remove any other camera driver
completely from your system.
Sometimes you have to re-install
your system.
2. Set the camera to PC cam mode,
refer to section 3 (system setting,
USB connection).
Cannot preview image in PC
Camera mode.
“Preview” is not selected
in option Menu in PC.
Click “preview” in the “option” menu
to select it.
1.
2.
3.
Press PLAYBACK to enter Playback mode.
Select the photo (video) you want to delete, press DELETE
Press OK to confirm.
button.
6. Installing the camera driver
6.1 Uninstalling old drivers and devices
2.
6.3.2 Connecting as a PC camera
Replace or install the battery
correctly.
5.6 Zoom in and out
Zoom in by pressing the ▲ or▼ button, a number will appear on the display. 8.0 is the
maximum zoom.
You can zoom in by pressing the UP or DOWN button.
Turn the camera on by pressing the ON/OFF button.
Press MENU button and press RIGHT key to select the Setup setting.
Press ▼button to set USB connection.
Press▲or ▼button to choose the Disk Drive mode.
Press OK to confirm.
Connect the camera to the computer.
Windows will automatically detect the camera. You can use this camera as a removable
disk.
Low battery power.
Battery placed at wrong
polarities.
Caution: 1) Taking picture for fast-moving object is not recommended.
2) Image may be distorted when taking picture in a moving vehicle.
1.
1.
2.
3.
4.
5.
6.
7.
Cannot turn on the camera
by pressing the “power”
button.
5.12.2 Shortcut to delete one picture
The driver in the CD has to be installed, under following applications:
1.
For windows 98 SE: Download picture /video, and as a PC cam.
2.
For windows ME, Windows 2000 and Windows XP: For using as a PC cam only.
(Download picture /video is driver free)
The camera can zoom in up to 8 times.
6.3.1 Connecting as a mass storage device
Note: During installation for Windows XP, you may receive a message saying that the driver
has not been signed. This does not cause a problem for the functionality of the program.
Please click "Yes" to continue.
The photos are over
exposure
Note: For example, ‘D:\’ is used to indicate the CD-ROM drive. This may be different for your
computer.
1.
2.
3.
4.
5.
Insert the CD-ROM into your computer’s CD-ROM drive. The installation program will
start automatically. If it does not start automatically, please do the following:
a) Select 'Run' from Windows Start menu.
b) Type [D:\SETUP.EXE] and click on 'OK' to start the Software Installer.
The Software Installer will appear.
Select the language you wish to use for the installation.
Click on ‘Install driver‘ to start the installation of the camera driver.
Follow the on-screen instructions.
.
For EU only
AM-D531K-AGB-CBA