1
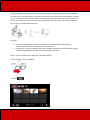
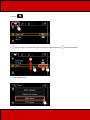
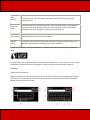
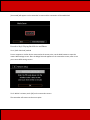
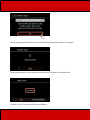
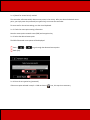
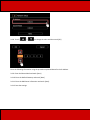
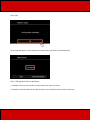
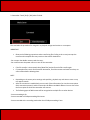
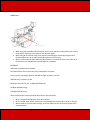
XA20-XA25 and HF G30 Using Wi-Fi to Play Images and Movies on a Computer Using the Media Server function, you can wirelessly view your movies and photos from your computer or similar device. You will need an access point connected to your home network and software installed on your computer that can play back movies and photos on the media server. We recommend that you connect the computer to the access point using a LAN cable. Refer also to the instruction manuals for the computer, software and access point. CAUTION Using an unprotected Wi-Fi network can expose your files and data to monitoring by unauthorized third parties. Be aware of the risks involved. Using the Wi-Fi functions outdoors while the camcorder is operating in the 5 GHz band may be prohibited depending on the laws of the country/region you are in. Step 1: Select a Media Server from the Camcorders Menu 1. Set the power switch to <MEDIA>. 2. Touch [ ]. 3. Touch [ 4. ]. Drag your finger up or down bring [Wi-Fi] into the orange selection bar, 5. Touch [Media Server]. and touch the button. Step 2: Connect to an Access Point Using Wi-Fi Connect to an access point. If you have already completed the settings for connecting to an access point, proceed to Step 3: Playing Back Movies and Photos If an access point has not been registered, an access point registration message will be displayed. Touch [OK]. 1. Select the desired connection method. You can select from the following four connection methods. For more information on your access point, please refer to the access points instruction manual. [WPS: Button]* Simply press and hold the WPS button on your access point and then touch the camcorders screen. This is the easiest connection method if you are using a WPScompatible router. [WPS: PIN Code]* Access the access points configuration screen using your Web browser. The camcorder will give you a PIN code, which you will enter into the browser. You will need a WPS compatible router and a computer or other device connected to it. [Search for Following the camcorders onscreen instructions, you select your access point from a list Access Points] of detected SSIDs and then enter your password. [Manual Setup] You manually enter the access points SSID, password and other network settings. This method is recommended for advanced users of Wi-Fi networks. * WPS, which stands for Wi-Fi Protected Setup, is a standard that makes connecting to an access point easier. If your wireless router is WPS-compatible, connecting the camcorder to it can be very easy. If you cannot successfully connect the camcorder using WPS, try using the [Search for Access Points] method. REFERENCE Using the virtual keyboard When you need to enter text for various settings, touch the text field and a virtual keyboard will appear on the screen. You must use the touch screen to operate the virtual keyboard. The illustrations below explain the various keys you can use. : (Press to exit after entering the information.) : Text field : Letter/number keys : / (Switch between letters and numbers/special characters.) : Space key : Backspace (Delete the character to the cursors left.) : / / Caps Lock. When the numerical keyboard is displayed, [#%?] switches between set 1 and set 2 of special characters. : (Change the position of the cursor.) : Cancel REFERENCE The camcorder can connect to a Wi-Fi network using a wireless router (access point) and even remember the settings for the four most recently used access points. IMPORTANT General requirements Correctly configured router that complies with the 802.11a/b/g/n protocol and is Wi-Fi certified (bears the logo shown below) and a home network. 2-a-1. [WPS: Button] method Press and hold the WPS button on the access point. Depending on the access point, the amount of time required may differ. Make sure the routers WPS function is activated. 2-a-2. Within 2 minutes, touch [OK] on the camcorders screen. The camcorder will connect to the access point. You can touch [Stop] and then [OK] to interrupt the Wi-Fi Protected Setup while it is in progress. [Connected] will appear on the camcorder's screen and the connection will be established. Proceed to Step3: Playing Back Movies and Photos 2-b-1. [WPS: PIN Code] method From a computer or similar device connected to the access point, use the Web browser to open the routers WPS settings screen. After the 8-digit PIN code appears on the camcorders screen, enter it into your routers WPS settings screen. 2-b-2. Within 2 minutes, touch [OK] on the camcorders screen. The camcorder will connect to the access point. You can touch [Stop] and then [OK] to interrupt the Wi-Fi Protected Setup while it is in progress. [Connected] will appear on the camcorder's screen and the connection will be established. Proceed to Step3: Playing Back Movies and Photos 2-c-1.[Search for Access Points] method The camcorder will automatically detect access points in the vicinity. After you select the desired access point, you simply enter the password (encryption key) to connect the camcorder. To enter text for the various settings, use the virtual keyboard. 2-c-2. Check the access point setting information. Note the access points network name (SSID) and encryption key. 2-c-3. Select the desired access point The SSID of detected access points will be displayed. Touch [ ]/[ ] to go through the detected access points. Touch [OK]. 2-c-4. Enter the encryption key (password). If the access point selected in step 2-c-3 did not have a [ ] icon, this step is not necessary. In the [Encryption Key] field, enter the encryption key. Touch [OK]. 2-c-5. Touch [OK]. [Connected] will appear on the camcorder's screen and the connection will be established. Proceed to Step3: Playing Back Movies and Photos 2-d-1. Manual Setup Perform this procedure to manually configure the wireless connection settings. This may be necessary, for example, if your access points network name (SSID) cannot be detected due to the stealth function being enabled. Manual setup is for advanced users of Wi-Fi networks. 2-d-2. Enter the SSID. Touch the [SSID] field. Enter the SSID and then touch [OK] > [Next]. 2-d-3. Select the Authentication/Encryption Method Touch the [Authentication/Encryption Method] field. 2-d-4. Touch the desired method. If you selected [OPEN WEP], the WEP index is 1. 2-d-5. Enter the [Encryption Key] In step 2-d-4., if you selected [OPEN NONE], entering the encryption key is not necessary. Touch the [Encryption Key] field, and then enter the encryption key. Touch [OK] > [Next]. 2-d-6. Select how to obtain the IP address. Touch [Automatic] or [Manual]. If you selected [Automatic], proceed to Step 2-d-12 2-d-7. Set the [IP Address] manually. Touch the [IP Address] field. 2-d-8. Touch [ ]/[ ] to change the value and then touch [OK]. Enter the following information using the procedure explained above for the IP Address. 2-d-9. Enter the Subnet Mask and touch [Next]. 2-d-10. Enter the Default Gateway and touch [Next]. 2-d-11. Enter the DNS Server information and touch [Next]. 2-d-12. Save the settings. Touch [OK]. [Connected] will appear on the camcorder's screen and the connection will be established. Step 3: Playing Back Movies and Photos 1. Computer: Select your camcorders model number from the list of servers. 2. Computer: Select the folder for the desired memory card and play back the movies and photos. 3. Camcorder: Touch [End] > [OK] when finished. This concludes the procedure for using Wi-Fi to playback images and movies on a computer. IMPORTANT Observe the following precautions when transferring files. Failing to do so may interrupt the transfer and incomplete files may remain at the transfer destination. - Do not open the double memory card slot cover. - Do not disconnect the power source or turn off the camcorder. If the file transfer is interrupted, select [New files] and perform the file transfer again. If incomplete files remain at the transfer destination, check the content and make sure they are safe to delete before deleting them. NOTE Depending on the access points settings and capability, playback may take time to start or may not appear smooth. After the connection is established, you can touch [View Information] to view the access points SSID, connection protocol, and the camcorders IP address and MAC address. You can also select the access point to which the camcorder will connect. The following types of MP4 scenes will be recognized as multiple files on other devices. - Scenes exceeding 4 GB - Scenes recorded at 35 Mbps exceeding 30 minutes - Scenes recorded with a recording mode other than 35 Mbps exceeding 1 hour IMPORTANT When using the camcorders Wi-Fi functions, do not cover the Wi-Fi antenna with your hand or other object. Covering it may interfere with wireless signals. While using Wi-Fi functions other than remotely controlling the camcorder using the Wi-Fi Remote application, do not open the double memory card slot cover. Make sure the optional WM-V1 Wireless Microphone is not attached to the camcorder. Wi-Fi functions are not available when the microphone is attached. REFERENCE About the camcorders Wi-Fi standard The specifications of the camcorder's Wi-Fi standard are as follows. Wi-Fi protocol, operating frequency: IEEE 802.11b/g/n-compliant, 2.4 GHz IEEE 802.11a/n-compliant, 5 GHz Maximum data transfer rate: 11 Mbps (IEEE 802.11b) 54 Mbps (IEEE 802.11a/g) 150 Mbps (IEEE 802.11n) These are theoretical values and actual data transfer rates may differ. Wi-Fi is a registered trademark of the Wi-Fi Alliance. Wi-Fi Certified, WPA, WPA2, and the Wi-Fi Certified logo are trademarks of the Wi-Fi Alliance. WPS as used on the camcorders settings, onscreen displays and in this manual signifies Wi-Fi Protected Setup.