1
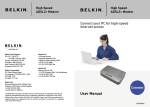
High Speed
ADSL2+ Modem-Router
High Speed
ADSL2+ Modem-Router
Connect your PC for high-speed
Internet access
Belkin International, Inc.
Los Angeles, CA 90094, USA
310-898-1100
Belkin Ltd.
Tuggerah, Australia
+61 (0) 2 4350 4600
Belkin Tech Support
http://www.belkin.com/au/support
Free 24/7 Technical Support
1800 235 546 AUS
0800 235 546 NZ
www.belkin.com/anz
© 2010 Belkin International, Inc. All rights reserved. All trade names are registered trademarks of
respective manufacturers listed. Mac and Mac OS are trademarks of Apple Inc., registered in the
U.S. and other countries. Windows and Windows Vista are either registered trademarks or
trademarks of Microsoft Corporation in the United States and/or other countries.
Connect
User Manual
F5D5630au
Table of Contents
Product Features . . . . . . . . . . . . . . . . . . . . . . . . . . . . . . . . . . . . . . . 1
2. Make sure you have the following. . . . . . . . . . . . . . . . . . . . . . . . . . 3
Package Contents . . . . . . . . . . . . . . . . . . . . . . . . . . . . . . . . . . . . . . 3
System Requirements . . . . . . . . . . . . . . . . . . . . . . . . . . . . . . . . . . . 3
Internet Connection Settings . . . . . . . . . . . . . . . . . . . . . . . . . . . . . . 3
3. Knowing your Modem-Router . . . . . . . . . . . . . . . . . . . . . . . . . . . . . 4
4. Connecting your Modem-Router . . . . . . . . . . . . . . . . . . . . . . . . . . . 7
Connecting your Computer via Ethernet . . . . . . . . . . . . . . . . . . . . . 7
Connecting your ADSL Line . . . . . . . . . . . . . . . . . . . . . . . . . . . . . . . 7
Thank you for purchasing the Belkin ADSL 2+ Modem-Router. In
minutes you will be able to connect to the Internet. The following is
a list of features that make your Modem-Router an ideal solution for
your home or small office. Please be sure to read through this User
Manual completely.
Compatibility with both PC’s and Mac® Computers
The Modem-Router supports a variety of networking environments
including Mac OS® 8.x, 9.x & v10.x, Windows® 7, Vista, NT, 2000 and XP
and others. You need an Internet browser and a network adapter
that supports TCP/IP (the standard language of the Internet).
Recommended Web Browser Settings . . . . . . . . . . . . . . . . . . . . . . 11
Understanding the Web-Based User Interface . . . . . . . . . . . . . . . . 13
Navigating the Web Browser Interface . . . . . . . . . . . . . . . . . . . . . . 13
Setup Wizard . . . . . . . . . . . . . . . . . . . . . . . . . . . . . . . . . . . . . . . . . 14
System Settings . . . . . . . . . . . . . . . . . . . . . . . . . . . . . . . . . . . . . . . 16
WAN . . . . . . . . . . . . . . . . . . . . . . . . . . . . . . . . . . . . . . . . . . . . . . . 19
LAN . . . . . . . . . . . . . . . . . . . . . . . . . . . . . . . . . . . . . . . . . . . . . . . . 24
NAT . . . . . . . . . . . . . . . . . . . . . . . . . . . . . . . . . . . . . . . . . . . . . . . . 25
Route . . . . . . . . . . . . . . . . . . . . . . . . . . . . . . . . . . . . . . . . . . . . . . . 29
Lighted LED’s on the front of the Modem-Router indicate which
functions are in operation. You’ll know at-a-glance whether your
Modem-Router is connected to the Internet. This feature eliminates
the need for advanced software and status-monitoring procedures.
Web-Based Advanced User Interface
You can set up the Modem-Router advanced functions easily through
your web browser, without having to install additional software onto
the computer. There are no disks to install or keep track of and, best
of all, you can make changes and perform setup functions from any
computer on the network quickly and easily.
Integrated 4 Port 10/100 Ethernet Switch
Your Modem-Router has the ability to connect to your PC’s with
10/100 Ethernet. The Ethernet connection will support any OS that
has an Ethernet connection and support for the TCP/IP Protocol.
Firewall . . . . . . . . . . . . . . . . . . . . . . . . . . . . . . . . . . . . . . . . . . . . . 34
ADSL . . . . . . . . . . . . . . . . . . . . . . . . . . . . . . . . . . . . . . . . . . . . . . . 43
Built-in Dynamic Host Configuration Protocol (DHCP)
UPnP . . . . . . . . . . . . . . . . . . . . . . . . . . . . . . . . . . . . . . . . . . . . . . . 47
Built-In Dynamic Host Configuration Protocol (DHCP) on-board makes
for the easiest possible connection of a network. The DHCP server
will assign IP addresses to each computer automatically so there is no
need for a complicated networking setup.
DDNS. . . . . . . . . . . . . . . . . . . . . . . . . . . . . . . . . . . . . . . . . . . . . . . 48
Tools . . . . . . . . . . . . . . . . . . . . . . . . . . . . . . . . . . . . . . . . . . . . . . . 48
Status . . . . . . . . . . . . . . . . . . . . . . . . . . . . . . . . . . . . . . . . . . . . . . 50
4
5
6
Front-Panel LED Display
Manually Configuring Network Adapters in Mac OS X . . . . . . . . . . 10
6. Manually Configuring your Modem-Router . . . . . . . . . . . . . . . . . . 13
2
3
Product Features
5. Setting up your computer . . . . . . . . . . . . . . . . . . . . . . . . . . . . . . . . 8
Manually Configuring Network Adapters in
Windows 7 and Vista . . . . . . . . . . . . . . . . . . . . . . . . . . . . . . . . . . . . 8
Manually Configuring Network Adapters in
Windows XP, 2000 or NT . . . . . . . . . . . . . . . . . . . . . . . . . . . . . . . . 9
Manually Configuring Network Adapters in Mac OS up to 9.x . . . . 10
1
7. New Zealand Telepermit Special Conditions . . . . . . . . . . . . . . . . 53
1
7
section
1. Introduction. . . . . . . . . . . . . . . . . . . . . . . . . . . . . . . . . . . . . . . . . . . . 1
Introduction
Introduction
Make sure you have the following
NAT IP Address Sharing
Package Contents
Your Modem-Router employs Network Address Translation (NAT) to
share the single IP address assigned to you by your Internet Service
Provider while saving the cost of adding additional IP addresses to
your Internet service account.
•
ADSL Modem-Router
•
RJ11 Telephone Cable
•
RJ45 Ethernet Networking Cable
•
Power Adapter
SPI Firewall
•
User Manual CD
Your Modem-Router is equipped with a firewall that will protect your
network from a wide array of common hacker attacks including IP
Spoofing, Land Attack, Ping of Death (PoD), Denial of Service (DoS),
IP with zero length, Smurf Attack, TCP Null Scan, SYN flood, UDP
flooding, Tear Drop Attack, ICMP defect, RIP defect, and fragment
flooding.
System Requirements
For added security, you can set up a list of MAC addresses (unique
client identifiers) that are allowed access to your network. Every
computer has its own MAC address. Simply enter these MAC
addresses into a list using the web-based user interface and you can
control access to your network.
2
3
4
•
An active ADSL service with a telephone wall jack for connecting the
Modem-Router
5
•
At least one computer with a Network Interface Card (NIC) and Internet
browser installed and correctly configured
6
•
TCP/IP networking protocol installed on each computer connected to
the Modem-Router
•
No other DHCP server on your local network assigning IP addresses to
computers and devices
Internet Connection Settings
Please collect the following information from your Internet Service
Provider (ISP) before setting up the ADSL Modem-Router.
•
Internet connection protocol: _________ (PPPoE, PPPoA,1483 Bridged*)
Universal Plug-and-Play (UPnP) Compatibility
•
Multiplexing method or Encapsulation: __________ (LLC or VC MUX)
UPnP (Universal Plug-and-Play) is a technology that offers seamless
operation of voice messaging, video messaging, games, and other
applications that are UPnP-compliant.
•
Virtual circuit: VPI (Virtual Path Identifier) __________ (a number between
0 and 255)
•
VCI (Virtual Channel Identifier) __________ (a number between 1 and
65535)
Support for VPN Pass-Through
•
For PPPoE and PPPoA users: ADSL account user name _____________
and password _______________
•
IP address for Domain Name Server ___ . ___ . ___ . ___ (If specified by
your ISP)
If you connect to your office network from home using a VPN
connection, your Modem-Router will allow your VPN-equipped
computer to pass through the Modem-Router and to your office
network.
2
*1483 Bridged turns all advanced features off in the Modem-Router,
such as Firewall & Dynamic DNS. The username and password is then
sent via PPPoE connection software installed on your PC.
3
7
section
MAC Address Filtering
1
Knowing Your Modem-Router
Knowing Your Modem-Router
The Modem-Router is designed to be placed on a desktop. All of the
cables exit from the rear of the Modem-Router for better organization
and utility. The LED indicators are easily visible on the front of the
Modem-Router to provide you with information about network activity
and status.
3. ADSL SYNC LED
The ADSL LED flashes light during negotiation with your IS P. It stays
light when the Modem-Router is connected properly to your ADSL
service.
On - blinking slow
No ADSL connection
On - blinking fast
Negotiating connection
On
ADSL link is up and connected
2
3
4
5
6
4. LAN Status LED
1. Power LED
When you apply power to the Modem-Router or restart it, a short
period of time elapses while the Modem-Router boots up. When the
Modem-Router has completely booted up, the Power LED becomes a
SOLID light, indicating the Modem-Router is ready for use.
When a computer is properly connected to a LAN port on the rear of
the Modem-Router, the associated LED will light. A solid light means a
computer or a network-enabled device is connected. When information
is being sent over the port, the LED blinks rapidly.
Off
Your computer is not connecte
d
Off
Modem-Router is off
On - blinking
Connected and transmitting or receiving data
On
Modem-Router is on
On
Your computer is connected
2. ADSL DATA LED
The ADSL Data LED shows you when the Modem-Router is connected to
the Internet. When the LED is OFF, the Modem-Router is NOT connected
to the Internet. When the LED is solid light, the Modem-Router is
connected to the Internet. When the LED is blinking, the Modem-Router
is transmitting or receiving data from the Internet.
Off
Not connected to Internet
On - blinking
Connected and transmitting or receiving data
On
Connected to Internet
4
5
7
section
Front Panel
1
Knowing your Modem-Router
Connecting your Modem-Router
Back Panel
Connecting your Computer via Ethernet
1.
Power off your computer and Modem-Router
2.
Connect your computer to an Ethernet port on the rear of the
Modem-Router by using an Ethernet networking cable (an
Ethernet network cable is supplied).
Power on your computer and Modem-Router.
5. Power Plug
Connect the included 12V 1A DC power supply to this inlet. Using
the wrong type of power adapter may cause damage to your ModemRouter.
6. LAN
The Ethernet port is RJ45, 10/100 auto-negotiation. Connect your
network-enabled computers or any networking devices to this port.
Connecting your ADSL Line
Connection for the Modem-Router to the ADSL line varies by country
and region. Typically it involves line filter or a line filter with built-in
splitter to allow simultaneous use of ADSL service and telephone
service on the same telephone line. Please read the following steps
carefully and select appropriate method.
1.
7. Reset
The “Reset” button is used in rare cases when the Modem-Router may
function improperly. Resetting the Modem-Router will restore the ModemRouter’s normal operation while maintaining the programmed settings. You
can also restore the factory default settings by using the Reset button. Use
the restore option in instances where you may have forgotten your custom
password.
Note: Do not connect the ADSL line filter between the wall jack
and the Modem-Router—this will prevent ADSL service from
reaching the Modem-Router.
2.
a. Resetting the Modem-Router
Push and hold the Reset button for one second then release it.
When the PWR light becomes solid again the reset is complete.
b. Restoring the Factory Defaults
Push and hold the Reset button for ten seconds then release it.
When the PWR light becomes solid again the restore is complete.
6
If your telephone service and ADSL service are on the same
telephone line and you are using an ADSL line filter with built-in
splitter, connect the splitter to the telephone wall jack providing
ADSL service. Then, connect the telephone cord from the ADSL
line filter RJ11 port generally labelled “ADSL” to the RJ11 port
labelled “ADSL” on the back of your Modem-Router. Connect
telephony device to the other port on the ADSL splitter commonly
labelled “Phone”. An additional ADSL line filter is needed for
another telephone and device on the same line.
Note: One RJ11 telephone cord is supplied. When inserting an
RJ11 plug, be sure the tab on the plug clicks into position to
ensure that it is properly seated.
8. ADSL
This port is for connection to your ADSL line. Connect your ADSL line
to this port.
If your telephone service and ADSL service are on the same
telephone line, ADSL line filters are needed for each telephone
and device, such as answering machine, fax machine, and caller
ID display. Additional splitters may be used to separate telephone
lines for telephone and the Modem-Router.
3.
If you have a dedicated ADSL service telephone line with an RJ11
wall jack, simply connect a telephone cord from the wall jack
to the RJ11 port labelled “ADSL” on the back of your ModemRouter.
7
2
3
4
5
6
7
section
3.
1
Setting up your Computer
Setting up your Computer
In order for your computer to properly communicate with your ModemRouter, you will need to change your computer’s “TCP/IP Ethernet”
settings to “Obtain an IP address automatically/Using DHCP”. This is
normally the default setting in most home computers.
Manually Configuring Network Adapters in Windows XP,
2000, or NT
Manually Configuring Network Adapte r s i n W i n d o w s Vista
Click “Start”, “Control Panel”
2.
Double-click on the “Network and Sharing Center” icon and then select
"Manage network connections"
3.
Right-click on the “Local Area Connection” associated with your network
adapter and select “Properties” from the drop-down menu.
4.
In the “Local Area Connection Properties” window, click “Internet
Protocol Version 6 (TCP/IPv6)” and click the “Properties” button.
5.
If not already selected, select “Obtain an IP address automatically”
and “Obtain DNS server address automatically”. Click “OK”.
6.
In the “Local Area Connection Properties” window, click “Internet
7.
If not already selected, select “Obtain an IP address automatically”
and “Obtain DNS server address automatically”. Click “OK”.
8.
If your telephone service and ADSL service are on the same, your network
adapter(s) are now configured for use with the Modem.
Manually Configuring Network Adapters in Windows 7
1.
Click “Start”, “Control Panel”, "Network and Internet"
"Change adapter settings"
3.
Right-click on the “Local Area Connection” associated with your network
adapter and select “Properties” from the drop-down menu
4.
In the “Local Area Connection Properties” window, click “Internet
Protocol Version 6 (TCP/IPv6)” and click the “Properties” button.
5.
If not already selected, select “Obtain an IP address automatically” and
“Obtain DNS server address automatically”. Click “OK”.
6.
In the “Local Area Connection Properties” window, click “Internet
7.
If not already selected, select “Obtain an IP address automatically” and
“Obtain DNS server address automatically”. Click “OK”.
8.
If your telephone service and ADSL service are on the same, your
network adapter(s) are now configured for use with the Modem.
8
Click “Start”, “Settings”, and then “Control Panel”.
2.
Double-click on the “Network and dial-up connections” icon
(Windows 2000) or the “Network Connections” icon (Windows
XP).
3.
Right-click on
the “Local Area
Connection”
associated with your
network adapter and
select “Properties”
from the drop-down
menu.
2
3
4
5
6
7
4.
In the “Local
Area Connection
Properties” window,
click “Internet
Protocol (TCP/
IP)” and click the
“Properties” button.
5.
If not already selected, select “Obtain an IP address
automatically” and “Obtain DNS server address automatically”.
Click “OK”.
Your network adapter(s) are now configu red for use with the ModemRouter.
9
section
1.
1.
1
Setting up your Computer
Setting up your Computer
Manually Configuring Network Adapters in Mac OS up to
9.x
Recommended Web Browser Settings
In order for your computer to properly communicate with your ModemRouter, you will need to change your Mac computer’s TCP/IP settings
to DHCP.
Pull down the Apple menu. Select “Control Panels” and select
“TCP/IP”.
2.
You will see the TCP/IP control panel. Select “Ethernet Built-In”
or “Ethernet” in the “Connect via:” drop-down menu.
3.
Next to “Configure”, if not already set, choose “Using DHCP
Server”. This will tell the computer to obtain an IP address from
the Modem-Router.
Manually Configuring Network Adapters in Mac OS X
1.
Click on the “System Preferences” icon.
2.
Select “Network” from the “System Preferences” menu.
3.
Select “Built-in Ethernet” next to “Show” in the Network menu.
4.
Select the “TCP/IP” tab. next to “Configure”, you should see
“Manually” or “Using DHCP”. If you do not, check the PPPoE tab
to make sure that “Connect using PPPoE” is NOT selected.
5.
If not already selected, select “Using DHCP” next to “Configure”,
then click “Apply Now”.
Your network adapter(s) are now configured for use with the ModemRouter.
10
In most cases, you will not need to make any changes to your web
browser’s settings. If you are having trouble accessing the Internet or
the advanced web-based user interface, then change your browser’s
settings to the recommended settings in this section.
2
Internet Explorer 4.0 or Higher
4
1.
Start your web browser. Select “Tools” then “Internet Options”.
2.
In the “Internet Options” screen, there are three selections:
“Never dial a connection”, “Dial whenever a network connection
is not present”, and “Always dial my default connection”. If you
can make a selection, select “Never dial a connection”. If you
cannot make a selection, go to the next step.
3.
Under the “Internet Options” screen, click on “Connections” and
select “LAN Settings...”.
4.
Make sure there
are no check marks
next to any of the
displayed options:
“Automatically
detect settings”,
“Use automatic
configuration
script”, and “Use a
proxy server”. Click
“OK”. Then click
“OK” again in the
“Internet Options”
page.
11
3
5
6
7
section
1.
1
Setting up your Computer
Manually Configuring your Modem-Router
Netscape Navigator 4.0
or Higher
Understanding the Web-Based User Interface
Start Netscape,
click on “Edit” then
“Preferences”.
2.
In the “Preferences”
window, click on
“Advanced” then
select “Proxies”. In
the “Proxies” window,
select “Direct
connection to the
Internet”.
Mozilla FireFox 1.0 or Higher
1.
Start FireFox, click on “Tools”
then “Options”
2.
In the “General” tab, click
“Connection Settings”
3.
Select “Direct connection to
the Internet” and then click
OK.
The Modem-Router can be configured by any browser such as
Internet Explorer 4.0 or above. Using the web management interface,
you may configure the Modem-Router and view statistics to monitor
network activity. Type “10.1.1.1” (do not type in anything else such
as “http://” or “www”) in your browser’s address bar. Then press the
“Enter” key.
2
The following screen will
appear in your browser
to prompt you to log in.
The default Password
is “admin”. Enter the
Password, and then click
the “Log In” button to log
in.
5
7
The Modem-Router’s management interface consists of a Setup
Wizard and an Advanced Setup section.
1.
Start Safari
2.
Click “Preferences”.
3.
Click the “Advanced” tab.
4.
Click “Change Settings”. The Network panel will open to the
Proxies tab.
5.
Verify all boxes are unchecked. To remove a checkmark, click in
the box once.
6.
Click the “Apply Now” button.
7.
Close “System Preferences“
8.
Close the “Preferences”.
Setup Wizard
12
4
6
Navigating the Web Browser Interface
MAC OS – Safari
3
Use the Setup Wizard to quickly configure the Modem-Router with
your username and password.
Advanced Setup
Advanced Setup offers more advanced functions such as hacker
attack detection, IP and MAC address filtering, virtual server setup,
virtual DMZ host, and many more functions.
13
section
1.
1
Manually Configuring your Modem-Router
Manually Configuring your Modem-Router
Making Configuration Changes
Advanced Setup
Configurable parameters have a dialog box or a drop-down list. Once
a configuration change has been made on a page, most times you will
need to click the “SAVE SETTINGS” or “NEXT” button at the bottom
of the page to enable the new setting. Some options may also have an
“ADD” button also.
Clicking the Home icon
returns you to the home
page. The Main Menu links
are used to navigate to
other menus that display
configuration parameters
and statistics.
2
3
4
The Modem-Router’s
advanced management
interface contains 14 main
menu items as described
in the following table.
5
6
Setup Wizard
After successfully logging into the Modem-Router, you will be
prompted with the following screen. You can quickly select your
country, add in your username and password for your ISP into the
Modem-Router. Once you have added all details correctly, click “Save
Settings”.
The status section shows:
7
Menu Description
Menu
Description
System
Sets the local time zone, the password for
administrator access, the IP address of a PC that
will be allowed to manage the Modem-Router
remotely, and the IP address of a Domain Name
Server.
•
Line Status – detects if the telephone line has correct line sync
•
Line Mode – This shows the current line mode, (G.DMT is common for
ADSL and ADSL2/ADSL2+)
•
Connected/NO Connection – Shows current Internet connection status
WAN
Specifies the Internet connection settings.
•
WAN IP – This is the IP
Address that the ISP
has assigned to the
Modem-Router.
LAN
Sets the TCP/IP configuration for the ModemRouter LAN interface and DHCP clients.
NAT
Shares a single ISP account with multiple users,
sets up Port forwarding.
Route
Sets routing parameters and displays the current
routing table.
Firewall
Configures a variety of security and specialized
functions including: Access Control, URL blocking,
Internet access control scheduling, Intruder
detection, and DMZ.
ADSL
Sets the ADSL operation type and shows the
ADSL status.
14
15
section
Note: To ensure proper screen refresh after a command entry, be sure
that Internet Explorer 5.0 and above is configured as follows: Under
the menu Tools/Internet Options/General/Temporary Internet Files/
Settings, the setting for “Check for newer versions of stored pages”
should be “Every visit to the page.”
1
Manually Configuring your Modem-Router
UPnP
Configures the Modem-Router’s Universal Plug
and Play features.
DDNS
Configures the Dynamic DNS function.
Tools
Contains options to back up and restore the
current configuration, restore all configuration
settings to the factory defaults, update system
firmware, or reset the system.
Status
System Settings
Time Settings
Set the time zone and time server for the Modem-Router. This
information is used for log entries and client access control.
Check “Enable Automatic Time Server Maintenance” to automatically
maintain the Modem-Router’s system time by synchronizing with
a public time server
over the Internet.
Then configure two
different time servers by
selecting the options in
the Primary Server and
Secondary Server fields.
16
1
Password Settings
Use this page to restrict
access based on a
password. By default, the
password is “admin”.
2
3
Passwords can contain
from 3 to12 alphanumeric
characters which are case
sensitive.
4
Note: If your password
is lost, or you cannot
gain access to the user
interface, press the reset
button on the rear panel
(holding it down for at
least 10 seconds) to restore the factory defaults. (By default the
password is “admin” password.)
Enter a maximum Idle Time Out (in minutes) to define a maximum
period of time an inactive login session will be maintained. If the
connection is inactive for longer than the maximum idle time, it will be
logged out, and you will have to login to the web management system
again. (Default: 10 minutes)
Remote Management
By default, management
access is only available
to users on your local
network. However, you can
also manage the ModemRouter from a remote host
by checking the Enabled
check box, and if you
wish you can set a HOST
ADDRESS, which will only
allow that computer to use
remote management. The
port field should be left as
the default setting of 8080
17
5
6
7
section
Provides WAN connection type and status,
firmware and hardware version numbers, system
IP settings, as well as DHCP, NAT, and firewall
information.
Manually Configuring your Modem-Router
Manually Configuring your Modem-Router
Manually Configuring your Modem-Router
unless you need to change it. After any changes are made you must
click on “Save Settings” to apply them.
WAN
Note: If you check “Enabled” and specify an IP address of 0.0.0.0, any
host can manage the Modem-Router.
For remote management via WAN IP address you need to connect
using port 8080. Simply enter WAN IP address followed by :8080 in the
address field of your web browser, for example, 123.123.123.123:8080.
This applies unless you change the port setting, in which case you
need to substitute the 8080 for whatever port you assign.
Domain Name Servers
are used to map a
domain name (e.g.,
www.somesite.com) to
the equivalent numerical
IP address (e.g.,
64.147.25.20). Your ISP
should provide the IP
address of one or more
Domain Name Servers.
If your ISP requires you
to manually specify the
addresses, enter them
on this page.
Specify the WAN (Wide Area Network) connection parameters provided
by your Internet Service Provider (ISP).
2
ATM PVC
3
The Modem-Router uses
ATM (Asynchronous
Transfer Mode) as its
WAN interface. Click on
each ATM VC for WAN
configuration.
4
See the table below
for a description of the
parameters.
7
6
Parameter
Description
Description
Click on the VC to set the values for the
connection.
VPI/VCI
Virtual Path Identifier (VPI) and Virtual Circuit
Identifier (VCI).
Encapsulation
Specifies how to handle multiple protocols at the
ATM transport layer.
Protocol
18
5
•
VC-MUX - Point-to-Point Protocol over ATM Virtual
Circuit Multiplexer (null encapsulation) allows only
one protocol running per virtual circuit with less
overhead.
•
LLC - Point-to-Point Protocol over ATM Logical
Link Control (LLC) allows multiple protocols
running over one virtual circuit (using slightly more
overhead).
Protocol used for the connection
19
section
DNS
1
Manually Configuring your Modem-Router
ATM Interface
Description
Protocol
•
Disable: Disables the connection.
•
1483 Bridging: Bridging is a standardized layer
2 technology. It is typically used in corporate
networks to extend the physical reach of a single
LAN segment and increase the number of stations
on a LAN without compromising performance.
Bridged data is encapsulated using the RFC1483
protocol to enable data transport.
•
PPPoA: Point-to-Point Protocol over ATM is a
method of encapsulating data for transmission to
a far point.
•
1483 Routing: 1483 Routing allows a simple, lowcost connection to the Internet via a standard
Ethernet port. The Modem-Router looks up the
network address for each packet seen on the LAN
port. If the address is listed in the routing table as
local, it is filtered. If the address is listed under the
ADSL port, it is forwarded. Or if the address is not
found, then it is automatically forwarded to the
default Modem-Router (i.e., the Modem-Router
at the head end).
When you have finished
entering your connection parameters, click “SAVE SETINGS”. You
can verify that you have established an ADSL connection by clicking
Status at the bottom of the left-hand menu.
See the table for a description of the parameters.
20
1
Parameter
•
PPPoE: Point-to-Point over Ethernet is a common
connection method used for xDSL.
•
MAC Encapsulated Routing: If your ADSL service
is a Bridged mode service and you want to share
the connection to multiple PC’s, please select
MAC Encapsulated Routing. MER is a protocol
that allows you do IP routing with NAT enabled.
21
2
3
4
5
6
7
section
Clicking on the ATM VC
brings up the following
screen. The ModemRouter uses ATM as its
WAN interface. Protocols
including 1483 Routing,
1483 Bridging, MAC
Encapsulated Routing
(MER), PPPoA and PPPoE
with LLC-SNAP and VCMux encapsulations are
supported for each ATM
PVC.
Manually Configuring your Modem-Router
Manually Configuring your Modem-Router
VPI/VCI
1
Username
Enter user name.
Password
Enter password
Confirm
password
Confirm Password
MTU
Leave the Maximum Transmission Unit (MTU)
at the default value (1500) unless you have a
particular reason to change it.
2
3
5
Shows the packet encapsulation type.
Packet encapsulation specifies how to handle
multiple protocols at the ATM transport layer.
•
•
VC-MUX: Point-to-Point Protocol over ATM Virtual
Circuit Multiplexer (null encapsulation) allows only
one protocol running per virtual circuit with less
overhead.
LLC: Point-to-Point Protocol over ATM Logical
Link Control allows multiple protocols running over
one virtual circuit (using slightly more overhead).
QoS Class
ATM QoS classes including CBR, UBR and VBR.
PCR/SCR/MBS
QoS Parameters - PCR (Peak Cell Rate), SCR
(Sustainable Cell Rate) and MBS (Maximum Burst
Size) are configurable.
IP Address
If your IP address is assigned by the ISP each time
you connect, leave this field all zeros. Otherwise,
enter your ISP supplied static IP address here.
Subnet Mask
If your subnet mask is assigned by the ISP
each time you connect, leave this field all zeros.
Otherwise, enter your subnet mask here.
Connect Type
Sets connection mode to always connected,
automatic or manual connection.
6
Clone MAC Address
Clicking on the Clone MAC
Address brings up the
following screen.
7
Some ISPs may require
that you register your
MAC address with them. If
this is the case, the MAC
address of the ModemRouter must be changed
manually to the MAC
address that you have
registered with your ISP.
Most ISP’s in Australia
and New Zealand do not
require this option.
Idle Time Enter the maximum idle time for the
Internet connection. (minutes) After this time has
been exceeded the connection will be terminated.
22
4
23
section
Encapsulation
See Virtual Path Identifier (VPI) and Virtual Circuit
Identifier (VCI). Data flows are broken up into fixed
length cells, each of which contains a Virtual Path
Identifier (VPI) that identifies the path between two
nodes, and a Virtual Circuit Identifier (VCI) that
identifies the data channel within that virtual path.
Each virtual circuit maintains a constant flow of
cells between the two end points. When there is
no data to transmit, empty cells are sent. When
data needs to be transmitted, it is immediately
inserted into the cell flows.
Manually Configuring your Modem-Router
Manually Configuring your Modem-Router
Manually Configuring your Modem-Router
LAN
DHCP Client List
Use the LAN (Local
Area Network) menu to
configure the LAN IP
address and to enable
the DHCP server for
dynamic client address
allocation.
The DHCP Clients List
displays the IP Address,
Host Name and MAC
Address of each client
that has requested an IP
address since the last
reboot of the ModemRouter. Check the FIX box
to have the IP address and
the MAC address linked
so that the IP address will
always be assigned as it is
on this screen.
1
2
3
4
5
7
Parameter
Description
IP Address
The IP address of the Modem-Router.
NAT
IP Subnet Mask
The subnet mask of the Modem-Router.
DHCP Server
To dynamically assign an IP address to client PCs,
enable the DHCP (Dynamic Host Configuration
Protocol) Server.
Lease Time
Set the DHCP Lease Time
From this section you can configure the Virtual Server, and Special
Application features that provide control over the TCP/ UDP port
openings in the Modem-Router’s firewall. This section can be used to
support several Internet based applications such as web, email, FTP,
and Telnet.
DHCP Option
60 Vendor ID
If you wish you can Specify the Name of your
DHCP Server (Optional)
Lease Time
Specify the length of time that the DHCP will
assign an IP address to a computer for.
Start IP
Specify the start IP address of the DHCP pool. Do
not include the gateway address of the ModemRouter in the client address pool. (See “TCP/IP
Configuration”). If you attempt to include the
Modem-Router gateway address (10.1.1.1 by
default) in the DHCP pool, an error dialog box
will appear. If you change the pool range, make
sure the first three octets match the gateway’s IP
address, i.e., 10.1.1.xxx.
End IP
Specify the end IP address of the DHCP pool.
Domain Name
If your network uses a domain name, enter it here.
Otherwise, leave this field blank.
24
NAT Settings
NAT allows one or more
public IP addresses to be
shared by multiple internal
users. You can enable
or disable NAT here.
Recommended setting =
Enable.
25
section
6
Manually Configuring your Modem-Router
Manually Configuring your Modem-Router
Address Mapping
Special Applications
Use Address Mapping to
allow a limited number of
public IP addresses to be
translated into multiple
private IP addresses for
use on the internal LAN
network. This also hides
the internal network for
increased privacy and
security.
Some applications, such
as Internet gaming,
video conferencing,
Internet telephony and
others, require multiple
connections. These
applications cannot work
with Network Address
Translation (NAT) enabled.
If you need to run
applications that require
multiple connections,
use the following screen
to specify the additional
public ports to be opened for each application.
If you configure the Port
Forwarding settings,
remote users accessing
services such as web
or FTP at your local site
via public IP addresses
can be automatically
redirected to local servers
configured with private
IP addresses. In other
words, depending on the
requested service (TCP/
UDP port number), the
Modem-Router redirects
the external service request to the appropriate server (located at
another internal IP address).
For example, if you set Type/Public Port to TCP/80 (HTTP or web)
and the LAN IP Address/LAN Port to 10.1.1.3/80, then all HTTP
requests from outside users will be transferred to 10.1.1.3 on port 80.
Therefore, by just entering the IP address provided by the ISP, Internet
users can access the service they need at the local address to which
you redirect them.
Specify the public port number normally associated with an
application in the Trigger Port field. Set the protocol type to TCP
or UDP, and then enter the ports that the application requires. The
ports may be in the format 7, 11, 57, or in a range, e.g., 72-96, or a
combination of both, e.g., 7, 11, 57, 72-96.
Popular applications
requiring multiple ports
are listed in the Popular
Applications field. From
the drop-down list, choose
the application and then
choose a row number to
copy this data into.
Note: Choosing a row
that already contains data
will overwrite the current
settings.
The more common TCP service ports include:
HTTP: 80, FTP: 21, Telnet: 23, and POP3: 110.
26
27
2
3
4
5
6
7
section
Port Forwarding
1
Manually Configuring your Modem-Router
Manually Configuring your Modem-Router
NAT Mapping Table
Route
NAT Mapping Table
displays the current
NAPT (Network Address
Port Translation) address
mappings. The NAT
address mappings are
listed 20 lines per page,
click the control buttons
to move forwards and
backwards. As the NAT
mapping is dynamic, a
Refresh button is provided
to refresh the NAT
Mapping Table with the
most up-to-date values.
These pages define
routing related
parameters, including
static routes and Routing
Information Protocol (RIP)
parameters.
1
2
3
4
Static Route Parameters
•
Protocol - protocol of the flow.
•
Local IP - local (LAN) host’s IP address for the flow.
•
Local Port - local (LAN) host’s port number for the flow.
•
Parameter
Description
Pseudo IP - translated IP address for the flow.
Index
Displays the number of the route.
•
Pseudo Port - translated port number for the flow.
•
Peer IP - remote (WAN) host’s IP address for the flow.
Network
Address
Displays the IP address of the remote computer
for which to set a static route.
•
Peer Port - remote (WAN) host’s port number for the flow.
Subnet Mask
Displays the subnet mask of the remote network
for which to set a static route.
Gateway
Displays the WAN IP address of the gateway to
the remote network.
Configure
Allows you to modify or delete configuration
settings
28
29
5
6
7
section
The content of the NAT Mapping Table is described as follows:
Static routing is the
manual method used to
set up routing. A network
administrator enters
routes into the ModemRouter using the following
screens. This method has
the advantage of being predictable, and simple to set up. It is easy to
manage in small networks but does not scale well.
Manually Configuring your Modem-Router
Manually Configuring your Modem-Router
Click Add or Edit to
display the following page
and add a new static route
to the list.
RIP Parameter
1
The device supports
Routing Information
Protocol (RIP) v1 and v2
to dynamically exchange
routing information with
adjacent Modem-Routers.
2
3
4
5
Parameter
Description
Index
Displays the number of the route.
Network
Address
Enter the IP address of the remote computer for
which to set a static route.
Subnet Mask
Enter the subnet mask of the remote network for
which to set a static route.
Gateway
Enter the WAN IP address of the gateway to the
remote network.
7
Parameter
Description
RIP mode
Globally enables or disables RIP.
Auto summary
If Auto summary is disabled, then RIP packets will
include sub-network information from all sub¬net
works connected to the ADSL Modem-Router.
If enabled, this sub-network information will be
summarized to one piece of information covering
all sub-networks.
Interface
The WAN interface to be configured.
Operation
Mode
Disable: RIP disabled on this interface.
Enable: RIP enabled on this interface.
Silent: Listens for route broadcasts and updates
its route table. It does not participate in sending
route broadcasts.
30
Version
Sets the RIP version to use on this interface.
Poison Reverse
A method for preventing loops that would cause
endless retransmission of data traffic.
31
section
6
Manually Configuring your Modem-Router
Authentication
Required
None: No authentication.
Manually Configuring your Modem-Router
1
Routing Table
2
Password: A password authentication key is
included in the packet. If this does not match
what is expected, the packet will be discarded.
This method provides very little security as it
is possible to learn the authentication key by
watching RIP packets.
3
4
MD5: An algorithm that is used to verify data
integrity through the creation of a 128-bitmessage
digest from data input (which may be a message
of any length) that is claimed to be as unique to
that specific data as a fingerprint is to a specific
individual.
Password or MD5 Authentication key.
RIP sends routing-update messages at regular intervals and when the
network topology changes. When a Modem-Router receives a routing
update that includes changes to an entry, it updates its routing table
to reflect the new route. RIP Modem-Routers maintain only the best
route to a destination. After updating its routing table, the ModemRouter immediately begins transmitting routing updates to inform
other network Modem-Routers of the change.
6
7
Parameter
Description
Flags
Indicates the route status:
C = Direct connection on the same subnet.
S = Static Modem-Router
R = RIP (Routing Information Protocol) assigned
route.
I = ICMP (Internet Control Message Protocol)
Redirect route.
Network
Address
Destination IP address
Netmask
The subnetwork associated with the destination.
This is a template that identifies the address bits
in the destination address used for routing to
specific subnets. Each bit that corresponds to a
“1” is part of the subnet mask number; each bit
that corresponds to “0” is part of the host number.
32
Gateway
The IP address of the Modem-Router at the next
hop to which frames are forwarded.
Interface
The local interface through which the next hop of
this route is reached.
Metric
When a Modem-Router receives a routing update
that contains a new or changed destination
network entry, the Modem-Router adds 1 to the
metric value indicated in the update and enters
the network in the routing table.
33
section
Authentication
Code
5
Manually Configuring your Modem-Router
Manually Configuring your Modem-Router
Firewall
Access Control Add PC
The Modem-Router’s
firewall enables access
control of client PCs,
blocks common hacker
attacks, including IP
Spoofing, Land Attack,
Ping of Death, IP with
zero length, Smurf Attack,
UDP port loopback, Snork
Attack, TCP null scan, and
TCP SYN flooding.
The settings in the screen
shot below will block
all email sending and
receiving.
1
2
3
Define the appropriate
settings for client PC
services (as shown
above). Click “OK” to save
your settings. The added
PC will now appear in the
Access Control page.
4
5
Access Control
Access Control allows
users to define the outgoing traffic permitted or not-permitted through
the WAN interface.
The Modem-Router can also limit the access of hosts within the local
area network (LAN). The MAC Filtering Table allows the Modem-Router
to enter up to 32 MAC addresses that are not allowed access to the
WAN port.
The following items are displayed on the Access Control screen:
Parameter
Description
Enable Filtering
Enables or disables the filtering function. Function
Normal Filtering Displays the IP address (or an IP address range)
Table
filtering table.
7
MAC Filter
Use this page to block
access to your network
using MAC addresses.
The Modem-Router can
also limit the access of
hosts within the local area
network (LAN). The MAC
Filtering Table allows the
Modem-Router to enter
up to 32 MAC addresses
that are allowed access
to the WAN port. All other
devices will be denied
access.
Click Add PC on the Access Control screen to view the following page.
34
35
section
6
Manually Configuring your Modem-Router
Manually Configuring your Modem-Router
URL Blocking
Edit Schedule Rule
To configure the URL
Blocking feature, use the
table below to specify the
web sites (www.somesite.
com) and/or keywords
you want to filter on your
network.
You can create and edit
schedule rules on this
page.
From the Access Control Page, Add PC section, check the option for
“WWW with URL Blocking” in the Client PC Service table to filter out
the web sites and keywords selected below, on a specific PC.
The Modem-Router allows the user to block access to web sites from
a particular PC by entering either a full URL address or just a keyword.
This feature can be used to protect children from accessing violent or
pornographic web sites.
Schedule Rule
2
3
Define the appropriate
settings for a schedule
rule (as shown on the
above screen). The rule
in the screen shot above
prohibits emailing after
8.00am to 11.59pm. Upon
completion, click “OK” to
save your schedule rules.
4
5
6
7
Intrusion Detection
The Modem-Router’s
firewall inspects packets
at the application layer,
maintains TCP and UDP
session information
including timeouts and
number of active sessions,
and provides the ability to
detect and prevent certain
types of network attacks
such as Denial-of-Service
(DoS) attacks.
You may filter Internet
access for local clients
based on rules.
Each access control rule
may be activated at a
scheduled time. Define the
schedule on the Schedule
Rule page, and apply the
rule on the Access Control
page.
Click Add Schedule Rule.
36
37
section
To complete this
configuration, you will
need to create or modify
an access rule in “Access
Control”. To modify an
existing rule, click the Edit
option next to the rule you
want to modify. To create a new rule, click on the Add PC option.
1
Manually Configuring your Modem-Router
Stateful Packet
Inspection
The Modem-Router
protects against DoS
attacks including: Ping of
Death (Ping flood) attack,
SYN flood attack, IP
fragment attack (Teardrop
Attack), Brute-force
attack, Land Attack, IP
Spoofing attack, IP with
zero length, TCP null scan
(Port Scan Attack), UDP
port loopback, Snork
Attack.
Note: The firewall does not
significantly affect system
performance, so we advise
enabling the prevention
features to protect your network.
Parameter
Defaults
Description
Enable SPI
and AntiDoS firewall
protection
Yes
The Intrusion Detection feature of the
VoIP Modem-Router limits the access
of incoming traffic at the WAN port.
When the Stateful Packet Inspection
(SPI) feature is turned on, all incoming
packets are blocked except those
types marked with a check in the
Stateful Packet Inspection section at
the top of the screen.
38
Discard Ping
from WAN
Discard
This option allows you to select
different application types that are
using dynamic port numbers. If you
wish to use Stateful Packet Inspection
(SPI) for blocking packets, click on the
Yes radio button in the “Enable SPI and
Anti-DoS firewall protection” field and
then check the inspection type that you
need, such as Packet Fragmentation,
TCP Connection, UDP Session, FTP
Service, H.323 Service, and TFTP
Service. It is called a “Stateful” packet
inspection because it examines the
contents of the packet to determine
the state of the communication; i.e.,
it ensures that the stated destination
computer has previously requested the
current communication. This is a way
of ensuring that all communications are
initiated by the recipient computer and
are taking place only with sources that
are known and trusted from previous
interactions. In addition to being more
rigorous in their inspection of packets,
stateful inspection firewalls also
close off ports until a connection to
the specific port is requested. When
particular types of traffic are checked,
only the particular type of traffic
initiated from the internal LAN will be
allowed. For example, if the user only
checks FTP Service in the Stateful
Packet Inspection section, all incoming
traffic will be blocked except for FTP
connections initiated from the local
LAN.
Prevents a ping on the ModemRouter’s WAN port from being routed
to the network.
39
1
2
3
4
5
6
7
section
Network attacks that deny
access to a network device
are called DoS attacks.
DoS attacks are aimed
at devices and networks
with a connection to the
Internet. Their goal is not
to steal information, but
to disable a device or
network so users no longer
have access to network
resources.
Manually Configuring your Modem-Router
Manually Configuring your Modem-Router
RIP Defect
Enabled
If the Modem-Router does not reply to
an IPX RIP request packet, it will stay
in the input queue and not be released.
Accumulated packets could cause
the input queue to fill, causing severe
problems for all protocols. Enabling
this feature prevents the packets
accumulating.
Enter your email address.
SMTP Server
Address
Enter your SMTP server address
(usually the part of the email address
following the “@” sign).
POP3 Server
Address
Enter your POP3 server address
(usually the part of the email address
following the “@” sign).
User Name
Enter your email account user name.
Password
Enter your email account password.
Fragmentation
half-open wait
10 secs
Configures the number of seconds that
a packet state structure remains active.
When the timeout value expires, the
Modem-Router drops the unassembled
packet, freeing that structure for use
by another packet.
TCP SYN wait
30 secs
Defines how long the software will
wait for a TCP session to reach an
established state before dropping the
session.
TCP FIN wait
5 secs
Specifies how long a TCP session will
be managed after the firewall detects a
FIN-exchange.
TCP connection
idle timeout
UDP session
idle timeout
3600 secs (1 hour) The length of
time for which a TCP session will be
managed if there is no activity.
30 secs
H.323 data
channel idle
timeout
180 secs
The length of time for which an H.323
session will be managed if there is no
activity.
Total
incomplete
TCP/UDP
sessions HIGH
300
sessions
Defines the rate of new un-established
sessions that will cause the software to
start deleting half-open sessions.
Total
incomplete
TCP/UDP
sessions LOW
250
sessions
Defines the rate of new un-established
sessions that will cause the software to
stop deleting half-open sessions.
Incomplete
TCP/UDP
sessions (per
min.) HIGH
250
sessions
Maximum number of allowed
incomplete TCP/UDP sessions per
minute.
Incomplete
TCP/UDP
sessions (per
min.) LOW
200
sessions
Minimum number of allowed
incomplete TCP/UDP sessions per
minute.
Maximum
incomplete
TCP/UDP
sessions
number from
same host
10
Maximum half-open fragmentation
packet number from same host
Incomplete
TCP/UDP
sessions detect
sensitive time
period
300 secs
Length of time before an incomplete
TCP/UDP session is detected as
incomplete
Maximum
half-open
fragmentation
packet number
from same host
30
Maximum number of half-open
fragmentation packets from the same
host.
The length of time for which a UDP
session will be managed if there is no
activity.
40
41
1
2
3
4
5
6
7
section
Your E-mail
Address
Manually Configuring your Modem-Router
Manually Configuring your Modem-Router
Maximum
number of
half-open
fragmentation
packets from
the same host.
1 secs
Flooding
cracker block
time
300 secs
Length of time before a half-open
fragmentation session is detected as
half-open.
Length of time from detecting a flood
attack to blocking the attack.
If you have a client PC
that cannot run an Internet
application properly from
behind the firewall, you
can open the client up
to unrestricted two-way
Internet access. Enter
the IP address of a DMZ
(Demilitarized Zone) host
on this screen. Adding
a client to the DMZ
may expose your local
network to a variety of
security risks, so it is only
recommended that this is used option as a last resort.
1
ADSL
ADSL Parameters
We recommend leaving
the Operation Mode at
the default Automatic
setting, to automatically
negotiate with remote
DSLAM (Digital Subscriber
Line Access Multiplexer).
A DSLAM is owned and
managed by your ISP,
if the Modem-Router
is having problems
connecting to the Internet,
it may be necessary to
force the Operation Mode to your ISP’s preferred connection.
Operation Mode
•
Automatic
•
T1.413 Issue 2
•
G.992.1 (G.DMT)
•
G.922.2 (G.Lite)
It is also recommended that you disable and software firewall installed
on your PC, this will continue to block ports even if the PC is entered
into the DMZ.
42
43
2
3
4
5
6
7
section
DMZ
Manually Configuring your Modem-Router
Manually Configuring your Modem-Router
Status
Manually Configuring your Modem-Router
1
Noise Margin:
The Status page displays
ADSL status information.
Upstream
Minimum noise margin upstream.
Downstream
Minimum noise margin downstream. Maximum
fluctuation in the output power
Output Power Attenuation:
Maximum reduction in the strength of the
upstream signal.
Downstream
Maximum reduction in the strength of the
downstream signal.
Fast Path FEC
Correction
There are two latency paths that may be used: fast
and interleaved. For either path a forward error
correction (FEC) scheme is employed to ensure
higher data integrity. For maximum noise immunity,
an interleaver may be used to supplement FEC.
Interleaved
Path FEC
Correction
An interleaver is basically a buffer used to
introduce a delay, allowing for additional error
correction techniques to handle noise Interleaving
slows the data flow and may not be optimal for
real-time signals such as video transmission.
Fast Path CRC
Error
Indicates the number of Fast Path Cyclic
Redundancy Check errors.
Interleaved
Path CRC Error
Indicates the number of Interleaved Path Cyclic
Redundancy Check errors.
Loss of Signal
Defect
Momentary signal discontinuities.
Loss of Frame
Defect
Failures due to loss of frames.
Parameter
Description
Line Status
Shows the current status of the ADSL line.
Loss of Power
Defect
Failures due to loss of power.
Data Rate:
Upstream
Actual and maximum upstream data rate.
Actual and maximum downstream data rate.
Fast Path HEC
Error
Fast Path Header Error Concealment errors.
Downstream
Interleaved
Path HEC Error
Interleaved Path Header Error Concealment errors.
Operation Data/Defect Indication:
44
45
3
4
5
6
7
section
Upstream
2
Manually Configuring your Modem-Router
Statistics
(Superframes represent the highest level of data
presentation.
Each superframe contains regular ADSL frames,
one of which is used to provide superframe
synchronization, identifying the start of a
superframe. Some of the remaining frames are
also used for special functions.)
Number of interleaved superframes received.
Transmitted
Superframes
Interleaved
Number of interleaved superframes transmitted.
Received
Superframes
Fast
Number of fast superframes received.
Transmitted
Superframes
Fast
Number of fast superframes transmitted.
46
1
UPnP
UPnP (Universal Plug-andPlay) is a technology that
offers seamless operation
of voice messaging, video
messaging, games, and
other applications that are
UPnP-compliant. Some
applications require the
Modem-Router’s firewall
to be configured in a
specific way to operate
properly. This usually
requires opening TCP
and UDP ports, and in
some instances, setting
trigger ports. An application that is UPnP compliant has the ability to
communicate with the Modem-Router, basically “telling” the ModemRouter which way it needs the firewall configured. The Modem-Router
ships with the UPnP feature disabled. If you are using any applications
that are UPnP-compliant, and wish to take advantage of the UPnP
features, you can enable the UPnP feature. Click on the “Enable”
button then click on the “SAVE SETTINGS” button to save your
settings.
47
2
3
4
5
6
7
section
Received
Superframes
Interleaved
Manually Configuring your Modem-Router
Manually Configuring your Modem-Router
Manually Configuring your Modem-Router
DDNS
Configuration Tools
2
Check Backup ModemRouter Configuration
and click “NEXT” to save
your Modem-Router’s
configuration to a file
named “backup.cfg” on
your PC.
With a DDNS connection
you can host your own
web site, email server,
FTP site and more at your own location even if you have a dynamic IP
Address.
This Modem-Router supports both DynDNS (www.dyndns.org) and
TZO (www.TZO.com) DDNS connections only. You will need to register
an account with either of these Dynamic DNS websites in order to
utilize this function.
Parameter
Description
Provider
Select either DynDNS or TZO
Dynamic DNS
Enable or Disable DDNS Function
DDNS Domain
Name
Type in your domain name (e.g. mydns.dyndns.org)
DDNS Account/
Email
Add your account username or email address
(DDNS Provider will specify)
DDNS
Password/Key
Add your account password
3
4
5
You can then check
Restore from saved
Configuration file (backup.
cfg) to restore the saved
backup configuration file.
6
To restore the factory
settings, check Restore Modem-Router to Factory Defaults and click
“NEXT.” You will be asked to confirm your decision. Click “APPLY” to
proceed, or “CANCEL” to go back.
Firmware Upgrade
Use this screen to
update the firmware or
user interface to the
latest versions. You
can download the latest
firmware from http://www.
belkin.com/dslModemRouters.
It is recommended that
you back up your ModemRouter’s settings prior to
updating the firmware,
you may loose all your
current settings. Refer to
“Backup Modem-Router Configuration”.
Tools
Use the Tools menu to back-up the current settings, to restore
previously saved settings, or to restore the factory default settings.
48
49
7
section
DDNS (Dynamic Domain
Name Server) provides
a way to tie a domain
name to the ModemRouters WAN IP. DDNS
allows your domain
name to follow your IP
Address automatically
by having your DNS
records changed
when your IP Address
changes.
1
Manually Configuring your Modem-Router
Manually Configuring your Modem-Router
Please note: If your Modem-Router is functioning correctly, we do
not recommend you update the firmware. Belkin is not responsible
for any consequence as result of a firmware update. Please
consult Belkin Technical Support prior to updating the ModemRouter’s firmware.
The following items are included on the Status screen:
Download the file to your hard drive. Then click Browse... to find the
file on your computer. Select the firmware file and click “Open.” Click
“BEGIN UPGRADE” to start the upgrade process.
2
Parameter
Description
INTERNET
Displays WAN connection type and status.
Release Click on this button to disconnect from
the WAN. Renew Click on this button to establish
a connection to the WAN.
Displays system IP settings, as well as DHCP
Server and Firewall status.
INFORMATION
Displays the number of attached clients, the
firmware versions, and the physical MAC address
for each media interface and for the ModemRouter, as well as the hardware version and serial
number.
Should your unit
become unresponsive
for any reason, you
can simply perform a
reset from this page.
Performing a reset will
reboot the device. Your
configuration settings
will remain the same.
ATM PVC
Displays ATM connection type and status.
DHCP Client List
Status
The Status screen
displays WAN/LAN
connection status,
firmware and hardware
version numbers, as
well as information on
DHCP clients connected
to your network.
50
51
3
4
5
6
7
section
GATEWAY
Reset
This function will reboot
the Modem-Router, no
settings will be lost
during this proccess.
1
Manually Configuring your Modem-Router
New Zealand Telepermit Special Conditions
Security Log
PTC General Warning
The security log may
be saved to a file by
clicking “Save” and
choosing a location.
DHCP Client Log
displays information on
DHCP clients on your
network.
The grant of a Telepermit for any item of terminal equipment indicates
only that Telecom has accepted that the item complies with minimum
conditions for connection to its network. It indicates no endorsement
of the product by Telecom, nor does it provide any sort of warranty.
Above all, it provides no assurance that any item will work correctly in
all respects with another item of Telepermitted equipment of a different
make or model, nor does it imply that any product is compatible with
all of Telecom’s network services.
1
2
3
4
5
This Belkin F5D5730au ADSL Router on Long Lines
Parameter
Description
Security Log
Displays illegal attempts to access your network.
Save
Click on this button to save the security log file.
The Service Covered by These Telepermits
Refresh
Click on this button to refresh the screen.
Clear
Click on this button to delete the access log.
This Telepermit shows that this Belkin F5D5730au ADSL Router is
suitable for connection to Telecom’s existing ADSL1 service. This
service is defined by the specification PTC270. When compliance with
the specification is proved a PTC272 Telepermit is issued for each
product. This Telepermit does not show suitability for connection to a
new ADSL2 service when Telecom introduces it. Telecom will require
proof of compliance with a new PTC specification when the new
ADSL2 service is introduced. This note should be attached to each of
the boxes containing these Belkin F5D5730au ADSL Routers:
ADSL2 & ADSL2+ Services
ADSL2 and ADSL2+ services are only available from the network
of the ADSL Service Provider. Telecom does not currently provide
either of the services to customers from its Broadband network.
When Telecom introduces either ADSL2 and/or ADSL2+ service this
Belkin F5D5730au ADSL Router will have to prove itself suitable for
connection to the service.
52
53
6
7
section
This Belkin F5D5730au ADSL Router may not achieve the type of
“high speed” operation expected when attached to a line that is
longer than intended by the ITU-T ADSL standard i.e. >3 km of 0.4mm
cable or a shorter cable length with several tails or multiples. If the
Router is installed in such conditions and does not give the expected
performance do not refer the matter to the Telecom Fault Service.