1
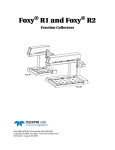
User Manual
InRoom SC
60 Hz
ON
/O
FF
DE
MO
FA
N
oo
InR
m
SC
TE
MP
E
TIM
SL
EE
P
ACPSC2000
ACPSC3500
American Power Conversion Legal Disclaimer
The information presented in this manual is not warranted by the American Power Conversion Corporation to be authoritative, error free, or complete. This publication is not meant to be a substitute for a
detailed operational and site specific development plan. Therefore, American Power Conversion Corporation assumes no liability for damages, violations of codes, improper installation, system failures, or any
other problems that could arise based on the use of this Publication.
The information contained in this Publication is provided as is and has been prepared solely for the purpose of evaluating data center design and construction. This Publication has been compiled in good faith
by American Power Conversion Corporation. However, no representation is made or warranty given,
either express or implied, as to the completeness or accuracy of the information this Publication contains.
IN NO EVENT SHALL AMERICAN POWER CONVERSION CORPORATION, OR ANY PARENT, AFFILIATE OR SUBSIDIARY COMPANY OF AMERICAN POWER CONVERSION
CORPORATION OR THEIR RESPECTIVE OFFICERS, DIRECTORS, OR EMPLOYEES BE
LIABLE FOR ANY DIRECT, INDIRECT, CONSEQUENTIAL, PUNITIVE, SPECIAL, OR
INCIDENTAL DAMAGES (INCLUDING, WITHOUT LIMITATION, DAMAGES FOR LOSS
OF BUSINESS, CONTRACT, REVENUE, DATA, INFORMATION, OR BUSINESS INTERRUPTION) RESULTING FROM, ARISING OUT, OR IN CONNECTION WITH THE USE OF,
OR INABILITY TO USE THIS PUBLICATION OR THE CONTENT, EVEN IF AMERICAN
POWER CONVERSION CORPORATION HAS BEEN EXPRESSLY ADVISED OF THE POSSIBILITY OF SUCH DAMAGES. AMERICAN POWER CONVERSION CORPORATION
RESERVES THE RIGHT TO MAKE CHANGES OR UPDATES WITH RESPECT TO OR IN
THE CONTENT OF THE PUBLICATION OR THE FORMAT THEREOF AT ANY TIME
WITHOUT NOTICE.
Copyright, intellectual, and all other proprietary rights in the content (including but not limited to software, audio, video, text, and photographs) rests with American Power Conversion Corporation or its
licensors. All rights in the content not expressly granted herein are reserved. No rights of any kind are
licensed or assigned or shall otherwise pass to persons accessing this information.
This Publication shall not be for resale in whole or in part.
Contents
General Information ........................................................ 1
Overview . . . . . . . . . . . . . . . . . . . . . . . . . . . . . . . . . . . . . . . . . . . . . . . . 1
Save these instructions . . . . . . . . . . . . . . . . . . . . . . . . . . . . . . . . . . . 1
About the InRoom SC Portable Cooling Units . . . . . . . . . . . . . . . . . 1
Safety symbols that may be used in this manual . . . . . . . . . . . . . . 2
Cross-reference symbol used in this manual . . . . . . . . . . . . . . . . . 2
Safety . . . . . . . . . . . . . . . . . . . . . . . . . . . . . . . . . . . . . . . . . . . . . . . . . . . 3
Storing the Cooling Unit. . . . . . . . . . . . . . . . . . . . . . . . . . . . . . . . . . . . 4
Cooling Unit Packaging . . . . . . . . . . . . . . . . . . . . . . . . . . . . . . . . . . . . 4
Inspecting the Cooling Unit . . . . . . . . . . . . . . . . . . . . . . . . . . . . . . . . . 5
Filing a claim . . . . . . . . . . . . . . . . . . . . . . . . . . . . . . . . . . . . . . . . . . . . 5
Tools Required . . . . . . . . . . . . . . . . . . . . . . . . . . . . . . . . . . . . . . . . . . . 6
Inventory . . . . . . . . . . . . . . . . . . . . . . . . . . . . . . . . . . . . . . . . . . . . . . . . 6
Component Identification. . . . . . . . . . . . . . . . . . . . . . . . . . . . . . . . . . . 7
ACPSC2000 and ACPSC3500 . . . . . . . . . . . . . . . . . . . . . . . . . . . . . . 7
Power plug . . . . . . . . . . . . . . . . . . . . . . . . . . . . . . . . . . . . . . . . . . . . . 8
Installation ....................................................................... 9
Location . . . . . . . . . . . . . . . . . . . . . . . . . . . . . . . . . . . . . . . . . . . . . . . . . 9
Requirements . . . . . . . . . . . . . . . . . . . . . . . . . . . . . . . . . . . . . . . . . . . 9
Exhaust Duct Assembly . . . . . . . . . . . . . . . . . . . . . . . . . . . . . . . . . . . 10
Exhaust kit . . . . . . . . . . . . . . . . . . . . . . . . . . . . . . . . . . . . . . . . . . . . . 10
Condensate Drain . . . . . . . . . . . . . . . . . . . . . . . . . . . . . . . . . . . . . . . . 12
Manual draining . . . . . . . . . . . . . . . . . . . . . . . . . . . . . . . . . . . . . . . . 12
Continuous draining . . . . . . . . . . . . . . . . . . . . . . . . . . . . . . . . . . . . . 13
Operation ....................................................................... 14
Control Panel. . . . . . . . . . . . . . . . . . . . . . . . . . . . . . . . . . . . . . . . . . . . 14
Function Button Locations . . . . . . . . . . . . . . . . . . . . . . . . . . . . . . . 14
InRoom SC 60 Hz User Manual
i
Display Interface . . . . . . . . . . . . . . . . . . . . . . . . . . . . . . . . . . . . . . . . . 15
Display Screen Information . . . . . . . . . . . . . . . . . . . . . . . . . . . . . . . 15
Function Button and Indicator Light Operation . . . . . . . . . . . . . . . 16
Remote Control . . . . . . . . . . . . . . . . . . . . . . . . . . . . . . . . . . . . . . . . . 17
Maintenance................................................................... 19
Clean the exterior . . . . . . . . . . . . . . . . . . . . . . . . . . . . . . . . . . . . . . . 19
Clean the air filter . . . . . . . . . . . . . . . . . . . . . . . . . . . . . . . . . . . . . . . 19
Replace the air filter . . . . . . . . . . . . . . . . . . . . . . . . . . . . . . . . . . . . . 19
Empty the condensate drain pan . . . . . . . . . . . . . . . . . . . . . . . . . . . 20
Storing while not in use . . . . . . . . . . . . . . . . . . . . . . . . . . . . . . . . . . 20
Caster replacement . . . . . . . . . . . . . . . . . . . . . . . . . . . . . . . . . . . . . . 21
Troubleshooting ............................................................ 22
Spare Parts List ............................................................. 23
Specifications ................................................................ 24
ii
InRoom SC 60 Hz User Manual
General Information
Overview
Save these instructions
This manual contains important instructions that must be followed during the installation of this
equipment.
About the InRoom SC Portable Cooling Units
InRoom SC cooling units are portable, compact air conditioners designed for spot-cooling, emergencycooling, and after-hours cooling of server closets, and data centers.
InRoom SC ACPSC2000 provides 2.9 kW (9,900 BTU) of cooling capacity.
InRoom SC ACPSC3500 provides 3.5 kW (12,000 BTU) of cooling capacity.
If the building’s cooling system has night and weekend thermostat setbacks, is shut down during the offseason or maintenance, or has limited cooling capacity, you may need to consider alternatives to the
standard installation.
The cooling units automatically adjust room temperature and reduce moisture while filtering the air.
Additional features of the equipment include:
• Electronic control panel with LCD display
• On/Off scheduling
• Remote control operation
• High-efficiency rotary compressor
• Adjustable louvers for air distribution
InRoom SC 60 Hz User Manual
1
Safety symbols that may be used in this manual
Electrical Hazard: Indicates an electrical hazard which, if not avoided, could result in
injury or death.
Danger: Indicates a hazard which, if not avoided, could result in severe personal injury or
substantial damage to product or other property.
Warning: Indicates a hazard which, if not avoided, could result in personal injury or damage
to product or other property.
Caution: Indicates a potential hazard which, if not avoided, could result in personal injury or
damage to product or other property.
Note: Indicates important information.
Cross-reference symbol used in this manual
More information on this subject can be found in another section of this document.
2
InRoom SC 60 Hz User Manual
Safety
Electrical Hazard: Connect the equipment to a 3-wire AC outlet (two poles plus a ground). The
receptacle must be connected to a dedicated, properly grounded 120 volt 60Hz branch circuit rated
for 20 amp main protection (fuses/circuit breaker). Connection to any other power source may
result in a shock hazard or damage to the cooling unit.
Do not cut or remove the ground from the power cord plug.
Use the cooling unit with the supplied power cord only.
Do not use an extension cord with this cooling unit.
If the plug gets hot, call a qualified electrician.
Do not immerse the cooling unit, cord or plug in water or any other liquid.
Warning: Do not stick anything into the air outlet of the air conditioner.
Close supervision is required when the unit is used near children.
Do not use in a room with poor air circulation.
Caution: Do not place the cooling unit on its side. If the cooling unit has been tipped, place it
upright on a flat, solid surface and keep it in this position for a minimum of 12 hours before
operating..
Use the cooling unit on a flat surface only.
Do not obstruct the cooling unit air outlets.
For indoor use only.
The equipment contains no internal user-serviceable parts.
Do not place the rear of the cooling unit closer than 500 mm (20 in) to any wall or obstacle.
Do not install the cooling unit where there are fumes or flammable gases, or in an extremely humid
space such as a greenhouse.
Do not place objects on top of the cooling unit or sit on the cooling unit.
InRoom SC 60 Hz User Manual
3
Storing the Cooling Unit
If the cooling unit will not be installed immediately, replace the packaging to protect from damage and
dust. Store the cooling unit indoors in a climate controlled, dry place.
Caution: Leaving the cooling unit uncovered and exposed to the elements can cause damage
and voids the factory warranty.
Cooling Unit Packaging
Recycle the packaging material when possible.
O
Do not discard packaging material until the cooling unit
has been inspected.
N
/O
FF
M
O
D
E
FA
N
In
R
m
oo
SC
TE
M
P
TI
M
E
EE
P
SL
+ °F
TIMER
MODE
Min
FAN
- °F
SLEEP
na3397a
ON/OFF
Hr.
DRY
SEND
Remove the tape securing the air filter and cover to the
cooling unit.
4
InRoom SC 60 Hz User Manual
Inspecting the Cooling Unit
Your cooling unit has been tested and inspected before shipment. To ensure that the cooling unit has not
been damaged during transit, carefully inspect the cooling unit immediately upon receipt.
Verify that all parts ordered were received as specified. See “Inventory” on page 6.
Caution: Do not tip or place the unit on its side.
Filing a claim
If damage is identified on receipt of the cooling unit, note the damage on the bill of lading and file a
damage claim with the shipping company. Contact APC for information on filing a claim with the
shipping company. The shipping claim must be filed at the receiving end of the delivery.
Caution: If damage is found, do not operate the unit. Keep all packaging for inspection by
the shipper and contact APC customer support. See the back cover of this manual for contact
information.
InRoom SC 60 Hz User Manual
5
Tools Required
Phillips head screwdriver
Inventory
The cooling unit includes the remote control storage bracket, hardware, batteries, the remote control, and
the exhaust kit.
See “Remote Control” on page 17 for more information.
E
oo
m
DE
ON
/O
FF
MO
FA
N
InR
SC
TE
MP
TIM
SL
EE
P
See “Exhaust kit” on page 10 for contents.
MODE
TIMER
SEND
DRY
FAN
SLEEP
Hr.
- °F
+ °F
Min
na3417a
ON/OFF
6
Item
Description
Item
Description
1
Cooling unit
4
Exhaust hose
2
Ceiling adapter
5
Exhaust cap
3
Phillips head screw ST 4.2 x 9.5 (2)
6
Remote control
InRoom SC 60 Hz User Manual
Component Identification
O
N/
M
O
DE
O
FF
O
N/
O
FF
M
O
DE
FA
N
In
Ro
om
SC
TE
M
P
TI
M
E
SL
EE
P
ACPSC2000 and ACPSC3500
FA
N
In
Ro
om
SC
TE
M
P
TI
M
E
SL
EE
P
+ °F
TIMER
MODE
FAN
Min
na3354a
- °F
SLEEP
ON/OFF
Hr.
DRY
SEND
Item
Description
1
Control panel
2
Vertical air louver
3
Remote control / storage
4
Air filter / upper air intake (evaporator)
5
Air outlet (heat exchanger)
6
Power cord
7
Lower air intake (condenser)
8
Water outlet drain
9
Caster
:
Lower air intake (condenser)
;
Handle
InRoom SC 60 Hz User Manual
7
Power plug
Electrical Hazard: This equipment requires an LCDI plug. Use only the power cord
supplied with the equipment.
IN THE EVENT THIS DEVICE TRIPS,
THE CAUSE OF THE MALFUNCTION IS
TO BE CORRECTED BEFORE
FURTHER USE OF THE DEVICE. SEE
OWNERS MANUAL FOR ADDITIONAL
INFORMATION.
1
4
na3371a
TEST
POWER
2
RESET
TESTING:
3
1. PRESS TEST BUTTON. LINE SHOULD TRIP.
2. PRESS RESET BUTTON FOR USE.
DO NOT USE IF ABOVE TEST FAILS.
Item
Description
1
15 amp plug
2
Green (Power ON) LED
3
Reset button
4
Test button
Important safety feature. The plug of the power cord contains a fuse as a safety feature to protect the
cooling unit from damage.
The fuse in the plug end of the power cord can trip if a power surge or a power outlet problem occurs.
If pressing the reset button does not return the cooling unit to service, contact www.apc.com for
assistance.
Electrical Hazard: A qualified electrician should be contacted to correct electrical
problems originating from the power outlet.
8
InRoom SC 60 Hz User Manual
Installation
Location
Requirements
DE
ON
/O
FF
MO
FA
N
InR
oo
m
SC
TE
MP
TIM
E
SL
EE
P
When deciding where to locate the cooling
unit, consider cooling needs, air flow, and
the location of the electrical outlet. The
cooling unit can be no more than 2.4 m
(8 ft) from the electrical outlet, condenser
intake and exhaust access.
na3362a
Cooling needs. Position the cooling unit
as close as possible to the main heat source
that requires cooling.
> 500
(20)
> 500
(20)
Dimensions are shown in mm (in).
Air flow. Position the rear of the cooling
unit at least 500 mm (20 in) away from a
wall or other equipment.
Location of electrical outlet. Place the
cooling unit no farther than 2.4 m (8 ft)
from a dedicated 120V, 60Hz, 15A branch
circuit receptacle.
Electrical Hazard: Do not use extension cords with this equipment. Using an extension
cord reduces circuit protection and will void the warranty.
Caution: To help avoid loss of cooling, only connect this equipment to a single-outlet
dedicated circuit.
InRoom SC 60 Hz User Manual
9
Exhaust Duct Assembly
Dry Mode. Exhaust air must be allowed to return to the room in order for dehumidification to take
place. Do not connect the exhaust hose to vent it outside the room. Continuous drainage for the
condensate drain pan must be provided or it will fill up and the unit will automatically shut down until it
is emptied.
Cool Mode. Exhaust air must vent outside the room when using the cool mode.
Note: Leave the door to the room slightly ajar to equalize pressure to improve ventilation.
Exhaust kit
O
N/
O
FF
M
O
DE
FA
N
In
om
Ro
SC
M
TE
P
TI
M
E
SL
EE
P
+ °F
TIMER
MODE
FAN
Min
na3415a
- °F
SLEEP
ON/OFF
Hr.
DRY
SEND
Item
10
Description
Item
4
Description
1
Exhaust cover
2
Ceiling adapter - 596 to 914 mm (23.5 to 36 in) 5
Exhaust vent of portable cooling unit
3
Phillips head screw ST 4.2 x 9.5 (2)
6
Flange connector end of exhaust hose
Ceiling connector end of exhaust hose
InRoom SC 60 Hz User Manual
Installation. Exhaust air can be vented to the outside through the ceiling. The cooling unit should be
positioned a minimum of 500 mm (20 in) from any wall; either at the back or on the sides. In a dropped
ceiling, the ceiling adapter can be installed in place of one of the ceiling tiles.
na3416a
1. Position the end of the exhaust hose so the small tabs line up with the holes in the ceiling adapter.
1 Insert the exhaust hose into the ceiling adapter and
2 turn the exhaust hose counterclockwise slightly until the tabs lock into position.
The exhaust hose is secured to the ceiling adapter when the tabs are in position.
2. Remove the ceiling tile and install the adapter panel in the
grid. The adapter panel can be adjusted to fit areas from 596
mm to 914 mm (23.46 to 36 in) long and 178 mm (7 in)
wide.
3. For permanent installation, cut the ceiling tile so that it will
lay flat in the grid next to the adapter.
4. For temporary installation, slide the ceiling tile up against
the ceiling adapter snugly.
6. Slide the flange onto the exhaust vent on the back of the
cooling unit.
InRoom SC 60 Hz User Manual
na3421b
5. Thread the base flange onto the end of the exhaust hose.
11
Condensate Drain
The InRoom SC utilizes evaporative technology, which eliminates the need for a condensate tank. To
manage any excess condensation, a drain pan is located in the bottom of the unit. When the drain pan is
full, a light will flash on the display and an alarm will sound to alert you. The cooling unit will
automatically shut down.
Caution: The cooling unit must be turned off and unplugged before draining the condensate.
Manual draining
O
N
/O
FF
M
O
D
E
FA
N
In
R
oo
m
SC
TE
M
P
TI
M
E
SL
EE
P
+ °F
TIMER
MODE
Min
FAN
ON/OFF
Hr.
DRY
SEND
- °F
SLEEP
1. When the drain pan is full, move the
cooling unit to a drain or place a
suitable container under the drain
pipe.
2. Remove the plastic cap and rubber
plug to allow the condensate to drain.
3. Replace the plug and cap when the
drain pan is empty.
na3356a
4. Return the cooling unit to service.
12
InRoom SC 60 Hz User Manual
Continuous draining
Note: Continuous drainage is recommended when the unit is used in DRY mode.
na3393a
Caution: Condensate draining is done by gravity. Do not run a drain hose to a drain that is
located above the drain port of the cooling unit.
InRoom SC 60 Hz User Manual
13
Operation
ON/OFF
MODE
FAN
SLEEP
TEMP
TIME
InRoom SC
na3359a
Control Panel
Function Button Locations
Item Function
14
Description
1
Power control
Turn the cooling unit On and Off
2
Mode selection
Three mode control settings: Cool, Dehumidify, and Fan.
The settings are adjusted by pressing the Mode Control Button.
3
Remote control infrared
receiver
Receives commands sent from the remote control.
4
Fan speed control
Press the Fan Speed Control button to move through the three settings:
Low, Medium and High.
5
Display interface
LCD user interface displays instructions and functions.
6
Temp
Up and down arrow buttons adjust the thermostat.
7
Timer
Up and down arrow buttons adjust the timer.
8
Sleep
Press the Sleep button to start or stop the Sleep mode.
InRoom SC 60 Hz User Manual
Display Interface
FAN
SLEEP
°C
°F
SET TEMP
ON
LOW MED HIGH
AUTO
SET TIME
DRY
OFF
na3360a
COOL
Display Screen Information
Item Function
1
Sleep mode indicator
Description
Sleep mode is an undercooling mode that is used during times of nonpeak heat. Sleep mode is activated by setting the timer. The set
temperature will automatically increase at intervals until the timer turns
off the Sleep mode.
2
Cool mode indicator
Cool mode cools the room. Temperature and fan speed are set by the user.
3
Fan mode indicator
Fan mode moves air only. The fan speed is set by the user.
4
Dry mode indicator
Dry mode dehumidifies the room. The fan speed is Low only.
5
Set Time
Displays the timer interval (0.5 to 24 hours) and if the timer is on or off.
6
Fan Speed indicator
Bars labeled Low, Medium and High indicate fan speed.
7
Auto mode indicator
In auto mode the microprocessor chooses fan, cool or dry mode
depending on the set temperature setting.
8
Set Temp
Displays the set temperature.
InRoom SC 60 Hz User Manual
15
Function Button and Indicator Light Operation
Cooling Mode. In Cool mode the unit attempts to bring the room air temperature down to the set
temperature. The fan speed and temperature are adjusted in Cool mode.
Note: The room temperature must be higher than the set temperature in order for the cooling
mode to start.
Dry Mode (Dehumidify). Press the ON/OFF button to start the cooling unit. Press the Mode button to
choose Dry. In Dry mode, the fan speed is fixed to Low.
• In Dry mode, air is not exhausted to the outside.
Fan Mode. When in Fan mode, air is circulated with no cooling. Low, Medium, and High fan speed can
be selected. Indicator bars on the display show the fan speed..
Auto Mode. The cooling unit will automatically choose the Cool, Dry, or Fan mode to ensure the
indoor constant temperature efficiency based on the set temperature you have selected.
Sleep Mode. Sleep mode is an energy saving mode. The Sleep mode temperature must be preset. When
Sleep mode starts (in Cool mode), the temperature increases by two degrees after one hour and four
degrees after two hours. After two hours the cooling unit will run at the preset temperature. In Fan or
Auto mode, the temperature is not changed during Sleep mode because cooling is not occurring.
Timer Control.
Auto OFF: With the cooling unit running in Cool mode, press the Timer button to start the timer
function. Press the up or down arrow buttons to select the number of hours (from 0.5 to 24) the unit will
run before it automatically shuts off.
Auto ON: With the cooling unit powered on but in standby mode (no mode selected), press the Timer
button to start the timer function. Press the up or down arrow buttons to select the number of hours
before the cooling unit automatically starts running in Cool mode.
Temperature Control. The default display is the set temperature.
• The set temperature is only adjustable in Cool mode.
• Press the up arrow button to increase the set temperature and the down arrow button to lower the
set temperature.
Note: After the cooling unit is powered OFF, you must wait three minutes before turning it
ON again.
16
InRoom SC 60 Hz User Manual
Remote Control
Caution: 1. Do not drop the remote control.
2. Do not leave the remote control exposed to direct sunlight.
Note: 1. To avoid interference, do not use the remote control within one meter (3 ft) of a
television or other electrical appliance
2. The remote control is functional up to 7 m (23 ft) from the cooling unit.
All portable cooling units are provided with a
hand-held remote control. The function
buttons on the remote control operate in the
same manner as using the controls on the
portable cooling unit.
;
1
:
9
Function buttons:
8
Item Description
MODE
TIMER
SEND
DRY
2
3
FAN
SLEEP
4
- °F
5
Hr.
+ °F
1
Send button
7
2
Fan speed control
3
Sleep button
6
4
Decrease temperature button
5
Power On/Off button
6
Minute selection button
7
Increase temperature button
8
Hour selection button
9
Timer mode
:
Dry mode
;
Mode selection button
ON/OFF
na3361a
Min
Power On/Off. The On/Off button toggles between power on and power off.
Mode selection. While the cooling unit is On, press the Mode button. Each time the Mode button is
pressed, an icon for the Fan, Cool, Dry, or Auto will be shown on the remote display. Stop when the
mode you want is displayed. Press Send to activate the mode.
Dry mode. While the cooling unit is On, press the Dry button. Press Send to activate the mode.
Temperature adjustment. To adjust the temperature, press the increase or decrease temperature
buttons. Press Send to set the temperature adjustment.
Fan speed adjustment. To adjust the fan speed, press the Fan button. Each time the Fan button is
pressed the remote display will change from High, Medium, or Low. When you reach your selection,
press the Send button to activate the selection.
Timer Operation.
Set Timer without changing settings: Press the Timer button to show the remaining time on the
display. Press the Hour button to change the adjust the delay time from 0.5 to 18 hours then press Send.
If the cooling unit is ON, when the timer counts down to 0, the cooling unit will turn OFF. The remote
timer cannot be set to turn the cooling unit ON.
InRoom SC 60 Hz User Manual
17
Set Timer changing settings: With the cooling unit ON,
1. - Select the mode and press Send.
2. - Select the fan speed and press Send.
3. - Adjust the temperature between 16°C and 30°C and press Send.
4. - Press the Timer button to see the remaining hours.
5. - Press the Hour button to adjust the delay time. Press Send.
Clear the Timer: Press and hold the timer button until the time of day appears in the display.
Press Send.
Sleep mode. While the cooling unit is On, set the mode, temperature and fan speed. Press the Hour
button to set the duration of Sleep mode. Sleep mode timer operation can be set for up to seven hours.
Press the Send button. Press the Sleep button to start the sleep operation. If the cooling unit is in Sleep
mode, pressing the Sleep button will cancel Sleep mode.
Battery Care
The remote control requires two AAA (IEC R03) 1.5V batteries (not included).
Remove the cover on the back of the remote control and insert the batteries with the (+) and (-) poles
pointing in the proper direction.
+ -
na3361b
- +
Caution: Use only AAA (IEC R03) 1.5V batteries. Do not use rechargeable batteries.
Caution: Replace both batteries at the same time.
Caution: Dispose of used batteries appropriately.
18
InRoom SC 60 Hz User Manual
Maintenance
Electrical Hazard: Before performing maintenance on the cooling unit:
1. Turn the cooling unit off.
2. Unplug the cooling unit.
Warning: Damage to equipment may occur if:
1. Caustic substances are used to clean the cooling unit.
2. The unit is subjected to excess water.
2. Air filters are cleaned too aggressively causing damage.
Clean the exterior
Wipe dirt and dust from the exterior surfaces with a soft, dry cloth. Dampen a cloth with a solution of
warm water and mild detergent for heavily soiled areas.
Ensure all detergent is wiped from the surface with a clean, damp cloth to remove residue.
Clean the air filter
Check the air filter frequently after initially putting the cooling unit into service. Determine how long
between cleanings you can wait. Keeping your air filter clean will maximize the performance and life of
the cooling unit.
O
N
/O
FF
1. Remove the air filter. Press down on the two
tabs on the top of the grill to release the filter
and grill from the cooling unit.
M
O
D
E
FA
N
In
R
oo
m
SC
TE
M
P
TI
M
E
SL
EE
P
+ °F
TIMER
MODE
FAN
Min
- °F
SLEEP
ON/OFF
Hr.
DRY
SEND
– Pull the air filter from under the small tabs
at the edges on the inside of the grill.
2. Clean the air filter. About every two to three
weeks clean by gently vacuuming, wiping or
knocking the edges of the filter on a firm
surface to remove the excess dust.
3. Wash the air filter. To remove excessive
soil, soak the air filter in a solution of mild
detergent and warm water. Allow to air dry.
1. See “Remove the air filter” (above) for
instructions to properly remove the air filter.
na3358a
Replace the air filter
2. Install a new, clean filter to the grill. Make
sure the filter is secured under the tabs along
the edges of the grill.
3. Attach the grill to the rear of the cooling unit.
Set the bottom of the grill into the opening.
Tabs on the grill bottom should enter the slots
in the bottom of the opening. Tip the top of
the grill up and into the opening. The tabs on
the top of the grill should snap into place.
InRoom SC 60 Hz User Manual
19
Empty the condensate drain pan
If the cooling unit is not equipped with a drain hose allowing the drain pan to drain, the unit will shut
down when the drain pan is full.
1. With the power off and the unit unplugged, move the cooling unit to an appropriate place to drain
the drain pan. Place the drainage port over a drain or use a container large enough to hold the
contents of the drain pan.
2. Remove the drain plug and allow the pan to drain completely.
3. When the condensate has been drained, install the plug in the drain port.
4. Discard the contents of the drain pan.
5. Return the cooling unit to service.
Storing while not in use
1. Remove the rubber plug from the drain port and drain the water from the condensate drain pan.
2. Allow the cooling unit to run with in the Fan mode for at least four hours in a low humidity
environment to remove any moisture from the inside of the unit and prevent mold formation.
3. Turn the cooling unit off.
4. Unplug the cooling unit from the power source.
5. Drain the condensate drain pan.
6. Clean and reinstall the air filter.
7. Remove the air hoses. Wipe clean with a soft, dry cloth. Store in a safe place.
8. Cover the air exhaust ports tightly.
9. Remove the batteries from the remote control and store in a safe place.
20
InRoom SC 60 Hz User Manual
Caster replacement
Warning: Tipping the cooling unit can cause damage.
ON
/O
FF
M
OD
E
FA
N
In
Ro
om
SC
TE
M
P
TI
M
E
SL
EE
P
1. Raise the unit levelly at least 406
to 508 mm (16 to 20 in) to access
the caster.
2. Remove the two Phillips head
screws securing the old caster to
the cooling unit.
3. When the old caster is removed,
attach the new caster by
inserting the post into the
installation hole in the chassis
and securing with the two
Phillips head screws.
na3404a
8
406-50
)
(16-20
Dimensions are shown in mm (in).
InRoom SC 60 Hz User Manual
21
Troubleshooting
Problem
Solution
Unit does not run
Tripped overcurrent protector: Reset the overcurrent
protector.
If you are attempting to run the cooling unit from the
remote control, check that the batteries in the remote
control are good.
Check that the unit is properly plugged into the power
outlet.
The unit stops running
during operation.
Check that the set temperature is lower than the room
temperature.
The unit runs but does not Check that the room is closed (no doors or windows
cool.
open).
Check that no heating appliance is working nearby.
Check and clean the air filter if necessary.
Check that the air inlet or outlet is not blocked.
Check that the set temperature is not too high.
The unit does not run and Drain the water at the drain pipe on the rear panel.
If the unit still will not work contact APC technical
the Water Full indicator
light is on.
assistance.
Error message E5
The power supply is unstable.
Unplug the cooling unit for 10 minutes. If the error still
exists, call maintenance or the power company to
stabilize the utility power.
Error message H8
The condensate drain pan is full. Empty the drain pan.
Call APC customer support if the error message is still
displayed after the drain pan is empty.
The unit is running in Dry The evaporator is defrosting. The unit will resume
mode but produces no cool cooling when the defrosting operation is complete.
air.
The unit is running in Cool The evaporator is defrosting. The unit will resume
mode but produces no cool cooling when the defrosting operation is complete.
air.
The displays shows the
Timer hours isn’t
operating.
22
The Timer is not set to ON. Cancel the operation and
reset the Timer hours.
InRoom SC 60 Hz User Manual
Spare Parts List
Part Number
Description
0J-0H-0307
Ceiling exhaust kit
0J-0H-0308
Exhaust duct kit
0J-870-16521
Swivel caster
0J-876-0318
Air filter
InRoom SC 60 Hz User Manual
23
Specifications
MODE
+ °F
TIMER
Min
Hr.
DRY
SEND
ON/OFF
na3355a
SLEEP
- °F
FAN
24
Model
APCSC2000
APCSC3500
Net weight (Equipment only)
31 Kg (68 lb)
33 Kg (73 lb)
Shipping weight
37 kg (82 lb)
42 kg (92 lb)
Dimensions
840 x 685 x 370 mm (33.07 H x 14.57 D x 17.72 W in)
Voltage/Frequency
120VAC - 60 Hz
120VAC - 60 Hz
Power input
1170 W
1560 W
Operating current
9.5 A
12.5 A
Capacity
9,900 Btu/h (2.9 kW)
12,000 Btu/h (3.5 kW)
Dehumidifying capacity
2.46 l/h (0.65 gal/h)
2.91 l/h (0.77 gal/h)
Refrigerant
R-410A - 0.54 kg (1.19 lbs)
R-410A - 0.65 kg (1.43 lbs)
Timer
24 hour
24 hour
Air flow volume
220 CFM
210 CFM
Operating Range
65 - 95°F
65 - 95°F
Sound Level dB(A)
with exhaust duct: High/Low
without exhaust duct: High/Low
52/48
53/50
52/49
53/51
InRoom SC 60 Hz User Manual
APC Worldwide Customer Support
Customer support for this or any other APC product is available at no charge in any of the following ways:
• Visit the APC Web site to access documents in the APC Knowledge Base and to submit customer
support requests.
– www.apc.com (Corporate Headquarters)
Connect to localized APC Web sites for specific countries, each of which provides customer support
information.
– www.apc.com/support/
Global support searching APC Knowledge Base and using e-support.
• Contact the APC Customer Support Center by telephone or e-mail.
– Local, country-specific centers: go to www.apc.com/support/contact for contact information.
For information on how to obtain local customer support, contact the APC representative or other distributors
from whom you purchased your APC product.
© 2010 APC by Schneider Electric. APC, and the APC logo are owned by Schneider Electric Industries
S.A.S., American Power Conversion Corporation, or their affiliated companies. All other trademarks are
property of their respective owners.
990-3862A-001
10/2010