1
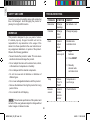
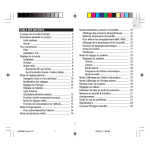
World Time Clock .................................................... 14
Alarms ..................................................................... 19
Set Daily Alarm..................................................... 19
Model: BAR916HG
Set Pre-Alarm....................................................... 19
USER MANUAL
Activate Alarm ...................................................... 20
Snooze ................................................................. 20
CONTENTS
Barometer................................................................ 20
Introduction .............................................................. 3
View Barometer Area ........................................... 20
Product Overview ..................................................... 4
Select Measurement Unit..................................... 20
Front View ............................................................. 4
View Barometer History ....................................... 20
Back View .............................................................. 5
Bar Chart Display ................................................. 21
Table Stand and Wall Mount.............................. 5
Set Altitude ........................................................... 21
LCD Display ........................................................... 6
Weather Forecast ................................................... 21
Remote Sensor (RTGR328N) ................................ 9
Weather Forecast Icons ....................................... 21
Getting Started.......................................................... 9
UV Measurement .................................................... 22
Batteries ............................................................... 9
New Additional UV Features ................................ 22
Change Settings................................................... 10
Temperature and Humidity .................................... 23
Remote Sensor ....................................................... 10
View Temperature and Humidity Area .................. 24
Set Up Thermo / Hygro Sensor (RTGR328N)...... 11
Select Measurement Unit..................................... 24
Sensor Data Transmission ................................... 12
Select Sensor Channel ........................................ 24
Search for Sensor ................................................ 12
Minimum / Maximum Records.............................. 24
Clock and Calendar ................................................ 12
Temperature and Humidity Trend......................... 24
Radio-Controlled Clock ........................................ 12
Comfort Zone ....................................................... 25
Turn Radio-Controlled Clock ON / OFF ............... 13
Heat Index............................................................ 25
Set Clock.............................................................. 14
Switch Clock Display ............................................ 14
BAR916HG_EN_OP.indd 1
EN
Wireless Weather Station
with World Time Clock
Backlight ................................................................. 25
1
5/8/06 11:20:24 AM
EN
Reset System .......................................................... 25
Safety and Care ...................................................... 26
Warnings ................................................................. 26
Troubleshooting ..................................................... 26
Specifications ......................................................... 27
About Oregon Scientific ........................................ 28
EU-Declaration of Conformity .............................. 29
2
BAR916HG_EN_OP.indd 2
5/8/06 11:20:25 AM
EN
INTRODUCTION
Thank you for selecting the Oregon ScientificTM Wireless
Weather Station with World Time Clock (BAR916HG).
This powerful device bundles time keeping, weather
monitoring, indoor and outdoor temperature and humidity
readings, barometric trends and altitude adjustment,
into a single tool you can use from the convenience
of your home.
In this box, you will find:
• Main unit
• Remote sensor (RTGR328N)
• Optional UV sensor (UVR128)
• Batteries
BAR916HG --- BAR916HG Main Unit + RTGR328N
Remote Sensor
NOTE The main unit is compatible with the
following sensors: THGR228N, THGR328N, THR228N,
THR328N, THWR288. Additional sensors are sold
separately. Please contact your local retailer for more
information. Keep this manual handy as you use
your new product. It contains practical step-by-step
instructions, as well as technical specifications and
warnings you should know.
3
BAR916HG_EN_OP.indd 3
5/8/06 11:20:27 AM
EN
PRODUCT OVERVIEW
FRONT VIEW
1
1. SNOOZE / LIGHT: Activate 8-minute snooze or
backlight
2. LCD display
3. SEL: Switch areas
4. MODE: Change settings / display
2
3
4
5
6
5.
: Increase setting / activate radio-controlled
clock
6.
: Decrease setting / deactivate radio- controlled
clock
7. MEM: View current, maximum and minimum
temperature / humidity / UV readings
7
8
8. HIST: View historical barometer and UV readings
9
10
9. CH: Switch remote sensor display
10.
/ : View alarm status; set alarm radio-controlled
clock
4
BAR916HG_EN_OP.indd 4
5/8/06 11:20:39 AM
EN
BACK VIEW
TABLE STAND AND WALL MOUNT
To stand the unit on a table, twist the lock button (on
the back of the unit) so that the two main unit segments
are unlocked from each other. Then position the unit
as shown below.
5
1
2
3
6
4
1. mb / inHg switch (in battery compartment)
To mount the unit on a wall, twist the lock button (on
the back of the unit) so that it locks the two segments
together. Then mount as shown below.
2. RESET button (in battery compartment)
3. °C / °F switch (in battery compartment)
4. Battery compartment (cover open)
5. Wall mount holes
6. Lock button -place the 2 parts of the unit next to
each other, as shown opposite. Twist the lock
button to secure the 2 unit parts together. Twist it
anti-clockwise to release the lock and separate the
two segments.
5
BAR916HG_EN_OP.indd 5
5/8/06 11:21:54 AM
EN
LCD DISPLAY
1. Weather Forecast Area: Animated weather
forecast.
2. Temperature / Humidity / Comfort Zone Area:
Readings and trend lines; comfort zone; sensor
channel number.
1
3. UVI / Barometer Area: UV level and barometric
pressure bar chart; UV Index and barometric
readings.
4. Clock / Alarm / Calendar Area: Radio-controlled
clock with World time; alarms; calendar.
2
3
4
6
BAR916HG_EN_OP.indd 6
5/8/06 11:22:19 AM
EN
Weather Forecast Area
Temperature / Humidity / Comfort Zone Area
1
6
7
1
2
2
3
8
9
4
5
10
11
1. Selected Area icon
2. Temperature trend
3. Channel number (1-5) / reception status
1. Low battery icon for main unit
4. Low battery icon for remote sensor
2. Weather display
5. Humidity trend
6. MAX / MIN temperature
7. Temperature - °C / °F
8. Heat Index
9. MAX / MIN humidity
10. Humidity
11. Comfort levels
7
BAR916HG_EN_OP.indd 7
5/8/06 11:22:34 AM
EN
UVI / Barometer Area
Clock / Alarm / Calendar Area
1
7
2
1
3
2
4
8
5
3
8
6
4
5
6
9
10
11
9
12
1. Pre-Alarm is set
7
2. Pre-Alarm display / Pre-Alarm setting
1. Barometric pressure is showing
3. Channel with RF clock reception is locked
2. UV is showing
4. RF clock reception icon
3. Low battery icon for UV sensor
5. Daily Alarm is set
4. UVI value is showing
6. Home or World time city
5. UV exposure time countdown has started
7. RF clock time (i.e. home clock time) / calendar
6. UV index level
8. Offset time-zone
7. UV exposure time for user
9. World clock time / calendar
8. Barometer / UV chart
9. SPF applied to user for UV exposure
10. User skin type for UV exposure
11. User no. (for UV Mode) or hour history for UV /
Barometric pressure reading
12. Altitude / barometric pressure / UVI reading
8
BAR916HG_EN_OP.indd 8
5/8/06 11:22:50 AM
4
2. Channel number
1
1. LCD display
1
1. Signal reception
EN
REMOTE SENSOR (RTGR328N)
3. Low battery icon
2. LED status indicator
2
3. Ventilation duct
3
5
2
4. Time
6
5. Temp (°C or °F)
7
6. Humidity %
7. Temp / Humidity
GETTING STARTED
3
BATTERIES
Batteries are supplied with this product:
1. Wall mount
1
2
3
4
5
6
7
• Main unit
4 x UM-3 (AA) 1.5V
• Remote unit
2 x UM-3 (AA) 1.5V
Insert batteries before first use, matching the polarity
as shown in the battery compartment. For best results,
install batteries in the remote sensor before the main
unit. Press RESET after each battery change.
2. CHANNEL switch
(1-5)
3. RESET
4. ºC / ºF
5. SEARCH
6. EU / UK radio signal
format switch
8
7. Battery compartment
8. Fold-out stand
9
BAR916HG_EN_OP.indd 9
5/8/06 11:23:04 AM
EN
To install the main unit batteries:
2. Most Areas have alternate display options
(for example, Clock / Alarm or Barometer / UVI).
Press MODE to switch options, or
/
to
switch between clock and alarm.
3. Press and hold MODE for 2 seconds to enter setting
mode.
NOTE Do not use rechargeable batteries.
4. Press
shows when batteries are low.
NOTE It is recommended that you use alkaline
batteries with this product for longer performance.
UNIT
Main
Remote
UV Sensor
or
to change settings.
5. Press MODE to confirm.
REMOTE SENSOR
This product is shipped with the RTGR328N Thermo
/ Hygro Sensor. The main unit can collect data from
up to 6 sensors (5 Thermo / Hygro Sensors and 1 UV
Sensor).
LOCATION
Weather Forecast Area
Temperature / Humidity Area
UVI / Barometric Pressure Area
The main unit is compatible with the following sensors:
THGR228N, THGR328N, THR228N, THR328N and
THWR288. (Additional sensors are sold separately.
Contact your local retailer for more information.)
CHANGE SETTINGS
1. Press SEL to switch between Areas.
indicates the selected Area.
10
BAR916HG_EN_OP.indd 10
5/8/06 11:23:16 AM
To fold out the stand:
1
SET UP THERMO / HYGRO
SENSOR (RTGR328N)
2
1. Open the battery compartment with a small Phillips
screwdriver.
For best results:
2. Insert the batteries.
• Insert the batteries and select the unit, channel, and
radio signal format before you mount the sensor.
3. Set the channel and radio signal format. The
switches are located in the battery compartment.
SWITCH
Channel
OPTION
If you are using more than one
sensor, select a different channel
for each sensor
Radio Signal
Format
EU (DCF) / UK (MSF)
• Place the sensor out of direct sunlight and moisture.
• Do not place the sensor more than 70 metres
(230 feet) from the main (indoor) unit.
• Position the sensor so that it faces the main
(indoor) unit, minimizing obstructions such as doors,
walls, and furniture.
• Place the sensor in a location with a clear view to the
sky, away from metallic or electronic objects.
4. Press RESET. Then set the temperature unit.
SWITCH
Temp
EN
The RTGR328N Sensor collects temperature and
humidity readings, and signals from official time-keeping
organizations for the radio-controlled clock. S
• Position the sensor close to the main unit during cold
winter months as below-freezing temperatures may
affect battery performance and signal transmission.
OPTION
°C / °F
NOTE The transmission range may vary and is subject
to the receiving range of the main unit.
5. Close the battery compartment.
You may need to experiment with various locations to
get the best results.
11
BAR916HG_EN_OP.indd 11
5/8/06 11:23:21 AM
EN
SENSOR DATA TRANSMISSION
Then, press and hold MEM and CH for 2 seconds.
Data is sent from the sensor(s) every 60 seconds. The
reception icon shown in the Temperature / Humidity Area
indicates the status.
NOTE If the sensor is still not found, check the
batteries.
ICON
DESCRIPTION
Main unit is searching
for sensors.
CLOCK AND CALENDAR
This product tracks the time and date based on radiocontrolled signals from the RTGR328N remote sensor,
or manual settings that you enter.
At least 1 channel has
been found.
Sensor 1 is sending
data. (The number
shows which sensor is
selected.)
--- shows in Temp /
Humidity Area
1
2
The selected sensor
cannot be found.
Search for the sensor
or check batteries.
3
1. RF Clock time
2. World Time city
3. World Time clock
SEARCH FOR SENSOR
RADIO-CONTROLLED CLOCK
To search for a Thermo / Hygro sensor, press SEL to
navigate to the Temperature / Humidity Area.
will
show next to the Area. Then, simultaneously press and
hold MEM and CH for 2 seconds.
The time and date are automatically updated by radiocontrolled clock signals from official time-keeping
organizations in Frankfurt (Germany) and Rugby
(England) unless you disable this feature. The signals
are collected by the remote sensor (RTGR328N)
whenever it is within 1500 km (932 miles) of a signal.
To search for the UV sensor, press SEL to navigate to
the UVI / Barometer Area.
will show next to the Area.
Initial reception takes 2-10 minutes, and is initiated when
12
BAR916HG_EN_OP.indd 12
5/8/06 11:23:27 AM
The unit cannot reach the remote
sensor.
NOTE To force a manual search for RF clock
reception, press and hold SEARCH on the sensor
(RTGR328N) for 2 seconds.
In addition to the local time and calendar display, you
can also select to display the corresponding time of 130
major world cities.
The
factors:
TURN RADIO-CONTROLLED CLOCK ON / OFF
icon shown in the Clock Area indicates 2
If you wish to manually set the clock, you must first
disable the radio-controlled feature. To do this, navigate
to the Clock / Alarm Area. Then, press and hold
on
the main unit for 2 seconds. To enable it, navigate to
the Clock / Alarm Area, then press and hold
for 2
seconds.
• Connection between the main unit and the sensor
that collects RF signals (
)
• RF signal reception (
)
How these signals work together:
ICON
EN
you first set up the unit, and whenever you press RESET.
Once complete, the reception icon will stop blinking.
RF clock enabled:
MEANING
The unit has contact with the
sensor and has synchronized
the time.
The unit has contact with the
sensor but the time has not been
synchronized.
RF clock disabled:
The unit has lost contact with
the remote sensor but the time
is synchronized.
The unit has lost contact with the
remote sensor and the time is not
synchronized.
13
BAR916HG_EN_OP.indd 13
5/8/06 11:23:36 AM
EN
SET CLOCK
• Clock with day and date
You only need to do this if you have disabled the radiocontrolled clock, or if you are too far from a RF signal.
1. Press SEL to navigate to the Clock Area.
next to the Area.
When the World Time city is set, you can toggle
between:
• RF clock with seconds and World Time clock
will show
• RF and World Time clock with day
2. Press and hold MODE for 2 seconds.
• RF and World Time date
3. Select the Home Time city, World Time city, 12 / 24
hour format, hour, minute, year, date / month format,
month, date and display language.
WORLD TIME CLOCK
4. Press
or
This clock features a World-time display function so that
you check the corresponding time of different places
in the world instantly with Daylight Saving Time (DST)
automatically adjusted. The names of the world cities
are in the abbreviated 3-letter format e.g., FRA for
Frankfurt, Germany.
to change the setting.
5. Press MODE to confirm.
NOTE The language options are (E) English, (F)
French, (D) German, (I) Italian, and (S) Spanish. The
language you select determines the weekday display.
SWITCH CLOCK DISPLAY
Press SEL to navigate to the Clock Area.
next to the Area.
will show
Press MODE to toggle between different displays.
When the World Time city is not set, you can toggle
between:
• Clock with seconds and date
BAR916HG_EN_OP.indd 14
14
5/8/06 11:23:42 AM
CITY CODE
ADD
ADL
AKL
AKR
ALG
AMS
ANC
ANT
ASU
ATH
ATL
AUH
BBU
BCN
BDD
BEG
BEJ
BER
BEY
BKK
BNE
BOG
BOS
BRN
BRU
BSB
BUA
BUD
CAI
CAS
CBR
CCS
CCU
CGX
CMB
CPH
TIME OFFSET SUMMER TIME START DATE
3
9.5
12
2
1
1
-9
3
-4
2
-5
4
2
1
3
1
8
1
2
7
10
-5
-5
1
1
-3
-3
1
2
0
10
-4
5.5
-6
6
1
No DST
Last Sunday in October
1st Sunday in October
Last Sunday in March
No DST
Last Sunday in March
1st Sunday in April
No DST
1st Sunday in September
Last Sunday in March
1st Sunday in April
No DST
Last Sunday in March
Last Sunday in March
1st April
Last Sunday in March
No DST
Last Sunday in March
Last Sunday in March
No DST
No DST
No DST
1st Sunday in April
Last Sunday in March
Last Sunday in March
2nd Sunday in October
No DST
Last Sunday in March
last Friday in April
No DST
Last Sunday in October
No DST
No DST
1st Sunday in April
No DST
Last Sunday in March
SUMMER TIME END DATE
EN
CITY, COUNTRY
Addis Ababa, Ethiopia
Adelaide, Australia
Auckland, New Zealand
Ankara, Turkey
Algiers, Algeria
Amsterdam, Netherlands
Anchorage AK, USA
Antananarivo, Madagascar
Asuncion, Paraguay
Athens, Greece
Atlanta GA, USA
Abu Dhabi, U.A.E
Bucharest, Romania
Barcelona, Spain
Baghdad, Iraq
Belgrade, Yugoslavia
Beijing, China
Berlin, Germany
Beirut, Lebanon
Bangkok, Thailand
Brisbane, Australia
Bogota, Colombia
Boston MA, USA
Bern, Switzerland
Brussels, Belgium
Brasilia, Brazil
Buenos Aires, Argentina
Budapest, Hungary
Cairo, Egypt
Casablanca, Morocco
Canberra, Australia
Caracas, Venezuela
Calcutta, India
Chicago IL, USA
Colombo, Sri Lanka
Copenhagen, Denmark
Last Sunday in March
3rd Sunday in March
Last Sunday in October
Last Sunday in October
Last Sunday in October
1st Sunday in April
Last Sunday in October
Last Sunday in October
Last Sunday in October
Last Sunday in October
1st October
Last Sunday in October
Last Sunday in October
Last Sunday in October
Last Sunday in October
Last Sunday in October
Last Sunday in October
3rd Sunday in February
Last Sunday in October
Last Friday in September
Last Sunday in March
Last Sunday in October
Last Sunday in October
15
BAR916HG_EN_OP.indd 15
5/8/06 11:23:44 AM
EN
Cape Town, South Africa
Dhaka, Bangladesh
Damascus, Syria
New Delhi, India
Detroit MI, USA
Dublin, Ireland
Frankfurt, Germany
Guatemala City, Guatemala
Geneva, Switzerland
Hamburg, Germany
Hanoi, Vietnam
Havana, Cuba
Ho Chi Minh City, Vietnam
Helsinki, Finland
Hong Kong, China
Honolulu HI, USA
Houston TX, USA
Indianapolis, IN, USA
Istanbul, Turkey
Jakarta, Indonesia
Johannesburg, South Africa
Kabul, Afghanistan
Khartoum, Sudan
Kiev, Ukraine
Kingston, Jamaica
Kathmandu, Nepal
Kuala Lumpur, Malaysia
Kuwait City, Kuwait
Las Vegas NV, USA
Los Angeles CA, USA
Lima, Peru
Lisbon, Portugal
London, UK
Lagos, Nigeria
La Paz, Bolivia
Luxembourg, Luxembourg
Madrid, Spain
CPT
DAC
DAM
DEL
DTW
DUB
FRA
GUA
GVA
HAM
HAN
HAV
HCM
HEL
HKG
HNL
HOU
IND
IST
JKT
JNB
KBL
KHA
KIE
KIN
KTM
KUL
KWI
LAS
LAX
LIM
LIS
LON
LOS
LPB
LUX
MAD
2
6
2
5.5
-5
0
1
-6
1
1
7
-5
7
2
8
-10
-6
-5
2
7
2
4.5
3
2
-5
5.75
8
3
-8
-8
-5
0
0
1
-4
1
1
No DST
No DST
1st April
No DST
1st Sunday in April
Last Sunday in March
Last Sunday in March
No DST
Last Sunday in March
Last Sunday in March
No DST
1st Sunday in April
No DST
Last Sunday in March
No DST
No DST
1st Sunday in April
No DST
Last Sunday in March
No DST
No DST
No DST
No DST
Last Sunday in March
No DST
No DST
No DST
No DST
1st Sunday in April
1st Sunday in April
No DST
Last Sunday in March
Last Sunday in March
No DST
No DST
Last Sunday in March
Last Sunday in March
1st October
Last Sunday in October
Last Sunday in October
Last Sunday in October
Last Sunday in October
Last Sunday in October
Last Sunday in October
Last Sunday in October
Last Sunday in October
Last Sunday in October
Last Sunday in October
Last Sunday in October
Last Sunday in October
Last Sunday in October
Last Sunday in October
Last Sunday in October
Last Sunday in October
16
BAR916HG_EN_OP.indd 16
5/8/06 11:23:46 AM
MEL
MEX
MGA
MIA
MIL
MNA
MNL
MON
MOW
MVD
NAS
NRB
NYC
OSL
OTW
PAP
PAR
PER
PHE
PNH
POS
PPT
PRG
PTL
PTR
PTY
RGN
RIO
RKV
ROM
RUH
SAL
SCL
SEA
SEL
SFO
SHA
10
-6
-6
-5
1
3
8
-5
3
-3
-5
3
-5
1
-5
-5
1
8
-7
7
-4
-10
1
-8
2
-5
6.5
-3
0
1
3
-6
-4
-8
9
-8
8
Last Sunday in October
1st Sunday in April
No DST
1st Sunday in April
Last Sunday in March
No DST
No DST
1st Sunday in April
Last Sunday in March
No DST
1st Sunday in April
No DST
1st Sunday in April
Last Sunday in March
1st Sunday in April
No DST
Last Sunday in March
No DST
No DST
No DST
No DST
No DST
Last Sunday in March
1st Sunday in April
No DST
No DST
No DST
2nd Sunday in October
No DST
Last Sunday in March
No DST
No DST
1st Sunday after 8th October
1st Sunday in April
No DST
1st Sunday in April
No DST
Last Sunday in March
Last Sunday in October
EN
Melbourne, Australia
Mexico City, Mexico
Managua, Nicaragua
Miami FL, USA
Milan, Italy
Manama, Bahrain
Manila, Philippines
Montreal, Canada
Moscow, Russia
Montevideo, Uruguay
Nassau, Bahamas
Nairobi, Kenya
New York NY, USA
Oslo, Norway
Ottawa, Canada
Port-au-Prince, Haiti
Paris, France
Perth, Australia
Phoenix, AZ, USA
Phnom Penh, Cambodia
Port-Of-Spain, Trinidad & Tobago
Papeete, French Polynesia
Prague, Czech Republic
Portland OR, USA
Pretoria, South Africa
Panama City, Panama
Rangoon, Myanmar
Rio de Janeiro, Brazil
Reykjavik, Iceland
Rome, Italy
Riyadh, Saudi Arabia
San Salvador, El Salvador
Santiago, Chile
Seattle WA, USA
Seoul, South Korea
San Francisco CA, USA
Shanghai, China
Last Sunday in October
Last Sunday in October
Last Sunday in October
Last Sunday in October
Last Sunday in October
Last Sunday in October
Last Sunday in October
Last Sunday in October
Last Sunday in October
Last Sunday in October
Last Sunday in October
3rd Sunday in February
Last Sunday in October
1st Sunday after 8th March
Last Sunday in October
Last Sunday in October
17
BAR916HG_EN_OP.indd 17
5/8/06 11:23:49 AM
EN
Singapore, Singapore
San Jose, Costa Rica
San Juan, Puerto Rico
Salt Lake City UT, USA
Sofia, Bulgaria
Sao Paulo, Brazil
Stockholm, Sweden
Sydney, Australia
Tashkent, Uzbekistan
Tokyo, Japan
Taipei, Taiwan
Tripoli, Libya
Toronto, Canada
Quito, Ecuador
Vancouver, Canada
Vienna, Austria
Warsaw, Poland
Washington DC, USA
Wellington, New Zealand
Zurich, Switzerland
SIN
SJO
SJU
SLC
SOF
SPL
STH
SYD
TAS
TKY
TPE
TRP
TRT
UIO
VAC
VIE
WAW
WDC
WLG
ZRH
8
-6
-4
-7
2
-3
1
10
5
9
8
2
-5
-5
-8
1
1
-5
12
1
No DST
No DST
No DST
1st Sunday in April
Last Sunday in March
2nd Sunday in October
Last Sunday in March
Last Sunday in October
No DST
No DST
No DST
No DST
1st Sunday in April
No DST
1st Sunday in April
Last Sunday in March
Last Sunday in March
1st Sunday in April
1st Sunday in October
Last Sunday in March
Last Sunday in October
Last Sunday in October
3rd Sunday in February
Last Sunday in October
Last Sunday in March
Last Sunday in October
Last Sunday in October
Last Sunday in October
Last Sunday in October
Last Sunday in October
3rd Sunday in March
Last Sunday in October
18
BAR916HG_EN_OP.indd 18
5/8/06 11:23:50 AM
This product has 2 alarms: The Daily Alarm and a
Pre-Alarm for snowy weather. The Daily Alarm can
be set to go off at the same time every day. The
Pre-Alarm sounds only when the Daily Alarm is activated
and the recorded temperature from Channel 1 Sensor
falls to 2°C (35.6°F) or below.
1. Set up and activate the Daily Alarm.
2. Press
/
to switch to Pre-Alarm view. (PRE-AL
will show at the top.)
3. Press and hold
SET DAILY ALARM
1
Press SEL to navigate to the Clock Area.
next to the Area.
2. Press
/
the top.)
/
5. Press
/
5. Press
for 2 seconds.
4. Select the hour and minute. Press
settings.
or
/
for 2 seconds.
4. Press
or
to select 15, 30, 45 or 60 minutes. This
is the amount of time the Pre-Alarm will sound
BEFORE the Daily Alarm. The Pre-Alarm is
automatically activated when you select a time.
will show
to view the alarm. (AL will show at
3. Press and hold
EN
For example, if you set the alarm to 7:00 AM, and the
Pre-Alarm to 45 minutes, the Pre-Alarm will sound at
6:15 AM provided the outdoor temperature at Channel
1 Sensor is 2°C or below.
ALARMS
to change
/
to confirm.
shows when the Pre-Alarm is set.
to confirm.
NOTE The Daily Alarm will NOT function until the
next day if the Pre-Alarm has been triggered. Also,
if you deactivate the Daily Alarm, the Pre-Alarm is
automatically deactivated.
6. The Daily Alarm icon will appear when the alarm
is set.
SET PRE-ALARM
The Pre-Alarm can be set to sound 15, 30, 45, or 60
minutes before the Daily Alarm. It will sound whenever
the recorded temperature from Channel 1 Sensor falls
to 2°C (35.6°F) or below.
19
BAR916HG_EN_OP.indd 19
5/8/06 11:23:55 AM
EN
Barometric data is shown in 2 areas at the bottom of the
display. The upper area shows a 24-hour bar chart. The
lower area shows current and historical readings.
ACTIVATE ALARM
Navigate to the Clock Area, then press
/
to
switch to Daily Alarm or Pre-Alarm view. To activate or
deactivate the alarm, press
or
.
When the alarm time is reached, the backlight will be
on for 8 seconds and crescendo alarm will sound for 2
minutes. Press any key (except snooze) to silence the
alarm. It will sound at the same time the next day.
SNOOZE
Press SNOOZE / LIGHT to temporarily disable the alarm
for 8 minutes.
or
will blink while snooze is on.
SELECT MEASUREMENT UNIT
BAROMETER
Slide the mb / inHg switch (in the clock battery
compartment), to change the display unit.
This product tracks fluctuations in barometric pressure to
provide the weather forecast, and the current and past
24 hours barometric pressure history measurements are
recorded by the main (indoor) unit.
VIEW BAROMETER HISTORY
Navigate to the Barometer Area. Then press HIST
repeatedly to scroll through the measurements. The
number shown in the HR box indicates how long ago
each measurement was taken (e.g. 2 hours ago, 3
hours ago, etc.).
VIEW BAROMETER AREA
Press SEL to navigate to the Barometer Area.
If
is NOT shown, press MODE.
20
BAR916HG_EN_OP.indd 20
5/8/06 11:23:59 AM
EN
1. Navigate to the Barometer Area.
2. Press and hold HIST for 2 seconds.
3. Press
or
to set the altitude in 10-metre
increments (-100m to 2500m).
4. Press HIST to confirm.
WEATHER FORECAST
This product forecasts the next 12 to 24 hours of weather
within a 30-50 km (19-31 mile) radius. The forecast is
based on barometric pressure trend readings.
BAR CHART DISPLAY
The bar chart visually shows atmospheric changes from
the current hour (0) to 24 hours prior (-24).
The top area shows an animated icon indicating the
forecasted weather.
WEATHER FORECAST ICONS
DESCRIPTION
SET ALTITUDE
ICON
Clear (Day)
Set the altitude to match how far above or below sea
level you are living. This ensures that the barometric
pressure readings are accurate.
Partly Cloudy (Day)
21
BAR916HG_EN_OP.indd 21
5/8/06 11:24:06 AM
EN
• Automatic calculation of acceptable UV exposure
times based on pre-set user profiles (4 users
maximum).
Cloudy
• UVI Danger Alert when UV Index reaches unsafe
levels.
Clear (Night)
Partly Cloudy (Night)
UV data is shown in the same area as the Barometer.
Press SEL to navigate to the Barometer Area, then press
MODE to display the UV icon
and data.
Snowy
NOTE Refer to the UVR128 User Manual for more
information and see below to learn about the new
additional UV features.
Rainy
NEW ADDITIONAL UV FEATURES
NOTE The night time icon displays from 6 PM to 6
AM. When the Channel 1 sensor records a temperature
of 2°C (35.6°F) or lower, the RAINY icon becomes
SNOWY.
UV EXPOSURE TIME COUNTDOWN
To set the exposure time countdown you need to set the
Skin Type and Sun Protection Factor (SPF) as follows:
UV MEASUREMENT
1. Press SEL to navigate to the Barometer Area,
then press MODE to select the UV display.
The UVR128 Ultra-Violet Radiation Sensor is included
with the BAR966HG and is available as an optional
item for the BAR916HG. The UV sensor gives you the
following information at your fingertips:
• 10-hour Ultra-Violet Index (UVI) record.
22
BAR916HG_EN_OP.indd 22
5/8/06 11:24:18 AM
countdown. The remaining user UV exposure time
will display and the
will flash.
3. Press and hold MODE for 2 seconds to enter the Skin
Type Setting Mode of the selected user.
7. When the countdown has reached “0”, an alarm will
sound for 2 minutes. Press any button to turn the
alarm off. The
icon will flash for 2 minutes even if you
have stopped the alarm sound.
SKIN
TYPE
TAN
BURN
HAIR
COLOUR
1
Never
Always
Red
EYE
COLOUR
Blue
MAXIMUM / MINIMUM MEMORY FOR UVI
To view the maximum and minimum memory for UVI:
2
Sometimes
Always
Blonde
Blue /
Green
3
Always
Rarely
Brown
Grey /
Brown
2. Press MODE to select the UV display.
4
Always
Never
Black
Brown
3. Press MEM to show maximum, minimum and current
UVI readings.
1. Press SEL to navigate to the Barometer Area.
4. Press and hold MEM for 2 seconds to clear the
UVI memory.
4. Press
or
to choose 1 of the 4 skin type settings.
Then press MODE to confirm and enter the SPF Set
Up Mode.
SPF
NOTE The UV sensor must be activated before you
try and set the additional features. Please refer to the
UVR128 User Manual for more information.
LEVEL OF PROTECTION
1 - 11
Low
12 - 29
Medium
30 - 50
High
EN
2. Press CH to select user 1-4.
TEMPERATURE AND HUMIDITY
The weather station can display the following information
from any of the 5 remote sensors:
5. Press
or
to increase or decrease the SPF
value. Then press MODE to confirm and enter the UV
Exposure Time Countdown Setting Mode.
• Current, minimum, and maximum temperatures and
relative humidity percentages.
6. Press
or
to enable or disable countdown.
Press MODE to exit the UV Exposure Time
Countdown Mode and start the exposure time
• Comfort level indicator and trend line (rising, falling,
or steady).
23
BAR916HG_EN_OP.indd 23
5/8/06 11:24:27 AM
EN
Data is collected and displayed approximately every
60 seconds.
• To auto-scan between sensors, press and hold CH
for 2 seconds. Each sensor’s data will be displayed
for 3 seconds.
VIEW TEMPERATURE AND HUMIDITY AREA
• To end auto-scan, press CH or MEM with the
Temperature / Humidity Area selected.
Press SEL to navigate to the Temperature and Humidity
Areas.
NOTE If you select a sensor that collects only
temperature data, the humidity will not be shown.
Temperature data is given at the top; Humidity is
below.
MINIMUM / MAXIMUM RECORDS
• Press MEM repeatedly to view current, maximum and
minimum records for the selected sensor.
• To clear the records, press and hold MEM for 2
seconds. A beep will sound to confirm that the memory
has been cleared.
TEMPERATURE AND HUMIDITY TREND
SELECT MEASUREMENT UNIT
The trend lines are shown next to the temperature and
humidity readings.
Slide the °C / °F switch (inside the clock battery
compartment), to the setting you want.
TREND
RISING
STEADY
FALLING
TEMPERATURE
SELECT SENSOR CHANNEL
Press CH to switch between sensors 1-5.
HUMIDITY
The house icon shows the selected remote sensor.
24
BAR916HG_EN_OP.indd 24
5/8/06 11:24:30 AM
EN
will show next to the Area.
COMFORT ZONE
2. Press MODE to reach the Heat Index display.
The Comfort Zone indicates how comfortable the
climate is, based on current temperature and humidity
measurements.
ZONE
TEMPERATURE
HUMIDITY
WET
Any
>70%
COM
20-25°C
(68-77°F)
40-70%
DRY
Any
<40%
3. Press CH to select the desired channel.
NOTE If the temperature is below 26°C / 80°F, or the
desired channel is not working, the Heat Index will display
“NA”.
BACKLIGHT
Press SNOOZE / LIGHT to illuminate the backlight for
8 seconds.
NOTE This information is shown in the Humidity Area
when the current measurement is displayed.
RESET SYSTEM
The RESET button is located in the main unit battery
compartment. Press RESET when you change the
batteries and whenever performance is not behaving
as expected (for example, unable to establish radio
frequency link with remote unit or radio-controlled
clock).
HEAT INDEX
The Heat Index advises 4 levels of warning if the
temperature is high.
DANGER
CATEGORY
TEMPERATURE
°C
°F
Extreme Danger >54.5
>130
Danger
40.5-54.4
105-130
Extreme
Caution
32.2-40.5
90-105
Caution
26.6-32.2
80-90
1. Press SEL to navigate to the Temperature Area.
BAR916HG_EN_OP.indd 25
NOTE When you press RESET, all settings will
return to default value, and you will lose all stored
information.
25
5/8/06 11:24:36 AM
EN
SAFETY AND CARE
TROUBLESHOOTING
Clean the product with a slightly damp cloth and alcohol
free, mild detergent. Avoid dropping the product or
placing it in a high-traffic location.
WARNINGS
This product is designed to give you years of service
if handled properly. Oregon Scientific will not be
responsible for any deviations in the usage of the
device from those specified in the user instructions or
any unapproved alterations or repairs of the product.
Observe the following guidelines:
PROBLEM
SYMPTOM
REMEDY
Barometer
Strange
readings
Set altitude / unit
Calendar
Strange
date /
month
Change language
Clock
Cannot
adjust
clock
Disable radiocontrolled clock
Cannot
auto-synch
1. Adjust
batteries
• Never immerse the product in water. This can cause
electrical shock and damage the product.
2. Press RESET
• Do not subject the main unit to extreme force, shock,
or fluctuations in temperature or humidity.
3. Manually
activate radiocontrolled clock
• Do not tamper with the internal components.
• Do not mix new and old batteries or batteries of
different types.
• Do not use rechargeable batteries with this product.
• Remove the batteries if storing this product for a long
period of time.
• Do not scratch the LCD display.
NOTE The technical specification of this product and
contents of this user guide are subject to change without
notice. Images not drawn to scale.
BAR916HG_EN_OP.indd 26
Temp
Shows
"LLL" or
"HHH"
Temperature is
out-of-range
Remote
sensor
Cannot
locate
remote
sensor
Check batteries
26
5/8/06 11:24:38 AM
Main Unit Dimensions
LxWxH
195 x 26 x 192 mm
(7.6 x 0.8 x 7.5 inches)
Weight
Remote Unit Dimensions
70 x 24.5 x 116 mm
40% to 70%
Memory
Min / max
Unit
mb / hPa or inHg
Resolution
1 mb (0.03 inHg)
Altitude
-100 to 2500 metres
(-328 to 8202 feet)
(2.76 x 0.96 x 4.57 inches)
Weight
1%
Comfort
Barometer
578 grams (20.4 ounces)
without battery
LxWxH
Resolution
EN
SPECIFICATIONS
Display
108 grams (0.24 lbs)
without battery
Sunny (day / night), partly
cloudy (day / night), cloudy,
rainy, snowy
Temperature
Unit
°C or °F
Remote Unit (RTGR328N)
Indoor Range
-5 °C to 50 °C
RF frequency
433 MHz
(23 °F to 122 °F)
Range
Up to 70 metres (230 feet)
with no obstructions
(-4 °F to 140 °F)
Transmission
Approx. every 1 minute
Resolution
0.1 °C (0.2° F)
Channel No.
1, 2, 3, 4 or 5
Comfort
20 °C to 25 °C
Unit
°C or °F
Outdoor Range
-20 °C to 60 °C
(68 °F to 77 °F)
Memory
Radio-Controlled Clock
Min / Max
Relative Humidity
Range
BAR916HG_EN_OP.indd 27
25% to 95%
Synchronization
Auto or disabled
Clock display
HH:MM:SS
27
5/8/06 11:24:39 AM
EN
Hour format
12hr AM/PM (MSF format)
24hr (DCF format)
ABOUT OREGON SCIENTIFIC
Calendar
DD / MM or MM / DD;
Day of the week in 1 of
5 languages (E, G, F, I, S)
Alarm
Daily & Pre-Alarm;
2-minute crescendo
Snooze
8-minute snooze
Visit our website (www.oregonscientific.com) to learn
more about Oregon Scientific products such as digital
cameras; MP3 players; children’s electronic learning
products and games; projection clocks; health and
fitness gear; weather stations; and digital and conference
phones. The website also includes contact information
for our Customer Care department in case you need
to reach us, as well as frequently asked questions and
customer downloads.
Power
Main Unit
Thermo / Hygro Remote Unit
We hope you will find all the information you need on our
website, however if you’re in the US and would like to
contact the Oregon Scientific Customer Care department
directly, please visit:
Batteries
www2.oregonscientific.com/service/default.asp
Batteries
4 x UM-3 (AA) 1.5V
2 x UM-3 (AA) 1.5V
OR
NOTE It is recommended that you use alkaline
batteries with this product for longer performance.
Call 1-800-853-8883.
For international inquiries, please visit:
www2.oregonscientific.com/about/international.asp
28
BAR916HG_EN_OP.indd 28
5/8/06 11:24:40 AM
EN
EU-DECLARATION OF CONFORMITY
Hereby, Oregon Scientific, declares that this Wireless
Weather Station with World Time Clock model
BAR916HG is in compliance with the essential
requirements and other relevant provisions of Directive
1999/5/EC.
A copy of the signed and dated Declaration of Conformity
is available on request via our Oregon Scientific
Customer Service.
COUNTRIES RTTE APPROVAL COMPLIED
All EU countries, Switzerland CH
and Norway
N
29
BAR916HG_EN_OP.indd 29
5/8/06 11:24:42 AM