1
83484.book Page 1 Monday, September 18, 2006 8:58 AM
Phase
Working on the
Command Line
CO
PY
R
IG
HT
ED
MA
TE
RI
AL
1
83484.book Page 2 Monday, September 18, 2006 8:58 AM
Linux’s tools for running programs and manipulating files are
simple, unglamorous, and powerful. Although you can use GUI
tools to drag and drop files, real Linux street smarts requires you
to be able to manage your files from the command line by using odd-sounding commands such
as ls, cp, ln, and mv. In the first few tasks of this phase, you’ll learn to use some of the most
basic of these tools. Don’t think that the basic nature of these commands is unimportant,
though; like the foundation of a house, these commands support more dramatic parts of the
structure. Specific tasks described in this phase include using basic command-line features;
managing files, directories, and links; finding files; and editing files.
Later tasks in this phase go further, examining streams, pipes, redirection, the shell environment, and shell scripts. You’ll also learn about managing accounts. Most of the tasks in this phase
assume you have both a normal user account and root access, but you must also be able to create,
delete, and otherwise manage normal user accounts for yourself or other users of a Linux system.
This phase maps to portions of the CompTIA Linux+ objectives 2 and 3 and to
portions of the LPIC objectives 103, 104, 109, and 111.
Task 1.1: Use Basic Command-Line
Features
Before delving into the details of commands used to manage, find, and manipulate files, you
must be able to use basic command-line features. Linux supports several shells, which are programs that accept typed commands and display their output. Some shell commands are built
into the shell, but many others are actually external programs. Knowing how to use your
shell’s features will enable to you to be more productive at the Linux command line. The most
common Linux shell is the Bourne Again Shell (bash), and it is the one described here. Other
shells, such as tcsh and zsh, support similar features, although some details differ.
Scenario
A user is experiencing problems with the whatis program, a standard Linux script that the user
frequently runs. As the administrator, you must check that this script exists and that it’s not obviously corrupt. In the process, you’ll use several important Linux command-line features.
83484.book Page 3 Monday, September 18, 2006 8:58 AM
Task 1.1: Use Basic Command-Line Features
3
Actually correcting a problem such as the one described here is likely to
require the use of Linux’s package management tools. These are described in
Phase 3, “Managing Software.”
Scope of Task
This task is fairly straightforward. It requires little time and effort. You might want to continue experimenting with bash after you’ve completed this task, though.
Duration
This task will take about half an hour to complete. Once you’re familiar with the commands,
using each one takes just seconds.
Setup
You must have access to a working Linux system. For the specific examples shown in this task,
your system should be configured to give you a bash shell by default and the whatis program
must be installed. Both of these conditions are usually true. If your Linux computer is not currently turned on, do so now and wait for it to finish booting.
Caveats
Most Linux systems configure bash as the default shell for all users. If your account is configured to use tcsh or some other shell, some of the commands and procedures described here
won’t work. Even with bash, a few details differ from one account or computer to another.
Most commonly, the form of the command prompt varies from one system to another and
sometimes even from one account to another. For simplicity and brevity, this book denotes
user shell commands with a leading dollar sign ($), which is often used as part of real bash
prompts, as in:
$ ls
This line means to type ls at a user command prompt. Some systems use a prompt that ends
in a greater-than sign (>) instead of a dollar sign.
Most Linux systems provide a different prompt (often terminating in a hash mark, #) for
the superuser (root) account. When a command must be typed as root, this book shows command lines beginning with this symbol:
# ls
When short commands appear inside paragraph text, the prompt ($ or #) is omitted.
83484.book Page 4 Monday, September 18, 2006 8:58 AM
4
Phase 1
Working on the Command Line
Procedure
To complete this task, you must log into your account on the affected workstation and enter
several Linux commands. In the process, you’ll learn how to type and edit commands, how to
use command completion, and how to use command history. You’ll also learn a few of the
more common Linux commands.
Logging In
The first task is logging into the Linux system. From the console, there are two ways to log in:
using a graphical user interface (GUI) login manager or using a text-mode console. In either
case, you type your username and then your password, typically in response to a login or
username prompt and a password prompt, respectively.
Upon a successful text-mode login, you’ll be greeted by a Linux command prompt and you
can begin issuing Linux commands. GUI logins, though, present you with a graphical desktop
environment—probably the K Desktop Environment (KDE) or the GNU Network Object
Model Environment (GNOME). Although GUI desktop environments are convenient for end
users, they don’t usually present you with a text shell by default. To access one, you must
locate an appropriate option from the menuing system. Look for entries called Shell, Terminal,
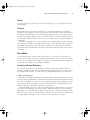
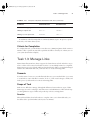
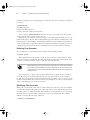
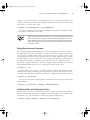
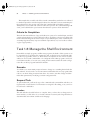
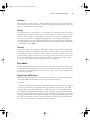
or xterm. If all else fails, look for an option to run a command by name and type xterm in the
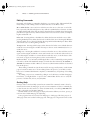
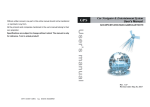
dialog box. This should launch an xterm window, as shown in Figure 1.1. Your default shell
should be running in this window.
If your computer displays a GUI login prompt but you’d prefer to work in a purely textmode session, press Ctrl+Alt+F1. This key sequence switches to the first virtual console, which
normally holds a text-mode session. You can switch between several (usually six) text-mode
consoles by pressing Alt+F1 through Alt+F6 for each of the first six virtual consoles. The X
Window System, Linux’s GUI environment, normally runs in virtual console 7, so pressing
Alt+F7 from a text-mode session switches to X if it’s running.
FIGURE 1.1
An xterm window enables you to type text-mode commands in a GUI session.
83484.book Page 5 Monday, September 18, 2006 8:58 AM
Task 1.1: Use Basic Command-Line Features
5
For this task, you should log in as an ordinary user. In fact, it’s good practice to always log
in as an ordinary user. You can subsequently acquire superuser privileges from your ordinary
user account if you need such access (described shortly in “Obtaining Superuser Privileges”).
Logging in as an ordinary user and then obtaining superuser privileges is better than logging
in directly as root because this two-step process leaves a trace in the system log file of who
acquired root privileges. On systems with multiple administrators, this can make it easier to
track down who caused problems if an administrator makes a mistake.
The Linux system administration account is conventionally called root, but
it’s possible to configure Linux with aliases for this name. Under any name,
this account is often referred to as the superuser account.
Verifying the Presence of a File
To verify that a file is present, use the ls command. This command’s name stands for list; it
shows a list of files that match a file specification you provide. (Task 1.2 describes file specifications in more detail.) For now, check for the presence of the whatis file, which is located
in the /usr/bin directory:
$ ls /usr/bin/whatis
/usr/bin/whatis
Used without any extra parameters, ls displays the names of all the matching files. Because
this example provides the complete name of a single file, only that filename is displayed, on the
line immediately following the command’s line.
If you type the name of a directory, ls displays the names of all the files in that directory.
Try this with the /usr/bin directory now—but be prepared for copious output! The /usr/
bin directory holds the program files associated with many (but not all) Linux commands.
Like many Linux commands, ls accepts options that modify its actions. One of the most
important is -l (that’s a lowercase L, not a number 1), which generates a “long” listing:
$ ls -l /usr/bin/whatis
-rwxr-xr-x 1 root root 2409 Nov 19
2004 /usr/bin/whatis
I describe what this output means in more detail in Task 1.2.
Examining the File
Now that you know the command file is present, you can examine it. Three commands are
very handy for examining text files:
cat This command’s name is short for concatenate, and it’s used to merge two or more files
together. If it’s passed just one filename, though, it copies the file to the screen. This can be a
good way to look at a short text file. Try it on the whatis file by typing cat /usr/bin/
83484.book Page 6 Monday, September 18, 2006 8:58 AM
6
Phase 1
Working on the Command Line
whatis. Unfortunately, the whatis file is too long to fit on a standard 80×25 screen, although
it might fit on an extra-large screen or resized xterm.
more This command is a simple pager—it displays text a page (that is, a screenful) at a time.
When you’re done reading a page, press the spacebar and more displays the next page.
less Unix (and hence Linux) programmers aren’t afraid to display their (sometimes quirky)
senses of humor. The more program is limited—for instance, it doesn’t let you page backward in
a file. Thus, when it came time to improve more, the authors of the improved program called it
less as a joke. You can use the keyboard’s arrow keys and various other options to move back and
forth in the file. When you’re done, press the Q key to exit from the program. Type man less to
learn more about less. (The man command is described in more detail shortly, in “Getting Help.”)
All of these commands are intended to work on text files. When fed non-text
files, such as binary program files, cat is likely to cause a lot of annoying
beeping and may leave your screen displaying gibberish when you type new
commands. Typing reset should restore the screen to usability. Both more
and less cope a bit better with binary files, but you’re not likely to be able to
learn much from them. Recent versions of less are often smart enough to recognize certain common binary file types and pass them through a translator
so you can see their contents in text form.
Working with Directories
Whenever you’re running a shell, you’re working in a specific directory. When you refer to a
file without providing a complete path to the file, the shell works on the file in the current
working directory. (Similar rules apply to many programs.) The cd command changes the current working directory. For instance, typing cd /home/sally changes the current directory
to /home/sally. The tilde (~) character is a useful shortcut; it stands for your home directory,
so cd ~ will have the same effect as cd /home/sally if your home directory is /home/sally.
Many Linux systems display the current working directory in their prompts. In Figure 1.1,
the current working directory is the home directory (~); that character appears in the command prompt and will be replaced by other directory names if you use cd to change directories. If your prompt doesn’t include this information and you want to know what directory
you’re working in, type pwd. This command’s name stands for print working directory; it displays the current working directory’s name.
Unlike DOS and Windows, Linux doesn’t use drive identifier letters, such as
C:. All directories reside in a single unified directory tree. Removable disks
and multiple disk partitions are mounted within that tree, as described in
Phase 5, “Managing Partitions and Filesystems.” Another important difference between Linux and Windows is that Linux uses a forward slash (/) to
separate directories, whereas Windows uses a backslash (\) for this purpose.
83484.book Page 7 Monday, September 18, 2006 8:58 AM
Task 1.1: Use Basic Command-Line Features
7
Using Command Completion
Many users find typing commands to be tedious and error prone. For this reason, Linux shells
include various tools that can help speed up operations. The first of these is command completion: Type part of a command or (as an option to a command) part of a filename and then
press the Tab key. The shell tries to fill in the rest of the command or the filename. If just one
command or filename matches the characters you’ve typed so far, the shell fills it in and places
a space after it. If the characters you’ve typed don’t uniquely identify a command or filename,
the shell fills in what it can and then stops. Depending on the shell and its configuration, it may
beep. If you press the Tab key again, the system responds by displaying the possible completions. You can then type another character or two and, if you haven’t completed the command
or filename, press the Tab key again to have the process repeat.
The most fundamental Linux commands have fairly short names—cd, pwd, and so on.
Some other commands are much longer, though, such as traceroute or sane-findscanner. Filenames can also be quite lengthy—up to 255 characters on many filesystems.
Thus, command completion can save a lot of time. It can also help you avoid typos.
To try out command completion, type the preceding ls command to verify the presence of
the whatis program, but press the Tab key once or twice after you type the wh portion of the
whatis name. Chances are you’ll see a list of half a dozen or more possible completions. Add the
a from the whatis name and press the Tab key again. Your system might then complete the
whatis name or display a shorter list of possible completions, depending upon whether or not
other files with names beginning wha appear in your /usr/bin directory.
Using Command History
Another helpful shell shortcut is the shell history. The shell keeps a record of every command
you type (stored in ~/.bash_history in the case of bash). If you’ve typed a long command
recently and want to use it again, or use a minor variant of it, you can pull the command out
of the history. The simplest way to do this is to press the up arrow key on your keyboard; this
brings up the previous command. Pressing the up arrow key repeatedly moves through multiple commands so you can find the one you want. If you overshoot, press the down arrow key
to move down the history. The Ctrl+P and Ctrl+N keystrokes double for the up and down
arrow keys, respectively.
Another way to use the command history is to search through it. Press Ctrl+R to begin a
backward (reverse) search, which is what you probably want, and begin typing characters that
should be unique to the command you want to find. The characters you type need not be the
ones that begin the command; they can exist anywhere in the command. You can either keep
typing until you find the correct command or, after you’ve typed a few characters, press
Ctrl+R repeatedly until you find the one you want. The Ctrl+S keystroke works similarly but
searches forward in the command history, which might be handy if you’ve used a backward
search or the up arrow key to look back and have overshot. In either event, if you can’t find
the command you want or change your mind and want to terminate the search, press Ctrl+G
to do so.
Try out these features now; use the up arrow key to recall your previous command, and
press Ctrl+R and a portion of that command to search for it.
83484.book Page 8 Monday, September 18, 2006 8:58 AM
8
Phase 1
Working on the Command Line
Editing Commands
Frequently, after finding a command in the history, you want to edit it. The bash shell, like
many shells, provides editing features modeled after those of the Emacs editor:
Move within the line Press Ctrl+A or Ctrl+E to move the cursor to the start or end of the
line, respectively. The left and right arrow keys will move within the line a character at a time.
Ctrl+B and Ctrl+F will do the same, moving backward and forward within a line. Pressing Ctrl
plus the left or right arrow keys will move backward or forward a word at a time, as will pressing Esc and then B or F.
Delete text Pressing Ctrl+D or the Delete key deletes the character under the cursor, while
pressing the Backspace key deletes the character to the left of the cursor. Pressing Ctrl+K deletes
all text from the cursor to the end of the line. Pressing Ctrl+X and then Backspace deletes all the
text from the cursor to the beginning of the line.
Transpose text Pressing Ctrl+T transposes the character before the cursor with the character
under the cursor. Pressing Esc and then T transposes the two words immediately before (or
under) the cursor.
Change case Pressing Esc and then U converts text from the cursor to the end of the word to
uppercase. Pressing Esc and then L converts text from the cursor to the end of the word to lowercase. Pressing Esc and then C converts the letter under the cursor (or the first letter of the
next word) to uppercase, leaving the rest of the word unaffected.
Invoke an editor You can launch a full-fledged editor to edit a command by pressing Ctrl+X
followed by Ctrl+E. The bash shell attempts to launch the editor defined by the $FCEDIT or
$EDITOR environment variable or Emacs as a last resort. (Environment variables are described
later in this phase.)
These editing commands are just the most useful ones supported by bash; consult its man
page to learn about many more obscure editing features. In practice, you’re likely to make
heavy use of command and filename completion, command history, and perhaps a few editing
features.
Try editing your previous command by pulling it out of the history and then changing it.
For instance, you might add the -l option to the command that did not use it or verify the
presence of another file, such as /usr/bin/who.
Getting Help
Linux provides a text-based help system known as man. This command’s name is short for
manual, and its entries (its man pages) provide succinct summaries of what a command, file,
or other feature does. For instance, to learn about man itself, you would type man man. The
result is a description of the man command.
The man utility uses the less pager to display information. When you’re done, press Q to
exit from less and the man page it’s displaying.
Some programs have moved away from man pages to info pages. The basic purpose of
info pages is the same as that for man pages, but info pages use a hypertext format so that
83484.book Page 9 Monday, September 18, 2006 8:58 AM
Task 1.1: Use Basic Command-Line Features
9
you can move from section to section of the documentation for a program. Type info info
to learn more about this system.
Both man pages and info pages are usually written in a terse style. They’re intended as reference tools, not tutorials; they frequently assume basic familiarity with the command, or at
least with Linux generally. For more tutorial information, you must look elsewhere, such as
this book or the Web. The Linux Documentation Project (http://tldp.org) is a particularly
relevant Web-based resource for learning about various Linux topics.
Obtaining Superuser Privileges
To fully administer a Linux system, you must sometimes use the superuser account, which
goes by the name root. Although you can log directly into the root account, it’s generally best
to instead log into a regular user account and then acquire superuser privileges.
One way to do this is to use the su command, whose name stands for switch user. You can
actually acquire any user’s identify in this way by typing the target username after the command, as in su hyde to acquire hyde’s privileges. If you omit a username, root is assumed,
so typing su alone is equivalent to typing su root. In any of these cases, you must know the
target user’s password, so only users who know the root password may acquire superuser
privileges via su. Once you’re using the root account, though, you can use su to acquire any
user’s privileges without a password. This can be a helpful problem-solving tool, since you can
locate problems that are user specific.
Try using su to acquire root privileges. Depending upon your system configuration,
chances are your prompt will change. For instance, a Fedora Core system shows the following
prompts:
[sally@halrloprillalar ~]$ su
Password:
[root@halrloprillalar sally]#
Logging Out
Once you’re done, you should log out. This is a particularly important security measure if your
computer is in a public place. If you’re using a login shell (that is, if you logged into the shell
via a login prompt), you can log out by typing logout at the command prompt. If you’re using
an xterm window or have used su to acquire another user’s privileges, though, you should
type exit to log out. (In fact, exit will also work with login shells.)
If you logged into an X session using a GUI login tool, you should log out from that session.
Most desktop environments provide an obvious way to do that via their main menuing systems. Typically, you’ll see a power button icon or a menu option titled “log out” or “exit.”
Some environments give you the option of logging out, rebooting the computer, or shutting
down the computer. Be sure to save files and exit from programs that open files before logging
out of an X session. You needn’t worry about shutting down xterm windows or other programs that don’t open disk files, though.
83484.book Page 10 Monday, September 18, 2006 8:58 AM
10
Phase 1
Working on the Command Line
Don’t shut down or reboot Linux by pressing the power or reset buttons on the
computer’s case. Like most modern OSs, Linux requires a controlled shutdown
to avoid damaging the data on its hard disk. If you want to shut down the system,
use a shutdown option at a GUI login prompt or type shutdown -h now as root.
Replace -h with -r if you want to reboot the computer rather than shut it down.
As a practical matter, if the computer has completely frozen, you may need to
perform an uncontrolled shutdown, but you should try to avoid this practice
whenever possible.
Criteria for Completion
You have completed this task when you’ve verified the presence of the whatis command in
/usr/bin and checked to see that it’s a shell script (that is, a program that consists of textmode commands that a shell executes). In the process, you’ll learn about file-examination
commands, command completion, command history, the Linux man system, and acquiring
superuser access. If a user were really having problems with the whatis command, though, it
might be missing or corrupt, in which case you’d be unable to find it in /usr/bin or it might
contain gibberish rather than text-mode commands.
Task 1.2: Manage Files and Directories
Many Linux features are implemented via files and directories. To perform some operations,
you may need to move, rename, delete, or otherwise modify files and directories. Thus, an
understanding of the commands used to accomplish these jobs is necessary for effective use of
Linux. This task gives you practice with these commands.
Scenario
A new project is starting at your place of work. To prepare, you must create a directory to hold
files that are to be accessible to all the members of this project, who are already members of
the users group. You must also populate this new directory with a few files (which, for purpose of this exercise, you’ll copy from the /etc directory).
Scope of Task
This task requires creating, copying, and managing the permissions of both files and directories.
Duration
This task should take about half an hour to complete. Once you’ve learned the task, you
should be able to perform similar tasks in just a few minutes.
83484.book Page 11 Monday, September 18, 2006 8:58 AM
Task 1.2: Manage Files and Directories
11
Setup
You need perform no special setup to do this task; just log into your computer and acquire
root privileges.
Caveats
Because this task is performed as root and uses powerful file-manipulation commands, a
potential for devastating errors exists. Certain typos, when entered as root, can obliterate an
entire Linux installation. Be very careful when performing this task, or any other task that
requires root privileges. When you type a command, remove your hands from the keyboard,
proofread the command, and be sure it’s the correct command before you press the Enter key
to finalize it.
All of these commands can be used by ordinary users, with the partial exception of chown;
only root may use chown to change the primary owner of a file, although ordinary users may
use chown to change the group of a file. These examples show root using the commands
because the task is an administrative one that requires root privileges because of the locations
of the files.
Procedure
To perform this task, you must create a shared directory, copy files to the new directory,
remove extraneous files, and set the ownership and permissions on the new directory and the
files you’ve copied. These actions utilize some of the most important Linux file-manipulation
commands, such as mkdir, cp, rm, chown, and chmod.
Creating a Shared Directory
To create the shared directory, use the mkdir command, which creates (makes) a directory
(hence the command’s name). This command takes the name of the directory you want to create
as an argument. For instance, to create a directory called /home/project7, you’d type this:
# mkdir /home/project7
Thereafter, the /home/project7 directory should exist. By default, this directory is owned
by the user who issued the mkdir command and has permissions based on the defaults for that
user. You can tell mkdir to create a directory with specific permissions by adding the -m mode
option between mkdir and the directory name. Another method of adjusting permissions is
described shortly, in “Setting File and Directory Permissions.”
Ordinarily, mkdir doesn’t create directories in the path up to the final directory specified;
for instance, if /home didn’t exist, the preceding command would return an error message.
Adding the -p or --parents option, though, causes mkdir to create intervening directories.
This can be handy, but it also means that if you mistype a directory name (say, /hom instead
of /home), mkdir will merrily create a new directory tree named after your typo.
83484.book Page 12 Monday, September 18, 2006 8:58 AM
12
Phase 1
Working on the Command Line
Copying Files
Linux’s file-copying command is cp (which is short for copy). In its most basic form, cp copies
a single file from one location to another:
# cp /etc/fstab /home/project7/
This command copies the /etc/fstab file to the /home/project7 directory; you’ll find
the copy there under the same name as the original. You can rename the copy as you make it
by specifying a filename along with the target directory:
# cp /etc/fstab /home/project7/sample-file
For clarity, I’ve shown the target directory alone with a trailing slash (/) in the first of these
examples. This indicates that project7 is a directory, not a file, and will result in an error
message if /home/project7 doesn’t exist. Linux will accept a directory name as a target without a trailing slash, though. For instance, if /home/project7/sample-file were a directory,
the second command would copy /etc/fstab into that directory under the name fstab.
You can copy an entire directory tree by using one of the recursion options (-r and -R):
# cp -R /etc/X11/ /home/project7/
This command copies the entire contents of the /etc/X11 directory, including all its subdirectories, to /home/project7. Using -r in place of -R is likely to result in the same behavior,
but some versions of cp produce subtly different effects for these two commands.
For information on other cp options, consult the man page for the command.
Removing Extraneous Files
Now that you’ve created the new project directory and placed some files in it, you may want
to do some housecleaning. For this task, you may want to first change into the directory in
which you want to operate so that you don’t need to type the complete path to each file:
# cd /home/project7/X11/
If you type ls, you’ll see a list of files and directories. Perhaps your project doesn’t need
access to the xorg.conf file; you can remove it with rm:
# rm xorg.conf
Be sure you type this command from within your copied directory tree
(/home/project7/X11). If you type this command from the original /etc/X11
directory, X is unlikely to work the next time you start it!
As with cp, you can use the -r or -R option to recursively delete an entire directory tree:
# rm -r mwm/
83484.book Page 13 Monday, September 18, 2006 8:58 AM
Task 1.2: Manage Files and Directories
13
Depending upon your configuration, you might or might not be prompted before rm deletes
each individual file. If you’re prompted and don’t want to be, you can add the -f option; if
you’re not prompted but you do want to be, you can add the -i option.
The contents of /etc/X11 vary somewhat from one system to another. Thus,
you might need to modify these examples on your system.
Moving and Renaming Files
Linux uses a single command to handle both the move and rename operations: mv. To use this
command, type it followed by the current name of a file and then the new name or location
of the file. For instance, to rename the /home/project7/X11/chooser.sh file to /home/
project7/X11/chooser, you’d type this:
# mv /home/project7/X11/chooser.sh /home/project7/X11/chooser
If the target name for the file is a directory, mv moves the file to that directory without
renaming the file. If the target name is a file in a directory other than the original directory, mv
moves and renames the file. You can specify more than one source file, but in that case the target must be a directory.
If the source and destination locations for the file are on the same partition, mv does its
work by rewriting directory entries; thus, it can operate quite quickly, even if it’s operating on
a large file. If you move a file from one partition or removable disk to another, though, mv
must copy the file and then delete the original. This operation is likely to take longer, particularly with large files.
Setting File and Directory Ownership
In Linux, all files and directories have owners. These owners are Linux accounts, such as your
user account or root. Files and directories are also tied to Linux groups, which are collections
of accounts. By default, mkdir creates directories that are owned by the user who issued the
command and with group ownership by that user’s default group. After you create a directory
as root, you can adjust the directory’s ownership by using the chown command:
# chown fred:users /home/project7
This example assumes the presence of the fred account and the users group.
You may need to adjust it for your system.
This command gives ownership of the /home/project7 directory to the user fred and the
group users. You may separate the username and group name with either a colon (:), as shown
in this example, or a dot (.). You may apply the chown command to both directories and files.
If you omit the username, chown changes the group of the file or directory without changing the
83484.book Page 14 Monday, September 18, 2006 8:58 AM
14
Phase 1
Working on the Command Line
file’s main owner. This is effectively the same as the chgrp command, which works much like
chown but accepts a group name alone (without a dot or colon). If you omit the colon or dot and
the group name, chown changes only the primary owner of the file or directory.
The chown command has several options; consult its man page for details. One of the most
useful options, though, is -R, which performs a recursive change to a directory and all the files
and subdirectories it contains:
# chown -R fred:users /home/project7
Setting File and Directory Permissions
Earlier, in “Verifying the Presence of a File” in Task 1.1, I described the long form of the ls command (ls -l), which shows additional information on a file. Specifically, the output looks like this:
$ ls -l /usr/bin/whatis
-rwxr-xr-x 1 root root 2409 Nov 19
2004 /usr/bin/whatis
The columns in this output are the permissions, the number of links to the file (described
in the next task), the owner, the group, the file size in bytes, the file creation date, and the filename. The permissions string can be perplexing at first. It consists of 10 characters. The first
of these characters is a code for the file type. A dash (-) denotes a normal file, while various
characters stand for special file types. Most important, d refers to a directory and l refers to
a symbolic link. Other codes include c and b for character and block devices, respectively (used
to access hardware via device files in /dev).
The remaining nine characters in the permissions string represent permissions for the file’s
owner, group, and all other users (aka world permissions). Each of these three classes of users consumes three characters, which denote the presence or absence of read, write, and execute permissions. If an r, w, or x character is present in the respective position, the class has the relevant
permission; if a dash is present, the class lacks that type of permission. Table 1.1 summarizes some
possible permissions and their uses; however, as there are 512 possible permissions, Table 1.1 is
incomplete. (Most of the 512 possible permissions are bizarre, though; Table 1.1 contains the most
common permissions in practice.) Note that the leading character is sometimes omitted from the
permission string, as it’s not really part of the permissions per se. Read and write permissions are
fairly self-explanatory. Execute permission identifies executable files—that is, program files. Note
that you can remove execute permission for some users to ensure that a program may only be run
by certain users (such as the program’s owner).
TABLE 1.1
Example Permissions and Their Likely Uses
Permission String
Octal Code Meaning
rwxrwxrwx
777
Read, write, and execute permissions for all users.
rwxr-xr-x
755
Read and execute permission for all users. The file’s
owner also has write permission.
83484.book Page 15 Monday, September 18, 2006 8:58 AM
Task 1.2: Manage Files and Directories
TABLE 1.1
15
Example Permissions and Their Likely Uses (continued)
Permission String
Octal Code Meaning
rwxr-x---
750
Read and execute permission for the owner and group.
The file’s owner also has write permission. Users who
are not the file’s owner or members of the group have no
access to the file.
rwx------
700
Read, write, and execute permissions for the file’s owner
only; all others have no access.
rw-rw-rw-
666
Read and write permissions for all users. No execute
permissions to anybody.
rw-rw-r--
664
Read and write permissions to the owner and group.
Read-only permission to all others.
rw-rw----
660
Read and write permissions to the owner and group. No
world permissions.
rw-r--r--
644
Read and write permissions to the owner. Read-only
permission to all others.
rw-r-----
640
Read and write permissions to the owner, and read-only
permission to the group. No permission to others.
rw-------
600
Read and write permissions to the owner. No permission to anybody else.
r--------
400
Read permission to the owner. No permission to anybody else.
The second column in Table 1.1 provides an octal (base-8) code corresponding to the permission string. Each cluster of three permission bits can be represented as a 3-bit number,
which in turn can be represented as a single octal number from 0 to 7. Read permission corresponds to 4, write permission corresponds to 2, and execute permission corresponds to 1.
Add the permissions you want to obtain the corresponding octal digit.
To change permissions, you use the chmod command. (Permissions are sometimes called the
file’s mode, so chmod is short for change mode.) This command takes a mode, expressed either
in octal form or as a set of symbolic codes. The octal form is easier to understand, although
many newcomers find the octal representation confusing:
# chmod 660 /home/project7/xorg.conf
83484.book Page 16 Monday, September 18, 2006 8:58 AM
16
Phase 1
Working on the Command Line
This command grants rw-rw---- permissions to the xorg.conf file in /home/project7.
The symbolic form of the command represents a series of changes to permissions, using the
codes summarized in Table 1.2.
TABLE 1.2
Codes Used in Symbolic Modes
Permission
Set Code
Meaning
Change
Type Code
Meaning
Permission to
Modify Code
Meaning
u
owner
+
add
r
read
g
group
-
remove
w
write
o
world
=
set equal
to
x
execute
a
all
X
execute only if
file is directory or
already has
execute permission
s
SUID or SGID
t
sticky bit
u
existing owner’s
permissions
g
existing group
permissions
o
existing world
permissions
Using these codes works best if you know the current mode and want to change it by adding
or removing certain specific permissions. Table 1.3 summarizes some examples.
TABLE 1.3
Examples of Symbolic Permissions with chmod
Command
Initial Permissions
End Permissions
chmod a+x bigprogram
rw-r--r--
rwxr-xr-x
chmod ug=rw report.tex
r--------
rw-rw----
83484.book Page 17 Monday, September 18, 2006 8:58 AM
Task 1.3: Manage Links
TABLE 1.3
Examples of Symbolic Permissions with chmod (continued)
Command
Initial Permissions
End Permissions
rwxrwxr-x
rwxrwx---
chmod g=u report.tex
rw-r--r--
rw-rw-r--
chmod g-w,o-rw report.tex
rw-rw-rw-
rw-r-----
chmod o-rwx
17
bigprogram
As with many other file-manipulation commands, chmod accepts a -R option to operate
recursively on an entire directory tree.
Criteria for Completion
To complete this task, you should have a new directory, /home/project7, which contains a
number of files copied from /etc. The copied files should be owned by an ordinary user on
your system (fred in the examples).
Task 1.3: Manage Links
Native Linux filesystems have always supported a feature known as links. A link is a way to
refer to a file in one location from another location or to use multiple names for a single file.
Linux supports two types of links, which are described shortly. They’re created and managed
with the ln command. In this task, you’ll learn how to create and manage links.
Scenario
To make it easier for users to access the files in the directory you created in Task 1.2, you want
to create links to some of the files it contains. To do so, you’ll create both types of links, and
in the process you’ll learn how to remove and manage links.
Scope of Task
Links are not difficult to manage, although the differences between the two types of links
Linux supports can be confusing to new Linux users and administrators. This task will step
you through the two types of links and provide tips on how to manage them.
Duration
This task should take about half an hour to complete. Once you’ve learned the task, you
should be able to perform similar tasks in just a few minutes.
83484.book Page 18 Monday, September 18, 2006 8:58 AM
18
Phase 1
Working on the Command Line
Setup
You need perform no special setup to perform this task; just log into your computer as the user
who owns the files in the /home/project7 directory and type cd /home/project7 to change
into that directory. Be sure to complete Task 1.2 before starting this task.
Caveats
If you perform this task as an ordinary user, the risk to the computer is minimal. If you opt
to perform this task as root, though, you might accidentally delete or corrupt important system files, particularly if you perform these steps in the wrong directory.
Procedure
The ln command creates links, so it’s the most important command to know when it comes
to link management. Other link-related tasks can be performed using ordinary Linux filemanipulation commands, such as mv, cp, and rm.
Links require support in the underlying filesystem. Although all Linux native
filesystems support links, they aren’t supported in some non-Linux filesystems, such as the File Allocation Table (FAT) filesystem used by DOS and
Windows. Thus, if you use non-Linux filesystems on removable disks or partitions shared across OSs, you may not be able to create links on them.
Creating Hard Links
The ln command works much like the cp command; type the command name, the name of the
current file, and the link filename you wish to use:
$ ln sample-file fstab
This command creates a hard link between the original sample-file and the new fstab.
(In Task 1.2, fstab was renamed sample-file.) A hard link is a duplicate filename that refers
to the original file. Both filenames are equally valid, and once a hard link is created, either may
be used with precisely the same effect. You can tell how many hard links exist by examining
the long output of ls:
$ ls -l
total 9
drwxr-xr-x 22 fred
-rw-r--r-- 2 fred
-rw-r--r-- 2 fred
users 1184 May 25 12:51 X11
users 2260 May 25 12:51 fstab
users 2260 May 25 12:51 sample-file
The second column of this output shows, for ordinary files, the number of filenames that
point to the file. Ordinary files show 1 in this column; files with a single hard link in addition to
83484.book Page 19 Monday, September 18, 2006 8:58 AM
Task 1.3: Manage Links
19
the original name show 2, and so on. (For directories, the second column’s number refers to the
number of directories within the specified directory, including pointers to the directory itself and
its parent directory.)
Current versions of Linux forbid making hard links to directories, but this was
possible with some earlier versions of Linux.
Hard links to a single file may exist in two or more different directories; however, both
directories must exist on the same filesystem (partition or removable disk). Because hard links
are created by pointing two filenames at the same file data, it makes no sense to create hard
links across filesystems.
Creating Soft Links
Soft links (aka symbolic links) are an alternative to hard links. Instead of creating a duplicate
directory entry that points directly to the same underlying filesystem data, you are creating a new
file that contains the filename of the target file. As a consequence, it’s possible to point to files
across filesystems. To create a soft link, you use the ln command, but pass it the -s option:
$ ln -s sample-file another-link
$ ls -l
total 9
drwxr-xr-x 22 fred
users 1184
lrwxrwxrwx 1 fred
users
11
-rw-r--r-- 2 fred
users 2260
-rw-r--r-- 2 fred
users 2260
May
May
May
May
25
26
25
25
12:51
15:30
12:51
12:51
X11
another-link -> sample-file
fstab
sample-file
This example shows the result, including how soft links appear in directory listings. Note
that the link count in the second column of the listing doesn’t increase when a soft link is created. The soft link itself, though, includes the l file type code in the permissions string and
shows the linked-to file after the filename in a long listing.
Unlike hard links, soft links don’t work quite exactly like the original link. The time to
access a soft link is minutely longer than the time to access the original file. You can delete the
soft link itself without affecting the linked-to file, but if you delete the original file, the soft link
will be broken; it will point to nothing. You can create soft links to directories.
In practice, soft links are more common than hard links. The fact that they can be created
across filesystems and the fact that they can point to directories makes them more flexible.
You should be cautious, though, not to break soft links by deleting, moving, or renaming the
original files.
Managing Links
The mv, rm, and cp commands work on links just as they work on the original files. Thus, link
management is just like ordinary file management; for instance, suppose you decide you only
83484.book Page 20 Monday, September 18, 2006 8:58 AM
20
Phase 1
Working on the Command Line
want the copied fstab file to be accessible under two names; you can delete either of the two
hard links with rm:
$ rm fstab
This example deletes the second link; if sample-file had been deleted instead, you’d
break the symbolic link (another-link).
You should be aware that some file operations will do odd things with links, and particularly with symbolic links. For instance, if you create a CD-R from files on your hard disk, you
might find that it contains duplicates of files that are links in the original directory tree. This
behavior can result in an unexpected increase in the space required on your CD-R media. Some
tools provide options that influence how they treat links, so consult your tool’s man page or
other documentation if you run into link-handling problems.
Criteria for Completion
To complete this task, you should create and delete links in the test directory you created in
Task 1.2. You should create both hard links, which are duplicate directory entries, and soft
links, which are special files that point to other files by name.
Task 1.4: Find Files
A complete Linux system is likely to contain thousands of files. Although Linux uses a hierarchical directory structure designed to place files in particular locations depending upon their
types, sometimes files get lost. You might know that a file is present but be unable to locate
it because you’ve forgotten its location or because it’s been accidentally moved. In such cases,
knowledge of Linux’s file-location commands can be invaluable.
Scenario
Returning to the scenario from Task 1.1, suppose you didn’t find the whatis executable where
you expected it, in /usr/bin. Your task now is to see if the file might be located somewhere
else on the computer. To do this, you’ll use several Linux commands that are designed to help
you find files.
Scope of Task
This task covers three Linux commands for locating files: find, locate, and whereis. Each
of these three commands has its own unique strengths and weaknesses, and you should learn
the basics of all three of them.
83484.book Page 21 Monday, September 18, 2006 8:58 AM
Task 1.4: Find Files
21
Duration
This task should take half an hour or an hour to complete. Once you’ve mastered these commands, you should be able to search for files in a matter of seconds—although some of these
commands may take several minutes to execute.
Setup
No special setup is required. Although the commands used in this task may be used by either
root or ordinary users, some of them work better when run as root because root may examine the contents of any directory, whereas ordinary users may not. Thus, you should use su to
acquire root privileges for this task.
Caveats
If you run this task as root, be careful what you type. Although the search commands themselves are non-destructive, you should be sure not to mistype a command and make it something destructive.
Procedure
To perform this task, you’ll search for the whatis program file using each of the three filelocation commands in turn. In the process, you’ll learn the capabilities and limitations of each
of these commands.
Using find
The find utility implements a brute-force approach to finding files. This program finds files
by searching through the specified directory tree, checking filenames, file creation dates, and
so on to locate the files that match the specified criteria. Because of this method of operation,
find tends to be slow, but it’s very flexible and is very likely to succeed, assuming the file for
which you’re searching exists. To search the entire computer for the whatis program file by
name, type the following command:
# find / -name whatis
This command specifies the path to search (/, meaning the entire directory tree) and the criteria to use for the search (-name whatis, to search for a file whose name is whatis). Because
this command searches the entire directory tree, it’s likely to take a long time to complete—
perhaps several minutes. This command is guaranteed to find any file meeting the specified criteria, though, at least assuming you have permission to read the directory in which it resides
and don’t make a mistake when specifying the criteria. The output of the find command is a
list of files that match the specified criteria, one file per line.
If you’re not certain of the exact filename, you can use wildcards in the filename specification, as in -name “what*” to search for any file whose name begins with what. Using quotes
around the search specification ensures that the shell will pass the wildcards to the find command rather than try to expand the wildcard itself.
83484.book Page 22 Monday, September 18, 2006 8:58 AM
22
Phase 1
Working on the Command Line
In addition to the -name criterion, you can search for files in various other ways, such as
by permissions (-perm), file size (-size), and owner (-user). The man page for find details
these options; consult it for more information.
Using locate
The locate command is much less flexible than find, but it’s also much faster. To use
locate, type the command name followed by the name of the file you want to find:
# locate whatis
The locate command works by searching a database that it maintains. (If this database is
out-of-date, typing updatedb as root will update it.) The locate command returns the names
of all the files in the database whose names contain the string you specify. Thus, this command
is likely to return the names of many files that merely contain the string you specify, such as
makewhatis and whatis.1.gz. This can be a real problem if you’re searching for a file with
a short name. The locate database also doesn’t include every directory on the computer, but
it does include enough directories that it’s likely to be a useful tool.
Many Linux distributions actually use a program called slocate rather than
locate. The slocate program is a more security-aware version of the program; it checks who’s calling the program and adjusts its output to remove
references to files to which the user shouldn’t have access. Distributions that
use slocate typically create a link called locate so that you can call the program using this more common name.
Using whereis
The whereis program searches for files in a restricted set of locations, such as standard binary
file directories, library directories, and man page directories. This tool does not search user
directories or many other locations that are easily searched by find or locate. The whereis
utility is a quick way to find program executables and related files like documentation or configuration files.
The whereis program returns filenames that begin with whatever you type as a search criterion, even if those filenames contain extensions. This feature often turns up configuration
files in /etc, man pages, and similar files. To use the program, type whereis followed by the
name of the program you want to locate. For instance, the following command locates
whatis:
# whereis whatis
whatis: /usr/bin/whatis /usr/X11R6/bin/whatis /usr/bin/X11/whatis
/usr/man/man1/whatis.1.gz /usr/share/man/man1/whatis.1.gz
The result shows the whatis executable (/usr/bin/whatis), links to it in other directories, and the man page for whatis, including a link in a second location. (Your system might
83484.book Page 23 Monday, September 18, 2006 8:58 AM
Task 1.5: Edit Files
23
find hits in a slightly different set of directories than is shown here. Don’t be concerned about
this.) The whereis program accepts several parameters that modify its behavior in various
ways. These are detailed in the program’s man page.
Criteria for Completion
To complete this task, you should use the three file-location commands to locate the whatis program. Although the output from the locate program is likely to be quite long, you should verify
that the three programs all return the same key file, which is likely to be /usr/bin/whatis.
Task 1.5: Edit Files
A great deal of Linux system administration involves editing files. In Linux, most configuration files are ordinary text files, and changing how the system functions involves editing these
files. Thus, you should be proficient with at least one text editor in Linux. Although you can
use a fancy GUI text editor if you like, one editor that’s particularly important is Vi. This editor is a simple text-mode editor, and it’s important because it’s a very lightweight editor that’s
accessible from most basic emergency systems. Thus, even if you prefer another editor, you
may be forced to use Vi in certain emergency recovery situations.
Scenario
An accidental change to the /etc/lilo.conf file has rendered a Linux system unbootable. To
recover, you must boot using an emergency disk and edit this file using Vi. For the purpose of
this exercise, of course, you won’t edit the real /etc/lilo.conf file, and you needn’t even
boot from an emergency disk (although you can if you want to). Instead, you’ll make a copy
of /etc/lilo.conf and edit the copy.
Scope of Task
This task involves reviewing the basics of the Vi editor and trying out Vi editing tasks. You will
not need to know anything about the format of the /etc/lilo.conf file to perform this task;
for now, the goal is simply to learn the basics of Vi. You might want to know, though, that
lilo.conf controls the way Linux boots, at least on computers that use the Linux Loader
(LILO) boot loader. Modifying this file therefore modifies the options that are available when
you first boot the computer.
Duration
This task should take half an hour or an hour to complete. Once you’re proficient with Vi, you
should be able to perform similar tasks in a matter of minutes.
83484.book Page 24 Monday, September 18, 2006 8:58 AM
24
Phase 1
Working on the Command Line
Setup
In principle, you could use an emergency boot disk, but you’ll probably find it more convenient
to use your regular Linux installation. Log into your computer as an ordinary user. You should
then copy the /etc/lilo.conf file to a safe temporary location, such as your home directory:
$ cp /etc/lilo.conf ~/
If your system lacks a lilo.conf file, locate one on the Web or enter the one presented
shortly in a GUI text editor and save it in your home directory.
Caveats
Do not try to perform this task as root and do not attempt to directly edit /etc/lilo.conf.
Doing so is likely to damage your system. Of course, in a real emergency recovery situation,
you’d need to perform these tasks as root, but for practice purposes, learning Vi as an ordinary user is safer.
Procedure
Vi is a bit strange, particularly if you’re used to GUI text editors. To use Vi, you should first
understand the three modes in which it operates. Once you understand those modes, you can
begin learning about the text-editing procedures Vi implements. You must also know how to
save files and exit from Vi.
Most Linux distributions actually ship with a variant of Vi known as Vim, or Vi
Improved. As the name implies, Vim supports more features than the original
Vi does. The information presented here applies to both Vi and Vim. Most distributions that ship with Vim enable you to launch it by typing vi, as if it were
the original Vi.
Vi Modes
At any given moment, Vi is running in one of three modes:
Command mode This mode accepts commands, which are usually entered as single letters.
For instance, i and a both enter insert mode, although in somewhat different ways, as
described shortly, and o opens a line below the current one.
Ex mode To manipulate files (including saving your current file and running outside programs), you use ex mode. You enter ex mode from command mode by typing a colon (:), typically directly followed by the name of the ex mode command you want to use. After you run
the ex mode command, Vi returns automatically to command mode.
Insert mode You enter text in insert mode. Most keystrokes result in text appearing on the
screen. One important exception is the Esc key, which exits from insert mode back to command mode.
83484.book Page 25 Monday, September 18, 2006 8:58 AM
Task 1.5: Edit Files
25
If you’re not sure what mode Vi is in, press the Esc key. This will return you
to command mode, from which you can re-enter insert mode, if necessary.
Unfortunately, terminology surrounding Vi modes is inconsistent at best. Command mode
is sometimes referred to as normal mode, and insert mode is sometimes called edit mode
or entry mode, for instance. Ex mode is often not described as a mode at all, but as colon
commands.
Basic Text-Editing Procedures
In this task, the lilo.conf entry for your kernel has been accidentally deleted, so you must
re-create this entry. Listing 1.1 shows the original lilo.conf file used in this example. If
you’re using a lilo.conf file from your computer or that you found on the Internet, it isn’t
likely to be identical, so you may need to adapt some of the details in the following procedure
in minor ways. Alternatively, you can type Listing 1.1 using a text editor with which you’re
already familiar and save it to a file on your disk.
Listing 1.1: Sample /etc/lilo.conf File
boot=/dev/sda
map=/boot/map
install=/boot/boot.b
prompt
default=linux
timeout=50
image=/boot/vmlinuz
label=linux
root=/dev/sda6
read-only
Don’t try editing your real /etc/lilo.conf file as a learning exercise; a mistake could render your system unbootable the next time you type lilo. You
might put your test lilo.conf file in your home directory for this exercise.
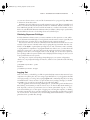
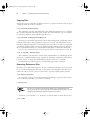
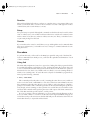
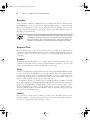
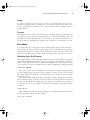
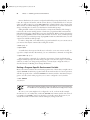
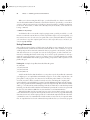
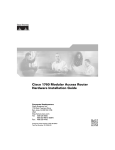
The first step to using Vi is to launch it and have it load the file. In this example, type vi
lilo.conf while in the directory holding the file. The result should resemble Figure 1.2,
which shows Vi running in a Konsole window. The tildes (~) down the left side of the display
indicate the end of the file. The bottom line shows the status of the last command—an implicit
file load command because you specified a filename when launching the program.
83484.book Page 26 Monday, September 18, 2006 8:58 AM
26
Phase 1
FIGURE 1.2
the program.
Working on the Command Line
The last line of a Vi display is a status line that shows messages from
Adding a new entry to lilo.conf involves duplicating the lines beginning with the image=
line and modifying the duplicates. Therefore, the first editing task is to duplicate these four
lines. To do this, follow these steps:
1.
Move the cursor to the beginning of the image= line by using the down arrow key; you
should see the cursor resting on the i.
The h, j, k, and l keys can also be used in place of the left, down, up, and right
arrow keys. This is a holdover from the days before all keyboards had arrow keys.
2.
You must now “yank” four lines of text. This term is used much as “copy” is used in most
text editors—you copy the text to a buffer from which you can later paste it back into the
file. To yank text, you use the yy command, preceded by the number of lines you want to
yank. Thus, type 4yy (do not press the Enter key, though). Vi responds with the message
4 lines yanked on its bottom status line. The dd command works much like yy, but it
deletes the lines as well as copying them to a buffer. Both yy and dd are special cases of
the y and d commands, respectively, which yank or delete text in amounts specified by the
next character, as in dw to delete the next word.
3.
Move the cursor to the last line of the file by using the arrow keys.
4.
Type p (again, without pressing the Enter key). Vi pastes the contents of the buffer starting
on the line after the cursor. The file should now have two identical image= stanzas. The
cursor should be resting at the start of the second one. If you want to paste the text into
the document starting on the line before the cursor, use an uppercase P command.
83484.book Page 27 Monday, September 18, 2006 8:58 AM
Task 1.5: Edit Files
27
Now that you’ve duplicated the necessary lines, you must modify one copy to point to the
kernel whose entry was accidentally deleted. To do so, follow these steps:
1.
Move the cursor to the v in vmlinuz on the second image= line. You’re about to begin
customizing this second stanza.
2.
Up until now, you’ve operated Vi in command mode. There are several commands that
you can use to enter insert mode. At this point, the most appropriate is R, which enters
insert mode so that it is configured for text replacement rather than insertion. If you prefer
to insert text rather than overwrite it, you could use i or a (the latter advances the cursor
one space, which is sometimes useful at the end of a line). For the purpose of these instructions, type R to enter insert mode. You should see -- REPLACE -- appear in the status line.
3.
Type the name of a new Linux kernel. For the purpose of this example, let’s say it’s called
bzImage-2.6.13, so that’s what you’d type. This entry should replace vmlinuz.
4.
Use the arrow keys to move the cursor to the start of linux on the next line. You must
replace this label so that your new entry has its own label.
5.
Type a new label, such as mykernel. This label should replace the existing linux label.
6.
Exit from insert mode by pressing the Esc key.
7.
Save the file and quit by typing :wq. This is an ex mode command that writes changes and
then exits (quits) from the editor. (The ZZ command is equivalent to :wq.)
Many additional commands are available that you might want to use in some situations.
Here are some of the highlights:
Case changes Suppose you need to change the case of a word in a file. Instead of entering
insert mode and retyping the word, you can use the tilde (~) key in command mode to change
the case. Position the cursor on the first character you want to change and press ~ repeatedly
until the task is done.
Undo To undo any change, type u in command mode.
Opening text In command mode, typing o opens text—that is, it inserts a new line immediately below the current one and enters insert mode on that line.
Searches To search forward for text in a file, type / in command mode, followed immediately by the text you want to locate. Typing ? will search backward rather than forward.
Changes The c command changes text from within command mode. You invoke it much as
you do the d or y commands, as in cw to change the next word or cc to change an entire line.
Go to a line The G key brings you to a line that you specify. The H key “homes” the cursor—that is, it moves the cursor to the top line of the screen. The L key brings the key to the
bottom line of the screen.
Global replacement To replace all occurrences of one string by another, type :%s/
original/replacement, where original is the original string and replacement is its
replacement. Change % to a starting line number, comma, and ending line number to perform
this change on just a small range of lines.
83484.book Page 28 Monday, September 18, 2006 8:58 AM
28
Phase 1
Working on the Command Line
There’s a great deal more depth to Vi than is presented here; the editor is quite capable, and
some Linux users are very attached to it. Entire books have been written about Vi. Consult one
of these, or a Vi Web page like http://www.vim.org, for more information.
Saving Changes
To save changes to a file, type :w from command mode. This enters ex mode and runs the w
ex-mode command, which writes the file using whatever filename you specified when you
launched Vi. Related commands enable other functions:
Edit new file The :e command edits a new file. For instance, :e /etc/inittab loads /etc/
inittab for editing. Vi won’t load a new file unless the existing one has been saved since its
last change or unless you follow :e with an exclamation mark (!).
Include existing file The :r command includes the contents of an old file in an existing one.
Execute an external command The ex-mode command :! executes the external command
that you specify. For instance, typing :!ls runs ls, enabling you to see what files are present
in the current directory.
Quit Use the :q command to quit from the program. As with :e, this command won’t
work unless changes have been saved or you append an exclamation mark to the command
(as in :q!).
You can combine ex commands such as these to perform multiple actions in sequence. For
instance, typing :wq writes changes and then quits from Vi.
Criteria for Completion
To complete this task, you must successfully edit a copy of your lilo.conf file to add a new
kernel. You don’t need to test the copy of the file, but you should verify that it’s been modified
as you desired. To do so, use cat or less.
Task 1.6: Manage Accounts
As a multi-user OS, Linux requires that users have accounts. This requirement is part of
Linux’s security system, so you shouldn’t try to bypass account management or give it short
shrift—say, by letting many people share an account. Instead, you should learn how to create,
delete, and otherwise manage Linux accounts.
Most Linux distributions provide GUI tools for account management.
Although these tools are perfectly capable of handling routine account maintenance tasks on small systems, they differ from one distribution to another.
The text-based tools described here are much more consistent across distributions and are the tools tested on Linux certification exams.
83484.book Page 29 Monday, September 18, 2006 8:58 AM
Task 1.6: Manage Accounts
29
Scenario
Personnel changes require you to add an account for a new user (Trevor Brown) and delete an
account for an employee who’s leaving (Susan Jones). Changes to the amount of free space on
two disks also requires you to move another user’s (Dale Smith’s) files from the /home2 to the
/home directory tree.
Scope of Task
This task involves creating, deleting, and modifying accounts. Each of these operations is fairly
straightforward, but you must understand the basics of the relevant commands and you must
be aware of the consequences of making mistakes when manipulating user accounts.
Duration
This task should take about half an hour to complete. Once you’re familiar with these tasks,
you can create, delete, or modify accounts in a few seconds to a few minutes, depending upon
the precise operations you need to perform.
Setup
You should log into your Linux system and then use su to acquire superuser privileges. Alternatively, you may log in directly as root, although using su is preferable, as described in Task 1.1.
You may perform this task from a text-mode login or within an xterm window from a GUI login.
For this task, it is assumed that two accounts already exist on the computer—sjones and dsmith.
If your computer lacks these accounts (they aren’t standard), you can create them yourself by following the instructions for creating the first account, but change the usernames.
Caveats
Account maintenance operations are potentially risky. You might accidentally delete or modify the wrong account. Even account creation poses risks, particularly when you use advanced
options; you might accidentally give two accounts the same user ID (UID) codes, which would
make them essentially interchangeable. Thus, you should be particularly cautious when using
these commands. Because these commands require root access to work, the usual caveats concerning working as root also apply.
This task assumes that you’re working on a Linux system that uses a local account database. Linux systems on LANs often refer to another computer for account management. On
such systems, you would ordinarily modify accounts on the password server system instead of
on the individual workstations and servers.
Procedure
Before delving into account management tools, you should understand the fundamentals of
how Linux manages its passwords. With a basic understanding in hand, you can proceed to
the three parts of this task: adding an account, deleting an account, and modifying an account.
83484.book Page 30 Monday, September 18, 2006 8:58 AM
30
Phase 1
Working on the Command Line
Understanding the Basics of Account Management
Linux and Unix systems have traditionally stored account information in the /etc/passwd
file. This file consists of a series of lines, each of which represents a single account, as in:
dsmith:x:512:100:Dale Smith:/home2/dsmith:/bin/bash
This line consists of a series of colon-delimited fields that contain the account’s username,
password, UID number, group ID (GID) number, a free-form comment, home directory, and
default shell. Note that in this example the password field contains a single x. This is a code
that means the password is encoded in another file, /etc/shadow. Most Linux systems today
use this shadow password system as a way of increasing security; the /etc/passwd file must
be world-readable to enable programs to access information such as the user’s default shell
and the comment field. Even an encrypted password could be broken if it were readable, so the
shadow password system locks this sensitive data, as well as additional account information,
in /etc/shadow, which is readable only by root. The format of the /etc/shadow file is similar to that of /etc/passwd in that it consists of colon-delimited fields. The first two fields
contain the username and encrypted password, while remaining fields contain account aging
and other advanced information.
Account management involves creating, deleting, or modifying the information in /etc/
passwd and /etc/shadow. In principle, this can be done with a text editor, and in fact some
extraordinarily street-savvy administrators work this way. Most administrators, though, use
command-line or GUI tools to help manage the task. These tools obviate the need to remember
what fields hold what data and minimize the risk of encountering problems from typos, such
as accidentally deleting a colon.
The basic Linux account management tools are useradd, userdel, and usermod. These
tools add, delete, and modify existing user accounts, respectively. Linux also provides groupadd,
groupdel, and groupmod tools to perform similar tasks with groups, although some of the
details of operation differ.
Adding User Accounts
To add an account, you use the useradd command. At its simplest, you can use this command
followed by the username you want to use:
# useradd tbrown
This command creates an account called tbrown, using defaults for various account parameters. On most systems, the user’s home directory will be /home/tbrown, the shell will be
/bin/bash, the comment field will be empty, and the UID and GID will be assigned based on
the lowest available numbers for both. Most importantly, the account’s password will be disabled (more on that shortly).
Some systems give each user a unique GID, and create an appropriate group
to go with it, as a default policy. Other systems assign new users to an existing group, typically users, as a default policy.
83484.book Page 31 Monday, September 18, 2006 8:58 AM
Task 1.6: Manage Accounts
31
You can create an account with different defaults by placing appropriate parameters
between useradd and the account name. Alternatively, you can create an account with the
defaults and then use usermod to change them. Some features you’re particularly likely to
want to adjust include:
Comment The -c comment parameter passes the comment field for the user. Some administrators store public information like a user’s office or telephone number in this field. Others
store just the user’s real name or no information at all.
Home directory You specify the account’s home directory with the -d home-dir parameter.
This defaults to /home/username on most systems.
Do or do not create a home directory The -M option forces the system to not automatically
create a home directory, while -m forces the system to create one. Which behavior is the default
varies from one system to another.
Default group You set the name or GID of the user’s default group with the -g defaultgroup option. The default for this value varies from one distribution to another.
Default shell Set the name of the user’s default login shell with the -s shell option. On
most systems, this defaults to /bin/bash.
Specify a UID The -u UID parameter creates an account with the specified user ID value
(UID). This value must be a positive integer, and it is normally above 500 for user accounts.
System accounts typically have numbers below 100. The -o option allows the number to be
reused so that two usernames are associated with a single UID.
No user group In some distributions, such as Red Hat, the system creates a group with the
same name as the specified username. The -n parameter disables this behavior.
This list of options isn’t complete; consult useradd’s man page for more options. As an
example of some of these options in action, suppose you want to place Trevor Brown’s real
name in the comment field and set his home directory to /home2/trevor. You could do so at
account creation time by including appropriate parameters:
# useradd -c "Trevor Brown" -d /home2/trevor tbrown
After typing this command (or the simpler version shown earlier), be sure to check for the
existence of the home directory. If it’s not present, you must create it yourself and change its
ownership (including its group):
# mkdir /home2/trevor
# chown tbrown.users /home2/trevor
Alternatively (and preferably), you could add the -m option to the useradd command. This
option has the advantage that the system copies a starting set of files from /etc/skel. These
files include things such as bash configuration files.
The useradd command won’t ordinarily set a starting password for the account. (There is
a -p option to do this, but it requires a pre-encrypted password.) The best way to deal with
this issue is to create new accounts in the presence of their users; you can then, as root, use
83484.book Page 32 Monday, September 18, 2006 8:58 AM
32
Phase 1
Working on the Command Line
passwd to begin the password-changing process and allow the users to type their own desired
passwords:
# passwd tbrown
New UNIX password:
Retype new UNIX password:
passwd: password updated successfully
You would type passwd tbrown, then let the user type a password (twice). The system
doesn’t echo the password for security reasons.
Alternatively, you can set the password yourself to some random value and find a way to communicate this value to the user. The trouble with this approach is that the communication could
be intercepted or copied, leading to an immediate security breach. Users might also leave their passwords set at the value you give them, which is non-optimal but might be acceptable if you choose
a unique and good password for each account. (Phase 7 describes passwords in more detail.)
Deleting User Accounts
You can delete an account with userdel, which works much like useradd:
# userdel sjones
This command deletes the sjones account. It does not, however, delete the user’s home
directory or mail spool, much less other files that may be owned by the user elsewhere on the
computer. You must manually delete or otherwise deal with these files.
Before deleting an account, back it up to tape, CD-R, or some other medium.
You can then give the backup to the user, if appropriate, or store it yourself in
case another user (such as this individual’s replacement in your organization)
needs the files.
You can pass the -r option to have userdel delete the user’s home directory and mail
spool. This option won’t delete other files the user may own elsewhere on the computer,
though. To locate those files, use find (described in Task 1.4) with its -uid n option to search
for files owned by UID n. If you search for files before deleting the account, you can use find’s
-user username option to search by username.
Modifying User Accounts
What if an account already exists and you want to change it in some way? You can modify the
account with usermod, which takes most of the same options as useradd. Another important
usermod option is -l name, which alters the username associated with the account. To change
the home directory of Dale Smith’s (dsmith’s) account from /home2/dsmith to /home/
dsmith, you’d type the following command:
# usermod -d /home/dsmith
83484.book Page 33 Monday, September 18, 2006 8:58 AM
Task 1.7: Use Streams, Pipes, and Redirection
33
Don’t modify a user account when that user is logged in; certain changes are
likely to wreak havoc with work the user is doing. Wait for the user to log out,
or if a change must be implemented immediately, ask the user to log out.
Changing the account’s home directory won’t move the files in the directory. To do that,
you must use the cp command. In this case, the -a option to cp will copy the entire directory
tree and preserve ownership, permissions, and other file characteristics. You’ll then delete the
original directory:
# cp -a /home2/dsmith /home/dsmith
# rm -r /home2/dsmith
To be 100 percent safe, though, you might want to check that the new directory contains
all the files it should before deleting the old one. If possible, wait for the user to log in and use
the account before deleting the old directory.
Criteria for Completion
To complete this task, you should have created a new account (tbrown), deleted an old account
(sjones), and changed the home directory location of a third account (dsmith), including moving its files. The three commands used to perform this task (useradd, userdel, and usermod)
are at the core of Linux account management. The passwd command is also critical in that it
enables you to set a password on new accounts so that they’re usable. File-manipulation commands such as cp and rm help you manage the files that are associated with accounts.
Task 1.7: Use Streams, Pipes,
and Redirection
The command-line tools introduced earlier enable you to interact with your Linux system at the
command line, typing commands and viewing their output. Sometimes, though, you might want
to do more with that output than simply view it; for instance, you might want to store it in a file
or pass it as input to another program. Fortunately, Linux provides the means to do just that. In
Linux, input and output operations are described as streams. Standard input and output streams
may be redirected to send output to or read input from a regular file, or piped between two programs. These capabilities provide a great deal of flexibility, as you’ll soon learn.
Part of the Unix philosophy to which Linux adheres is, whenever possible, to
do complex things by combining multiple simple tools. Redirection and pipes
help in this task by enabling simple programs to be combined together in
chains, each link feeding off of the output of the preceding link.
83484.book Page 34 Monday, September 18, 2006 8:58 AM
34
Phase 1
Working on the Command Line
Scenario
A user of a Linux computer you administer reports problems with network connections from
the Mozilla Firefox browser. As part of your diagnosis of this problem, you want to use some
diagnostic commands that produce copious output. In order to do this more easily, you will
pipe the output streams from these programs into other programs and redirect the output into
files that you can peruse later.
This task uses advanced network diagnostic commands. These commands are
described in more detail in Phase 6. For now, don’t be too concerned with what
these commands do; just concentrate on their input and output streams, the
redirection of these streams, and piping these streams between programs.
Scope of Task
This task demonstrates several tools and techniques that you’re likely to use quite heavily as
a Linux user and system administrator. Each of these commands and techniques is quite powerful and so can take some time to master, but once you’ve mastered them, they’ll become second nature.
Duration
This task should take half an hour or so to complete. Once you understand streams, pipes, and
redirection, you should be able to use these tools and techniques as a matter of course in a wide
variety of commands, most of which will take just seconds to type.
Setup
You need a working Linux computer with a network connection and the Mozilla Firefox Web
browser. (You may use another Web browser instead of Firefox, but you must then modify the
examples appropriately.) Firefox is an X-based (GUI) Web browser, so you’ll need to run it
from X; however, the diagnostic commands must be run from the command line—either in an
xterm or similar window or from a separate text-mode login.
To prepare for this task, you should log into your Linux system as an ordinary user in GUI
mode. Once logged in, launch the Mozilla Firefox Web browser by locating it from the menu
system or by typing firefox in an xterm window. Once Firefox is running, browse to a Web
site (any external Web site will do). You should then launch an xterm or similar window to
obtain a command prompt or press Alt+Ctrl+F1 to switch to text mode and log in as an ordinary user to get a command prompt.
Caveats
If you don’t have or don’t want to use Firefox, you may use any other Web browser (such as
Konqueror, Opera, or even the text-mode lynx). If you do, you must change the references to
the browser as appropriate in the following procedure.
83484.book Page 35 Monday, September 18, 2006 8:58 AM
Task 1.7: Use Streams, Pipes, and Redirection
35
This task may be performed as an ordinary user. If you run it as root, you run the usual
risks of performing tasks as root.
Procedure
This task investigates three practical techniques: redirecting output, redirecting input, and piping data between programs. All three techniques rely on the fact that Linux uses input and output streams, so you should first understand a bit of theory.
Understanding Streams
To Linux programs, input and output involve files. A program can read or write data from or
to a disk file, but even the keyboard and screen are treated much like files. These devices correspond to three separate streams:
Standard input This stream, often abbreviated stdin, corresponds to the keyboard. When a
program wants input from the user, it opens standard input and reads data from it as if it were
reading data from a disk file.
Standard output This stream is often referred to as stdout, and it corresponds to the textmode display, which can mean a text-mode console, the contents of an xterm or similar window, or a remote login session’s display. Programs write data to standard output as if it were
a file, and the characters so written then appear on the screen.
Standard error Ordinarily, this stream (often abbreviated stderr) is the same physical device
as standard output; however, it’s used by programs to display error messages rather than ordinary output. The reason it’s treated separately is so that it may be redirected separately—so
that you can interact normally with a program while sending error message to a file or so that
you can redirect normal output to a file while still seeing error messages on the screen.
If you use a Linux computer at the console (that is, using the keyboard and monitor that
are attached directly to the computer), these streams correspond to the computer’s own keyboard and display. Linux systems can also be used remotely, via logins using protocols such
as the Secure Shell (SSH). In such cases, standard input, standard output, and standard error
are all directed over the remote login protocol and so ultimately correspond to a keyboard and
monitor on the remote computer.
Redirecting Output
To begin the task, you want to investigate the network connections maintained by Firefox. To
do so, you’ll use the netstat command, which displays information on all the network connections maintained by the computer. You’ll use the -p option to netstat, so as to display the
program names:
$ netstat -p
When you type this command, though, chances are you’ll see so much output scroll past
that you won’t be able to read it all before most of it disappears off the top of the screen. One
way around this problem is to redirect standard output to a file. You do this with the redirection
83484.book Page 36 Monday, September 18, 2006 8:58 AM
36
Phase 1
Working on the Command Line
operator (>), which you place after the command and before the name of a file that is to receive
the output:
$ netstat -p > net-connections.txt
The file net-connections.txt now contains the output of the netstat -p command,
with one exception (described shortly). You can then open net-connections.txt in a text
editor or view it with a program such as less in order to study its contents in greater detail.
Do so now and search for references to the Firefox browser. (These may be called firefoxbin.) Don’t worry about what these references mean, though; the point is to familiarize yourself with redirection, not the output of netstat.
When you ran the netstat -p command with redirection as an ordinary user, chances are
you saw a message appear on the screen to the effect that not all processes would be displayed.
This message was directed to standard error. It, too, can be redirected, but you must use the
standard error redirection (2>) operator rather than the standard output redirection operator:
$ netstat -p 2> error-messages.txt
If you examine the error-messages.txt file, you’ll see that it contains only the warning
about not all processes being displayed; standard output appears on the screen. You can redirect both standard output and standard error by using the &> redirection operator:
$ netstat -p &> net-connections.txt
All of these redirection operators overwrite whatever file you provide as an argument (netconnections.txt or error-messages.txt in these examples). When redirecting standard
output or standard error (but not both), you can append to an existing file rather than overwrite it by adding a second greater-than symbol:
$ netstat -p >> net-connections.txt
$ netstat -p 2>> error-messages.txt
A common trick is to redirect standard output or standard error to /dev/null.
This file is a device that’s connected to nothing; it’s used when you want to
get rid of data. For instance, if the whine program is generating error messages you don’t care about, you might type whine 2> /dev/null to run it and
discard its error messages.
Redirecting Input
Many Linux programs are designed to accept input from files whose names you specify on the
command line. Some programs, though, are designed to accept keyboard input via standard
input. What if you want to provide fixed input from a file to such programs, though? The
answer is to use standard input redirection via the input redirection operator (<).
As an example, suppose you wanted to convert the error-messages.txt file to a graphics
format. You might want to use the text2gif program (part of the giflib package), but it
83484.book Page 37 Monday, September 18, 2006 8:58 AM
Task 1.7: Use Streams, Pipes, and Redirection
37
requires you to enter text either as a command-line option or via standard input. Thus, you’d
redirect standard input from the error-messages.txt file. You’d also have to redirect standard output to save the result in a file:
$ text2gif < error-messages.txt > error-graphics.gif
You can use a graphics program, such as the GIMP, to view the error-graphics.gif file
to verify that it contains the correct image.
When using the redirection operators, you start a command line with the program name and then “point” the operators toward their destinations—the
input redirection operator points left, toward the command name, whereas
the output redirection operators point right, toward the filename of the file
you want to create.
Piping Data between Programs
The preceding example showed text2gif operating on a file that was created by another program. This approach is common in Linux; so common, in fact, that a variant of the redirection
operator exists to simplify matters. This tool is known as a pipe or a pipeline, and it’s a way
to send standard output from one program directly into another, without using any on-disk
file. The symbol for a pipe is a vertical bar (|), located above the Enter key on the same key
that holds the backslash (\) character on most keyboards. You place the pipe character
between the commands. For instance, instead of saving the output of netstat -p in a file and
then examining that file with less, you can pipe the result directly into less:
$ netstat -p | less
Another common use of a pipe is to send the results of a lengthy command through grep,
which searches for lines containing a particular string that you specify. For instance, to search
for the lines in the netstat output that refer to Firefox, you might issue the following command:
$ netstat -p | grep firefox
You can create a pipeline containing multiple commands and even redirect the output of the
final command:
$ netstat -p | grep firefox | text2gif > netstat-output.gif
Additional Pipe and Redirection Tricks
Pipes and redirection can be combined in complex ways and obscure variants may be used. For
instance, the &1 and &2 strings refer to standard output and standard error, respectively. This
fact enables you to pipe standard error without also piping standard output:
$ netstat -p 2>&1 > /dev/null | text2gif > error-message.gif
83484.book Page 38 Monday, September 18, 2006 8:58 AM
38
Phase 1
Working on the Command Line
This example relies on subtle order effects: On the command line, standard error is redirected
to standard output before standard output is redirected to /dev/null; however, bash interprets
these redirections in the opposite order. Thus, this command will send nothing as input to
text2gif if you reverse the order of the two redirection operators. Also, when redirecting to &1
or &2, you should include no space between the redirection operator and its destination.
Criteria for Completion
This task demonstrated the use of pipe and redirection operators for standard input, standard
output, and standard error. You should now be able to apply these operators in working with
Linux commands that generate textual output or expect textual input. (A few commands, such
as text2gif, generate binary output on standard output and rely on you to be able to redirect
or pipe it appropriately.)
Task 1.8: Manage the Shell Environment
Linux shells are simply programs, and like many programs, the details of their operation can
be customized. You can change the command prompt, set the directories in which the shell
searches for program files, and so on. These features are adjusted via environment variables,
which you can set on the command line or in configuration files. Other programs can also use
environment variables, so in some cases, setting an environment variable in a bash configuration file can affect programs launched from bash.
Scenario
You dislike your current bash prompt and want to change it to something that includes the
date and time. You also need to set an environment variable that tells various programs what
editor to use when calling an external text editor. You want to test these changes and then
make them permanent by modifying your bash configuration file.
Scope of Task
To perform this task, you’ll need to type a few commands at the command line and edit a configuration file. Consult Task 1.5 for information on using Vi for file editing, or use your favorite text-based or GUI editor.
Duration
This task will take about half an hour to complete. Once you know how to change environment variables, you’ll be able to do so in under a minute—but it may take longer than that to
determine what environment variable needs changing!
83484.book Page 39 Monday, September 18, 2006 8:58 AM
Task 1.8: Manage the Shell Environment
39
Setup
To prepare for the task, log into your user account on your Linux system. (You can—and
should—perform this task as an ordinary user.) You may perform this task in either a textmode or a GUI login, but in the latter case, you must launch an xterm or similar command
prompt window.
Caveats
Performing this task as root poses the usual risks of accidentally damaging the installation. If
you badly corrupt your own bash configuration files, it’s conceivable (but unlikely) that you’ll
be unable to log in again. If this happens, use a root login to copy /etc/skel/.bashrc to your
user home directory and change the ownership of the copied file to your normal user account.
Procedure
To complete this task, you’ll change two environment variables. First you’ll do this temporarily so that your changes affect just a single login session. You’ll then make your changes
permanent by editing a user configuration file. At the end of this procedure, I describe several
other important environment variables, which you might choose to change if you so desire.
Adjusting Your Shell Prompt
The prompt in bash is controlled through the $PS1 variable. You set a variable by specifying the
variable name (minus the leading dollar sign, $), an equal sign (=), and the value to which you
want to set the variable. In most cases, you should surround the value of the prompt by quotes
("). For instance, you can set your bash prompt to read Your command? by typing the following:
$ PS1="Your command? "
Pay attention to the spaces (and lack thereof), particularly around the equal sign; adding
spaces around the equal sign will cause this command to fail. If you want a space between
the prompt and the point at which you begin typing, be sure to include one at the end of the
new prompt string.
The scenario presented earlier, though, specified that you want to include the time and date
in the command prompt. To do this, you must include special strings that serve as stand-ins
for other data. Specifically, the current date can be denoted by \d and the time can be denoted
by \@. Thus, you can set your prompt to include the date and time by issuing the following
command:
$ PS1="\d \@ $ "
The result might resemble the following, although of course the date and time shown in the
prompt will change with the real date and time:
Thu Jun 08 11:44 AM $
83484.book Page 40 Monday, September 18, 2006 8:58 AM
40
Phase 1
Working on the Command Line
In most distributions, the system is configured with default prompts that include your username, the computer’s hostname, and the current directory, but details differ. You can learn
what your shell prompt is by typing echo $PS1. This command displays the contents of the
$PS1 variable. Consult the man page for bash for more information on common substitution
strings, including those found in your distribution’s default shell prompt.
Setting the $PS1 variable as just described has one important limitation: The change is
restricted to the current running instance of bash. Any program launched from bash will
inherit the default value of $PS1. This is true even of bash itself. With your altered prompt displayed, try typing bash to launch another shell from the current one. Your command prompt
will be replaced by your default prompt. Typing exit from the new shell will return you to the
original one with the modified prompt.
To make a change that can be inherited by programs launched from your current session,
you must use the export command after setting the variable:
$ PS1="\d \@ $ "
$ export $PS1
A variable that’s been exported in this way is referred to as an environment variable, as
opposed to a simple variable. Alternatively, you can combine these commands on a single line:
$ export PS1="\d \@ $ "
After typing these commands, if you launch a new instance of bash, it will inherit the
changed command prompt. Even this change, though, won’t affect new logins or new xterm
windows; to make your change truly permanent, you must adjust configuration files, as
described shortly in “Making Your Changes Permanent.”
Setting a Program-Specific Environment Variable
Many environment variables affect non-bash programs. One of these that you might want to
adjust is $EDITOR. Some Linux programs launch an external text editor for certain operations,
and these programs often consult the $EDITOR environment variable to determine what program to use. First, check what program your account is configured to use by default:
$ echo $EDITOR
/usr/bin/vi
Although the $EDITOR variable is frequently defined, it isn’t guaranteed to be.
If a variable isn’t set, displaying it with echo will show an empty line as output.
Of course, your system might not be configured to use Vi, as shown in this example.
Another test is to use a utility that consults the $EDITOR environment variable. One such tool
is crontab; type crontab -e and you should see a (probably empty) file appear in your
default editor. Exit from this editor without making any changes to the file.
83484.book Page 41 Monday, September 18, 2006 8:58 AM
Task 1.8: Manage the Shell Environment
41
Suppose you don’t want to use Vi as your default editor, though; perhaps you prefer nano.
You can adjust your default editor by changing the environment variable:
$ export EDITOR="/usr/bin/nano"
Check that /usr/bin/nano exists before typing this command. If it doesn’t
exist, locate the file’s true location or substitute another editor, such as /usr/
bin/emacs or /usr/bin/jed.
You must use the export command to set the environment variable, not simply a variable
for the current bash session, since $EDITOR is used by programs other than bash. Once the
environment variable has been set, test it by typing crontab -e again. You should see the
same (probably empty) file you saw before appear in your new editor.
Making Your Changes Permanent
Chances are you don’t want to type a series of commands to adjust your environment variables every
time you log into your Linux system or launch a new xterm window. You can automate the process
by modifying bash configuration files. Table 1.4 summarizes the locations and names of these files.
TABLE 1.4
Common bash Configuration Files
Type of File
Login File Location
Non-Login File Location
Global
/etc/profile and files in /etc/
profile.d
/etc/bashrc or /etc/bash.bashrc
User
~/.bash_login, ~/.profile, or
~/.bash_profile
~/.bashrc
The bash configuration files can be either global (they apply to all users) or user (they apply
to individual users), and either login files (they apply to login sessions, such as those initiated
from a text-mode login prompt) or non-login files (they apply to non-login sessions, such as
those started in xterm windows). The precise names used for these files varies from one distribution to another. The most common user configuration files are ~/.bashrc and ~/.profile,
so look for those files. To make your changes permanent, you must locate existing lines that set
the environment variables you want to modify or add new lines.
Whatever the name or location, bash configuration files are actually shell scripts, as described
in more detail in Task 1.9. For now, you can simply add or modify existing export commands.
Type the commands in the shell script just as you’d type them at a command prompt. If you need
to add a line rather than modify an existing one, be careful to keep it out of command structures,
such as if statements. Your best bet is to add new lines to the very end of the file.
Try modifying an appropriate bash login script to change the shell prompt or default editor.
Log out, log in again, and test your changes. If they didn’t work, restore the file to its original
83484.book Page 42 Monday, September 18, 2006 8:58 AM
42
Phase 1
Working on the Command Line
condition and try again with another file; it may take a bit of trial and error to locate the correct
file. If you like, you can change the global configuration file to affect all users, but you must do
so as root.
In addition to startup scripts, bash provides shutdown (or logout) scripts. The most common name for this script is ~/.bash_logout, which is a user script. Modifying this or similar
scripts can be handy if you want to ensure that certain actions are taken when a user logs out.
You might use it to destroy sensitive temporary files, for instance.
Exploring Other Environment Variables
Linux supports many more environment variables than the $PS1 and $EDITOR variables described
earlier. In fact, you can set any environment variable you want—$PHASE1 or $GOBBLEDEGOOK, for
instance. To be useful, though, an environment variable must be used by bash or by some other
program. Table 1.5 summarizes some common environment variables and their uses. This table is
not comprehensive, though; in principle, any program may use its own unique environment variables. If you read in a program’s documentation that it uses particular environment variables, you
can set them using the techniques described earlier.
TABLE 1.5
Common Environment Variables and Their Meanings
Variable Name
Explanation
$USER
This is your current username. It’s a variable that’s maintained by
the system.
$SHELL
This variable holds the path to the current command shell.
$PWD
This is the present working directory. This environment variable is
maintained by the system. Programs may use it to search for files
when you don’t provide a complete pathname.
$HOSTNAME
This is the current TCP/IP hostname of the computer.
$PATH
This is an unusually important environment variable. It sets the path
for a session; the path is a colon-delimited list of directories in which
Linux searches for executable programs when you type a program
name. For instance, if PATH is /bin:/usr/bin and you type ls, Linux
looks for an executable program called ls in /bin and then in /usr/
bin. If the command you type isn’t on the path, Linux responds with
a command not found error. The $PATH variable is typically built up in
several configuration files, such as /etc/profile and the .bashrc
file in the user’s home directory.
$HOME
This variable points to your home directory. Some programs use it
to help them look for configuration files or as a default location in
which to store files.
83484.book Page 43 Monday, September 18, 2006 8:58 AM
Task 1.8: Manage the Shell Environment
TABLE 1.5
43
Common Environment Variables and Their Meanings (continued)
Variable Name
Explanation
$LD_LIBRARY_PATH
A few programs use this environment variable to indicate directories
in which library files may be found. It works much like PATH.
$PS1
This is the default prompt in bash. It generally includes variables of
its own, such as \u (for the username), \h (for the hostname), and \W
(for the current working directory). This value is frequently set in
/etc/profile, but it is often overridden by users.
$TERM
This variable is the name of the current terminal type. To move a
text-mode cursor and display text effects for programs like textmode editors, Linux has to know what commands the terminal supports. The $TERM environment variable specifies the terminal in use.
This information is combined with data from additional files to provide terminal-specific code information. $TERM is normally set automatically at login, but in some cases you may need to change it.
$DISPLAY
This variable identifies the display used by X. It’s usually :0.0, which
means the first (numbered from 0) display on the current computer.
When you use X in a networked environment, though, this value
may be preceded by the name of the computer at which you’re sitting, as in machine4.example.com:0.0. This value is set automatically when you log in, but you may change it if necessary. You can
run multiple X sessions on one computer, in which case each one
gets a different DISPLAY number—for instance, :0.0 for the first session and :1.0 for the second.
$EDITOR
Some programs launch the program pointed to by this environment
variable when they need to call a text editor for you to use. Thus,
changing this variable to your favorite editor can help you work in
Linux. It’s best to set this variable to a text-mode editor, though; GUI
editors might cause problems if they’re called from a program that
was launched from a text-mode login.
The PATH variable often includes the current directory indicator (.) so that programs in the current directory can be run. This practice poses a security risk,
though, because a miscreant could create a program with the name of some
other program (such as ls) and trick another user into running it by simply
leaving it in a directory the victim frequents. Even the root user may be victimized in this way. For this reason, it’s best to omit the current directory from
the PATH variable, especially for the superuser. If it’s really needed for ordinary users, put it at the end of the path.
83484.book Page 44 Monday, September 18, 2006 8:58 AM
44
Phase 1
Working on the Command Line
To learn what environment variables are set in your particular session, type env. This command
officially runs a program in a modified environment; however, when typed alone, it displays the
values of all the currently set environment variables. The output of this command is likely to be
quite long, so you may want to pipe it through less or redirect the output to a file for later examination. Some of the environment variables will have fairly suggestive names, but others are likely
to be obscure. You can find the purpose of some in the man page for bash, but others have meaning
only to particular programs. If you don’t understand the purpose of an environment variable, don’t
try to change it; ignore it or, if you’re curious, try looking it up using a Web search engine.
Criteria for Completion
To complete this task, you should have successfully tested modifications to at least two environment variables: $PS1 (to set the shell prompt) and $EDITOR (to set the default editor). You
should have made both transient changes (by setting the variable and using the export command on a command line) and more permanent changes (by editing a bash configuration file).
Task 1.9: Write Basic Scripts
The bash and other Linux command-prompt shells are more than simple command-line tools;
they’re powerful programming languages. You can string together commands to have them
execute one after another, add variables to improve flexibility, and use program control statements to have parts of the program execute repeatedly or only upon certain conditions.
Programs written in the bash shell language are often referred to as scripts. Compared to
programs written in languages such as C, C++, and Pascal, bash scripts are easy to create but
slow to execute. This makes them good choices for simple programs and for “throwaway”
programs that aren’t likely to be used very often. In fact, many of Linux’s key startup and system configuration files are actually shell scripts. Thus, understanding how to create and modify scripts will help you administer a Linux system.
Scenario
You find that you want to simplify or otherwise improve various tasks that you routinely perform, so you want to create scripts to handle these tasks. Specifically, you want a script to
launch a few X programs with one command, a way to simplify account creation tasks, a
script that reports nothing but the computer’s IP address, a script that plays all the .wav audio
files in a directory, and a script that copies files only if the destination file doesn’t already exist.
Scope of Task
Script-writing is a very open-ended activity; scripts can perform a wide variety of tasks, and
there may be multiple ways of achieving the same goals within a script. This particular task
presents a few scripts that illustrate important scripting features.
83484.book Page 45 Monday, September 18, 2006 8:58 AM
Task 1.9: Write Basic Scripts
45
Duration
This task will take about an hour to complete. Writing real-world scripts can take anywhere
from a minute or so up to several hours or even days, depending on the complexity of the script
and your own proficiency at script writing.
Setup
To perform this task, you must log into your computer as an ordinary user. One of the scripts
presented in this task requires root access to run. You’ll also need root access if you want to
copy any of these scripts to a system directory, but this isn’t necessary to complete the task.
You may use a text-mode or GUI login, although the first script launches X programs, so
you’ll need an X session to test it. The scripts themselves are executed from the command line,
but you’ll edit them in an editor, which may be a purely text-based editor (such as Vi or nano)
or a GUI editor (such as KEdit).
Caveats
As programs, scripts can contain bugs. Although the scripts presented in this task are fairly
simple and are likely to be harmless even with typos, bugs in scripts can cause infinite loops
(in which the script never terminates), excessive CPU use, accidental file deletions, and other
problems. These problems can be more serious if a buggy script is run as root, or even if a bugfree script is used inappropriately by root. Thus, unless a script absolutely requires root
access, you should always develop and test scripts as a non-root user.
Procedure
The first thing to understand about scripts is how to create them: You use a text editor to type
commands, then modify the file permissions on the resulting file so that it’s executable. Once
you know how to perform these basic operations, you can proceed to create scripts that meet
the objectives of this task.
Beginning a Shell Script
Shell scripts are plain-text files, so you create them in text editors. A shell script begins with
a line that identifies the shell that’s used to run it, such as the following:
#!/bin/sh
The first two characters are a special code that tells the Linux kernel that this is a script and
to use the rest of the line as a pathname to the program that’s to interpret the script. Shell
scripting languages use a hash mark (#) as a comment character, so the script utility itself
ignores this line, although the kernel doesn’t. On most systems, /bin/sh is a symbolic link
that points to /bin/bash, but it could point to some other shell. Specifying the script as using
/bin/sh guarantees that any Linux system will have a shell program to run the script, but if
the script uses any features specific to a particular shell, you should specify that shell instead—
for instance, use /bin/bash or /bin/tcsh instead of /bin/sh.
83484.book Page 46 Monday, September 18, 2006 8:58 AM
46
Phase 1
Working on the Command Line
When you’re done writing the shell script, you should modify it so that it’s executable.
You do this with the chmod command, as described in Task 1.2. Specifically, you use the +x
option to add execute permissions, probably in conjunction with a to add these permissions
for all users. For instance, to make a file called my-script executable, you’d issue the following command:
$ chmod a+x my-script
You’ll then be able to execute the script by typing its name, possibly preceded by ./ to tell
Linux to search in the current directory for the script. If the script is one you run regularly, you
may want to move it to a location on your path, such as /usr/local/bin. When you do that,
you won’t have to type the complete path or move to the script’s directory to execute it; you
can just type my-script.
Using Commands
One of the most basic features of shell scripts is the ability to run commands. You can use
both shell internal commands and external commands. Most of the commands you type in
a shell prompt are in fact external commands—they’re programs located in /bin, /usr/bin,
and other directories on your path. You can run such programs, as well as internal commands, by including their names in the script. You can also specify parameters to such programs in a script. For instance, suppose you want to start a script that launches two xterm
windows and the KMail mail reader program. Listing 1.2 presents a shell script that accomplishes this goal.
Listing 1.2: A Simple Script That Launches Three Programs
#!/bin/bash
/usr/bin/xterm &
/usr/bin/xterm &
/usr/bin/kmail &
Aside from the first line that identifies it as a script, the script looks just like the commands
you might type to accomplish the task manually except for one fact: The script lists the complete paths to each program. (You may need to modify the path to kmail; it’s not always
stored in /usr/bin.) This is usually not strictly necessary, but listing the complete path
ensures that the script will find the programs even if the $PATH environment variable changes.
Also, each program-launch line in Listing 1.2 ends in an ampersand (&). This character tells the
shell to go on to the next line without waiting for the first to finish. If you omit the ampersands
in Listing 1.2, the effect will be that the first xterm will open but the second won’t open until
the first is closed. Likewise, KMail won’t start until the second xterm terminates.
Although launching several programs from one script can save time in startup scripts and
some other situations, scripts are also frequently used to run a series of programs that manipulate data in some way. Such scripts typically do not include the ampersands at the ends of the
commands because one command must run after another or may even rely on output from the
first. A comprehensive list of such commands is impossible because you can run any program
83484.book Page 47 Monday, September 18, 2006 8:58 AM
Task 1.9: Write Basic Scripts
47
you can install in Linux as a command—even another script. The following list includes a few
commands that are commonly used in scripts:
Normal file-manipulation commands The file-manipulation commands, such as ls, mv, cp,
and rm, are often used in scripts. You can use these commands to help automate repetitive file
maintenance tasks.
grep This command is described earlier, in “Piping Data between Programs” in Task 1.7. It
locates files that contain specific strings.
find Where grep searches for patterns within the contents of files, find does so based on filenames, ownership, and similar characteristics. This command is described earlier, in Task 1.4.
cut This command extracts text from fields in a file. It’s frequently used to extract variable
information from a file whose contents are highly patterned. To use it, you pass it one or more
options that control what it cuts followed by one or more filenames. For instance, users’ home
directories appear in the sixth colon-delimited field of the /etc/passwd file. You could therefore include cut -f 6 -d “:” /etc/passwd in a script to extract this information.
sed This program provides many of the capabilities of a conventional text editor but via
commands that can be typed at a command prompt or entered in a script.
echo Sometimes a script must provide a message to the user; echo is the tool to accomplish
this goal. You can pass various options to echo or just a string to be shown to the user. For
instance, echo “Press the Enter key” causes a script to display the specified string.
mail The mail command can be used to send email from within a script. Pass it the -s subject
parameter to specify a subject line and give it an email address as the last argument. If it’s used at
the command line, you would then type a message and terminate it with a Ctrl+D. If it’s used from
a script, you might omit the message body entirely or pass it an external file as the message using
input redirection. You might want to use this command to send mail to the superuser about the
actions of a startup script or a script that runs on an automated basis.
Many of these commands are extremely complex. You can consult their man
pages for more information.
Even if you have a full grasp of how to use some key external commands, simply executing
commands you might type at a command prompt is of limited utility. Many administrative
tasks require you to modify what you type at a command, or even what commands you enter,
depending on information from other commands. For this reason, scripting languages include
additional features to help you make your scripts useful.
Using Variables
Variables can help you expand the utility of scripts. A variable is a placeholder in a script for
a value that will be determined when the script runs. Variables’ values can be passed as parameters to scripts, generated internally to the scripts, or extracted from the scripts’ environments.
83484.book Page 48 Monday, September 18, 2006 8:58 AM
48
Phase 1
Working on the Command Line
Variables that are passed to the script are frequently called parameters. They’re represented
by a dollar sign ($) followed by a number from 0 up—$0 stands for the name of the script, $1
is the first parameter to the script, $2 is the second parameter, and so on. To understand how
this might be useful, consider the task of adding a user. As described earlier, in Task 1.6, creating an account for a new user typically involves running at least two commands—useradd
and passwd. You might also need to run additional site-specific commands, such as commands that create unusual user-owned directories aside from the user’s home directory.
As an example of how a script with a parameter variable can help in such situations, consider Listing 1.3. This script creates an account and changes the account’s password (you’ll be
prompted to enter the password when you run the script). It creates a directory in the /shared
directory tree corresponding to the account, and it sets a symbolic link to that directory from
the new user’s home directory. It also adjusts ownership and permissions in a way that may
be useful, depending on your system’s ownership and permissions policies.
Listing 1.3: A Script That Reduces Account-Creation Tedium
#!/bin/sh
useradd -m $1
passwd $1
mkdir -p /shared/$1
chown $1.users /shared/$1
chmod 775 /shared/$1
ln -s /shared/$1 /home/$1/shared
chown $1.users /home/$1/shared
When you use Listing 1.3, you need type only three things: the script name with the desired
username and the password (twice). For instance, if the script is called mkuser, you might use
it like this:
# mkuser sjones
Changing password for user sjones
New password:
Retype new password:
passwd: all authentication tokens updated successfully
Most of the scripts’ programs operate silently unless they encounter problems, so the interaction (including typing the passwords, which don’t echo to the screen) is a result of just the
passwd command. In effect, Listing 1.3’s script replaces seven lines of commands with one.
Every one of those lines uses the username, so by using this script, you also reduce the chance
of an error.
Another type of variable is assigned within scripts themselves—for instance, they can be set
from the output of a command. These variables are also identified by leading dollar signs, but
they’re typically given names that at least begin with a letter, such as $Addr or $Name. These
variables are the same as variables you can set at the command line (as described earlier, in
Task 1.8), but unless you use the export command, they don’t become environment variables.
83484.book Page 49 Monday, September 18, 2006 8:58 AM
Task 1.9: Write Basic Scripts
49
For instance, consider Listing 1.4, which displays the current IP address of the computer on
which it runs. This script uses the variable $ip, which is extracted from the output of ifconfig
using grep and cut commands. (The trailing backslash on the second line of the script indicates
that the following line is a continuation of the preceding line.) When assigning a value to a variable from the output of a command, that command should be enclosed in back-quote characters
(`), which appear on the same key as the tilde (~) on most keyboards. These are not ordinary single quotes, which appear on the same key as the regular quote character (") on most keyboards.
Listing 1.4: Script Demonstrating Assignment and Use of Variables
#!/bin/sh
ip=`ifconfig eth0 | grep inet | cut -f 2 -d ":" | \
cut -f 1 -d " "`
echo "Your IP address is $ip"
Listing 1.4 relies on the networking command ifconfig, which is described in more detail
in Phase 6. You can type ifconfig by itself to see what its output includes. The second line
of Listing 1.4 uses grep and cut to isolate the IP address from the rest of the ifconfig output.
Scripts like Listing 1.4, which obtain information from running one or more commands,
are useful in configuring features that rely on system-specific information or information that
varies with time. You might use a similar approach to obtain the current hostname (using the
hostname command), the current time (using date), the total time the computer’s been running (using uptime), free disk space (using df), and so on. When combined with conditional
expressions (described shortly), variables become even more powerful because then your
script can perform one action when one condition is met and another in some other case. For
instance, a script that installs software could check free disk space and abort the installation
if there’s not enough disk space available.
One special type of variable was mentioned earlier in this chapter: environment variables.
Environment variables are assigned and accessed just like shell script variables. The difference
is that the script or command that sets an environment variable uses the export command to
make the value of the variable accessible to programs launched from the shell or shell script
that made the assignment. Environment variables are most often set in shell startup scripts, but
the scripts you use can access them. For instance, if your script calls X programs, it might
check for the presence of a valid $DISPLAY environment variable and abort if it finds that this
variable isn’t set. By convention, environment variable names are all uppercase, whereas nonenvironment shell script variables are all lowercase or mixed case.
Using Conditional Expressions
Scripting languages support several types of conditional expressions. These enable a script to
perform one of several actions contingent on some condition—typically the value of a variable.
One common command that uses conditional expressions is if, which allows the system to take
one of two actions depending on whether some condition is true. The if keyword’s conditional
expression appears in brackets after the if keyword and can take many forms. For instance,
-f file is true if file exists and is a regular file; -s file is true if file exists and has a size
greater than 0; and string1 = string2 is true if the two strings have the same values.
83484.book Page 50 Monday, September 18, 2006 8:58 AM
50
Phase 1
Working on the Command Line
To better understand the use of conditionals, consider the following code fragment:
if [ -s /tmp/tempstuff ]
then
echo "/tmp/tempstuff found; aborting!"
exit
fi
This fragment causes the script to exit if the file /tmp/tempstuff is present. The then keyword marks the beginning of a series of lines that execute only if the conditional is true, and
fi (if backwards) marks the end of the if block. Such code might be useful if the script creates and then later deletes this file, since its presence indicates that a previous run of the script
didn’t succeed or is still working.
An alternative form for a conditional expression uses the test keyword rather than square
brackets around the conditional:
if test -s /tmp/tempstuff
You can also test a command’s return value by using the command as the condition:
if [ command ]
then
additional-commands
fi
In this example, the additional-commands will be run only if command completes successfully. If command returns an error code, the additional-commands won’t be run.
Conditional expressions are sometimes used in loops as well. Loops are structures that tell
the script to perform the same task repeatedly until some condition is met (or until some condition is no longer met). For instance, Listing 1.5 shows a loop that plays all the .wav audio
files in a directory.
Listing 1.5: A Script That Executes a Command on Every Matching File in a Directory
#!/bin/bash
for d in `ls *.wav` ;
do play $d ;
done
The for loop as used here executes once for every item in the list generated by ls *.wav.
Each of those items (filenames) is assigned in turn to the $d variable and so is passed to the
play command.
Another type of loop is the while loop, which executes for as long as its condition is true.
The basic form of this loop type is like this:
83484.book Page 51 Monday, September 18, 2006 8:58 AM
Task 1.9: Write Basic Scripts
51
while [ condition ]
do
commands
done
The until loop is similar in form, but it continues execution for as long as its condition is
false—that is, until the condition becomes true.
Using Functions
A function is a part of a script that performs a specific sub-task and that can be called by name
from other parts of the script. Functions are defined by placing parentheses after the function
name and enclosing the lines that make up the function within curly braces:
myfn() {
commands
}
The keyword function may optionally precede the function name. In either event, the
function is called by name as if it were an ordinary internal or external command.
Functions are very useful in helping to create modular scripts. For instance, if your script
needs to perform half a dozen distinct computations, you might place each computation in a
function and then call them all in sequence. Listing 1.6 demonstrates the use of functions in
a simple program that copies a file but aborts with an error message if the target file already
exists. This script accepts a target and a destination filename and must pass those filenames to
the functions.
Listing 1.6: A Script Demonstrating the Use of Functions
#/bin/bash
doit() {
cp $1 $2
}
function check() {
if [ -s $2 ]
then
echo "Target file exists! Exiting!"
exit
fi
}
check $1 $2
doit $1 $2
83484.book Page 52 Monday, September 18, 2006 8:58 AM
52
Phase 1
Working on the Command Line
If you enter Listing 1.6 and call it safercp, you might use it like this, assuming the file
original.txt exists and dest.txt does not:
$ ./safercp original.txt dest.txt
$ ./safercp original.txt dest.txt
Target file exists! Exiting!
The first run of the command succeeded because dest.txt did not exist. When the command was run a second time, though, the destination file did exist, so the program terminated
with the error message.
Note that the functions are not run directly and in the order in which they appear in the
script. They’re run only when called in the main body of the script (which in Listing 1.6 consists of just two lines, each corresponding to one function call).
Criteria for Completion
To complete this task, you must have created five scripts to perform the five tasks outlined earlier. I recommend that you try some simple variants on these tasks so that you create scripts
that perform other tasks—for instance, you might modify Listing 1.5 so that it displays graphics files in a directory rather than plays audio files.