1
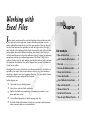
➟
Chapter
RI
AL
Working with
Excel Files
TE
I
GH
TE
D
MA
n this book, you discover the new Excel interface that provides you with
the right tools at the right time. In most Windows programs, you see
menus and toolbars from which you select your options. Now you discover
the new Excel interface that provides you with the right tools at the right
time. Instead of the traditional look, Excel now provides tabs with icon-and
button-laden tabs on the Ribbon containing your favorite Excel features.
Galleries and themes are also a new addition to Excel, helping you maintain
consistency and style in workbook appearance. The Office Quick Access
toolbar, which is now the only toolbar, provides fast and easy access to basic
file functions. You discover later in this chapter how you can customize the
Quick Access toolbar.
PY
In this chapter you:
RI
Throughout the course of this book, you discover methods to use Excel as a
spreadsheet, of course; but you also discover how to use it as a database, a
calculator, a planner, and even a graphic illustrator. You start with the basics
and work into the more advanced Excel actions.
➟
➟
➟
Open and close the Excel program
➟
➟
Use workbook properties to better manage your files.
CO
Open, close, and save Excel workbooks
Explore the Excel screen including customizing it to make it even
faster and easier to use.
Set Excel default file locations, which saves you time and frustration
when you open and save your workbooks.
Get ready to . . .
1
➟ Open and Explore Excel ..............................6
➟ Select Commands with the Keyboard ............7
➟ Close Excel ..................................................7
➟ Customize the Quick Access Toolbar ............8
➟ Change Status Bar Indicators........................8
➟ Create a New Excel File................................9
➟ Save a Workbook in Various Formats ..........9
➟ Open an Existing Excel File ........................10
➟ Rename or Delete a File ............................11
➟ Set the Default File Locations ....................12
➟ View and Specify Workbook Properties ......13
Chapter 1: Working with Excel Files
Open and Explore Excel
Click the Cancel button to close a dialog box without making any
changes.
1. Choose Start➪All Programs➪Microsoft Office➪
Microsoft Office Excel. The Microsoft Excel program
begins with a new, blank workbook displayed like the
one shown in Figure 1-1, ready for you to enter data.
2. The icon at the top-left of the screen is called the Office
Button. As you hover your mouse over it, a description
of the Office Button functions appears.
When you click the Office Button, Excel displays a list of options.
Click the Office Button to close the menu if you don’t want to make
a selection at this time.
3. Pause your mouse over any of the three icons next to
the Office Button. By default, the Quick Access toolbar
functions include Save, Undo, and Redo.
4. Hover your mouse over the tabs, or task-oriented portions,
of the Ribbon and a description of a tab’s feature appears.
The tabs are broken down into subsections called groups.
The Home tab includes the Clipboard, Font, Alignment,
Number, Styles, Cells, and Editing groups.
Figure 1-1: A blank Excel workbook, which Excel calls Book1.
5. Click the Insert tab. The Ribbon changes to reflect
options pertaining to Insert. Groups include Shapes,
Tables, Illustrations, Charts, Links, and Text.
6. On the Home tab, click the down arrow under Format
As Table. A Gallery of table styles appears. (Click the
arrow again to close the Gallery.)
7. On the Home tab, clicking the Dialog Box Launcher on
the bottom-right of the Font group opens a related dialog box. (See Figure 1-2.) In this example, the Format
Cells dialog box opens.
➟
6
Figure 1-2: Click a Dialog Box Launch icon to display a relevant dialog box.
Close Excel
Select Commands with the Keyboard
Optionally, choose Office ➪Close. The current workbook closes, but the
Excel program remains open.
1. If appropriate for the command you intend to use, place
the insertion point in the proper word or paragraph.
2. Press Alt on the keyboard. Shortcut letters and numbers
appear on the Ribbon. See Figure 1-3.
Numbers control commands on the Quick Access toolbar.
Figure 1-3: Use the keyboard to select Ribbon commands.
3. Press a letter to select a tab on the Ribbon; for this
example, press P. Excel displays the appropriate tab
and letters for each command on that tab.
4. Press a letter or letters to select a command. Excel dis-
plays options for the command you selected.
5. Press a letter or use the arrow keys on the keyboard to
select an option. Excel performs the command you
selected, applying the option you choose.
Press the Esc key to step the key controls back one step.
Press F6 to change the focus of the program, switching between the
document, the status bar, and the Ribbon.
Close Excel
Figure 1-4: Closing Excel releases the program
from your computer memory.
1. Choose Office Button➪Exit Excel, as you see in Figure 1-4.
Optionally, Click the Close button (x).
2. Click Yes or No if prompted to save your workbook.
(See “Save a Workbook” later in this chapter.)
➟
7
Chapter 1: Working with Excel Files
Customize the Quick Access Toolbar
1. Right-click any tool or group title you want to add to
the Quick Access toolbar. A menu appears.
2. Choose Add to Quick Access Toolbar. The tool or group
icon appears on the Quick Access bar.
3. Right-click an icon on the Quick Access toolbar. A menu
appears.
4. Choose Remove from Quick Access Toolbar. The
selected item disappears from the Quick Access toolbar.
5. Right-click the Quick Access toolbar and select
Customize the Quick Access Toolbar. The Excel Options
dialog box, seen in Figure 1-5, appears.
6. Open the Choose Commands From drop-down menu
and select a tab name. Excel displays a list of available
features.
Figure 1-5: You can select any Excel options to add to the Quick Access toolbar.
7. Select a feature and click the Add button. The selected
feature appears on the right panel. Click OK.
Change Status Bar Indicators
1. Right-click anywhere along the status bar at the
bottom of the window. Excel opens the Status Bar
Configuration menu.
2. To activate an inactive feature, click it. This automati-
cally adds a check mark and displays the feature’s status.
In Figure 1-6, the Caps Lock feature is on, and now the
status bar shows the Caps Lock status.
3. To deactivate any active feature, click it.
➟
8
Figure 1-6: Customize what you see along the Excel status bar.
Save a Workbook
Create a New Excel File
Filenames cannot contain asterisk, slash, blackslash, or question mark
characters.
1. Click the Office Button.
2. Choose New. The New Workbook dialog box opens.
(See Figure 1-7.)
3. Click Blank Workbook.
4. Click the Create button. Excel creates a blank workbook
based on the default template.
See Chapter 8, “Changing Worksheet Views,” for more information
about Excel templates.
Optionally, press Ctrl+N to create a new workbook without opening
the New Workbook dialog box.
Save a Workbook
Figure 1-7: Excel names each new workbook incrementally such as
Workbook 2 or Workbook 3.
1. Choose Office Button➪Save or click the Save button on
the Quick Access toolbar. The Save As dialog box
appears, as shown in Figure 1-8.
The Save As dialog box only appears the first time you save a file.
2. By default, Excel saves your files in the My Documents
folder. If you want to save your file in a different folder,
select that folder from the Save In drop-down list.
3. In the File Name text box, type a descriptive name for
the file.
4. Click the Save button. Excel saves the workbook in the
location with the name you specified.
Figure 1-8: Choose a folder and filename for your Excel workbook.
➟
9
Chapter 1: Working with Excel Files
Save a Workbook in a
Different Format
If the file you open was created in a previous version of Excel, the words
Compatibility Mode appear on the title bar next to the document name.
1. Choose Office Button➪Save As. The Save As dialog box
appears.
2. Select the folder where you want to save the file from
the Save In drop-down list.
3. In the File Name text box, type a descriptive name for
the file.
4. Open the Save As Type drop-down menu. A list of file
formats appears.
5. Choose one of the 26 different file formats. Files saved in
Figure 1-9: Excel warns you of compatibility
conflicts.
the Excel 2007 format have a .xlsx extension, whereas files
created in earlier versions of Excel have a .xls extension.
6. Click Save. Depending on the format you choose,
Excel may prompt you for additional information.
Open an Existing Excel File
1. Choose Office Button➪Open. The Open dialog box,
seen in Figure 1-10, appears.
2. If necessary, select the appropriate folder from the Look
In drop-down list. Then select the file you want to open.
Open the Files of Type drop-down menu to display files saved in
other formats.
3. Click the Open button. The workbook appears in the
➟
10
Excel workspace, ready for you to edit.
Figure 1-10: Open a previously created Excel file.
Excel displays recently used files on the right side of the Office Button
menu. Click any listed filename to quickly open it.
Rename a File
Rename a File
1. Open Excel, but not the file you want to rename.
Choose Office Button➪Open. The Open or Save As
dialog box appears.
Optionally, choose Office Button➪Save As and continue as described.
2. If necessary, click the Look In list and navigate to the
folder containing the file you want to delete.
Figure 1-11: Change the name of an existing Excel workbook.
3. Right-click the file. Do not double-click the file because
double-clicking the file opens it.
4. Choose Rename from the shortcut menu. (See
Figure 1-11.) The original filename becomes
highlighted.
5. Type the new file name. Filenames cannot contain aster-
isk, slash, blackslash, or question mark characters.
6. Press Enter when you are finished typing.
7. Click the Cancel button to close the Open dialog box.
➟
11
Chapter 1: Working with Excel Files
Delete a File
1. Open Excel, but not the file you want to delete. Choose
To override the default file location, you can click the Look In list when
saving or opening a file and choose a location different from the default
location.
Office Button➪Open or Office➪Save As. Either the
Open or Save As dialog box appears.
2. If necessary, click the Look In list and navigate to the
folder containing the file you want to delete.
3. Right-click on the unwanted file. Do not double-click
the file.
Figure 1-12: Delete unwanted files through
the Open or Save As dialog box.
4. Choose Delete from the shortcut menu. (See Figure 1-12.)
A confirmation message appears.
5. Click Yes. Excel deletes the file.
6. Click the Cancel button to close the Open or Save As
dialog box.
Set the Default File Locations
1. Click the Office Button and click Excel Options. (It’s
located at the bottom of the Office list.) The Excel
Options dialog box opens.
2. From the options on the left side of the dialog box,
click the Save category. You see the options shown in
Figure 1-13.
3. In the Default file location, enter the data path to the
place where you want to save most of your files. Click
OK.
➟
12
By default, Excel saves your files in the My Documents folder stored
on your local hard drive, but your company may have another location where it wants you to keep most of your Excel files. An example might be G:\COMPANY DOCUMENTS\DIANE
Figure 1-13: Customize to determine where Excel stores your workbooks.
View Workbook Properties
Specify Workbook Properties
1. Click the Office Button and click Prepare. A list of
options appears.
2. Click Properties. The Document Information Panel
appears.
3. Enter identifying information such as the author’s
name, subject, or a list of keywords. See Figure 1-14.
Excel automatically adds statistical information such as the workbook’s original creation date, the last time it was printed or modified, and the workbook size.
4. Click the Close box to close the Document Information
Panel.
Figure 1-14: Enter information to identify your workbook.
View Workbook Properties
1. Choose Office Button➪Open. The Open dialog box
appears.
2. If necessary, click the Look In list and navigate to the
folder containing the file you want to delete.
3. Click the Views button drop-down arrow to display a
Views shortcut menu or click the Views button itself to
cycle through the available views.
4. Choose Properties. The Open window splits into two
panels like the ones you see in Figure 1-15.
Figure 1-15: View the workbook’s properties and file statistics.
5. Click a file name. Excel displays the workbook proper-
ties in the right panel.
6. Click OK to open the file or Cancel to close the Open
dialog box.
➟
13
Chapter 1: Working with Excel Files
➟
14