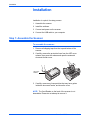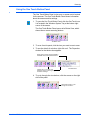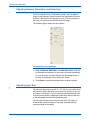
1
DocuMate 272
scanner
user’s guide
DocuMate 272
scanner
user’s guide
Copyright © 2005 Visioneer, Inc.
Reproduction, adaptation, or translation without prior written permission is prohibited, except as allowed under the
copyright laws.
XEROX ® is a trademark of Xerox Corporation in the United States and/or other countries and is used under license.
DocuMate is a trademark of Xerox Corporation used under license. All other Xerox product names and product numbers
mentioned in this publication are trademarks of Xerox Corporation.
The Visioneer brand name and logo are registered trademarks of Visioneer, Inc. The PaperPort brand name and logo are
registered trademarks of ScanSoft, Inc.
Microsoft is a U.S. registered trademark of Microsoft Corporation. Windows is a trademark of Microsoft Corporation.
ZyINDEX is a registered trademark of ZyLAB International, Inc. ZyINDEX toolkit portions, Copyright © 1990-1998, ZyLAB
International, Inc. All Rights Reserved. All other products mentioned herein may be trademarks of their respective
companies.
Information is subject to change without notice and does not represent a commitment on the part of Visioneer. The
software described is furnished under a licensing agreement. The software may be used or copied only in accordance with
the terms of such an agreement. It is against the law to copy the software on any medium except as specifically allowed in
the licensing agreement. No part of this document may be reproduced or transmitted in any form or by any means,
electronic or mechanical, including photocopying, recording, or information storage and retrieval systems, or translated to
another language, for any purpose other than the licensee's personal use and as specifically allowed in the licensing
agreement, without the express written permission of Visioneer.
Part Number: 05-0671-000
Restricted Rights Legend
Use, duplication, or disclosure is subject to restrictions as set forth in contract subdivision (c)(1)(ii) of the Rights in
Technical Data and Computer Software Clause 52.227-FAR14. Material scanned by this product may be protected by
governmental laws and other regulations, such as copyright laws. The customer is solely responsible for complying with all
such laws and regulations.
Table of Contents
Table of Contents
Welcome
What’s in the Box . . . . . . . . . . . . . . . . . . . . . . . . . . . . . . . . . . . . . . . . . . . . . . . . . . . . . . . . . . . . . . . . . 1
The Xerox DocuMate 272 Scanner . . . . . . . . . . . . . . . . . . . . . . . . . . . . . . . . . . . . . . . . . . . . . . . . . . . 2
What You Need . . . . . . . . . . . . . . . . . . . . . . . . . . . . . . . . . . . . . . . . . . . . . . . . . . . . . . . . . . . . . . . . . . 3
Documentation . . . . . . . . . . . . . . . . . . . . . . . . . . . . . . . . . . . . . . . . . . . . . . . . . . . . . . . . . . . . . . . . . . . 3
Installation
Step 1: Assemble the Scanner . . . . . . . . . . . . . . . . . . . . . . . . . . . . . . . . . . . . . . . . . . . . . . . . . . . . . . . 4
Step 2: Install the Software . . . . . . . . . . . . . . . . . . . . . . . . . . . . . . . . . . . . . . . . . . . . . . . . . . . . . . . . . . 6
Step 3: Connect and Power On the Scanner . . . . . . . . . . . . . . . . . . . . . . . . . . . . . . . . . . . . . . . . . . . 13
Step 4: Connect the USB Cable . . . . . . . . . . . . . . . . . . . . . . . . . . . . . . . . . . . . . . . . . . . . . . . . . . . . . 14
Additional Applications Available with Your Scanner . . . . . . . . . . . . . . . . . . . . . . . . . . . . . . . . . 17
Register Your Scanner . . . . . . . . . . . . . . . . . . . . . . . . . . . . . . . . . . . . . . . . . . . . . . . . . . . . . . . . . . . . 19
Scanning
Load and Scan Documents . . . . . . . . . . . . . . . . . . . . . . . . . . . . . . . . . . . . . . . . . . . . . . . . . . . . . . . . 21
Check the Scan Settings Before Scanning . . . . . . . . . . . . . . . . . . . . . . . . . . . . . . . . . . . . . . . . 23
Scan from the One Touch Button Panel . . . . . . . . . . . . . . . . . . . . . . . . . . . . . . . . . . . . . . . . . . . . . . . 24
Using the One Touch Button Panel . . . . . . . . . . . . . . . . . . . . . . . . . . . . . . . . . . . . . . . . . . . . . . 25
The Default One Touch Settings on Your Scanner . . . . . . . . . . . . . . . . . . . . . . . . . . . . . . . . . . 27
Scanning from Other Software . . . . . . . . . . . . . . . . . . . . . . . . . . . . . . . . . . . . . . . . . . . . . . . . . . 27
Configuring the One Touch Buttons . . . . . . . . . . . . . . . . . . . . . . . . . . . . . . . . . . . . . . . . . . . . . . . . . . 28
About the One Touch Properties Window . . . . . . . . . . . . . . . . . . . . . . . . . . . . . . . . . . . . . . . . . 28
Selecting New Settings for a Button . . . . . . . . . . . . . . . . . . . . . . . . . . . . . . . . . . . . . . . . . . . . . . 31
Setting Destination Application Properties . . . . . . . . . . . . . . . . . . . . . . . . . . . . . . . . . . . . . . . . . 32
Selecting Page Format Options . . . . . . . . . . . . . . . . . . . . . . . . . . . . . . . . . . . . . . . . . . . . . . . . . 39
Renaming a One Touch Button . . . . . . . . . . . . . . . . . . . . . . . . . . . . . . . . . . . . . . . . . . . . . . . . . 43
Selecting Options for a Button . . . . . . . . . . . . . . . . . . . . . . . . . . . . . . . . . . . . . . . . . . . . . . . . . . 43
Creating a New Scan Configuration . . . . . . . . . . . . . . . . . . . . . . . . . . . . . . . . . . . . . . . . . . . . . . 46
Editing or Deleting Scan Configurations . . . . . . . . . . . . . . . . . . . . . . . . . . . . . . . . . . . . . . . . . . 53
Configuring Before Scanning . . . . . . . . . . . . . . . . . . . . . . . . . . . . . . . . . . . . . . . . . . . . . . . . . . . 54
Scanning with Optical Character Recognition (OCR) . . . . . . . . . . . . . . . . . . . . . . . . . . . . . . . . 55
Scanning with sPDF or nPDF and Searching for Text . . . . . . . . . . . . . . . . . . . . . . . . . . . . . . . . 62
Scan and Burn to a CD . . . . . . . . . . . . . . . . . . . . . . . . . . . . . . . . . . . . . . . . . . . . . . . . . . . . . . . 64
Scanning with Event Forwarding . . . . . . . . . . . . . . . . . . . . . . . . . . . . . . . . . . . . . . . . . . . . . . . . 65
Creating an HTML Web Page from Your Scanned Documents . . . . . . . . . . . . . . . . . . . . . . . . . 67
Transferring Scanned Documents to Storage . . . . . . . . . . . . . . . . . . . . . . . . . . . . . . . . . . . . . . 69
Checking the Hardware and Setting the Lamp Power Saving . . . . . . . . . . . . . . . . . . . . . . . . . . 71
DocuMate 272 Scanner User’s Guide
iii
Table of Contents
Scanning from PaperPort
Scanning from the Basic Interface or Advanced Interface . . . . . . . . . . . . . . . . . . . . . . . . . . . . . . . . . 74
Scanning from the Basic Interface . . . . . . . . . . . . . . . . . . . . . . . . . . . . . . . . . . . . . . . . . . . . . . . 78
Scanning from the Advanced Interface . . . . . . . . . . . . . . . . . . . . . . . . . . . . . . . . . . . . . . . . . . . 81
Load and Scan Credit Cards and Identification Cards . . . . . . . . . . . . . . . . . . . . . . . . . . . . . . . . 84
Adjusting the Image with the Advanced Interface . . . . . . . . . . . . . . . . . . . . . . . . . . . . . . . . . . . 86
Adjusting the Brightness and Contrast . . . . . . . . . . . . . . . . . . . . . . . . . . . . . . . . . . . . . . . . . . . . 89
Adjusting Gamma, Saturation, and Color Hue . . . . . . . . . . . . . . . . . . . . . . . . . . . . . . . . . . . . . . 90
Adjusting Input Size . . . . . . . . . . . . . . . . . . . . . . . . . . . . . . . . . . . . . . . . . . . . . . . . . . . . . . . . . . 90
Creating a New Advanced Interface Profile . . . . . . . . . . . . . . . . . . . . . . . . . . . . . . . . . . . . . . . . 93
Display the Device Configuration . . . . . . . . . . . . . . . . . . . . . . . . . . . . . . . . . . . . . . . . . . . . . . . . 94
Scanning with the Windows Image Acquisition . . . . . . . . . . . . . . . . . . . . . . . . . . . . . . . . . . . . . . . . . 95
Scanning with the ISIS Interface . . . . . . . . . . . . . . . . . . . . . . . . . . . . . . . . . . . . . . . . . . . . . . . . . . . . . 99
Adjusting the ISIS Scan Settings . . . . . . . . . . . . . . . . . . . . . . . . . . . . . . . . . . . . . . . . . . . . . . . 101
Scanning from ISIS in Other Applications . . . . . . . . . . . . . . . . . . . . . . . . . . . . . . . . . . . . . . . . 104
Maintenance
Cleaning the Automatic Document Feeder . . . . . . . . . . . . . . . . . . . . . . . . . . . . . . . . . . . . . . . . . . . . 105
Clearing Paper Jams . . . . . . . . . . . . . . . . . . . . . . . . . . . . . . . . . . . . . . . . . . . . . . . . . . . . . . . . . . . . 106
Replacing the ADF Pad Assembly . . . . . . . . . . . . . . . . . . . . . . . . . . . . . . . . . . . . . . . . . . . . . . . . . . 107
Troubleshooting . . . . . . . . . . . . . . . . . . . . . . . . . . . . . . . . . . . . . . . . . . . . . . . . . . . . . . . . . . . . . . . . 108
Status Light Troubleshooting Codes . . . . . . . . . . . . . . . . . . . . . . . . . . . . . . . . . . . . . . . . . . . . 109
Uninstalling Your Scanner . . . . . . . . . . . . . . . . . . . . . . . . . . . . . . . . . . . . . . . . . . . . . . . . . . . . . . . . 111
Step 1: Uninstalling the Scanner and One Touch Software . . . . . . . . . . . . . . . . . . . . . . . . . . . 111
Step 2: Uninstalling the PaperPort Software . . . . . . . . . . . . . . . . . . . . . . . . . . . . . . . . . . . . . . 112
Xerox DocuMate 272 Scanner Specifications . . . . . . . . . . . . . . . . . . . . . . . . . . . . . . . . . . . . . . . . . 113
Xerox DocuMate 272 Scanner Parts List . . . . . . . . . . . . . . . . . . . . . . . . . . . . . . . . . . . . . . . . . . . . . 114
Notices
. . . . . . . . . . . . . . . . . . . . . . . . . . . . . . . . . . . . . . . . . . . . . . . . . . . . . . . . . . . . . . . . . . . . . . . . . 115
It’s Illegal in the USA . . . . . . . . . . . . . . . . . . . . . . . . . . . . . . . . . . . . . . . . . . . . . . . . . . . . . . . . . . . . . 115
It’s Illegal in Canada . . . . . . . . . . . . . . . . . . . . . . . . . . . . . . . . . . . . . . . . . . . . . . . . . . . . . . . . . . . . . 116
Federal Communications Commission (FCC) for USA . . . . . . . . . . . . . . . . . . . . . . . . . . . . . . . . . . . 117
Energy Star for the USA . . . . . . . . . . . . . . . . . . . . . . . . . . . . . . . . . . . . . . . . . . . . . . . . . . . . . . . . . . 118
Product recycling and disposal for USA . . . . . . . . . . . . . . . . . . . . . . . . . . . . . . . . . . . . . . . . . . . . . . 118
Index
iv
. . . . . . . . . . . . . . . . . . . . . . . . . . . . . . . . . . . . . . . . . . . . . . . . . . . . . . . . . . . . . . . . . . . . . . . . . . . . 119
DocuMate 272 Scanner User’s Guide
Welcome
Your new Xerox DocuMate 272 scanner can quickly scan singlesided or double-sided stacks of color and black-and-white
documents and place their images on your computer. In addition,
your scanner includes a Card Reader that can scan either or both
sides of credit cards, driver’s licenses, medical cards, and other
identification cards, and put their images on your computer as well.
What’s in the Box
Before proceeding, check the contents of the box. If items are
missing or damaged, contact the dealer where you purchased the
scanner.
DocuMate 272 Scanner
USB Cable
Two CDs
Disc 1 and Disc 2
DocuMate 272 Scanner User’s Guide
Power Cord
User’s
Guide
Paper Guide
Power Supply
Buttons
Label
Quick Install Guide
Output Tray
Replacement
ADF Pad
Technical
Support Card
1
Welcome
The Xerox DocuMate 272 Scanner
Paper guide
LED Number
Destination Selector button
Simplex button
Duplex button
Status light
Output tray
ADF cover release
Card Reader
Power switch
USB port
Power jack
Paper guide—Holds documents to scan through the Document
Feeder. Adjusts to fit the width.
LED Number—Shows the current scan setting for the Simplex and
Duplex scanning buttons. A scan setting includes resolution, file
type, brightness, color or black and white, destination, and so on.
Destination Selector button—Selects the setting for the Simplex
and Duplex buttons. Press to cycle through the nine settings.
Simplex button—Press to scan a one-sided document.
Duplex button—Press to scan a two-sided document.
Status light—Shows the scanner’s status. A rapidly flashing green
light indicates the scanner is preparing to scan. A steady green
light indicates the scanner is available to scan. Refer to the
Troubleshooting section for additional details.
Output tray—Holds documents after scanning through the
automatic document feeder (ADF).
ADF cover release—Opens the cover on the ADF.
Card Reader—Holds cards to scan.
Power switch—On/Off power switch.
Power jack—Connects the power cord to the scanner.
Universal Serial Bus (USB) port—Connects scanner to the
computer.
2
DocuMate 272 Scanner User’s Guide
Welcome
What You Need
An IBM-compatible PC with:
•
A CD-ROM drive
•
An available Universal Serial Bus (USB) port
•
A Pentium II (or higher) processor or equivalent
•
Microsoft Windows operating system: 2000 (Service Pack 4),
Me, or XP (Service Pack 1 and 2)
•
Available megabytes (MB) of internal memory (RAM):
•
•
128 MB for Windows 2000 or Me
•
256 MB for Windows XP
200 MB minimum of free hard disk space
A VGA Monitor
Recommended settings for your monitor are as many colors as
possible—High Color (16-bit), True Color (24-bit or 32-bit). Set the
resolution to at least 800 by 600 pixels.
To set your monitor’s colors and resolution, open the Windows
Control Panel, double-click Display, and then click the Settings tab.
Documentation
Your scanner is delivered with the following documentation:
•
Quick Install Guide—Abbreviated installation instructions.
•
DocuMate 272 Scanner User’s Guide—On the Installation CD;
contains detailed installation, scanning, configuration, and
maintenance information.
•
ScanSoft PaperPort User’s Guide—On the Installation CD;
contains detailed feature and configuration information.
•
Online Help—For the scanner configuration, Basic Interface,
Advanced Interface, and PaperPort software applications.
DocuMate 272 Scanner User’s Guide
3
Installation
Installation
Installation is a quick, four-step process:
1. Assemble the scanner
2. Install the software
3. Connect and power on the scanner
4. Connect the USB cable to your computer
Step 1: Assemble the Scanner
To assemble the scanner:
1. Remove all shipping tape from the top and bottom of the
scanner.
2. Carefully remove the protective foam from the ADF cover
release, then press the release and open the automatic
document feeder cover.
ADF Cover
Release
3. Carefully remove any foam particles that may have gotten
inside the document feeder, and close the cover.
NOTE: The Card Reader on the back of the scanner is not
detachable. Please do not attempt to remove it.
4
DocuMate 272 Scanner User’s Guide
Installation
1. Align the slots on the paper guide with the ridges on the
scanner and slide it down until it snaps into place.
2. Insert the pins on each side of the output tray into the holes on
the scanner.
3. Flip open the extension on the output tray so it is fully
extended.
4. Proceed to “Step 2: Install the Software.”
DocuMate 272 Scanner User’s Guide
5
Installation
Step 2: Install the Software
NOTE: The software is on the two CD’s you received with your
scanner. Please be sure to install from Disc 1 first.
To install the software:
1. Start Microsoft Windows and make sure no other applications
are running.
2. Insert Disc 1 into your computer’s CD-ROM drive.
The CD automatically starts.
NOTE: If the CD does not start, check the following:
•
Make sure you have inserted Disc 1.
•
Make sure the CD drive’s door is completely shut.
•
Open Windows Explorer and double-click the icon for your
CD-ROM drive. From the list of files on the CD, double-click
the file named START32.EXE.
3. On the installation menu, select Install Products.
6
DocuMate 272 Scanner User’s Guide
Installation
4. Make sure the boxes for Scansoft PaperPort, Scanner
Driver, and OmniPage Pro are checked.
NOTE: The OmniPage Pro software is required for installation.
It provides extensive Optical Character Recognition (OCR)
capabilities to your scanner as well as a special format for
searchable PDF files (known as sPDF and nPDF).
If you want to also install the other software, click their boxes as
well.
If you install the Kofax VRS software, you may see the
following message.
Please disregard this message and click OK. The Kofax VRS
Certified ISIS driver is installed correctly when you install your
Xerox DocuMate 272 scanner.
5. Click Install Now.
6. On the PaperPort 9.0 Welcome window, click Next.
Installing PaperPort 9.0 will uninstall any existing versions of
PaperPort and install PaperPort 9.0 while retaining all of your
PaperPort files.
7. On the License Agreement window, read the ScanSoft license
agreement. If you accept the terms, select I accept the terms
in the license agreement, and then click Next.
DocuMate 272 Scanner User’s Guide
7
Installation
8. On the Customer Information window, accept the current
values or enter new information, and then click Next.
9. On the Setup Type window, click Next.
10. Click Install to begin the installation.
11. On the Product Registration window, do one of the following:
•
Select Register online, click OK, and then follow the
registration instructions.
•
Select Print registration form, click OK, and then follow
the instructions to complete and print the registration form.
•
Select Remind me in 7 days and click OK.
12. At the Installshield Wizard Completed window, click Finish.
If a message window opens instructing you to restart your
computer, click Restart.
A window then appears offering two choices for installation: Full
Feature Install and Custom Install.
13. Choose the option you want.
Full Feature Install—This is the recommended installation. It
installs the Xerox One Touch 4.0 software that provides the
necessary driver software for the scanner’s buttons. It also
installs scanning interfaces for Twain, Microsoft’s Windows
Image Acquisition, and the ISIS driver. Installing this option
means that you can use several different methods to scan.
Each is explained in this User Guide.
Custom Install—This option is recommended for advanced
users only. It offers separate combinations of the driver
software: Full Install, Twain and One Touch 4.0, Twain Only,
and ISIS Only. See “Custom Installation” on page 10 for the
steps to install using the Custom Install option.
14. Click Full Feature Install for the recommended installation.
8
DocuMate 272 Scanner User’s Guide
Installation
15. On the Welcome to the One Touch 4.0 Setup Wizard window,
click Next.
16. On the Xerox License Agreement window, read the license
agreement. If you accept the terms, select I Agree, and click
Next.
During installation of the Full Feature Install you will see this
window asking you to select one of the images for your Color
Space setting.
The Color Space setting sets the gamma value for the scanner
so scanned items look good on your monitor. Gamma controls
the brightness of the midtones of colors. That setting can be
changed later on as you’re scanning.
17. Select the option that looks best to you and click Next.
Installation begins.
DocuMate 272 Scanner User’s Guide
9
Installation
18. When you see the “Complete the installation by connecting
your hardware” window, STOP. Do NOT click OK yet. Leave
the window open and proceed to the next section, “Step 3:
Connect and Power On the Scanner”.
NOTE: If you want to see more information about your scanner
and a quick explanation of how to use the One Touch features,
click the More button on the window. When you’re finished,
return to the window above to continue with the installation
process.
Custom Installation
Custom installation is recommended for advanced users only.
NOTE: The One Touch 4.0 driver is required for the scanner’s
buttons to function. If you select a custom installation without
One Touch 4.0, the scanner buttons will not initiate scanning.
NOTE: If you select a custom installation and later decide to
upgrade to a Full Feature Installation or one of the other Custom
Installations, you must first uninstall the scanner and the custom
installation. See the steps on page 12.
10
DocuMate 272 Scanner User’s Guide
Installation
To install using the Custom Install:
1. Choose Custom Install as your choice of installation.
A window appears with the choice of Scanner Driver options.
The options are:
•
One Touch 4.0 with TWAIN and ISIS (Full Install)—This
is the recommended selection. When you select this option,
the scanner gets the full functionality of One Touch 4.0 with
TWAIN and ISIS drivers. Selecting this option is the same
as selecting the “Full Feature Install” in the Driver Selection
window, except for selecting the Color Space.
•
One Touch 4.0 with TWAIN—The ISIS driver is not
installed. You can use the “Xerox DocuMate 272” TWAIN
driver but not the Kofax TWAIN driver. The scanner’s
buttons are fully functional with the One Touch 4.0 driver.
•
TWAIN only—The TWAIN driver is installed, but the ISIS
driver is not. One Touch 4.0 Service will not run and you
can only use the “Xerox DocuMate 272” TWAIN driver. You
will not be able to use the Kofax TWAIN driver, or use WIA.
You also will not be able to invoke the functionality of the
buttons on the scanner.
•
ISIS only—The ISIS driver is installed. You can use
applications that use the ISIS driver, such as Kofax and
QuickScan, and you can also use the Kofax TWAIN driver.
But the One Touch 4.0 Service will not run, therefore you
will not be able to invoke the functionality of the buttons on
the scanner. You will not be able to use the “Xerox
DocuMate 272” TWAIN driver.
2. Select the option for the custom installation.
3. Click Next and follow the instructions on the screen.
DocuMate 272 Scanner User’s Guide
11
Installation
4. When you see the “Complete the installation by connecting
your hardware” window, STOP. Do NOT click OK yet. Leave
the window open and proceed to “Step 3: Connect and Power
On the Scanner” on page 13.
To select another Custom Installation
Before changing the driver installation method, you need to remove
the previous installation from you computer first and then re-install
One Touch 4.0 when selecting a different option.
1. Remove the scanner from the system by going to the Windows
Control Panel, double-click the System icon, select the
Hardware tab, and click the Device Manager button. In the list
of devices, select Imaging Devices, and select your Xerox
DocuMate 272. Choose Uninstall from the Action menu.
2. Unplug the USB cable.
3. Remove the One Touch 4.0 driver from the system by going to
the Windows Control Panel, double-click the Add/Remove
Programs icon, then from the list of programs choose One
Touch 4.0 and click the Remove button.
4. Install the new option using the steps starting in the section
“Step 2: Install the Software” on page 6, but only select
Scanner Driver and then click Install Now.
12
DocuMate 272 Scanner User’s Guide
Installation
Step 3: Connect and Power On the Scanner
Connect the power supply and power cord, and then turn the
power on.
To connect your Xerox DocuMate 272 scanner:
1. Plug the power supply into the power port on the scanner.
NOTE: Only use the power supply (SA60-24 made by SinoAmerican) included with your scanner. Connecting any other
type of power supply may damage your scanner, and will void its
warranty.
2. Plug the power cord into the power supply and into a wall
outlet.
3. Turn on the power switch, located on the back of the scanner to
the left of the power port.
The status light comes on and flashes indicating that the
scanner is receiving power.
Now proceed to the next section, “Step 4: Connect the USB
Cable.”
DocuMate 272 Scanner User’s Guide
13
Installation
Step 4: Connect the USB Cable
The Xerox DocuMate 272 scanner connects to any available USB
port. Check your computer’s manual for USB port locations.
NOTE: You can connect the scanner to your computer while the
computer is running.
1. Plug the USB cable into the USB port on the scanner and then
into a USB port on the computer. The ports are identified with
the USB symbols.
USB
You can also connect the scanner to a USB port on the
computer’s keyboard if it has one, or to a USB hub. If you use a
USB hub, it must have its own power supply already plugged
into an electrical outlet.
NOTE: If you have not installed the scanner driver, unplug the
USB cable from the computer and install the software now.
When the driver installation is complete, a message tells you
when to connect the scanner.
If you are using Windows XP Service Pack 1, and have
plugged the USB cable into a USB 1.1 port, an information
bubble may open explaining that “A HI-SPEED USB device is
plugged into a non-HI-SPEED USB hub”. Plug the USB cable
into a USB 2.0 port (if available) or just disregard the message.
If you leave it plugged into the USB 1.1 port, your scanner may
scan a bit slower than the 33 pages per minute, and 66 images
per minute available with a USB 2.0 port.
14
DocuMate 272 Scanner User’s Guide
Installation
Your computer then recognizes that a scanner has been
plugged into the USB port and automatically loads the
appropriate software to run the scanner.
Do not proceed until you receive a message that your computer
has found the new hardware, or updated the driver database. If
your computer is running Windows XP, you will see the
following message.
2. When you’re certain that the software has completely loaded,
return to the “Complete the installation by connecting your
hardware” window and click OK to complete the installation
process.
You can also click More to see a quick overview about
accessing and navigating the One Touch Button Panel. When
you’re finished reading the additional information, click OK.
The scanner’s status light is green when the scanner and
computer are communicating properly.
DocuMate 272 Scanner User’s Guide
15
Installation
3. Click Close on the Installation Complete window.
If you selected OmniPage for installation, a window tells you to
insert the second CD to install it.
4. Follow the instructions to install OmniPage.
5. If you want to install additional applications on the CD, click
Return to Main Menu.
If you removed the CD from the CD drive and want to install
other software, reinsert the CD Disc 1 into the drive.
In addition to installing the other software from the CD, you can
also view and print the User Guides.
16
DocuMate 272 Scanner User’s Guide
Installation
Additional Applications Available with Your Scanner
Your scanner includes free, additional applications on the
installation CD.
1. To install the other applications on the CD, return to the Main
Menu screen and click Install Products.
You’ll see the screen that shows the additional products.
2. See the following table to decide which software you would like
to install.
3. Then click in the boxes of the other software you want to install,
and click Install Now. Follow the instructions on the screen to
install each of the additional products.
DocuMate 272 Scanner User’s Guide
17
Installation
Software
About the Software
QuickScan
QuickScan Pro (QSP) is a standalone, out-of-the-box imaging solution
that provides all the necessary capabilities for high-speed scanning,
image enhancement, viewing, annotation, printing, and storing images,
for both black-and-white and color pages. Its strengths include flexible job
separation, barcode recognition, and, above all, usability. QuickScan Pro
uses an ISIS-certified driver for scanning.
You can use this software as an additional method to scan from your
scanner.
Arcsoft Scrapbook
Suite
The Scrapbook Suite contains two programs: Collage Creator and
PhotoImpression 5.
Collage Creator includes all the fun of traditional collage building but
leaves out all the messy paste, paper trimmings, and most importantly, all
the hard work. Because Collage Creator uses your digital images, you’ll
find it easy to construct and modify your collages.
PhotoImpression 5 is an all-in-one solution that blends powerful photo
editing with project templates, and a slick, easy-to-use interface.
Particularly for children, these fun programs provide ways to organize and
display your scanned images.
Kofax VRS
Kofax VRS is an additional scanning interface that uses patented VRS
(VirtualReScan) technology, and that ensures your scanning is as efficient
and easy as possible, while also improving both the quality of the scanned
images. Kofax VRS uses an ISIS-certified driver for scanning.
This software provides an additional method to scan from your scanner.
4. To get the documentation for each of the additional products,
return to the Main Menu window and click User Guides.
5. Click the links of the Guides you want.
6. When you’re finished, click Exit on the Main Menu window and
save your CD in a safe place.
18
DocuMate 272 Scanner User’s Guide
Installation
Register Your Scanner
Registering your scanner is very important because it provides you
with access to our free telephone support service. Registration also
gives you free access to software updates for your scanner.
To register your scanner:
1. Right-click on the One Touch icon in the Windows System Tray
(at the bottom right corner of the screen).
The One Touch Icon
2. Choose Check for Online Updates from the pop-up menu.
3. Follow the instructions on the screen and register your scanner
by entering your scanner’s serial number and your email
address.
NOTE: A valid email address is required.
The serial number is located on the underside of the scanner.
The Serial Number
After registration is complete you will receive an email
message with your RegID.
Your RegID is very important because you will need it when
accessing free telephone support, or checking for online
updates.
4. Write down your RegID below so you will always know where to
find it.
RegID:_________________________________
DocuMate 272 Scanner User’s Guide
19
Scanning
Scanning
Your Xerox DocuMate 272 scanner scans paper documents placed
in the Document Feeder, as well as medical cards and credit cards
placed in the Card Reader.
To scan documents, photos, magazine articles, business cards,
and other paper items, use the Document Feeder.
See “Load and Scan Documents” on page 21 for the steps to scan
using the scanner’s buttons.
See “Scan from the One Touch Button Panel” on page 24 for the
steps to scan from your computer screen.
To scan medical cards, credit cards, drivers licenses, identification
cards, and other plastic items, use the Card Reader.
You don’t use the scanner’s buttons or One Touch to scan cards.
Instead, you use the Advanced Twain Interface. See “Load and
Scan Credit Cards and Identification Cards” on page 84, for details.
NOTE: Do not use the Card Reader to scan business cards.
They can jam the Card Reader’s mechanism. Use the Document
Feeder to scan business cards.
20
DocuMate 272 Scanner User’s Guide
Scanning
Load and Scan Documents
When you press either the Simplex or Duplex button, documents
are scanned using the scan settings indicated by the LED number.
The scanned images are then sent to a software application
(known as the Destination Application) on your computer.
1. Make sure the output tray is fully extended, and adjust the
paper guide for the width of paper.
NOTE: Remove any staples or paper clips from the documents
before loading them into the automatic document feeder. Staples
and paper clips can damage the feed mechanism.
2. Load the documents with their tops into the automatic
Document Feeder.
For Simplex (one-sided) scans, load the documents face down.
For Duplex (two-sided) scans, the documents can be face up or
down because both sides are scanned.
NOTE: If a card is in the Card Reader, the automatic document
feeder will not scan the page. The Card Reader must be empty
when scanning from the automatic document feeder.
DocuMate 272 Scanner User’s Guide
21
Scanning
3. Check the LED number to make sure you’re using the scan
setting you want.
To choose a new scan setting, press the Destination Selector
button.
The current scan setting. See “Check
the Scan Settings Before Scanning”
on page 23 to check the settings.
Press the Destination Selector to cycle
through the scan settings to select the
one you want.
4. To scan a one-sided document, press the Simplex button.
To scan a two-sided document, press the Duplex button.
A scan progress window opens and then a thumbnail of the
scanned image appears in the Destination Application. In this
example of duplex (two-sided) scanning, the Destination
Application is the PaperPort desktop and the two pages are
stacked, one on top of the other.
Cancel
button
Pause
button
To Cancel scanning, click the Cancel button.
To pause the scanning, click the Pause button. It will change to
a Continue button. Put the page back into the scanner and
click Continue to resume scanning.
22
DocuMate 272 Scanner User’s Guide
Scanning
Check the Scan Settings Before Scanning
1. To check the scan settings before scanning, press, hold down,
and then release, either the Simplex or Duplex button.
Press, hold down,
and then release
either button to
see the setting for
the selected LED
number.
The One Touch Button Panel appears with the description of
the selected settings. This sample shows the current
description of setting 6.
This number corresponds
to the LED on the scanner.
The icon indicates the
Destination Application
for this setting.
The current name of the
setting.
Your document will be scanned with
these options for setting Number 6.
The One Touch Properties window for that setting also appears
in case you want to change scanning options before scanning.
Use this window to reset the button settings for the destination
applications, file formats, and so forth. See “Configuring the
One Touch Buttons” on page 28 to reset the settings.
2. Click the close boxes on the One Touch Button Panel and the
Properties window to close them.
DocuMate 272 Scanner User’s Guide
23
Scanning
Scan from the One Touch Button Panel
You can scan from the One Touch Button Panel on the screen.
1. Adjust the paper guide for the width of paper and load the
documents with their tops into the automatic document feeder.
For Simplex (one-sided) scans, load the documents face down.
For Duplex (two-sided) scans, the documents can be face up or
down because both sides are scanned.
The One Touch Icon
2. Now click on the One Touch icon in the Windows System Tray
(at the bottom right corner of the screen).
The One Touch Button Panel appears and shows the first five
on-screen scanning buttons. Click the arrows to cycle through
all 9 settings.
Click the button you
want to use to scan.
Click these arrows
to navigate through
the 9 buttons.
The Properties window also appears in case you want to
change the scanning options before scanning.
3. On the screen—not on the scanner—click the button you want
to use to scan.
For example, if you want to
scan with button 2, which
converts the document to
PDF, click here.
Or if you want to scan with button 4,
which attaches the scanned
document to a blank eMail message,
click here.
NOTE: Your scanner comes with 9 factory-preset One Touch
button settings. You can reconfigure and rename the buttons for
your specific scanning requirements.
The scanner begins scanning. When the process finishes, the
scanned images appear in the Destination Application, just as if
you scanned with the Simplex or Duplex scanner buttons.
24
DocuMate 272 Scanner User’s Guide
Scanning
Using the One Touch Button Panel
The One Touch Button Panel is also your on-screen set of controls
for the scanner. The One Touch Button Panel shows information
about the scanner and its settings.
1. To open the One Touch Button Panel, click the One Touch icon.
It is located in the Windows System Tray at the bottom right
corner of the screen.
The One Touch Button Panel opens at its Button View, which
shows the on-screen scanning buttons.
The Button View
2. To scan from the panel, click the icon you want to use to scan.
3. To see the details for a button, right-click on it. The Properties
window for that button also appears.
Right-click on a button to see its details in
the Detail View and Properties Window.
Clicking the icon in either view
starts the scanner scanning using
the button’s settings.
The Detail View
4. To cycle through the nine buttons, click the arrows on the right
side of the panel.
Click these arrows to cycle
through the 9 buttons.
DocuMate 272 Scanner User’s Guide
25
Scanning
5. To navigate through the panel’s three views, click the green
arrows at the top of the panel.
Click these
arrows to
navigate
through the
panel’s three
views.
The Button View
The Hardware View
The Detail View
•
The Button View is your main scanner control panel. Use it
to scan or to see all nine buttons.
•
The Detail View shows the current scan settings for a
button.
•
The Hardware View shows the current scanners connected
to your computer.
If the Properties window is not open, right-click the icon on
the Detail View or Button View to open it.
From the Hardware View and Detail View, click the green
arrow to return to the Button View. You can also click on the
hardware icon to return to the Button View.
6. To close the One Touch Button Panel, click the close button on
the panel.
About the One Touch Button Panel’s Names and Icons
The button names, such as PDF, eMail or Fax, indicate the original
factory settings for a button. For example, the eMail button is set
up to scan documents and then immediately attach them to a new
eMail message in Microsoft Outlook Express. But you can change
the name, the Destination Application, and any of the other aspects
of the button.
A question mark for a button, such as shown for button 5 in the
examples above, means your computer does not have appropriate
software for the initial factory settings (Fax software in the example
above). In that case, you would probably want to change the name
and Destination Application to something else. For example, if you
scan a lot of documents that have faint images, such as handdrawn sketches in light pencil, you might want to change the
button’s name to Sketches, and the Destination Application to
Microsoft Paint, or some other drawing program.
See “Configuring the One Touch Buttons” on page 28 to change
the settings of the buttons on the One Touch Button Panel.
26
DocuMate 272 Scanner User’s Guide
Scanning
The Default One Touch Settings on Your Scanner
When you receive your scanner, its settings are preconfigured to
scan items for various basic tasks, such as email or fax, and then
send the scanned image to an appropriate, preselected
Destination Application. The following table shows these factorydefault settings. You can change any of these settings.
Name
Destination
Application
1
Scan
PaperPort
Black&White @ 200dpi Duplex
8.5" x 11" page
Brightness 50%
2
PDF
PaperPort
Black&White @ 200dpi Duplex
8.5" x 11" page
Brightness 50%
3
Print
Printer
Black&White @ 300dpi Simplex
8.5" x 14" page
Brightness 50%
4
eMail
Microsoft
Black&White @ 200dpi Simplex
Outlook
8.5" x 11" page
(attachment) Brightness 50%
5
Fax
Fax
Application
Black&White @ 200dpi Simplex
8.5" x 11" page
Brightness 50%
6
OCR
Microsoft
Word
Black&White @ 300dpi Duplex
8.5" x 11" page
Brightness 50%
Button
Preconfigured Settings
7
Archive Transfer to
Storage
Black&White @ 300dpi Simplex
8.5" x 11" page
Brightness 50%
8
Custom Microsoft
Paint
Color @ 100dpi Simplex
6" x 4" photo size
Brightness 50% Contrast 50%
9
Paint
Microsoft
Paint
Color @ 300dpi Simplex
8.5" x 11" page
Brightness 50% Contrast 50%
Scanning from Other Software
In addition to scanning from the scanner buttons and the One
Touch Button Panel, you can scan directly from PaperPort and
other software applications. See the sections “Scanning from
PaperPort,” and “Scanning with the Windows Image Acquisition,”
for details.
DocuMate 272 Scanner User’s Guide
27
Scanning
Configuring the One Touch Buttons
Each One Touch button configuration consists of a Destination
Application, a Scan Configuration, and a Document Format.
The One Touch Properties window is where you select these three
elements for a button.
To open the One Touch Properties window:
1. Click the One Touch icon. It is located in the Windows System
Tray at the bottom right corner of the screen.
2. Right-click a button on the One Touch Button Panel.
REMINDER: Remember that left-clicking a button on the One
Touch Button Panel starts the scanner scanning. Right-clicking
opens the One Touch Properties window.
The One Touch Properties window opens for that button.
Right-click on a button (for example,
button 2) and the Properties window
opens for that button.
The One Touch Properties window also opens when you press,
hold down, and release the Simplex or Duplex button on the
scanner.
About the One Touch Properties Window
The One Touch Properties window is where you can select new
settings for the buttons. The One Touch Properties window also
has special scanning features such as scanning to a CD, scanning
and converting text directly into an HTML web page, and scanning
with optical character recognition (OCR) that turns a scanned
image into text that you can edit.
28
DocuMate 272 Scanner User’s Guide
Scanning
NOTE: Some of the options on the One Touch Properties
Window (and other One Touch windows and dialog boxes) are
“grayed out” and are not available. Grayed out options are not
appropriate for your Xerox DocuMate 272 scanner. For example,
on the figure below, the option “Use Document Feeder” is
selected and “grayed out” because the Xerox DocuMate 272 is
an ADF scanner and always uses the document feeder, so
there’s no reason for you to select it. If you use the One Touch
application with other Xerox scanners, grayed out options
become active, if appropriate.
The following example of the One Touch window shows the
settings for Button 2. The button is set to scan with the scan
configuration named Color Document and then open ScanSoft
PaperPort to display the scanned image. The Format and Page(s)
option is set to scan in the PDF image format.
Click to select
options.
The button number and
name.
The file format of
the images of
the scanned
item.
The Destination Application.
This is the application that
opens when you are finished
scanning.
The settings that
the scanner uses
when scanning
with the currently
selected button
(in this case
button 2).
The settings on the Properties window are:
Select Destination—The list of applications that can open to
display the scanned image for the selected button. To configure the
list of available applications, click the Options tab at the top of the
dialog box and select the desired options. See “Selecting Options
for a Button” on page 43 for more information.
DocuMate 272 Scanner User’s Guide
29
Scanning
Select Configuration—The list of available scan configurations for
the selected button. The configuration settings include: scanning
mode, resolution (dpi), page size, brightness, color saturation, hue,
and gamma. To see a selected scan configuration’s settings, click
its icon. Click the icon again to close the detailed information.
Click the icon of a
selected configuration
to view its settings.
The icons next to each scan configuration indicate the scanning
mode.
Color
Black and White
Grayscale
Configure
Before Scan
NOTE: Use Configure Before Scan if you want to set the
scanning mode manually before scanning. See “Configuring
Before Scanning” on page 54.
You can also click the Edit button or double click the configuration
to see more detailed information about the selected configuration.
Select Format and Page(s)—A set of file formats for the scanned
image for the selected button. The formats are based on the type
of destination application you select. This example shows the
formats that apply to the PaperPort Desktop.
The button names indicate their file types. See “Selecting Page
Format Options” on page 39 for more about the formats.
Options tab—Displays a window for selecting options related to
the selected destination application for the scanned image.
30
DocuMate 272 Scanner User’s Guide
Scanning
Selecting New Settings for a Button
For each of the nine One Touch buttons, you can select a new
Destination Application, Scan Configuration, and Document
Format.
Click these arrows to see the
properties for the button
whose settings you want to
change.
Select a format for
the scanned image
Select a software application
as the destination to send
scanned documents.
Select a configuration
for scanning the item.
To select new settings for the Scanner Button:
1. Click the button selection arrows to select the button you want
to change.
Each button has its own settings. So, as you click the arrows to
cycle through the buttons, the available settings on the window
change to show them for each button.
2. From the Select Destination list, select the application where
you want documents sent when scanning is finished.
See “Selecting Options for a Button” on page 43 to display a
full list of the Destination Applications that you can use with the
scanner.
NOTE: If you select a word processing program such as
Microsoft WordPad or Microsoft Word and a page format that
can be used for OCR (such as Text, RTF, Word, sPDF, or nPDF),
the text in scanned images is automatically converted to word
processing text. See “Scanning with Optical Character
Recognition (OCR)” on page 55 for details.
3. From the Select Configuration list, select a scan
configuration.
DocuMate 272 Scanner User’s Guide
31
Scanning
To scan in color, select one of the configurations indicated by
the small color icon, such as the Color Document configuration.
The scan configuration list is preset for the application you
select in the Select Destination list. If you select a different
application, the configurations are for that application.
However, you can create your own scan configurations as well.
4. Select a Format and Page(s) option.
The available options apply to the Destination Application you
select. For example, if you select Microsoft Word as the
Destination Application, the available formats are for text, such
as .doc, .txt, and .rtf. But if select Microsoft Paint as the
Destination Application, then the available formats are for
graphics, such as .bmp, and .jpg.
5. Click OK, or if you want to keep the window open and work with
other features, click Apply.
Now when you press or click a scanner button, the document is
scanned using the newly configured settings for that button.
Setting Destination Application Properties
The different types of Destination Applications have various
properties that you can select.
1. On the One Touch Properties window, click a Destination
Application.
2. Click the Properties button.
Click a Destination
Application.
Click the Properties
button
A One Touch 4.0 Link Properties dialog box appears for the
type of Destination Application you selected, and the available
options are for that type of application.
32
DocuMate 272 Scanner User’s Guide
Scanning
PaperPort Properties
These properties apply to PaperPort, and are for designating the
folder to receive your scanned items.
1. Select the PaperPort folder where you want the file of the
scanned image to be located.
2. Click OK.
3. Click OK or Apply on the One Touch Properties window.
When PaperPort opens after you finish scanning, the
thumbnails of your scanned documents are on the Desktop in
that folder.
DocuMate 272 Scanner User’s Guide
33
Scanning
Text Documents Properties
These properties apply to Microsoft Word, Excel, Adobe Reader,
and the other applications indicated by their icons in the list. The
properties apply to the OCR settings for the applications.
1. Click in the OCR settings boxes for the options you want.
The options will apply to all the applications in the group.
Always send a file, even when no text was found—The
scanned file is sent to the OCR reader even if the image does
not appear to contain text. This could occur if you scanned a
photograph with a One Touch button set for text applications.
Show message if text recognition failed—A message will
appear on the screen if the OCR reader does not detect text in
the image.
34
DocuMate 272 Scanner User’s Guide
Scanning
2. To add another application to the list, click the Add Application
button.
The Add Text Based Link dialog box appears.
3. Click Browse to find the application you want to add to the list.
When you select the application using the Browse button, steps
1, and 2 on the dialog box are automatically filled in, and the
application icon appears in step 3.
4. Select the icon in Step 3.
To select the options in step 4 on the dialog box, refer to the
documentation that you received with the application to see
which text formats it supports.
The boxes you select here determine the Page Format icons
that appear on the One Touch Properties window for that group
of applications.
5. Click the Add button.
6. Click OK or Apply on the One Touch Properties window.
DocuMate 272 Scanner User’s Guide
35
Scanning
Image Documents Properties
These properties apply to ScanSoft OmniPage Pro 12 that you
received with your scanner, plus Microsoft Paint and other image
processing applications.
1. Click in the Color document handling settings boxes for the
options you want.
The options will apply to all the applications in the group.
Convert Bitmaps using Screen Resolution—Use this option
to ensure that an image will fit on the computer’s screen. When
a computer screen is set to a lower resolution, bitmap images
with a higher resolution may be too big to fit on the screen.
Converting the bitmap image to match the screen resolution
ensures that the image fits on the screen.
Convert Bitmaps to JPEG—JPEG files can be compressed to
produce smaller file sizes and, therefore, shorter transmission
times. Use this option to provide that compression capability to
image files.
2. To add another application to the list, click the Add Application
button.
See the steps on page 35 to add an application to the list.
3. Click OK.
4. Click OK or Apply on the One Touch Properties window.
36
DocuMate 272 Scanner User’s Guide
Scanning
Storage Properties
These properties apply to the Destination Application named
Transfer to Storage. If a CD burner is attached to your computer,
you also use this dialog box to start the Burn to CD process.
NOTE: If you do not have a CD burner attached to your
computer, the CD options are not shown on the dialog box. The
Burn to CD option is only available for Windows XP.
1. Click the Storage Layout options you want.
All documents are in the root—The scanned documents are
saved in the root of the folder specified in the Storage Location.
Documents are put into folders by month, week, or type—
Folders are created based on your selection (month, week, or
type) and the scanned documents are saved in those folders.
New folders are created for each month and week so you can
keep track of when you scanned the documents.
2. Click the Browse button to specify the location to store the
scanned documents, or type a location directly into the box.
If you are scanning to a shared network drive, it must be a
mapped drive. For more information about mapped drives, see
your network administrator.
3. If you have a CD burner attached to your computer, the option
Show message when ready to burn 5" CD (700MB), should
be selected.
You’ll see a message when it’s time to click the Burn to CD
button.
4. Click OK.
5. Click OK or Apply on the One Touch Properties window.
DocuMate 272 Scanner User’s Guide
37
Scanning
eMail Properties
These properties apply to eMail applications so you can specify the
folder for documents that you will attach to an eMail message.
Microsoft Outlook and AOL Version 9 accept direct attachment of
documents to a blank eMail message as soon as scanning is
finished, but other eMail applications do not. If you’re using one of
those applications, you need to know which folder contains the
scanned documents so you can manually attach them to your
eMail messages.
1. Click the Browse button for Folder for storing attachments
and choose a folder for your eMail attachments.
2. Click the Browse button to specify the location to store them,
or type a location directly into the box.
See the steps on page 36 to add an application.
3. If you are using America Online (AOL) on your computer, and
the folder name for AOL is incorrect, click the Browse button
and find the correct AOL folder.
Normally the folder that AOL uses to store attachments will be
listed in the box. For AOL versions prior to version 9.0, the
folder has to be the specific folder AOL uses to find
attachments. AOL 9.0, however, can attach documents
automatically after scanning is finished.
4. If you need to set or change any internet options for AOL click
the Internet Options button.
The Windows Internet Options Control Panel appears. See
your Windows documentation and AOL user manual for the
settings on the Windows Control Panel.
38
DocuMate 272 Scanner User’s Guide
Scanning
5. Select the options for color document handling.
Convert Bitmaps using Screen Resolution—Use this option
to ensure that an image will fit on the computer’s screen. When
a computer screen is set to a lower resolution, bitmap images
with a higher resolution may be too big to fit on the screen.
Converting the bitmap image to match the screen resolution
ensures that the image fits on the screen.
Convert Bitmaps to JPEG—JPEG files can be compressed to
produce smaller files sizes and, therefore, shorter transmission
times. Use this option to provide that compression capability to
image files.
6. Click OK.
7. Click OK or Apply on the One Touch Properties window.
Selecting Page Format Options
The Page Format options that you select determines the file format
of the scanned document. Appropriate page format options and file
types are available for the type of Destination Application selected
for the button.
The available options are for images and text.
Image Formats
Text Formats; sPDF is
only one of several text
formats available.
The Text Formats are for text file types. The names of the formats
indicate their file types. See “Text Formats” on page 41 for details.
Image Formats
Select an image file format for photos, artwork or other documents
that you want to save as images. BMP and TIFF are standard
image file formats generally used if you want to do additional image
processing, such as photo touch-up or color correction. Both of
those file formats tend to be larger than the JPEG format.
DocuMate 272 Scanner User’s Guide
39
Scanning
Because JPEG image files can be reduced in size, the JPEG
format is often used for images on web pages, or if file size might
be a problem when electronically sending the files. JPEG files are
reduced in size by lowering their image quality, and you can select
the degree of quality for your scanned images from the JPEG file
format icon.
The PDF format is often used to create images of text pages. You
may want to select PDF as the page format when scanning text
pages that do not require OCR processing or other processing.
The PDF format is also used to put multi-page documents on web
sites as pdf-readable files. As with the JPEG option, the PDF
format can be reduced in size or quality.
NOTE: The two other PDF formats—nPDF and sPDF—are for
scanning with OCR processing and with the ability to search the
scanned text. See the next section, “Text Formats,” and also
“Scanning with sPDF or nPDF and Searching for Text” on
page 62 for details.
To select a JPEG or PDF file size:
1. Select JPG or PDF as the page format.
2. Right-click on the JPG or PDF icon.
A menu appears.
3. Choose the file size/image quality option for your scanned
images.
Minimize Size—Smallest file size, lowest image quality.
Normal—Medium file size, some loss of image quality.
Maximize Quality—Largest file size, no loss of image quality.
Your selection pertains only to the button currently selected on
the One Touch Properties window. Other buttons that have
JPG or PDF selected as the Page Format are not affected, so
you can set the JPEG or PDF file size/image quality
independently for each button.
4. Click OK or Apply on the One Touch Properties window.
40
DocuMate 272 Scanner User’s Guide
Scanning
Text Formats
Selecting the text format option also selects OCR processing as an
automatic step for scanning. Therefore, when you scan a
document with the text format selected, the text portions of the
document are automatically converted to editable text. See
“Scanning with Optical Character Recognition (OCR)” on page 55.
Select a text format for documents with text or numbers, such as a
business letter, report, or spreadsheet. The text format icon has
several file formats available, depending on the Destination
Application you select.
The specific file format is the file name extension on the text format
icon.
The specific text format; this
example is for Microsoft Word
format (.doc).
As you select Destination Applications that are text applications,
the text format icon changes to match the file type of the
application. In some cases, the Destination Application supports
several file types, and you can right-click on the icon to choose the
particular file type for that application.
To select a file type for the text format:
1. Select the Destination Application.
2. Right-click on the text format icon.
A menu appears. The following figure shows samples for
different formats.
Example menu for the
DOC text format.
DocuMate 272 Scanner User’s Guide
Example menu for the
nPDF text format.
41
Scanning
3. Choose the file type that you want for the text format.
Your selection of a file type pertains only to the button currently
selected on the One Touch Properties window. Other buttons
that have a text option selected as the Page Format are not
affected, so you can set the text file type independently for
each button.
Simple Text—The .txt file format. Text with no formatting; used
by the standard Microsoft Notepad application.
Rich Text Format—The .rtf file format. Text that retains
formatting when converted. Available with Microsoft Wordpad
and Word.
Word Document—The .doc file format used by Microsoft
Word.
Comma Delimited—The .csv file format; used for database or
spreadsheet data with fields separated by commas. When the
document is converted into editable text by the OCR software,
the fields are maintained so you can copy and paste them to a
database or spreadsheet application.
Excel Spreadsheet—The .xls file format used by Microsoft
Excel.
HTML Document—The .htm file format used to create web
pages.
Searchable PDF—The .sPDF file format used by Adobe
Acrobat and OmniPage Pro 12. This format converts scanned
text into PDF with text search and OCR capabilities. It is only
available if you have installed OmniPage Pro 12 on your
computer. See “Scanning with sPDF or nPDF and Searching
for Text” on page 62 for details.
Normal PDF—The .nPDF file format used by Adobe Acrobat
and OmniPage Pro 12. This format also converts scanned text
into PDF with text search and OCR capabilities, plus you can
edit the text in an nPDF image if you have a PDF editing
program. The nPDF format is also only available if you have
installed OmniPage Pro 12 on your computer. See “Scanning
with sPDF or nPDF and Searching for Text” on page 62 for
details.
4. To change the OmniPage OCR settings, choose OCR
Options. This menu selection is not available when the
Destination Application is NotePad or Microsoft Internet
Explorer.
42
DocuMate 272 Scanner User’s Guide
Scanning
The OCR Options provide a series of selections for the OCR
feature when you scan text. This menu option is only available
if you have installed OmniPage Pro 12 on your computer. See
“Selecting OmniPage OCR Options” on page 56 for details.
Note that the OCR Options settings apply to all buttons. If you
change them for one button, those changes apply to the other
buttons as well.
5. Click OK or Apply on the One Touch Properties window.
Renaming a One Touch Button
The One Touch buttons have names that identify their pre-set
functions, such as OCR and PDF, but you can edit the names.
To change the button names:
1. Open the One Touch Properties window.
2. Using the arrows, choose the button that you want to rename.
3. Select the name’s text and type a new name.
Click the arrows to get to
the button to rename, then
select the name text.
Type a new name for the
button.
4. Click OK or Apply.
The button is now renamed.
Selecting Options for a Button
The One Touch Options determine the types of Destination
Applications available for a button, as well as the location of the
files of your scanned items.
DocuMate 272 Scanner User’s Guide
43
Scanning
To select options:
1. Open the One Touch Properties window and click the Options
tab.
Options tab
2. Click the menu arrow and choose the button for new options.
3. Select button options as described below.
Show All Destinations—This option selects all the Destination
Application categories. The list of Destination Applications
available for the selected button will include all the applications
on your computer that fall into these categories. This is the
default selection for Button 8. The list also includes printers and
other devices connected to your computer so, for example, you
can scan an item and have it printed immediately.
Select Destinations—Select this option to individually choose
the types of applications to include in the list of Destination
Applications. Check the boxes for the type of application to
include.
44
•
Document Management includes PaperPort and other
applications for processing and keeping track of your
scanned documents.
•
Image Editors include Microsoft Paint and other drawing
and graphics applications.
•
Text Editors include Microsoft Word and WordPad,
Microsoft Excel, and other word processing and
spreadsheet applications. Select this option if you want
OCR processing to convert your scanned documents to
text that you can edit. See “Scanning with Optical Character
Recognition (OCR)” on page 55 for more about OCR.
DocuMate 272 Scanner User’s Guide
Scanning
•
PDF applications are for documents scanned to PDF
format.
•
Email includes Microsoft Outlook and other eMail
applications. If you are using Microsoft Outlook or AOL
Version 9.0 (or later) your scanned documents are added to
a blank eMail message.
•
Storage and CD-R/W is for either storing scanned
documents in a folder, or sending them to a CD burner to
create a CD containing the scanned documents. See
“Transferring Scanned Documents to Storage” on page 69
and “Scan and Burn to a CD” on page 64 for details.
•
Fax and Print is for sending your scanned documents
directly to your printer or fax software for faxing.
•
Sti event forwarding is for using another application’s
interface for scanning. The One Touch Event Forwarding
dialog box appears so you can select which application to
use to continue scanning. See “Scanning with Event
Forwarding” on page 65 for details.
4. After selecting a new category of Destination Applications, click
the Multi Function tab to see which ones are added to the list.
Show Progress Window—Select this option to display the
progress window of the document(s) during scanning.
Create copies of scanned documents—Select this option if
you want a copy of your scanned documents to be saved in the
folder specified in the Folder Copy Options section. Note that
these copies are in addition to the scanned files sent to the
Destination Application. For example, if the Destination
Application is Microsoft Word, two copies are saved—one in
the Word folder and the other in the copy location folder. This
option is not available if you have Document Management or
Storage and CD-R/W selected as the Destination Application
type.
Folder Copy Options—Type the name and path of the folder
where you want to store copies of scanned documents, or click
the Browse button and find the folder for the copies. Select the
grouping option for the documents. The Group by button option
groups the documents under the name of the One Touch
button. For example, if the button is named Printer, the
documents are grouped under the name Printer. Group by type
groups the scanned documents by the type of file, such as .doc
or .jpg. If you also want to group them by date you can choose
the week and month options.
5. Click OK to save the options for the selected button.
DocuMate 272 Scanner User’s Guide
45
Scanning
Creating a New Scan Configuration
The scan configurations are where you select the scanning
resolution, brightness, mode (color, black&white, or grayscale),
and a number of other settings.
The Scan Configurations.
The Lock Icon.
Click New to create a
new Scan Configuration.
Note the lock icon on the preset configurations. Although you can
unlock and edit the preset configurations, we recommend that you
leave them locked, and only add new configurations. That way, you
will always have the original factory-set configurations available.
To create a new configuration:
1. Open the One Touch Properties window and make sure the
Multi Function tab is selected.
2. Scroll through the applications in the Select Destination list and
click the type of application for which you want to create a new
scan configuration.
When you create a new scan configuration, it will appear for the
buttons that are set for the same types of Destination
Applications. For example, if you create a new configuration for
a button that is set to show image editor applications, that new
configuration also appears for any other buttons set for image
editors, but not for buttons set for text editing applications.
Thus, you can create specific sets of scan configurations for
specific functions and they appear only when appropriate.
3. Click the New button.
If you want to start from the settings of another configuration,
select the configuration, then click the Copy button.
If the Scan Settings tab is not selected, click it.
4. On the Scan Configuration Properties dialog box, type a name.
46
DocuMate 272 Scanner User’s Guide
Scanning
TIP: If you’re going to set up the new configuration to scan
duplex (two-sided), include that in the name, such as “Scan for
Dark Print (Duplex),” to remind you that it is a duplex scan.
If the configuration
is locked, click the
lock to unlock it. The
icon becomes a key.
Type a new name for
the configuration.
Select the scan mode
and drag the slider to
set the resolution.
Drag the sliders to set
the Brightness and
Contrast.
NOTE: If you select a printer or other device in the Select
Destinations list, the dialog box may have an additional Device
Settings tab for setting specific options for the particular device.
5. Select scan settings for the new scan configuration.
Mode—Select a scanning mode:
•
Black&White to scan in black and white. For example,
letters and memos are usually scanned in black and white.
This scan mode produces the smallest file size.
•
GrayScale to scan items such as documents containing
drawings or black and white photographs. The scanning
produces an image of up to 256 shades of gray.
•
Color to scan color photographs and other color items.
Color scans have the largest file size.
Resolution—Drag the slider to the right or left to adjust the
dots per inch (dpi) of the resolution. The maximum resolution is
600 dpi; the minimum is 50 dpi. The higher the dpi setting, the
sharper and clearer the scanned image. However, higher dpi
settings take longer to scan and produce larger files for the
scanned images.
Brightness and Contrast—Sometimes an item is scanned
with the brightness and contrast set too light or too dark. For
example, a note written with a light pencil may need to be
scanned darker to improve legibility.
DocuMate 272 Scanner User’s Guide
47
Scanning
Brightness refers to the lightness or darkness of the image.
Contrast is the range between the darkest and lightest portions
of the image. The greater the contrast, the more difference
between the lighter and darker shades in the image.
Drag the sliders to the right or left to adjust the brightness and
contrast of the scanned image. The Contrast setting does not
apply to the Black&White mode.
6. If you want to lock the configuration, click the lock icon to
change it from a key to a lock.
7. Click the Page Settings tab to select page settings.
Click to toggle
between inches
and centimeters.
Size—Click Standard, click the menu arrow and choose a
page size from the list, or click Custom and enter the horizontal
and vertical page dimensions in the boxes. The maximum size
is 8.5" x 14". The units of measurement can be inches or
centimeters. Click the name of the units, inches or centimeters,
to toggle between them.
Improvements and Settings—Only the options that apply to
the selected Destination Application are available.
•
AutoCrop to Original—Select this option to let the
scanner automatically determine the size of the item being
scanned. For example, if you scan a 5 by 7 inch photo, the
scanner will determine the size of the photo.
When using the AutoCrop to Original option, always use the
paper guides on the scanner so the page is not skewed.
Skewed pages may not scan properly.
For single-sided scans, the scan area is the size of the
image. For double-sided scans, the scan area is the size of
the larger of the two areas on the front and back of the
page.
48
DocuMate 272 Scanner User’s Guide
Scanning
•
Straighten Image—Select this option to let the scanner
automatically determine if a page is skewed, and then
straighten its image. The scanner detects page edges and
can sense when the page is fed through at an angle.
However, if the page is fed through at too great an angle,
the image may not scan correctly. In that case, re-scan the
page using the paper guides to feed the paper in straight.
•
Reduce Moire Patterns—Moire patterns are wavy, rippled
lines that sometimes appear on the scanned images of
photographs or illustrations, particularly newspaper and
magazine illustrations. Selecting Reduce Moire Patterns
will limit or eliminate moire patterns in the scanned image.
This option is only available for the Grayscale or Color
Mode at 200dpi or less.
•
Invert Image—Only available for Black&White Mode, this
option reverses the black and whites of an image.
Original Image
•
Inverted Image
Duplex—Scan both sides of the page. If this option is not
selected, the scanner will scan the front side of the page
only.
NOTE: Because you can set Duplex and Simplex for the One
Touch buttons, there could be a conflict when you press the
Simplex or Duplex button on the scanner. Regardless of the One
Touch setting, the scanner button always takes precedence. In
other words, even if the LED number on the scanner has a
setting for Duplex, when you press the Simplex scanner button
the scanner scans in Simplex mode, and vice versa.
•
DocuMate 272 Scanner User’s Guide
Skip Blank Originals—Skips pages that are completely
blank. Typically you use this option when you will scan a
stack of two-sided pages which have a number of blank
sides. This option is only available for Duplex scanning.
49
Scanning
•
Color Filter—Color filter is the ability of your scanner to
automatically remove a color from a scanned item. For
example, if you are scanning a letter with a red watermark,
you can choose to filter out the red so the scanned letter
just shows the text and not the red watermark. Color filter
applies to Black&White or Grayscale Mode.
The original with a red
watermark over black text.
The scanned item with the
red filtered out.
8. Click the Advanced Settings tab.
The options of the Advanced Settings tab are for the Color or
Grayscale scanning mode.
Saturation is the strength or purity of a color, hue is the color
your eyes see as reflected from the image, and gamma
controls the brightness of the midtones of the color.
9. Drag the sliders to the left and right to change the color
settings. As you do, the image changes to show the effects of
the new settings.
10. Click OK to save the new configuration.
It will now appear in the list of Scan Configurations on the One
Touch Properties window for the appropriate Destination
applications.
50
DocuMate 272 Scanner User’s Guide
Scanning
The Device Settings Tab
A Device Settings tab appears on the Scan Configurations dialog
box when your selected Destination Application sends the scanned
image to a printer, fax application, or other device. You use the
options on the Device Settings tab to select settings for the device.
1. Click on the Device Settings tab.
Fit to page, reduce image if necessary—If the scanned
image is too big to be printed or faxed on a single page, the
image will automatically be reduced to fit the page.
Actual size, crop image if necessary—If the scanned image
is to big to be printed or faxed on a single page, the image will
automatically be cropped around its edges to fit on the page.
Center image on page—The image will be printed in the
center of the page instead of at the top right corner.
Maintain aspect ratio—The aspect ratio is the length-to-width
relationship of the image’s dimensions. Select this option so
the image’s relative proportions remain constant.
AutoRotate image for best fit—If the image is a Landscape
format and the device is printing in the Portrait mode, or vice
versa, rotate the image to fit on the page.
Collate copies—If you’re printing more than one page, collate
the copies. Enter the number of copies in the Copies box.
Advanced—Click to see additional settings for the device. The
dialog that appears is specific to the device. For example, if the
device is your printer, the dialog box is your printer’s setup
settings.
2. Click OK or Apply.
DocuMate 272 Scanner User’s Guide
51
Scanning
The Storage Options Tab (Archive)
A Storage Options tab appears on the Scan Configurations dialog
box when the selected Destination Application is set as Transfer to
Storage. You use the options on this tab to select where you want
to save your scanned items for storage when scanning with that
particular Scan Configuration. Button 7 is set as the default Archive
button for scanning to storage, with Transfer to Storage as the
destination. So if you want to have the Scan Configuration apply to
Button 7, switch to it first before creating the new Scan
Configuration.
NOTE: The selections you make using the Storage Options tab
override the storage options that apply to the Storage Properties.
This means that you can create separate Scan Configurations to
store scanned items at various locations in addition to the main
location set by the Storage Properties. See “Storage Properties”
on page 37 and “Transferring Scanned Documents to Storage”
on page 69 for more details.
1. Click on the Storage Options tab.
2. Click the Storage Layout options you want.
All documents are in the root—The scanned documents are
saved in the root of the folder specified in the Storage Location.
Documents are put into folders by month, week, or type—
Folders are created based on your selection (month, week, or
type) and the scanned documents are saved in those folders.
New folders are created for each month and week so you can
keep track of when you scanned the documents.
3. Click the Browse button to specify the location to store the
scanned documents, or type a location directly into the box.
4. Click OK or Apply.
52
DocuMate 272 Scanner User’s Guide
Scanning
Editing or Deleting Scan Configurations
To edit or delete a scan configuration:
1. Open the One Touch Properties window.
2. Select the scan configuration you want to edit or delete.
Select the scan configuration
to edit or delete. It must be
unlocked, as indicated by not
having a lock displayed here.
3. To delete the configuration, click the Delete button.
4. To edit the configuration, click the Edit button.
The Scan Configuration Properties dialog box opens for that
configuration.
To edit or delete a configuration, it must first be unlocked. Click
the Lock icon to unlock the configuration. Clicking it toggles
between locking and unlocking the configuration.
Click the Lock icon to toggle
between locked and unlocked.
5. Edit the settings and click OK.
6. Click OK to close the dialog box.
DocuMate 272 Scanner User’s Guide
53
Scanning
Configuring Before Scanning
You can manually configure the scan settings before beginning the
scanning process. In that case, you select Configure Before Scan
as the Scan Setting. When you press a scan button, one of the
scanning interfaces appears for you to set the scanning options.
To configure before scanning:
1. Open the One Touch Properties window.
2. Using the arrows, choose the button that you want to set to
configure before scanning.
3. Select the scan configuration Configure Before Scan.
Click the arrows to
select the button.
Select Configure
Before Scan.
Right-click on
Configure Before Scan
to get the menu, and
choose the interface to
use for configuring.
4. Right-click on Configure Before Scan and choose an interface
to use for configuring before scanning.
TWAIN—The Basic Interface or Advanced Interface appears
for you to configure the scanning. See “Scanning from the
Basic Interface or Advanced Interface” on page 74.
VirtualReScan—The Kofax VRS TWAIN interface appears for
you to configure the scanning.
ISIS—The ISIS Scan interface appears for you to configure the
scanning. See “Maintenance” on page 105.
WIA—The Windows Image Acquisition Interface (WIA)
appears for you to configure the scanning. See “Scanning with
the Windows Image Acquisition” on page 95.
NOTE: The WIA option is only available if your computer is
running Microsoft Windows XP or Me.
5. Click OK or Apply on the One Touch Properties window.
54
DocuMate 272 Scanner User’s Guide
Scanning
Scanning with Optical Character Recognition (OCR)
Optical Character Recognition (OCR) is like a printer in reverse.
Instead of printing what’s on the screen onto paper, OCR converts
text and numbers on a scanned page into editable text and
numbers. You can then work with the text and numbers to edit,
spellcheck, change font or type size, sort, calculate, and so forth.
You must have installed the OmniPage Pro 12 software on your
computer in order to use the OCR options with the One Touch 4.0
software and your Xerox DocuMate 272 scanner. One Touch 4.0
and OmniPage Pro 12 work together to combine scanning with
OCR processing into one integrated step. OmniPage Pro 12 is on
the Disc 2 CD that you received with your scanner in case you
haven’t installed it yet.
If OmniPage Pro 12 is installed, the OCR process is automatic
when the page format on the One Touch Properties window is a
text format, such as DOC, TEXT, XLS, RTF, and so forth.
NOTE: If OmniPage Pro 12 is not installed on your computer,
items scanned as a text format are still converted with the OCR
process, however the options available with the process are
then limited.
NOTE: One Touch Button 6 is preset as your OCR button. But
you can also set up any other button to scan and OCR the text.
To scan with OCR:
1. To scan using the buttons on the scanner, press the Destination
Selector until the LED is at 6, then press the Simplex or
Duplex button.
DocuMate 272 Scanner User’s Guide
55
Scanning
2. To scan from the One Touch Button Panel, click the One Touch
icon in the Windows system Tray, click the arrows to see Button
6, then click Button 6.
Click the arrows until
Button 6 is on the panel,
then click Button 6.
Your scanned pages appear in the Destination Application with
their text ready for editing and other text processing.
NOTE: OCR scanning is also for spreadsheets so you can work
in Microsoft Excel (or other spreadsheet application) with the
figures and text from the original spreadsheets.
Selecting OmniPage OCR Options
The OCR Options are only available if you have installed
OmniPage Pro 12 on your computer. Scanning to PaperPort to use
its OCR capabilities does not offer the options in this section.
NOTE: OmniPage OCR options apply globally to all the One
Touch buttons that perform OCR. For example, Button 6 is set
by default to OCR text, but Button 8 is not. If you reconfigure
Button 8 to also OCR text, the OCR options you select for Button
8 will also apply to Button 6.
To select OmniPage OCR options:
1. Open the One Touch Properties window.
2. Using the arrows, choose a button that has Destination
Applications that use the text format as their file type.
3. Select the Destination Application to get one of the text format
file types as the page format.
4. Right-click on the page format icon to see the menu.
56
DocuMate 272 Scanner User’s Guide
Scanning
5. Choose OCR Options from the menu.
The OmniPage OCR Options window opens with the OCR tab
selected.
6. Choose the options you want from the OCR window.
Languages in Document—Select the language(s) in the
documents to be scanned. These are the languages that will be
recognized during the OCR process. For faster and more
reliable language recognition, select only the languages in the
document.
The languages at the top of the list are your recent choices.
Below that the languages are in alphabetical order. Type a
letter to jump to one of the languages in the list.
The dictionary icon indicates a language with dictionary support
available. The dictionary is consulted to help in the OCR
process. It can also offer suggestions during proofing.
User Dictionary—A user dictionary is your personal dictionary
with words that you want the OCR proofreading process to
recognize as legitimate words. For example, if you scan
documents with highly technical terms not found in typical
dictionaries, you can add them to your personal dictionary. You
DocuMate 272 Scanner User’s Guide
57
Scanning
can also add names that you expect to be in the documents
too. That way, when the OCR process proofreads the text,
names will not be considered misspelled words.You can create
multiple user dictionaries.
Click the menu arrow and select a user dictionary from the list.
Any Microsoft Word user dictionaries detected on your
computer system are also listed. A dictionary named Custom is
your default Word dictionary.
To create a user dictionary, click the button next to the menu
arrow. Click New, type a name for the dictionary, and click OK.
Click Close and then choose your new dictionary from the list.
It will be used during the OCR process. You add words to a
dictionary during the proofreading process. To turn on the
proofreading process for your scanned documents, see the
OmniPage Pro 12 documentation.
Professional Dictionaries—These are legal and medical
dictionaries containing highly specialized words and phrases.
The options are: Dutch Legal, Dutch Medical, English Legal,
English Medical, French Legal, French Medical, German Legal,
and German Medical. Click the checkbox next to a dictionary
name to select it.
Reject Character—This is the character that the OCR process
inserts for an unrecognizable text character. For example, if the
OCR process cannot recognize the J in REJECT, and ~ is the
reject character, the word would appear as RE~ECT in your
document. The ~ is the default reject character.
Type the character you want to use in the Reject character box.
Try to choose a character that will not appear in your
documents.
Font Matching—Your computer system usually has a number
of fonts available for the OCR process to use to recognize text.
However, not all of the fonts may be selected for the OCR
process. Using Font Matching you can select the fonts on your
computer that match the fonts in your documents.
58
DocuMate 272 Scanner User’s Guide
Scanning
Click the Font Matching button to see the Font Matching
dialog box.
The list on the left are the fonts available on your computer
system. The list on the right are the fonts that will be used by
the OCR process to recognize the text in your documents. If
possible, the list of Fonts for your document should include
all the fonts in the documents you plan to scan. To add new
fonts to that list, select a font in the Fonts on System list and
click Add. Note that when you select a font, a sample appears
in the text box so you can compare it with the fonts in your
document to see if that’s the right font. To remove a font, select
it and click Remove. To return the lists to their defaults, click
Use Defaults. Click OK when you’re finished.
7. Click the Process tab and choose the options from the Process
window.
When bringing in a new image—Click the menu arrow and
select where you want new pages added to your current
document. The choices are After last page, After current
page, Before current page, and Before first page.
Automatically prompt for more pages—Select this option if
the document is too big to fit into the scanner’s paper guide.
DocuMate 272 Scanner User’s Guide
59
Scanning
Automatically correct page orientation—Select this option to
have the OCR process check orientation and automatically
rotate an improperly oriented page image by 90, 180 or 270
degrees prior to recognition. All pages are automatically
straightened (de-skewed) if necessary.
Retain text and background color—If your document
contains colored text or backgrounds, select this option to have
them detected and displayed in the text editing application you
have selected. The colored text and backgrounds will also be
available for export. Deselect this option if you want color
pictures in the document but do not want colored text and
backgrounds. You can change the color of texts and
backgrounds in the OmniPage Pro 12 Text Editor.
Retain inverted text—Inverted text is white or pale letters on a
black or dark background. Select this option to retain inverted
text, deselect it to have inverted text transformed to normal text
of black text on a white background.
Look for facing pages—Select this option if you want to scan
two facing pages of an open book in one step, and then to
recognize and store them as two separate pages (as if they had
come from two separate scannings).
User interface language—English is the interface language.
8. Click the Format tab and choose the options you want from the
Format window.
Note that as you select formats, the image changes to
represent the selection so you can see, at a glance, what the
layout will look like.
60
DocuMate 272 Scanner User’s Guide
Scanning
Automatic—Choose this option to let the OCR process
determine the layout of the pages. It is the fastest type of
format processing. Typically you select this option when the
document has different or unknown types of layouts, pages
with multiple columns and a table, or pages containing more
than one table. The OCR process will then determine if text is
in columns, an item is a graphic or text, and tables are present.
Single Column no Table—Choose this option if the document
contains only one column of text and no tables. Business
letters are normally in this form. You can also use this option for
documents with words or numbers in columns if you do not
want them placed in a table or decolumnized or treated as
separate columns.
Multiple Columns, no Table—Choose this option if some
document pages contain text in columns and you want it kept in
separate columns, similar to the original layout. If table-like
data is encountered, it is placed in columns, not in a gridded
table.
Single Column with Table—Choose this option if your
document contains only one column of text and a table. The
table will be placed in a grid in the text editing application you
have selected. You can later specify whether to export it in a
grid or as tab-separated text columns.
Spreadsheet—Choose this option if the entire document
consists of a table that you want to export to a spreadsheet
program, or have treated as a table. No flowing text or graphics
zones will be detected.
Template—If you created a zone template in OmniPage Pro
12, choose a zone template file to have its background value,
zones and zone properties applied to all OCR scanned pages
from now on.
No Formatting (NF)—The document will be plain text,
decolumnized and left-aligned in a single font and font size.
You can export plain text to nearly all file types and target
applications, and graphics, tables and bullets can be retained.
When exporting to Text or Unicode file types, graphics and
tables are not supported.
Retain Fonts and Paragraphs (RFP)—This output format
retains the font and paragraph styling, including graphics and
tables without columnized text. This output format is available
for nearly all file types.
Flowing Page (FP)—This format keeps the original layout of
the pages, including columns. This is done wherever possible
with column and indent settings, but not with text boxes or
frames. Text will then flow from one column to the other, which
does not happen when text boxes are present.
DocuMate 272 Scanner User’s Guide
61
Scanning
True Page (TP)—This output format keeps the original layout
of the pages, including columns. This is done with text, picture
and table boxes and frames. True page is offered only for target
applications capable of handling the formatting. True Page
formatting is the only choice for XML export and for all PDF
export, except to the file type “PDF Edited”.
9. When you’re finished selecting the OCR options, click OK on
the Options window.
These options will now apply to the OCR processing when you
select any scan button with a text format as the page format.
Scanning with sPDF or nPDF and Searching for Text
Searchable PDF (sPDF) and Normal PDF (nPDF) are special
forms of an Adobe PDF file. sPDF converts scanned text into the
PDF format with text search and OCR capabilities. nPDF has those
same features, plus you can edit the text in an nPDF image if you
have a PDF editing program.The two PDF formats can also
produce images with different image quality, so you may want to
experiment with them to determine which is better for your scanned
documents. sPDF and nPDF are only available as page format
options if you have installed OmniPage Pro 12 on your computer.
To scan with sPDF or nPDF:
1. Open the One Touch Properties window.
2. Using the arrows, choose a One Touch button to use for the
sPDF or nPDF scanning.
3. Select a Destination Application that uses a text format as the
page format.
4. Right-click on the text format icon.
5. Choose the Searchable PDF or Normal PDF option for the
page format.
62
DocuMate 272 Scanner User’s Guide
Scanning
NOTE: Not all Destination Applications have the sPDF and
nPDF options. Microsoft Word, for example, does not have them
as scanning options.
The settings for the button (button 8 in this example) now show
your page format selection.
The page format
icon is now set to
the selection from
the menu.
6. Choose a Scan Configuration.
7. Click Apply or OK.
8. Now scan with that button and the scanned document will be in
the sPDF or nPDF format that was selected for the button.
NOTE: The Transfer to Storage selection for a Destination
Application also has the sPDF and nPDF options. That means
you can scan and store items directly to a server in these
formats.
9. To search for the text, open Adobe Acrobat Reader or Adobe
Acrobat.
10. From the Adobe Acrobat File menu choose Open, and open
the file you just scanned.
11. From the Adobe Acrobat Edit menu choose Find.
The Find dialog box appears.
DocuMate 272 Scanner User’s Guide
63
Scanning
12. Enter the text you want to find, and click the Find button.
See the Adobe Acrobat user manual for more about finding text
in a PDF file, or about editing PDF text.
Scan and Burn to a CD
If you have a CD burner attached to your computer, you can scan
directly from your Xerox DocuMate 272 scanner onto a CD. This
feature is available only on computers running Windows XP.
To scan and burn to a CD:
1. Put a blank CD into your computer’s CD Drive.
2. Open the One Touch Properties window.
3. Using the arrows, choose a button to use for scanning and
burning to a CD.
4. Select Burn to CD as the Destination Application.
The Burn to CD Destination Application is only available if you
have a CD burner attached to your computer, but you do not
need to have a CD in the burner to select the destination.
5. Choose a Page Format and a Scan Configuration.
6. Click Apply or OK.
7. Now start scanning using the button you selected to use to
scan and burn to CD.
When scanning is finished, a bubble message on the screen
tells you that files are waiting to be burned to the CD.
64
DocuMate 272 Scanner User’s Guide
Scanning
8. On the One Touch window, make sure that the Burn to CD
Destination Application is still selected and click the Properties
button.
The One Touch 4.0 Link Properties window appears,
9. Make sure a CD is in the CD burner.
10. Click the Burn to CD button.
The CD burner begins and your scanned documents are
written to the CD.
Scanning with Event Forwarding
If you want to specify an application to use for scanning at the start
of the process, you can use event forwarding. The scanner will
feed in the first page, but will then stop until you select the
application to use. After you select the application, its interface will
open and you can use it to continue with the scanning.
To scan with event forwarding:
1. Open the One Touch Properties window.
2. Using the arrows, choose a button to use for the event
forwarding.
DocuMate 272 Scanner User’s Guide
65
Scanning
3. Select Still Image Client as the Destination Application.
Note that you cannot choose a page format for this option
because the actual destination application is not selected until
after the scanner feeds in the first page of your document.
4. Choose a Scan Configuration.
5. Click Apply or OK.
6. Start scanning using the button you selected for event
forwarding.
A dialog box appears for you to select the application to use for
scanning.
7. Select the application in the box and click OK.
Now the application you selected opens and you can continue
the scanning from that application’s TWAIN interface.
66
DocuMate 272 Scanner User’s Guide
Scanning
Creating an HTML Web Page from Your Scanned Documents
If you scan a document, whether a single page or multiple pages,
you can have the pages converted directly to html formatted pages
for posting directly to your web site. Those pages are then
viewable by visitors to your web site without the need for any
internet plug-ins or other special processing. This is, essentially,
from your scanner to a web-ready format in one automatic step.
To scan and create an HTML web page:
1. Open the One Touch Properties window.
2. Using the arrows, choose Button 6, or any other button that has
Microsoft Explorer as one of its Destination Applications.
3. Select Microsoft Explorer as the Destination Application.
4. Choose HTML as the Page Format.
Choose HTML
5. Choose a Scan Configuration.
6. Click Apply or OK.
DocuMate 272 Scanner User’s Guide
67
Scanning
7. Now on the One Touch Button Panel, click Button 6 (or if you
used another button, click it).
When scanning is finished, the document is first converted to
editable text using the OCR process, and then is converted into
an HTML format. Microsoft Internet Explorer then opens
showing your converted page.
8. Choose Save As from the Internet Explorer File menu, give the
page a name, and save it in the location you use for your web
page files.
You may also want to write down the address shown in the
Address bar to make sure you’ll know where to find your new
HTML page later on.
If you want to see what the page will look like on your web site,
click on it.
9. You can now use Microsoft Internet Explorer or other
application to post the document to your web page as you
would any other HTML page.
68
DocuMate 272 Scanner User’s Guide
Scanning
Transferring Scanned Documents to Storage
With the Transfer to Storage scanning process, you can scan
documents and save them in a folder in one step. The process is
ideal for archiving documents without having to manually save or
process them in any other way. If you choose a text format for the
file format, the documents are also automatically converted by the
OCR process into editable text and numbers before being stored.
NOTE: One Touch Button 7 is preset as your Archive button.
But you can also set up any other button to scan to Archive the
text.
1. To scan using the buttons on the scanner, press the Destination
Selector until the LED is at 7, then press the Simplex or
Duplex button.
2. To scan from the One Touch Button Panel, click the One Touch
icon in the Windows system Tray, click the arrows to see Button
7, then click Button 7.
Click the arrows until
Button 7 is on the panel,
then click Button 7.
Your scanned pages are stored in the location that you
specified on the One Touch 4.0 Link Properties window.
Your scanned documents
will be stored at this location.
DocuMate 272 Scanner User’s Guide
69
Scanning
To Use OCR Before Transferring to Storage
If the documents you want to transfer to storage are text
documents or spreadsheets, you can have them converted by the
OCR process prior to being stored.
1. Open the One Touch Properties window.
2. Using the arrows, choose Button 7, or any other button if it is
set up with Transfer to Storage as one of its Destination
Applications.
3. Choose a text format as the file format.
4. Right-click on the text format icon and choose the file format for
the scanned documents.
5. Choose a Scan Configuration.
6. Click Apply or OK.
7. Now start scanning using Button 7 (or other button you set up
for archiving).
When scanning is finished, the documents are saved in the text
file format and in the location you specified.
70
DocuMate 272 Scanner User’s Guide
Scanning
Checking the Hardware and Setting the Lamp Power Saving
1. Right-click on the One Touch icon and choose Show
Hardware from the pop-up menu.
You can also click the scanner icon at the top of the One Touch
Button Panel.
The Hardware icon
If the Hardware View of the panel is open you can also rightclick on the DM272 icon.
The Hardware Properties dialog box appears and shows
information about your Xerox DocuMate 272 scanner.
DocuMate 272 Scanner User’s Guide
71
Scanning
2. Click the Properties button.
Your scanner has a built-in power saving feature that is set to
power down after 15 minutes of idle time. You can change the
time before the scanner powers down, from 10 minutes to a
maximum of 10 hours.
3. Click the arrows for the Lamp timeout setting and choose a
time setting.
To turn the lamp on and off manually without turning off power
to the scanner, click the Lamp On or Lamp Off buttons.
To return the scanner to its factory settings, click Reset Device.
4. Click OK to save the changes and close the dialog box.
72
DocuMate 272 Scanner User’s Guide
Scanning from PaperPort
Scanning from PaperPort
Instead of using the scanner buttons or the One Touch Button
Panel to scan, you can scan from PaperPort.
You scan from PaperPort using the Basic Interface, Advanced
Interface, or the Windows Image Acquisition (WIA). See “Scanning
with the Windows Image Acquisition” on page 95 to scan using the
Windows Image Acquisition.
The Basic Interface and Advanced Interface use the TWAIN
standard for scanning. TWAIN is a widely recognized method that
computers use to receive images from scanners, digital cameras,
and other digital devices. Many other graphics and imaging
applications also comply with the TWAIN standard, so you can use
your scanner with those applications too.
NOTE: When scanning, the Basic Interface or Advanced
Interface opens right away (without opening PaperPort first) if
the button you’re using to scan is set to Configure Before
Scan, and the selected option is TWAIN.
DocuMate 272 Scanner User’s Guide
73
Scanning from PaperPort
Scanning from the Basic Interface or Advanced Interface
The instructions in this section are for scanning from the PaperPort
Desktop using the Basic Interface or Advanced Interface.
To scan an item from PaperPort:
1. From the Windows Start menu, choose Programs, then
ScanSoft PaperPort 9.0, then PaperPort.
The PaperPort Desktop opens.
Scan icon
Folders Pane
2. Click the Scan icon on the PaperPort command bar.
The Folders pane (which shows folders for organizing your
scanned images) is replaced by the Scan pane.
Scan pane
74
Choose Xerox DocuMate 272 from here
DocuMate 272 Scanner User’s Guide
Scanning from PaperPort
3. From the Scanner list, choose TWAIN: Xerox DocuMate 272.
4. In the “Scan what?” section, choose to scan a Document or
Photograph.
If you want to change the format of the scanned item’s file
name or file type before you start scanning, click Settings. The
default file type for documents is .pdf and the default for
photographs is .jpg.
5. Use the Single page items check box as follows:
•
When the check box is selected, all pages in the automatic
document feeder are scanned and placed as single pages
on the PaperPort desktop.
•
When the check box is not selected, all pages in the
automatic document feeder are scanned, but not placed on
the PaperPort desktop until you indicate the scanning job is
finished by clicking Done on the PaperPort-Scan window.
6. Click the Scan button on the Scan pane.
The Basic Interface opens and you’re ready to start scanning.
7. If you haven’t put the document into the scanner’s paper guide,
do it now.
NOTE: If you used the Advanced Interface the last time you
scanned from PaperPort, it will open instead.
NOTE: You can also open the Basic Interface and Advanced
Interface from the PaperPort ScanDirect application.
Selecting Settings
Clicking the Settings option on the PaperPort Scan panel displays
the Settings dialog box where you can change the naming of
scanned items and their file type.
DocuMate 272 Scanner User’s Guide
75
Scanning from PaperPort
To select Settings:
1. Click Settings on the Scan Pane before clicking the Scan
button.
The Settings dialog box appears.
Click the Output tab to
see setting options.
When the Scan tab is selected, as shown above, the dialog box
shows information about the scan.
2. Click the Output tab.
The Settings dialog box now has options for setting the name
of scanned items, and their file type.
•
Enter name or select date format—You have two basic
options for the naming of scanned items: a text name, or a
date.
To give scanned items a text name, type the name in the
box. For example, to name your scanned items
Photograph, type the word Photograph in the box. From
then on, each scanned item is named Photograph and is
numbered sequentially, Photograph (1), Photograph (2),
and so on.
76
DocuMate 272 Scanner User’s Guide
Scanning from PaperPort
To name each item by the date when it is scanned, click the
menu arrow and choose one of the date formats, such as
March 4, 2001. From then on each scanned item is named
on the date when it is scanned, and numbered sequentially,
May 23, 2003 (1), May 23, 2003 (2), and so on.
•
File type—Click the menu arrow and choose the file type
for your scanned items, such as .jpg, .pdf, or .bmp. Your
scanned items are then converted to that file type and
placed on the PaperPort Desktop. The small icon on the
bottom right corner of the PaperPort thumbnails indicates
the file type you selected.
This icon indicates the
PDF format.
If you select JPEG or PDF as the file type, you can also click
the Options button to select image quality options.
These options offer choices for the balance between image
quality and file size. The higher the quality of the image, the
larger the file size, and the lower the quality the smaller the
size. For example, for images on your web site, you may
accept less image quality and a smaller file size so images load
faster on your web pages. The Good Quality and Lower
Quality options produce reasonably good images. To select
your own option, click Custom and drag the slider. Click OK.
DocuMate 272 Scanner User’s Guide
77
Scanning from PaperPort
Scanning from the Basic Interface
The Basic Interface can scan a preview of the image so you can
adjust its appearance before scanning the final image. After
adjusting the appearance, you click the Scan button on the Basic
Interface (not on the scanner) to scan the item.
Click the Advanced Interface button if
you would rather scan with the
Advanced Interface.
1. From the Scan Type menu, choose the option to scan Simplex
(one-sided) or Duplex (two-sided).
2. Choose the color, grayscale, or black and white option from the
Picture Type menu.
NOTE: If you want to preview the document before scanning,
make sure only one page is loaded into the scanner.
3. Click the Preview button.
The scanner scans the item and displays a preview image. You
can now use the options on the Basic Interface to adjust the
image.
NOTE: If you want to preview for a stack of pages, use one of
the pages as a test page and load it into the scanner. Click the
Preview button and adjust the scanner settings. Then replace
the page on the stack at its original position and load the stack
into the scanner. Then just click the Scan button.
4. Adjust the brightness, contrast, and resolution until the picture
is what you want.
You can also change the picture type again, for example, from
color to grayscale.
78
DocuMate 272 Scanner User’s Guide
Scanning from PaperPort
5. To preview the item with the new settings, place the document
into the ADF again and click the Preview button again on the
Basic Interface.
6. When you are satisfied with the preview image, place the
document into the ADF again and click Scan.
7. When you’re finished scanning items, click Done to close the
Basic Interface.
If the Single page items check box is selected on the
PaperPort desktop, the item appears as a thumbnail on the
desktop.
If the Single page items check box is not selected, thumbnails
do not appear until you indicate the scanning job is finished.
See “The Single Page Items Check Box” on page 80.
8. On the PaperPort Scan message box, click Done.
When scanning is complete, thumbnail images appear on the
PaperPort Desktop.
A thumbnail image of
the scanned item
appears on the
PaperPort desktop
The small icon
represents the file
format, in this case
the PaperPort format
On the PaperPort desktop
•
Unless you changed it with the Settings option, the name of the
scanned image is the day, date, and number of scanned items
that day. For example, the second item scanned on a day is
followed by a (2), the third by a (3) and so on. To change a
name, click it to select its text and type a new name.
•
The thumbnail images of the stack of documents has “go to
page arrows” at their top right corners so you can click to flip
through the pages in the stack. The page counter underneath
the thumbnail name shows which page you’re viewing.
•
The small icon at the bottom right corner of the thumbnail
image indicates the file format of the scanned item.
DocuMate 272 Scanner User’s Guide
79
Scanning from PaperPort
The Single Page Items Check Box
The Single page items check box (on the PaperPort Desktop Scan
Pane) provides the option to add additional items to a scanning job.
If the check box is selected, scanned items immediately appear on
the PaperPort desktop. If the check box is not selected (this is the
default), the following message box appears when you close the
Basic Interface.
•
Click Scan More Pages to scan additional pages and add
them to the stack of items placed on the PaperPort desktop.
•
Click Scan Other Side to reload and scan the other side of
previously scanned pages. This option is only available once.
•
Click Done if you are finished scanning. The scanned items are
placed on the PaperPort desktop.
To learn more about the PaperPort software please see the
ScanSoft PaperPort User’s Guide on the Installation CD.
Getting Help with the PaperPort Software
The PaperPort software includes a complete set of help topics that
answer questions about each feature of the software. To open the
Help Topics window, press the F1 key or choose PaperPort Help
from the Help menu.
You can also refer also to the PaperPort Getting Started Guide and
PaperPort User’s Guide on the CD.
80
DocuMate 272 Scanner User’s Guide
Scanning from PaperPort
Scanning from the Advanced Interface
The Advanced Interface has more options for scanning.
1. Open the Basic Interface as described in the section “To scan
an item from PaperPort:” on page 74.
2. Click the Advanced Interface button on the Basic Interface.
The Advanced Interface appears.
Choose Simplex (one-sided)
or Duplex (two-sided) from this
menu.
Click an icon to select a
configuration—Color, Grey
Scale, or Black&White. Clicking
the “+” sign in front of Custom
shows Custom’s scan settings.
Click a setting in the list to
change it. The setting’s options
appear on the right side of the
Advanced Interface where you
can make changes if
necessary.
Check the Scan Info to
make sure your computer
has sufficient space for the
image. Warning icons on
this box appear if your
computer does not have
enough space for the
scanned image’s file.
If you don’t need all the
features of the Advanced
Interface, click Basic
Interface to return to it.
Click Preview to view the
image in the window.
When you are satisfied
with the scan settings,
click Scan.
Click Done to close the
Advanced Interface.
3. From the menu at the top left panel, select whether you want to
scan a Simplex (one-sided) or Duplex (two-sided) document.
4. Click one of the icons to select a configuration.
For example, select Color Configurations and then select
Custom to scan a color item with the preset Custom scan
settings.
The configuration settings appear as a list. Click the + (plus)
sign to see the full list. Click the - (minus) sign to collapse the
list.
•
DocuMate 272 Scanner User’s Guide
Black&White is for letters, memos, pen and ink drawings,
and other black and white material. This setting produces
the smallest file size for scanned items.
81
Scanning from PaperPort
•
GrayScale scans the image using up to 256 true shades of
gray. Use this setting to scan black and white photographs
and other higher quality black and white images. You can
also scan a color photo with this setting to turn its colors
into gray shades. The file size is about one third the size of
a color scan.
•
Color scans the image in full color. Use this setting to scan
color photographs and other color images. The file size is
the largest of the image type options.
5. Click the Preview button to preview the image before
scanning.
6. Review the image to determine if adjustments are needed.
7. To adjust a setting, click the setting in the list on the left below
the selected configuration.
A panel opens on the right side of the Advanced Interface for
the selected setting. Select new options on that panel. See
“Adjusting the Image with the Advanced Interface” on page 86
for details on changing scan settings.
8. (optional) To preview the image again, put the document back
into the scanner’s automatic document feeder, and click the
Preview button again. Readjust the settings if necessary.
9. When you’re satisfied with the image, load all the documents
into the paper guide and click the Scan button.
82
DocuMate 272 Scanner User’s Guide
Scanning from PaperPort
10. When you’re finished scanning items, click Done to close the
Advanced Interface.
A scan progress window opens, then when scanning is
finished, a thumbnail of the scanned image appears on the
PaperPort desktop. If you’re scanning multiple pages, they
appear as PaperPort stacks. The default setting is to scan
multiple items and save them as stacks. That setting is
controlled by the Single Page Items check box.
To Cancel scanning while it’s in progress, click the Cancel
button on the progress window.
11. If the Single page items check box is selected on the
PaperPort desktop, the item appears as a thumbnail on the
desktop.
If the Single page items check box is not selected, thumbnails
do not appear until you indicate the scanning job is finished.
See “The Single Page Items Check Box” on page 80.
12. Use the PaperPort software to work with the image.
DocuMate 272 Scanner User’s Guide
83
Scanning from PaperPort
Load and Scan Credit Cards and Identification Cards
You can scan cards from software that supports the Twain
interface. The following steps show how to scan a card from the
PaperPort software that you received with your scanner.
NOTE: If paper is in the automatic document feeder, the card
reader will not scan a card. The document feeder must be empty
when scanning cards.
1. Insert the card into the Card Reader slot on the back of the
scanner.
2. For Simplex (one-sided) scans, load the card with the side you
want to copy face down.
For Duplex (two-sided) scans, the card can be face up or down
because both sides are scanned.
NOTE: Do not use the Card Reader to scan business cards.
They can jam the Reader’s mechanism. Use the Document
Feeder to scan business cards.
84
DocuMate 272 Scanner User’s Guide
Scanning from PaperPort
3. On the Advanced Interface choose Card Reader-Simplex
(one-sided) or Card Reader-Duplex (two-sided) from the dropdown menu.
Choose Card Reader-Duplex
or Card Reader-Simplex from
the drop-down menu.
Click Preview to view the
image in the window.
When you are satisfied
with the scan settings,
click Scan.
Click Done to close the
Advanced Interface.
4. Click the Preview button to preview the card’s image before
scanning.
5. Review the image to determine if adjustments are needed.
6. To adjust a setting, click the setting in the list on the left.
7. (optional) To preview the image again, put the card back into
the scanner’s card reader slot, and click the Preview button
again. Readjust the settings if necessary.
8. When you’re satisfied with the card’s image, click the Scan
button.
9. When you’re finished scanning cards, click Done to close the
Advanced Interface.
When scanning is finished, a thumbnail image of the scanned
card appears on the PaperPort desktop. If you’re scanning
multiple cards, they appear as PaperPort stacks.
DocuMate 272 Scanner User’s Guide
85
Scanning from PaperPort
Adjusting the Image with the Advanced Interface
You can adjust the scan settings on the Advanced Interface to
produce the best possible image for the documents you’re
scanning.
To adjust a setting:
1. On the left side of the Advanced Interface, select a
configuration, for example, Color Configurations.
2. Click a setting in the list of settings, or click its corresponding
button on the right side of the Advanced Interface.
Resolution
Brightness/Contrast
Color (Gamma,
Saturation, and Hue)
Scan Size
NOTE: The list of scan settings for a configuration applies only
to that type of configuration. For example, the Black&White
Configuration does not have a setting for adjusting the Color
Hue.
86
DocuMate 272 Scanner User’s Guide
Scanning from PaperPort
The following figure shows an example of the Advanced
Interface if you click the Resolution setting in the list, or click
the Resolution button.
Click to close the
settings panel
NOTE: The information in the scan settings list and the options
you select on the various settings panels are interactive. As you
change the settings on the panel, the numbers in the list on the left
also change.
Adjusting the Resolution
Resolution determines the amount of detail you can see in the
scanned image. The resolution setting for a scan is in dots-per-inch
(dpi). The higher the resolution, the finer the details. However,
higher dpi settings also take longer to scan and produce larger files
sizes. Usually the higher resolution settings are used for precision
work, such as photographs or fine artwork.
DocuMate 272 Scanner User’s Guide
87
Scanning from PaperPort
The following figure shows the resolution options.
NOTE: The location of various buttons on the panels may be
slightly different on your Advanced Interface window. The
appearance of the window depends on your monitor’s screen
resolution.
To adjust the resolution:
1. To use one of the preset resolutions for typical scanned items,
click one of the options in the list.
For example, to set the resolution for scanning a business card,
select Business Card. That setting is preset to read small print
on a typical business card.
2. To set the resolution manually, drag the Resolution slider to
the left to decrease the resolution or to the right to increase it.
You can also type a number directly into the resolution setting
box, or click the up and down arrows to increase or decrease
the setting. The resolution settings on your DocuMate 272
scanner range from 50 dpi to 600 dpi.
3. Click Reset to return the resolution to its original setting.
The resolution panel also includes an advanced setting for Moire
patterns. Moire patterns are wavy, rippled lines that sometimes
appear on the scanned images of photographs or illustrations,
particularly newspaper and magazine illustrations. To scan the
image and limit or eliminate moire patterns, select the Reduce
Moire option. This option is only available from 50 to 300 dpi. The
Reduce Moire option is not available when scanning with the Card
Reader.
88
DocuMate 272 Scanner User’s Guide
Scanning from PaperPort
Adjusting the Brightness and Contrast
Sometimes an item is scanned with the brightness and contrast set
to be too light or too dark. For example, a note written with a light
pencil may need to be scanned darker to improve legibility.
The following figure shows the brightness and contrast options.
Contrast is only available for Color and Gray Scale configurations.
To adjust the brightness and contrast:
1. Drag the Brightness slider to the left to make the item darker
or to the right to make the item lighter.
2. Drag the Contrast slider to the left to decrease the contrast or
to the right to increase the contrast.
You can also type a number directly into the brightness or
contrast setting boxes, or click the up and down arrows next to
the box to increase or decrease the setting.
3. Click Reset to return the settings to their original numbers
DocuMate 272 Scanner User’s Guide
89
Scanning from PaperPort
Adjusting Gamma, Saturation, and Color Hue
If you’re using the Color Configuration to scan, you can adjust a
group of color settings. Gamma controls the brightness of the color
midtones. Saturation is the strength or purity of a color and hue is
the color your eyes see as reflected from the image.
The following figure shows the color options.
To adjust the color settings:
1. Drag the Gamma, Saturation, and Color Hue sliders to the left
to decrease the settings or to the right to increase the settings.
You can also type a number directly into the setting boxes, or
click the up and down arrows next to the boxes.
2. Click Reset to return the settings to their original numbers.
Adjusting Input Size
You can scan documents up to 8.5" x 14", but you can select other
scan sizes, or adjust the input size to scan only specific sections of
an image. For example, if you’re scanning a photograph and want
to focus on one section, adjusting the input size removes the rest
of the photograph from the final scanned image.
You can also preview the item and use the Auto Trim option to
automatically sense the edges of the page, and eliminate the
sections outside of the edges.
90
DocuMate 272 Scanner User’s Guide
Scanning from PaperPort
The following figure shows the input size options.
To set the image size:
1. Select the image size from the menu.
The dotted outline shows the selected area in the image.
The following figure shows an example of a manually selected
area.
This is the image that appears
on the PaperPort desktop
when scanning is finished.
The Scan Info box shows the
size and position of the area.
The selected scan area.
DocuMate 272 Scanner User’s Guide
91
Scanning from PaperPort
You can now move or resize the outline to select the specific
area you want to scan.
2. To move the dotted outline, put the pointer in the selected area
and drag the mouse.
3. To resize the selected area, put the pointer on a dotted line and
drag it.
Note that as you drag a dotted line, the menu selection for the
image size changes to Custom to indicate you are customizing
the size.
The Scan Info box on the lower left portion of the Advanced
Interface shows the information for the new area.
4. If the dotted line is not exactly where you want it, put the pointer
on the line and drag the mouse.
5. If you want to remove the selected area and start over, click
Remove on the Scan Info box.
NOTE: Clicking Remove causes the entire 8.5" x 14" area to be
selected.
The ruler units
The ruler around the edges of the image help you precisely
position a custom sized image. You can change the ruler units to
suit the type of measurements you want.
To set the ruler units:
1. Click the Ruler Units button.
The ruler units across the top and down the side of the window
cycle through centimeters, inches, and pixels.
The Scan Info Box
The following figure shows the information on the Scan Info box:
Physical size of the
image to scan
Location of the top
left corner of the
image in the
Preview window
Current location of
the pointer as you
drag it on the
Preview window
92
Size of the file of the
scanned image
The space on your
computer’s hard drive
DocuMate 272 Scanner User’s Guide
Scanning from PaperPort
Creating a New Advanced Interface Profile
You cannot change the settings of the preset profiles in the
Advanced Interface. However you can create new profiles and
save them for future use.
To create a new profile:
1. On the Advanced Interface, select one of the preset profiles, for
example, Black&White Configurations/Custom.
2. Adjust the settings as required and then click the Save As
button.
The Save Profile dialog box opens.
3. Type a name for the new profile and click OK. The name must
be at least two characters long.
Your new profile is added to the configuration list.
To change or delete a profile you created:
1. Select your profile from the configuration list.
2. Make changes to the profile as needed, and then click Save.
3. If you want to delete the selected profile, click Delete.
DocuMate 272 Scanner User’s Guide
93
Scanning from PaperPort
Display the Device Configuration
1. Click the Device Configuration button.
The Device configuration window shows the information about
your scanner.
See the section “Checking the Hardware and Setting the Lamp
Power Saving” on page 71 for more information about the
device settings.
94
DocuMate 272 Scanner User’s Guide
Scanning from PaperPort
Scanning with the Windows Image Acquisition
Microsoft Windows includes its own set of options for acquiring
images from scanners, digital cameras, and other digital devices.
Windows Image Acquisition (WIA) options as described below.
NOTE: Scanning with the Windows Image Acquisition (WIA) is
only available if your computer is running Windows XP or Me.
To scan an item:
1. From the Windows Start menu, choose Programs, then
ScanSoft PaperPort 9.0, then PaperPort.
The PaperPort Desktop opens.
Scan icon
Scan Pane
2. Click the Scan icon on the PaperPort command bar.
The Folders pane is replaced by the Scan pane.
3. From the Scanner list, select WIA: XEROX DocuMate 272.
4. In the “Scan what?” section, choose to scan a Document or
Photograph.
5. Click Settings to view and change the format for the scanned
item’s file name and the file type. The default file type for
documents is .pdf and for photographs is .jpg.
6. Use the Single page items check box as follows:
•
DocuMate 272 Scanner User’s Guide
When the check box is selected, all pages in the document
feeder are scanned and placed as single pages on the
PaperPort desktop.
95
Scanning from PaperPort
•
When the check box is not selected, all pages in the
document feeder are scanned, but not placed on the
PaperPort desktop until you indicate the scanning job is
finished.
7. Click the Scan button in the Scan pane.
The scan window opens. Use this window to select scanning
options and start the scanner.
8. Click the button most appropriate for the item you’re scanning.
9. Select a paper size from the Page Size list.
10. Click Preview to preview the image before scanning.
The image is displayed on the right side of the window.
NOTE: If you preview when scanning a stack of documents, the
first page of the stack feeds through the ADF for the preview.
After adjusting the scanner settings, replace that page on the
stack so it is scanned with the rest of the pages.
11. Adjust settings of the previewed image as desired:
•
Change the button selection for the type of image.
•
Adjust the custom settings; refer to the next section, “Fine
Tuning Your Scans”.
•
Change the size of the scanned image. To do this, click and
hold the mouse pointer over one of the four sizing-boxes on
the corners of the previewed image. Then drag the box to
increase or decrease the size of the image.
12. Preview the image again. When you are satisfied with the
image, click the Scan button.
If the Single page items check box is selected on the Scan
pane, the scanned item appears as a thumbnail on the
PaperPort desktop.
96
DocuMate 272 Scanner User’s Guide
Scanning from PaperPort
13. If the Single page items check box is not selected, thumbnails
do not appear until you indicate the scanning job is finished.
14. On the PaperPort - Scan message box, click Done.
NOTE: Refer to “The Single Page Items Check Box” on
page 80.
Fine Tuning Your Scans
You can select new settings before you scan an item to fine tune
exactly how you want to scan a particular item.
To select the scanner settings before you scan:
1. On the scan window, click Adjust the quality of the scanned
picture.
The Advanced Properties dialog box opens.
DocuMate 272 Scanner User’s Guide
97
Scanning from PaperPort
2. Select the options for scanning.
Brightness and Contrast—Drag the sliders to the right or left
to adjust the brightness and contrast of the scanned image.
The Contrast setting does not apply to the setting Black and
White picture or text.
Resolution (DPI)—Click the menu arrow and choose the dots
per inch (dpi) of the resolution. The maximum resolution is 600
dpi; the minimum is 50 dpi. The higher the dpi setting, the
sharper and clearer the scanned image. However, higher dpi
settings take longer to scan and produce larger files for the
scanned images.
Picture type—Click the menu arrow and choose the most
appropriate type for the item you’re scanning.
3. Click OK.
The Custom Settings button is now set to scan with the options
you selected.
If you want to reset the settings and start over, click Reset.
98
DocuMate 272 Scanner User’s Guide
Scanning from PaperPort
Scanning with the ISIS Interface
The ISIS interface for scanning appears when you scan with a
button that has Configure Before Scan set as the Configuration,
and ISIS selected as the interface to use.
NOTE: You can also use the ISIS interface from other ISIScompliant applications, such as QuickScan 3.x that you received
with your scanner. Please see “Scanning from ISIS in Other
Applications” on page 104.
ISIS is selected by right-clicking on the Configure Before Scan
configuration and selecting it from the menu.
Right-click on
Configure Before Scan
to get the menu, and
choose ISIS to use it as
the interface to
configure before scan.
DocuMate 272 Scanner User’s Guide
99
Scanning from PaperPort
When you press the button to scan, the One Touch ISIS Scan
window opens. Use this window to select scanning options and
start the scanner.
Click a button
to choose the
type of scan.
Click Define to
change the
scan settings
for the selected
button.
Click Preview
One to see
what the first
scanned page
looks like so
you’ll know
which scan
settings to
adjust.
Click Scan All when you’re ready to scan
all the pages. Remember to put the
preview page back onto the stack so it
gets scanned with the new settings too,
1. Click the button most appropriate for the item you’re scanning.
2. Click Preview One to preview the image before scanning.
The image is displayed on the right side of the window.
NOTE: If you preview when scanning a stack of documents, the
first page of the stack feeds through the ADF for the preview.
After adjusting the scanner settings, replace that page on the
stack so it is scanned with the rest of the pages.
3. Click the Define button and adjust the scan settings, if
necessary.
You can also click one of the other scan type buttons if you
would rather scan with it. For example, if Color Document is
selected you can click GrayScale in case you decide to scan
with it instead.
4. When you’re ready to scan, replace the preview page in its
original position in your document and then press Scan All.
The document is scanned with the new scan settings.
100
DocuMate 272 Scanner User’s Guide
Scanning from PaperPort
Adjusting the ISIS Scan Settings
You can adjust the scan settings for the selected type of scan.
NOTE: Some of the options for the ISIS scan settings are
“grayed out” and are not available. Grayed out options are not
appropriate for your DocuMate 272 scanner. If you use the ISIS
interface with other Xerox scanners, grayed out options become
active, if appropriate.
To adjust the Color Document, GrayScale, or Text
Document settings:
1. Click the Color Document button, the GrayScale Document
button, or the Text Document button, and then click the Define
button.
The dialog box on the left appears for GrayScale Document or
Color Document. The dialog box on the right appears for Text
Document. A Text Document scan is in Black and White.
Brightness—Drag the sliders or click the arrows to the right or
left to adjust the brightness one unit at a time. Click the buttons
Darken, Normal, or Lighten to move the slide in larger steps.
Contrast—Contrast is set automatically for Color Document or
GrayScale. Document. Because the Text Document option
scans in Black and White, the contrast option does not apply.
Resolution—Click the menu arrow and choose a resolution
(dpi). Your Xerox DocuMate 272 scanner can scan at up to 600
dpi.
Page—Click the menu arrow and choose a page size. Your
Xerox DocuMate 272 scanner can scan a page up to 8.5" x 14".
2. Click OK.
DocuMate 272 Scanner User’s Guide
101
Scanning from PaperPort
To adjust the Custom Document settings:
1. Click the Custom Document button and click the Define
button.
The dialog box for Custom settings appears.
Mode—Click the arrow and choose a scan mode.
Black and White—The scanning pixels are all the same
size and are either black or white. Use this setting for
letters, memos, pen and ink drawings, and other black and
white material. This setting produces the smallest file size
for scanned items.
256-Level Gray—Scans the image using up to 256 true
shades of gray. Use this setting to scan black and white
photographs and other higher quality black and white
images. You can also scan a color photo with this setting to
turn its colors into gray shades. The file size is about one
third the size of a color scan.
24-Bit Color—Scans the image in full color. Use this
setting to scan color photographs and other color images.
The file size is the largest of the scan mode options.
Dither—Only available if the Mode is Black and White. Click
the menu arrow and choose a Halftone option or Diffusion from
the list. Halftone converts the image so it appears to consist of
gray tones. Halftones produce simulated gray tones by using
black and white pixels of different sizes and is often used to
produce newspaper and magazine images. Use this setting for
lower resolution black and white images. The halftone settings
also produce small file sizes. Diffusion also converts the image
to gray tones, but diffuses the grays to nearby pixels to give the
image a grainy, film-like texture. Diffusion is useful for viewing
images on a black-and-white screen.The preview image shows
the effect of your Dither selection so you can see which one is
best for scanning.
Dots per inch—Click the menu arrow and choose a resolution
(dpi). Your Xerox DocuMate 272 scanner can scan at up to 600
dpi.
102
DocuMate 272 Scanner User’s Guide
Scanning from PaperPort
Page Size—Click the menu arrow and choose a page size.
Your Xerox DocuMate 272 scanner can scan a page up to 8.5"
x 14".
Brightness—Drag the sliders or click the arrows to the right or
left to adjust the brightness in small increments. Click the
buttons Darken, Normal, or Lighten to move the slide in larger
steps.
Contrast—Drag the sliders or click the arrows to the right or
left to adjust the contrast. Contrast is set automatically for Black
and White.
2. To scan only a specific area of the image, click the Area button.
The Set Scanning Area dialog box appears.
3. Click in the image and drag a rectangle around the area you
want to scan.
The boxes to the left show the relative position and size of the
selected area.
You can now move and resize the rectangle to adjust the
specific area to scan.
4. To move the rectangle, put the crosshairs cursor in it, hold
down the Ctrl key and drag the mouse.
You can also type new numbers in the boxes on the left.
5. To resize the rectangle, click in the Width or Length boxes and
type new measurements.
To set the units of measurements, click the menu arrow for the
Units box and choose the measurement units.
6. To start over with a new rectangle, click on the image and drag
a new rectangle.
7. When the area is exactly what you want, click OK.
Now when you scan with the ISIS interface, only the selected area
appears as an image in the Destination Application.
DocuMate 272 Scanner User’s Guide
103
Scanning from PaperPort
Scanning from ISIS in Other Applications
You can also use the ISIS interface from QuickScan 3.x that you
received with your scanner. The QuickScan 3.x software is on the
Disc 1 CD. Note that the ISIS interface for the other applications
may vary from the descriptions provided in this User’s Guide.
If you open the QuickScan 3.x software to scan directly from it, you
may see the following warning message:
1. Please disregard this message and click Continue.
The Pixel Translations ISIS drivers were installed correctly
during the installation of your Xerox DocuMate 272 scanner.
The Scanner Selection dialog box will then appear.
2. Select Xerox DocuMate 272 from the list of scanners and click
OK.
Your scanner is then ready to work with the QuickScan 3.x ISIS
driver.
104
DocuMate 272 Scanner User’s Guide
Maintenance
Maintenance
This section contains information on maintenance, troubleshooting,
uninstalling, scanner specifications, and spare parts.
Cleaning the Automatic Document Feeder
You may need to clean the ADF feed mechanism if your
documents do not feed easily into the ADF, or several documents
feed in at the same time.
To clean the ADF:
1. Wet a cotton swab with some isopropyl alcohol (rubbing
alcohol).
2. Press the ADF cover release on the top left of the scanner body
to open the automatic document feeder cover.
3. Wipe the feed roller from side to side. Rotate the roller to clean
its entire surface.
4. Wipe the pad from top to bottom. Be careful not to snag the
swab on the springs on either side of the pad.
5. Close the cover when you’re finished.
DocuMate 272 Scanner User’s Guide
105
Maintenance
Clearing Paper Jams
If your scanner stops scanning due to a paper jam in the Automatic
Document Feeder, a warning dialog box opens after a few
moments.
To clear a paper jam:
1. Press the ADF cover release on the top-left of the scanner
body to open the automatic document feeder cover.
2. Remove the jammed paper and close the cover.
To reduce the number of paper jams, smooth and straighten the
paper before scanning and adjust the guides to the paper size.
106
DocuMate 272 Scanner User’s Guide
Maintenance
Replacing the ADF Pad Assembly
The ADF pad spring may wear out and is designed to be a userreplaceable part. Problems with documents feeding into the ADF is
an indication that the pad spring may be wearing out.
See the “Xerox DocuMate 272 Scanner Parts List” on page 114 for
ordering information.
To replace the ADF Pad assembly:
1. Press the ADF cover release on the top left of the scanner body
to open the automatic document feeder cover.
2. Squeeze the plastic clamps that hold the pad assembly in place
and lift the pad up and out
3. Reverse the procedure to replace the new pad into its slots.
DocuMate 272 Scanner User’s Guide
107
Maintenance
Troubleshooting
In addition to the troubleshooting information contained in this
section, please see the Readme file on your installation CD. The
Readme file contains additional information that may help you
diagnose problems with the scanner.
If you try the troubleshooting procedures described in this section
and in the Readme file, and the scanner still has problems, you
may have a malfunctioning scanner. Refer to the technical support
card that you received with your scanner. Also visit our web site at
www.xeroxscanners.com for additional technical information.
Problem: The scanner won’t scan. What’s wrong?
Check for one of these possible problems:
•
Are the cables loose or not plugged in securely? Inspect
the cable connections. Make sure the cables are plugged in
securely.
•
Is the scanner’s status light on? Turn on the scanner’s
power. If the status light doesn’t come on, plug the power
supply into another electrical outlet.
•
Did you restart the computer after installing the software?
If you didn’t restart the computer, it may not have loaded all of
the software files. Try restarting your computer.
•
Did you plug the scanner into a USB hub? If you’re using a
USB hub to connect the scanner, the hub must have its own
power supply. If the hub does not have its own power supply,
plug the scanner into a USB port on the computer.
•
Did you select another scanning source in the PaperPort
Scan Pane? If you use multiple devices with your computer,
you may have selected another source for images. Start the
PaperPort software and click the Scan icon, and then make
sure Xerox DocuMate 272 is selected as the scanner.
Problem: During installation I got the error message:
PaperPort Installation is not complete. What do I do?
The installation procedure was not successful. You need to reinstall
the PaperPort software.
Problem: With AutoCrop to Original selected, sometimes
I get blank pages, or pages with lines. What’s wrong?
The pages were probably scanned in crookedly, or skewed. To use
AutoCrop to Original, the pages must be scanned in straight.
Adjust the paper guides on the scanner so pages feed in straight.
108
DocuMate 272 Scanner User’s Guide
Maintenance
Problem: I got the error message: PaperPort cannot
allocate enough memory to perform internal critical
operations. What do I do?
Close any other active applications so that additional memory is
available. If you click Continue, PaperPort moves the file to the
PaperPort data directory and renames the file with the prefix “bad”.
This allows you to recover the file later.
To recover the file, you can import it into PaperPort by using the
Import command in the File menu.
Problem: How do I uninstall PaperPort?
See the section “Uninstalling Your Scanner” on page 111.
Uninstalling does not delete your scanned items, and they remain
in the PaperPort Data folder.
Status Light Troubleshooting Codes
A green status light indicates the normal state of the scanner.
Normal Operation
•
Blinking green: indicates the scanner is waking up from power
saving and preparing to scan.
•
Steady green: indicates the scanner is ready to scan.
Error Codes
If your scanner experiences hardware problems, the status light
will blink red, and the LED flashes an “E” and the error code
number.
The LED blinks back and forth
between “E” and the error code
number (such as 6).
The red light flashes the
number of times as the error
code (6 in this example).
The table below describes the error codes.
DocuMate 272 Scanner User’s Guide
109
Maintenance
Error
Code
110
Problem Description
Solution
0
Scanner is not
connected to the
computer. (The LED
does not flash “E” and
the status light
remains green.)
A cable may be loose. Check
that the scanner’s cables are
correctly attached to the
computer. If the scanner still
does not connect, re-boot the
computer.
1
The scanning
hardware in the body
of the scanner has
malfunctioned.
Re-boot your computer. If the
problem persists, contact Xerox
Technical Support.
2
The scanning
Re-boot your computer. If the
hardware in the ADF problem persists, contact Xerox
portion of the scanner Technical Support.
has malfunctioned.
3
The main board in the Re-boot your computer. If the
scanner has
problem persists, contact Xerox
malfunctioned.
Technical Support.
4
The CCD in the body
of the scanner has
malfunctioned.
5
The CCD in the ADF Re-boot your computer. If the
portion of the scanner problem persists, contact Xerox
has malfunctioned.
Technical Support.
6
The scanner’s cover
is open.
Close the scanner cover and
make sure it attaches
completely.
7
The lamp in the
scanner body has
malfunctioned.
Make sure that the lamp has
not been turned off manually.
See the steps on page 71 to
turn the lamp on and off. Reboot your computer. If the
problem persists, contact Xerox
Technical Support.
8
The lamp in the ADF Make sure that the lamp has
portion of the scanner not been turned off manually.
has malfunctioned.
See the steps on page 71 to
turn the lamp on and off. Reboot your computer. If the
problem persists, contact Xerox
Technical Support.
9
Paper jam
Re-boot your computer. If the
problem persists, contact Xerox
Technical Support.
See “Clearing Paper Jams” on
page 106.
DocuMate 272 Scanner User’s Guide
Maintenance
Uninstalling Your Scanner
To uninstall the DocuMate 272 scanner, remove the One Touch
software first, and then remove PaperPort, or other scanner
software.
Step 1: Uninstalling the Scanner and One Touch Software
1. On the Windows taskbar, click Start, point to Settings, and
then click Control Panel.
2. Double-click the Scanner/Cameras icon.
•
For Windows 2000, click the Devices tab, select the Xerox
DocuMate 272 scanner, and click the Remove button to
remove the scanner from the list. Click OK.
•
For Windows Me or XP, right-click the Xerox DocuMate
272 icon, and select Delete to delete the scanner from the
list.
3. Unplug the USB cable from the scanner.
4. Click the Back button in the toolbar to go back to the Control
Panel.
5. Double-click the Add/Remove Programs icon.
•
Windows Me: The Add/Remove Programs Properties
window opens. Select the Install/Uninstall tab.
•
Windows 2000 or XP: The Add or Remove Programs
window opens. Make sure the Change or Remove option is
selected.
6. From the list of programs, select One Touch 4.0.
•
Windows Me: Click the Add/Remove button.
•
Windows 2000 or XP: Click the Change/Remove button.
7. On the One Touch 4.0 InstallShield Wizard window, select
Remove and then click Next.
8. On the Confirm Uninstall window, click OK.
9. On the Maintenance Complete window, click Finish.
The DocuMate software is removed from your computer.
10. Close all open windows and restart your computer.
DocuMate 272 Scanner User’s Guide
111
Maintenance
Step 2: Uninstalling the PaperPort Software
To uninstall PaperPort 9 from Windows Me:
1. On the Windows taskbar, click Start, point to Settings, and
then click Control Panel.
2. Double-click the Add/Remove Programs icon.
3. On the Add/Remove Programs Properties window, select the
Install/Uninstall tab.
4. Select PaperPort 9 and click Remove.
5. On the Welcome window, click Next.
6. On the Program Maintenance window, select the Remove
option, and then click Next.
7. On the Remove the Program window, select the Remove files
option, and then click Remove.
The PaperPort software is removed.
8. On the Uninstall Completed window, click Finish.
9. Close all open windows and restart your computer.
To uninstall PaperPort 9 from Windows 2000 or XP:
1. On the Windows taskbar, click Start, point to Settings, and
then click Control Panel.
2. Click the Add or Remove Programs icon.
The Add or Remove Programs window opens.
3. Select PaperPort 9 and click Remove.
4. A message window opens, asking if you are sure you want to
remove PaperPort 9 from your computer. Click Yes.
The PaperPort software is removed.
5. Close all open windows and restart your computer.
112
DocuMate 272 Scanner User’s Guide
Maintenance
Xerox DocuMate 272 Scanner Specifications
Optical resolution
Bit depth
Maximum item size
Minimum item size
Scan method
ADF specifications
Scanning Speed
Capacity
Paper Thickness
Light source
Interface
Scanner dimensions
Height
Width
Length
Weight
Operating temperature
Relative humidity
Power adaptor
Power consumption
Safety and agency certifications
DocuMate 272 Scanner User’s Guide
600 x 1200 dpi
48-bit color (internal)
8.5” x 14”
3.5” x 2” (automatic document feeder)
Automatic document feeder (ADF)
Up to 33 pages per minute.
Up to 66 images per minute @ 200 dpi B&W
50 sheets
16 - 28 lbs. (0.002” - 0.006”)
Cold cathode fluorescent lamp
USB 2.0 High Speed
12.5 inches (31.75 cm)
13.25 inches (33.66 cm)
17 inches (43.18 cm)
8.6 pounds (3.91 kg)
50°–104° F (5°–35° C without condensation)
40%–70% (@35° C without condensation)
DC Jack, 24V/2.0A (60W), 100-240V (with EMI core)
< = 30 Watts
UL, C-UL, FCC Class B, CE
113
Maintenance
Xerox DocuMate 272 Scanner Parts List
Please use the following part names and numbers when ordering
replacements for your scanner.
114
Part Name
Part Number
Paper Guide
57-0104-000
Output Tray
57-0105-000
ADF Pad
57-0103-000
AC Power Cord
35-0071-000
Power Supply
37-0067-000
Buttons Label
09-0631-000
DocuMate 272 Scanner User’s Guide
Appendix A Notices
It’s Illegal in the USA
Congress, by statute, has forbidden the reproduction of the
following subjects under certain circumstances. Penalties of fine or
imprisonment may be imposed on those guilty of making such
reproductions.
1. Obligations or Securities of the United States Government,
such as:
Certificates of Indebtedness
National Bank Currency
Coupons from Bonds
Federal Reserve Bank Notes
Silver Certificates
Gold Certificates
United States Bonds
Treasury Notes
Federal Reserve Notes
Fractional Notes
Certificates of Deposit
Paper Money
Bonds and Obligations of certain agencies of the government,
such as FHA, etc.
Bonds. (U.S. Savings Bonds may be photographed only for
publicity purposes in connection with the campaign for the sale
of such bonds.)
Internal Revenue Stamps. (If it is necessary to reproduce a
legal document on which there is a canceled revenue stamp,
this may be done provided the reproduction of the document is
performed for lawful purposes.)
Postage Stamps, canceled or uncanceled. (For philatelic
purposes, Postage Stamps may be photographed, provided the
reproduction is in black and white and is less than 75% or more
than 150% of the linear dimensions of the original.)
Postal Money Orders.
Bills, Checks, or Drafts of money drawn by or upon authorized
officers of the United States.
Stamps and other representatives of value, of whatever
denomination, which have been or may be issued under any
Act of Congress.
2. Adjusted Compensation Certificates for Veterans of the
World Wars.
3. Obligations or Securities of any Foreign Government, Bank,
or Corporation.
DocuMate 272 Scanner User’s Guide
115
4. Copyrighted material, unless permission of the copyright owner
has been obtained or the reproduction falls within the “fair use”
or library reproduction rights provisions of the copyright law.
Further information of these provisions may be obtained from
the Copyright Office, Library of Congress, Washington, D.C.
20559. Ask for Circular R21.
5. Certificates of Citizenship or Naturalization. (Foreign
Naturalization Certificates may be photographed.)
6. Passports. (Foreign Passports may be photographed.)
7. Immigration Papers.
8. Draft Registration Cards.
9. Selective Service Induction Papers that bear any of the
following Registrant’s information:
Earnings or Income
Dependency Status
Court Record
Previous military service
Physical or mental condition
Exception: U. S. Army and Navy discharge certificates may be
photographed.
10. Badges, Identification Cards, Passes, or Insignia carried by
military personnel, or by members of the various Federal
Departments, such as FBI, Treasury, etc. (unless photograph is
ordered by the head of such department or bureau.)
Reproducing the following is also prohibited in certain states:
Automobile Licenses — Drivers’ Licenses — Automobile
Certificates of Title.
The above list is not all inclusive, and no liability is assumed for its
completeness or accuracy. In case of doubt, consult your attorney.
It’s Illegal in Canada
Parliament, by statute, has forbidden the reproduction of the
following subjects under certain circumstances. Penalties of fines
or imprisonment may be imposed on those guilty of making such
copies.
1. Current bank notes or current paper money.
2. Obligations or securities of a government or bank.
3. Exchequer bill paper or revenue paper.
4. The public seal of Canada or of a province, or the seal of a
public body or authority in Canada, or of a court of law.
116
DocuMate 272 Scanner User’s Guide
5. Proclamations, orders, regulations or appointments, or notices
thereof (with intent to falsely cause same to purport to have
been printed by the Queen’s Printer for Canada, or the
equivalent printer for a province).
6. Marks, brands, seals, wrappers or designs used by or on behalf
of the Government of Canada or of a province, the government
of a state other than Canada or a department, board,
Commission or agency established by the Government of
Canada or of a province or of a government of a state other
than Canada.
7. Impressed or adhesive stamps used for the purpose of revenue
by the Government of Canada or of a province or by the
government of a state other than Canada.
8. Documents, registers or records kept by public officials
charged with the duty of making or issuing certified copies
thereof, where the reproduction falsely purports to be a certified
copy thereof.
9. Copyrighted material or trademarks of any manner or kind
without the consent of the copyright or trademark owner.
The above list is provided for your convenience and assistance,
but it is not all inclusive, and no liability is assumed for its
completeness or accuracy. In case of doubt, consult your solicitor.
Federal Communications Commission (FCC) for USA
This equipment has been tested and found to comply with the limits
for the class B digital device, pursuant to part 15 of the FCC Rules.
These limits are designed to provide reasonable protection against
interference in a residential installation. This equipment generates,
uses and can radiate radio frequency energy and if not installed,
and used in accordance with the instructions, may cause harmful
interference to radio communications. However, there is no
guarantee that interference will not occur in a particular installation.
If this equipment does cause harmful interference to radio or
television reception, which can be determined by turning the
equipment off and on, the user is encouraged to try and correct the
interference by one or more of the following measures:
Reorient or relocate the receiving antenna.
Increase the separation between the equipment and receiver.
Connect the equipment into an outlet on a circuit different from that
to which the receiver is connected.
Consult the dealer or an experienced radio/TV technician for help.
DocuMate 272 Scanner User’s Guide
117
This equipment has been certified to comply with the limits for a
class B computing device, pursuant to FCC Rules. In order to
maintain compliance with FCC regulations, shielded cables must
be used with this equipment. Operation with non-approved
equipment or unshielded cables is likely to result in interference to
radio and TV reception. The user is cautioned that changes and
modifications made to the equipment without the approval of
manufacturer could void the user's authority to operate this
equipment.
This device complies with part 15 of the FCC Rules. Operation is
subject to the following two conditions: (1) This device may not
cause harmful interference, and (2) this device must accept any
interference received, including interference that may cause
undesired operation.
Energy Star for the USA
As an ENERGY STAR partner, Xerox Corporation has determined
that this product meets the ENERGY STAR guidelines for energy
efficiency.
ENERGY STAR® is a US registered trademark.
The ENERGY STAR program is a team effort between the
Environmental Protection Agency and the office equipment
industry to promote energy-efficient personal computers, monitors,
printers, digital presses, fax machines and copiers. Reducing the
energy consumption of this equipment will help combat smog, acid
rain and long-term changes to the climate by decreasing the
emissions that result from generating electricity.
Product recycling and disposal for USA
Xerox operates a worldwide equipment takeback and reuse/
recycle program. Contact your Xerox sales representative (1-800ASK-XEROX) to determine whether this Xerox product is part of
the program.
If your product is not part of the Xerox program and you are
managing its disposal, please note that the product may contain
lead and other materials whose disposal may be regulated due to
environmental considerations. For recycling and disposal
information, contact your local authorities.
118
DocuMate 272 Scanner User’s Guide
Index
Numerics
24-Bit Color 102
256-Level Gray 102
A
ADF cleaning 105
ADF pad assembly replace 107
Advanced Interface 74, 81
adjust settings 86
new profile 93
profile 93
Advanced Properties 97
advanced settings 50
AOL Version 9 38
Archive button 69
aspect ratio 51
Autocrop to Original 48
AutoRotate image 51
B
background color 60
Basic Interface 78
bit depth 113
Black&White 47, 81, 102
blurred image 88
BMP 39
Brightness 47, 89, 98, 101
Burn to CD 37, 64
Destination Application 65
button options 43
button settings 31
C
Card Reader 2
card reader 20, 84
Card Scan 84
CD
other software 16
CD-ROM drive 3
Color 47, 82
color
hue 90
options 90
Color Document 32
Color Document button 101
DocuMate 272 Scanner User’s Guide
color filter 50
Comma Delimited 42
components 2
computer specifications 3
Configure Before Scan 54, 99
Contrast 47, 89, 98, 101
csv file format 42
D
date format 76
Destination Application 21, 28
OCR 31
text file format 41
Destination Selector 22
Device Settings 47, 51
Diffusion 102
Disc 1 6
Dither 102
Document Format 28
Document Management 44
documentation 3
dots-per-inch 87
dpi 87, 98
Duplex 49
duplex button 2, 21, 22, 49
E
eMail 45
eMail Properties 38
error codes 109
Excel Spreadsheet 42
F
Fax and Print 45
file format 42
file storage location 69
file type 77
flowing page 61
folder pane 74, 95
Font Matching 58
Format and Page(s) 32
G
gamma 50, 90
119
Index
grayed out options 29, 101
GrayScale 47, 82
GrayScale Document button 101
monitor 3
H
Normal PDF 42, 62
nPDF 31, 40, 42, 62
Halftone 102
help 3, 80
htm file format 42
HTML Document 42
HTML page 68
HTML Web Page 67
hue 50
N
O
image
blur 88
preview 82, 85
Image Documents Properties 36
Image Editors 44
image file 40
image file format 39
image size 91
improvements and settings 48
input size 90
installation 4
invert image 49
inverted text 60
ISIS 7, 54
ISIS interface 99
OCR 7, 41
columns 61
optical character recognition 55
storage 70
tables 61
OCR button 55
OCR Dictionary 57
OCR Options 56, 57
OmniPage Pro 12 7, 36, 42, 55
on/off switch 13
One Touch Button Panel 23, 24, 69
Button View 25
Detail View 26
Hardware View 26
initial settings 27
names 26, 43
OCR 56
One Touch icon 24, 25, 28
One Touch ISIS Scan window 100
One Touch Properties window 23, 28, 32
options 44, 46
optical character recognition 7
J
P
JPG 39
JPG file size 40
Page Format
HTML 67
page format options 39
page settings 48
page size 48
paper guide 5
paper jam 106, 110
PaperPort 73
desktop 74, 95
help topics 80
Scan pane 74, 95
thumbnail 79
PaperPort Properties 33
pause scanning 22
PDF 40, 45
PDF file size 40
Picture type 98
power saving 72
Preview button 78, 96
preview image 82, 85
Preview One button 100
I
K
Kofax VRS 7
L
lamp malfunction 110
Lamp timeout setting 72
Languages in Document 57
LED number 2, 21, 49
Link Properties 32
M
Microsoft Internet Explorer 68
Microsoft Outlook 38
Moire Patterns 49, 88
120
DocuMate 272 Scanner User’s Guide
Index
Q
T
QuickScan 99, 104
template 61
text color 60
Text Document button 101
Text Documents Properties 34
Text Editors 44
text file format 41
Text Formats 41
thumbnail icon 77, 79
thumbnail image 22
TIFF 39
Transfer to Storage 69
troubleshooting 108
true page 62
TWAIN 54, 66
R
Reject Character 58
Resolution 47, 87, 98, 101
Rich Text Format 42
rtf file format 42
ruler units 92
S
saturation 50, 90
scan
card 84
file name 79
from PaperPort 73
multiple pages 79
PaperPort desktop 79
Scan Configuration 28
scan file name 76
Scan Info box 92
scan with event forwarding 65
scanner
components 2
connecting 13
troubleshooting 108
uninstall 111
Searchable PDF 42, 62
Select Configuration 30, 31
Select Destination 29, 31, 44
Select Format and Page(s) 30
Settings on the Scan Pane 76
setup 4
Show All Destinations 44
Show Hardware 71
Simple Text 42
simplex button 2, 21, 22, 49
single page items check box 75, 80, 96
size 48
skewed page 48
skip blank originals 49
sPDF 7, 31, 40, 42, 62
spreadsheet 61
spreadsheets
OCR 56
status light 2, 13, 15, 108
troubleshooting codes 109
Sti event forwarding 45
Storage and CD-R/W 45
Storage Properties 37
Straighten Image 49
system requirements 3
DocuMate 272 Scanner User’s Guide
U
uninstall 111
USB port 14
V
VirtualReScan 54
W
watermark, remove 50
WIA 54, 95
Windows Image Acquisition 95
Word Document 42
X
xls file format 42
121
Index
122
DocuMate 272 Scanner User’s Guide
05-0671-000