1
E9RF0FH_EN.book
Page 1
Friday, May 16, 2014
7:17 PM
Introduction
OWNER’S MANUAL
Basic Setup /
TV View Operation
WL6D-M102
Connections
DVD / VIDEO CASSETTE RECORDER
Recording
PAL SECAM
Playback
Editing
Function Setup
VCR Functions
EN
1
Others
For Customer Use:
Carefully read the Model No. and Serial No. located at the
back of the unit and enter the information below. Retain
this information for future reference.
Model No. __________________________
Serial No. __________________________
E9RF0FH_EN.book
Page 2
Friday, May 16, 2014
7:17 PM
.
Introduction
Precautions
WARNING:
TO REDUCE THE RISK OF FIRE OR ELECTRIC SHOCK, DO NOT EXPOSE THIS
APPLIANCE TO RAIN OR MOISTURE.
The lightning flash with arrowhead
symbol, within an equilateral triangle, is
intended to alert the user to the presence
of uninsulated “dangerous voltage” within
the product’s enclosure that may be of
sufficient magnitude to constitute a risk of
electric shock to persons.
CAUTION
RISK OF ELECTRIC SHOCK
DO NOT OPEN
CAUTION:
TO REDUCE THE RISK OF ELECTRIC SHOCK, DO NOT
REMOVE COVER (OR BACK). NO USER SERVICEABLE PARTS
INSIDE. REFER SERVICING TO QUALIFIED SERVICE
PERSONNEL.
The important note and rating are located on the rear or bottom of
the cabinet.
The exclamation point within an
equilateral triangle is intended to alert the
user to the presence of important
operating and maintenance (servicing)
instructions in the literature
accompanying the appliance.
The symbol for CLASS II (Double Insulation)
Laser Safety
Caution
This unit is classified as a CLASS 1 LASER PRODUCT.
This unit employs a laser. Only qualified service personnel
should remove the cover or attempt to service this unit, due to
the possibility of eye injury.
1. Do not attempt to open the cabinet. There are no user
serviceable parts inside. Refer all servicing to qualified
service personnel.
2. Slots and openings in the cabinet at the sides and
underneath are provided for ventilation. To ensure reliable
operation and to protect the unit from overheating, these
openings must not be blocked or covered.
Avoid installation in enclosed spaces such as bookcases
unless suitable ventilation is provided.
3. Keep the unit away from radiators and other heat sources.
4. Avoid use near strong magnetic fields.
5. Do not push objects of any kind into the unit through the
cabinet slots or openings as they could touch electrically
live parts or short circuit parts resulting in a fire or electric
shock.
6. To prevent fire or shock hazard, do not expose this
apparatus to dripping or splashing, no objects filled with
liquids, such as vases, should be placed on the
apparatus.
7. Do not stand the unit vertically. Use the unit in a horizontal
(flat) position only.
8. Before attempting to operate the unit, make sure that the
timer recording mode is off.
9. This product is in Stand-by mode when turned off while
the mains cable is connected.
The front panel display will not light up. This is a
Power Saving Mode (ECO) for standby.
10. Do not place any combustible objects on the device
(candles, etc.).
11. Before moving the unit, be sure to remove any discs and
unplug the mains cable from the AC outlet.
12. Disconnect the mains plug to switch off when the unit
becomes faulty or not in use.
13. The mains plug shall remain readily operable.
14. Read the manual instructions to ensure correct and safe
installation and interconnection of the unit in multimedia
systems.
15. Keep the distances 20 cm around apparatus of ventilation
openings.
CAUTION:
USE OF CONTROLS OR ADJUSTMENTS OR
PERFORMANCE OF PROCEDURES OTHER
THAN THOSE SPECIFIED HEREIN MAY
RESULT IN HAZARDOUS RADIATION
EXPOSURE.
CAUTION:
CLASS 2M VISIBLE AND INVISIBLE LASER
RADIATION WHEN OPEN, DO NOT STARE
INTO THE BEAM OR VIEW DIRECTLY WITH
OPTICAL INSTRUMENTS.
LOCATION: INSIDE, NEAR THE DECK MECHANISM.
Power Supply
The power supply is connected and the unit is live when the
mains cable is plugged into a 220 - 240 V~, 50 Hz AC outlet.
To operate the unit, press [STANDBY-ON Q].
WARNING: LIVE PARTS INSIDE.
DO NOT REMOVE ANY SCREWS.
2
EN
E9RF0FH_EN.book
Page 3
Friday, May 16, 2014
7:17 PM
This product consists of materials which can be recycled
and reused if disassembled by a specialised company.
Moisture condensation may occur inside the unit when it is
moved from a cold place to a warm place, after heating a cold
room, or under conditions of high humidity. Do not use the unit
for at least 2 hours to allow the inside to dry.
About Copyright
Unauthorised copying, broadcasting, public performance and
lending of discs are prohibited. This item incorporates copy
protection technology that is protected by U.S. patents and
other intellectual property rights of Rovi Corporation. Reverse
engineering and disassembly are prohibited.
Notice for the Progressive Scan Outputs
Editing
Consumers should note that not all high definition television
sets are fully compatible with this product and may cause
artifacts to be displayed in the picture. In case of picture
problems with 480 or 576 progressive scan output, it is
recommended that the user switch the connection to the
‘standard definition’ output. If there are questions regarding
your TV set compatibility with this 480p or 576p product,
please contact our customer service centre.
Function Setup
Manufactured under license from Dolby
Laboratories. Dolby and the double-D
symbol are trademarks of Dolby
Laboratories.
VCR Functions
Never use a gas duster on this unit.
The gas trapped inside of this unit may cause ignition and
explosion.
Moisture Condensation Warning
Others
“Dolby® Digital Recording enables consumers to record
high-quality video with stereo sound on recordable DVD
discs. The technology, when utilised instead of PCM
recording, also saves recordable disc space, allowing for
higher video resolution or extended recording time on
each DVD. DVDs created using Dolby Digital Recording
will play back on all DVD-Video players.”
Note: This is true when the players are compatible with
actual recordable DVD discs.
EN
Playback
Do not place the unit on the furniture that is capable of
being tilted by a child and an adult leaning, pulling,
standing or climbing on it. A falling unit can cause serious
injury or even death.
• Do not handle the mains cable with wet hands.
• Do not pull on the mains cable to disconnect it from the AC
outlet. Grasp it by the plug.
• If, by accident, water is spilled on the unit, unplug the mains
cable immediately and take the unit to an authorised service
centre for servicing.
Recording
Make your contribution to the environment!!!
• Exhausted batteries do not belong in the
dustbin.
• You can dispose of them at a collection point for
exhausted batteries or special waste.
• Contact your council for details.
Avoid the Hazards of Electrical Shock and Fire
Basic Setup /
TV View Operation
Following information is only valid EU-member States:
Disposal of batteries and/or accumulators
The crossed out wheeled dust bin symbol indicates that
batteries and/or accumulators must be collected and
disposed of separately from household waste. If the battery
or accumulator contains more than the specified values of
lead (Pb), mercury (Hg), and/or cadmium (Cd) defined in
the Battery Directive (2006/66/EC), then the chemical
symbols for lead (Pb), mercury (Hg) and/or cadmium (Cd)
will appear below the crossed out wheeled dust bin
symbol. By participating in separate collection of batteries,
you will help to assure the proper disposal of products and
batteries and thus help to prevent potential negative
consequences for the environment and
human health. For more detailed
information about the collection and
recycling programmes available in your
country, please contact your local city office
or the shop where you purchased the
Pb, Hg, Cd
product.
For safety and optimum performance of this unit:
• Install the unit in a horizontal and stable position.
• Keep the unit away from electronic equipment such as an
amplifier, TV, etc. to prevent warping, damage, fire and
malfunction.
• Do not place anything directly on top of the unit.
• Shield the unit from direct sunlight and keep away from
sources of intense heat. Avoid dusty or humid locations.
Avoid locations with insufficient ventilation for suitable heat
dissipation. Do not block the ventilation holes on the sides of
the unit. Avoid locations subject to strong vibration or strong
magnetic fields.
Connections
Following information is only for EU-member states:
The use of the symbol indicates that this product may not
be treated as household waste. By ensuring this product is
disposed of correctly, you will help prevent potential
negative consequences for the environment and human
health, which could otherwise be caused by
inappropriate waste handling of this
product. For more detailed information
about recycling of this product, please
contact your local city office, your
household waste disposal service or the
shop where you purchased the product.
Installation Location
Introduction
A NOTE ABOUT RECYCLING
This product’s packaging materials are recyclable and can
be reused. Please dispose of any materials in accordance
with your local recycling regulations.
3
E9RF0FH_EN.book
Page 4
Friday, May 16, 2014
7:17 PM
The terms HDMI and HDMI
High-Definition Multimedia
Interface, and the HDMI Logo
are trademarks or registered
trademarks of HDMI Licensing
LLC in the United States and
other countries.
DivX®, DivX Certified® and
associated logos are trademarks of
Rovi Corporation or its subsidiaries
and are used under license.
Kodak and the KODAK Picture CD
Compatible logo are trademarks of
Kodak used under license.
is a trademark of DVD Format/Logo Licensing Corporation.
MPEG Layer-3 audio coding technology licensed from
Fraunhofer IIS and Thomson.
THIS PRODUCT IS LICENSED UNDER THE MPEG-4
VISUAL PATENT PORTFOLIO LICENSE FOR THE
PERSONAL AND NON-COMMERCIAL USE OF A
CONSUMER FOR (i) ENCODING VIDEO IN
COMPLIANCE WITH THE MPEG-4 VISUAL STANDARD
(“MPEG-4 VIDEO”) AND/OR (ii) DECODING MPEG-4
VIDEO THAT WAS ENCODED BY A CONSUMER
ENGAGED IN A PERSONAL AND NON-COMMERCIAL
ACTIVITY AND/OR WAS OBTAINED FROM A VIDEO
PROVIDER LICENSED BY MPEG LA TO PROVIDE
MPEG-4 VIDEO. NO LICENSE IS GRANTED OR SHALL
BE IMPLIED FOR ANY OTHER USE. ADDITIONAL
INFORMATION INCLUDING THAT RELATING TO
PROMOTIONAL, INTERNAL AND COMMERCIAL USES
AND LICENSING MAY BE OBTAINED FROM MPEG LA,
L. L. C. SEE HTTP://WWW.MPEGLA.COM
‘MP3 SURROUND’ and its logo are trademarks of
Thomson S.A.
Note: Supply of this product does not convey a license nor
imply any right to distribute content with this product in
revenue-generating broadcast systems (terrestrial,
satellite, cable and/or other distribution channels),
streaming applications (via Internet, intranets and/or other
networks), other content distribution systems (pay-audio or
audio-on-demand applications and the like) or on physical
media (compact discs, digital versatile discs,
semiconductor chips, hard drives, memory cards and the
like). An independent license for such use is required.
For details, please visit
http://mp3licensing.com.
4
EN
Maintenance
CLEANING THE UNIT
Use a soft cloth slightly moistened with a mild detergent
solution. Do not use solutions containing alcohol, spirits,
ammonia or abrasives.
CLEANING DISCS
If a disc becomes dirty, clean it with a cleaning cloth. Wipe the
disc from the centre out. Do not wipe in a circular motion.
Do not use solvents such as benzine, thinners, commercially
available cleaners, detergent, abrasive cleaning agents or
antistatic spray intended for analogue records.
DISC HANDLING
Handle the discs so that fingerprints and dust do not adhere
to the disc surfaces.
Always store the disc in its protective case when it is not in
use.
SERVICING
If the unit becomes inoperative, do not try to correct the
problem by yourself. There are no user serviceable parts
inside. Turn the unit off, unplug the mains cable, and consult
your dealer or an authorised service centre.
CLEANING THE DISC LENS
If the unit does not perform correctly even though you have
referred to “Troubleshooting” and the relevant sections in the
Owner’s Manual, the laser optical pickup unit may be dirty.
Consult your dealer or an authorised service centre for
inspection and cleaning of the laser optical pickup unit.
AUTO HEAD CLEANING
• Automatically cleans video heads as you insert or remove a
cassette, so you can see a clear picture.
• Playback picture may become blurred or interrupted while
the TV programme reception is clear. Dirt accumulated on
the video heads after a long period of use, or the usage of
rental or worn tapes can cause this problem. If a streaky or
snowy picture appears during playback, the video heads in
the unit may need to be cleaned.
1 Please visit your local Audio / Video store and purchase a
good quality VHS Video Head Cleaner.
2 If a Video Head Cleaner does not solve the problem,
please consult your dealer or an authorised service centre.
Note
• Remember to read the instructions along with the video
head cleaner before use.
• Clean video heads only when problems occur.
E9RF0FH_EN.book
Page 5
Friday, May 16, 2014
7:17 PM
Accessories Supplied
The following features are available with this unit.
DVD
•
•
•
•
•
•
Recording
•
DVD
VCR
DVD
Dubbing
VCR
Editing
DVD
• Adding or deleting chapter marks manually:
[E Pages 49-50]
• Creating titles to a Playlist
(VR mode DVD-RW discs only): [E Page 51]
• Deleting titles: [E Page 48]
• Deleting a scene of a title
(VR mode DVD-RW discs only): [E Page 52]
• Editing title name: [E Page 49]
• Combining titles
(VR mode DVD-RW discs only): [E Page 51]
• Dividing titles
(VR mode DVD-RW discs only): [E Pages 50-51]
• Protecting titles
(VR mode DVD-RW discs only): [E Page 50]
• Adding or deleting chapter marks at once
(video mode DVD-RW discs only): [E Page 50]
Playback
DVD
• DV dubbing:
(DVD) [E Pages 30-31]
(VCR) [E Page 63]
• Dubbing mode: [E Page 32]
VCR
• Quick search: [E Pages 63]
Recording
• Automatic chapter mark setting: [E Page 23]
• Automatic Playlist making
(VR mode DVD-RW discs only)
• Automatic finalising
(video mode DVD-RW/-R discs only): [E Page 34]
• Automatic title menu making
(video mode DVD-RW/-R discs only): [E Page 34]
•
Basic Setup /
TV View Operation
• Recording up to 12 programmes
• One-touch timer recording:
(DVD) [E Page 25]
(VCR) [E Page 62]
Theatre surround sound: [E Page 19]
Quick search: [E Page 43]
CM skip: [E Page 40]
Playback from Original or a Playlist
(VR mode DVD-RW discs only): [E Page 35]
Virtual Surround System: [E Page 46]
Playing back data files recorded in a USB device:
[E Page 36]
Chasing playback during recording and simultaneous
playback and recording: [E Page 42]
Playing back MP3 / JPEG / DivX® / KODAK Picture CD
files: [E Pages 35-39]
Connections
Features
Introduction
• Remote control with 2 R6 (1.5 V) batteries
• Owner’s Manual(CD-ROM)
• Quick Start Guide
Playback
Editing
Compatibility
DVD
Function Setup
• Playing back discs recorded in video mode in any
regular DVD player: [E Page 35]
Others
DVD
VCR Functions
• Progressive scan system: [E Pages 17,60]
• HDMI (High-Definition Multimedia Interface):
[E Pages 18,61]
Others
EN
5
E9RF0FH_EN.book
Page 6
Friday, May 16, 2014
7:17 PM
Table of Contents
Introduction ...................................................... 2
Editing ............................................................. 47
Precautions ........................................................................ 2
Guide to a Title List .......................................................... 47
Features ............................................................................. 5
Editing Discs .................................................................... 48
Guide to the Owner’s Manual ............................................. 7
Functional Overview......................................................... 10
Function Setup ............................................... 53
Installing Batteries in the Remote Control ........................ 12
General Setting ................................................................ 56
Switching DVD / VCR mode ............................................. 12
Guide to On-Screen Displays ........................................... 13
Front Panel Display Guide................................................ 16
VCR Functions ................................................ 62
Playback........................................................................... 62
Connections ................................................... 17
Basic Recording and One-touch
Timer Recording (OTR) ................................................. 62
Connecting to a TV........................................................... 17
Search.............................................................................. 63
Connecting to External Equipment................................... 19
Other Operations.............................................................. 64
Digital Audio for Better Sound Quality .............................. 19
Changing the Video Colour System ................................. 64
Hi-Fi Stereo Sound System ............................................. 64
Basic Setup / TV View Operation .................. 20
Initial Setting..................................................................... 20
Others .............................................................. 65
Troubleshooting................................................................ 65
Recording........................................................ 21
Troubleshooting for Error Messages ................................ 68
Information on DVD Recording......................................... 21
Language Code ............................................................... 70
Formatting a Disc ............................................................. 23
Specifications ................................................................... 71
Selecting the Audio Mode ................................................ 24
Declaration of Conformity................................... Back Cover
Basic Recording and One-touch
Timer Recording (OTR) ................................................. 25
Timer Recording............................................................... 26
Satellite Link ..................................................................... 29
Settings for External Equipment....................................... 30
Information on DV Dubbing .............................................. 30
DVC to DVD Dubbing ....................................................... 31
Dubbing Mode .................................................................. 32
Setting a Disc to Protect................................................... 33
Finalising Discs ................................................................ 33
Playback.......................................................... 35
Basic Playback ................................................................. 35
Special Playback .............................................................. 40
Search .............................................................................. 43
Repeat / Random / Programme Playback / Slide Show ... 44
Selecting the Format of Audio and Video ......................... 45
6
EN
E9RF0FH_EN.book
Page 7
Friday, May 16, 2014
7:17 PM
Introduction
Guide to the Owner’s Manual
Symbols Used in the Owner’s Manual
Symbol
DVD-V
Video
DVD-RW
DVD-R
CD
Description
Available to DVD-videos
Available to DVD-RW discs in video mode
Available to DVD-RW discs in VR mode
Available to DVD-R discs in video mode
Available to audio CDs
Available to CD-RW/-R discs and USB device with
MP3 files
JPEG
Available to CD-RW/-R discs and USB device with
JPEG files
DivX
Available to DVD-RW/-R, CD-RW/-R discs and USB
device with DivX® files
(DivX® files in USB device are not guaranteed.)
VCR
Available to VHS tapes
Use only cassettes marked VHS (
PAL SECAM
Recording
MP3
®
Basic Setup /
TV View Operation
VR
DVD-RW
Connections
To show what recording mode or media type applies to each
function, the following symbols appear at the beginning of
each operating item.
)
Playback
Editing
Function Setup
VCR Functions
Others
EN
7
E9RF0FH_EN.book
Page 8
Friday, May 16, 2014
7:17 PM
Media for Recording / Playing
Media Type
DVD-RW
DVD-R
Logo
Automatically formatted
in video mode
Format Can be formatted in VR or video mode
Video Mode
Icon
Maximum Record Time
VR Mode
Video
VR
DVD-RW
DVD-RW
480 min
(12 cm)
144 min
(8 cm)
480 min
(12 cm)
144 min
(8 cm)
1×-6×
Recordable/Playable
Ver. 1.1/1.2
Versions
Ver. 1.1/1.2 CPRM compatible
Available Features
Playable on most DVD
players.
Compatibility Finalisation necessary.
(Title menu will be
created)
1×-16×
Ver. 2.0/2.1
Playable only on VR
mode compatible unit.
Finalisation
recommended.
Playable on most DVD
players.
Finalisation necessary.
(Title menu will be
created)
Recording Features
Record AV Input
✔
✔
Reuse by Deleting
the Current
Contents
✔
✔
Record 16:9 Size
Pictures
✔
✔
Record Copy-once
Programmes
✔
Editing Features
Scene Delete
✔
Edit Title Name
Create Chapters
Wherever You Like
(chapter mark)
Divide a Title
Combine Titles
✔
Delete a Title
✔: Available
* CPRM compatible disc only.
✔
Playlist
Original
✔
✔
✔
✔
✔
✔
✔
✔
✔
Protect a Title
EN
✔
✔
Create a Playlist
DVD players with
✔
✔*
Create Chapters at
Fixed Intervals
(auto chapter)
8
DVD-R
480 min
(12 cm)
144 min
(8 cm)
✔
✔
✔
✔
✔
Grey: Not available
are capable of playing DVD-RW recorded in VR mode.
E9RF0FH_EN.book
Page 9
Friday, May 16, 2014
7:17 PM
Introduction
Discs for Playing
Disc Type
DVD-VIDEO
CD-DA
Logo
Icon
CD
Connections
DVD-V
Files for Playing
Type of title
MP3
JPEG
DivX®
Icon
MP3
JPEG
DivX
CD-RW/-R
USB device
CD-RW/-R
USB device
CD-RW/-R
DVD-RW/-R
USB device (not guaranteed)
This unit has been designed to play DVD with
region 2. If these region symbols do not appear on
your DVD, you cannot play back the DVD in this unit.
The number inside the globe refers to region of the
world.
2
Following discs are recommended for good recording quality
and are proven to be compatible with this unit.
However, depending on the media condition the unit may not
read the disc properly.
Verbatim
JVC
Maxell
DVD-R 8x, DVD-RW 2x
DVD-RW 4x
DVD-R 8x/16x
Playback
Unplayable Discs
Region Codes
Recording
• ABOUT DIVX VIDEO: DivX® is a digital video format created
by DivX, LLC, a subsidiary of Rovi Corporation. This is an
official DivX Certified® device that plays DivX video.
Visit divx.com for more information and software tools to
convert your files into DivX videos.
• ABOUT DIVX VIDEO-ON-DEMAND: This DivX Certified®
device must be registered in order to play purchased DivX
Video-on-Demand (VOD) movies. To obtain your registration
code, locate the DivX VOD section in your device setup
menu. Go to vod.divx.com for more information on how to
complete your registration.
• DivX Certified® to play DivX® video, including premium
content.
• Media containing the DivX® files with the DivX® GMC (Global
Motion Compensation) playback feature, which is DivX®
supplemental function, cannot be played back on this unit.
Basic Setup /
TV View Operation
Media
®
The following discs will not play back on this unit.
• CD-ROM
Editing
Function Setup
•
•
•
•
•
•
• Compact Disc-Interactive
(CD-I)
Video CD (VCD)
• Super Video CD (SVCD)
Video Single Disc (VSD)
• DVD-ROM
DVD-audio
• Unfinalised disc
DVD or CD contains Windows Media™ Audio files
DVD-RW/-R recorded in non compatible recording format
Blu-ray Disc
• HD DVD
On the following disc, the sound may not be heard.
• Super audio CD - Only the sound on the CD layer can be
heard. The sound on the high-density super audio CD layer
cannot be heard.
Colour Systems
VCR Functions
This unit uses the PAL system. However, it is also possible to
play back DVDs using other colour systems, such as NTSC.
Others
EN
9
E9RF0FH_EN.book
Page 10
Friday, May 16, 2014 7:17 PM
Functional Overview
Front Panel
1
2
3*1 4
5
5V
21*3 19*2 17*2 16 15 14
20 18*2
13 12
10
11
8
9*1
500mA
7
6
You can also turn on the unit by pressing these buttons.
You can turn on the unit by pressing these buttons only when a videotape is in this unit.
Press to turn on the unit, or to turn the unit into the standby mode. (To completely shut down the unit, you must unplug the
AC power cord.)
1
2
3
4
5
6
7
8
9
10
11
STANDBY-ON indicator
Cassette compartment
OPEN\CLOSE A button*1 (DVD)
VCR/DVD indicators
Disc tray
DV-IN jack (AV3)
USB input jack
RECORD I button (DVD)
PLAY B button*1 (DVD)
STOP C button (DVD)
SELECT button
12
13
14
15
16
17
18
19
20
21
DUBBING button
AUX K \ L buttons
Display (“Off” in standby)
Infrared sensor window
RECORD I button (VCR)
PLAY B button*2 (VCR)
F.FWD D button*2 (VCR)
REW E button*2 (VCR)
STOP\EJECT C A button (VCR)
STANDBY-ON Q button*3
Button names described in the Owner’s Manual
The instructions in this manual are described mainly with the operations using the remote control. Some operations can be
carried out using the buttons on the front panel.
Rear Panel
1
1
2
3
4
2
Mains cable
HDMI OUT jack
DIGITAL AUDIO OUT (COAXIAL) jack
AUDIO OUT (L\R) jacks
3 4
56
5
6
7
7
COMPONENT VIDEO OUT jacks
AV2 (DECODER) socket
AV1 (TV) socket
Note
• Do not touch the inner pins of the jacks on the rear panel. Electrostatic discharge may cause permanent damage to the unit.
• After turning off the unit, leave the mains cable plugged for about one minute. Otherwise it may cause data loss or the unit may
not work properly.
• This unit has no tuner system so it cannot receive TV broadcasts without an external tuner or
such devices.
10
EN
E9RF0FH_EN.book
Page 11
Friday, May 16, 2014 7:17 PM
18
19
20
2
3
22
6
24
7
25
8
9
10
11
12
13
14
26
27
28
29
30
17
34
Button names described in the Owner’s Manual
The instructions in this manual are described mainly with the
operations using the remote control. Some operations can
be carried out using the buttons on the front panel.
Note
VCR Functions
• If you turn off this unit, [OPEN\CLOSE EJECT A] on the
remote control is not available. Be sure to use
[OPEN\CLOSE A] or [STOP\EJECT C A] on the unit.
Function Setup
16
31
32
33
15
Editing
23
Playback
5
Recording
4
Basic Setup /
TV View Operation
21
STANDBY-ON Q button
Number buttons
SAT.LINK button
AUDIO button
TOP MENU button (DVD)
Direction K / L / 0 / 1 buttons
DISPLAY button
SYSTEM button (VCR)
SEARCH button (VCR)
REV E button
PLAY B button
SKIP H button (DVD)
VCR button
PAUSE F button
DUBBING button
SETUP button
TIMER SET button
HDMI button
OPEN\CLOSE EJECT A button
AUX G \ H buttons
TIME SHIFT button (DVD)
CLEAR button
MENU/LIST button (DVD)
ENTER button
RETURN button
FWD D button
STOP C button
SKIP G button (DVD)
DVD button
CM SKIP button (DVD)
REC SPEED button
REC button
1.3x/0.8x PLAY button (DVD)
TIMER PROG. button
Connections
1
1
2
3
4
5
6
7
8
9
10
11
12
13
14
15
16
17
18
19
20
21
22
23
24
25
26
27
28
29
30
31
32
33
34
Introduction
Remote Control
Others
EN
11
E9RF0FH_EN.book
Page 12
Friday, May 16, 2014 7:17 PM
Installing Batteries in the Remote
Control
Install 2 R6 (1.5 V) batteries (supplied) into the remote
control, carefully match with the polarity indicated inside the
battery compartment.
1
2
Caution
button
About the Remote Control
• Make sure there is no obstacle between the remote control
and the remote control sensor on the unit.
• Use within the operating range and angle as shown.
7m
5 m (30°) Within
about 5 m
• The maximum operable range as follows:
Line of sight:
approximately 7 m
Either side of centre: approximately 5 m within 30 degrees
• Remote control operation may become unreliable if the
remote control sensor of the unit is being exposed by the
strong sunlight or fluorescent light.
• Remote controls for different devices can interfere with each
other. Be careful when using remote controls for other
equipment located close to the unit.
• Replace the batteries when the operating range of the
remote control reduces.
12
EN
You must select which component you want to operate first.
Press [DVD] or [VCR] on the remote control or [SELECT] on
the front panel.
3
• Incorrect use of batteries can result in hazards such as
leakage and bursting.
• Do not mix new and old batteries together.
• Do not use different kinds of batteries together.
• Make sure that the plus (+) and minus (–) ends of each
battery match the indications inside the battery
compartment.
• Remove batteries if the equipment will not be used for a
month or more.
• When disposing used batteries, please comply with
governmental regulations or the public instructions for
environmental protection that apply in your country or area.
• Do not recharge, short-circuit, heat, burn or disassemble
batteries.
5 m (30°)
Switching DVD / VCR mode
indicators
VCR button
DVD button
DVD
Press [DVD] on the remote control or [SELECT] on the front
panel.
(Verify that the DVD indicator is lit in green.)
VCR
Press [VCR] on the remote control or [SELECT] on the front
panel.
(Verify that the VCR indicator is lit in orange.)
E9RF0FH_EN.book
Page 13
Friday, May 16, 2014 7:17 PM
Guide to On-Screen Displays
Introduction
Press [DISPLAY] repeatedly while the display menu is
displayed to display the following information.
<Title / File Name Information>
Title name information
DISPLAY Menu
Title Name
DVD
My Title
T
1/ 5 C
1/ 5
0:01:00 / 1:23:45
1 -RW
3
VR
ORG
(only when VR mode DVD-RW, unfinalised
video mode DVD-RW/-R disc is in playback)
File name information
8
2
File Name
My File
Basic Setup /
TV View Operation
5
6
Connections
Press [DVD] first.
With a disc inserted into the unit, press [DISPLAY] to display
the on-screen display. The on-screen display shows
information about what is recorded on the disc.
AV1
Stereo
(only when MP3/JPEG/DivX® files is in
playback)
<MP3 Tag Information>
7
4
DVD 2H
(only when MP3 file is in playback)
1:53
1
2
5
6
Title Name
Indicates a disc type and format mode.
Indicates a type of titles for VR mode DVD-RW
disc.
Indicates a selected external input mode.
Indicates a media, recording speed and
possible recording time left.
Indicates the current title number/total number
of titles, the current chapter number/total
number of chapters, and time lapse of the
current title playback/total duration of the title.
Each icon means:
Artist name information
Artist Name
Playback
3
4
Recording
Title name information
This is an example screen for explanation. Displayed items
vary depending on the actual mode.
Album name information
Album Name
Editing
: Search
: Audio
: Subtitle
: Angle
<HDMI Information>
: Repeat
1 480p
/ 2 YCbCr
3 Bitstream
Function Setup
Video Info. :
Audio Info. :
: Marker
: Noise Reduction
(only for the images output through the HDMI
output)
: Zoom
: Surround
7
8
Indicates an operation status.
Indicates the component in use.
Note
2
3
Indicates the resolution of the HDMI output
image.
Indicates the HDMI video format.
Indicates the HDMI audio format.
VCR Functions
: DVD
: USB device
1
• “- - -” will be displayed, when it does not have any
information.
• For some descriptions on this manual, only one disc type is
indicated as an example.
Others
EN
13
E9RF0FH_EN.book
Page 14
Friday, May 16, 2014 7:17 PM
VCR
While in the VCR mode, the on screen display of the VCR
mode is displayed.
Press [VCR] first.
Press [DISPLAY] to display the on screen display.
.
1
2
STEREO 3
12:00
AV2
7
6 SP
0:00:00
5
STEREO
4
This is an example screen for explanation.
Displayed items are depending on the actual mode.
1
2
3
4
5
6
7
14
Current time
Position number
Audio status of the external equipment
Audio status of the currently playing back video
tape.
Tape counter
Recording or playing back speed
Status of the current tape
EN
E9RF0FH_EN.book
Page 15
Friday, May 16, 2014 7:17 PM
B Timer Programming
Press [SETUP] to display the main menu. Then use [K \ L] to
select a menu and press [ENTER] to display the sub menu.
Press [RETURN] to return to previous screen.
Setup
Timer Programming
To call up the title list. [E Page 47]
D DVD Menu
Title List
DVD Menu
DISC Playback Mode
USB Playback Mode
Playback
Display
Video
Recording
Clock
DivX
HDMI
Reset All
Delete All Playlists (VR mode DVD-RW disc
only): [E Page 51]
E DISC Playback Mode
Audio CD
DISC Playback Mode
1
2
1
2
Random Play
Programme Play
Playback
Random Play: [E Page 44]
Programme Play: [E Page 44]
CD-RW/-R with MP3 / JPEG / KODAK Picture CD files
3
4
1
5
Random Play
Slide Show
Music (MP3 files): [E Page 44]
Photo (JPEG files): [E Pages 44, 45]
Slide Show (JPEG / KODAK Picture CD files):
[E Page 45]
F USB Playback Mode
VCR Functions
USB Playback Mode
1
2
1
2
Music
Photo
Function Setup
3
4
5
DISC Playback Mode
Music
Photo
Editing
Playback: [E Page 57]
Display: [E Page 59]
Video: [E Page 60]
Recording: [E Pages 23-24, 30]
Clock: [E Page 61]
DivX: [E Pages 38, 61]
HDMI: [E Page 61]
Reset All: [E Page 61]
[E Page 33]
4
Recording
General Setting
DVD Menu
1
Format
2
Finalise
Disc Protect OFF
ON
3
Delete All Playlists
4
1 Format (DVD-RW only): [E Pages 23-24]
2 Finalise: [E Page 33]
3 Disc Protect (VR mode DVD-RW disc only):
Basic Setup /
TV View Operation
A General Setting
1
2
3
4
5
6
7
8
C Title List
General Setting
• E is displayed when a disc with CD-DA/MP3/JPEG/
KODAK Picture CD is inserted.
• F is displayed when a USB flash memory with MP3/JPEG
is plugged.
1
2
3
4
5
6
7
8
To programme a timer recording. [E Page 26]
Connections
A
1
2
B
3
C
4
D
5
E
F
6
Introduction
Main Menu
Random Play
Slide Show
Music (MP3 files): [E Page 44]
Photo (JPEG files): [E Pages 44, 45]
Others
EN
15
E9RF0FH_EN.book
Page 16
Friday, May 16, 2014 7:17 PM
Front Panel Display Guide
1
DB
VCR
2
DVD
3
1
Title / Track and Chapter number
:
:
2
: Appears when a videotape is in this unit.
Title / track number
Chapter number
: Appears when a disc is in this unit.
Current status of the unit
DB :
Appears when playback is paused.
Appears during step by step playback.
B:
Appears when playing back a disc.
F B: Appears during slow forward / reverse playback.
: Appears when the timer programming or Onetouch Timer Recording (OTR) is set and operating.
Appears when the unit goes into the satellite link
standby or recording mode.
Flashes when timer programming and satellite
recording was not executed because of some
error.
I:
Appears during recording.
Flashes when recording being paused.
DVD :Appears when this unit is in DVD output mode, or
F:
Appears during dubbing.
the timer-standby mode for DVD recording.
VCR :Appears when this unit is in VCR output mode, or
the timer-standby mode for VCR recording.
3
Displays the following
•
•
•
•
•
•
Playing back time
Current title / chapter / track / file number
Recording time / remaining time
Clock
One-touch Timer Recording (OTR) remaining time
Selected HDMI video resolution
Note
• Except when satellite recording is in standby, front panel
display stays off while the power is off/timer-standby mode.
This is a new Power Save (ECO) feature.
Display Messages
The disc tray is opening.
DVD
DVD
Appears when HDMI video
resolution (576p) is
selected.
DVD
Appears when HDMI video
resolution (720p) is
selected.
DVD
Appears when HDMI video
resolution (1080i) is
selected.
DVD
Appears when HDMI video
resolution (1080p) is
selected.
The disc tray is closing.
DVD
A disc is loading.
DVD
Data is being recorded on a
disc.
DVD
Appears when the satellite
link recording is in standby.
DVD
DVD
16
EN
Appears when HDMI video
resolution (480p) is
selected.
E9RF0FH_EN.book
Page 17
Friday, May 16, 2014 7:17 PM
Introduction
Connections
Using the COMPONENT VIDEO OUT
Jacks and the AUDIO OUT (L\R) Jacks
Connect the unit to a TV after considering the capabilities of
your existing equipment.
Using the Scart socket
Audio IN
Component
video IN
Y
PB/CB
PR/CR
Scart/RCA cable (not supplied)
Scart cable
(not supplied)
Audio cable
(not supplied)
2
Component
video cable
(not supplied)
Recording
Scart adaptor
(not supplied)
1
Playback
Connect AV1 (TV) Scart socket of this unit to
the Scart socket of your TV.
Note
1 Connect the COMPONENT VIDEO OUT jacks of
this unit to the component video input jacks of
your TV.
2 Connect the AUDIO OUT (L\R) jacks of this unit
to the analogue audio input jacks of your TV.
• After you have made the connections, set the “Video Out”
setting. (See page 60.)
VCR Functions
• If your TV is compatible with progressive scanning (576p/
480p), connect the TV to the COMPONENT VIDEO OUT
jacks of this unit and set “Video Out” setting to “Component
(Progressive)” in “Setup” menu. (See page 60.) Next, set
your TV to the progressive scan mode.
• If your TV is not compatible with progressive scan, set
“Video Out” setting to “Component (Interlace)”.
• Use a commercially available adaptor if the video input jacks
of your TVs or monitors are the BNC type.
• Only component and HDMI connections are compatible with
the Progressive Scan.
Function Setup
Selecting Progressive Scan (576p/480p or
Interlaced 576i/480i) Playback
Editing
• If your TV does not have a Scart socket, use a Scart/RCA
cable to connect.
• Connect this unit directly to the TV. If the AV cables are
connected to a VCR, pictures may be distorted due to the
copy protection system.
• Analogue teletext can only be output in VCR mode through
AV1 (TV) out. Use TV remote control to decode the
analogue teletext.
• When changing the “Video Out” setting (“SCART (RGB)”,
“Component (Interlace)” or “Component (Progressive)”),
connect to the corresponding jack on the TV. If the setting is
changed, for example, to “Component (Interlace)” or
“Component (Progressive)” while the scart cable is
connected to the TV, a distorted video signal may be output.
Basic Setup /
TV View Operation
Audio/video cable
(not supplied)
If your TV has component video input jacks, use a component
video cable (to connect the COMPONENT VIDEO OUT jacks)
and an audio cable (to connect the AUDIO OUT (L/R) jacks).
When using this type of connection, “Video Out” setting
should be set to “Component (Progressive)” or “Component
(Interlace)”. Refer to “B Video Out (Default: SCART (RGB))”
on page 60.
• Component connection provides the better quality picture.
Connections
Connecting to a TV
Others
EN
17
E9RF0FH_EN.book
Page 18
Friday, May 16, 2014 7:17 PM
Using an HDMI Compatible Port
[HDMI CONNECTION]
• HDMI outputs the video / audio signals without converting to
analogue signals.
• No audio connections is required.
• Use the HDMI cable (commercially available) for connection.
• Connect the HDMI output jack of this unit to the HDMI input
jack of TV.
HDMI cable (not supplied)
To HDMI
input jack
HDMI IN
this unit
TV
Selecting HDMI video resolution
Press [HDMI] to select the HDMI video resolution. The video
resolution changes as follows every time [HDMI] is pressed.
576p (PAL) / 480p (NTSC) 720p 1080i 1080p
(An HDMI video resolution that is not supported by the display
device will be skipped.)
Actual Output Modes by Media
Dolby Digital / DTS /
Audio recording format of
MPEG setting of this
the disc
unit
PCM
Dolby
Digital
Stream
PCM
LPCM
Stream
DVD-video
ON
DTS®
OFF
PCM
MPEG
Stream
PCM
Dolby
Digital
Stream
PCM
DivX®
MP3
Stream
PCM
MP2
Stream
Actual output
2 channel PCM
Dolby Digital
2 channel PCM
DTS®
2 channel PCM
MPEG
2 channel PCM
Dolby Digital
2 channel PCM
2 channel PCM
MPEG
For audio CD and MP3 files, 2 channel PCM will be output
regardless of the “Dolby Digital” setting.
If the connected device is not compatible with HDMI
BITSTREAM, audio will be output as PCM even if you select
“Stream” in “Dolby Digital” setting. (See page 58.)
Copyright protection system
To play back the digital video images of a DVD via an HDMI
connection, it is necessary that both the player and the display
device (or an AV amplifier) support a copyright protection
system called HDCP (high-bandwidth digital content
protection system). HDCP is copy protection technology that
comprises data encryption and authentication of the
connected AV device. This unit supports HDCP. Please read
the operating instructions of your display device (or AV
amplifier) for more information.
* HDMI: High Definition Multimedia Interface
18
EN
Note
• Because HDMI is an evolving technology, it is possible that
some devices with an HDMI input may not operate properly
with this unit.
• When using an HDCP-incompatible display device, the
image will not be viewed properly.
• Among the devices that support HDMI, some devices can
control other devices via the HDMI connector; however, this
unit cannot be controlled by another device via the HDMI
connector.
• The audio signals from the HDMI connector (including the
sampling frequency, the number of channels and bit length)
may be limited by the device that is connected.
• Among the monitors that support HDMI, some do not
support audio output (for example, projectors). In
connections with device such as this unit, audio signals are
not output from the HDMI output connector.
• When this unit’s HDMI connector is connected to a DVI-D
compatible monitor (HDCP compatible) with an HDMI-DVI
conversion cable, the signals are output in digital RGB.
• If the connected equipment is not compatible with HDMI
BITSTREAM, DTS sound will not be output.
• When the power failure occurs, or when you unplug the unit,
some problems in the HDMI setting might occur.
Please check and set the HDMI setting again.
• This unit does not support HDMI-CEC.
E9RF0FH_EN.book
Page 19
Friday, May 16, 2014 7:17 PM
This unit has three input terminals. Press [AUX G \ H]
repeatedly to select AV1, AV2 or DV(AV3). Be sure that all the
units are switched off before making connections.
Digital Audio for Better Sound Quality
Dolby Digital decoder,
DTS decoder or
MPEG decoder, etc.
Digital audio
input jack
Introduction
Connecting to External Equipment
COAXIAL
AV output jack
(Scart)
Connections
Recording from a DVD player, Satellite
Box or other Audio-Video equipment
with a Scart output socket (AV2)
Coaxial cable
(not supplied)
COAXIAL
Basic Setup /
TV View Operation
Scart cable (not supplied)
AV2 (DECODER)
For clear digital sound quality, use the DIGITAL
AUDIO OUT (COAXIAL) jack to connect your digital
audio equipment.
Note
DV(AV3) (Front)
500mA
Connecting to an MD deck or DAT deck
• The audio source recorded in Dolby Digital Multi-channel
surround format cannot be recorded using an MD or DAT
deck as a digital sound.
• If not connected to a Dolby Digital decoder, set “Dolby
Digital” to “PCM” in “Audio Out” menu. Playing back a DVD
using incorrect settings may generate noise distortion and
damage speakers.
• Set “Dolby Digital” and “MPEG” to “PCM” and set “DTS” to
“OFF” in “Audio Out” menu for connecting to an MD or DAT
deck.
• You can use AUDIO OUT (L\R) jacks for the connection of
your audio system.
VCR Functions
5V
• Connecting multi-channel Dolby Digital decoder allows you
to enjoy the Multi-channel Dolby Digital surround system as
well as DTS decoder, Multi-channel surround system.
• After connecting to a Dolby Digital decoder, set “Dolby
Digital” to “Stream” in “Audio Out” menu. (See pages 57-58.)
• After connecting to a DTS decoder, set “DTS” to “ON” in
“Audio Out” menu. (See pages 57-58.)
• After connecting to a MPEG decoder, set “MPEG” to
“Stream” in “Audio Out” menu. (See pages 57-58.)
Function Setup
When connecting a DV-camcorder, use DV-IN jack of DV(AV3)
(Front).
Connecting a Dolby Digital™ decoder,
DTS decoder or MPEG decoder
Editing
Recording from a DV-camcorder
(DV(AV3))
If the audio format of the digital output does not match the
capabilities of your receiver, the receiver will produce a strong,
distorted sound or no sound at all.
Playback
• When you record a TV programme from a Satellite Box /
decoder, you must connect a Scart cable to AV2 (DECODER).
(See page 29.)
• The signal from the external device will be output
automatically when the TV is connected to AV1 and the
external device is connected to AV2 using a Scart cable with
its power on. (However, it will not be output when this unit’s
power is turned off.)
If you want to monitor this unit’s signal, press [DISPLAY]
or turn the external device off. (The signal from this unit can
only be monitored during playback.)
If you want to monitor the signal from other input, press
[DISPLAY], then select the desired input channel using
[AUX G \ H].
Recording
The connections illustrated above are
optional for better sound
DV cable
(4-pin)
Others
(not supplied)
DV OUT
EN
19
E9RF0FH_EN.book
Page 20
Friday, May 16, 2014 7:17 PM
Basic Setup / TV View Operation
Selecting the TV Aspect Ratio
Initial Setting
When you turn on this unit for the first time, you need to follow
these steps.
1
2
Press [STANDBY-ON Q].
1
Turn the TV on. Select the input to which the
unit is connected.
In stop mode, press [SETUP]. Select “General
Setting” using [K \ L], then press [ENTER].
2
Select “Video” using [K \ L], then press
[ENTER].
3
Select “TV Aspect” using [K \ L], then press
[ENTER].
“Initial Setting” will automatically appear.
3
Select your desired language for the OSD using
[K \ L]. Then press [ENTER] to go to the next
step.
OSD Language
English
Áúëãàðñêè
Èesky
Nederlands
Français
Deutsch
Magyar
4
Use this feature to adjust the aspect ratio of the video source
which is different from your TV’s ratio to fit your TV monitor
without distorting the picture.
After finishing language setting, proceed to
“Clock” on page 61.
TV Aspect
Video Out
4
Select the desired option using [K \ L], then
press [ENTER].
TV Aspect
4:3 Letter Box
4:3 Pan & Scan
16:9 Wide
5
Press [SETUP] to exit.
Note
Note
• After “Initial Setting”, if you need to unplug the mains cable,
make sure to turn off the power first and leave it in standby
mode for at least 1 minute before attempting to unplug.
Otherwise, it may cause data loss.
If you want to set each item of “Initial Setting” again, you can
set them at “General Setting”.
• Refer to “A OSD Language (Default: French)” on page 59.
• Refer to “Clock” on page 61.
20
EN
If you have a standard TV:
• Select “4:3 Letter Box” for a full width picture with black
bars at the top and bottom.
• Select “4:3 Pan & Scan” for a full height picture with both
sides trimmed.
If you have a wide screen TV:
• Select “16:9 Wide”.
E9RF0FH_EN.book
Page 21
Friday, May 16, 2014 7:17 PM
Introduction
Recording
Restrictions on Recording
Type of Discs
Information on Copy Control
Some satellite broadcasts include copy-protected information.
If you want to record them, refer to the following.
Media type / format
VR
DVD-RW
Video
Recording
speed
DVD
8 cm
60 min
18 min
2H
120 min
36 min
4H
240 min
72 min
6H
360 min
108 min
8H
480 min
144 min
ver. 1.1 / ver. 1.2 CPRM compatible
DVD-R
ver. 2.0 / ver. 2.1
VCR
: Recordable
: Not recordable
Note
• This unit cannot record on CD-RW/-R discs.
• Discs recorded on a personal computer or a DVD or CD
recorder may not be played back if the disc is damaged or
dirty or if there is condensation on the recorder’s lens.
• If you record a disc using a personal computer, even if it is
recorded in a compatible format, it may not be played back
or dubbed because of the settings of the application
software used to create the disc. (Check with the software
publisher for more detailed information.)
• Discs recorded in video mode on this unit cannot record
additional information using other DVD recorders.
• Since recording is performed using the Variable Bit Rate
(VBR) method, the actual remaining time for recording may
be a little shorter than the remaining time displayed on the
OSD, depending on the picture you are recording.
VCR Functions
• This table is intended for a standard new single-sided
12 cm / 8 cm disc. The recording times are estimates and
actual recording time may differ.
• The audio and video quality becomes poorer as the
recording time gets longer.
ver. 1.1 / ver. 1.2
Function Setup
1H
Video / Sound
Quality
ver. 1.1 / ver. 1.2CPRM compatible
Editing
DVD
12 cm
ver. 1.1 / ver. 1.2
DVD-RW
Recording time
Copyprohibited
Playback
Recording Speed
You can select a recording speed from 5 options.
The recording time will vary depending on the recording
speed you select as follows.
Copy- Copyfree
once
Recording
Video mode is the same recording format as used on the prerecorded DVD-videos you purchase in local shops. You can
play back the discs recorded in this format in most of the DVD
players. You will need to finalise such discs (see page 33)
before playing them back in other DVD players. Unless
finalised, you can record additional materials or edit discs
recorded in video mode with this unit. VR (Video Recording)
mode is a basic recording format for DVD-RW discs.
VR mode offers advanced editing, and you can record and
edit material repeatedly, however it is playable only on VR
mode compatible unit. Finalisation is recommended before
playing them back in other unit.
Basic Setup /
TV View Operation
This unit can record on DVD-RW/-R discs.
DVD-RW discs allow you to record programmes repeatedly,
and the recorded contents can be erased.
There are 2 recording formats: VR mode and video mode. VR
and video modes are available for DVD-RW discs while as
only video mode is available for DVD-R discs.
You cannot record copy-protected video using this unit. Copyprotected video includes DVD-videos and some satellite
broadcasts.
If copy-protected material is detected, recording will pause or
stop automatically and an error message appears on the
screen.
You can only record “Copy-once only” video using a DVD-RW
disc in VR mode with Content Protection for Recordable
Media (CPRM).
When recording an external input, you can display copy
control information on the screen.
CPRM is a scrambling copy protection system for the
protection of “copy-once” broadcast programmes.
This unit is CPRM compatible, which means that you can
record copy-once broadcast programmes, but you cannot
then make a copy of those recordings. CPRM recordings can
only be played back on DVD players that are specifically
compatible with CPRM.
Connections
Information on DVD Recording
Others
EN
21
E9RF0FH_EN.book
Page 22
Friday, May 16, 2014 7:17 PM
Making Discs Playable in Other DVD Players (Finalise)
After recording, you must finalise the disc to play it back in other players. (See page 33.)
You cannot finalise discs in other DVD recorders.
Disc Type
DVD-R
DVD-RW
Video Mode
VR Mode
✔
✔
✔
✔
✔
After finalising
✔
Automatic Title menu making
Undo finalising (See page 33.)
Additional recording or editing (See page 33.)
(undo finalise)
✔: Available
Maximum Recordable Numbers of Title /
Chapters
VR mode DVD:
99 titles per each Playlist and Original
999 chapters per each Playlist and Original
Video mode DVD:
99 titles per disc
99 chapters per title
22
EN
(undo finalise)
Grey: Not available
E9RF0FH_EN.book
Page 23
Friday, May 16, 2014 7:17 PM
Formatting a Disc
Select your desired setting using [K \ L], then
press [ENTER].
Aspect Ratio (Video mode)
Choosing the Recording Format of a
Blank DVD-RW Disc
Video
Auto
4:3
16 : 9
3
Select “Format” using [K \ L], then press
[ENTER].
4
Select “Format Mode” using [K \ L], then press
[ENTER].
5
Select “Video mode” or “VR mode” using
[K \ L], then press [ENTER].
Select “DVD Menu” using [K \ L], then press
[ENTER].
Note
• For VR mode DVD-RW disc, the image will be recorded in
whichever the ratio that the programme you record is
broadcasted with, regardless of the “Aspect Ratio (Video
mode)” setting.
Setting Auto Chapter
Video
In stop mode, press [SETUP]. Select “General
Setting” using [K \ L], then press [ENTER].
2
Select “Recording” using [K \ L], then press
[ENTER].
Video mode
DVD Player Compatibility mode.
VR mode
Editing possibility mode.
3
Select “Auto Chapter” using [K \ L], then press
[ENTER].
6
7
Press [SETUP] to exit.
4
If you want to set “Auto Chapter” off, select
“OFF” using [K \ L], then press [ENTER].
Insert a blank disc.
Auto Chapter
Formatting will start.
OFF
5 minutes
10 minutes
15 minutes
30 minutes
60 minutes
Formatting is complete.
“100%” is indicated.
Note
5
Press [SETUP] to exit.
Note
• The interval for auto chapter may be up to 2 minutes
different from the time option you set.
• While recording, no more chapter mark will be added after
coming up to the maximum chapter mark number.
Reformatting a Disc Manually
Video
DVD-RW
DVD-R
You can set aspect ratio for video mode recording.
In stop mode, press [SETUP]. Select “General
Setting” using [K \ L], then press [ENTER].
2
Select “Recording” using [K \ L], then press
[ENTER].
3
Select “Aspect Ratio (Video mode)” using
[K \ L], then press [ENTER].
VR
Others
1
Video
DVD-RW
DVD-RW
If you use a DVD-RW disc, you can format the disc by
performing “Format”. You can format DVD-RW disc for either
video mode recording or VR mode recording.
Note
• When you reformat the disc, the contents of the disc are
erased.
• Make sure that the recording format is set to the desired
mode. (Refer steps 1 to 6 in “Choosing the Recording
Format of a Blank DVD-RW Disc” on page 23.)
EN
VCR Functions
Setting Aspect Ratio for Video Mode
Recording
If you want to change the time period for “Auto
Chapter”, select the required time period using
[K \ L], then press [ENTER].
Function Setup
• The recording format setting is effective only for DVD-RW
discs. You cannot change the recording format for a DVD-R
disc.
• You cannot mix two formats on one DVD-RW disc.
• If you insert a disc that has been formatted before, the
recording format is not changed if you select another format
in the “Setup” menu only. To reformat a disc (change disc
format type), refer to “Reformatting a Disc Manually” on
page 23.
Editing
8
Playback
1
Format Mode
Video mode
VR mode
VR
DVD-RW
DVD-RW
DVD-R
The unit inserts a chapter mark periodically (every 10 minutes
by default) during recording. Using the Auto Chapter menu,
you can set this function off or change the time period.
Recording
In stop mode, press [SETUP].
Press [SETUP] to exit.
Basic Setup /
TV View Operation
1
2
5
Connections
Auto: It will be recorded with whichever the ratio that the
programme you started to record is broadcasted
with.
4:3 : Recorded with the aspect ratio of 4:3.
16:9 : Recorded with the aspect ratio of 16:9.
VR
DVD-RW
DVD-RW
When inserting a brand-new DVD-RW disc, the unit
automatically starts to initialise the disc. DVD-RW disc will be
formatted either video or VR mode according to the recording
format mode setting of the unit. Before inserting a brand-new
DVD-RW disc, you need to set the recording format to the
desired mode. You can also manually format a DVD-RW disc
once it has been used.
Introduction
4
23
E9RF0FH_EN.book
Page 24
Friday, May 16, 2014 7:17 PM
Insert a recordable disc.
1 In stop mode, press [SETUP].
2
Select “DVD Menu” using [K \ L], then press
[ENTER].
3
Select “Format” using [K \ L], then press
[ENTER].
4
Select “Start” using [K \ L], then press
[ENTER].
A pop up window will appear and prompt you to confirm.
5
Select “Yes” using [K \ L], then press [ENTER].
e.g.) VR mode DVD-RW
Are you sure?
Yes
No
Setting Bilingual Recording Audio
Video
DVD-RW
DVD-R
You can select either “Main” or “Sub” audio to record a
bilingual broadcast in video mode when the external input
audio is a bilingual broadcast.
1
In stop mode, press [SETUP]. Select “General
Setting” using [K \ L], then press [ENTER].
2
Select “Recording” using [K \ L], then press
[ENTER].
3
Select “Bilingual Recording Audio” using
[K \ L], then press [ENTER].
4
Select “Main” or “Sub” using [K \ L], then
press [ENTER].
Formatting will start.
If you want to cancel formatting, select “No”.
6
Bilingual Recording Audio
Main
Sub
Formatting is complete.
5
Note
• It is not possible to use a disc formatted with another DVD
recorder. The disc needs to be reformatted with this unit. But
this unit may not be able to reformat some discs that are not
previously formatted by this unit (e.g. DVD disc formatted by
PC or another recorder).
Selecting the Audio Mode
You can set the external input audio type for recording.
You can switch between modes by pressing [AUDIO]. Each
mode is indicated on the TV.
Setting External Input Audio
Video
VR
DVD-RW
DVD-RW
DVD-R
When the external input audio is a bilingual broadcast, you
can choose “Stereo” or “Bilingual” to record on a DVD. This
setting is only for recording external input (AV1/AV2).
Press [SETUP] to exit.
Note
• If you want to record onto a VR mode disc, both “Main” and
“Sub” will be recorded regardless of your setting here. And
when you play back, you can choose either audio format or a
combination of both as your playback audio.
Recording Audio Select (1H)
Video
VR
DVD-RW
DVD-RW
DVD-R
You can enjoy high quality sound recording. This function
works only when the recording speed is set at 1H.
1
In stop mode, press [SETUP]. Select “General
Setting” using [K \ L], then press [ENTER].
2
Select “Recording” using [K \ L], then press
[ENTER].
3
Select “Recording Audio Select (1H)” using
[K \ L], then press [ENTER].
4
Select “PCM” or “Dolby Digital” using [K \ L],
then press [ENTER].
1
In stop mode, press [SETUP]. Select “General
Setting” using [K \ L], then press [ENTER].
2
Select “Recording” using [K \ L], then press
[ENTER].
3
Select “External Input Audio” using [K \ L],
then press [ENTER].
PCM:
4
Select “Stereo” or “Bilingual” using [K \ L],
then press [ENTER].
Dolby Digital:
External Input Audio
Stereo
Bilingual
5
Press [SETUP] to exit.
Note
• If you select “Stereo”:
The audio will be recorded as “stereo audio”.
• If you select “Bilingual”:
The audio will be recorded as “bilingual audio”. (See “Setting
Bilingual Recording Audio” on page 24 for more detail.)
24
EN
Recording Audio Select (1H)
PCM
Dolby Digital
5
Records PCM audio for the best quality
sound.
Records Dolby Digital audio for good
quality sound.
Press [SETUP] to exit.
Note
• “PCM” stands for Pulse Code Modulation. It changes
analogue sound to digital sound without compressing audio
data.
• When the recording speed is set at other than 1H, the unit
records “Dolby Digital” audio automatically even if you
selected “PCM”.
E9RF0FH_EN.book
Page 25
Friday, May 16, 2014 7:17 PM
Basic Recording and One-touch Timer
Recording (OTR)
Video
VR
1
Press [STANDBY-ON Q] to turn on the unit.
Turn on the TV and be sure to select the input to which the
unit is connected.
Press [OPEN\CLOSE EJECT A] to open the
disc tray.
3
Place the disc on the disc tray with its label
facing up. Be sure to align the disc with the disc
tray guide.
5
Select the recording speed using [REC SPEED].
(See page 21.)
6
Select the desired channel to record using
[AUX G \ H] or [the Number buttons].
7
Basic Recording:
Press [REC] to start recording.
The “I” mark will be displayed on the TV screen briefly.
One-touch Timer Recording (OTR):
This is a simple way to set the recording time in blocks of
30 minutes. Check that the disc you are recording onto
has enough space remaining for the time you set. (See
page 62 for VCR recording.)
VCR Functions
Press [REC] repeatedly until the desired
recording time (30 minutes to 8 hours) appears
on the TV screen.
One-touch Timer Recording will start.
0:30
Normal
Recording
1:00
Others
8:00
Function Setup
To pause the recording, press [PAUSE F]. Press
[PAUSE F] or [REC] again to restart the recording.
Editing
Press [OPEN\CLOSE EJECT A] to close the
disc tray.
• You can change the channel while in the REC pause mode.
• Recording continues until the disc is full or you stop the
recording.
• If the clock is not set, the date and time of title names will be
01/01/14 and 00:00.
• You cannot change the recording speed in the REC or REC
pause mode.
• Even if the external input you are recording is in the SECAM
system, this unit automatically converts it to the PAL system
when recording.
• Up to 99 titles can be recorded on the DVD-RW/-R discs.
• You can play back a title on one component while making a
recording on the other component. To do so, simply select
the component (DVD or VCR) you want to use for the
playback by pressing [DVD] or [VCR] during DVD / VCR
recording. And then follow the normal playback procedure.
• NTSC recording is prohibited in this unit.
• The remaining recording time will appear on the TV screen
during One-touch Timer Recording. Press [DISPLAY] to see
it on the TV screen.
• The remaining recording time will be displayed on the front
panel display during One-touch Timer Recording.
• Unlike the timer recording, you can perform the following
operations during One-touch Timer Recording.
- Turn off the power. (One-touch timer recording will be
cancelled.)
- Use [REC] or [STOP C] on the remote control.
• You cannot use the pause function during One-touch Timer
Recording.
• The unit will be turned off automatically under the following
conditions.
- No space remains on the disc.
- If a power failure occurs.
• If DVD One-touch Timer Recording is completed during
VCR playback or recording, the DVD will be in stop mode
and the VCR keeps the current mode.
• When One-touch Timer Recording is finished and the power
is turned off, the unit will switch to the timer-standby mode
automatically if a timer recording has been programmed.
Press [TIMER SET] to cancel the timer-standby mode to
use the unit continuously.
Playback
4
This operation may take a few moments to complete.
Note
Recording
Disc tray guide
Press [STOP C] to stop the recording.
Basic Setup /
TV View Operation
Press [DVD].
2
8
Connections
DVD-RW
DVD-RW
DVD-R
Follow the steps below to record an external input.
This unit has no tuner system so it cannot receive TV
broadcasts without an external tuner or such devices.
(See page 62 for VCR recording.)
Introduction
• When the unit reaches the specified time, it will be
turned off automatically.
• To change the recording length during One-touch Timer
Recording, press [REC] repeatedly until the desired
length appears.
• To cancel One-touch Timer Recording within the
specified time, press [STOP C].
7:30
EN
25
E9RF0FH_EN.book
Page 26
Friday, May 16, 2014 7:17 PM
Timer Recording
Video
4
Enter the time to start and to end using [K \ L],
then press [1].
5
Select the external input (AV1/AV2) using
[K \ L], then press [1].
6
Select the recording media (“DVD” or “VCR”)
using [K \ L], then press [1].
7
Select the recording speed using [K \ L], then
press [1].
VR
VCR
DVD-RW
DVD-RW
DVD-R
You can set the unit to record up to 12 programmes, up to a
month in advance. Daily or weekly programme recordings are
also available.
• Be sure to set the clock before entering a timer
programming.
Insert a recordable disc or a tape with a record tab.
1 In stop mode, press [TIMER PROG.].
Refer to “Recording Speed” on page 21 for DVD or
page 62 for VCR.
8
“Timer Programming” list will appear.
2
Select “New Programme” using [K \ L], then
press [ENTER].
Your programme setting is stored.
• To set another programme, repeat steps 2 to 8.
• To exit, press [TIMER PROG.].
• When 2 or more programmes are overlapped, “Timer
programme overlapped” appears, and the overlapped
programme will be displayed in blue. To correct the timer
programme, refer to “Checking, Cancelling or Correcting
the Timer Programming Information” on page 27.
Timer Programming
0:00 SAT 17/05
Date
20/05
21/05
Start
End
7:00
9:00
9:00
9:30
New Programme
CH
AV1
AV2
Press [ENTER] when all information required is
entered.
9
Press [TIMER SET] to set a timer programming.
Timer Programming
0:00 SAT 17/05
1/1
• If there are 6 programmes or more, use
[SKIP H \ G] to turn the page.
3
Enter the date using [K \ L], then press [1].
Each time you press [L] at the current date, the timer
recording date will change as follows.
e.g., 1st January
Daily
M-F (Mon.-Fri.)
W-SAT
W-FRI
W-SUN
31/01
Timer Programming
0:00 SAT 17/05
Start
--:-REC To
DVD
End
--:-Speed
2H
2H
2:00
1/1
26
EN
Start
End
9:00
7:00
9:30
9:00
18:00
17:00
New Programme
CH
AV1
AV2
AV2
1/1
Front panel display stays off while the unit is in the
standby mode.
01/01
Date
20/05
CH
AV1
Date
20/05
21/05
22/05
E9RF0FH_EN.book
Page 27
Friday, May 16, 2014 7:17 PM
Checking, Cancelling or Correcting the
Timer Programming Information
1
Press [TIMER SET] to cancel the timer-standby
mode.
2
Press [TIMER PROG.].
Introduction
Note
“Timer Programming” list will appear.
3
Connections
A) To delete the timer programme:
1) Select the programme you want to delete using
[K \ L], then press [ENTER].
2) Select “Delete” using [K \ L], then press [ENTER].
Confirmation window will appear.
3) Select “Yes” using [K \ L], then press [ENTER].
B) To correct the timer programme:
1) Select the programme you want to correct using
[K \ L], then press [ENTER].
2) Select “Programme Change” using [K \ L], then press
[ENTER].
3) Correct the timer programme by using [K \ L \ 0 \ 1],
then press [ENTER].
Press [TIMER PROG.] to exit.
Recording
4
5
Basic Setup /
TV View Operation
• If you have not set the clock, the clock setting window will
appear instead of the Timer Programming list. Continue
from “ Clock” on page 61 before programming the timer.
• Press [K \ L] to move the cursor in “Timer Programming”
list.
• If a basic recording or One-touch Timer Recording is in
progress on one component (e.g. VCR) and the timer
recording set for the other component (e.g. DVD) is about to
begin, the unit automatically switches to the programmed
channel for timer recording 2 minutes before the
programmed starting time, and the recording in progress (for
VCR) will be cancelled UNLESS their recording channels
are the same. If their recording channels are the same, the
timer recording will start without cancelling the recording
currently in progress. In this case, the recording of the same
channel will be made on both DVD and VCR.
• Cancel the timer-standby mode by pressing [TIMER SET] to
use the component currently in timer-standby mode. When
finished operating, press [TIMER SET] to resume the timerstandby mode.
• In the timer-standby mode, you can turn on the power and
use the component (VCR or DVD) which is not currently
timer-programmed.
Press [TIMER SET] to return to the timerstandby mode.
To check the timer programming in progress
Press [TIMER PROG.].
Note
Editing
Stop the Timer Recording in Progress
On the front panel:
Press [STOP C].
If the Timer Programming did not
Complete Correctly
The error number appears on “Timer Programming” list.
VCR Functions
Timer Programming
10:00 SAT 17/05
E40
Start
End
7:00
9:00
New Programme
Function Setup
On the remote control:
1 Press [STOP C].
2 Select “Yes” using [K \ L], then press [ENTER].
Date
17/05
Playback
• If a timer recording is proceeding, that programme is
highlighted in red. In such a case, you cannot select any
other programmes.
• When you check the timer programming in progress by
pressing [TIMER PROG.] during operations of the
component (DVD or VCR) which is not currently used for the
timer recording, the programme will not be highlighted. In
this case, you cannot select other programmings.
CH
AV1
The error programme will be displayed in grey with an error
number.
EN
27
Others
1/1
E9RF0FH_EN.book
Page 28
Friday, May 16, 2014 7:17 PM
The error numbers indicate:
E1–E22, E37–E39 Recording error
E23–E24
Unrecordable disc
E25/E51
• Copy prohibited programme
• Cannot record because of the NTSC /
PAL-60 signal is received.
E26–E28
Copy prohibited programme
E29
Disc protected
Priority of overlapped settings
The unit records programmes according to priority if the timer
programmes overlap.
If the starting time is same:
• The timer programming set first (PROG. 1) has priority.
PROG. 2
recording will start
after PROG. 1
recording is
completed.
PROG. 1
PROG. 2
E30
Disc full
E31
Already recorded 99 titles (video mode)
Actual
recording
E32
Already recorded 99 titles (VR mode)
The first 2 minutes (at the longest) will be cut off.
E33
Already recorded 999 chapters
E34
No space for Control Information
E35
PCA (Power Calibration Area) full
E36
Already finalised video format disc
E40
• There are some unrecorded parts due
to the overlapped timer programmes.
• Recording did not start at the start
time.
E41
Power failure
E42
No disc
E45
Copy prohibited programme
• Timer programme with an error number will be cleared once
the entry screen for the programme is displayed.
Notes for the Timer Recording
• If there is a power failure or the unit is unplugged for more
than 30 seconds, the clock setting and all timer settings will
be lost.
• If a disc is not inserted or if a inserted disc is not recordable
(finalised DVD-RW/-R, a fully recorded disc, etc.), the DVD
on the front panel display will flash and the timer recording
will not occur. Insert a recordable disc.
• If there is no tape or a tape with a record tab is not in the
cassette compartment, the VCR on the front panel display
will flash and the timer recording cannot be performed.
Please insert a recordable tape.
• After all timer recordings have completed, if you want to play
back or eject the recorded disc, press [TIMER SET], and
then press [PLAY B] or [OPEN\CLOSE EJECT A].
• The timer recording cannot be performed in DVD and VCR
at the same time. If you set two programmings with the same
channel and time both in DVD and VCR, the programming
that has priority will be recorded.
• You cannot make any DVD operation during DVD timer
recording.
• You cannot make any VCR operation during VCR timer
recording.
• Timer recording whose recording time exceeds 12 hours
cannot be made.
• When 2 or more programmes are overlapped, “Timer
programme overlapped” appears, and the overlapped
programme will be displayed in blue. To correct the timer
programme refer to “Checking, Cancelling or Correcting the
Timer Programming Information” on page 27.
• If the Start time is earlier and the End time is later than the
current time, the recording will start immediately after you
press [TIMER SET].
• If a videotape ends during the timer recording, the unit will
automatically stop, eject the videotape, and turn itself off. To
continue recording, insert a recordable tape.
28
EN
PROG. 1
PROG. 2
When the starting time and the ending time for each
programmes are different:
• A programme that has earlier start time has priority.
PROG. 1
PROG. 2
PROG. 3
Actual
recording
PROG. 1
PROG. 3
PRO
G. 2
The first 2 minutes (at the longest) will be cut off.
If the recording time is partially overlapped:
• The timer programming with the earlier start time (PROG. 2)
has priority. PROG. 1 will start after PROG. 2 recording is
complete.
PROG. 1
PROG. 2
Actual
recording
PROG. 2
PROG. 1
The first 2 minutes (at the longest) will be cut off.
If the recording time entirely overlaps:
• The shorter timer programming (PROG. 1) is not recorded.
PROG. 1
PROG. 2
Actual
recording
PROG. 2
Note for DVD recording
• If the recording time of two programmes are overlapped, or
the End time of a programme and the Start time of another is
same, the first 2 minutes (at the longest) of the subsequent
programme will be cut off.
If the End time of the programme currently being
recorded and the Start time of the subsequent
programme are same:
• If PROG. 1 is a DVD recorded programme, the beginning of
the PROG. 2 may be cut off.
PROG. 1
PROG. 2
Actual
recording
PROG. 1
PROG. 2
The first 2 minutes (at the
longest) will be cut off.*
* If the cut off time exceeds 3 minutes, the error number “E40”
will appear in “Timer Programming” list.
E9RF0FH_EN.book
Page 29
Friday, May 16, 2014 7:17 PM
Satellite Link
You can set the unit to start recording whenever it detects the
video scart control from the external tuner.
Preparing for the satellite link timer recording:
Timer
Recording
Satellite Link
Basic Setup /
TV View Operation
[Preparation of this unit]
• Make sure to select the desired recording speed
beforehand.
External tuner
(not supplied)
Example 1
Connections
[Preparation of the external tuner]
• The external tuner should be equipped with some kind
of timer function. Using timer function of the tuner, set it
to be turned on when it comes to the time you want to
start recording, and off when it comes to the time you
want to finish recording. (Refer to the tuner’s manual on
how to set the timer.)
• Make sure to turn off the external tuner when you finish
setting.
Introduction
Note
• If you have not set the clock, the clock setting window will
appear and follow to “ Clock” on page 61.
• You cannot set the End time for the satellite link timer
recording on this unit.
• Recording picture will be distorted if the copy protection
signal is being detected during satellite link timer recording.
• When a regular timer recording and the satellite link timer
recording are overlapped, the examples are given below.
Actual
Recording
Example 2
Timer
Recording
Recording
Satellite Link
Scart cable (not supplied)
Actual
Recording
Example 3
Playback
Timer
Recording
Satellite Link
In stop mode, press [DVD]/[VCR] to select the
DVD mode or the VCR mode, then select the
recording speed using [REC SPEED].
2
Press [SAT.LINK].
Actual
Recording
Editing
1
• “Sat” will appear on the front panel display and the unit
goes into the satellite link standby mode.
Function Setup
DVD
To cancel the satellite link function in the satellite link
standby mode:
Press [TIMER SET] or [SAT.LINK] to turn on the unit.
VCR Functions
To cancel the satellite link function while the satellite link
recording is in progress:
On the front panel
Press [STOP C].
On the remote control
1 Press [STOP C].
2 Select “Yes” using [K \ L], then press [ENTER].
Others
EN
29
E9RF0FH_EN.book
Page 30
Friday, May 16, 2014 7:17 PM
When you want to record to a videotape:
Settings for External Equipment
Press [VCR].
Insert a videotape with a record tab into the
cassette compartment.
Video Colour System
When you record from external equipment or copy a
videotape to a DVD disc, you can set the format Auto, PAL or
SECAM.
3
Select the input terminal to which the external
equipment is connected (AV1 or AV2).
Press [AUX G \ H] repeatedly to select AV1 or AV2.
1
In stop mode, press [SETUP]. Select “General
Setting” using [K \ L], then press [ENTER].
2
Select “Recording” using [K \ L], then press
[ENTER].
5
3
Select “Video Colour System” using [K \ L],
then press [ENTER].
Press [RECORD I] (DVD / VCR) on the unit to
start recording.
6
4
Select “Auto”, “PAL” or “SECAM” using [K \ L],
then press [ENTER].
Press the [PLAY B] button on the external
equipment.
4
Refer to “Recording Speed” on page 21 for DVD or page
62 for VCR.
7
General Setting
Playback
Display
Video
Recording
Clock
DivX
HDMI
Reset All
Auto:
5
Auto Chapter
Recording Audio Select (1H)
Auto
Finalise
Video Colour
System
Aspect Ratio (Video mode)
Auto Dubbing Mode
PAL Bilingual Recording Audio
SECAM
External Input Audio
Video Colour System
The video colour system will be set
automatically according to the recording
material.
PAL:
The video colour system will be set to PAL.
SECAM:
The video colour system will be set to
SECAM.
Press [SETUP] to exit.
Note
• During recording, when a signal other than PAL or SECAM
is detected, an error message appears on the screen and
recording will be paused. Recording will be resumed when a
PAL or SECAM signal is detected.
Recording from External Equipment
Video
VR
VCR
DVD-RW
DVD-RW
DVD-R
Before recording from external equipment, see page 19 for
connection instructions.
1
Turn on the TV and be sure to select the input to
which the unit is connected.
2
When you want to record to the disc:
Press [DVD].
Press [OPEN\CLOSE EJECT A] to open the
disc tray, then place the disc to record on.
Press [OPEN\CLOSE EJECT A] again to close
the disc tray.
30
EN
Select a recording speed using [REC SPEED].
For disc:
Press [STOP C] on the unit to stop
recording.
For videotape:
Press [STOP\EJECT C A] on the unit to stop
recording.
Note
• During recording, recording will be paused when a signal
other than PAL or SECAM is detected. (See “Video Colour
System” on page 30 for details.)
• The signal from the external device will be output automatically
when the TV is connected to AV1 and the external device is
connected to AV2 using a Scart cable with its power on.
(However, it will not be output when this unit’s power is turned off.)
If you want to monitor this unit’s signal, press [DISPLAY]
or turn the external device off. (The signal from this unit can
only be monitored during playback.)
If you want to monitor the signal from other input, press
[DISPLAY], then select the desired input channel using
[AUX G \ H].
Information on DV Dubbing
This function helps you to dub the contents in the DVC (digital
video camcorder) to DVD or VCR easily. (See page 63 for
DVC to VCR Dubbing.)
You can control basic operations of the DVC from the remote
control of this unit if the DVC is in video mode.
Guide to DV and On-Screen Display
1
2
Connect your DVC to the DV-IN jack on the front
panel using a DV cable. (Use the DV cable that
has 4-pin input jack and is compliance with the
IEEE 1394 standards.)
Press [AUX G \ H] repeatedly to select
DV(AV3).
E9RF0FH_EN.book
Friday, May 16, 2014 7:17 PM
Press [DISPLAY] to display the DVC information
on the screen.
7
Status of the current operation and the time
counter
Each icon means (Available icons may vary depending on
the DVC):
When the DVC is in video mode...
T
1/ 1 C
DVC is in stop mode.
1/ 1
-RW
Control
DV Audio
Start Rec
DVD
Stereo1
VR
ORG
DVC is in playback mode.
DV
AB-1234
0:12:34
DVC is in pause mode.
Connections
1
2
DVC is fast forwarding. (standard speed)
DVC is fast forwarding. (faster than above)
DVC is fast forwarding. (faster than above)
DVD 2H
DVC is slow forwarding. (standard speed)
2:00
Basic Setup /
TV View Operation
DVC is slow forwarding. (faster than above)
3
4
DVC is slow forwarding. (faster than above)
When the DVC is in camera mode...
T
1/ 1 C
DVC is fast forwarding. (in stop mode)
DVC is fast reversing. (in stop mode)
1/ 1
-RW
VR
DVC is fast reversing. (standard speed)
ORG
5
DVC is fast reversing. (faster than above)
Recording
DV
AB-1234
0:12:34
DVC is fast reversing. (faster than above)
DVC is in slow reverse playback.
DVC is in recording.
DVD 2H
DVC is in recording pause mode.
2:00
6
Please also read the operating instructions of your
DVC for more information.
Playback
7
The menu changes according to the mode of DVC.
Switch the mode on the DVC to video mode for the dubbing
information.
The following instructions are described with the
operations using the remote control of this unit.
DV icon
Indicator of active device
3
Preparing for DV dubbing (DVC to DVD):
• Insert a recordable DVD.
• Make sure your DVC is in video mode.
Press [DVD] first.
1
Press [AUX G \ H] repeatedly to select
DV(AV3).
VCR Functions
Command menu
• “Start Rec” or “Pause Rec” will appear.
DV
AB-1234
0:00:00
2
Press [REC SPEED] to select a recording
speed. (See page 21.)
3
Press [DISPLAY].
External input channel
Product name of your DVC
Others
5
6
VR
Recording audio mode
• “DV Audio” can be changed. With “DV Audio” selected,
press [ENTER] to display “DV Audio” menu. Select the
audio you want to output using [K \ L], then press
[ENTER].
- Select “Stereo1” to dub the stereo sound.
- Select “Stereo2” to dub the sound that was added after
the recording.
- Select “Mix” to dub the stereo1 and stereo2.
4
Video
DVD-RW
DVD-RW
DVD-R
Before recording from DVC, see page 19 for connection
instructions. (See page 63 for DVC to VCR Dubbing.)
Function Setup
• With “Control” highlighted, press [ENTER] to display the
available devices to control with the remote control of
this unit. Select the device you want to operate using
[K \ L], then press [ENTER].
- Select “DVD” to control this unit with the remote control
of this unit.
- Select “DVC” to control your DVC with the remote
control of this unit.
DVC to DVD Dubbing
Editing
1
2
Introduction
3
Page 31
• If the unit cannot recognise the input signal from the
DVC or if it is the unknown product, “No Device” or “****”
will appear instead.
EN
31
E9RF0FH_EN.book
4
Page 32
Friday, May 16, 2014 7:17 PM
With “Control” highlighted, press [ENTER] to
display the available devices to control with the
remote control of this unit. Select “DVC” using
[K \ L], then press [ENTER].
e.g.) DVC to DVD dubbing
T
1/ 1 C
1/ 1
-RW
Control
DV Audio
Start Rec
DVD
Stereo1
VR
ORG
DV
AB-1234
0:00:00
Dubbing Mode
You can copy a DVD disc to a videotape or copy a videotape
to a DVD disc. This function will be possible only if the DVD or
the videotape is not copy protected.
Before dubbing, prepare for the recording on the DVDs or the
videotape. See pages 21-22 (DVD) or page 62 (VCR).
Note for recording to a videotape:
• The videotape’s record tab is intact.
• The videotape is long enough to record the DVD disc.
Note for recording to a disc:
DVD 2H
2:00
Now you can operate your DVC with the remote control of
this unit.
5
6
• The DVD disc is satisfied with the recording status. See
pages 21-22.
Insert a disc and a videotape with a record tab.
Press [PLAY B] to start playing back the DVC,
and find where you want to start dubbing.
Press [STOP C] when it comes to the desired
start point.
1
In stop mode, press [SETUP]. Select “General
Setting” using [K \ L], then press [ENTER].
2
Select “Start Rec” using [K \ L], then press
[ENTER].
Select “Recording” using [K \ L], then press
[ENTER].
3
Select “Dubbing Mode” using [K \ L], then
press [ENTER].
The dubbing will start.
To stop dubbing:
1) Select “Control” using [K \ L], then press
[ENTER].
2) Select “DVD” using [K \ L], then press [ENTER].
3) Press [STOP C].
Option window will appear.
VCR to DVD
4
General Setting
Note
• The tape will rewind a few seconds when you press
[ENTER] at step 6 so that the dubbing starts exactly where
you press [PAUSE F] instead of [STOP C] at step 5.
• The unit does not send out the output signal to DVC.
• For the proper operation, connect DVC to the unit directly.
Do not connect this unit and DVC via any other unit.
• Do not connect more than one DVC.
• The unit can only accept DVC. Other DV device such as
cable/satellite box or D-VHS recorder cannot be recognised.
• If no video signal is detected from the DVC during DVC to
DVD dubbing, the recording will be paused and “I” will flash
on the TV screen. The recording will resume when the unit
detects the video signal again.
• When the DVC is in camera mode, refer to “Guide to DV and
On-Screen Display” on page 30.
• Date / time and cassette memory data will not be recorded.
• Pictures with a copy-guard signal cannot be recorded.
• A DV terminal is a terminal that can use the transmission
mode conforming to the IEEE 1394 standards called
“Fire Wire”. It serves as the interface that connects the PC
and peripheral device such as “i.LINK” (registered trademark
of SONY). It enables digital dubbing between DV devices
with little degradation.
32
EN
Select “VCR A DVD” using [K \ L], then press
[ENTER].
Playback
Display
Video
Recording
Clock
DivX
HDMI
Reset All
Auto Chapter
Recording Audio Select (1H)
Auto
Dubbing ModeFinalise
Aspect Ratio (Video mode)
VCR Dubbing
DVD Mode
DVD Bilingual
VCR Recording Audio
External Input Audio
Video Colour System
5
6
7
Press [SETUP] to exit.
8
Press [DVD].
Press [VCR].
Press [PLAY B], and then press [PAUSE F]
where you want to start recording.
Make sure to select a recording speed using
[REC SPEED]. (See page 21.)
9
Press [DUBBING].
VCR to DVD duplication will start.
10 Press [STOP C] to stop the recording.
Note for VCR to DVD duplication:
• During duplication, recording will be paused when a
signal other than PAL or SECAM is detected. (See
“Video Colour System” on page 30 for details.)
• After starting VCR to DVD duplication, the picture may
be distorted because of the auto tracking function. This
is not a malfunction. Be advised to play back the tape
until the picture is stabilised, then set the starting point
at which you want to start recording, and start VCR to
DVD duplication.
E9RF0FH_EN.book
Page 33
Friday, May 16, 2014 7:17 PM
Introduction
Setting a Disc to Protect
VR
DVD-RW
To prevent accidental over-recording, editing or erasing of
recordings, you can protect them using “Setup” menu.
Insert a recordable disc.
1 In stop mode, press [SETUP].
Select “DVD Menu” using [K \ L], then press
[ENTER].
3
Select “Disc Protect OFF A ON” using [K \ L],
then press [ENTER].
4
Select “Yes” using [K \ L], then press [ENTER].
The disc is protected.
5
Press [SETUP] to exit.
Note
DVD to VCR
Select “DVD A VCR” using [K \ L], then press
[ENTER].
General Setting
Auto Chapter
Recording Audio Select (1H)
Dubbing Auto
ModeFinalise
Aspect Ratio (Video mode)
VCR Dubbing
DVD Mode
DVD Bilingual
VCR Recording Audio
External Input Audio
Video Colour System
Finalising Discs
Video
Press [SETUP] to exit “Setup” menu.
8
Press [VCR].
Press [DVD].
Press [PLAY B], and then press [PAUSE F] at
the point you want to start recording.
9
Press [DUBBING].
Insert a recordable disc before finalising.
1 In stop mode, press [SETUP].
2
Select “DVD Menu” using [K \ L], then press
[ENTER].
3
Select “Finalise” using [K \ L], then press
[ENTER].
4
Select “Yes” using [K \ L], then press [ENTER].
DVD to VCR duplication will start.
10 Press [STOP C] to stop the recording.
Note
Finalise disc?
Yes
No
VCR Functions
• NTSC dubbing is prohibited in this unit.
• Dubbing mode is available only if the tape or disc is not
copy-protected.
• You cannot change the output mode during VCR to DVD or
DVD to VCR duplication.
• If you want to watch the duplicated material, after the DVD to
VCR duplication, press [VCR] first and then press [PLAY B].
• When “DV” is selected as input, DUBBING function cannot
be performed. DUBBING can be performed with either AV1
or AV2 inputs.
Function Setup
Make sure to select a recording speed using
[REC SPEED]. (See page 62.)
Rewind or fast forward the tape to the point where you
want to start recording.
Editing
5
6
7
VR
DVD-RW
DVD-RW
DVD-R
You will need to finalise discs to play them back in other units.
Finalising may take from several minutes up to an hour.
A shorter recording period on the disc will require a longer
time period for finalisation. Do not unplug the mains cable
during finalisation.
Playback
Playback
Display
Video
Recording
Clock
DivX
HDMI
Reset All
Recording
4
• The Disc Protect setting is available only when a disc
recorded in VR mode is inserted.
• You can select only “Disc Protect ON A OFF” when a
protected disc is inserted.
To cancel the disc protect:
• Select “Disc Protect ON A OFF” at step 3, then select “Yes”.
• If you insert a disc protected with this unit, “Disc Protect
ON A OFF” will appear instead of “OFF A ON”.
Basic Setup /
TV View Operation
2
Connections
• This unit will automatically stop the duplication if
playback with no image detected for more than 3
minutes during VCR to DVD duplication.
• If the playback sound mode of VCR is set to “STEREO”,
“LEFT” or “RIGHT”, the sound mode upon dubbing is
automatically switched to “STEREO”. If the playback
sound mode is set to “MONO”, the sound mode upon
dubbing is also “MONO”.
• If you set “External Input Audio” to “Stereo”, the sound is
recorded in “Stereo” (video mode and VR mode).
• While in video mode, if you set “External Input Audio” to
“Bilingual”, the audio set in “Bilingual Recording Audio”
mode is recorded. While in VR mode, if you set
“External Input Audio” to “Bilingual”, bilingual audio is
recorded.
• The main and sub audio will be simultaneously recorded
(VR mode). You can select audio modes during
playback.
• If you want to watch the duplicated material, after the
VCR to DVD duplication, press [DVD] first then press
[PLAY B].
Finalising will start.
Others
EN
33
E9RF0FH_EN.book
Page 34
Friday, May 16, 2014 7:17 PM
To cancel finalising (DVD-RW disc only):
At step 4, press [STOP C]. Select “Yes” using [K \ L],
then press [ENTER]. Finalising is cancelled and the unit
switches to stop mode.
Do you want to cancel?
Yes
No
10%
Finalising
If “ ” appears when [STOP C] is pressed, you cannot
cancel finalising because the finalising has already
reached at a critical point in its process.
If “No” is selected and [ENTER] or [RETURN] is pressed,
finalising is continued.
You cannot cancel finalising a DVD-R disc once it has
started.
5
Finalising is complete.
Note
• Finalising a disc in video mode automatically creates a Title
menu.
• After you finalise DVD-RW/-R disc, you can edit or record
only on a video mode disc.
• To release the finalisation of the disc, select “Undo Finalise”
at step 3.
• If you insert a DVD-RW disc finalised with this unit,
“Undo Finalise” will appear instead of “Finalise”.
• DO NOT power off during finalising. This may result in a
malfunction.
Auto Finalise
Video
DVD-RW
DVD-R
You can finalise discs automatically when the disc space runs
out if you set this in “Setup” menu.
1
In stop mode, press [SETUP]. Select “General
Setting” using [K \ L], then press [ENTER].
2
Select “Recording” using [K \ L], then press
[ENTER].
3
Select “Auto Finalise” using [K \ L], then press
[ENTER].
4
Select “ON” using [K \ L], then press [ENTER].
Auto Finalise
ON
OFF
5
Press [SETUP] to exit.
Note
• Auto finalise function is not available for discs formatted in
VR mode disc.
34
EN
E9RF0FH_EN.book
Page 35
Friday, May 16, 2014 7:17 PM
Introduction
Playback
9
Note for DVD Playback
The contents of a DVD are generally divided into titles. Titles
are further subdivided into chapters depend on Auto Chapter
setting (See page 23).
Title 1
Stop Rec.
Title 2
Playing Back a DVD-V
DVD-V
Playing Back a DVD-RW /
DVD-R Disc
VR
DVD-RW
Follow steps 1 to 5 in “Playing Back a DVD-RW /
DVD-R Disc” on page 35.
2
Press [PLAY B] to start playback.
DVD-R
Playback will start.
Press [STANDBY-ON Q] to turn on the unit.
Turn on the TV and be sure to select the input to which the
unit is connected.
2
3
Press [DVD].
4
Place the disc on the disc tray with its label
facing up. Be sure to align the disc with the disc
tray guide.
If you play back a DVD-video, a disc menu may appear.
See page 39 for details.
3
Press [STOP C] to stop playback.
Note
Press [OPEN\CLOSE EJECT A] to open the
disc tray.
• Some discs may start playback automatically.
2
If you want to play back an audio CD or a disc
with a single file type (e.g., a disc containing
MP3 files only), skip to step 4.
If you want to play back a disc with mixed file
types, proceed to step 3.
3
Select the desired file type using [K \ L], then
press [ENTER].
6
Press [TOP MENU] to display the Title list.
You can switch between the “Original” and “Playlist” in the
VR mode DVD-RW disc using [MENU\LIST].
Select the desired title using [K \ L \ 0 \ 1],
then press [ENTER].
Pop up window will appear.
Select “Play From Start” using [K \ L], then
press [ENTER].
Playback will start.
EN
35
Others
8
If you want to change the media type, press [0]. Select
the desired media type using [K \ L], then press
[ENTER]. (You can also access the media type selection
screen from the “Title List” in the “Setup” menu in stop
mode.)
• Video Files: The DivX® File List will appear.
• Music: The MP3 File List will appear.
• Photo: The JPEG File List will appear.
VCR Functions
Follow steps 1 to 5 in “Playing Back a DVD-RW /
DVD-R Disc” on page 35.
Function Setup
Press [OPEN\CLOSE EJECT A] to close the
disc tray.
®
1
Disc tray guide
5
MP3 JPEG DivX
Editing
Playing Back an Audio CD or a Disc with
MP3 / JPEG / DivX® Files
CD
7
Playback
1
Video
DVD-RW
1
Recording
Chapter 1 Chapter 2 Chapter 3 Chapter 1 Chapter 2
Basic Setup /
TV View Operation
Stop Rec./Start Rec.
Note
• For DVD-R (video mode) and DVD-RW (video mode) discs
that are already finalised, a Title menu will be displayed
instead of thumbnails.
• You can resume playback from where you stopped playing
back the disc (Resume playback).
See page 40 for details.
• You can also start playback by pressing [PLAY B] instead of
[ENTER] at steps 7 and 8.
• Some discs may start playback automatically.
Connections
To eject the disc, press [OPEN\CLOSE EJECT A] to
open the disc tray, then remove the disc. Press
[OPEN\CLOSE EJECT A] to close the disc tray before
turning off the unit.
Basic Playback
Start Rec.
Press [STOP C] to stop playback.
E9RF0FH_EN.book
4
Page 36
Friday, May 16, 2014 7:17 PM
Press [K \ L] to select the desired track / file or
folder, then press [ENTER].
e.g.) Photo (JPEG) files
File List
DISC NAME
A
B
JPEG file1
JPEG file2
JPEG file3
JPEG file4
JPEG file5
JPEG file6
Note
• Files with extensions other than “.mp3 (MP3)” or “.jpg /
.jpeg (JPEG)” will not be listed in the File List.
• Some folders or tracks listed in the File List may be unplayable
due to their recording status.
• The File List displays only up to 8 folders and file names.
Notes on JPEG:
After file is displayed for 5 seconds or 10 seconds (set in the
“Slide Show” on page 45), the display moves to the next file.
During JPEG playback, press [1] or [0] to rotate a picture 90
degrees clockwise or counterclockwise respectively. (Not
available when the display menu appears.)
1/ 2
If a track / file is selected:
Playback will start.
If a folder is selected:
The files in the folder will appear.
Press [K \ L] to select the file or folder you want, then
press [ENTER].
• You can also call up the file type selection screen by
following the steps below;
In stop mode, press [SETUP]. Select “Title List” using
[K \ L], then press [ENTER]. Select the media type
using [K \ L], then press [ENTER].
• To exit the File List, press [TOP MENU] or press
[STOP C].
• To resume the File List, press [TOP MENU].
• Press [PLAY B], [ENTER] or [1] to move to any lower
folders.
• Press [0] to move back to the folder above.
Note for audio CD tracks and MP3 / JPEG files:
• Folders are shown with the
icon.
• Audio CD tracks are shown by
.
• MP3 files are shown with the
icon.
Playback will start from the selected track and continue
with each one after.
• JPEG files are shown with the
icon.
• The unit can recognise up to 255 folders and up to 99
tracks / 999 files.
• Letters of a file / folder name overflowing the given
space will be displayed as “...”.
• Unplayable folders and tracks / files may be displayed
depending on the recording conditions.
• For MP3 file recorded in Variable Bit Rate (VBR), the
unit may not display the actual elapsed time.
• If there are no files in the folder, “No Files” is displayed.
• High resolution or large-size JPEG files take a few
moments to be displayed.
• It is not possible to play back progressive JPEGs (JPEG
files saved in progressive format) on this unit.
• It is not possible to play back JPEG files of 12 MB or
more.
It is recommended that files to be played back in this unit
are recorded under the following specifications:
[MP3]
• Sampling frequency
• Constant Bit Rate
: 44.1 kHz or 48 kHz
: 112 kbps to 320 kbps
[JPEG] Size of picture
• Upper limit
: 6,300 x 5,100 dots
• Lower limit
: 32 x 32 dots
• Capacity limit
: less than 12 MB
36
EN
Playing Back a USB Device with MP3 /
JPEG / DivX® Files
MP3 JPEG DivX
®
You can play back the contents in a USB device.
Note for DivX®
• DivX® files recorded in USB device are not guaranteed to
play back.
USB Playback
About file types
Playable
Not Playable
.mp3 (MP3)
File extensions other than
these, as shown on the left
are not playable or will not
be listed in the File List.
.jpg (JPEG)
.avi (DivX®)
Compatible / Incompatible devices
Compatible
Incompatible
USB hubs
USB devices with an inner
hub
PC's
USB flash memories
(max. 32GB)
Cameras
Devices which require a
driver (e.g. some MP3
players)
Bus-powered HDD's
USB device requirements:
• USB version 2.0 (Full Speed)
• USB devices formatted with the FAT16 / FAT32 file system are
supported.
• Up to 8 characters (excluding the extension) are displayed as
a file / folder name. 9 or more characters cannot be displayed.
• The maximum supply current from the USB port is up to 500
mA.
Note
• A USB device cannot be used under the following conditions.
- During the operation of the disc tray
- During the disc loading, DVD recording, DVD/CD playback,
editing or dubbing
- While “Title List” or “File List” of disc is displayed
- While “Setup”, “Timer Programming” or “EPG” menu is
displayed
• Do not disconnect the USB device while the indicator on the
device is flickering.
E9RF0FH_EN.book
Friday, May 16, 2014 7:17 PM
In stop mode, plug your USB flash memory.
5V
500mA
front of this unit
2
2
3
Video Files
Music
Photo
Note
Select the desired file type using [K \ L], then
press [ENTER].
KODAK Picture CD
Press [TOP MENU].
Picture CD
Image 1
2
3
4
5
6
After the DivX® file is selected, “Subtitle List”
will appear.
2
Select the desired extension of the subtitle file
you want to display using [K \ L], then press
[ENTER]. DivX® with the subtitle starts
playback. The subtitle cannot be displayed
when the setting is “OFF”.
• If there is more than one extension, the extension
selection will appear in “Subtitle List”.
Note
• “DivX Subtitle” must be activated in the DivX® menu. (Refer
to “B DivX Subtitle (Default: OFF)” on page 61.)
• Playback file and the subtitle file must have the same name.
• Playback file and the subtitle file must locate in the same
folder.
• Only the subtitle files with the following extensions are
supported; .smi (.SMI), .srt (.SRT), .sub (.SUB), .ass (.ASS),
.ssa (.SSA), .txt (.TXT). (.sub (.SUB) and .txt (.TXT) files
may not be recognised.)
• The subtitles that exceed the playback time of the DivX® file
will not be displayed.
1/2
• To exit the Picture CD thumbnail List, press
[TOP MENU], [STOP C] or [RETURN].
VCR Functions
1
1
Function Setup
1
The subtitle created by the user can be displayed during
DivX® playback.
Editing
KODAK Picture CD is a service that converts and stores
photographs taken by a conventional film camera into digital
data and writes the data on a CD. You can enjoy your digital
images on the TV by playing back the KODAK Picture CDs.
For local service providers, please refer to www.kodak.com/
Press [DVD] first.
DivX® Subtitle
Playback
Follow the step 4 in “Playing Back an Audio CD
or a Disc with MP3 / JPEG / DivX® Files” on
pages 35-36.
• After a track is displayed for 5 seconds or 10 seconds (set in
the “Slide Show” on page 45), the display moves to the next
file.
• During JPEG or KODAK Picture CD playback, press [1] or
[0] to rotate a picture 90 degrees clockwise or
counterclockwise respectively.
(Not available when the display menu appears.)
Recording
If you want to change the media type, press [0]. Select
the desired media type using [K \ L], then press
[ENTER]. (You can also access the media type selection
screen from the “Title List” in the “Setup” menu in stop
mode.)
• Video Files: The DivX® File List will appear (not
guaranteed).
• Music: The MP3 File List will appear.
• Photo: The JPEG File List will appear.
3
Press [STOP C] to stop playback.
Basic Setup /
TV View Operation
An image will be played back from the selected track and
go to the next one in turn.
Title List
DISC
USB
Press [K \ L \ 0 \ 1] to select a desired track to
be played back, then press [PLAY B] or
[ENTER].
Connections
If all menu items cannot be displayed in the screen scope,
the A appears at the right bottom and the R appears at
the left bottom of the screen and you can view other items
on the next or previous page. The track number of the
items currently played back is highlighted.
If the A is shown at the right bottom, use [SKIP G] to
view the next page. If the R is shown at the left bottom,
use [SKIP H] to view the previous page.
It may take some time until all menu items are displayed
on the menu screen.
File type selection screen will appear.
Introduction
1
Page 37
Others
EN
37
E9RF0FH_EN.book
Page 38
Friday, May 16, 2014 7:17 PM
DivX® VOD
It is recommended that files to be played back in this unit
are recorded under the following specifications:
DivX
[DivX®]
• Official DivX® Certified product
• Playable Codec of AVI files : DivX®3.x, DivX®4.x,
DivX®5.x, DivX®6.x
• Maximum size of image
: 720 x 480 @30 fps
720 x 576 @25 fps
• Sampling frequency of audio : 16 kHz - 48 kHz
• Audio type
: MPEG1 audio layer 3 (MP3),
MPEG1 audio layer 2,
Dolby Digital
®
This unit allows you to play back the files purchased or rented
from DivX® Video-On-Demand (VOD) services. The files are
available on the Internet. When you purchase or rent
DivX® VOD files on the Internet, you will be asked to enter a
registration code and a deactivation code. This menu items
provide you with the both codes.
1
2
3
4
Press [SETUP].
Select “General Setting” using [K \ L], then
press [ENTER].
Select “DivX” using [K \ L], then press
[ENTER].
Select “DivX® VOD” using [K \ L], then press
[ENTER].
DivX® VOD
DivX Subtitle
DivX® VOD selection screen will appear.
5
Select “Registration Code” or “Deactivation
Code” using [K \ L], then press [ENTER].
DivX® VOD
Registration Code
Deactivation Code
Deactivation
Your registration code or deactivation code will appear.
e.g.) Registration Code
Hint for the purchased or rental official DivX® Certified
product
• When you purchased or rental a DivX® file through the
official site of DivX® video which is called DivX® Video-OnDemand (VOD) services, a registration code is required
every time you get the new file from the DivX® VOD services.
Refer to “DivX® VOD” on page 38.
• Some DivX® VOD files are restricted with the limited
playable times (you cannot play them back beyond the limit).
If your DivX® VOD file has such limit, the playback
confirmation screen will appear.
Use [0 \ 1] to select “Yes” if you want to play back the file, or
to select “No” if you do not want to play it back. Then press
[ENTER] to confirm the selection.
• You cannot play back the DivX® VOD files of which rental
period has been expired. In such case, press [TOP MENU]
and select other files that can be played back.
DivX®VOD
Rental Expired
Your registration code is:
This rental is expired.
Please push ‘TOP MENU’.
To learn more visit
www.divx.com/vod
To deactivate this unit:
You can register 6 devices (1PC and 5 devices) for an
account of DivX®. If you want to use more than 6 devices,
you must deactivate unnecessary one. If you want to
deactivate this unit, please follow the steps below.
At step 5, select “Deactivation” using [K \ L], then press
[ENTER]. Confirmation screen will appear. Select “Yes”
using [K \ L], then press [ENTER].
This unit is deactivated.
You can get the new registration code and deactivation
code.
You will be asked to enter the new codes when you
download a DivX® VOD file next time.
Note
• You must first download the file from the Internet and play it
back on this unit before you are able to get another code.
• Once you play back the DivX® VOD file, you will not be able
to select “Registration Code” and “Deactivation Code”
unless you deactivate the unit.
• You must follow this step every time you purchase or rent a
DivX® VOD file from the Internet for a deactivated unit.
38
EN
Note for DivX®
• DivX® is a codec (compression/decompression) that can
compress images to a very small amount of data. The
software can compress video data from almost any sources
to the size that can be sent on the Internet without
compromising visual quality of the images.
• For discs, a file with an extension of “.avi” and “.divx” can be
played back as a DivX® file.
• Files whose extension other than “.avi” and “.divx” will not be
listed on the DivX® menu. However, unplayable groups or
tracks may be displayed, depending on the recording
conditions.
• Even if the file has an extension of either “.avi” and “.divx”,
this unit cannot play it back if it is recorded in the format
other than DivX®.
• Folders are known as Groups; files are known as tracks.
• A symbol of
is shown on the top of the file name.
• A maximum of 255 folders or 999 files may be recognised in
one disc.
• Up to 8 hierarchies can be recognised in one folder. Files in
the 9th or deeper hierarchies cannot be played back.
• If the track extends beyond the scope of screen, a down
arrow “ ” appears, indicating that the user can view
another part on the next page. The current page number
and the number of total pages are shown on the right of the
down arrow “ ”.
• Letters of a file / folder name overflowing the given space will
be displayed as “...”.
E9RF0FH_EN.book
Page 39
Friday, May 16, 2014 7:17 PM
Playing Back a Disc Using the Title
Menu
Video
DVD-RW
DVD-V
DVD-R
Some DVDs have a Title menu, which lists the titles available
on the DVD. You can start playing back such discs at a
specific title.
Press [DVD] first.
1 Press [TOP MENU].
If the feature is not available, “
screen.
2
[K \ L \ 0 \ 1] buttons:
Move the cursor from item to item on the screen.
[ENTER] button:
Selects the currently highlighted menu option.
Please push ‘TOP MENU’.
3
Press [TOP MENU] to exit.
Note
Playback
[the Number buttons]:
Selects a numbered menu option (available on certain
discs).
Recording
[TOP MENU] button:
Displays the DVD “Title Menu” which will vary between discs.
This player is not authorized to play
this video.
• [TOP MENU] will not be available for some DVDs.
• Menus vary among discs. Refer to the information
accompanying the disc for details.
Editing
DVD-V
A DVD contains a disc menu, which lists the contents and
enables you to customise playback. The menu may offer
choices for subtitle languages, special features, and chapter
selection. Usually this information appears automatically
when you start playback, but sometimes you need to press
[MENU\LIST] to display the menu.
Select a desired item using [K \ L \ 0 \ 1], then
press [ENTER].
The disc will start playing back at the title you selected.
The following operations are available.
Authorization Error
Playing Back Discs Using the Disc Menu
” may appear on the TV
Basic Setup /
TV View Operation
The Title Menu will appear.
• For some discs, the Title Menu appears automatically.
Connections
On this unit, if you finalise video mode disc, a Title Menu will
be created automatically.
Introduction
• You can play back the disc recorded in multi-session.
• It may take awhile for audio and images to be output after
you inserted a disc and pressed [PLAY B].
• When playing back the files recorded in high bit rates, the
images can be interrupted in some occasions.
• Although DivX® logo has been obtained for this unit, it may
not be able to play back some data, depending on the
characteristics, bit rates, or audio format settings, etc.
• Use the software recognised by the DivX, Inc. when you
make DivX® files.
• A DivX® file whose file size exceeds 2 GB cannot be played
back.
• If you try to play back the DivX® file that has the screen
resolution, audio format and frame rate (over 30 fps) which
this unit does not support, an error message will appear.
• If a large-sized DivX® file is selected, it may take awhile to
start the playback (over 20 seconds sometimes).
• If DivX® files written on CD discs cannot be played back,
rewrite them on a DVD disc and try to play back.
• For more information for DivX®, please visit
http://www.divx.com.
• You cannot play back the DivX® VOD files obtained with
different registration codes on this unit. Press [TOP MENU]
and select other files that can be played back.
• This unit does not support the DivX® file with UDF format.
Press [DVD] first.
1 Press [MENU\LIST].
2
Function Setup
If the feature is not available, “ ” may appear on the TV
screen. The displayed disc menu, which will vary among
discs, and may be same with the Title menu.
Select an item using [K \ L \ 0 \ 1], then press
[ENTER].
VCR Functions
Repeat this step until all the features you want are set up
or to start playing back the disc from the menu. The
following operation is available.
[the Number buttons]:
Selects a numbered menu option (available on certain discs).
3
Press [MENU\LIST] to exit the disc menu.
Note
• Menus vary among discs. Refer to the information
accompanying the disc for details.
Others
EN
39
E9RF0FH_EN.book
Page 40
Friday, May 16, 2014 7:17 PM
Skipping TV Commercials during
Playback
Special Playback
Video
DVD-V
Video
VR
DVD-RW
DVD-RW
DVD-R
1
MP3 JPEG DivX
®
CD
During playback, press [STOP C].
The resume message will appear.
2
Press [PLAY B].
In a few seconds, playback will resume from the point at
which you stopped it before. Even if you turn off the unit,
you can resume playback at the same point after turning
back on the unit.
To cancel the resume playback and start playing back the
disc from the beginning:
Press [STOP C] while playback is stopped.
Pause
DVD-V
CD
1
• For MP3 and JPEG files, playback will resume from the
beginning of the track at which playback was stopped.
DVD-V
DVD-RW
DVD-RW
MP3
CD
1
VR
FWD
20x
REV
FWD
5x
REV
FWD
Normal
speed
playback
REV
FWD
2x
REV
20x
REV
1
Video
VR
DVD-RW
DVD-RW
DVD-R
Note
During playback, press [1.3x\0.8x PLAY].
B x0.8 : Press [1.3x\0.8x PLAY] once during playback.
Plays back approximately at 0.8 times of normal
playback.
B x1.3 : Press [1.3x\0.8x PLAY] twice during playback.
Plays back approximately at 1.3 times of normal
playback.
B
:Press [1.3x\0.8x PLAY] thrice to play back in
normal speed.
No effects.
40x
• Forward / reverse speeds are indicated with icons as follows.
Forward (Approx. Speed):
2x:
20x:
40x:
Reverse (Approx. Speed):
5x:
20x:
40x:
EN
Press [PLAY B] to resume playback.
Available only on discs recorded in the Dolby Digital format,
Rapid Playback plays back in a slightly faster/slower speed
while keeping the sound output.
FWD
• For audio CDs and MP3 files approximate speed is fixed
at 8x with sound.
• For DivX® files, approximate forward speeds are 2x, 20x
and 40x, and approximate reverse speeds are 5x, 20x
and 40x.
• To return to playback at normal speed, press [PLAY B].
• Picture quality of DivX® files in fast reverse is lower than
that in fast forward.
• For some DivX® files, Fast forward/Fast reverse may not
function.
40
During playback, press [PAUSE F].
Rapid Playback function is available only during
playback.
DVD-R
Each time you press [FWD D] or [REV E], the
approximate speed will change as follows.
Fast forward or fast reverse playback across titles (for
DVDs) or tracks / files (for MP3 / DivX®) is not possible.
REV
®
®
During playback, press [FWD D] or [REV E].
40x
DVD-R
MP3 JPEG DivX
DVD-V
DivX
FWD
VR
DVD-RW
Rapid Playback
Fast Forward / Fast Reverse
Video
Video
DVD-RW
Playback will pause with the sound muted.
2
Note
During playback, press [CM SKIP].
Normal playback will start 30-second advanced point from
the point at which you press [CM SKIP].
Each time you press [CM SKIP], the start point will move
another 30 seconds forward and playback resume
automatically.
You can press [CM SKIP] up to 6 times (180 seconds).
You can resume playback from the point where you stopped it
before.
1
VR
DVD-V
DVD-RW
DVD-RW
DVD-R
To enjoy recorded programmes without any interruptions,
press [CM SKIP].
Resume Playback
2
Press [PLAY B] to return to the normal
playback.
Note
• Audio (language) setting cannot be changed while using this
mode.
• This feature may not work at some point in a disc.
• Audio is PCM during Rapid Playback mode.
• When you select “PAL” in “TV System” (see page 59), this
function is not available with discs recorded using the NTSC
system.
E9RF0FH_EN.book
Page 41
Friday, May 16, 2014 7:17 PM
DVD-V
1
2
Video
VR
DVD-RW
DVD-RW
The zoom area is displayed.
DVD-R DivX
®
4
During playback, press [PAUSE F].
Press [SKIP H \ G] repeatedly.
Press [PLAY B] to resume playback.
Note
• To cancel the zoom function, select “x1.0” using [K \ L],
then press [ENTER].
• If selecting a smaller factor than that currently selected, the
zoom area is not displayed.
• You cannot slide the zoomed picture on some JPEG files.
DVD-V
Slow Forward / Slow Reverse Playback
DVD-V
Video
VR
DVD-RW
DVD-RW
DVD-R DivX
®
1/4x
REV
1/8x
REV
FWD
1/16x
REV
FWD
Pause
REV
FWD
1/16x
REV
REV
e.g.) DVD-video
T
1/ 5 C
1/ 5
3
4
5
Note
6
Video
VR
DVD-RW
DVD-R JPEG DivX
During playback, press [DISPLAY] to bring up
the display menu.
2
Select the
icon using [0 \ 1] to display the
selection menu.
T
1/ 5 C
1/ 5
The title (track) number and the time are displayed.
4
To return to the marker, select the desired
marker number using [K \ L], then press
[ENTER].
Note
• To clear a marker, select the marker number you want to
clear, then press [CLEAR].
• You can mark up to 6 points.
• All markers are erased when you perform the following
operations.
- Opening the disc tray
- Turning off the power
- Making additional recording on the disc (DVD only)
- Editing any title (DVD only)
- Changing the mode between Original and Playlist. (VR
mode DVD-RW disc only)
VCR Functions
1
®
Select the desired marker number using [K \ L].
When the disc reaches the desired point, press
[ENTER].
Function Setup
Zoom
3
Editing
• Forward / reverse speeds are indicated with icons as follows.
Forward (Approx. Speed):
1/16x:
1/8x:
1/3x:
Reverse (Approx. Speed):
1/16x:
1/8x:
1/4x:
• For some DivX® files, Slow forward may not function.
• Only slow forward is available when playing back media with
DivX® files.
-------------
Playback
1
2
DVD-RW
0:01:00 / 1:23:45
DVD Video
1/3x
To return to normal playback, press [PLAY B].
DVD-V
CD
During playback, press [DISPLAY] to bring up
the display menu.
If the display menu is already shown, skip to step 2.
Select the
icon using [0 \ 1] to display the
marker list.
FWD
1/8x
DVD-R
Recording
2
Each time you press [FWD D] or [REV E], the
approximate speed changes as follows.
(The sound will remain muted.)
FWD
VR
DVD-RW
You can assign a specific point on a disc to return later.
1
During playback, press [PAUSE F], then press
[FWD D] or [REV E].
FWD
Video
DVD-RW
Basic Setup /
TV View Operation
Marker Setup
Note
• Only step by step forward is available when playing back
media with DivX® files.
Connections
Press and hold [SKIP G] to continue going forward.
To continue going backward, press and hold [SKIP H].
1
Select the desired zoom position using
[K \ L \ 0 \ 1], then press [ENTER].
Zoom playback will start.
Each time you press [SKIP G], playback will go forward
one frame (or step) at a time with the sound muted.
To go backward one frame (or step), press [SKIP H].
3
Select the desired zoom factor to zoom using
[K \ L], then press [ENTER].
Introduction
3
Step by Step Playback
0:01:00 / 1:23:45
DVD Video
Others
× 1.2
× 1.5
× 2.0
Four options are available, “x1.0”, “x1.2”, “x1.5” and
“x2.0”. These are displayed excluding the current zoom
rate.
EN
41
E9RF0FH_EN.book
Page 42
Friday, May 16, 2014 7:17 PM
Chasing Playback during Recording
Simultaneous Playback and Recording
VR
DVD-RW
You can play back a title being recorded from the beginning
while recording continues. This function works from 1 minute
after the start of the recording. Make sure to use a DVD-RW
disc in VR mode, and the recording speed is set to 4H, 6H or
8H.
1
1
During recording, press [DISPLAY].
T
1/ 5 C
1/ 5
To stop the playback, press [STOP C] once.
The resume message will appear.
To stop recording, press [STOP C] again.
To cancel the resume, press [STOP C] again.
Using the [TIME SHIFT] button
0:01:00 / 1:23:45
-RW
During recording, press [PLAY B].
Playback of the title you are recording will start from the
beginning.
If you play the fast forward playback and the playback
reaches the scene recorded 1 minute before, the
forwarding playback will automatically return to the normal
playback.
2
VR
DVD-RW
You can also play back a recorded title during current
recording or the Timer Recording on the same disc.
VR
ORG
AV1
Stereo
2
Select
icon using [0 \ 1], then press
[ENTER].
The title number next to
will be highlighted.
Title:
Enter a desired title number to search using [K \ L] or
[the Number buttons], then press [ENTER].
Selected title playback will start.
Chapter:
To move to
for chapter, press [1].
Enter a desired chapter number to search using [K \ L] or
[the Number buttons], then press [ENTER].
Selected chapter playback will start.
With [TIME SHIFT], even if you leave your couch while you
are watching TV through this unit, you can come back and
watch the rest of the programme right from where you left at
any the convenient time with just one button. Please make
sure to put VR mode DVD-RW disc, and set the recording
speed to 4H, 6H or 8H.
If you play the currently recording programme and the
playback reaches the scene recorded 1 minute before, the
forwarding playback will automatically return to the normal
playback.
1
3 Press [STOP C] once to stop playback.
While viewing a TV broadcast via this unit,
press [TIME SHIFT].
The resume message will appear.
This unit start to record the TV broadcast.
2
T
Press [TIME SHIFT] again.
1/ 5 C
1/ 5
0:01:00 / 1:23:45
-RW
Playback will start from where you first press
[TIME SHIFT] while recording continues.
• While viewing the recorded content, you can pause and
resume the playback by pressing [TIME SHIFT].
3
ORG
AV1
Stereo
To stop the recording, press [STOP C] twice.
Note
Resume ON
• Playback image may freeze momentarily using this function.
However this does not affect the recording.
• The 2x fast forward playback is not available.
• [REC] is not available during this function.
• You must cancel this function first by pressing [STOP C]
once. Then you can use [REC] to use OTR (one-touch timer
recording) function or change recording time for the OTR.
• “Wait for a moment.” will be displayed on the screen if you
press [PLAY B] before 1 minute of recording.
• This function is available only when you are recording
on a DVD-RW disc in VR mode, with the recording speed
4H, 6H or 8H.
• Use DVD-RW disc capable of 2x or 4x speed recording.
42
VR
EN
4H
1:01
To stop recording, press [STOP C] again.
To cancel the resume, press [STOP C] again.
Note
• Playback image may freeze momentarily using this function.
However this does not affect the recording.
• The 2x fast forward playback is not available.
• This function is available only when you are recording
on a DVD-RW disc in VR mode, with the recording speed
4H, 6H or 8H.
• Only the titles (chapters) in the Original can be selected. You
cannot select titles from the title list.
• When you stop the playback after the Timer recording is
completed, the unit will be switched to the timer-standby
mode if another programme has been set (refer to “Notes for
the Timer Recording” on page 28).
• Use DVD-RW disc capable of 2x or 4x speed recording.
E9RF0FH_EN.book
Page 43
Friday, May 16, 2014 7:17 PM
Title / Chapter Search
DVD-V
Video
VR
DVD-RW
DVD-RW
DVD-R
Using the [DISPLAY] button
1 During playback, press [DISPLAY] to bring up
the display menu.
2
Select the
[ENTER].
icon using [0 \ 1], then press
Title Search
3
Enter the desired title number to search for
using [K \ L] or [the Number buttons], then
press [ENTER].
Note
• Total number of chapters and playback time of the selected
title are also displayed.
• During Random playback or Programme playback, you
cannot search the desired track.
Direct Search
CD
You can search the desired track directly.
Using [the Number buttons]
1 During playback, if the display menu is not
displayed, press [the Number buttons] to enter
the desired track number.
Note
• During Random playback or Programme playback, you
cannot search the desired track directly.
Time Search
DVD-V
Chapter Search
Video
VR
DVD-RW
DVD-RW
DVD-R
CD
DivX
®
Press [0 \ 1] to highlight the number displayed
in the right side of the
icon.
4
1
Enter the desired chapter number to search for
using [K \ L] or [the Number buttons], then
press [ENTER].
2
for the title or track number is highlighted.
Note
• The title number and playback time of the selected chapter
are also displayed.
Track Search
®
Using [SKIP H \ G] buttons
1 During playback, press [SKIP G] to skip the
current track and move to the next.
The unit moves to the next track one after another.
To go back to the previous track, press [SKIP H] twice
in quick successions. The unit moves backward one track
at a time.
Press [0 \ 1] to highlight
.
Enter the desired time to search for using
[K \ L] or [the Number buttons], then press
[ENTER].
Time search will start.
Note
• During Random playback or Programme playback, you
cannot search the desired time.
• The title number and chapter number of the setting time are
also displayed.
• Time search function is available only in the same track or
title.
VCR Functions
MP3 JPEG DivX
3
4
Function Setup
Chapter search will start.
During playback, press [DISPLAY] to bring up
the display menu.
If the display menu is already shown, skip to step 2.
Select the
icon using [0 \ 1], then press
[ENTER].
Editing
3
CD
Playback
Title search will start.
Track search will start.
Note
Recording
for the title number is highlighted.
Enter the desired track number to search for
using [K \ L] or [the Number buttons], then
press [ENTER].
Basic Setup /
TV View Operation
The unit moves to the next title or chapter one after
another.
To go back to the previous title or chapter, press
[SKIP H] twice in quick successions.
for the track number is highlighted.
3
Connections
Using [SKIP H \ G] buttons
1 During playback, press [SKIP G] to skip the
current title or chapter and move to the next.
Introduction
Search
Using the [DISPLAY] button
1 During playback, press [DISPLAY] to bring up
the display menu.
If the display menu is already shown, skip to step 2.
2 Select the
icon using [0 \ 1], then press
[ENTER].
Others
EN
43
E9RF0FH_EN.book
Page 44
Friday, May 16, 2014 7:17 PM
Random Playback
Repeat / Random / Programme
Playback / Slide Show
CD
You can use this function to play back a disc randomly instead
of in the recorded order.
Repeat Playback
DVD-V
Video
VR
DVD-RW
DVD-RW
DVD-R
CD
1
2
MP3 JPEG DivX
®
1
2
3
MP3 JPEG
During playback, press [DISPLAY] to bring up
the display menu.
If the display menu is already shown, skip to step 2.
Select the
icon using [0 \ 1] to display the
selection menu.
3
Select “Music” using [K \ L], then press
[ENTER] twice.
JPEG files:
Select “Photo” using [K \ L], then press
[ENTER], and select “Random Play” using
[K \ L], then press [ENTER].
Title:
The current title will be played back repeatedly.
(DVD only)
A-B:
The A-B point will be played back repeatedly.
(DVD, audio CD and DivX® only)
When pressing [ENTER] while A-B is highlighted, A-B
repeat is set.
• Press [ENTER] again to decide the starting point (A).
• Press [ENTER] after setting point (A) to select the
ending point (B).
Track:
The current track will be played back repeatedly.
(audio CD, MP3, JPEG and DivX® only)
Group:
The current group will be played back repeatedly.
(MP3, JPEG and DivX® only)
Note
Audio CD:
Select “Random Play” using [K \ L], then press
[ENTER].
MP3 files:
The selected repeat playback will start.
The following operations are available.
All:
The current disc will be played back repeatedly.
(DVD-RW (VR mode), audio CD, MP3, JPEG and DivX®
only)
Select “DISC Playback Mode” or “USB Playback
Mode” using [K \ L], then press [ENTER].
“DISC Playback Mode” or “USB Playback Mode” menu
will appear.
Select the desired option to repeat using
[K \ L], then press [ENTER].
Chapter:
The current chapter will be played back repeatedly.
(DVD only)
In stop mode, press [SETUP].
Random playback will start.
Note
• To cancel random playback, press [STOP C] twice during
random playback. “OFF” appears on the screen.
• During random playback, if you forward the track to the end,
the playback speed of the next track will be normal.
• During random playback, you cannot use the search
function except for the search with [SKIP H \ G]. By
pressing [SKIP H], you can return only to the beginning of
the current track.
Programme Playback
CD
You can programme the disc to play back in your desired
order.
1
Follow steps 1 to 2 in “Random Playback” on
page 44.
2
Select “Programme Play” using [K \ L], then
press [ENTER].
3
Select the desired track using [K \ L], then
press [ENTER] or [1].
• To cancel the repeat playback, select “OFF” at step 3. The
repeat setting is also cancelled when you stop playback.
• Point B for the repeat A-B playback should be set within the
same title or track as point B.
• You cannot select “Group” during the random playback of
MP3 and JPEG files.
• Chapter / Track repeat will be cancelled whenever a Chapter
/ Track is skipped forward or backward.
• For some DivX® files, A-B Repeat playback may not function.
DISC Playback Mode
Programme Play
--
--
--
--
--
--
--
--
--
--
--
--
--
--
--
--
--
--
--
--
--
--
--
--
--
--
--
--
--
--
--
--
--
--
--
--
--
--
--
--
--
--
--
--
--
--
--
--
--
--
Total
4
44
EN
0:00:00
Press [PLAY B] to start programme playback.
E9RF0FH_EN.book
Page 45
Friday, May 16, 2014 7:17 PM
You can select the display time between 5 seconds and 10
seconds.
Follow steps 1 to 2 in “Random Playback” on
page 44.
2
Select “Photo” using [K \ L], then press
[ENTER].
3
Select “Slide Show” using [K \ L], then press
[ENTER].
4
Select the display time using [K \ L], then press
[ENTER].
5
Press [SETUP] to exit.
VR
DVD-V
DVD-RW DivX
®
Many DVD-videos have subtitles in one or more languages.
The available languages are usually printed on the disc case.
You can switch subtitle languages at any time during
playback.
1
During playback, press [DISPLAY] to bring up
the display menu.
Or press [SUBTITLE] during playback and follow from
step 3.
2
Select the
icon using [0 \ 1] to display the
selection menu.
3
Select the desired subtitle language using
[K \ L], then press [ENTER].
Subtitles are displayed in the selected language.
If you select “OFF”, subtitles will disappear.
Note
• With some discs it is only possible to change the subtitle
language from the disc menu. Press [TOP MENU] or
[MENU\LIST] to display the disc menu.
• If a 4-digit language code appears in the subtitle menu at
step 3, refer to the “Language Code” on page 70.
• For media with DivX® files, the screen only displays the
number of subtitle languages.
Playback
Note
• Large-size JPEG files take a few moments to be displayed.
Switching Subtitles
Recording
1
You can select the format of audio and video to suit the
content of the disc you are playing back.
Basic Setup /
TV View Operation
JPEG
Selecting the Format of Audio and
Video
Connections
Slide Show
Introduction
Note
• To erase tracks you selected, press [CLEAR].
• You can make up to 50 track settings.
• To cancel programme playback, press [STOP C] twice
during programme playback. “OFF” appears on the screen.
• You may also select the desired track using
[the Number buttons] at step 3.
• During programme playback, if you forward the track to the
end, the playback speed of the next track will be normal.
• During programme playback, you cannot use the search
function except for the search with [SKIP H \ G].
Switching Audio Soundtrack
DVD-RW
CD
DivX
®
1
Or press [AUDIO] during playback and follow from step 3.
2
Select the
icon using [0 \ 1] to display the
selection menu.
VCR Functions
During playback, press [DISPLAY] to bring up
the display menu.
If the display menu is already shown, skip to step 2.
Function Setup
When playing back a DVD-videos recorded with two or more
soundtracks (often in different languages), you can switch
among them during playback.
When playing back the titles in VR mode DVD-RW discs
recorded with bilingual audio, you can switch to main audio
(L), sub audio (R) or a combination of both (L / R).
When playing back audio CDs, you can switch among the left,
the right channel and stereo.
Editing
VR
DVD-V
Others
EN
45
E9RF0FH_EN.book
3
Page 46
Friday, May 16, 2014 7:17 PM
Select a desired audio soundtrack or audio
channel using [K \ L], then press [ENTER].
With a DVD-video, VR mode DVD-RW, or DivX® files:
Audio soundtrack will switch.
Example:
English Spanish French
If the title contains both main and sub audio, you can
further select L (main), R (sub), L/R (mixed of main and
sub).
With an audio CD:
The Audio channel will switch.
Example:
L/R L R
Note
• For some discs, it is only possible to change the soundtrack
from the disc menu. Press [TOP MENU] or [MENU\LIST] to
display the disc menu.
• When outputting the audio signal from the DIGITAL AUDIO
OUT (COAXIAL) or when connected to the Dolby Digital
Stream compatible TV with an HDMI cable, you cannot
switch to the main audio (L) or sub audio (R) when playing
back a title in VR mode DVD-RW with “Dolby Digital” set to
“Stream”. If you want to switch the audio, set “Stream” to
“PCM”. (See page 58.)
Switching Virtual Surround System
DVD-V
Video
VR
DVD-RW
DVD-RW
Switching Camera Angles
DVD-V
Some DVD-videos feature scenes shot from two or more
angles. The disc case is usually marked with an angle icon if
the disc has multi-angle scenes.
1
During playback, press [DISPLAY] to bring up
the display menu.
The angle icon appears when a switching camera angle is
available. (Available only when the angle icon appears in
bottom right on the TV screen.)
2
The angle will switch each time you press [ENTER].
Note
• If the Angle Icon setting is “OFF” in “Setup” menu, the
icon will appear only when the disc is played back and the
Display menu appears. (See page 59.)
• Even when the
icon is not displayed, you can select the
angle if the currently played back title has at least two multiangle scenes.
Reducing Block Noise
DVD-V
DVD-R
icon using [0 \ 1], then press
Select the
[ENTER].
Video
VR
DVD-RW
DVD-RW
DVD-R DivX
®
CD
1
During playback, press [DISPLAY] to bring up
the display menu.
You can enjoy stereophonic virtual space through your
existing 2 channel stereo system.
2
Select the
icon using [0 \ 1] to display the
selection menu.
MP3
1
2
During playback, press [DISPLAY] to bring up
the display menu.
If the display menu is already shown, skip to step 2.
Select the
icon using [0 \ 1] to display the
selection menu.
Virtual Surround menu will appear.
3
Select “OFF”, “Type 1” or “Type 2” using
[K \ L], then press [ENTER].
e.g.) DVD-video
T
1/ 5 C
1/ 5
0:01:00 / 1:23:45
DVD Video
OFF
Type 1
Type 2
OFF:
Type 1:
Type 2:
No effect
Natural effect
Emphasised effect
Note
• Select Virtual Surround to “OFF” in case the sound is
distorted.
• The setting will be kept “OFF” when the unit is turned off.
46
EN
Noise Reduction menu will appear.
3
Select the desired option using [K \ L], then
press [ENTER].
This function reduces noise in the playback picture. When
playing back discs recorded in long time modes such as 6H or
8H, select “Type 1” or “Type 2”.
“Type 2” is more effective.
When playing back discs with a little noise, such as DVDvideos, select “OFF”
E9RF0FH_EN.book
Page 47
Friday, May 16, 2014 7:17 PM
1
Title list allows you to check the titles recorded on the disc
easily. You can choose a title to play back from this list and
easily edit the titles as you prefer.
Press [DVD], then press [TOP MENU].
5
6
ORG
ORG
Title List
PL
ABCDE
12:00 (2:00:00)
Video
AV1 LP
17/ 05/ 14
2
3
4
5
6
1/2
3
2
3
Edit
1
Scene Delete
Edit Title Name
Chapter Mark
Protect
Playback
ORG
1
Recording
1
Basic Setup /
TV View Operation
4
Connections
Guide to a Title List
Title list: List of titles recorded on the disc. Each title
is indicated by its index picture. Index picture for the
selected title can be seen in motion. Following
icons may be displayed on the index picture.
2
: Indicating the title is protected.
The protect icon, which appears when the title has
been protected. (Original titles only)
3 Arrow: Indicating there is a previous / next page.
4 Title list icon, which indicates a type of the
displayed title list.
: VR (Original) mode
: VR (Playlist) mode
: Video mode
5 Title name.
6 Title information, which displays recorded time,
length of the title, date / month / year, recorded CH,
and the recording speed.
7 Submenu: Submenus for the selected menu are
displayed here.
8 Title name (editable): If you do not name the title,
the recorded date, time, channel, and the recording
speed are displayed here.
9 Progress bar: Indicating the progress of the
playback.
10 Preview window: Preview of the selected title is
displayed here.
11 Playback status: Indicating the current playback
status of the selected title.
Introduction
Editing
Press [RETURN] to exit the title list.
Editing
17/05/14 18:00 AV1 LP
0:00:59
11 10
9
8
7
Function Setup
VCR Functions
Others
EN
47
E9RF0FH_EN.book
Page 48
Friday, May 16, 2014 7:17 PM
Deleting Titles
Editing Discs
You will find editing discs is easy. This unit offers convenient
edit functions.
You can edit the following from a title list.
• Assigning a name to a title
• Dividing a title
• Combining titles
• Adding titles to a Playlist
• Setting or releasing the title protection
• Adding or deleting chapter marks
• Deleting titles or parts of titles
(Possible editing functions depend on the recording format
and editing method.)
Original and Playlist (VR mode)
For VR mode DVD-RW disc, you can edit the recordings in
Playlist without changing the original recordings. Playlist does
not take up much disc space.
What “Original” or “Playlist” is for?
There are 2 types for the title list: Original and Playlist
• Original content refers to what’s actually recorded on the
VR mode DVD-RW disc.
• Playlist content refers to the edited version of the VR mode
DVD-RW disc; how the Original content is to be played.
Finalising a Disc
• This will allow a disc that is recorded on this unit to be played
back on a different DVD player — without finalisation it will
not be playable on another player.
• After finalising a DVD-RW/-R disc, you cannot edit any
information that is on that disc.
Using these editing functions to modify copyrighted
content for any purpose other than your private viewing
may be prohibited under the Copyright Laws of the United
States and other countries, and may subject you to civil
and criminal liability.
Video
Note
• It is not possible to retrieve deleted titles.
Press [DVD] first.
1
48
EN
In stop mode, press [TOP MENU].
Title List will appear.
For VR mode DVD-RW disc, press [MENU\LIST] to
switch between “Original” and “Playlist”.
2
Select the desired title with [K \ L \ 0 \ 1], then
press [ENTER].
Pop up window will appear.
3
Select “Title Delete” using [K \ L], then press
[ENTER].
e.g.)VR mode DVD-RW Original
Play From Start
Edit
Title Delete
Add To Playlist
Dubbing
4
Select “Yes” using [K \ L], then press [ENTER].
Delete this title?
Yes
No
Note
• A Playlist is not available for DVD-R or video mode DVD-RW
discs.
• It is not possible to edit a disc recorded in another video
system other than PAL, such as NTSC.
• After finalising a DVD-RW/-R disc, you cannot edit any
information that is on that disc.
VR
DVD-RW
DVD-R
DVD-RW
You can delete titles you do not want to keep.
When an Original is deleted from VR mode DVD-RW disc, the
recordable disc space will increase. Even when a Playlist is
deleted, the original of the Playlist will remains, and
recordable disc space will not increase.
Recordable disc space of video mode DVD-RW disc will
increase when the last title on the title list is deleted. However,
deleting the title will not change recordable disc space for
DVD-R disc.
In finalised DVD-R or video mode DVD-RW discs, you cannot
select the title list because it cannot be edited once finalised.
Final confirmation message will appear. Select “Yes”
using [K \ L], and then press [ENTER].
Title is deleted.
5
Press [STOP C] to exit.
Writing onto the disc starts.
It may take awhile to write the data on a disc.
E9RF0FH_EN.book
Page 49
Friday, May 16, 2014 7:17 PM
Video
Guide to Editing Title Names
VR
DVD-RW
DVD-R
DVD-RW
You can edit the title names from this menu.
The title names you edit will appear on the title list.
Press [DVD] first.
Step 2 : Using the list below as a guide, press
[the Number buttons] repeatedly until the desired
letter appears.
In stop mode, press [TOP MENU].
Select
Press
Title List will appear.
For VR mode DVD-RW disc, press [MENU\LIST] to
switch between “Original” and “Playlist”.
2
abc
123
<space>
<space>
0
<space>
! ”# $ % & ’( )
∗+,-./:;<=>
?@[]^_{|}
4
–
1
Edit menu will appear.
ABC
abc
2
–
Select “Edit Title Name” using [K \ L], then
press [ENTER].
DEF
def
3
–
GHI
ghi
4
–
JKL
jkl
5
–
MNO
mno
6
–
PQRS
pqrs
7
–
TUV
tuv
8
–
WXYZ
wxyz
9
–
Select “Edit” with [K \ L], then press [ENTER].
To enter the title name, refer to “Guide to
Editing Title Names” on page 49.
ORG
Edit
Edit Title Name
1
A
a
1
@
B
b
2
!
C
c
3
?
0:00:59
When you finish entering the title name, press [ENTER].
6
Select “Yes” using [K \ L], then press [ENTER].
7
Press [RETURN] repeatedly to exit.
Adding or Deleting Chapter Markers
Manually
Writing onto the disc starts.
It may take awhile to write the data on a disc.
Editing
The name you edited becomes the title.
Note
• To delete letters, press [CLEAR] repeatedly. Press and hold
[CLEAR] to delete all letters.
• Press [0 \ 1] to move the cursor to the left or right.
• You can enter up to 30 letters.
• Unrecognisable characters will be replaced with asterisks
(*). If you delete them, adjoining characters may change to
asterisks (*) or other.
Playback
1 7/05/14 18:00 22 2H
• Characters set will be changed to the “@!?” automatically if
you press [1] after you selected the “ABC” or “abc” mode.
Recording
–
A window for entering the title name will appear.
5
@!?
Basic Setup /
TV View Operation
Select the desired title with [K \ L \ 0 \ 1], then
press [ENTER].
ABC
Pop up window will appear.
3
Connections
1
Step 1 : Select the desired character set using [K \ L], then
press [ENTER].
Introduction
Editing Title Name
VR
DVD-RW
Press [DVD] first.
Follow the steps 1 to 3 in “Editing Title Name”
on this page.
2
Select “Chapter Mark” using [K \ L], then press
[ENTER].
3
Use [SKIP H \ G], [REV E], [FWD D],
[PLAY B] and [PAUSE F] to find where you
want to create a new chapter mark.
Or, use [SKIP H \ G] to find a chapter mark
that you want to delete.
VCR Functions
1
Function Setup
You can add chapter marks to a title. After a title is marked
with chapters, you can use the chapter search feature.
You can set a chapter mark anywhere you want.
Others
EN
49
E9RF0FH_EN.book
4
Page 50
Friday, May 16, 2014 7:17 PM
Select “Add” or “Delete” accordingly using
[K \ L], then press [ENTER].
You cannot delete the first chapter of a title.
5
Select “Yes” using [K \ L], then press [ENTER].
Adding a chapter mark:
If you select “Add” at step 4, a new chapter mark is
created at the point you specified.
Deleting a chapter mark:
If you select “Delete” at step 4, the chapter mark you
selected is deleted.
6
Press [RETURN] repeatedly to exit.
For DVD, the data will be written onto the disc
momentarily.
This operation may take awhile to be completed.
Note
• You cannot select the chapter mark the title of which is less
than 5 minutes.
• You cannot select a chapter mark interval that exceeds the
length of a title.
• The length of chapters may slightly deviate from the one
specified at the step 3.
• A chapter mark may be delayed depending on the recording
content.
• Maximum number of chapter for video mode DVD is 99
chapters per disc and title.
Protecting Titles
VR
DVD-RW
Original
Note
• Maximum numbers of chapter for each media:
VR mode DVD : 999 chapters per entire Playlist and
Original
Besides the mentioned above, the number of chapters
may be different according to the recording time.
• Only with regard to DVD editing, you may not be able to add
chapter marks depending on the duration of the title or the
number of chapters.
• Only with regard to DVD editing, remaining time of the disc
may decrease when adding chapter marks or increase when
clearing chapter marks depending on the recording time or
edited contents.
To prevent the accidental editing or erasing of the titles, you
can protect them in the Original menu.
Press [DVD] first.
1
Follow the steps 1 to 3 in “Editing Title Name”
on page 49.
2
Select “Protect” using [K \ L], then press
[ENTER].
3
Press [ENTER] again.
Writing onto the disc starts.
It may take awhile to write the data on a disc.
• If the title is already protected, “ON A OFF” will appear
instead. Press [ENTER], to release the title from
protection.
• The protected title will be marked with
icon.
Adding or Deleting Chapter Marks at
once for Video Mode DVD-RW disc
Video
DVD-RW
For titles in video mode DVD-RW disc, you can set or edit
chapter at every selected time interval at once. You can also
clear all the chapter marks at once.
You can only specify the interval of chapter marks that last for
more than 5 minutes.
Press [DVD] first.
1
Follow the steps 1 to 3 in “Editing Title Name”
on page 49.
4
Press [RETURN] repeatedly to exit.
Writing onto the disc starts.
It may take awhile to write the data on a disc.
To protect a whole disc:
Select “Disc Protect OFF A ON” from “DVD Menu”, then
select “Yes”. Refer to “Setting a Disc to Protect” on
page 33.
Dividing a Title
VR
DVD-RW
2
Select “Chapter Mark” using [K \ L], then press
[ENTER].
You can divide a title into two new titles.
3
Select the desired interval using [K \ L], then
press [ENTER].
Press [DVD] first.
4
Select “Yes” using [K \ L], then press [ENTER].
1
Chapter marks are added.
If you select “OFF” at step 3, all the chapter marks are
erased.
Follow steps 1 to 3 in “Editing Title Name” on
page 49.
2
Use [SKIP H \ G], [REV E], [FWD D],
[PLAY B] and [PAUSE F] to find where you
want to divide the title.
3
Select “Title Dividing” using [K \ L], then press
[ENTER].
5
Press [RETURN] repeatedly to exit.
Writing onto the disc starts.
It may take awhile to write the data on a disc.
50
Playlist
EN
E9RF0FH_EN.book
Friday, May 16, 2014 7:17 PM
Select “Yes” using [K \ L], then press [ENTER].
Adding Titles to a Playlist
The title is divided into two new titles with the same title
names.
5
VR
DVD-RW
Press [RETURN] to exit.
Original
Writing onto the disc starts.
It may take awhile to write the data on a disc.
For VR mode DVD-RW disc, you can add a title to the Playlist
as you want.
Press [DVD] first.
1
Follow the steps 1 to 2 in “Deleting Titles” on
page 48.
2
Select “Add To Playlist” using [K \ L], then
press [ENTER].
Combining Titles
Playlist
You can combine two titles into a single title.
3
Press [DVD] first.
Follow steps 1 to 3 in “Editing Title Name” on
page 49.
2
Select “Title Combining” using [K \ L], then
press [ENTER].
3
Select another title to combine using
[K \ L \ 0 \ 1], then press [ENTER].
4
Select “Yes” using [K \ L], then press [ENTER].
PL
Edit - Title Combining
17/05/14 12:00
12:00 (0:30:00)
1
1+2
PL
1 4H
17/05/14
2
Note
• To delete a title from the Playlist, refer to “Deleting Titles” on
page 48.
• When the number of the Playlist reaches its maximum (refer
to page 22), or when the number of the total chapter marks
of the Playlists reaches 999, “Add To Playlist” cannot be
selected.
1 4H
17/05/14
1 4H
3
1
2
3
6
4
5
6
Deleting All Playlists
Combine selected titles?
4
Yes
5
No
1/6
1/6
Press [RETURN] to exit.
Writing onto the disc starts.
It may take awhile to write the data on a disc.
Note
VR
DVD-RW
All Playlists can be deleted if it is no longer needed.
Editing
5
Writing onto the disc starts.
It may take awhile to write the data on a disc.
Title List
17/05/14 12:00
12:00 (2:30:00)
1 4H
Press [RETURN] to exit.
Playback
The two titles will combine into a single title.
The title is added to Playlist.
4
Recording
1
Select “Yes” using [K \ L], then press [ENTER].
Basic Setup /
TV View Operation
Play From Start
Edit
Title Delete
Add To Playlist
Dubbing
VR
DVD-RW
Connections
Note
• You cannot divide a title of the disc when the number of
recording titles reaches the maximum of 99 (-RW), or the
number of recording chapters reaches the maximum of 999
(-RW).
Introduction
4
Page 51
Press [SETUP].
3
Select “Delete All Playlists” using [K \ L], then
press [ENTER].
• You cannot select the same title twice and combine it into a
single title.
• If either one of the two original titles is deleted, the combined
new title is also deleted.
Select “DVD Menu” using [K \ L], then press
[ENTER].
Format
Finalise
Disc Protect OFF A ON
Delete All Playlists
4
Select “Yes” using [K \ L], then press [ENTER].
“Are you sure?” will appear. Select “Yes” using [K \ L],
and then press [ENTER].
Playlist is deleted.
Writing onto the disc starts.
It may take awhile to write the data on a disc.
EN
51
Others
Note
• Deleting a Playlist will not increase the available recording
time on the disc.
VCR Functions
Delete entire playlist?
Yes
No
Function Setup
1
2
E9RF0FH_EN.book
Page 52
Friday, May 16, 2014 7:17 PM
Deleting Parts of Titles
VR
DVD-RW
You can delete a specific part of a title.
Even when a title is deleted from the Playlist, the original title
will remain as it is.
Press [DVD] first.
1
Follow the steps 1 to 3 in “Editing Title Name”
on page 49.
2
Select “Scene Delete” using [K \ L], then press
[ENTER].
3
Use [SKIP H \ G], [REV E], [FWD D],
[PLAY B] and [PAUSE F] to find the start point,
then press [ENTER].
Then use [SKIP H \ G], [REV E], [FWD D],
[PLAY B] and [PAUSE F] again to move to the
end point, and press [ENTER].
The cursor will move to “Preview”.
The bar at the bottom of the screen indicates the total and
the elapsed time of the title, and the area selected for
deletion is indicated in red.
You can check the preview by pressing [ENTER].
• Before and after 5 seconds of the deleted point will be
playback for preview.
4
Select “Delete” using [K \ L], then press
[ENTER].
5
Select “Yes” using [K \ L], then press [ENTER].
“Are you sure?” will appear. Select “Yes” using [K \ L],
and then press [ENTER].
The part of the title is deleted.
6
Press [RETURN] repeatedly to exit.
Writing onto the disc starts.
It may take awhile to write the data on a disc.
Note
• You cannot select “Scene Delete” if the number of chapter
marks in the Original or Playlist is 999. (Depends on the
content, there is a case that you cannot select “Scene
Delete” before the number of chapter marks reaches 999.)
• The recordable disc space will not increase after deleting
parts of titles on a Playlist.
• When a scene is deleted from an Original, the related title on
the Playlist will also be deleted automatically.
52
EN
E9RF0FH_EN.book
Page 53
Friday, May 16, 2014 7:17 PM
Introduction
Function Setup
The following table is the contents which you can set and the default settings.
Refer to the following table for useful operation.
Items (highlight is the default)
Parental Lock
E Page 57
Audio Out
Dynamic
E Pages 57-58 Range Control
PCM
MPEG
DTS
MP3 Surround
Set the language for audio.
Set the language for subtitles.
VCR Functions
Set whether or not to display the angle icon.
Set the type of still image in pausing playback.
Others
TV System
E Page 59
Set the language for Disc Menu.
Function Setup
Angle Icon
E Page 59
Still Mode
E Page 59
Set the type of MP3 signal to output.
Editing
Subtitle Language
E Page 58
Set whether the sound recorded in 96kHz will be down
sampled to 48kHz.
Set whether to convert Dolby Digital into PCM or to output
Dolby Digital signals.
Set whether to convert MPEG into PCM or to output
MPEG signals.
Set whether DTS signal is output or not.
Playback
Audio Language
E Page 58
Compressing the range of sound volume.
Recording
General Setting
Disc Menu Language
E Page 58
Contents
Set the parental level for DVD disc playback.
Basic Setup /
TV View Operation
Dolby Digital
OFF
level 1 to 8
ON
OFF
48kHz
96kHz
PCM
Stream
PCM
Stream
ON
OFF
PCM
Stream
English
Bulgarian
Czech
Dutch
French
German
Hungarian
Italian
Polish
Romanian
Russian
Slovak
Spanish
Other
Original
English
Bulgarian
Czech
Dutch
French
German
Hungarian
Italian
Polish
Romanian
Russian
Slovak
Spanish
Other
OFF
English
Bulgarian
Czech
Dutch
French
German
Hungarian
Italian
Polish
Romanian
Russian
Slovak
Spanish
Other
ON
OFF
Auto
Field
Frame
PAL
Auto
Connections
Setup
Playback
Set the TV system.
EN
53
E9RF0FH_EN.book
Page 54
Setup
Display
Friday, May 16, 2014 7:17 PM
Items (highlight is the default)
OSD Language
E Page 59
Auto Power Off
E Page 59
Screen Saver
E Page 59
General Setting
Video
FL Dimmer
E Page 59
TV Aspect
E Page 60
Video Out
E Page 60
Recording
Auto Chapter
E Page 23
Recording Audio Select (1H)
E Page 24
Auto Finalise
E Page 34
Aspect Ratio (Video mode)
E Page 23
Dubbing Mode
E Page 32
Bilingual Recording Audio
E Page 24
External Input Audio
E Page 24
Video Colour System
E Page 30
English
flİÝł˛×¹ð¦
Česky
Nederlands
Français
Deutsch
Magyar
Italiano
Polski
Romana
Ó³¹¹ð¦Ð
Slovenský
Español
ON
OFF
OFF
1 minute
5 minutes
10 minutes
15 minutes
Bright
Dark
4:3 Letter Box
4:3 Pan & Scan
16:9 Wide
SCART (RGB)
Component (Progressive)
Component (Interlace)
OFF
5 minutes
10 minutes
15 minutes
30 minutes
60 minutes
PCM
Dolby Digital
ON
OFF
Auto
4:3
16:9
VCR A DVD
DVD A VCR
Main
Sub
Stereo
Bilingual
Auto
PAL
SECAM
Clock
E Page 61
54
EN
Contents
Set the language for OSD (on-screen display).
Set for the auto power off function to turn off the unit
automatically when the unit has been inactive for 3 hours.
Set the idling time before the screen saver starts.
Set the brightness of the front panel display.
Set a picture size according to aspect ratio of your TV.
Sets the video output mode.
Insert chapter marks periodically.
Set the recording audio type. (Only when the recording
speed is set to “1H”.)
Set the unit to finalise the disc automatically.
Set a aspect ratio for video mode recording.
Set the dubbing selection.
Set the audio type for recording.
Set the external input audio type for recording.
Set the video colour system to “PAL” or “SECAM”
automatically.
Set the video colour system to “PAL”.
Set the video colour system to “SECAM”.
Set the clock manually.
E9RF0FH_EN.book
Page 55
Items (highlight is the default)
DivX® VOD
E Pages 38, 61
Registration Code
Deactivation Code
Set the colour space for the HDMI output.
Set whether to output the HDMI audio signal or not.
Set the black-white contrast level for HDMI RGB output.
Set to the default setting.
Playback
Reset All
E Page 61
Format
E Page 61
HDMI Audio
E Page 61
RGB Range
E Page 61
Recording
HDMI
OFF
English
Czech
Dutch
French
German
Hungarian
Italian
Polish
Romanian
Russian1
Russian2
Slovak
Spanish
Swedish
RGB
YCbCr
ON
OFF
Normal
Enhanced
Basic Setup /
TV View Operation
General Setting
DivX Subtitle
E Pages 37, 61
Yes
No
Connections
Deactivation
Contents
This menu item provides you with the DivX® VOD
registration code. The DivX® registration code is required
when downloading the DivX® VOD files from the Internet.
To learn more about DivX® VOD, visit www.divx.com/vod.
This menu item provides you with the DivX® VOD
deactivation code. The DivX® deactivation code is
required when re-downloading the DivX® VOD files from
the Internet after deactivating. To learn more about DivX®
VOD, visit www.divx.com/vod.
This menu deactivates this unit and provides you with
new registration code and deactivation code in order to
download the DivX® VOD files from the Internet.
Set the language for DivX® Subtitle.
Introduction
Setup
DivX
Friday, May 16, 2014 7:17 PM
Note
• Your change to each settings stays on even when the power is switched off.
• An item which is not currently available is greyed in the settings.
Editing
Function Setup
VCR Functions
Others
EN
55
E9RF0FH_EN.book
Page 56
Friday, May 16, 2014 7:17 PM
General Setting
Common Procedures
1
2
3
In stop mode, press [SETUP].
5
Select “General Setting” using [K \ L], then
press [ENTER].
Select a desired setting using [K \ L], then
press [ENTER].
e.g.) Parental Lock item
Select a desired setup using [K \ L], then
press [ENTER].
General Setting
Playback
Display
Video
Recording
Clock
DivX
HDMI
Reset All
General Setting
Playback
Display
Video
Recording
Clock
DivX
HDMI
Reset All
Parental
Lock
Parental
Lock
Audio Out
OFF
Disc Menu Language
8
Audio Language
7
Subtitle Language
6
Angle Icon
5
Still Mode
4
TV System
3
2
1
Your setting is activated.
6
4
Select a desired item using [K \ L], then
press [ENTER].
To return to the previous screen
e.g.) Playback setup
Press [RETURN].
General Setting
Playback
Display
Video
Recording
Clock
DivX
HDMI
Reset All
56
When you finish the setting, press [SETUP] to
exit.
EN
Parental Lock
Audio Out
Disc Menu Language
Audio Language
Subtitle Language
Angle Icon
Still Mode
TV System
E9RF0FH_EN.book
Page 57
Friday, May 16, 2014 7:17 PM
Setup A General Setting A Playback
Introduction
Playback
A password is already set
1 Enter the current password using
[the Number buttons].
Parental Lock
Audio Out
Disc Menu Language
Audio Language
Subtitle Language
Angle Icon
Still Mode
TV System
Password Input
2-A Select “No” using [K \ L], then press
[ENTER].
Change Password?
Yes
No
A Parental Lock (Default: OFF) (DVD only)
“Parental Lock” level is activated.
Change “Parental Lock” level using [K \ L],
then press [ENTER].
[ENTER].
Change Password?
Proceed to either of the following steps.
Yes
No
Parental Lock
Recording
Enter a new password using
[the Number buttons], then press
[ENTER].
OFF
8
7
6
5
4
3
2
1
Password Input
Your setting is activated.
(You can change both password and
“Parental Lock” level.)
Parental level
OFF : All parental locks are cancelled.
1 : Only DVD software intended for children can be
played back.
B Audio Out
Choose the appropriate audio setting for your external
device.
It will only affect a disc playback.
Function Setup
Audio Out
Dynamic Range Control
PCM
Dolby Digital
MPEG
DTS
MP3 Surround
A password is not yet set
1 Select “Yes” using [K \ L], then press
[ENTER].
Yes
No
Dynamic Range Control (Default: ON)
(DVD only)
Set to “ON” to make the dynamic range narrower.
2 Enter a new password using
Dynamic Range Control
ON
OFF
[the Number buttons], then press
[ENTER].
Password Input
“Dynamic Range Control” function is effective only with
analogue audio connection.
VCR Functions
Change Password?
Editing
Note
• “Parental Lock” function may not be available on some
discs.
• It may be difficult to determine if some DVDs support the
parental lock function. Be sure to confirm that
“Parental Lock” function operates in the way that you
have set.
• Record the password in case you forget it.
Note
• Press [CLEAR] to erase numbers entered incorrectly.
• If you forget your password or you want to clear all
settings in “Parental Lock”, enter [4], [7], [3], [7] using
[the Number buttons] at the option window. Your
password is cleared and parental levels are set to
“OFF”.
Playback
7 to 2 : Only DVD software intended for general use
and children can be played back.
Basic Setup /
TV View Operation
2-B Select “Yes” using [K \ L], then press
Set “Parental Lock” level.
8 : DVD software of any grade (adult / general /
children) can be played back.
Connections
A
B
C
D
E
F
G
H
Note
• “Dynamic Range Control” function is available only on
discs recorded in the Dolby Digital format.
EN
57
Others
Your setting is activated.
If you select “No”, press [SETUP] to exit.
E9RF0FH_EN.book
Page 58
Friday, May 16, 2014 7:17 PM
PCM sampling (Default: 48kHz)
Settings for MP3 Surround (Default: PCM)
MP3 Surround
PCM
PCM
Stream
48kHz
96kHz
48kHz
96kHz
: If your amplifier / decoder is NOT compatible
with 96 kHz PCM, select “48kHz”. Sound
recorded at 96 kHz is down sampled to 48 kHz.
: If your amplifier / decoder is compatible with
96 kHz PCM, select “96kHz”. Sound is sampled
at 96 kHz.
Note
When playing back a disc with copyright protection:
• Even if you select “96kHz”, the sound is down sampled
to 48 kHz.
PCM
Note
• Set to “Stream” when this unit is connected to an
amplifier for MP3 Surround.
C Disc Menu Language (Default: French)
(DVD only)
Set “Disc Menu Language”.
Dolby Digital conversion (Default: Stream)
Disc Menu Language
English
Bulgarian
Czech
Dutch
French
German
Hungarian
Italian
Dolby Digital
PCM
Stream
PCM
: Converts the Dolby Digital into PCM
(2 channel).
If your amplifier / decoder is NOT compatible
with Dolby Digital, set to “PCM”.
Stream : Outputs Dolby Digital signals.
If your amplifier / decoder is compatible with
Dolby Digital, set to “Stream”.
: Outputs all the MP3 files in stereo.
Stream : Outputs MP3 files in Stream.
D Audio Language (Default: Original)
(DVD only)
Set “Audio Language”.
Audio Language
Note
Original
English
Bulgarian
Czech
Duch
French
German
Hungarian
When playing back a DVD-RW disc recorded in VR mode:
• If the audio source on a disc is in Dolby Digital format,
set “Dolby Digital” to “PCM” so that you can switch to
main audio (L), sub audio (R), or a combination of both
(L / R) using your amplifier / decoder.
Note
Settings for MPEG (Default: PCM) (DVD only)
MPEG
PCM
Stream
PCM
: Converts MPEG into PCM.
If your amplifier / decoder is NOT compatible
with MPEG, set to “PCM”.
Stream : Outputs MPEG Audio signals.
If your amplifier / decoder is compatible with
MPEG, set to “Stream”.
Settings for DTS (Default: ON) (DVD only)
DTS
ON
OFF
58
ON
: Outputs DTS signals.
If your amplifier / decoder is compatible with
DTS®, set to “ON”.
OFF
: No DTS signal is output.
If your amplifier / decoder is NOT compatible with
DTS®, set to “OFF”.
EN
• If “Original” is selected, the audio language is the default
of the inserted disc.
• “Audio Language” setting may not be available for some
discs.
E Subtitle Language (Default: OFF)
(DVD only)
Set “Subtitle Language”.
Subtitle Language
OFF
English
Bulgarian
Czech
Dutch
French
German
Hungarian
If “Other” is selected, enter the appropriate 4digit code using [the Number buttons].
Refer to “Language Code” on page 70.
Code Input
-
-
-
-
When you finish entering the code, press
[ENTER].
E9RF0FH_EN.book
Page 59
Friday, May 16, 2014 7:17 PM
Set to “ON” to show the angle icon during the playback.
Setup A General Setting A Display
A
B
C
D
A OSD Language (Default: French)
Set the OSD language.
Angle Icon
OSD Language
ON
OFF
Auto
Field
Frame
: Automatically select the best resolution setting
(“Frame” or “Field”) based on the data
characteristics of the pictures.
Field
: Select “Field” when the pictures are still
unstable even if “Auto” is selected. “Field”
stabilises the pictures, although the picture
quality may become coarse due to the limited
amount of data.
: Select “Frame” to display relatively motionless
pictures in higher resolution. “Frame” improves
the picture quality, although it may unstabilise
the pictures due to simultaneous output of two
Field data.
Auto Power Off
ON
OFF
C Screen Saver (Default: 10 minutes)
Set the screen saver time delay.
Screen Saver
OFF
1 minute
5 minutes
10 minutes
15 minutes
Note
D FL Dimmer (Default: Bright)
Editing
• An individual picture on TV screen is called as Frame,
which consists of two separate images called as Field.
Some pictures may be blurred at the “Auto” setting in still
mode due to their data characteristics.
Playback
Frame
Set for the auto power off function. When this function is
set to “ON” and this unit has been inactive for 3 hours, a
confirmation message will be displayed 3 minutes before
the unit is automatically turned off.
Set the front panel display brightness.
H TV System (Default: PAL) (DVD only)
FL Dimmer
Bright
Dark
: Outputs a modified PAL signal for viewing discs
recorded with the NTSC system on a PAL system
TV.
Auto
: Changes the video system (PAL / NTSC)
automatically according to the format of the
inserted disc.
VCR Functions
PAL
Note
• The display will not light up when the unit is in standby
mode. This is a Power Saving mode (ECO) for standby.
Function Setup
TV System
PAL
Auto
Recording
Auto
B Auto Power Off (Default: ON)
Basic Setup /
TV View Operation
English
Áúëãàðñêè
Èesky
Nederlands
Français
Deutsch
Magyar
G Still Mode (Default: Auto) (DVD only)
Still Mode
OSD Language
Auto Power Off
Screen Saver
FL Dimmer
Connections
F Angle Icon (Default: ON) (DVD only)
Introduction
Display
Note
• You can also change or switch off the subtitles on a DVD
from the disc menu if it is available.
• Press [CLEAR] or [0] to erase numbers entered
incorrectly.
• You can only select the languages supported by the
inserted disc.
Note
Others
• With discs recorded using the PAL system, a PAL signal
is output for viewing on a PAL system TV.
• Discs recorded with the PAL system cannot be viewed
on an NTSC system TV.
• With discs recorded using the NTSC system, an NTSC
signal is output for viewing on an NTSC or Multi system
TV.
• With discs recorded using the NTSC system, select PAL
to view on a PAL system TV.
EN
59
E9RF0FH_EN.book
Page 60
Friday, May 16, 2014 7:17 PM
B Video Out (Default: SCART (RGB))
Video
Setup A General Setting A Video
A TV Aspect
B Video Out
A TV Aspect (Default: 16:9 Wide)
Use this feature to adjust the aspect ratio of the video
source which is different from your TV’s ratio to fit your TV
monitor without distorting the picture.
TV Aspect
4:3 Letter Box
4:3 Pan & Scan
16:9 Wide
This unit is compatible with the Progressive Scan System.
The feature provides you with the higher definition images
than the traditional output system does. You can enjoy
Progressive Scan image by using HDMI OUT or
COMPONENT VIDEO OUT. To utilise the Progressive
Scan system through the COMPONENT VIDEO OUT, you
must set video output mode in “Setup” menu by following
the steps. “SCART (RGB)” is selected as the default.
• When you set “Video Out” setting, you need a Scart
cable or an HDMI cable to output from this unit with
component video cable.
1 Select the desired setting using [K \ L], then
press [ENTER].
Video Out
If you have a standard TV:
Select “4:3 Letter Box”, so that black bars appear on the
top and bottom of the TV screen when playing back a
wide-screen picture. Select “4:3 Pan & Scan” for a full
height picture with both sides trimmed when playing back
wide-screen picture.
If you have a widescreen TV:
Select “16:9 Wide”.
SCART (RGB)
Component (Progressive)
Component (Interlace)
• If your TV is compatible with progressive scanning
(576p/480p), connect the TV to the COMPONENT
VIDEO OUT jacks of this unit and select “Component
(Progressive)” and set your TV to the progressive
scan mode.
• If your TV is not compatible with progressive scan,
select “Component (Interlace)” for component
connection, or select “SCART (RGB)” for Scart cable
connection.
• Refer to page 17 for more details.
Only if you select the “Component (Progressive)”,
proceed to step 2. If you select “Component (Interlace)”
or “SCART (RGB)”, your setting is activated.
2 Select “Yes” using [0 \ 1], then press
[ENTER].
Final confirmation window will appear.
3 Select “Yes” using [K \ L], then press
[ENTER] within 15 seconds.
Confirm again to use progressive scan.
If picture is good, select “Yes”.
Yes
No
Your setting is activated.
Note
• When changing “Video Out” setting (“SCART (RGB)”,
“Component (Progressive)” or “Component (Interlace)”),
connect to the corresponding jack on the TV. If the
setting is changed, for example, to “SCART (RGB)”
while the COMPONENT VIDEO OUT jacks are used to
connect to the TV, a distorted video signal may be
output.
60
EN
E9RF0FH_EN.book
Page 61
Friday, May 16, 2014 7:17 PM
HDMI
Setup A General Setting A Clock
Clock Setting
Setup A General Setting A HDMI
• Make sure that the HDMI cable is connected and the TV
input is set to HDMI.
01 / 01 / 2014 (WED)
0 : 00
[K \ L].
2 Enter the time (hours / minutes) using [K \ L],
then press [ENTER].
You can select the colour space for HDMI output.
Set the appropriate colour space for your display device.
• When the connected device is not compatible with the
Y/Cb/Cr, HDMI signal is output as RGB regardless of
the setting.
Note
Format
DivX®
Setup A General Setting A DivX
RGB
YCbCr
B HDMI Audio (Default: ON)
If you do not want to output the audio through HDMI
(when you digitally output the audio through the DIGITAL
AUDIO OUT (COAXIAL) jack to your audio system, etc.),
you can set the HDMI audio output off.
• Set to “OFF” when the HDMI sound is not required.
Recording
• Your clock setting will be lost if either there is a power
failure or the unit is unplugged for more than 30
seconds.
• The clock is not displayed in standby mode because the
unit will return to a new Power Saving mode (ECO) with
the display off.
Basic Setup /
TV View Operation
The clock will start.
• Although seconds are not displayed, they will be
counted from zero.
A Format (Default: RGB)
Connections
A Format
B HDMI Audio
C RGB Range
1 Enter the date (day / month / year) using
Press [1] to move the cursor to the next field. If you
want to go back to the previous field, press [0].
Introduction
Clock
HDMI Audio
A DivX® VOD
B DivX Subtitle
Provides DivX® VOD registration code and deactivation
code.
Refer to page 38 for more details.
You can adjust the RGB range to make the dark areas of
the HDMI images brighter.
• Select “Enhanced” if the black-white contrast is not
clear.
• This setting is effective only for HDMI RGB output.
Editing
B DivX Subtitle (Default: OFF)
C RGB Range (Default: Normal)
RGB Range
Set the DivX® subtitle.
Normal
Enhanced
DivX Subtitle
A General Setting A Reset All
Reset All
Select “Yes” using [K \ L], then press [ENTER].
Reset to factory default?
Yes
No
“Are you sure?” will appear. Select “Yes” using [K \ L], and
then press [ENTER].
VCR Functions
Note
• The settings listed below will remain unchanged even after
resetting to the factory default.
- Clock setting
- Parental lock setting
- DivX® VOD code
- Timer programmes
- OSD language setting
Function Setup
OFF
English
Bulgarian
Czech
Dutch
French
German
Hungarian
Playback
A DivX® VOD
ON
OFF
Others
EN
61
E9RF0FH_EN.book
Page 62
Friday, May 16, 2014 7:17 PM
VCR Functions
Common Procedures
1
Press [STANDBY-ON Q] to turn on the unit.
To play back a tape, turn on the TV and be sure to
select the input to which the unit is connected.
2
Basic Recording and One-touch Timer
Recording (OTR)
VCR
Press [VCR].
Before recording, make sure:
Playback
VCR
Note for HDMI, Component and Digital
Audio (COAXIAL) Output in VCR
Playback
This unit can be output with HDMI, Component and Digital
Audio (COAXIAL) in VCR playback.
However, the image and the sound of VCR cannot be output
at the following condition.
• When switching to the VCR mode while recording in the
DVD mode.
• When selecting the DV channel (AV3).
• During DVD to VCR dubbing.
Playing back a Tape
1
Insert a pre-recorded tape, then press [PLAY B]
to begin playback.
2
During playback, press [PAUSE F].
• The desired channel is selected by pressing
[the Number buttons] or [AUX G \ H] on the remote
control.
• There is a tape with a record tab in the unit.
Tape speed
Type of tape
1
2
Recording / Playback Time
E60
E120
E180
E240
SP (standard play) mode
1 hour
2 hours
3 hours
4 hours
LP (long play) mode
2 hours
4 hours
6 hours
8 hours
Insert a recordable videotape.
Select the recording speed using [REC SPEED].
• The desired recording speed is selected in SP or LP
mode by pressing [REC SPEED].
3
4
Select the desired channel to record using
[AUX G \ H] or [the Number buttons].
Basic Recording:
Press [REC] to start recording.
To temporarily stop recording or to resume it, press
[PAUSE F].
Playback will be paused and sound will be muted.
3
4
5
Press [PLAY B] to resume playback.
Press [STOP C] to stop playback.
Press [OPEN\CLOSE EJECT A] to eject the
tape.
Note
• When a tape without record tab is inserted, the unit will start
playback automatically.
• Tracking will be automatically adjusted upon playback. To
adjust the tracking manually, press [AUX G \ H].
62
EN
After the unit has been in pause mode for 5 minutes, it will
stop automatically to protect the tape and the video head
from damage.
E9RF0FH_EN.book
Page 63
Friday, May 16, 2014 7:17 PM
3
Stop or pause the DVC where you want to start
dubbing.
4
5
Play back the DVC.
0:30
8:00
Note
1:00
7:30
• Dubbing will start from where the tape is stopped.
Search
Index Search
VCR
Press [SEARCH] so that the index search menu
appears.
2
Enter the number of recordings you want to
skip using [the Number buttons] within 30
seconds.
3
Press [FWD D] or [REV E] to start index
search.
Note
5
Press [STOP C] when the recording is
completed.
If you want to go in the forward direction, press
[FWD D].
If you want to go in the reverse direction, press [REV E].
After index search, the VCR will play back the tape
automatically.
Note
• This function is not available during recording.
• Every time a tape is recorded, an index mark is written on
the tape.
• You can make the index mark up to 20.
To prevent accidental recording on a recorded cassette,
remove its record tab. To record on it later, cover the hole with
cellophane tape.
DVC to VCR Dubbing
VCR
Preparing for DV dubbing (DVC to VCR):
• Insert a recordable videotape.
• Make sure your DVC is in video mode.
Press [AUX G \ H] repeatedly to select
DV(AV3).
2
Select the recording speed using [REC SPEED].
(See page 62.)
2
Enter your desired time to skip using
[the Number buttons] within 30 seconds.
3
Press [FWD D] or [REV E] to start time
search.
If you want to go in the forward direction, press
[FWD D].
If you want to go in the reverse direction, press [REV E].
After index search, the unit will play back the tape
automatically.
Note
• This function is not available during recording.
• Press [STOP C] to stop the search.
• If the tape reaches the end during the search, this unit will
cancel it and rewind the tape.
• You can set the time up to 9:59 (9h. 59min.).
EN
63
Others
1
Press [SEARCH] repeatedly until the time
search menu appears.
VCR Functions
This function helps you to dub the contents in the DVC (digital
video camcorder) to VCR.
1
Function Setup
Record tab
VCR
This feature allows you to go to a specific point on a tape by
entering the exact amount of time you want to skip in order to
reach the point.
Editing
Time Search
Prevent accidental erasure
Playback
• The remaining recording time will appear on the TV screen
during One-touch Timer Recording. Press [DISPLAY] to see
it on the TV screen.
• If VCR One-touch Timer Recording is completed during
DVD playback or recording, the VCR will be in stop mode
and the DVD keeps the current mode.
• You cannot use the pause function during One-touch Timer
Recording.
• When One-touch Timer Recording is finished and the power
is turned off, the unit will switch to the timer-standby mode
automatically if a timer recording has been programmed.
Press [TIMER SET] to cancel the timer-standby mode in
order to use the unit continuously.
Recording
1
Basic Setup /
TV View Operation
• When the unit reaches the specified time, it will be turned off
automatically.
• To change the recording length during One-touch Timer
Recording, press [REC] repeatedly until desired length
appears.
• To cancel One-touch Timer Recording within the specified
time, press [STOP C].
Connections
Normal Recording
Press [REC].
The dubbing will start.
One-touch Timer Recording will start.
Introduction
One-touch Timer Recording:
Press [REC] repeatedly until the desired
recording time (30 minutes to 8 hours) appears
on the TV screen.
E9RF0FH_EN.book
Page 64
Friday, May 16, 2014 7:17 PM
Other Operations
VCR
To cue or review picture during playback
(Picture Search):
Press [FWD D] or [REV E] during playback.
Press it again and the unit will search in super high speed (in
the LP mode only).
Changing the Video Colour System
This unit will distinguish the video colour system (SECAM,
PAL or MESECAM) automatically according to the format of a
pre-recorded video tape during playback or the input signal
from the external devices.
To change the video colour system manually, press
[SYSTEM].
Each time you press [SYSTEM], the colour system will
change as follows.
To freeze the picture on TV screen during playback
(Still mode):
Press [PAUSE F]. Each time you press the button, the picture
will be forwarded frame by frame.
If the picture begins to vibrate vertically during the still mode,
stabilise the picture by pressing the [AUX G \ H]. If the
picture is distorted or rolling vertically, adjust the vertical hold
control on your TV, if equipped.
To reset the tape counter:
Press [CLEAR].
AUTO
SECAM
PAL
MESECAM
Note
• If the playback picture on the TV screen is black and white,
change the video colour system manually.
• When you change the video colour system manually, be
sure to change it before recording. If you select the wrong
video colour system for recording, the colour of the picture
may be deteriorated.
To play back in slow forward motion:
During playback, press [PAUSE F], then press [FWD D].
If the noise bars appear on the TV screen, you can reduce it
by pressing [AUX G \ H]. Slow reverse is not available in
VCR mode.
Note
• Still / Slow / Pause mode will be automatically cancelled
after 5 minutes to prevent damage to the tape and the video
head.
• To return to normal play back from the Picture Search / Still /
Slow mode, press [PLAY B].
Hi-Fi Stereo Sound System
This unit will record and playback Hi-Fi stereo sound.
In addition, it has an A2 and NICAM stereo sound decoder.
This unit will receive stereo and bilingual broadcasts and it is
possible to record in several ways and to play back the sound.
Selecting the Audio Mode
You can select each mode by pressing [AUDIO] on the
remote control. Each mode is indicated on the TV screen as
following.
Audio mode during playback of the recorded tape in Hi-Fi
mode:
Mode
Audio output
Stereo Stereo
Display on the
TV screen
STEREO
L
L audio from both speakers
LEFT
R
R audio from both speakers
RIGHT
Normal Monaural
MONO
Audio mode during reception of bilingual broadcasts:
Mode
Audio output
Display on the
TV screen
Main
Main audio from the both speakers
Main
Sub
Sub audio from the both speakers
Sub
Main /
Sub
• Main audio from the left speaker
• Sub audio from the right speaker
Main
Sub
Note
• If you play back non-Hi-Fi tapes, the unit will play back
automatically in monaural even if you select any mode.
• If the stereo signal becomes weak, the broadcast is
automatically recorded in monaural.
64
EN
E9RF0FH_EN.book
Page 65
Friday, May 16, 2014 7:17 PM
Introduction
Others
Before requesting service for this unit, check the table below for a possible cause of the problem you are experiencing. Some
simple checks or a minor adjustment on your part may eliminate the problem and restore proper operation.
• The unit turns on automatically 2 seconds before the timer recording.
The unit does not function.
• “ ” or error message appears if the operation is prohibited.
• Batteries of the remote control are weak or exhausted.
No picture, sound or menu appears on
the screen.
• Check if the connections are made securely and correctly.
• Check if the cables are damaged.
• Check if a correct external input channel is selected on your TV.
“Clock” setting cannot be performed.
• If a recording is in progress, this operation cannot be performed.
The unit does not operate properly.
• Moisture has condensed inside the unit. Remove the disc and leave the unit
turned on for about 2 hours until the moisture evaporates. (See page 3.)
The clock display does not appear on
the front panel display.
• Check that the AC power cord is connected securely.
• (In case of power failure) Check the breaker and “Clock” setting.
• When the unit is in standby mode, front panel display is off because Power
Saving mode is applied to this product.
When you forget the password for
parental lock.
• Please cancel the password and the set level. (See page 57.)
DV signal cannot be input.
• Before connection, turn on the power supplies for both this unit and the DVC,
and make sure that these units have stopped.
• Only a “DVC-SD” signal can be input from the DVC to this unit. Other types of
signals are not supported.
• Do not connect any device other than the DVC. Even if a recorder or PC with
another DV terminal is connected, the DV function will not operate.
• If the DVC is not recognised after connection, turn off the power supply for the
unit and re-connect the DVC.
The DVC cannot be operated with this
unit.
• Signal input or DVC operation from this unit may be disabled depending on the
type of DVC.
• If a DVC signal cannot be input, use an external input (AV2) for analogue
connection via audio/video cables. Use Scart adaptor for connecting to AV2.
• DVC control may be disabled depending on the type of DVC, even in a mode
other than camera mode. In this case, switch to DVD control and execute the
normal recording procedure while operating the DVC.
Certain functions of the DVC cannot
operate.
• Some functions may not operate depending on the type of DVC. For example, if
the DVC does not support slow playback mode, the slow playback function is
disabled.
• With DV (AV3), the disc display menu does not appear unless disc playback is
executed.
DV audio signal cannot be switched.
• For recording with the DVC, the recording audio signal can be set to 12 bits or
16 bits. However, when 16-bit recording mode is selected, audio signal cannot
be switched. To record an audio signal, set it to 12 bits.
No image from HDMI connection.
• Check the HDMI connection. (Check the status of the HDMI related indications.)
• Check whether the connected monitor device or other device supports HDCP.
(This unit will not output a video signal unless the other device supports HDCP.)
• Check the setting of HDMI.
• Check whether the output format of this unit (HDMI FORMAT) matches the
supported input format of other connected device.
• If the unit is connected to the unauthorised display device with an HDMI cable,
the audio and video signals may not be output when playing back a commercial
DVD-video.
Function Setup
VCR Functions
Others
65
Editing
EN
Playback
GENERAL
The unit turns on automatically without
any operation.
Recording
GENERAL
Remedy
• Check that the AC power cord is connected securely.
• Batteries of the remote control are weak.
• Press [TIMER SET] to cancel the timer-standby mode. (When both DVD and
VCR is in timer-standby mode, you cannot operate the unit.)
Basic Setup /
TV View Operation
POWER
Symptom
The power does not turn on.
Connections
Troubleshooting
E9RF0FH_EN.book
Page 66
Friday, May 16, 2014 7:17 PM
DVD
RECORDING
GENERAL
Symptom
Remedy
The image from the external device
cannot be displayed.
• Try pressing [AUX G \ H] repeatedly to select your desired channel.
• Turn on all connected devices.
• Check if the connections are made securely and correctly.
Recording is impossible.
• This unit cannot record programmes that contain copy protection signal. This is
not a malfunction.
• The space of the recording media may be used up. Try deleting unnecessary
titles, or exchange it with the recordable media.
• The maximum number of titles or chapters has exceeded. Delete the
unnecessary titles to make enough space or insert a new recordable media.
• Check if the disc is CPRM compatible. Copy-once programmes can only be
copied onto the disc which is CPRM compatible.
• Check if the disc is protected or finalised. Undo the protection or the finalisation.
• Video mode DVD-RW once formatted in other unit cannot be recorded in this
unit unless formatted in this unit.
• Check if the connections are made securely and correctly.
Timer recording cannot be
performed.
• The internal clock of the unit may have been stopped due to a power failure that
lasted for more than 30 seconds. Reset the clock. (See page 61.)
“Repairing” appears on the TV
screen.
• If there is a power failure or unplugging during recording, finalising, formatting or
editing (even after “Repairing” disappears), a repairing process will begin
automatically just after turning the unit on again.
• It may take several minutes up to about several hours.
Repairing
In a case you intend to cancel the
repairing process.
• If you intend to cancel the repairing process, press [OPEN\CLOSE A] on the
front panel, then select “Yes” and press [ENTER]. After that, press
[OPEN\CLOSE EJECT A] to take out the disc. The disc cancelled during the
repairing process MAY NOT work.
Do you want to cancel a repairing
process? When selecting “Yes”,
the disc may not be usable.
Yes
No
Repairing
VCR
The indication
“ Writing to Disc
does not disappear.
66
100%
”
Recording does not start
immediately after pressing [REC].
EN
100% ” may remain on screen for the maximum of
• “ Writing to Disc
20 seconds even after it reached 100%. This is not a malfunction.
• Make sure the videotape has a recorded tab when you record to a videotape. If
needed, cover the hole with cellophane tape.
E9RF0FH_EN.book
Page 67
Friday, May 16, 2014 7:17 PM
Remedy
GENERAL
• Check if all the connections are made correctly.
• Check if the “Audio Out” is set correctly. (See pages 57-58.)
• There is a possibility that the selected subtitle language is not supported by the
disc.
Digital audio setting cannot be
changed to main audio (L), sub
audio (R) or combination of both.
• If the audio source is in the Dolby Digital format, set “Dolby Digital” setting to
“PCM” in “Playback” menu. (available only for DVD) (See page 58.)
Audio language or the subtitle
language of the DVD cannot be
changed.
• Multilingual subtitles are not supported by the disc.
• Some audio languages or the subtitle languages can be changed only from the
disc menu. Please refer to the disc’s manual.
Angles cannot be changed.
• Even though the multi-angle feature is supported by the disc, that does not
mean all the scenes are shot from multi-angles. Changing angles is available
only for those scenes shot from the multi-angle.
The disc cannot be played back on
other player even though it is
finalised properly.
• Some DVD players do not play back the disc made on other recorder. Refer to
the manual of the unit.
Picture noise appears.
• Adjust tracking control for better picture by pressing [AUX G \ H] while you
are playing back a videotape.
• Head cleaning for VCR may be necessary.
Refer to “AUTO HEAD CLEANING” on page 4.
The unit does not play back the
videotape.
• Check if a videotape is in this unit.
The motor rotates even when
playback / recording is stopped.
• The motor may rotate for the duration of approximately 5 minutes for efficient
operation. This is not a malfunction.
VCR
DVD
PLAYBACK
There is no sound, or no subtitle.
EN
67
Others
• Check if the playable disc is inserted.
• Check if the disc is loaded correctly with the labelled side facing up.
• Discs made on other devices or on personal computers cannot be played back
on this unit unless it is finalised on the device.
• Even if it is finalised, the performance of those discs are not guaranteed on this
unit.
• The disc may be dirty or flawed. Clean the disc.
• Check if all the connections are made correctly.
• Check “Parental Lock” setting. (See page 57.)
• Playback of DVD is prohibited from 2 minutes before the programmed start time
of a timer recording when the recording media is DVD.
VCR Functions
Playback cannot be performed.
Function Setup
• Resume function may be activated. Refer to page 40 to cancel the resume
point.
Editing
Playback does not start from the
beginning.
Turn on all connected devices.
Check if the external input channel is set correctly.
Check if the connections are made securely and correctly.
If using the HDMI connection, sound is not output when “HDMI Audio” is set to
“OFF”.
• Check the RCA audio cable connection. If you are using HDMI-DVI conversion
cable, you must connect the RCA audio cable, too.
• If using the HDMI connection, check whether the output format of this unit
(HDMI FORMAT) matches the supported input format of other connected
device.
Playback
•
•
•
•
Recording
There is no sound, or no subtitle.
Basic Setup /
TV View Operation
• During fast forward or fast reverse, playback picture may be distorted. This is
not a malfunction.
• Connect to TV directly. When you connect this unit with the television via VCR
or other devices, the picture may be distorted due to the copy-protection signal.
• Check if the cables are damaged.
• Keep the equipment which may cause electrical disturbances, such as a cellular
phone, away.
Connections
Playback picture is distorted.
Colour of the picture is abnormal.
Introduction
Symptom
TV aspect ratio does not match your • Check “TV Aspect” setting. (See page 60.)
TV screen.
• A different aspect ratio will be used when the aspect ratio specified by the disc
is not supported by this unit.
DVD
EDITING
E9RF0FH_EN.book
Page 68
Friday, May 16, 2014 7:17 PM
Symptom
Remedy
Titles cannot be edited or deleted.
• The titles or the disc itself may be protected. Cancel the protection by following
the steps on page 50 for title protection and page 33 for disc protection.
Dubbing cannot be executed.
• When the number of the titles or the chapters exceeds the maximum recordable
number, the dubbing will not be executed.
Titles cannot be edited or deleted.
• The titles in the DVD-R cannot be edited or deleted if they are finalised. If it is
DVD-RW, undo the finalisation by following the steps on page 33.
The capacity of the disc doesn’t
increase even if the recorded
programme is deleted.
• With video mode DVD-RW, the disc space will increase only when the last title is
deleted. With DVD-R, deleting a title will not increase the disc space.
REMOTE CONTROL
Dubbing cannot be executed.
• Check if the disc is compatible for recording. (See page 21.)
The remote control does not function.
• No batteries in the remote control or the batteries may be weak. Replace the
batteries.
• Make sure there is no obstacle between the remote control and the unit.
• Try getting closer to the unit. (See page 12.)
• If above solutions do not solve the problem, please call an Authorised Service
Centre.
Troubleshooting for Error Messages
Error message
Cause
Solution
Disc Error
— Please eject the disc. —
Playback feature may not be
available on this disc.
• An unplayable disc is inserted in the unit. • Insert a standard disc. (See pages 8-9.)
• The disc is upside down.
• Insert the disc with the labelled side
facing up.
Unknown USB Device/File
— Please Remove the USB. —
Insert a compatible USB device.
• Format of the files in the connected USB
device are not supported.
• Incompatible USB device is connected.
• Insert a compatible USB device with
supported file format. If this does not
solve the problem, use other type of
compatible USB device.
Region Error
— Please eject the disc. —
Playback is not authorized in your
region.
• Playback is not authorised in the region
of the DVD-video that you inserted in the
unit.
• Insert a DVD-video with region codes 2
or ALL.
Parental Lock On
The current selected parental level
prohibits playback.
• The current selected parental level in
“Setup” menu prohibits playback.
• Check the “Parental Lock” setting.
(See page 57.)
Recording Error
This programme is not allowed to be
recorded.
• The recording function encountered a
copy prohibited programme.
• Original source is in NTSC system.
• You cannot record copy prohibited
programmes.
Recording Error
This programme is not recordable in
Video mode.
• You are trying to record a copy-once
programme onto a DVD-RW disc in
video mode.
• Set “Format Mode” to “VR mode”.
(See page 23.)
Recording Error
Can not record on this disc.
• You are trying to record onto a disc that
is unrecordable, or the disc status does
not satisfy recording requirements.
• The disc is dirty.
• The disc is damaged.
• You are trying to record onto a VR mode
DVD-RW disc which contained
recordings from another recorder.
• Insert a recordable disc, and ensure the
disc status satisfies the recording
requirements. (See page 21.)
• Clean the disc with a cleaning cloth.
• Replace the disc.
• Disc may need formatting.
Recording Error
Cannot record. Disc not CPRM
comp.
• You are trying to record a copy-once
programme onto a DVD disc that is not
compatible with CPRM.
• Insert a ver. 1.1 or ver. 1.2 DVD-RW
disc. (Compatible with CPRM.)
Recording Error
This disc is protected and not
recordable.
• You are trying to record onto the VR
mode DVD-RW disc that is set as
protected in “Setup” Menu.
• Remove the disc protect setting in “DVD
Menu” menu. (See page 33.)
Recording Error
Disc is full.
(No area for new recording)
• You are trying to record onto the VR
mode DVD-RW disc that has no space
for recording.
• Insert a recordable disc with enough
recording space.
• Delete unnecessary original titles.
(See page 48.)
68
EN
E9RF0FH_EN.book
Page 69
Friday, May 16, 2014 7:17 PM
Cause
Introduction
Error message
Solution
• You are trying to record onto the
DVD-RW / -R disc on which the number
of recorded titles has reached the
maximum (99).
• Delete unnecessary original titles.
(See page 48.)
Recording Error
You cannot record more than 999
chapters on one disc.
(The maximum is 999)
• You are trying to record onto the VR
mode DVD-RW disc on which the
number of recorded chapters has
reached the maximum (999).
• Delete unnecessary chapter mark from
an Original list. (See page 49.)
Recording Error
You cannot record on this disc as
Control Information is full.
• This disc has no space to write Control
Information when recording or deleting
contents.
• When editing has been repeatedly
performed, the control information area
may become full even though the
recording area has enough space.
• Delete unnecessary original titles.
(See page 48.)
Recording Error
You cannot record on this disc as
Power Calibration Area is full.
• When recordings are performed
• Insert a new disc.
repeatedly onto an unstable disc, this
area may become full.
• Every time you insert a disc for
recording, part of the disc’s working area
will be used. If you repeat this frequently,
it will be used up quicker and you may
not be able to record maximum number
of titles for the disc.
Recording Error
This disc is already finalised.
• You are trying to record onto a disc that
is already finalised.
Connections
Recording Error
You cannot record more than 99
titles on one disc.
(The maximum is 99)
Basic Setup /
TV View Operation
Recording
• Release the finalising for the disc.
(See page 33.)
* If you are still having trouble with the unit after checking all the Troubleshooting points, write down the error code and the error
description and consult your dealer.
Playback
Editing
Function Setup
VCR Functions
Others
EN
69
E9RF0FH_EN.book
Page 70
Friday, May 16, 2014 7:17 PM
Language Code
Language
70
Code
Language
Code
Language
Code
Language
Code
Abkhazian
4748
French
5264
Lithuanian
5866
Sindhi
6550
Afar
4747
Frisian
5271
Macedonian
5957
Singhalese
6555
Afrikaans
4752
Galician
5358
Malagasy
5953
Siswat
6565
Albanian
6563
Georgian
5747
Malay
5965
Slovak
6557
Amharic
4759
German
5051
Malayalam
5958
Slovenian
6558
Arabic
4764
Greek
5158
Maltese
5966
Somali
6561
Armenian
5471
Greenlandic
5758
Maori
5955
Spanish
5165
Assamese
4765
Guarani
5360
Marathi
5964
Sundanese
6567
Aymara
4771
Gujarati
5367
Moldavian
5961
Swahili
6569
Azerbaijani
4772
Hausa
5447
Mongolian
5960
Swedish
6568
Bashkir
4847
Hebrew
5569
Nauru
6047
Tagalog
6658
Basque
5167
Hindi
5455
Nepali
6051
Tajik
6653
Bengali;Bangla
4860
Hungarian
5467
Norwegian
6061
Tamil
6647
Bhutani
5072
Icelandic
5565
Occitan
6149
Tatar
6666
Bihari
4854
Indonesian
5560
Oriya
6164
Telugu
6651
Bislama
4855
Interlingua
5547
Oromo (Afan)
6159
Thai
6654
Breton
4864
Interlingue
5551
Panjabi
6247
Tibetan
4861
Bulgarian
4853
Inupiak
5557
Pashto; Pushto
6265
Tigrinya
6655
Burmese
5971
Irish
5347
Persian
5247
Tonga
6661
Byelorussian
4851
Italian
5566
Polish
6258
Tsonga
6665
Cambodian
5759
Japanese
5647
Portuguese
6266
Turkish
6664
Catalan
4947
Javanese
5669
Quechua
6367
Turkmen
6657
Chinese
7254
Kannada
5760
Rhaeto-Romance
6459
Twi
6669
Corsican
4961
Kashmiri
5765
Romanian
6461
Ukrainian
6757
Croatian
5464
Kazakh
5757
Russian
6467
Urdu
6764
Czech
4965
Kinyarwanda
6469
Samoan
6559
Uzbek
6772
Danish
5047
Kirghiz
5771
Sangho
6553
Vietnamese
6855
Dutch
6058
Kirundi
6460
Sanskrit
6547
Volapuk
6861
English
5160
Korean
5761
Scots Gaelic
5350
Welsh
4971
Esperanto
5161
Kurdish
5767
Serbian
6564
Wolof
6961
Estonian
5166
Laothian
5861
Serbo-Croatian
6554
Xhosa
7054
Faroese
5261
Latin
5847
Sesotho
6566
Yiddish
5655
Fiji
5256
Latvian; Lettish
5868
Setswana
6660
Yoruba
7161
Finnish
5255
Lingala
5860
Shona
6560
Zulu
7267
EN
E9RF0FH_EN.book
Page 71
Friday, May 16, 2014 7:17 PM
Introduction
Specifications
General
Four heads
Power requirements
220–240 V
Power consumption
35 W
± 10 %, 50 Hz ± 0.5 %
Power consumption (standby)
0.5 W
Weight
5.0 kg
Dimensions (width x height x depth)
435 x 99.5 x 388 mm
5°C to 40°C
Operating humidity
Less than 80 % (no condensation)
Recording
Video Recording (VR) format (DVD-RW only), video format (DVD-RW, DVD-R)
Recordable discs
DVD-ReWritable, DVD-Recordable
Video recording format
Sampling frequency
Compression format
13.5 MHz
MPEG
Audio recording format
Sampling frequency
Compression format
48 kHz
Dolby Digital
Recording
Recording format
Input/Output
Front Panel :
IEEE 1394
USB input
TYPE A
USB 2.0
Bus power current: MAX. 500 mA
Rear Panel :
Two 21-pin scart sockets (AV1, AV2)
2 Vrms (input impedance: more than 10 k / output impedance: less than 1 k)
Video input /output
Input /output level
Two 21-pin scart sockets (AV1, AV2)
1 Vp-p (75 ) each
Component video output
Output level
Three RCA connectors
Y: 1.0 Vp-p (75 )
PB/CB, PR/CR: 0.7 Vp-p (75 ) each
Audio output
Output level
Two RCA connectors
2 Vrms (output impedance: 680 )
Digital audio output
Output level
One Coaxial pin jack
500 mVp-p (75 )
HDMI output
HDMI jack
Editing
Audio input /output
Input /output level
Playback
DV input
DV 4-pin jack
Basic Setup /
TV View Operation
Operating temperature
Connections
VCR video heads
Function Setup
Note
The specifications and design of this product are subject to change without notice.
VCR Functions
Others
EN
71
99_BackCover.fm
Page 72
Tuesday, May 20, 2014
12:57 PM
Declaration of Conformity
This product complies with the requirement of the related directives.
We: FUNAI ELECTRIC EUROPE Sp. z o.o.
17 Stycznia 45 B 02-146 Warszawa, Poland
declare that the following product:
DVD / Video Cassette recorder
Model WL6D-M102
Trade Name: Funai
is in compliance with the related regulations.
Web Site: http://www.funai.eu
© 2014 FUNAI ELECTRIC All rights reserved.
E9RF0FH
2VMZ00111 ★★★★★

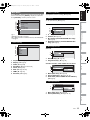
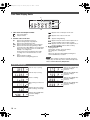

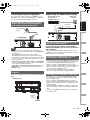
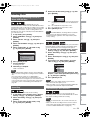
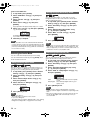
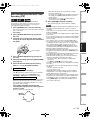


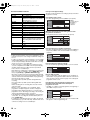
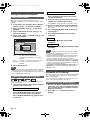
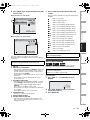


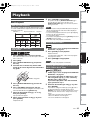


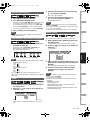

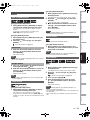
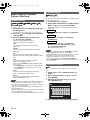

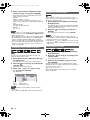
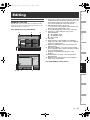
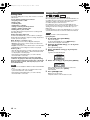
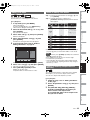

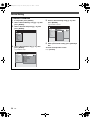


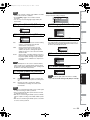


![1 No modo parado, prima [SETUP]. - Wiki Karat](http://vs1.manualzilla.com/store/data/006083260_1-661b4f9fb10cd2383726a866e7981720-150x150.png)