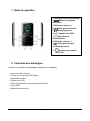
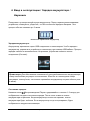
1
Version 1.0 Intenso Video Scooter - Special Edition Bedienungsanleitung Seite 1-21 DE Manual Page 1-20 GB Istruzioni per l’uso Pagina 1-20 IT Notice d’utilisation Page 1-20 FR Instrucciones de uso Página 1-20 ES Manual de instruções Página 1-20 PT Instrukcja obsługi Strona 1-20 PL инструкция по эксплуатации Стр. 1-20 RU Seite 1 von 21 - DE Inhalt Zu dieser Anleitung ........................................................................................................................................ 4 Bestimmungsgemäßer Gebrauch .................................................................................................................. 4 Sicherheitshinweise ....................................................................................................................................... 5 1. Geräteüberblick ......................................................................................................................................... 6 2. Packungsinhalt ........................................................................................................................................... 6 3. Verbinden mit einem Computer................................................................................................................ 7 a) Verbinden des Gerätes ......................................................................................................................... 7 b) Trennen des Gerätes ............................................................................................................................ 7 4. Inbetriebnahme / Aufladen des Akkus / Kopfhörer .................................................................................. 8 Laden des Akkus: ........................................................................................................................................... 8 Ladestatus: .................................................................................................................................................... 8 Nutzung während des Ladevorganges: ......................................................................................................... 9 5. Bedienung ................................................................................................................................................ 10 a) Allgemeine Bedienung........................................................................................................................ 10 (1) Ein- und Ausschalten des Players ....................................................................................................... 10 (2) Tastensperre ...................................................................................................................................... 10 (3) Das Hauptmenü.................................................................................................................................. 11 (4) Navigieren .......................................................................................................................................... 11 b) Musik .................................................................................................................................................. 12 (1) Wiedergabe ........................................................................................................................................ 12 (2) Ordnerübersicht ................................................................................................................................. 12 (3) A-B Schleife ........................................................................................................................................ 13 c) Video................................................................................................................................................... 13 (1) Wiedergabe ........................................................................................................................................ 13 (2) Ordnerübersicht ................................................................................................................................. 14 d) Foto..................................................................................................................................................... 14 (1) Wiedergabe ........................................................................................................................................ 14 Seite 2 von 21 - DE (2) Ordnerübersicht ................................................................................................................................. 14 e) Aufnahmefunktion ............................................................................................................................. 15 (1) Aufnahme ........................................................................................................................................... 15 (2) Wiedergabe ........................................................................................................................................ 16 f) Datei Explorer ..................................................................................................................................... 16 g) Einstellungen ...................................................................................................................................... 17 (1) Musik .................................................................................................................................................. 17 i. Abspielmodus .................................................................................................................................. 17 ii. Zufällige Wiedergabe ...................................................................................................................... 17 iii. Equalizer......................................................................................................................................... 17 iv. Bass / 3D Einst. ............................................................................................................................... 18 v. Nutzer EQ Einst................................................................................................................................ 18 (2) Aufnahme ........................................................................................................................................... 18 (3) Foto .................................................................................................................................................... 18 (4) Display ................................................................................................................................................ 18 i. Dauer ............................................................................................................................................... 18 ii. Helligkeit ......................................................................................................................................... 18 iii. Eco Modus...................................................................................................................................... 18 (5) Sleep Timer......................................................................................................................................... 19 (6) Sprache ............................................................................................................................................... 19 (7) System ................................................................................................................................................ 19 i. Information ...................................................................................................................................... 19 ii. Werkseinstellungen ........................................................................................................................ 19 6. Micro SD Karte ......................................................................................................................................... 19 7. Technische Daten .................................................................................................................................... 20 8. Entsorgung von Elektro-Altgeräten ......................................................................................................... 21 Seite 3 von 21 - DE Zu dieser Anleitung Lesen Sie diese Anleitung sorgfältig durch und beachten und befolgen Sie bitte sämtliche in dieser Anleitung erwähnten Hinweise, um eine lange Lebensdauer und eine zuverlässige Nutzung des Gerätes zu gewährleisten. Heben Sie diese Anleitung griffbereit auf und geben Sie sie an andere Nutzer des Gerätes weiter. Bestimmungsgemäßer Gebrauch Dieses Gerät dient der Wiedergabe von Musikdateien im MP3, WMA und WAV Format, welche über die mitgelieferte Micro-SD Karte abgespielt werden können. Dieses Produkt ist nicht für eine kommerzielle Nutzung oder für medizinische und spezielle Anwendungen vorgesehen, in denen der Ausfall des Produktes Verletzungen, Todesfälle oder erhebliche Sachschäden verursachen kann. Im Falle einer Nutzung, die nicht dem bestimmungsgemäßen Gebrauch entspricht, erlischt die Haftung. Das Öffnen sowie Umbauen des Gerätes und die Nutzung von Zusatzgeräten und Zubehörteilen, die nicht von uns genehmigt wurden, sind zu unterlassen. Nutzen Sie das Gerät nicht unter extremen Umgebungsbedingungen und beachten Sie die Sicherheitshinweise. Ein Nichtbeachten der Informationen und Sicherheitshinweise in dieser Anleitung gilt als nichtbeachten des bestimmungsmäßen Gebrauchs und führt zum Erlöschen der Haftung und kann zu Personen- oder Sachschäden führen. Seite 4 von 21 - DE Sicherheitshinweise Lesen und beachten Sie die Bedienungsanleitung nebst Warnungen und Hinweisen vor der ersten Nutzung des Produkts. Vor der ersten Benutzung des Gerätes achten Sie bitte darauf, dass Sie den Akku vollständig aufladen. Vermeiden Sie einen harten Aufprall des Gerätes. Verwenden Sie das Gerät nicht in extrem kalten, heißen, feuchten oder staubigen Gebieten. Setzen Sie es ebenfalls keinen direkten Sonnenstrahlen aus. Stellen Sie keine offenen Lichtquellen, wie z.B. brennende Kerzen in die Nähe des Produkts. Führen Sie häufiger Datensicherungen durch, um einen möglichen Datenverlust zu vermeiden. Vermeiden Sie das Benutzen in stark magnetisierten Feldern. Bedienen Sie dieses Gerät nicht mit nassen Händen. Schützen Sie das Gerät vor Nässe. Wenn Feuchtigkeit in das Gerät eintritt, schalten Sie es bitte unverzüglich aus, danach säubern und trocknen Sie bitte das Gerät. Verwenden Sie bitte kein Wasser oder chemische Lösungen, um das Gerät zu säubern. Nutzen Sie dazu bitte nur ein trockenes Tuch. Wir sind nicht haftbar für Schäden oder Datenverlust bei einer Fehlfunktion, fehlerhafter Handhabung, eigenhändiger Reparatur des Geräts oder eigenmächtigem Wechseln des Akkus. Bitte zerlegen Sie das Gerät nicht in seine Einzelteile, und versuchen Sie bitte nicht, es selbst zu reparieren, da die Garantie in diesem Fall erlischt. Blockieren oder bedecken Sie die Öffnungen des Produkts nicht. Dieses Produkt ist nur für den privaten Gebrauch vorgesehen und sollte nicht kommerziell oder industriell genutzt werden. Stecken Sie keine Gegenstände, die nicht für den Gebrauch vorgesehen sind, in die Öffnungen des Produkts. Schäden, die auf nicht sachgemäße Handhabung oder Missachtung der Warnungen oder Anweisungen dieser Bedienungsanleitung zurückzuführen sind, werden nicht von der Garantie gedeckt. WARNUNG: Eine verlängerte Belastung durch zu laut wiedergegebene Musik kann zu temporären oder permanenten Gehörschäden oder Gehörverlust führen. Der Gebrauch des Video Players ist im Straßenverkehr nicht empfohlen. Es kann dazu führen, dass der Hörer unachtsamer gegenüber potenziellen Gefahren, wie sich nähernden Fahrzeugen, reagiert. Seite 5 von 21 - DE 1. Geräteüberblick 1. Ein / Aus Schalter 2. Pfeil-Zurück Taste 3. Lautstärke (+) Taste 4. 5. Zurück Taste Play / Pause Taste 6. Mini USB Anschluss 7. Kopfhörer Eingang 8. Lautstärke (-) Taste 9. Vorwärts Taste 10. M (Menü) Taste 11. 2. Packungsinhalt Bitte überprüfen Sie den Packungsinhalt auf Vollständigkeit Intenso Video Player Hi-Fi Stereo Kopfhörer Hi-Fi Stereo Ohrstöpsel Micro SD-Karte CD mit Konvertierungssoftware (AVI-Format) USB Kabel Bedienungsanleitung Seite 6 von 21 - DE Micro SD Steckplatz 3. Verbinden mit einem Computer Um Dateien zwischen Ihrem Player und einem Computer auszutauschen, können Sie Ihren Player einfach mit Hilfe des beiliegenden USB Kabels mit Ihrem Computer verbinden. a) Verbinden des Gerätes Um den Player mit einem Computer zu verbinden, stecken Sie den USB 2.0 Anschluss des USB Kabels in einen freien USB Port des eingeschalteten Computers und verbinden Sie den Mini-USB Anschluss des Kabels mit dem Player. Dieser wird nun als Wechseldatenträger erkannt und ist für einen Datentransfer mit dem Computer bereit. Sie können jetzt die gewünschten Dateien ganz einfach per “Drag and Drop” oder durch „Kopieren und Einfügen“ von Ihrem Computer auf den Player (oder von Ihrem Player auf den Computer) übertragen. b) Trennen des Gerätes Vor dem Abziehen des USB Kabels sollte unbedingt die Datenverbindung zwischen den Geräten getrennt werden! Halten Sie dazu die Taste für 1 - 2 Sekunden gedrückt. Das Display zeigt nun den aktuellen Ladestatus an und die Datenverbindung wurde getrennt. Sollten Sie einen Windows PC nutzen (XP oder höhere Version), kann der Player auch direkt über den Computer ausgeworfen werden. Klicken Sie hierfür auf das „Hardware sicher entfernen“ Symbol in der Windows Taskleiste. Wählen Sie nun den Video Scooter aus und befolgen Sie gegebenenfalls den weiteren Anweisungen Ihres Computers, bis dieser Ihnen den erfolgreichen Vorgang bestätigt. Sollten Sie einen Mac benutzen, können Sie den Player einfach trennen, indem Sie das Player Icon auf das Papierkorbsymbol ziehen. Das USB Kabel kann anschließend sicher vom Player und Computer entfernt werden. Hinweis: Entfernen Sie den Player nicht vom Computer, wenn noch Dateien zwischen den Geräten übertragen werden. Dies kann zu Datenverlust und Beschädigung des Datenträgers führen. Seite 7 von 21 - DE 4. Inbetriebnahme / Aufladen des Akkus / Kopfhörer Der Player hat einen fest verbauten internen Akku. Vor der ersten Benutzung des Gerätes achten Sie bitte darauf, dass Sie den Akku vollständig aufladen. Dieser Vorgang dauert in der Regel bis zu 3 Stunden. Akku vollständig geladen Laden des Akkus: Der Akku wird über die USB- Verbindung mit Ihrem PC geladen. Um den Akku aufzuladen, verbinden Sie daher bitte das Gerät über das USB-Kabel mit dem PC. Der Ladevorgang startet automatisch. Es erscheint das Symbol für eine Verbindung (Connect) auf dem Display des Gerätes. Hinweis: Für eine optimale Leistungsfähigkeit muss der Akku regelmäßig genutzt werden. Sollte dies nicht der Fall sein, laden Sie den Akku mindestens einmal pro Monat vollständig auf. Ladestatus: Drücken Sie die Play/Pause Taste für 1-2 Sekunden, um den aktuellen Ladestatus angezeigt zu bekommen. Es erscheint nun ein Batteriesymbol auf dem Display. Ist der Akku vollständig aufgeladen, wird Ihnen eine grüne Batterie angezeigt. Befindet sich der Akku noch im Ladezustand, wird dies durch eine Ladeanimation dargestellt. Seite 8 von 21 - DE Nutzung während des Ladevorganges: Sie können den Player während des Ladevorganges nutzen. Drücken Sie dazu einfach ein weiteres Mal auf die Play/Pause Taste und das Gerät wechselt von der Ladestatusanzeige in das Hauptmenü. Auch während der Nutzung können Sie den aktuellen Ladestatus erkennen. In der oberen rechten Ecke wird dieser beispielsweise während der Musikwiedergabe in 3 Stufen angezeigt. Ist der Akku vollständig geladen, sind alle drei Felder fest eingeblendet. Befindet sich der Akku noch im Ladezustand, wird auch hier eine Animation angezeigt. 0 – 33% 34 – 66 % 67 – 100 % Hinweis: Wenn Sie in die Ladestatusanzeige wechseln, oder das am Computer angeschlossene Gerät benutzen, ist kein Datenaustausch mit dem Computer mehr möglich. Um wieder Dateien übertragen zu können, müssen Sie den Player erneut mit dem Computer verbinden. Einschalten: Informationen hierzu finden Sie im nächsten Abschnitt „Bedienung“. Nutzung eines Kopfhörers: Dieser Player gibt Musik über den 3.5mm Klinkenanschluss wieder. Stellen Sie vor dem Verbinden sicher, dass der Player auf eine niedrige Lautstärkestufe eingestellt ist. Verbinden Sie nun einen der mitgelieferten Kopfhörer mit dem Gerät und passen Sie langsam die Lautstärke auf die von Ihnen gewünschte Stufe an. Verwenden Sie nur die im Lieferumfang enthaltenen Hi-Fi On-Ear Stereo Kopfhörer oder die Stereo Ohrstöpsel. WARNUNG: Eine verlängerte Belastung durch zu laut wiedergegebene Musik kann zu temporären oder permanenten Gehörschäden oder Gehörverlust führen. Der Gebrauch des Video Players ist im Straßenverkehr nicht empfohlen. Es kann dazu führen, dass der Hörer unachtsamer gegenüber potenziellen Gefahren, wie sich nähernden Fahrzeugen, reagiert. Seite 9 von 21 - DE 5. Bedienung Hinweis: Bitte achten Sie bitte darauf, dass eine Micro SD Karte im Player eingesetzt ist! a) Allgemeine Bedienung (1) Ein- und Ausschalten des Players Schieben Sie den Ein-/ Ausschalter an der linken Seite des Geräts auf die “ON” Position. Halten Sie danach die Play/Pause Taste für ca. 3 Sekunden gedrückt, um den Player einzuschalten. Um das Gerät in den Standby-Modus zu versetzen, halten Sie die Play/Pause Taste erneut für ca. 3 Sekunden gedrückt. Falls Sie den Player dauerhaft ausschalten möchten, schieben Sie den Knopf auf der linken Seite des Players auf die „OFF“ Position. Hinweis: Dieser Player hat eine Energiespar Funktion. Das Gerät schaltet sich automatisch aus, wenn es mehr als zehn Minuten nicht benutzt wird. (2) Tastensperre Um ungewollte Eingaben zu verhindern, verfügt der Player über eine Tastensperre. Drücken Sie dazu einfach gleichzeitig die Play/Pause Taste und die M Taste. Zur Bestätigung wird nun ein geschlossenes Schloss eingeblendet. Zum Entsperren drücken Sie einfach wieder die Play/Pause Taste und die M Taste gleichzeitig. Es wird nun zur Bestätigung ein geöffnetes Schloss eingeblendet. Seite 10 von 21 - DE (3) Das Hauptmenü Nach Einschalten des Players erscheint das Hauptmenü. Dies besteht aus sechs verschiedenen Menüpunkten (Musik, Video, Foto, Aufnahme, Datei-Explorer und Einstellungen). Musik Video Aufnahme Datei Foto Einstellungen (4) Navigieren Mit der Vorwärts und Zurück Taste können Sie durch die verschiedenen Menüs navigieren. Mit der Play/Pause Taste können Sie den gewünschten Menüpunkt öffnen oder die gewünschte Funktion starten. Drücken Sie kurz die Pfeil-Zurück Taste, um eine Ebene zurück zu gelangen. Halten Sie die Pfeil-Zurück Taste für 1 - 2 Sekunden gedrückt, um direkt wieder in das Hauptmenü zu wechseln. Seite 11 von 21 - DE b) Musik (1) Wiedergabe Navigieren Sie im Hauptmenü zum Menüpunkt Music und bestätigen Sie Ihre Auswahl mit der Play/Pause Taste. Es öffnet sich der Wiedergabebildschirm und die Wiedergabe startet automatisch. Um die Wiedergabe zu pausieren oder wieder fortzusetzen, drücken Sie jeweils die Play/Pause Taste. Um einen Titel vor- oder zurück zu springen, drücken Sie die Vorwärts oder Zurück Taste. Um innerhalb eines Titels vor- oder zurück zu spulen, halten Sie diese einfach gedrückt. Drücken Sie (+) Taste oder (-) Taste, um die Lautstärke zu regulieren. (2) Ordnerübersicht Um aus dem Wiedergabebildschirm in die Ordnerübersicht zu gelangen, drücken Sie die Pfeil-Zurück Taste. Navigieren Sie mit der (+) Taste oder (-) Taste durch die Dateien und vorhandenen Ordner. Bestätigen Sie mit der Play/Pause Taste eine Musikdatei, wird diese wiedergegeben. Bestätigen Sie mit dieser Taste einen Ordner, wird dieser geöffnet. Mit der Pfeil-Zurück Taste wechseln Sie in die nächst höhere Ebene Ihrer Ordnerstruktur bis hin zurück zum Hauptmenü. Um eine Datei zu löschen, navigieren Sie in der Ordnerübersicht zu der gewünschten Datei und drücken Sie die M Taste. Bestätigen Sie nun den Vorgang mit der Taste, um die Datei endgültig zu entfernen. Seite 12 von 21 - DE Play/Pause (3) A-B Schleife Mit diesem Player ist es möglich, einen beliebigen Zeitabschnitt eines Musikstückes auszuwählen und diesen in einer Schleife dauerhaft zu wiederholen. Drücken Sie während der Wiedergabe des Musikstückes die M Taste, um den Startpunkt (A) der Wiedergabeschleife zu bestimmen. Drücken Sie die M Taste erneut, um den Endpunkt (B) festzulegen. Der ausgewählte Zeitabschnitt wird nun in einer Wiedergabeschleife abgespielt. Hinweis: Für weitere Konfigurationsmöglichkeiten öffnen Sie bitte im Hauptmenü den Menüpunkt Setup. c) Video Hinweis: Um Videos auf diesem Player wiederzugeben, müssen diese mit der beiliegenden Konvertierungssoftware in das für den Player angepasste AVI Format umgewandelt werden. (1) Wiedergabe Navigieren Sie im Hauptmenü zum Menüpunkt Movie und bestätigen Sie Ihre Auswahl mit der Play/Pause Taste. Es öffnet sich die Ordnerübersicht. Wählen Sie mit der (+) Taste oder (-) Taste die abzuspielende Videodatei und bestätigen Sie Ihre Auswahl mit der Play/Pause Taste. Das Video startet automatisch. Um die Wiedergabe zu pausieren oder wieder fortzusetzen, drücken Sie jeweils die Play/Pause Taste. Um einen Titel vor- oder zurück zu springen, drücken Sie die Vorwärts oder Zurück Taste. Um innerhalb eines Titels vor- oder zurück zu spulen, halten Sie diese einfach gedrückt. Drücken Sie die (+) Taste oder (-) Taste, um die Lautstärke zu regulieren. Seite 13 von 21 - DE (2) Ordnerübersicht Um aus dem Wiedergabebildschirm in die Ordnerübersicht zu gelangen, drücken Sie die Pfeil-Zurück Taste. Navigieren Sie mit der (+) Taste oder (-) Taste durch die Dateien und vorhandenen Ordner. Bestätigen Sie mit der Play/Pause Taste eine Videodatei, wird diese wiedergegeben. Bestätigen Sie mit dieser Taste einen Ordner, wird dieser geöffnet. Mit der Pfeil-Zurück Taste wechseln Sie in die nächst höhere Ebene Ihrer Ordnerstruktur bis hin zurück zum Hauptmenü. Um eine Datei zu löschen, navigieren Sie in der Ordnerübersicht zu der gewünschten Datei und drücken Sie die M Taste. Bestätigen Sie nun den Vorgang mit der Taste, um die Datei endgültig zu entfernen. Play/Pause d) Foto (1) Wiedergabe Navigieren Sie im Hauptmenü zum Menüpunkt Photo und bestätigen Sie Ihre Auswahl mit der Play/Pause Taste. Es öffnet sich die Ordnerübersicht. Wählen Sie mit der (+) Taste oder (-) Taste die wiederzugebende Bilddatei und bestätigen Sie Ihre Auswahl mit der Play/Pause Taste. Das ausgewählte Bild wird Ihnen nun angezeigt. Um eine automatische Bildwiedergabe zu starten, oder auch zu pausieren, drücken Sie jeweils die Play/Pause Taste. (2) Ordnerübersicht Um aus dem Wiedergabebildschirm in die Ordnerübersicht zu gelangen, drücken Sie die Pfeil-Zurück Taste. Navigieren Sie mit der (+) Taste oder (-) Taste durch die Dateien und vorhandenen Ordner. Bestätigen Sie mit der Play/Pause Taste eine Datei, wird diese wiedergegeben. Wählen Sie mit dieser Taste einen Ordner, wird dieser geöffnet. Mit der Pfeil-Zurück Taste wechseln Sie in die nächst höhere Ebene Ihrer Ordnerstruktur bis hin zurück zum Hauptmenü. Seite 14 von 21 - DE Um eine Datei zu löschen, navigieren Sie in der Ordnerübersicht zu der gewünschten Datei und drücken Sie die M Taste. Bestätigen Sie nun den Vorgang mit der Taste, um die Datei endgültig zu entfernen. Play/Pause Hinweis: Für weitere Konfigurationsmöglichkeiten öffnen Sie bitte im Hauptmenü den Menüpunkt Setup. e) Aufnahmefunktion (1) Aufnahme Navigieren Sie im Hauptmenü zum Menüpunkt Tonaufnahme und bestätigen Sie Ihre Auswahl mit der Play/Pause Taste. Der Player ist nun bereit, eine Tonaufnahme über das integrierte Mikrofon zu beginnen. Drücken Sie dazu einfach die Play/Pause Taste. Die laufende Aufnahme wird Ihnen jetzt im Display angezeigt. Um die laufende Aufnahme zu pausieren, oder wieder fortzusetzen, drücken sie erneut die Play/Pause Taste. Drücken Sie während einer Aufzeichnung die M Taste, um die Aufnahme zu speichern. Mit der Pfeil-Zurück Taste wechseln Sie wieder in das Hauptmenü; eine laufende Aufnahme wird automatisch gespeichert. Hinweis: Die aufgenommenen Dateien (.wav Format) finden Sie im Ordner „VOICE“ über den Datei-Explorer. Steht nicht mehr genügend Speicherplatz für eine Aufnahme zur Verfügung, weist Sie der Player mit der Meldung „Speicher voll!“ darauf hin. Seite 15 von 21 - DE (2) Wiedergabe Navigieren Sie im Hauptmenü zum Menüpunkt File Explorer und bestätigen Sie Ihre Auswahl mit der Play/Pause Taste. Wählen Sie nun den Ordner VOICE aus. Alle bisher getätigten Aufnahmen werden Ihnen chronologisch angezeigt. Navigieren Sie jetzt zur gewünschten Datei und starten Sie die Wiedergabe mit der Play/Pause Taste. Mit der Pfeil-Zurück Taste wechseln Sie wieder in das Hauptmenü. Hinweis: Für weitere Konfigurationsmöglichkeiten öffnen Sie bitte im Hauptmenü den Menüpunkt Setup. f) Datei Explorer Navigieren Sie im Hauptmenü zum Menüpunkt File Explorer und bestätigen Sie Ihre Auswahl mit der Play/Pause Taste. Es wird Ihnen nun das Hauptverzeichnis Ihrer Speicherkarte angezeigt. Navigieren Sie mit der (+) Taste oder (-) Taste durch die Dateien und vorhandenen Ordner. Bestätigen Sie mit der Play/Pause Taste eine Datei, wird diese wiedergegeben. Bestätigen Sie mit dieser Taste einen Ordner, wird dieser geöffnet. Mit der Pfeil-Zurück Taste wechseln Sie in die nächst höhere Ebene Ihrer Ordnerstruktur bis hin zurück zum Hauptmenü. Um eine Datei zu löschen, navigieren Sie in der Ordnerübersicht zu der gewünschten Datei und drücken Sie die M Taste. Bestätigen Sie nun den Vorgang mit der Taste, um die Datei endgültig zu entfernen. Play/Pause Hinweis: Informationen über den ungenutzten bzw. belegten Speicher sowie der gesamten Speichergröße der eingesetzten Speicherkarte erhalten Sie im Setup unter dem Menüpunkt System und dort unter Information. Seite 16 von 21 - DE g) Einstellungen Navigieren Sie im Hauptmenü zum Menüpunkt Setup und bestätigen Sie Ihre Auswahl mit der Play/Pause Taste. (1) Musik Im Menüpunkt Musik finden Sie folgende Einstellungsmöglichkeiten: i. Abspielmodus Legen Sie hier den gewünschten Abspielmodus fest. Spielt den gewählten Titel einmal ab und stoppt dann die Wiedergabe. Titel wiederholen Der gewählte Titel wird wiederholt abgespielt. Wiederholt die Titel in dem ausgewählten Ordner einmal und Ordner einmal stoppt dann die Wiedergabe. Titel einmal Ordner wiederholen Alle einmal Alle wiederholen Intro Wiederholt alle Titel aus dem aktuellen Ordner. Alle Lieder werden einmal abgespielt. Wiederholt alle gespeicherten Lieder. Anspielen der einzelnen Lieder. ii. Zufällige Wiedergabe Hier können Sie die zufällige Wiedergabe aller Lieddateien aktivieren bzw. deaktivieren. iii. Equalizer Wählen Sie hier Ihren favorisierten Equalizer Modus aus. Zur Wahl stehen Normal, Rock, Pop, Klassik, Jazz, Pure Bass / 3D und Nutzer EQ. Seite 17 von 21 - DE iv. Bass / 3D Einst. Hier haben Sie unter dem Punkt „Bass/3D Einst.“ die Möglichkeit, für diesen Equalizer Modus einen verstärkten Bass oder 3D Klang voreinzustellen. v. Nutzer EQ Einst. Hier haben Sie die Möglichkeit, einen individuellen Equalizer einzurichten. Passen Sie die Einstellungen für die einzelnen Frequenzbänder mit der (+) Taste oder (-) Taste an. Um zum nächsten Frequenzband zu wechseln, drücken Sie die Vorwärts oder Zurück Taste. Drücken Sie die Play/Pause Taste, um Ihre getätigten Einstellungen zu übernehmen. (2) Aufnahme Im Menüpunkt Aufnahme können Sie die Aufnahmequalität festlegen. Sie haben die Wahl zwischen normaler Qualität (32 KBPS) und hoher Qualität (64 KBPS). Beachten Sie, dass die hohe Qualität mehr Speicherplatz beansprucht. (3) Foto Im Menüpunkt Foto können Sie die Anzeigedauer der automatischen Diaschau festlegen. Sie haben die Wahl zwischen: 2 s, 4 s, 6 s, 8 s, und 10 s. (4) Display Im Menüpunkt Display finden Sie folgende Einstellungsmöglichkeiten: i. Dauer Hier können Sie festlegen, wie lange das Display beleuchtet sein soll. Sie haben die Wahl zwischen 5 s, 10 s, 15 s, 20 s, 30 s und Immer an. ii. Helligkeit Hier können Sie die Helligkeit der Displaybeleuchtung in 5 Stufen festlegen. iii. Eco Modus Wenn Sie den Eco Modus aktivieren, schaltet sich das Display nach der voreingestellten Zeit vollständig aus. Bei deaktiviertem Eco Modus bleibt das Display nach der voreingestellten Zeit permanent auf geringster Stufe beleuchtet. Beachten Sie, dass dies die Akkulaufzeit deutlich verringert. Seite 18 von 21 - DE (5) Sleep Timer Im Menüpunkt Sleep Timer können Sie eine Zeitspanne festlegen, nach deren Ablauf sich das Gerät automatisch ausschaltet. Sie haben die Wahl zwischen Aus (das Gerät schaltet sich nicht automatisch ab), 10 min, 15 min, 30 min, 60 min, und 120 min. (6) Sprache Im Menüpunkt Sprache können Sie eine der acht vorinstallierten Sprachen auswählen. Sie haben die Wahl zwischen Englisch, Spanisch, Französisch, Deutsch, Italienisch, Portugiesisch, Polnisch und Russisch. (7) System Im Menüpunkt System haben Sie folgende Auswahlmöglichkeiten: i. Information Hier erhalten Sie Informationen über die Firmware Version des Players, den gesamt zur Verfügung stehenden Speicherplatz, den genutzten Speicherplatz (U:) und den freien Speicherplatz (F:) Ihrer Speicherkarte. ii. Werkseinstellungen Mit bestätigen dieser Option setzen Sie den Player wieder auf die Standardeinstellungen zurück. 6. Micro SD Karte Dieser Player besitzt keinen verwendbaren internen Speicher. Er wird mit einer eingesetzten Speicherkarte, in der auf der Verpackung ausgewiesenen Größe, ausgeliefert. Der Player wird bei bestehender USB Verbindung nur von einem Computer erkannt, wenn eine Speicherkarte eingesetzt ist. Es werden Speicherkarten mit einer Kapazität von bis zu 64 GB unterstützt. Seite 19 von 21 - DE 7. Technische Daten Video Scooter: Dimensionen Gewicht LCD PC Verbindung Akku Frequenzbereich SNR Musik Format Video Format Aufnahmeformat Bildformat Betriebstemperatur Betriebssystem 88 mm (H) x 41 mm (B) x 9.0mm (T) ~30 Gr. 4,4 cm (1.8 Zoll) Farbdisplay, Auflösung: 128 x 160 Pixel USB 2.0 (PC) | mini USB Anschluss (Player) Wiederaufladbarer Li-Polymer Akku, Kapazität: 150mAh Musikwiedergabe: ~ 12 Stunden (MP3 Musik im Energiesparmodus) 20Hz bis 20000Hz > 70dB MP3 / WMA 32 – 320kbps AVI 160 x 120 Pixel WAV mit 32 oder 64 KBPS JPEG / BMP 0 bis 40 Grad Celsius Windows XP / Vista / Win7 / Win8, 8.1 / Mac 9.2 oder höher Hi-Fi Stereo Kopfhörer: Dimensionen: Gewicht: Kabellänge: Klinkenstecker: Frequenzbereich: Impedanz: Maximale Eingangsleistung: Größenverstellbar: 150 x 135 x 70 mm 125 gr 120 cm 3.5 mm Stereo 20 Hz bis 20 KHz 32 Ohm 40 mW ja Hi-Fi Stereo Ohrstöpsel: Dimensionen: Gewicht: Kabellänge: Klinkenstecker: Frequenzbereich: Impedanz: Maximale Eingangsleistung: Größenverstellbar: 30 x 17 x 13 mm 14.2 gr 115 cm 3.5mm Stereo 20 Hz bis 20KHz 32 Ohm 5 mW nein Seite 20 von 21 - DE Haftungsausschluss Es können jederzeit ohne Ankündigung Veränderungen an der Firmware und / oder Hardware vorgenommen werden. Aus diesem Grund ist es möglich, dass Teile der Anleitung, technischen Daten und Bilder in dieser Dokumentation von dem Ihnen vorliegenden Produkt leicht abweichen. Alle in dieser Anleitung beschriebenen Punkte dienen nur dem Zweck der Verdeutlichung und müssen nicht zwangsläufig mit einer bestimmten Situation übereinstimmen. Es können keine Rechtsansprüche auf Grund dieser Anleitung geltend gemacht werden. 8. Entsorgung von Elektro-Altgeräten Die mit diesem Symbol gekennzeichneten Geräte unterliegen der europäischen Richtlinie 2012/19/EG. Alle Elektro- und Elektroaltgeräte müssen getrennt vom Hausmüll über die dafür vorgesehenen staatlichen Stellen entsorgt werden. Mit der ordnungsgemäßen Entsorgung von Elektro-Altgeräten vermeiden Sie Umweltschäden. Seite 21 von 21 - DE Table of Contents Table of Contents .............................................................................................................................................. 1 About this manual ......................................................................................................................................... 3 Intended Use ................................................................................................................................................. 3 Notes ............................................................................................................................................................. 4 1. Device overview......................................................................................................................................... 5 2. Package content ........................................................................................................................................ 5 3. Connecting to a computer ......................................................................................................................... 6 a) Connecting the device .......................................................................................................................... 6 b) Disconnecting the device ..................................................................................................................... 6 4. Commissioning / Charging the battery / Headphones .............................................................................. 7 Charging the battery:..................................................................................................................................... 7 Charging status: ............................................................................................................................................. 7 Usage during the charging process: .............................................................................................................. 8 5. Operation................................................................................................................................................... 9 a) General operation ................................................................................................................................ 9 (1) Switching the player on and off..................................................................................................... 9 (2) Key lock .......................................................................................................................................... 9 (3) The main menu ............................................................................................................................ 10 (4) Navigation.................................................................................................................................... 10 b) Music .................................................................................................................................................. 11 (1) Playback ....................................................................................................................................... 11 (2) Folder overview ........................................................................................................................... 11 (3) A-B loop ....................................................................................................................................... 11 c) Video................................................................................................................................................... 12 (1) Playback ....................................................................................................................................... 12 Page 1 of 19 - EN (2) d) Folder overview ........................................................................................................................... 12 Photo .................................................................................................................................................. 13 (1) Playback ....................................................................................................................................... 13 (2) Folder overview ........................................................................................................................... 13 e) Recording function ............................................................................................................................. 14 (1) Recording ..................................................................................................................................... 14 (2) Playback ....................................................................................................................................... 14 f) File Explorer ........................................................................................................................................ 15 g) Setup................................................................................................................................................... 15 (1) Music ........................................................................................................................................... 16 i. Playback mode ................................................................................................................................. 16 ii. Random playback............................................................................................................................ 16 iii. Equalizer......................................................................................................................................... 16 (2) Recording ..................................................................................................................................... 16 (3) Photo ........................................................................................................................................... 16 (4) Display ......................................................................................................................................... 17 i. Lighting duration .............................................................................................................................. 17 ii. Brightness ....................................................................................................................................... 17 iii. Eco mode ....................................................................................................................................... 17 (5) Sleep Timer .................................................................................................................................. 17 (6) Language ...................................................................................................................................... 17 (7) System ......................................................................................................................................... 17 i. Information ...................................................................................................................................... 17 ii. Factory settings ............................................................................................................................... 17 6. Micro SD card .......................................................................................................................................... 18 7. Technical data.......................................................................................................................................... 18 8. Disposal of used electric devices ............................................................................................................. 19 Page 2 of 19 - EN About this manual Read this manual carefully and observe, read and follow all instructions mentioned in this to ensure the long life and reliable use of the device. Please keep this manual handy for future reference and pass it on to other users of the device. Intended Use This device is used to play music files in MP3, WMA and WAV format, which can be played through the included micro-SD card. This product is not intended for commercial uses or for medical and special applications in which the failure of the product can cause injury, death or substantial property damage. The liability shall expire in the event of use that does not conform to the intended use. Οpening and altering the device as well as using additional equipment and accessories that have not been approved by us is prohibited. Do not use the device under extreme environmental conditions and observe the safety instructions. Non-compliance with information and safety instructions contained in this manual shall be deemed as noncompliance with the intended use and will cause the liability to lapse and may cause injury or property damage. Page 3 of 19 - EN Notes Read and observe the user manual including warnings and notes before the first activation of the product. Please make sure before the first activation of the device that the rechargeable battery is fully charged. Avoid hard collisions of the device. Do not use the device in extremely cold, hot, wet or dusty areas. Also, do not expose it to direct sunlight. Do not put naked light sources such as burning candles near the product. Perform backups regularly to prevent possible data loss. Avoid using it in strongly magnetized fields. Protect the device against moisture. If moisture penetrates the device, please turn it off immediately and then please clean and dry the device. Do not use chemical solutions to clean the device. Only use a dry cloth. We are not liable for damages or data loss upon a malfunction, improper handling, and unauthorised repair of the device or changing of the battery. Please do not disassemble the device into its components and please do not try and repair it on your own, because otherwise the warranty expires. Do not block or cover the openings of the product. This product is only intended for private use and should not be used commercially or in industrial environments. Do not insert objects that are not intended for usage into the openings of the product. Damages that are not attributable to improper handling or disregard of the warnings or instructions of this user manual are not covered by the warranty. WARNING: Prolonged exposure to excessively loud music can result in temporary or permanent hearing damage or hearing loss. The use of the Video player in traffic is not recommended. It can cause the listener to react disregardful towards potential hazards such as approaching vehicles Page 4 of 19 - EN 1. Device overview 1. On / Off Switch 2. Arrow back button 3. Volume (+) button 4. back button 5. Play / pause button 6. Mini USB port 7. Headphohe jack 8. Volume (-) button 9. Forward button 10. M (Menu) button 11. 2. Package content Please check the package content for completeness Intenso Video player Hi-Fi Stereo headphones Hi-Fi stereo earphones Micro SD card CD with conversion software (AVI format) USB cable User manual Page 5 of 19 - EN Micro SD slot 3. Connecting to a computer In order to exchange files between your player and a computer, you can simply connect your player to the computer using the provided USB cable. a) Connecting the device In order to connect the player to the computer, insert the USB 2.0 port of the USB cable with a free USB port of the activated computer and connect the Mini USB port of the cable with the player. It is now recognised as removable medium and is ready for data transfer with the computer. Now you can simply transfer the files from your computer to your player or vice versa using “Drag and Drop” or by "Copy and Paste“. b) Disconnecting the device Before removing the USB cable you must make sure that the data connection between the devices is separated! To do that, press the button for 1 - 2 seconds. The display now shows the current charging level and the data connection was separated. If you are using a Windows PC (XP or higher version), the player can also be disconnected via the computer. To do that, click on the “Remove hardware safely” symbol in the Windows taskbar. Now select the Video Scooter and follow your computer’s instructions, until it confirms the successful process. If you are using a Mac you can simply disconnect the player by dragging the player icon onto the trash symbol. The USB cable can now be separated safely from the player and computer. Note: Do not remove the player from the computer if the transfer of files between the devices is not finished. This can result in data loss and damage the medium. Page 6 of 19 - EN 4. Commissioning / Charging the battery / Headphones The player has an installed internal rechargeable battery. Make sure before activating the device for the first time that the battery is fully charged. This process usually takes up to 3 hours. Battery fully charged Charging the battery: The battery is charged via the USB connection with your PC. To charge the battery, connect the device with the PC using the USB cable. The charging process starts automatically. The symbol for a connection (Connect) appears on the screen of the device. Note: For optimum performance, the battery must be used regularly. If this is not the case, recharge the battery at least once a month. Charging status: Press the Play/Pause button for 1-2 seconds to view the current charging status. A battery symbol is now shown on the screen. If the battery is fully charged, a green battery is shown. If the battery is still charging, a charging animation is displayed. Page 7 of 19 - EN Usage during the charging process: You can use the player during the charging process. Simply press once more on the Play/Pause button and the device changes from the charging status display into the main menu. You can also view the current charging status during usage. In the upper right corner it is shown in 3 stages, e.g. during playback of music. If the battery is fully charged, all three fields are displayed. If the battery is still charging, the animation is shown here as well. 0 – 33% 34 – 66 % 67 – 100 % Note: If you change into the charging status display or use the device connected to the computer, data transfer with the computer is no longer possible. To be able to transfer files again, you must reconnect the player to the computer. Switching on: You will find further information on this in the next section “Operation”. Using the headphones: This player reproduces music through the 3,5mm stereo jack. Before the connection assure that the player is set up on a low volume level. Now connect the supplied headphones with the device and slowly adapt the volume to the level you desire. Use the hi-fi on-ear stereo headphones or the stereo cushions. WARNING: Prolonged exposure to excessively loud music can result in temporary or permanent hearing damage or hearing loss. The use of the Video player in traffic is not recommended. It can cause the listener to react disregardful towards potential hazards such as approaching vehicles Page 8 of 19 - EN 5. Operation Note: Make sure that a Micro SD card is inserted into the player! a) General operation (1) Switching the player on and off Slide the on / off switch on the left side of the device to the “ON” position. Then press the Play/Pause button for approx. 3 seconds to switch on the player. To set the device into standby mode, press the Play/Pause button again for approx. 3 seconds. If you wish to deactivate the player permanently, slide the button on the left side of the player into “OFF” position. Note: This player has an energy-saving function. The device automatically switches off, if it is not used for more than 10 minutes. (2) Key lock In order to prevent accidental entries, the player is equipped with a key lock. To activate it, press Play/Pause button and the M button simultaneously. A closed lock is displayed for confirmation now. To unlock, simply press the Play/Pause button and the M button again at the same time. Now, an open lock is displayed for confirmation. Page 9 of 19 - EN (3) The main menu After activating the player, the main menu appears. It consists of six different menu items (Music, Video, Photo, Record, File Explorer and Setup). Music Record Video Photo File Setup (4) Navigation With the Forward and Back button, you can navigate through the different menus. With the Play/Pause button you can open the desired menu item or start the desired function. Press the Arrow Back button briefly to return to the previous level. Press the Arrow Back button for 1 - 2 seconds to return to the main menu directly. Page 10 of 19 - EN b) Music (1) Playback Navigate from the main menu to the menu item Music and confirm your selection with the Play/Pause button. A playback screen opens and playback starts automatically. To pause the playback or continue it, press the Play/Pause button. To jump one track forward or back, press the Forward or Back button respectively. To fast forward or rewind within a track, simply keep it pressed. Press the (+) button or (-) button to adjust the volume. (2) Folder overview To reach the folder overview from the playback screen, press the Arrow Back button. Navigate with the (+) button or (-) button to scroll through the files and existing folders.If you confirm a music file with the Play/Pause button, it is played back. If you confirm a folder with this button it is opened. With the Arrow Back button you change into the next higher level of your folder structure up to the main menu. To delete a file, navigate in the folder overview to the desired file and press the M button. Confirm this procedure with the Play/Pause button to delete this file permanently. (3) A-B loop It is possible with this player to select any period of a musical piece and set it on repeat in a loop. Press the M button during playback of this musical piece to determine the starting point (A). Press the M button again to determine the end (B). The selected period will now be played in a playback loop. Note: Please open the menu item Setup in the main menu for additional configuration options. Page 11 of 19 - EN c) Video Note: To playback videos on this player, they must be converted into the AVI format adjusted to the player using the provided conversion software. (1) Playback Navigate in the main menu to the menu item Movie and confirm your selection with the Play/Pause button. The folder overview opens. Select with the (+) button or (-) button the video file to play and confirm your selection with the Play/Pause button. The video starts automatically. To pause the playback or to continue it, press the Play/Pause button respectively. To jump one track forward or back, press the Forward or Back button respectively. To fast forward or rewind within a track, simply keep it pressed. Press the (+) button or (-) button to adjust the volume. (2) Folder overview To reach the folder overview from the playback screen, press the Arrow Back button. Navigate with the (+) button or (-) button to scroll through the files and existing folders.If you confirm a video file with the Play/Pause button it is played back. If you confirm a folder with this button it is opened. With the Arrow Back button you change into the next higher level of your folder structure up to the main menu. To delete a file, navigate in the folder overview to the desired file and press the M button. Confirm this procedure with the Play/Pause button to delete this file permanently. Page 12 of 19 - EN d) Photo (1) Playback Navigate from the main menu to the menu item Photo and confirm your selection with the Play/Pause button. The folder overview opens. Select with the (+) button or (-) button the image file to be reproduced and confirm your selection with the Play/Pause button. To start automatic image rendition or to pause, press the Play/Pause button respectively. (2) Folder overview To reach the folder overview from the playback screen, press the Arrow Back button. Navigate with the (+) button or (-) button to scroll through the files and existing folders. If you confirm a file with the Play/Pause button, it is played back. If you confirm a folder with this button it is opened. With the Arrow Back button you change into the next higher level of your folder structure up to the main menu. To delete a file, navigate in the folder overview to the desired file and press the M button. Confirm this procedure with the Play/Pause button to delete this file permanently. Note: Please open the menu item Setup in the main menu for additional configuration options. Page 13 of 19 - EN e) Recording function (1) Recording Navigate from the main menu to the menu item Record and confirm your selection with the Play/Pause button. The player is now ready to start an audio recording via the integrated microphone. To do this, simply press the Play/Pause button. The current recording is now displayed on the screen. To pause the current recording or to continue it, press the Play/Pause button again. Press the M button during the recording to save the recording. With the Arrow Back button you change back into the main menu; the current recording is then saved automatically. Note: The recorded files (.wav format) can be found in the folder “VOICE” with the file explorer. If there is not enough disk space available for a recording, the player will inform you with the message “Disk space full!”. (2) Playback Navigate from the main menu to the menu item File Explorer and confirm your selection with the Play/Pause button. Now select the folder VOICE. All recordings previously made will be displayed chronologically here. Navigate to the desired file and start the playback with the Play/Pause button. With the Arrow Back button you change back into the main menu. Note: Please open the menu item Setup in the main menu for additional configuration options. Page 14 of 19 - EN f) File Explorer Navigate from the main menu to the menu item File Explorer and confirm your selection with the Play/Pause button. Now, the main directory of your memory card is displayed. Navigate with the (+) button or (-) button to scroll through the files and existing folders. If you confirm a file with the Play/Pause button, it is played back. If you confirm a folder with this button it is opened. With the Arrow Back button you change into the next higher level of your folder structure up to the main menu. To delete a file, navigate in the folder overview to the desired file and press the M button. Confirm this procedure with the Play/Pause button to delete this file permanently. Note: In the Setup under the menu item System under Information you can get information about the unused or reserved disk space as well as the entire disk space of the inserted memory card. g) Setup Navigate in the main menu to the menu item Setup and confirm your selection with the Play/Pause button. Page 15 of 19 - EN (1) Music In the menu item Music you can find the following setup options: i. Playback mode Define the desired playback mode here. Track once Repeat track Folder once Repeat folder All once Repeat all Intro Plays back the selected track once and then stops the playback. The selected track is played back repeatedly. Repeats the track in the selected folder once and then stops the playback. Repeats all tracks in the current folder. All songs are played once. Repeats all saved songs. Intro of the individual songs. ii. Random playback Here you can activate or deactivate the random playback of all song files. iii. Equalizer Select here your favourite equalizer mode. You can select between Normal, Rock, Pop, Classical, Jazz, Pure Bass / 3D and user EQ. iv. Bass / 3D setting Here you have the opportunity to preset under point “Bass/3D Settings” an enhanced bass or 3D sound for this equaliser mode. v. User EQ setting Here you have the opportunity to set up a personalised equaliser. Adjust the settings for each frequency band with the (+) button or (-) button. To move to the next frequency band, press the Forward or Back button. Press the Play/Pause button to apply your s selected settings. (2) Recording In the menu item Recording you can define the recording quality. You can choose between normal quality (32 KBPS) and high quality (64 KBPS). Please note that the high quality requires more disk space. (3) Photo In the menu item Photo you can define the display time of the automatic slide show. You can choose between: 2 s, 4 s, 6 s, 8 s, and 10 s. Page 16 of 19 - EN (4) Display In the menu item Display you can find the following setup options: i. Lighting duration Here you can define how long the display is illuminated. You can choose between 5 s, 10 s, 15 s, 20 s, 30 s and always active. ii. Brightness Here you can define the brightness of the display lighting in 5 levels. iii. Eco mode If you activate the Eco mode, the display switches off completely after the preset time. If the Eco mode is deactivated, the display remains illuminated permanently on the lowest level after the preset time. Please note that this significantly reduced the battery life. (5) Sleep Timer In the menu item Sleep Timer you can define a period of time after which the device automatically switches off. You can choose between off (the device does not switch off automatically), 10 min, 15 min, 30 min, 60 min, and 120 min. (6) Language In the menu item Language you can select one of the eight pre-installed languages. You can choose between English, Spanish, French, German, Italian, Portuguese, Polish and Russian. (7) System In the menu item System you have the following options: i. Information Here you can get information about the firmware version of the player, the total available disk space, the reserved disk space (U:) and the free disk space (F:) of your memory card. ii. Factory settings By confirming this option you set the player back to the standard settings. Page 17 of 19 - EN 6. Micro SD card This player does not have usable internal memory. It is provided with an inserted memory card in the size displayed on the packaging. With an existing USB connection, the player is only recognised by a computer, if a memory card is inserted. Memory cards with a capacity of up to 64 GB are supported. 7. Technical data Video Scooter: Dimensions Weight LCD PC connection Battery Frequency range SNR Music format Video format Recording format Image format Operating temperature Operating system 88 mm (H) x 41 mm (B) x 9.0mm (T) ~30gr. 4,4 cm (1.8 inch) colour display, resolution: 128 x 160 Pixel USB 2.0 (PC) | mini USB port (player) Rechargeable Li-Polymer battery, capacity: 150mAh Music playback: ~ 12 hours (MP3 music in energy-saving mode) 20Hz to 20000Hz >70dB MP3 / WMA 32 – 320kbps AVI 160 x 120 pixels WAV with 32 or 64 KBPS JPEG / BMP 0 to 40° Celsius Windows XP / Vista / Win7 / Win8, 8.1 / Mac 9.2 or higher Hi-Fi Stereo headphones: Dimensions: Weight: Cable length: Stereo jack: Frequenzbereich: Impendence: Maximal input performance: Size adjustable: 150 x 135 x 70 mm 125 gr 120 cm 3.5 mm Stereo 20 Hz - 20 KHz 32 Ohm 40 mW yes Hi-Fi stereo earphones: Dimensions: Weight: Cable length: Stereo jack: Frequenzbereich: Impendence: Maximal input performance: Size adjustable: 30 x 17 x 13 mm 14.2 gr 115 cm 3.5 mm Stereo 20 Hz - 20KHz 32 Ohm 5 mW no Page 18 of 19 - EN Exclusion of liability Changes to the firmware and / or hardware can be made at any time without prior notification. For this reason it is possible that parts of the manual, technical data and images in this documentation may deviate slightly from the product in your hand. All products described in this manual are only for the purpose of clarification and must not necessarily match any certain situation. No claims can be made based on this manual. 8. Disposal of used electric devices Devices marked with this symbol are subject to the European Directive 2012/19/EG. All electric and used electric devices must be separated from the household waste and disposed of at the provided public locations. With proper disposal of used electric devices you avoid damaging the environment. Page 19 of 19 - EN Indice Informazioni sulle presenti istruzioni per l‘uso ............................................................................................. 3 Utilizzo previsto ............................................................................................................................................. 3 Indicazioni ...................................................................................................................................................... 4 1. Panoramica del dispositivo ........................................................................................................................ 5 2. Contenuto della confezione ...................................................................................................................... 5 3. Collegamento a un computer .................................................................................................................... 6 a) Collegamento del dispositivo ............................................................................................................... 6 b) Scollegamento del dispositivo .............................................................................................................. 6 4. Messa in funzione /caricamento della batteria/ cuffie ............................................................................. 7 Carica dell’accumulatore: .............................................................................................................................. 7 Stato di carica: ............................................................................................................................................... 7 Utilizzo durante il processo di ricarica:.......................................................................................................... 8 5. Utilizzo ....................................................................................................................................................... 9 a) Utilizzo generale ................................................................................................................................... 9 (1) Accensione e spegnimento del player ............................................................................................. 9 (2) Blocco tasti ....................................................................................................................................... 9 (3) Il menù principale........................................................................................................................... 10 (4) Navigazione .................................................................................................................................... 10 b) Musica ................................................................................................................................................ 11 (1) Riproduzione .................................................................................................................................. 11 (2) Panoramica cartelle ....................................................................................................................... 11 (3) Riproduzione ciclica tra due punti A-B di un brano ....................................................................... 12 c) Video................................................................................................................................................... 12 (1) Riproduzione .................................................................................................................................. 12 (2) Panoramica delle cartelle............................................................................................................... 13 Pagina 1 di 19 - IT d) Foto..................................................................................................................................................... 13 (1) Riproduzione .................................................................................................................................. 13 (2) Panoramica delle cartelle............................................................................................................... 13 e) Funzione di registrazione ................................................................................................................... 14 (1) Registrazione .................................................................................................................................. 14 (2) Riproduzione .................................................................................................................................. 14 f) File Explorer ........................................................................................................................................ 15 g) Impostazioni ....................................................................................................................................... 15 (1) Musica ............................................................................................................................................ 16 i. Modalità di riproduzione ................................................................................................................. 16 ii. Riproduzione casuale ...................................................................................................................... 16 iii. Equalizzatore .................................................................................................................................. 16 (2) Registrazione .................................................................................................................................. 16 (3) Foto ................................................................................................................................................ 17 (4) Display ............................................................................................................................................ 17 i. Durata dell’illum. ............................................................................................................................. 17 ii. Luminosità ...................................................................................................................................... 17 iii. Modalità ecologica ......................................................................................................................... 17 (5) Sleep timer ..................................................................................................................................... 17 (6) Lingua ............................................................................................................................................. 17 (7) Sistema ........................................................................................................................................... 17 i. Informazioni ..................................................................................................................................... 17 ii. Impostazioni di fabbrica.................................................................................................................. 18 6. Scheda micro SD ...................................................................................................................................... 18 7. Specifiche tecniche .................................................................................................................................. 18 8. Smaltimento di apparecchi elettrici usati................................................................................................ 19 Pagina 2 di 19 - IT Informazioni sulle presenti istruzioni per l‘uso Si prega di leggere accuratamente e rispettare le istruzioni per l’uso, attenendosi anche a tutte le avvertenze citate nelle predette istruzioni, al fine di garantire una lunga durata e un utilizzo affidabile dell’apparecchio. Tenere le istruzioni per l’uso a portata di mano e cederle al nuovo utente qualora il dispositivo sia venduto. Utilizzo previsto Il presente dispositivo serve alla riproduzione di file musicali in formato MP3, WMA e WAV, che possono essere letti mediante la scheda Micro SD in dotazione. Questo prodotto non è destinato all’utilizzo commerciale, medico o ad utilizzi speciali, nei quali un guasto dell’apparecchio possa essere causa di lesioni, decessi o danni materiali di considerevole entità. Un utilizzo non corrispondente alla destinazione d’uso descritta comporta la perdita della responsabilità da parte nostra. Astenersi dall’apertura, dalla trasformazione dell’apparecchio e dall’utilizzo di dispositivi aggiuntivi e accessori da noi non approvati. Non utilizzare l’apparecchio in condizioni ambientali estreme e rispettare le avvertenze per la sicurezza. L’inosservanza delle informazioni e delle avvertenze per la sicurezza contenute nelle presenti istruzioni per l’uso si considera utilizzo non conforme e comporta la perdita di ogni responsabilità da parte nostra, oltre a poter essere causa di danni alle persone o alle cose. Pagina 3 di 19 - IT Indicazioni Leggere e osservare le presenti istruzioni per l’uso, comprese le avvertenze e le indicazioni da seguire prima del primo utilizzo del prodotto. Prima del primo utilizzo del dispositivo, accertarsi che l’accumulatore sia completamente carico. Evitare forti impatti sul dispositivo. Non utilizzare il dispositivo in zone estremamente fredde, calde, umide o polverose. Non esporlo alla luce diretta del sole. Non collocare vicino al prodotto fonti di luce aperte, come ad es. candele. Effettuare regolarmente il backup dei dati al fine di evitare un’eventuale perdita dei dati. Evitare l’uso in campi fortemente magnetici. Non utilizzare questo dispositivo con le mani bagnate. Proteggere il dispositivo dall’acqua. Se l’umidità penetra nel dispositivo, spegnerlo immediatamente, pulirlo e asciugarlo. Non utilizzare acqua o soluzioni chimiche per pulire il dispositivo. Usare solo un panno asciutto. Non siamo responsabili per eventuali danni o perdite di dati in caso di malfunzionamento, utilizzo errato, riparazioni di propria mano o sostituzione arbitraria dell’accumulatore. Non scomporre il dispositivo nelle sue componenti singole e non cercare di ripararlo autonomamente, altrimenti la garanzia decadrebbe. Non bloccare o coprire le aperture del prodotto. Questo prodotto è previsto solo per l’uso privato e non dovrebbe essere usato a scopi commerciali o industriali. Non inserire oggetti inadeguati all’uso nelle aperture del prodotto. Danni derivanti da un uso improprio o dal mancato rispetto delle avvertenze o delle indicazioni di queste istruzioni per l’uso, non sono coperti dalla garanzia. AVVERTENZA: un’esposizione prolungata all’ascolto di musica troppo alta può causare danni temporanei o permanenti all’udito oppure persino la perdita dell’udito. Non si consiglia di utilizzare il video player nella circolazione stradale. Ciò può comportare che l’utente reagisca con disattenzione a potenziali rischi, come ad esempio veicoli in avvicinamento. Pagina 4 di 19 - IT 1. Panoramica del dispositivo 1. Interruttore 2. Tasto freccia indietro 3. Tasto (+) volume 4. Tasto indietro 5. Tasto play / pausa 6. Porta mini USB 7. Ingresso auricolari 8. Tasto (-) volume 9. Tasto avanti 10. Tasto M (menù) 11. Slot micro SD 2. Contenuto della confezione Si prega di verificare la completezza del contenuto della confezione Video player Intenso Cuffie auricolari Hi-Fi stereo Cuscinetti stereo Scheda micro SD CD con software di conversione (formato AVI) Cavo USB Istruzioni per l‘uso Pagina 5 di 19 - IT 3. Collegamento a un computer Per trasferire i dati tra il player e un computer, è possibile collegare il player a un computer semplicemente tramite il cavo USB fornito in dotazione. a) Collegamento del dispositivo Per collegare il player a un computer, inserire il connettore USB 2.0 del cavo USB in una porta USB libera del computer acceso e collegare il connettore mini USB del cavo con il player. Quest’ultimo verrà riconosciuto come dispositivo rimovibile e sarà pronto per il trasferimento dei dati con il computer. È possibile trasferire i file desiderati dal computer al player (o dal player al computer) semplicemente tramite la funzione “Drag & Drop” oppure tramite il comando “copia e incolla”. b) Scollegamento del dispositivo Prima di estrarre il cavo USB, è assolutamente necessario interrompere il collegamento tra i dispositivi! A tale scopo premere il tasto per 1 o 2 secondi. Il display mostrerà lo stato di carica attuale e il collegamento verrà interrotto. Se si utilizza un PC Windows (XP o versioni successive), il player può anche essere scollegato direttamente dal PC. A tale scopo cliccare sul simbolo “rimozione sicura dell’hardware” sulla barra delle applicazioni Windows. Selezionare quindi il Video Scooter e seguire le eventuali ulteriori istruzioni del computer fino a quando quest’ultimo confermerà il processo andato a buon fine. Se si utilizza un MAC, è possibile scollegare il player trascinando l’icona del player sul simbolo del cestino. Infine è possibile scollegare il cavo USB dal player e dal computer in tutta sicurezza. Nota: non scollegare il player dal computer se è ancora in corso un trasferimento dei dati. Ciò può comportare la perdita dei dati o il danneggiamento del supporto. Pagina 6 di 19 - IT 4. Messa in funzione /caricamento della batteria/ cuffie Il player ha un accumulatore interno fisso. Prima del primo utilizzo, accertarsi che l’accumulatore sia completamente carico. Questo processo dura di norma fino a 3 ore. Accumulatore completamente carico Carica dell’accumulatore: L’accumulatore si carica tramite il collegamento USB con il computer. Per caricare l’accumulatore, collegare il dispositivo al PC tramite il cavo USB. Il processo di ricarica inizia automaticamente. Comparirà il simbolo del collegamento (Connect) sul display del dispositivo. Nota: per una funzionalità ottimale, l’accumulatore deve essere utilizzato regolarmente. In caso contrario, caricarlo completamente almeno una volta al mese. Stato di carica: Per visualizzare lo stato di carica attuale, premere il tasto play/pausa per 1 o 2 secondi. Comparirà sul display il simbolo della batteria. Se l’accumulatore è carico completamente, verrà visualizzata una batteria verde. Se l’accumulatore si sta ancora caricando, verrà visualizzata la rispettiva animazione. Pagina 7 di 19 - IT Utilizzo durante il processo di ricarica: È possibile utilizzare il player anche durante il processo di ricarica. Premere semplicemente un’altra volta il tasto play/pausa e il dispositivo passerà dalla visualizzazione dello stato di carica al menù principale. Anche durante l’utilizzo è possibile consultare lo stato di carica attuale. Ad esempio, durante la riproduzione di un file musicale, lo stato viene visualizzato in tre stadi nell’angolo in alto a destra. Quando l’accumulatore è carico completamente, tutti e tre gli stati sono accesi costantemente. Se l’accumulatore si sta ancora caricando, anche in questo caso verrà visualizzata la rispettiva animazione. 0 – 33% 34 – 66 % 67 – 100 % Nota: se si passa alla visualizzazione dello stato di carica o si utilizza il dispositivo collegato al computer, non è più possibile uno scambio di dati con il computer. Per poter trasferire nuovamente i dati, è necessario ricollegare il player al PC. Accensione: Le informazioni sull’accensione si trovano nel paragrafo successivo “Azionamento”. Utilizzo delle cuffie: Questo lettore riproduce musica tramite la presa stereo di 3,5 mm. Prima del collegamento si assicuri che sia impostato ad un volume basso. Ora colleghi le cuffie fornite con il dispositivo e adatti lentamente il volume al livello da Lei desiderato. Utilizzi solo le cuffie auricolari Hi-Fi stereo o i cuscinetti stereo contenuti nel volume di consegna. AVVERTENZA: un’esposizione prolungata all’ascolto di musica troppo alta può causare danni temporanei o permanenti all’udito oppure persino la perdita dell’udito. Non si consiglia di utilizzare il video player nella circolazione stradale. Ciò può comportare che l’utente reagisca con disattenzione a potenziali rischi, come ad esempio veicoli in avvicinamento. Pagina 8 di 19 - IT 5. Utilizzo Nota: si prega di accertarsi che nel player sia inserita una scheda micro SD a) Utilizzo generale (1) Accensione e spegnimento del player Spostare l’interruttore collocato sul lato sinistro del dispositivo sulla posizione “ON”. Per accendere il player, tenere quindi premuto il tasto play/pausa per ca. 3 secondi. Per impostare il dispositivo nella modalità standby tenere di nuovo premuto il tasto play/pausa per ca. 3 secondi. Se si desidera spegnere il player definitivamente, spostare il pulsante sul lato sinistro del player nella posizione “OFF”. Nota: questo player è dotato di una funzione di risparmio energetico. Il dispositivo si spegne automaticamente se non viene utilizzato per oltre dieci minuti. (2) Blocco tasti Per impedire la pressione involontaria dei tasti, il player dispone di una funzione blocco tasti. Premere semplicemente allo stesso tempo il tasto play/pausa e il tasto M. Per confermare l’azione, verrà visualizzato un lucchetto chiuso. Per sbloccare lo schermo, premere semplicemente di nuovo il tasto play/pausa e il tasto M contemporaneamente. Come conferma verrà visualizzato un lucchetto aperto. Pagina 9 di 19 - IT (3) Il menù principale Dopo aver acceso il player, verrà visualizzato il menù principale, che consiste di sei voci differenti (musica, video, foto, registrazione, file explorer e impostazioni). Musica Registrazione Video Foto File Impostazioni (4) Navigazione Con il tasto avanti e indietro è possibile navigare tra i vari menu. Con il tasto play/pausa è possibile aprire la voce di menù desiderata o avviare la funzione desiderata. Premere brevemente il tasto freccia indietro per tornare a un livello precedente. Per tornare direttamente al menù principale, tenere premuto il tasto freccia indietro per 1 o 2 secondi. Pagina 10 di 19 - IT b) Musica (1) Riproduzione Navigare nel menù principale fino alla voce Music e confermare la scelta con il tasto play/pausa. Si aprirà un’apposita schermata e la riproduzione inizierà automaticamente. Per mettere in pausa e proseguire di nuovo la riproduzione, premere il tasto play/pausa. Per passare a un titolo precedente o successivo, premere il tasto avanti o indietro . Per tornare indietro o andare avanti all’interno di un titolo, tenere premuti i suddetti tasti. Per regolare il volume, premere il tasto (+) o (-). (2) Panoramica cartelle Per passare dalla schermata della riproduzione musicale alla panoramica delle cartelle, premere il tasto freccia indietro . Con il tasto (+) oppure il tasto (-) navigare attraverso i file e le cartelle presenti. Confermando un file musicale con il tasto play/pausa, esso verrà riprodotto. Se si conferma con tale tasto una cartella, quest’ultima si aprirà. Con il tasto freccia indietro è possibile passare al livello subito superiore nella struttura delle cartelle fino a raggiungere il menù principale. Per eliminare un file, navigare nella panoramica delle cartelle fino al file desiderato e premere il tasto M. Per eliminarlo definitivamente, confermare il processo con il tasto play/pausa. Pagina 11 di 19 - IT (3) Riproduzione ciclica tra due punti A-B di un brano Con questo player è possibile selezionare un estratto di un pezzo musicale e riprodurlo in modo ciclico. Durante la riproduzione del pezzo musicale, premere il tasto M per determinare il punto iniziale (A). Premere di nuovo il tasto M per stabilire il punto finale (B). Il pezzo selezionato verrà quindi riprodotto in modo ciclico. Nota: Per ulteriori possibilità di configurazione, aprire nel menù principale la voce Setup. c) Video Nota: per riprodurre video su questo player, è necessario utilizzare il software di conversione allegato per convertire i file nel formato AVI compatibile con il player. (1) Riproduzione Navigare nel menù principale fino alla voce Movie e confermare la scelta con il tasto play/pausa. Si aprirà la panoramica delle cartelle. Con il tasto (+) oppure il tasto (-) selezionare il file video da riprodurre e confermare la scelta con il tasto . Il video si avvierà automaticamente. Per mettere in pausa e proseguire di nuovo la riproduzione, premere il tasto play/pausa. Per passare a un titolo precedente o successivo, premere il tasto avanti o indietro . Per tornare indietro o andare avanti all’interno di un titolo, tenere premuti i suddetti tasti. Per regolare il volume, premere il tasto (+) o (-). Pagina 12 di 19 - IT (2) Panoramica delle cartelle Per passare dalla schermata della riproduzione musicale alla panoramica delle cartelle, premere il tasto freccia indietro . Con il tasto (+) oppure il tasto (-) navigare attraverso i file e le cartelle presenti. Confermando un file video con il tasto play/pausa, esso verrà riprodotto. Se si conferma con tale tasto una cartella, quest’ultima si aprirà. Con il tasto freccia indietro è possibile passare al livello subito superiore nella struttura delle cartelle fino a raggiungere il menù principale. Per eliminare un file, navigare nella panoramica delle cartelle fino al file desiderato e premere il tasto M. Per eliminarlo definitivamente, confermare il processo con il tasto play/pausa. d) Foto (1) Riproduzione Navigare nel menù principale fino alla voce Photo e confermare la scelta con il tasto play/pausa. Si aprirà la panoramica delle cartelle. Con il tasto (+) oppure il tasto (-) selezionare il file fotografico da riprodurre e confermare la scelta con il tasto Play/Pause. La foto selezionata verrà visualizzata. Per avviare una riproduzione automatica delle foto, o anche per metterla in pausa, premere il tasto play/pausa. (2) Panoramica delle cartelle Per passare dalla schermata della riproduzione musicale alla panoramica delle cartelle, premere il tasto freccia indietro . Con il tasto (+) oppure il tasto (-) navigare attraverso i file e le cartelle presenti. Confermando un file con il tasto play/pausa, esso verrà riprodotto. Se si conferma con tale tasto una cartella, quest’ultima si aprirà. Con il tasto freccia indietro è possibile passare al livello subito superiore nella struttura delle cartelle fino a raggiungere il menù principale. Pagina 13 di 19 - IT Per eliminare un file, navigare nella panoramica delle cartelle fino al file desiderato e premere il tasto M. Per eliminarlo definitivamente, confermare il processo con il tasto play/pausa. Nota: Per ulteriori possibilità di configurazione, aprire nel menù principale la voce Setup. e) Funzione di registrazione (1) Registrazione Navigare nel menù principale fino alla voce Record e confermare la scelta con il tasto play/pausa. Il player è pronto per registrare un file audio tramite il microfono integrato. A tale scopo, premere semplicemente il tasto play/pausa. L’avanzamento della registrazione verrà visualizzato sul display. Per mettere in pausa o proseguire la registrazione, premere nuovamente il tasto play/pausa. Per salvare una registrazione, premere il tasto M. Con il tasto freccia indietro è possibile tornare al menù principale; l’eventuale registrazione in corso verrà salvata automaticamente. Nota: i file registrati (in formato .wav) si trovano nella cartella “VOICE” tramite l’Explorer. Se non è disponibile spazio sufficiente per una registrazione, il player visualizzerà la notifica “memoria piena”. (2) Riproduzione Navigare nel menù principale fino alla voce File Explorer e confermare la scelta con il tasto play/pausa. Selezionare la cartella VOICE per visualizzare tutte le registrazioni effettuate in ordine cronologico. Navigare quindi sul file desiderato e avviare la riproduzione con il tasto tasto play/pausa. Con il tasto freccia indietro è possibile tornare al menù principale. Nota: Per ulteriori possibilità di configurazione, Pagina 14 di 19aprire - IT nel menù principale la voce Setup. f) File Explorer Navigare nel menù principale fino alla voce File Explorer e confermare la scelta con il tasto play/pausa. Verrà visualizzata la directory principale della scheda di memoria. Con il tasto (+) oppure il tasto (-) navigare attraverso i file e le cartelle presenti. Se si conferma un file con il tasto play/pausa, quest’ultimo verrà riprodotto. Se si conferma con tale tasto una cartella, quest’ultima si aprirà. Con il tasto freccia indietro è possibile passare al livello subito superiore nella struttura delle cartelle fino a raggiungere il menù principale. Per eliminare un file, navigare nella panoramica delle cartelle fino al file desiderato e premere il tasto M. Per eliminarlo definitivamente, confermare il processo con il tasto play/pausa. Nota: informazioni sulla memoria non utilizzata e occupata nonché sulle dimensioni complete della scheda di memoria in uso sono disponibili nel Setup alla voce Sistema e quindi alla voce Informazioni. g) Impostazioni Navigare nel menù principale fino alla voce Setup e confermare la scelta con il tasto play/pausa. Pagina 15 di 19 - IT (1) Musica Alla voce Musica si trovano le seguenti opzioni di impostazione: i. Modalità di riproduzione Stabilire qui la modalità di riproduzione desiderata. Titolo una volta Ripetere titolo Cartella una volta Ripetere cartella Tutti una volta Riproduci tutti Intro Il titolo selezionato viene riprodotto una volta e poi la riproduzione viene interrotta. Il titolo scelto viene riprodotto ripetutamente. I titoli di una cartella selezionata vengono riprodotti una volta e poi la riproduzione viene interrotta. Tutti i titoli della cartella attuale vengono riprodotti ripetutamente. Tutti i brani vengono riprodotti una volta. Tutti i brani salvati vengono riprodotti ripetutamente. Viene riprodotto l’inizio di singoli brani. ii. Riproduzione casuale Qui è possibile attivare o disattivare la riproduzione di tutti i file musicali. iii. Equalizzatore Selezionare la propria modalità equalizzatore preferita. Le opzioni di scelta sono: Normale, Rock, Pop, Classica, Jazz, Pure Bass / 3D e EQ utente. iv. Impost. Basso / 3D Qui, alla voce "Impost. Basso/3D“ vi è la possibilità di preimpostare per questa modalità di equalizzatore un basso amplificato o il suono 3D. v. Impostazione utente EQ. Qui è invece possibile configurare un equalizzatore personalizzato. Adattare le impostazioni per le singole bande di frequenza con il tasto (+) o il tasto (-). Per passare alla banda di frequenza successiva, premere il tasto Avanti o il tasto Indietro. Premere il tasto Play/Pause per rilevare le impostazioni attivate. (2) Registrazione Alla voce Registrazione è possibile stabilire la qualità di registrazione. Si può scegliere tra qualità normale (32 KBPS) e alta qualità (64 KBPS). Tenere presente che un’elevata qualità richiederà maggiore spazio di memoria. Pagina 16 di 19 - IT (3) Foto Alla voce Foto è possibile impostare la durata di visualizzazione dello slideshow. È possibile scegliere tra: 2 s, 4 s, 6 s, 8 s, e 10 s. (4) Display Alla voce Display si trovano le seguenti opzioni di impostazione: i. Durata dell’illum. Qui è possibile impostare la durata di illuminazione del display. Si può scegliere tra 5 s, 10 s, 15 s, 20 s, 30 s e sempre. ii. Luminosità Qui è possibile impostare la luminosità del display in base a 5 livelli. iii. Modalità ecologica Se si attiva la modalità ecologica, il display si spegnerà completamente dopo la durata di tempo preimpostata. Se la modalità ecologica è disattivata, il display rimarrà acceso con luminosità minima dopo la durata di tempo preimpostata. Tenere presente che ciò riduce notevolmente la durata dell’accumulatore. (5) Sleep timer Alla voce Sleep Timer è possibile programmare lo spegnimento automatico del dispositivo dopo una certa durata. Si può scegliere tra Off (il display non si spegnerà automaticamente), 10 min, 15 min, 30 min, 60 min, e 120 min. (6) Lingua Alla voce Lingua è possibile selezionare una delle otto lingue predefinite. Si può scegliere tra inglese, spagnolo, francese, tedesco, italiano, portoghese, polacco e russo. (7) Sistema Alla voce Sistema si trovano le seguenti opzioni di impostazione: i. Informazioni Qui si trovano informazioni riguardanti la versione del firmware del player, la memoria totale disponibile, la memoria utilizzata (U:) e la memoria libera (F:) della scheda. Pagina 17 di 19 - IT ii. Impostazioni di fabbrica Confermando questa opzione, il player verrà impostato nuovamente in base alla configurazione standard. 6. Scheda micro SD Questo player non possiede una memoria interna utilizzabile. Viene fornito in dotazione con una scheda di memoria le cui dimensioni sono indicate sulla confezione. Il player viene riconosciuto dal computer a cui è collegato tramite USB solo se la scheda di memoria è inserita. Il dispositivo supporta schede di memoria con una capacità fino a 64 GB. 7. Specifiche tecniche Video Scooter: Dimensioni Peso LCD Collegamento PC 88 mm (H) x 41 mm (B) x 9.0mm (T) ~30 gr. 4,4 cm (1.8 pollici) display a colori, risoluzione: 128 x 160 pixel USB 2.0 (PC) | collegamento mini USB (player) Accumulatore ricaricabile ai polimeri di litio, capacità: 150mAh Riproduzione musicale: ~ 12 ore (musica MP3 in modalità risparmio energetico) Da 20Hz a 20000Hz > 70dB MP3 / WMA 32 – 320kbps AVI 160 x 120 pixel WAV con 32 o 64 KBPS JPEG / BMP Accumulatore Ambito di frequenza SNR Formato musicale Formato video Formato registrazione Formato immagine Temperatura di funzionamento Sistema operativo Da 0 a 40 gradi Celsius Windows XP / Vista / Win7 / Win8, 8.1 / Mac 9.2 o successivi Cuffie auricolari Hi-Fi stereo: Misure: Peso: Lunghezza del cavo: Presa stereo: Ambito di frequenza: Impedanza: Massima prestazione entrata: Misura impostabile: 150 x 135 x 70 mm 125 gr 120 cm 3,5 mm stereo 20 Hz – 20 KHz 32 Ohm in 40 mW sì Pagina 18 di 19 - IT Cuscinetti stereo: Misure: Peso: Lunghezza del cavo: Presa stereo: Ambito di frequenza: Impedanza: Massima prestazione entrata: Misura impostabile: 30 x 17 x 13 mm 14.2 gr 115 cm 3,5 mm stereo 20 Hz – 20 KHz 32 Ohm in 5 mW no Clausola di esonero dalla responsabilità Possono subentrare modifiche al firmware e / o all’hardware in qualsiasi momento e senza preavviso. Per questo motivo è possibile che parti delle istruzioni, delle specifiche tecniche e delle immagini contenute in questa documentazione divergano leggermente dal presente prodotto. Tutti i punti descritti in queste istruzioni hanno uno scopo chiarificatore e non devono necessariamente coincidere con una determinata situazione. Non è possibile far valere rivendicazioni legali sulla base di queste istruzioni. 8. Smaltimento di apparecchi elettrici usati I dispositivi contrassegnati da questo simbolo sono soggetti alla direttiva europea 2012/19/EG. Tutti i dispositivi elettrici ed elettronici usati devono essere smaltiti separatamente dai rifiuti domestici tramite le sedi indicate dalla legge. Con uno smaltimento regolare dei dispositivi elettrici ed elettronici usate, si evitano danni all’ambiente. Pagina 19 di 19 - IT Table des matières À propos de ce manuel .................................................................................................................................. 3 Utilisation prévue .......................................................................................................................................... 3 Consignes ....................................................................................................................................................... 4 1. Présentation de l'appareil ....................................................................................................................... 5 2. Contenu de l'emballage .......................................................................................................................... 5 3. Connexion à un ordinateur ..................................................................................................................... 6 a) Raccordement de l'appareil ................................................................................................................. 6 b) Débranchement de l'appareil ............................................................................................................... 6 4. Mise en service/chargement de la batterie/écouteurs .......................................................................... 7 Charge de la batterie : ................................................................................................................................... 7 Etat de charge : .............................................................................................................................................. 7 Utilisation pendant le processus de charge : ................................................................................................ 8 5. Fonctionnement ...................................................................................................................................... 9 a) Fonctionnement general ...................................................................................................................... 9 (1) Activation et désactivation du lecteur........................................................................................... 9 (2) Bouton de verrouillage .................................................................................................................. 9 (3) Il Le menu principal ..................................................................................................................... 10 (4) Navigation.................................................................................................................................... 10 b) Musique .............................................................................................................................................. 11 (1) Lecture ......................................................................................................................................... 11 (2) Affichage des dossiers ................................................................................................................. 11 (3) Lecture en boucle entre deux points A-B d'une piste ................................................................. 12 c) Vidéo................................................................................................................................................... 12 (1) Lecture ......................................................................................................................................... 12 (2) Aperçu des dossiers ..................................................................................................................... 13 d) Photo .................................................................................................................................................. 13 (1) Lecture ......................................................................................................................................... 13 Page 1 de 20 - FR (2) e) Aperçu des dossiers ..................................................................................................................... 13 Fonction d'enregistrement ................................................................................................................. 14 (1) Enregistrement ............................................................................................................................ 14 14 (2) Lecture ......................................................................................................................................... 15 f) Explorateur de fichiers ....................................................................................................................... 15 g) Paramètres ......................................................................................................................................... 16 (1) Musique ....................................................................................................................................... 16 i. Mode de lecture .............................................................................................................................. 16 ii. Lecture aléatoire ............................................................................................................................. 16 iii. Égaliseur ......................................................................................................................................... 16 (2) Enregistrement ............................................................................................................................ 17 (3) Photo ........................................................................................................................................... 17 (4) Affichage ...................................................................................................................................... 17 i. Durée d'éclairage ............................................................................................................................. 17 ii. Luminosité ...................................................................................................................................... 17 iii. Mode Eco ....................................................................................................................................... 17 (5) Mise en veille programmable ...................................................................................................... 17 (6) Langue ......................................................................................................................................... 18 (7) Système ....................................................................................................................................... 18 i. Informations .................................................................................................................................... 18 ii. Les réglages d'usine ........................................................................................................................ 18 6. Carte Micro SD ...................................................................................................................................... 18 7. Caractéristiques..................................................................................................................................... 19 8. Mise au rebut des appareils électriques utilisés ................................................................................... 20 Page 2 de 20 - FR À propos de ce manuel Lisez attentivement ce manuel et observez, lisez et suivez toutes les instructions mentionnées dans le présent manuel pour assurer la longue durée de vie et une utilisation fiable de l'appareil. Veuillez garder ce manuel à portée de main pour référence future et le transmettre à d'autres utilisateurs de l'appareil. Utilisation prévue Ce dispositif est utilisé pour lire des fichiers musicaux aux formats MP3, WMA et WAV, qui peuvent être lus via la carte micro-SD. Ce produit n'est pas destiné à des fins commerciales ou médicales et des applications particulières dans lesquelles la défaillance du produit peut causer des blessures, la mort ou des dommages matériels importants. La responsabilité expire en cas d'utilisation non conforme à l'usage prévu. L'ouverture et la modification de l'appareil ainsi que l'utilisation d'équipements et accessoires supplémentaires qui n'ont pas été approuvés par nous est interdite. Ne pas utiliser l'appareil dans des conditions environnementales extrêmes et observer les consignes de sécurité. Le non-respect des instructions d'information et de sécurité contenues dans ce manuel sera considéré comme non-conformité à l'usage prévu et donc entraînera l'expiration de notre responsabilité. En outre, cela peut causer des blessures ou des dommages matériels. Page 3 de 20 - FR Consignes Lisez et suivez ces instructions d'utilisation, y compris tous les avertissements et les instructions à suivre avant la première utilisation du produit. Avant la première utilisation de l'appareil, assurez-vous que la batterie est complètement chargée. Éviter les chocs forts sur l'appareil. Ne pas utiliser l'appareil dans des conditions de froid, de chaleur, d'humidité ou de poussière extrêmes. Ne pas exposer à la lumière directe du soleil. Ne pas placer le produit à proximité de sources de lumière directes, par exemple près de bougies. Effectuez des sauvegardes régulières de vos données afin d'éviter toute perte de données. Évitez l'utilisation dans de champs magnétiques élevés. Ne pas utiliser cet appareil avec les mains mouillées. Protégez l'appareil de l'eau. Si de l'humidité pénètre dans l'appareil, éteignez-le immédiatement, nettoyez et laissez sécher. Ne pas utiliser d'eau ou de solutions chimiques pour nettoyer l'appareil. Utilisez uniquement un chiffon sec. Nous ne sommes pas responsables des dommages ou des pertes de données en cas de dysfonctionnement, d'utilisation abusive, de réparation ou de remplacement volontaire de votre batterie. Ne pas démonter l'appareil et ses différents composants et ne pas essayer de réparer vous-même, sinon la garantie sera annulée. Ne pas obstruer ou recouvrir les ouvertures du produit. Ce produit est destiné à un usage privé et ne doit pas être utilisé à des fins commerciales ou industrielles. Ne pas insérer d'objets inappropriés dans les ouvertures du produit. La garantie ne couvre pas les dommages résultant d'une mauvaise utilisation ou du défaut de respect des avertissements ou des instructions de ce manuel d'instructions. Avertissement : L'exposition prolongée à l'écoute de la musique forte peut causer des dommages auditifs temporaires ou permanents ou même la perte de l'audition. Il n'est pas recommandé d'utiliser le lecteur vidéo sur la route. Cela peut signifier que l'utilisateur réagisse sans faire attention aux risques potentiels, et ne pas voir les véhicules qui approchent Page 4 de 20 - FR 1. Présentation de l'appareil 1. Interrupteur 2. retour Bouton fléché de 3. Bouton de volume (+) 4. 5. Bouton de retour Bouton de lecture/pause 6. Port mini USB 7. Port casque audio 8. Bouton volume (-) 9. Bouton d'avance 10. Bouton M (menu) 11. 2. Contenu de l'emballage Vérifiez le contenu de l'emballage Lecteur vidéo Intenso Écouteurs intra-auriculaires Hi-Fi stéréo Coussins stéréo Carte Micro SD CD avec logiciel de conversion (format AVI) Câble USB Mode d'emploi Page 5 de 20 - FR Fente carte micro SD 3. Connexion à un ordinateur Pour transférer des données entre le lecteur et un ordinateur, vous pouvez connecter le lecteur à un ordinateur en utilisant simplement le câble USB fourni. a) Raccordement de l'appareil Pour connecter le lecteur à un ordinateur, branchez le connecteur USB du câble USB 2.0 à un port USB libre de votre ordinateur et branchez le connecteur mini-USB du câble au lecteur. Ce dernier sera reconnu comme périphérique amovible et prêt pour le transfert de données avec votre ordinateur. Vous pouvez transférer les fichiers souhaités à partir de l'ordinateur vers le lecteur (ou du lecteur à l'ordinateur) en utilisant simplement la fonction "glisser/déposer" ou en utilisant le «copier-coller». b) Débranchement de l'appareil Avant de retirer le câble USB, vous devez absolument rompre le lien entre les appareils ! Pour ce faire, appuyez sur le bouton pendant 1 ou 2 secondes. L'écran affiche l'état de charge actuel et le lien sera déconnecté. Si vous utilisez un PC sous Windows (XP ou version ultérieure), le lecteur peut également être débranché du PC. Pour ce faire, cliquez sur "Déconnectez le matériel en toute sécurité" sur la barre des tâches de Windows. Ensuite, sélectionnez le scooter vidéo et suivez les instructions supplémentaires de l'ordinateur jusqu'à ce que ce dernier confirme la réussite du processus. Si vous utilisez un Mac, vous pouvez déconnecter le lecteur en faisant en faisant glisser l'icône du lecteur sur le symbole de la corbeille. Enfin, vous pouvez débrancher le câble USB du lecteur et de l'ordinateur en toute sécurité. Remarque: ne pas débrancher le lecteur du computeur pendant le transfer de données. Cela peut entraîner la perte de données et endommager l'appareil. Page 6 de 20 - FR 4. Mise en service/chargement de la batterie/écouteurs Le lecteur dispose d'une batterie interne fixe. Avant la première utilisation, assurez-vous que la batterie est complètement chargée. Ce processus prend normalement 3 heures. Batterie entièrement chargée Charge de la batterie : La batterie se recharge via la connexion USB avec votre ordinateur. Pour charger la batterie, connectez l'appareil à l'ordinateur via le câble USB. Le processus de charge commence automatiquement. Vous verrez le symbole de la connexion (Connect) sur l'écran de l'appareil. Remarque: pour un fonctionnement optima, la batterie doit être utilisée régulièrement. Dans le cas contraire, rechargez-la complètement au moins une fois par mois. Etat de charge : Pour afficher l'état de charge actuel, appuyez sur le bouton lecture / pause pendant 1 ou 2 secondes. L'affichage du symbole de la batterie apparaît à l'écran. Si la batterie est complètement chargée, vous verrez une batterie verte. Si la batterie est toujours en charge, vous pourrez voir l'animation correspondante. Page 7 de 20 - FR Utilisation pendant le processus de charge : Vous pouvez utiliser le lecteur pendant le processus de charge. Il suffit d'appuyer à nouveau sur la touche principal. lecture / pause et l'appareil passera de l'état de charge au menu Même lorsque vous l'utilisez, vous pouvez voir l'état de charge actuel. Par exemple, lors de la lecture d'un fichier musical, l'état est affiché en trois étapes dans le coin supérieur droit. Lorsque la batterie est complètement chargée, tous les trois états sont allumés en permanence. Si la batterie est toujours en charge, dans ce cas, vous verrez l'animation correspondante. 0 – 33% 34 – 66 % 67 – 100 % Remarque: si vous affichez l'état de charge de la batterie ou si vous utilisez l'appareil connecté à l'ordinateur, il n'est plus possible d'échanger des données avec l'ordinateur. Pour pouvoir transférer à nouveau des données, il faut reconnecter le lecteur au PC. Pour Allumer : Vous trouverez de plus amples informations à ce sujet dans la prochaine section «Fonctionnement». Utilisation des écouteurs : Ce lecteur reproduit la musique par un connecteur jack de 3,5 mm. Avant la connexion assurez-vous que le lecteur soit réglé sur un volume bas. Maintenant connectez les écouteurs livrés avec l’appareil en réglant doucement le niveau du volume par vous désiré. Utilisez uniquement les écouteurs intra-auriculaires Hi-Fi stéréo et les coussins stéréo contenus dans le volume de livraison. Avertissement : L'exposition prolongée à l'écoute de la musique forte peut causer des dommages auditifs temporaires ou permanents ou même la perte de l'audition. Il n'est pas recommandé d'utiliser le lecteur vidéo sur la route. Cela peut signifier que l'utilisateur réagisse sans faire attention aux risques potentiels, et ne pas voir les véhicules qui approchent Page 8 de 20 - FR 5. Fonctionnement Remarque: Veuillez vous assurer qu'une carte micro SD est insérée dans le lecteur ! a) Fonctionnement general (1) Activation et désactivation du lecteur Déplacer le commutateur situé sur le côté gauche de l'appareil sur la position «ON». Pour allumer le lecteur, maintenez enfoncé le bouton lecture / pause pendant env. 3 secondes. Pour configurer l'appareil en mode veille, appuyez et maintenez enfoncer le bouton lecture/ pause env. 3 secondes. Si vous voulez désactiver définitivement le lecteur, faites glisser le bouton sur le côté gauche du lecteur dans la position «OFF». (2) Bouton de verrouillage Pour éviter la pression involontaire des touches, le lecteur dispose d'une fonction de verrouillage du clavier. Il suffit d'appuyer en même temps sur le bouton Lecture/ pause et le bouton M. Pour confirmer l'action, vous verrez un cadenas fermé. Pour déverrouiller l'écran, appuyez à nouveau en même temps sur la touche lecture/pause et la touche M. En confirmation, vous verrez un cadenas ouvert. Page 9 de 20 - FR (3) Il Le menu principal Après avoir mis le lecteur sous tension, vous verrez le menu principal, qui se compose de six options différentes (musique, vidéos, photos, enregistrements, explorateur de fichier et paramètres). Musique Enregistrement Vidéo Fichier Photo paramètres (4) Navigation Avec le bouton avance et retour, vous pouvez naviguer dans les différents menus. Avec le bouton Lecture / Pause, vous pouvez ouvrir l'option de menu souhaitée ou activer la fonction désirée. Appuyez brièvement sur le bouton fléché de retour pour revenir au niveau précédent. Pour revenir au menu principal, appuyez sur le bouton fléché de retour pendant 1 ou 2 secondes. Page 10 de 20 - FR b) Musique (1) Lecture Naviguez dans le menu principal jusqu'à l'option Music et validez votre choix en appuyant sur le bouton Lecture/pause. Ceci ouvrira un écran séparé, et la lecture commencera automatiquement. Pour mettre en pause et reprendre la lecture, appuyez sur le bouton Lecture/pause. Pour passer à un titre précédent ou suivant, appuyez sur le bouton avance ou retour . Pour revenir en arrière ou aller en avant dans un titre, appuyez sur ces touches en les maintenant enfoncées. Pour régler le volume, appuyez sur le bouton (+) ou (-). (2) Affichage des dossiers Pour passer de l'écran de lecture musicale à la liste des dossiers, appuyez sur la flèche de retour . Naviguez avec le bouton (+) ou (-) pour faire défiler les fichiers et dossiers existants. En confirmant un fichier de musique en appuyant sur le bouton Lecture/pause, la lecture commencera. Si vous confirmez un dossier avec ce bouton, ce dossier s'ouvrira. Avec la touche fléchée de retour vous pouvez aller au niveau supérieur dans la structure du dossier jusqu'à atteindre le menu principal. Pour supprimer un fichier, accédez à la liste des dossiers jusqu'au fichier désiré et appuyez sur la touche M. Pour le supprimer définitivement, confirmez le processus en appuyant sur lecture/pause. Page 11 de 20 - FR (3) Lecture en boucle entre deux points A-B d'une piste Avec ce lecteur, vous pouvez sélectionner un extrait d'un morceau de musique et le lire en boucle. Pendant la lecture du morceau, appuyez sur la touche M pour déterminer le point (A) de départ. Appuyez sur le bouton M pour définit le point de fin (B).Le morceau sélectionné sera alors lu en boucle. Remarque: Pour une autre possibilité de configuration, ouvrir l'option paramètre dans le menu principal. c) Vidéo Remarque: pour la lecture de vidéo sur ce lecteur, il faut utiliser le logicie de conversion fourni pour convertir le fichier au format AVI compatible avec le lecteur. (1) Lecture Naviguez dans le menu principal jusqu'à l'option Movie et validez votre choix en appuyant sur le bouton Lecture/pause. Cela va ouvrir la liste de dossier. Sélectionnez avec le bouton (+) ou (-) le fichier vidéo à lire et confirmez votre sélection avec le Lecture/Pause. La vidéo démarre automatiquement. Bouton Pour mettre en pause et reprendre la lecture, appuyez sur le bouton Lecture/pause. Pour passer à un titre précédent ou suivant, appuyez sur le bouton avance ou retour .Pour revenir en arrière ou avancer dans la lecture d'un titre, appuyez sur ces touches en les maintenant enfoncées. Pour régler le volume, appuyez sur le bouton (+) ou (-). Page 12 de 20 - FR (2) Aperçu des dossiers Pour passer de l'écran de lecture musicale à la liste des dossiers, appuyez sur la flèche de retour . Naviguez avec le bouton (+) ou (-) pour faire défiler les fichiers et dossiers existants. Confirmer un fichier vidéo avec la touche Lecture/Pause, et la lecture commencera. Si vous confirmez un dossier avec ce bouton, ce dossier s'ouvrira. Avec la touche fléchée de retour vous pouvez aller au niveau supérieur dans la structure du dossier jusqu'à atteindre le menu principal. Pour supprimer un fichier, accédez à la liste des dossiers jusqu'au fichier désiré et appuyez sur la touche M. Pour le supprimer définitivement, confirmez le processus en appuyant sur le bouton lecture/pause. d) Photo (1) Lecture Naviguez dans le menu principal jusqu'à l'option Photo et validez votre choix en appuyant sur le bouton Lecture/pause. Cela va ouvrir la liste de dossier. Sélectionnez avec le bouton (+) ou (-) le fichier image à reproduire et confirmez votre choix avec la Lecture/Pause. La photo sélectionnée s'affichera. Bouton Pour lancer une lecture automatique de photos, ou mettre une photo en pause, appuyez sur le bouton Lecture/pause. (2) Aperçu des dossiers Pour passer de l'écran de lecture musicale à la liste des dossiers, appuyez sur la flèche de retour . Naviguez avec le bouton (+) ou (-) pour faire défiler les fichiers et dossiers existants. En confirmant un fichier de musique en appuyant sur le bouton Lecture/pause, la lecture commencera. Si vous confirmez un dossier avec ce bouton, ce dossier s'ouvrira. Avec la touche fléchée de retour vous pouvez aller au niveau supérieur dans la structure du dossier jusqu'à atteindre le menu principal. Page 13 de 20 - FR Pour supprimer un fichier, naviguez jusqu'à la liste des dossiers dans le fichier désiré et appuyez sur la touche M. Pour le supprimer définitivement, confirmez le processus en appuyant sur le bouton Lecture/pause. Remarque: Pour une autre possibilité de configuration, ouvrir l'option Setup dans le menu principal. e) Fonction d'enregistrement (1) Enregistrement Naviguer dans le menu principal jusqu'à l'option Record et confirmez la sélection en appuyant sur le bouton Lecture/pause. Le lecteur est prêt à enregistrer un fichier audio via le microphone intégré. Pour ce faire, appuyez simplement sur le bouton Lecture/pause. La progression de l'enregistrement apparaît à l'écran. Pour suspendre ou reprendre l'enregistrement, appuyez à nouveau sur le bouton Lecture/pause. Pour sauvegarder un enregistrement, appuyez sur la touche M. Avec la touche fléchée de retour vous pouvez revenir au menu principal ; tout enregistrement en cours sera automatiquement sauvegardé. Remarque: Les fichiers enregistrés (au format .wav) se touvent dans le dossier “VOICE” via l’Explorateur. S'il n'y a pas assez d'espace disque pour l'enregistrement, le lecteur addiche le message “mémoire pleine”. Page 14 de 20 - FR (2) Lecture Naviguez dans le menu principal jusqu'à l'option File Explorer et confirmez la sélection en appuyant sur le bouton Lecture/pause. Sélectionnez le dossier VOICE pour afficher tous les enregistrements dans l'ordre chronologique. Ensuite, sélectionnez le fichier souhaité et commencez la lecture en appuyant sur le bouton lecture / pause. Avec la touche fléchée de retour vous pouvez revenir au menu principal. Remarque: Pour une autre possibilité de configuration, ouvrir l'option Setup dans le menu principal. f) Explorateur de fichiers Naviguez dans le menu principal jusqu'à l'option File Explorer et validez votre choix en appuyant sur le bouton Lecture/pause. Cela ouvre le répertoire principal de la carte mémoire. Naviguez avec le bouton (+) ou (-) pour faire défiler les fichiers et dossiers existants. Si vous confirmez un fichier avec le bouton Lecture/Pause, la lecture de ce dernier commencera. Si vous confirmez ce dossier avec ce bouton, le dossier s'ouvre. Avec la touche fléchée de retour vous pouvez aller au niveau supérieur dans la structure du dossier jusqu'à atteindre le menu principal. Pour supprimer un fichier, naviguez dans les dossiers jusqu'au fichier désiré et appuyez sur la touche M. Pour le supprimer définitivement, confirmez le processus en appuyant sur le bouton Lecture/pause. Remarque: Les informations sur la mémoire non utilisée et occupée ainsi que sur les dimensions comptètes de la carte mémoire utilisée sont disponibles dans Setup de la rubrique Système et dans Informations. Page 15 de 20 - FR g) Paramètres Naviguez dans le menu principal jusqu'à l'option Setup et validez la sélection en appuyant sur le bouton Lecture/pause. (1) Musique Dans l'option Musique se trouvent les paramètres de réglage suivants : i. Mode de lecture Réglez ici le mode de lecture souhaité. Titre une fois Répétition du titre Dossier une fois Répétition du dossier Tout une fois Tout lire Intro Le titre sélectionné est lu une fois ensuite la lecture s'arrête. Le titre sélectionné est lu de manière répétée. Les titres d'un dossier sélectionné sont lus une fois puis la lecture s'arrête. Tous les titres du dossier sélectionnés sont lus de manière répétée. Toutes les pistes sont lues une fois. Toutes les pistes enregistrées sont lues de façon répétée. Lecture du début de chaque piste. ii. Lecture aléatoire Ici il est possible d'activer ou de désactiver la lecture de tous les fichiers musicaux. iii. Égaliseur Sélectionnez avec le bouton (+) ou (-) le fichier image à reproduire et confirmez votre choix avec la Bouton Lecture/Pause. Sélectionnez ici le mode d'égaliseur préféré. Vous pouvez sélectionner Normal, Rock, Pop, Classique, Jazz, Basse Pure/3D et utilisateur EQ. iv. Réglage basses/3D Ici vous avez la possibilité de pré-régler, sous le point « Basse/3D », une basse renforcée ou un ton 3D pour ce mode d'égaliseur. Page 16 de 20 - FR v. Réglage EQ de l'utilisateur Ici vous avez la possibilité de mettre en place un égaliseur personnalisé. Réglez les paramètres pour chaque bande de fréquence avec le bouton (+) ou le bouton (-). Pour passer à la prochaine bande de fréquence, appuyez sur le bouton Avant ou Arrière. Appuyez sur le Bouton Lecture/Pause pour appliquer les réglages sélectionnés. (2) Enregistrement Pour l'enregistrement de la voix, vous pouvez régler la qualité d'enregistrement. Vous pouvez choisir entre qualité normale (32 kbps) et haute qualité (64 kbps). N'oubliez pas que le choix d'une qualité élevée demande plus d'espace de mémoire. (3) Photo Dans l'option Photo, vous pouvez définir la durée d'affichage du diaporama. Vous pouvez choisir entre : 2 s, 4 s, 6 s, 8 s et 10 s. (4) Affichage Sous l'option affichage se trouvent les paramètres de réglage suivants : i. Durée d'éclairage Ici, vous pouvez définir la durée d'éclairage de l'écran. Vous pouvez choisir entre 5 s, 10 s, 15 s, 20 s, 30 s et toujours. ii. Luminosité Ici, vous pouvez régler la luminosité de l'écran selon 5 niveaux. iii. Mode Eco Si le mode éco est activé, l'écran s'éteint complètement après une période de temps prédéfinie. Si le mode Eco est désactivé, l'écran restera allumé avec la luminosité minimum après une période de temps prédéfinie. N'oubliez pas que ceci réduira considérablement la durée de vie de la batterie. (5) Mise en veille programmable Dans l'option de Programmation de la mise en veille, vous pouvez programmer l'appareil pour qu'il s'éteigne automatiquement après une certaine durée. Vous pouvez choisir entre Off (l'écran ne s'éteint pas automatiquement), 10 min, 15 min, 30 min, 60 min et 120 min. Page 17 de 20 - FR (6) Langue Dans l'option Langue vous pouvez sélectionner l'une des huit langues prédéfinies. Vous pouvez choisir entre l'anglais, le portugais l'espagnol, le français, l'allemand, l'italien, le polonais et le russe. (7) Système Dans l'option Système se trouvent les paramètres de réglage suivants : i. Informations Ici vous trouverez des informations sur la version logicielle du lecteur, la mémoire totale disponible, la mémoire utilisée (U :) et la mémoire libre (F :) sur la carte. ii. Les réglages d'usine En confirmant cette option, le lecteur sera réinitialisé selon la configuration standard. 6. Carte Micro SD Ce lecteur n'a pas de mémoire interne utilisable. Il est fourni avec une carte mémoire dont la taille est indiquée sur l'emballage. Le lecteur est reconnu par l'ordinateur auquel il est connecté via un port USB uniquement si la carte mémoire est insérée. L'appareil prend en charge les cartes mémoire d'une capacité allant jusqu'à 64 Go. Page 18 de 20 - FR 7. Caractéristiques Video Scooter : Dimensions Poids LCD Raccordement au PC Batterie Gamme de fréquence SNR Formats de fichier musicaux Format vidéo Format d'enregistrement Format d'image Température de fonctionnement Système d'exploitation 88 mm (H) x 41 mm (l) x 9.0 mm (T) ~ 30 gr. 4,4 cm (1,8 pouces) écran couleur, résolution : 128 x 160 pixels USB 2.0 (PC) | connexion mini-USB (lecteur) Batterie rechargeable au lithium-polymère, capacité : 150mAh Durée de lecture de musique : ~ 12 heures (MP3 en mode d'économie d'énergie) De 20Hz à 20000Hz > 70 dB MP3 / WMA 32 - 320kbps AVI 160 x 120 pixels fichiers WAV avec 32 ou 64 kbps JPEG / BMP De 0 à 40 degrés Celsius Windows XP / Vista / Win7 / Win8, 8.1 / Mac 9.2 ou version ultérieure Écouteurs intra-auriculaires Hi-Fi stéréo : Dimensions : Poids : Longueur du câble : Connecteur stéréo : Domaine de fréquence : Impédance : Performance maximale en entrée : Dimensions ajustables : 150 x 135 x 70 mm 125 gr 120 cm 3.5 mm stéréo 20 Hz bis 20 KHz 32 Ohm 40 mW oui Coussins stéréo : Dimensions : Poids : Longueur du câble : Connecteur stéréo : Domaine de fréquence : Impédance : Performance maximale en entrée : Dimensions ajustables : 30 x 17 x 13 mm 14.2 gr 115 cm 3.5 mm stéréo 20 Hz bis 20KHz 32 Ohm 5 mW non Page 19 de 20 - FR Clause de non-responsabilité Nous nous réservons le droit de modifier le logiciel et/ou matériel à tout moment et sans préavis. Pour cette raison, il est possible que certaines parties des instructions, des spécifications et des images contenues dans ce document diffèrent légèrement de ce produit. Tous les points décrits dans ce manuel le sont à des fins de clarification et ne coïncident pas nécessairement avec une situation donnée. Il n'est pas possible de faire valoir une réclamation sur la base de ces instructions. 8. Mise au rebut des appareils électriques utilisés Les appareils marqués de ce symbole sont soumis à la directive européenne 2012/19/EG. Tous les équipements électriques et électroniques doivent être mis au rebut séparément des ordures ménagères dans les sites indiqués par la loi. Une mise au rebut appropriée des appareils électriques et électroniques, permettra d'éviter de nuire à l'environnement. Page 20 de 20 - FR Índice Sobre este manual ......................................................................................................................................... 3 Uso planeado ................................................................................................................................................. 3 Observaciones ............................................................................................................................................... 4 1. Vista general del aparato........................................................................................................................... 5 2. Contenido de la caja .................................................................................................................................. 5 3. Conectar a un ordenador .......................................................................................................................... 6 a) Conectar el aparato .............................................................................................................................. 6 b) Desconectar el aparato ........................................................................................................................ 6 4. Activación / Cargado de batería / Auriculares........................................................................................... 7 Cargar la batería: ........................................................................................................................................... 7 Estado de la carga:......................................................................................................................................... 7 Uso durante el proceso de la carga: .............................................................................................................. 8 5. Manejo....................................................................................................................................................... 9 a) Manejo general .................................................................................................................................... 9 (1) Encendido y apagado del reproductor .......................................................................................... 9 (2) Bloqueo de teclas .......................................................................................................................... 9 (3) El menú principal ......................................................................................................................... 10 (4) Navegación .................................................................................................................................. 10 b) Música ................................................................................................................................................ 11 (1) Reproducción ............................................................................................................................... 11 (2) Vista general de carpetas ............................................................................................................ 11 (3) Bucle A-B...................................................................................................................................... 12 c) d) Vídeo................................................................................................................................................... 12 (1) Reproducción ............................................................................................................................... 12 (2) Vista general de carpetas ............................................................................................................ 13 Foto..................................................................................................................................................... 13 Pagina 1 de 20 – ES (1) Reproducción ............................................................................................................................... 13 (2) Vista general de carpetas ............................................................................................................ 13 e) Función de grabación ......................................................................................................................... 14 (1) Grabación .................................................................................................................................... 14 (2) Reproducción ............................................................................................................................... 15 f) Explorador de archivos ....................................................................................................................... 15 g) Ajustes ................................................................................................................................................ 16 (1) Música.......................................................................................................................................... 16 i. Modo de reproducción ..................................................................................................... 16 ii. Reproducción aleatoria ................................................................................................ 16 iii. Ecualizador................................................................................................................... 16 (2) Grabación .................................................................................................................................... 17 (3) Foto .............................................................................................................................................. 17 (4) Pantalla ........................................................................................................................................ 17 i. Duración de ilum. ............................................................................................................ 17 ii. Brillo ............................................................................................................................ 17 iii. Modo Eco ..................................................................................................................... 17 (5) Temporizador .............................................................................................................................. 17 (6) Idioma .......................................................................................................................................... 18 (7) Sistema ........................................................................................................................................ 18 i. Información...................................................................................................................... 18 ii. Ajustes de fábrica ......................................................................................................... 18 6. Tarjeta Micro SD ...................................................................................................................................... 18 7. Datos técnicos ......................................................................................................................................... 19 Pagina 2 de 20 – ES Sobre este manual Lea este manual cuidadosamente y observe, lea y siga todas las instrucciones mencionadas aquí para asegurar la larga vida y el uso confiable de este aparato. Por favor tenga a mano este manual para referencia futura y páselo a otros usuarios de este artefacto. Uso planeado Este aparato es usado para ejecutar archives musicales en formato MP3, WMA y WAV, que puede ser ejecutado a través de la tarjeta micro-SD que se incluye. Este producto no está pensado para usos comerciales o para aplicaciones médicas o especiales en las cuales una falla en el producto pueda causar lesiones, muertes o daños sustanciales a la propiedad. La responsabilidad del fabricante expirará en caso de que su uso no esté en concordancia con el uso planeado. Abrir y alterar el artefacto, así como usar accesorios y equipos adicionales que no hayan sido aprobados por nosotros, está prohibido. No use este aparato bajo condiciones ambientales extremas, y observe las instrucciones de seguridad. No cumplir con las instrucciones de seguridad y la información contenida en este manual será visto como una falta de cumplimiento con el uso planeado y causará que la responsabilidad se suspenda y quizás pueda causar lesiones o daños a la propiedad. Pagina 3 de 20 – ES Observaciones Lea y siga las instrucciones, así como las advertencias y observaciones antes del primer uso del producto. Antes del primer uso, tenga la precaución de cargar completamente la batería. Evite los golpes fuertes en el aparato. No utilice el aparato en lugares extremadamente fríos, calientes, húmedos o polvorientos. Tampoco lo exponga a rayos de sol directos. No coloque focos de luz abiertos, como p.ej. velas encendidas, cerca del producto. Realice con regularidad copias de seguridad para evitar una posible pérdida de datos. Evite el uso en campos con fuerte magnetización. No use el aparato con las manos mojadas. Proteja el aparato del contacto con agua. Si entra humedad en el aparato, apáguelo inmediatamente, límpielo y séquelo. No utilice agua ni soluciones químicas para limpiar el aparato. Use solamente un paño seco. No nos hacemos responsables de daños o pérdida de datos en el caso de malfuncionamiento o uso indebido, reparaciones bajo su propia responsabilidad en el aparato o a causa del cambio de la batería. No desmonte el aparato en todos sus componentes ni intente repararlo usted mismo, ya que la garantía en este caso pierde su validez. No bloquee o tape los orificios del producto. Este producto está pensado solamente para el uso privado y no debe ser utilizado con fines comerciales ni industriales. No introduzca objetos que no estén previstos para su uso en los orificios del producto. Los daños causados por un uso indebido o no cumplimiento de las advertencias o instrucciones de estas instrucciones no serán cubiertos por esta garantía. ADVERTENCIA: Una exposición prolongada a música con el volumen demasiado alto puede causar daños en la audición o pérdida de audición temporal o permanente. No se recomienda el uso del reproductor de vídeo en el tráfico. Puede llevar a la exposición a peligros potenciales, como no oír vehículos que se acercan. Pagina 4 de 20 – ES 1. Vista general del aparato 1. Interruptor ON / OFF 2. Tecla Volver 3. Tecla Volumen (+) 4. Tecla Retroceder 5. Tecla Play / Pausa 6. Conexión mini USB 7. Entrada auriculares 8. Tecla Volumen (-) 9. Tecla Avanzar 10. Tecla M (Menú) 11. Ranura Micro SD 2. Contenido de la caja Por favor compruebe que el contenido de la caja esté completo Reproductor vídeo Intenso Auriculares In-ear para Estéreo HiFi Cojines estéreo Tarjeta Micro SD CD con software de conversión (formato AVI) Cable USB Instrucciones Pagina 5 de 20 – ES 3. Conectar a un ordenador Para intercambiar datos entre su reproductor y un ordenador, puede conectarlo de forma fácil con el ordenador mediante el cable USB incluido. a) Conectar el aparato Para conectar el reproductor con un ordenador, conecte la conexión USB 2.0 del cable USB en a un puerto USB libre del ordenador encendido y conecte la conexión mini-USB del cable con el reproductor. Éste se reconoce ahora como soporte de datos extraíble y está listo para la transferencia de datos con el ordenador. Ahora pueden transferir los archivos deseados de forma fácil mediante “arrastrar y colocar” o mediante “copiar y pegar“ de su ordenador al reproductor (o del reproductor al ordenador. b) Desconectar el aparato ¡Antes de retirar el cable USB es imprescindible separar la conexión de datos entre los aparatos! Para ello, mantenga pulsada la tecla durante 1 - 2 segundos. La pantalla ahora indica el estado de carga actual y la conexión de datos ha sido separada. En el caso de que use un ordenador con Windows (XP o versión superior), el reproductor también se puede expulsar a través del ordenador. Haga clic en el símbolo “retirar hardware de forma segura“ en la barra de tareas de Windows. Ahora, seleccione el Video Scooter y siga en caso necesario las instrucciones de su ordenador hasta que este confirme el proceso exitoso. Si usa un ordenador Mac puede separar el reproductor de forma fácil, arrastrando el icono del reproductor al símbolo de la papelera. Posteriormente se puede retirar el cable USB de forma segura. Advertencia: No retire el reproductor del ordenador si aún se están transfiriendo datos entre ambos aparatos. Esto puede conllevar pérdida de datos y producir daños en el soporte de datos. Pagina 6 de 20 – ES 4. Activación / Cargado de batería / Auriculares El reproductor tiene una batería integrada de forma fija. Antes del primer uso del aparato preste atención a que la batería esté completamente cargada. Este proceso dura normalmente hasta 3 horas. Batería completamente cargada Cargar la batería: La batería se carga a través de la conexión USB con su ordenador. Para cargar la batería debe conectar por lo tanto el aparato al ordenador mediante el cable USB. El proceso de carga comienza de forma automática. Aparece el símbolo de conexión (Connect) en la pantalla del aparato. Observación: Para obtener una eficiencia óptima se debe usar la batería de forma regular. Si esto no es el caso, cargue la batería como mínimo una vez al mes completamente. Estado de la carga: Pulse la tecla Play/Pausa durante 1-2 segundos para que se indique el estado actual de la carga. Aparecerá un símbolo de batería en la pantalla. Si la batería está totalmente cargada, el símbolo aparecerá en verde. Si la batería aún está cargando, esto se indica mediante una animación de carga. Pagina 7 de 20 – ES Uso durante el proceso de la carga: Puede utilizar el reproductor durante el proceso de carga. Simplemente pulso una vez más la tecla principal. Play/Pausa y el aparato cambia de la indicación de carga al menú Puede ver el estado actual de carga incluso durante el uso. Por ejemplo, se indica en la esquina superior derecha en 3 niveles durante la reproducción de música. Si la batería está totalmente cargada, los tres campos están marcados de forma fija. Si la batería sigue cargando, también aparece aquí una animación. 0 – 33% 34 – 66 % 67 – 100 % Observación: Si cambia a la visualización del estado de carga o gasta el aparato conectado al ordenador, ya no es posible ningúna transferencia de datos con el ordenador Para poder transferir datos de nuevo, debe volver a conectar el reproductor con el ordenador. Encendiendo el aparato: Usted encontrará más información en la siguiente sección titulada “Operación”. Utilizando los auriculares: Este reproductor reproduce música a través del jack estéreo de 3,5 m. Antes de la conexión asegurarse que el reproductor está configurado en un nivel bajo de volumen. Ahora conecte los auriculares suministrados con el dispositivo y adapte lentamente el volumen al nivel que desee. Use los auriculares In-ear de estéreo o los cojines estéreo. ADVERTENCIA: Una exposición prolongada a música con el volumen demasiado alto puede causar daños en la audición o pérdida de audición temporal o permanente. No se recomienda el uso del reproductor de vídeo en el tráfico. Puede llevar a la exposición a peligros potenciales, como no oír vehículos que se acercan. Pagina 8 de 20 – ES 5. Manejo Observación: ¡Por favor preste atención de que haya introducida una tarjeta Micro SD en el reproductor! a) Manejo general (1) Encendido y apagado del reproductor Deslice el interruptor de encendido y apagado en la parte izquierda del aparato en la posición “ON”. Después, mantenga pulsada la tecla Play/Pausa durante unos 3 segundos para encender el reproductor. Para poner el aparato en modo de espera, vuelva a pulsar la tecla Play/Pausa de nuevo durante unos 3 segundos. Si desea apagar el aparato de forma permanente, deslice el interruptor en la parte izquierda del reproductor a la posición “OFF“. Observación: Este reproductor dispone de una función de ahorro de energía. El aparato se apaga automáticamente en el caso de no ser utilizado durante más de 10 minutos. (2) Bloqueo de teclas El reproductor dispone de un bloqueo de teclas para evitar introducciones de datos accidentales. Para activarla, simplemente pulse al mismo tiempo la tecla Play/Pausa y la tecla M. Como confirmación, aparecerá un candado cerrado en pantalla. Para desbloquear las teclas, simplemente vuelva a pulsar al mismo tiempo la tecla Play/Pausa y la tecla M. Como confirmación, aparecerá un candado abierto en pantalla. Pagina 9 de 20 – ES (3) El menú principal Una vez encendido el reproductor, aparece el menú general. Este consiste en seis puntos de menú distintos (Música, Vídeo, Foto, Grabación, Explorador de archivos y Ajustes). Música Grabación Video Foto Archivos Ajustes (4) Navegación Puede navegar a través de los diversos menús con las teclas Avanzar y Retroceder. Con la tecla Play/Pausa puede abrir el punto de menú deseado o iniciar la función deseada. Pulse brevemente la tecla Retroceder para volver al nivel anterior. Mantenga pulsada la tecla Retroceder durante 1 - 2 segundos para volver a acceder directamente al menú principal. Pagina 10 de 20 – ES b) Música (1) Reproducción Navegue en el menú principal al punto de menú Music u confirme la selección mediante la tecla Play/Pausa. Se abre la pantalla de reproducción y la reproducción se inicia automáticamente. Para pausar la reproducción o volver a reanudarla, pulse la tecla Play/Pausa respectivamente. Para saltar a un título posterior o anterior, pulse la tecla Avanzar Retroceder. Para rebobinar hacia delante o hacia detrás dentro de un título, simplemente mantenga pulsada la tecla correspondiente. Pulse la tecla (+)o (-) para regular el volumen. (2) Vista general de carpetas Para acceder desde la pantalla de reproducción a la vista general de carpetas, pulse la tecla Retroceder. Navegue con el botón (+) o el botón (-) para recorrer los archivos y carpetas ya existentes. Confirme con la tecla Play/Pausa un archivo de música para reproducirlo. Confirme con esta tecla una carpeta para abrirla. Con la tecla Retroceder puede acceder al siguiente nivel de su estructura de carpetas hasta llegar al menú principal. Para eliminar un archivo, navegue por la vista general de carpetas hasta llegar al archivo deseado y pulse la tecla M. Confirme el proceso con la tecla definitivamente el archivo. Pagina 11 de 20 – ES Play/Pausa para eliminar (3) Bucle A-B Con este reproductor se puede seleccionar un determinado intervalo de la pieza musical y volver a repetirlo permanentemente en un bucle. Pulse la tecla M durante la reproducción de la pieza musical para determinar el punto de inicio (A) del bucle de reproducción. Vuelva a pulsar la tecla M para determinar el punto final (B). El intervalo seleccionado se reproduce ahora en un bucle de reproducción. Observación: Para otras posibilidades de configuración, abra el punto de menú “Setup“ en el menú principal. c) Vídeo Observación: Para reproducir vídeos en este reproductor, éstos deben ser convertidos al formato AVI adaptado al reproductor con el software de conversión incluido. (1) Reproducción Navegue al punto de menú Movie del menú principal y confirme su selección con la tecla Play/Pausa. Se abre la vista general de carpetas. Seleccione con el botón (+) o el botón (-) el archivo de video a ejecutar, y confirme su selección con el botón de Pausa/Ejecución. El vídeo se inicia automáticamente. Para pausar o volver a reanudar la reproducción, pulse la tecla Play/Pausa. Para saltar a un título posterior o anterior, pulse la tecla Avanzar o Retroceder. Para rebobinar hacia delante o atrás dentro de un título, simplemente mantenga la tecla correspondiente pulsada. Pulse la tecla (+)o (-) para regular el volumen. Pagina 12 de 20 – ES (2) Vista general de carpetas Para acceder desde la pantalla de reproducción a la vista general de carpetas, pulse la tecla Retroceder. Navegue con el botón (+) o el botón (-) para recorrer los archivos y carpetas ya existentes. Si confirma un archivo de vídeo con la tecla Play/Pausa, este se reproducirá. Si confirma con esta tecla una carpeta, esta se abrirá. Con la tecla Retroceder puede acceder al siguiente nivel más alto de su estructura de carpetas hasta llegar al menú principal. Para eliminar un archivo, navegue hasta el archivo deseado en la vista general de carpetas y pulse la tecla M. Confirme ahora el proceso con la tecla eliminar definitivamente el archivo. Play/Pausa para d) Foto (1) Reproducción Navegue en el menú principal hasta el punto de menú Photo y confirme su selección con la tecla Play/Pausa. Se abrirá la vista general de carpetas. Seleccione con el botón (+) o el botón (-) el archivo de imagen a ejecutar, y confirme su selección con el botón de Pausa/Ejecución. Se visualizará la imagen seleccionada. Para iniciar una reproducción automática de imágenes o bien pausarla, pulse la tecla Play/Pausa. (2) Vista general de carpetas Para acceder desde la pantalla de reproducción a la vista general de carpetas, pulse la tecla Retroceder. Navegue con el botón (+) o el botón (-) para recorrer los archivos y carpetas ya existentes. Si confirma con la tecla Play/Pausa un archivo, éste se reproducirá. Si selecciona con esta tecla una carpeta, ésta se abrirá. Con la tecla Retroceder puede acceder al siguiente nivel más alto hasta llegar al menú principal. Pagina 13 de 20 – ES Para eliminar un archivo, navegue hasta el archivo deseado dentro de la vista general y pulse la tecla M. Confirme el proceso con la tecla definitivamente el archivo. Play/Pausa para eliminar Observación: Para otras posibilidades de configuración, abra el punto de menú Setup en el menú principal e) Función de grabación (1) Grabación Navegue al punto de menú Record del menú principal y confirme su selección con la tecla Play/Pausa. El reproductor está listo ahora para iniciar una grabación de tono mediante el micrófono integrado. Para comenzar, pulse simplemente la tecla Play/Pausa. La grabación activa se indica en pantalla. Para pausar o volver a reanudar la grabación, pulse simplemente de nuevo la tecla Play/Pausa. Pulse la tecla M durante una grabación para guardarla. Con la tecla Retroceder puede volver a acceder al menú principal, una posible grabación en curso en ese momento se guardará de forma automática. Observación: Los archivos grabados (formato .wav) se encuentran en la carpeta „VOICE“ a través del explorador de archivos. Si no hay suficiente memoria libre para una grabación, el reproductor le avisa mediante una notificación “Memoria llena”. Pagina 14 de 20 – ES (2) Reproducción Navegue al punto de menú File Explorer en el menú principal y confirme su selección mediante la tecla Play/Pausa. Seleccione la carpeta VOICE. Se mostrarán todas las grabaciones efectuadas hasta el momento de forma cronológica. Navegue hasta el archivo deseado e inicie la reproducción mediante la tecla Play/Pausa. Pulsando la tecla Retroceder puede volver al menú principal. Observación: Para otras opciones de configuración, abra el punto de menú Setup en el menú principal. f) Explorador de archivos Navegue hasta el punto de menú File Explorer en el menú principal y confirme su selección con la tecla Play/Pausa. Podrá visualizar ahora el índice principal de su tarjeta de memoria. Navegue con el botón (+) o el botón (-) para recorrer los archivos y carpetas ya existentes. Si un archivo con la tecla Play/Pausa, éste se reproducirá. Si confirma con esta tecla una carpeta, ésta se abrirá. Con la tecla Retroceso puede acceder al siguiente nivel más alto de su estructura de carpetas hasta el menú principal. Para eliminar un archivo, navegue hasta el archivo deseado dentro de la vista general de carpetas y pulse la tecla M. Confirme ahora el proceso con la tecla eliminar de forma definitiva el archivo. Play/Pausa para Observación: Puede consultar la información sobre la memoria libre o bien utilizada, así como el tamaño total de memoria de la tarjeta de memoria introducida en el Setup bajo el punto de menú Sistema, en Información. Pagina 15 de 20 – ES g) Ajustes Navegue hasta el punto de menú Setup en el menú principal y confirme su selección con la tecla Play/Pausa. (1) Música En el punto de menú música podrá encontrar las siguientes posibilidades de ajuste: i. Modo de reproducción Determine aquí el modo de reproducción deseado. Carpeta una vez Reproduce el título seleccionado una vez y para la reproducción después. El título seleccionado se reproduce de forma repetida. Repite los títulos de la carpeta seleccionada una vez y para la reproducción después. Repetir carpeta Todos una vez Repetir todos Intro Repite todos los títulos de la carpeta actual. Todas las canciones se reproducen una vez. Repite todas las canciones guardadas. Empieza a reproducir las canciones individuales. Título una vez Repetir título ii. Reproducción aleatoria Aquí puede activar o desactivar la reproducción aleatoria de todos los archivos de música. iii. Ecualizador Seleccione su modo de ecualizador favorito aquí. Puede seleccionar el modo normal, rock, pop, clásico, jazz, puro bajo, / 3D y ecualización personalizada. iv. Configuración de Bajo / 3D Aquí en el párrafo “Configuración Bajo/3D“usted puede tener la oportunidad de preajustar un tono de bajo reforzado o de 3D para este modo de ecualización. Pagina 16 de 20 – ES v. Configuración de Ecualización de Usuario Aquí usted puede ajustar un ecualizador individual. Adapte los ajustes para la banda de frecuencia sencilla con la tecla (+) ó (-). Para cambiar a la siguiente banda de frecuencia, presione la tecla para adelantar o para ir hacia atrás. Presione la tecla de ejecución/ pausa para registrar sus ajustes activados. (2) Grabación En el punto de menú grabación puede determinar la calidad de grabación. Puede elegir entre calidad normal (32 KBPS) y calidad alta (64 KBPS). Tenga en cuenta de que la calidad alta ocupa más espacio de memoria. (3) Foto En el punto de menú Foto puede determinar la duración de visualización de los archivos automáticos. Puede elegir entre: 2 s, 4 s, 6 s, 8 s, y 10 s. (4) Pantalla En el punto de menú pantalla puede encontrar las siguientes posibilidades de ajuste: i. Duración de ilum. Aquí puede determinar durante cuanto tiempo debe iluminarse la pantalla. Puede elegir entre 5 s, 10 s, 15 s, 20 s, 30 s y Siempre encendido. ii. Brillo Aquí puede determinar el brillo de la iluminación de pantalla en 5 niveles. iii. Modo Eco Si activa el modo Eco se apaga la pantalla totalmente después del tiempo predeterminado. Con el modo Eco desactivado, la pantalla se queda iluminada de forma permanente en el nivel más bajo después del tiempo predeterminado. Tenga en cuenta que esto disminuye de forma considerable la duración de la batería. (5) Temporizador En el punto de menú Temporizador puede determinar un rango de tiempo después del cual se apaga automáticamente el aparato. Puede elegir entre Apagado (el aparato no se apaga automáticamente), 10 min, 15 min, 30 min, 60 min, y 120 min. Pagina 17 de 20 – ES (6) Idioma En el punto de menú Idioma puede seleccionar uno de los ocho idiomas preinstalados. Puede elegir entre inglés, español, francés, alemán, italiano, portugués, polaco y ruso. (7) Sistema En el punto de menú Sistema encontrará las siguientes posibilidades de selección: i. Información Aquí puede obtener información sobre la Versión del firmware del reproductor, la memoria total disponible, la memoria ocupada (U:) y la memoria libre (F:) de su tarjeta de memoria. ii. Ajustes de fábrica Confirmando esta opción restablecerá los ajustes estándar del reproductor. 6. Tarjeta Micro SD Este reproductor no dispone de memoria interna. Se suministra con una tarjeta de memoria introducida del tamaño indicado en la caja. Estando conectado mediante USB, el reproductor solamente es reconocido por un ordenador si la tarjeta de memoria está introducida. Se soportan tarjetas de memoria con una capacidad de hasta 64 GB. Pagina 18 de 20 – ES 7. Datos técnicos Video Scooter: Dimensiones Peso LCD Conexión ordenador 88 mm (A) x 41 mm (A) x 9.0mm (F) ~30 gr. Pantalla color 4,4 cm (1.8 pulgadas), resolución: 128 x 160 píxeles USB 2.0 (PC) | conexión mini USB (Reproductor) Batería Li-polímero recargable, capacidad: 150mAh Reproducción de música: ~ 12 horas (música MP3 en modo ahorro de energía) 20Hz hasta 20000Hz > 70dB MP3 / WMA 32 – 320kbps AVI 160 x 120 píxeles WAV con 32 o 64 KBPS JPEG / BMP Batería Rango de frecuencia SNR Formato música Formato vídeo Formato grabación Formato imagen Temperatura funcionamiento Sistema operativo 0 hasta 40 grados Celsius Windows XP / Vista / Win7 / Win8, 8.1 / Mac 9.2 o superior Auriculares In-ear para Estéreo HiFi: Dimensiones: Peso: Longitud de cable: Jack Estéreo: Rango de frequencias: Impedancia: Máximo desempeño entrada: Talla ajustables: 150 x 135 x 70 mm 125 gr 120 cm 3.5 mm estéreo 20 Hz bis 20 KHz 32 Ohm de 40 mW sí Cojines estéreo: Dimensiones: Peso: Longitud de cable: Jack Estéreo: Rango de frequencias: Impedancia: Máximo desempeño entrada: Talla ajustables: 30 x 17 x 13 mm 14.2 gr 115 cm 3.5 mm estéreo 20 Hz bis 20 KHz 32 Ohm de 5 mW no Pagina 19 de 20 – ES Exoneración de responsabilidad Se pueden realizar en cualquier momento y sin previo aviso cambios en el firmware y o el hardware. Por este motivo es posible que partes de las instrucciones, de los datos técnicos y las imágenes en esta documentación difieran ligeramente del producto que tiene delante. Todos los puntos descritos en estas instrucciones solamente sirven para la explicación y no tienen que coincidir forzosamente con una situación en concreto. No se pueden alegar pretensiones legales basadas en estas instrucciones. 8. Eliminación de aparatos electrónicos usados Los aparatos marcados con este símbolo están sujetos a la directiva europea 2012/19/EG. Todos los aparatos eléctricos y electrónicos usados deben ser eliminados por separado de la basura doméstica en los lugares estatales previstos para ello. Eliminando debidamente los aparatos electrónicos evita daños en el medio ambiente. Pagina 20 de 20 – ES Índice Índice ................................................................................................................................................................. 1 Sobre este manual: ........................................................................................................................................ 3 Uso pretendido: ............................................................................................................................................. 3 Indicações ...................................................................................................................................................... 4 1. Geral do aparelho ...................................................................................................................................... 5 2. Conteúdo da embalagem .......................................................................................................................... 5 3. Conectar a um computador....................................................................................................................... 6 a) Conectar o aparelho ............................................................................................................................. 6 b) Desconectar o aparelho ....................................................................................................................... 6 4. Colocação em funcionamento/Carregamento da bateria/Auscultadores ................................................ 7 Carregar a bateria: ......................................................................................................................................... 7 Estado de carga: ............................................................................................................................................ 7 Utilização durante o processo de carga: ....................................................................................................... 8 5. Operação ................................................................................................................................................... 9 a) Utilização geral ..................................................................................................................................... 9 (1) Ligar e desligar o leitor .................................................................................................................. 9 (2) Bloqueio dos botões ...................................................................................................................... 9 (3) O menu principal ......................................................................................................................... 10 (4) Navegação ................................................................................................................................... 10 b) Música ................................................................................................................................................ 11 (1) Reprodução ................................................................................................................................. 11 (2) Vista de pastas ............................................................................................................................. 11 (3) Ciclo A-B ....................................................................................................................................... 12 c) d) Vídeo................................................................................................................................................... 12 (1) Reprodução ................................................................................................................................. 12 (2) Vista de pastas ............................................................................................................................. 13 Imagem ............................................................................................................................................... 13 Página 1 de 20 - PT (1) Reprodução ................................................................................................................................. 13 (2) Vista de pastas ............................................................................................................................. 13 e) Função de gravação ............................................................................................................................ 14 (1) Gravação ...................................................................................................................................... 14 (2) Reprodução ................................................................................................................................. 15 f) Explorador de Ficheiros ...................................................................................................................... 15 g) Definições ........................................................................................................................................... 16 (1) Música.......................................................................................................................................... 16 i. Modo de reprodução ....................................................................................................................... 16 ii. Reprodução aleatória...................................................................................................................... 16 iii. Equalizador .................................................................................................................................... 16 (2) Gravação ...................................................................................................................................... 17 (3) Imagem ........................................................................................................................................ 17 (4) Ecrã .............................................................................................................................................. 17 i. Duração da iluminação .................................................................................................................... 17 ii. Luminosidade.................................................................................................................................. 17 iii. Modo Eco ....................................................................................................................................... 17 (5) Temporizador Sleep ..................................................................................................................... 17 (6) Idioma .......................................................................................................................................... 18 (7) Sistema ........................................................................................................................................ 18 i. Informação ....................................................................................................................................... 18 ii. Definições de fábrica ...................................................................................................................... 18 6. Cartão micro SD ....................................................................................................................................... 18 7. Dados técnicos......................................................................................................................................... 19 8. Eliminação de aparelhos elétricos usados............................................................................................... 20 Página 2 de 20 - PT Sobre este manual: Leia atentamente este manual e observe, leia e siga todas as instruções mencionadas no mesmo, por forma a garantir uma vida longa e uma utilização fiável do dispositivo. Queira manter este manual num local acessível para consulta futura e passá-lo aos outros utilizadores do dispositivo. Uso pretendido: Este dispositivo é utilizado para reproduzir ficheiros de música nos formatos MP3, WMA e WAV, os quais podem ser reproduzidos através do microcartão SD incluído. Este produto não se destina a usos comerciais ou para aplicações médicas ou especiais nas quais uma avaria do produto possa provocar ferimentos, a morte ou danos de propriedade substanciais. A garantia será anulada caso o uso não seja feito em conformidade com o uso a que se destina. A abertura e alteração do dispositivo, bem como a utilização de equipamento e acessórios adicionais que não tenham sido por nós aprovados são proibidas. Não utilize o dispositivo em condições ambientais extremas e observe as instruções de segurança. A não conformidade com as informações e as instruções de segurança contidas no presente manual deverá ser considerada como não conformidade com o uso a que se destina e irá fazer com que a garantia seja anulada, podendo provocar danos ou lesões de propriedade. Página 3 de 20 - PT Indicações Leia e siga o manual de instruções, bem como os avisos e indicações antes da primeira utilização do produto. Antes de utilizar o produto pela primeira vez, certifique-se de que a bateria está totalmente carregada. Evite impactos fortes no aparelho. Não utilize o aparelho em áreas extremamente frias, quentes, húmidas ou com pó. Nunca exponha o aparelho à luz solar direta. Não coloque fontes de luz desprotegidas, por exemplo, velas acesas, na proximidade do aparelho. Realize cópias de segurança com frequência, a fim de evitar possíveis perdas de dados. Evite a utilização em campos magnéticos fortes. Não toque no aparelho com as mãos molhadas. Proteja o aparelho da humidade. Se entrar humidade no aparelho, desligue-o de imediato, limpe-o e seque-o. Não utilize água nem soluções químicas para limpar o aparelho. Utilize apenas um pano seco. Não assumimos qualquer responsabilidade por danos ou perda de dados resultantes de avarias de funcionamento, manuseamento incorreto, reparações não autorizadas ou substituição da bateria do aparelho. Não desmonte o aparelho nem tente repará-lo por si próprio, caso contrário a garantia é anulada. Não obstrua nem cubra as saídas do produto. Este produto destina-se a uma utilização privada e não deve ser utilizado para fins comerciais ou industriais. Não encaixe objetos não adequados para a utilização nas aberturas do aparelho. Os danos resultantes de um manuseamento inadequado ou da inobservância dos aviso ou das indicações deste manual de instruções não são abrangidos pela garantia. AVISO: Ouvir música a um volume demasiado elevado durante um longo período de tempo pode provocar lesões auditivas temporárias ou permanentes, ou mesmo a perda da audição. A utilização do leitor de vídeo durante a condução rodoviária não é recomendada. O condutor pode não se aperceber de potenciais perigos, como veículos em aproximação, e não reagir adequadamente. Página 4 de 20 - PT 1. Geral do aparelho 1. Interruptor para ligar/desligar 2. Botão de seta para retroceder 3. Botão de volume (+) 4. 5. Botão para retroceder Botão play/pausa 6. Ligação mini USB 7. Entrada para auscultadores 8. Botão de volume (-) 9. Botão para avançar 10. Botão M (menu) 11. Ranhura para cartão micro SD 2. Conteúdo da embalagem Verifique o conteúdo da embalagem quanto à sua totalidade Leitor de vídeo Intenso Fones de ouvido para HiFi Stereo Almofadas estéreo Cartão micro SD CD com software de conversão (formato AVI) Cabo USB Manual de instruções Página 5 de 20 - PT 3. Conectar a um computador Para partilhar ficheiros do seu leitor com um computador, pode ligar o seu leitor facilmente ao seu computador através do cabo USB fornecido. a) Conectar o aparelho Para conectar o aparelho, insira a ligação USB 2.0 do cabo USB numa porta USB livre do computador ligado, e insira a ligação mini USB do cabo ao leitor. Este é detetado como unidade de dados removível e está pronto para a transferência de dados com o computador. Pode agora transferir os ficheiros pretendidos, arrastando-os ou copiando-os do seu computador para o leitor (ou do leitor para o computador). b) Desconectar o aparelho Antes de desligar o cabo USB, a ligação de dados entre os aparelhos tem de ser desconectada! Para tal, mantenha o botão premido durante 1 a 2 segundos. O ecrã apresenta agora o estado atual da bateria e a ligação de dados foi desconectada. Se utilizar um PC com Windows (XP ou superior), o leitor também pode ser ejetado diretamente através do computador. Para tal, clique no símbolo "Remover hardware com segurança" na barra de tarefas do Windows. Selecione o Video Scooter e siga as instruções do seu computador até que este confirme que o processo foi bem sucedido. Se utilizar um Mac, pode desconectar o aparelho arrastando o ícone do leitor para o símbolo da reciclagem. O cabo USB pode ser desligado do leitor e do computador com segurança. Nota: Não desligue o leitor do computador enquanto a transferência de ficheiros entre os dois aparelhos estiver a decorrer. Isto pode provocar a perda de dados e danos na unidade de dados. Página 6 de 20 - PT 4. Colocação em funcionamento/Carregamento da bateria/Auscultadores O leitor possui uma bateria interna integrada. Antes de utilizar o produto pela primeira vez, certifique-se de que a bateria está totalmente carregada. Por norma, este processo tem uma duração de até 3 horas. Bateria totalmente carregada Carregar a bateria: A bateria é carregada através da ligação USB ao seu PC. Para carregar a bateria, ligue o aparelho ao PC através do cabo USB. O processo de carga é iniciado automaticamente. O símbolo de ligação (Connect) surge no ecrã do aparelho. Nota: Para obter uma capacidade ideal, a bateria deve ser utilizada regularmente. Se tal não se verificar, carregue totalmente a bateria pelo menos uma vez por mês. Estado de carga: Mantenha o botão play/pausa durante 1-2 segundos para visualizar o estado de carga atual. No ecrã surge o símbolo da bateria. Se a bateria estiver totalmente carregada, é apresentada uma bateria verde. Se a bateria ainda estiver em carga, tal é representado por uma animação de carga. Página 7 de 20 - PT Utilização durante o processo de carga: Pode utilizar o leitor durante o processo de carga. Para tal, basta premir novamente o botão play/pausa e o aparelho muda automaticamente do indicador de estado de carga para o menu principal. Também pode visualizar o estado de carga durante a utilização. Este é exibido, por exemplo, durante a reprodução de música, em 3 níveis no canto superior direito. Se a bateria estiver totalmente carregada, os três campos são exibidos. Se a bateria ainda estiver em carga, também é apresentada uma animação. 0 – 33% 34 – 66 % 67 – 100 % Nota: Se pretender visualizar o estado de carga ou utilizar o aparelho conectado ao computador, já não será possível partilhar ficheiros com o computador. Para poder voltar a transferir ficheiros, o leitor deve ser novamente ligado ao computador. Ligar: Irá encontrar mais informações sobre este tópico na secção "Operação" que se segue. Usando os auscultadores: Este reproductor reproduce música a través del jack estéreo de 3,5 m. Antes de la conexión asegurarse que el reproductor está configurado en un nivel bajo de volumen. Ahora conecte los auriculares suministrados con el dispositivo y adapte lentamente el volumen al nivel que desee. Use los auriculares In-ear de estéreo o los cojines estéreo. Este jogador reproduz música através do jack estéreo de 3,5 m. Antes de ligar certifique-se que o jogador está fixado n um nível de volume baixo. Agora ligue os fones fornecidos com o dispositivo e ajuste lentamente o volume para o nível desejado. Use a fones de ouvido estéreo ou almofadas estéreo. AVISO: Ouvir música a um volume demasiado elevado durante um longo período de tempo pode provocar lesões auditivas temporárias ou permanentes, ou mesmo a perda da audição. A utilização do leitor de vídeo durante a condução rodoviária não é recomendada. O condutor pode não se aperceber de potenciais perigos, como veículos em aproximação, e não reagir adequadamente. Página 8 de 20 - PT 5. Operação Nota: Certifique-se de que está inserido um cartão micro SD no leitor! a) Utilização geral (1) Ligar e desligar o leitor Desloque o interruptor para ligar/desligar no lado esquerdo do aparelho para a posição "ON". Mantenha premido o botão play/pausa durante aprox. 3 segundos para ligar o leitor. Para colocar o aparelho no modo standby, mantenha o botão play/pausa premido durante aprox. 3 segundos. Se pretender desligar o aparelho, desloque o botão no lado esquerdo do aparelho para a posição "OFF". Nota: Este leitor possui uma função de poupança de energia. O aparelho desliga-se automaticamente se não for utilizado durante mais do que dez minutos. (2) Bloqueio dos botões Para evitar um acionamento dos botões inadvertido, o leitor possui um bloqueio de botões. Para tal, prima o botão play/pausa e o botão M em simultâneo. Como confirmação é apresentado um símbolo de um cadeado fechado. Para desbloquear, volte a premir o botão play/pausa e o botão M em simultâneo. Como confirmação é apresentado um símbolo de um cadeado aberto. Página 9 de 20 - PT (3) O menu principal Depois de ligar o aparelho surge o menu principal. Este é composto por até seis pontos diferentes (Música, Vídeo, Imagens, Gravação, Explorador de Ficheiros e Definições). Música Vídeo Imagens Gravação Ficheiro Definições (4) Navegação Pode navegar pelos diferentes menus com o botão para avançar e retroceder . Pode abrir o ponto de menu pretendido ou iniciar a função desejada com o botão play/pausa . Prima brevemente o botão de seta para retroceder para retroceder um nível. Mantenha o botão de seta para retroceder premido durante 1 a 2 segundos para mudar diretamente para o menu principal. Página 10 de 20 - PT b) Música (1) Reprodução Aceda ao ponto de menu Music a partir do menu principal e confirme a sua seleção com o botão play/pausa . É aberto o ecrã de reprodução e a reprodução é iniciada automaticamente. Para pausar ou retomar a reprodução, prima o botão play/pausa . Para avançar ou retroceder uma faixa, prima o botão para avançar ou para retroceder . Para avançar ou retroceder dentro de uma faixa, mantenha este botão premido. Prima o botão (+) ou o botão (-) para regular o volume. (2) Vista de pastas Para passar do ecrã de reprodução para a vista de pastas, prima o botão de seta para retroceder . Percorra com o botão (+) ou (-) para percorrer os ficheiros e as pastas existentes. Se confirmar um ficheiro de música com o botão play/pausa , este será reproduzido. Se confirmar uma pasta com este botão, a pasta será aberta. Com o botão de seta para retroceder pode aceder ao próximo nível da sua estrutura de pastas até chegar ao menu principal. Para apagar um ficheiro, navegue até à vista de pastas, selecione o ficheiro pretendido e prima o botão M. Confirme este processo com o botão play/pausa definitivamente o ficheiro. Página 11 de 20 - PT para apagar (3) Ciclo A-B Este leitor permite selecionar uma secção de uma música e repeti-la permanentemente em ciclo. Prima o botão M durante a reprodução da música para definir o ponto inicial (A) do ciclo de reprodução. Prima novamente o botão M para determinar o ponto final (B). A secção selecionada será agora reproduzida em ciclo. Nota: Para outras opções de configuração, abra o ponto de menu Setup do menu principal. c) Vídeo Nota: Para ser possível reproduzir vídeos neste leitor, estes devem ser convertidos para o formato AVI adequado com o software de conversão fornecido. (1) Reprodução Aceda ao ponto de menu Movie a partir do menu principal e confirme a sua seleção com o botão play/pausa . É aberta a vista de pastas. Selecione com o botão (+) ou (-) o ficheiro de vídeo a reproduzir e confirme a sua seleção com o botão Reproduzir/Pausar. O vídeo é iniciado automaticamente. Para pausar ou retomar a reprodução, prima o botão play/pausa . Para avançar ou retroceder uma faixa, prima o botão para avançar ou para retroceder . Para avançar ou retroceder dentro de uma faixa, mantenha este botão premido. Prima o botão (+) ou o botão (-) para regular o volume. Página 12 de 20 - PT (2) Vista de pastas Para passar do ecrã de reprodução para a vista de pastas, prima o botão de seta para retroceder . Percorra com o botão (+) ou (-) para percorrer os ficheiros e as pastas existentes. Se confirmar um ficheiro de vídeo com o botão play/pausa , este será reproduzido. Se confirmar uma pasta com este botão, a pasta será aberta. Com o botão de seta para retroceder pode aceder ao próximo nível da sua estrutura de pastas até chegar ao menu principal. Para apagar um ficheiro, navegue até à vista de pastas, selecione o ficheiro pretendido e prima o botão M. Confirme este processo com o botão play/pausa definitivamente o ficheiro. para apagar d) Imagem (1) Reprodução Aceda ao ponto de menu Photo a partir do menu principal e confirme a sua seleção com o botão play/pausa . É aberta a vista de pastas. Selecione com o botão (+) ou (-) o ficheiro de imagem a reproduzir e confirme a sua seleção com o botão Reproduzir / Pausar. A imagem selecionada será exibida. Para iniciar ou pausar a reprodução automática de imagens, prima o botão play/pausa . (2) Vista de pastas Para passar do ecrã de reprodução para a vista de pastas, prima o botão de seta para retroceder . Percorra com o botão (+) ou (-) para percorrer os ficheiros e as pastas existentes. Se confirmar um ficheiro com o botão play/pausa , este será reproduzido. Se selecionar uma pasta com este botão, a pasta será aberta. Com o botão de seta para retroceder pode aceder ao próximo nível da sua estrutura de pastas até chegar ao menu principal. Página 13 de 20 - PT Para apagar um ficheiro, navegue até à vista de pastas, selecione o ficheiro pretendido e prima o botão M. Confirme este processo com o botão play/pausa definitivamente o ficheiro. para apagar Nota: Para outras opções de configuração, abra o ponto de menu Setup do menu principal. e) Função de gravação (1) Gravação Aceda ao ponto de menu Record a partir do menu principal e confirme a sua seleção com o botão play/pausa . O leitor está pronto a iniciar a gravação de sons através do microfone integrado. Para tal, prima o botão play/pausa . A gravação em curso é exibida no ecrã. Para pausar ou retomar a gravação, prima novamente o botão play/pausa . Prima o botão M durante a gravação para a guardar. Prima o botão de seta para retroceder para regressar ao menu principal; uma gravação em curso é guardada automaticamente. Nota: Pode aceder aos ficheiros de gravação (formato .wav) na pasta "VOICE" através do Explorador de Ficheiros. Se não existir espaço livre suficiente para a gravação, o leitor exibe a mensagem "Memória cheia". Página 14 de 20 - PT (2) Reprodução Aceda ao ponto de menu File Explorer a partir do menu principal e confirme a sua seleção com o botão play/pausa . Selecione a pasta VOICE. Todas as gravações efetuadas são apresentadas por ordem cronológica. Aceda ao ficheiro pretendido e inicie a reprodução com o botão play/pausa . Para regressar ao menu principal, prima o botão de seta para retroceder . Nota: Para outras opções de configuração, abra o ponto de menu Setup do menu principal. f) Explorador de Ficheiros Aceda ao ponto de menu File Explorer a partir do menu principal e confirme a sua seleção com o botão play/pausa . É apresentado o diretório principal do seu cartão de memória. Percorra com o botão (+) ou (-) para percorrer os ficheiros e as pastas existentes. Se confirmar um ficheiro com o botão play/pausa , este será reproduzido. Se confirmar uma pasta com este botão, a pasta será aberta. Com o botão de seta para retroceder pode aceder ao próximo nível da sua estrutura de pastas até chegar ao menu principal. Para apagar um ficheiro, navegue até à vista de pastas, selecione o ficheiro pretendido e prima o botão M. Confirme este processo com o botão play/pausa definitivamente o ficheiro. para apagar Nota: Pode obter informações sobre a memória não utilizada ou ocupada, bem como sobre toda a capacidade da memória em Setup no ponto de menu Sistema e, aí, em Informação. Página 15 de 20 - PT g) Definições Aceda ao ponto de menu Setup a partir do menu principal e confirme a sua seleção com o botão play/pausa . (1) Música No ponto de menu Música existem as seguintes opções de ajuste: i. Modo de reprodução Defina aqui o modo de reprodução pretendido. Reproduzir faixa uma vez Repetir faixa Reproduzir pasta uma vez Repetir pasta Reproduzir tudo uma vez Repetir tudo Introdução Reproduz a faixa pretendida uma vez e para a reprodução. A faixa selecionada é repetida. Reproduz as faixas da pasta selecionada e para a reprodução. Repete todas as faixas da pasta atual. Todas as músicas são reproduzidas uma vez. Repete todas as músicas guardadas. Reprodução do início de cada música. ii. Reprodução aleatória Aqui pode ativar ou desativar a reprodução aleatória de todos os ficheiros de música. iii. Equalizador Selecione aqui o seu modo do equalizador favorito. Pode selecionar Normal, Rock, Pop, Clássico, Jazz, Puro Baixo/3D e EQ de utilizador. iv. Definição de baixo/3D Aqui, tem a oportunidade de predefinir sob "Definições do Baixo/3D" um baixo ou som 3D melhorados para este modo do equalizador. Página 16 de 20 - PT v. Definição do EQ do utilizador Aqui, tem a oportunidade de configurar um equalizador personalizado. Ajuste as definições para cada banda de frequência com o botão (+) ou (-). Para se movimentar até à próxima banda de frequência, prima os botões Avançar ou Retroceder. Prima o botão Reproduzir/Pausar para aplicar as suas definições selecionadas. (2) Gravação No ponto de menu Gravação pode definir a qualidade da gravação. Pode optar entre qualidade normal (32 KBPS) e qualidade elevada (64 KBPS). Tenha em atenção que a qualidade elevada ocupa mais espaço de memória. (3) Imagem No ponto de menu Imagem pode definir a duração da apresentação automática de diapositivos. Pode optar entre: 2 seg., 4 seg., 6 seg., 8 seg., e 10 seg. (4) Ecrã No ponto de menu Ecrã existem as seguintes opções de ajuste: i. Duração da iluminação Aqui pode definir durante quanto tempo o ecrã está iluminado. Pode optar entre 5 seg., 10 seg., 15 seg., 20 seg., 30 seg. e Sempre ligado. ii. Luminosidade Aqui pode definir a luminosidade do ecrã em 5 níveis. iii. Modo Eco Se ativar o modo Eco, o ecrã desliga-se após um período de tempo definido. Se o modo Eco estiver desligado, o ecrã permanece ligado após o período de tempo definido, mas com o nível mínimo de iluminação. Tenha em atenção que isto reduz significativamente a duração da bateria. (5) Temporizador Sleep No ponto de menu Temporizador Sleep pode definir o período de tempo, após o qual o aparelho se desliga automaticamente. Pode optar entre Desligado (o aparelho não se desliga automaticamente), 10 min., 15 min., 30 min., 60 min., e 120 min. Página 17 de 20 - PT (6) Idioma No ponto de menu Idioma pode selecionar um dos oito idiomas pré-instalados. Pode optar entre inglês, espanhol, francês, alemão, italiano, português, polaco e russo. (7) Sistema No ponto de menu Sistema existem as seguintes opções de seleção: i. Informação Aqui pode obter informações sobre a versão de firmware do leitor, a capacidade de memória disponível, a memória utilizada (U:) e a memória livre (F:) do seu cartão de memória. ii. Definições de fábrica Se confirmar esta opção, as definições originais do leitor serão repostas. 6. Cartão micro SD Este leitor não possui uma memória interna utilizável. É fornecido com um cartão de memória inserido, com o tamanho indicado na embalagem. No caso de uma ligação USB, o leitor só será detetado por um computador se estiver inserido um cartão de memória. São suportados cartões de memória com uma capacidade de até 64 GB. Página 18 de 20 - PT 7. Dados técnicos Video Scooter: Dimensões Peso LCD Ligação a PC 88 mm (A) x 41 mm (L) x 9,0 mm (P) ~30 gr. Ecrã a cores de 4,4 cm (1,8 polegadas), resolução: 128 x 160 pixeis USB 2.0 (PC) | ligação mini USB (leitor) Bateria de polímeros de lítio recarregável, capacidade: 150 mAh Reprodução de música: ~ 12 horas (música MP3 no modo de poupança de energia) 20 Hz até 20000 Hz > 70dB MP3 / WMA 32 – 320 kbps AVI 160 x 120 pixeis WAV com 32 ou 64 KBPS JPEG / BMP Bateria Gama de frequências SNR Formato de música Formato de vídeo Formato de gravação Formato de imagem Temperatura de funcionamento Sistema Operativo 0 a 40 graus Celsius Windows XP/Vista/Win7/Win8, 8.1 / Mac 9.2 ou superior Fones de ouvido para HiFi Stereo: Dimensões: Peso: Comprimento do cabo: Jack Estéreo: Faixa de frequência: Impedância: Máximo desempenho entrada: Dimensão ajustável: 150 x 135 x 70 mm 125 gr 120 cm 3.5 mm estéreo 20 Hz bis 20 KHz 32 Ohm de 40 mW sí Almofadas estéreo: Dimensões: Peso: Comprimento do cabo: Jack Estéreo: Faixa de frequência: Impedância: Máximo desempenho entrada: Dimensão ajustável: 30 x 17 x 13 mm 14.2 gr 115 cm 3.5 mm estéreo 20 Hz bis 20 KHz 32 Ohm de 5 mW não Página 19 de 20 - PT Exclusão de responsabilidade Podem ser efetuadas alterações no firmware e/ou no hardware a qualquer momento e sem aviso prévio. Como tal, algumas secções das instruções, dados técnicos e imagens nesta documentação podem divergir do produto que adquiriu. Todos os pontos descritos nestas instruções servem apenas para efeitos de explicação e não correspondem obrigatoriamente a uma determinada situação. Por este motivo, não consideramos válido qualquer tipo de direito ou compensação com base nestas instruções. 8. Eliminação de aparelhos elétricos usados Os aparelhos identificados com este símbolo são abrangidos pela Diretiva 2012/19/EG. Os aparelhos elétricos e eletrónicos usados devem ser eliminados separadamente do lixo doméstico, junto das entidades para tal previstas. Ao efetuar uma eliminação correta de aparelhos elétricos usados, está a prevenir danos ambientais. Página 20 de 20 - PT Spis treści O instrukcji obsługi ........................................................................................................................................ 3 Przeznaczenie ................................................................................................................................................ 3 Informacje ogólne.......................................................................................................................................... 4 1. Widok urządzenia ...................................................................................................................................... 5 2. Zawartość opakowania .............................................................................................................................. 5 3. Podłączanie do komputera ........................................................................................................................ 6 a) Podłączenie urządzenia ........................................................................................................................ 6 b) Odłączenie urządzenia.......................................................................................................................... 6 4. Uruchamianie / Ładowanie baterii / Słuchawki ........................................................................................ 7 Ładowanie bateri: .......................................................................................................................................... 7 Stan baterii: ................................................................................................................................................... 7 Używanie podczas procesu ładowania baterii :............................................................................................. 8 5. Obsługiwanie ............................................................................................................................................. 9 a) Obsługiwanie ogólne ............................................................................................................................ 9 (1) Włączanie i wyłączanie odtwarzacza ............................................................................................. 9 (2) Blokada klawiszy ............................................................................................................................ 9 (3) Menu główne ............................................................................................................................... 10 (4) Sterowanie ................................................................................................................................... 10 b) Muzyka ............................................................................................................................................... 11 (1) Odtwarzanie ................................................................................................................................ 11 (2) Widok folderów ........................................................................................................................... 11 (3) Pętla A-B ...................................................................................................................................... 12 c) Video................................................................................................................................................... 12 (1) Odtwarzanie ................................................................................................................................ 12 (2) Widok folderów ........................................................................................................................... 13 d) Aparat ................................................................................................................................................. 13 (1) Odtwarzanie ................................................................................................................................ 13 (2) Widok folderów ........................................................................................................................... 13 Strona 1 z 20 - PL e) Funkcja nagrywania ............................................................................................................................ 14 (1) Nagrywanie .................................................................................................................................. 14 (2) Odtwarzanie ................................................................................................................................ 15 f) Eksplorator plików .............................................................................................................................. 15 g) Ustawienia .......................................................................................................................................... 16 (1) Muzyka ........................................................................................................................................ 16 i. Tryb odtwarzania ............................................................................................................................. 16 ii. Odtwarzanie przypadkowe ............................................................................................................. 16 iii. Equalizer......................................................................................................................................... 16 (2) Nagrywanie .................................................................................................................................. 17 (3) Aparat .......................................................................................................................................... 17 (4) Wyświetlacz ................................................................................................................................. 17 i. Czas trwania oświetlenia ................................................................................................................. 17 ii. Jasność ............................................................................................................................................ 17 iii. Tryb eco.......................................................................................................................................... 17 (5) Sleep Timer .................................................................................................................................. 18 (6) Język............................................................................................................................................. 18 (7) System ......................................................................................................................................... 18 i. Informacja ........................................................................................................................................ 18 ii. Ustawienia fabryczne ...................................................................................................................... 18 6. Karta Micro SD ......................................................................................................................................... 18 7. Dane techniczne ...................................................................................................................................... 19 8. Usuwanie sprzętów elektrycznych .......................................................................................................... 20 Strona 2 z 20 - PL O instrukcji obsługi Przeczytaj uważnie instrukcję obsługi i zastosuj się do zawartych w niej wskazówek, a zapewni to niezawodne korzystanie i długą żywotność urządzenia. Prosimy o zachowanie instrukcji do wykorzystania jej w przyszłości i o przekazanie jej innym użytkownikom urządzenia. Przeznaczenie Urządzenie służy do odtwarzania plików muzycznych w formatach MP3, WMA i WAV, które moga być odtwarzane przy pomocy załączonej karty micro-SD. Ten product nie jest przeznaczony do zastosowań komercyjnych lub dla medycznych bądź specjalnych programów, podczas których awaria urządzenia może spowodować obrażenia, śmierć lub znaczne szkody materialne. Nasza odpowiedzialność wygasa w przypadku użycia niezgodnego z przeznaczeniem. Otwieranie i zmienianie urządzenia, jak również używanie dodatkowych urządzeń i akcesoriów, które nie zostały zaakceptowane przez nas jest zabronione. Nie należy korzystać z urządzenia w ekstremalnych warunkach środowiskowych i należy przestrzegać wskazówek dotyczących bezpieczeństwa obsługi. Niezastosowanie się do wskazówek bezpieczeństwa obsługi zawartych w tej instrukcji zostanie uznane za niezgodność z przeznaczeniem i spowodowuje wygaśnięcie naszej odpowiedzialności oraz może spowodować obrażenia lub uszkodzenia mienia. Strona 3 z 20 - PL Informacje ogólne Przed pierwszym użyciem produktu należy przeczytać i przestrzegać niniejszą instrukcję obsługi. Przed pierwszym użyciem urządzenia należy zwrócić uwagę, aby całkowicie naładować baterię. Należy unikać silnych uderzeń sprzętu. Nie należy używać urządzenia w ekstremalnie zimnych, gorących, wilgotnych lub zakurzonych obszarach. Nie należy również wystawiać urządzenia na bezpośrednie działanie promieni słonecznych. W pobliżu produktu nie wolno stawiać otwartych źródeł ognia, jak np. palące świeczki. Należy częściej zabezpieczać dane, aby uniknąć ewentualnej utraty danych. Należy unikać użytkowania w silnie namagnesowanych polach. Nie należy obsługiwać urządzenie mokrymi rękoma. Urządzenie należy chronić przed wilgocią. Jeżeli wilgoć przedostanie się do urządzenia, należy je niezwłocznie wyłączyć, następnie wyczyścić i wysuszyć. Aby wyczyścić urządzenie, nie należy stosować wody ani żadnych środków chemicznych. Do tego celu należy używać tylko suchy ręcznik. Nie odpowiadamy za szkody lub utratę danych w przypadku nieprawidłowej czynności, błędnej obsługi, własnoręcznej naprawy urządzenia lub samowolnej wymiany baterii. Urządzenia nie należy rozkładać na jego czynniki pierwsze, oraz nie należy próbować naprawiać urządzenia na własną rękę, gdyż w tym wypadku gwarancji straci ważność. Nie należy blokować ani zakrywać otworów produktu. Niniejszy produkt przeznaczony jest tylko do użytku prywatnego i nie wolno używać go do celów komercyjnych lub przemysłowych. Nie należy wkładać żadnych przedmiotów, które nie są przewidziane do użytku, w otwory produktu. Szkody powstałe w wyniku niewłaściwej obsługi lub zignorowania ostrzeżeń lub informacji zawartych w niniejszej instrukcji obsługi, nie będą pokryte przez gwarancję. OSTRZEŻENIE: Przedłużone obciążenie słuchu poprzez zbyt głośne odtwarzanie muzyki może prowadzić do tymczasowych lub stałych uszkodzeń słuchu lub utraty słuchu. Nie zaleca się używanie odtwarzacza filmów Video w ruchu ulicznym. Może to doprowadzić do tego, że słuchacz nie będzie uważał na potencjalne niebezpieczeństwa, jak np. zbliżające się pojazdy. . Strona 4 z 20 - PL 1. Widok urządzenia 1. Włącznik / wyłącznik Przycisk strzałka 2. cofnij 3. Przycisk głośności (+) 4. Przycisk wstecz 5. Przycisk play / pauza 6. Złącze mini USB 7. Wejście na słuchawki 8. Przycisk głośności (-) 9. Przycisk dalej 10. Przycisk M (menu) 11. gniazdo do karty Micro SD 2. Zawartość opakowania Proszę sprawdzić zawartość opakowania pod kątem kompletności. Odtwarzacz mp3 Intenso Video Player Słuchawki nauszne Hi-Fi Stereo Poduszeczki dokanałowe Stereo Karta Micro SD Płyta CD z oprogramowaniem konwertującym (format AVI) Kabel USB Instrukcja obsługi Strona 5 z 20 - PL 3. Podłączanie do komputera Aby dokonać wymiany danych pomiędzy waszym odtwarzaczem a komputerem, można podłączyć odtwarzacz w łatwy sposób z komputerem za pomocą dołączonego kabla USB. a) Podłączenie urządzenia Aby podłączyć odtwarzacz z komputerem, należy włożyć wtyczkę USB 2.0 kabla USB w wolny port USB włączonego komputera i połączyć wtyczkę mini USB kabla z odtwarzaczem. Odtwarzacz zostanie rozpoznany jako nośnik wymiany danych i jest gotowy do przesyłania danych z komputerem. Teraz można bardzo łatwo przesłać wybrane pliki poprzez „Drag and Drop” lub „kopiuj i wklej” z komputera na odtwarzacz (lub z odtwarzacza na komputer). b) Odłączenie urządzenia Przed wyciągnięciem kabla USB należy przede wszystkim rozłączyć łącze danych pomiędzy urządzeniami! W tym celu należy przytrzymać klawisz przez 1 – 2 sekund. Wyświetlacz pokaże aktualny stan baterii i łącze danych zostanie rozłączone. Jeśli używasz komputera z systemem Windows (XP lub wersja wyższa), odtwarzacz można usnąć bezpośrednio poprzez komputer. W tym celu należy kliknąć na symbol „bezpieczne usuwanie sprzętu” znajdujący się na pasku zadań Windows. Odtwarzacz Video Scooter należy wyciągnąć i postępować zgodnie z ewentualnymi poleceniami komputera, aż do momentu potwierdzenia skutecznego zakończenia procesu. Jeśli korzystasz z systemu Mac, odtwarzacz można łatwo rozłączyć, przeciągając ikonkę odtwarzacza do symbolu kosza na usunięte pliki. Na końcu można bezpiecznie usunąć kabel USB z odtwarzacza oraz komputera. Wskazówka: Nie należy usuwać odtwarzacza z komputera, jeżeli pliki przesyłane są jeszcze pomiędzy urządzeniami. Może doprowadzić to do utraty danych lub uszkodzenia nośnika danych. Strona 6 z 20 - PL 4. Uruchamianie / Ładowanie baterii / Słuchawki Odtwarzacz posiada wbudowaną na stałe baterię wewnętrzną. Przed pierwszym użyciem urządzenia należy zwrócić uwagę, aby bateria była całkowicie naładowana. Proces ten trwa z reguły do 3 godzin. Bateria całkowicie naładowana Ładowanie bateri: Baterię ładuje się podłączając odtwarzacz poprzez złącze USB z komputerem. Aby naładować baterię, należy podłączyć urządzenie kablem USB do komputera. Proces ładowania załącza się automatycznie. Pojawia się symbol połączenia (Connect) na wyświetlaczu urządzenia. Wskazówka: Dla optymalnej wydajności należy regularnie ładować baterię. W przeciwnym wypadku, baterię należy ładować całkowicie przynajmniej raz w miesiącu. Stan baterii: Naciśnij przycisk Play/Pause na 1-2 sekund, aby wyświetlić aktualny stan baterii. Na wyświetlaczu pojawi się symbol baterii. Jeżeli bateria naładowana jest w pełni, pojawi się bateria zielona. Jeżeli bateria znajduje się jeszcze w fazie ładowania, proces ten przedstawiony będzie przy pomocy animacji ładowania. Strona 7 z 20 - PL Używanie podczas procesu ładowania baterii : Można korzystać z odtwarzacza w trakcie procesu ładowania baterii. W tym celu naciśnij po prostu kolejny raz na przycisk ładowania na menu główne. Play/Pause a urządzenie zmieni wyświetlanie statusu Również w trakcie używania można podejrzeć aktualny stan ładowania baterii, który przykładowo podczas odtwarzania muzyki wyświetlany jest w stopniach w prawym górnym rogu. Jeżeli bateria jest w pełni naładowana, wówczas wyświetlają się wszystkie trzy pola. Jeżeli bateria znajduje się jeszcze w fazie ładowania, pokazuje się poniższa animacja. 0 – 33% 34 – 66 % 67 – 100 % Wskazówka: Jeżeli przejdzie sie do widoku stanu baterii lub używa się podłączonego do komputera urządzenia, wymiana danych z komputerem nie będzie możliwa. Aby ponownie móc przesyłać dane, należy ponownie połączyć odtwarzacz z komputerem. Właczanie: Wiecej informacji na ten temat znajdziesz w następnym rozdziale “Obsługa”. Używanie słuchawek: Ten odtwarzacz odtwarza muzykę przez gniazdo 3,5mm stereo. Przed podłączeniem należy upewnić się, że odtwarzacz ma ustawione niskie natężenie dźwięku. Następnie podłączyć załączone słuchawki do urządzenia i powoli dostosować głośność do wybranego poziomu. Użyć słuchawek nausznych hi-fi stereo lub poduszek dokanałowych stereo. OSTRZEŻENIE: Przedłużone obciążenie słuchu poprzez zbyt głośne odtwarzanie muzyki może prowadzić do tymczasowych lub stałych uszkodzeń słuchu lub utraty słuchu. Nie zaleca się używanie odtwarzacza filmów Video w ruchu ulicznym. Może to doprowadzić do tego, że słuchacz nie będzie uważał na potencjalne niebezpieczeństwa, jak np. zbliżające się pojazdy. Strona 8 z 20 - PL 5. Obsługiwanie Wskazówka: Należy zwrócić uwagę na to, czy karta micro SD jest włożona do odtwarzacza! a) Obsługiwanie ogólne (1) Włączanie i wyłączanie odtwarzacza Włącznik/wyłącznik znajdujący się po lewej stronie urządzenia należy przesunąć do pozycji „ON”. Następnie należy przytrzymać przycisk Play/Pause na około 3 sekundy, aby włączyć odtwarzacz. Aby wprawić urządzenie w tryb oczekiwania standby, należy ponownie przytrzymać przycisk Play/Pause na około 3 sekundy. Aby wyłączyć zupełnie urządzenie, należy przesunąć przycisk znajdujący się po lewej stronie odtwarzacza do pozycji „OFF”. Wskazówka: niniejszy odtwarzacz posiada funkcję oszczędzania energii. Urządzenieie wyłączy się automatycznie, jeżeli nie będzie używane więcej niż 10 minut. (2) Blokada klawiszy Aby zapobiec niechcianemu wprowadzaniu danych, odtwarzacz posiada blokadę klawiszy. W tym celu należy po prostu nacisnąć jednocześnie przycisk Play/Pause oraz przycisk M. Jako potwierdzenie zablokowania wyświetli się zamknięta kłódka. W celu odblokowania należy ponownie nacisnąć jednocześnie przycisk Play/Pause oraz przycisk M. Jako potwierdzenie odblokowania wyświetli się otwarta kłódka. Strona 9 z 20 - PL (3) Menu główne Po włączeniu odtwarzacza pojawi się menu główne. Składa się ono z sześciu różnych punktów menu (muzyka, video, aparat, nagrywanie, eksplorator plików i ustawienia). Muzyka Nagrywanie Video Pliki Aparat Ustawienia (4) Sterowanie Za pomocą przycisków dalej oraz wstecz można przechodzić przez różne menu. Za pomocą przycisku Play/Pause można otworzyć wybrany punkt menu lub rozpocząć wybraną funkcję. Naciśnij krótko przycisk strzałki cofnij, aby przejść do poziomu wstecz. Naciśnij przycisk strzałki cofnij i przytrzymaj na około 1 – 2 sekund, aby bezpośrednio przejść ponownie do menu głównego. Strona 10 z 20 - PL b) Muzyka (1) Odtwarzanie Przejdź z menu głównego do punktu menu Music i zatwierdź swój wybór za pomocą przycisku Play/Pause. Otworzy się ekran odtwarzania i odtwarzanie rozpocznie się automatycznie. Aby zrobić przerwę w odtwarzaniu lub ponownie kontynuować odtwarzanie, wciśnij za każdym razem przycisk Play/Pause. Aby przeskoczyć o jeden utwór do przodu lub do tyłu, należy nacisnąć przycisk dalej lub wstecz. Aby przewinąć dany utwór do przodu lub do tyłu, należy po prostu przytrzymać te przyciski. Aby regulować głośność należy nacisnąć przycisk (+) lub przycisk (-). (2) Widok folderów Aby przejść z ekranu odtwarzania do widoku folderów, należy nacisnąć przycisk strzałki cofnij. Przy pomocy przycisku (+) lub przycisku (-) można poruszać się w plikach i istniejących folderach. Wybrany plik muzyczny należy zatwierdzić przyciskiem Play/Pause, wówczas zostanie on odtworzony. Jeżeli tym przyciskiem zatwierdzi się dany folder, zostanie on otworzony. Za pomocą przycisku strzałki cofnij, można przejść do następnego wyższego poziomu struktury folderów, aż do powrotu do menu głównego. Aby skasować plik, należy przejść w widoku folderów do wybranego pliku i nacisnąć przycisk M. Proces ten należy zatwierdzić przyciskiem plik. Strona 11 z 20 Play/Pause, aby ostatecznie usunąć dany - PL (3) Pętla A-B Przy pomocy niniejszego odtwarza możliwe jest wybranie dowolnego okresu czasu utworu muzycznego i odtwarzać go stale w pętli. Podczas odtwarzania utworu muzycznego wciśnij przycisk M, aby ustalić punkt rozpoczęcia (A) pętli odtwarzania. Następnie ponownie wciśnij przycisk M, aby ustalić punkt końcowy (B) pętli. Wybrany okres czasu odtwarzany będzie w pętli. Wskazówka: W celu uzyskania więcej możliwości konfiguracji należy w menu głównym otworzyć punkt menu Setup [konfiguracja]. c) Video Wskazówka: Aby odtwarzać filmy video na tym odtwarzaczu, przetworzyć je do formatu AVI dostosowanego do niniejszego odtwarzacza za pomocą załączonego oprogramowania konwertującego. (1) Odtwarzanie Przejdź w menu głównym do punktu menu Movie i zatwierdź swój wybór za pomocą przycisku Play/Pause. Otworzy się widok folderów. Przy pomocy przycisku (+) lub przycisku (-) wybierz plik wideo, który ma być odtwarzany i potwierdź wybór przyciskiem Odtwarzanie / Pauza. Video włącza się automatycznie. Aby zrobić przerwę w odtwarzaniu lub ponownie kontynuować odtwarzanie, wciśnij za każdym razem przycisk Play/Pause. Aby przeskoczyć o jeden utwór do przodu lub do tyłu, należy nacisnąć przycisk dalej lub wstecz. Aby przewinąć dany utwór do przodu lub do tyłu, należy po prostu przytrzymać te przyciski. Aby regulować głośność należy nacisnąć przycisk (+) lub przycisk (-). Strona 12 z 20 - PL (2) Widok folderów Aby przejść z ekranu odtwarzania do widoku folderów, należy nacisnąć przycisk strzałki cofnij. Przy pomocy przycisku (+) lub przycisku (-) można poruszać się w plikach i istniejących folderach. Wybrany plik video należy zatwierdzić przyciskiem Play/Pause, wówczas zostanie on odtworzony. Jeżeli tym przyciskiem zatwierdzi się dany folder, zostanie on otworzony. Za pomocą przycisku strzałki cofnij, można przejść do następnego wyższego poziomu struktury folderów, aż do powrotu do menu głównego. Aby skasować plik, należy przejść w widoku folderów do wybranego pliku i nacisnąć przycisk M. Proces ten należy zatwierdzić przyciskiem plik Play/Pause, aby ostatecznie usunąć dany d) Aparat (1) Odtwarzanie Przejdź w menu głównym do punktu menu Photo i zatwierdź swój wybór za pomocą przycisku Play/Pause. Otworzy się widok folderów. Przy pomocy przycisku (+) lub przycisku (-) wybierz zdjęcie, które ma być odtworzone i potwierdź wybór przyciskiem Odtwarzanie / Pauza. Pojawi się wybrane zdjęcie. W celu rozpoczęcia lub też zatrzymania automatycznego odtwarzania zdjęć, naciśnij za każdym razem przycisk Play/Pause. (2) Widok folderów Aby przejść z ekranu odtwarzania do widoku folderów, należy nacisnąć przycisk strzałki cofnij. Przy pomocy przycisku (+) lub przycisku (-) można poruszać się w plikach i istniejących folderach. Wybrany plik należy zatwierdzić przyciskiem Play/Pause, wówczas zostanie on odtworzony. Jeżeli tym przyciskiem zatwierdzi się dany folder, zostanie on otworzony. Za pomocą przycisku strzałki cofnij, można przejść do następnego wyższego poziomu struktury folderów, aż do powrotu do menu głównego. Strona 13 z 20 - PL Aby skasować plik, należy przejść w widoku folderów do wybranego pliku i nacisnąć przycisk M. Proces ten należy zatwierdzić przyciskiem usunąć dany plik. Play/Pause, aby ostatecznie Wskazówka: W celu uzyskania więcej możliwości konfiguracji należy w menu głównym otworzyć punkt menu Setup [konfiguracja]. e) Funkcja nagrywania (1) Nagrywanie Przejdź w menu głównym do punktu menu Record i zatwierdź swój wybór za pomocą przycisku Play/Pause. W tym momencie odtwarzacz jest gotowy do rozpoczęcia rejestracji dźwięków poprzez zintegrowany mikrofon. W tym celu naciśnij po prostu przycisk Play/Pause. Na wyświetlaczu będzie pokazana bieżąca rejestracja. W celu zatrzymania bieżącego zapisu lub ponownej kontynuacji, należy ponownie nacisnąć przycisk Play/Pause. W trakcie nagrywania wciśnij przycisk M, aby zapisać daną rejestrację. Za pomocą przycisku strzałki cofnij przejdź ponownie do menu głównego; bieżąca rejestracja zostanie zapisana automatycznie. Wskazówka: Nagrane pliki (format .wav) można znaleźć w folderze „VOICE“ poprzez eksploratora plików. Jeśli nie ma wystarczającego miejsca w pamięci, by zapisać dane nagranie, odtwarzacz zwróci na to uwagę przekazując informację „pamięć pełna!” Strona 14 z 20 - PL (2) Odtwarzanie Przejdź w menu głównym do punktu menu File Explorer i zatwierdź swój wybór za pomocą przycisku Play/Pause. Wybierz teraz folder VOICE. Wyświetlą się wszystkie dotychczas wykonane nagrania chronologicznie. Najedź na wybrany plik i rozpocznij odtwarzanie za pomocą przycisku Play/Pause. Za pomocą przycisku strzałki cofnij przejdź z powrotem do menu głównego. Wskazówka: W celu uzyskania więcej możliwości konfiguracji należy w menu głównym otworzyć punkt menu Setup [konfiguracja]. f) Eksplorator plików Przejdź w menu głównym do punktu menu File Explorer i zatwierdź swój wybór za pomocą przycisku Play/Pause. Wyświetli się główny folder karty pamięci. Przy pomocy przycisku (+) lub przycisku (-) można poruszać się w plikach i istniejących folderach. Wybrany plik należy zatwierdzić przyciskiem Play/Pause, wówczas zostanie on odtworzony. Jeżeli tym przyciskiem zatwierdzi się dany folder, zostanie on otworzony. Za pomocą przycisku strzałki cofnij, można przejść do następnego wyższego poziomu struktury folderów, aż do powrotu do menu głównego. Aby skasować plik, należy przejść w widoku folderów do wybranego pliku i nacisnąć przycisk M. Proces ten należy zatwierdzić przyciskiem plik. Play/Pause, aby ostatecznie usunąć dany Wskazówka: Inofrmacje o niewykorzstanej lub zajętej pamięci, jak również całkowitego stanu zapisu używanej karty pamięci można uzyskać w folderze Setup w punkcie menu System a następnie w punkcie Informacja. Strona 15 z 20 - PL g) Ustawienia W menu głównym najedź na punkt menu Setup i zatwierdź swój wybór przyciskiem Play/Pause. (1) Muzyka W punkcie menu Musik dostępne są następujące możliwości ustawień: i. Tryb odtwarzania W tym miejscu można określić wybrany tryb odtwarzania. Odtwarzanie jednorazowe utworu Powtarzanie odtwarzania utworu Odtwarzanie folderu jednorazowe Odtwarzanie folderu powtórnie Wszystkie utwory jednorazowo Powtórzenie wszystkich utworów Intro Odtwarza wybrany utwór jeden raz i zatrzymuje odtwarzanie. Wybrany utwór odtwarzany jest powtórnie. Odtwarza wszystkie utwory w wybranym folderze jednorazowo a następnie zatrzymuje odtwarzanie. Powtarza wszystkie utwory z bieżącego folderu. Wszystkie utwory odtwarzane będą jednorazowo. Powtarza odtwarzanie wszystkich dostępnych utworów. Zagranie pojedyńczych utworów. ii. Odtwarzanie przypadkowe Tutaj można aktywować lub deaktywować przypadkowe odtwarzanie wszystkich plików z piosenkami. iii. Equalizer Wybierz twój ulubiony tryb korektora dźwiękowego. Można wybrać normalny, rock, pop, klasyczny, jazz, basowy / 3D oraz korektor użytkownika. Strona 16 z 20 - PL iv. Ustawienia Basowy / 3D W akapicie "Ustawienia Basowy / 3D" istnieje możliwość wcześniejszego ustawienia wzmocnionych tonów basowych lub dźwięku 3D dla tego trybu korektora dźwiękowego. v. Ustawienia korektora użytkownika Tutaj można ustawić indywidualny korektor dźwiękowy. Dostosuj ustawienia dla konkretnego pasma częstotliwości przyciskiem (+) lub (-). Aby przejść do następnego pasma częstotliwości, wciśnij przycisk do przodu lub przycisk do tyłu. Wciśnij przycisk Odtwarzanie / Pauza, aby zapisać swoje wybrane ustawienia. (2) Nagrywanie W punkcie menu Nagrywanie można określić jakość nagrywania. Do dyspozycji jest wybór pomiędzy jakością normalną (32 KBPS) i jakością wysoką (64 KBPS). Należy pamiętać, że wysoka jakość zabiera więcej miejsca w pamięci. (3) Aparat W punkcie menu Aparat można określić czas trwania wyświetlania automatycznego pokazu zdjęć. Do dyspozycji jest wybór pomiędzy: 2 s, 4 s, 6 s, 8 s, oraz 10 s. (4) Wyświetlacz W punkcie menu Wyświetlacz znajdują się następujące możliwości ustawień: i. Czas trwania oświetlenia W tym miejscu można określić, jak długo powinien świecić się wyświetlacz. Do dyspozycji jest wybór pomiędzy 5 s, 10 s, 15 s, 20 s, 30 s oraz zawsze. ii. Jasność W tym miejscu można ustalić jasność oświetlenia wyświetlacza w 5 stopniach. iii. Tryb eco Jeśli tryb Eco zostanie aktywowany, wówczas wyświetlacz wyłączy się całkowicie po ustawionym domyślnie czasie. Gdy tryb Eco jest wyłączony, wówczas wyświetlacz po ustawionym domyślnie czasie świeci się stale na najniższym stopniu. Należy pamiętać, że to znacznie zmniejsza żywotność baterii. Strona 17 z 20 - PL (5) Sleep Timer W punkcie menu sleep timer można określić przedział czasu, po upływie którego urządzenie wyłącza się automatycznie. Do wyboru jest Wyłączony (urządzenie nie wyłącza się automatycznie), 10 min, 15 min, 30 min, 60 min, oraz 120 min. (6) Język W punkcie menu język można wybrać jeden z ośmiu domyślnie zainstalowanych języków. Można wybrać spośród języków angielski, hiszpański, francuski, niemiecki, włoski, portugalski, polski i rosyjski. (7) System W punkcie menu System dostępne są następujące możliwości ustawień: i. Informacja Tutaj można otrzymać informacje o wersji oprogramowania firmowego (sprzętowego) odtwarzacza, o całkowitym będącym do dyspozycji miejscu w pamięci, o wykorzystanej pojemności pamięci (U:) i o wolnej pojemności pamięci (F:) dostępnej na karcie pamięci. ii. Ustawienia fabryczne Zatwierdzając tę opcję można zresetować odtwarzacz przywracając go do ustawień fabrycznych. 6. Karta Micro SD Niniejszy odtwarzacz nie posiada żadnej wewnętrznej pamięci. Odtwarzacz dostarczany jest z wbudowaną kartą pamięci o pojemności wykazanej na opakowaniu. Odtwarzacz przy istniejącym połączeniu USB może być rozpoznany przez komputer, tylko jeśli włożona jest karta pamięci. Wspomagane są karty pamięci o pojemności aż do 64 GB. Strona 18 z 20 - PL 7. Dane techniczne Video Scooter: Wymiary Waga LCD Połączenie z komputerem Bateria Zakres częstotliwości SNR Format utworów muzycznych Format filmów video Format nagrywania Format zdjęć Temperatura robocza System operacyjny 88 mm (wys.) x 41 mm (szer.) x 9.0mm (głęb.) ~30 gr. 4,4 cm (1.8 Zoll) wyświetlacz kolorowy, rozdzielczość: 128 x 160 Pikseli USB 2.0 (PC) | mini USB złącze (Player) Nadająca się do powtórnego naładowania bateria Li-Polimer, Wydajność: 150mAh Odtwarzanie muzyki: ~ 12 godzin (MP3 Musik w trybie energooszczędnym) 20Hz do 20000Hz > 70dB MP3 / WMA 32 – 320kbps AVI 160 x 120 Pikseli WAV z 32 lub 64 KBPS JPEG / BMP 0 do 40 stopni Celsjusza Windows XP / Vista / Win7 / Win8, 8.1 / Mac 9.2 lub wyższy Słuchawki nauszne Hi-Fi Stereo: Wymiary: Waga: Długość przewodu: Gniazdo stereo: Zakres częstotliwości: Impedancja: Maksymalna wydajność na wejściu: Regulowany rozmiar: 150 x 135 x 70 mm 125 gr 120 cm 3.5 mm Stereo 20 Hz bis 20 KHz 32 Ohm 40 mW nie Poduszeczki dokanałowe Stereo: Wymiary: Waga: Długość przewodu: Gniazdo stereo: Zakres częstotliwości: Impedancja: Maksymalna wydajność na wejściu: Regulowany rozmiar: 30 x 17 x 13 mm 14.2 gr 115 cm 3.5 mm Stereo 20 Hz bis 20 KHz 32 Ohm 5 mW tak Strona 19 z 20 - PL Wyłączenie odpowiedzialności W każdym momencie można dokonywać zmian w oprogramowaniu firmowym i / lub sprzętowym, bez wcześniejszej zapowiedzi. W związku z tym możliwe jest, że części instrukcji, dane techniczne i rysunki zawarte w niniejszej dokumentacji mogą lekko odbiegać od produktu, który został zakupiony. Wszystkie opisane w niniejszej instrukcji punkty służą tylko w celu objaśnienia i nie muszą zawsze zgadzać się z konkretną sytuacją. Na podstawie niniejszej instrukcji obsługi nie przysługuje prawo do wysuwania roszczeń prawnych. 8. Usuwanie sprzętów elektrycznych Oznaczone tym symbolem urządzenia podlegają przepisom europejskiej dyrektywy 2012/19/EG. Wszystkie urządzenia elektryczne i elektronicznie powinny być usuwane oddzielnie od odpadów i śmieci z gospodarstw domowych tylko przez przewidziane do tego celu placówki państwowe. Dzięki usuwaniu urządzeń elektrycznych i elektronicznych zgodnie z przepisami unika się powstaniu szkód w środowisku naturalnym. Strona 20 z 20 - PL Содержание Содержание...................................................................................................................................................... 1 О данном руководстве ................................................................................................................................ 3 Использование по назначению .................................................................................................................. 3 Предупреждения ......................................................................................................................................... 4 1. Обзор устройства ..................................................................................................................................... 5 2. Комплект поставки .................................................................................................................................. 5 3. Подключение к компьютеру ................................................................................................................... 6 a) Подключение устройства ................................................................................................................... 6 b) Отключение устройства...................................................................................................................... 6 4. Ввод в эксплуатацию / Зарядка аккумулятора / Наушники ................................................................. 7 Зарядка аккумулятора: ................................................................................................................................ 7 Состояние зарядки:...................................................................................................................................... 7 Использование во время зарядки:............................................................................................................. 8 5. Основные операции ................................................................................................................................ 9 a) Общие принципы работы .................................................................................................................. 9 (1) Включение и выключение плеера .............................................................................................. 9 (2) Блокировка клавиш ..................................................................................................................... 9 (3) Главное меню ............................................................................................................................. 10 (4) Навигация ................................................................................................................................... 10 b) Музыка............................................................................................................................................... 11 (1) Воспроизведение музыки ......................................................................................................... 11 (2) Список файлов............................................................................................................................ 11 (3) Цикл A-B ...................................................................................................................................... 12 c) Видео ................................................................................................................................................. 12 (1) Воспроизведение видео ........................................................................................................... 12 (2) Список файлов............................................................................................................................ 13 Страница 1 из 20 - RU d) Фото ................................................................................................................................................... 13 (1) Просмотр фото ........................................................................................................................... 13 (2) Список файлов............................................................................................................................ 13 e) Функция записи................................................................................................................................. 14 (1) Запись.......................................................................................................................................... 14 (2) Воспроизведение ....................................................................................................................... 15 f) Поиск файлов .................................................................................................................................... 15 g) Настройки .......................................................................................................................................... 16 (1) Музыка ........................................................................................................................................ 16 i. Воспроизведение ........................................................................................................................... 16 ii. Воспроизведение в случайном порядке ..................................................................................... 16 iii. Эквалайзер.................................................................................................................................... 16 (2) Запись.......................................................................................................................................... 17 (3) Фото............................................................................................................................................. 17 (4) Дисплей ...................................................................................................................................... 17 i. Время подсветки ............................................................................................................................ 17 ii. Яркость ........................................................................................................................................... 17 iii. Экономичный режим ................................................................................................................... 17 (5) Таймер отключения ................................................................................................................... 18 (6) Язык ............................................................................................................................................. 18 (7) Система ....................................................................................................................................... 18 i. Информация ................................................................................................................................... 18 ii. Настройки по умолчанию ............................................................................................................. 18 6. Микро SD-карта ...................................................................................................................................... 18 7. Техническая характеристика................................................................................................................. 19 8. Утилизация электрического и электронного оборудования ............................................................. 20 Страница 2 из 20 - RU О данном руководстве Внимательно прочитайте данное руководство и выполняйте все инструкции, указанные в нем для обеспечения длительного срока службы и надежного использования устройства. Пожалуйста, держите это руководство под рукой для дальнейшего использования и передайте его другим пользователям устройства. Использование по назначению Данное устройство используется для воспроизведения музыкальных файлов в MP3, WMA и WAV формате, которые могут воспроизводиться из входящей в комплект микро-SD карты. Этот продукт не предназначен для коммерческого использования или для медицинских и специальных применений, во время которых отказ изделия может привести к травмам, смерти или значительному материальному ущербу. Ответственность утрачивает силу в случае использования устройства не по назначению. Открытие и видоизменение устройства, а также использование дополнительного оборудования и аксессуаров, не одобренных производителем, строго запрещено. Не используйте устройство в экстремальных условиях окружающей среды и соблюдайте правила техники безопасности. Несоблюдение инструкций и техники безопасности, содержащихся в данном руководстве трактуется как использование не по назначению и влечет за собой отказ от ответственности и может привести к травмам или порче имущества. Страница 3 из 20 - RU Предупреждения Прочитайте и соблюдайте руководство по эксплуатации и предупреждения перед первым использованием продукта. Перед первым использованием устройства, пожалуйста, убедитесь, что батарея полностью заряжена. Не допускайте воздействия на устройство сильных ударов и падений устройства с большой высоты. Не используйте данный проигрыватель в условиях очень высоких или низких температур, повышенной запыленности или влажности. Не допускайте воздействия на устройство прямых солнечных лучей. Не держите источники света, например горящие свечи, в непосредственной близости от продукта. Регулярно создавайте резервные копии данных на случай их возможной потери. Избегайте использовать проигрыватель в условиях сильного магнитного поля. Не используйте прибор мокрыми руками. Избегайте контакта устройства с водой и другими жидкостями. В случае попадания воды или другой жидкости внутрь устройства немедленно выключите его и произведите чистку устройства. Во избежание коррозии не используйте для чистки устройства химических растворов. Чистку осуществляйте сухой тканью. Мы не несём ответственности за повреждения и потерю данных, произошедшую в результате неисправной работы, неверного использования, ремонта или замены батареи. Запрещается самостоятельно разбирать, ремонтировать устройство либо вносить в него изменения. Эти действия влекут за собой аннулирование гарантии. Не блокируйте и не закрывайте отверстия в корпусе изделия. Продукт предназначен только для персонального использования и не должен использоваться на коммерческой основе или в заводских условиях. Не вставляйте предметы, которые не предназначены для использования, в отверстия продукта. Повреждения в результате неправильного обращения, пренебрежения предупреждениями или инструкциями данного руководства не покрываются гарантией. ПРЕДУПРЕЖДЕНИЕ: Прослушивание музыки в слишком громком режиме или постоянное прослушивание плеера не рекомендуется. Также использование видеопроигрывателя не рекомендуется в стрессовых ситуациях. Это может вызвать невнимательность слушателя в потенциально опасных ситуациях, например, вблизи движущихся транспортных средств. Страница 4 из 20 - RU 1. Обзор устройства 1. Кнопка Включения/Выключения 2. Кнопка возврата назад 3. Кнопка Громкость (+) 4. 5. Кнопка Назад Кнопка Воспроизведение / Пауза 6. Мини USB-порт 7. Разъём для наушников 8. Кнопка Громкость (-) 9. Кнопка Вперёд 10. Кнопка М (Меню) 11. Слот для микро SD-карты 2. Комплект поставки Пожалуйста, проверьте содержимое упаковки на полноту. Видеопроигрыватель Intenso Hi-Fi стерео наушники-вкладыши Стерео амбушюры Микро SD-карта Компакт-диск с программным обеспечением для преобразования (формат AVI) USB-кабель Руководство пользователя Страница 5 из 20 - RU 3. Подключение к компьютеру Для обмена данными плеер необходимо подключить к компьютеру. Это можно сделать при помощи прилагаемого USB-кабеля. a) Подключение устройства Для подключения плеера к компьютеру подключите порт кабеля USB 2.0 в свободный USB-порт компьютера, и подключите мини-разъём USB-кабеля к плееру. После этого плеер будет признан в качестве съёмного диска и будет готов к обмену данными с компьютером. Теперь можно отправить выбранные файлы путём «перетаскивания» или «копирования» и с компьютера на плеер (или с плеера на компьютер). b) Отключение устройства Перед отсоединением USB-кабеля подключение для передачи данных между устройствами должно быть отключено! Нажмите и удерживайте кнопку в течение 1 - 2 секунд. Теперь дисплей показывает текущее состояние заряда, и подключение для передачи данных отключено. Если Вы используете Windows PC (XP или более поздней версии), плеер может быть извлечён непосредственно из компьютера. Для это щёлкните по значку «Безопасное извлечение устройства» на панели задач Windows. Теперь выберите Video Scooter и следуйте соответствующим инструкциям на компьютере до подтверждения успешного выполнения операции. Если Вы используете Mac, можно отключить плеер, просто перетянув значок плеера на значок корзины. Затем USB-кабель можно безопасно удалить из плеера и компьютера. Примечание: Не рекомендуется отключать плеер от компьютера во время передачи файлов. Это может привести к потере данных и повреждению плеера. Страница 6 из 20 - RU 4. Ввод в эксплуатацию / Зарядка аккумулятора / Наушники Плеер имеет установленный внутри аккумулятор. Перед первым использованием устройства, пожалуйста, убедитесь, что Вы полностью зарядили батарею. Этот процесс обычно занимает до 3 часов. Полностью заряженный аккумулятор Зарядка аккумулятора: Аккумулятор заряжается через USB-соединение с компьютером. Чтобы зарядить аккумулятор, подключите устройство к компьютеру при помощи USB-кабеля. Процесс зарядки начинётся автоматически. На дисплее устройства появится значок соединения (Connect). Примечание: Для обеспечения оптимальной производительности аккумулятора, плеер необходимо регулярно использовать. Если Вы не используете плеер регулярно, пожалуйста, полностью заряжайте аккумулятор не реже одного раза в месяц. Состояние зарядки: Нажмите кнопку Воспроизведение/Пауза и удерживайте в течение 1-2 секунд для отображения текущего состояния зарядки. После этого появится значок аккумулятора на дисплее. Когда аккумулятор полностью заряжен, значок аккумулятора будет зелёным. Если аккумулятор не до конца заряжен, будет отображаться загрузочная анимация. Страница 7 из 20 - RU Использование во время зарядки: Вы можете использовать устройство во время зарядки. Просто нажмите ещё раз на кнопку Воспроизведение/Пауза, и устройство переключится из состояния зарядной индикации в основное меню. Также во время использования Вы можете видеть текущее состояние зарядки. В правом верхнем углу будет отображаться степень зарядки во время воспроизведения музыки в 3 этапа. Когда аккумулятор полностью заряжен, отображаются три палочки. Аккумулятор по-прежнему заряжается – отображается анимация. 0 – 33% 34 – 66 % 67 – 100 % Примечание: При отображении на дисплее состояния зарядки, или использовании подключенного к компьютеру устройства, обмен данными не возможен. Вы сможете передавать файлы обратно на компьютер, снова подключив плеер к компьютеру. Включение: Более подробная информация по данному вопросу находится в разделе "Эксплуатация". Использование наушников: Данный проигрыватель может воспроизводить музыку через 3,5 мм стерео разъем. Перед подключением убедитесь, что на проигрывателе установлен низкий уровень громкости. Затем подключите прилагаемые наушники к устройству и медленно отрегулируйте громкость до нужного уровня. Используйте hi-fi стерео наушникивкладыши или стерео амбушюры. ПРЕДУПРЕЖДЕНИЕ: Прослушивание музыки в слишком громком режиме или постоянное прослушивание плеера не рекомендуется. Также использование видеопроигрывателя не рекомендуется в стрессовых ситуациях. Это может вызвать невнимательность слушателя в потенциально опасных ситуациях, например, вблизи движущихся транспортных средств. Страница 8 из 20 - RU 5. Основные операции Примечание: Пожалуйста, обратите внимание, что в плеере установлена микро SD-карта! a) Общие принципы работы (1) Включение и выключение плеера Переместите кнопку Включения/Выключения на левой стороне устройства в положение “ON”. После этого нажмите и удерживайте в течение 3 секунд кнопку Воспроизведение/Пауза. Чтобы перевести устройство в режим ожидания, нажмите и удерживайте кнопку Воспроизведение/Пауза нажатой в течение 3 секунд. Для выключения плеера, сдвиньте кнопку на левой стороне плеера в положение „OFF“. Примечание: Плеер имеет функцию энергосбережения. Питание отключается автоматически, если плеер более десяти минут не используется. (2) Блокировка клавиш Для предотвращения случайной записи плеер имеет функцию блокировки клавиатуры. Просто нажмите одновременно кнопки Воспроизведение/Запись и M. На дисплее отобразится закрытый замок. Для разблокироки снова нажмите кнопки Воспроизведение/Запись и M одновременно. На дисплее отобразится открытый замок. Страница 9 из 20 - RU (3) Главное меню После включения плеера на дисплее появится главное меню. Он состоит из шести различных пунктов (музыка, видео, фото, записи , файловый менеджер и настройки). Музыка Записи Видео Фото Файловый менеджер Настройки (4) Навигация Используйте кнопки Вперёд и Назад для навигации по различным разделам меню При помощи кнопки Воспроизведение/Запись можно открыть нужный пункт меню или запустить нужную функцию. Легко нажмите на кнопку Вернуться назад, чтобы вернуться в предыдущий уровень. Нажмите и удерживайте кнопку Вернуться назад в течение 1 - 2 секунд для выхода непосредственно в главное меню. Страница 10 из 20 - RU b) Музыка (1) Воспроизведение музыки Перейдите в главное меню, выберите пункт музыка и подтвердите свой выбор, нажав на кнопку Воспроизведение/Пауза. Откроется экран воспроизведения, и воспроизведение начнётся автоматически. Чтобы приостановить или возобновить воспроизведение, нажмите на кнопку Воспроизведение/Пауза. Чтобы перейти к предыдущему или следующему треку нажмите кнопку Вперёд или Назад. Для перемотки трека просто удерживайте одну из данных кнопок нажатой. Нажмите кнопку (+) или (-) для регулировки громкости. (2) Список файлов Чтобы выйти из экрана воспроизведения в список файлов, нажмите на кнопку Вернуться назад. Перемещайтесь с помощью кнопки (+) или (-) между файлами и существующими папками. Нажмите на кнопку Воспроизведение/Пауза чтобы выбрать музыкальный файл для воспроизведения. Также нажмите эту кнопку для открытия папки. Нажмите кнопку Вернуться назад, чтобы вернуться на предыдущий уровень структуры папок и для возврата в главное меню. Чтобы удалить файл, перейдите в список файлов, выберите нужный файл и нажмите кнопку M. Для удаления файла нажмите кнопку Страница 11 из 20 Воспроизведение/Пауза. - RU (3) Цикл A-B При помощи данного плеера можно выбрать любой музыкальный трек и повторять его в цикле через определённое время. Нажмите во время воспроизведения трека кнопку M, чтобы установить начальную точку (А) повторного воспроизведения, нажмите кнопку M снова, чтобы установить конечную точку (B). Выбранный период времени будет воспроизводиться определённый трек в цикле. Примечание: Чтобы воспользоваться дополнительными возможностями конфигурации , пожалуйста, откройте главное меню, выберите Настройка . c) Видео Примечание: Для воспроизведения видео на данном плеере, видео необходимо преобразовать в подходящий для плеера формат AVI при помощи прилагаемого программного обеспечения для преобразования. (1) Воспроизведение видео Перейдите в главное меню при помощи навигации, выберите пункт видео и подтвердите выбор, нажав на кнопку Воспроизведение/Пауза. Откроется список файлов. Выберите с помощью кнопки (+) или (-) видеофайл для воспроизведения и подтвердите свой выбор с помощью кнопки Воспроизведение/Пауза. Воспроизведение видео начнётся автоматически. Чтобы приостановить или возобновить воспроизведение, нажмите на кнопку Воспроизведение/Пауза. Чтобы перейти к предыдущему или следующему треку нажмите кнопку Вперёд или Назад. Для перемотки видео просто удерживайте одну из данных кнопок нажатой. Нажмите кнопку (+) или (-) для регулировки громкости. Страница 12 из 20 - RU (2) Список файлов Чтобы выйти из экрана воспроизведения в список файлов, нажмите на кнопку Вернуться назад. Перемещайтесь с помощью кнопки (+) или (-) между файлами и существующими папками. Нажмите на кнопку Воспроизведение/Пауза чтобы выбрать видео файл для воспроизведения. Также нажмите эту кнопку для открытия файла. Нажмите кнопку Вернуться назад, чтобы вернуться на предыдущий уровень структуры файлов и для возврата в главное меню. Чтобы удалить файл, перейдите в список файлов, выберите нужный файл и нажмите кнопку M. Для удаления файла нажмите кнопку Воспроизведение/Пауза. d) Фото (1) Просмотр фото Перейдите в главное меню при помощи навигации, выберите пункт видео и подтвердите выбор, нажав на кнопку Воспроизведение/Пауза. Откроется список файлов. Выберите с помощью кнопки (+) или (-) файл изображения для воспроизведения и подтвердите ваш выбор с помощью кнопки Воспроизведение/Пауза. Появится выбранное изображение. Для запуска автоматического воспроизведения изображения или приостановки нажмите на кнопку Воспроизведение/Пауза. (2) Список файлов Чтобы выйти из экрана воспроизведения в список файлов, нажмите на кнопку Вернуться назад. Перемещайтесь с помощью кнопки (+) или (-) между файлами и существующими папками. Нажмите на кнопку Воспроизведение/Пауза чтобы выбрать видео файл для воспроизведения. Также нажмите эту кнопку для открытия файла. Нажмите кнопку Вернуться назад, чтобы вернуться на предыдущий уровень структуры файлов и для возврата в главное меню. Страница 13 из 20 - RU Чтобы удалить файл, перейдите в список файлов, выберите нужный файл и нажмите кнопку M. Для удаления файла нажмите кнопку Воспроизведение/Пауза. Примечание: Чтобы воспользоваться дополнительными возможностями конфигурации , пожалуйста, откройте главное меню, выберите настройки. e) Функция записи (1) Запись Перейдите в главное меню при помощи навигации, выберите пункт запись. Плеер готов начать аудиозапись при помощи встроенного микрофона. Просто нажмите кнопку Воспроизведение/Пауза. Текущая запись отобразится на дисплее. Для приостановки записи в процессе или повторного включния записи нажмите кнопку Воспроизведение/Пауза. Нажмите во время записи кнопку M для сохранения записи. При помощи кнопки Вернуться назад можно выйти в главное меню; текущая запись автоматически сохраняется. Примечание: Записанные файлы (в формате .wav) сотрите в папке „VOICE“ через файловый менеджер. При нехватке места для записи на дисплее плеера появится сообщение «Память заполнена!». Страница 14 из 20 - RU (2) Воспроизведение Перейдите в главное меню к пункту Файлы и подтвердите свой выбор, нажав на кнопку Воспроизведение/Пауза. Теперь выберите папку VOICE. Все ранее сделанные записи располагаются в хронологическом порядке. Выберите нужный файл и начните воспроизведение при помощи кнопки Воспроизведение/Пауза. При помощи кнопки Вернуться назад можно выйти в главное меню. Примечание: Чтобы воспользоваться дополнительными возможностями конфигурации , пожалуйста, откройте главное меню, выберите настройки. . f) Поиск файлов Перейдите в главное меню к пункту Файлы и подтвердите свой выбор, нажав на кнопку Воспроизведение/Пауза. Откроется корневой каталог, находящийся на карте памяти. Перемещайтесь с помощью кнопки (+) или (-) между файлами и существующими папками. Для воспроизведения файла нажмите на кнопку Воспроизведение/Пауза. Также при помощи данной кнопки можно открыть папку. При помощи кнопки Вернуться назад можно перейти на предыдущий уровень структуры папок или выйти в главное меню. Чтобы удалить файл, перейдите в список файлов, выберите необходимый файл и нажмите клавишу M. Для удаления файла нажмите кнопку Воспроизведение/Пауза. Примечание: Информацию о неиспользованной или используемой памяти и общий объём памяти на используемой карте памяти, можно посмотреть в пункте меню настройки под пунктами меню Система и Информация. Страница 15 из 20 - RU g) Настройки При помощи навигации перейдите в пункт меню настройки и подтвердите свой выбор, нажав на кнопкуr Воспроизведение/Пауза. (1) Музыка В пункте меню Музыка доступны следующие опции: i. Воспроизведение Здесь можно указать желаемый режим воспроизведения Трек Повтор Папка Повтор Все файлы в папке Повтор всех файлов Интро Воспроизведение выбранного трека, затем воспроизведение будет остановлено. Повторное воспроизведение трека. Воспроизведение трека в выбранной папке один раз, затем воспроизведение будет остановлено. Повтор всех треков текущей папки. Все треки воспроизводятся один раз. Повтор всех записанных треков. Предварительный просмотр отдельных треков. ii. Воспроизведение в случайном порядке Здесь можно включить или выключить воспроизведение в случайном порядке всех музыкальных файлов. iii. Эквалайзер Здесь можно выбрать предпочитаемый режим эквалайзера. Вы можете выбрать из режимов: нормальнй, рок, поп, классика, джаз, чистый бас / 3D и пользовательский эквалайзер. Страница 16 из 20 - RU iv. Настройка Басов / 3D Здесь, в пункте «Настройка Басов / 3D» у вас имеется возможность предустанавливать усиленные басы или 3D звук для определенного режима эквалайзера. v. Настройка Пользовательского Эквалайзера Здесь у вас имеется возможность настроить индивидуальный эквалайзер. Отрегулируйте параметры для каждой полосы частот с помощью кнопки (+) или (-). Чтобы перейти к следующей полосе частот, нажмите кнопку Вперед или Назад. Нажмите кнопку Воспроизведение/Пауза чтобы применить выбранные настройки. (2) Запись В данном пункте меню можно установить качество записи. Вы можете выбрать между нормальным качеством (32 Kbps) и высоким качеством (64 Kbps). Обратите внимание, что высокое качество требует больше дискового пространства. (3) Фото В данном пункте меню можно установить длительность автоматического показа слайдов. Вы можете выбрать между: 2 с, 4 с, 6 с, 8 с и 10 с. (4) Дисплей В пункте меню Дисплей доступны следующие опции: i. Время подсветки В данном пункте меню можно установить длительность подсветки дисплея. Вы можете выбрать между: 5 с, 10 с, 15 с, 20 с, 30 с и всегда. ii. Яркость В данном пункте меню можно установить яркость подсветки из 5 пунктов. iii. Экономичный режим При активации экономичного режима дисплей полностью выключается по истечении установленного времени. При отключении экономичного режима дисплей будет гореть постоянно на самом низком уровне в течение заданного времени. Отметим, что это значительно снижает срок службы аккумулятора. Страница 17 из 20 - RU (5) Таймер отключения В пункте меню Таймер отключения можно установить время, по истечении которого устройство автоматически выключися. Вы можете выбрать между Отключено (устройство не выключится автоматически), 10 мин, 15 мин, 30 мин, 60 мин, и 120 мин. (6) Язык В пункте меню Язык можно выбрать один из восьми предустановленных языков. Вы можете выбрать между английским, испанским, французским, немецким, итальянским, португальским, польским и русским языками. (7) Система В пункте меню Система доступны следующие опции: i. Информация Здесь можно посмотреть информацию о версии прошивки плеера, общем пространсте, доступном на диске, неиспользуемом пространстве (U:) и свободном пространстве (F:) на карте памяти. ii. Настройки по умолчанию Подтверждение данной опции восстановит в плеере настройки по умолчанию. 6. Микро SD-карта Данный плеер не имеет встроенную карту памяти. Плеер поставляется со съёмной картой памяти. Плеер распознаёт установленное соединение USB-порта с компьютером только тогда, когда карта памяти вставлена. Поддерживаются карты памяти мощностью до 64 ГБ. Страница 18 из 20 - RU 7. Техническая характеристика Video Scooter: Размеры Вес ЖК-дисплей Соединение с ПК Аккумулятор Частотный диапазон SNR Формат музыки Формат видео Формат записи Формат изображения Рабочая температура Операцияонная система 88 мм (В) x 41 мм (Ш) x 9.0 мм (T) ~30 грамм 4,4 см (1.8Zoll) цветной дисплей, разрешение: 128 x 160 пикселей USB 2.0 (ПК) | мини USB-порт (плеер) Литий- полимерный аккумулятор, мощность: 150 мАч Время воспроизведения музыки: ~ 12 часов (MP3в режиме экономии энергии) От 20 Гц до 20000 Гц >70 дБ MP3 / WMA 32 – 320 Кбит/с AVI 160 x 120 пикселей WAV с 32 или 64 Кбит/с JPEG / BMP От 0 до 40 градусов по Цельсию Windows XP / Vista / Win 7 / Win 8, 8.1 / Mac 9.2 или более поздняя версия Hi-Fi стерео наушники-вкладыши: Размеры: Вес: Длина кабеля: Стерео разъем: Частотный диапазон: Сопротивление: Максимальная входная мощность: Регулировка по размеру: 150 x 135 x 70 мм 125 gr 120 см 3.5 mm стерео 20 Hz bis 20 KHz 32 Ohm 40 mW Да Стерео амбушюры: Размеры: Вес: Длина кабеля: Стерео разъем: Частотный диапазон: Сопротивление: Максимальная входная мощность: Регулировка по размеру: 30 x 17 x 13 мм 14.2 gr 115 см 3.5 mm стерео 20 Hz bis 20 KHz 32 Ohm 5 mW Нет Страница 19 из 20 - RU Отказ от ответственности В любое время без предварительного уведомления могут быть произведены изменения в аппарате и / или аппаратном обеспечении. Поэтому возможно, что инструкции, спецификации и фотографии в данной документации продукта могут немного отличаться. Все детали, описанные в данном руководстве, используются в целях иллюстрации и не обязательно совпадают с той или иной ситуацией. Никакие юридические претензии на основе данного руководства не могут быть предъявлены. 8. Утилизация электрического и электронного оборудования Устройства, обозначенные данным символом, подлежат Директиве ЕС 2012/19/EG. Все электрические и электронные устройства должны утилизироваться отдельно от бытовых отходов через соответствующие государственные службы. Правильная утилизация использованного электрического оборудования защищает от нанесения ущерба окружающей среде. Страница 20 из 20 - RU