1
TeraStation 7000
User Manual
www.buffalotech.com
35012398-05
2014-01
Contents
Chapter 1 Installation.........................................................9
Diagrams................................................................................................9
Installation...........................................................................................10
Turning the TeraStation On and Off..................................................13
Changing the Administrator Password.............................................15
Recovery Drive....................................................................................17
Chapter 2 Configuration..................................................18
Opening Settings................................................................................18
Chapter 3 Access Restrictions.........................................20
Configuring Access Restrictions on Users and Groups....................20
Adding a Shared Folder.................................................................................20
Adding Users..................................................................................................22
Adding Groups...............................................................................................23
Access Restrictions.........................................................................................24
Active Directory..................................................................................26
NT Domains.........................................................................................28
Delegating Authority to an External SMB Server.............................30
Chapter 4 Managing Storage..........................................33
RAID Arrays..........................................................................................33
2
Working with RAID Arrays..................................................................34
Using JBOD.....................................................................................................34
Changing RAID Mode....................................................................................35
Configuring a Hot Spare................................................................................36
RMM (RAID Mode Manager)..........................................................................37
RAID Scanning...............................................................................................38
Adding an External Hard Drive..........................................................39
Dismounting Drives............................................................................40
Checking Drives..................................................................................40
S.M.A.R.T..............................................................................................41
Formatting Drives...............................................................................42
Encrypting Drives................................................................................44
Media Cartridges.................................................................................44
Erase Data on the TeraStation Completely........................................44
Disk Quotas.........................................................................................45
Quotas for Users.............................................................................................46
Quotas for Groups.........................................................................................46
Size Limits.......................................................................................................47
Using the TeraStation as an iSCSI Device..........................................50
Introduction...................................................................................................50
Creating and Expanding Volumes................................................................53
Disconnecting Volumes.................................................................................54
Setting Access Restrictions...........................................................................55
Hard Drive Replacement ....................................................................57
Hard Drive Replacement Examples..............................................................58
3
Chapter 5 Backup.............................................................60
Back Up from the TeraStation............................................................60
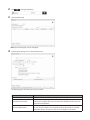
Preparing a Backup Destination...................................................................60
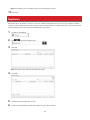
Configuring a Backup Job.............................................................................61
Replication...........................................................................................64
Failover................................................................................................66
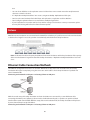
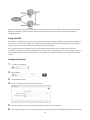
Ethernet Cable Connection Methods...........................................................66
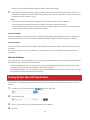
Backing Up Your Mac with Time Machine.........................................68
Amazon S3...........................................................................................71
Chapter 6 Remote Access................................................73
WebAccess...........................................................................................73
Configuration.................................................................................................73
WebAccess Remote.............................................................................75
FTP........................................................................................................76
Chapter 7 BitTorrent........................................................78
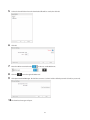
Configuration.................................................................................................78
Chapter 8 Multimedia......................................................80
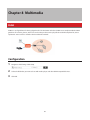
DLNA....................................................................................................80
Configuration.................................................................................................80
Playing Files...................................................................................................81
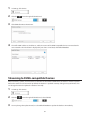
Connected DLNA-compatible Devices.........................................................81
Streaming to DLNA-compatible Devices.....................................................82
4
Disabling Playback from Specific Devices...................................................83
iTunes Server.......................................................................................84
Configuration.................................................................................................84
Chapter 9 Surveillance Server........................................86
Overview..............................................................................................86
Getting Started..............................................................................................86
Initial Setup.........................................................................................87
Installing Client Tools....................................................................................87
Connecting Devices to the Network.............................................................87
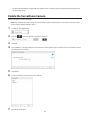
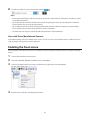
Enable the Surveillance Camera...................................................................88
Enabling the Free License.............................................................................89
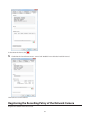
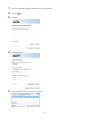
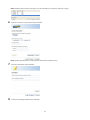
Registering the Recording Policy of the Network Camera.........................90
Checking Recording.......................................................................................94
Email Error Notification.................................................................................95
Configuration......................................................................................95
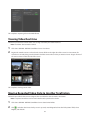
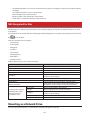
Viewing Saved Video.....................................................................................95
Export Recorded Data as a MOV Video File.................................................95
Viewing Video Real-time...............................................................................98
Moving Recorded Video Data to Another TeraStation................................98
Backing Up Recorded Video to Another TeraStation..................................99
Automatically Delete Old Data when Space is Low.................................. 100
Changing Where Recorded Video Is Saved............................................... 102
Client Utilities................................................................................... 102
Camera Policies........................................................................................... 102
Live Viewer.................................................................................................. 103
Data Service Policies................................................................................... 104
5
Vault Admin................................................................................................. 104
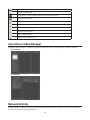
Surveillance Video Manager...................................................................... 105
Network Activity......................................................................................... 105
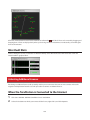
Mini Vault Stats........................................................................................... 106
Activating Additional Licenses....................................................... 106
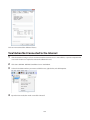
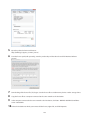
When the TeraStation is Connected to the Internet................................. 106
TeraStation Not Connected to the Internet.............................................. 108
Troubleshooting............................................................................... 111
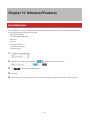
Chapter 10 Advanced Features.....................................113
Email Notification............................................................................ 113
Sleep Mode....................................................................................... 114
Wake-on-LAN................................................................................... 116
UPS (Uninterruptible Power Supply).............................................. 116
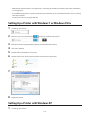
Connecting a Printer........................................................................ 117
Setting Up a Printer with Windows 7 or Windows Vista........................... 118
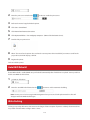
Setting Up a Printer with Windows XP...................................................... 118
Auto RAID Rebuild........................................................................... 119
Write Caching................................................................................... 119
Power Supply Failure....................................................................... 120
IP Routing......................................................................................... 121
NFS Rules.......................................................................................... 121
TeraSearch........................................................................................ 122
Offline Files....................................................................................... 124
DFS ................................................................................................... 126
6
Accessing from a NFS Client............................................................ 127
Encrypting Data Transmission........................................................ 129
Encrypting Settings Data........................................................................... 129
Encrypting FTP Transfer Data.................................................................... 129
SSL Keys....................................................................................................... 130
Web Server........................................................................................ 130
MySQL Server................................................................................... 131
SNMP................................................................................................. 132
Saving and Applying Settings......................................................... 133
Saving Settings........................................................................................... 133
Applying Settings....................................................................................... 134
Recovering the TeraStation............................................................. 135
Creating a Recovery Drive.......................................................................... 135
Recovering the TeraStation........................................................................ 135
Logs................................................................................................... 136
Restoring Factory Defaults.............................................................. 137
Updating the Firmware.................................................................... 137
Name, Date, Time, and Language................................................... 138
Beep Alerts....................................................................................... 140
Jumbo Frames.................................................................................. 140
DHCP and IP Address....................................................................... 141
Port Trunking.................................................................................... 142
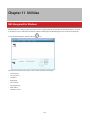
Chapter 11 Utilities........................................................145
NAS Navigator2 for Windows.......................................................... 145
7
Mount as Network Drive............................................................................ 147
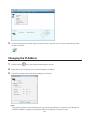
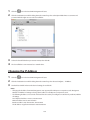
Changing the IP Address............................................................................ 148
NAS Navigator2 for Mac.................................................................. 149
Mounting as a Network Drive.................................................................... 149
Changing the IP Address............................................................................ 150
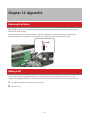
Chapter 12 Appendix....................................................151
Replacing the Battery...................................................................... 151
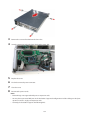
Adding a NIC..................................................................................... 151
Adding a USB 3.0 Card..................................................................... 153
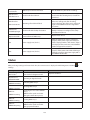
Errors ................................................................................................ 154
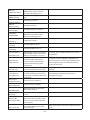
Status........................................................................................................... 155
Default Settings............................................................................... 157
Specifications................................................................................... 158
Compliance Information.................................................................. 159
FCC Statement............................................................................................. 159
CE Marking Statement................................................................................ 159
Environmental Information....................................................................... 159
KC................................................................................................................. 159
BSMI............................................................................................................. 160
CCC............................................................................................................... 160
Models......................................................................................................... 160
8
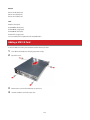
Chapter 1 Installation
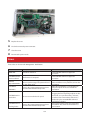
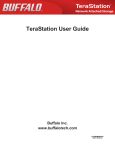
Diagrams
1
2
3
4
5
6
7
8
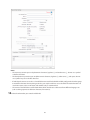
Power Button
On: Press the power button to turn on the TeraStation.
Off: Press the power button twice within 3 seconds to turn off the TeraStation.
Reset Button
This resets the TeraStation. Use a toothpick or similar object to hold down this switch for a second, then release it.
Mute Button
This turns off audible alarms, such as the one you get when a power supply fails. Use a toothpick or similar object
to hold down this switch for a second, then release it.
Power LED
This LED is on during normal operation. It blinks during boot and shutdown.
LAN LED
When any of the 4 LAN ports is connected to a network, this LED is illuminated green. The light to the right of the
LAN port will be illuminated as well.
Error LED
If there is an error, the red error LED will light up. If there is an information, the red error LED will blink.
Drive Lock
Push the drive release to the left and swing out the lock to release the drive.
USB 2.0 Port
Compatible Buffalo USB hard drives, USB flash drives, digital cameras, and USB UPS connection can be connected.
9
USB hubs are not supported.
9
Power Connectors
Use the included power cables to connect these to a UPS, surge protector, or outlet.
10Power Status
Glowing green: power is on
Blinking green: power is off
Glowing red: error
Blinking red: power supply fan error
11UPS Port
Connect to a UPS.
12LAN Port 1
Use an Ethernet cable to connect this port to your network.
13LAN Port 2
This second Ethernet port may be used for network redundancy or backup. You may connect a TeraStation directly
to this port for backup.
14LAN Port 3
This third Ethernet port may be used for network redundancy or backup. You may connect a TeraStation directly to
this port for backup.
15LAN Port 4
This fourth Ethernet port may be used for network redundancy or backup. You may connect a TeraStation directly
to this port for backup.
16VGA Port
17Link LED
Glows orange when the unit is connected to a 1000 Mbps network and green when the unit is connected to a 100
Mbps network.
18Act LED
This LED shows network activity. It blinks orange when the TeraStation is accessed over the network.
Installation
1
Insert the TeraNavigator CD into your computer. TeraNavigator will launch.
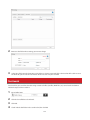
2
Click Begin Installation.
10
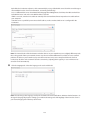
3
Follow the steps on the screen to connect the TeraStation’s Ethernet and power cables and turn it on.
Note: Use LAN port 1 for initial setup. After setup, you may connect a second cable to LAN port 2. If you use LAN
port 2, configure the IP address at Network - IP Address in Settings.
4
Follow the steps on the screen to install NAS Navigator2.
5
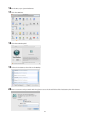
Click Finish. NAS Navigator2 will open.
6
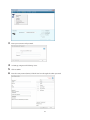
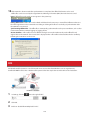
Right-click on your TeraStation’s icon and choose Properties.
Note: For Mac OS, select the TeraStation’s icon while holding down the control key, then click Configure.
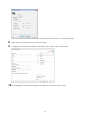
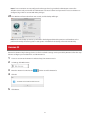
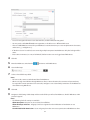
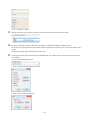
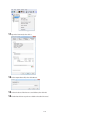
7
Click the IP Address tab, enter the desired settings, and click OK.
11
If you are prompted to enter the administrator password for the TeraStation, it is “password” by default.
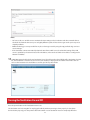
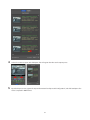
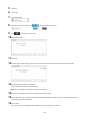
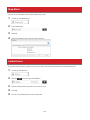
8
Right-click on your TeraStation’s icon and choose Settings.
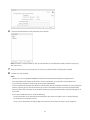
9
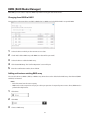
Changing the password from the default in File Sharing - Users - admin - Edit is recommended.
10Go to Management - Name/Time/Language and configure the TeraStation’s time and date.
12
Notes:
• For best results, use an NTP server to maintain the time settings on the TeraStation and other network devices.
Clocks for the network devices may run at slightly different speeds. If these devices get out of sync it may cause
network problems.
• Buffalo Technology is not responsible for any loss or damage caused by using the ntp.jst.mfeed.ad.jp service or
service outages.
• If the TeraStation cannot automatically obtain the time from an NTP server, check its DNS settings. If the NTP
server is specified by a hostname instead of an IP address, make sure that a DNS server address is configured in
Network - IP Address.
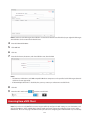
11In NAS Navigator2, double-click your TeraStation’s icon. This will open the shared folder of the TeraStation. For Mac
OS, the TeraStation is mounted as a drive icon on the desktop or displayed in the sidebar of the Finder. You can
now use the TeraStation’s shared folder to save files just like any other folder.
Turning the TeraStation On and Off
Press the power button on the TeraStation to turn it on.
The TeraStation can be damaged if it is unplugged suddenly without powering it down properly. To shut down
the TeraStation properly, press the power button twice within 3 seconds. Wait for it to turn completely off before
13
unplugging it. You can also shut it down and restart it remotely from Settings.
Shutting down or Restart from Settings:
1
2
3
Double-click the
icon.
Right-click your TeraStation’s icon and select Settings. For Mac OS, select the TeraStation’s icon while holding down
the control key, then select Settings.
Enter the username and password, then click OK.
Note: The default username and password are “admin” and “password”.
4
Settings will open.
14
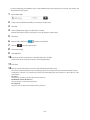
5
Click
at the top-right of Settings and choose either Restart or Shut Down.
When all the LEDs on the front of the TeraStation turn off, the shutdown process is complete.
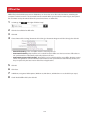
Changing the Administrator Password
After initial setup, follow this procedure to change your password.
1
2
Double-click the
icon. NAS Navigator2 will start.
Right-click on your TeraStation’s icon and select Settings. On the Mac, select the TeraStation’s icon while holding
down the control key, then select Settings.
15
3
Enter your username and password.
4
In Settings, navigate to File Sharing - Users.
5
Click on admin.
6
Enter the new password (twice). Click OK. You have changed the admin password.
16
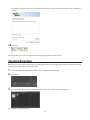
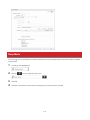
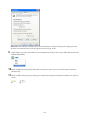
Recovery Drive
1
Insert a 1 GB or larger USB flash drive into a USB port on the TeraStation.
Note: All data on the USB flash drive will be erased!
2
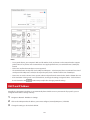
In Settings, navigate to Management - Restore/Erase - USB Options.
3
Select “Create a USB drive for system recovery”.
4
5
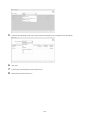
Select the USB drive connected to the TeraStation from “Target USB drive”, then click Execute. Enter the 4 digit
confirmation number and click OK. The TeraStation will create the recovery drive. This will take about a minute.
When the “finished” dialog opens, the USB recovery drive is ready to use. Dismount the USB drive before
unplugging it.
For the instructions on recovering the TeraStation using the drive you just created, turn to chapter 10.
17
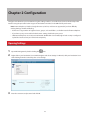
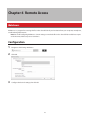
Chapter 2 Configuration
Configure and administer your TeraStation using the Settings interface, accessible from a browser window. Open the
interface using the procedure below or type the TeraStation’s IP address in the URL field of your browser.
Note: Internet Explorer 9, Firefox 8, Google Chrome 15, Safari 5, and later are supported. If you have difficulty
viewing Settings, check the following:
• If there are a large number of registered users, groups, or shared folders, use Firefox instead of Internet Explorer.
• If you have a proxy server enabled in the browser settings, disable the proxy server.
• With Internet Explorer, set security to Local intranet. On Windows Server 2008, higher-level security is configured
by default. Set the security to a lower level temporarily.
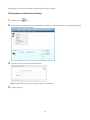
Opening Settings
1
2
3
Open NAS Navigator2 by double-clicking the
icon.
Right-click on your TeraStation’s icon in NAS Navigator and select Settings. For Mac OS, click your TeraStation’s icon
while holding down the control key, then select Settings.
Enter the username and password and click OK.
18
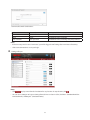
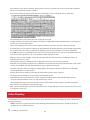
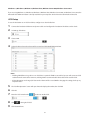
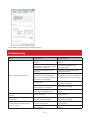
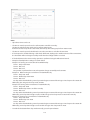
Username/Password Combinations:
Username
admin
guest
your username
Password
password
blank
your password
Settings Available
All
TeraStation’s name (read-only)
TeraStation’s name (read-only) and your password.
Notes:
• If the time-out period is set to “10 minutes”, you will be logged out of Settings after 10 minutes of inactivity.
• Click Secure Connection to secure your login.
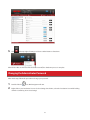
4
Settings will open.
Notes:
• Click
to play a tone from the TeraStation for easy location. To stop the tone, click
.
• You can also use Bonjour to log in to Settings from OS X 10.4 or later. In Safari, click View - Show Bookmarks bar.
From Bookmarks, click Bonjour - (TeraStation name).
19
Chapter 3 Access Restrictions
You may restrict access to specific shared folders, including external USB drives.
Notes:
• Access restrictions can be set separately for each shared folder, but not for folders within the shared folders.
• Configure access restrictions through Settings. Configuring access restrictions through Windows is not supported and may cause unexpected behavior.
• Shared folders with limited access can still be used as backup destinations.
Configuring Access Restrictions on Users and Groups
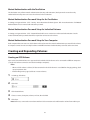
Adding a Shared Folder
1
In Settings, click the
2
Click Create Folder.
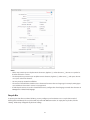
3
Configure the desired settings, then click OK at the bottom of the window.
icon to the right of “Folder Setup”.
20
Notes:
• Names may contain up to 27 alphanumeric characters, hyphens (-), and underscores (_). Do not use a symbol as
the first character in a name.
• The description may contain up to 75 alphanumeric characters, hyphens (-), underscores (_), and spaces. Do not
use a space as the first character.
• You may create up to 400 shared folders.
• The names of shared folders should not use characters from more than one language. For example, mixing Japanese and Korean characters in names is not supported.
• If multi-byte characters are used in shared folder names, configure the client language to match the characters in
Management - Name/Time/Language.
Recycle Bin
To protect your data from accidental deletion, you may configure your TeraStation to use a recycle bin instead of
deleting files immediately. The recycle bin will only work with SMB connections. To empty the recycle bin, click File
Sharing - Folder Setup - Empty the recycle bin in Settings.
21
Accounts
Your TeraStation username and password should be the same as your Windows username and password. If they are
different, you may not be able to access folders on the TeraStation with access restrictions configured.
Read-only Shares
By default, new shares are set with read & write access, but you may change the attribute to Read-only in Shared Folder
Attributes. Read-only shares and HFS+ formatted USB hard drives will have “Read-only” added to the shared folder
description.
Hidden Shares
To hide a shared SMB folder, select “Hidden Share (SMB Only)” and click OK. To open a hidden folder, click Start - Search
programs and files and enter “\\TeraStation name\Shared folder name$\” for the name. Example: If the TeraStation name
is “TS-XX001” and the shared folder name is “share”, then enter “\\TS-XX001\share$\” to open it.
Note: FTP, SFTP, Mac AFP, WebAccess, and NFS folders cannot be hidden.
Adding Users
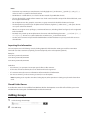
1
In “File Sharing”, select Users.
2
Click Create User.
3
Enter the desired settings, then click OK.
22
Notes:
• Usernames may contain up to 224 characters, including hyphens (-), underscores (_), periods (.), !, #, &, @, $, *, ^,
and %. Do not use a symbol as the first character.
• For Windows 8.1 or Windows 8, use a local username instead of your Windows Live ID.
• The user ID should be a number from 1000 to 1999. Each user ID should be unique. If this field is left blank, a user
ID is assigned automatically.
• Do not duplicate user IDs, group IDs, usernames, or group names. Each should be distinct and unique.
• The description may contain up to 75 alphanumeric characters, hyphens (-), underscores (_), and spaces. Do not
use a space as the first character.
• When users are given access privileges, a maximum of 300 users, including “admin” and “guest”, can be registered
in the TeraStation.
• Passwords may contain up to 20 alphanumeric characters and the following characters: - _ @ ! # $ % & ‘ ( ) * + , . / ;
< > = ? “ ] ^ { } | ~. Do not use a symbol other than an underscore (_) as the first character.
• Use the same username and password for both Windows and the TeraStation or you may not be able to access
shared folders.
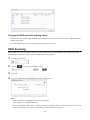
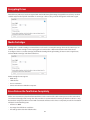
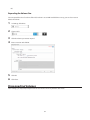
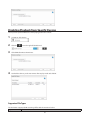
Importing User Information
You can import users in File Sharing - Users by clicking Import CSV File. Note that existing users will be overwritten.
Format for user data: Username (required), password (required), and user description (optional).
Examples:
username1,password1,comment1
username2,password2,comment2
username3,password3,comment3
Guidelines:
• Use commas (,) as separators. Do not put spaces before or after commas.
• If a line has an incorrect format, the user on that line will not be registered.
• If a username exists, the new user information will overwrite the old information.
• Do not use commas (,) in the username, password, or user description. .
Note: Importing users may take some time. During import, other operations in Settings may be much slower than
usual.
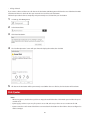
Shared Folder Owners
To confirm the owner of a shared folder from Windows XP from the Properties screen of the file or folder, open a new
window from the Security tab. Click Advanced, then click the Owner tab.
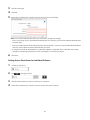
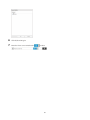
Adding Groups
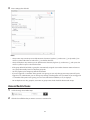
1
In “File Sharing”, select Groups.
2
Click Add Group.
23
3
Enter settings, then click OK.
Notes:
• Group names may contain up to 224 alphanumeric characters, hyphens (-), underscores (_), and periods (.). Do
not use a symbol other than an underscore (_) as the first character.
• Group descriptions may contain up to 75 alphanumeric characters, hyphens (-), underscores (_), and spaces. Do
not use a symbol or space as the first character.
• If the group ID field is left blank, a group ID is automatically assigned. Use numbers between 1000 and 1999 to
set a group ID manually. Don’t use duplicate group IDs.
• You may register up to 300 groups with the TeraStation.
• If you are logged in as a member of the general users group, you can only change your own password. If you’re
logged in as an administrator, you can change any settings, including other user’s passwords. If you are logged in
as a member of the power users group, you can create and edit shared folders, users, and groups.
• Do not duplicate user IDs, group IDs, usernames or group names. Each should be distinct and unique.
Access Restrictions
1
In “File Sharing”, select Folder Setup.
2
Click the shared folder that you want to set access restrictions for.
24
3
Click Edit.
4
Enable “Access Restrictions”.
5
6
Select the level of access for the user or group you added.
: Read and write access allowed
: Read access allowed
: Access prohibited
Click OK.
Notes
• The example above shows access restriction by user. To restrict access by group, click the Local Groups tab and select
group permissions.
• If both read-only and read & write permissions are given to a user, the user will have read-only access. The most
restrictive access always applies.
• The following characters are handled differently by Mac OS and Windows. Avoid using these characters when
sharing data between Mac OS and Windows:
• Windows does not support some characters that Mac OS and the TeraStation allow. If you create a filename on a Mac
with any of the following characters, it will not display correctly on a Windows computer. With OS X 10.2 or later, you
may have to connect to the TeraStation via AFP in order to display or copy any of the following characters.
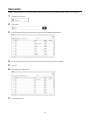
? ] / \ = + < > ; :“ , | *
• Do not use any of the following words as a username or group name: root, bin, daemon, sys, adm, tty, disk, lp, sync,
shutdown, halt, operator, nobody, mail, news, uucp, ftp, kmem, utmp, shadow, users, nogroup, all, none, hdusers,
admin, guest, man, www, sshd, administrator, ftpuser, apache, mysql, splx
• Do not use any of the following words as the name of a shared folder. These words are reserved for internal use by
25
the TeraStation: info, spool, lost+found, global, printers, homes, lp, authtest, ram, msdfs_root, mt-daapd, usbdisk#
(where # is a number, for example: usbdisk1)
• Don’t use the following unsupported characters in shared folder names, workgroup names, or filenames:
• File and folder names may contain up to 255 single-byte characters.
• Configure hidden and read-only file attributes in Settings. Configuring them from within Windows is not supported
and may cause unexpected behavior.
• Folder and workgroup names whose names contain non-Roman characters may not be displayed correctly.
• If shared folders are accessed from a Macintosh, information files for the Macintosh may be generated automatically.
Do not delete these files. If they are deleted using Windows, this may prevent further access from a Macintosh.
• If an SMB connection is used with OS X 10.3.9, the names of mounted volumes may appear as unreadable characters
in Finder and other applications. This is not a problem with the filename or data.
• With OS X 10.5 to 10.5.6, Spotlight searches are not supported over AFP connections. Use SMB connections or
upgrade to OS X 10.5.7 or later.
• The TeraStation belongs to the default zone in AppleShareServer; the zone cannot be specified.
• When files are copied to the TeraStation or to a USB drive connected to the TeraStation, file information such as date
created, date modified, and other date information may be updated or changed.
• Hard drive capacity is shown in Settings in actual gigabytes. The Properties window in Windows may show GiB
instead, which will be a smaller number.
• During a file transfer, if settings are changed, the file transfer operation may be aborted.
• File copying to the TeraStation is protected by a journaling file system.
• If the Ethernet cable is disconnected or a power outage occurs while copying data, the following may occur:
- The preset data (TeraStation name, user, and group) may be erased.
- An incomplete file may be copied and the file can no longer be deleted. If this happens, restart the TeraStation,
delete the file, and perform the copy operation again.
• After a drive is formatted, the “% Used” and “Amount Used” in Settings will not be 0. This is because some drive space
is used for the system area.
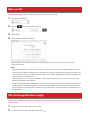
Active Directory
The TeraStation can join an Active Directory domain. Up to 1000 domain users and 1000 groups may be downloaded
from Active Directory.
Note: If usernames or group names from Active Directory include multi-byte characters, you will not be able to
configure access restrictions for them.
1
In Settings, select Network.
26
2
Select Workgroup/Domain.
3
Click Edit.
4
Select “Active Directory”, then click Next.
5
Click Yes.
6
Enter the desired settings, then click OK.
7
Choose Folder Setup.
8
Click a shared folder that you want to set access restrictions for.
27
9
Click Edit.
10Enable “Access Restrictions”.
11Select the level of access for the user or group:
: Read and write access allowed
: Read access allowed
: Access prohibited
12Click OK.
Notes:
• To have the TeraStation join an Active Directory domain, configure it to use a DNS server that can resolve names
for the Active Directory domain.
• After building an Active Directory domain, the administrator password for joining the domain must be changed
at least once, or joining the Active Directory domain will fail.
• The DNS name and NetBIOS name of Active Directory domains should be identical.
• If both read-only and read & write permissions are given, the user will have read-only access. The most restrictive
access setting will apply.
• If there are more than 5 minutes difference between the TeraStation’s clock and the domain controller’s clock,
joining the domain or authenticating domain users and groups may fail. For best results, use an NTP server to set
the time for all network devices.
• The TeraStation supports a domain environment with a maximum of 1000 users and 1000 groups. 10,000 users
and 10,000 groups can be downloaded from the domain controller but are not supported.
• To use the TeraStation as a member server in an Active Directory domain, the TeraStation should be logged in to
the domain and accessed from a computer that is not a member of the domain with a valid domain account.
• If the TeraStation is a member server of an Active Directory domain, you cannot connect as a guest user via AFP.
• If your TeraStation is a member server in an Active Directory domain and you change the authentication method
to “Workgroup”, the account on the domain controller will not be deleted automatically.
• AFP connection will not be possible while using Active Directory and access restrictions. Use SMB or FTP instead.
NT Domains
In an NT domain environment, the TeraStation uses account information from the NT domain server to set access
restrictions for files and folders on the TeraStation. There’s no need to perform individual account management for the
TeraStation. If multiple TeraStations are installed on the network, the account information is centrally managed in the NT
domain, greatly reducing the operations required for installation and management.
Note: A maximum of 1000 domain users and 1000 groups can be downloaded from an NT domain server.
1
Create an account on the domain controller for the TeraStation.
2
In Settings, click Network.
3
Select Workgroup/Domain.
28
4
Click Edit.
5
Select “NT Domain”, then click Next.
Note: To use Active Directory from Windows 2000 or Windows Server 2003, select “Active Directory” instead of “NT
Domain”.
6
Click Yes.
7
Enter settings and click OK.
8
Click
9
Click a shared folder for which you want to set access restrictions.
to the right of “Folder Setup”.
10Click Edit.
11Enable “Access Restrictions”.
12Select the level of access for “Domain Users” or “Domain Groups” you added.
: Read and write access allowed
: Read access allowed
29
: Access prohibited
13Click OK.
Notes:
• If you change the TeraStation’s name, you will no longer be able to use domain users and groups or access restrictions. To repair this, rejoin the domain.
• If both read-only and read & write permissions are given to a user, the user will have read-only access. The most
restrictive access is used.
• If a domain username is more than 20 bytes long (20 single-byte characters), the TeraStation truncates it to 20
bytes.
• The TeraStation supports a domain environment with a maximum of 1000 users and 1000 groups. 10,000 users
and 10,000 groups can be downloaded from the domain controller but are not supported.
• To use the TeraStation as a member server in an NT domain, the TeraStation should be logged in to the domain
and accessed from a computer that is not a member of the domain with a valid domain account.
• If the TeraStation is a member server of an NT domain, you cannot connect as a guest user via AFP.
• When you change the user or group settings on the domain controller, these changes may not take effect immediately on the TeraStation until it is rebooted.
• If your TeraStation is a member server in an NT domain and you change the authentication method to “Workgroup”, the account on the domain controller will not be deleted automatically.
• If the TeraStation has joined a domain network, you cannot connect to it via FTP.
Delegating Authority to an External SMB Server
TeraStations on your network can be linked to an authentication server for centralized management of user accounts
and passwords. The authentication server should be a LinkStation or another TeraStation.
Notes:
• Other external SMB authentication servers are not supported. Use a TeraStation or a LinkStation for the authentication server.
• When saving changes to the external authentication server settings, clicking Yes will convert all local users to
external authentication users. If external authentication is disabled, local user passwords will need to be reconfigured.
• Disable SMB2 before using external authorization with Windows 8.1, Windows 8, or Windows 7.
• Using external authentication may require the default security settings in Windows to be changed. An easy way
to do this is to run the File Sharing Security Level Change Tool, available from www.buffalotech.com. This simple
tool will let you change or restore your Windows security settings to work with external authentication.
1
In Settings, click Network.
2
Choose Workgroup/Domain.
3
Click Edit.
4
Select “Workgroup”, then click Next.
To use in a domain environment, select “NT Domain” or “Active Directory”.
30
5
6
7
Click Yes.
Enter a workgroup name. Select “Assign authorization to external SMB server” and enter the authentication server’s
IP address (recommended) or name. Check “Automatic user registration” and “Use shared folder for authorization
testing”, and enter the name of the folder to use. Click OK.
A shared folder for authentication will be created on the TeraStation. Users registered to the authentication server
are automatically registered as users on the TeraStation when they open the shared folder for authentication. You
can also register users directly. Connect to the authentication folder via SMB, not FTP or AFP.
8
Choose Folder Setup.
9
Choose a shared folder to set access restrictions on.
10Click Edit.
11Enable “Access Restrictions”.
31
12Select the level of access:
: Read and write access allowed
: Read access allowed
: Access prohibited
13Click OK.
Notes:
• If access restrictions are set for users or groups from the authentication server, guest and anonymous connections will not be possible with AFP or FTP connections.
• Users who are automatically registered belong to the “hdusers” group. They can be added to other groups from
within group settings.
• If both read-only and read & write permissions are given to a user, the user will have read-only access.
• The names of registered users are listed in “Users” - “External Users”. To delete a user who was registered automatically, select that user and click Delete External User.
• When connecting through AFP or FTP, always use an IP address. Using a server name may cause problems with
authentication.
• To specify a server from another subnet, enter its IP address.
• Use AFP to access-limited shared folders from OS X 10.7 instead of SMB. Enable “AFP (Mac)” under “LAN Protocol
Support” on the destination folders to use AFP.
• Use OS X 10.5 or later for use with external authentication. Earlier versions of OS X aren’t supported.
32
Chapter 4 Managing Storage
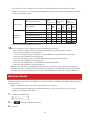
RAID Arrays
TeraStations support many types of RAID. The type of RAID arrays available for use depends on how many drives are
installed in your TeraStation.
Notes:
• If you change the RAID mode, all data on the array is deleted. This is true for every procedure in this chapter.
Always back up any important data before performing actions that affect your RAID.
• After the RAID mode is changed (except when creating a RAID 0 array or JBOD), the TeraStation performs a RAID
check that will take about 10 hours per TB. File transfers are slower during this period. While the message “RAID
I20 DISKx Formatting” is displayed in NAS Navigator2, do not turn off the TeraStation. If you do, the RAID check
starts over.
• If the TeraStation is restarted or shut down while changing the RAID mode, the message displayed in NAS Navigator2 will change from I46 or I47 to I18.
JBOD
This mode uses the hard drives inside the TeraStation as individual drives. The disk space you can use is the total
capacity of all drives in the TeraStation. If any drive is damaged, then the data on that drive is lost.
RAID 6
RAID 6 arrays are available for TeraStations with 4 or more hard drives. RAID 6 combines 4 or more drives into a single
array. The usable space is equal to the sum of the capacity of all drives minus the capacity of two drives. For example, if 4
drives are combined into a RAID 6 array, the usable spaces the sum of the capacity of 2 drives. If 2 drives in the array are
damaged, you can recover data by replacing them. If 3 or more drives are damaged, your data is lost.
RAID 61
RAID 61 arrays are available for TeraStations with 8 or more drives. In this mode, two RAID 6 arrays are mirrored in a RAID
1 array. 8 drives in a RAID 61 array have a usable capacity of 2 x the capacity of the smallest drive.
RAID 5
RAID 5 arrays are available for TeraStations with 3 or more hard drives. RAID 5 combines 3 or more drives into a single
array. The usable space is equal to the sum of the capacity of the hard drives minus the capacity of one drive. For
example, if 4 drives are combined into a RAID 5 array, the usable space is the sum of 3 drives. If one drive in the array is
damaged, you can recover data by replacing the damaged drive. If two or more drives are damaged at the same time,
your data is lost.
33
RAID 51
RAID 51 arrays are available for TeraStations with 6 or more hard drives. In this mode, two RAID 5 arrays are combined
into a RAID 1 array. The total usable space for 6 drives in a RAID 51 array is 2 x the capacity of the smallest drive. For 8
drives, the total usable capacity is 3 x the capacity of the smallest drive.
RAID 10
RAID 10 arrays are available for TeraStations with 4 or more hard drives. In this mode, mirrored pairs of drives in RAID 1
arrays are combined into a RAID 0 array. The usable space is equal to the capacity of the smallest drive multiplied by the
number of hard drives divided by 2.
RAID 1
Combines 2 drives into a mirrored array. The available space in the array is the capacity of a single drive. Identical data is
written to each drive. If a drive is damaged, data can be recovered by replacing the damaged drive. As long as one drive
in the array remains undamaged, all data in the array can be recovered.
RAID 0
Combines 2 or more hard drives into a single array. The usable disk space is the total space of all drives used. This simple
RAID mode offers faster performance than RAID modes that include parity. If a single drive in the array fails, then all data
in the array is lost.
Working with RAID Arrays
To change RAID settings, navigate to Drives - RAID in Settings.
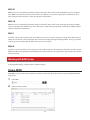
Using JBOD
With JBOD, each hard drive in the TeraStation is addressed separately. To put drives from an array into JBOD, follow the
steps below.
1
Select RAID.
2
Select the array to delete.
34
3
Click Delete RAID Array.
Once JBOD mode is configured, create shared folders on each drive to use them.
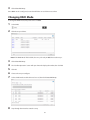
Changing RAID Mode
To change the RAID mode, first put the drives in JBOD.
1
Select RAID.
2
Click the array to delete.
Note: If the “RAID Mode” field is blank, the array is already in JBOD. Proceed to step 7.
3
Click Delete RAID Array.
4
The “Confirm Operation” screen will open. Enter the displayed number, then click OK.
5
Click OK.
6
Choose the array to configure.
7
Select a RAID mode and the drives to be used, then click Create RAID Array.
8
Step through the wizard to create the array.
35
Note: After changing the RAID mode, create a shared folder.
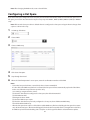
Configuring a Hot Spare
If you have a hot spare configured and an array fails, the TeraStation immediately switches over to the hot spare. To use a
hot spare, you need an extra drive that’s not part of any array and a RAID 1, RAID 10, RAID 5, RAID 51, RAID 6, or RAID 61
array.
Note: All data on the hot spare drive is deleted when it is configured as a hot spare and again when it changes from
a spare to a drive in the array.
1
In Settings, click Drives.
2
Choose RAID.
3
Choose a RAID array.
4
Click Set as a hot spare.
5
Step through the wizard.
6
When the “Confirm Operation” screen opens, enter the confirmation number and click OK.
Notes:
• To turn the hot spare back into a normal disk, choose Set as a normal disk.
If a drive fails in the RAID array before it is rebooted, the hot spare will not automatically replace the failed drive.
In this case, follow the steps below to repair the array.
(1) In Settings, navigate to Drives - Drives.
(2) Select the drive that was configured as a hot spare, then click Dismount Disk.
(3) Click Rediscover Disk.
(4) Navigate to Drives - RAID.
(5) Select the RAID array to repair.
(6) Select the drive that was previously configured as a hot spare, then click Recover RAID Array.
This will rebuild the RAID array.
• After the hot-spare drive replaces a failed drive and the RAID array finishes rebuilding, the hot-spare drive status
may still show “Hot Spare / Dismounted/ Plugged”. Check the drive status LED. If it has changed from red to blue,
the RAID array has finished rebuilding and is ready for use. This bug will be fixed in a future firmware update.
36
RMM (RAID Mode Manager)
With RMM, you can create or expand a RAID array without erasing the data on the drives.
Changing from JBOD to RAID 1
You must have at least two drives available in JBOD (not in a RAID array) to build the RAID 1 array with RMM.
1
Select the drive on which you do not want to erase data.
2
Check “Add a disk to RAID array with RMM. Your data will be preserved.”.
3
Select the drive to add to the RAID array.
4
Click Create RAID Array. The “Confirm Operation” screen will open.
5
Enter the confirmation number, then click OK.
Adding a drive to an existing RAID array
You can add a drive to a RAID 1, RAID 5, or RAID 6 array. Drives that can be added to the RAID array show “Normal (RMM
available)” or “Normal”.
Notes:
• Each drive must have the same capacity.
• RMM can be used to expand an array by one drive per operation. To expand by two or more drives, RMM must be
performed multiple times.
1
Click Drives.
2
Click RAID.
3
Choose a RAID array.
37
Changing the RAID mode while adding a drive:
• Select the drive you want to add to the RAID array and choose the mode for the array. Enter the “Confirm Operation”
number and click OK.
• The “Confirm Operation” screen will open. Enter the number, then click OK.
RAID Scanning
RAID maintenance scans your RAID array for bad sectors and if it finds any it automatically repairs them. Arrays other
than RAID 0 are supported. For best results, run RAID maintenance regularly.
1
In Settings, click Drives.
2
Click the
3
Click Edit.
4
Select the schedule for running RAID maintenance, then click OK.
icon to the right of “RAID Scanning”.
Notes:
• Check “Immediately” to run RAID maintenance immediately.
• To stop a RAID scan, click Abort RAID Scan.
• The “1st week” of the month is days 1–7 of the month. The “2nd week” is days 8–14 of the month, etc. If you select
one of these schedules, be sure to also select the day of the week for the scan to run.
38
5
Move the RAID scanning switch to the
position to enable RAID scanning.
Note: Normally “I15” information message or code will be notified in NAS Navigator2, Settings, or error LED,
however, it may not be displayed if your TeraStation’s firmware version is 2.30. RAID scanning will start correctly
when the scheduled time passed without the notification.
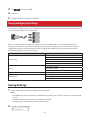
Adding an External Hard Drive
Connecting an External Drive
You can connect external drives to the USB ports on your TeraStation. Once connected, they appear as shared folders on
the TeraStation. Formatted drives are detected automatically. Unformatted drives should be formatted in Settings.
After a USB drive is recognized, Windows adds “usbdisk X” under the TeraStation in “Network”, where “X” is the USB port
where the hard drive is connected.
The following USB devices are supported by the TeraStation:
• USB storage devices
• Card readers (except for card readers that can recognize two or more memory cards)
• Digital cameras
• USB-connected UPSs
• USB printers
Buffalo external USB drives are recommended.
These devices are not supported:
• DUB and DIU series drives
• Hubs, mice, and keyboards
Connect only one device to each USB port of the TeraStation. Some external drives with automatic power-on don’t
turn on automatically when connected to the TeraStation. Use their manual power switch to turn them on. Be sure
to connect only one bus-powered drive at a time. If there is insufficient bus power for your USB drive, connect its AC
adapter. Note that only the first partition of a connected USB hard drive is mounted. Additional partitions are not
recognized.
Notes:
• Hubs are not supported. Connect a single USB drive to each USB port.
• Backup data from Mac OS may include characters that cannot be written to FAT16 or FAT32 drives such as “.DS_
Store”. For best results, reformat the drive before using it as a backup target.
• When external hard drives are connected to the USB port, they are recognized as shared folders with names of
the form “usbdisk x”. Depending on which USB port they are connected to, they will have the following settings
by default:
USB ports 1 to 4: Trashbox and backup are enabled.
USB ports 5 and 6: Trashbox and backup are disabled.
• The TeraStation is compatible with most USB 2.0 external hard drives. Compatible USB 3.0 external drives include
HD-LBU3 series, HD-LXU3 series, HD-PCTU3 series, HD-PNTU3 series, HD-PZU3 series (as of May 2013)
39
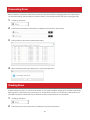
Dismounting Drives
If the TeraStation is powered on, dismount drives (internal and external) before unplugging them. You may dismount
any drive from Settings. If the TeraStation is off, then all drives are already dismounted and may be unplugged safely.
1
In Settings, click Drives.
2
Select Drives to dismount an internal drive or USB Drives to dismount an external drive.
3
Select the drive to dismount and click Dismount Disk.
4
When the following message is displayed, it is safe to unplug the drive.
Checking Drives
A disk check tests the data on a drive in the TeraStation or connected via USB for integrity. Errors are fixed automatically.
With large drives, a disk check may run for many hours. Shared folders cannot be accessed during a disk check. Do not
turn off the TeraStation until the disk check is finished. Use the procedure below to run a disk check.
1
In Settings, click Drives.
2
Select Drives to check an internal drive or USB Drives to check an external drive.
40
3
Select the drive to test, then click Check Disk.
4
Click Check. You have the option of deleting information files from Mac OS during the check if desired.
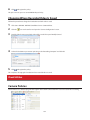
S.M.A.R.T.
S.M.A.R.T. (Self-Monitoring, Analysis, and Reporting Technology) monitors hard drives to detect and report various
indicators of reliability, in the hope of anticipating failures. When a failure is anticipated by S.M.A.R.T., the user may
choose to replace the drive to avoid outages and data loss. Follow the steps below to check S.M.A.R.T. information for
the TeraStation’s internal drives.
Note: S.M.A.R.T. information is only available for internal drives.
1
In Settings, navigate to Drives - Drives.
2
Select a drive to check and click S.M.A.R.T.
41
3
The S.M.A.R.T. information for the drive will be displayed. Different information may be displayed depending on
the brand of drives in your TeraStation. Critical attributes are displayed in bold. Attributes with current value less
than or equal to the threshold value may be significant. If an attribute reports a failure, or has had one in the past,
it will be displayed in the status column.
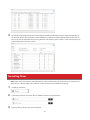
Formatting Drives
Note: Under some circumstances, data deleted when a drive is formatted can be recovered. To ensure that data is
“gone forever”, a format might not be sufficient. See “Erase Data on the TeraStation Completely”.
1
In Settings, click Drives.
2
Select Drives to format an internal drive or USB Drives to format an external drive.
3
Select the drive to format, then click Format Disk.
42
4
Select a format type, then click Format.
5
The “Confirm Operation” screen will open. Enter the displayed number, then click OK.
6
Depending on the size of your drive, the format may take several minutes or several hours to complete. “I20 DISKx
Formatting” will be displayed in NAS Navigator2 until the format is complete.
Notes:
• Do not turn off or disconnect power to the TeraStation while formatting a hard drive.
• Format drives of 2.2 TB or larger with GPT partitions. For many drives, this option will be enabled automatically
during format.
43
Encrypting Drives
Internal drives (and arrays) can be encrypted with 128-bit AES during formatting. Encrypted drives and arrays are then
readable only from that specific TeraStation. To unencrypt a drive or array, uncheck “Encryption” and format it again.
Media Cartridges
If configured as a media cartridge, an internal drive can be used as a removable storage device in the same way as an
external drive. Media cartridges can be unplugged and connected to a different TeraStation with all data intact.
To configure a drive as a media cartridge, check “Media Cartridge” during formatting. To return it to its original state,
uncheck “Media Cartridge” and reformat the drive.
Media cartridge do not support:
• RAID arrays
• LVM volumes
• Access restrictions
• Direct connection to a Windows computer
Erase Data on the TeraStation Completely
Under some circumstances, data from formatted drives can be recovered. The disk erasure process in this section does
a much more thorough job of erasing data. This procedure is recommended for removing all data from a drive in a way
that makes it nearly impossible to recover with current tools. All data on the drives is completely erased. The TeraStation
will then be in the following state:
• All drives in JBOD
• An empty shared folder on each drive
• All settings returned to their default values
44
• All logs deleted
If you remove a drive and then erase all data on the TeraStation, NAS Navigator2 will show the error “HDx Error E22 HDx
Can’t Mount” where X is the hard drive you removed. You can still use the TeraStation.
Follow the procedure below to completely and permanently erase all data from your TeraStation.
1
In Settings, click Management.
2
Select Restore/Erase.
3
Click Erase TeraStation.
4
The “Confirm Operation” screen will open. Enter the displayed number, then click OK.
5
All data on the TeraStation will be permanently erased. When the erase finishes, the TeraStation will shut down.
Disk Quotas
Notes:
• When using quotas, disable the recycle bin or empty the trash folder often. The limited space includes the space
used for trash.
• Quotas apply per drive or per array. If a quota is set to 1 GB, each array or drive can use a maximum of 1 GB.
• Quotas cannot be set for external hard drives connected to the TeraStation and hard drives that are configured as
media cartridges.
45
• If both user and group quotas are configured for a user, the most restrictive quota will always apply.
Quotas for Users
Follow this procedure to limit the total drive space available for a user.
1
In Settings, click
2
Select the user whose space will be limited.
3
Enable quotas, choose the maximum space the user will be allowed to use, and click OK.
4
Click Close.
to the right of “Users”.
Quotas for Groups
Follow the procedure below to limit the total drive space that each group can use.
1
In Settings, click
2
Select the group whose space will be limited.
3
Enable quotas, choose the maximum space the group is allowed, and click OK.
4
Click Close.
5
In Settings, click
6
Change the user’s primary group to the group with the quota, then click OK.
7
Click Close.
to the right of “Groups”.
to the right of “Users”.
46
Size Limits
If LVM is enabled, volumes can be created with maximum size limits. Up to 32 LVM and iSCSI volumes are supported.
1
In Settings, click Drives.
2
Select LVM.
3
Select the drive where the volume will be located and click Enable LVM on Volume.
4
The “Confirm Operation” screen will open. Enter the displayed number, then click OK.
5
Click OK.
6
Click Edit under “NAS Volume”.
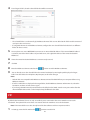
7
Click Create Volume.
47
8
Configure the desired settings, then click OK.
9
Click Close.
10Click Close.
11Navigate to File Sharing - Folder Setup.
12Click Create Folder.
13Configure the settings.
48
Notes:
• The name may contain up to 27 alphanumeric characters, hyphens (-), and underscores (_). Do not use a symbol
as the first character.
• The description may contain up to 75 alphanumeric characters, hyphens (-), underscores (_), and spaces. Do not
use a symbol or space as the first character.
• If multi-byte characters are used in a shared folder name used for both AFP and FTP, configure the client language
to match the characters that are being used. Also, you may be unable to access the folder if certain characters are
used in the name, so the use of letters and numbers only is recommended.
• The names of shared folders used for both AFP and FTP should not use characters from different language sets
(such as mixing Japanese and Korean characters, for instance).
14Select the volume that you created and click OK.
49
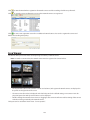
Using the TeraStation as an iSCSI Device
Introduction
iSCSI is a protocol for carrying SCSI commands over IP networks. Unlike traditional SAN protocols such as fibre channel,
which requires special-purpose cabling, iSCSI can be run over long distances using existing network infrastructure.
Normal Windows formatting such as NTFS is supported.
Differences Between NAS and iSCSI
With iSCSI, the TeraStation is connected to a single computer, such as a server. Other computers on the network access
files on the TeraStation through the computer it’s connected to. The TeraStation can be used as a local drive from
Windows Server. Features of Windows Server such as Active Directory can be used normally.
As a NAS, the TeraStation is a server, and computers (including other servers) on the network can access shared folders
on it directly. A separate server is not required, and features such as backup are built-in.
Network Configuration
Use gigabit or faster network equipment with iSCSI. For best results, a dedicated network for iSCSI is recommended,
separate from the regular network. Use fixed IP addresses for storage devices such as the TeraStation.
Advanced iSCSI Settings
Advanced settings for iSCSI are available in Settings. Navigate to Drives - iSCSI and click on your volume name. Advanced
Settings will be at the bottom left of the window. The default values for each of these settings are recommended for
most users.
Install the Microsoft iSCSI Software Initiator
Windows XP, Windows Server 2003
Before using iSCSI equipment with Windows XP or Windows Server 2003, download and install the “Microsoft iSCSI
Software Initiator”.
1
Go to http://www.microsoft.com.
2
Search for “Microsoft iSCSI Software Initiator”.
3
Download the latest version of the Microsoft iSCSI Software Initiator.
4
5
When the download is complete, double-click on the installer. Check the “Initiator Service” and “Software Initiator”
checkboxes.
Step through the wizard to install.
50
Windows 8.1, Windows 8, Windows 7, Windows Vista, Windows Server 2008, Windows Server 2012
If you are using Windows 8.1, Windows 8, Windows 7, Windows Vista, Windows Server 2008, or Windows Server 2012, the
Microsoft iSCSI Software Initiator is already installed on your computer. You don’t need to download and install it.
iSCSI Setup
To use the TeraStation as an iSCSI hard drive, configure it as described below.
1
Connect the TeraStation’s Ethernet and power cables and configure the TeraStation’s IP address and its clock.
2
In Settings, click Drives.
3
Choose LVM.
4
Select the drive where the volume will be created and click Enable LVM on Volume.
Notes:
• Enabling LVM before using a drive as an iSCSI drive is optional. If LVM is not enabled, you can still create one iSCSI
volume from the entire drive. However, enabling LVM is recommended for drives that will be used for iSCSI.
• If the LVM settings are changed, all data on the volume will be erased. Before changing the settings, back up any
important data.
5
The “Confirm Operation” screen will open. Enter the displayed number, then click OK.
6
Click OK.
7
Move the iSCSI switch to the
8
Click
9
Click Create Volume.
position to enable iSCSI.
to the right of “iSCSI”.
51
10Enter a volume name, volume description, volume, and size, then click OK.
11Click Close.
12Connect the new volume. The process for this will depend on your iSCSI software. For the Microsoft iSCSI Software
Initiator, navigate in Windows to Control Panel - Administrative Tools - iSCSI Initiator, enter the IP address of the
TeraStation in the “Target” field, and click Quick Connect.
Note: Windows XP computers will not reconnect iSCSI volumes automatically if iSCSI has been disabled. After reenabling iSCSI, reconnect from your iSCSI initiator.
13The connected volume will be recognized by the computer as an unallocated volume. Assign and format the
volume in Windows. When the format process is completed, the drive will be visible as an icon in “Computer” or
“My Computer” and can be used as a normal drive on the computer.
Use with Multiple Computers
If the TeraStation is divided into multiple volumes (or drives), it can be used with multiple computers. Accessing a single
volume or drive from multiple computers is not recommended.
Checking Whether iSCSI Volume is Connected
To check whether an iSCSI volume is connected, navigate to Drives - iSCSI - iSCSI Settings and select Connection. If
“Connected” is displayed, the TeraStation is currently connected to the client.
52
Mutual Authentication with the TeraStation
The TeraStation can perform mutual authentication (two-way authentication). Dual passwords ensure that only
authorized client computers can access the volumes on the TeraStation.
Mutual Authentication Password Setup for the TeraStation
In Settings, navigate to Drives - iSCSI - Security - Access Restrictions for Entire System - Edit - Access Restrictions. Click Mutual
Authentication and set a mutual authentication password.
Mutual Authentication Password Setup for Individual Volumes
In Settings, navigate to Drives - iSCSI - Create Volume. Enable access restrictions and mutual authentication. Set the
mutual authentication password that will be required to connect to each volume.
Mutual Authentication Password Setup for Your Computer
Each computer that connects to an iSCSI volume will need to enter the mutual authentication password for the volume.
A computer cannot connect to multiple volumes with different mutual authentication passwords at the same time.
Creating and Expanding Volumes
Creating an iSCSI Volume
Up to 32 iSCSI and LVM volumes are supported. Each individual iSCSI volume can be connected to different computers
(a single iSCSI volume cannot be connected to multiple computers).
Notes:
• When an iSCSI volume is deleted, all data contained in the iSCSI volume is erased. Before changing settings, back
up any important data.
• Enable LVM (previous page) to delete or create volumes.
1
In Settings, click Drives.
2
Click iSCSI.
3
Click Create Volume.
4
Choose a name, description, volume, and size, then click OK.
5
Click Close.
Note: Before use, connect the new volume with an iSCSI connection tool and format the volume from within your
53
OS.
Expanding the Volume Size
You can expand the size of a volume. If the iSCSI volume is on an LVM-enabled drive or array, you can also create or
delete the volume.
1
In Settings, click Drives.
2
Choose iSCSI.
3
Click the volume you want to expand.
4
Enter a new size and click OK.
5
Click OK.
6
Click Close.
Disconnecting Volumes
From Settings, you may temporarily disconnect iSCSI volumes from any initiators and clients.
54
Navigate to Drives - iSCSI. Select the iSCSI volume to disconnect and click Disable Connection. To reconnect the volume,
click Enable Connection.
Similarly, you may connect or disconnect a volume from the editing page by enabling or disabling Volume Connection.
Setting Access Restrictions
A username and password can be set following the procedure below for the entire TeraStation iSCSI volume or for each
volume.
Setting Access Restrictions for an Entire iSCSI Volume
1
In Settings, click Drives.
2
Click
to go into iSCSI settings.
55
3
Click the Security tab.
4
Click Edit.
5
Enable “Access Restrictions”, enter the username and password, and click OK.
Note: To use mutual authentication with access restrictions, configure the settings:
• In the screen shown above, check “Mutual Authentication” and enter the password in the “Mutual Authentication
Password” field.
• In the “User Authorization” window displayed when the TeraStation is connected, select “Enable Mutual Authentication” to connect. Enter the mutual authentication password.
• If using the iSCSI Initiator from Windows 8.1, Windows 8, Windows 7, Windows Vista, or Windows Server 2008,
configure the CHAP login information to allow searching for or connecting to targets.
6
Click Close.
Setting Access Restrictions for Individual Volumes
1
In Settings, click Drives.
2
Click
3
Click the volume where you want to set the access restrictions.
4
Enable “Access Restrictions”, enter the username and password, then click OK.
to the right of “iSCSI”.
56
5
Click Close.
Mutual Authentication Access Restrictions by Username and Password
To set access restrictions using mutual authentication in addition to regular access restrictions, configure the settings as
shown below.
• In the screen above, check “Mutual Authentication” and enter the password in the “Mutual Authentication Password”
field.
• In the “User Authorization” screen displayed when the TeraStation is connected, select “Enable Mutual
Authentication”.
• The entry screen for the mutual authentication password will be displayed again. Enter the password.
• If using the iSCSI Initiator included with Windows 8.1, Windows 8, Windows 7, Windows Vista, or Windows Server
2008, set the CHAP login information for target searches and connections.
Mutual Authentication Access Restrictions by IP Address
To set access restrictions by IP address, enable “IP Address Restrictions” as shown above, enter the IP addresses that will
be allowed access in the “IP Address List”, and click OK.
Hard Drive Replacement
Hard drives in the TeraStation show a blue status LED during normal operation. When a drive fails, its error LED will glow
red. A failed drive whose error LED is glowing red may be hot-swapped.
Notes:
• Do not unplug a drive whose status LED is blue. Dismount it first or shut down the TeraStation before swapping a
working drive. If you remove the drive without properly dismounting it, data may be lost or the TeraStation may
malfunction.
• Use a Buffalo OP-HDS series drive of the same size for the replacement drive..
• To avoid damaging the TeraStation with static electricity, ground yourself by touching something made of metal
before handling any sensitive electronic parts.
• After a drive is replaced, it takes about 30 minutes before normal file reading and writing are restored. Settings
may not be accessible during this period.
57
• Do not change the order of the hard drives in the TeraStation. For example, pulling out drive 1 and replacing it
with drive 2 may cause data to be corrupted or lost.
• If a new drive is not recognized, click Rediscover Disk in Settings.
• If two drives fail at the same time, replace and resync them one at a time.
Hard Drive Replacement Examples
Drive Replacement (using a redundant RAID mode such as RAID 1, 5, or 6 with autoshutdown disabled)
This section describes replacing a drive with the TeraStation on.
1
The failed drive’s status LED will be glowing red. Push its unlock button and swing the lock mechanism out.
2
Pull out the drive cartridge and remove it from the TeraStation.
3
Insert the new drive in the empty slot. Slide the drive in with the locking mechanism open.
4
Swing the lock back down until it clicks into place.
5
When the replacement hard drive is recognized, the status LED will flash red. The TeraStation will start rebuilding
the RAID array automatically.
Drive Replacement (using a redundant RAID mode such as RAID 1, 5, or 6 with autoshutdown enabled)
This section describes the process of replacing a drive while the TeraStation is off.
1
Push the unlock button of the failed hard drive and swing the lock mechanism out.
2
Pull out the drive cartridge and remove it from the TeraStation.
3
Insert the new hard drive in the empty slot. Slide the drive in with the locking mechanism open. Swing the lock
back down until it clicks into place.
4
Press the power button on the TeraStation.
5
When the replacement hard drive is recognized, the status LED will flash red.
6
The TeraStation will start rebuilding the RAID array automatically.
Drive Replacement (RAID 0 or JBOD)
Drives in a RAID 0 array or JBOD mode do not automatically turn off in the event of a malfunction. Before replacing the
failed drive, either dismount the drive from Settings, or shut down the TeraStation. This section describes the process of
replacing a drive with the TeraStation on.
1
In Settings, navigate to Drives - Drives.
58
2
Select the hard drive with the flashing status LED and click Dismount Disk.
3
The status LED will stop flashing and glow steadily.
4
Unlock the failed drive by pushing the unlock button and swinging the lock mechanism out.
5
Pull out the hard drive cartridge and remove it from the TeraStation.
6
7
Insert the new hard drive (sold separately) into the empty slot. Slide the drive in with the locking mechanism open.
Swing the lock back down until it clicks into place.
For RAID 0
When the replacement drive is recognized, the status LED will flash red and the message “Set From Web I32 New
Diskx ready” will be displayed in NAS Navigator2.
Select Drives - RAID - the RAID array In Settings and click Delete RAID Array.
Select the replacement hard drive by navigating to Drives - Drives and clicking Format Disk to format the new drive.
Configure RAID mode by selecting Drives - RAID after formatting the hard drive.
If a hard drive malfunctions in RAID 0, all data on the RAID array will be lost. All of the settings for the shared
folders (such as access restrictions) are erased after replacing a drive from a RAID 0 array. Create a shared folder
before use.
For JBOD
When the replacement hard drive is recognized, the status LED will flash red and the drive will be formatted as an
individual drive. If this drive is removed from the TeraStation, shared folder settings such as access restrictions will
be lost. Create a shared folder on the drive before use.
Drive Replacement (using a redundant RAID mode such as RAID 1, 5, or 6 with a hot
spare configured)
If your TeraStation’s drives are in a redundant RAID mode, and you have a hot spare enabled, a malfunctioning drive in
the array is replaced by the spare disk and the RAID array is rebuilt automatically. The status LED will continue to glow
red for the failed drive even after the RAID array is rebuilt with the hot spare. This section describes the replacement
process for a hard drive while the TeraStation is still on.
1
The failed drive’s status LED will be glowing red. Push its unlock button and swing the lock mechanism out.
2
Pull out the drive cartridge and remove it from the TeraStation.
3
4
Insert the new drive in the empty slot. Slide the drive in with the locking mechanism open. Swing the lock back
down until it clicks into place.
When the replacement drive is recognized, the status LED will flash red. The replacement hard drive is
automatically registered as a hot spare. To use the replacement disk as a normal drive rather than a hot spare,
navigate to Drives - RAID and click the RAID array, select the new drive, and click Set as a normal disk.
Replacing a Media Cartridge
Drives configured as media cartridges may be removed and moved to a different TeraStation for use. Before unplugging
the drive, dismount it in Settings or shut down the TeraStation.
59
Chapter 5 Backup
Back Up from the TeraStation
You can back up TeraStation folders to:
• A different folder on the TeraStation
• Another LinkStation on the network
• Another TeraStation on the network
You can also configure backup jobs from Easy Setup.
Preparing a Backup Destination
First, configure a folder as a backup destination.
1
In Settings, navigate to Folder Setup.
2
Choose the folder to set as a backup destination.
3
Click Edit.
4
Check “Backup” from “LAN Protocol Support”, then click OK.
Note: To configure a password, enter it in the “Remote Backup Password” field. Leave this field blank if you don’t
want a password. If the target device is configured with a backup password, you can easily find the backup target
folder during configuration of the backup job by searching for the password.
Backing up to a LinkStation or TeraStation on another network when connected by a
VPN
You can back up to a LinkStation or TeraStation on another network as long as the two networks are connected by a
VPN. Follow this procedure to enter the IP address or hostname of the target LinkStation or TeraStation.
1
In Settings, click Backup.
2
Click
3
Click List of LinkStations and TeraStations.
to the right of “Backup”.
60
4
Click Add, enter the IP address of the target LinkStation or TeraStation, and click Close.
If your setup meets the requirements below, you don’t have to configure these settings:
• The source and target TeraStations are on the same network.
• No backup password is set for the target TeraStation.
• No TeraStation from outside the subnet, or connected by a VPN, is used.
Notes:
• To back up data between LinkStations or TeraStations on a network using jumbo frames, make sure that both devices are configured to use identical (or similar) Ethernet frame sizes. If Ethernet frame sizes are significantly different, the backup job may not be properly performed. In such a case, select the default frame size (1500 bytes).
• You can also specify hostname by a fully qualified domain name (FQDN).
Configuring a Backup Job
1
In Settings, click Backup.
61
2
Click
3
Click Create New Job.
to the right of “Backup”.
Note: Up to 8 backup jobs can be configured.
4
Select backup settings such as date and time to run.
The following types of backup jobs may be selected:
Type
Normal backup
Overwrite (incremental)
Overwrite (differential)
Files included
All files in the source will be backed up to the destination.
The first time the backup job runs like a normal backup. In subsequent
backups, files added to the source as well as files deleted from the source are
kept in the backup folder.
The first backup job runs like a normal backup. As each additional backup
job runs, files are added to and deleted from the backup folder. The backup
destination folder is always the same size as the backup source folder.
62
Type
Management backup
Files included
Each time a backup is executed, management information is stored, and
only files that have changed are copied or deleted. Data is retrieved from
the previous backup file for files that were not changed. This is useful for
making backups with limited space or for referencing status at a particular
point in time (for use for data snapshot applications). The destination folder
for a management backup should be a local folder on this TeraStation or on a
USB drive attached to it. The target folder will be set to read-only. Do not use
folders from drives formatted with FAT.
5
Click Add.
6
Click Browse under “Backup Source Folder Name”.
7
Select the shared folder that will be the backup source, then click OK.
8
Click Browse under “Backup Target Folder Name”.
9
Select the backup target and click OK.
10Click OK. Tasks added to “Backup List” are displayed.
63
Note: If the backup task is not added to the list, try refreshing the browser.
11Click Close.
Replication
Replication copies all data from a share to a share on a different TeraStation. This is an easy way to configure a reliable
system to provide data protection in the event your main TeraStation fails. To configure replication, connect an Ethernet
cable to the LAN port of each TeraStation and follow the steps below.
1
In Settings, click Backup.
2
Click
3
Click Edit.
to the right of “Replication”.
Note: Click Sync to copy all files to the replication target.
4
Click Add.
5
Click Browse under “Replication Source”.
6
Select the shared folder that will be the replication source, then click OK.
64
7
Click Browse under “Replication Target”.
8
Select the shared folder that will be the replication target, then click OK.
9
Click OK.
10Click Yes.
Notes:
• During setup, you may choose to encrypt and/or compress replication data. Encrypted data will transferred
securely on the network. Compressed data will ease network loading and is recommended for slow or heavily
loaded network connections. Either will increase the CPU load on the source TeraStation. Encrypted and compressed data will be unencrypted and decompressed on the target TeraStation.
• For best results, add replication tasks one at a time. Multiple replication tasks may take some time to complete.
• A maximum of 64 shared folders can be configured for replication.
• Shared folders with a backup password set cannot be selected as replication targets.
• Replication source data is copied using a differential overwrite to the replication target folder. Note that any data
that is not in the replication source will be overwritten.
• Replication can also be used to copy all data from a share to a share on an attached external drive. Format the
drive with ext3 or XFS before using it for replication. Drives with FAT32 partitions are not supported with replica65
tion.
• You can select subfolders as the replication source. Folders whose names contain more than 80 alphanumeric
characters cannot be selected.
• If a “Replication I33 ReplicateFailure” error occurs, navigate to Backup - Replication and click Sync.
• Don’t use the same TeraStation for both failover and replication, or replication and Time Machine.
• Don’t configure replication from one source folder to multiple target folders.
• If your TeraStation has more than 100 local users with an average of 8 characters or more per username, replication may fail. This bug will be fixed in a future firmware update.
Failover
With failover, two TeraStations are connected to the network for redundancy. If a problem occurs in the main TeraStation
so that it can no longer be accessed, operation is automatically switched to the backup TeraStation.
Note: Use identical model and capacity TeraStations for the main TeraStation and backup TeraStation. If the capacity
of the main TeraStation is larger than that of the backup TeraStation, a “Replication I33 ReplicationFailure” error will
occur.
Ethernet Cable Connection Methods
Two different configurations for failover are available. With the first setup, if the main TeraStation fails, the backup
TeraStation will replace it completely, using the same name and IP address. The backup TeraStation is updated over
normal network traffic.
Connecting to the network at LAN port 1 and setting failover at LAN port 1
With the second setup, the backup TeraStation and main TeraStation are connected by a second Ethernet cable
connecting their LAN 2 ports. Updating is done over this dedicated network path, so updates are quicker and don’t
interfere with normal network traffic. With this setup, if the main TeraStation fails, the backup TeraStation will replace it
by name, but will keep its original IP address.
Connecting to the network at LAN port 1 and setting failover at LAN port 2
66
The main and backup TeraStations should be the same model and capacity. Use fixed IP addresses for both TeraStations.
Because the IP address of the TeraStation designated as the backup cannot be changed, set its IP address before
configuring failover.
Using with UPS
Once failover is configured, you cannot set up a UPS for the backup TeraStation. Configure your UPS before configuring
failover. UPS recovery can be configured for both the main TeraStation and the backup TeraStation. However, the UPS
settings of the main TeraStation will not be copied to the backup TeraStation.
If the backup TeraStation is configured to sync with the UPS connected to the main TeraStation, then if the main
TeraStation shuts down, the backup TeraStation will no longer be able to detect if there was a power outage. In this case,
move the UPS communication cable from the main TeraStation to the backup TeraStation and reconfigure the UPS link
settings.
Configuring Failover
1
In Settings, click Backup.
2
Open Failover.
3
Click Edit Failover Status.
4
Select a TeraStation to be the target backup device.
5
Enter the administrator password of the target backup device, then click Continue.
6
If the administrator password is correct, the backup TeraStation will beep. In NAS Navigator2, both TeraStations will
67
show I51 messages and the backup TeraStation will also show an I48 message.
7
In the backup TeraStation’s Settings, navigate to Backup - Failover and accept failover backup status. In the main
TeraStation’s Settings, the “This TeraStation is being configured as a failover main device.” message will change to a
“completed” message. Failover is set up.
Notes:
• Don’t use the same TeraStation for both failover and replication, or failover and Time Machine.
• Ethernet frame size settings for both main and failover TeraStations should be 1500 bytes.
• If your TeraStation has more than 100 local users with an average of 8 characters or more per username, failover
may fail. This bug will be fixed in a future firmware update.
Maintenance Mode
If failover is configured, change to maintenance mode temporarily before turning off the TeraStation or updating the
firmware. Maintenance mode can be enabled and disabled at Backup - Failover in the main TeraStation’s settings.
Service IP Address
The “service IP address” will be the new address of the backup TeraStation when it takes over operation from the main
TeraStation.
If no service IP address is set, or a fixed IP address is set, an attempt is made to inherit the IP address from the main
TeraStation.
Network Problems
If network problems occur, the following messages may appear in NAS Navigator2 even though neither TeraStation has
failed. If this happens, disable and then reset failover.
• “FailOver I49 LostMainTarget” - This message (I49) is displayed in NAS Navigator2 for the backup TeraStation when
operation switches from the main TeraStation to the backup TeraStation.
• “E27: LostBackupTarget” - This message (E27) is displayed in NAS Navigator2 for the main TeraStation if it is no longer
able to detect the backup TeraStation on the network.
Backing Up Your Mac with Time Machine
Time Machine is a backup program included with OS X 10.5 or later. Configure your TeraStation as shown to use Time
Machine.
1
In Settings, move the AFP switch to the
2
Choose Folder Setup.
3
Choose a shared folder as your backup destination for Time Machine.
4
Click Edit.
position to enable AFP.
68
5
Select AFP (Mac) to LAN Protocol Support and click OK.
6
Click OK.
7
Click Close.
8
Click Backup.
9
Click the
icon to the right of “Time Machine”.
10Click Edit.
11Click Browse.
12Select the shared folder that you set in the previous step, then click OK.
13Click OK.
14Click OK.
15Move the Time Machine switch to the
position to enable Time Machine.
69
16On the Mac, open System Preferences.
17Click Time Machine.
18Click Choose Backup Disk.
19Select the TeraStation, then click Use for Backup.
20Enter a username and password with the rights to access the shared folder of the TeraStation, then click Connect.
70
Note: If access restrictions are not configured on the target share, log in with the administrator account. The
default username and password for the administrator account are “admin” and “password”. If access restrictions are
configured, log in with an account with write privileges.
21Time Machine will count down from 120 seconds, and the backup will begin.
Note: Because the backup operation is performed in the background, Mac OS operations and shutdown can be
performed normally. If recovering data or setting items excluded from the backup, refer to the Mac OS help.
Amazon S3
Amazon S3 (Amazon Simple Storage Service) is a fee-based online storage service provided by Amazon. Follow the steps
below to configure your TeraStation for use with Amazon S3.
1
Create an account at the Amazon S3 website: http://aws.amazon.com/s3
2
In Settings, click Web Services.
3
Move the Amazon S3 switch to the
4
Click OK.
5
Click Browse.
position to enable Amazon S3.
71
6
Select the shared folder for remote replication, then click OK.
Note: This folder is used by Amazon S3. Files are not added to the selected folder and the amount of used space
does not increase.
7
Enter the bucket name, access key ID, and secret access key of the Amazon S3 bucket, then click OK.
8
Amazon S3 is now enabled.
Notes:
• Amazon S3 is not compatible with Buffalo TurboPC EX. Uninstall TurboPC EX before using Amazon S3.
• Enter the path from the “Target Folder” field in a browser window to access the files saved to Amazon S3.
• To use after the network was temporarily disconnected, click Remount.
• If a file is added to the Amazon S3 bucket from a folder other than the TeraStation’s Amazon S3 remote replication
folder, it may take up to an hour for the file to appear in the TeraStation’s Amazon S3 remote replication folder.
However, when a file is added to the TeraStation’s Amazon S3 remote replication folder, it immediately appears in
the bucket.
• If you cannot enable Amazon S3, check the following:
Can the TeraStation access the Internet? From Network - Ping, enter an IP address such as “8.8.8.8” (Google).
Are all Amazon S3 credentials correct?
Can you access the Amazon S3 website (http://aws.amazon.com/s3) from a browser on your computer?
72
Chapter 6 Remote Access
WebAccess
WebAccess is a program for accessing the files in the shared folder of your TeraStation from your computer, smartphone,
or tablet through the Internet.
Note: Be careful configuring WebAccess. Certain settings can make the files in the shared folder available to anyone
on the Internet, without any access restrictions.
Configuration
1
Navigate to File Sharing - WebAccess.
2
Click Edit.
3
Configure the desired settings, then click OK.
73
• To use SSL encryption for more secure data transfers, enable “HTTPS/SSL Encryption”.
• You may use the default BuffaloNAS.com registration, or disable to use a different DNS server.
• Choose a “BuffaloNAS.com name” for your WebAccess account. Names may use 3 to 20 alphanumeric characters,
underscores (_), and hyphens (-).
• If “Exclusive Session” is enabled, users cannot log multiple computers into WebAccess. Only the last login will be
active.
• Enter a time in minutes (1 to 120, or “Unlimited”) before inactive users are logged out of WebAccess.
4
Click OK.
5
Move the WebAccess switch to the
6
Go to Folder Setup.
7
Select a shared folder to publish.
position to enable WebAccess.
Notes:
• For best results, create a new dedicated share for WebAccess.
• When accessing shared folders through WebAccess from a remote location, the username and password may
be required for certain operations. For best results, configure a user account with permissions on the WebAccess
share before using WebAccess.
8
9
Click Edit.
Navigate to File Sharing - Folder Setup and choose the folder you will use for WebAccess. Enable “WebAccess LAN
protocol support”.
Notes:
• The following levels of security are available:
Allow Anonymous - Anyone can access (view) shared folders.
Allow All Groups and Users - All groups and users registered on the LinkStation or TeraStation can use
WebAccess.
Use Inherited Folder Permissions - Users and groups have the same access permissions with WebAccess that
74
they do locally. If access restrictions are not set for the shared folder, then this option will not be shown.
• When a user or group can access a folder through WebAccess depends on a combination of WebAccess settings
and the shared folder’s settings.
Allow
Anonymous
WebAccess Public Mode
Folder Setup
Folder Attribute
WebAccess
Account
Not logged in
User with read & write access
User with read-only access
Group with read & write access
Group with read-only access
Other users
Read
&
Write
R
R/W
R/W
R/W
R/W
R/W
Read
Only
R
R
R
R
R
R
Allow All
Groups and
Users
Read
Read
&
Only
Write
R/W
R
R/W
R
R/W
R
R/W
R
R/W
R
Use Inherited
Folder
Permissions
Read
Read
&
Only
Write
R/W
R
R
R
R/W
R
R
R
-
R: Read only, R/W: Read and write, -: No access
10There are many ways to access WebAccess folders depending on your device.
• From a computer, supported browsers include Internet Explorer 8, Firefox 3.6, Safari 4, and later.
Instructions: http://buffalonas.com/manual/en/
• To access from an iPhone, iPad, or iPod touch, install the “WebAccess i” application from the App Store.
Instructions: http://buffalonas.com/manual/i/en/
• To access from an Android device, install the “WebAccess A” application from Google Play.
Instructions: http://buffalonas.com/manual/a/en/
• To access from a Windows Phone, install “WebAccess” from the Marketplace.
Instructions: http://buffalonas.com/manual/wp/en/
Note: If you are warned that your BuffaloNAS.com name is wrong when you access buffalonas.com, check your
network settings. This can happen when your DNS or default gateway is not configured correctly. Confirm that the
TeraStation can connect to the Internet, then reregister your BuffaloNAS.com name and reconfigure WebAccess.
WebAccess Remote
WebAccess Remote lets you open a shared folder on a remote TeraStation or LinkStation from Explorer, My Computer, or
other file manager.
Note: To use WebAccess Remote, the following conditions must be satisfied.
• You have TeraStations or LinkStation in two different locations, such as at home and at a remote location.
• WebAccess is enabled for both devices.
1
In Settings, click Web Services.
2
Click
3
Click Edit.
to the right of “WebAccess Remote”.
75
4
From “Target Folder”, select the shared folder that will be connected.
Notes:
• The selected folder is used internally by “WebAccess Remote”. Files are not added to this folder and the amount of
used space does not increase.
• If using both Amazon S3 and WebAccess Remote, configure the same shared folder for both. Don’t use different
folders for these services.
5
You may choose to enter a BuffaloNAS.com name or an external DNS/IP address. If “Use external DNS/IP address”
is selected, enter either the IP address of your DNS server, or the global IP address of the remote TeraStation’s
WebAccess.
6
Enter the remote TeraStation’s WebAccess username and password.
7
Click OK.
8
Move the WebAccess Remote switch to the
9
position to enable WebAccess Remote.
You can directly access the shared folder in the remote TeraStation by entering the path displayed in “Target
Folder” into the address box in Explorer, My Computer, or other file manager.
Notes:
• TurboPC EX is not compatible with WebAccess Remote. Uninstall TurboPC EX from your computer before using
WebAccess Remote.
• If no files and folders are displayed in the target folder, disable WebAccess Remote and Amazon S3, reboot the
TeraStation, and turn on both services again.
• If you change the NAS internal port number from the default value (9000), enter the new port number after the
external DNS/IP address with a colon. Example: http://buffalotech.com:9002
FTP
By default, the TeraStation’s shares are only accessible by users connected to the same network or router as the
TeraStation. The optional FTP server allows users outside the local network to access the TeraStation.
Note: FTP is intended for users who already have FTP client software and have experience with it.
1
In Settings, move the FTP switch to the
position to enable FTP.
76
2
Open Folder Setup.
3
Choose a folder to enable remote FTP access on.
4
Click Edit.
5
Select read-only or read & write for the shared folder’s attribute, check “FTP” under “LAN Protocol Support”, then
click OK.
Accessing the TeraStation with an FTP client
• To access the TeraStation via FTP, configure your FTP client software with the following settings:
Hostname: IP address of the TeraStation
Username: The TeraStation’s username
Password: The TeraStation’s password
Port: 21
• Shared folders connected by FTP are available from the “/mnt” directory. The default locations are:
For RAID 0, RAID 5, or RAID 1:
/mnt/array1/share
/mnt/usbdisk1
/mnt/usbdisk2
For RAID 1 (two arrays):
/mnt/array1/share
/mnt/array2/share2
/mnt/usbdisk1
/mnt/usbdisk2
For JBOD:
/mnt/disk1/share
/mnt/disk2/share2
/mnt/disk3/share3
/mnt/disk4/share4
/mnt/usbdisk1
/mnt/usbdisk2
Accessing the TeraStation with an Anonymous user:
• To allow anonymous access to your FTP share, check “FTP” in “LAN Protocol Support” and disable access
restrictions.
• To access the TeraStation via anonymous FTP, configure your FTP client software with the following settings:
Hostname: IP address of the TeraStation
Username: anonymous
Password: any character string
Port: 21
Notes:
• If the TeraStation joins a domain, anonymous users cannot access it.
• If a file was created or copied by AFP, you may not be able to delete it using an FTP connection. If this occurs, use
an SMB or AFP connection instead to delete the file.
• For FTP connections, make sure that the total filename including directory path is 250 single-byte characters or
less.
77
Chapter 7 BitTorrent
BitTorrent is a protocol for distributing large amounts of data efficiently. The information in this chapter is for users who
are familiar with BitTorrent.
Note: Use compatibility mode to use Download Manager with Windows 8.1 or Windows 8.
Configuration
1
In Settings, click Applications.
2
Click the
3
Click Edit.
4
Click Browse.
icon to the right of “BitTorrent”.
78
5
Select the shared folder where the downloaded file will be saved, then click OK.
6
Click OK.
7
Move the BitTorrent switch to the
8
Click the
9
Click Open Download Manager. The default username is “admin” and the default password is blank (no password).
position to enable BitTorrent.
icon to the right of “BitTorrent”.
10The download manager will open.
79
Chapter 8 Multimedia
DLNA
DLNA is a set of guidelines for sharing digital media. The TeraStation includes a DLNA server compliant with the DLNA
guidelines. The movies, photos, and music saved on this product can be played back on DLNA-compliant TVs, stereo
equipment, game consoles, and other devices within the network.
Configuration
1
Navigate to File Sharing - Folder Setup.
2
Select the folder that you want to share with media players and other DLNA-compatible devices.
3
Click Edit.
80
4
Enable “DLNA” under “LAN Protocol Support”, then click OK.
5
Click Services.
6
Move the DLNA switch to the
7
Click the
8
Click Edit.
9
Select an interval for DLNA server database updates and click OK.
position to enable DLNA.
icon to the right of “DLNA Server”.
Playing Files
To play back content from a DLNA-compatible device:
1
Connect the DLNA-compatible device to the same network as the TeraStation and turn it on.
2
Select the TeraStation in the software of the DLNA-compatible device.
3
Select the content to be played back.
Connected DLNA-compatible Devices
Follow the procedure below to view the DLNA-compatible devices connected to your TeraStation.
81
1
In Settings, click Services.
2
Click the
3
Click DLNA Client Access Permissions.
4
icon to the right of “DLNA Server”.
A list of the MAC addresses, IP addresses, and device names of the DLNA-compatible devices connected to the
same network as the TeraStation is displayed. If your device is not listed, click Refresh Database.
Streaming to DLNA-compatible Devices
When new movies, photos, and music files are added to the TeraStation’s DLNA folder, the database must be updated
before the new file scan be streamed. By default, the database is updated at startup and again every 60 minutes. You
can change this interval or update the database manually.
1
In Settings, click Services.
2
Click the
3
You may change the update interval, or select Refresh Database to update the database immediately.
icon to the right of “DLNA Server”, then click Edit.
82
Disabling Playback from Specific Devices
You may block specific DLNA devices from playing back media content.
1
In Settings, click Services.
2
Click the
3
Click DLNA Client Access Permissions.
4
Uncheck the devices you do not want to allow to play media and click OK.
icon to the right of “DLNA Server”.
Supported File Types
The TeraStation supports DLNA streaming of files with the extensions below.
Types
File Extensions
83
Video files
Picture files
Music files
.avi, .divx, .asf, .mpg, .mpe, .m1v, .vob, .mts, .m2ts, .m2t, .mpeg, .mpeg2, .vdr, .spts, .tp, .ts, .3gp,
.mov, .m4v, .wmv, .dvr-ms, .xvid, .mp4
.jpg, .jpeg, .gif, .png, .tif, .tiff, .yuv, .bmp
.mp3, .mpa, .wma, .aac, .apl, .ac3, .lpcm, .pcm, .wav, .m3u, .m4a, .mp4, .3gp, .m4b, .aif, .aiff, .flac,
.ogg, .mp2, .mp1, .mp4
iTunes Server
If the iTunes server is enabled, computers on your network with iTunes can play music files stored on the TeraStation
and transfer them to iPod, iPhone, and iPad devices. The iTunes server supports playback from up to five computers.
Configuration
1
In Settings, click Services.
2
Click the
3
Click Edit.
4
Click Browse.
5
Select the shared folder that you want to make available to iTunes, then click OK.
icon to the right of “iTunes Server”.
84
6
Click OK, then OK again.
7
Move the iTunes server switch to the
position.
85
Chapter 9 Surveillance Server
Overview
The TeraStation supports streaming video from RTSP (Real Time Streaming Protocol) network cameras.
Getting Started
The following items are required:
• TeraStation with surveillance camera support
• Supported network camera
• Ethernet cable
• Ethernet hub
• Computer
Supported Operation Systems: Windows 7 (64-bit or 32-bit), Windows Vista (64-bit or 32-bit), Windows XP SP 3,
Windows Server 2008 SP 2 (64-bit or 32-bit), Windows Server 2003 SP 2, OS X 10.5.8 or later
CPU: Intel Dual-core 2.20 GHz or faster
Hard drive: 10 GB or more of available space
RAM: 2 GB or more
Note: Live Viewer requirements:
Supported OSs: Windows 7 (64-bit or 32-bit), Windows Vista (64-bit or 32-bit), Windows XP SP 3
CPU: Quad-core 2.33 GHz or faster
Hard drive: 10 GB or more of available space
RAM: 2 GB or more
Surveillance cameras cannot be used if failover is configured. Also, failover cannot be used if surveillance camera
functionality is enabled.
86
Initial Setup
Installing Client Tools
Download the client tools below from www.buffalotech.com and install them on your computer.
Camera Policies - Registers that a network camera is connected and ready to record.
Live Viewer - Lets you view video as it is being recorded. With some network cameras, pan, tilt, zoom, focus, and other
remote operations may be unavailable.
Data Service Policies - Used to move, back up, and delete recorded video data.
Vault Admin - Used to perform license registration, self-diagnosis, check the remaining disk space, and other
operations.
Surveillance Video Manager - Used to view recorded video data, perform searches, export, and other operations.
Network Activity - Displays the operating status of the TeraStation.
Notes:
• Use an account with administrator rights to install software.
• To play recorded video, install VLC media player 1.11–1.13 or Apple QuickTime 7 or later on your computer. VLC
media player 2.0.x doesn’t work with some network cameras. For network cameras that record in MPEG-4 format,
VLC media player is recommended.
• If VLC media player is installed, use the default installation location (C:\Program Files (x86)\VideoLAN\VLC in Windows 7 64-bit or the Application folder in Mac OS).
• If surveillance cameras or client tools installed under C:\Program Files (x86)\BUFFALO\SurveillanceServer\Bin) are
blocked due to the OS firewall, refer to the OS help for instructions about how to disable the firewall.
• Install Client Tools on one or more computers connected to the same network as the network camera(s) and the
TeraStation. Surveillance camera settings are shared for all cameras on the network.
Connecting Devices to the Network
Connect the following devices to the network.
• A TeraStation that supports surveillance cameras
• A compatible network camera
• A computer with the above client tools installed
Notes:
• Connect all devices on the same network subnet.
• Set the TeraStation’s and network camera’s time settings to the correct time. By default, the TeraStation adjusts
its clock automatically by using a default NTP server. This NTP Server belongs to Internet Multi Feed Inc. For more
information,visit www.jst.mfeed.ad.jp. You can select a different NTP Server by clicking Name/Time/Language on
the “Management” screen. The Name/Time/Language screen opens.
• Click Time.
• Click Edit.
• Uncheck Use Default NTP Server and enter a new NTP IP address.
• Click OK.
If NTP is not used,disable it and enter the time and date manually. Click Use Local Date/Time to import the time and date
from your computer.
In certain cases, the DNS server address must be set in order to access the NTP server.
87
• Use the dedicated utility provided with the network camera or other program to confirm that the network camera operates properly.
Enable the Surveillance Camera
Enable surveillance camera in Settings.
Note: First, complete the initial settings for the TeraStation and the network camera. For details on the procedure,
see the manual supplied with the device.
1
In Settings, click Applications.
2
Click the
3
Click Edit.
4
icon to the right of “Surveillance Cameras”.
From “LAN Port”, select the LAN port connected to the same network as the network camera and computer where
the client tools are installed.
5
Click Browse.
6
Choose a folder for recorded video, then click OK.
7
Click OK, then OK again.
88
8
To enable surveillance cameras, change the switch to
.
Notes:
• If the target shared folder specified as the storage location for recorded video is deleted, the surveillance camera
is automatically disabled.
• Do not directly edit recorded video data in the shared storage folder. If a file is directly edited, the surveillance
camera software may no longer operate properly.
• Do not duplicate or back up the shared storage folder with the built-in utilities in Settings. A separate backup
license must be purchased to back up this data to another TeraStation.
• The client tools can only be used with the LAN connected to the selected LAN port.
Users with Two or More Network Cameras
In the default settings, only one network camera can be used. To use two or more network cameras, additional licenses
(sold separately) must be purchased and registered.
Enabling the Free License
Your TeraStation comes with a license for one surveillance camera. Follow the procedure below to enable the included
license.
1
Connect the TeraStation to the Internet.
2
Click Start - BUFFALO - BUFFALO Surveillance Server - Vault Admin.
3
Select the TeraStation where you want to add the license, right-click it, and click Properties.
4
Open the License tab, then click Activate Free License.
89
To deactivate the license, click
5
.
Check that the “SurveillanceCamera 1 camera” and “HardDisk” were added to “Installed Licenses”.
The free license is now enabled.
Registering the Recording Policy of the Network Camera
Register the network camera that is used.
90
1
Click Start - BUFFALO - BUFFALO Surveillance Server - Camera Policies.
2
Click the
3
Click Next.
4
Click Find Cameras.
5
Select the detected network camera, then click OK.
icon.
91
Note: Network cameras that are already in use are indicated by an asterisk (*) and they are gray.
6
Enter the username and password, then click Next.
Note: Clicking Test Camera runs an operational check of the network camera.
7
Enter the description, then click Next.
8
Select the recording schedule, then click Next.
92
9
Select the TeraStation where the video will be recorded, then click Next.
10Check the registration information, and if it is correct, click Next.
11Click Next.
93
An additional network camera can be registered by selecting “Yes” when asked “Do you want to add an additional
camera?”
12Click Save.
Recording will begin. You’ve now registered the recording policy of the network camera.
Checking Recording
Wait at least 15 minutes after registering the recording policy before performing this procedure. To check that recording
is working correctly, follow the procedure below.
1
Click Start - BUFFALO - BUFFALO Surveillance Server - Surveillance Video Manager.
2
Click Search.
3
Recorded video clips are shown in the center of the screen. Click a video clip to start playback.
This completes checking recording.
94
Email Error Notification
You may configure the TeraStation to send you an email notification when the available space for recording is low, or
when recording fails due to a camera malfunction, network disconnection, or other cause.
Configuration
Viewing Saved Video
Follow the procedure below to view recorded data saved in the TeraStation.
1
Click Start - BUFFALO - BUFFALO Surveillance Server - Surveillance Video Manager.
2
Click Search.
3
Video clips are shown in the search results at the center of the screen. Click the clip to start playback.
Export Recorded Data as a MOV Video File
To export recorded data saved to the TeraStation as a MOV format video file:
1
Click Start - BUFFALO - BUFFALO Surveillance Server - Surveillance Video Manager.
2
Select the search criteria on the left side of the search screen, then click Search.
95
3
The search results are displayed. Click a thumbnail to start the media viewer.
96
4
5
Select the section to export and click Export. This will register the video to the export queue.
Open the Export screen, register the export information from “Export Job Configuration”, and click Start Export. The
video is exported in MOV format.
97
This completes exporting video in the MOV format.
Viewing Video Real-time
Follow this procedure to view the video as it is being recorded by the network camera.
Note: Live Viewer data cannot be viewed.
1
2
Click Start - BUFFALO - BUFFALO Surveillance Server - Live Viewer.
Registered network cameras are listed in the Camera folder on the right side of the screen. To view content of a
video that is currently being recorded, double-click the camera whose video you want to view or drag to a frame of
the camera viewer on the left side of the screen.
This completes viewing current video.
Moving Recorded Video Data to Another TeraStation
Follow the procedure below to move (migrate) the recorded video data to another TeraStation.
Note: A separate Surveillance Server License Pack must be purchased to do this.
1
2
Click Start - BUFFALO - BUFFALO Surveillance Server - Data Service Policies.
Click
, and when the Create a Policy screen is opened, enter “MigrateTest” into the “Policy Name” field, select
Migrate, and click OK.
98
3
4
5
6
Click the Source tab. Under “Vault”, select the TeraStation where the recorded video data is saved. Select any to
migrate recorded data on all network-connected TeraStations.
Click the Destination tab to select which TeraStation you want to move the data from “Vault” off of.
Set the migration date and time on the Scheduling tab.
To execute migration every hour, select Repeatedly at a defined interval and Every 1 hour.
Click
, and register the policy.
This completes the settings for moving recorded video to another TeraStation.
Backing Up Recorded Video to Another TeraStation
Follow this procedure to back up recorded video data to another TeraStation.
Note: A separate Surveillance Camera License Pack must be purchased to do this.
1
2
Click Start - BUFFALO - BUFFALO Surveillance Server - Data Service Policies.
Click
and when the Create a Policy screen opens, enter “DuplicateTest” into the “Policy Name” field, select
Duplicate, and click OK.
99
3
Click the Source tab and select the TeraStation where the recorded video data is saved under “Vault”.
Note: If any is selected, recorded data for all TeraStations connected to the network will be backed up.
4
5
6
Click the Destination tab, then select the TeraStation where you want to move the data from “Vault”.
Set the job execution date and time from the Scheduling tab.
For example, the settings below are made to repeatedly execute the backup job every hour.
Select Repeatedly at a defined interval and Every hour.
Click
and register the policy.
This completes the settings for backing up video to another TeraStation.
Automatically Delete Old Data when Space is Low
Follow the procedure below to delete (purge) recorded video starting from the oldest when available space for
recording video becomes low.
1
2
Click Start - BUFFALO - BUFFALO Surveillance Server - Data Service Policies.
Click
, and when the Create a Policy screen is opened, enter “PurgeTest” into the “Policy Name” field, select
Purge, and click OK.
100
3
4
5
Click the Source tab and select the TeraStation on which recorded video is saved under “Vault”.
Open the Criteria tab, and under “Miscellaneous Options”, set Watermark: High and Watermark: Low.
For example, the settings below delete old data when the amount of used media space exceeds 80% until it drops
to 40%.
Set Watermark: High to “80” and Watermark: Low to “40”.
Set the job execution date and time from the Scheduling tab. This example shows a job to be executed at 2:00 am
on weekdays.
• Select On selected days each week.
• Select every day between Monday and Friday.
• Select “2:00” and “AM”, then click OK.
101
6
Click
and register the policy.
This job is now set up to run at 2:00 AM Monday to Friday.
Changing Where Recorded Video Is Saved
Follow this procedure to change the TeraStation to which video is saved.
1
Click Start - BUFFALO - BUFFALO Surveillance Server - Camera Policies.
2
Click the
3
Double-click the camera to which video will be saved. This opens “Modify Camera”.
4
Select the TeraStation you want to quit using as the “Recording Computer” and click OK.
5
Click
icon on the tool bar and open the “Camera Configuration” screen.
and register the policy.
This completes changing the TeraStation where recorded video is saved.
Client Utilities
Camera Policies
Camera Policies is a software program that registers the network camera that will be used and starts video recording.
102
Click
to start the wizard where registration of network cameras and the recording schedule are performed.
Click
to start the camera configuration screen where network cameras are registered.
Click
to start a new registration screen for an additional network camera. You can also register the camera and
define the recording video policy.
Live Viewer
Live Viewer allows you to view video currently being recorded by a network camera.
Note: To view the current video, the network camera must be registered in Camera Policies.
• The layout of the camera view (numbers of rows and columns) and registered network cameras are displayed in
the panel on the right side of the screen.
• The camera view (live video) is displayed on the left side panel. In the default setting, a 2x2 camera view is displayed. A layout view with up to 4x4 cameras can be displayed.
• Double-clicking the network camera name or dragging to the camera view frame enables viewing of the current
video that is being recorded by the network camera.
The layout can be saved from “View” menu - “Save Layout As”.
103
Data Service Policies
Data Service Policies is a software program for creating data service policies. The policy types that can be created are
shown below.
Note: To use migration and duplication, an additional backup license must be purchased.
Policy Type
Migration
Duplication
Purge
Action
Moves recorded video data to another TeraStation
Copies recorded video data to another TeraStation and synchronizes the data.
Deletes the recorded video data.
The right side of the screen includes tools for creating and updating data service policies. The left side of the screen
shows an overview of all data service policies.
Notes:
• If
is displayed for a policy in the left-side frame, the policy is disabled.
• Surveillance server functionality must be enabled beforehand for the TeraStation where migration or duplication
files will be saved.
Vault Admin
Vault Admin is a software program for managing surveillance camera resources.
Operations are performed from the tool bar located in the top section of the screen.
The icons and their functions are shown below.
Icon
Description
104
Starts “Mini Vault Status” for enabling the display of basic monitoring information.
Sets the security status.
Shuts down or restarts a portion (Vault) of the surveillance cameras.
Changes the properties.
Performs a diagnosis of the surveillance camera.
Loads a media device.
Prepares a media device.
Unloads a media device.
Erases a media device.
Refreshes the current screen.
Surveillance Video Manager
Surveillance Video Manager is a software program for performing searches and exporting of recorded video data.
Search Window
Export Window
Network Activity
Network Activity is a software program that displays the TeraStations on which surveillance cameras are operating on
the network, in real time and in graphical form.
105
All clients and TeraStations located on the network are indicated by
and labels. These can be moved by dragging and
dropping them. Clients are displayed only when a job is being executed and activities are indicated by a line linking the
client and TeraStation.
Mini Vault Stats
Double-clicking the icon for a TeraStation on “Network Activity” starts “Mini Vault Stats”. “Mini Vault Stats” shows the
network traffic in graphical form.
Activating Additional Licenses
Purchasing an additional license (sold separately) enables you to connect and use two or more cameras and use the
migration and duplication functions. Use this procedure to activate an additional license.
When the TeraStation is Connected to the Internet
1
Click Start - BUFFALO - BUFFALO Surveillance Server - Vault Admin.
2
Select the TeraStation to which you want to add the license, right-click it, and click Properties.
106
3
Open the License tab, then click +.
If your default free license activation is not installed, see “Enabling the Free License” to install it.
4
Enter the product key for the license pack (sold separately), then click OK.
5
Confirm that the new license was added to “Installed License”.
107
You have now activated the additional license.
TeraStation Not Connected to the Internet
1
If the TeraStation is being used in an environment where Internet access is not available, a separate computer with
access to the Internet is required to activate the additional license.
2
Click Start - BUFFALO - BUFFALO Surveillance Server - Vault Admin.
3
Select the TeraStation where you want to add the license, right-click it, and click Properties.
4
Open the License tab, then make a note of the “Host Id”.
108
5
6
Open the website below in web browser.
http://buffalo.jp/support_s/camera_licence/
From the license pack (sold separately), enter the product key and host ID code and click “Activate Software
License”.
7
Downloading of the license file (*.lic) begins. Save the license file to a USB memory device or other storage device.
8
Copy the license file to a computer connected to the same network as the TeraStation.
9
In the computer connected to the same network as the TeraStation, click Start - BUFFALO - BUFFALO Surveillance
Server - Vault Admin.
10Select the TeraStation to which you want to add the license, right-click, and click Properties.
109
11Open the license tab, then click +.
12Select Import license file, then click Browse.
13Select the license file that was saved before, then click OK.
14Check that the license pack was added to “Installed Licenses”.
110
This completes authentication of an additional license.
Troubleshooting
Issue
Video recording does not start.
Possible Cause
Surveillance Camera setting not
enabled.
A LAN cable between the TeraStation
and network camera is disconnected,
or the power is turned off.
The video recording policy is not
registered.
The device is not connected to a
network on the same LAN, or the
device is not connected to the LAN
port that was set in Settings.
The time for the TeraStation and
network camera is not correct.
There are not enough camera
licenses for the network cameras.
I cannot view the network camera
using Live Viewer.
Check that the LAN cables are
inserted correctly.
Register the video recording policy
from Camera Policies.
Connect the device to the network of
the LAN port that was set in Settings.
Free available space on the disk by
moving or deleting files.
The disk is full.
I cannot enable the surveillance
camera.
Surveillance cameras no longer
record video.
Possible Solution
Enable the Surveillance Camera from
Settings.
Set the time in Settings.
Purchase and register an additional
license.
Failover is running.
Disable failover.
The target shared folder for the
recorded video was deleted.
The network camera is not registered
in some camera policies.
There is an error in the network
camera settings.
Enable surveillance camera
functionality in Settings.
Register the network camera from
camera policies.
Verify the settings in the camera
policies.
111
Issue
Possible Cause
There is no recorded data, or the
recorded data cannot be found.
A camera was added in camera
policies while Surveillance Video
Manager was running.
Possible Solution
If this is the case, this video may not
be accessible. Restart Surveillance
Video Manager to enable searching
for recorded video from the new
camera.
Notes:
• QuickTime is a trademark of Apple Inc., registered in the U.S. and other countries.
• VLC media player is a trademark of Video LAN org.
• See www.buffalotech.com for supported cameras.
• Refer to the “Buffalo Surveillance Server Administrator’s Guide” for information about client tools.
112
Chapter 10 Advanced Features
Email Notification
Your TeraStation can send you email reports daily, or when settings are changed or an error occurs. Notification emails
may be triggered by any of the following events:
• Backup job completed
• Change to RAID configuration
• RAID error
• Fan error
• Hard drive read error
• Hard drive replacement
• Quota exceeded
1
In Settings, click Management.
2
Move the email notification switch to the
3
Click
4
Click Edit.
5
Enter your mail server settings and choose what events will trigger notification. Click OK to send a test email.
position to enable email notification.
to the right of “Email Notification”.
113
Sleep Mode
To save energy, you can specify times to put the TeraStation into sleep (standby) mode, where the hard drive and LEDs
are turned off.
1
In Settings, click Management.
2
Click the
3
Click Edit.
4
Specify the timer interval, wake-up time, and time go into sleep mode, then click OK.
icon to the right of “Sleep Timer”.
114
Notes:
• Up to three timers can be set.
• The time to enter sleep mode can be set from 0:00 to 3:45 of the next day.
The time to wake from sleep mode can be set from 0:00 to 23:45.
If the time to enter sleep mode is after 24:00, the wake-up time setting may be from 4:00 to 23:45.
• The time to enter sleep mode should not be set at the same time as or before the start time.
• If a backup task is scheduled during a disk check, disk format, backup job, or within 5 minutes of the current time,
the TeraStation will not change to standby mode when the configured time is reached.
• If scheduled times in the timer overlap, operation is performed using the widest time interval.
• Examples of multiple timer settings are shown below.
Example 1: If running at a current time of 10:00 Wednesday
Timer 1: Daily 12:00–24:00
Timer 2: Not used
Timer 3: Not used
No operation is performed at 12:00, and operation changes to standby mode at 24:00.
Example 2: When running at a current time of 10:00 Wednesday
Timer 1: Daily 9:00–18:00
Timer 2: Wednesday 10:00–20:00
Timer 3: Not used
On days other than Wednesday, normal operation begins at 9:00 and the unit goes into sleep mode at 18:00. On
Wednesday, the unit goes into sleep mode at 20:00.
Example 3: If running at the current time of 10:00 Wednesday
Timer 1: Daily 9:00–18:00
Timer 2: Wednesday 10:00–1 am of the next day
Timer 3: Not used
On days other than Wednesday, normal operation begins at 9:00 and the unit goes into sleep mode at 18:00. On
Wednesday, normal operation begins at 9:00, and the unit goes into sleep mode at 1:00 am the next day.
Example 4: If running at a current time of 10:00 Wednesday
Timer 1: Daily 9:00–18:00
Timer 2: Wednesday 7:30–22:00
Timer 3: Not used
On days other than Wednesday, normal operation begins at 9:00 and the unit goes into sleep mode at 18:00. On
Wednesday, normal operation begins at 7:30 and the unit goes into sleep mode at 22:00.
• To wake the TeraStation from sleep mode manually, press the power button.
115
Wake-on-LAN
The TeraStation supports Wake-on-LAN, which allows it to be turned on remotely.
1
In Settings, click Network.
2
Click the
3
Click Change.
4
Enable “Wake-on-LAN”, then click OK.
icon to the right of “IP Address”.
Wake-on-LAN is now enabled. As long as it is connected to power and the network, you can turn on the
TeraStation remotely.
Notes:
• After a power outage, wait 5 minutes after power is restored to send the Wake-on-LAN packet to the TeraStation.
• After receiving the Wake-on-LAN packet, the TeraStation may take approximately five minutes to be ready to use.
• To use Wake-on-LAN, you’ll need Wake-on-LAN software such as AMD’s Magic Packet utility. The TeraStation does
not include Wake-on-LAN software.
• The TeraStation does not support using Wake-on-LAN and port trunking at the same time. You may use either
feature, but not both at the same time.
• On the local network, Wake-on-LAN packets may be sent to port 2304 on either of the TeraStation’s LAN ports. If
the TeraStation is connected to a Buffalo wireless router configured for remote access, then it may be turned on
from outside the local network (from the WAN side). To use this feature, connect the router to only LAN port 1 on
the TeraStation.
UPS (Uninterruptible Power Supply)
If a UPS (sold separately) is attached, the TeraStation can be automatically shut down for protecting data in the event of
a power outage.
1
Plug the power cable of the UPS to a wall socket.
2
Connect the AC cable of the TeraStation to the UPS.
116
3
Connect the UPS and TeraStation using a USB cable or serial cable.
4
Turn on the UPS, then the TeraStation.
5
In Settings, click Management.
6
Click
7
Click Edit.
8
Configure the desired settings, then OK.
9
Reboot your TeraStation. Settings are applied after the TeraStation restarts.
to the right of “Power”.
Notes:
• If the TeraStation is connected directly to a UPS, select “Sync with the UPS connected to this TeraStation”. If a
different TeraStation is connected to the UPS, select “Sync with the UPS connected to another TeraStation on the
same network.” After making this selection, enter the IP address of the TeraStation that will be the sync source in
“Other TeraStation’s IP Address”.
• If you have only one UPS, then configure “UPS 1”. Don’t select “Configure UPS 2” unless you have already configured UPS 1 and have a second UPS to configure.
• When the TeraStation is rebooted after an automatic shutdown (such as from a power outage or power supply
problem), verify that the power supply has been restored. If the TeraStation is turned on while it is still running on
the UPS and without the power supply restored, automatic shutdown is not performed, even after the specified
time has elapsed.
• If the power supply from the UPS to the TeraStation is stopped and restarted when UPS recovery is enabled, the
TeraStation is automatically restarted.
Connecting a Printer
You can connect a printer to the USB port on the TeraStation.
Notes:
• Only one USB printer can be connected to the TeraStation.
117
• Bidirectional communication is not supported i.e., remaining ink quantities and other printer status information
is not supported.
• If a multifunctional printer is connected, only the printer function can be used. Other functions such as scanning
will not be available.
• The print server does not support Mac OS.
Setting Up a Printer with Windows 7 or Windows Vista
1
In Settings, click Services.
2
Move the print server switch to the
3
Refer to the manual supplied with the printer and install the printer drivers.
4
Click Start - Network.
5
Double-click the TeraStation server name.
6
Double-click the icon of the connected printer (shared name is displayed).
7
Select your printer, then click OK.
8
Register the printer.
position to enable the print server.
Setting Up a Printer with Windows XP
1
In Settings, click Services.
118
2
Move the print server switch to the
3
Refer to the manual supplied with the printer.
4
Click Start - Control Panel.
5
Click Network and Internet Connections.
6
Click My Network Places - View workgroup computers - (Name of the TeraStation Server).
7
Double-click your printer icon.
8
9
position to enable the print server.
When “The server for the printer does not have the correct printer driver installed. If you want to search for the
proper driver, click OK.” displays, click OK.
Register the printer.
You have added a printer.
Auto RAID Rebuild
If auto RAID rebuild is enabled, RAID arrays will rebuild automatically after a failed drive is replaced. You may enable or
disable auto RAID rebuild in Drives.
1
In Settings, click Drives.
2
Move the auto RAID rebuild switch to the
position to enable automatic rebuilding.
Note: You may see an “I32” message in NAS Navigator2 when you insert a blank replacement drive. This will
disappear when the RAID rebuild begins.
Write Caching
Caching can speed up disk writes, but increases the danger of data corruption if power is suddenly disconnected. You
may enable or disable write caching in Drives - Drives.
119
Power Supply Failure
You may configure the TeraStation to shut down automatically if a power supply fails in Management - Power.
1
Navigate to Management - Power in Settings. Choose the Power Supply Failure tab.
2
Click Edit.
3
Select the number of minutes after the power supply fails to have the unit shut down. Click OK.
120
IP Routing
IP routing allows viewing and editing the routing table. You may configure it in Network - IP Routing.
1
Navigate to Network - IP Routing in Settings. The routing table will open.
2
Click Add Route.
3
Choose your route type, enter the necessary information, and click OK.
NFS Rules
NFS rules let you restrict who can access your NFS share. By default, no one can access NFS shares until rules are created
to allow them access. Only users detailed by rules will be able to access the share. To add an NFS rule, follow the steps
below.
1
Navigate to File Sharing - NFS in Settings. Select the NFS Rules tab and click Add Rule.
121
2
3
Browse to the folder whose settings you want to change.
In the Hosts field, enter the hostnames or IP addresses (comma separated) of the devices that will be able to access
the folder. Or, put an asterisk in the field to allow access for everyone. Click OK.
TeraSearch
TeraSearch lets you search for character strings contained in files (text files, Word files, etc.) stored on the TeraStation.
Follow the steps below to enable it.
1
Open Folder Setup.
2
Click the shared folder to be indexed.
3
Click Edit.
4
Check “Include this folder in the search index”, then click OK.
122
5
Click OK.
6
Click Close.
7
Click Applications.
8
Move the TeraSearch switch to the
9
Click
position to enable TeraSearch.
to the right of “TeraSearch”.
10Click Refresh Index.
11Click Edit.
12Enter the port number that you want to use and the time that the index will be updated, then click OK.
13Open the following URL in your browser.
http://(IP address of your TeraStation):3000/
Note: You can identify your IP address from NAS Navigator2.
14Enter your TeraStation’s username and password, then click Login.
15Enter a keyword in the “Search Text” field. Click Advanced Search to enable searches by specifying the filename,
owner, date updated, and file size.
16Click Search.
The search results are displayed. Click the filename in the results to open the file.
123
Offline Files
Offline files (included with many versions of Windows, can be used to access files in the TeraStation, mimicking the
computer’s behavior even if it is disconnected from the network. When connected to the network again, the updated
files are written and synchronized. Follow the procedure below to use offline files.
1
In Settings, click
2
Click the shared folder for offline files.
3
Click Edit.
4
Choose “Manual File Caching”, “Automatic File Caching”, or “Automatic Program and File Caching”, then click OK.
to the right of “Folder Setup”.
• Manual File Caching - Files used offline must be selected by the user.
• Automatic File Caching - Opened files can be cached locally for offline use. Previous versions of files that are
not synchronized are automatically replaced by the latest versions.
• Automatic Program and File Caching - Opened files can be cached locally for usage offline. Previous versions
of files and applications executed from the network that are not synchronized are automatically deleted, and
they are replaced by the latest version of the files and applications.
5
Click OK.
6
Click Close.
7
In Windows, navigate to Folder options. (Windows 8.1, Windows 8, and Windows 7 users should skip to step 9).
8
Check “Enable Offline Files”, then click OK.
124
Note: Offline files cannot be enabled if “Use Fast User Switching” is enabled. To change the setting, open “User
Accounts” in Control Panel and select “Change the way users log on or off”.
9
Right-click the icon of the shared folder on the TeraStation for which you have set the offline feature, then click
Make Available Offline.
10When the offline file wizard opens, follow the instructions on the screen. For more information, refer to the
Windows help.
11When the offline settings and sync settings are completed using the wizard, the files and folders set appear as
shown:
125
12If the network is disconnected after synchronization is completed, the offline file function can be used.
Offline files can be accessed by the original Universal Naming Convention (UNC) where the data was saved.
Note: If offline files can be used, an icon appears in the system tray.
Editing Offline Files - Offline files can be edited and deleted in the same way as normal files. Differences that arise
from the original data on the network due to editing or deleting of the file are resolved by resynchronization after
the network is reconnected.
Synchronizing Offline Files - The offline file is automatically synchronized based on preset conditions, such as after
reconnection with the network, logging on, logging off, etc.
Version Conflicts - A file conflict occurs if different changes were made simultaneously to the offline file and
original data on the network. The screen below is displayed when a file conflict is detected. Resolve the conflict by
following the instructions on the screen.
DFS
DFS (Distributed File System) is a set of client and server services that allows Windows users to organize many
distributed SMB file shares into a distributed file system. Follow the steps below to enable DFS on the TeraStation.
1
In Settings, click the
2
Click Edit.
3
Enable or disable “Allow Multiple DFS Links”.
icon to the right of “DFS”.
126
Note: If enabled, a DFS link target shared folder is created under the DFS root. If disabled, up to eight DFS link target
shared folders can be created under the DFS root.
4
Enter DFS Root Folder Name.
5
Click Add Link.
6
Click Yes.
7
Enter the link name, hostname, and shared folder name, then click OK.
Notes:
• TeraStations, LinkStations, and SMB-compatible Windows computers can be specified as DFS link targets (Mac OS
and Linux are not supported).
• If “Allow Multiple DFS Links” is disabled, then you may create up to 8 hostnames and DFS links.
8
Click OK.
9
Move the DFS switch to the
position to enable DFS.
Accessing from a NFS Client
Note: (US purchasers only) Buffalo’s customer support will help configure the NFS settings on your TeraStation, and
will support VMware, Citrix, and Windows clients but will not provide support for configuring your Linux or other
UNIX clients. There are many types of UNIX and the procedures for configuring NFS with them will vary considerably.
127
For help configuring your NetWare, Linux, or other UNIX clients for NFS support, please consult each client’s own
documentation and support.
1
Open Folder Setup.
2
Choose the shared folder that will be accessible to the NFS client.
3
Click Edit.
4
Under “LAN Protocol Support”, enable “NFS”. Click OK.
Note the NFS path. It will be used later for accessing data from an NFS client.
5
Click Close.
6
Move the NFS switch to the
7
Click the
8
Click Client Settings.
9
Click Add Client.
position to enable NFS.
icon to the right of “NFS”.
10Enter the IP address and hostname of the NFS client, then click OK.
To delete the client, check the hostname and click Delete Client.
11Click Close.
12Enter the mount command to access the shared folder from the NFS client.
The mount command depend on your operating system. The examples below assume that IP address of your
TeraStation is 192.168.11.10, “/mnt/array1/share” is the desired NFS path, and “/mnt/nas” or drive letter “z” is the
mount point.
For Linux:
mount -t nfs 192.168.11.10:/mnt/array1/share /mnt/nas
For Windows Service for Unix 3.5:
mount 192.168.11.10:/mnt/array1/share z:
For Solaris 10:
mount -F nfs 192.168.11.10:/mnt/array1/share /mnt/nas
128
Notes:
• To restrict NFS access to a specific network or client, navigate to File Sharing - NFS - Services and click Edit. Enter
the address of the network. For example, if your local network subnet has a router at 192.168.1.1 and clients
with IP addresses in the range from 192.168.1.2 through 192.168.1.48 with subnet mask 255.255.255.0, then the
“Public Network Address” would be 192.168.1.0 and the “Public Subnet Mask” would be 255.255.255.0. This would
mean that only clients on this local network would be able to access the NFS share. If the default settings are
used (0.0.0.0 for both the public network address and the public subnet mask), then access to the NFS share will
not be restricted.
• To use NFS folders with VMware ESX/ESXi or Citrix, navigate to Services - Edit and change the operation mode
from “User Mode” to “Kernel Mode”.
• Async is the default for NFS rules. Sync is available only when the device is in kernel mode.
• To restrict access to a NFS share for specific clients, navigate to File Sharing - NFS - NFS Rules and click Add Rule.
Choose the folder to restrict access to, and enter the clients that will have restricted access in the “Hosts” field.
Clients may be entered by hostname, IP address, or IP address range. Wildcards are supported. Separate multiple
entries with commas. You may assign read-only or read & write access to the listed clients. Rules override settings
made from the Services tab.
Encrypting Data Transmission
Encrypting Settings Data
All communication to Settings can use SSL encryption if you access settings through https://.
Encrypting FTP Transfer Data
You can encrypt passwords and files using SSL/TLS for secure FTP communication. First, in the shared folders settings,
select FTP under LAN Protocol Support In Settings. Enable SSL security in the setup screen for your FTP client. The
procedure depends on the FTP client software.
129
SSL Keys
SSL keys are used during setup screen operations and FTP communication. SSL (Secure Socket Layer) is a type of
encryption system called public key encryption. Generally, SSL is managed by the two files below.
server.crt (SSL Certificates)
In this system, the TeraStation sends this file to the computer, and the computer uses this key to perform encryption.
The TeraStation receives the encrypted data and uses server.key (private key) to decrypt the data.
In SSL, this key contains the server certificate, and depending on your computer environment, a check may be
performed to determine the trustworthiness of the certificate. The server certificate included in the TeraStation in
the default settings was created by Buffalo Technology, and in some cases the message “There is a problem with this
website’s security certificate” may be displayed in your browser or other software. Disregard this message and continue.
server.key (SSL Key)
This file is used as a pair with server.crt (server certificate). This is required for decrypting the data that was encrypted by
the server certificate, and this is normally not revealed.
Updating SSL Key
To update a server certificate and a private key for SSL, follow this procedure.
1
Click Management - the
2
Register “server.key” for “Secret Key” and “server.crt” for “Server Certificate (.crt)”, then click Import.
icon to the right of “SSL”.
Notes:
• Place the SSL key files (server.key, server.crt) directly below the C root drive. The SSL key may not be able to be
updated if it is placed in folders or paths that contain multi-byte characters.
• Use the provided password for the SSL key.
• If Settings cannot be displayed after updating, initialize the TeraStation settings.
• Updating the firmware initializes an SSL key.
Web Server
The TeraStation can be used as a web server. In addition to HTML files, images, and JavaScript, the TeraStation also
allows installation of Perl script and PHP script files. The web server uses version 1.4.23 of lighttpd, version 5.8.8 of Perl,
and version 5.2.10 of PHP.
1
In Settings, click Services.
2
Move the web server switch to the
3
Click
position to enable the web server.
to the right of “Web Server”.
130
4
Click Edit.
Note: The settings of the PHP language interpreter can be changed from “Edit php.ini”.
5
Click Browse.
6
Choose a shared folder for the web server, then click OK.
7
Choose an external port, then click OK.
MySQL Server
The TeraStation can be used as a MySQL server. A MySQL database may be installed and linked with the web server. The
TeraStation uses version 5.0.70 of MySQL server and version 3.2.2 of PhpMyAdmin.
1
In Settings, click Services.
131
2
Click the
3
Click Edit.
4
Click Browse.
5
Choose a shared folder for the MySQL server, then click OK.
6
Choose an external port, then click OK.
7
Move the MySQL server switch to the
icon to the right of “MySQL Server”.
position.
SNMP
If SNMP is enabled, you can browse your TeraStation from SNMP-compatible network management software. The
specific MIB (management information base) file for Buffalo is available from the Buffalo website (buffalotech.com).
1
In Settings, click Network.
2
Move the SNMP switch to the
position to enable SNMP.
132
3
Click
4
Click Edit.
5
Configure the desired settings, then click OK.
to the right of “SNMP”.
Saving and Applying Settings
The TeraStation’s settings can be saved to a USB memory device and restored to another TeraStation. Use this function to
back up and copy settings to a new TeraStation.
Make a note of the hard drive configuration (number of hard drives, RAID, LVM, etc.) of the TeraStation where the
settings were saved. Make sure that any TeraStation that you apply these settings to has exactly the same hard drive
configuration before you apply the settings. If the drive configuration is different, you may get unexpected results.
The following settings are not saved or restored:
Category
Folder Setup
Drives
Backup
Management
Settings
Shared folders on USB drives and media cartridges
DLNA protocol
Offline file settings
Email addresses linked to user accounts
Email addresses for group notification
All settings in “Drives”
All settings in “LVM”
All settings in “iSCSI”
All settings in “Failover”
All settings in “Power”
All settings in “SSL”
Display language in Settings
Saving Settings
1
Insert a USB memory device into a USB port on the TeraStation.
Notes:
• Use a USB 2.0 port. If your TeraStation has both USB 3.0 and USB 2.0 ports, make sure that you use one of the USB
2.0 ports.
• The USB memory device should have a capacity of at least 1 GB.
• Any data stored on the USB memory device will be deleted.
2
In Settings, click Management.
133
3
Click
4
From “Target USB drive”, select the USB memory device that is connected to the USB 2.0 port of the TeraStation.
5
Select “Save current configuration to a USB drive”, then click Execute.
to the right of “Restore/Erase”.
Troubleshooting:
If the settings are not saved to the USB memory device successfully, you may receive the error message “The specified
operation cannot be executed”. Verify:
• The device is connected to a USB 2.0 port, not a USB 3.0 port.
• The device has a capacity of 1 GB or larger.
• The device is not write-protected.
Applying Settings
The saved settings can be applied to a different TeraStation.
Note: By applying settings from the USB memory device, the hostname and IP address will conflict because these
settings are restored. Change the existing TeraStation’s hostname and IP address to different settings before
applying settings.
1
Connect the USB memory device with the saved settings to a USB 2.0 port of the TeraStation (not a USB 3.0 port).
2
In Settings, click Management.
3
Click the
4
From “Target USB drive”, select the USB memory device that is connected to the USB 2.0 port of the TeraStation.
icon to the right of “Restore/Erase”.
134
5
Select “Transfer settings from a USB drive”, then click Execute.
Recovering the TeraStation
Creating a Recovery Drive
A recovery drive can let you recover your TeraStation even if it will not boot at all. It lets you completely reinstall the
operating system. While your TeraStation is working perfectly, create a recovery drive in case something goes wrong
later. Follow the steps below to create a recovery drive for the TeraStation.
Note: Although making the recovery drive as described below will not effect your settings or data, if you ever have
to use it to recover the TeraStation, all data and settings from the TeraStation will be erased. Back up your data and
settings regularly!
1
Insert a 1 GB or larger USB flash drive into a USB port on the TeraStation.
Note: All data on the USB flash drive will be erased!
2
In Settings, navigate to Management - Restore/Erase - USB Options.
3
Select “Create a USB drive for system recovery”.
4
5
Select the USB drive connected to the TeraStation from “Target USB drive”, then click Execute. Enter the 4 digit
confirmation number and click OK. The TeraStation will create the recovery drive. This will take about a minute.
When the “finished” dialog opens, the USB recovery drive is ready to use. Dismount the USB drive before
unplugging it. See “Dismounting Drives” in chapter 4 for the instruction to dismount your USB drive.
Note: If your TeraStation will not boot, it’s too late to create the recovery drive from within its software! Instead,
download the recovery image from www.buffalotech.com and use disk image software such as dd or Win32 Disk
Imager to image a 1 GB or larger USB flash drive with the downloaded file.
Recovering the TeraStation
If your TeraStation will not boot at all, you can completely reinstall the operating system.
Warning:
Recovering the TeraStation will erase all data and settings from the TeraStation. Back up your data and settings regularly!
To recover the TeraStation, follow the procedure below.
1
Insert the USB recovery drive into a USB port on the TeraStation.
2
Create a USB “recovery drive” as described above.
135
3
4
5
6
Connect a USB keyboard and a monitor to the TeraStation.
Power on the TeraStation and repeatedly hit the F7 key over and over, twice per second, until the boot device
menu appears.
Select the first “USB Flash Disk” from the menu. The name of this device will vary depending on the brand of your
USB flash drive.
The TeraStation will begin the recovery process. It will take about 10 minutes to complete, during which time the
TeraStation will reboot. When it finishes, the TeraStation will shut down completely and all the main LEDs will go
out.
When the recovery process is complete and the TeraStation has shut down, remove the USB flash drive and power
on the TeraStation. The TeraStation has been restored to its default settings. All data has been erased and all drives
are combined into a RAID 0 array with no redundancy. For data security, creation of an array data with redundancy
is recommended.
Logs
Follow this procedure to check the TeraStation’s logs.
1
In Settings, click Management.
2
Click
3
Click Edit.
4
Select a log to view.
to the right of “Logs”.
The file operation log stores file operations performed on the internal hard drives. File operations on USB drives are
not logged.
To transfer logs
1
Click Edit.
2
Enable “Syslog Transfer”.
3
Enter the IP address of the syslog server where you want to transfer the logs to.
136
4
Select the type of log that you want to transfer from “Logs To Transfer”.
5
Click OK.
Notes:
• You can also download logs from within Settings by using either of the following hotkeys: Alt+Ctrl+Shift+b or
Alt+Ctrl+Shift+l.
• FTP logs cannot be written to a syslog server.
• Logs are in UTF-8 format. Your Syslog server must support UTF-8 encoding.
To create a link to the logs in the shared folder
1
Click Edit.
2
Enable “Share the link to logs”.
3
Select the shared folder where the link will be created in “Target Shared Folder”.
4
Click OK.
Under the selected shared folder, a folder named “system_log” will now contain the logs.
Restoring Factory Defaults
To initialize the TeraStation to its factory defaults, follow this procedure.
1
In Settings, click Management.
2
Click the
3
Click Initialize TeraStation.
4
The “Confirm Operation” screen will open. Enter the displayed number, then click OK.
5
The TeraStation will be restored to its factory default settings.
icon to the right of “Restore/Erase”.
Updating the Firmware
If a new firmware is available, a message is displayed when the TeraStation boots. You can update the firmware by the
following way.
137
Note: At least 1 GB of free space on the TeraStation is required to update the firmware.
To update from Settings:
1
In Settings, click Management.
2
Choose Update.
3
Click Install Update.
You can also download the firmware from www.buffalotech.com.
Name, Date, Time, and Language
Configure the TeraStation’s hostname, date, time, and language as follows.
Note: If the TeraStation is being used as an iSCSI hard drive, to change the settings, navigate to Drives - iSCSI in
Settings and move the iSCSI switch to the
position temporarily before changing settings.
1
In Settings, click Management.
2
Open Name/Time/Language.
3
Click Edit.
4
Click the Name tab, then configure the TeraStation’s name and description.
5
Click the Time tab.
Click Use Local Date/Time to use your computer’s time settings for the TeraStation.
138
By default, the TeraStation adjusts its clock automatically by using a default NTP server. This NTP server belongs to
Internet Multi Feed Inc. For more information, visit www.jst.mfeed.ad.jp.
To use a different NTP server, select Name/Time/Language from Management. Click Time, then Edit. Uncheck “Use
Default NTP Server” and enter a new NTP IP address. Click OK.
If NTP is not used, enter the time and date manually. Click Use Local Date/Time to import the time and date from
your computer.
If an NTP server is specified by name instead of IP address, make sure that a DNS server is configured for the
TeraStation.
Note: The internal clocks of the TeraStation and other devices on your network may run at slightly different speeds.
Over a long period of time your network devices may show somewhat different times, which can cause network
problems. If clocks on your network vary by more than 5 minutes it may cause unexpected behavior. For best
results, keep all clocks on the network set to the same time by adjusting them regularly, or use an NTP server to
correct them all automatically.
6
Click the Language tab. Select the language to be used and click OK.
Note: This tab changes the language used by the TeraStation for email notifications, DLNA, and other functions. To
change the language displayed in Settings, go to Advanced Settings and click Language in the menu bar. Choose
your desired language from the drop-down menu.
139
Beep Alerts
You can set the TeraStation to beep when certain errors occur.
1
In Settings, click Management.
2
Select Notifications.
3
Click Edit.
4
Select the conditions to beep the alert, then click OK.
Jumbo Frames
If your other network devices support it, you may be able to increase network performance with jumbo frames.
1
In Settings, click Network.
2
Click the
3
Click the LAN port where the jumbo frames will be used.
4
Click Edit.
5
Enter the desired Ethernet frame size and click OK.
icon to the right of “IP Address”.
140
Notes:
• To use jumbo frames, your computer’s NICs and all switches, hubs, and routers on the network need to support
jumbo frames. If any device on the network does not support jumbo frames, use standard frames (1500 bytes)
instead.
• Frame sizes smaller than 1500 bytes are not supported.
• The maximum frame size depends on the LAN port: LAN ports 1–4 (10/100 ports) have a maximum frame size of
9216 bytes while LAN ports 5 and 6 (10 Gb expansion ports) have a maximum frame size of 9000 bytes.
• Frame sizes are used as shown. Some systems subtract 18 bytes from the entered value, but the TS7000 does not.
• If the TeraStation is being used as an iSCSI hard drive, to change the settings, navigate to Drives - iSCSI and move
the iSCSI switch to the
position temporarily before changing network settings.
DHCP and IP Address
Normally, the TeraStation’s IP address is set automatically from a DHCP server on your network. If you prefer, you can
configure the IP address settings manually.
1
Navigate to Network - IP Address in Settings.
2
Click on the LAN port whose IP address you want to configure (normally LAN port 1). Click Edit.
3
Change the settings as desired and click OK.
141
Notes:
• From the IP address list, other settings are available at the bottom left of the window. Click Change to modify the
gateway and Wake-on-LAN settings. Click Allowed Protocols for each Port to restrict by LAN port which protocols
network connections can use. Click Port Trunking to combine ports in trunked combinations. See the next section
for more on port trunking.
• To use a different default gateway, click Change and select the LAN port to modify. This might be useful if you
want the default gateway to be assigned by another port besides the default LAN port 1.
• You can also change the TeraStation’s IP address from NAS Navigator2. Right-click on your TeraStation’s icon and
choose Properties - IP Address. For Mac OS, hold down the control key and click on the TeraStation’s icon. Choose
Configure - IP Address.
• Do not configure more than one LAN port with the same IP address. This may cause unstable network communication.
• If the TeraStation is being used as an iSCSI hard drive, temporarily disable iSCSI before changing network settings.
Navigate to Drives - iSCSI in Settings and move the iSCSI switch to the
position.
Port Trunking
The multiple Ethernet ports on the TeraStation can provide redundancy and reliability. Several port trunking modes are
available:
Trunking Mode
Round-robin*
Active-backup
Characteristics
Network packets are transmitted in sequential order
from the first available NIC slave through the last.
Only one NIC slave in the bond is active. A different slave
becomes active if and only if the active slave fails.
142
Trunking Mode
XOR*
Broadcast
Dynamic link aggregation**
TLB
ALB
Characteristics
Transmits network packets based on [(source MAC
address XOR’d with destination MAC address) modulo
NIC slave count]. This selects the same NIC slave for each
destination MAC address.
Transmits network packets on all slave network
interfaces.
Creates aggregation groups that share the network
speed and duplex settings. Utilizes all slave network
interfaces in the active aggregator group according to
the 802.3ad specification.
The outgoing network packets traffic is distributed
according to the current load (relative to the speed) on
each network interface slave.
Includes both balance-tlb and rlb by ARP negotiation.
*A separate intelligent switch that supports EtherChannel or other port trunking is required. Configure the LAN ports on
the switch for port trunking first.
**A separate intelligent switch that supports IEEE 802.3ad is required. Configure LACP in the switch first.
Configuring Port Trunking
1
Use an Ethernet cable to connect the TeraStation’s LAN port 1 to a LAN port on the hub.
Notes:
• Port trunking is not supported with ports on expansion cards.
• AFP connection will not be possible if port trunking is enabled. If using port trunking, connect to shares with SMB
or FTP instead.
• If the TeraStation is being used as an iSCSI hard drive, disable iSCSI before changing network settings such as port
trunking. Navigate to Drives - iSCSI in Settings and move the iSCSI switch to the
position temporarily.
• Do not connect the second Ethernet cable to the TeraStation yet.
• If using an intelligent switch, configure the LAN ports on the switch first, before connecting to the TeraStation.
2
In Settings, click Network.
3
Click
4
Choose which ports will be trunked.
to the right of “Port Trunking”.
143
5
Select the port trunking mode. Some modes allow the hash policy to be configured as well. Click OK.
6
Click Save.
7
Connect the second LAN port to the switch or hub.
8
Restart the TeraStation before use.
144
Chapter 11 Utilities
NAS Navigator2 for Windows
NAS Navigator2 is a utility program that makes it easy to display Settings, change the TeraStation’s IP address, or check
its hard drive. If you installed the TeraStation with the TeraNavigator CD, NAS Navigator2 was installed automatically.
To launch NAS Navigator2, double-click the
icon.
Click your TeraStation’s icon to open a share on the TeraStation and display:
• Total capacity
• Capacity in use
• IP address
• Workgroup
• Subnet mask
• Default gateway
• MAC address
• Firmware version
145
Name
Map Share*
Disconnect Share*
Map All Remote Shares to Drive
Letters
Create Desktop Shortcut*
Menu
Launch NAS Navigator2 on
Startup
Display Errors
Properties*
Close
View
View
Sort by
Browse*
Refresh
I’m here
Right-click your
device’s icon to
show these options.
Browse Shares
Settings
Properties
Map Share
Disconnect Share
Create Shortcut
I’m here
Description
Assigns the TeraStation’s shared folder as a network drive.
Unmaps the network drive.
Assigns all the TeraStation’s shared folders as network
drives.
Creates a shortcut icon to the shared folder “share” on the
desktop.
Launches NAS Navigator2 in the system tray when
Windows boots.
If an error occurs, an error message will pop up from the
NAS Navigator2 icon in the system tray.
Opens the selected TeraStation’s properties page.
Closes NAS Navigator2.
Icons: Displays icon.
Details: Displays hostname, product name, workgroup, IP
address, subnet mask, and default gateway.
Selects the sort order from following to display when
multiple TeraStations are found:
Hostname, product name, workgroup, IP address, subnet
mask, default gateway
Opens the TeraStation’s shared folder.
Searches for NAS devices on the network again.
Causes your TeraStation to beep.
Opens the TeraStation’s shared folder.
Opens Settings for the selected TeraStation.
Opens the TeraStation’s properties page.
Assigns the TeraStation’s shared folder as a network drive.
Unmaps the network drive.
Creates a shortcut icon to the shared folder “share” on the
desktop.
Causes your TeraStation to beep.
*Click on the TeraStation’s icon to display these options.
When NAS Navigator2 is minimized, right-click on the NAS Navigator2 icon in the system tray for the following options.
Name
TeraStation
Name
Browse Shares
Settings
Properties
Map Share
Disconnect Share
Create Shortcut
I’m here
Refresh
Browse Shares
Description
Opens the TeraStation’s shared folder.
Opens Settings for the selected TeraStation.
Opens the TeraStation’s properties page.
Assigns the TeraStation’s shared folder as a network drive.
Unmaps the network drive.
Creates a shortcut icon to the shared folder “share” on the
desktop.
Causes your TeraStation to beep.
Refreshes list of NAS devices.
Displays NAS Navigator2 window.
146
Exit
Exits NAS Navigator2.
The following tasks may be performed from the TeraStation’s properties page.
Name
Configuration
IP Address
Description
Click Settings to open the configuration interface.
Check Use DHCP to assign an IP address from the DHCP server automatically. If there is
no DHCP server in the network, you cannot use this function.
Check Renew IP address to obtain an IP address from the DHCP server.
You can manually enter an IP address, subnet mask, and default gateway.
Mount as Network Drive
You can easily map a shared folder as a network drive using NAS Navigator2.
1
2
Double-click the
icon on the desktop.
NAS Navigator2 will start.
Right-click on the TeraStation’s icon, then click Map Share.
147
3
An icon for the mapped share will appear in Computer or My Computer. You can use this network drive just like
any other hard drive.
Changing the IP Address
1
Double-click the
2
Right-click on your TeraStation’s icon and choose Properties - IP Address.
3
Uncheck “Use DHCP” and enter the desired settings, then click OK.
icon on the desktop. NAS Navigator2 will start.
Notes:
• Changing the IP address from NAS Navigator2 is not supported for LAN ports on expansion cards. Navigate to
Network - IP Address in Settings to change the IP addresses of LAN ports on expansion cards.
148
• The following IP address are reserved and should not be used. If you configure one of them by accident, initialize
all settings.
Local loopback address: 127.0.0.1, 255.255.255.0
Network address: 0.0.0.0, 255.255.255.0
Broadcast address: 255.255.255.255, 255.255.255.0
The IP address range from 224.0.0.0 to 255.255.255.255
NAS Navigator2 for Mac
NAS Navigator2 is a utility program that makes it easy to display Settings, change the TeraStation’s IP address, or check
its hard drive.
If you installed the TeraStation with the TeraNavigator CD, NAS Navigator2 was installed automatically. To launch it, click
the
icon in the Dock.
Click on a TeraStation’s icon to display:
• Total capacity
• Used capacity
• Workgroup
• IP address
• Subnet mask
• Default gateway
• MAC address
• Firmware version
Double-click it to open a share on the TeraStation.
Name
Open
Refresh
I’m here
Settings
Configure
Label Color
View Options
Auto Power Mode
To display these options,
hold down the control
key and select your
TeraStation’s icon.
Open Folder
Settings
Configure
I’m here
Label Color
Description
Opens the default shared folder for a selected TeraStation.
Searches for NAS devices on the network again.
Causes your TeraStation to beep.
Opens Settings for the selected TeraStation.
Opens a window that lets you configure the NAS’s IP
address or open Settings.
Selects the color of the name displayed below the icon.
Lets you choose icon size, position, and view mode.
Auto power mode can turn supported TeraStations and
LinkStations on the network on and off automatically.
Opens the TeraStation’s shared folder.
Opens Settings for the selected TeraStation.
Opens a window that lets you change the NAS’s IP
address or open Settings.
Causes your TeraStation to beep.
Selects the color of the name displayed below the icon.
Mounting as a Network Drive
You can map the shared folder as a network drive using NAS Navigator2 on Mac OS.
149
1
2
Click the
icon in the Dock. NAS Navigator2 will start.
Click the TeraStation icon while holding down the control key, then select Open Folder. Enter a username and
password with the rights to access the shared folder.
3
Select the shared folder that you want to mount, then click OK.
4
The shared folder is now mounted as a network drive.
Changing the IP Address
1
Click the
2
Click the TeraStation icon while holding down the control key, then choose Configure... - IP Address.
3
Uncheck “Use DHCP” and enter the desired settings, then click OK.
icon in the Dock. NAS Navigator2 will start.
Notes:
• Changing the IP address from NAS Navigator2 is not supported for LAN ports on expansion cards. Navigate to
Network - IP Address in Settings to change the IP addresses of LAN ports on expansion cards.
• The following IP address are reserved and should not be used. If you configure one of them by accident, initialize
all settings.
Local loopback address: 127.0.0.1, 255.255.255.0
Network address: 0.0.0.0, 255.255.255.0
Broadcast address: 255.255.255.255, 255.255.255.0
The IP address range from 224.0.0.0 to 255.255.255.255
150
Chapter 12 Appendix
Replacing the Battery
After approximately 5 years, the CR2032 battery on the motherboard will need to be replaced. Use only the correct
CR2032 3 Volt lithium battery.
Move the lock to the side to release the battery and pull it straight up to remove. Be extremely careful to put the
replacement battery in correctly! If it is inserted with reverse polarity, the TeraStation will be damaged.
Adding a NIC
The TeraStation includes 4 gigabit Ethernet ports as standard, but you may add expansion cards for one or two
additional 10-gigabit Ethernet ports. Follow the steps below to install a network expansion card in your TeraStation.
1
Turn off the TeraStation and unplug its power cord(s).
2
Open the cover.
151
3
Remove the screw and bracket from the lower slot.
4
Insert the expansion card in the lower slot (not the upper slot).
5
Replace the screw.
6
Find and connect the power connector.
7
Close the cover.
8
Reconnect the power cords.
Notes:
• Port trunking is not supported with ports on expansion cards.
• You may have up to 6 total NIC ports in the TeraStation. Supported configurations include adding one dual-port
expansion card or 2 single-port expansion cards.
• Currently, the TeraStation supports the following NICs:
152
Emulex
OCe11102-N (dual-port)
OCe11102-I (dual-port)
OCe11102-F (dual-port)
Intel
X540T2 (dual-port)
E10G42BTDA (dual-port)
E10G41BFSR (single-port)
E10G42BFSR (dual-port)
E10G41 AT2 (single-port)
See our website for an updated list of compatible NICs.
Adding a USB 3.0 Card
To install a USB 3.0 card in your TeraStation, follow the steps below.
1
Turn off the TeraStation and unplug its power cord(s).
2
Open the cover.
3
Remove the screw and bracket from an open slot.
4
Insert the USB 3.0 card in the open slot.
153
5
Replace the screw.
6
Find and connect the power connector.
7
Close the cover.
8
Reconnect the power cords.
Errors
Error codes can be viewed in Management - Notifications.
Error
Description
Corrective Action
Contact Buffalo technical support for
assistance.
BOOT FAIL
Hard drive not found.
SYSTEM Error E04
Can’t Load Krnl!
The firmware is corrupted.
UPS E10
Dependent Mode
The TeraStation is running on the UPS battery
due to a power outage. The system will now
be shut down safely.
SYSTEM I10
TOO HOT !
A rise in the system temperature may have
exceeded the allowable safety value.
SYSTEM Error E11
Fan Failure
An error occurred in the fan speed.
SYSTEM Error E12
Cooling Failure
A rise in the system temperature may have
exceeded the allowable safety value.
Contact Buffalo technical support for
assistance.
154
Check that power is being supplied to the
UPS, and if there are no problems, turn on the
TeraStation.
Move the TeraStation to a cool location. Do
not place objects in the area around the
TeraStation.
Check that no foreign objects or dust are
clogging the fan. If any foreign objects or dust
are found, use a pair of tweezers, air duster,
or other tool to remove them. If the error is
displayed again, contact Buffalo technical
support for assistance.
Do not place objects in the area around the
TeraStation. Also, move the TeraStation to a
cool location.
RAID Arrayx E14
Can’t Mount
RAID array X cannot be mounted.
HDx Error E16
HDx Not Found
Unable to find hard drive X.
HDx Error E22
HDx Can’t Mount
Mounting of hard drive X failed.
FailOver E27
LostBackupTarget
Unable to find the backup TeraStation.
HDx Broken E30
Replace the DISK
An error occurred, so hard drive X was
removed from the RAID array.
E31
Power supply error (level 1)
E32
Power supply error (level 2)
Run the RAID array disk check in Settings.
Hard drive X may be disconnected or may
have failed. After shutting down, reinstall the
hard drive.
Format the hard drive. After formatting,
if the error still appears after rebooting,
replace the hard drive. If the error is displayed
again, contact Buffalo technical support for
assistance.
In the main TeraStation’s settings, navigate to
Backup - Failover to reconfigure the backup
TeraStation for failover.
Replace hard drive X.
Make sure that the AC cable is connected
properly. If the power supply has failed, E32
will be displayed within a few minutes. If E31 is
still displayed after 5 minutes, contact Buffalo
technical support for assistance.
Make sure that the AC cable is connected
properly. If the power status LED is blinking or
glowing red, replace the power supply with a
new Buffalo OP-PU-2RZ.
Status
After you change settings or format a hard drive, the current status is displayed on NAS Navigator2 or clicking
Settings.
Message
HDx Warning I11
Bad Sectors
Operation I12
DEGRADE MODE
RAID I13
ARRAYxFormatting
RAID I14
ARRAYx Checking
Description
Corrective Action
The bad sectors in hard drive x may
have reached a dangerous level.
Replace hard drive x.
Operating in degraded mode.
-
Formatting RAID array x.
-
Checking RAID array x.
-
RAID I15
ARRAYx Scanning
Examining the error status of RAID
array x.
Note: Transfer speeds are slower
during the examination process.
-
RAID I16
ARRAYx Creating
Creating RAID array x.
-
RAID I17
ARRAYx Resyncing
Resynchronizing RAID array x.
Note: Transfer speeds are slower
during resynchronization.
-
155
in
RAID I18
ARRAYx Rebuilding
RAID I19
ARRAYx 0 Filling
RAID I20
DISKx Formatting
RAID I21
DISKx Checking
RAID I22
DISKx 0 Filling
SYSTEM I25
F/WUPDATING
Web Setting I26
Initializing
USB Diskx I27
Checking
USB Diskx I28
Formatting
Set From Web I32
New Diskx ready
Replication I33
ReplicateFailure
Rebuilding RAID array x.
Note: Transfer speeds are slower
during the rebuilding process.
-
Writing 0s to RAID array x, erasing all
data.
-
Formatting hard drive x.
-
Checking hard drive x.
-
Erasing the data for hard drive x.
-
Updating the TeraStation firmware.
Note: Do not turn off the power
during the updating process.
-
Initializing all settings.
-
Checking USB hard drive x.
-
Formatting USB hard drive x.
-
Displayed after replacing hard drive x
when the RAID needs to be rebuilt in
Settings or formatting is necessary.
An error occurred in replication,
or synchronization between the
main TeraStation and the backup
TeraStation failed during failover
configuration.
In Settings, either rebuild the RAID array or format
the hard drive.
In Settings, navigate to Backup - Replication and
choose “Resync” to execute resynchronization. If the
error is displayed again, contact Buffalo technical
support for assistance.
Cartridgex I35
Location error
A hard drive set as a media cartridge
has been installed in the drive x slot.
Connect to the slot that was set as a media
cartridge.
Cartridgex I36
Decryption error
Media cartridge cannot be decrypted.
The media cartridge may have been
encrypted by a TeraStation other than
this product.
Connect to the TeraStation that performed
encryption to decrypt.
System recovery in progress.
-
System recovery is complete.
-
Beginning recovery. All data in the
drive 1 will be deleted.
-
Preparing to start the recovery
process.
-
Recovery I37
SystemRecovering
Recovery I38
RecoveryFinished
Recovery I40
DataWillDeleted
Recovery I42
Preparing
Recovery I43
Unsupported HW
Recovery I44
Disk1 not found
The TeraStation was started from the
USB recovery device, but the system
cannot be recovered from this USB
recovery device.
Recovery from the USB recovery
device was initiated, but the drive 1
was not detected.
156
-
Make sure that Disk 1 is present and fully inserted in
its slot.
Recovery I45
Recovery Failed
RAID ARRAY I46
RMM+Processing
SYSTEM I47
Don’t Power Off
FailOver I49
LostMainTarget
FailOver I50
Maintenance mode
FailOver I51
Initializing
New Firmware I52
Available
Recovery failed.
-
Data migration or conversion (RAID
migration) is in progress.
Do not turn off the TeraStation power.
The main TeraStation in the failover
configuration cannot be found.
Make sure that the main TeraStation is on, working,
and connected to the network.
Failover maintenance is in progress.
Do not turn off the TeraStation power.
Initializing the failover configuration.
Do not turn off the TeraStation power.
A new firmware version has been
released.
Update the firmware.
Make sure that the xxth backup task is configured
correctly. Make sure that the NAS is not in standby
mode. If the backup task still fails, check the
network, backup source, and backup destination.
Settings can only be restored for the TeraStation
whose settings were originally saved. To restore
settings, insert the USB memory device, move the
Boot Mode switch on the rear of the TeraStation
to the USB position, and restart the TeraStation.
Or, settings can be restored in Settings with the
TeraStation powered on.
BackupTask xx I54
Backup Failure
xxth backup task failed.
Recovery I55
RecoveryAuthFail
Authentication during recovery of
settings failed.
Surveillance I56
Lack of License
Surveillance I57
No free space
There are not enough surveillance
camera server licenses.
Purchase and register an additional license.
There is not enough space to save
additional surveillance video.
Delete or move some of the stored video.
Video not recorded.
Check your settings. Also, use the utilities provided
with your camera to check that the camera is
operating correctly.
Surveillance I58
Recording Failure
Default Settings
Administrator’s Name
Password
Shared Folders
DHCP Client
Registered Groups
admin
password
“share” (with recycle bin enabled by default).
Normally, the TeraStation will get its IP address automatically from a DHCP
server on the network.
If no DHCP server is available, then an IP address will be assigned as follows:
IP Address: 169.254.xxx.xxx (xxx is assigned randomly when booting the
TeraStation.)
Subnet Mask: 255.255.0.0
“hdusers”, “admin”, and “guest”
You cannot edit or delete these default groups.
157
Microsoft Network Group Name
Ethernet Frame Size
AFP
FTP
NTP
Print Server
WebAccess
Time Machine
TeraSearch
RAID Mode
WORKGROUP
1500 bytes (plus 14 bytes of header and 4 bytes of FCS)
Enabled
Disabled
Enabled
Enabled
Disabled
Disabled
Disabled
The default RAID mode for 12-drive TeraStations is RAID 6. 4-drive models
come in RAID 5 by default.
Specifications
Check www.buffalotech.com for information about the latest products and specifications.
IEEE 802.3ab (1000BASE-T)
IEEE 802.3u (100BASE-TX)
IEEE 802.3 (10BASE-T)
1000 Mbps Full duplex (auto-negotiation)
100 Mbps Full duplex/Half duplex (auto-negotiation)
10 Mbps Full duplex/Half duplex (auto-negotiation)
4 ports (Auto-MDIX)
RJ-45 8-pin
TCP/IP
CSMA/CD
SMB/CIFS, AFP, FTP, SFTP, NFS
HTTP/HTTPS
1500–9216 (10/100 ports)
1500–9000 (10 Gb ports)
(not Including 14 bytes of header and 4 bytes of FCS)
Interface
Transfer speed
LAN Port
Number of Ports
Connector Type
Protocol
Access Method
File Sharing
Management
Jumbo Frames
USB Port
UPS Port
Internal Hard Drive
Power Supply
Power Consumption
Weight
Dimensions (W x H x D)
Operating Environment
Compatibility
USB 2.0 Port (Series A) x 6
Note: Supported USB devices include Buffalo USB hard drives, USB UPS devices, and
printers.
UPS Port (D-SUB 9 pin (Male)) x 1
Note: Compatible UPSs are manufactured by Omron and APC.
If a hard drive in the TeraStation malfunctions, replace it with a Buffalo OP-HDZS series
or OP-HDZH series drive of the same capacity, available from www.buffalotech.com.
2x (redundant) AC 100–240 V, 50/60 Hz
Max 220 W
25 kg (55.1 lbs.)
480 x 88 x 736 mm; 18.9 x 3.5 x 29 in (excluding protruding parts)
Temperature: 5–35°C; 41–95° F
Environment Humidity: 20–80% (no condensation)
Windows and Mac computers with Ethernet interface.
Note: The TeraStation requires an Ethernet connection with your computer for
operation. It cannot be connected via USB.
158
Supported OS
Windows 8.1*, Windows 8*, Windows 7*, Windows Vista*, Windows XP*, Windows XP
Media Center Edition (2004 or 2005), Windows Server 2012 R2, Windows Server 2012,
Windows Server 2008 R2, Windows Server 2008, Windows Server 2003 R2, Windows
Server 2003
OS X 10.9, 10.8, 10.7, 10.6, 10.5, 10.4
*32-bit and 64-bit
Compliance Information
The TeraStation uses GPL code. For source code, visit http://opensource.buffalo.jp
FCC Statement
This device complies with part 15 of the FCC Rules. Operation is subject to the following two conditions: (1) This device
may not cause harmful interference, and (2) This device must accept any interference received, including interference
that may cause undesired operation.
Note: This equipment has been tested and found to comply with the limits for a Class A digital device, pursuant to part
15 of the FCC Rules. These limits are designed to provide reasonable protection against harmful interference when the
equipment is operated in a commercial environment. This equipment generates, uses, and can radiate radio frequency
energy and, if not installed and used in accordance with the instruction manual, may cause harmful interference to radio
communications. Operation of this equipment in a residential area is likely to cause harmful interference in which case
the user will be required to correct the interference at his own expense.
CE Marking Statement
This is a Class A product. In a domestic environment, this product may cause radio interference, in which case the user
may be required to take adequate measures.
Environmental Information
• The equipment that you have purchased required the extraction and use of natural resources for its production.
• The equipment may contain hazardous substances that could impact health and the environment.
• In order to avoid the dissemination of those substances in our environment and to diminish the load on natural
resources, we encourage you to use the appropriate take-back systems.
• The take-back systems will reuse or recycle most of the materials of your end of life equipment appropriately.
• The crossed-out wheeled bin symbol invites you to use those systems.
• If you need more information on the collection, reuse and recycling systems, please contact your local or regional
waste administration.
KC
기종별
사용자안내문
159
A급 기기(업무용
정보통신기기)
이 기기는 업무용(A급) 전자파적합기기로서 판매자 또는 사용자는 이 점을
주의하시기 바라며, 가정외의 지역에서 사용하는 것을 목적으로 합니다.
BSMI
警告使用者:
此為甲類資訊技術設備,於居住環境中使用時,可能會造成射頻擾動,在此種情況下,使用者會被要求採取某些
適當的對策。
CCC
警告
此为A级产品,在生活环境中,该产品可能会造成无线电干扰。在这种情况下,可能需要用户对其干扰采取切实可
行的措施。
设备的最高使用室内环境温度: 35° C
仅适用于海拔 2000M 以下地区安全使用。
断开装置为电源软线上的插头。插座应当装在设备的附近,而且应当便于触及到。电池警告语
1.电池不得暴露。
2.使用型号不正确的电池可能导致爆炸。
Models
TS-2RZS04T04D, TS-2RZS08T04D, TS-2RZS12T12D, TS-2RZS24T12D, TS-2RZS36T12D
TS-2RZH12T12D, TS-2RZH24T12D, TS-2RZH36T12D, TS-2RZH48T12D, TS-2RZH72T12D,
160