1
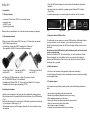
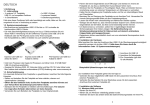
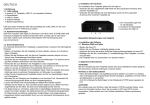
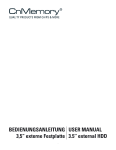
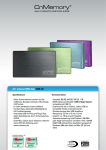
Deutsch
• Achten Sie auf die LED-Funktionsanzeige Ihrer Festplatte. Diese zeigt die Betriebsbereitschaft an.
• Für die Betriebssysteme Windows 2000 oder höher müssen keine Treiber installiert
werden (Plug & Play)
• Eine separate Stromversorgung mittels Netzteil ist nicht nötig, jedoch optional
möglich.
1. Einführung
1.1. Lieferumfang
• 1x externe 2,5“ Festplatte, USB 3.0,
• 1x USB 3.0 Kabel
im kompakten Gehäuse
• 1x Bedienungsanleitung
• 1x Garantiekarte
Falls eine dieser Positionen fehlt oder beschädigt sein sollte, bitten wir Sie, sich
umgehend mit uns in Verbindung zu setzen.
1.2. Systemvoraussetzungen
Abb. 1
(Abb. ähnlich)
•B
ei Anschluss an bestehende USB 2.0 Slots bis zu 10 % schneller als herkömmliche
USB 2.0 Datenträger.
•D
ie volle Geschwindigkeitsausnutzung von bis zu 5 Gbit/s erreichen Sie mit
dieser HDD in Verbindung mit der CnMemory ® Express Card USB 3.0 für Ihr
Notebook oder der PCI Express Card 3.0 für Ihren Computer.
Die Kompatibilität zu USB 2.0 Geräten ist auch weiterhin gewährleistet.
3. Nutzung der externen USB-Festplatte
Abb. 2
(Abb. ähnlich)
Um die Daten zu transferieren, können Sie über den Windows Explorer oder über den
Arbeitsplatz auf Ihre externe USB-Festplatte zugreifen. Sie können nun wie gewohnt
Ihre Daten speichern, verschieben oder löschen. Während eines Datentransfers blinkt
die LED-Funktionsanzeige (nicht bei allen Modellen).
Bitte entfernen Sie bei einem Datentransfer niemals die USB-Festplatte, da bei
diesem Vorgang Daten verloren oder beschädigt werden können.
Bitte beachten Sie das bei Windows 2000, XP, Vista und höher, die USB-Festplatte
über das Icon „Hardware sicher entfernen“ in der Taskleiste (neben der Zeitanzeige
des Computers) abzumelden ist, da es hier bei Nichtbeachtung ebenfalls zu Datenverlust oder -beschädigung auf der Festplatte kommen kann.
4. Sicherheitshinweis
Express Card USB 3.0
Artikel Nr. 68751
Express Card USB 3.0
Artikel Nr. 68753
PCI-Express Card USB 3.0
Artikel Nr. 68771
• Intel Pentium II 350 MHz Prozessor oder Apple G3 Prozessor und höher/mind.
128 MB RAM/USB 3.0 Anschluss empfohlen.
• Geeignet für Windows 2000, XP, Vista oder höher und Mac OS 10.0 oder höher /
unter Mac nutzbar durch einfaches umformatieren (FAT32) / Anleitung unter:
www.cnmemory.de
2. Installation der Hardware
•S
chalten Sie Ihren Computer ein und warten Sie bis dieser das komplette Betriebssystem initialisiert hat.
•S
tecken Sie den dünneren Stecker des mitgelieferten USB-Kabels in die Rückseite
Ihrer USB-Festplatte (Abb. 1).
•S
tecken Sie nun das andere Ende des Kabels (bei Mitlieferung eines Y-USB Kabels
beide Stecker) in die USB-Schnittstelle(n) Ihres Computers (Abb. 2).
•Z
uerst erscheint ein Symbol des Hardware-Assistenten, danach das Symbol um die
Hardware sicher zu entfernen.
• Während des Betriebes die Festplatte nicht abdecken (Überhitzung möglich).
• Vermeiden Sie Temperaturschwankungen (Winter: Kondenswasser / Sommer:
starke Sonneneinstrahlung).
• Vermeiden Sie magnetische Felder.
5. Technischer Support
Sollten Probleme auftreten, setzen Sie sich bitte mit uns in Verbindung und halten Sie
folgende Informationen bereit:
• Betriebssystem und Konfiguration Ihres Rechners
• Bezeichnung zusätzlicher Peripheriegeräte, die Sie nutzen
• (Fehler-) Meldungen, die auf dem Bildschirm erscheinen
• Bezeichnung der Software, die beim Auftreten des Fehlers verwendet wurde
• Schritte, die Sie unternommen haben, um das Problem zu lösen
• Ihre Kundennummer (wenn vorhanden)
• Kaufdatum und Barcode-Nummer Ihrer Festplatte
English
• Check the LED function display for your hard drive; this indicates the operational
readiness.
• No drivers need to be installed for operating systems Windows 2000 or higher
(Plug & Play).
• A separate power supply via a power supply unit is optional, but not necessary.
1. Introduction
1.1. Scope of delivery
• 1x external 2.5” hard drive, USB 3.0, in a compact housing
• 1x warranty card
• 1x USB 3.0 cable
• 1x operating instructions
Please contact us immediately if any of the above items are missing or damaged.
Fig. 1
(Fig. similar)
Fig. 2
(Fig. similar)
1.2. System requirements
3. Using the external USB hard drive
• When connected to the existing USB 2.0 slot up to 10 % faster than conventional
USB 2.0 data storage medium.
• Full utilization of speed with USB 3.0 adapters from CnMemory®.
The compatibility to USB 2.0 devices will still be guaranteed.
To transfer data, you can access your external USB hard drive via Windows Explorer
or your workstation. You can then save, move or delete your data as usual.
During the data transfer process, the LED function display will flash (not the case for
all models).
Never disconnect the USB hard drive while transferring data, as this may result
in lost or corrupted data.
Note that for Windows 2000, XP, Vista and higher, you need to choose the “Safely
Remove Hardware” icon in the taskbar (next to your computer’s time display) to
dismount the USB hard drive. Failure to do so may also result in data on the hard
drive being lost or corrupted.
4. Safety instructions
Express Card USB 3.0
Item No 68751
Express Card USB 3.0
Item No 68753
PCI-Express Card USB 3.0
Item No 68771
• Intel Pentium II 350 MHz processor or Apple G3 processor or higher / min. 512 MB RAM / USB port 3.0 recommended.
•C
ompatible with Windows 2000, XP, Vista or higher and Mac OS 10.0 or higher.
Compatible with Mac by simple reformatting (FAT 32).
• Do not cover the hard drive during operation (may cause overheating).
• Avoid temperature fluctuations (winter: condensation / summer: exposure to sunlight).
• Avoid magnetic fields.
5. Technical support
2. Installing the hardware
If you experience any problems, please contact us with the following information to
hand:
• Switch on your computer and wait until it has fully initialised the operating system.
•P
lug the smaller end of the supplied USB cable into the back of your USB hard drive
(Fig. 1).
•N
ext, plug the other end of the cable (when Y-USB cable is provided use both plugs)
in your computer’s USB port(s) (Fig. 2).
• The hardware wizard icon will first appear, followed by the icon for safely removing
the hardware.
• Your computer’s operating system and configuration
• Names of any additional peripheral devices you are using
• (Error) messages appearing on the screen
• Name of the software you were using when the error occurred
• Steps you have taken to resolve the problem
• Your customer number (if available)
• Purchase date and barcode-number of your hard drive