1
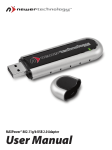
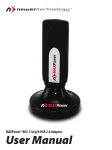
USB 3.0 SuperSpeed
Universal Drive Adapter
Instruction Manual
Before using this device with any of your storage devices, please be aware
that this product is designed to be used in a temporary situation. This adapter
does not use any drive enclosure to protect the drive mechanism from
damage due to electrostatic discharge. We highly recommend placing the
drive mechanism on a static safe work surface, one that you may have readily
available would be a mousepad. Turn the mousepad over so that its rubber
bottom surface is able to be placed underneath the drive you are attaching.
Another option is to use a NewerTech ProtectaDrive, pictured to the right. NewerTech’s ProtectaDrive lets you use
bare, swapped out hard drives as an external storage solution. By encapsulating your drive with this protective sleeve,
you can protect it from shock, short circuits, and static electricity.
To begin, remove the contents of the shipping box and lay them out in front of you.
Items should include:
• Universal Drive Adapter
• Power Supply
• Power Supply Power Cable
• USB Cable
• Serial ATA Cable
• IDE Extension Cable
• Power Adapter Cable (SATA / PATA)
Locate the Universal Drive Adapter. You will need this to connect any type of drive
mechanism to your computer.
On the bottom of the Universal Drive Adapter there is a USB 3.0 connector. The other
3 sides have three separate connectors on them - They are a full size 40 Pin ATA
connector for 3.5” ATA drives / 5.25” ATAPI devices, a mini 44 Pin ATA connector for
2.5” drives, and a Serial ATA (SATA I or SATA II) connector is molded into the top of the
adapter.
Please note that the USB 3.0 connector is backwards compatible with USB 2.0, or even a USB 1.1 connection. It’s truly
universal! As long as the USB port is powered, the Universal Drive Adapter will work!
On the front of the Universal Drive Adapter there is a LED indicator light. This LED is a multifunction indicator, showing
both power and drive activity. The LED with illuminate solid once plugged into your USB port and it is drawing power,
and upon drive access the LED will flash with data transfer.
NWTU3NVSPATA
3.5” IDE / 5.25* ATAPI Drive Use
Using the Newer Technology Universal Drive Adapter with IDE/ATA devices is quite simple.
Basic jumper settings for Western Digital ATA Hard Drives
Thank you for purchasing your new ATA hard drive from Other World Computing! Please
review these jumper settings prior to installing your new hard drive into your computer.
You may want to review more detailed information about the installation process, or
the location and configuration of your existing internal ATA drive before proceeding.
Your manual that came with your computer can be of assistance in both of these
determinations.
A few notes about installing an ATA hard drive into your existing system:
Your existing drive is normally configured one of two ways, Master (single drive), or
Cable Select. You will want to determine this before installing your new drive, the easiest
way is to remove the existing drive from your system and visually inspect it’s hard drive
jumpers. Most hard drives have a schematic either silk screened onto the case of the
drive, or the schematic is on a label near the jumper pins. If you have difficulty locating
this information, visit the hard drive manufacturer’s website.
If your existing hard drive is configured as “Master”, then set your new hard drive
to “Slave”. If your existing drive is set for “Cable Select”, then set your new drive to
“Cable Select” also. You can change the existing jumper settings on the original drive
to suit your needs, but we recommend following these instructions first to verify proper
operation of the new hard drive.
Installing jumpers on the new drive is a simple process, follow the schematic to
configure your drive.
Please note the configuration of
the internal ATA cable already
installed in your existing system.
If your internal cable is configured
differently than pictured here,
you may want to replace it before
installing a new hard drive to
achieve maximum performance.
For further assistance, visit our tech center at http://eshop.macsales.com/Tech/index.cfm
1) You need to begin by looking at the back of the device you’re hooking up and
make certain that the drive is set to MASTER or SINGLE DRIVE. This is different on
all hard drive manufacturer’s drive mechanisms, and we do offer instruction sheets
with all new bare hard drives we sell - a sample is shown to the bottom left here.
All of those drive instruction sheets are available for download in our tech center
http://eshop.macsales.com/tech_center/index.cfm?page=data_inthdd.html
2) Once you have the drive set to Master/Single, plug the Universal Drive Adapter into the
40 pin connection on the back of the drive, it is keyed to only fit the correct way.
3) Then, plug the AC Power Adapter into a standard outlet, plug the power adapter into the
other end of the AC cord, and the 4 pin connector into the back of the drive. Note that there
is an on/off power switch on the power cord - make sure it’s turned on.
4) And finally, plug the USB connection into your computer. The drive should mount on your
desktop, ready to copy data onto or off of. This will take up to 30 seconds.
* Compatible with full height 5.25” optical drives only. Not compatible with slimline optical drives such as those used in a laptop.
2.5” IDE Drive Use
The Newer Technology Universal Drive Adapter is even more simple to use with 2.5” hard drive
mechanisms, because there are less items to configure.
1) The 44 pin mini IDE connection on the drive must be attached to the Universal Drive Adapter.
This is the smaller of the two inline connections on the side of the adapter.
2) Attach the 44 pin mini IDE connector to the back of the drive, it is also keyed to make sure you
have it facing the correct direction - follow the picture to the above left as an example.
3) And finally, plug the USB connection into your computer. The drive should mount on your desktop, ready to copy
data onto or off of. This will take up to 30 seconds.
3.5” / 2.5” SATA Drive Use
The Newer Technology Universal Drive Adapter has the unique ability to also work with
Serial ATA, or SATA drives, both 2.5” and 3.5” (they use the same connectors). Connection
of both of these types of drives is identical.
1) Start by plugging the included SATA cable (the rectangular red cable) into the end of
the Universal Drive Adapter.
2) Plug the AC Power Adapter into a standard outlet, plug the power adapter into the
other end of the AC cord, the 4 pin connector into yellow, black and red plug adapter,
and then the plug adapter into the back of the SATA hard drive - it is keyed to only go in
one direction. Note that there is an inline power switch on the power cord - make sure it’s turned on.
3) Plug the other end of the red SATA cable into the back of your hard drive. It is keyed to plug in the correct direction.
4) Finally, plug the USB connection into your computer. The drive should mount on your desktop, ready to copy data
onto or off of. This will take up to 30 seconds.
Basic Troubleshooting:
If the device is not registering with your computer, try rebooting with the device attached and powered on. If this
does not resolve the issue, try disconnecting the power, detach, then reattaching the drive several times, before
reattaching the power. If you have any further difficulty with the Newer Technology Universal Drive Adapter, please
contact our customer service department. For contact methods visit: http://newertech.com/support
NWTU2NVSPATA