1
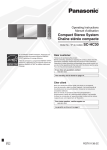
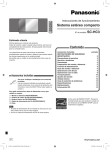
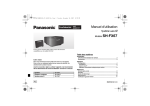
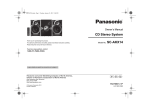
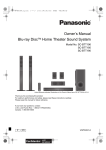
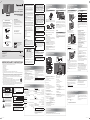
FCC Note:
Owner’s Manual
Compact Stereo System
Model No.
SC-HC05
Dear Customer
Thank you for purchasing this system.
Supplied Accessories
For optimum performance and safety, read these
instructions fully before you connect, operate or adjust
this system.
Check and identify the supplied accessories.
Use numbers indicated in parentheses when asking for
replacement parts. (Product numbers correct as of January
2011. This may be subject to change.)
Keep this manual for future reference.
To order accessories, refer to “Accessory Purchases
(United States and Puerto Rico)” on the next page.
Your system and the illustrations can look differently.
This equipment has been tested and found to comply with the
limits for a Class B digital device, pursuant to Part 15 of the
FCC Rules.
These limits are designed to provide reasonable protection
against harmful interference in a residential installation. This
equipment generates, uses and can radiate radio frequency
energy and, if not installed and used in accordance with
the instructions, may cause harmful interference to radio
communications.
However, there is no guarantee that interference will not occur
in a particular installation. If this equipment does cause harmful
interference to radio or television reception, which can be
determined by turning the equipment off and on, the user is
encouraged to try to correct the interference by one or more of
the following measures:
• Reorient or relocate the receiving antenna.
• Increase the separation between the equipment and receiver.
• Connect the equipment into an outlet on a circuit different
from that to which the receiver is connected.
• Consult the dealer or an experienced radio/TV technician for
help.
FCC caution: To maintain compliance with FCC regulations,
shielded interface cables must be used with this equipment.
Operation with non-approved equipment or unshielded cables
may result in interference to radio and TV reception. Any
changes or modifications not approved by the party responsible
for compliance could void the user’s authority to operate this
equipment.
This device complies with Part 15 of the FCC Rules.
Operation is subject to the following two conditions:
(1) This device may not cause harmful interference, and
(2) this device must accept any interference received,
including interference that may cause undesired operation.
1 x AC power supply cord
If you have any questions contact
1-800-211-PANA (7262)
Responsible Party:
Panasonic Corporation of North America
One Panasonic Way
Secaucus, NJ 07094
(K2CB2CB00021)
The warranty can be found on the next page.
1 x Remote control
Support Contact:
Panasonic Consumer Electronics Company
Telephone No.: 1-800-211-PANA (7262)
(RAK-SC989ZM)
CAUTION!
DO NOT INSTALL OR PLACE THIS UNIT IN A
BOOKCASE, BUILT-IN CABINET OR IN ANOTHER
CONFINED SPACE. ENSURE THE UNIT IS WELL
VENTILATED. TO PREVENT RISK OF ELECTRIC
SHOCK OR FIRE HAZARD DUE TO OVERHEATING,
ENSURE THAT CURTAINS AND ANY OTHER
MATERIALS DO NOT OBSTRUCT THE VENTILATION
VENTS.
1 x Lithium Button-Type battery
®
As an ENERGY STAR Partner,
Panasonic has determined
that this product meets the
ENERGY STAR® guidelines for
energy efficiency.
(Battery is already installed in the remote control.)
Panasonic Consumer Electronics Company,
Division of Panasonic Corporation of North America
P
En
Sp
One Panasonic Way, Secaucus,
New Jersey 07094
http://www.panasonic.com
RQTX1316-2P
© Panasonic Corporation 2011
Printed in China
“Made for iPod” and “Made for iPhone” mean that an electronic
accessory has been designed to connect specifically to
iPod, or iPhone, respectively, and has been certified by the
developer to meet Apple performance standards.
L0111HH2031
Apple is not responsible for the operation of this device or its
compliance with safety and regulatory standards.
Please note that the use of this accessory with iPod, or iPhone
may affect wireless performance.
IMPORTANT SAFETY INSTRUCTIONS
Read these operating instructions carefully before using the unit. Follow the safety instructions on the unit and the applicable safety
instructions listed below. Keep these operating instructions handy for future reference.
Remote control
Using an iPod or iPhone
Connect the AC power supply cord
Before using
Remove the insulation sheet before you use the remote
control for the first time.
Rear view
TO REDUCE THE RISK OF FIRE, ELECTRIC SHOCK
OR PRODUCT DAMAGE,
• DO NOT EXPOSE THIS APPARATUS TO RAIN,
MOISTURE, DRIPPING OR SPLASHING AND THAT
NO OBJECTS FILLED WITH LIQUIDS, SUCH AS
VASES, SHALL BE PLACED ON THE APPARATUS.
• USE ONLY THE RECOMMENDED ACCESSORIES.
• DO NOT REMOVE THE COVER (OR BACK); THERE
ARE NO USER SERVICEABLE PARTS INSIDE.
REFER SERVICING TO QUALIFIED SERVICE
PERSONNEL.
Replacing the battery
Replace the remote control battery when it stops operating
or when the range is decreased. Replace with a new battery
(CR2025) only.
Stopper
holder.
WARNING
Keep the Button-Type battery out of reach of children to
prevent swallowing.
– If you see this symbol –
Information on Disposal in other Countries outside the
European Union
This symbol is only valid in the European Union.
If you wish to discard this product, please
contact your local authorities or dealer and ask
for the correct method of disposal.
< For USA-California only >
This product contains a CR Coin Cell Lithium Battery which
contains Perchlorate Material - special handling may apply.
See www.dtsc.ca.gov/hazardouswaste/perchlorate.
2 Insert a new battery with the (+) side facing up.
3 Push the battery holder back fully.
CAUTION!
• Insert with poles aligned.
• Do not touch the terminals (+ and –) with metal objects.
• Do not recharge, disassemble, remodel, heat or throw into
fire.
• Keep out of reach of children.
• Do not heat or expose to flame.
• Do not leave the battery(ies) in an automobile exposed
to direct sunlight for a long period of time with doors and
windows closed.
• Remove the battery if you do not use the remote control for
a long period of time. Keep in a cool, dark area.
Speakers
• Do not remove the speaker nets.
• These speakers do not have magnetic shielding. Do not put
them near TVs, PCs or other devices easily influenced by
magnetism.
• When you play at high levels for a long period, it can cause
damage to the system and decrease the life of the system.
• Decrease the volume when you play distorted sound to
prevent damage.
10) Protect the power cord from being walked on or pinched particularly at plugs, convenience receptacles, and the point where they
exit from the apparatus.
11) Only use attachments/accessories specified by the manufacturer.
12) Use only with the cart, stand, tripod, bracket, or table specified by the manufacturer, or sold with the apparatus.
When a cart is used, use caution when moving the cart/apparatus combination to avoid injury from tip-over.
The Bluetooth® word mark and logos are owned by the
Bluetooth SIG, Inc. and any use of such marks by Panasonic
Corporation is under license. Other trademarks and trade
names are those of their respective owners.
CAUTION: TO REDUCE THE RISK OF ELECTRIC
SHOCK, DO NOT REMOVE SCREWS.
NO USER-SERVICEABLE PARTS
INSIDE.
REFER SERVICING TO QUALIFIED
SERVICE PERSONNEL.
SERIAL NUMBER
User memo:
DATE OF PURCHASE
DEALER NAME
The lightning flash with arrowhead symbol,
within an equilateral triangle, is intended to
alert the user to the presence of uninsulated
“dangerous voltage” within the product’s
enclosure that may be of sufficient magnitude
to constitute a risk of electric shock to persons.
4. Safety check — After repairs or service, ask the servicer
to perform safety checks to confirm that the unit is in proper
working condition.
Product information
For product information or assistance with product operation:
Refer to “Customer Services Directory (United States and
Puerto Rico)”.
The exclamation point within an equilateral
triangle is intended to alert the user to
the presence of important operating and
maintenance (servicing) instructions in the
literature accompanying the appliance.
DEALER ADDRESS
Bluetooth® section
RMS output power stereo mode
Front Ch (both ch driven)
20 W per channel (6 ), 1 kHz, 10% THD
Total RMS stereo mode power
40 W
FTC output power stereo mode
Front Ch (both ch driven)
15 W per channel (6 ), 20 Hz to 20 kHz, 10% THD
Total FTC stereo mode power
30 W
Bluetooth® system specification
Ver. 2.1 + EDR
Wireless equipment classification
Class 2 (2.5 mW)
Support profiles
A2DP, AVRCP
Frequency band
2402 MHz to 2480 MHz (Adaptive Frequency Hopping)
Driving distance
10 m (33 ft) line of sight
(iPhone 4, at height 1 m (3.3 ft), in MODE 1)
General
AUX (rear)
Terminal
Stereo, 3.5 mm (1/8″) jack
Speaker section
The unit should be installed near an accessible AC power
outlet, with the power cord connected directly to it.
To completely disconnect power from the unit, unplug the
power cord from the AC power outlet.
Type
2 way, 2 speaker system (passive radiator)
Speaker unit(s)
Woofer
6.5 cm (2 1/2″) cone type x 1/ch
Tweeter
1.5 cm (5/8″) piezo type x 1/ch
Passive radiators
8 cm (3 1/8″) x 2/ch
Impedance
6
Power supply
Power consumption
Dimensions (W x H x D)
AC 120 V, 60 Hz
16 W
370 mm x 176 mm x 85 mm
(14 1/2″ x 7″ x 3 1/2″)
[D = 121 mm (4 3/4″) dock open]
[D = 59 mm (2 1/2″) without stand]
Mass (Weight)
1.8 kg (9 lb.)
Operating temperature range
0°C to +40°C
(+32°F to +104°F)
Operating humidity range
35% to 80% RH (no condensation)
Power consumption in standby mode
0.1 W (approximate)
Note:
1. Specifications are subject to change without notice.
Mass and dimensions are approximate.
2. Total harmonic distortion is measured by the digital
spectrum analyzer.
HC05_P2_us_le.indd 1
Press to switch the unit from on to standby mode or vice
versa.
In standby mode, the unit is still consuming a small
amount of power.
B View the iPod or iPhone menu
I Start or pause playback
Press [2] or [6].
Search track
Press and hold [2] or [6].
View the iPod or
iPhone menu
Press [iPod MENU].
Select an item
Press [R] or [T] and then press
[OK].
K Power indicator
On : The system is on
Off : The system is in standby mode
L iPod or iPhone dock
D Confirm a selection
M Status indicator
Bluetooth® is the default mode except when an iPod or
iPhone is connected.
F Start Bluetooth® pairing mode
Select Bluetooth® link mode
Adjust the audio input level in AUX mode
•
•
•
•
•
•
•
•
•
•
•
•
•
•
•
•
•
•
•
iPod touch 4th generation (8GB, 32GB, 64GB)
iPod nano 6th generation (8GB, 16GB)
iPod touch 3rd generation (32GB, 64GB)
iPod nano 5th generation (video camera) (8GB, 16GB)
iPod touch 2nd generation (8GB, 16GB, 32GB)
iPod classic [120GB, 160GB (2009)]
iPod nano 4th generation (video) (8GB, 16GB)
iPod classic (160GB) (2007)
iPod touch 1st generation (8GB, 16GB, 32GB)
iPod nano 3rd generation (video) (4GB, 8GB)
iPod classic (80GB)
iPod nano 2nd generation (aluminum) (2GB, 4GB, 8GB)
iPod 5th generation (video) (60GB, 80GB)
iPod 5th generation (video) (30GB)
iPod nano 1st generation (1GB, 2GB, 4GB)
iPhone 4 (16GB, 32GB)
iPhone 3GS (8GB, 16GB, 32GB)
iPhone 3G (8GB, 16GB)
iPhone (4GB, 8GB, 16GB)
1 Disconnect the iPod or iPhone.
Compatibility depends on the software version of your iPod or
iPhone.
2 Press [PUSH CLOSE] while closing the dock.
Note:
• The display on the iPod can show differently because of the
compatibility of the iPod models.
• All phone features can only be controlled by the touch
screen of the iPhone.
• The system does not show incoming calls or the phone
status.
• Playback will stop when there is an incoming call.
Disconnect the iPhone to answer the call.
• A call is not canceled when you connect or disconnect the
iPhone from the system.
• There is no Apple Inc. specification that will guarantee the
above iPhone response. iPhone responses can be different
on newer models or with newer software.
Charging an iPod or iPhone
An iPod or iPhone is charged automatically when connected
to the system (even when the system is in standby mode).
• See the iPod or iPhone display for its battery charging
status.
• Disconnect the iPod or iPhone if it is not used for an
extended period of time after charging is complete.
• Charging stops when the battery is fully charged. The battery
will deplete naturally.
Listening to the Internet radio
J Skip or search track
C Select an item
Set or cancel the auto off function
Amplifier section
TELEPHONE NUMBER
Product identification marking is located on the bottom of unit.
A Standby/on switch [`], [1, POWER]
E Select iPod, Internet radio, Bluetooth® or AUX mode
Terminal section
Dock adapter
(not included)
iPhone
(not included)
3. Replacement parts — When parts need replacing ensure
the servicer uses parts specified by the manufacturer or
parts that have the same characteristics as the original
parts. Unauthorized substitutes may result in fire, electric
shock, or other hazards.
Specifications
SC-HC05
The status indicator changes to green.
Note:
• Make sure to align your iPod or iPhone with the connector
when inserting.
• Make sure to press [PUSH CLOSE] while closing the dock to
prevent damage.
• When an iPod or iPhone is connected, press [SELECTOR]
to switch between modes (Internet radio, Bluetooth®, AUX or
iPod).
• The system automatically switches on when you connect an
iPod or iPhone that is in playback mode (except for some
models).
• To purchase a dock adapter, consult your local iPod or
iPhone dealer.
PAIRING
14) Refer all servicing to qualified service personnel. Servicing is required when the apparatus has been damaged in any way, such as
power-supply cord or plug is damaged, liquid has been spilled or objects have fallen into the apparatus, the apparatus has been
exposed to rain or moisture, does not operate normally, or has been dropped.
MODEL NUMBER
Skip track
(as of January 2011)
Top view
iPod MENU
13) Unplug this apparatus during lightning storms or when unused for long periods of time.
The model number and serial number of this product can be
found on either the back or the bottom of the unit.
Please note them in the space provided below and keep for
future reference.
3 Connect the iPod or iPhone.
Overview of controls
OK
2. Servicing — Do not attempt to service the unit beyond that
described in these operating instructions. Refer all other
servicing to authorized servicing personnel.
Press [4/9].
Press again to continue playback.
Compatible iPod and iPhone
To close the dock
5) Do not use this apparatus near water.
9) Do not defeat the safety purpose of the polarized or grounding-type plug. A polarized plug has two blades with one wider than the
other. A grounding-type plug has two blades and a third grounding prong. The wide blade or the third prong are provided for your
safety. If the provided plug does not fit into your outlet, consult an electrician for replacement of the obsolete outlet.
2 Insert a compatible dock adapter.
Hold the dock when connecting or disconnecting the iPod
or iPhone.
If any electrolyte should come into contact with your hands or
clothes, wash it off thoroughly with water.
If any electrolyte should come into contact with your eyes,
never rub the eyes.
Rinse eyes thoroughly with water, and then consult a doctor.
Product service
8) Do not install near any heat sources such as radiators, heat registers, stoves, or other apparatus (including amplifiers) that produce
heat.
Pause playback
Note:
• Depending on the model, it may be necessary to remove the
iPod or iPhone and select the album, artist, etc. on the iPod
or iPhone.
• Operation results may vary depending on the iPod or iPhone
models.
• Read the User Guide of the iPod or iPhone for operating
instructions.
Connector
4) Follow all instructions.
7) Do not block any ventilation openings. Install in accordance with the manufacturer’s instructions.
2 Press [4/9] to start playback.
Battery holder
1 While pressing the stopper, pull out the battery
WARNING
Risk of fire, explosion and burns. Do not disassemble, heat
above 60°C (140°F) or incinerate.
• Use the included AC power supply cord with this system
only.
• Do not use an AC power supply cord from other equipment.
Conserving power
The system consumes approximately 0.1 W when it is in
standby mode. Disconnect the power supply if you do not use
the system. Some settings will be lost after you disconnect the
system. You have to set them again.
CAUTION!
Danger of explosion if battery is incorrectly replaced. Replace
only with the same or equivalent type recommended by the
manufacturer. Dispose of used batteries according to the
manufacturer’s instructions.
iPhone, iPod, iPod classic, iPod nano, and iPod touch are
trademarks of Apple Inc., registered in the U.S. and other
countries.
1. Damage requiring service — The unit should be serviced
by qualified service personnel if:
(a) The AC power supply cord or the plug has been
damaged; or
(b) Objects or liquids have gotten into the unit; or
(c) The unit has been exposed to rain; or
(d) The unit does not operate normally or exhibits a marked
change in performance; or
(e) The unit has been dropped or the cabinet damaged.
1 Connect the iPod or iPhone.
To household AC outlet
MUTE
6) Clean only with dry cloth.
Preparation
Update your iPod or iPhone with the latest software.
Make sure to remove the iPod or iPhone from its case.
Insulation sheet
SELECTOR LINK MODE
3) Heed all warnings.
Basic playback
WARNING:
1) Read these instructions.
2) Keep these instructions.
Connecting an iPod or iPhone
1 Push [x, iPod] to open the dock.
WARNING:
To satisfy FCC RF exposure requirements for mobile
transmitting devices, a separation of 20 cm or more should be
maintained between the antenna of this device and persons
during device operation. To ensure compliance, operations at
closer than this distance are not recommended. The antenna
used for this transmitter must not be co-located in conjunction
with any other antenna or transmitter.
Getting started
Green
: iPod mode
Blue
: Bluetooth® mode
Light blue : Set or cancel the auto off function
Mute function is on
Off
: AUX mode
The green status indicator blinks each time a remote
control button is pressed.
N [PUSH CLOSE]
Press while closing the dock.
You can listen to a radio station on the Internet if you install
the “vTuner for Panasonic” application on your iPod touch or
iPhone. Download this application from the App Store.
Note:
For compatible iPod touch and iPhone models and
instructions on how to use the “vTuner for Panasonic”
application, refer to:
http://radio.vtuner.com/panasonic/en/
Preparation
Install “vTuner for Panasonic” on your iPod touch or iPhone.
Connect your iPod touch or iPhone to the Internet. Go to the
Home screen of the iPod touch or iPhone.
1 Connect the iPod touch or iPhone.
2 Press [SELECTOR] to start the application.
Using the auto off function
G Adjust the volume of the system
The setting returns to the default when you disconnect the
AC power supply cord.
H Mute the sound of the system
O Remote control sensor
Point the remote control at the remote control sensor,
away from obstacles, at a maximum range of 7 m (23 ft)
directly in front of the main unit.
In iPod mode
: The light blue and green status
indicators blink alternately.
In Bluetooth® mode : The light blue and blue status
indicators blink alternately.
In AUX mode
: The light blue status indicator blinks
continuously.
This function does not work when the system is pairing or
waiting to connect with a Bluetooth ® device.
Press the button again to cancel.
Mute is also canceled when you adjust the volume or
when you switch off the system.
The system automatically switches off if there is no audio input
and you do not use it for approximately 30 minutes.
1 Press [SELECTOR] to select AUX mode.
Status indicator: Off
2 Press and hold [OK].
ON
(default)
↔
OFF
Note:
• This function does not work when a Bluetooth® device is
connected.
• 1 minute before the system switches off, the power indicator
blinks.
• The setting returns to the default when you disconnect the
AC power supply cord.
ON : The light blue status indicator blinks 2 times.
OFF : The light blue status indicator blinks 1 time.
Maintenance
To clean this system, wipe with a soft, dry cloth.
• Never use alcohol, paint thinner or benzine to clean this system.
• Before using chemically treated cloth, read the instructions that came with the cloth carefully.
3/15/2011 8:45:37 AM
®
Using Bluetooth
Using the auxiliary input
You can connect and play an audio device wirelessly through
Bluetooth®.
Panasonic bears no responsibility for data and/or
information that can possibly be compromised during a
wireless transmission.
Preparation
Switch on the Bluetooth® feature of the device and put the
device near the system. Read the operating instructions of the
device for details.
The blue status indicator can indicate different Bluetooth®
conditions:
Note:
• When playing iPod or iPhone by Bluetooth® with the main
unit, intermittent sound may be experienced if you leave
the iPod or iPhone Bluetooth® menu screen active or when
making Bluetooth® registration and connection. If this occurs,
please exit the iPod or iPhone Bluetooth® menu screen.
• If playback does not start, stop or disable the Bluetooth®
transmission of the device and then connect the device
again.
• If you connect an iPod or iPhone to the dock when it is
playing via Bluetooth®, the system switches to iPod mode
and playback is paused. Press [4/9] to continue playback.
Preparation
Switch off the equalizer (if any) of the portable audio
equipment to prevent sound distortion.
Decrease the volume of the system and the portable audio
equipment before you connect or disconnect the portable
audio equipment.
2 Press [SELECTOR] to select AUX mode.
Blinks quickly
The system is ready for pairing.
Link mode
Blinks slowly
The system is waiting to connect.
You can select different modes to suit the type of connection.
Lighted
A Bluetooth® device is connected.
1 Stop or disable the Bluetooth
Pairing and connecting a device
®
mode.
Status indicator: Blue
2 Access the Bluetooth
®
menu of the device and search
for “SC-HC05”.
3 Pair or connect the device to “SC-HC05”.
If prompted for a passkey, input “0000”.
The device connects with this system automatically after
pairing is complete.
Note:
• A device must be paired to connect.
• This system can only connect to one device at a time.
• A device stays connected even if the system is switched to
iPod or AUX mode.
Pairing with additional devices
1 Press [SELECTOR] to select Bluetooth
2 Press and hold [
®
mode.
, –PAIRING].
3 Access the Bluetooth
®
menu of the device and search
for “SC-HC05”.
4 Pair or connect the device to “SC-HC05”.
You can pair up to 6 devices with this system. If a 7th device
is paired, the device with the oldest connection history will be
replaced.
You only have to do pairing once, unless:
• The pairing of the device has been replaced.
• The memory of this system has been reset.
• The pairing of “SC-HC05” has been deleted from the device.
Disconnecting a device
A device is disconnected when you:
• Switch off the system or the device.
• Move the device out of the maximum range.
• Stop or disable the Bluetooth® transmission of the device.
Basic playback
1 Press [SELECTOR] to select Bluetooth
®
mode.
2 Connect the device.
3 Press [4/9] to start playback.
Pause playback
Skip track
2 Press [
Press [4/9].
Press again to continue playback.
Press [2] or [6].
®
transmission of the
, LINK MODE].
MODE 1 ↔
(default)
MODE 2
MODE 1
For stable communication.
MODE 2
For good audio quality.
Communication can disconnect easily. Select
“MODE 1” if this occurs.
Common problems
Power indicator blinks and then the system automatically
switches off.
• An error has occurred. Disconnect the AC power supply
cord. Wait for a few seconds, connect the AC power supply
cord and then switch on the system again. If the problem
continues, contact an authorized service center.
Frequency band
• This system uses the 2.4 GHz frequency band.
Certification
• This system conforms to frequency restrictions and has
received certification based on frequency laws. Thus, a
wireless permit is not necessary.
• The actions below are punishable by law:
– Taking apart or modifying the main unit.
– Removing specification indications from the bottom of this
main unit.
Restrictions of use
• Wireless transmission and/or usage with all Bluetooth®
equipped devices is not guaranteed.
• All devices must conform to standards set by Bluetooth SIG,
Inc.
• Depending on the specifications and settings of a device, it
can fail to connect or some operations can be different.
• This system supports Bluetooth® security features. But
depending on the operating environment and/or settings, this
security is possibly not sufficient. Transmit data wirelessly to
this system with caution.
• This system cannot transmit data to a Bluetooth® device.
Range of use
• Use this device at a maximum range of 10 m (33 ft).
• The range can decrease depending on the environment,
obstacles or interference.
Interference from other devices
• Other devices can use the same frequency as this system
and cause the system to operate incorrectly or sound
distortion.
• To prevent interference from other devices:
– Keep the system away from other devices that emit radio
frequency interference.
– Do not use this system and a wireless LAN device at the
same time. Switch off any wireless LAN device.
Intended usage
• This system is for normal, general use only.
• Do not use this system near an equipment or in an
environment that is sensitive to radio frequency interference
(example: airports, hospitals, laboratories, etc.).
iPod or iPhone does not respond.
• Make sure that the system is in iPod mode.
• The iPod or iPhone is not connected correctly. Remove the
iPod or iPhone and connect it again.
iPod or iPhone does not charge.
• Examine the connections.
Bluetooth®
Pairing cannot be done.
• The device is out of the 10 m (33 ft) communication range.
Move the device nearer to the system.
No sound.
• Examine the connections.
• Increase the volume of the system.
• Examine the volume of the iPod, iPhone, Bluetooth® device
or portable audio equipment.
• Make sure that the iPod, iPhone, Bluetooth® device or
portable audio equipment is actually playing something.
The device cannot be connected.
• The pairing of the device was unsuccessful. Read the
instructions and try again.
• The pairing of the device has been replaced. Do pairing
again.
• Make sure that the system is not connected to a different
device.
Sound is distorted.
• Lower the volume of the system.
• Noise can occur if you play a lower quality audio content.
• Make sure that the equalizer function of the iPod, iPhone,
Bluetooth® device or portable audio equipment is switched
off.
• Move mobile telephones away from the main unit if the
interference is apparent.
The device is connected but audio cannot be heard
through the system.
• For some built-in Bluetooth® devices, you have to set the
audio output to “SC-HC05” manually. Read the operating
instructions of the device for details.
A “humming” sound can be heard during playback.
• An AC power supply cord or fluorescent light is near the
cable. Keep other appliances and cords away from the cable
of this system.
No response when remote control buttons are pressed.
• Remove the insulation sheet before you use the remote
control for the first time.
• Examine that the battery is installed correctly.
• The battery is weak. Replace it with a new one.
Other Panasonic equipment responds to the remote
control of this system.
This system responds to the remote control of other
Panasonic equipment.
• Change the remote control code of the other Panasonic
equipment.
iPod or iPhone
iPod or iPhone does not switch on.
• Make sure that the iPod or iPhone battery is not depleted.
Charge the iPod or iPhone.
• Switch off the system and then switch it on again.
HC05_P2_us_le.indd 2
Visión general de los controles
Sound from the device is broken.
• The device is out of the 10 m (33 ft) communication range.
Move the device nearer to the system.
• Remove any obstacle between the system and the device.
• Switch off any wireless LAN device.
• Select “MODE 1” for stable communication.
Puede escuchar una estación de radio en Internet si instala la
aplicación “vTuner for Panasonic” en su iPod touch o iPhone.
Descargue esta aplicación de App Store.
Rear view
Vista superior
Plug type: Ø 3.5 mm (1/8″) stereo
Audio cable
(not included)
When the following situations occur, refer to the instructions
below to reset the memory:
• There is no response when buttons are pressed.
• You want to clear and reset the memory contents.
To reset the memory
1 Disconnect the AC power supply cord.
2 While you press and hold [1, POWER] on the main
unit, connect the AC power supply cord again.
Wait until the power indicator lights up.
3 Release [1, POWER].
All the settings are set back to the factory preset.
The system is in standby mode.
Switch on the system to set the memory items again.
1 Conectar el iPod touch o iPhone.
2 Pulse [SELECTOR] para iniciar la aplicación.
SELECTOR LINK MODE
MUTE
PAIRING
To adjust the audio input level
3 Play the portable audio equipment.
Note:
• Read the operating instructions of the portable audio
equipment for details.
• Components and cables are sold separately.
Uso de Bluetooth®
OK
Portable audio equipment
(not included)
Puede conectar y reproducir un dispositivo de audio de
manera inalámbrica a través de Bluetooth®.
Press [ , LINK MODE/–PAIRING].
NORMAL ↔ HIGH
(default)
Panasonic no se responsabiliza por datos y/o
información que podrían correr algún riesgo durante la
transmisión inalámbrica.
Note:
• Select “NORMAL” if the sound is distorted during “HIGH”
input level.
• The setting returns to the default when you disconnect the
AC power supply cord.
Preparación
Encienda la opción de Bluetooth® en el dispositivo y ponga
el dispositivo cerca del sistema. Lea las instrucciones de
operación del dispositivo para obtener más detalles.
A Interruptor de alimentación en espera/conectada [`],
[1, POWER]
Pulse este interruptor para cambiar del modo de
alimentación conectada al modo de alimentación en
espera o viceversa.
En el modo de alimentación en espera, la unidad
consume una pequeña cantidad de corriente.
Limited Warranty
Panasonic Consumer Electronics Company,
Division of Panasonic Corporation of North America
One Panasonic Way, Secaucus, New Jersey 07094
B Vea el menú del iPod o iPhone
C Seleccione un elemento
Panasonic Home Audio Products
Limited Warranty
Limited Warranty Coverage (For USA and Puerto Rico Only)
If your product does not work properly because of a defect in materials or workmanship, Panasonic Consumer Electronics
Company (referred to as “the warrantor”) will, for the length of the period indicated on the chart below, which starts with the date
of original purchase (“warranty period”), at its option either (a) repair your product with new or refurbished parts, (b) replace it with
a new or a refurbished equivalent value product, or (c) refund your purchase price. The decision to repair, replace or refund will be
made by the warrantor.
D Confirmar selección
Configure o cancele la función de apagado automático
E Seleccione el modo iPod, radio de Internet, Bluetooth® o
AUX
Bluetooth® es el modo predeterminado, excepto cuando
hay un iPod o iPhone conectado.
F Inicie el modo de pareo por Bluetooth®
Elija el modo de vínculo por Bluetooth ®
Ajuste el nivel de entrada de audio en el modo AUX
G Ajuste el volumen del sistema
Product or Part Name
Audio Products (except items below)
Parts
Labor
1 year
1 year
DVD Home Theater System
1 year
1 year
Home Theater Audio System
1 year
1 year
USB Reader-writer, PC Card Adapters (defective exchange)
1 year
Not Applicable
Accessories: Headphones, cartridges, Microphones, Adapters
90 days
90 days
Rechargeable Batteries, DVD-RAM Disc (defective exchange)
10 days
Not Applicable
SD Memory Cards, Rechargeable Battery Packs (defective exchange)
90 days
Not Applicable
During the “Labor” warranty period there will be no charge for labor. During the “Parts” warranty period, there will be no charge
for parts. This Limited Warranty excludes both parts and labor for non-rechargeable batteries, antennas, and cosmetic parts
(cabinet). This warranty only applies to products purchased and serviced in the United States or Puerto Rico. This warranty is
extended only to the original purchaser of a new product which was not sold “as is”.
Carry-In or Mail-In Service
To find a service center please visit http://www.panasonic.com/help or call 1-800-211-PANA (7262).
I Inicie o pause la reproducción
J Saltar o buscar pista
K Indicador de encendido
Encendido : El sistema está encendido
Apagado : El sistema está en modo de espera
L Base de acoplamiento de iPod o iPhone
M Indicador de estado
La configuración se restaurará a los valores
predeterminados cuando desconecte el cable de
alimentación de CA.
Verde
: El modo iPod
Azul
: El modo Bluetooth®
Azul claro : Configure o cancele la función de apagado
automático
La función de silencio está activada
Apagado : El modo AUX
El indicador de estado verde parpadea cada vez que se
pulsa un botón del control remoto.
N [PUSH CLOSE]
Pulse mientras cierra la base de acoplamiento.
O Sensor del control remoto
Apunte el control remoto al sensor del control remoto,
lejos de obstáculos, dentro de un rango máximo de 7 m
(23 pies) directamente al frente de la unidad principal.
H Desactive el sonido del sistema
El indicador de estado azul puede indicar distintas
condiciones del Bluetooth®:
Parpadea
rápidamente
El sistema está listo para el pareo.
Parpadea
lentamente
El sistema está esperando conexión.
Encendido
Un dispositivo Bluetooth® está
conectado.
Pareo y conexión de un dispositivo
1 Pulse [SELECTOR] para seleccionar el modo
Bluetooth ®.
Indicador de estado: Azul
2 Acceda al menú Bluetooth
®
del dispositivo y busque
“SC-HC05”.
3 Paree o conecte el dispositivo a “SC-HC05”.
Si le pide clave de acceso, ingrese “0000”.
El dispositivo se conecta con el sistema
automáticamente, después que se hubiera completado el
pareo.
Nota:
• Para conectarse, un dispositivo debe estar pareado.
• El sistema sólo puede conectarse a un dispositivo a la vez.
• El dispositivo permanece conectado incluso si el sistema se
cambia a modo iPod o AUX.
En modo iPod
: Los indicadores de estado
azul claro y verde parpadean
alternativamente.
En modo Bluetooth® : Los indicadores de estado
azul claro y azul parpadean
alternativamente.
En modo AUX
: El indicador de estado azul claro
parpadea continuamente.
Esta función no está activa cuando el sistema está en
modo de pareo o esperando conectar con un dispositivo
Bluetooth®.
Pulse el botón nuevamente para cancelar.
El silenciado del sonido también se cancela cuando usted
ajusta el volumen o cuando apaga el sistema.
When shipping the unit, carefully pack, include all accessories, and send it prepaid, adequately insured and preferably in the
original carton. When shipping Lithium Ion batteries please visit our Web Site at www.panasonic.com/BatteryHandling as
Panasonic is committed to providing the most up to date information. Include a letter detailing the complaint, a return address and
provide a daytime phone number where you can be reached. A valid registered receipt is required under the Limited Warranty.
IF REPAIR IS NEEDED DURING THE WARRANTY PERIOD, THE PURCHASER WILL BE REQUIRED TO FURNISH A SALES
RECEIPT/PROOF OF PURCHASE INDICATING DATE OF PURCHASE, AMOUNT PAID AND PLACE OF PURCHASE.
CUSTOMER WILL BE CHARGED FOR THE REPAIR OF ANY UNIT RECEIVED WITHOUT SUCH PROOF OF PURCHASE.
Limited Warranty Limits And Exclusions
This warranty ONLY COVERS failures due to defects in materials or workmanship, and DOES NOT COVER normal wear and
tear or cosmetic damage. The warranty ALSO DOES NOT COVER damages which occurred in shipment, or failures which are
caused by products not supplied by the warrantor, or failures which result from accidents, misuse, abuse, neglect, mishandling,
misapplication, alteration, faulty installation, set-up adjustments, misadjustment of consumer controls, improper maintenance,
power line surge, lightning damage, modification, introduction of sand, humidity or liquids, commercial use such as hotel, office,
restaurant, or other business or rental use of the product, or service by anyone other than a Factory Service Center or other
Authorized Servicer, or damage that is attributable to acts of God.
THERE ARE NO EXPRESS WARRANTIES EXCEPT AS LISTED UNDER “LIMITED WARRANTY COVERAGE”.
THE WARRANTOR IS NOT LIABLE FOR INCIDENTAL OR CONSEQUENTIAL DAMAGES RESULTING FROM THE USE OF
THIS PRODUCT, OR ARISING OUT OF ANY BREACH OF THIS WARRANTY. (As examples, this excludes damages for lost
time, travel to and from the servicer, loss of or damage to media or images, data or other memory or recorded content. The items
listed are not exclusive, but for illustration only.)
ALL EXPRESS AND IMPLIED WARRANTIES, INCLUDING THE WARRANTY OF MERCHANTABILITY, ARE LIMITED TO THE
PERIOD OF THE LIMITED WARRANTY.
Some states do not allow the exclusion or limitation of incidental or consequential damages, or limitations on how long an implied
warranty lasts, so the exclusions may not apply to you.
This warranty gives you specific legal rights and you may also have other rights which vary from state to state. If a problem with
this product develops during or after the warranty period, you may contact your dealer or Service Center. If the problem is not
handled to your satisfaction, then write to the warrantor’s Consumer Affairs Department at the addresses listed for the warrantor.
PARTS AND SERVICE, WHICH ARE NOT COVERED BY THIS LIMITED WARRANTY, ARE YOUR RESPONSIBILITY.
2 Pulse y mantenga pulsado [ , –PAIRING].
3 Acceda al menú Bluetooth del dispositivo y busque
®
Cómo conectar un iPod o iPhone
Reproducción básica
Preparación
Actualice su iPod o iPhone con el software más reciente.
Asegúrese de sacar el iPod o el iPhone de su estuche.
1 Conectar el iPod o iPhone.
Debe realizar el pareo una sola vez, salvo que:
• El pareo del dispositivo se hubiera reemplazado.
• La memoria del sistema se hubiera restablecido.
• El pareo de “SC-HC05” se hubiera borrado del dispositivo.
iPhone
(no
suministrado)
Adaptador para base de
acoplamiento
(no suministrado)
Conector
Customer Services Directory (United States and Puerto Rico)
Obtain Product Information and Operating Assistance; locate your nearest Dealer or Service Center; purchase Parts
and Accessories; or make Customer Service and Literature requests by visiting our Web Site at:
http://www.panasonic.com/help
or, contact us via the web at:
http://www.panasonic.com/contactinfo
You may also contact us directly at:
1-800-211-PANA (7262)
Monday-Friday 9am-9pm, Saturday-Sunday 10am-7pm EST
For hearing or speech impaired TTY users, TTY: 1-866-605-1277
As of December 2010
2 Conectar el dispositivo.
3 Pulse [4/9] para iniciar la reproducción.
Pause la
reproducción
Pulse [4/9].
Pulse nuevamente para continúe la
reproducción.
Saltar pista
Pulse [2] o [6].
Nota:
• Cuando reproduzca material del iPod o iPhone mediante
Bluetooth® con la unidad principal, podría haber sonidos
intermitentes si deja activa la pantalla del menú de
Bluetooth® del iPod o iPhone o cuando realice el registro y
conexión del dispositivo Bluetooth®. En caso de ocurrir esto,
por favor salga de la pantalla de menú de Bluetooth® del
iPod o iPhone.
• Si no comienza la reproducción, detenga o desactiva la
transmisión Bluetooth® del dispositivo y luego conecte el
dispositivo nuevamente.
• Si conecta un iPod o un iPhone al acoplamiento del equipo
cuando está reproduciendo vía Bluetooth®, el sistema
cambia a modo iPod y la reproducción se cambia a
pausado. Pulse [4/9] para continuar la reproducción.
Modo de vínculo
Puede elegir modos distintos para adecuarse al tipo de
conexión.
®
del
dispositivo.
, LINK MODE].
MODO 1
↔
(predeterminado)
MODO 2
MODO 1 → MODO 2: El indicador de estado azul claro
parpadea 4 veces.
MODO 2 → MODO 1: El indicador de estado azul claro
parpadea 2 veces.
MODO 1
Para comunicación estable.
MODO 2
Para buena calidad de audio.
La comunicación se puede desconectar con
facilidad. Elija “MODO 1” si esto ocurre.
Pause la
reproducción
Pulse [4/9].
Pulse nuevamente para continúe la
reproducción.
Saltar pista
Pulse [2] o [6].
Buscar pista
Pulse y mantenga pulsado [2] o
[6].
Vea el menú del
iPod o iPhone
Pulse [iPod MENU].
Seleccione un
elemento
Pulse [R] o [T] y después pulse
[OK].
Cómo usar la función de apagado automático
El sistema se apaga automáticamente si no hay entrada de
audio y no lo utiliza durante aproximadamente 30 minutos
1 Pulse [SELECTOR] para seleccionar el modo AUX.
Nota:
• Dependiendo del modelo, podría requerirse quitar el iPod
o el iPhone y elegir el álbum, artista, etc. en el iPod o en el
iPhone.
• El funcionamiento podría variar dependiendo de los modelos
de iPod o iPhone.
• Lea el Manual del Usuario del iPod o iPhone para
instrucciones de su funcionamiento.
Indicador de estado: Apagado
2 Pulse y mantenga pulsado [OK].
ENCENDIDO
↔
(predeterminado)
APAGADO
Nota:
• Esta función no trabaja cuando el dispositivo Bluetooth® está
conectado.
• 1 minuto antes que el sistema se apague, el indicador de
energía parpadea.
• La configuración se restaurará a los valores
predeterminados cuando desconecte el cable de
alimentación de CA.
ENCENDIDO : El indicador de estado azul claro
parpadea 2 veces.
APAGADO : El indicador de estado azul claro
parpadea 1 vez.
Sujete la base de acoplamiento al conectar o desconectar
el iPod o el iPhone.
Para cerrar la base de acoplamiento
1 Desconectar el iPod o iPhone.
2 Pulse [PUSH CLOSE] mientras cierra la base de
acoplamiento.
For hearing or speech impaired TTY users, TTY: 1-877-833-8855
Purchase Parts, Accessories and Instruction Books online for all Panasonic Products by visiting our Web Site at:
http://www.pstc.panasonic.com
Or, send your request by E-mail to:
[email protected]
You may also contact us directly at:
1-800-332-5368 (Phone) 1-800-237-9080 (Fax Only)
(Monday-Friday 9am-9pm EST)
Panasonic Service and Technology Company
20421 84th Avenue South, Kent, WA 98032
(We accept Visa, MasterCard, Discover Card, American Express, and Personal Checks)
Bluetooth ®.
2 Pulse [4/9] para iniciar la reproducción.
compatible.
El indicador de estado cambia a verde.
1 Pulse [SELECTOR] para seleccionar el modo
2 Pulse [
Bluetooth ®.
Puede parear hasta 6 dispositivos con este sistema. Si se
parea un 7mo dispositivo, el dispositivo con el historial de
conexión más antiguo será reemplazado.
3 Conectar el iPod o iPhone.
Reproducción básica
1 Pulse [SELECTOR] para seleccionar el modo
Cómo usar un iPod o iPhone
2 Introduzca un adaptador para base de acoplamiento
Un dispositivo se desconecta cuando:
• Apaga el sistema o el dispositivo.
• Mueve el dispositivo fuera del alcance máximo.
• Detenga o desactiva la transmisión Bluetooth® del
dispositivo.
1 Detenga o desactiva la transmisión Bluetooth
4 Paree o conecte el dispositivo a “SC-HC05”.
1 Pulse [x, iPod] para abrir la base de acoplamiento.
Desconexión del dispositivo
Pareo con dispositivos adicionales
“SC-HC05”.
Accessory Purchases (United States and Puerto Rico)
Memory reset (Initialization)
Nota:
Para obtener modelos compatibles para iPod touch e iPhone
e instrucciones sobre cómo utilizar la aplicación “vTuner for
Panasonic”, refiérase a:
http://radio.vtuner.com/panasonic/en/
Preparación
Instale “vTuner for Panasonic” en su iPod touch o iPhone.
Conecte su iPod touch o iPhone al Internet. Vaya a la Pantalla
de inicio en su iPod touch o iPhone.
1 Connect the portable audio equipment.
®
About Bluetooth
Escuchar la radio de Internet
iPod MENU
MODE 1 → MODE 2: The light blue status indicator blinks
4 times.
MODE 2 → MODE 1: The light blue status indicator blinks
2 times.
Troubleshooting guide
Before requesting service, make the following checks. If you
are in doubt about some of the check points, or if the solutions
indicated do not solve the problem, refer to “Customer
Services Directory (United States and Puerto Rico)”.
You can connect a portable audio equipment and listen to the
audio through this system.
Status indicator: Off
device.
1 Press [SELECTOR] to select Bluetooth
ESPAÑOL
Cómo cargar un iPod o iPhone
El iPod o iPhone se carga automáticamente cuando está
conectado al sistema (incluso cuando el sistema está en
modo de alimentación en espera).
• Consulte la pantalla del iPod o iPhone para verificar el
estado de carga de su batería.
• Desconecte el iPod o iPhone si no se utiliza durante un
periodo de tiempo largo después que se hubiera completado
la carga.
• La carga se detiene cuando la batería está completamente
cargada. La batería se agotará de forma natural.
Cómo usar la entrada auxiliar
Puede conectar un equipo de audio portátil y escuchar el
audio a través de este sistema.
Vista posterior
Preparación
Apague el equializador (si existe alguno) del equipo de audio
portátil para evitar la distorsión del sonido.
Baje el volumen del sistema y del equipo de audio portátil
antes de conectar o de desconectar del equipo de audio
portátil.
1 Conecte el equipo de audio portátil.
Tipo de clavija: estéreo de Ø 3.5 mm (1/8″)
Nota:
• Asegúrese de alinear su iPod o iPhone con el conector
cuando realice la inserción.
• Asegúrese de pulsar [PUSH CLOSE] mientras cierra la base
de acoplamiento para evitar daños.
• Cuando se conecta un iPod o iPhone, pulse [SELECTOR]
para conmutar entre modos (radio Internet, Bluetooth®, AUX
o iPod).
• El sistema se activa automáticamente cuando conecta un
iPod o iPhone que está en modo de reproducción (excepto
en algunos modelos).
• Para comprar un adaptador para base de acoplamiento,
consulte a su distribuidor local de iPod o iPhone.
2 Pulse [SELECTOR] para seleccionar el modo AUX.
Indicador de estado: Apagado
3 Reproduzca desde el equipo de audio portátil.
Nota:
• Lea las instrucciones de operación del equipo de audio
portátil para obtener más detalles.
• Los componentes y los cables se venden por separado.
Cable de audio
(no suministrado)
Equipo de audio portátil
(no suministrado)
Para ajustar el nivel de entrada de audio
Pulse [ , LINK MODE/–PAIRING].
NORMAL
↔ ALTO
(predeterminado)
Nota:
• Seleccione “NORMAL” si el sonido está distorsionado
durante un nivel de entrada “ALTO”.
• La configuración se restaurará a los valores
predeterminados cuando desconecte el cable de
alimentación de CA.
3/15/2011 8:45:43 AM