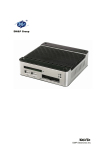
1
eBox-2300SX-LS User’s Manual DM&P Group eBox-2300SX-LS User’s Manual DMP Electronics Inc. 1 eBox-2300SX-LS User’s Manual COPYRIGHT The information in this manual is subject to change without notice for continuous improvement in the product. All rights are reserved. The manufacturer assumes no responsibility for any inaccuracies that may contain in this document, and makes no commitment to update or to keep current information contain in this manual. No part of this manual may be reproduced, copied, translated or transmitted, in whole or in part, in any form or by any means without the prior written permission of the DMP Electronics Inc. ©Copyright 2008 DMP Electronics Inc. Manual No. IUMeBox2300SX-LS-01 Ver.0.1 1st Issued Date: Dec 01, 2007 Revised Date: Jan, 2008 SPECIAL NOTICE TO USERS DMP Electronics Inc. provides no warranty with regard to this manual, the software, or other information contained herein and hereby expressly disclaims any implied warranties of merchantability or fitness for any particular purpose with regard to this manual, the software, or such other information. In no event shall DMP Electronics be liable for any incidental, consequential, or special damages, whether based on tort, contract, or otherwise, arising out of or in connection with this manual, the software, or other information contained herein or the use thereof. DMP Electronics reserves the right to make any modification to this manual or the information contained herein at any time without notice. The software described herein is governed by the terms of a separated user license agreement or label sticker. This product contains software owned by DMP and licensed by third parties. Use of such software is subject to the terms and conditions of license agreements enclosed with this product. Software specifications are subject to change without notice and may not necessarily be identical to current retail versions. Updates and additions to software may require an additional charge. Subscription to online service providers may require a fee and credit card information. Financial services may require prior arrangements with participating financial institution. I eBox-2300SX-LS User’s Manual TRADEMARKS ACKNOWLEDGMENT eBox-2300SX-LS is the registered trademarks of DMP Electronics Inc. The brand names, product names or trade names appearing in this document are the properties and registered trademarks of their respective owners. All names mentioned herewith are served for identification purpose only. OWNER’S RECORD The serial number of this product is located at the rear panel of your eBox-2300SX series. Refer to the model and serial number when you contact your nearest dealer or DMP offices for services. The Model No. of this product is also indicated on the product label of your gift box as: eBox-2300SX, eBox-2300SX-H, eBox-2300SX-M eBox-2300SX-JSK and eBox-2300SX-LS II eBox-2300SX-LS User’s Manual SAFETY INFORMATION WARNING Do not expose eBox-2300SX to rain or moisture, in order to prevent shock and fire hazard. Never install eBox-2300SX in wet locations. Do not open the cabinet to avoid electrical shock. Refer to your nearest dealer for qualified personnel servicing. Never touch un-insulated terminals or wire unless your power adaptor and display monitor are disconnected. Locate eBox-2300SX as close as possible to the socket outline for easy access and to avoid force caused by entangling of your arms with surrounding cables from the eBox-2300SX. When using eBox-2300SX, avoid using or installing the modem to the serial port during a storm or a lightning. Do not use the modem or a telephone to report a gas leak in the vicinity of the leak. USB connectors are not supplied with Limited Power Sources. DO NOT ATTEMPT TO OPEN OR TO DISASSEMBLE THE CHASSIS (ENCASING) OF THIS PRODUCT. PLEASE CONTACT YOUR NEAREST DEALER FOR SERVICING FROM QUALIFIED TECHNICIAN. III eBox-2300SX-LS User’s Manual REGULATORY FCC CLASS A NOTE This equipment has been tested and found to comply with the limits for a Class A digital device, pursuant to Part 15 of the FCC Rules. These limits are designed to provide reasonable protection against harmful interference when the equipment is operated in a commercial environment. This equipment generates, uses and can radiate radio frequency energy and, if not installed and used in accordance with the instruction manual, may cause harmful interference in which case the user will be required to correct the interference at his own expense. Testing was done with shielded cables. Therefore, in order to comply with the FCC regulations, you must use shielded cables with your installation. WARNING This product complies with EN55022 class A. In a domestic environment this product may cause radio interference in which case the user may be required to take adequate measures. Changes or modifications to this unit not expressly approved by the party responsible for compliance could void the user’s authority to operate the equipment. This device complies with Part 15 of the FCC rules. Operation is subject to the following two conditions: (1) this device may not cause harmful interference, and (2) this device must accept any interference received, including interference that may cause undesired operation. This digital apparatus does not exceed the Class A limits for radio noise emissions from digital apparatus as set out in the interference - causing equipment standard entitled “Digital Apparatus”, ICES-003 of the Department of Communications. MANUFACTURER’S DECLARATION OF CONFORMITY This equipment has been tested and found to comply with the requirements of European Community Council Directives 89/336/EEC and 73/23/EEC relating to electromagnetic compatibility and product safety respectively. ATTENTION This product has been designed and certified to comply with certain regulatory requirements pertaining to Information Technology Equipment. This product has not been designed for use as a medical device. Without limitation of the foregoing, this product is not intended and has not been certified for use in a hospital or clinical environment to diagnose, treat, or monitor patients under medical supervision, and is not intended and has not been certified to make physical or electrical contact with patients, nor to transfer energy to or from patients and/or to detect such energy transfer to or from patients. IV eBox-2300SX-LS User’s Manual PURCHASE AGREEMENT PURPOSE: In accordance to the general commercial conduct of Trust and Fair Trade, herewith below is the agreement for the protection for both parties, DMP and Users in pursuant of trading. PRODUCT DESCRIPTION: With this product, herewith also known as eBox-2300SX, which is a simplified & an economical design of an embedded eBox-2300SX for Special Purpose Personal Computing. The basic specification of this product comprises of the x86 technology design, and with onboard 128MB System memory, Display, USB, Keyboard, PS2 Mouse, LAN, and Audio Interfaces. DISTRIBUTION CONVENTION: 1. This Product includes a gift box, an inner case, a PC, a Power adaptor, User’s Manual, and IDE cable (standard eBox-2300SX configuration do not have the IDE cable). Upon receiving this product, kindly please refer to the User’ Manual to check for the contents and appearance of this product; contact immediately your nearest dealer or DMP office for any defective or missing parts. The supplier will not be responsible for any reported discrepancy thereafter the expiration period of 3-days from the date of purchase. 2. In consideration of transportation and the cost of storage, the supplier provides to the distributors a warranty of 12-months. This warranty covers the failure caused by hardware breakdown (excluding hard drives), but does not cover the act of misuse and mishandling. 3. The supplier will not accept unknown post, therefore if you wish to repair or to return your goods – kindly please contact your nearest dealer to make your declaration, and at the same time, apply for a RMA number (RMA stands for Return Merchandise Authorization – please see the RMA form and fill-up for authorization). 4. The freight for return goods for repair will follow the International customary practice and convention: Both parties is to pay for freight of one shipment each. The shipper is required to prepay the freight from the place of origin (This means that the returnee (user) covers the freight for return goods, while the Supplier covers the freight for goods after the repair). 5. Obsolete warranty is referred to as: (1) Expiration of warranty or (2) Damage due to misuse within warranty. The Supplier will be taken into consideration of the circumstances, to provide repair service with charges expense for obsolete warranty. This expense includes the cost of material and the cost of labor. NOTE: If there is other particular issue not listed in the above conditions, both parties agreed to follow the General Law of Commerce with fair and reasonable discussion in handling and resolving the argument. V eBox-2300SX-LS User’s Manual Table Chapter 1 Product Package ………………………………………………………… 1 Chapter 2 The Setup Mode Setting ………………………………………………….2 First Section: Booting ………………………………………………………………….2 Second Section: The Introduction of Control Panel Setting ……………………….6 Third Section: Nets Tool……………………………………………………………... 11 Forth Section: About ………………………………………………………………….13 Fifth Section: Network Setting ……………………………………………………….14 Sixth Section: Desktop………………………………………………………………. 15 Seven Section: Connecting Manager ……………………………………………… 16 7.1 ICA Connection Setting …………………………………………………………17 7.2 RDP Connection Setting ………………………………………………………. 25 7.3 VNC Connection Setting ………………………………………………………. 29 7.4 XDMCP Connection Setting …………………………………………………... 30 Eighth Section: Stateless ………………………………………………………….....31 Ninth Section: Alter System Password …………………………………………….. 39 Chapter 3 The User Mode …………………………………………………………….41 Chapter 4 Q&A ………………………………………………………………………….43 First Section: About Win2000 Server ……………………………………………….43 Second Section: The Using of eBox-2300SX-LS ………………………………… 52 Chapter 5 Technique Supporting ……………………………………………………54 VI eBox-2300SX-LS User’s Manual Chapter 1 Product Package 1. eBox-2300SX x 1。 2. Power-15W-3pin x 1。 3. Compact Flash Card x 1。 1 eBox-2300SX-LS User’s Manual Chapter 2 The Setup Mode Setting First section: Booting 1.1 When you start the system and the screen will shows as below: (1-1) 1.2 Input administrator’s username and password as picture 1-2. The default username is administrator and the default password is 123. Administrator can click in “My Computer”/ “Control Panel”/ “Password” to alter system password. 2 _______________________________eBox-2300SX-LS User’s Manual (1-2) 3 _______________________________eBox-2300SX-LS User’s Manual 1.3 When you enter to Setup Mode in the first time as (1-3). There are function icons, including “My Computer”, “Change Language”, and “Test Stateless” on the desktop. The administrator have to click into “My Computer”/ “Control Panel” and to install peripheral devices, to set loop circumstance and system function; you can check whether your eBox-2300SX is registered or not; Test Stateless can test whether the Statelss Server is normal or not. (1-3) 1.4 Click “My Computer” on the desktop and there are three icons as (1-4), including “Control Penal”, “Net Tool”, and “About”. If you would like to install peripheral driver and set up user’s desktop, Internet and Time setting, you have to enter “Control Panel” to do these setting. 4 _______________________________eBox-2300SX-LS User’s Manual (1-4) 5 _______________________________eBox-2300SX-LS User’s Manual Second section: The Introduction of Control Panel Setting Under “My Computer”/ “Control Panel”, it includes Network, User Desktop, Resource, VNC, Display, Package Info, Boot Menu, Stateless, Window Manager, Adjust Time, Admin, XFS IP, Connection Manager, Environment, OS Upgrade, Device Manager. There are 15 System Administration Interface items of setting capability. Each capability of tool setting under Control Panel is below: 2.1 Device Manager:It co-operate with Driver CD to auto-detect peripheral hardware and auto-install the driver. 2.2 Network:Set local access InternetEnvironment, and the setting itemsinclude IP address, Subnet mask,Broadcast IP, Gate way, Nameserver and Starting DHCP. 2.3 User Desktop:Set up function which can be uesd for user; then, these functions will be showed on the desktop. 6 _______________________________eBox-2300SX-LS User’s Manual 2.4 Resource:Set “Enable” or “ Disable” in eBox Local access Peripheral resource. The Default is “Enable”. The system cooperates with Driver CD and Device Managercan to auto-scratch hardware devices on the resources list and installs the driver. 2.5 Package Info:Start Package Browser to browse all of module information of the system. 2.6 Dispaly:Set up the resolution of monitor, Refresh rate of monitor, 7 _______________________________eBox-2300SX-LS User’s Manual 2.7 Boot Menu:You can set “Enable” or “Disable” on eBox graphic or literal boot mode. Suggest user use default of the system and do not change it. 2.8 Stateless:The implement can make administrator to centralize the setting methods. It is not necessaryto set eBox Client access usingfunction one by one. It just connectsto Stateless Sever and completes allof related settings. 2.9 Window Manager:The implement is for setting tool bar location. 8 _______________________________eBox-2300SX-LS User’s Manual 2.10 Adjust Time:It can set the time and date of the system. 2.11 Admin:It supply administrator to alter system password, and to set “Enable” or “Disable” system setting function inf Control Panel and Samba Server password revise setting tool 2.12 XFS IP:The tool is for setting net connection to XFS Server access in order to get character support from Serve. For example, 192.168.1.1 is XFS Server (Font Server),hence, the system can support more characters by connecting to XFS IP. 9 _______________________________eBox-2300SX-LS User’s Manual 2.13 Connection Manager:The tool is for integrateing RDP, ICA, XDMCP, VNC connection. User can set related connection setting of RDP, ICA, XDMCP, and VNC by Connection Manager. 2.14 Environment:The tool is for setting keyboard language, mouse speed, mouse wheel. Suggest using system default or “Enable” mouse wheel. 2.15 OS Upgrade:The tool is supply user to upgrade eBox by CD-ROM or Internet. Third Section: Nets Tool There is an operating interface supply administrator to test Internet condition in “My Computer”/ “Control Panel”/ “Net Tools”, including Detect, Terminal, and 10 Xhost. _______________________________eBox-2300SX-LS User’s Manual These are showed as (3-1). 3.1 Detect:Net- detect tool. 3.1.1 Ping:It can input IP Address to test whether the Internet is normal or not. 3.1.2 Traceroute : The tool can detect the condition of Nets Package Transmission of IP address. 3.2 Terminal:Net Terminal Tool。 3.2.1 SSH: By security remote terminal connection, user can connect another mainframe to operate its Remote Host System. (3-1) 11 _______________________________eBox-2300SX-LS User’s Manual 3.2.2 Telnet:The tool is for Remote Terminal Connection. After Connecting to another host, if its IP address have been added in Xhost (see 3.1),and input Command order: export DISPLAY=local IP:0.0. It means the x windows of the Remote Host will transmit to and operate by local access. If you wanted to use mp3 player of Remote Host, you just input xmms command, then you can play mp3 from Remote Host by mp3 Player. How about the start Telnet is showed as (3-2). (3-2) 3.3 Xhost:When add a Remote Host IP address, Xhost can permit Remote Host to transmit its x windows screen to Host. With Telnet, the Applied Program of Remote Host can be started and be showed on Host access as example of 3.2.2. 12 _______________________________eBox-2300SX-LS User’s Manual Forth Section: About It shows related system information in “My Computer”/ “About”, including eBox version, CPU, and RAM as (4-1). (4-1) 13 _______________________________eBox-2300SX-LS User’s Manual Fifth Section: Network Setting 1 Click “My Computer”/ “Control Panel”/ “Network” and it will show Network Configuration as(5-1). User can press Edit to proceed to network setting, and then click Enable DHCP to start DHCP and press OK. The system will catch DHCP setting in normal situation. If not, you can catch IP by manual work.( means Enable, means Disable)。 (5-1) 2 Press Enable DHCP will show as (5-1) and the DHCP will be started. Then press OK and eBox will auto- catch DHCP Network Address; or manual- input configuration of IP、Submask、Brocast IP、Gateway、Dns. 14 _______________________________eBox-2300SX-LS User’s Manual Sixth Section: Desktop 1. Click “My Computer”/ “Control Panel”/ “User Desktop”, it will show as (6-1), and you can choose which tools can be used for user. ( means Enable, means Disable)After select, administrator press Accept and Preview, and then the system will request you to select Screen Resolution. Choose 800*600. The item which you choose in Setup Mode will be showed in User Mode; if you want the item can be auto- started when you enter User Mode, you just press “Enable” the item’s Autorun. (6-1) 15 _______________________________eBox-2300SX-LS User’s Manual Seventh Section: Connecting Manager 1. Administrator can enter “My Computer”/ “Control Panel”/ “Connection Manager” in Setup Mode which showed as(7-1). Then press “New” and it will show “New Add”, including ICA、RDP、XDMCP、VNC. Administrator select connection type which you want , press OK, and proceed to next related connection setting step. (7-1) 2.(7-2)is each function of Conncetion Edit Area. (7-2) New: Add New Conncetion 16 _______________________________eBox-2300SX-LS User’s Manual Edit: Delet/ Modify Conncetion Delete: Desktop: Delete Connection Definition Select ICA and RDP which be set, then press ”Desktop”, and the connection will showed as ICON and be put on desktop in the User Mode. Autorun: Press “Autorun” and the connection as ICA or RDP which be set will in auto- run and in connection when user enter User Mode. PRINT: Press “PRINT” will start Printer Setting screen which can set sharing local access printer. (7-3) About: Show the current version of connection manager. 7.1 Set ICA Connection: This section illustrates how to connect to Citrix Family: The MetaFrame 1.8, Meta Frame XP and CDS (Citrix Device Service). You can set up two connection type in Citrix Server: connect to Citrix Server or applied programe which is released. You can pre-set in Server that user can execute applied programes on the desktop after connecting to Server. If user have connected to system desktop and could use any applied programes which be set in ICA Client access to relate to applied programe from ICA Server on the desktop, these applied programes could be put in different Servers. (Load Balance). When you connect to ICA Server, you have to select ICA Connection and press ”New” in the Connetcion Manager, and you enable to start ICA setting list. Belows are illustrations of setting: 7.1.1 ICA-Connection Setting This Part illustrates when user set up an ICA related connection setting for the first time, it will open ICA Server connection setting list viwer as (7-4). Below is showing how to set each field. 17 _______________________________eBox-2300SX-LS User’s Manual (7-4) Setting Item Illustration Title Input Connection title Browse Option Network Protocol:Choose one network protocol. Server Location:input IP or DNS of ICA Server which you want to connect. Browse Server Select Citrix Server or Published Application in the Server, you can also press Find to search Published Application from Net Server. These applications will be showed on below frame, click one application, and you will see its connection information. 18 _______________________________eBox-2300SX-LS User’s Manual 7.1.2 ICA-Service Setting When you click Sevice in ICA Server Connection list, it will show a picture as(7-5). (7-5) Setting Item Illustration Command Line Input complete application route, including the name of application which be executed when you connect to ICA Server. Working Input complete name of application route. Directory 7.1.3 ICA-Account Setting When you click Account in ICA Server Connection list, it will show a picture as(7-6). (7-6) 19 _______________________________eBox-2300SX-LS User’s Manual Setting Item Illustration Username Input ICA Server user’s username. Password Input ICA Server user’s password. Domain Any information about using Internet can be inputted in the frame. 7.1.4 ICA-Desktop Setting When you click Desktop in ICA Server Connection list, it will show a picture as(7-7). (7-7) Setting Item Color Palette Desktop Resolution Illustration Select Color Pallete of the connection. Selct Desktop Resolution after connecting to ICA Server. 7.1.5 ICA–Socks Setting When you click Socks in ICA Server Connection list, it will show a picture as(7-8) (7-8) 20 _______________________________eBox-2300SX-LS User’s Manual Setting Item Connect via SOCKS Proxy Proxy Illustration If the firewall is used on ICA Server, you can click the item. Input IP address and Port number. 7.1.6 ICA–Misc Setting When you click Misc in ICA Server Connection list, it will show a picture as(7-9). (7-9) Setting Item Compress Data Stream Sound Enable Quality Encryption Level Illustration Reducing information stream between ICA by compressing data stream.The function default is “Enable”. Click sound Enable, and it will has sound support when you execute some applications after connceting to ICA. Select Sound Quality. The good sound quality needs wider bandwidth to transmiss sound. Encryption Level can enssure ICA security. Before selecting higher Encryption Level, your ICA Server security level has already been set on RC5. 7.1.7 ICA-Settings You can start ICA Connection Setting List when you press “Setting”. 7.1.7.1 Hotkeys Setting Press “Hotkeys” and it will show as(7-10). You can choose “Hotkeys” when you start ICA Server connection. 21 _______________________________eBox-2300SX-LS User’s Manual (7-10) 7.1.7.2 ICA-Settings-Hotkeys Setting Press “Hotkeys” and it will show as(7-11). You can choose “Hotkeys” when you start ICA Server connection. (7-11) 7.1.7.3 ICA-Settings-Preference Setting After pressing “Setting” in ICA Server Connection Setting, Press “Preference” and it will show as(7-12). You can choose ICA Keyboard items which you need. (7-12) 7.1.7.4 ICA-Settings-Disk Cache Setting After pressing “Setting” in ICA Server Connection Setting, Press “DiskCache” and it will show as(7-13). You can set Disk Cache Amount and Disk Cache Directory. 22 _______________________________eBox-2300SX-LS User’s Manual (7-13) 7.1.7.4 ICA-Settings-Drive Mapping Setting After pressing “Setting” in ICA Server Connection Setting, Press “Drive Mapping” and it will show as(7-14). You can set each storage and “Enable” its Read or Write. (7-14) 7.1.7.5 ICA-Settings-COM Ports Setting After pressing “Setting” in ICA Server Connection Setting, Press “COM Port” and it will show as(7-15). You can set each COM Port in accordance with need. (7-15) 7.1.7.6 ICA-Settings-Auto Reconnect Setting After pressing “Setting” in ICA Server Connection Setting, Press “AutoReconnect” and it will show as(7-16). When ICA connection is severed, the system will auto-connect to ICA Sercer after start “AutoReconnect”. 23 _______________________________eBox-2300SX-LS User’s Manual (7-16) 7.1.7.7 ICA-Settings-Printer Setting After pressing “Setting” in ICA Server Connection Setting, Press “Printer” and it will show as(7-17). Select a printer which you want to use in the system and inform Server that the priting data should be transmitted to the printer which be selected. (7-17) 24 _______________________________eBox-2300SX-LS User’s Manual 7.2 Set RDP Client Connection: After pressing “New”, click a “New Add” RDP Connection. It shows as (7-18). (7-18) 7.2.1 Set RDP Client Connection:After clicking a “New Add” RDP Connection, it shows as (7-19), you have to input Title in the “Name”. Also, you need to input RDP Server Connection IP Address and Port (It can be omitted if you do not have it) in Server Name, and press OK to complete RDP Connection. (7-19) 25 _______________________________eBox-2300SX-LS User’s Manual 7.2.2 Set RDP user’s Login information. It shows as (7-20). (7-20) 7.2.3 This part is set Network Drive, including Disk Redirection, Com Ports and LPT Ports. It shows as below. (7-21) 26 _______________________________eBox-2300SX-LS User’s Manual 7.2.4 Set Color Pallete and Screen Resolution of Desktop. It shows as (7-22). (7-22) 7.2.5 Set the type of printer. It shows as (7-23). (7-23) 27 _______________________________eBox-2300SX-LS User’s Manual 7.2.6 The(7-24) shows that user select a connection setting, press”Connect”, and it will connect to RDP Server. (7-24) 28 _______________________________eBox-2300SX-LS User’s Manual 7.3 Set VNC Connection:Add new VNC Connection and it will shows a VNC viewer as(7-25). After setting VNC Server Name、Server IP、Password、Port, press OK and save VNC configuration; click connection type what you want and press “Connect” will connect to VNC Server. (7-25) 29 _______________________________eBox-2300SX-LS User’s Manual 7.4 XDMCP Connection Setting:Add new XDMCP Connection and it will shows a XDMCP viewer as(7-26). Input Connection Title in “Name”, IP Address in “IP”and press “OK” to complete XDMCP Connection Setting. (7-26) 30 _______________________________eBox-2300SX-LS User’s Manual Eighth Section: Stateless 8.1 If administrator has to set more 2300SX-LS in different computer, you can uniform their using function and set different using limits by Stateless.(8-1) shows how to set the Stateless, including User ID(Default ID:stateless), Password(Default Password is: 123), Server IP(Server:your.company.com). Then click “Enable”and press “Accept”, and it will show “Stateless mode enable” viewer when you complete Stateless setting. (Stateless Server has FTP capability. The administrator can set up FTP under Linux OS or Win2000 OS, and put files(*.ini) of Stateless which each eBox Client needs on FTP. ) (8-1) 31 _______________________________eBox-2300SX-LS User’s Manual 8.2 After executing the step of 8.1 go back to Desktop, press Test Stateless, and it will shows that Check User name, Password, Server Address. Then the system will show whether the Stateless Server is in success or not. If it in success and there will show “OK” viewer as(8-2). Also, if it in fail and there will show “error”. (8-2) 8.3 After executing the step of 8.2, and it show an information viewer. The viewer is show the Stateless Server has completely executed after reading global.ini file. (global.iniis put in FTP Server root catalog route) 32 _______________________________eBox-2300SX-LS User’s Manual (8-3) 8.4 (8-4) is show that Stateless be in “Enable” and it only reveal Stateless after rebooting Control Panel. (8-4) 33 _______________________________eBox-2300SX-LS User’s Manual 8.5 Start Statelesss and reboot, the system will request you to input login ID and password in booting process. Administrator can take the Stateless Demo / williamh.ini be reference in Driver CD. After user input williamh in login and input williamh in Password, the system will enter User Mode as (8-5). (Login ID is the name of *.ini, it means that the connection is to williamh.ini of Stateless Server, and the password is the password that is set in williamh.ini. Administrator can set User Mode environment in Server access and save it to *.ini file. Then user can connect to *.ini file and get configuration of operating environment under the started Stateless mode. (8-5) z Below setting file exemplification have to coordinate with [username.ini]. Exemple 1: williamh.ini [user] my_passwd="williamh" [lang] [my_lang]=en [desktop_pic] desktop=bb.jpg [userdesktop] MYCOMPUTER=1 CONNECTMGR=1 VCDPLAYER=1 MP3=1 WWW=1 The illustration of each argument setting williamh.ini Password Setting System Language Setting En means the system setting is in English; tw means the system setting is in Chinese. System Desktop Picture Setting Set System Desktop Picture to bb.jpg Set the applied program which can be operated on the user’s Desktop My Computer: 1 mean “Enable”, 0 means “Disable” Connection Manager: 1 means “Enable”, 0 means “Disable”. VCD Player: 1 means “Enable”, 0 means “Disable” mp3 player: 1 means “Enable”, 0 means “Disable” Browser: 1 means “Enable”, 0 means “Disable” 34 _______________________________eBox-2300SX-LS User’s Manual CDPLAYER=1 CD Player: 1 means “Enable”, 0 means “Disable” MAIN=1 Control Panel: 1 means “Enable”, 0 means “Disable” TOOLBAR=1 Tool Bar: 1 means “Enable”, 0 means “Disable” OFF=1 Turn Off: 1 means “Enable”, 0 means “Disable” [userdesktop_autorun] Auto- run user’s desktop setting Exemple 2: global.ini [lang] [my_lang]=en [login] login=1 [userdesktop] MYCOMPUTER=0 CONNECTMGR=0 VCDPLAYER=0 MP3=0 WWW=0 CDPLAYER=0 MAIN=0 TOOLBAR=1 OFF=1 The illustration of each argument setting global.ini System Language Setting En means the system setting is in English; tw means the system setting is in Chinese. Set if the system request user to login 0=False;1=Ture Set the applied program which can be operated on the user’s Desktop My Computer: 1 mean “Enable”, 0 means “Disable” Connection Manager: 1 means “Enable”, 0 means “Disable”. VCD Player: 1 means “Enable”, 0 means “Disable” mp3 player: 1 means “Enable”, 0 means “Disable” Browser: 1 means “Enable”, 0 means “Disable” CD Player: 1 means “Enable”, 0 means “Disable” Control Panel: 1 means “Enable”, 0 means “Disable” Tool Bar: 1 means “Enable”, 0 means “Disable” Turn Off: 1 means “Enable”, 0 means “Disable” 35 _______________________________eBox-2300SX-LS User’s Manual 8.6 Stateless The illustration of further argument: [extra_app] Put other Volutary- making applied programs on user’s desktop Programe Name Program Name has to accord with Language Setting For example: my_lang=en The name pf program can not use Chinese my_lang=tw The name pf program can use Chinese Volutary setting in Desktop Connection You can set the RDP setting which you want to connect by yourself. It allow user to set much definition. Because the Connection Title can be set feely, user may begin the title by “rdp” in order to prevent it is in repetition with system. Connection Notepad [rdp_notepad] The Connection Type only support RDP so far TYPE="rdp" Connection Name NAME="test" Domain DEFAULT_DOMAIN="tcide" Password DEFAULT_PASSWORD="tcide" z z z z Username DEFAULT_USER="tcide" Executing Program APPLICATION="c:\winnt\notepad.exe" Fullscreen FULLSCREEN="True" Sever SERVER="192.168.1.7" User can put these setting and publish them on Desktop [extra_app] "Notepad" "rdp.xpm" "connection.sh rdp_notepad" 1. Set WORD Argument [rdp_word] TYPE="rdp" NAME="test" DEFAULT_DOMAIN="tcide" DEFAULT_PASSWORD="tcide" DEFAULT_USER="tcide" APPLICATION="c:\progra~1/micros~2/office/winword.exe" FULLSCREEN="True" SERVER="192.168.1.7" 36 _______________________________eBox-2300SX-LS User’s Manual 2. Set EXCELArgument [rdp_excel] TYPE="rdp" NAME="test" DEFAULT_DOMAIN="tcide" DEFAULT_PASSWORD="tcide" DEFAULT_USER="tcide" APPLICATION="c:\progra~1/micros~2/office/excel.exe" FULLSCREEN="True" SERVER="192.168.1.7" 3. Set powerpoint Argument [rdp_powerpoint] TYPE="rdp" NAME="test" DEFAULT_DOMAIN="tcide" DEFAULT_PASSWORD="tcide" DEFAULT_USER="tcide" APPLICATION="c:\progra~1/micros~2/office/powerpnt.exe" FULLSCREEN="True" SERVER="192.168.1.7" z Put above- arguments on the argument setting of user’s desktop [extra_app] "Word" "rdp.xpm" "connection.sh rdp_word" "Excel" "rdp.xpm" "connection.sh rdp_excel" "PowerPoit" "rdp.xpm" "connection.sh rdp_powerpoint" 4. Group Setting File [group].ini [group].ini Put [group].ini with global.ini in the same catalog. The setting of [group].ini is as same as global.ini. Please see the method of global.ini. 37 _______________________________eBox-2300SX-LS User’s Manual 8.6 Set eBox-2300SX-LS argument in Stateless: Global.ini [lang] my_lang=en [icaserver] ip=211.72.201.94 ICA Server IP Address [appsrv] The name of applied program on ICA Server 38 _______________________________eBox-2300SX-LS User’s Manual Ninth Section: Alter System Password 9.1 User can alter system password in Admin. Administrator enters Control Panel/ Admin, and it will show a login screen. The default password is “123”, and press”login”. (9-1) 39 _______________________________eBox-2300SX-LS User’s Manual 9.2 After login, the screen will show three icons as(9-2), including Password, Authentication, and SAMBA. Password is for altering system booting password; Authentication is for setting “Enable”or ”Disable” system function, for example, if you pressed “Disable” in Network and reboot, administrator could not alter any information in Network; SAMBA is for administrator to change password for SAMBA Share. After changing password and default ID (guest), user has to input new password to successful login. (9-2) 40 _______________________________eBox-2300SX-LS User’s Manual Chapter 3 The User Mode 1. The User can “Double Click “thses icons on the Desktop, or press “Start” to click the applied program which you want to use. (3-1) 2. Click “Opera” on the Desktop, input the Address, and it will connect to Internet Browser as(3-2). The browser support Java Script and Flash. 41 _______________________________eBox-2300SX-LS User’s Manual (3-2) 42 _______________________________eBox-2300SX-LS User’s Manual Chapter 4 Q&A First Section about Win2000 Server Q:I can not input login information when I login Windows 2000 Terminal Server, why? A:Make sure if the item of user offer has been selected in login information of RDP-Tcp Connection Setting. Also, make sure the Terminal Server Setting (Sever Setting (Internet Connector authority should be suspended. Q:I can not set disk corresponding in the RDP-Tcp Client Setting, why? A:So far, in Windows 2000 Version, the disk corresponding function only be used on ICA client of Citrix. Q:How to get the Windows 2000 Server Service authorization? Have any limitation? A:Different purchase way: Select or Enterprise Agreement: Buying from Microsoft Select or Enterprise Agreement, you only use “Enrollment Agreement number” then install the software. Open License: Buying from Microsoft Open License, you need to get Authorization Number and License Number from Microsoft. Others: Buying the software from distributors who were authorized by Microsoft. License codes often included in Microsoft License Pak (MLP). Different Version: 120 days BETA: There is a set of Existing Windows 2000 License after installing Windows 2000(BETA), it will provide you temporary authorization to use the software within 90 days. Please do not install authorization in the BETA because it will disappear with the end of testing period. Official Version: There is a temporary License (90 days) in Windows 2000 server (Officail Version), The License provide you to use before you start Terminal Server Service. If you got the Terminal Server Service License by Microsoft Select/Enterprise, you could directly login by enroll number. If you got License by Open License, you could use permit number to login. If you were not any kinds of customers as above, you could contact Microsoft Taiwan or go through the internet: https://activate.microsoft.com, and to buy License for logining. Q:How to install Windows 2000 server (Official) License? A:Step 1: From " Start "/ "Programes"/ "System Management", and select "Terminal Service License"。 Click right mouse key on the “Name” and select “Start Server”. The screen will show “License Wizard” and click “Next”. About Connecting Mode, selecting connecting mode and the “License Wizard” will prompts you the proper way to get Server Identity Number. Take Internet be the exemple, selecting "Internet" and clicking "Next"。 The screen will show a License programe, you choose a proper licenseand click “Next”. Fill in the company name (It have to fill),and fill in E-mail address, then press "Next". After the “License Wizard” confirming the E-mail address,it will show a windows which you need to fill in company information and 43 _______________________________eBox-2300SX-LS User’s Manual click “Next”. After pressing “Finish”, you will get a mail of PIN. (Personal ID Number). Then, go back to “Terminal Service License”, click right mouse key on Computer Name, and select “Start Server.” Select first item on “License Wizard” then press “Next”. Input the PIN and compelte the step. Step 2: ”License Wizard” select present install lisence and press “Next” (or click “Start”/ “Programe”/ “System Management”, select “Terminal Service License”, click right mouse key the “Install License” on Computer Name.) If you were “Select” customer, you could input Enrollment Agreement number and choose License Type. “Open License” customer input Authorization Number and License Number 。 Other customers input the PIN which you purchased (25 characters), press “Add” and “Next”. Q:How to calculate the License Number which Terminal Service Client access demands? A:If you bought 10 merchadises and all of them may connect to Win2000 Terminal Server, you would need to buy 10 Terminal Client License. However, if your client access is Win2000 Professional or Win2000 Server OS,it was not necessary to buy License because there is internal Win2000 Terminal Server License. Q:What kind of OS (Operation Software) can support Terminal Client? A:Windows 2000 only support 32 bit x86 Windows OS (Win9x、NT、Windows2000)。 Other devices (Macintosh Computer or UNIX) can connect to Server by using joint vendor’s software. Q:How to set auto-login Terminal server ? A: Click”Start”/ “Programe”/ “System Management”, then press “Terminal Server Service Setting”. Click “Connect” data folder, click RDP-Tcp Connect,click right mouse key, click “Content” and “Login Default”, and click ● auto-run login information as below, fill in “Name” and “PIN”,. Finally, click “OK” to complete the step. Q: How to install and exchange the “Remote Manage” and “Applied Programe Mode” in Terminal server? A:1. Start “Terminal Service” by “Remote Manage Mode” Start “Add/ Remove Programe” in “Contrl Panel”. Press “Add/ Remove Windows Component” in order to start “Windows Component Wizard”. In “Windows Componet”, select “Terminal Service”, and click “Next”. In “Terminal Service Install Program”, click “Remote Manage Mode”. The system will duplicate essential file to your hard disk, and it will use the Software in Server after rebooting. 2. Start “Terminal Service” by “Applied Service Mode” Start “Add/ Remove Programe” in “Contrl Panel”. Press “Add/ Remove Windows Component” in order to start “Windows Component Wizard”. In “Windows Componet”, select “Terminal Service”, and click “Next”. ”Terminal Service License” is an essential component. It is in charge in licensing to client on “Terminal” Server. Suggest that you do not start “Terminal Service License” on the computer which with “Terminal Service” at the same time. Press “Applied Program Server Mode” in the “Terminal Service Install Program”. After 44 _______________________________eBox-2300SX-LS User’s Manual starting “Terminal Service”, you need use “Add/ Remove” to re-install program. Next, select Windows 2000 User compatible authority. In the “Terminal Service License Install Program”, you should assign to authorize if the Server offers service to all enterprise or network. Also, you need offer tha location where the data base is. Then, press “Next” and “Finish”. The system will duplicates the necessary file to hard disk and the Server software will be loading after rebooting. 3. How to change to “Terminal Server Mode”? Start “Add/ Remove” in the “Control Panel” and you can “enable” or “disable” the mode. If you started “Terminal Service” in applied program server mode, you should to know: when you terminate “Terminal Service”, for instance, the applied program is designed for single user or mult-user; it would cause a lot of complicated problems. If you start “Terminal Service” by “Remote Management Mode”, when you terminated the Server Service, it was not effect to applied program. Some program are designed for multi- user, therefore, the applied program would be executed even you start or terminate “Terminal Service”. P.S.: If you temporaryterminated “Terminal Service” (for exemple, installing applied program), you could select “Stop conneting” in “Terminal Service Setting”. Q:I can not get License Number of Windows 2000 server OEM version. Why? A:The problem is the Bug of Windows 2000 serverOEM version. There are so me illustrations in the connection as below: Q256854 - Terminal Services OEM License Server Activation Does Not Validate PIN or Recognize License Server ID http://support.microsoft.com/support/kb/articles/q256/8/54.asp?L N=ENUS&SD=gn&FR=0 Q269425 - List of Bugs Fixed in Windows 2000 Service Pack 1 (2 of 3) http://support.microsoft.com/support/kb/articles/q269/4/25.asp?LN=EN-US&SD=gn& FR=0 There are two resolutions as below: After installing reviosionary program and clicking connection as below, selecting the language, then installing on the Windows 2000 OEM version and enrolling. http://www.microsoft.com/windows2000/downloads/recommended/q256854/default.a sp Update to Windows 2000 SP1and click the connection as below, selecting the language, then installing on the Windows 2000 OEM version and enrolling. http://www.microsoft.com/windows2000/downloads/recommended/sp1/x86Lang.asp Q:I want to re-install or transfer the license of Windows 2000 serve’ s “Terminal Service License” to other Windows 2000, how to do it? A:The customer of Taiwan area can call 00-800-2468-1668 (Free International call) to "Hong Kong Service Center" for helping. (Speak Chinese): Q248430- How to Transfer TS CAL from One Computer to Another [ntrelease] 45 _______________________________eBox-2300SX-LS User’s Manual http://support.microsoft.com/support/kb/articles/Q248/4/30.ASP Q:How to set the Proxy in order to make the “Terminal Service” go through the Firewall? A:Terminal Server client use the TCP 3389. hence, you have to set the Proxy Server be TCP- 3389. The method is below: Start “Internet Service Manager”. Click right mouse key and select “Web Proxy”, then select “Properties”. Click “Security”. Click “Packet Filters” and press”Add”. Click “Customer Filter”, then change the default to fill the form as below: Setting Value -----------------------------------------Protocol ID TCP Direction Both Local Port Fixed Port:3389 Remote Port Any Click “OK”, and confirm that all the items are added in the Filter. Then, shut down the Web Proxy: Q258544 - How to Configure Proxy Packet Filters for Terminal Server Access on the Same Serverhttp://support.microsoft.com/support/kb/articles/Q258/5/44.ASP Q:How to make the Terminal Server to correspond with client hard di sk as saving local access hard disk? A:You can use the “Drive Share tool” in the Microsoft Windows 2000 Server Resource Kit. The tool only suuprots Microsoft Windows NT and Windows 2000. Notice: The utility only can be use in Windows 2000 and Windows NTuser access. The client of Windows 95, Windows 98 and Windows Millennium can not use. Warning: Please be careful on using login editor. It may cause incapable operation because of improper revising Windows 2000. Suggest to backup for registry before installing: Press “Start”/ “Execute”, and click Regedt32. Input Drive Map Service :HKEY_LOCAL_MACHINE\SYSTEM\CurrentControlSet\Control\Terminal Server\ AddIns Then input: Value: NAME Type: REG_SZ Data value: DRMAPSRV Value: TYPE Type: REG_DWORD Data value: 00000003 Find : HKEY_LOCAL_MACHINE\SYSTEM\CurrentControlSet\Control\TerminalSe rver\Wds\rdpwd Add Drmapsrv. Duplicate Drmapsrv.exe to Winnt\System32 Folder Windows NT/Windows 2000 Client 46 _______________________________eBox-2300SX-LS User’s Manual Duplicate Drmapclt.dll File to Winnt\System32 Folder Press “Start”/ “Execute” and input Regedt32 Input Drmapclt : HKEY_CURRENT_USER\Software\Microsoft\Terminal Server Client\Default\Addins4 Input Drmapclt : HKEY_LOCAL_MACHINE\SOFTWARE\Microsoft\Terminal Server Client\Default\AddIns Add Drmapclt: Value: NAME Type: REG_SZ Data value: Drmapclt.dll ※The detail as below: Q244725 - Using Drive Share with Terminal Services http://support.microsoft.com/support/kb/articles/Q244/7/25.ASP Q:How to duplicate files with other client in the Terminal Service Ses sion? A:You can use File Copy tool in Microsoft Terminal Services. The tool ca beu sed in Microsoft Windows for Workgroups, Microsoft Windows 95, Microsoft Wi ndows 98, Microsoft Windows NT 4.0, and Windows 2000. In order to use Fil e Copy tool, you need to change something on Windows 2000 Server: Windows 2000 Server Install Windows 2000 Resource Kit Install the "Rdpclip.exe" from Microsoft website: http://www.microsoft.com/windows2000/library/resources/reskit/tools/hotfixes/rdpcli p-o.asp Check Files and Version: C:\Program Files\Resource Kit\rdpclip.exe 5.0.2205.1 C:\Program Files\Resource Kit\fxfr.dll 5.0.2064.1 C:\Program Files\Resource Kit\rdpdr.dll 5.0.2205.1 Notice: The installing roadmap of Resource Kit may has different: Execute Regedt32, and change the name from RDPCLIP to FXRDPCLP: HKEY_LOCAL_MACHINE\SYSTEM\ CurrentControlSet\Control\Terminal Server\A ddIns\Clip Redirector Change the name from RDPCLIP to FXRDPCLP in the connection as below: HKEY_LOCAL_MACHINE\SYSTEM\CurrentControlSet\Control\Terminal Server\W ds\rdpwd Change the name from Rdpclip.exe to Fxrdpclp.exe in the ResourceKit catalog, and duplicate the file to Winnt\System32 Duplicate the Fxfr.dll in the Resource Kit to Winnt\System32 Reboot your computer Windows for Workgroups Clients Duplicate 16-bit Fxfr.dll to Tsclient folder Change the name of Rdpdr.dll which in the Tsclient to Rdpdr.pss Duplicate 16-bit Rdpdr.dll to Tsclient Windows 95, Windows 98, Windows NT, or Windows 2000 Clients 47 _______________________________eBox-2300SX-LS User’s Manual Duplicate the 32-bit Fxfr.dll to "Program Files\Terminal Services Client" Change the name of Rdpdr.dll which in the "Program Files\Terminal Services Client" to Rdpdr.pss Duplicate 32-bit Rdpdr.dll to "Program Files\Terminal Services Client" The detail is below: Q244732 - How to Install the File Copy Tool Included with the Windows 2000 Resource Kit http://support.microsoft.com/support/kb/articles/Q244/7/32.ASP Q: Some client only get temporary license after starting Terminal Service License, why? A: resolution: Stop the connection between the Terminal Client and Terminal Server. Find the registry in client and delete it. HKEY_LOCAL_MACHINE\Software\Microsoft\MSLicensing\Store\LICENSE00x Restart the connection between the Terminal Client and Terminal Server. Q: What is “Terminal Services Advanced Client (TSAC)”? A: Microsoft “Terminal Services Advanced Client (TSAC)” is for expanding function of “Terminal Service”. It also provides manager, homwpage designer and Web manager to use “Terminal Service” Client in website or Visual Basic Applied Program. The ValueAdd folder includes “TSAC” in Windows 2000 SP1 CD, and It’ a Win 32R ActiveXR Control station. You can execute “Terminal Service” in Internet Explorer by Win32R ActiveXR. Q:How to install TSAC ActiveX Client Control and Test Web? A:Put the Windows 2000 SP1 CD in the Server ROM where you want to inst -all. Then, input command as below: <cdroot>\ValueAdd\TSAC\Tswebsetup.exe Cdroot is a word including Windows 2000 SP1 CD ROM. For exemple: D:\ValueAdd\TSAC\Tswebsetup.exe ”ActiveX Client Control Install Program” will install files in designate catalog. (Default= C:\Inetpub\Wwwroot\Tsweb )。The information of 「Terminal Service Ac tiveX Client Control」and Test Web is in Microsoft Terminal Service ActiveX Cli ent Control Webclient.doc. (Default=C:\Inetpub\Wwwroot\Tsweb)。 <P.S.> ActiveX Client Control and Test Web are installed in Web Server of Windows NT 4.0 (or above) Server and Internet Information Server 4.0(above). Q:How to start “Terminal Services Advanced Client (TSAC)”? A:After installing TSAC ActiveX Client Control on the Web Server, start IE fro m Client, input http:// Computer Name (/tsweb or http:// IP /tsweb), then, it will show “Terminal Service Web Connect”. Input Terminal server’s Name or IP. Also, input “User Name” and “PIN” and press login if it needs. Q: What is the Remote Control? A: You can monitor or control Client computer by Remote Control. Also, you c an use own keyboard and mouse to control Client computer. Of course, the Client can be noticed that their computer will be controlled and monitored. 48 _______________________________eBox-2300SX-LS User’s Manual <Notice>Client computer can not remote control System Controller and Sy stem Controller can not control Client computer. The Resolution of your computer and Client computer should be in consistency. Otherwise, the connection would be failed. Press CTRL+ * and the Remote control will be finished. Q: How to start, set and use Terminal client Remote Control? A: (I) Start Remote Control a. If it is Net User Account, start Active Directory User and computer. Click fol ders in the Control Panel Catalog, and click the user’s folder which you want to connect. b. If it is Computer User Account, click Computer Manage. Click “User” in Control Panel dendriform catalog. Open “Computer Manager”/ “System Tool”/ “U sers”. Click twice on user who you want to control. Press “Start Remote Contr ol” and it can be work. (II)Remote Control Default Setting Start “Terminal Service Setting”. Press “Connect” under Control Panel. Select a type of Remote Contrl and click right mouse key, and click “Content”. Then pr ess “use all Remote Control Setting as below” in order to set Remote Control which you want to connect. If you want to show message in Client Computer, you could click “Demand Client Authority”, it means the client will know that yo u will control and monitor their computer by the authority. (III)Remote Control Using Start Terminal Service Manager. Click right mouse key on a computer which yo u want to control and monitor, and press “Remote Control”. If you want to ter minate it, just presses CTRL+*. <Notice>If you want to open “Terminal Service Manager”, press “Start”/ “Program”/ “System Management Tool” and press“Terminal Service Manag er”. You must have “Completly Control” authority so that you can control other computer. You also can use “Terminal Service Expanding” of “Acti ve Directory User or Computer” to set every user’s Remote Control. The Server will tell User that they are going to use Remote Control. Q:Terminal Service Command A:Below is the command use in DOS. change logon: Terminate using and loging to “Terminal” Server. change port: Change the COM port in order to work with MS-DOS. change user: Chage the .ini file for user. cprofile: Remove the relation of User setting file and user designate file. dbgtrace Start or Terminate detection or tracing. Flattemp: Start or Terminate register. logoff: logout from Server or user computer. msg Send the message to user. query process: Show the the related information of executing procesure on the “Termianl” Server. query session: Show the related information on “Termianl” Server. query termserver: Show the list of all “Terminal” Server. query user: Show the user related information on “Terminal” Server. register: register the applied program on the system. 49 _______________________________eBox-2300SX-LS User’s Manual reset session: reset default. shadow: monitor other user’s computer. tscon: Connet to other existing “Terminal” Server. tsdiscon: Terminate the connection of “Termianl” Server and Client. tskill: Terminate the procesure of processing. tsprof: duplicating the user setting and change the setting file route. tsshutdn: shut down “Terminal” Server. Q: It will cause "File Association" can not be set after installing Term inal Service, why? A: The UI interface was locked basing on security. However, you can revise th e login default as below: [HKEY_LOCAL_MACHINE\SOFTWARE\Microsoft\Windows \CurrentVersion\Policies\Explorer]"NoFileAssociate"=dword:00000000 The illustration is below: Q257592-Changes in File Types/Association Features in Windows 2000 [ntrelea se] http://support.microsoft.com/support/kb/articles/Q257/5/92.ASP Q: How to retract or re-load “Terminal Clients License”? A: Start/ Program/ System Manage Tool, start “Terminal Service License”. Click “All Server Name” and click “You Server Name”. Click right mouse key on licensed Server which you want to terminate, press “Advanced” and “Stop Server”. About re-start Server, Click right mouse key on server which you want it re-start, press “Advanced” and “re-start Server”. Q: How to backup "Terminal License service"? A: You should regular use “NTBACKUP” to backup License Server. It will prot ect the data in order to prevent losing. Meanwhile, you have to backup the folder of “System Status” and License Server. Q: How to restart “Terminal License service”? A: Start/ Program/ System Manage Tool, start “Terminal Service License”. In dentriform catalog of Control Panel, Click right key mouse on the Lincesed Server which you want to re-start, press “Advance” and press “Restart Server”. The “License Wizard” will be started. Confirm your Name, TEL and E-mail Address, then, press “Next”. Fill out the reason of re-start on “Reason”, and press “Finish”. The request of restart License Server will transfer to Microsoft. <Notice> Start/ Program/ System Manage Tool, start “Terminal Service License”. It can not restart License Server by Fax or World Wide Web. You will receive a message if you restart License Server by Telephone. The record of Licensing would be reserved when the License Server was restarted. You have to restart License Server when it was overdue. Q: How add the user to “Terminal Service” License list? A: “Start”/ “Program”/ “System Manager” and start “Terminal Service Setting”. Press “Connect” in dendriform catalog. Click right mouse key on RDP-Tcp Connection and press “Content”. Click “Add” in “License Usering” in order to start “User, Computer or Group”. 50 _______________________________eBox-2300SX-LS User’s Manual Select an item from “Name” and press “Add”. Press “OK”. The item which yo u select will show on the “Name”. Q: How can I call Microsoft Consumer Service Center to re-issue “Ter minal License”? A: You can call 00-800-2468-1668 (Free) and press 3, it will has an assistant to help you to finish Terminal License re-issuance. Q: What is “license token re-issuance hotfix”? A: If you format hard disk or re-input WBT Flash Memory, previously client lice nse would be disappeared. Currently, Microsoft have provided “revised progra m” to solve the problem. After installing the revised program, there are two sit uations of license auto re-issuance: If there is no surplus License can be issued, it will have temporary 90 days Li cense for client. The losing License would be valid within 52-89 days. if there is surplus License can be issued, the new License would authorized to client . The losing License would be valid within 52-89 days. Q: How to get “license token re-issuance hotfix”? A: Please download the revised file from the website as below: http://support.microsoft.com/support/kb/articles/Q287/6/87.ASP Q: After installing “license token re-issuance hotfix”, how about the o riginal License? A: After installing “license token re-issuance hotfix”, if the License whichbe inss ued is losing, it could not be revised. You still need to call to our clearinghouse for re-issuing License which is lose d. Q: How to use the Terminal Service on “Network Load Balance” (NL B)? A: It have to install WLBS/ NLB on each Terminal Server, and dispose Port R ule as below: Port Range: from 3389 to 3389. Protocols: TCP Multiple hosts. Affinity: Depends on requirements. Load weight: Equal (if you want equal load on each Terminal Server). The detail is in the website as below: http://support.microsoft.com/support/kb/articles/Q243/5/23.ASP Q:How to encrypt the information transmiting between Terminal Serve r and Terminal Client? A: Currently, Terminal Service supports three encryption levels: Low level encryption: (it suggests using if the Internet is in safety.) Middle level encryption (Default) High level encryption: (It offers 128bit encryption) The detail is in the website as below: http://support.microsoft.com/support/kb/articles/Q232/5/14.ASP Q: How to designate particular License Server in the domain or the si te? A: Warning: Improper using “Regedit” may cause serious problems and you ne ed re-install Operating System. Microsoft do not guaranty these problems which 51 _______________________________eBox-2300SX-LS User’s Manual caused by improper using “Regedit”. The way of editing system register information, please open “Changing Keys a nd Values” in the Regedt32.exe of “Discription” or open “Add and Delete Infor mation in the Registry” and “Edit Registry Data” in the Regedt32.exe of “Discri ption”. Please be notice, doing backup before editing registry. If you use Windo ws NT or Windows 2000, you have to upgrade ERD (Emergent Revise Disk). Select particular License server and find the register route as below: HKEY_LOCAL_MACHINE\SYSTEM\CurrentControlSet\Services\TermService\Para meters, and plus: Name: DefaultLicenseServer Data type: REG_SZ Data value: ServerName Below information is how to change the proper License server for ServerName: http://support.microsoft.com/support/kb/articles/Q239/1/07.ASP Second section The using of eBox-2300SX-LS Q:Why the eBox-2300SX-LS has A:Plwase be sure that the LAN Card, Use the PING to test whether the LAN Please be test whether the firewall was no connection? IP and DHCP Server if can be work. was broken or not. opened. Q:What kind of port on Internet for Server use? A: 1604 port Citrix ICA, MS Terminal。 3389 port RDP Protocol (Terminal Server)。 1494 port Citrix ICA Protocol。 Q:What kind of situation is proper for 2300SX-LS? A:For central control in order to reduce the burden of workers. The equipment is not enough for demand but it needs the new OS. Q:I can not enter the Setup mode, why? A:Please check: 1. whether the Caps Lock and Number Lock were turned off. 2. whether the Driver CD was put in the CD-ROM. 3. whether the VGA Driver was in right setting. In general, the situation occurr ed because the VGA Driver is not matching with the VGA which you are using. 4. If all the method as above were not work, please be select “force turn-off s etupmode” in “online upgrade”. Q: I always feel my screen is flashing, why? A: The 2300SX-LS supports VGA clock only to 60MHz because the default isV ESA. You can adjust the VGA Driver in Control Panel/ Screen. Q: How to change the mode from usermode to setupmode without re booting? A: Please be press Ctrl+Alt+Backspace, and then press Caps Lock and Numb er Lock. Q:Why the Flash part of webset always flashes when I browse it by IE in the RDP? A:You could upgrade the IE to IE6.x and the problem would be solved. 52 _______________________________eBox-2300SX-LS User’s Manual Chapter 5 Technique Supporting Thank you for your supporting. If you have any installing problems, please call: Customer Service: (02)22980770 DMP Electronics Inc. Monday to Friday: AM 08:30-PM 17:30 Or E-mail to: [email protected] The website:http://www.compactpc.com.tw © The content and logo of the manual are possessed of DMP. DMP Company has the right of revising withous notifying. 53