Download Velleman KSR9 toy
Transcript
KSR9 – “BOTBALL” KIT
1. Introduction & Features
To all residents of the European Union
Important environmental information about this product
This symbol on the device or the package indicates that disposal of the device after its lifecycle could harm
the environment.
Do not dispose of the unit (or batteries) as unsorted municipal waste; it should be taken to a specialised
company for recycling.
This device should be returned to your distributor or to a local recycling service.
Respect the local environmental rules.
If in doubt, contact your local waste disposal authorities.
Thank you for buying the KSR9! Please read the manual thoroughly before bringing this device into service. If the
device was damaged in transit, don't install or use it and contact your dealer.
The KSR9 requires 2 x 1.5V AA batteries (not incl.) and 1 x 9V battery (not incl.); the remote control requires 4 x
1.5V AA batteries (not incl.). Apart from the batteries, you will also need a pair of long-nose pliers, a diagonal cutter
and a screwdriver.
2. Remote Control
a. Introduction
This is a 4-channel IR remote control used to control one KSR9. Line up to 4 KSR9’s by choosing a different channel
for each Botball.
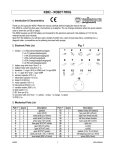
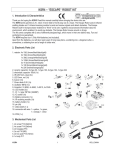
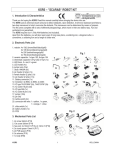
b. Parts List
P1 Battery terminal #1 x 2
P2 Battery terminal #2 x 2
P4 Tapping screw (2.3 x 7mm) x 4
P6 Finished PCB
P3 Battery terminal #3 x 2
P5 Tapping screw (2.6 x 7mm) x 4
KSR9
-1-
VELLEMAN
c. Assembly
3. The Botball
a. Introduction
Control the Botball by means of the remote control. Select a different channel for each Botball (max. 4 Botballs) when
playing against each other.
KSR9
-2-
VELLEMAN
b. Parts List
P1-1
Motor x 2
P1-2
Motor x 1
P2
Motor holder x 2
P3
Face gear 36T/14T
(white) x 2
P4
Gear 36T/14T
(red) x 2
P5
Gear 36T/0T
(white) x 2
P6
Gear 48/18T
(white) x 3
P7
Pinion gear 10T (white)
x1
P8
Pinion gear 8T
(white) x 3
P9
Post x 1
P10
Hex post x 1
P11
Wheel x 2
P12
Tyre x 2
P13
Round shaft (3 x
25mm) x 2
P14
Knurled shaft (2 x
13mm) x 1
P15
Round shaft (2 x
13mm) x 1
P16
Washer x 2
P17
Round top nut x 2
P18
Machine screw (3 x
12mm) x 1
P19
Tapping screw (3 x
7mm) x 10
P20
Yellow Tube x 2
P21
Machine screw (3
x 6mm) x 1
P22
Tapping screw (2.3
x 12mm) x 3
P23
Tapping screw (2.3 x
7mm) x 17
P24
Machine screw (2
x 5mm) x 2
P25
Sponge x 1
P26
Buzzer x 1
P27
Battery holder x 1
P28
Battery snap x 1
P30
Eyelet x 2
P31
Finished PCB
P29
Housing x 2
KSR9
-3-
VELLEMAN
c. Assembly
KSR9
-4-
VELLEMAN
KSR9
-5-
VELLEMAN
4. Dressing your Botball
Cut out the two shapes on the separate leaflet along the dotted lines, place them on a piece of cardboard and mark the
contours on the cardboard. Next, cut out the cardboard shapes and decorate the front and back of the shirt. Dress your
Botball according to the drawing below. Save the cut-out shapes in case you want to make other shirts.
Fig. 1
KSR9
-6-
VELLEMAN
5. Wiring Diagram
Fig. 2 – Remote control
Fig. 3 - Botball
KSR9
-7-
VELLEMAN
6. Remote Control Description (fig. 5)
1.
2.
3.
4.
5.
6.
IR transmitter
Kicking button
Control buttons
Power switch
Power indicator
Channel switch
7. Operation
1. Select the channel (A, B, C or D) on your IR remote control first and turn on afterwards. The red LED lights. Once
your remote control switched on, you will not be able to change the channel.
2. Next, switch on your Botball. Its eyes will flash. Point the remote control at the Botball and push any button for 3
to 5 seconds. The eyes will burn lighter when the Botball has accepted the selected channel. Repeat this step
every time you switch on your remote control and your Botball or when you wish to reset the channel. It is
recommended to set the channels one by one when playing with more than 2 players.
3. Your Botball can make 8 different movements. Refer to the chart below. The more you practice, the easier you
will control your Botball.
4. The Botball’s eyes will flash when it does not receive any signal from the remote control for 5 seconds.
5. Push the top right button to kick the ball.
8. Troubleshooting
• Make sure all components on the PCB are in the right position. Make sure all batteries are correctly inserted.
Respect the polarity.
• Ensure all wiring is correctly connected.
• If your Botball makes a movement wrongly according to the pressed button, check if the wiring from M1, M2 and
M3 is not reversed.
• If your Botball does not make any sound, check if the wiring of BZ is correct.
The information in this manual is subject to change without prior notice.
KSR9 – “BOTBALL” KIT
1. Inleiding en kenmerken
Aan alle ingezetenen van de Europese Unie
Belangrijke milieu-informatie betreffende dit product
Dit symbool op het toestel of de verpakking geeft aan dat, als het na zijn levenscyclus wordt weggeworpen,
dit toestel schade kan toebrengen aan het milieu.
Gooi dit toestel (en eventuele batterijen) niet bij het gewone huishoudelijke afval; het moet bij een
gespecialiseerd bedrijf terechtkomen voor recyclage.
U moet dit toestel naar uw verdeler of naar een lokaal recyclagepunt brengen.
Respecteer de plaatselijke milieuwetgeving.
Hebt u vragen, contacteer dan de plaatselijke autoriteiten inzake verwijdering.
KSR9
-8-
VELLEMAN
Dank u voor uw aankoop! Lees deze handleiding grondig voor u het toestel in gebruik neemt. Werd het toestel
beschadigd tijdens het transport, installeer het dan niet en raadpleeg uw dealer.
Uw KSR9 wordt gevoed door 2 x 1.5V AA-batterijen (niet meegelev.) en 1 x 9V-batterij (niet meegelev.); de
afstandsbediening wordt gevoed door 4 x 1.5V AA-batterijen (niet meegelev.). Naast de batterijen heeft u ook nog
het volgende nodig: een puntbektang, een zijkniptang en een schroevendraaier.
2. De afstandsbediening
a. Inleiding
Dit is een 4-kanaals IR afstandsbediening waarmee u uw KSR9 kunt besturen. U kunt tot 4 KSR9’s opstellen door
voor elke Botball een kanaal te kiezen.
b. Onderdelen (zie figuren op blz. 1)
P1: Poolklem batterij #1 x 2
P2: Poolklem batterij #2 x 2
P3: Poolklem batterij #3 x 2
P4: Zelftappende schroef (2.3 x 7mm) x 4
P5: Zelftappende schroef (2.6 x 7mm) x 4
P6: PCB
c. Assemblage (zie figuren op blz. 2)
3. De Botball
a. Inleiding
Bestuur uw Botball met behulp van de afstandsbediening. Kies een apart kanaal voor elke Botball (max. 4 Botballs)
wanneer u tegen elkaar wenst te spelen.
b. Onderdelen (zie figuren op blz. 3)
P1-1: Motor x 2 (groene en gele kabel)
P1-2: Motor x 1 (oranje en blauwe kabel)
P2: Motorhouder x 2
P3: Tandwiel 36T/14T (wit) x 2
P4: Tandwiel 36T/14T (rood) x 2
P5: Tandwiel 36T/0T (wit) x 2
P6: Tandwiel 48T/18T (wit) x 3
P7: Rondsel 10T (wit) x 1
P8: Rondsel 8T (wit) x 3
P9: Afstandsbus x 1
P10: Zeskantige afstandsbus x 1
P11: Wiel x 2
P12: Band x 2
P13: Ronde as (3 x 25mm) x 2
P14: Geribde as (2 x 13mm) x 1
P15: Ronde as (2 x 13mm) x 1
P16: Sluitring x 2
P17: Moer met ronde top x 2
P18: Machineschroef (3 x 12mm) x 1
P19: Zelftappende schroef (3 x 7mm) x 10
P20: Geel buisje x 2
P21: Machineschroef (3 x 6mm) x 1
P22: Zelftappende schroef (2.3 x 12mm) x 3
P23: Zelftappende schroef (2.3 x 7mm) x 17
P24: Machineschroef (2 x 5mm) x 2
P25: Sponsje x 1
P26: Zoemer x 1
P27: Batterijhouder x 1
P28: Batterijclip x 1
P29: Behuizing x 1
P30: Ring x 2
P31: PCB
c. Assemblage (zie figuren op blz. 4, 5 en 6)
4. Het shirt voor uw Botball
Knip de figuren op het afzonderlijke blaadje (voor- en achterkant) langs de stippellijnen uit, plaats de vormen op een
stuk karton en breng de contouren aan op het karton. Knip vervolgens de vormen uit het karton en versier beide
kanten van het shirt. Kleed uw Botball volgens figuur 1 op blz. 6. Bewaar de vormen om later meer shirts te kunnen
maken.
KSR9
-9-
VELLEMAN
5. Aansluitdiagram
Zie fig. 2 (afstandsbediening) en fig. 3 (Botball) op blz. 7.
6. Omschrijving afstandsbediening (zie fig. 4 op blz. 8)
1.
2.
3.
4.
5.
6.
IR zender
Trapknop
Controleknoppen
Voedingschakelaar
Voedingsaanduiding
Kanaalkeuze
7. Bediening
1. Kies eerst een kanaal (A, B, C of D) op de afstandsbediening en schakel dan pas de afstandsbediening in. De
rode LED licht op. Het kanaal kan niet meer worden gewijzigd eens u de afstandsbediening hebt ingeschakeld.
2. Schakel daarna uw Botball in. De ogen flitsen. Richt de afstandsbediening op de Botball en houd een willekeurige
knop gedurende 3 à 5 seconden ingedrukt. De ogen gloeien minder fel wanneer de Botball het gekozen kanaal
heeft erkend. Herhaal deze stap elke keer u de afstandsbediening en de Botball inschakelt of wanneer u een
ander kanaal wenst te kiezen. Het is aangeraden om één na één uw kanaal te kiezen wanneer meer dan 2
spelers deelnemen.
3. De Botball kan op 8 verschillende manieren bewegen. Raadpleeg de figuur hieronder. Hoe meer u oefent, des te
gemakkelijker zal u de Botball kunnen besturen.
4. De ogen van de Botball flitsen wanneer hij gedurende 5 seconden geen signaal van de afstandsbediening
ontvangt.
5. Duw op de knop rechtsboven de afstandsbediening om op de bal te trappen.
8. Problemen en oplossingen
• Zorg ervoor dat alle componenten op de PCB en alle batterijen correct zijn geplaatst. Respecteer hun polariteit.
• Zorg ervoor dat alle draden correct aangesloten zijn.
• Ga na of de bedrading van M1, M2 en M3 niet omgekeerd is aangesloten wanneer uw Botball niet op de
instructies antwoordt.
• Controleer de bedrading van BZ wanneer de Botball geen geluid maakt.
De informatie in deze handleiding kan te allen tijde worden gewijzigd zonder voorafgaande kennisgeving.
KSR9
- 10 -
VELLEMAN
KSR9 – KIT « BOTBALL »
1. Introduction et caractéristiques
Aux résidents de l'Union européenne
Des informations environnementales importantes concernant ce produit
Ce symbole sur l'appareil ou l'emballage indique que l’élimination d’un appareil en fin de vie peut polluer
l'environnement.
Ne pas éliminer un appareil électrique ou électronique (et des piles éventuelles) parmi les déchets
municipaux non sujets au tri sélectif ; une déchetterie traitera l’appareil en question.
Renvoyer les équipements usagés à votre fournisseur ou à un service de recyclage local.
Il convient de respecter la réglementation locale relative à la protection de l’environnement.
Si vous avez des questions, contactez les autorités locales pour élimination.
Nous vous remercions de votre achat ! Lisez attentivement la présente notice avant la mise en service de l'appareil.
Si l’appareil a été endommagé pendant le transport, ne l'installez pas et consultez votre revendeur.
Le KSR9 est alimenté par 2 piles 1.5V de type R6 (non incl.) et une pile 9V (non incl.); la télécommande est
alimentée par 4 piles 1.5V de type R6 (non incl.). Outre les piles, vous aurez besoin d’une pince plate, une pince
coupante et un tournevis.
2. La télécommande
a. Introduction
Cette télécommande à 4 canaux permet de manœuvrer votre KSR9. Il est possible d’aligner jusqu’à 4 KSR9’s en
choisissant un canal pour chaque Botball.
b. Liste des pièces (voir ill. à la page 1)
P1 : Borne #1 x 2
P2 : Borne #2 x 2
P3 : Borne #3 x 2
P4 : Vis autotaraudeuse (2.3 x 7mm) x 4
P5 : Vis autotaraudeuse (2.6 x 7mm) x 4
P6 : Carte imprimée
c. Assemblage (voir ill. à la page 2)
3. Le char d’assaut
a. Introduction
Manœuvrez votre Botball à l’aide de la télécommande. Choisissez un canal pour chaque Botball (max. 4 robots) si
vous désirez vous opposer à d’autres joueurs.
KSR9
- 11 -
VELLEMAN
b. Liste des pièces (voir ill. à la page 3)
P1-1 : Moteur x 2 (câble vert et jaune)
P1-2 : Moteur x 1 (câble orange et bleu)
P2 : Porte-moteur x 2
P3 : Pignon 36T/14T (blanc) x 2
P4 : Pignon 36T/14T (rouge) x 2
P5 : Pignon 36T/0T (blanc) x 2
P6 : Pignon 48T/18T (blanc) x 3
P7 : Pignon 10T (blanc) x 1
P8 : Pignon 8T (blanc) x 3
P9 : Entretoise x 1
P10 : Entretoise hexagonale x 1
P11 : Roue x 2
P12 : Pneu x 2
P13 : Arbre rond (3 x 25mm) x 2
P14 : Arbre cranté (2 x 13mm) x 1
P15 : Arbre rond (2 x 13mm) x 1
P16 : Rondelle x 2
P17 : Écrou à tête ronde x 2
P18 : Vis de montage (3 x 12mm) x 1
P19 : Vis autotaraudeuse (3 x 7mm) x 10
P20 : Tube jaune x 2
P21 : Vis de montage (3 x 6mm) x 1
P22 : Vis autotaraudeuse (2.3 x 12mm) x 3
P23 : Vis autotaraudeuse (2.3 x 7mm) x 17
P24 : Vis de montage (2 x 5mm) x 2
P25 : Éponge x 1
P26 : Ronfleur x 1
P27 : Porte-piles x 1
P28 : Contact à pression x 1
P29 : Boîtier x 1
P30 : Œillet x 2
P31 : Carte imprimée
c. Assemblage (voir ill. à la page 4, 5 et 6)
4. Le maillot de votre Botball
Découpez les formes sur le feuillet séparé (l’avant et le dos) selon les pointillés, placez-les sur un morceau de carton
et décalquez les contours sur le carton. Ensuite, découpez les formes et décorez les deux faces du maillot. Habillez
votre Botball comme illustré (ill. 1 à la page 6). Conservez les formes au cas où vous désireriez dessiner de
nouveaux maillots.
5. Câblage
Voir ill. 2 (télécommande) et ill. 3 (Botball) à la page 7.
6. Description télécommande (voir ill. 4 à la page 8)
1.
2.
3.
4.
5.
6.
Émetteur IR
Bouton de frappe
Boutons de contrôle
Interrupteur d’alimentation
Témoin lumineux d’alimentation
Choix de canal
7. Opération
1. Choisissez d’abord un canal (A, B, C ou D) sur la télécommande en activez la télécommande. La LED rouge
s’allume. Il sera impossible de modifier le canal une fois la télécommande allumée.
2. Ensuite, activez votre Botball. Les yeux commencent à flasher. Pointez la télécommande vers le Botball et
maintenez enfoncé une touche arbitraire pendant 3 à 5 secondes. Les yeux brûlent moins fort dès que le Botball
reconnait le canal sélectionné. Répétez cette étape lors de chaque activation de la télécommande et du Botball et
si vous désirez modifier le canal. Il est conseillé de choisir le canal séparément lors d’une partie de jeu avec plus
de 2 joueurs.
3. Le Botball se déplace à l’aide de 8 mouvements. Consultez l’illustration ci-dessous. Plus vous vous exercerez,
plus aisément vous réussirez à manœuvrer le Botball.
KSR9
- 12 -
VELLEMAN
4. Les yeux du Botball flashent lorsqu’il ne reçoit pas de signal de la télécommande pendant 5 secondes.
5. Enfoncez le bouton en haut à droite de la télécommande pour frapper dans le ballon.
8. Problèmes et solutions
• Assurez-vous que chaque composant soit correctement placé sur la carte imprimée et que les piles soient dûment
insérées. Respectez la polarité.
• Veillez à ce que le câblage soit correctement connecté.
• Assurez-vous que le câblage de M1, M2 et M3 ne soit pas inversé si le Botball ne répond pas correctement aux
commandes.
• Si votre Botball ne produit aucun son, vérifiez le câblage de BZ.
Toutes les informations présentées dans cette notice peuvent être modifiées sans notification préalable.
KSR9 – JUEGO “BOTBALL”
1. Introducción y características
A los ciudadanos de la Unión Europea
Importantes informaciones sobre el medio ambiente concerniente a este producto
Este símbolo en este aparato o el embalaje indica que, si tira las muestras inservibles, podrían dañar el
medio ambiente.
No tire este aparato (ni las pilas, si las hubiera) en la basura doméstica; debe ir a una empresa
especializada en reciclaje. Devuelva este aparato a su distribuidor o a la unidad de reciclaje local.
Respete las leyes locales en relación con el medio ambiente.
Si tiene dudas, contacte con las autoridades locales para residuos.
¡Gracias por haber comprado el KSR9! Lea atentamente las instrucciones del manual antes de usarlo.
Si el aparato ha sufrido algún daño en el transporte no lo instale y póngase en contacto con su distribuidor.
El KSR9 funciona con 2 pilas AA de 1.5V (no incl.) y una pila de 9V (no incl.); el mando a distancia funciona con 4
piles AA de 1.5V (no incl.). Salvo las pilas, necesitará unos alicates de punta plana larga, unos alicates de corte en
diagonal y un destornillador.
2. El mando a distancia
a. Introducción
Este mando a distancia 4 canales permite manejar el KSR9. Es posible alinear máx. 4 KSR9 al seleccionar un canal
para cada Botball.
KSR9
- 13 -
VELLEMAN
b. Lista de piezas (véase fig. en la p. 1)
P1: Terminal de batería #1 x 2
P2: Terminal de batería #2 x 2
P3: Terminal de batería #3 x 2
P4: Tornillo autoroscante (2.3 x 7mm) x 4
P5: Tornillo autoroscante (2.6 x 7mm) x 4
P6: CI
c. Montaje (véase fig. en la p. 2)
3. El Botball
a. Introducción
Maneje el Botball con el mando a distancia. Seleccione un canal para cada Botball (máx. 4 robots) si quiere jugar
con otras personas.
b. Lista de piezas (véase fig. en la p. 3)
P1-1: Motor x 2 (cable verde y amarillo)
P1-2: Motor x 1 (cable naranja y azul)
P2: Soporte de motor x 2
P3: Piñón 36T/14T (blanco) x 2
P4: Piñón 36T/14T (rojo) x 2
P5: Piñón 36T/0T (blanco) x 2
P6: Piñón 48T/18T (blanco) x 3
P7: Piñón 10T (blanco) x 1
P8: Piñón 8T (blanco) x 3
P9: Separado x 1
P10: Separador hexagonal x 1
P11: Rueda x 2
P12: Rueda x 2
P13: Eje redondo (3 x 25mm) x 2
P14: Eje muescado (2 x 13mm) x 1
P15: Eje redondo (2 x 13mm) x 1
P16: Arandela x 2
P17: Tuerca de cabeza redonda x 2
P18: Tornillo de montaje (3 x 12mm) x 1
P19: Tornillo autoroscante (3 x 7mm) x 10
P20: Tubo amarillo x 2
P21: Tornillo de montaje (3 x 6mm) x 1
P22: Tornillo autoroscante (2.3 x 12mm) x 3
P23: Tornillo autoroscante (2.3 x 7mm) x 17
P24: Tornillo de montaje (2 x 5mm) x 2
P25: Esponja x 1
P26: Zumbador x 1
P27: Portapilas x 1
P28: Clip para pila x 1
P29: Caja x 1
P30: Anillo x 2
P31: CI
c. Montaje (véase fig. en la p. 4, 5 y 6)
4. Vestir el Botball
Corte las formas de la pequeña hoja incluida (parte delantera y parte trasera) según las líneas de puntos. Póngalas
en una pieza de cartón y dibuje los contornos en el cartón. Luego, corte las formas y decore las dos partes de la
camiseta. Vista el Botball como está indicado (fig. 1 en la p. 6). Guarde las formas para cuando quiera dibujar
nuevas camisetas.
5. Cableado
Véase fig. 2 (mando a distancia) y fig. 3 (Botball) en la página 7.
6. Descripción del mando a distancia (véase fig. 4 en la p. 8)
1.
2.
3.
4.
5.
6.
KSR9
Emisor IR
Botón de patada
Botones de control
Interruptor de alimentación
Indicador luminoso de alimentación
Selección de canal
- 14 -
VELLEMAN
7. Funcionamiento
1. Primero, seleccione un canal (A, B, C o D) en el mando a distancia y active el mando a distancia. El LED rojo se
ilumina. Será imposible modificar el canal después de haber activado el mando a distancia.
2. Luego, active el Botball. Los ojos empiezan a parpadear. Apunte el mando a distancia al Botball y mantenga
pulsado cualquier botón durante 3 a 5 segundos. Los ojos brillan menos fuerte en cuanto el Botball reconoce el
canal seleccionado. Repita este paso cada vez que activa el mando a distancia y el Botball y si quiere modificar
el canal. Seleccione el canal por separado al jugar con más de 2 jugadores.
3. El Botball se desplaza con 8 movimientos. Consulte la figura a continuación. Cuanto más practique, más fácil
será maniobrar el Botball.
4. Los ojos del Botball parpadean si no recibe una señal durante 5 segundos del mando a distancia.
5. Pulse el botón de la esquina superior derecha del mando a distancia para dar patadas al balón.
8. Solución de problemas
• Verifique si cada componente del CI se encuentra en la buena posición y asegúrese de que las pilas estén
introducidas de manera correcta. Respete la polaridad.
• Compruebe el cableado.
• Asegúrese de que el cableado de M1, M2 y M3 no esté inverso si el Botball no responde correctamente a los
mandos.
• Si el Botball no produce ningún sonido, verifique el cableado de BZ.
Se pueden modificar las especificaciones y el contenido de este manual sin previo aviso.
KSR9 – “BOTBALL”-BAUSATZ
1. Einführung & Eigenschaften
An alle Einwohner der Europäischen Union
Wichtige Umweltinformationen über dieses Produkt
Dieses Symbol auf dem Produkt oder der Verpackung zeigt an, dass die Entsorgung dieses Produktes nach
seinem Lebenszyklus der Umwelt Schaden zufügen kann.
Entsorgen Sie die Einheit (oder verwendeten Batterien) nicht als unsortiertes Hausmüll; die Einheit oder
verwendeten Batterien müssen von einer spezialisierten Firma zwecks Recycling entsorgt werden.
Diese Einheit muss an den Händler oder ein örtliches Recycling-Unternehmen retourniert werden.
Respektieren Sie die örtlichen Umweltvorschriften.
Falls Zweifel bestehen, wenden Sie sich für Entsorgungsrichtlinien an Ihre örtliche Behörde.
Danke für Ihren Ankauf! Lesen Sie diese Bedienungsanleitung vor der Inbetriebnahme sorgfältig durch. Überprüfen
Sie, ob Transportschäden vorliegen. Sollte dies der Fall sein, verwenden Sie das Gerät nicht und wenden Sie sich an
Ihren Händler.
KSR9
- 15 -
VELLEMAN
Ihr KSR9 wird über 2 x 1.5V AA(Mignon)-Batterien (nicht mitgeliefert) und 1 x 9V-Batterie (nicht mitgeliefert) mit
Strom versorgt; die Fernbedienung erfordert 4 x 1.5V AA(Mignon)-Batterien (nicht mitgeliefert). Neben den Batterien
brauchen Sie auch Folgendes: eine Spitzzange, einen Seitenschneider und einen Schraubendreher.
2. Die Fernbedienung
a. Einführung
Die Fernbedienung ist eine 4-Kanal-Fernbedienung, mit der Sie Ihren KSR9 steuern können. Sie können bis zu 4
KSR9 aufstellen, indem Sie für jeden Botball einen Kanal wählen.
b. Teile (siehe Abbildung auf Seite 1)
P1: Batterie-Polklemme, Batterie #1 x 2
P2: Batterie-Polklemme, Batterie #2 x 2
P3: Batterie-Polklemme, Batterie #3 x 2
P4: Blechschraube (2.3 x 7mm) x 4
P5: Blechschraube (2.6 x 7mm) x 4
P6: PCB
c. Montage (siehe Abbildungen Seite 2)
3. Der Botball
a. Einführung
Steuern Sie Ihren Botball mithilfe der Fernbedienung. Wählen Sie einen separaten Kanal für jeden Botball (max. 4
Botballs) wenn Sie miteinander Kämpfen wollen.
b. Teile (siehe Abbildungen Seite 3)
P1-1: Motor x 2 (grünes und gelbes Kabel)
P1-2: Motor x 1 (orange und blaues Kabel)
P2: Motorhalter x 2
P3: Zahnrad 36T/14T (weiß) x 2
P4: Zahnrad 36T/14T (rot) x 2
P5: Zahnrad 36T/0T (weiß) x 2
P6: Zahnrad 48T/18T (weiß) x 3
P7: Zahnradgetriebe 10T (weiß) x 1
P8: Zahnradgetriebe 8T (weiß) x 3
P9: Distanzscheibe x 1
P10: Hexagonale Distanzscheibe x 1
P11: Rad x 2
P12: Reifen x 2
P13: Runde Achse (3 x 25mm) x 2
P14: Gerillte Achse (2 x 13mm) x 1
P15: Runde Achse (2 x 13mm) x 1
P16: Dichtungsring x 2
P17: Mutter mit rundem Kopf x 2
P18: Maschinenschraube (3 x 12mm) x 1
P19: Blechschraube (3 x 7mm) x 10
P20: Gelbes Röhrchen x 2
P21: Maschinenschraube (3 x 6mm) x 1
P22: Blechschraube (2.3 x 12mm) x 3
P23: Blechschraube (2.3 x 7mm) x 17
P24: Maschinenschraube (2 x 5mm) x 2
P25: Schwamm x 1
P26: Summer x 1
P27: Batteriehalter x 1
P28: Batterieclip x 1
P29: Gehäuse x 1
P30: Ring x 2
P31: PCB
c. Montage (siehe Abbildungen Seite 4, 5 und 6)
4. Das Trikot für Ihren Botball
Schneiden Sie die Abbildungen vom kleinen Zettel (Vorderseite und Rückseite) längs der punktierten Linie aus und
kleben Sie die Konturen auf ein Stück Pappe. Schneiden Sie danach die Formen aus der Pappe und dekorieren Sie
die beiden Seiten des Trikots. Kleiden Sie Ihren Botball gemäß Abbildung 1 auf Seite 6 an. Bewahren Sie die
Formen auf, sodass Sie später mehr Trikots machen können.
KSR9
- 16 -
VELLEMAN
5. Schaltplan
Siehe Abb. 2 (Fernbedienung) und Abb. 3 (Botball) auf Seite 7.
6. Umschreibung Fernbedienung (siehe Abb. 4 auf Seite 8)
1.
2.
3.
4.
5.
6.
IR-Sender
Spieltaste
Steuertasten
Stromschalter
Stromanzeige
Kanalauswahl
7. Bedienung
1. Wählen Sie zuerst einen Kanal (A, B, C oder D) auf der Fernbedienung und schalten Sie erst dann die
Fernbedienung ein. Die rote LED wird aufleuchten. Der Kanal kann nicht mehr geändert werden wenn Sie die
Fernbedienung eingeschaltet haben.
2. Schalten Sie danach Ihren Botball ein. Die Augen werden blinken. Richten Sie die Fernbedienung auf den Botball
und halten Sie irgendeine Taste 3 bis 5 Sekunden gedrückt. Die Augen werden weniger stark brennen.
Wiederholen Sie diesen Schritt immer wenn Sie die Fernbedienung und den Botball einschalten oder wenn Sie
einen anderen Kanal wählen. Es ist empfehlenswert, dass Sie den einen Kanal nach den anderen wählen wenn
sich mehr als 2 Teilnehmer beteiligen.
3. Der Botball hat 8 Bewegungsarten. Siehe Abbildung unten. Je mehr Sie üben, umso besser werden Sie den
Botball steuern können.
4. Die Augen des Botballs blinken wenn er während 5 Sekunden kein Signal der Fernbedienung bekommt.
5. Drücken Sie die Taste an der rechten Oberseite der Fernbedienung um den Ball zu schießen.
8. Problemlösung
• Sorgen Sie dafür, dass alle Komponenten korrekt auf der Leiterplatte montiert und die Batterien richtig eingelegt
sind.
• Achten Sie darauf, dass alle Kabel korrekt angeschlossen sind.
• Wenn der Botball nicht auf die Befehle reagiert, überprüfen Sie, ob die Verkabelung von M1, M2 und M3 nicht
umgekehrt ist.
• Wenn der Botball keine Geräusche macht, müssen Sie die BZ-Verkabelung überprüfen.
Alle Änderungen vorbehalten.
KSR9
- 17 -
VELLEMAN
This document in other languages
- français: Velleman KSR9
- español: Velleman KSR9
- Deutsch: Velleman KSR9
- Nederlands: Velleman KSR9


