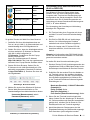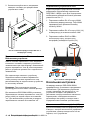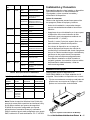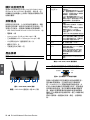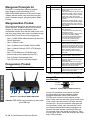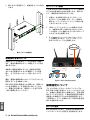
1
Building Networks for People Quick Installation Guide Unified Services Router This document will guide you through the basic installation process for your new D-Link Wireless N Services Router. DSR-500N / DSR-1000N Quick Installation Guide Installationsanleitung Guide d’installation Guía de instalación Guida di Installazione Documentation also available on CD and via the D-Link Website ENGLISH About This Guide Item Feature Description A LED (Top to bottom) Power LED: Indicates the Wireless N Services Router is powered on. 5GHz WLAN LED (only available on DSR-1000N): A solid light indicates that the wireless segment is ready. This LED blinks during wireless data transmission. 2.4GHz WLAN LED: A solid light indicates that the wireless segment is ready. This LED blinks during wireless data transmission. B USB Ports (2) It can support various USB 1.1 or 2.0 devices below: 1. Flash Disk or Hard Disk for network sharing. 2. 3G Adaptor for WAN redundant (Available on DSR-1000N only) 3. WCN Configuration (It will be supported by future firmware upgrade) 4. Printer (It will be supported by future firmware upgrade) C WPS Button Wi-Fi Protected Setup (WPS) System is a simplified method for securing your wireless network during the “Initial setup” as well as the “Add New Device” processes. Please refer to the user manual for more detail process. D Gigabit LAN port (1-4) Connect Ethernet devices, such as computers, switches and hubs. E Gigabit WAN port Two auto MDI/MDIX WAN ports (1-2) are the connection for the Ethernet cable to the cable or DSL modem. The WAN2 port is a configurable port which can support WAN2 or DMZ port for dual WAN connections or internal Server Farm purpose. F Console Port This guide gives step by step instructions for setting up D-Link DSR-500N/1000N Wireless N Services Router. Please note that the model you have purchased may appear slightly different from those shown in the illustrations. Unpacking the Product Open the shipping carton and carefully unpack its contents. Please consult the packing list located in following information to make sure all items are present and undamaged. If any item is missing or damaged, please contact your local D-Link reseller for replacement. -- One (1) DSR-500N/1000N Wireless N Services Router Appliance. -- One (1) Power Cord -- One (1) Console Cable (RJ45-to-DB9 Cable) -- One (1) Ethernet (CAT5 UTP/Straight Through) Cable -- One (1) Reference CD (CD-ROM containing product documentation in PDF format) -- Two (2) Rack Mounting Brackets -- Three (3) Detachable Omni-direction antennas Product Overview Front Panel - DSR-500N/1000N Used to access Command Line Interface (CLI) via RJ45-to-DB9 console Cable. Table 1. DSR-500N/1000N Front Panel Descriptions Device Status LEDs and Ethernet Port LEDs Link Speed TX/RX Status Figure 2. Ethernet RJ-45 Port LEDs A B C D E F Figure 1. DSR-500N/1000N Front Panel Note: DSR-500N supports one USB port only. 2 D-Link Wireless N Services Router The device LEDs show information about current device status. When the device power up, the POWER/STATUS LED will show solid orange during power on process. Startup takes one minute approximately to complete, the LED will change to solid green. If you want to turn the device off and on again, we recommend you wait a few seconds between shutting it down and powering it back. The Ethernet LEDs show the status of each Ethernet port. Table 2 lists the name, color, status and description of each device LED. Power / Status Status Orange/ Solid Green Orange Description Installing and Connection Device during power-on process This chapter describes how to install a DSR-500N/1000N device in a standard 19-inch equipment rack and how to connect cables and power to the device. Solid Green Completion of power on 2.4GHz/ 5GHz WLAN Green USB Green Blinking Orange Device is crashed and under recovery mode Blinking Green The system is defective, such firmware upgrades fail. Light Off The device is power-off Steady Green The link is good Blinking Green There is activity on this port Light Off No link Solid Green The link is good Blinking Green WPS Blue TX/RX Status Green There is activity on this port Light Off No link Blinking Blue Start to process Solid Blue The connection is successfully established Light Off No Link. Light Off No Link. Solid Green Link present. LINK Speed Green/ Orange Blinking Green Port is sending or receiving data. Light Off Port is operating at 10Mbps. -- Before installation, always check that the power supply is disconnected. -- Ensure that the room in which you operate the device has adequate air circulation and that the room temperature does Not exceed 40oC (104oC) -- Allow 1 meter (3 feet) of clear space to the front and back of the device. -- Do not place the device in an equipment rack frame that blocks the air vents on the sides of the chassis. Ensure that enclosed racks have fans and louvered sides -- Correct these hazardous conditions before any installation: moist or wet floors, leaks, ungrounded or frayed power cables, or missing safety grounds. Solid Green Port is operating at 100Mbps Installing Equipment Solid Orange You can mount the DSR-500N/1000N device into a standard 19-inch equipment rack. To install an appliance into a rack: Port is operating at 1000Mbps Table 2. Device Status LED Descriptions DSR-500N/1000N Default Interface Settings Ethernet Interface Before You Begin Observe the following precautions to help prevent shutdowns, equipment failures and injuries: Interface Type IP Address Web-Based Management LAN(1-4) / WLAN Static IP 192.168.10.1/24 Enabled WAN1 DHCP Client 0.0.0.0/0 Disabled WAN2 (Configurable port) DHCP Client (default) 0.0.0.0/0 Disabled Static IP (When it’s configured as DMZ) 172.17.100.254/24 Disabled 1. Attach the mounting brackets to each side of the chassis as shown in figure 3 and secure them with the screws provided. Table 3. Default Interface Settings Note: D-Link Wireless N Services Router only allow Web GUI access from LAN and WLAN interfaces by default for security reason. The WAN2 is a configurable port which support various and advanced scenario applications. When WAN2 port is configured as DMZ port, the IP address will be changed to 172.17.100.254. Figure 3. Attaching Rack Mount Brackets D-Link Wireless N Services Router 3 ENGLISH LED Color Indicators ENGLISH 2. Then, use the screws provided with the equipment rack to mount the device in the rack. Connecting the Device to a Network This section provides basic information about physically connecting the DSR-500N / 1000N to a network. To connect the necessary cables as shown in Figure 5. 1. Connect an RJ-45 cable from the port labeled WAN1 to the external router. The port WAN1 is pre-allocated to the WAN1 network segment. 2. Connect an RJ-45 cable from the port labeled LAN (1-4) to a switch in the LAN network segment. 3. Connect an RJ45-to-DB9 cable from the console port for CLI (Command Line Interface) management access. Internet Figure 4. Installing the Wireless N Services Router in a standard-sized equipment rack WAN1 Connecting Power and Turning On/Off The AC Power cord shipped with the device connects the device to earth ground when plugged an AC grounding-type power outlet. The device must be connected to earth ground during normal operation. To connect power to the device, plug one end of the AC power core into the AC power appliance inlet on the back panel of the device. Plug the other end into an AC power source. Note: We recommend using a surge protector for the power connection. To power on the DSR-500N/1000N device, press the AC power switch on the rear panel to the on position. To power off the device, press the power switch to the off position. LAN Switch Console User Figure 5. Basic Cabling Example Initial Configuration The Wireless N Services Router software is preinstalled on the DSR-500N/1000N device. When the device is powered on, it is ready to be configured. While the device has a default factory configuration that allow you to initially connect to the device, you must perform further configuration for your specific network requirements. Using the WebUI To use the WebUI, the workstation from which you are managing the device must initially be on the same subnetwork as the device. 4 D-Link Wireless N Services Router Microsoft Internet Explorer Version 6.0 or higher Using a Console Connection (RJ45-to-DB9 DCE) The Wireless N Services Router provides an serial port that enables a connection to a computer or terminal for monitoring and configuring the device. This port is a RJ-45 connector, implemented as a data communication terminal equipment (DCE) connection. Mozilla Firefox 3.5 or higher Netscape Navigator 9.0 or higher Apple Safari 4.0 and later To use the console port connection, you need the following equipment: Google Chrome 3.0 and later 1. A terminal or a computer with both a serial port and the ability to emulate a terminal. Table 4. Browser Compatibility To access the device with the WebUI: 1. Connect your workstation on the port labeled LAN (1-4), which is pre-allocated to the LAN. 2. Ensure your workstation is configured with a static IP address in the 192.168.10.0/24 subnet. Note: Disable pop-up blocking software or add the management IP address http://192.168.10.1 to your pop-up blocker’s allow list. 3. Launch your browser; enter the IP address for the LAN interface. (The factory default IP address is http://192.168.10.1), then press Enter. Figure 6. Browser Address 4. Log on the Wireless N Services Router Web Interface The default log on information is: Username: admin Password: admin 2. A RJ45-to-DB9 RS-232 with female connector. (Already included in packing list) 3. If your Laptop or PC doesn’t have RS-232 connector, a converter is required. Note: DSR-500N/1000N does not come with RS-232 converter and these must be purchased separately. To establish a console connection: 1. Plug the RJ-45 connector of the supplied RJ45-to-DB9 cable directly to the console port on the Wireless N Services Router. 2. Connect the other end of the cable to a terminal or to the serial connector of a computer running terminal emulation software. Set the terminal emulation software as following: Baud rate: 115200 Data bits: 8 Parity: None Stop bits: 1 Flow control: None 3. When you have correctly set up the terminal, having previously followed the instructions in section 2.3, “Connecting Power and Turn the Device On/Off” then switch on your device. The boot sequence appears in the terminal. 4. Once the boot sequence completes, the command prompt is displayed, the device is ready to be configured. Figure 7. Authentication Message D-Link Wireless N Services Router 5 ENGLISH Browser ENGLISH Finalizing the Configuration After initial setup, you should refer to the companion publications found in PDF format on the accompanying master CD for more information on how to begin to configure the DSR-500N/1000N device. D-Link Wireless N Services Router User Manual This document describes the general operation and control of the Wireless N Services Router firmware which drives and controls the Wireless N Services Router series hardware. It includes examples of how to carry out typical administrative tasks such as setting up a VPN and how to use Wireless N Services Router series in various scenarios. D-Link Wireless N Services Router CLI Reference Guide This document describes all available text-based commands that can be used on RJ45-to-DB9 Console or SSH interface to configure Wireless N Services Router during system operation. Additional Information Additional help is available through D-Link worldwide offices listed at the appendix of the User Manual or online. To know more about D-Link security product products or marketing information, please visit the website http://mydsr.dlink.com. tw; for any support issue, please visit the website http://support.dlink.com.tw, which will redirect you to appropriate local D-Link website. Technical Support United Kingdom (Mon-Fri) website: http://www.dlink.co.uk FTP: ftp://ftp.dlink.co.uk Home Wireless/Broadband 0871 873 3000 (9.00am–06.00pm, Sat 10.00am-02.00pm) Managed, Smart, & Wireless Switches, or Firewalls 0871 873 0909 (09.00am- 05.30pm) (BT 10ppm, other carriers may vary.) Ireland (Mon-Fri) All Products 1890 886 899 (09.00am-06.00pm, Sat 10.00am-02.00pm) Phone rates: €0.05ppm peak, €0.045ppm off peak times 6 D-Link Wireless N Services Router Building Networks for People Installationsanleitung Unified Services Router Diese Anleitung führt Sie durch den allgemeinen Installationsprozess für Ihren neuen D-Link Wireless N Services Router. DSR-500N / DSR-1000N Die Dokumentation ist auch auf CD und über die D-Link-Website verfügbar Element Merkmal Beschreibung A LED (Von oben nach unten) LED-Betriebsanzeige: Zeigt an, dass der Wireless N Services Router eingeschaltet ist. 5 GHz WLAN LED (nur mit dem DSR-1000N): Ein durchgehend leuchtendes Licht zeigt an, dass das drahtlose Segment betriebsbereit ist. Diese LED blinkt während der drahtlosen Datenübertragung. 2,4 GHz WLAN LED: Ein durchgehend leuchtendes Licht zeigt an, dass das drahtlose Segment betriebsbereit ist. Diese LED blinkt während der drahtlosen Datenübertragung. B USB-Ports (2) Kann verschiedene USB 1.1 oder 2.0 Geräte (unten) unterstützen: 1. Flash-Speicher oder Festplatte für gemeinsamen Netzwerkzugang. 2. 3G-Adaptor für redundantes WAN (Nur mit dem DSR-1000N) 3. WCN-Konfiguration (Von zukünftigem Firmware-Upgrade unterstützt) 4. Drucker (Wird von zukünftigem Firmware-Upgrade unterstützt) C WPS-Taste Das Wi-Fi Protected Setup (WPS)-System ist ein vereinfachtes Verfahren zur Sicherung Ihres drahtlosen Netzwerks beim 'Initial setup' (Ersteinrichtung), sowie beim Hinzufügen neuer Geräte. Weitere Informationen dazu finden Sie im Benutzerhandbuch. -- Ein (1) Konsolenkabel (RJ45-to-DB9-Kabel) D -- Ein (1) Ethernet-Kabel (CAT5 UTP/StraightThrough) Gigabit-LAN-Port (1-4) Zum Anschluss von Ethernet-Geräten wie Computer, Switches und Hubs. E Gigabit-WAN-Port (1-2) Zwei Auto-MDI/MDIX-WAN-Ports sind die Anschlüsse für das Ethernet-Kabel an das Kabel- bzw. DSL-Modem. Der WAN2-Port ist konfigurierbar und kann einen WAN2- oder DMZ-Port für duale WAN-Verbindungen unterstützen oder zu systeminternen Serverfarm-Zwecken dienen. F Konsolenport Zum Zugriff auf CLI (Command Line Interface/Befehlszeilenschnittstelle) über ein RJ45-to-DB9 Konsolenkabel. Informationen zum Handbuch Diese Anleitung weist Sie Schritt für Schritt an, wie Sie D-Link DSR-500N/1000N Wireless N Services Router einrichten können. Beachten Sie, dass Ihr Modell sich möglicherweise geringfügig von den Abbildungen unterscheidet. DEUTSCH Lieferumfang und Auspacken des Produkts Öffnen Sie den Versandkarton, entnehmen Sie den Inhalt und packen Sie ihn vorsichtig aus. Stellen Sie bitte sicher, dass alle auf der Packliste aufgeführten Artikel auch tatsächlich geliefert wurden und unbeschädigt sind. Sollte ein Artikel fehlen oder beschädigt sein, wenden Sie sich zum Zwecke einer Ersatzlieferung umgehend an Ihren D-LinkFachhändler. -- Ein (1) DSR-500N/1000N Wireless N Services Router. -- Ein (1) Netzkabel -- Eine (1) Referenz-CD (CD-ROM mit der Produktdokumentation im PDF-Format) -- Zwei (2) Rackbefestigungsklammern -- Drei (3) abnehmbare, allseitig bewegliche Antennen Produktübersicht Tabelle 1. Beschreibung der Vorderseite des DSR-500N/1000N Vorderseite - DSR-500N/1000N Gerätestatus-LEDs und Ethernet-Port-LEDs Verbindungsgeschwindigkeit TX/RXStatus Abbildung 2. Ethernet RJ-45 Port LEDs A B C D E F Abbildung 1. Die Vorderseite des DSR-500N/1000N Hinweis: DSR-500N unterstützt nur einen USB-Port. 8 D-Link Wireless N Services Router Die Geräte-LEDs zeigen Informationen über den aktuellen Gerätestatus an. Die BETRIEBSANZEIGE/ STATUS-LED leuchtet während des Einschalt- und Hochfahrvorgangs durchgehend orangefarben. Der Vorgang dauert etwa eine Minute. Danach leuchtet die LED durchgehend grün. Wenn Sie das Gerät ausschalten und dann wieder einschalten möchten, ist es ratsam, zwischen dem Ausschalten und dem erneuten Einschalten ein paar Sekunden zu warten. Die Ethernet-LEDs zeigen den Status für jeden Ethernet-Port an. In Tabelle 2 sind Name, Farbe, Status und Beschreibung für jede GeräteLED aufgeführt. Farbe Status Beschreibung Strom / Status Orangefarben/ Grün Durchgehend orangefarben Gerät während Einschaltund Hochfahrvorgang Durchgehend grün Ende Hochfahrvorgang Blinkt orangefarben Gerät abgestürzt und in Wiederherstellmodus Grün blinkend System defekt. FirmwareUpgrades fehlgeschlagen. LED leuchtet nicht Gerät ist ausgeschaltet. Durchgehend grün Gute Verbindung Grün blinkend Dieser Port ist aktiv LED leuchtet nicht Keine Verbindung Durchgehend grün Gute Verbindung Grün blinkend Dieser Port ist aktiv LED leuchtet nicht Keine Verbindung Blau blinkend Prozessstart Durchgehend blau Verbindung erfolgreich hergestellt 2,4 GHz/ 5 GHz WLAN USB WPS TX/RXStatus Verbindungsgeschwindigkeit Grün Grün Blau Grün Grün/ Orangefarben LED leuchtet nicht Keine Verbindung LED leuchtet nicht Keine Verbindung Durchgehend grün Verbindung hergestellt Grün blinkend Port sendet oder empfängt Daten LED leuchtet nicht Port-Betrieb mit 10 Mbit/s Durchgehend grün Port-Betrieb mit 100 Mbit/s Durchgehend orangefarben Port-Betrieb mit 1000 Mbit/s Tabelle 2. Beschreibungen der Status-LEDs des Geräts Standardeinstellungen für die DSR-500N/1000N-Schnittstellen EthernetSchnittstelle Schnittstellentyp Webbasiertes Management IP-Adresse LAN (1-4) / WLAN Statische IP 192.168.10.1/24 Aktiviert WAN1 DHCP-Client 0.0.0.0/0 Deaktiviert WAN2 (Konfigurierbarer Port) DHCP-Client (Standard) 0.0.0.0/0 Deaktiviert Statische IP (wenn als DMZ konfiguriert) 172.17.100.254/24 Deaktiviert Installation und Verbindung In diesem Abschnitt wird beschrieben, wie Sie ein DSR-500N/1000N-Gerät in einem 19-ZollStandardrack installieren und Kabel am Gerät anschließen. Erste Schritte Beachten Sie die folgenden Vorsichtsmaßnahmen, um Fehler, Geräteausfälle und Verletzungen zu vermeiden: -- Vor der Installation muss die Stromversorgung getrennt werden. -- Das Gerät muss in einem Raum mit ausreichender Belüftung betrieben werden. Die Raumtemperatur darf 40oC -- Vor und hinter dem Gerät muss sich 1 Meter freier Platz befinden. -- Achten Sie beim Installieren des Geräts in einem Rackrahmen darauf, dass die Lüftungsöffnungen an den Seiten des Gehäuses nicht blockiert sind. Stellen Sie sicher, dass geschlossene Racks über Lüfter und seitliche Lüftungsschlitze verfügen. -- Beseitigen Sie vor der Installation die folgenden Gefahrenquellen: feuchte oder nasse Böden, Lecks, beschädigte oder nicht geerdete Stromkabel und fehlende Sicherheitserdungen. Installation des Geräts Das DSR-500N/1000N-Gerät kann in ein Geräterack mit einer Standardgröße von 19 Zoll eingebaut werden. So installieren Sie ein Gerät in einem Rack: 1. Bringen Sie die Befestigungsklammern an den beiden Seiten des Gehäuses an, wie in Abbildung 3 gezeigt, und fixieren Sie sie mit den mitgelieferten Schrauben. Tabelle 3. Standardschnittstellen-Einstellungen Hinweis: Standardmäßig ermöglichen D-Link Wireless N Services Router aus Sicherheitsgründen nur den webbasierten Zugriff über LAN- und WLANSchnittstellen. WAN2 ist ein konfigurierbarer Port. Er unterstützt verschiedene und spezielle Anwendungsmöglichkeiten. Wird der WAN2-Port als DMZ-Port konfiguriert, wird die IP-Adresse auf 172.17.100.254 geändert. Abbildung 3. Anbringen der Rackbefestigungsklammern D-Link Wireless N Services Router 9 DEUTSCH LED Anzeigen 2. Befestigen Sie dann das Gerät mithilfe der mit dem Rack gelieferten Schrauben im Geräterack. Anschließen des Geräts an ein Netzwerk In diesem Abschnitt wird der physische Anschluss des DSR-500N / 1000N an ein Netzwerk beschrieben. Zum Anschluss der erforderlichen Kabel wie in Abbildung 5 angezeigt: 1. Verbinden Sie Port WAN1 mithilfe eines RJ-45Kabels mit dem externen Router. Port-Nr. WAN1 ist standardmäßig dem WAN1-Netzwerksegment zugewiesen. DEUTSCH 2. Verbinden Sie den LAN-Port (1-4) mithilfe eines RJ-45-Kabels mit einem Switch im LAN-Netzwerksegment. 3. Verbinden Sie den Konsolenport mit einem RJ45-to-DB9-Kabel, um die Verwaltung über die CLI (Command Line Interface, Befehlszeilenschnittstelle) zu ermöglichen. Internet Abbildung 4. Installation des Wireless N Services Routers in einem Geräterack mit Standardgröße WAN1 Herstellen der Stromversorgung und Ein-/Ausschalten Das mit dem Gerät gelieferte Netzkabel verbindet das Gerät mit Masse, wenn es an eine SchukoNetzsteckdose angeschlossen wird. Während des normalen Betriebs muss das Gerät mit Masse verbunden sein. Zur Stromversorgung des Geräts stecken Sie ein Ende des Netzkabels in den Netzstromeingang an der Geräterückseite und schließen Sie das andere Ende an eine Wechselstromquelle an. Hinweis: D-Link empfiehlt die Verwendung eines Überspannungsschutzes für die Stromverbindung. Zum Einschalten des DSR-500N/1000N-Geräts stellen Sie den Netzschalter an der Geräterückseite in die Position EIN. Zum Ausschalten des Geräts stellen Sie den Netzschalter in die Position AUS. LAN Switch Console User Abbildung 5. Einfaches Verkabelungsbeispiel Erstkonfiguration Die Wireless N Services Router-Software ist auf dem DSR-500N/1000N-Gerät vorinstalliert. Sobald das Gerät eingeschaltet ist, kann es konfiguriert werden. Obwohl das Gerät eine werkseitige Standardkonfiguration aufweist, mit der Sie eine Erstverbindung zum Gerät herstellen können, müssen Sie weitere Einstellungen für Ihre besonderen Netzwerkanforderungen vornehmen. Die Weboberfläche (WebUI) 10 D-Link Wireless N Services Router Damit Sie die WebUI verwenden können, muss der Arbeitsplatzrechner, mit dem das Gerät verwaltet wird, sich zunächst im selben Subnetzwerk wie das Gerät befinden. Browser Microsoft Internet Explorer Version 6,0 oder höher 3,5 oder höher Netscape Navigator 9.0 oder höher Apple Safari 4,0 und höher Google Chrome 3.0 und höher Tabelle 4. Browserkompatibilität So greifen Sie über die WebUI auf das Gerät zu: 1. Schließen Sie Ihren Arbeitsplatzrechner am Port an, der mit LAN (1-4) gekennzeichnet und standardmäßig dem LAN zugewiesen ist. 2. Stellen Sie sicher, dass der Arbeitsplatzrechner mit einer statischen IP-Adresse im Subnetz 192.168.10.0/24 konfiguriert ist. SFlbHinweis: Deaktivieren Sie die PopupBlocker-Software oder fügen Sie die Management-IP-Adresse http://192.168.10.1 der Liste der zugelassenen Adressen Ihrer Popup-Blocker-Software hinzu. 3. Starten Sie Ihren Browser. Geben Sie die IP-Adresse für die LAN-Schnittstelle ein. (Die werkseitig vorgegebene Standard-IP-Adresse ist http://192.168.10.1). Drücken Sie dann auf die Eingabetaste. Abbildung 6. Browser-Adresse 4. Melden Sie sich auf der Wireless N Services Router-Web-Benutzeroberfläche an. Die standardmäßigen Anmeldeinformationen lauten: Username (Benutzername): admin Password (Kennwort): admin Der Wireless N Services Router bietet einen seriellen Port, der eine Verbindung mit einem Computer oder Terminal zur Überwachung und Konfiguration des Geräts ermöglicht. Dieser Port verwendet einen RJ-45-Verbindungsstecker zur Verbindung mit einem Datenkommunikationsgerät (DCE, z. B. einem Modem). Zur Verwendung der Konsolenport-Verbindung benötigen Sie Folgendes: 1. Ein Terminal oder einen Computer mit einem seriellen Port und Terminal-Emulationsfähigkeiten. 2. Ein RJ45-to-DB9 RS-232 mit Verbindungsbuchse. (Im Lieferumfang des Produkts enthalten und auf der Packliste aufgeführt) 3. Wenn Ihr Laptop oder PC keinen RS-232Anschluss aufweist, ist ein Konverter erforderlich. Hinweis: Im Lieferumfang des DSR-500N/1000N ist kein RS-232-Konverter enthalten. Er muss also gesondert erworben werden. So stellen Sie eine Konsolenverbindung her: 1. Stecken Sie den RJ-45-Verbindungsstecker des mitgelieferten RJ45-to-DB9-Kabels direkt in den Konsolenport des Wireless N Services Routers. 2. Schließen Sie das andere Ende des Kabels an ein Terminal oder an den seriellen Anschluss eines Computers an, auf dem Terminal-Emulations-Software ausgeführt wird. Nehmen Sie in der Terminal-Emulations-Software folgende Einstellungen vor: Baud rate (Baudrate): 115200SFlbData bits (Datenbits): 8 Parity (Parität): Keine Stop bits (Stoppbits): 1 Flow Control (Datenflusssteuerung): Keine 3. Wenn Sie das Terminal korrekt eingerichtet haben (indem Sie den Anleitungen in Abschnitt 2.3 "Stromanschluss und Gerät ein-/ausschalten" gefolgt sind), schalten Sie Ihr Gerät ein. Die Startsequenz wird am Terminal angezeigt. 4. Nach Abschluss der Startsequenz wird die Eingabeaufforderung der Befehlszeile angezeigt. Das Gerät kann jetzt konfiguriert werden. Abbildung 7. Authentifizierungsmeldung D-Link Wireless N Services Router 11 DEUTSCH Mozilla Firefox Verwendung einer Konsolenverbindung (RJ45-to-DB9 DCE) Konfiguration abschließen DEUTSCH Weitere Informationen zur Konfiguration des DSR-500N/1000N-Geräts nach der Ersteinrichtung finden Sie in der Begleitdokumentation im PDF-Format auf der im Lieferumfang enthaltenen Master-CD. D-Link Wireless N Services Router Benutzerhandbuch In diesem Benutzerhandbuch werden die allgemeinen Operationen und Steuerelemente der Wireless N Services Router-Firmware beschrieben, die die Hardware der Produktserie der Wireless N Services Router steuert. Enthalten sind Beispiele zur Durchführung typischer administrativer Aufgaben wie das Einrichten eines VPN und Beispiele zur Verwendung der Wireless N Services Router-Serie in verschiedenen Szenarien. D-Link Wireless N Services Router - CLI Referenzhandbuch In diesem Handbuch werden alle verfügbaren textbasierten Befehle beschrieben, die auf der RJ45-to-DB9 Konsole oder der SSH-Schnittstelle zur Konfiguration des Wireless N Services Routers während des gesamten Betriebs des Systems verwendet werden können. Weitere Informationen Weitere Hilfe ist von den weltweiten Niederlassungen von D-Link erhältlich, die im Anhang des Benutzerhandbuchs und online aufgelistet werden. Wenn Sie an weiteren Einzelheiten zu den Sicherheitsprodukten von D-Link oder an Marketinginformationen interessiert sind, besuchen Sie die Website http:// mydsr.dlink.com.tw. Bei Fragen zum Support besuchen Sie die Website http://support.dlink. com.tw. Dort werden Sie an die entsprechende regionale D-Link-Website weitergeleitet. Technischer Support Deutschland: Web: http://www.dlink.de Telefon: +49(0)1805 2787 0,14 € pro Minute Zeiten: Mo. –Fr. 09:00 – 17:30 Uhr Österreich: Web: http://www.dlink.at Telefon: +43(0)820 480084 0,116 € pro Minute Zeiten: Mo. –Fr. 09:00 – 17:30 Uhr Schweiz: Web: http://www.dlink.ch Telefon: +41(0)848 331100 0,08 CHF pro Minute Zeiten: Mo. –Fr. 09:00 – 17:30 Uhr * Gebühren aus Mobilnetzen und von anderen Providern können abweichen. 12 D-Link Wireless N Services Router Building Networks for People Guide d'installation rapide Routeur de services unifiés Ce document vous guidera tout au long de la procédure élémentaire d'installation de votre nouveau routeur de services Wireless N D-Link. DSR-500N / DSR-1000N Documentation également disponible sur CD et sur le site Web de D-Link. À propos de ce guide Élément Fonction Description A Voyant (de haut en bas) Voyant d'alimentation : Indique que le routeur de services Wireless N est sous tension. Voyant du réseau local sans fil de 5 GHz (uniquement disponible sur le DSR-1000N) : Lorsque le voyant reste allumé, le segment sans fil est prêt. Ce voyant clignote pendant la transmission sans fil des données. Voyant du réseau local sans fil de 2,4 GHz : Lorsque le voyant reste allumé, le segment sans fil est prêt. Ce voyant clignote pendant la transmission sans fil des données. B Ports USB (2) Il peut prendre en charge les différents périphériques USB 1.1 ou 2.0 ci-dessous : 1. Disque Flash ou disque dur pour le partage sur le réseau. 2. Adaptateur 3G pour lien WAN redondant (uniquement disponible sur le DSR-1000N) 3. Configuration Wi-Fi par WCN (prise en charge par une mise à jour ultérieure du microprogramme) 4. Imprimante (prise en charge par une mise à jour ultérieure du microprogramme) C Bouton WPS La fonction WPS (Wi-Fi Protected Setup) est une méthode simplifiée destinée à sécuriser votre réseau sans fil lors de la première installation et durant l’opération d’ajout d’un nouveau périphérique. Veuillez vous reporter au manuel d’utilisation pour de plus amples détails sur la procédure. D Ports LAN Gigabit (1-4) Connexion de périphériques Ethernet tels que des ordinateurs, des commutateurs et des concentrateurs. E Ports WAN Gigabit (1-2) Deux ports WAN (Réseau étendu) Auto MDI/MDIX permettent de connecter le câble Ethernet au modem câble ou DSL. Le port WAN2, configurable, peut prendre en charge le port WAN2 ou DMZ pour établir une double connexion au réseau étendu ou pour créer des grappes de serveurs internes. F Port de console Sert à accéder à l'interface de ligne de commande (CLI) via un câble de console RJ45 à DB9. Ce guide fournit des instructions étape par étape, qui vous permettront de configurer votre routeur de services Wireless N DSR-500N/1000N D-Link. Notez que le modèle que vous avez acheté peut légèrement différer de celui illustré sur les figures. Déballage du produit Ouvrez le carton d'emballage, puis déballez soigneusement son contenu. Consultez la liste de colisage pour vous assurer qu'il ne manque aucun article et qu'ils sont tous en bon état. Si un des éléments est manquant ou endommagé, veuillez contacter votre revendeur D-Link local pour obtenir un remplacement. -- Un (1) routeur de services Wireless N DSR-500N/1000N. -- Un (1) cordon d'alimentation -- Un (1) câble de console (câble RJ45 à DB9) FRANÇAIS -- Un (1) câble Ethernet (CAT5 UTP/droit) -- Un (1) CD de référence (CD-ROM contenant la documentation du produit au format PDF) -- Deux (2) supports de montage en bâti -- Trois (3) antennes omni-directionnelles amovibles Présentation du produit Façade - DSR-500N/1000N Tableau 1. Description de la façade du DSR-500N/1000N Voyants d'état et voyants des ports Ethernet du périphérique Vitesse de connexion État de l'émission/ réception Figure 2. Voyants du port Ethernet RJ-45 A B C D E F Figure 1. Façade du DSR-500N/1000N Remarque : Le DSR-500N ne prend en charge qu'un seul port USB. 14 D-Link Wireless N Services Router Les voyants du périphérique donnent des informations sur son état actuel. Pendant la procédure de mise sous tension du périphérique, le voyant d'alimentation/d'état reste allumé en orange. Le démarrage prend environ une minute ;ensuite, le voyant devient vert. Pour éteindre le périphérique puis le rallumer, il est conseillé d'attendre quelques secondes entre le moment où vous l'arrêtez puis le rallumez. Le voyant Ethernet indique l'état de chaque port Ethernet. Le tableau 2 répertorie le nom, la couleur, l'état et la description de chaque voyant du périphérique. Couleur État Description Alimentation / État Orange / Vert Orange fixe Périphérique pendant la procédure de mise sous tension Vert fixe Mise sous tension terminée Orange clignotant Le périphérique a planté ou est en mode de récupération Vert clignotant Le système est défectueux, la mise à niveau du microprogramme a donc échoué. Voyant éteint Le périphérique est éteint. Vert fixe La connexion est correcte. Vert clignotant Ce port présente une activité. Voyant éteint Pas de connexion. Vert fixe La connexion est correcte. Vert clignotant Ce port présente une activité. Voyant éteint Pas de connexion. Bleu clignotant Début de la procédure. Bleu fixe La connexion a été établie avec succès. Voyant éteint Pas de connexion. Voyant éteint Pas de connexion. Vert fixe Une connexion est active. Vert clignotant Le port envoie ou reçoit des données. Voyant éteint Le port fonctionne à 10 Mbits/s. Vert fixe Le port fonctionne à 100 Mbits/s. Orange fixe Le port fonctionne à 1 000 Mbits/s. Réseau local sans fil de 2,4 GHz/5 GHz Vert USB Vert WPS État de l'émission/ réception. Vitesse de connexion Bleu Vert Vert / Orange Tableau 2. Description des voyants d'état du périphérique Paramètres par défaut des interfaces du DSR-500N/1000N Interface Ethernet Type d'interface Adresse IP Gestion Web Activé LAN(1-4) / WLAN Adresse IP statique 192.168.10.1/24 WAN1 Client DHCP 0.0.0.0/0 Désactivé WAN2 (port configurable) Client DHCP (par défaut) 0.0.0.0/0 Désactivé Adresse IP statique (lorsqu'elle est configurée en tant que DMZ) 172.17.100.254/24 Désactivé Installation et connexion Ce chapitre décrit comment installer un périphérique DSR-500N/1000N dans un bâti standard de 19 pouces et comment y relier des câbles et l'alimentation. Avant de commencer Respectez les précautions suivantes afin d'éviter tout risque d'arrêt, de dysfonctionnement de l'équipement ou de blessure : -- Avant l'installation, vérifiez toujours que l'alimentation est déconnectée. -- Assurez-vous que la pièce dans laquelle vous installez le périphérique est suffisamment aérée et que sa température ne dépasse pas 40 ºC. -- Laissez un espace d'au moins 1 mètre à l'avant et à l'arrière du périphérique. -- Si vous installez l'appareil dans un bâti, veillez à ce que le cadre de ce dernier ne bouche pas les orifices de ventilation de l'appareil. Assurezvous que les bâtis intégrés possèdent des ventilateurs et des orifices latéraux. -- Corrigez ces situations dangereuses avant toute installation : sols humides ou mouillés, fuites ou câbles d'alimentation souterrains, endommagés ou sans terre de protection. Installation du matériel Vous pouvez monter le périphérique DSR-500N/ 1000N dans un bâti standard de 19 pouces. Pour installer un appareil dans un bâti : 1. Montez les supports de montage de chaque côté du châssis, comme indiqué sur la figure 3, puis fixez-les à l'aide des vis fournies. Tableau 3. Paramètres par défaut des interfaces Remarque : Pour des raisons de sécurité, le routeur de services Wireless N de D-Link permet par défaut d'accéder à l'interface Web uniquement depuis les interfaces du réseau local ou du réseau local sans fil. Le port WAN2, configurable, prend en charge diverses applications avancées. Lorsqu'il est configuré sous forme de port DMZ, son adresse IP est remplacée par 172.17.100.254. Figure 3. Fixation des supports de montage du bâti D-Link Wireless N Services Router 15 FRANÇAIS Voyant 2. Ensuite, utilisez les vis fournies avec le bâti pour monter le périphérique dedans. Connexion du périphérique à un réseau Cette section fournit des informations générales sur la connexion physique du DSR-500N / 1000N à un réseau. Pour connecter les câbles nécessaires comme illustré en Figure 5. 1. Connectez un câble RJ-45 entre le port étiqueté WAN1 et le routeur externe. Ce port est pré-attribué à la section de réseau WAN1. 2. Connectez un câble RJ-45 entre le port étiqueté LAN (1-4) et un commutateur de la section de réseau LAN. 3. Connectez un câble RS45 à DB9 au port de console pour pouvoir accéder à l'interface de gestion CLI (interface de ligne de commande). Internet FRANÇAIS Figure 4. Installation du routeur de services Wireless N dans un bâti de taille standard WAN1 Alimentation de l'appareil et mise en marche/arrêt Le cordon d'alimentation CA fourni avec l'appareil permet de relier ce dernier à la terre lorsqu'il est branché à une prise de courant avec borne de terre. Le périphérique doit être relié à la terre durant son fonctionnement normal. Pour connecter l'alimentation du périphérique, branchez une extrémité du cordon CA au connecteur d'alimentation CA situé à l'arrière de l'appareil. Branchez l'autre extrémité à une prise de courant CA. Remarque : Nous recommandons d'utiliser un parasurtenseur pour la connexion de l'alimentation. Pour allumer le périphérique DSR-500N/1000N, mettez l'interrupteur d'alimentation CA situé à l'arrière de l'appareil en position Marche (ON). Pour l'éteindre, mettez-le en position Arrêt (OFF). LAN Switch Console User Figure 5. Exemple élémentaire de câblage Configuration initiale Le logiciel du routeur de services Wireless N est préinstallé sur le périphérique DSR-500N/1000N. Dès sa mise sous tension, il est prêt à être configuré. Bien que le périphérique possède une configuration d'usine par défaut qui vous permet d'établir une connexion initiale, vous devez effectuer des configurations supplémentaires pour satisfaire aux besoins spécifiques de votre réseau. Utilisation de l'interface Web Pour utiliser l'interface Web, le poste de travail de gestion du périphérique doit être initialement situé sur le même sous-réseau que le périphérique. 16 D-Link Wireless N Services Router Navigateur Microsoft Internet Explorer Version version 6,0 ou supérieure Mozilla Firefox version 3,5 ou supérieure Netscape Navigator version 9.0 ou supérieure Apple Safari version 4,0 et supérieure Google Chrome version 3.0 et supérieure Tableau 4. Liste des navigateurs compatibles Pour accéder au périphérique à l'aide de l'interface Web : 1. Connectez votre poste de travail au port étiqueté LAN (1-4), qui est pré-affecté au réseau local. 3. Lancez votre navigateur, puis saisissez l'adresse IP pour l'interface LAN (Réseau local) (l'adresse IP d'usine par défaut est https://192.168.10.1), puis appuyez sur Entrée. Figure 6. Adresse du navigateur 4. Connectez-vous à l'interface Web du routeur de services Wireless N. Les données de connexion par défaut sont les suivantes : Nom d’utilisateur : admin Mot de passe : admin Le routeur de services Wireless N dispose d'un port série qui permet de se connecter à un ordinateur ou à un terminal afin de surveiller et de configurer le périphérique. Ce port est un connecteur RJ-45, mis en place sous forme de connexion ETCD (Équipement Terminal de Circuit de Données). Pour utiliser une connexion via le port de console, vous devez disposer des éléments suivants : 1. Un terminal ou un ordinateur équipé d'un port série et d'une application d'émulation de terminal 2. Un câble RJ45 à DB9 avec connecteur RS-232 femelle (déjà inclus dans la liste de colisage) 3. Si votre ordinateur portable ou de bureau ne possède pas de connecteur RS-232, vous aurez besoin d'un convertisseur. Remarque : Le DSR-500N/1000N n'est pas équipé de convertisseur RS-232 ; vous devez l'acheter séparément. Pour établir une connexion avec la console : 1. Branchez le connecteur RJ-45 du câble RJ45 à DB9 fourni directement dans le port de la console du routeur de services Wireless N. 2. Connectez l'autre extrémité du câble à un terminal ou à un connecteur série d'un ordinateur exécutant un logiciel d'émulation de terminal. Configurez le logiciel d'émulation de la façon suivante : Débit de bauds : 115200 Bits de données : 8 Parité : Aucun Bits d'arrêt : 1 Contrôle de flux : Aucun 3. Après avoir configuré le terminal en suivant les instructions de la section 2.3, « Alimentation de l'appareil et mise en marche/arrêt », mettez le périphérique sous tension. La séquence de démarrage apparaît sur le terminal. 4. À la fin de cette séquence, l'invite de commandes s'affiche : l'appareil est prêt à être configuré. Figure 7. Message d'authentification D-Link Wireless N Services Router 17 FRANÇAIS 2. Vérifiez que votre poste de travail est configuré avec une adresse IP statique sur le sous réseau 192.168.10.0/24. Remarque : Désactivez le blocage des fenêtres publicitaires ou ajoutez l'adresse IP de gestion http://192.168.10.1 à la liste des sites autorisés du bloqueur de fenêtres publicitaires. Utilisation d'une connexion de console (ETCD RJ45 à DB9) Fin de la configuration Après la configuration initiale, reportez-vous aux documents joints au format PDF du CD principal pour de plus amples informations sur la configuration du périphérique DSR-500N/1000N. Manuel d'utilisation du routeur de services Wireless N D-Link Ce document explique comment faire fonctionner et commander le microprogramme du routeur de services Wireless N qui gère et commande le matériel des routeurs de services Wireless N. Il comporte des exemples de réalisation de tâches administratives types, telles que la configuration d'un VPN et l'utilisation des routeurs de services Wireless N dans diverses situations. FRANÇAIS Guide de référence de la CLI du routeur de services Wireless N D-Link Ce document présente toutes les commandes textuelles disponibles sur l'interface de la console RJ45 à DB9 ou SSH pour configurer le routeur de services Wireless N en cours de fonctionnement. Informations complémentaires Pour obtenir davantage d'aide, vous pouvez contacter les différents bureaux D-Link dans le monde, dont la liste est annexée à ce manuel d'utilisation ou disponible en ligne. Pour en savoir plus sur les produits de sécurité D-Link ou pour obtenir des informations marketing, visitez le site Web http:///mydsr.dlink.com.tw ; pour toute demande d'assistance, visitez le site Web http://support. dlink.com.tw. Vous serez à chaque fois redirigé vers le site Web local adéquat de D-Link. Assistance technique Assistance technique D-Link sur internet : http://www.dlink.fr Assistance technique D-Link par téléphone : 0820 0803 03 (0.12 € la minute) Du lundi au vendredi de 9h à 19h. 18 D-Link Wireless N Services Router Building Networks for People Guía de instalación rápida Router para servicios unificados Este documento le guiará a través del proceso de instalación básico de su nuevo router para servicios de red inalámbrica D-Link. DSR-500N / DSR-1000N La documentación está también disponible en CD y a través del sitio web de D-Link Elemento Característica Descripción A LED (de arriba a abajo) LED de alimentación: Indica que el router para servicios de red inalámbrica está encendido. LED de WLAN de 5 GHz (sólo disponible en el DSR-1000N): Una luz continua indica que el segmento inalámbrico está preparado. Este LED parpadea durante la transmisión de datos inalámbrica. LED de WLAN de 2,4 GHz: Una luz continua indica que el segmento inalámbrico está preparado. Este LED parpadea durante la transmisión de datos inalámbrica. B Puertos USB (2) Puede admitir diversos dispositivos USB 1.1 ó 2.0 indicados a continuación: 1. Disco flash o disco duro para compartir la red. 2. Adaptador 3G para WAN redundante (sólo disponible en el DSR-1000N) 3. Configuración WCN (será admitida mediante futuras actualizaciones de firmware) 4. Impresora (será admitida mediante futuras actualizaciones de firmware) C Botón WPS -- Un (1) cable para consola (cable de RJ45 a DB9) El sistema Wi-Fi Protected Setup (WPS) es un método simplificado para hacer más segura su red inalámbrica durante la “Configuración inicial” y durante los procesos para “Añadir nuevo dispositivo”. Consulte el manual del usuario para ver el proceso más detalladamente. D -- Un (1) cable Ethernet (CAT5 UTP/directo) Puerto Gigabit LAN (1-4) Conecte dispositivos Ethernet como ordenadores, conmutadores y terminales. E Puerto Gigabit WAN (1-2) Dos puertos WAN MDI/MDIX automáticos son la conexión para el cable Ethernet al módem por cable o DSL. El puerto WAN2 es un puerto configurable que puede admitir un puerto WAN2 o DMZ para conexiones WAN dobles o torre de servidores interna. F Puerto de la consola Se utiliza para acceder a la interfaz de línea de comandos (CLI) a través del cable para consola de RJ45 a DB9. Acerca de esta guía Esta guía ofrece instrucciones paso a paso para configurar el router para servicios de red inalámbrica D-Link DSR-500N/1000N. Tenga en cuenta que el modelo que ha adquirido puede tener un aspecto ligeramente diferente al mostrado en las ilustraciones. Desempaquetado del producto Abra la caja del envío y desempaquete su contenido con cuidado. Consulte la información contenida en la lista siguiente para asegurarse de que están presentes todos los artículos y que no están dañados. Si falta algún artículo o está dañado, póngase en contacto con su proveedor local de D-Link para que lo reponga. -- Un (1) router para servicios de red inalámbrica DSR-500N/1000N. -- Un (1) cable de alimentación -- Un (1) CD de referencia (CD-ROM que contiene la documentación del producto en formato PDF) -- Dos (2) soportes de montaje en estante -- Tres (3) antenas multidireccionales desmontables Tabla 1. Descripciones del panel frontal del DSR-500N/1000N Descripción general del producto Indicadores LED de estado del dispositivo e indicadores LED de puerto Ethernet Panel frontal - DSR-500N/1000N ESPAÑOL Conexión Velocidad Transmisión/ Recepción Estado Figura 2. Indicadores LED de puerto Ethernet RJ-45 A B C D E F Figura 1. Panel frontal del DSR-500N/1000N Nota: el DSR-500N sólo admite un puerto USB. 20 D-Link Wireless N Services Router Los indicadores LED del dispositivo muestran información acerca del estado actual del dispositivo. Al activarse el dispositivo, el LED de ALIMENTACIÓN/ESTADO se mostrará en naranja continuo durante el proceso de encendido. El inicio tarda aproximadamente un minuto en completarse y el LED cambiará a verde continuo. Si desea desactivar y activar de nuevo el dispositivo, se recomienda esperar unos segundos entre apagarlo y volver a encenderlo. Los indicadores LED de Ethernet muestran el estado de cada puerto Ethernet. La Tabla 2 enumera el nombre, el color, el estado y la descripción de cada LED del dispositivo. LED LED Color Estado Descripción Alimentación / Estado Verde/ Naranja Naranja continuo Dispositivo durante el proceso de encendido Verde continuo Encendido finalizado Naranja parpadeante El dispositivo se ha bloqueado y está en modo de recuperación Verde parpadeante Error en el sistema como, por ejemplo, al fallar las actualizaciones de firmware. Luz apagada El dispositivo está apagado Verde fijo La conexión es buena Verde parpadeante Existe actividad en este puerto Luz apagada No existe conexión Verde continuo La conexión es buena Verde parpadeante Existe actividad en este puerto Luz apagada No existe conexión Azul parpadeante Se ha iniciado el proceso Azul continuo Se ha establecido correctamente la conexión Luz apagada No existe conexión. Luz apagada No existe conexión. Verde continuo Existe conexión. Verde parpadeante El puerto está enviando o recibiendo datos. Luz apagada El puerto funciona a 10Mbps. Verde continuo El puerto funciona a 100 Mbps Naranja continuo El puerto funciona a 1.000 Mbps 2,4 GHz/ 5 GHz WLAN USB WPS Estado de transmisión/ recepción Velocidad de la CONEXIÓN Verde Verde Azul Verde Verde/ Naranja Tabla 2. Descripciones del LED de estado del dispositivo DSR-500N/1000N Parámetros de interfaz predeterminados Interfaz Ethernet Dirección IP Gestión basada en web LAN (1-4) / WLAN IP estática 192.168.10.1/24 Activado WAN1 Cliente DHCP 0.0.0.0/0 Desactivado WAN2 (puerto configurable) Cliente DHCP (predeterminado) 0.0.0.0/0 Desactivado IP estática (cuando está configurada como DMZ) 172.17.100.254/24 Desactivado Este capítulo describe cómo instalar un dispositivo DSR-500N/1000N en un estante de equipos estándar de 19 pulgadas y cómo conectar los cables y la alimentación al dispositivo. Antes de empezar Respete las precauciones siguientes para ayudar a evitar paradas, errores del equipo y lesiones: -- Antes de la instalación, compruebe siempre daños la fuente de alimentación está desconectada. -- Asegúrese de que la sala en la que utiliza el dispositivo tiene la circulación de aire adecuada y que la temperatura de la sala no supera los 40o (104oF) -- Deje libre 1 metro (3 pies) de espacio en la parte frontal y en la parte trasera del dispositivo. -- No coloque el dispositivo en una estructura de estante de equipos que bloquee la ventilación de aire en los laterales del chasis. Asegúrese de que los estantes adjuntos tienen ventiladores y laterales con celosía. -- Antes de realizar cualquier instalación, corrija las situaciones peligrosas siguientes: suelos húmedos o con agua, fugas, cables de alimentación sin toma de tierra o desgastados o falta de tomas de tierra de seguridad. Instalación del equipo Puede montar el dispositivo DSR-500N/1000N en un estante de equipos estándar de 19 pulgadas. Para instalar un aparato en un estante: 1. Acople los soportes de montaje a cada lado del chasis, como se muestra en la figura 3 y fíjelos con los tornillos suministrados. Tabla 3. Parámetros de interfaz predeterminada Nota: el router para servicios de red inalámbrica D-Link sólo permite el acceso de la interfaz gráfica de usuario a la web desde las interfaces LAN y WLAN de forma predeterminada por motivos de seguridad. El WAN2 es un puerto configurable que admite aplicaciones para situaciones variadas y avanzadas. Cuando el puerto WAN2 se configura como un puerto DMZ, la dirección IP se cambiará a 172.17.100.254. Figura 3. Acoplamiento de los soportes de montaje en estante D-Link Wireless N Services Router 21 ESPAÑOL Tipo de interfaz Instalación y conexión 2. A continuación, utilice los tornillos suministrados con el estante de equipos para montar el dispositivo en el estante. Conexión del dispositivo a una red Esta sección proporciona información básica acerca de la conexión física entre el DSR-500N/ 1000N y una red. Para conectar los cables necesarios como se muestra en la figura 5. 1. Conecte un cable RJ-45 desde el puerto con la etiqueta WAN1 al router externo. El puerto WAN1 está preasignado al segmento de red WAN1. 2. Conecte un cable RJ-45 desde el puerto con la etiqueta LAN (1-4) a un conmutador en el segmento de red LAN. 3. Conecte un cable de RJ45 a DB9 desde el puerto de la consola para el acceso de gestión a CLI (Interfaz de línea de comandos). Internet Figura 4. Instalación del router para servicios de red inalámbrica en un estante de equipos de tamaño estándar WAN1 Conexión de la alimentación y encender o apagar ESPAÑOL El cable de alimentación CA enviado con el dispositivo conecta el dispositivo a la toma de tierra cuando se enchufa en una toma de alimentación de tipo de toma de tierra CA. El dispositivo se debe conectar a la toma de tierra durante el funcionamiento normal. Para conectar la alimentación al dispositivo, enchufe un extremo del núcleo de alimentación CA en la entrada de alimentación de CA del aparato en el panel posterior del dispositivo. Enchufe el otro extremo en una fuente de alimentación CA. Nota: se recomienda el uso de un protector de sobretensión para la conexión de alimentación. Para encender el dispositivo DSR-500N/1000N, pulse el interruptor de alimentación CA en el panel posterior hasta la posición de encendido. Para apagar el dispositivo, pulse el interruptor de alimentación hasta la posición de apagado. 22 D-Link Wireless N Services Router LAN Switch Console User Figura 5. Ejemplo de cableado básico Configuración inicial El software del router para servicios de red inalámbrica está preinstalado en el dispositivo DSR-500N/1000N. Cuando se enciende el dispositivo, está preparado para configurarse. Aunque el dispositivo tiene una configuración predeterminada de fábrica que permite conectar inicialmente al dispositivo, debe realizar la configuración adicional para satisfacer sus requisitos de red específicos. Utilización de WebUI Para utilizar la WebUI, la estación de trabajo desde la que gestiona el dispositivo debe estar inicialmente en la misma subred que el dispositivo. Explorador Microsoft Internet Explorer Mozilla Firefox Versión 6,0 o superior 3,5 o superior Navegador Netscape 9.0 o superior Apple Safari 4,0 y superior Google Chrome 3.0 y superior Tabla 4. Compatibilidad del explorador Para acceder al dispositivo con la WebUI: 1. Conecte la estación de trabajo en el puerto con la etiqueta LAN (1-4), que está preasignado a la LAN. 2. Asegúrese de que la estación de trabajo está configurada con una dirección IP estática en la subred 192.168.10.0/24. Nota: desactive el software de bloqueo de elementos emergentes o añada la dirección IP de gestión http://192.168.10.1 a la lista de bloqueadores de elementos emergentes permitidos. 3. Inicie el explorador; introduzca la dirección IP para la interfaz de LAN. (La dirección IP predeterminada de fábrica es http://192.168.10.1) y, a continuación, pulse Intro. Utilización de una conexión de consola (DCE de RJ45 a DB9) El router para servicios de red inalámbrica proporciona un puerto serie que admite la conexión a un ordenador o terminal para la monitorización y configuración del dispositivo. Este puerto es un conector RJ-45, que se utiliza como una conexión de equipo terminal de comunicación de datos (DCE). Para utilizar la conexión del puerto de la consola, necesita el equipo siguiente: 1. Un terminal o un ordenador con un puerto serie y capacidad para emular un terminal. 2. Un RS-232 de RJ45 a DB9 con conector hembra. (Incluido en la lista de envasado) 3. Si su ordenador portátil o de sobremesa no tiene un conector RS-232, será necesario un convertidor. Nota: el DSR-500N/1000N no se suministra con convertidor de RS-232 y deberá adquirirlo por separado. Para establecer una conexión de consola: 1. Enchufe el conector RJ-45 del cable de RJ45 a DB9 suministrado al puerto de consola en el router para servicios de red inalámbrica. 2. Conecte el otro extremo del cable a un terminal o al conector serie de un ordenador que ejecute el software de emulación de terminal. Configure el software de emulación de terminal del modo siguiente: 4. Inicie sesión en la interfaz de web del router para servicios de red inalámbrica. La información de inicio de sesión predeterminada es: Nombre de usuario: admin Contraseña: admin Figura 7. Mensaje de autentificación Frecuencia de baudios: 115200 Bits de datos: 8 Paridad: Ninguna Bits de parada: 1 Control de flujo: Ninguna 3. Una vez configurado correctamente el terminal, después de seguir las instrucciones de la sección 2.3, “Conectar la alimentación y activar o desactivar el dispositivo”, encienda el dispositivo. En el terminal aparece la secuencia de arranque. 4. Una vez completada la secuencia de arranque, se muestra el símbolo del sistema y el dispositivo está preparado para configurarse. D-Link Wireless N Services Router 23 ESPAÑOL Figura 6. Dirección del explorador Finalización de la configuración Después de la configuración inicial, debe consultar la documentación adjunta en formato PDF que encontrará en el CD maestro incluido, para obtener más información sobre cómo empezar a configurar el dispositivo DSR-500N/1000N. Manual del usuario del router para servicios de red inalámbrica D-Link Este documento describe el funcionamiento y control general del firmware del router para servicios de red inalámbrica que activa y controla el hardware de serie del router para servicios de red inalámbrica. Incluye ejemplos sobre cómo llevar a cabo las tareas administrativas normales como, por ejemplo, configurar una VPN y cómo utilizar la serie del router para servicios de red inalámbrica en diversas situaciones. Guía de referencia CLI del router para servicios de red inalámbrica D-Link Este documento describe todos los comandos de texto disponibles que se pueden utilizar en la consola de RJ45 a DB9 o la interfaz SSH para configurar el router para servicios de red inalámbrica durante el funcionamiento del sistema. ESPAÑOL Información adicional Existe ayuda adicional disponible a través de las oficinas de D-Link en todo el mundo, que aparecen enumeradas en el apéndice del Manual del usuario o en línea. Para obtener más información acerca de los productos de seguridad D-Link o su comercialización, visite el sitio web http:// mydsr.dlink.com.tw; para cualquier tema sobre asistencia, visite el sitio web http://support.dlink. com.tw, que le redirigirá al sitio web local de D-Link correspondiente. Asistencia técnica http://www.dlink.es Asistencia Técnica Telefónica de D-Link: +34 902 30 45 45 0,067 €/min De Lunes a Viernes de 9:00 a 19:00 Tarifas telefónicas: €0,05 ppm tarifa mínima, €0,045 ppm tarifa reducida 24 D-Link Wireless N Services Router Building Networks for People Quick Installation Guide Unified Services Router In questo documento é descritta la procedura rapida per l'installazione del dispositivo D-Link Wireless N Services Router. DSR-500N / DSR-1000N Documentazione disponibile anche su CD e tramite il sito Web D-Link Informazioni sulla guida Elemento Funzione Descrizione A LED (dall'alto verso il basso) LED Power: indica che il router Wireless N Services è acceso. LED WLAN 5 GHz (disponibile solo sul modello DSR-1000N): una spia fissa indica che il segmento wireless è pronto. Questo LED lampeggia durante la trasmissione di dati wireless. LED WLAN 2,4GHz: una spia fissa indica che il segmento wireless è pronto. Questo LED lampeggia durante la trasmissione di dati wireless. B Porte USB (2) Può supportare diversi dispositivi USB 1.1 o 2.0 tra quelli elencati di seguito: 1. Disco flash o disco rigido per la condivisione di rete. 2. Adattatore 3G per la ridondanza della WAN (disponibile solo sul modello DSR-1000N) 3. Configurazione WCN (verrà supportato da futuri aggiornamenti del firmware) 4. Stampante (verrà supportato da futuri aggiornamenti del firmware) C Pulsante WPS Il sistema WPS (Wi-Fi Protected Setup) è un metodo semplificato per proteggere la rete wireless durante i processi di configurazione iniziale e di aggiunta di nuovi dispositivi. Consultare il manuale dell'utente per ulteriori informazioni. D Porta LAN Gigabit (1-4) Consente di collegare dispositivi Ethernet, ad esempio computer, switch e hub. E Porta WAN Gigabit (1-2) Due porte WAN MDI/MDIX auto vengono utilizzate per il collegamento del cavo Ethernet al modem cavo o DSL. La porta WAN2 è una porta configurabile che può supportare una porta WAN2 o DMZ per le connessioni WAN doppie o per una server farm interna. F Porta per console Utilizzata per accedere all'interfaccia della riga di comando (CLI) tramite il cavo RJ45-DB9. La presente guida contiene le istruzioni passo passo necessarie per l'installazione de dispositivo D-Link DSR-500N/1000N Wireless N Services Router. Si noti che il modello acquistato potrebbe essere leggermente diverso da quello raffigurato nelle illustrazioni. Disimballo del prodotto Aprire la confezione e disimballarne il contenuto prestando particolare attenzione. Verificare il contenuto sulla base della lista riportata di seguito per accertarsi che tutti gli articoli siano presenti e integri. Qualora un articolo risultasse mancante o danneggiato, chiederne la sostituzione al rivenditore D-Link di zona. -- Un dispositivo (1) DSR-500N/1000N Wireless N Services Router. -- Un (1) cavo di alimentazione -- Un (1) cavo per connessione tramite console (cavo RJ45-DB9) -- Un (1) cavo Ethernet (UTP/diritto CAT5) -- Un (1) CD-ROM contenente la documentazione del prodotto in formato PDF -- Due (2) staffe per il montaggio in rack -- Tre (3) antenne omnidirezionale staccabili Panoramica sul prodotto Pannello frontale - DSR-500N/1000N Tabella 1. Descrizioni per il pannello frontale di DSR-500N/1000N LED di stato del dispositivo e LED delle porte Ethernet Link Speed TX/RX Status Figure 2. LED della porta Ethernet RJ-45 A B C D E F ITALIANO Figura 1. Pannello frontale di DSR-500N/1000N Nota: il modello DSR-500N supporta una sola porta USB. 26 D-Link Wireless N Services Router I LED di stato del dispositivo forniscono informazioni sullo stato corrente del dispositivo. Durante il processo di accensione del dispositivo, il LED POWER/STATUS sarà di colore arancione fisso. Al termine del processo di avvio, che richiede circa un minuto, il LED diventerà di colore verde fisso. Se si desidera spegnere e riaccendere il dispositivo, si consiglia di attendere alcuni secondi tra un'operazione e l'altra. I LED Ethernet indicano lo stato di ciascuna porta Ethernet. Nella tabella 2 sono elencati il nome, il colore, lo stato e la descrizione di tutti i LED del dispositivo. LED Indicatori Colore Status Descrizione Power / Status Arancione/ Verde Arancione fisso Dispositivo durante il processo di accensione Verde fisso Completamento del processo di accensione Arancione lampeggiante Arresto anomalo del dispositivo. Modalità di ripristino attivata Verde lampeggiante Sistema malfunzionante. Aggiornamenti del firmware non riusciti. Spia spenta Dispositivo spento Verde fisso Collegamento valido Verde lampeggiante Attività sulla porta Spia spenta Collegamento assente Verde fisso Collegamento valido Verde lampeggiante Attività sulla porta Spia spenta Collegamento assente Blu lampeggiante Avvio elaborazione in corso Blu fisso Connessione correttamente stabilita Spia spenta Collegamento assente Spia spenta Collegamento assente Verde fisso Collegamento presente Verde lampeggiante La porta invia o riceve dati. Spia spenta La porta funziona a 10 Mbps. Verde fisso La porta funziona a 100 Mbps. Arancione fisso La porta funziona a 1000 Mbps. 2.4GHz/ 5GHz WLAN Verde USB Verde WPS Blu Stato TX/ RX Velocità collegamento Verde Verde/ Arancione Tabella 2. Descrizione dei LED di stato del dispositivo Impostazioni predefinite dell'interfaccia di DSR-500N/1000N Interfaccia Ethernet Tipo di interfaccia Indirizzo IP Gestione basata sul Web LAN (1-4) / WLAN IP statico 192.168.10.1/24 Abilitato WAN1 Client DHCP 0.0.0.0/0 Disabilitato WAN2 (porta configurabile) Client DHCP (default) 0.0.0.0/0 Disabilitato IP statico (se configurato come DMZ) 172.17.100.254/24 Disabilitato Installazione e connessione Il presente capitolo descrive come installare un dispositivo DSR-500N/1000N in un rack standard da 19 pollici e come collegare i cavi e l'alimentazione al dispositivo. Prima di iniziare Per prevenire arresti, malfunzionamenti del dispositivo e lesioni, osservare le seguenti precauzioni: -- Prima dell'installazione, verificare sempre che il cavo di alimentazione sia scollegato. -- Verificare che l'ambiente di installazione del dispositivo abbia una sufficiente ventilazione e che la temperatura non superi i 40oC (104oF) -- Lasciare uno spazio libero di 1 metro (3 piedi) anteriormente e posteriormente al dispositivo. -- Non collocare il dispositivo in un rack che blocchi le prese d'aria poste sui lati del telaio. Verificare che i rack chiusi siano dotati di ventole e lati con prese d'aria. -- Prima dell'installazione eliminare le seguenti condizioni di pericolo: pavimenti bagnati o umidi, perdite, cavi di alimentazione non collegati a terra o logorati oppure mancanza di connessioni a terra di sicurezza. Installazione del dispositivo È possibile montare il dispositivo DSR-500N/1000N in un rack standard da 19 pollici. Per installare un dispositivo in un rack: 1. Collegare le staffe di montaggio su ciascun lato del telaio, come illustrato nella figura 3 e fissarle utilizzando le viti in dotazione. Tabella 3. Impostazioni di default dell'interfaccia Figura 3. Collegamento delle staffe di montaggio del rack D-Link Wireless N Services Router 27 ITALIANO Nota: per motivi di sicurezza il dispositivo D-Link Wireless N Services Router consente l'accesso all'interfaccia di amministrazione (via Web browser) soltanto attraverso le interfacce LAN e WLAN. WAN2 è una porta configurabile che può essere utilizzata in diversi scenari avanzati. Quando viene configurata come porta DMZ, il relativo indirizzo IP verrà modificato in 172.17.100.254. 2. Utilizzare le viti in dotazione con il rack, per montare il dispositivo nel rack. Collegamento del dispositivo in rete In questa sezione vengono fornite informazioni di base sul collegamento fisico del dispositivo DSR-500N / 1000N a una rete. Per collegare i cavi necessari come illustrato nella Figura 5: 1. Collegare con un cavo RJ-45 la porta contrassegnata con WAN1 al router esterno. La porta WAN1 è preallocata al segmento di rete WAN1. 2. Collegare con un cavo RJ-45 la porta LAN (1-4) a uno switch nel segmento di rete LAN. 3. Collegare con un cavo RJ45-DB9 la porta della console per l'accesso di gestione CLI (Command Line Interface). Internet Figura 4. Installazione del dispositivo Wireless N Services Router in un rack di dimensioni standard WAN1 Connessione dell'alimentazione e accensione/spegnimento Il cavo di alimentazione CA fornito in dotazione, collega il dispositivo con la messa a terra se inserito in una presa CA collegata a terra. Il dispositivo deve essere collegato a terra durante il normale funzionamento. Per collegare l'alimentazione al dispositivo, collegare un'estremità del cavo di alimentazione CA alla presa di alimentazione CA presente nella parte posteriore del dispositivo. Collegare l'altra estremità alla sorgente di alimentazione CA. Nota: si consiglia l'uso di un dispositivo di protezione da sovratensioni per il collegamento all'alimentazione. Per accendere il dispositivo DSR-500N/1000N, portare l'interruttore di alimentazione CA posto sul pannello posteriore in posizione On. Per spegnere il dispositivo, collocare l'interruttore di alimentazione in posizione Off. LAN Switch Console User Figura 5. Esempio di cablaggio di base Configurazione iniziale Il software Wireless N Services Router è preinstallato nel dispositivo DSR-500N/1000N. All'accensione il dispositivo è pronto per essere configurato. Il dispositivo prevede una configurazione predefinita che ne consente il primo utilizzo, tuttavia è necessario specificare ulteriori impostazioni di configurazione a seconda dei requisiti specifici della rete. ITALIANO Utilizzo dell'interfaccia utente Web 28 D-Link Wireless N Services Router Per utilizzare l'interfaccia utente Web, la workstation da cui si gestisce il dispositivo deve appartenere inizialmente alla stessa subnet del dispositivo. Browser Microsoft Internet Explorer Versione 6,0 o successiva Mozilla Firefox 3,5 o successiva Netscape Navigator 9.0 o successiva Apple Safari 4,0 e successiva Google Chrome 3.0 e successiva Tabella 4. Compatibilità dei browser Per accedere al dispositivo tramite l'interfaccia utente Web: 1. Collegare la workstation alla porta LAN (1-4), preallocata per la LAN. 2. Verificare che la workstation sia configurata con un indirizzo IP statico nella subnet 192.168.10.0/24. Nota: disabilitare il software per il blocco dei popup oppure aggiungere l'indirizzo IP di gestione http://192.168.10.1 all'elenco degli indirizzi consentiti dal software per il blocco dei popup. 3. Avviare il browser, quindi immettere l'indirizzo IP per l'interfaccia LAN. L'indirizzo IP di default è http://192.168.10.1. Premere Invio. Figura 6. Indirizzo del browser 4. Accedere all'interfaccia Web di Wireless N Services Router. Le informazioni di default per l'accesso sono le seguenti: Username: admin Password: admin Il dispositivo Wireless N Services Router include una porta seriale per il collegamento a un computer o a un terminale utilizzabile per il monitoraggio e la configurazione del dispositivo. Tale porta utilizza un connettore RJ-45, implementato come connessione DCE (Data Communication Terminal Equipment). Per utilizzare la connessione tramite la porta della console, è necessario disporre di quanto segue: 1. Terminale o computer dotato di porta seriale e della funzione per l'emulazione di terminale. 2. Connettore RS-232 RJ45-DB9 con connettore femmina. (già incluso nella bolla di accompagnamento) 3. Se il laptop o il PC non dispongono di un connettore RS-232, è necessario utilizzare un convertitore. Nota: il convertitore RS-232 non viene fornito con il dispositivo DSR-500N/1000N pertanto non deve essere acquistato separatamente. Per stabilire una connessione tramite console: 1. Collegare il connettore RJ-45 del cavo RJ45-DB9 fornito direttamente alla porta della console del dispositivo Wireless N Services Router. 2. Collegare l'altra estremità del cavo a un terminale o al connettore seriale di un computer che esegue il software di emulazione del terminale. Configurare il software di emulazione terminale nel modo seguente: Velocità in baud: 115200 Bit di dati: 8 Parità: Nessuno Bit di stop: 1 Controllo del flusso: Nessuno 3. Configurare correttamente il terminale, attenendosi alle istruzioni riportate nella sezione 2.3 “Collegamento del cavo di alimentazione e accensione del dispositivo”, quindi accendere il dispositivo. Sul terminale compare la sequenza di avvio. 4. Al termine della sequenza di avvio, viene visualizzato il prompt dei comandi per indicare che il dispositivo è pronto per essere configurato. D-Link Wireless N Services Router 29 ITALIANO Figura 7. Messaggio di autenticazione Utilizzo di una connessione tramite console (DCE RJ45-DB9) Completamento della configurazione Dopo l'impostazione iniziale, fare riferimento ai manuali in formato PDF disponibili nel CD fornito in dotazione per istruzioni dettagliate su come avviare la configurazione del dispositivo DSR-500N/1000N. Manuale dell'utente di D-Link Wireless N Services Router In questo documento sono descritte le procedure di utilizzo generale e i comandi del firmware Wireless N Services Router che consente di gestire e controllare l'hardware della serie Wireless N Services Router. Sono inoltre inclusi esempi relativi all'esecuzione di attività amministrative standard, ad esempio la configurazione di una VPN e all'utilizzo della serie Wireless N Services Router in diversi scenari. Guida di riferimento per il CLI di D-Link Wireless N Services Router In questo documento sono descritti tutti i comandi di testo disponibili che possono essere utilizzati con la console RJ45-DB9 o con l'interfaccia SSH per configurare Wireless N Services Router durante il funzionamento del sistema. Ulteriori informazioni Per ulteriore supporto è possibile rivolgersi agli uffici D-Link il cui elenco è riportato nell'appendice del manuale dell'utente o è disponibile in linea. Per maggiori informazioni sui prodotti D-Link per la sicurezza o per informazioni commerciali, visitare il sito Web http://mydsr.dlink.com.tw; per eventuali problemi di assistenza visitare il sito Web http://support.dlink.com.tw, che indirizzerà l'utente al sito Web D-Link locale appropriato. Supporto tecnico ITALIANO http://www.dlink.it/support Supporto Tecnico dal lunedì al venerdì dalle ore 9.00 alle ore 19.00 con orario continuato Telefono: 199400057 30 D-Link Wireless N Services Router Building Networks for People Quick Installation Guide Unified Services Router This document will guide you through the basic installation process for your new D-Link Wireless N Services Router. DSR-500N / DSR-1000N Quick Installation Guide Руководство по быстрой установке Guía de Instalación Rápida Guia de Instalação Rápida 快速安裝指南 Petunjuk Pemasangan Cepat クイックインストールガイド Documentation also available on CD and via the D-Link Website ENGLISH About This Guide This guide gives step by step instructions for setting up D-Link DSR-500N/1000N Wireless N Services Router. Please note that the model you have purchased may appear slightly different from those shown in the illustrations. Unpacking the Product Open the shipping carton and carefully unpack its contents. Please consult the packing list located in following information to make sure all items are present and undamaged. If any item is missing or damaged, please contact your local D-Link reseller for replacement. -- One (1) DSR-500N/1000N Wireless N Services Router Appliance. -- One (1) Power Cord Item Feature Description A LED (Top to bottom) Power LED: Indicates the Wireless N Services Router is powered on. 5GHz WLAN LED (only available on DSR-1000N): A solid light indicates that the wireless segment is ready. This LED blinks during wireless data transmission. 2.4GHz WLAN LED: A solid light indicates that the wireless segment is ready. This LED blinks during wireless data transmission. B USB Ports (2) It can support various USB 1.1 or 2.0 devices below: 1. Flash Disk or Hard Disk for network sharing. 2. 3G Adaptor for WAN redundant (Available on DSR-1000N only) 3. WCN Configuration (It will be supported by future firmware upgrade) 4. Printer (It will be supported by future firmware upgrade) C WPS Button Wi-Fi Protected Setup (WPS) System is a simplified method for securing your wireless network during the “Initial setup” as well as the “Add New Device” processes. Please refer to the user manual for more detail process. D Gigabit LAN port (1-4) Connect Ethernet devices, such as computers, switches and hubs. E Gigabit WAN port Two auto MDI/MDIX WAN ports (1-2) are the connection for the Ethernet cable to the cable or DSL modem. The WAN2 port is a configurable port which can support WAN2 or DMZ port for dual WAN connections or internal Server Farm purpose. F Console Port -- One (1) Console Cable (RJ45-to-DB9 Cable) -- One (1) Ethernet (CAT5 UTP/Straight Through) Cable -- One (1) Reference CD (CD-ROM containing product documentation in PDF format) -- Two (2) Rack Mounting Brackets -- Three (3) Detachable Omni-direction antennas Product Overview Front Panel - DSR-500N/1000N Used to access Command Line Interface (CLI) via RJ45-to-DB9 console Cable. Table 1. DSR-500N/1000N Front Panel Descriptions Device Status LEDs and Ethernet Port LEDs Link Speed TX/RX Status Figure 2. Ethernet RJ-45 Port LEDs A B C D E F Figure 1. DSR-500N/1000N Front Panel Note: DSR-500N supports one USB port only. 32 D-Link Wireless N Services Router The device LEDs show information about current device status. When the device power up, the POWER/STATUS LED will show solid orange during power on process. Startup takes one minute approximately to complete, the LED will change to solid green. If you want to turn the device off and on again, we recommend you wait a few seconds between shutting it down and powering it back. The Ethernet LEDs show the status of each Ethernet port. Table 2 lists the name, color, status and description of each device LED. Power / Status Status Orange/ Solid Green Orange Description Device during power-on process Solid Green Completion of power on 2.4GHz/ 5GHz WLAN Green USB Green Blinking Orange Device is crashed and under recovery mode Blinking Green The system is defective, such firmware upgrades fail. Light Off The device is power-off Steady Green The link is good Blinking Green There is activity on this port Light Off No link Solid Green The link is good Blinking Green WPS Blue TX/RX Status Green There is activity on this port Light Off No link Blinking Blue Start to process Solid Blue The connection is successfully established Light Off No Link. Light Off No Link. Solid Green Link present. LINK Speed Green/ Orange Blinking Green Port is sending or receiving data. Light Off Port is operating at 10Mbps. This chapter describes how to install a DSR-500N/1000N device in a standard 19-inch equipment rack and how to connect cables and power to the device. Before You Begin Observe the following precautions to help prevent shutdowns, equipment failures and injuries: -- Before installation, always check that the power supply is disconnected. -- Ensure that the room in which you operate the device has adequate air circulation and that the room temperature does Not exceed 40oC (104oC) -- Allow 1 meter (3 feet) of clear space to the front and back of the device. -- Do not place the device in an equipment rack frame that blocks the air vents on the sides of the chassis. Ensure that enclosed racks have fans and louvered sides -- Correct these hazardous conditions before any installation: moist or wet floors, leaks, ungrounded or frayed power cables, or missing safety grounds. Solid Green Port is operating at 100Mbps Installing Equipment Solid Orange You can mount the DSR-500N/1000N device into a standard 19-inch equipment rack. To install an appliance into a rack: Port is operating at 1000Mbps Table 2. Device Status LED Descriptions DSR-500N/1000N Default Interface Settings Ethernet Interface Installing and Connection Interface Type IP Address Web-Based Management LAN(1-4) / WLAN Static IP 192.168.10.1/24 Enabled WAN1 DHCP Client 0.0.0.0/0 Disabled WAN2 (Configurable port) DHCP Client (default) 0.0.0.0/0 Disabled Static IP (When it’s configured as DMZ) 172.17.100.254/24 Disabled 1. Attach the mounting brackets to each side of the chassis as shown in figure 3 and secure them with the screws provided. Table 3. Default Interface Settings Note: D-Link Wireless N Services Router only allow Web GUI access from LAN and WLAN interfaces by default for security reason. The WAN2 is a configurable port which support various and advanced scenario applications. When WAN2 port is configured as DMZ port, the IP address will be changed to 172.17.100.254. Figure 3. Attaching Rack Mount Brackets D-Link Wireless N Services Router 33 ENGLISH LED Color Indicators ENGLISH 2. Then, use the screws provided with the equipment rack to mount the device in the rack. Connecting the Device to a Network This section provides basic information about physically connecting the DSR-500N / 1000N to a network. To connect the necessary cables as shown in Figure 5. 1. Connect an RJ-45 cable from the port labeled WAN1 to the external router. The port WAN1 is pre-allocated to the WAN1 network segment. 2. Connect an RJ-45 cable from the port labeled LAN (1-4) to a switch in the LAN network segment. 3. Connect an RJ45-to-DB9 cable from the console port for CLI (Command Line Interface) management access. Internet Figure 4. Installing the Wireless N Services Router in a standard-sized equipment rack WAN1 Connecting Power and Turning On/Off The AC Power cord shipped with the device connects the device to earth ground when plugged an AC grounding-type power outlet. The device must be connected to earth ground during normal operation. To connect power to the device, plug one end of the AC power core into the AC power appliance inlet on the back panel of the device. Plug the other end into an AC power source. Note: We recommend using a surge protector for the power connection. To power on the DSR-500N/1000N device, press the AC power switch on the rear panel to the on position. To power off the device, press the power switch to the off position. LAN Switch Console User Figure 5. Basic Cabling Example Initial Configuration The Wireless N Services Router software is preinstalled on the DSR-500N/1000N device. When the device is powered on, it is ready to be configured. While the device has a default factory configuration that allow you to initially connect to the device, you must perform further configuration for your specific network requirements. Using the WebUI To use the WebUI, the workstation from which you are managing the device must initially be on the same subnetwork as the device. 34 D-Link Wireless N Services Router Microsoft Internet Explorer Version 6.0 or higher Using a Console Connection (RJ45-to-DB9 DCE) The Wireless N Services Router provides an serial port that enables a connection to a computer or terminal for monitoring and configuring the device. This port is a RJ-45 connector, implemented as a data communication terminal equipment (DCE) connection. Mozilla Firefox 3.5 or higher Netscape Navigator 9.0 or higher Apple Safari 4.0 and later To use the console port connection, you need the following equipment: Google Chrome 3.0 and later 1. A terminal or a computer with both a serial port and the ability to emulate a terminal. Table 4. Browser Compatibility To access the device with the WebUI: 1. Connect your workstation on the port labeled LAN (1-4), which is pre-allocated to the LAN. 2. Ensure your workstation is configured with a static IP address in the 192.168.10.0/24 subnet. Note: Disable pop-up blocking software or add the management IP address http://192.168.10.1 to your pop-up blocker’s allow list. 3. Launch your browser; enter the IP address for the LAN interface. (The factory default IP address is http://192.168.10.1), then press Enter. Figure 6. Browser Address 4. Log on the Wireless N Services Router Web Interface The default log on information is: Username: admin Password: admin 2. A RJ45-to-DB9 RS-232 with female connector. (Already included in packing list) 3. If your Laptop or PC doesn’t have RS-232 connector, a converter is required. Note: DSR-500N/1000N does not come with RS-232 converter and these must be purchased separately. To establish a console connection: 1. Plug the RJ-45 connector of the supplied RJ45-to-DB9 cable directly to the console port on the Wireless N Services Router. 2. Connect the other end of the cable to a terminal or to the serial connector of a computer running terminal emulation software. Set the terminal emulation software as following: Baud rate: 115200 Data bits: 8 Parity: None Stop bits: 1 Flow control: None 3. When you have correctly set up the terminal, having previously followed the instructions in section 2.3, “Connecting Power and Turn the Device On/Off” then switch on your device. The boot sequence appears in the terminal. 4. Once the boot sequence completes, the command prompt is displayed, the device is ready to be configured. Figure 7. Authentication Message D-Link Wireless N Services Router 35 ENGLISH Browser ENGLISH Finalizing the Configuration After initial setup, you should refer to the companion publications found in PDF format on the accompanying master CD for more information on how to begin to configure the DSR-500N/1000N device. D-Link Wireless N Services Router User Manual This document describes the general operation and control of the Wireless N Services Router firmware which drives and controls the Wireless N Services Router series hardware. It includes examples of how to carry out typical administrative tasks such as setting up a VPN and how to use Wireless N Services Router series in various scenarios. D-Link Wireless N Services Router CLI Reference Guide This document describes all available text-based commands that can be used on RJ45-to-DB9 Console or SSH interface to configure Wireless N Services Router during system operation. Additional Information Additional help is available through D-Link worldwide offices listed at the appendix of the User Manual or online. To know more about D-Link security product products or marketing information, please visit the website http://mydsr.dlink.com. tw; for any support issue, please visit the website http://support.dlink.com.tw, which will redirect you to appropriate local D-Link website. Technical Support You can find software updates and user documentation on the D-Link website. Tech Support for customers in Australia: Tel: 1300-766-868 24/7 Technical Support Web: http://www.dlink.com.au E-mail: [email protected] India: Tel: 1800-233-0000 (MTNL & BSNL Toll Free) +91-832-2885700 (GSM, CDMA & Others) Web: www.dlink.co.in E-Mail: [email protected] Indonesia, Malaysia, Singapore and Thailand: Tel: +62-21-5731610 (Indonesia) Tel: 1800-882-880 (Malaysia) Tel: +65 6501 4200 (Singapore) Tel: +66-2-719-8978/9 (Thailand) 24/7, for English Support only Web: http://www.dlink.com.sg/support/ 36 D-Link Wireless N Services Router E-mail: [email protected] Korea: Tel: +82-2-2028-1815 Monday to Friday 9:00am to 6:00pm Web: http://www.d-link.co.kr E-mail: [email protected] New Zealand: Tel: 0800-900-900 24/7 Technical Support Web: http://www.dlink.co.nz E-mail: [email protected] Egypt: Tel: +202-2919035 +202-2919047 Sunday to Thursday 9:00am to 5:00pm Web: http://support.dlink-me.com E-mail: [email protected] Iran: Tel: +98-21-88880918,19 Saturday to Thursday 9:00am to 5:00pm Web: http://support.dlink-me.com E-mail: [email protected] [email protected] Israel: Magshimim 20, Petach Tikva 49348 Main Tel: 972-3-9215173 Customer Support Tel: 972-3-9212886 Web: www.dlink.co.il Pakistan: Tel: +92-21-4548158 +92-21-4548310 Monday to Friday 10:00am to 6:00pm Web: http://support.dlink-me.com E-mail: [email protected] South Africa and Sub Sahara Region: Tel: +27-12-665-2165 08600 DLINK (for South Africa only) Monday to Friday 8:30am to 9:00pm South Africa Time Web: http://www.d-link.co.za E-mail: [email protected] Turkey: Tel: +90-212-2895659 Monday to Friday 9:00am to 6:00pm Web: http://www.dlink.com.tr E-mail: [email protected] U.A.E and North Africa: Tel: +971-4-4278127 (U.A.E) Sunday to Thursday 9.00AM to 6.00PM GMT+4 Web: http://www.dlink-me.com E-mail: [email protected] Saudi ARABIA (KSA): Tel: +971-4-4278127 (U.A.E) Sunday to Thursday 9.00AM to 6.00PM GMT+4 Web: http://www.dlink-me.com E-mail: [email protected] Building Networks for People Руководство по быстрой установке Руководство содержит пошаговые инструкции по установке беспроводного маршрутизатора DSR-500N / DSR-1000N Документ также доступен на CD-диске и на Web-сайте D-Link PYCCКИЙ О руководстве Обозначение Функция Описание A Индикатор (Сверху вниз) Индикатор Power: Свидетельствует о включенном питании маршрутизатора 802.11n. Индикатор WLAN 5GHz (только для DSR-1000N): Постоянный свет индикатора свидетельствует о готовности беспроводного сегмента сети. Этот индикатор мигает во время передачи данных по беспроводной сети. Индикатор WLAN 2.4GHz: Постоянный свет индикатора свидетельствует о готовности беспроводного сегмента сети. Этот индикатор мигает во время передачи данных по беспроводной сети. B USB-порты (2) Поддержка различных USB-устройств 1.1 или 2.0, указанных в списке ниже: 1. Flash-диск или жесткий диск для совместного использования сетевых ресурсов. 2. Адаптер 3G для организации резервного канала WAN (доступно только для DSR-1000N). 3. Устройства с поддержкой WCN (доступно в будущих версиях программного обеспечения). 4. Принтер (доступно в будущих версиях программного обеспечения). C Кнопка WPS Система Wi-Fi Protected Setup (WPS) упрощает настройку безопасности беспроводной сети как во время первоначальной установки (“Initial setup”), так и в процессе добавления нового устройства (“Add New Device”). Для получения более подробной информации, пожалуйста, обратитесь к руководству пользователя. D Гигабитный LAN-порт (1-4) Используется для подключения устройств Ethernet, таких как компьютеры, коммутаторы и концентраторы. E Гигабитный WAN-порт (1-2) Два порта WAN с автоматическим определением полярности MDI/ MDIX используются для подключения к кабельному или DSL-модему с помощью кабеля Ethernet. Порт WAN2 является настраиваемым портом с поддержкой WAN2 или DMZ-порта, используемый для двойного WAN-соединения или внутреннего пула сервера. F Консольный порт Используется для доступа к интерфейсу командной строки (CLI) через консольный кабель RJ45-to-DB9. Руководство содержит пошаговые инструкции по установке беспроводного маршрутизатора DSR-500N/1000N 802.11n. Пожалуйста, помните, что приобретенная модель может отличаться от изображений на иллюстрациях данного руководства. Комплект поставки Откройте коробку и аккуратно распакуйте содержимое. Пожалуйста, проверьте по прилагаемому списку наличие и целостность всех компонентов. Если какой-либо компонент отсутствует или поврежден, пожалуйста, обратитесь к поставщику. -- (1шт.) Беспроводной маршрутизатор DSR-500N/1000N -- (1шт.) Кабель питания -- (1шт.) Консольный кабель (RJ45-to-DB9) -- (1 шт.) Кабель Ethernet (CAT5 UTP/Прямой) -- (1шт.) CD-диск (содержит документацию по продукту в формате PDF) -- (2шт.) Скобы для монтажа в стойку -- (3шт.) Съемные однонаправленные антенны Обзор устройства Передняя панель - DSR-500N/1000N Таблица 1. Описание передней панели DSR-500N/1000N. Индикаторы статуса устройства и порта Ethernet Скорость соединения A B C D E F Рис.1 Передняя панель DSR-500N/1000N Внимание: DSR-500N поддерживает только один USB-порт. 38 Беспроводной D-Link Wireless N Services Router маршрутизатор D-Link 802.11n Статус TX/RX Рис.2 Индикаторы порта Ethernet RJ-45 Индикаторы отображают информацию о текущем статусе устройства. При включении питания устройства индикатор POWER/STATUS загорится оранжевым светом. Запуск займет около одной минуты, затем индикатор изменит цвет на зеленый. Если необходимо выключить устройство и повторно включить, рекомендуется подождать несколько секунд между выключением и включением устройства. Индикаторы Ethernet показывают статус каждого порта Ethernet. В Таблице 2 указаны имя, цвет, статус и описание каждого индикатора устройства. Цвет Статус Описание Оранжевый/ Зеленый Постоянный оранжевый Устройство во время процесса включения питания Постоянный зеленый Питание включено Мигающий оранжевый Устройство неисправно и находится в режиме восстановления Мигающий зеленый Система неисправна, обновление программного обеспечения не выполнено. Индикатор не горит Питание устройства выключено Постоянный зеленый Соединение исправно Мигающий зеленый Неактивный порт Индикатор не горит Соединение отсутствует Постоянный зеленый Соединение исправно Мигающий зеленый Неактивный порт Индикатор не горит Соединение отсутствует Мигающий синий Запуск процесса Постоянный синий Соединение установлено WLAN Зеленый 2,4GHz/5GHz USB WPS Статус TX/RX Скорость соединения Зеленый Синий Зеленый Зеленый/ Оранжевый Индикатор не горит Соединение отсутствует Индикатор не горит Соединение отсутствует Постоянный зеленый Соединение установлено. Мигающий зеленый Отправка или прием данных через порт. Индикатор не горит Порт работает на скорости 10 Мбит/с. Постоянный зеленый Порт работает на скорости 100 Мбит/с. Постоянный оранжевый Порт работает на скорости 1000 Мбит/с. Установка и подключение Данная глава описывает установку маршрутизатора DSR-500N/1000N в стандартную 19-дюймовую стойку, а также процесс подключения кабелей и включения устройства. Перед началом работы Соблюдайте следующие меры предосторожности для предотвращения выключения, неисправности оборудования и повреждений: -- Перед началом установки убедитесь, что источник питания отключен -- -Убедитесь, что помещение, в котором выполняется установка устройства, хорошо проветривается и температура не превышает 40°С (104°С) -- -Необходимо оставить 1 метр свободного пространства спереди и позади устройства -- -Располагайте устройство в стойке таким образом, чтобы не блокировать вентиляционные отверстия по боковым сторонам шасси. Убедитесь в наличии жалюзи на сторонах стойки -- -Перед началом установки убедитесь в отсутствии следующих опасных условий: влажный или сырой пол, протекания, незаземленные или потертые кабели питания, отсутствие защитного заземления. Установка оборудования Можно установить маршрутизатор DSR-500N/1000N в стандартную 19-дюймовую стойку. Для установки выполните следующие действия: Таблица 2. Описание индикаторов статуса устройства Настройки интерфейса DSR-500N/1000N по умолчанию Интерфейс Ethernet Тип интерфейса IP-адрес Управление на основе Web-интерфейса LAN(1-4) / WLAN Статический IP-адрес 192.168.10.1/24 Включено WAN1 DHCP-клиент 0.0.0.0/0 Выключено WAN2 (Настраиваемый порт) DHCP-клиент (по умолчанию) 0.0.0.0/0 Выключено Статический 172.17.100.254/24 IP-адрес (если выполнена настройка DMZ) 1. Прикрепите скобы к боковым сторонам шасси, как показано на Рис.3, и закрепите их с помощью винтов. Выключено Таблица 3. Настройки интерфейса по умолчанию Внимание: Беспроводной маршрутизатор D-Link 802.11n обеспечивает доступ только к Web-интерфейсу GUI с интерфейсов LAN и WLAN по умолчанию в целях обеспечения безопасности. WAN2 является настраиваемым портом с поддержкой различных расширенных приложений. В случае, когда WAN2-порт настроен в качестве DMZ-порта, IP-адрес меняется на 172.17.100.254. Рис.3 Прикрепление скоб для установки в стойку D-Link Wireless N Services Беспроводной маршрутизатор D-Link Router 802.11n 39 PYCCКИЙ Индикаторы Power / Status (Питание/ Статус) PYCCКИЙ 2. Затем используйте винты, входящие в комплект поставки, для прикрепления устройства к стойке. Подключение устройства к сети В данном разделе представлена основная информация о физическом подключении DSR-500N / 1000N к сети. Для подключения необходимых кабелей выполните действия, указанные на Рис. 5. 1. Подключите кабель RJ-45 к порту WAN1 и внешнему маршрутизатору. Порт WAN1 предварительно присвоен сетевому сегменту WAN1. 2. Подключите кабель RJ-45 к порту LAN (1-4) и коммутатору в сетевом сегменте LAN. 3. Подключите кабель RJ45-to-DB9 к консольному порту для доступа к интерфейсу командной строки (CLI) Internet Рис.4 Установка маршрутизатора 802.11n в стандартную стойку WAN1 Подключение питания и Включение/ Выключение устройства Кабель питания переменного тока, входящий в комплект поставки, соединяет устройство с заземлителем при подключении к заземленной розетке переменного тока. В обычном режиме работы устройство должно быть подключено к заземлителю. Для подключения питания к устройству подключите кабель питания переменного тока к разъему питания переменного тока, расположенному на задней панели устройства, и к источнику питания. Внимание: При подключении питания рекомендуется использовать сетевой фильтр. Для включения DSR-500N/1000N установите переключатель питания переменного тока (AC power switch) на задней панели в положение “on”. Для выключения устройства установите переключатель питания в положение “off ”. LAN Switch Console User Figure 5. Basic Cabling Example Начальная настройка На маршрутизаторе DSR-500N/1000N предварительно установлено программное обеспечение. При включении устройство готово к настройке. Не смотря на то, что устройство обладает настройками по умолчанию, которые позволяют начальное подключение, необходимо выполнить дальнейшую настройку в соответствии с определенными сетевыми требованиями. Использование Web-интерфейса (UI) Для использования Web-интерфейса рабочая станция, с которой выполняется управление устройством, должна находиться в той же подсети, что и устройство. 40 Беспроводной D-Link Wirelessмаршрутизатор N Services Router D-Link 802.11n Браузер Microsoft Internet Explorer Mozilla Firefox Соединение через консоль (RJ45-to-DB9 DCE) Версия 6.0 или выше Netscape Navigator 9.0 или выше Apple Safari Google Chrome 4.0 или более поздняя версия 3.0 или более поздняя версия Для соединения через консоль, необходимо наличие следующего оборудования: 1. Терминал или компьютер с последовательным портом и возможностью эмулировать терминал. 2. Кабель RS-232 RJ45-to-DB9 с разъемом «мама» (входит в комплект поставки) Таблица 4. Совместимость с браузерами Для доступа к устройству через Web-интерфейс выполните следующие действия: 1. Подключите рабочую станцию к порту LAN (1-4), который предназначен для подключения к сети LAN. Внимание: Конвертер RS-232 не входит в комплект поставки и приобретается отдельно. 2. Убедитесь, что рабочей станции присвоен статический IP-адрес в подсети 192.168.10.0/24. Для установки соединения через консоль выполните следующие действия: 1. Подключите коннектор RJ-45 входящего в комплект поставки кабеля RJ45-to-DB9 непосредственно к консольному порту беспроводного маршрутизатора 802.11n. Внимание: Отключите блокирование всплывающих окон или добавьте IP-адрес управления http://192.168.10.1 в список адресов, которым разрешено открывать всплывающие окна. 3. Откройте браузер, введите IP-адрес для интерфейса LAN. (IP-адрес по умолчанию http://192.168.10.1), затем нажмите Enter. Рис.6 Адресная строка браузера 4. Зарегистрируйтесь в Web-интерфейсе настройки маршрутизатора. Информация по умолчанию: Имя пользователя: admin Пароль: admin Рис.7 Сообщение аутентификации 3. Если ноутбук или компьютер пользователя не оснащен интерфейсом RS-232, необходимо приобрести конвертер. 2. Подключите кабель к терминалу или последовательному порту компьютера с установленным программным обеспечением эмуляции терминала. Установите следующие параметры программного обеспечения эмуляции терминала: Baud rate (Скорость передачи в бодах): 115200 Data bits (Бит данных): 8 Parity (Четность): None (нет) Stop bits (Стоп-бит): 1 Flow control (Управление потоком): None (нет) 3. После установки терминала с предварительным выполнением инструкций раздела 2.3 “Connecting Power and Turn the Device On/Off” («Подключение питания и Включение/Выключение устройства»), включите устройство. В терминале появится загрузочная последовательность. 4. После выполнения загрузочной последовательности появится командная строка, устройство готово к настройке. D-Link Wireless N Services Router 41 Беспроводной маршрутизатор D-Link 802.11n PYCCКИЙ Беспроводной маршрутизатор оснащен последовательным портом, обеспечивающим соединение с компьютером или терминалом для предоставления пользователям возможности мониторинга и настройки устройства. Данный порт с разъемом RJ-45 используется устройством DCE (модем) для передачи данных. 3.5 или выше Завершение настройки PYCCКИЙ После завершения начальной установки необходимо обратиться к документации в формате PDF на CD-диске, входящем в комплект поставки, для получения информации по настройке DSR-500N/1000N. Руководство пользователя Данный документ описывает основную эксплуатацию программного обеспечения беспроводного маршрутизатора, которое управляет аппаратным обеспечением маршрутизатора. Руководство содержит примеры выполнения типичных задач администратора, таких как установка VPN-соединения, а также различные варианты использования беспроводного маршрутизатора. Справочное руководство Данный документ описывает все доступные текстовые команды, используемые для консоли RJ45-to-DB9 или интерфейса SSH для настройки беспроводного маршрутизатора. Дополнительная информация Дополнительную помощь можно получить в офисах D-Link по всему миру, указанных в приложении к Руководству пользователя или онлайн. Для получения более подробной информации о продукции D-Link и технической поддержки, пожалуйста, обратитесь на сайт D-Link http://www.dlink.ru. Техническая поддержка Обновления программного обеспечения и документация доступны на Интернет-сайте D-Link. D-Link предоставляет бесплатную поддержку для клиентов в течение гарантийного срока. Клиенты могут обратиться в группу технической поддержки D-Link по телефону или через Интернет. Техническая поддержка D-Link: +7(495) 744-00-99 Техническая поддержка через Интернет http://www.dlink.ru e-mail: [email protected] 42 Беспроводной D-Link Wirelessмаршрутизатор N Services Router D-Link 802.11n Building Networks for People Guía de Instalación Rápida Unified Services Router This document will guide you through the basic installation process for your new D-Link Wireless N Services Router. DSR-500N / DSR-1000N Documentation also available on CD and via the D-Link Website Acerca de esta Guía Esta Guía ofrece instrucciones paso a paso para la creación de Servicios Router D-Link Wireless N DSR-500N/1000N . Tenga en cuenta que el modelo que usted ha comprado puede tener ligeras diferencias con las que se muestran en las ilustraciones ESPAÑOL Desembalando el Producto Ítem Función Descripción A LED (De arriba a abajo) LED Power: Indica que el Router de Servicios Wireless N está encendido LED 5GHz WLAN (Solo disponible en DSR-1000N): Una luz fija indica que el segmento Wireless se encuentra preparado. El LED parpadea durante la transmisión de datos. LED 2.4GHz WLAN: Una luz fija indica que el segmento Wireless se encuentra preparado. El LED parpadea durante la transmisión de datos B Puertos USB (2) Soporta varios dispositivos USB 1.1 y 2.0: 1.Disco Flash o Disco Duro para compartir en la Red 2.Adaptador 3G para redundancia WAN (Solo disponible en DSR-1000N) 3.Configuración WCN (Será soportada en el futuro con una actualización de Firmware) 4.Impresora (Será soportada en el futuro con una actualización de Firmware) C Botón WPS Wi-Fi Protected Setup (WPS) System es un método simplificado para asegurar su red inalámbrica durante la configuración inicial, así como los procesos "Agregar Nuevo Dispositivo". Por favor, consulte el Manual del Usuario para más detalles D Puerto LAN Gigabit (1-4) Conecte dispositivos Ethernet, como computadoras, switches y hubs E Puerto WAN Gigabit (1-2) 2 puertos WAN MDI/MDIX para la conexión del cable Ethernet al módem de cable o DSL. El puerto WAN 2 es un puerto configurable que puede soportar el puerto WAN 2 o DMZ de doble conexiones WAN o servidor de uso interno F Puerto de Consola Usado para ingresar a la interfaz de línea de comando (CLI) vía cable RJ-45 a DB9 Abra la caja de envío y cuidadosamente descomprima su contenido. Por favor, consulte la lista de embalaje, detallada a continuación, para asegurarse de que todos los elementos están presentes y en buen estado. Si algún elemento falta o está dañado, por favor, póngase en contacto con su distribuidor D-Link para su reemplazo. -- (1) DSR-500N/1000N Router de Servicios Wireless N -- (1) Cable de alimentación -- (1) Cable de consola (RJ45 a DB9 Cable) -- (1) Cable Ethernet (CAT5 UTP / Straight Through) -- (1) CD-ROM que contiene la documentación del producto en formato PDF -- (2) Soportes de montaje en rack -- (3) Antenas Omni-direccionales reemplazables Descripción del Producto Panel Frontal - DSR-500N/1000N Tabla 1. Descripciones del Panel Frontal de DSR-500/1000N LEDs de Estado del Dispositivo y Puerto Ethernet Velocidad de Enlace Estado TX/RX Figura 2. LED de los puertos Ethernet RJ-45 A B C D E F Figura 1. Panel Frontal DSR-500N/1000N Nota: DSR-500N soporta solo un puerto USB 44 Router D-Link Wireless N Services de Servicios WirelessRouter N de D-Link Los LEDs del dispositivo muestran información sobre el estado del dispositivo actual. Cuando el dispositivo se encuentra encendido, el indicador LED POWER/STATUS se mostrará naranja durante el proceso de encendido. El inicio tarda un minuto aproximadamente, al completar, el indicador LED cambiará a verde. Si desea apagar el dispositivo y volver a encenderlo, le recomendamos que espere unos segundos entre apagarlo y encenderlo de nuevo. Los LED de Ethernet muestran el estado de cada puerto Ethernet. La tabla 2 muestra el nombre, color, estado y descripción de cada dispositivo LED Indicadores LED Color Estado Descripción Power / Status Naranjo / Verde Naranjo Solido Dispositivo durante el proceso de inicio Verde Solido Finalización de Inicio Naranjo Parpadeando El dispositivo está dañado y está bajo modo de recuperación Verde Parpadeando El sistema esta defectuoso, falla en la actualización de Firmware Apagado El dispositivo está apagado Verde Fijo El enlace está bueno Verde Parpadeando Hay actividad en este puerto Verde USB Verde WPS Azul Estado TX / RX Velocidad de Enlace Verde Verde / Naranjo Apagado No hay enlace Verde Fijo El enlace esta bueno Verde Parpadeando Hay actividad en este puerto Apagado No hay enlace Azul Parpadeando Proceso de inicio Azul Fijo La conexión ha sido establecida exitosamente Apagado No hay enlace Apagado No hay enlace Verde Fijo Enlace presente Verde Parpadeando El puerto está enviando o recibiendo datos Apagado El puerto está operando a 10Mbps Verde Fijo El puerto está operando a 100Mbps Naranjo Fijo El puerto está operando a 1000Mbps Tabla 2. Descripciones de los LED Status Interfaz por defecto DSR-500/1000N Interfaz Ethernet Tipo de Interfaz Dirección IP Administración basada en Web LAN(1-4) / WLAN IP Estática 192.168.10.1/24 Habilitado WAN1 Cliente DHCP 0.0.0.0/0 Deshabilitado WAN2 (Puerto Configurable) Cliente DHCP (Por defecto) 0.0.0.0/0 Deshabilitado IP Estática (Cuando es configurada como DMZ) 172.17.100.254/24 Deshabilitado Este capítulo describe cómo instalar un dispositivo DSR-500N/1000N en un Rack estándar de 19 pulgadas y cómo conectar los cables y alimentación al dispositivo Antes de comenzar Observe las siguientes precauciones para evitar los apagones, fallas de equipos y lesiones. -- Antes de la instalación, compruebe siempre que se encuentra desconectado el suministro eléctrico. -- Asegúrese de que la habitación en la que opera el dispositivo tiene una circulación de aire adecuada y que la temperatura ambiente no exceda de 40 ° C (104oC) -- Permitir 1 metro (3 pies) de espacio libre en la parte delantera y trasera del dispositivo. -- No coloque el dispositivo en un marco de rack de equipos que bloquea los orificios de ventilación en los laterales del chasis. Asegúrese de que los Racks cerrados tengan ventiladores y persianas en las partes donde corresponde -- Corregir estas condiciones peligrosas antes de cualquier instalación: suelos húmedos o mojados, goteras, sin conexión a tierra o cables de alimentación deshilachados, o falta de motivos de seguridad Instalación del Equipo Usted puede montar el dispositivo de DSR-500N/1000N en un Rack estándar de 19 pulgadas. Para instalar un dispositivo en un rack: 1. Fije las escuadras de montaje a cada lado del chasis como se muestra en la figura 3, debe fijarlos con los tornillos suministrados Tabla 3. Interfaz de configuración por defecto Nota: Router de servicios Wireless N de D-Link sólo permite el acceso Web a partir de las interfaces LAN y de WLAN por defecto por razones de seguridad. El WAN2 es un puerto configurable que soporta aplicaciones en escenarios diversos y avanzados. WAN 2 cuando el puerto está configurado como puerto DMZ, la dirección IP será cambiada a 172.17.100.254 Figura 3. Fijando las Escuadras de Montaje Wireless N Services RouterD-Link de Servicios Wireless N de Router D-Link 45 ESPAÑOL 2.4GHz / 5GHz WLAN Instalación y Conexión 2. A continuación, utilice los tornillos suministrados con el rack de equipos para montar el dispositivo en el rack Conectando el Dispositivo a la Red Esta sección proporciona información básica acerca de conectar físicamente el DSR-500N / 1000N a la red. Para conectar los cables necesarios, como se muestra en la Figura 5. 1. Conecte un cable RJ-45 desde el puerto con la etiqueta WAN 1 al router externo. El puerto es WAN 1 pre asignado al segmento de red WAN 1. ESPAÑOL 2. Conecte un cable RJ-45 desde el puerto con la etiqueta de LAN (1-4) a un cambio en el segmento de red LAN. 3. Conecte un conector RJ45 al cable de puerto de la consola de CLI (Command Line Interface) de acceso de administración Internet Figura 4. Instale el Router de Servicios Wireless N Gigabit en un rack de equipos tamaño estándar WAN1 Conectando la Energía y encendido/Apagado El cable de alimentación AC suministrado con el dispositivo conecta el aparato a tierra cuando se enchufa una toma de alimentación. El dispositivo debe ser conectado a tierra durante la operación normal. Para conectar la alimentación al dispositivo, conecte un extremo de la base de alimentación AC en el dispositivo de entrada de alimentación AC en el panel posterior del dispositivo. Conecte el otro extremo a una fuente de alimentación AC. Nota: Se recomienda usar un protector contra sobretensiones para la conexión eléctrica. Para encender el dispositivo DSR-500N/1000N, pulse el interruptor de alimentación AC en el panel posterior a la posición de encendido. Para apagar el dispositivo, pulse el interruptor de encendido a la posición de apagado LAN Switch Console User Figure 5. Basic Cabling Example Configuración Inicial El software del Router de Servicios Wireless N está preinstalado en el dispositivo DSR-500N/1000N. Cuando el dispositivo está encendido, está listo para ser configurado. Mientras que el dispositivo tiene una configuración por defecto de fábrica que le permite conectar con el dispositivo principal, debe realizar una configuración adicional para sus requisitos específicos de la red Utilizando la Administración Web Para utilizar la interfaz de usuario Web, la estación de trabajo de la que está gestionando el dispositivo deberá estar inicialmente en la misma subred que el dispositivo 46 Router D-Link Wireless N Services de Servicios WirelessRouter N de D-Link Navegador Microsoft Internet Explorer Versión 6.0 o superior Usando una Conexión de la Consola (RJ45-to-DB9 DCE) El router de Servicios Wireless N Gigabit ofrece un puerto serial que permite una conexión a un ordenador o un terminal de control y configurar el dispositivo. Este puerto es un conector RJ-45, implementado como un equipo terminal de datos de comunicaciones (DCE) de conexión. 3.5 o superior Netscape Navigator 9.0 o superior Apple Safari 4.0 o superior Para utilizar la consola de conexión de puerto, se necesita el siguiente equipo Google Chrome 3.0 o superior 1. Un terminal o un ordenador con puerto serie y la capacidad de emular un terminal. Tabla 4. Compatibilidad de Navegador Para acceder al dispositivo con la interfaz de usuario web: 1. Conecte su estación de trabajo en el puerto con la etiqueta de LAN (1-4), que es pre-asignados a la LAN. 2. Asegúrese de que su estación de trabajo se configura con una dirección IP estática en la subred 192.168.10.0/24. Nota: Desactivar el software de bloqueo de pop-ups Agregar la dirección IP http://192.168.10.1 a su bloqueador de elementos emergentes a la lista para permitir. 3. Inicie el explorador, escriba la dirección IP de la interfaz LAN. (La dirección IP por defecto de fábrica es http://192.168.10.1), a continuación, pulse Enter Figura 6. Dirección de Navegador 4. Inicie la sesión en Router de Servicios Wireless N Gigabit en la Interfaz Web de forma predeterminada con lo siguiente: Nombre de usuario: admin Contraseña: admin 2. un conector RJ45 a DB9 RS-232 hembra. (Ya incluidos en la lista de equipaje) 3. Si su portátil o PC no dispone de conector RS-232, se requiere un convertidor Nota: DSR-500N/1000N no viene con convertidor RS-232, debe adquirirse por separado. Para establecer una conexión de consola: 1. Enchufe el conector RJ-45 al cable suministrado RJ45 a DB9 directamente al puerto de consola en el Router de Servicios Wireless N Gigabit. 2. Conecte el otro extremo del cable a un terminal, o el conector de serie de un equipo que ejecuta software de emulación de terminal. Configurar el software de emulación de terminal de la siguiente manera: Velocidad de transmisión: 115200 Bits de datos: 8 Paridad: Ninguna Bits de parada: 1 Control de flujo: Ninguno 3. Cuando haya configurado correctamente el terminal, tras haber seguido las instrucciones en la sección 2.3, " Conectando la energía y encendido/Apagado " vuelva a encender el dispositivo. La secuencia de arranque aparece en el terminal 4. Una vez completa la secuencia de arranque, el símbolo del sistema se muestra, el dispositivo está listo para ser configurado. Figura 7. Mensaje de Autentificación Wireless N Services RouterD-Link de Servicios Wireless N de Router D-Link 47 ESPAÑOL Mozilla Firefox Finalizando la Configuración ESPAÑOL Después de la configuración inicial, debe referirse a las publicaciones de la compañía que se encuentran en formato PDF en el CD que se incluye para obtener más información sobre cómo empezar a configurar el dispositivo DSR-500N/1000N Manual de Usuario Router de Servicios Wireless N D-Link Este documento describe el funcionamiento general y el control del firmware del Router de Servicios Wireless N el cual maneja y controla el Router de Servicios Wireless N. Incluye ejemplos de cómo llevar a cabo tareas administrativas típicas como la creación de una red privada virtual y cómo utilizar el Router de Servicios Wireless N en diversos escenarios Guía de Referencia CLI para Router de Servicios Wireless N de D-Link Este documento describe todos los textos disponibles basados en comandos que pueden ser utilizados en RJ45 a DB9 o SSH para configurar el Router de Servicios Wireless N Información adicional Existe ayuda adicional disponible a través de oficinas D-Link en todo el mundo que figuran en el apéndice del Manual del Usuario o en línea. Para saber más acerca de productos D-Link o la comercialización de productos de seguridad de la información, por favor visite el sitio web de http://mydsr.dlink.com.tw, para cualquier tema de soporte, por favor visite el sitio web de http:// support.dlink.com.tw, que le redirigirá al sitio web D-Link local apropiado SOPORTE TÉCNICO Usted puede encontrar actualizaciones de softwares o firmwares y documentación para usuarios a través de nuestro sitio www.dlinkla.com SOPORTE TÉCNICO PARA USUARIOS EN LATINO AMERICA Soporte técnico a través de los siguientes teléfonos de D-Link PAIS NUMERO HORARIO Argentina 0800-12235465 Lunes a Viernes 08:00am a 21:00pm 48 Router D-Link Wireless N Services de Servicios WirelessRouter N de D-Link Chile 800-835465 ó (02) 5941520 Lunes a Viernes 08:00am a 21:00pm Colombia 01800-9525465 Lunes a Viernes 06:00am a 19:00pm Costa Rica 0800-0521478 Lunes a Viernes 05:00am a 18:00pm Ecuador 1800-035465 Lunes a Viernes 06:00am a 19:00pm El Salvador 800-6335 Lunes a Viernes 05:00am a 18:00pm Guatemala 1800-8350255 Lunes a Viernes 05:00am a 18:00pm México 01800-1233201 Lunes a Viernes 06:00am a 19:00pm Panamá 011 008000525465 Lunes a Viernes 05:00am a 18:00pm Perú 0800-00968 Lunes a Viernes 06:00am a 19:00pm Venezuela 0800-1005767 Lunes a Viernes 06:30am a 19:30pm Soporte Técnico de D-Link a través de Internet www.dlinkla.com e-mail: [email protected] & [email protected] Building Networks for People Guia de Instalação Rápida Unified Services Router This document will guide you through the basic installation process for your new D-Link Wireless N Services Router. DSR-500N / DSR-1000N Documentation also available on CD and via the D-Link Website Sobre Este Manual Este manual propicia instruções passo a passo para a instalação do produto DSR-500N/1000N Wireless N Services Router da D-Link. Observe que o modelo que você adquiriu pode parecer um pouco diferente com relação àqueles mostrados nas ilustrações. Item Característica Descrição A LED (De cima para baixo) LED Power: Indica que o Wireless N Services Router está ligado. LED 5GHz WLAN (somente disponível no DSR-1000N): Uma luz sólida indica que o segmento sem fio está pronto. Esse LED pisca durante a transmissão de dados sem fio. LED 2.4GHz WLAN: Uma luz sólida indica que o segmento sem fio está pronto. Esse LED pisca durante a transmissão de dados sem fio. B Portas USB (2) A mesma pode suportar vários dos dispositivos USB 1.1 ou 2.0 abaixo: 1. Flash Disk ou Disco Rígido para compartilhamento de rede. 2. Adaptador 3G para WAN redundante (Disponível apenas no DSR-1000N) 3. Configuração WCN (Será suportada pela futura atualização de firmware) 4. Impressora (Será suportada pela futura atualização de firmware) C Botão WPS O Sistema Wi-Fi Protected Setup (WPS) é uma método simplificado para proteger a sua rede sem fio durante “a configuração inicial”, também como processos “Add New Device” (Inclua um Novo Dispositivo). Consulte o manual de usuário para obter mais detalhes sobre o processo. D Porta Gigabit LAN (1-4) Conecta dispositivos Ethernet, tais como computadores, interruptores e hubs. E Porta Gigabit WAN As duas portas auto MDI/MDIX WAN (1-2) são a conexão para o cabo Ethernet ao cabo ou modem DSL. A porta WAN2 é uma porta configurável que pode suportar porta WAN2 ou DMZ para propósitos de conexões duplas WAN ou Parque de Servidores interno. F Porta de Console Como desembalar o Produto Abra a caixa do produto e desembale o seu conteúdo cuidadosamente. Consulte a lista de itens abaixo para se certificar de que todos os componentes estão presentes e não estão danificados. Caso algum item esteja faltando e ou danificado, entre em contato com o seu revendedor D-Link local para a substituição do mesmo. -- Um (1) aparelho DSR-500N/1000N Wireless N Services Router. PORTUGUÊS -- Um (1) Cabo de Alimentação -- Um (1) Cabo de Console (Cabo RJ45 para DB9) -- Um (1) Cabo Ethernet (CAT5 UTP/Direto) -- Um (1) CD de referência (CD-ROM contendo a documentação do produto em formato PDF) -- Dois (2) Suportes de Montagem de Bastidor -- Três (3) Antenas direcionais desmontáveis Omni Visão Geral do Produto Painel Frontal - DSR-500N/1000N Utilizada para acessar a Interface de Linha de Comando (CLI), através do Cabo de console RJ45-to-DB9. Tabela 1. Descrições do Painel Frontal DSR-500N/1000N LEDs Device Status (status do aparelho) e LEDs da Ethernet Port (Porta Ethernet) Velocidade de Link A B C D E F Figura 1. Painel Frontal do DSR-500N/1000N Nota: O DSR-500N tem capacidade para apenas uma porta USB. 50 D-Link Wireless N Services Router Status TX/RX Figura 2. LEDs de Porta Ethernet RJ-45 Os LEDs do aparelho mostram as informações sobre o status atual do dispositivo. Quando o aparelho é ligado, o LED POWER/STATUS exibirá uma luz laranja sólida durante o processo de ativação. A inicialização leva aproximadamente um minuto para ser concluído, o LED mudará para uma luz verde sólida. Caso você queira desligar o aparelho novamente, recomendamos que você aguarde alguns segundos entre a desativação e uma nova ativação. Os LEDs Ethernet mostram o status de cada porta Ethernet. A Tabela 2 lista o nome, a cor, o status e descrição de cada LED do aparelho. Instalação e Conexão Indicadores LED Cor Status Descrição Power / Status Laranja / Verde Laranja Sólido Dispositivo durante o processo de ligação Verde Sólido Conclusão do processo de ativação Laranja Intermitente O dispositivo trava e entre no módulo de recuperação Verde Intermitente O sistema está defeituoso, as atualizações de firmware falham. 2.4GHz / 5GHz WLAN Verde USB Verde WPS Azul Velocidade de LINK Verde Verde / Laranja O dispositivo é desligado O link é bom Verde Intermitente Não há atividade nesta porta Desligado Sem link Verde Sólido O link é bom Verde Intermitente Não há atividade nesta porta Desligado Sem link Azul Intermitente Iniciar o processo Azul Sólido A conexão foi estabelecida com sucesso Desligado Sem link. Desligado Sem link. Verde Sólido Link presente. Verde Intermitente A porta está enviando ou recebendo dados. Desligado A porta está operando a 10 Mbps. Verde Sólido A porta está operando a 100 Mbps. Laranja Sólido A porta está operando a 1.000 Mbps. Tabela 2. Descrição do LED Device Status Configurações da Interface Padrão do DSR-500N/1000N Interface Ethernet LAN(1-4) / WLAN Tipo de Interface Endereço IP Gestão Baseada na Internet IP Estático 192.168.10.1/24 Ativado WAN1 Cliente DHCP 0.0.0.0/0 Desativado WAN2 (Porta configurável) Cliente DHCP (padrão) 0.0.0.0/0 Desativado IP estático (Quando configurado como DMZ) 172.17.100.254/24 Desativado Antes de Começar Observe as seguintes precauções para evitar paralisações, falhas no equipamento e ferimentos: -- Antes da instalação, sempre verifique se a alimentação elétrica está desconectada. -- Certifique–se de que a sala, onde você opera o aparelho possui a circulação de ar adequada e se a temperatura da sala NÃO excede 40°C (104°F) -- Deixe um espaço livre de 1 metro (3 pés) na parte frontal e posterior do aparelho. -- Não coloque o aparelho em uma estrutura de bastidor de equipamento que bloqueie a ventilação nas laterais do chassi. Certifique-se de que os bastidores fechados possuam ventoinhas e laterais entradas de ar -- Corrija essas condições perigosas, antes de qualquer instalação: umidade ou pisos molhados, vazamento, cabos de alimentação não aterrados ou danificados ou ainda a falta de aterramentos seguros. Instalação do Equipamento Você pode montar o DSR-500N/1000N num bastidor de equipamento padrão de 19 polegadas. Para instalar o aparelho num bastidor: 1. Instale os suportes de montagem em cada um dos lados do chassi, conforme mostrado na figura 3 e os fixe com os parafusos fornecidos. Tabela 3. Configurações de Interface Padrão Nota: O D-Link Wireless N Services Router só permite o acesso Web GUI, a partir de interfaces LAN e WLAN como padrão, por motivos de segurança. A WAN2 é uma porta configurável que suporta aplicações de cenário variadas e avançadas. Quando uma porta WAN2 é configurada como porta DMZ, o endereço IP será alterado para 172.17.100.254. Figura 3. Instalação dos Suportes de Montagem do Bastidor D-Link Wireless N Services Router 51 PORTUGUÊS Status TX / RX Desligado Verde Sólido Este capítulo descreve como instalar o aparelho DSR-500N/1000N num bastidor de equipamento de 19 polegadas (48 cm) e como conectar os cabos e ligar o aparelho. 2. Utilize os parafusos fornecidos com o bastidor do equipamento para montar o aparelho no bastidor. Conexão do Aparelho em uma Rede Esta seção fornece as informações básicas sobre a conexão física do DRS-500N/1000N a uma rede. Para conectar os cabos necessários, conforme mostrado na Figura 5. 1. Conecte um cabo RJ-45, a partir da porta com a informações WAN1, ao roteador externo. A porta WAN1 é pré-estabelecida para o segmento de rede WAN1. 2. Conecte o cabo RJ-45, a partir da porta com a etiqueta LAN (1-4) ao interruptor do segmento de rede LAN. 3. Conecte um o cabo RJ45-to-DB9, a partir da porta do console para o acesso de gestão CLI (Command Line Interface/Interface de Linha de Comando). PORTUGUÊS Internet Figura 4. Instalação do Wireless N Services Router num bastidor de equipamento de tamanho padrão WAN1 Conexão da Alimentação e como Ligar/Desligar O cabo de alimentação CA, fornecido com o aparelho, conecta o aparelho com o aterramento, quando conectado a uma tomada de alimentação do tipo aterramento CA. O aparelho deve estar conectado ao aterramento durante a operação normal. Para conectar o aparelho, conecte uma das extremidades da alimentação CA principal à tomada de alimentação do aparelho, na parte posterior do mesmo. Conecte a outra extremidade a uma fonte de alimentação CA. Nota: Recomendamos o uso de um estabilizador de voltagem para a conexão de alimentação. Para ligar o DSR-500N/1000N, coloque o interruptor de alimentação CA, localizado na parte posterior do painel, na posição ON. Para desligar o aparelho, coloque o interruptor na posição OFF. LAN Switch Console User Figure 5. Basic Cabling Example Configuração Inicial O software do Wireless N Services Router é pré-instalado no DSR-500N/1000N. Quando o aparelho é ligado, o mesmo já está pronto para ser configurado. Enquanto o aparelho estive com a configuração de fábrica, a qual permite que você faça a conexão inicial do aparelho, posteriormente você deve fazer a sua uma outra configuração, de acordo com os seus requisitos de rede. Uso do Web UI Para utilizar o Web UI, a estação de trabalho, a partir da qual você controla o aparelho, inicialmente deve estar na mesma sub-rede do aparelho. 52 D-Link Wireless N Services Router Navegador Microsoft Internet Explorer versão 6.0 ou superior Como usar a Conexão de Console/Console Connection (RJ45-to-BB9 DCE) Mozilla Firefox 3.5 ou superior Netscape Navigator 9.0 ou superior O Wireless N Services Router fornece uma porta serial que permite a conexão com um computador ou terminar para o monitoramento e configuração do aparelho. Essa porta é um conector RJ-45, implantada com uma conexão de equipamento de terminar de comunicação de dados (DCE). Apple Safari 4.0 ou mais recente Para utilizar a conexão de porta de console, você precisa dos seguintes equipamentos: Google Chrome 3.0 ou mais recente 1. Um terminal ou computador com porta serial e capacidade de simular um terminal. Tabela 4. Compatibilidade de Navegador Como acessar o aparelho com o Web UI: 2. Certifique-se de que a sua estação de trabalho está configurada com um endereço IP estático na sub-rede 192.168.10.0/24. Nota: Desative o software de bloqueio de pop-up ou inclua o endereço IP de gestão http://192.168.10.1 à lista de permissão do seu bloqueador de pop-up. 3. Inicie o seu navegador; digite o endereço IP para a interface LAN. (O endereço IP padrão de fábrica é http://192.168.10.1), a seguir, pressione Enter. Figura 6. Endereço do Navegador 4. Conecte-se à Interface do Wireless N Services Router. As informações de log-in de fábrica são: Nome de Usuário: admin Senha: admin 3. Caso o seu laptop ou PC não possua conector RS-232, será necessário o uso de um conversor. Nota: O DSR-500N/1000N não vem com um conversor RS-232 e o mesmo deve ser adquirido separadamente. Para estabelecer uma conexão de console: 1. Conecte o conector RJ-45 do cabo RJ45-toDB9 fornecido diretamente à porta do console do Wireless N Services Router. 2. Conecte a outra extremidade do cabo ao terminal ou ao conector serial do computador, executando o software de simulação de terminal. Configure o software de simulação de terminal conforme a seguir: Taxa de transmissão: 115200 Bits de dados: 8 Paridade: Nenhuma Bits de parada: 1 Controle de fluxo: Nenhum 3. Quando você tiver configurado o terminal corretamente, tendo seguido previamente as instruções da seção 2.3, “Como Conectar, Ligar/Desligar o Aparelho”, ligue o seu aparelho. A sequência inicial aparece no terminal. 4. Assim que a sequência inicial for concluída, o prompt de comando é exibido, o aparelho estará pronto para ser configurado. Figura 7. Mensagem de Autenticação D-Link Wireless N Services Router 53 PORTUGUÊS 1. Conecte a sua estação de trabalho à porta com a etiqueta LAN (1-4), a qual é pré-estabelecida para a LAN. 2. Um RS-232 RJ45-to-DB9 com conector fêmea. (Já incluído na lista de embalagem) Finalização da Configuração Após a configuração inicial, você deve consultar as publicações que acompanham o aparelho, as quais se encontram no formato PDF, no CD fornecido, para obter mais informações sobre como começar a configurar o DSR-500N/1000N. PORTUGUÊS Manual de Usuário do D-Link Wireless N Services Router Este documento descreve a operação geral do firmware do Wireless N Services Router, o qual aciona e controla o hardware da série Wireless N Services Router O mesmo inclui exemplos de como realizar tarefas administrativas, tais como a configuração de um VPN e como utilizar a série Wireless N Services Router em vários cenários. Guia de Referência CLI do D-Link Wireless N Services Router Esse documento descreve todos os comandos disponíveis baseados em texto que podem ser utilizados no Console RJ45-to-DB9 ou interface SSH, para configurar o Wireless N Services Router durante a operação do sistema. Informações Adicionais A assistência adicional está disponível através dos escritórios mundiais da D-Link, os quais estão listados no apêndice do Manual de Usuário ou on-line. Para obter mais informações sobre os produtos ou informações de marketing dos produtos de segurança da D–Link, visite o site http://mydrs.dlink.com.tw; para qualquer questão de suporte, visite o site http://support.dlink.com. tw, o qual o redirecionará para o local apropriado do site da D-link. Suporte Técnico Você pode encontrar atualizações de software e documentação de usuário no site da D-Link Brasil. A D-Link fornece suporte técnico gratuito para clientes no Brasil durante o período de vigência da garantia deste produto. Suporte Técnico para clientes no Brasil: Website para suporte: www.dlink.com.br/suporte e-mail: [email protected] Telefones para contato: Clientes de São Paulo: 2755 6950 Clientes das demais regiões: 0800 70 24 104 Segunda à Sexta-feira, das 9:00h às 21:00h Sábado, das 9:00h às 15:00h 54 D-Link Wireless N Services Router Building Networks for People 快速安裝指南 Unified Services Router This document will guide you through the basic installation process for your new D-Link Wireless N Services Router. DSR-500N / DSR-1000N Documentation also available on CD and via the D-Link Website 項目 特徵 描述 A LED燈號 (從上到下) 電源指示燈號:標示設備是否正常 供電運作。 5GHz 無線網路燈號(僅DSR-1000N 具 備):當燈號恆亮表示5GHz無線網路 正常運作。當資料透過5GHz 無線網 路傳輸時,燈號將會閃爍。 2.4GHz 無線網路燈號(僅DSR-1000N 具備):當燈號恆亮表示2.4GHz無線 網路正常運作。當資料透過5GHz 無 線網路傳輸時,燈號將會閃爍。 B USB 埠(2) 可相容USB 1.1與2.0標準的USB 設備: 1.隨身碟或外接式硬碟,可透過區 域網路分享檔案。 2.3G網卡,作為WAN端對外網際網 路備援(僅DSR-1000N支援) 3.WCN 無線設定(未來透過韌體 升級支援) 4.列印分享(未來透過韌體升級支援) C WPS按鍵 Wi-Fi Protected Setup (WPS)功能讓 您可以透過簡單的步驟安全且快速 的完成無線網路的設定。詳細操作 方式敬請參考產品操作手冊。 -- CD光碟(內含PDF 產品說明文件) 1片 D -- 機架式支架 2 片 Gigabit LAN port (1-4) 區域網路連接網路設備,例如:電 腦、網路交換器、hubs等。 E Gigabit WAN port (1-2) 兩組 auto MDI/MDIX WAN 埠,可 透過網路線連結Cable/xDSL寬頻數 據機連線網際網路。 WAN2 埠可設定為第二組對外網 路連線介面或是DMZ區域,提供 對外網路備援或內部伺服器對外 連線服務。 F Console Port 經由RJ-45 轉DB9的Console線進行 設備Command Line Interface(CLI) 設定。 關於本說明手冊 透過本手冊將導引您完成D-Link DSR-500N/1000N Wireless N Service Router 基本設定。請注意,您 所購買的型號與圖片上所標示可能會出現略為不同 的顯示畫面。 拆開產品 拆開您的包裝外箱,小心的將內容設備取出。請對 照產品包裝清單,確認所有的配件是否皆齊全。若 有確少任何配件,敬請與您購買的經銷商聯繫。 -- DSR-500N/1000N Wireless N Services Router 1台 -- 電源線 1 條 -- Console Cable (RJ45-to-DB9 Cable) 1條 -- 乙太網路線(CAT5 UTP/Straight Through) 1條 -- 可更換全向式天線 3 支 產品檢視 面板- DSR500N/1000N 表格1. DSR-500N/1000N 面板說明 中 設備狀態燈號與乙太網路指示燈號 文 連線速率 TX/RX 狀態 圖片2. 乙太網路RJ-45 埠指示燈號 A B C D E F 圖片1. DSR-500N/1000N 面板 備註:DSR-500N 僅提供一組USB 介面 56 D-Link Wireless N Services Router 設備LED燈號顯示目前設備運作狀態的相關訊息。 當設備的電源開啟,且設備正再進行開機程序 時,POWER/STATUS 燈號將會顯示橘色燈號。大 約過1分鐘後設備會完成開機運作程序,燈號將會 更改顯示綠色燈號。當您想要將設備重新開啟電 源,建議您在關閉電源時稍過幾秒後再重新開啟 電源。乙太網路指示燈號顯示每一個乙太網路埠的 運作狀態。 表格2 說明每一個燈號的名稱、顏色、狀態與說 明。 LED 標示 顏色 狀態 說明 安裝與連線 Power / Status 橘色/ 綠色 恆亮橘色 設備進行電源開啟程序 恆亮綠色 完成設備開啟 閃爍橘色 設備故障與恢復模式中 本章節說明如何將DSR-500N/1000N安裝至標準19 吋的機架上。以及如何連將網路線與電源連接至 設備。 閃爍綠色 系統是有缺陷的,例如韌 體更新失敗。 燈號關閉 設備電源為關閉 恆亮綠色 連線正常 閃爍綠色 表示此網路部正在 使用中 2.4GHz/ 5GHz WLAN 綠色 USB 綠色 WPS TX/RX Status 藍色 綠色 LINK Speed 綠色/ 橘色 燈號關閉 沒有連線 恆亮綠色 連線正常 閃爍綠色 表示此網路部正在 使用中 燈號關閉 沒有連線 閃爍藍色 開始連線程序 固定藍色 成功完成無線網路連線 燈號關閉 沒有連線 燈號關閉 沒有連線 恆亮綠色 連線中 閃爍綠色 網路部正在進行資料的 傳送與接收。 燈號關閉 網路埠運作速率為 10Mbps 恆亮綠色 網路埠運作速率為 100Mbps 恆亮橘色 網路埠運作速率為 1000Mbps 在您開始安裝前 遵守下列預防措施,以幫助防止與避免,設備故 障和傷害: -- 在您安裝前,請確認電源供應器的電源是關閉的。 -- 確保設備安裝使用的環境空氣流通且溫度不超過 40oC (104oC) -- 盡量保持設備前後有1公尺(3 feet)的開放空間。 -- 請勿將設備至放於密閉的機架中,確認密閉式機 架具備風扇與散熱窗。 -- 請不要將設備安裝於以下的環境包含:潮濕的地 板上、連結磨損的電源線、無接地線迴路或任何 可能造成不安全的環境。 安裝設備 您可以將DSR-500N/1000N 設備安裝至19吋的機架 上。將設備安裝至機架: 表格2.設備狀態燈號說明 文 DSR-500N/1000N 出廠預設介面設定 中 1. 如圖片3所標示:將機架式支架使用螺絲固定與 設備的兩側。 乙太網路介面 介面類型 IP 位址 網頁式管理 LAN(1-4) / WLAN 靜態IP 192.168.10.1/24 啟用 WAN1 DHCP 用戶端 0.0.0.0/0 停用 WAN2 (可組 態埠) DHCP 用戶端 (預設) 0.0.0.0/0 停用 靜態IP (當設定 為DMZ) 172.17.100.254/24 停用 表格3.出廠預設介面設定 備註:D-Link Wireless N Services Router 為了安全 考量,預設僅允許經由區域網路或無線網路並透過 網頁GUI介面進行管理與設定。 WAN2介面為一個可配置的介面,支援各種應用與 進階的情境使用。當WAN2埠設定為DMZ 埠時,IP 位址將會更改為172.17.100.254。 圖片3. 安裝設備機架式支架 D-Link Wireless N Services Router 57 2. 然後將設備放入機架中並使用螺絲將設備固定於 機架上。 將設備連線至網路 本章節將導引您把DSR-500N/1000N連接至網路。 必要的網路連線架構如圖片5所標示 1. 使用一條RJ-45網路線其中一端連接至設備面板 標示WAN1的網路埠,再將網路線的另外一端 連接至對外寬頻網際網路連線的數據機或其他 網路設備。 2. 使用RJ-45網路線其中一段連接至設備面板標示 LAN(1-4)的網路埠,將設備連接至區域網路的 網路交換器或電腦等設備。 3. 將RJ-45 轉DB9的Cable連接至設備標示Condole 的網路埠透過此連線可以進行設備的管理與 設定。 Internet 圖片4.將Wireless N Services Router 安裝至標準 尺寸的機架 WAN1 電源連線與設備開啟/關閉 中 為使設備可以正常運作,供應電源必須具備接地機 制。請將交流電源線連接至具備接地型的電源插 座。 文 開啟設備電源的方式,將交流電源線一端連接至設 備背面的電源輸入孔,再將交流電源線另一端連接 至供應電源的電源插座。 備註:建議您使用具備突波保護的電源連線。 開啟DSR-500N/1000N的電源,將設備背面的電源 開關切換至開啟的位置。要關閉電源,請將電源開 關切換至關閉的位置。 LAN Switch Console User Figure 5. Basic Cabling Example 設備組態設定 Wireless N Service Router軟體以預先安裝於 DSR-500N/1000N的設備中。當設備完成開機程序 後即可開始進行組態設定。設備具備出廠預設的設 定,能夠讓您網路連線至設備,您必須登入設備的 管理介面,依據需求進行相關進階網路設定。 使用網頁式管理介面 當您透過網頁進行設備的管理設定,您操作的電腦 與管理設備必須在相同的網路環境。 58 D-Link Wireless N Services Router 網頁瀏覽器 Microsoft Internet Explorer 版本 6.0 or higher 使用 Console 連線管理設備 (RJ-45–to-DB9 DCE) Mozilla Firefox 3.5 or higher Wireless N Servicer Router 提供管理者可透過序列 埠方式連接電腦並且進行設備的監控與管理設定。 此埠的設計為RJ-45介面,透過數據通信端程式進 行連線。 Netscape Navigator 9.0 or higher Apple Safari 4.0 and later Google Chrome 3.0 and later 透過Console埠進行連線,您需要以下的設備: 1. 具備一個終端連線設備或電腦具備序列埠介 面,並且具備終端連線程式。(如Windows 超 級終端機) 2. 具備RJ-45 轉DB9 RS-232 母頭的連接線(隨產 品包裝提供) 表格4. 支援的網頁瀏覽器 透過網頁進行設備的管理: 1. 將您的電腦透過網路線連接至設備標示 LAN(1-4)的網路埠,您將連接至與設備相同的 區域網路。 2. 確認您的電腦設定的固定IP位址是在 192.168.10.0/24的網段。 圖片6.網頁瀏覽器輸入管理IP位址 4. Wireless N Services Router網頁登入預設資訊 為: Username: admin Password: admin 建立Console管理連線: 1. 將隨產品包裝提供的RJ-45轉DB9 Cable RJ-45 端連接至Wireless N Services Router 標示 Console 的介面。 2. 將Cable的另外一端連接至終端機或是具備序列 埠的電腦並且執行終端機連線程式。相關終端 機連線環境設定如下說明: Baud rate: 115200 Data bits: 8 Parity: None Stop bits: 1 Flow control: None 3. 當您正確的完成終端機連線設定,參考前面章 節2.3,電源連線與設備開啟/關閉。開啟程序將 會出現在終端連線。 4. 當啟動程序完成後,將會顯示命令提示符號, 表示設備已準備好進行組態管理設定。 圖片7.認證訊息 D-Link Wireless N Services Router 59 文 3. 開啟您電腦的網頁瀏覽;在網址欄位輸入設備管 理IP位址(出廠預設IP位址為http:192.168.10.1) ,然後按下鍵盤Enter按鍵。 備註:DSR-500N/1000N 產品出貨並不提供RS-232 的轉接器,使用者必須自行額外購買。 中 備註 :請停用彈出式視窗攔截軟體或將設備管理 IP位址http://192.168.10.1 加入您彈出式視窗攔 截軟體允許的清單中。 3. 假如您的電腦不具備RS-232介面,您必須額外購 買轉接器。 完成設定組態 在您完成設備基本設定後,更多關於 DSR-500N/1000N詳細功能設定您可以參考隨附光 碟內的產品操作手冊說明。 D-Link Wireless N Services Router產品操作手冊 本手冊主要介紹Wireless N Services Router相關 的操作與設定方式。例如如何設定寬頻網路連線 設定、防火牆設定、與VPN安全連線設定等完整 Wireless N Services Router操作說明。 D-Link Wireless N Servicer Router CLI 指令參 考手冊 本手冊主要說明相關設備操作指令,讓管理者可 以透過RJ-45轉DB9 Console或SSH連線方式進行 Wireless N Services Router的系統操作。 其他資訊 其他幫助,可以通過隨附於操作手冊的D-Link技術 服務諮詢或網站聯繫。想知道更多有關D-Link安全 產品的產品或市場訊息,請造訪網站 http://mydsr. dlink.com.tw,對任何技術支援的問題,請造訪網 站http://support.dlink.com.tw,將您重新導向各地 方D-Link官方網站。 D-Link 友訊科技 台灣分公司 技術支援資訊 中 文 如果您還有任何本使用手冊無法協助您解決的產品 相關問題,台灣地區用戶可以透過我們的網站、電 子郵件或電話等方式與D-Link台灣地區技術支援工 程師聯絡。 D-Link 免付費技術諮詢專線 0800-002-615 服務時間:週一至週五,早上9:00到晚上9:00 (不含周六、日及國定假日) 網 站:http://www.dlink.com.tw 電子郵件:[email protected] 如果您是台灣地區以外的用戶,請參考D-Link網 站,全球各地分公司 的聯絡資訊以取得相關支援服務。 產品保固期限、台灣區維修據點查詢,請參考以下 網頁說明: http://www.dlink.com.tw 產品維修: 使用者可直接送至全省聯強直營維修站或請洽您的 原購買經銷商。 60 D-Link Wireless N Services Router Building Networks for People Petunjuk Pemasangan Cepat Unified Services Router This document will guide you through the basic installation process for your new D-Link Wireless N Services Router. DSR-500N / DSR-1000N Documentation also available on CD and via the D-Link Website Item Fitur Deskripsi A Lampu LED (Atas ke Bawah) Lampu LED Power : Menandakan Wireless N Services Router dalam kondisi hidup Lampu LED 5GHz WLAN (hanya ada pada DSR-1000N) : Lampu menyala terang menandakan bagian nirkabel sudah siap. Lampu LED ini akan berkedip-kedip selama transmisi data nirkabel. Lampu LED 2.4GHz WLAN : Lampu menyala terang menandakan bagian nirkabel sudah siap. Lampu LED ini akan berkedip-kedip selama transmisi data nirkabel. B Port-port USB (2) Dapat mendukung perangkat USB 1.1 atau 2.0 berikut : 1.Flash Disk atau Hard Disk untuk pembagian jaringan. 2.Adaptor 3G untuk cadangan WAN (hanya ada pada DSR-1000N). 3.Konfigurasi WCN (akan didukung oleh firmware terbaru berikutnya). 4.Printer (akan didukung oleh firmware terbaru berikutnya). C Tombol WPS -- Satu (1) CD Referensi (CD-ROM berisi dokumentasi produk dalam format PDF) Sistem Wi-Fi Protected Setup (WPS) adalah metode penyederhanaan untuk mengamankan jaringan nikabel anda selama “Pemasangan Awal” dan pada saat proses “Penambahan Perangkat Baru”. Silahkan mengacu pada Petunjuk Penggunaan untuk proses lebih detil. D -- Dua (2) Braket Pemasangan Rak Port LAN Gigabit (1-4) Menghubungkan perangkat Ethernet seperti komputer, switch dan hub. E Port WAN Gigabit (1-2) 2 buah port WAN Auto MDI/MDIX yang digunakan untuk koneksi ke modem kabel atau DSL. Port WAN2 adalah port yang dapat diatur apakah menjadi port WAN2 atau DMZ untuk koneksi dual WAN atau keperluan area server internal. F Port Konsol Digunakan untuk mengakses Command Line Interface (CLI) melalu kabel konsol RJ45-to-DB9. Mengenai Petunjuk Ini Petunjuk ini memberikan instruksi langkah demi langkah untuk memasang D-Link DSR-500N/1000N Wireless N Services Router. Catatan bahwa model yang anda beli mungkin sedikit berbeda dengan yang ditunjukkan pada ilustrasi. Mengeluarkan Produk Buka kardus pembungkus dan keluarkan isinya secara hati-hati. Silahkan periksa isinya sesuai dengan isi paket yang ada dibawah untuk memastikan semua item ada dan tidak rusak. Jika ada item yang hilang atau rusak, silahkan hubungi penjual lokal D-Link anda untuk penggantian. -- Satu (1) DSR-500N/1000N Wireless N Services Router Appliance. -- Satu (1) Kabel Power -- Satu (1) Kabel Konsol (Kabel RJ45-to-DB9) -- Satu (1) Kabel Ethernet (CAT5 UTP/Straight Through) -- Tiga (3) Antena Omni yang bisa dilepas Pengenalan Produk Panel Depan – DSR-500N/1000N BAHASA INDONESIA Tabel 1. Deskripsi Panel Depan DSR-500N/1000N Lampu LED perangkat dan Lampu LED port Ethernet Kecepatan Sambungan Status TX/RX Gambar 2. Lampu LED Port Ethernet RJ-45 A B C D E F Gambar 1. Panel Depan DSR-500N/1000N Catatan: DSR-500N hanya mendukung satu buah port USB saja 62 D-Link Wireless N Services Router Lampu LED perangkat menunjukkan informasi mengenai status perangkat sekarang. Ketika perangkat dihidupkan, lampu LED POWER/ STATUS akan berwarna oranye selama proses awal. Proses awal menyita waktu kira-kira satu menit untuk selesai, kemudian lampu LED akan berubah menjadi hijau. Jika anda mematikan perangkat dan menghidupkannya lagi, kami menyarankan untuk menunggu beberapa detik setelah perangkat mati dan baru hidupkan kembali. Lampu LED Ethernet menunjukkan status dari setiap port Ethernet. Tabel 2 berisi nama, warna, status dan deskripsi dari setiap lampu LED perangkat. Indikator lampu LED Warna Status Power/ Status Oranye/ Oranye Hijau Terang Deskripsi Memasangan dan Koneksi Perangkat selama proses awal Bagian ini menjabarkan bagaimana memasang DSR-500N/1000N pada rak peralatan standar 19 inci dan bagaimana menghubungkan kabel dan power ke perangkat. 2.4GHz/5GHz Proses awal selesai WLAN Kecepatan Sambungan USB WPS TX/RX Status LINK Speed Hijau Hijau Biru Hijau Hijau/ Oranye USB Perangkat terganggu dan dalam mode pemulihan WPS Sistem tidak berfungsi, misalnya upgrade firmware gagal Status TX/RX Perangkat mati Hijau Terang Sambungan bagus Hijau Berkedip Ada aktivitas pada port ini Lampu Mati Tidak ada sambungan Hijau Diam Sambungan bagus Hijau Berkedip Ada aktivitas pada port ini Lampu Mati Tidak ada sambungan Biru Berkedip Memulai proses Biru Terang Koneksi terhubung dengan sukses Lampu Mati Tidak ada sambungan Lampu Mati Tidak ada sambungan Hijau Terang Sambungan tersedia Hijau Berkedip Port mengirim atau menerima data Lampu Mati Port beroperasi pada kecepatan 10Mbps Hijau Terang Port beroperasi pada kecepatan 100Mbps Oranye Terang Port beroperasi pada kecepatan 1000Mbps Tabel 2. Deskripsi Status Lampu LED Perangkat Antar-Muka Ethernet Tipe Antar-Muka Alamat IP Manajemen berbasiskan Web LAN(1-4) / WLAN IP Statis 192.168.10.1/24 Aktif WAN1 Klien DHCP 0.0.0.0/0 Tidak Aktif WAN2 (Port yang dapat diatur) Klien DHCP (Bawaan) 0.0.0.0/0 Tidak Aktif IP Statis (Ketika diatur sebagai DMZ) 172.17.100.254/24 Tidak Aktif -- Sebelum pemasangan, selalu periksa dan pastikan power supply tidak terhubung. -- Pastikan ruangan dimana anda memasang mempunyai sirkulasi udara dan suhu ruang tidak melebihi 40oC (104oF). -- Berikan 1 meter (3 kaki) ruang kosong didepan dan belakang perangkat. -- Jangan letakkan benda pada rangka rak peralatan yang dapat menghalangi ventilasi udara pada bagian samping chassis. Pastikan rak tertutup mempunyai kipas dan sisi yang berventilasi. -- Perbaiki kondisi bahaya berikut sebelum pemasangan : lantai basah atau lembab, kebocoran, kabel yang tidak di-ground atau diamankan, atau tidak ada ground keselamatan Pemasangan Perangkat Anda dapat mengaitkan perangkat DSR-500N/1000N ke rak peralatan standar 19 inci. Untuk memasang perangkat ke sebuah rak : 1. Pasang braket pemasangan ke setiap sisi dari chassis seperti yang ditunjukkan pada gambar 3 dan amankan dengan baut yang disediakan. Tabel 3. Seting Antar-Muka Awal Catatan : D-Link Wireless N Services Router hanya mengijinkan akses web GUI dari antar-muka LAN dan WLAN secara bawaan untuk alasan keamanan. WAN2 adalah port yang dapat diatur untuk mendukung bermacam-macam skenario dan aplikasi tingkat lanjut. Ketika port WAN2 diatur sebagai port DMZ, alamat IP akan diganti ke 172.17.100.254. Gambar 3. Memasang Braket Pemasangan Rak D-Link Wireless N Services Router 63 BAHASA INDONESIA Seting Antar-Muka awal DSR-500N/1000N Sebelum Anda Mulai Perhatikan langkah-langkah dibawah untuk membantu mencegah shutdown, perangkat rusak dan cedera : 2. Kemudian, gunakan baut yang disediakan oleh Menghubungkan Perangkat ke Jaringan rak peralatan untuk memasang perangkat ke rak. Bagian ini menyediakan informasi dasar mengenai cara menghubungkan DSR-500N/1000N ke jaringan secara fisik. Untuk menghubungkan kabel-kabel yang dibutuhkan seperti yang terlihat pada Gambar 5. 1. Hubungkan kabel RJ-45 dari port dengan label WAN1 ke router eksternal. Port WAN1 dialokasikan untuk bagian jaringan WAN1. 2. Hubungkan kabel RJ-45 ke port dengan label LAN (1-4) ke sebuah switch pada bagian jaringan LAN. 3. Hubungkan kabel RJ45-to-DB9 ke port konsol untuk akses manajemen CLI (Command Line Interface). Internet Gambar 4. Memasang Wireless N Services Router ke rak peralatan ukuran standar. WAN1 Menghubungkan Power dan Melakukan On/Off BAHASA INDONESIA Kabel Power AC yang disediakan menghubungkan perangkat ke ground bumi ketika dicolokkan ke colokan listrik tipe ground AC. Perangkat harus dihubungkan ke ground bumi selama operasi normal. Untuk menghubungkan power ke perangkat, colok ujung kabel power AC ke colokan power pada bagian belakang perangkat. Colok ujung satunya lagi ke colokan listrik AC. Catatan : Kami menyarankan untuk menggunakan sebuah surge protector untuk koneksi power. Untuk menghidupkan perangkat DSR-500N/1000N, tekan tombol power AC pada panel bagian belakang ke posisi On. Untuk mematikan perangkat, tekan tombol switch ke posisi Off. LAN Switch Console User Gambar 5. Contoh Pengkabelan Dasar Konfigurasi Awal Perangkat Lunak Wireless N Services Router terpasang didalam perangkat DSR-500N/1000N. Ketika perangkat dihidupkan maka perangkat siap untuk diseting. Perangkat mempunyai konfigurasi bawaan pabrik yang mengijinkan anda untuk terhubung ke perangkat untuk awalnya, anda harus melakukan konfigurasi lebih lanjut sesuai dengan kebutuhan jaringan anda. Menggunakan Web UI Untuk menggunakanWeb UI, Komputer tempat dimana anda mengatur perangkat harus berada dalam subnet yang sama dengan perangkat pada awalnya. 64 D-Link Wireless N Services Router Browser Microsoft Internet Explorer Versi 6.0 atau lebih tinggi Menggunakan sebuah Koneksi Konsol (RJ45-to-DB9 DCE) Wireless N Services Router menyediakan sebuah port serial yang memungkinkan komputer atau terminal untuk memonitor dan mengatur perangkat. Port ini adalah sebuah konektor RJ-45, diimplementasikan sebagai koneksi Data Communication Terminal Equipment (DCE). Mozilla Firefox 3.5 atau lebih tinggi Netscape Navigator 9.0 atau lebih tinggi Apple Safari 4.0 atau lebih tinggi Untuk menggunakan koneksi port konsol, anda butuh perangkat sebagai berikut: Google Chrome 3.0 atau lebih tinggi 1. Sebuah terminal atau komputer dengan port serial dan kemampuan untuk mengemulasi sebuah terminal. Tabel 4. Kompatibilitas Browser Untuk mengakses perangkat menggunakan Web UI: 2. Konektor Female RJ45-to-DB9 RS-232 (termasuk dalam paket penjualan). 1. Hubungkan komputer anda ke port dengan label LAN (1-4), dimana dialokasikan untuk LAN. 3. Jika Laptop atau PC anda tidak mempunyai konektor RS-232, sebuah konverter dibutuhkan. 2. Pastikan komputer anda mempunyai alamat IP statis dalam subnet 192.168.10.0/24. Catatan: Non-Aktifkan perangkat lunak yang digunakan untuk menghentikan pop-up atau masukkan alamat IP manajemen http://192.168.10.1 ke daftar yang diijinkan dari perangkat lunak penghentian pop-up anda. 3. Jalankan browser anda, masukkan alamat IP dari antar-muka LAN. (alamat IP bawaan pabrik adalah http://192.168.10.1) , kemudian tekan Enter. Username: admin Password: admin Gambar 7. Pesan Autentikasi Membangun koneksi konsol: 1. Masukkan konektor RJ-45 yang disediakan pada kabel RJ-45-to-DB9 ke port konsol pada Wireless N Services Router. 2. Hubungkan ujung satunya lagi ke sebuah terminal atau konektor serial pada komputer yang menjalankan perangkat lunak emulasi terminal. Atur perangkat lunak emulasi terminal sebagai berikut: Baud rate: 115200 Data bits: 8 Parity: None Stop bits: 1 Flow control: None 3. Ketika anda sudah mengatur terminal dengan benar, lakukan instruksi yang sudah dijelaskan pada bagian 2.3, ” Menghubungkan Power dan Melakukan On/Off” kemudian hidupkan perangkat anda. Proses boot akan muncul di terminal 4. Setelah proses boot selesai, command prompt akan muncul dan perangkat siap untuk diseting. D-Link Wireless N Services Router 65 BAHASA INDONESIA Gambar 6. Alamat Browser 4. Masuk ke Antar-Muka berbasiskan Web Wireless N Services Router dengan informasi bawaan sebagai berikut: Catatan: Konverter RS-232 tidak termasuk dalam paket penjualan DSR-500N/1000N dan harus dibeli secara terpisah. Menyelesaikan Konfigurasi Setelah melakukan pemasangan awal, anda harus mengacu pada dokumen dalam format PDF yang berada dalam CD untuk mengetahui informasi lebih lanjut mengenai cara memulai untuk mengatur perangkat DSR-500N/1000N. Petunjuk Penggunaan D-Link Wireless N Services Router Dokumen ini menjabarkan operasi umum dan kontrol dari firmware Wireless N Services Router yang menggerakkan dan mengontrol perangkat keras seri Wireless N Services Router. Didalamnya termasuk bagaimana menangani tugas-tugas administrasi seperti mengatur sebuah VPN dan menggunakan Wireless N Services Router dalam berbagai macam skenario. Petunjuk Penggunaan CLI D-Link Wireless N Services Router Dokumen ini menjabarkan semua perintah berbasiskan teks yang tersedia yang dapat digunakan melalui konsol RJ45-to-DB9 atau antar-muka SSH untuk mengatur Wireless N Services Router selama operasi sistem. BAHASA INDONESIA Informasi Tambahan Informasi tambahan tersedia melalui kantorkantor perwakilan D-Link diseluruh dunia seperti yang ada dalam daftar tambahan dari Petunjuk Penggunaan atau online. Untuk mengetahui lebih lanjut mengenai produk keamanan D-Link atau informasi pemasaran, silahkan kunjungi website http://mydsr.dlink.com.tw; untuk masalah bantuan, silahkan kunjungi website http://support.dlink.com. tw, dimana akan mengantarkan anda ke website lokal D-Link yang sesuai. Dukungan Teknis Update perangkat lunak dan dokumentasi pengguna dapat diperoleh pada situs web D-Link. Dukungan Teknis untuk pelanggan: Dukungan Teknis D-Link melalui telepon: Tel: +62-21-5731610 Dukungan Teknis D-Link melalui Internet: Email : [email protected] Website : http://support.dlink.co.id 66 D-Link Wireless N Services Router Building Networks for People クイックインストールガイド Unified Services Router This document will guide you through the basic installation process for your new D-Link Wireless N Services Router. DSR-500N / DSR-1000N Documentation also available on CD and via the D-Link Website 項目 機能 内容 A LED Power LED:本製品の電源が供給さ れ、正常に動作しています。 5GHz WLAN LED(DSR-1000Nのみ):点 灯時は無線LAN による通信が可能な 状態です。点滅時は無線LAN により データを送受信しています。 2.4GHz WLAN LED:点灯時は無線LAN による通信が可能な状態です。点滅 時は無線LAN によりデータを送受信 しています。 B USBポート(2) 下記の様々なUSB 1.1もしくは2.0 に対応するデバイスに対応して います。 1.ネットワーク共有用のフラッシ ュディスクもしくはハードディスク 2.冗長化に対応する3Gアダプタ (DSR-1000Nのみに対応) 3.WCN設定(次期ファームウェアに て対応) 4.プリンター(次期ファームウェ アにて対応) C WPSボタン -- ネットワークケーブル(CAT5 UTP/ストレー ト) x 1 Wi-Fi Protected Steup(WPS)システ ムは「新規デバイスの追加」と同様 に「初期設定」を安全なワイヤレス 環境で行なうことが出きる方法で す。WPSに関しての詳細は、ユーザ マニュアルを参照して下さい。 D ギガビットLANポ ート(1-4) パソコンやスイッチ、ハブ等のネッ トワークデバイスを接続します。 -- CD-ROM(ユーザマニュアルを含む) x 1 E ギガビットWANポ ート(1-2) 2つのAuto MDI/MDIX WANポートはネ ットワークケーブルを使用して、 ケーブルモデムまたはDSLモデムへ 接続します。 2つのWANポートはデュアルWAN接 続もしくは内部サーバファームと してWAN2ポートもしくはDMZポー トをサポートできる構成可能なポ ートです。 F コンソールポート RJ45-to-DB9コンソールケー ブルを使用し、Command Line Interface(CLI)へ接続するために 使用します。 本書について 本書はD-Link DSR-500N/1000Nワイヤレス IEEE802.11N対応ルータの設定方法を説明しま す。ご購入いただきました製品と本書に記載され ている図が若干異なる場合があります。 パッケージ内容について 本製品の箱を開梱し、下記にリストされている物 が同梱されているかを確認してください。同梱物 の不足や破損がありましたら、弊社ホームページ にてユーザ登録を行い、サポート窓口までご連絡 お願い致します。 -- DSR-500NもしくはDSR-1000N ワイヤレスルー タx 1 -- 電源ケーブルx 1 -- コンソールケーブル(RJ-45-to-DB9ケーブル) x 1 -- 19インチラックマウントキットx 2 -- アンテナ x 3 製品概要について 前面パネル – DSR-500N/1000N テーブル1.DSR-500N/1000N 前面パネルの詳細 デバイスステータスとイーサネットポー トのLED リンクス ピード TX/RXステ ータス 図2:イーサネットRJ-45ポートのLED A B C D E F 図1:DSR-500N/1000N 前面パネル 日本語 備考:DSR-500Nのみ1USBポートに対応して います。 68 D-Link N Services Router D-Link Wireless ワイヤレスNサービスルータ 各LEDの状態は本製品の状態を把握することがで きます。本製品に電源を供給すると、本製品が 起動するまでPOWER/STATUS LEDが橙色で点灯しま す。本製品が起動するまでに約一分間程度かか り、完全に起動するとLEDが緑色に点灯します。 本製品の電源を切り、再度電源を入れる場合に は、電源を切ってから数秒間の時間を置いてか ら、再度電源をいれることをお勧めいたします。 イーサネットLEDは各イーサネットポートの状態 を表しています。テーブル2において、各デバイ スLEDの名称、色、状態、そしてその内容を説明 していますので、参照下さい。 LEDインジケ ータ 色 状態 内容 設置及び接続方法について Power / Status 橙/緑 点灯・橙 電源の供給をしています。 点灯・緑 電源が供給されています。 点滅・橙 本体がクラッシュし、リカバ リーモードで起動中です。 この章ではDSR-500N/1000N への19インチラックマ ウントキットの取付けとケーブルおよび電源への接 続方法を説明致します。 点滅・緑 ファームウェアのアップグ レードに失敗するなどで、 本製品にエラーが発生して います。 始める前に 以下の注意をよく読み守った上で、本製品のクラッ シュや、故障およびケガ等に注意してください。 消灯 電源が供給されていま せん。 -- 設定をする前に、必ず電源が供給されていないか を確認してください。 点灯・緑 リンクが確立しています。 点滅・緑 データ転送が行なわれて います。 消灯 リンクがありません。 点灯・緑 リンクが確立しています。 点滅・緑 データ転送が行なわれて います。 消灯 リンクがありません。 点滅・青 WPS機能を使用して、接続を 試みています。 点灯・青 WPS接続が正常に確立され ました。 消灯 リンクがありません。 消灯 リンクがありません。 2.4GHz/5GHz WLAN 緑 USB 緑 WPS 青 TX/RXステー タス リンクスピ ード 緑 緑/橙 点灯・緑 リンクされています。 点滅・緑 データを送受信しています。 消灯 10Mbpsでリンクが確立して います。 点灯・緑 100Mbpsでリンクが確立して います。 点灯・橙 1000Mbpsでリンクが確立し ています。 テーブル2.デバイスステータスLEDの詳細 DSR-500N/1000N デフォルトインタフェ ース設定 イーサネット インタフェ ース インタフェース タイプ IPアドレス WEBベース マネージメ ント LAN(1-4)/ WLAN スタティックIP 192.168.10.1/24 有効 WAN1 DHCPクライ アント 0.0.0.0/0 無効 WAN2(設 定可能なポ ート) DHCPクライアン ト(デフォルト) 0.0.0.0/0 無効 スタティック IP(DMZポートとし て設定した場合) 172.17.100.254/24 無効 -- 本製品の機器を設置し、使用する部屋もしくは 環境において十分な空気循環を行なうことがで き、室内の温度が40℃以上にならないよう注意 してください。 -- 本製品の前面、背面、及び側面において、1メー ル以上のスペースを空けて設置してください。 -- 本製品の側面にある空気口を塞ぐ状態での設置は 行なわないで下さい。 -- 設置を行なう際に、以下の危険な状態がある場 合はその環境を正し、安全な環境で設置できる よう対策を施してください:湿気があり、床が ぬれた状態や電源ケーブルがアースされていな い、もしくは擦り切れている状態、保守用アー スがない状態 本製品の設置に関して DSR-500N/1000Nに同梱されている19インチラック マウントキットを取り付けることができます。19 インチラックマウントキットの取付け方法は下記 を参照ください。 1.本製品の両サイドに19インチラックマウント キットを同梱されているネジを使用し、図3 のように取付け固定します。 備考:D-Link ワイヤレスNサービスルータはセキュ リティの問題上、LAN及びWLANインタフェースからの みWEB GUIへのアクセスを許可しています。WAN2は様 々な高機能アプリケーションに対応している設定可 能なポートです。WAN2ポートがDMZポートとして設定 されている場合、IPアドレスは172.17.100.254に変 更されます。 日本語 テーブル3.インタフェースのデフォルト設定値 図3.19インチラックマウントキットの取付け D-Link ワイヤレスNサービスルータ Wireless N Services Router 69 D-Link 2.残りのネジを使用して、本製品をラックに取付 けます ネットワークへ接続 この章ではDSR-500N/1000Nのネットワーク接続を 行うための基本的な方法を説明します。図5にお いて、接続方法が表示されています。 1.外部ルータのWAN1と記されているポートに RJ-45ケーブルを接続します。ポートWAN1は WAN1ネットワークセグメントとして事前に割 り当てられたポートです。 2.LANネットワークセグメントに接続するため に、本製品のLAN1~LAN4と記されているポー トに外部ルータに接続されているRJ-45ケーブ ルのもう片方を接続します。 3.CLI(Command Line Interface)マネージメン トに接続するために、コンソールポートに RJ45-to-DB)ケーブルを接続します。 Internet 図4.ラックへの取付け WAN1 電源接続と電源のON/OFF 同梱されているAC電源ケーブルを本製品に接続し ます。通常の動作時にはアース線をとりつける必 要があります。 本製品に電源を接続するには、本製品の背面パ ネルにある電源コネクタにAC電源ケーブルを接 続し、もう片方をコンセントに差し込んでくだ さい。 備考:電源の接続の際にはサージプロテクターを 使用することをお勧めします。 DSR-500N/1000Nに電源を入れる際には、背面パネ ルにある電源スイッチをON方向へ押してくださ い。電源を切る際には、電源スイッチをOFF方向 へ押し電源を切ってください。 LAN Switch Console User Figure 5. Basic Cabling Example 初期設定について 日本語 ワイヤレスNサービスルータのソフトウェアは DSR-500N/1000Nに事前にインストールされていま す。本製品に電源を投入に起動すると、設定を開 始することができます。工場出荷時の設定内容は 本製品への接続を行うための初期設定値となり、 ご使用のネットワーク環境に応じて設定内容を変 更する必要があります。 WEB GUIの使用 WEB GUI使用するために、設定用PCは本製本と同 じサブネットマスクに設定する必要があります。 70 D-Link D-Link ワイヤレスNサービスルータ Wireless N Services Router ブラウザ Microsoft Internet Explorer バージョン 6.0もしくは それ以降 Mozilla Firefox 3.5 もしくは それ以降 Netscape Navigator 9.0 もしくは それ以降 Apple Safari 4.0 もしくは それ以降 Google Chrome 3.0 もしくは それ以降 テーブル4.ブラウザの互換性 WEB GUIへの接続: 1.LANとして既に割り当てられているLAN1~4の ポートに設定用PCを接続します。 2.設定用PCのスタティックIPアドレスが 192.168.10.0/24のサブネット内で設定されて いるかを確かめてください。 備考:ポップアップをブロックするソフトウ ェアは無効にするか、もしくはポップアップ を許可するリストにhttp://192.168.10.1追加 してください。 3.ブラウザを起動し、工場出荷時のIPアドレス http://192.198.10.1を入力し、Enterキーを 教えてください。 図6. 工場出荷時のIPアドレス 4.WEB GUIのログイン認証画面が表示後、ログ インを行うために下記のログイン情報を入力 します。 Username: admin Password: admin コンソールケーブル(RJ45-to-DB9)の使用 本製品はコンピュータもしくはその他の端末から 接続し、モニタリングや製品の設定ができるよう シリアルポートが搭載されています。このポート はDCE(Data Communication Terminal Equipmet) 接続用として搭載しているRJ-45コネクタです。 コンソールポートへの接続を行うには、下記が必 要となります。 1.シリアルポートがありターミナルをエミュレ ートできる端末もしくはコンピュータ 2.RJ45-to-DB9 RS232メスコネクタ(本製品とと もに同梱されています。) 3.ご使用のノートパソコンもしくはPCにRS-232 コネクタが搭載されていない場合の変換機( 本製品とともに同梱されていませんので、ご 注意ください。) 備考:RS-232の変換機はDSR-500N/1000Nに同梱さ れていないため、別途購入する必要があります。 コンソール接続を行うには: 1.本製品のコンソールポートに同梱されている RJ45-to-DB9ケーブルを直接接続します。 2.RJ45-to-DB9ケーブルのもう片方をシリアルポ ートがありターミナルをエミュレートできる 端末もしくはコンピュータに接続します。 Baud rate: 115200 Data bits: 8 Parity: None Stop bits: 1 Flow control: None 3.ターミナルの設定が終了後、セクション2.3の 「電源接続と電源のON/OFF」の説明に従い、 本製品でCLIを使用できるように切り替えてく ださい。ブートシーケンスはターミナルに表 示されます。 4.ブートシーケンスが完了すると、コマンドプ ロンプトに表示され、設定を開始することが できます。 日本語 図7. WEB GUIのログイン認証画面 D-LinkワイヤレスNサービスルータ Wireless N Services Router 71 D-Link 詳細設定について 初期設定終了後にDSR-500N/1000Nの詳細設定を行 うには、同梱されているCD-ROMに集録されている ユーザマニュアルを参照ください。 D-Link ワイヤレスNサービスルータ ユーザマニュ アルについて ユーザマニュアルは本製品の一般的な操作と管理 方法に関して記載されています。VPNの設定や本 製品の様々な使用用途に合わせることができるよ うサンプル例を記載してあります。 D-Link ワイヤレスNサービスルータ CLIリファレ ンスガイドについて CLIリファレンスガイドは本製品が稼働中に RJ45-to-DB9コンソールもしくはSSHを使用して実 行できるテキストベースコマンドが全て記載され ています。 その他 本製品に関するお問い合わせは、弊社ホームペー ジにてユーザ登録を行い弊社サポート窓口へお問 い合わせください。下記弊社Webサイトからユー ザ登録及び新製品登録を行っていただくと、ダウ ンロードサービスにてサポート情報、ファームウ ェア、ユーザマニュアルをダウンロードすること ができます。 ホームページ:http://www.dlink-jp.com Technical Support この度は弊社製品をお買い上げいただき、誠にあり がとうございます。 下記弊社Webサイトからユーザ登録及び新製品 登録を 行っていただくと、ダウンロードサービスにて サポート情報、ファームウェア、ユーザマニュアルを ダウンロードすることができます。 ディーリンクジャパン Webサイト URL: http://www.dlink-jp.com 日本語 72 D-Link D-Link ワイヤレスNサービスルータ Wireless N Services Router Appendix: Product Statement FCC EMI for Class B Statements FCC Statement This equipment has been tested and found to comply with the limits for a Class B digital device, pursuant to part 15 of the FCC Rules. These limits are designed to provide reasonable protection against harmful interference in a residential installation. This equipment generates, uses, and can radiate radio frequency energy and, if not installed and used in accordance with the instructions, may cause harmful interference to radio communication. However, there is no guarantee that interference will not occur in a particular installation. If this equipment does cause harmful interference to radio or television reception, which can be determined by turning the equipment off and on, the user is encouraged to try to correct the interference by one or more of the following measures: • Reorient or relocate the receiving antenna. • Increase the separation between the equipment and receiver. • Connect the equipment into an outlet on a circuit different from that to which the receiver is connected. • Consult the dealer or an experienced radio/TV technician for help. FCC CAUTION Any changes or modifications not expressly approved by the party responsible for compliance could void the user’s authority to operate this equipment. For operation within 5.15 ~ 5.25GHz frequency range, this device is restricted to indoor environments. This device complies with Part 15 of the FCC Rules. Operation is subject to the following two conditions: (1) This device may not cause harmful interference, and (2) this device must accept any interference received, including interference that may cause undesired operation. IMPORTANT NOTICE FCC Radiation Exposure Statement: This equipment complies with FCC radiation exposure limits set forth for an uncontrolled environment. This equipment should be installed and operated with minimum distance 20cm between the radiator & your body.This transmitter must not be co-located or operating in conjunction with any other antenna or transmitter. The availability of some specific channels and/or operational frequency bands are country dependent and are firmware programmed at the factory to match the intended destination. The firmware setting is not accessible by the end user. For operation within 5.15 & 5.25 GHz frequency range. This product is restricted to indoor environment. For detailed warranty information applicable to products purchased outside the United States, please contact the corresponding local D-Link office. Industry Canada Notice This device complies with RSS-210 of the Industry Canada Rules. Operation is subject to the following two conditions: (1) This device may not cause harmful interference, and (2) this device must accept any interference received, including interference that may cause undesired operation. IMPORTANT NOTE Radiation Exposure Statement: This equipment complies with Canada radiation exposure limits set forth for an uncontrolled environment. This equipment should be installed and operated with minimum distance 20 cm between the radiator & your body. This device has been designed to operate with an antenna having a maximum gain of 2dB. Antenna having a higher gain is strictly prohibited per regulations of Industry Canada. The required antenna impedance is 50 ohms. Caution The device for the band 5150-5250 MHz is only for indoor usage to reduce potential for harmful interference to co-channel mobile satellite systems. High power radars are allocated as primary users (meaning they have priority) of 5250-5350 MHz and 5650-5850 MHz and these radars could cause interference and/or damage to LE-LAN devices. CE Mark Warning This is a Class B product. In a domestic environment, this product may cause radio interference, in which case the user may be required to take adequate measures. Warnung! Warnung! Dies ist ein Produkt der Klasse B. Im Wohnbereich kann dieses Produkt Funkstoerungen verursachen. In diesem Fall kann vom Benutzer verlangt werden, angemessene Massnahmen zu ergreifen. Precaución! Este es un producto de Clase B. En un entorno doméstico, puede causar interferencias de radio, en cuyo case, puede requerirse al usuario para que adopte las medidas adecuadas. Attention! Ceci est un produit de classe B. Dans un environnement domestique, ce produit pourrait causer des interférences radio, auquel cas l`utilisateur devrait prendre les mesures adéquates. Attenzione! Il presente prodotto appartiene alla classe B. Se utilizzato in ambiente domestico il prodotto può causare interferenze radio, nel cui caso è possibile che l`utente debba assumere provvedimenti adeguati. VCCI WARNING Statement D-Link Wireless N Services Router 73 Ver. 1.00 2010/04/12