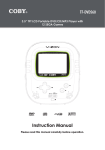
1
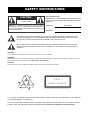
Portable MP3/CD Player with AM/FM Radio
MP-CD455
Instruction Manual
SAFETY INSTRUCTIONS
CAUTION
For Customer Use:
Enter below the serial number that is located on the
bottom of the unit. Retain this information for future
reference.
RISK OF ELECTRIC SHOCK
DO NOT OPEN
CAUTION: TO REDUCE THE RISK OF FIRE AND ELECTRIC SHOCK, DO NOT REMOVE THE COVER (OR BACK)
OF THE UNIT. REFER SERVICING ONLY TO QUALIFIED
SERVICE PERSONNEL.
Model No.
MP-CD455
Serial No.
The lightning flash with arrowhead symbol within an equilateral triangle is intended to alert
the user to the presence of uninsulated “dangerous voltage” within the product’s enclosure
that may be of sufficient magnitude to constitute a risk of electric shock.
The exclamation point within an equilateral triangle is intended to alert the user to the presence of important operation and servicing instructions in the literature accompanying the
appliance.
WARNING:
To prevent fire or shock hazard, do not expose this device to rain or moisture.
WARNING:
Handling the cords on this product will expose you to lead, a chemical known to the State of California to cause cancer, and
birth defects or other reproductive harm. Wash hands after handling.
CAUTION:
To prevent electric shock, match wide blade of plug to wide slot of outlet and fully insert.
CLASS 1
LASER PRODUCT
For recycling or disposal information about this product, please contact your local authorities or the Electronics Industries Alliance: www.eiae.org.
This unit incorporates a safety interlock mechanism that switches the laser beam on and off. When the disc
holder is open, the laser beam stops automatically. Do not attempt to defeat the safety interlock.
--
SAFETY INSTRUCTIONS (Cont.)
1.
Read these instructions carefully. Keep these instructions for future reference.
2.
Heed all warnings and follow all instructions.
3.
Do not expose to water or moisture.
4.
Clean only with a dry cloth.
5.
Keep objects away from ventilation openings. Do not block ventilation openings at any time.
6.
Do not install near any apparatus that produces heat such as stoves, radiators, amplifiers, etc.
7.
Do not force the power plug into a wall outlet. If the plug provided does not fit into your outlet, consult an
electrician for replacement of the obsolete outlet. (A polarized plug has two blades where one is wider than
the other; the wide blade is provided for your safety.)
8.
Do not place heavy objects on the power cord. Protect the cord from being walked on, pinched by objects,
or torn and exposed to liquids (especially at plugs, convenience receptacles, and the point at which they
exit from the device).
9.
Use only with attachments/accessories specified by the manufacturer. Use of attachments/accessories
not recommended by the product manufacturer may be hazardous.
10. Use only with a cart, stand, tripod, bracket, or table specified by the manufacturer or sold with the device.
If a cart is used, use caution when moving the cart/device combination to avoid injury from tip over.
11. Unplug the unit during lightning storms. Unplug the device and remove any batteries when the device will
be unused for long periods of time.
12. Do not use headphones/earphones at high volume.
13. Do not open or attempt to repair this device. Refer all repairs to authorized service personnel.
Positioning the Unit:
•
The ventilation openings should not be impeded by covering them with items such as newspapers, table
cloths, curtains, etc. Do not stand the unit on a thick pile carpet or otherwise install it in a place with
inadequate air flow.
•
Do not use the unit in excessively hot, cold, dusty, damp, or humid locations.
•
Condensation may form inside the CD player if the unit is left anywhere warm and damp, or if you move
the unit from a cold location to a warm room. In this case, let the unit stand for 1 to 2 hours or gradually
increase the room temperature so that the unit will be dry before use.
•
Place the unit on a flat, even surface.
•
Do not place the unit where it is subject to vibration.
--
LOCATION OF CONTROLS
Front View
02
03
01
04
Top View
05
15
06
07
14
08
13
20
12
09
21
11
10
Rear View
16
19
Voltage Selector Switch
(110/220 V) (bottom)
18
--
17
LOCATION OF CONTROLS (Cont.)
1.
Speaker
2.
LCD Display
3.
FM Stereo Indicator
4.
Telescopic FM Antenna
5.
Radio Band Switch (FM Stereo, FM, AM)
6.
Next/Fast Forward Button
7.
Play/Pause Button
8.
Previous/Fast Reverse Button
9.
Stop Button
10. Open/Close CD Door
11. Repeat Mode Button (REPEAT)
12. Program Button
13. Headphone Jack
14. Function Switch (MP3/CD, Off, Radio)
15. Handle
16. Volume Dial
17.
AC Power Jack
18. Battery Compartment
19. Tuning Dial
20. Forward 10 (10+)
21. Back 10 (10-)
--
PACKAGE CONTENTS
Carefully unpack the main unit from its carton (do not attempt to connect anything at this stage). The carton
should contain the following items:
1.
Instruction Manual
.
Main Unit with AC Plug
If any of these items are missing, please consult your local retailer. Please retain the original packaging for
future transport of this unit.
CARE & MAINTENANCE
Handling CDs
Hold a CD by its edges. Avoid touching the recorded side of the disc. To remove a CD from its storage case,
press down on the center retention mechanism of the case and lift the disc out.
Cleaning CDs
Use a dry, soft cloth to wipe off any fingerprints and dusts from the playing surface of the disc. Wipe in a straight
line radially from the center to the outside edge of the disc. Small dust particles and light stains will not affect
playback quality.
•
Never use chemicals such as record sprays, anti-static sprays, benzene, or thinners to clean your CDs.
•
To reduce the risk of scratches, always put CDs back in their case after use.
•
Do not subject CDs to prolonged exposure to direct sunlight, high humidity, or high temperatures.
•
Do not place stickers or labels on either side of the CD.
Cleaning the CD Player Lens
A dirty lens can cause CD playback to skip. If the lens is very dirty, the CD may not work at all. Unplug the power
supply, open the CD door, and clean the lens as follows:
•
For Dust or Dry Particles - use a camera lens brush/blower to blow on the lens a few times. Then, wipe
the lens gently with the brush, and blow on the lens once more.
•
For Fingerprints - use a dry cotton swab to wipe the lens in a straight line radially from the center to the
outside edge.
--
GENERAL OPERATION
Power Sources
AC Power
Before connecting the unit to an AC outlet, make sure that the operating voltage of the unit has been properly
set to match the voltage of your local power supply (110V or 220V). The voltage switch can be found on the
bottom of the unit.
When you have confirmed that the proper voltage has been set, use the supplied AC power cord to connect the
unit to an AC outlet.
DC Power (Battery Operation)
Remove the battery compartment cover on the rear of the unit and insert 8 “C” batteries. Make sure that the
polarity of the batteries (+/-) match the markings on the inside of the battery compartment. Replace the battery
compartment cover.
Stereo Headphone Jack
Make sure to lower the volume on the unit prior to use with headphones to avoid damage to your hearing or the
headphones.
For private listening, connect a pair of headphones to the headphone jack on the unit. The speakers on the unit
will be disconnected during headphone use.
Power On / Function Modes
Use the Function switch to change the operation mode of the unit. Set the switch to “MP3/CD” to play CDs and
MP3-CDs (MP3/CD mode), set the switch to “Radio” to listen to the radio (Radio mode), and set the switch to
“Off” to turn off the unit.
RADIO OPERATION
Set the Function switch to the RADIO position to listen to AM/FM radio broadcasts.
•
To listen to FM broadcasts, set the Band switch to the FM or FM ST position (FM ST = FM Stereo). The
FM Stereo indicator will light up when the tuner is receiving an FM Stereo broadcast.
To listen to AM broadcasts, set the Band switch to the AM position.
•
Extend the telescopic rod antenna fully and adjust its position to obtain the best FM broadcast reception.
The AM antenna is built into the unit; turn or move the entire unit to obtain the best AM reception.
•
Turn the tuning dial to change the radio station.
--
MP3/CD OPERATION
Set the Function switch to the MP3/CD position to listen to MP3-CDs or regular audio CDs.
What is an MP3-CD?
MP3-CDs are CDs that contain MP3 music files. Approximately 200 files can fit on one 700MB CD — in comparison, a regular audio CD can fit approximately 20 tracks. Each MP3 file on the MP3-CD is recognized by the player
as an audio track. The buttons “10+” and “10-” make it easier to find and play a MP3-CD track.
If you own a computer equipped with a CD-R/RW burner and the appropriate mastering software, you may create
your own MP3-CDs (see your burner or computer’s documentation for more information).
Loading a CD
•
Press the OPEN/CLOSE CD Door button to open
the CD door.
•
Place the CD in the compartment with the label
side facing up.
•
Close the CD door. Once the door is closed, the
CD will spin briefly and the total number of tracks
on the CD will be shown on the LCD Display. If an
MP3-CD has been inserted, the LCD will indicate
“MP3”.
Notes
• Do not force the CD door open or
closed at any time.
• Keep the CD door closed when the
unit is not in use to prevent dirt and
dust from entering the CD compartment.
Playing a CD
• Do not put anything other than a CD
in the CD compartment as other objects may damage the play mechanism.
Load a CD and press
to start playback. The LCD
Display will show the track number being played.
• Never insert more than one CD at a
time.
•
To pause playback, press
back, press
again.
•
To select the next track, press
. To fast forward
through the current track, press and hold
.
• If a CD is deeply scratched or too
dirty, it may not play (see the Care &
Maintenance section for more information).
•
To skip forward 10 tracks, press “10+”. For example, if you are currently playing Track 12, press
“10+” to play Track 22.
•
To select the previous track, press
•
To skip backwards 10 tracks, press “10-”. For example, if you are currently playing Track 133, press “10-”
to play Track 123.
•
To stop playback, press
. To resume play-
• Never remove a CD from the compartment while it is still spinning.
. To reverse through a track, press and hold
.
.
Repeat Play Modes
You can set the unit to play a tracks repeatedly. Press REPEAT to cycle through the different Repeat mode options.
To cancel Repeat mode, press REPEAT until the LCD no
longer displays “REPEAT”.
•
Repeat One (LCD displays “REPEAT”): Plays a
single track repeatedly.
•
Repeat All (LCD displays “REPEAT ALL”): Plays
the entire CD repeatedly. If the unit is in Program
mode, the unit will play the entire Program list repeatedly (see the Program Mode section for more
information).
--
Notes
• The program list can store a maximum of 20 tracks.
• The program list will be lost if STOP
is pressed twice, the CD door is
opened, or the unit is turned off.
• If
is pressed before PROG during track selection, the track will not
be added to the program list. The unit
will start playing the CD from the first
selected track instead.
MP3/CD OPERATION
Program Mode
You can set the unit to play tracks on the CD in a predetermined order. To create a programmed track list:
1.
Press
.
Press PROG once. The LCD will display “P01”.
to make sure that the CD has stopped playing.
.
Use the FWD, PREV, “10+”, and “10-” buttons to select a track to program (the LCD display will show the
track number) and then press PROG to add the track to the program list. The LCD will now display the
next Program track number (eg, “P02”).
4.
Repeat Step 3 until you have finished adding tracks to the program list.
5.
Press
to start Program mode playback. To cancel Program mode playback, press
the CD door.
--
twice or open
SPECIFICATIONS
Power Supply
AC: 110/220V 50/60Hz Dual Voltage
DC: 12V (8 x C Batteries) (Not Included)
Frequency Range
AM: 530 - 1710 kHz
FM: 88 - 108 MHz
Power Consumption
14W
Output Power
1.2W RMS x 2 channels
CD Player
Optical Pickup
3-beam, semi-conductor laser
Frequency Response
100Hz - 16 kHz
General
Headphones:
3.5mm stereo plug, 8 - 32 Ohms
Product Size:
10.1” x 4.6” x 7.9” (WHD)
COBY Electronics Technical Support
Hours:
Monday to Friday, 8:30 AM–11:00 PM EST
Saturday to Sunday, 9:00 AM–11:00 PM EST
Email:
[email protected]
Phone:800-681-2629 or 718-416-3197
Web:
www.cobyusa.com
- 10 -