1
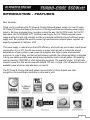
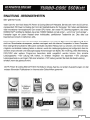
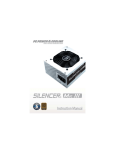
 TABLE OF CONTENTS:
ENGLISH
Introduction – Features
Technical Specifications
Connectors Description & Illustration
Installation of Power Supply
Troubleshooting / Warranty and RMA
3
4
5
6
7
DEUTSCH
Einleitung – besonderheiten
Technische Spezifikationen
Einbau des Netzteils in den PC
Fehlerbehebung / Gerantie und RMA-Abwicklung
8
9
10
11
FRANÇAIS
Introduction – Caractéristiques
Documentation technique
Installation de l’alimentation
Dépannage / Garantie et procédure de retour du materiel
12
13
14
15
2 INTRODUCTION - FEATURES
Dear Customer,
Thank you for purchasing this PC Power & Cooling Silencer® power supply. For over 20 years,
PC Power & Cooling has been at the forefront of the high-performance computer power supply
industry. We have produced many innovations along the way: the first CPU cooler, the first PC
heat alarm, the first NVIDIA® SLI™ Certified power supply, the first 1000W computer power
supply and the first and only company to offer an individual certified test report with each power
supply sold. We produced the world’s premier high-performance computer power supplies, all
expertly engineered in California, USA.
This power supply is rated at more than 85% efficiency, which will help you to lower overall power
consumption of your PC; this will save money on power costs as well as reduce the internal
temperatures of your system. Lower power consumption also helps to save environmental
resources. In order to bring you the best performance possible, the voltage regulation is designed
to bring you stable operation even during heavy application loads such as games, 3D rendering,
video processing, CAD/CAM, or other demanding programs. The powerful single +12V rail helps
minimize power loss that would come with multiple 12V rails. A single +12V rail enables full use of
available power whenever and whenever you need it.
The PC Power & Cooling Silencer® series has won Editor’s Choice Awards and other
recognitions from most major publications online and in print.
3 TECHNICAL SPECIFICATIONS
4 CONNECTORS DESCRIPTION & ILLUSTRATION
5 INSTALLATION OF POWER SUPPLY
Note: You will need a Philips screwdriver to install your new power supply.
To install a new power supply you first need to remove the old one. Please proceed as
follows:
1.
2.
3.
4.
Unplug the AC power cable from your old power supply.
Make sure to disconnect all other cables from the PC and remove cover from the PC case. Remove
any screws holding the cover in place; specifics will vary by computer case design.
Disconnect the power supply from all the components in the PC – make sure that all the connectors
are unplugged.
You can now remove the screws securing the old power supply to your case; normally, there are four
screws at the back of the chassis. After removing all the screws, slowly take the power supply out of
the PC case. Be careful that you do not damage any other components during this action.
Installing the new power supply:
1.
Place your new PC Power & Cooling Silencer® power supply in the appropriate
space in the PC case and secure it by screwing the four screws into the rear of
the power supply.
2. Guide the 24-pin ATC connector through the case and connect it to your
motherboard.
3. Connect the 8-pin power cable to the motherboard. If your motherboard supports
only a 4-pin jack, connect only the right side of the 4/8 connector to the
motherboard.
4. If you are using a graphics card with a 6-pin connector please connect the
respective connectors to the jack on the card. If your card supports more than one
jack just connect a second 6-pin connector. In addition the PC Power & Cooling
Silencer ® supports 8-pin connectors on modern graphics cards. If you card has
an 8-pin jack mounted just use the additional two pins beside the regular 6-pin
connectors and form an 8-pin connector.
5. Proceed with connecting all Molex and SATA connectors to your hard drives and
optical drives.
6. Connect any other internal components that require power to the appropriate
connector – i.e. fans and/or case lighting.
7. You may replace the cover on the PC case now, or you can leave it off initially
while you verify everything works properly.
8. Connect your display, keyboard, mouse, speakers, printer, and any other
peripherals to your computer.
9. Plug the main AC power cable into the back of the power supply and turn on your
computer.
10. If everything works properly and you have not already done so, turn off your
computer and replace the cover on the case.
6 TROUBLESHOOTING / WARRANTY & RMA
If you experience any problems with your new power supply, please check these simple troubleshooting steps or consult the retailer where the product was purchased.
Caution: Working on electrical devices can be life-threatening. If you are not familiar with the
steps taken please consult a professional. If your power supply has developed traces of smoke,
broken cables, or was exposed to liquids, it should not under any circumstances be brought back
into operation.
If you installed a new power supply and the system will no longer start, please check the
following steps:
1. Make sure the AC input is plugged in correctly and the wall outlet distributes power. [Try
another device in the electrical outlet to verify it is working properly.]
2. Check that all connectors from the power supply are correctly plugged into the
motherboard.
3. Are the cables from the power switch of the computer case properly connected to the
motherboard?
4. Make sure there are no short circuits within the system that could result from defective
hardware or misplaced connectors.
5. If you are not sure take all parts out of the housing and only leave the motherboard
inside together with the power supply. Disconnect all plugs, check them and then
connect them again to the respective jacks.
If you need further assistance please visit: http://www.pcpower.com/support/ticket.html
USA Tech Support Hotline: 1-866-925-3027
7-Year Warranty
Your PC Power & Cooling Silencer® PSU is covered by an industry-leading 7-year warranty. This
product is warranted to be free from defects in material and workmanship for a period of seven(7)
years from the date of purchase. If any defects should occur during this period, contact PC Power
& Cooling for further assistance and to take advantage of your warranty.
To place a Returned Merchandise Authorization (RMA) request, you may simply submit a ticket
through our website at: http://www.pcpower.com/support/ticket.html
7 8 TECHNICAL SPECIFICATIONS
9 EINBAU DES NETZTEILS IN DEN PC
Anmerkung: Sie benötigen einen Kreuzschlitzschraubendreher für den Eineau des Netzteils.
Um ein neues Netzteil einzubauen, müssen Sie das alte Netzteil erst einmal ausbauen.
Gehen Sie heierbei wie folgt vor:
1.
2.
3.
4.
Trennen Sie die Stromverbindung zu Ihrem PC.
Öffnen Sie nun die Seitentür des PC-Gehäuses.
Trennen Sie alle Stecker des Netzeils von angeschlossenen Komponenten im Gehäuse Ihres PCs.
Bitte achten Sie vor dem nächsten Schritt darauf, dass wirklich alle Stecker getrennt sind.
Nun können Sie die Schrauben des alten Netzteils an der Rückseite des PCs entfernen. Nachdem die
Schrauben entfernt sind, nehmen Sie das Netzteil vorsichtig aus dem Gehäuse heraus. Achten Sie
bitte darauf, dass beim Herausnehmen keinerlei Komponenten im Gehäuse in Mitleiden schaft
gezogen warden.
Installation des neuen Netzteils:
1.
Setzen Sie das neue PC Power & Cooling Silencer® Netzteil in die vorgesehene
Position im Gehäuse und schrauben Sie es mit den gelieferten Schrauben fest.
2. Legen die den 24poligen ATX Stecker durch das Gehäuse zum korrekten
Anschluss des Mainboards.
3. Verbinden Sie den 8poligen Stecker mit dem Mainboard. Wenn lhr Mainboard nur
über einen 4poligen Anschluss verfügt, dann verbinden Sie nur die rechte Hälfte
des Steckers.
4. Wenn Sie eine Grafikkarte mit 6poligen Anschluss verwenden, verwenden Sie
das entsprechende Kabel vom Netzteil. Falls lhre Grafikkarte mehr als einen
6poligen Anschluss hat, verbinden Sie auch diesen mit dem Kabel vom Netzteil.
Zusätzlich unterstützt das PC Power & Cooling Silencer® auch modern
Grafikkarten mit 8poligem Anschluss. Verwenden Sie dann die zwei weiteren Pins
neben des regulären 6poligen Steckers, um einen 8poligen zu erhalten.
5. Verbinden Sie nun nur noch die peripheren Geräte wie Festplatten und optischen
Laufwerke mit den 4poligen Molex-oder 15poligen SATA Steckern.
6. Verbinden Sie außerdem alle weiteren internen Komponenten, die eine
Stromzufuhr benötigen. Wie zum Beispiel Lüfter und/oder Gehäusebeleuchtung.
7. Sie können nun das Gehäuse wieder schliessen ode res weiterhin im geöffnet
Zustand belassen um korrekte Funktion des Systems zu überprüfen.
8. Verbinden Sie lhren Monitor, Tastatur, Maus, Lautsprecher, Drucker und etwaige
weitere Periperiegeräte mit dem Computer.
9. Als letztes verbinden Sie den Netzstecker an der Rücksite des Netzteils mit einer
geeigneten Steckdose in lhrem Haushalt.
10. Schalten Sie lhren Computer ein. Wenn alles erwartungsgemäß funktioniertn und
Sie lhr Gehäuse bisher noch nicht geschlossen haben, holen Sie dies nun nach.
10 FEHLERBEHEBUNG /
GARANTIE UND RMA-ABWICKLUNG
Wenn Sie Probleme jeglicher Art beim Einbau oder bei der Inbetriebnahme haben, dann lessen
Sie such diese Hilfestellung bitte sorgfältig durch und kontaktieren Sie gegebenenfalls lhren
Händler.
Achtung: Arbiten an elektrischen Leitungen kann legbensgef ährlich sein. Wenn Sie sich nicht
sicher mit den folgenden Schritten sind, dann kontaktieren Sie bitte einen Elektriker. Falls das
Netzteil Rauch oder offene Kabel aufweist oder mit Flüssigkeiten in Kontakt kam, dann solte es in
keinem Falle wieder in Betrieb genommen werden.
Falls Sie das neue Netzteil installiert haben und lhr System nicht mehr anläuft, dann tun
Sie bitte folgendes:
1. Stellen Sie sicher, dass der Kaltgerätestecker richtig im Netzteil und in der Steckdose
sitzt.
2. Überprüfen Sie alle Steckverbindungen im PC nach ihrem Sitz.
3. Sind die Stecker von lhrem Gehäuse richtig am Mainboard angeschlossen?
4. Überprüfin Sie das System auf einen Kurschluss, welcher von defekter Hardware oder
falsch angebrachten Steckern ausgehen kann. Wenn Sie sich nicht sicher sind, dann
empfiehlt es sich wieder alle Teile bis auf das Mainboard und das Netzteil aus dem
Gehäuse auszubauen. Ziehen Sie alle angebrachten Stecker, kontrollieren Sie diese
und stecken Sie sie erneut an.
Falls Sie weitere Fragen haben, kontaktieren Sie bitte unser Supportteam online unter:
http://www.pcpower.com/support/ticket.html
USA Tech Support Hotline: 1-866-925-3027
7-Jahre Garantie
Ihr PC Power & Cooling Silencer® Netzteil verfügt über eine Marktführende Herstellergarantie
von 7 Jahren. Das Ihnen vorliegende Produkt wird für diesen Zeitraum von der Herstellergarantie
in Nezug auf jegliche Material – und Verarbeitungsdefekte abgedeckt. Sollte dennoch
unerwarteterweise ein Defekt auftreten, kontaktieren Sie PC Power & Cooling für weitere
Unterstützung und um von Ihrem Garantieanspruch Gebrauch zu machen.
Um eine RMA Anfrage zu stellen, besuchen Sie bitte folgende Webseite und folgen Sie den
dortigen Anseisungen: http://www.pcpower.com/support/ticket.html
11 INTRODUCTION – CARACTÉRISTIQUES
Cher Client,
Nous vous remercions d’avoir acheté cette alimentation PC Power & Cooling Silencer ®. Depuis plus de 20
ans, PC Power & Cooling est à la pointe du secteur des alimentations d'ordinateur à hautes performances.
Chemin faisant, nous avons produit de nombreuses innovations : le premier refroidisseur de CPU, la
première alarme de température, la première alimentation certifiée NVIDIA® SLI™, la première
alimentation d'ordinateur de 1000W et nous sommes la première et unique société à offrir un rapport certifié
et individuel de test pour chaque alimentation vendue. Nos alimentations d’ordinateur des plus
performantes au monde sont toutes fabriquées en Californie, États-Unis, par des spécialistes.
Cette alimentation au taux d’efficacité supérieur à 85% vous permettra de réduire la consommation globale
de votre PC, de faire des économies sur les coûts énergétiques ainsi que de réduire la température interne
de votre système. Une consommation moindre permet également de préserver les ressources
environnementales. Pour que vous disposiez des meilleures performances possibles, la tension est régulée
de façon à vous fournir une stabilité de fonctionnement même pendant l’utilisation d’applications lourdes
telles que jeux, rendu 3D, traitement vidéo, CAO/FAO ou autres programmes gourmands. L’efficacité du
monorail +12V permet de réduire la perte de puissance inhérente aux rails 12V multiples. Un monorail
+12V diminue la perte énergétique associée aux rails 12V multiples. Un monorail +12V vous permet de
bénéficier de la totalité de la puissance disponible au moment et dans toutes les configurations où vous en
avez besoin.
Les PC Power & Cooling Silencer® Series ont été récompensées par plusieurs « Editor's Choice » et
autres marques de reconnaissance de la plupart des éditeurs en ligne et publications les plus en vue
.
12 TECHNICAL SPECIFICATIONS
13 INSTALLATION DE L’ALIMENTATION
Nota: l’installation de l’alimentation requiert l’emploi d’un tournevis cruciforme.
Afin d’installer votre nouvelle alimentation, vous allez devoir commencer par enlever l'ancienne.
Veuillez procéder comme suit:
1.
2.
3.
4.
Débranchez le câble électrique de l’ancienne alimentation.
Veillez à bien débrancher tous les autres câbles de l’ordinateur et enlevez le panneau latéral du boîtier
de l’ordinateur. La disposition des vis maintenant le panneau dépend du modèle de boîtier d’ordinateur.
Débranchez l’alimentation de tous les composants de l’ordinateur et vérifiez que tous les connecteurs
soient débranchés.
Vous pouvez maintenant retirer les (quatre) vis de fixation de l'ancienne alimentation qui se trouvent
normalement à l’arrière du châssis. Après avoir retiré toutes les vis, sortez précautionneusement
l’alimentation du boîtier de l’ordinateur. Prenez garde à ne pas endommager les autres composants
pendant cette opération.
Installation De Votre Nouvelle Alimentation:
1.
Positionnez la PC Power & Cooling Silencer® à la place qui lui est réservée dans le
boîtier de l’ordinateur et fixez-la à l’aide des quatre vis prévues dans la partie arrière de
l’alimentation.
2. Introduisez le connecteur ATX 24 broches dans le boîtier et branchez-le sur la carte
mère.
3. Branchez le câble de l’alimentation à 8 broches sur la carte mère. Si la carte mère est
seulement munie d’une fiche à 4 broches, branchez uniquement la partie droite du
connecteur.
4. Si vous utilisez une carte graphique dotée d’un connecteur à 6 broches, veuillez
brancher les connecteurs respectifs sur la fiche de la carte. Si cette carte est équipée
de plusieurs fiches, branchez simplement un deuxième connecteur à 6 broches. De
plus, la PC Power & Cooling Silencer® prend en charge les connecteurs à 8 broches
des cartes graphiques récentes. Si votre carte est équipée d'une fiche à 8 broches,
servez-vous simplement des deux broches contiguës au connecteur standard à 6
broches pour réaliser un connecteur à 8 broches.
5. Puis effectuez toutes les connections Molex et SATA de votre disque dur et des
lecteurs optiques.
6. Branchez tous les autres composant internes qui ont besoin de courant aux connecteurs
appropriés, tels que ventilateurs et/ou éclairage du boîtier.
7. Vous pouvez maintenant remettre le panneau du boîtier à sa place ou attendre dans un
premier temps d'avoir vérifié que tout marche bien.
8. Branchez l’écran, le clavier, la souris, les haut-parleurs, l'imprimante et tous les autres
périphériques de votre ordinateur.
9. Branchez le câble électrique à l'arrière de l’alimentation et allumez l’ordinateur.
10. Si tout marche bien et que vous aviez attendu pour le faire, éteignez votre ordinateur et
replacez le panneau latéral sur le boîtier.
14 DÉPANNAGE / GARANTIE ET PROCÉDURE DE
RETOUR DU MATÉRIEL
Si vous rencontrez des problèmes avec votre nouvelle alimentation, veuillez suivre ces simples
conseils de dépannage ou consulter le fournisseur qui vous l'a vendue.
Avertissement: la manipulation d’appareils électriques peut mettre votre vie en danger. Si vous ne
connaissez pas la marche à suivre, veuillez consulter un professionnel. Vous ne devez en aucun
cas réutiliser votre alimentation électrique lorsque celle-ci présente des traces de fumée, des
câbles sectionnés ou qu’elle a reçu des projections de liquides.
Après l’installation d’une nouvelle alimentation, si le système ne redémarre pas, veuillez
vérifier les points suivants:
1.
2.
3.
4.
5.
Assurez-vous que le câble d’alimentation électrique est correctement branché et que la prise
électrique murale est bien alimentée. (Effectuez un essai avec un autre appareil pour vérifier que
la prise électrique fonctionne bien.)
Vérifiez que tous les connecteurs de l’alimentation sont branchés correctement sur la carte mère.
Les câbles de l’interrupteur d’alimentation du boîtier de l’ordinateur sont-ils connectés
correctement à la carte mère?
Assurez-vous que des éléments défectueux ou des connecteurs mal positionnés n’entraînent pas
de court-circuit dans le système.
En cas de doutes, sortez toutes les pièces du boîtier et laissez-y seulement la carte mère et
l'alimentation. Débranchez toutes les prises, vérifiez-les, puis rebranchez-les sur leurs fiches
respectives.
Si vous avez besoin de conseils supplémentaires, veuillez consulter:
http://www.pcpower.com/support/ticket.html
USA Tech Support Hotline: 1-866-925-3027
7-ANS DE GARANTIE
Votre alimentation PC Power & Cooling Silencer® est couverte par la garantie de 7 ans des leaders du
secteur. Ce produit est garanti exempt de vices de matériaux et de fabrication pendant une période de 7
ans à compter de sa date d’achat. En cas de défectuosité constatée pendant cette période, veuillez
contacter PC Power & Cooling pour prendre conseil et bénéficier de votre garantie.
Pour solliciter la procédure de retour du matériel, il suffit d’en faire la demande sur notre site à l’adresse
suivante: http://www.pcpower.com/support/ticket.html
15 16