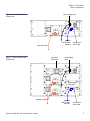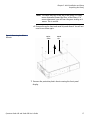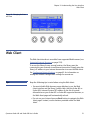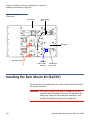
1
User ’s Guide User ’s Guide User ’s Guide User ’s Guide
Quantum Scalar i40 and Scalar i80
Scalar Libraries
6-66545-001 Rev B
Scalar i40 and Scalar i80 User’s Guide, 6-66545-001 Rev B, November 2009, Product of USA.
Quantum Corporation provides this publication “as is” without warranty of any kind, either express or
implied, including but not limited to the implied warranties of merchantability or fitness for a particular
purpose. Quantum Corporation may revise this publication from time to time without notice.
COPYRIGHT STATEMENT
Copyright 2009 by Quantum Corporation. All rights reserved.
Your right to copy this manual is limited by copyright law. Making copies or adaptations without prior
written authorization of Quantum Corporation is prohibited by law and constitutes a punishable
violation of the law.
TRADEMARK STATEMENT
Quantum, the Quantum logo, and Scalar are registered trademarks of Quantum Corporation, registered
in the U.S. and other countries.
Backup. Recovery. Archive. It’s What We Do., StorageCare, and Vision are trademarks of Quantum.
LTO and Ultrium are trademarks of HP, IBM, and Quantum in the U.S. and other countries. All other
trademarks are the property of their respective companies.
Specifications are subject to change without notice.
ii
Quantum Scalar i40 and Scalar i80 User’s Guide
Contents
Preface
Chapter 1
xix
Description
1
Overview . . . . . . . . . . . . . . . . . . . . . . . . . . . . . . . . . . . . . . . . . . . . . . . . 1
Library Components . . . . . . . . . . . . . . . . . . . . . . . . . . . . . . . . . . . . . . . 2
Front Panel . . . . . . . . . . . . . . . . . . . . . . . . . . . . . . . . . . . . . . . . 2
Robotic System and Barcode Scanner . . . . . . . . . . . . . . . . . . . . 3
Magazines . . . . . . . . . . . . . . . . . . . . . . . . . . . . . . . . . . . . . . . . 4
Power Supply . . . . . . . . . . . . . . . . . . . . . . . . . . . . . . . . . . . . . . 7
System Control Board . . . . . . . . . . . . . . . . . . . . . . . . . . . . . . . . 7
Tape Drives . . . . . . . . . . . . . . . . . . . . . . . . . . . . . . . . . . . . . . . . 8
Standard Features . . . . . . . . . . . . . . . . . . . . . . . . . . . . . . . . . . . . . . . . 10
User Interface . . . . . . . . . . . . . . . . . . . . . . . . . . . . . . . . . . . . . 10
Partitions . . . . . . . . . . . . . . . . . . . . . . . . . . . . . . . . . . . . . . . . 10
Control Path Modification. . . . . . . . . . . . . . . . . . . . . . . . . . . . 10
Support for WORM . . . . . . . . . . . . . . . . . . . . . . . . . . . . . . . . . 11
Licensable Features . . . . . . . . . . . . . . . . . . . . . . . . . . . . . . . . . . . . . . . 11
Capacity on Demand (COD) . . . . . . . . . . . . . . . . . . . . . . . . . . 11
Advanced Reporting . . . . . . . . . . . . . . . . . . . . . . . . . . . . . . . . 11
Quantum Scalar i40 and Scalar i80 User’s Guide
iii
Contents
Chapter 2
Initial Installation and Setup
13
Required Tools and Equipment . . . . . . . . . . . . . . . . . . . . . . . . . . . . . . 13
Before You Begin. . . . . . . . . . . . . . . . . . . . . . . . . . . . . . . . . . . . . . . . . 14
Unpacking the Library . . . . . . . . . . . . . . . . . . . . . . . . . . . . . . . . . . . . . 14
Accessory Kit Items . . . . . . . . . . . . . . . . . . . . . . . . . . . . . . . . . . . . . . . 18
Installing the Library in a Rack or Desktop Kit . . . . . . . . . . . . . . . . . . . 18
Installing Tape Drives. . . . . . . . . . . . . . . . . . . . . . . . . . . . . . . . . . . . . . 18
Connecting the Cables. . . . . . . . . . . . . . . . . . . . . . . . . . . . . . . . . . . . . 19
Turning the Library ON and Configuring Network Settings . . . . . . . . . 19
Accessing the Library Via the Web Client. . . . . . . . . . . . . . . . . . . . . . . 25
Configuring Partitions . . . . . . . . . . . . . . . . . . . . . . . . . . . . . . . . . . . . . 26
Importing Tape Cartridges. . . . . . . . . . . . . . . . . . . . . . . . . . . . . . . . . . 26
Saving the Library Configuration . . . . . . . . . . . . . . . . . . . . . . . . . . . . . 26
Configuring the Host Software . . . . . . . . . . . . . . . . . . . . . . . . . . . . . . 26
Chapter 3
Understanding the User Interface
27
Operator Panel . . . . . . . . . . . . . . . . . . . . . . . . . . . . . . . . . . . . . . . . . . 27
Operator Panel Layout and Functions . . . . . . . . . . . . . . . . . . . 28
Navigating and Editing on the Operator Panel . . . . . . . . . . . . 30
Web Client. . . . . . . . . . . . . . . . . . . . . . . . . . . . . . . . . . . . . . . . . . . . . . 31
Tips . . . . . . . . . . . . . . . . . . . . . . . . . . . . . . . . . . . . . . . . . . . . . 31
Sorting Information In Tables . . . . . . . . . . . . . . . . . . . . . . . . . 32
Web Client Layout and Functions . . . . . . . . . . . . . . . . . . . . . . 32
Web Client Home Page . . . . . . . . . . . . . . . . . . . . . . . . . . . . . . 34
System Summary . . . . . . . . . . . . . . . . . . . . . . . . . . . . . . . . . . 34
Subsystem Status . . . . . . . . . . . . . . . . . . . . . . . . . . . . . . . . . . 35
Menu Trees . . . . . . . . . . . . . . . . . . . . . . . . . . . . . . . . . . . . . . . . . . . . . 36
iv
Quantum Scalar i40 and Scalar i80 User’s Guide
Contents
Chapter 4
Configuring the Library
39
Using the Setup Wizard. . . . . . . . . . . . . . . . . . . . . . . . . . . . . . . . . . . . 41
Default Configuration . . . . . . . . . . . . . . . . . . . . . . . . . . . . . . . . . . . . . 42
Configuring Network Settings . . . . . . . . . . . . . . . . . . . . . . . . . . . . . . . 42
Library Host Name . . . . . . . . . . . . . . . . . . . . . . . . . . . . . . . . . 43
DHCP . . . . . . . . . . . . . . . . . . . . . . . . . . . . . . . . . . . . . . . . . . . 43
IP Addresses . . . . . . . . . . . . . . . . . . . . . . . . . . . . . . . . . . . . . . 44
Default Gateway, Subnet Mask, Network Prefix, and
DNS Addresses . . . . . . . . . . . . . . . . . . . . . . . . . . . . . . . . . . . . 45
Configuring SNMP Settings . . . . . . . . . . . . . . . . . . . . . . . . . . . . . . . . . 45
Registering External Management Applications . . . . . . . . . . . 46
Enabling SNMP Versions . . . . . . . . . . . . . . . . . . . . . . . . . . . . . 47
Enabling SNMP Authentication Traps . . . . . . . . . . . . . . . . . . . 47
Modifying the SNMP Community String . . . . . . . . . . . . . . . . . 48
Downloading the SNMP MIB. . . . . . . . . . . . . . . . . . . . . . . . . . 48
Setting the Date, Time, and Time Zone . . . . . . . . . . . . . . . . . . . . . . . . 49
Setting the Date and Time Manually. . . . . . . . . . . . . . . . . . . . 50
Setting the Date and Time Using the Network Time
Protocol . . . . . . . . . . . . . . . . . . . . . . . . . . . . . . . . . . . . . . . . . 50
Setting the Time Zone. . . . . . . . . . . . . . . . . . . . . . . . . . . . . . . 51
Setting Daylight Saving Time . . . . . . . . . . . . . . . . . . . . . . . . . 51
Working With Partitions . . . . . . . . . . . . . . . . . . . . . . . . . . . . . . . . . . . 52
Automatically Creating Partitions . . . . . . . . . . . . . . . . . . . . . . 53
Manually Creating Partitions. . . . . . . . . . . . . . . . . . . . . . . . . . 55
Modifying Partitions . . . . . . . . . . . . . . . . . . . . . . . . . . . . . . . . 57
Deleting Partitions . . . . . . . . . . . . . . . . . . . . . . . . . . . . . . . . . 57
Viewing the Current Partitions . . . . . . . . . . . . . . . . . . . . . . . . 58
Changing Access to Partitions. . . . . . . . . . . . . . . . . . . . . . . . . 59
Taking a Partition Online or Offline. . . . . . . . . . . . . . . . . . . . . 59
Configuring Cleaning Slots . . . . . . . . . . . . . . . . . . . . . . . . . . . . . . . . . 61
Configuring I/E Station Slots . . . . . . . . . . . . . . . . . . . . . . . . . . . . . . . . 63
Configuring Tape Drive Parameters . . . . . . . . . . . . . . . . . . . . . . . . . . . 65
Configuring Control Paths . . . . . . . . . . . . . . . . . . . . . . . . . . . . . . . . . . 67
Adding or Upgrading Licensable Features . . . . . . . . . . . . . . . . . . . . . . 68
Viewing Your License Keys . . . . . . . . . . . . . . . . . . . . . . . . . . . 68
Viewing Installed Licenses. . . . . . . . . . . . . . . . . . . . . . . . . . . . 68
About License Keys . . . . . . . . . . . . . . . . . . . . . . . . . . . . . . . . . 69
Quantum Scalar i40 and Scalar i80 User’s Guide
v
Contents
Obtaining a License Key . . . . . . . . . . . . . . . . . . . . . . . . . . . . . 69
Applying a License Key . . . . . . . . . . . . . . . . . . . . . . . . . . . . . . 70
Working With E-mail Notifications . . . . . . . . . . . . . . . . . . . . . . . . . . . 71
Creating E-mail Notifications . . . . . . . . . . . . . . . . . . . . . . . . . 72
Modifying E-mail Notifications . . . . . . . . . . . . . . . . . . . . . . . . 73
Deleting E-mail Notifications . . . . . . . . . . . . . . . . . . . . . . . . . 74
Configuring the Library E-Mail Account. . . . . . . . . . . . . . . . . . . . . . . . 74
Setting Customer Contact Information . . . . . . . . . . . . . . . . . . . . . . . . 77
Configuring the Service Port . . . . . . . . . . . . . . . . . . . . . . . . . . . . . . . . 77
Working With Local User Accounts . . . . . . . . . . . . . . . . . . . . . . . . . . . 78
Using the Web Client Default Administrative User Account . . 79
Privilege Levels . . . . . . . . . . . . . . . . . . . . . . . . . . . . . . . . . . . . 80
Creating Local User Accounts on the Web Client . . . . . . . . . . 81
Modifying Local User Accounts on the Web Client . . . . . . . . . 82
Deleting Local User Accounts on the Web Client . . . . . . . . . . 82
Enabling and Creating Passwords on the Operator Panel . . . . 83
Disabling Passwords on the Operator Panel . . . . . . . . . . . . . . 85
Modifying Passwords on the Operator Panel . . . . . . . . . . . . . 85
Resetting Passwords on the Operator Panel . . . . . . . . . . . . . . 86
Working With LDAP User Accounts (Remote Authentication) . . . . . . . 86
Local Authentication vs. Remote Authentication . . . . . . . . . . 86
Using Microsoft Active Directory. . . . . . . . . . . . . . . . . . . . . . . 87
LDAP Server Guidelines . . . . . . . . . . . . . . . . . . . . . . . . . . . . . . 87
Enabling and Configuring LDAP on the Library . . . . . . . . . . . . 88
Configuring Kerberos . . . . . . . . . . . . . . . . . . . . . . . . . . . . . . . 90
Generating the Kerberos Service Keytab File . . . . . . . . . . . . . . 91
Setting the Session Timeout . . . . . . . . . . . . . . . . . . . . . . . . . . . . . . . . 93
Configuring System Settings . . . . . . . . . . . . . . . . . . . . . . . . . . . . . . . . 93
Unload Assist . . . . . . . . . . . . . . . . . . . . . . . . . . . . . . . . . . . . . 94
Logical Serial Number Addressing. . . . . . . . . . . . . . . . . . . . . . 94
Manual Cartridge Assignment . . . . . . . . . . . . . . . . . . . . . . . . 95
SNMP . . . . . . . . . . . . . . . . . . . . . . . . . . . . . . . . . . . . . . . . . . . 96
SMI-S . . . . . . . . . . . . . . . . . . . . . . . . . . . . . . . . . . . . . . . . . . . 96
Configuring Security Settings . . . . . . . . . . . . . . . . . . . . . . . . . . . . . . . 97
Network Interface . . . . . . . . . . . . . . . . . . . . . . . . . . . . . . . . . . 97
SSH Services . . . . . . . . . . . . . . . . . . . . . . . . . . . . . . . . . . . . . . 97
Internet Control Message Protocol (ICMP) . . . . . . . . . . . . . . . 98
Remote Access Via Web Client . . . . . . . . . . . . . . . . . . . . . . . . 98
vi
Quantum Scalar i40 and Scalar i80 User’s Guide
Contents
Remote Service Login . . . . . . . . . . . . . . . . . . . . . . . . . . . . . . . 99
SSL . . . . . . . . . . . . . . . . . . . . . . . . . . . . . . . . . . . . . . . . . . . . . 99
Saving and Restoring the Library Configuration . . . . . . . . . . . . . . . . 100
Saving the Library Configuration . . . . . . . . . . . . . . . . . . . . . 101
Restoring the Library Configuration . . . . . . . . . . . . . . . . . . . 101
Registering the Library. . . . . . . . . . . . . . . . . . . . . . . . . . . . . . . . . . . . 102
Chapter 5
Performing Library Operations
103
Logging In . . . . . . . . . . . . . . . . . . . . . . . . . . . . . . . . . . . . . . . . . . . . . 104
Simultaneous Logins . . . . . . . . . . . . . . . . . . . . . . . . . . . . . . . 104
Logging In for the First Time. . . . . . . . . . . . . . . . . . . . . . . . . 104
Logging In Using the Operator Panel . . . . . . . . . . . . . . . . . . 104
Logging In Via the Web Client . . . . . . . . . . . . . . . . . . . . . . . 105
Logging In When LDAP or Kerberos is Enabled . . . . . . . . . . . 105
Logging Out . . . . . . . . . . . . . . . . . . . . . . . . . . . . . . . . . . . . . . . . . . . 106
Shutting Down, Restarting, Turning Off, and Removing Power. . . . . 107
Shutting Down the Library . . . . . . . . . . . . . . . . . . . . . . . . . . 107
Restarting the Library . . . . . . . . . . . . . . . . . . . . . . . . . . . . . . 109
Turning Off the Library . . . . . . . . . . . . . . . . . . . . . . . . . . . . . 111
Completely Removing Library Power. . . . . . . . . . . . . . . . . . . 111
Emergency Power-off Procedure . . . . . . . . . . . . . . . . . . . . . . 112
Taking the Library Offline . . . . . . . . . . . . . . . . . . . . . . . . . . . 113
Unlocking the I/E Station . . . . . . . . . . . . . . . . . . . . . . . . . . . . . . . . . . 113
Releasing Magazines . . . . . . . . . . . . . . . . . . . . . . . . . . . . . . . . . . . . . 114
Releasing Magazines via the User Interface. . . . . . . . . . . . . . 115
Releasing Magazines Manually . . . . . . . . . . . . . . . . . . . . . . . 116
Performing Media Operations . . . . . . . . . . . . . . . . . . . . . . . . . . . . . . 117
Importing Tape Cartridges . . . . . . . . . . . . . . . . . . . . . . . . . . 117
Bulk Loading Tape Cartridges . . . . . . . . . . . . . . . . . . . . . . . . 121
Moving Tape Cartridge . . . . . . . . . . . . . . . . . . . . . . . . . . . . . 121
Exporting Tape Cartridges. . . . . . . . . . . . . . . . . . . . . . . . . . . 123
Loading Tape Drives . . . . . . . . . . . . . . . . . . . . . . . . . . . . . . . 125
Unloading Tape Drives . . . . . . . . . . . . . . . . . . . . . . . . . . . . . 127
Cleaning Tape Drives . . . . . . . . . . . . . . . . . . . . . . . . . . . . . . . . . . . . . 128
Valid Cleaning Cartridges . . . . . . . . . . . . . . . . . . . . . . . . . . . 130
About AutoClean . . . . . . . . . . . . . . . . . . . . . . . . . . . . . . . . . 130
Enabling AutoClean . . . . . . . . . . . . . . . . . . . . . . . . . . . . . . . 130
Quantum Scalar i40 and Scalar i80 User’s Guide
vii
Contents
Importing Cleaning Cartridges . . . . . . . . . . . . . . . . . . . . . . . 131
Exporting Cleaning Cartridges . . . . . . . . . . . . . . . . . . . . . . . 133
Manually Cleaning Tape Drives . . . . . . . . . . . . . . . . . . . . . . . 134
Taking a Tape Drive Online or Offline . . . . . . . . . . . . . . . . . . . . . . . . 137
Chapter 6
Getting Information About the Library
139
Viewing Library Information . . . . . . . . . . . . . . . . . . . . . . . . . . . . . . . 140
Viewing System Information . . . . . . . . . . . . . . . . . . . . . . . . . . . . . . . 140
Viewing the Library Configuration Report . . . . . . . . . . . . . . . . . . . . . 141
Saving and E-mailing the Library Configuration Record. . . . . . . . . . . 143
Saving the Configuration Record . . . . . . . . . . . . . . . . . . . . . 144
E-mailing the Configuration Record . . . . . . . . . . . . . . . . . . . 145
Viewing the Network Settings Report . . . . . . . . . . . . . . . . . . . . . . . . 145
Viewing the Logged in Users Report . . . . . . . . . . . . . . . . . . . . . . . . . 146
Viewing the All Slots Report . . . . . . . . . . . . . . . . . . . . . . . . . . . . . . . 147
Viewing, Saving, and E-mailing Logs . . . . . . . . . . . . . . . . . . . . . . . . . 148
Cleaning Log. . . . . . . . . . . . . . . . . . . . . . . . . . . . . . . . . . . . . 148
Diagnostic Tickets Log . . . . . . . . . . . . . . . . . . . . . . . . . . . . . 149
Tape Drive Log . . . . . . . . . . . . . . . . . . . . . . . . . . . . . . . . . . . 149
Viewing Library Information on the Operator Panel . . . . . . . . . . . . . 151
Viewing Partition Information. . . . . . . . . . . . . . . . . . . . . . . . 151
Viewing Network Settings. . . . . . . . . . . . . . . . . . . . . . . . . . . 151
Viewing the Date, Time, and Time Zone . . . . . . . . . . . . . . . . 152
Viewing Licenses . . . . . . . . . . . . . . . . . . . . . . . . . . . . . . . . . . 152
Using Advanced Reporting . . . . . . . . . . . . . . . . . . . . . . . . . . . . . . . . 152
Required Firmware . . . . . . . . . . . . . . . . . . . . . . . . . . . . . . . . 153
Using the Reports and Understanding the Data . . . . . . . . . . 153
Loading and Reloading Advanced Reporting Data . . . . . . . . 154
Configuring the Drive Resource Utilization Report . . . . . . . . 154
Configuring the Media Integrity Analysis Report. . . . . . . . . . 156
Saving and E-mailing Advanced Reporting Data . . . . . . . . . . 157
Creating and Using a Template. . . . . . . . . . . . . . . . . . . . . . . 158
Deleting Advanced Reporting Data . . . . . . . . . . . . . . . . . . . . 158
Viewing the Open Source License Agreement . . . . . . . . . . . . . . . . . . 159
Viewing the Copyright Statement . . . . . . . . . . . . . . . . . . . . . . . . . . . 160
viii
Quantum Scalar i40 and Scalar i80 User’s Guide
Contents
Chapter 7
Updating Firmware
161
Upgrading Library Firmware . . . . . . . . . . . . . . . . . . . . . . . . . . . . . . . 161
Updating and Autoleveling Tape Drive Firmware . . . . . . . . . . . . . . . 164
About Tape Drive Firmware Autoleveling . . . . . . . . . . . . . . . 164
Uploading Tape Drive Firmware Used in Autoleveling. . . . . . 166
Deleting Tape Drive Firmware Used in Autoleveling . . . . . . . 168
Initiating Tape Drive Firmware Autoleveling . . . . . . . . . . . . . 169
Chapter 8
Installing, Removing, and Replacing Components
171
Taking ESD Precautions . . . . . . . . . . . . . . . . . . . . . . . . . . . . . . . . . . . 172
Connecting Library Cables . . . . . . . . . . . . . . . . . . . . . . . . . . . . . . . . . 173
Installing the Rack Mount Kit (Rail Kit) . . . . . . . . . . . . . . . . . . . . . . . 174
Supported Rack Types. . . . . . . . . . . . . . . . . . . . . . . . . . . . . . 175
Space Requirements . . . . . . . . . . . . . . . . . . . . . . . . . . . . . . . 175
Tools Required . . . . . . . . . . . . . . . . . . . . . . . . . . . . . . . . . . . 176
Rack Mount Kit Contents . . . . . . . . . . . . . . . . . . . . . . . . . . . 176
Installing the Rack Mount Shelves. . . . . . . . . . . . . . . . . . . . . 177
Installing the Library In a Rack. . . . . . . . . . . . . . . . . . . . . . . . . . . . . . 186
Removing the Library From a Rack . . . . . . . . . . . . . . . . . . . . . . . . . . 188
Installing the Library in a Desktop Kit . . . . . . . . . . . . . . . . . . . . . . . . 189
Kit Contents . . . . . . . . . . . . . . . . . . . . . . . . . . . . . . . . . . . . . 191
Tools Required . . . . . . . . . . . . . . . . . . . . . . . . . . . . . . . . . . . 191
Space Requirements . . . . . . . . . . . . . . . . . . . . . . . . . . . . . . . 192
Procedure . . . . . . . . . . . . . . . . . . . . . . . . . . . . . . . . . . . . . . . 192
Removing the Library from a Desktop Kit . . . . . . . . . . . . . . . . . . . . . 197
Removing and Replacing the Front Bezel. . . . . . . . . . . . . . . . . . . . . . 198
Required Tools . . . . . . . . . . . . . . . . . . . . . . . . . . . . . . . . . . . 198
Bezel Replacement Kit Contents . . . . . . . . . . . . . . . . . . . . . . 198
Bezel Replacement Procedure . . . . . . . . . . . . . . . . . . . . . . . . 198
Removing and Replacing the Chassis. . . . . . . . . . . . . . . . . . . . . . . . . 202
Required Tools . . . . . . . . . . . . . . . . . . . . . . . . . . . . . . . . . . . 203
Procedure . . . . . . . . . . . . . . . . . . . . . . . . . . . . . . . . . . . . . . . 203
Removing and Installing a Filler Plate . . . . . . . . . . . . . . . . . . . . . . . . 213
Removing and Installing a Tape Drive Filler Plate . . . . . . . . . 213
Removing and Installing a Power Supply Filler Plate . . . . . . . 214
Quantum Scalar i40 and Scalar i80 User’s Guide
ix
Contents
Removing and Replacing a Magazine . . . . . . . . . . . . . . . . . . . . . . . . 215
Required Tools . . . . . . . . . . . . . . . . . . . . . . . . . . . . . . . . . . . 215
Magazine Replacement Kit Contents . . . . . . . . . . . . . . . . . . 215
Creating a Backup Map of Cartridge Locations . . . . . . . . . . . 216
Removing the Magazine from the Library . . . . . . . . . . . . . . . 216
Installing the Magazine. . . . . . . . . . . . . . . . . . . . . . . . . . . . . 217
Removing and Installing a Power Supply. . . . . . . . . . . . . . . . . . . . . . 220
Replacing a Power Supply in a Single-Power-Supply
System (Scalar i40 and Scalar i80). . . . . . . . . . . . . . . . . . . . . 221
Adding or Replacing a Redundant Power Supply on the
Scalar i80 . . . . . . . . . . . . . . . . . . . . . . . . . . . . . . . . . . . . . . . 222
Removing and Replacing the System Control Board . . . . . . . . . . . . . 223
Replacing the System Control Board . . . . . . . . . . . . . . . . . . . 224
Installing Library Firmware . . . . . . . . . . . . . . . . . . . . . . . . . . 226
Restoring the Library Configuration . . . . . . . . . . . . . . . . . . . 228
Manually Reconfiguring the Library . . . . . . . . . . . . . . . . . . . 229
Removing and Replacing a Tape Drive. . . . . . . . . . . . . . . . . . . . . . . . 231
Preparing Partitions and Control Paths . . . . . . . . . . . . . . . . . 231
Removing a Tape Drive from the Library . . . . . . . . . . . . . . . . 232
Installing a Tape Drive. . . . . . . . . . . . . . . . . . . . . . . . . . . . . . 233
Packaging the Library for Moving or Shipping. . . . . . . . . . . . . . . . . . 237
Packaging Kit Contents . . . . . . . . . . . . . . . . . . . . . . . . . . . . . 237
Creating a Backup Map of Cartridge Locations . . . . . . . . . . . 237
Procedure . . . . . . . . . . . . . . . . . . . . . . . . . . . . . . . . . . . . . . . 237
Replacing the Robot . . . . . . . . . . . . . . . . . . . . . . . . . . . . . . . . . . . . . 242
Chapter 9
Troubleshooting
243
About Diagnostic Tickets . . . . . . . . . . . . . . . . . . . . . . . . . . . . . . . . . . 244
Viewing, Closing, and Resolving Diagnostic Tickets . . . . . . . 245
Capturing the Library Snapshot. . . . . . . . . . . . . . . . . . . . . . . . . . . . . 247
Troubleshooting Library “Not Ready” Messages . . . . . . . . . . . . . . . . 248
“Not Ready” Messages on the Operator Panel . . . . . . . . . . . 248
“Not Ready” Messages on the Web Client . . . . . . . . . . . . . . 248
Retrieving Tape Drive Logs. . . . . . . . . . . . . . . . . . . . . . . . . . . . . . . . . 250
Interpreting LEDs. . . . . . . . . . . . . . . . . . . . . . . . . . . . . . . . . . . . . . . . 250
Front Panel LEDs . . . . . . . . . . . . . . . . . . . . . . . . . . . . . . . . . . 251
System Control Board LEDs . . . . . . . . . . . . . . . . . . . . . . . . . . 252
x
Quantum Scalar i40 and Scalar i80 User’s Guide
Contents
Tape Drive/Sled LEDs . . . . . . . . . . . . . . . . . . . . . . . . . . . . . . . 253
Power Supply LED . . . . . . . . . . . . . . . . . . . . . . . . . . . . . . . . . 255
Running the Installation and Verification Test (IVT). . . . . . . . . . . . . . 255
Running the IVT Diagnostic Subtests Individually – Robotics,
Tape Drive, and Magazine Tests . . . . . . . . . . . . . . . . . . . . . . . . . . . . 257
Running the Random Move Test . . . . . . . . . . . . . . . . . . . . . . . . . . . . 258
Performing Library Diagnostics . . . . . . . . . . . . . . . . . . . . . . . . . . . . . 259
Resetting a Tape Drive . . . . . . . . . . . . . . . . . . . . . . . . . . . . . 260
Robotics Get/Put Test . . . . . . . . . . . . . . . . . . . . . . . . . . . . . . 261
Resetting Factory Defaults . . . . . . . . . . . . . . . . . . . . . . . . . . . . . . . . . 261
Chapter 10
Working With Cartridges and Barcodes
263
Handling Cartridges Properly. . . . . . . . . . . . . . . . . . . . . . . . . . . . . . . 264
Write-Protecting Tape Cartridges. . . . . . . . . . . . . . . . . . . . . . . . . . . . 265
Barcode Requirements. . . . . . . . . . . . . . . . . . . . . . . . . . . . . . . . . . . . 265
Installing Barcode Labels . . . . . . . . . . . . . . . . . . . . . . . . . . . . . . . . . . 267
Appendix A
Specifications
269
Physical Specifications . . . . . . . . . . . . . . . . . . . . . . . . . . . . . . . . . . . . 269
Capacity . . . . . . . . . . . . . . . . . . . . . . . . . . . . . . . . . . . . . . . . . . . . . . 270
Environmental Specifications. . . . . . . . . . . . . . . . . . . . . . . . . . . . . . . 271
Air Clearance Requirements. . . . . . . . . . . . . . . . . . . . . . . . . . . . . . . . 271
Power Specifications . . . . . . . . . . . . . . . . . . . . . . . . . . . . . . . . . . . . . 272
Communication Interfaces. . . . . . . . . . . . . . . . . . . . . . . . . . . . . . . . . 272
Supported Tape Drives . . . . . . . . . . . . . . . . . . . . . . . . . . . . . . . . . . . 273
Supported Media. . . . . . . . . . . . . . . . . . . . . . . . . . . . . . . . . . . . . . . . 273
Supported Internet Browsers. . . . . . . . . . . . . . . . . . . . . . . . . . . . . . . 274
Appendix B
Tape Alert Flag Descriptions
Quantum Scalar i40 and Scalar i80 User’s Guide
275
xi
Contents
Appendix C
Disposal of Electrical and Electronic Equipment
285
Glossary
287
Index
297
xii
Quantum Scalar i40 and Scalar i80 User’s Guide
Figures
Figure 1
Front Panel . . . . . . . . . . . . . . . . . . . . . . . . . . . . . . . . . . . . . 2
Figure 2
Scalar i40 Internal Layout and Magazine Slot
Location Coordinates . . . . . . . . . . . . . . . . . . . . . . . . . . . . . 5
Figure 3
Scalar i80 Internal Layout and Magazine Slot
Location Coordinates . . . . . . . . . . . . . . . . . . . . . . . . . . . . . 6
Figure 4
Scalar i80 Back Panel Components . . . . . . . . . . . . . . . . . . . 9
Figure 5
Scalar i80 Back Panel Components . . . . . . . . . . . . . . . . . . . 9
Figure 6
Packaging . . . . . . . . . . . . . . . . . . . . . . . . . . . . . . . . . . . . . 15
Figure 7
Pushing Down on Thumbscrews to Release Robot . . . . . . 16
Figure 8
Removing the Robot Restraint . . . . . . . . . . . . . . . . . . . . . 17
Figure 9
Turning on the Library . . . . . . . . . . . . . . . . . . . . . . . . . . . 20
Figure 10
Setup Wizard – Initial Screen . . . . . . . . . . . . . . . . . . . . . . 20
Figure 11
Setup Wizard – Date/Time Screen . . . . . . . . . . . . . . . . . . 21
Figure 12
Changing the Date and Time . . . . . . . . . . . . . . . . . . . . . . 22
Figure 13
Setup Wizard – Setup Network Screen . . . . . . . . . . . . . . . 22
Figure 14
Setup Wizard – Licenses Screen . . . . . . . . . . . . . . . . . . . . 23
Figure 15
Setup Wizard – Current Configuration Screen . . . . . . . . . 24
Figure 16
Setup Wizard Complete . . . . . . . . . . . . . . . . . . . . . . . . . . 25
Figure 17
Operator Panel User Interface - Home Page . . . . . . . . . . . 28
Quantum Scalar i40 and Scalar i80 User’s Guide
xiii
Figures
xiv
Figure 18
Changing the Date and Time . . . . . . . . . . . . . . . . . . . . . . 31
Figure 19
Web Client User Interface - Home Page . . . . . . . . . . . . . . 33
Figure 20
Operator Panel Menus . . . . . . . . . . . . . . . . . . . . . . . . . . . 37
Figure 21
Web Client Menus . . . . . . . . . . . . . . . . . . . . . . . . . . . . . . 38
Figure 22
Shutdown in Progress Message . . . . . . . . . . . . . . . . . . . 108
Figure 23
Ready to Power Down Message . . . . . . . . . . . . . . . . . . . 108
Figure 24
Ready to Power Down Message . . . . . . . . . . . . . . . . . . . 109
Figure 25
Series of Restart Messages . . . . . . . . . . . . . . . . . . . . . . . 110
Figure 26
Magazine Unlocked Message . . . . . . . . . . . . . . . . . . . . . 114
Figure 27
Magazine Unlocked Message . . . . . . . . . . . . . . . . . . . . . 115
Figure 28
Magazine Release Latch Access . . . . . . . . . . . . . . . . . . . 117
Figure 29
Saving and E-mailing the Report Data . . . . . . . . . . . . . . 157
Figure 30
Template and Report Data Functions . . . . . . . . . . . . . . . 159
Figure 31
Reinstalled Components . . . . . . . . . . . . . . . . . . . . . . . . . 174
Figure 32
Rack Mount Shelf Depth Requirements . . . . . . . . . . . . . 178
Figure 33
Assembling the Left and Right Rack Mount Shelves . . . . 179
Figure 34
Rail Adapter Types . . . . . . . . . . . . . . . . . . . . . . . . . . . . . 180
Figure 35
Assembling the Left-Hand Rack Mount Shelf . . . . . . . . . 181
Figure 36
Installing the Rack Mount Shelves . . . . . . . . . . . . . . . . . 183
Figure 37
Tightening the Rack Mount Shelves . . . . . . . . . . . . . . . . 184
Figure 38
Location for Installing the Clip Nut or Cage Nut . . . . . . . 186
Figure 39
Magazine Release Latch Access Holes . . . . . . . . . . . . . . . 187
Figure 40
Securing the Scalar i40 and Scalar i80 in the Rack . . . . . 188
Figure 41
Desktop Kit, Scalar i40 and Scalar i80. . . . . . . . . . . . . . . 190
Figure 42
Magazine Release Latch Access Holes . . . . . . . . . . . . . . . 193
Figure 43
Location of Rubber Feet on Bottom of Library . . . . . . . . 194
Figure 44
Installing the side panels . . . . . . . . . . . . . . . . . . . . . . . . 196
Figure 45
Installing the Top Cover . . . . . . . . . . . . . . . . . . . . . . . . . 197
Figure 46
Bezel Screw Locations on Bottom of Library . . . . . . . . . . 200
Quantum Scalar i40 and Scalar i80 User’s Guide
Figures
Figure 47
Bezel Screws . . . . . . . . . . . . . . . . . . . . . . . . . . . . . . . . . . 201
Figure 48
Components to Remove . . . . . . . . . . . . . . . . . . . . . . . . . 206
Figure 49
Removing the Robot Restraint . . . . . . . . . . . . . . . . . . . . 207
Figure 50
Restraining the Robot . . . . . . . . . . . . . . . . . . . . . . . . . . . 209
Figure 51
Reinstalled Components . . . . . . . . . . . . . . . . . . . . . . . . . 212
Figure 52
Filler Plates Installed . . . . . . . . . . . . . . . . . . . . . . . . . . . . 215
Figure 53
Magazine Release Latch Access Holes . . . . . . . . . . . . . . . 217
Figure 54
Proper Orientation (Right-Side Magazine) . . . . . . . . . . . 218
Figure 55
Removing/Installing the Magazine Bezel. . . . . . . . . . . . . 219
Figure 56
Single Power Supply System . . . . . . . . . . . . . . . . . . . . . . 221
Figure 57
Redundant Power Supply System . . . . . . . . . . . . . . . . . . 221
Figure 58
Ethernet Port Locations on the SCB . . . . . . . . . . . . . . . . 226
Figure 59
Acceptable Installation Locations for Full-Height
Tape Drives . . . . . . . . . . . . . . . . . . . . . . . . . . . . . . . . . . . 234
Figure 60
Installing a Tape Drive . . . . . . . . . . . . . . . . . . . . . . . . . . 235
Figure 61
Restraining the Robot . . . . . . . . . . . . . . . . . . . . . . . . . . . 240
Figure 62
Packing the Library for Shipping. . . . . . . . . . . . . . . . . . . 241
Figure 63
Front Panel LEDs . . . . . . . . . . . . . . . . . . . . . . . . . . . . . . . 251
Figure 64
System Control Board LEDs. . . . . . . . . . . . . . . . . . . . . . . 252
Figure 65
Fibre Channel Tape Drive LEDs . . . . . . . . . . . . . . . . . . . . 254
Figure 66
Power Supply LED. . . . . . . . . . . . . . . . . . . . . . . . . . . . . . 255
Quantum Scalar i40 and Scalar i80 User’s Guide
xv
Figures
xvi
Quantum Scalar i40 and Scalar i80 User’s Guide
Tables
Table 1
Front Panel Features . . . . . . . . . . . . . . . . . . . . . . . . . . . . . . 2
Table 2
Operator Panel Functions . . . . . . . . . . . . . . . . . . . . . . . . . 28
Table 3
Web Client Screen Elements . . . . . . . . . . . . . . . . . . . . . . . 34
Table 4
Fibre Channel Tape Drive Configurable Settings . . . . . . . . 65
Table 5
Base Library
Table 6
Library Installed in a Desktop Kit . . . . . . . . . . . . . . . . . . 270
Table 7
Tape Alert Flag Severity Codes . . . . . . . . . . . . . . . . . . . . 275
Table 8
Tape Alert Flag Descriptions . . . . . . . . . . . . . . . . . . . . . . 276
Quantum Scalar i40 and Scalar i80 User’s Guide
. . . . . . . . . . . . . . . . . . . . . . . . . . . . . . . . . 269
xvii
Tables
xviii
Quantum Scalar i40 and Scalar i80 User’s Guide
Preface
This manual introduces the Quantum Scalar® i40 and Scalar i80 and
discusses:
• System operations
• Configuration
• Web and operator panel interface
• Installation and replacement
• Basic troubleshooting
Audience
This manual is written for Scalar i40 and Scalar i80 operators, system
administrators, and field service engineers.
Document Organization
Following is a brief description of chapter contents.
• Chapter 1, Description provides a physical description of the library,
its components, and major features.
• Chapter 2, Initial Installation and Setup explains how to install and
configure your library.
• Chapter 3, Understanding the User Interface describes the
appearance and function of the operator panel and Web client.
Quantum Scalar i40 and Scalar i80 User’s Guide
xix
Preface
• Chapter 4, Configuring the Library provides instruction and
description for all the configurable features of the library.
• Chapter 5, Performing Library Operations explains how to run the
library from the operator panel and Web client.
• Chapter 6, Getting Information About the Library describes all of
the reporting features on the library.
• Chapter 7, Updating Firmware describes how to upgrade library
firmware and install and autolevel tape drive firmware.
• Chapter 8, Installing, Removing, and Replacing Components
provides detailed instruction on how to install, remove, and replace
all the physical components of the library.
• Chapter 9, Troubleshooting describes the library’s troubleshooting
tools, including diagnostic tickets, LEDs, and tests.
• Chapter 10, Working With Cartridges and Barcodes provides basic
information about how to label and care for media used in the
library.
• Appendix A, Specifications provides physical, environmental, power,
and other specifications about the library, tape drives, and media.
• Appendix B, TapeAlert Flag Descriptions lists all the Tape Alerts you
may encounter in a diagnostic ticket.
• Appendix C, Disposal of Electrical and Electronic Equipment
provides information on disposing and recycling.
The document concludes with a glossary and index.
Notational Conventions
xx
This manual uses the following conventions:
Convention
Example
File and directory names, menu
commands, button names, and
window names are shown in bold
font.
/data/upload
Menu names separated by arrows
indicate a sequence of menus to be
navigated.
Utilities > Firmware
Quantum Scalar i40 and Scalar i80 User’s Guide
Preface
The following formats indicate important information:
Note: Note emphasizes important information related to the main
topic.
Caution: Caution indicates potential hazards to equipment or data.
WARNING: Warning indicates potential hazards to personal safety.
• Right side of the system — Refers to the right side as you face the
component being described.
• Left side of the system — Refers to the left side as you face the
component being described.
Product Safety
Statements
Quantum will not be held liable for damage arising from unauthorized
use of the product. The user assumes all risk in this aspect.
This unit is engineered and manufactured to meet all safety and
regulatory requirements. Be aware that improper use may result in
bodily injury, damage to the equipment, or interference with other
equipment.
The System, Safety, and Regulatory Information Guide is located on the
Scalar i40 and Scalar i80 documentation and training CD.
WARNING: Before operating this product, read all instructions and
warnings in this document and in the System, Safety, and
Regulatory Information Guide.
Quantum Scalar i40 and Scalar i80 User’s Guide
xxi
Preface
xxii
Quantum Scalar i40 and Scalar i80 User’s Guide
Preface
Related Documents
The following Quantum documents are also available for Scalar i40 and
Scalar i80 systems:
Document
No.
Document Title
6-66546-xxx
Scalar i40 and Scalar i80 Quick Start Guide
6-66547-xxx
Scalar i40 and Scalar i80 Release Notes
6-00618-xx
System, Safety, and Regulatory Information
6-66773-xx
Scalar i40 and Scalar i80 Basic SNMP Reference
Guide
6-00423-xx
Quantum Intelligent Libraries SCSI Reference Guide
6-01317-xx
Quantum Intelligent Libraries SMI-S Reference
Guide
For the most up to date product information and documentation, see:
http://www.quantum.com/ServiceandSupport/Index.aspx
SCSI-2 Specification
The SCSI-2 communications specification is the proposed American
National Standard for information systems, dated March 9, 1990.
Copies may be obtained from:
Global Engineering Documents
15 Inverness Way, East
Englewood, CO 80112
(800) 854-7179 or (303) 397-2740
Quantum Scalar i40 and Scalar i80 User’s Guide
xxiii
Preface
Contacts
Quantum company contacts are listed below.
Quantum Corporate Headquarters
To order documentation on the Scalar i40 or Scalar i80 or other
products, contact:
Quantum Corporation (Corporate Headquarters)
1650 Technology Drive, Suite 700
San Jose, CA 95110-1382
Technical Publications
To comment on existing documentation send e-mail to:
[email protected]
Quantum Home Page
Visit the Quantum home page at:
http://www.quantum.com
Getting More
Information or Help
StorageCare™, Quantum’s comprehensive service approach, leverages
advanced data access and diagnostics technologies with crossenvironment, multi-vendor expertise to resolve backup issues faster and
at lower cost.
Accelerate service issue resolution with these exclusive Quantum
StorageCare services:
• Service and Support Web site - Register products, license
software, browse Quantum Learning courses, check backup
software and operating system support, and locate manuals, FAQs,
firmware downloads, product updates and more in one convenient
location. Benefit today at:
http://www.quantum.com/ServiceandSupport/Index.aspx
• eSupport - Submit online service requests, update contact
information, add attachments, and receive status updates via
e-mail. Online Service accounts are free from Quantum. That
account can also be used to access Quantum’s Knowledge Base, a
xxiv
Quantum Scalar i40 and Scalar i80 User’s Guide
Preface
comprehensive repository of product support information. Sign up
today at:
http://www.quantum.com/osr
• StorageCare Guardian - Securely links Quantum hardware and the
diagnostic data from the surrounding storage ecosystem to
Quantum's Global Services Team for faster, more precise root cause
diagnosis. StorageCare Guardian is simple to set up through the
internet and provides secure, two-way communications with
Quantum’s Secure Service Center. More StorageCare Guardian
information can be found at:
http://www.quantum.com/ServiceandSupport/Services/
GuardianInformation/Index.aspx
For further assistance, or if training is desired, contact Quantum
Customer Support Center:
United States
800-284-5101 (toll free)
949-725-2100
EMEA
00800-4-782-6886 (toll free)
+49 6131 3241 1164
APAC
+800 7826 8887 (toll free)
+603 7953 3010
For worldwide support:
http://www.quantum.com/ServiceandSupport/Index.aspx
Worldwide End-User
Product Warranty
For more information on the Quantum Worldwide End-User Standard
Limited Product Warranty:
http://www.quantum.com/pdf/QuantumWarranty.pdf
Quantum Scalar i40 and Scalar i80 User’s Guide
xxv
Preface
xxvi
Quantum Scalar i40 and Scalar i80 User’s Guide
Chapter 1
Description
This chapter covers the layout and basic functionality of the library,
including:
• Overview
• Library Components
• Standard Features
• Licensable Features
Overview
The Scalar i40 and i80 tape libraries automate the retrieval, storage, and
management of tape cartridges. Tape cartridges are stored in the library
and mounted and dismounted from tape drives using firmware running
on the library or software running on the host systems.
See Appendix A, Specifications for library capacity and a list of tape
drives and media supported by the Scalar i40 and Scalar i80 libraries.
Quantum Scalar i40 and Scalar i80 User’s Guide
1
Chapter 1: Description
Library Components
Library Components
Front Panel
Figure 1 illustrates the features of the operator panel. The picture shows
the Scalar i40, but the features are the same on the Scalar i80. These
features are described in Table 1.
Figure 1 Front Panel
Operator panel screen
Navigation/selection buttons
Ticket indicator LED
Power-on LED
Power button
Table 1 Front Panel Features
2
Feature
Description
Operator
panel screen
The operator panel displays library status
information and allows you to access the library
menus. These menus allow you to view or change
the library settings and run diagnostic tests. For
more information, see Operator Panel on page 27.
Quantum Scalar i40 and Scalar i80 User’s Guide
Chapter 1: Description
Library Components
Feature
Description
Four navigation/selection
buttons
These buttons, in combination with the operator
panel display, are used to scroll through screens and
select options or commands. The functionality of
these buttons changes depending on the currently
displayed operator panel screen.
Ticket indicator LED
Indicates whether a diagnostic ticket exists on the
library. See Front Panel LEDs on page 251 and About
Diagnostic Tickets on page 244 for more information.
Power-on LED
Indicates whether library power is on or off. See
Front Panel LEDs on page 251 for more information.
Power button
Push-button that turns the library on or off.
Turning off the library using the power button turns
off the robot and operator panel, but power still
runs to the power supplies. See Shutting Down,
Restarting, Turning Off, and Removing Power on
page 107 for instructions on how to shut down the
library safely.
Robotic System and
Barcode Scanner
The robotic system identifies and moves the cartridges between the
storage slots, tape drives, and the I/E station. The robotic arm (picker)
has picker fingers that enable it to grab tape cartridges and move them
into and out of slots and tape drives.
A barcode scanner is attached to the library’s robotic hand. This barcode
scanner automatically identifies the slots and cartridges in the library, if
the cartridges are fitted with acceptable barcode labels.
Each tape cartridge must contain a unique, matching-readable barcode
that the barcode scanner reads during the inventory process. During the
inventory process, the barcode scanner reads the barcode labels on the
tape cartridges and empty slots to identify the types of tape cartridges
that are installed in the library.
Tape cartridges cannot have duplicate barcode labels. This barcode
identifies the cartridge. The library stores the physical location of the
tape cartridge in an inventory database. All library or host requests
typically reference the location of the tape cartridges based on this
Quantum Scalar i40 and Scalar i80 User’s Guide
3
Chapter 1: Description
Library Components
barcode number. Barcode labels are mandatory and must adhere to
specific standards. For more information on barcodes, see Chapter 10,
Working With Cartridges and Barcodes.
Robots can only be replaced by a Quantum Support technician.
Magazines
Magazines are removable and contain storage and import/export
station slots for cartridges. Each magazine has 20 slots, arranged in four
columns of five slots each. The Scalar i40 contains two magazines; the
Scalar i80 contains four. The right magazines provide up to five slots
each for use as an import/export (I/E) station. For more information on I/
E stations, see Configuring I/E Station Slots on page 63.
The library will run if one or more magazines is open or removed;
however, it runs at reduced speed. The library will not move a cartridge
to an open or removed magazine, but it will move a cartridge to any of
the other installed magazines.
You can open the magazines using library software or manually. For
information, see Releasing Magazines on page 114.
For information on removing and replacing magazines, see Removing
and Replacing a Magazine on page 215.
Magazine Slot Location Coordinates
Each slot in the installed magazine is numbered with location
coordinates. The library location coordinate contains three digits as
follows: [Magazine],[Column],[Slot]. Figure 2 and Figure 3 show the
magazines and list all of the location coordinates.
• Magazine — Library magazine level is represented by the first digit
of a library coordinate. In a Scalar i40, there is only one level of
magazine. The coordinate is always zero. In a Scalar i80 library, the
bottom magazines are indicated by a zero; the top magazines are
indicated by the number 1.
• Column — A storage column is a group of slots arranged vertically
in the library. Columns are represented by the second digit of a
library coordinate. Columns are identified relative to the front left of
the library. The column in the front left of the library is number 1.
The column numbering continues around the library in a clockwise
direction. The I/E station column is always number 8.
4
Quantum Scalar i40 and Scalar i80 User’s Guide
Chapter 1: Description
Library Components
• Slot — Slots (both storage and I/E station) are represented by the
third digit of the library location coordinate. Within each magazine
column, slots are numbered from 1 to 5, starting at the top of the
magazine.
Figure 2 Scalar i40 Internal
Layout and Magazine Slot
Location Coordinates
Tape Drives
Robot
Right magazine
Left magazine
Left Magazine
Right Magazine
0,1,1
0,2,1
0,3,1
0,4,1
0,5,1
0,6,1
0,7,1
0,8,1
0,1,2
0,2,2
0,3,2
0,4,2
0,5,2
0,6,2
0,7,2
0,8,2
0,1,3
0,2,3
0,3,3
0,4,3
0,5,3
0,6,3
0,7,3
0,8,3
0,1,4
0,2,4
0,3,4
0,4,4
0,5,4
0,6,4
0,7,4
0,8,4
0,1,5
0,2,5
0,3,5
0,4,5
0,5,5
0,6,5
0,7,5
0,8,5
Quantum Scalar i40 and Scalar i80 User’s Guide
5
Chapter 1: Description
Library Components
Figure 3 Scalar i80 Internal
Layout and Magazine Slot
Location Coordinates
Robot
Top right
magazine
Bottom right
magazine
Top left
magazine
Bottom left
magazine
Top Left Magazine
Top Right Magazine
1,1,1
1,2,1
1,3,1
1,4,1
1,5,1
1,6,1
1,7,1
1,8,1
1,1,2
1,2,2
1,3,2
1,4,2
1,5,2
1,6,2
1,7,2
1,8,2
1,1,3
1,2,3
1,3,3
1,4,3
1,5,3
1,6,3
1,7,3
1,8,3
1,1,4
1,2,4
1,3,4
1,4,4
1,5,4
1,6,4
1,7,4
1,8,4
1,1,5
1,2,5
1,3,5
1,4,5
1,5,5
1,6,5
1,7,5
1,8,5
Bottom Left Magazine
6
Bottom Right Magazine
0,1,1
0,2,1
0,3,1
0,4,1
0,5,1
0,6,1
0,7,1
0,8,1
0,1,2
0,2,2
0,3,2
0,4,2
0,5,2
0,6,2
0,7,2
0,8,2
0,1,3
0,2,3
0,3,3
0,4,3
0,5,3
0,6,3
0,7,3
0,8,3
0,1,4
0,2,4
0,3,4
0,4,4
0,5,4
0,6,4
0,7,4
0,8,4
0,1,5
0,2,5
0,3,5
0,4,5
0,5,5
0,6,5
0,7,5
0,8,5
Quantum Scalar i40 and Scalar i80 User’s Guide
Chapter 1: Description
Library Components
Power Supply
The Scalar i40 and Scalar i80 libraries support single power
configurations consisting of a single AC line input and single DC power
supply. The Scalar i80 library supports a redundant power configuration
consisting of a dual AC line input and dual DC power supplies.
If you have a Scalar i80 and are only using one power supply, the power
supply should be installed in the upper power supply slot, and a filler
plate must cover the empty power supply slot (see Figure 5 on page 9).
If you are using redundant power, you can hot add or hot swap a power
supply (power to the library remains on while you add or exchange the
hardware).
The Scalar i40 power supply cannot be installed in a Scalar i80. However,
the Scalar i80 power supply works in either the Scalar i40 or the
Scalar i80.
Warning: The power outlet must be available near the library and
must be easily accessible.
The power system consists of the following components:
• Power supply
• AC power cord
The power supply has one status LED. For more information, see Power
Supply LED on page 255.
For information on removing and replacing power supplies, see
Removing and Installing a Power Supply on page 220.
System Control Board
The system control board (SCB) contains the library firmware and
processor. It manages the entire library, including the operator panel
and robot, and is responsible for running system tests to ensure that the
library is functioning properly. The SCB has two Ethernet ports:
• Left port — for remote management (Web client)
• Right port — for service only. In rare cases, you may need to change
the IP address of the port if it conflicts with your library IP address
(see Configuring the Service Port on page 77).
See Figure 4 on page 9 and Figure 5 on page 9 for port locations.
Quantum Scalar i40 and Scalar i80 User’s Guide
7
Chapter 1: Description
Library Components
The SCB contains one LED, in addition to two LEDs on each Ethernet
port (for a total of 5 LEDs). For more information, see System Control
Board LEDs on page 252.
For information on removing and replacing the SCB, see Removing and
Replacing the System Control Board on page 223.
Tape Drives
Every library configuration must contain at least one tape drive.
See Appendix A, Specifications for a list of tape drives and media
supported by the Scalar i40 and Scalar i80 libraries.
The library supports mixing different tape drive types within the library
and within partitions. For information on how to do this, see Working
With Partitions on page 52.
Tape drives are installed into tape drive slots in the rear of the library. If a
tape drive slot is empty, a filler plate must cover the empty slot (see
Figure 5 on page 9).
Caution: Filler plates are required to maintain proper library cooling.
Do not run the library with uncovered slots.
SAS tape drives have one status LED. Fibre Channel tape drives contain a
status and a link LED. For more information on tape drive LEDs, see Tape
Drive/Sled LEDs on page 253.
All tape drives contain only one cable connector.
For information on removing and replacing tape drives, see Removing
and Replacing a Tape Drive on page 231.
Installed Tape Drive Location Coordinates
Installed tape drives have a two-digit location coordinate. These are the
coordinates shown in the library configuration report. The first digit is
always zero. The second digit indicates the location of the tape drive
relative to the other tape drives. The bottommost tape drive has
location coordinates [0,1], the next-to-bottom has location coordinates
[0,2], and so on.
8
Quantum Scalar i40 and Scalar i80 User’s Guide
Chapter 1: Description
Library Components
Figure 4 Scalar i80 Back Panel
Components
Power supply cord
Ethernet
cable in LEFT
SCB port
Tape drive cable
Figure 5 Scalar i80 Back Panel
Components
Tape drive
filler plate
Service port –
do not use
Power supply
cord
Power supply
filler plate
Tape drive cables
Quantum Scalar i40 and Scalar i80 User’s Guide
Ethernet
cable in LEFT
SCB port
Service port –
do not use
9
Chapter 1: Description
Standard Features
Standard Features
This section describes several features of Scalar i40 and Scalar i80
libraries.
User Interface
The operator panel is located on the front of the library and allows you
to work locally on the library via the user interface. The Web client
allows you to view and perform library functions from remote sites and
is accessible through a browser. The operator panel and Web client
contain a different user interface and functionality.
See Chapter 3, Understanding the User Interface for more information
about the operator panel and the Web client.
Partitions
Partitions are virtual sections within a library that present the
appearance of multiple, separate libraries for purposes of file
management, access by multiple users, or dedication to one or more
host applications.
Organizing the library into partitions divides the resources into virtual
sections. If one of the resources is not available due to a failure or other
cause, the other partitions and their assigned components are still
available. Partitions can also be used to control access to portions of the
library by granting permissions to user accounts to access certain
partitions.
For more information on partitions, see Working With Partitions on
page 52.
Control Path
Modification
10
The control path tape drive is used to connect a partition to a host
application. Only one tape drive can be selected as the control path at
one time. By default, the first tape drive assigned to a partition is
designated the control path. In the event that the control path
connection to the host application fails, you can select a new control
path for the partition. See Configuring Control Paths on page 67.
Quantum Scalar i40 and Scalar i80 User’s Guide
Chapter 1: Description
Licensable Features
Support for WORM
Scalar i40 and Scalar i80 tape libraries support WORM (write once, read
many) technology. WORM allows non-rewriteable and non-erasable
data to be written and provides extra data security by prohibiting
accidental data erasure. The WORM feature is supported whenever you
use WORM cartridges.
Licensable Features
In addition to the standard features, the following additional, licensable
features are available:
• Capacity on Demand (COD)
• Advanced Reporting
For information on how to obtain and install a license key, see Adding or
Upgrading Licensable Features on page 68.
Capacity on Demand
(COD)
All Scalar i40 and Scalar i80 library configurations ship with the
purchased number of slots pre-activated. After the initial purchase of
your library, you can activate any remaining inactive slots in your library
by purchasing a COD license upgrade.
• The Scalar i40 base configuration has 25 slots activated. You can
buy a COD license to activate the remaining 15 slots.
• The Scalar i80 base configuration has 50 slots activated. You can
buy a COD license to activate the remaining 30 slots.
To see your library’s current configuration and slot availability, open the
Library Configuration Report (choose Reports > Library Configuration
from the Web client).
Advanced Reporting
Advanced Reporting provides the following reports that you can
configure for viewing and analysis:
• Drive Resource Utilization Report—Provides tape drive usage
information, showing you which tape drives are working at
Quantum Scalar i40 and Scalar i80 User’s Guide
11
Chapter 1: Description
Licensable Features
optimum capacity and which are under-utilized. This can help you
allocate your tape drive resources properly.
• Media Integrity Analysis Report—Provides Tape Alert count for
various combinations of tape drives, tape cartridges, and Tape Alert
flags. This can help you determine if a problem is due to a specific
tape drive or tape cartridge.
For information on how to use the advanced reporting capabilities, see
Using Advanced Reporting on page 152.
The Advanced Reporting license applies to your entire library, regardless
of library size. This means you only need to purchase the license once. If
you increase the size of your library, your existing license applies to your
new library configuration.
12
Quantum Scalar i40 and Scalar i80 User’s Guide
Chapter 2
Initial Installation and Setup
This chapter covers how to set up your library for the first time and get
it ready for use, including:
• Unpacking the Library
• Accessory Kit Items
• Turning the Library ON and Configuring Network Settings
• Accessing the Library Via the Web Client
Required Tools and Equipment
• Ethernet cable
Quantum Scalar i40 and Scalar i80 User’s Guide
13
Chapter 2: Initial Installation and Setup
Before You Begin
Before You Begin
Refer to the following sections of this manual for important information
that you need when installing and setting up your library:
• Environmental Specifications on page 271
• Taking ESD Precautions on page 172
Unpacking the Library
Note: Unpack the library as close to the installation location as
possible.
1 Inspect the outer library packaging for damage. If there is any
damage evident on the library packaging, do not continue with the
installation and contact Quantum customer support.
2 Open the library packing box and remove the accessory kit and the
rail kit box (see Figure 6). Some configurations come with tape
drives installed in the library, and some come with tape drives
packaged separately. If yours comes with tape drives packaged
separately, remove them and set aside for installation later.
14
Quantum Scalar i40 and Scalar i80 User’s Guide
Chapter 2: Initial Installation and Setup
Unpacking the Library
Figure 6 Packaging
Accessory kit
Rail kit
Kit tray
Top foam
Library front bezel
Bottom foam
Packing box
3 With the help of a second person, lift the library chassis out of the
shipping carton and place it on a table approximately waist high.
WARNING: Two people are required to safely lift the library out of
its packaging or into a rack.
Quantum Scalar i40 and Scalar i80 User’s Guide
15
Chapter 2: Initial Installation and Setup
Unpacking the Library
Caution: Lift the library chassis at the sides. Avoid putting the
weight of the library chassis on the front bezel.
4 Remove the anti-static wrapping from the library. Keep the antistatic wrapping intact so that you can use it later if needed.
5 Save the packing box, packaging material, and anti-static wrapping
in case you need to move or ship the library in the future.
6 Remove the robot restraint. The robot restraint consists of four (4)
thumbscrews, a mylar sheet, and a small metal clip, located on the
top cover of the library. See Figure 7 and Figure 8.
a Partially unscrew (about 3 or 4 turns) all four thumbscrews, but
do not remove them.
b Using your fingers, carefully push down on two diagonally
positioned thumbscrews. Push them down as far as they will go.
This ensures that the robot can initialize freely. See Figure 7.
Figure 7 Pushing Down on
Thumbscrews to Release Robot
Push down on two diagonally
positioned thumbscrews
c Completely unscrew and remove the four thumbscrews from
the top cover (see Figure 8). Save the thumbscrews in case you
need to move or ship the library in the future.
16
Quantum Scalar i40 and Scalar i80 User’s Guide
Chapter 2: Initial Installation and Setup
Unpacking the Library
Note: The robot may stay at the top of the library, or it may
move downward toward the floor of the library. If it
moves downward, you will hear the gears turning as it
moves. This is normal.
d Remove the mylar sheet and metal clip and discard. You will not
need to use them again.
Figure 8 Removing the Robot
Restraint
Mylar
sheet
7
Metal
clip
Remove the protective plastic sheet covering the front panel
display.
Quantum Scalar i40 and Scalar i80 User’s Guide
17
Chapter 2: Initial Installation and Setup
Accessory Kit Items
Accessory Kit Items
Open the accessory kit and make sure all of the following items are
present:
• Power cord(s) – one for each power supply
• Scalar i40 and Scalar i80 Documentation and Training CD
• Scalar i40 and Scalar i80 Quick Start Guide
• China RoHS statement
• System, Safety, and Regulatory Information Guide
• 2.5 mm Allen wrench (for installing the rail kit)
• 3 mm Allen wrench (for installing the rail kit)
Installing the Library in a Rack or Desktop Kit
Follow the instructions in Installing the Rack Mount Kit (Rail Kit) on
page 174 or Installing the Library in a Desktop Kit on page 189.
Installing Tape Drives
If your library did not come with all tape drives installed, follow the
instructions in Installing a Tape Drive on page 233.
18
Quantum Scalar i40 and Scalar i80 User’s Guide
Chapter 2: Initial Installation and Setup
Connecting the Cables
Connecting the Cables
Follow the instructions for connecting the cables in Connecting Library
Cables on page 173.
Turning the Library ON and Configuring Network
Settings
Caution: Before turning the library on, make sure you removed the
shipping restraint (4 thumbscrews, mylar sheet, metal clip)
from the top of the library! Otherwise, the library will not
initialize. See Figure 8 on page 17.
1 Turn the library ON by pressing the power button on the front bezel
(see Figure 9).
• The green power LED on the front panel above the power
button illuminates, and the LCD screen turns on. The library
goes through a connection and initialization sequence. This can
take 5 to 17 minutes, depending on the size of your library.
• The status LED on the rear of each drive sled turns green during
initialization.
Quantum Scalar i40 and Scalar i80 User’s Guide
19
Chapter 2: Initial Installation and Setup
Turning the Library ON and Configuring Network Settings
Figure 9 Turning on the Library
Power LED
Power
button
2 When initialization completes, the Setup Wizard screen appears on
the operator panel (see Figure 10). The operator panel screen
contains a menu bar with operations that correspond to the four
physical buttons below it. The menu operations and button
functions change with each screen.
Figure 10 Setup Wizard –
Initial Screen
Menu bar
Navigation/selection
buttons
3 Before proceeding, verify the Ethernet cable is connected and all of
your tape drives are installed.
4 Do one of the following:
• To configure basic network settings using the Setup Wizard,
press the button below Next on the menu bar. You will be
guided through a series of screens where you can accept or
change the default configuration settings (date, time, IP
address, licenses, partitions, I/E station slots, and cleaning slots).
Once you accept a setting, you move to the next one.
20
Quantum Scalar i40 and Scalar i80 User’s Guide
Chapter 2: Initial Installation and Setup
Turning the Library ON and Configuring Network Settings
Remember that you can always change the configuration later if
needed.
• To cancel out of the Setup Wizard and begin using the library
immediately, press the button below Cancel on the menu bar.
This accepts the library’s default configuration, including an
IPv4 address assigned by DHCP (see Default Configuration on
page 42). You can change any of the configuration settings later
using the Setup menus on the operator panel or the Web client.
It is easier to configure the library using the Web client, so you
may wish to cancel now. To access the Web client immediately,
skip the rest of this section and go to Accessing the Library Via
the Web Client on page 25.
5 The Setup Date/Time screen appears (see Figure 11).
Figure 11 Setup Wizard –
Date/Time Screen
Do one of the following:
• To accept the date and time, press the Accept button.
• To change the date or time, press the Change button. The Date
field becomes available to edit and the menu bar button
designations change. Use the Left and Right buttons to move
through the date field, one digit at a time. Use the Up and
Down buttons to change each digit of the date value. As you
press Right, each digit of the date fills in. Continue to press the
Right button to go to the Time field and edit it the same way.
See Figure 12. When you reach the last digit of the Time field,
the Right button designation changes to Apply. Press the Apply
button. The new date and time display, and you can Accept or
Change. Once you press Accept, you move to the next step.
Quantum Scalar i40 and Scalar i80 User’s Guide
21
Chapter 2: Initial Installation and Setup
Turning the Library ON and Configuring Network Settings
Figure 12 Changing the Date
and Time
Note: You cannot change the time zone on the operator panel.
You can change it later using the Web client.
6 The Setup Network screen appears, listing a default host name
(which you cannot change here but you can change later on the
Web client) and an IPv4 address assigned by DHCP (see Figure 13).
Figure 13 Setup Wizard –
Setup Network Screen
Do one of the following:
• To accept the IP address, press the Accept button.
• To change the IP address, press the Change button. Complete
the network configuration screens and press Accept when
finished.
• If you accept IPv4 as the protocol, you can choose to get an
IP address via DHCP or enter a static IP address. If you
choose DHCP, the IP address, mask, and gateway are
displayed. If you choose not to use DHCP, use the directional
buttons as described in Step 5 on page 21 to enter a static
IP address, mask, and gateway.
22
Quantum Scalar i40 and Scalar i80 User’s Guide
Chapter 2: Initial Installation and Setup
Turning the Library ON and Configuring Network Settings
• If you choose IPv6 as the protocol, the library supplies a
stateless IPv6 address and displays it, along with other
network settings, on two screens. Use the Next and Back
buttons to view the screens. You can only change these
settings via the Web client.
7 The Current Licenses screen appears, which lists the number of
licensed and unlicensed slots in the library and whether an
Advanced Reporting license is installed (see Figure 14). If you
ordered Capacity on Demand (COD) or Advanced Reporting
features, they may already be installed on your library, depending
on the library configuration you ordered. If they are not installed,
you will have received, separately, a License Key Certificate
containing instructions on how to retrieve your license key from the
Quantum Web site. Once you have retrieved your license key, you
may add it now or any time later. (If you did not receive your License
Key Certificate, contact Quantum Support.)
Figure 14 Setup Wizard –
Licenses Screen
Do one of the following:
• To accept the settings and go to the next step, press Accept.
• To change the settings, press Change. You can only change the
settings if you have a new license key to enter. If you have a
license key, press Add, then enter the license key using the
directional buttons as described in Step 5 on page 21 and press
Accept when complete. If you need to add another license key,
perform the Change operation again.
8 The Current Configuration screen appears, displaying the default
number of partitions, I/E station slots, and cleaning slots (see
Figure 15).
Quantum Scalar i40 and Scalar i80 User’s Guide
23
Chapter 2: Initial Installation and Setup
Turning the Library ON and Configuring Network Settings
Figure 15 Setup Wizard –
Current Configuration Screen
Do one of the following:
• To accept the current settings, press Accept.
• To change any of the settings, press Change. This will delete the
current partitions, and you are asked to confirm you want to do
this. If you agree, the library deletes the partitions, which take
about 30 seconds. When the partitions are deleted, you are
guided through several more screens to change the number of
partitions, I/E station slots, and cleaning slots. Use the
directional buttons as described in Step 5 on page 21 and press
Accept when complete.
• Partitions — The minimum number of partitions you can
create is one. The maximum is equal to the number of tape
drives installed in the library. The library assigns resources
proportionately among the partitions. You can change
resource allocation later via the Web client. For details, see
Working With Partitions on page 52.
• I/E Station Slots — You can create a maximum of five I/E
station slots on a Scalar i40 and a maximum of ten on a
Scalar i80. The minimum is zero. Be aware that if you
configure zero I/E station slots, you will not be able to
import and export tape cartridges.
• Cleaning Slots — You can configure a minimum of zero and
a maximum of four cleaning slots.
24
Quantum Scalar i40 and Scalar i80 User’s Guide
Chapter 2: Initial Installation and Setup
Accessing the Library Via the Web Client
9 The Setup Wizard is complete (see Figure 16). Press the Exit button.
Figure 16 Setup Wizard
Complete
Accessing the Library Via the Web Client
It is recommended that you use the Web client to perform most library
functions. The Web client is easier to use than the operator panel, and it
presents more information and options than the operator panel does.
To access the library via the Web client:
1 From the operator panel, press the Reports button.
2 Press the Down button until Network Settings is highlighted.
3 Press the Select button.
4 Make note of your library’s IP address that is displayed on the
screen.
5 Enter the IP address in your Internet browser to bring up the
library’s Web client login screen.
6 Enter the default user name: admin
7 Enter the default password: password
8 Click OK.
Quantum Scalar i40 and Scalar i80 User’s Guide
25
Chapter 2: Initial Installation and Setup
Configuring Partitions
Configuring Partitions
You may wish to configure partitions via the Web client if the Setup
Wizard could not set them up exactly as you want them. To configure
partitions, see Working With Partitions on page 52.
Importing Tape Cartridges
See Importing Tape Cartridges on page 117 and Bulk Loading Tape
Cartridges on page 121 for instructions on how to import cartridges
into the library.
Saving the Library Configuration
Save the library configuration every time you change the configuration
or firmware. For instructions, see Saving the Library Configuration on
page 101.
Configuring the Host Software
Before you can use the library for backup, you need to configure your
host application. Refer to your host software documentation for
instructions on configuring your host.
26
Quantum Scalar i40 and Scalar i80 User’s Guide
Chapter 3
Understanding the User
Interface
The user interface for the Scalar i40 and Scalar i80 libraries is available in
two formats: the operator panel and the Web client. Operations on the
library can be performed locally on the operator panel or remotely on
your computer using the Web client.
Both the operator panel and Web client user interfaces are required to
operate the library. Some functionality is only available through the Web
client, and some functionality is only available through the operator
panel. However, it is recommended that you use the Web client rather
than the operator panel to perform most library operations.
This chapter covers:
• Operator Panel
• Web Client
• Menu Trees
Operator Panel
The operator panel is located on the front panel of the physical library.
The operator panel screen contains a menu bar with operations that
correspond to the four physical buttons below it. The menu operations
and button functions change with each screen.
Quantum Scalar i40 and Scalar i80 User’s Guide
27
Chapter 3: Understanding the User Interface
Operator Panel
Operator Panel Layout
and Functions
Figure 17 shows the operator panel user interface. Table 2 describes the
operator panel functions.
Figure 17 Operator Panel User
Interface - Home Page
Library Status
Name
Health status
Title bar
Active display
Menu bar
Navigation/selection
buttons
Table 2 Operator Panel
Functions
Operator Panel
Element
Title bar
28
Description
The title bar is present on every screen, and
contains three fields: name, library status, and
diagnostic ticket status.
Quantum Scalar i40 and Scalar i80 User’s Guide
Chapter 3: Understanding the User Interface
Operator Panel
Operator Panel
Element
Description
Name
The name field changes depending on the menu
selection. On the home page, this field displays
the library type (Scalar i40 or Scalar i80). On
active menu pages, the field displays the name of
the menu or function of the screen. On
diagnostic ticket pages, it displays the subsystem
that the diagnostic ticket refers to (library, tape
drives, or media).
Library status
The library’s current status. The status can be any
of the following:
• Init – The library is currently in the process of
initializing.
• Ready – The library’s robotics are operational.
• Not Ready – The library’s robotics are not
ready.
Health status
The health status field displays an icon
representing the health of the library.
Heart — Library is in good health (no open
or unopened diagnostic tickets are present).
Triangle — Library health is degraded
(library contains open or unopened low- or
high-priority diagnostic tickets).
Exclamation point — Immediate attention
is required (library contains open or
unopened urgent diagnostic tickets).
Active display
The active display provides information or menu
items according to the selected menu item or
operation.
Menu bar
The menu bar displays the function associated
with each of the navigation/selection buttons.
The button function changes with each menu.
Common functions are navigation (up, down,
left, right, next) and menu selection (select, apply,
exit, yes, no, cancel).
Quantum Scalar i40 and Scalar i80 User’s Guide
29
Chapter 3: Understanding the User Interface
Operator Panel
Operator Panel
Element
Navigation/
Selection
Buttons
Navigating and Editing
on the Operator Panel
Description
The physical buttons enable you navigate menus
and start and stop library operations according to
the functions listed in the button bar. Not all
buttons are functional for every operation. See
Navigating and Editing on the Operator Panel on
page 30 for more information.
You use the four navigation/selection buttons exclusively to move
through the menus and commands on the operator panel.
From the home page, the menu bar lists the four main menu headings.
Pressing the button corresponding to a menu item brings up the list of
sub-menu items. The item you are currently on is highlighted. Press the
buttons corresponding to Up, Down, Left, or Right to navigate to a
desired menu item. As you move through the items, the highlighting
moves with you so you always know which item you are on. Press the
button corresponding to Select to select a highlighted item or action.
This in turn brings up either another sub-menu, a screen where you can
modify settings or perform operations, or a screen displaying
information.
To edit a modifiable field, such as date, time, IP address, and so on, use
the Left and Right buttons to move through the field, one digit at a
time. Use the Up and Down buttons to change each the value of each
digit or letter. When you reach the value you want, press the Right
button. As you press Right, each digit fills in. If there are multiple fields,
continue to press the Right button to go to the next field and edit it the
same way. When you reach the last digit of the last field, the Right
button designation changes to Apply. Press the Apply button. The new
information displays. Press Exit to exit. For an example, see Figure 18 on
page 31.
30
Quantum Scalar i40 and Scalar i80 User’s Guide
Chapter 3: Understanding the User Interface
Web Client
Figure 18 Changing the Date
and Time
Web Client
The Web client interface is accessible from supported Web browsers (see
Supported Internet Browsers on page 274).
To access the library from a remote location, the library must be
connected to your network via an Ethernet connection. Simply enter the
library’s IP address in your Internet browser bar to access the Web client.
See Configuring Network Settings on page 42 for information on
setting the network configuration settings for remote use.
Tips
Keep the following tips in mind when using the Web client:
• You must disable Web browser popup blockers to use the Web
client interface and the library’s online Help. Add the Scalar i40 or
Scalar i80’s Internet Protocol (IP) address to the list of trusted/
allowed sites on your Scalar i40- or Scalar i80-supported browser, so
the Web client pages will automatically refresh.
• Do not use your Internet browser Back button to navigate the Web
client pages. Instead, use the buttons provided within the Web
client.
Quantum Scalar i40 and Scalar i80 User’s Guide
31
Chapter 3: Understanding the User Interface
Web Client
• Log out of the library before closing the Internet browser window
when you are using the Web client. If you do not log out, the
session will remain open. Clicking the close button (X) in the upperright corner of the Web client closes the browser window but does
not log you out.
Sorting Information In
Tables
You can sort information displayed in tables if the table column heading
is bold. Click the column heading and the information will sort. Click
again to toggle from ascending to descending.
Web Client Layout and
Functions
Figure 19 on page 33 shows the Web client interface. Table 3 on
page 34 explains the Web client interface elements.
32
Quantum Scalar i40 and Scalar i80 User’s Guide
Chapter 3: Understanding the User Interface
Web Client
Figure 19 Web Client User
Interface - Home Page
“Library is not ready”
message area
Home Online Logout
help
Header
Menu bar
Active
display
View diagnostic tickets
Quantum Scalar i40 and Scalar i80 User’s Guide
33
Chapter 3: Understanding the User Interface
Web Client
Table 3 Web Client Screen
Elements
Web Client
Element
Header
Description
The header is present on all pages and contains
the library type (Scalar i40 or Scalar i80) and three
buttons:
Home — Brings you to the home page.
Help — Displays the online help.
Logout — Logs out of the current session.
A message in the header alerts you when the
robot is not ready to perform library functions.
See Troubleshooting Library “Not Ready”
Messages on page 248 for more information on
“Library Not Ready” messages displayed in the
header.
Menu bar
Displays the available menu choices. The choices
vary depending on login privileges.
The far right of the menu bar also displays the
name of the logged-in user, with the associated
privilege level indicated in brackets.
Active display
The active display provides information or menu
items according to the selected menu item or
operation.
Web Client Home Page
The home page displays status and health information in the active
display portion of the window (see Figure 19 on page 33). See System
Summary and Subsystem Status below for more information.
System Summary
The system summary is available on the home page of the Web client.
It provides tabular data on the capacity of the library’s partitions, slots,
and tape drives. It also displays whether partitions are online or offline
34
Quantum Scalar i40 and Scalar i80 User’s Guide
Chapter 3: Understanding the User Interface
Web Client
(in the Storage Slots section). The current user’s login privileges
determine which partitions are displayed (see Privilege Levels on
page 80).
Subsystem Status
You can quickly gauge the health of the library by observing the color of
the three subsystem status buttons located at the bottom of the home
page. These buttons provide quick access to information about the
“health” of the library for faster recovery if problems occur. You can
select the buttons to view diagnostic tickets that report problems in the
subsystems.
The three subsystems are:
• Library — This subsystem represents connectivity, control, cooling,
power, and robotics.
• Drives — This subsystem represents tape drive components, such as
tape drives, tape drive firmware, and tape drive sleds.
• Media — This subsystem represents media components, such as
cartridges and barcode labels.
Each button has three states indicated by color. The three states are:
Green (check mark) — No diagnostic tickets exist, or, if any tickets
do exist, they have all been closed.
Yellow (exclamation point) — The library contains open or
unopened, low or high priority diagnostic tickets.
Red (“X” mark) — The library contains open or unopened urgent
diagnostic tickets.
If the color of a subsystem button is red or yellow, you can click the
button to display the corresponding Diagnostic Tickets screen. This
screen lists library, drives, or media tickets, depending on which button
was selected. See About Diagnostic Tickets on page 244 for more
information.
Quantum Scalar i40 and Scalar i80 User’s Guide
35
Chapter 3: Understanding the User Interface
Menu Trees
Menu Trees
The following menus organize operations and commands into logical
groupings:
• The Setup menu consists of commands that users with
administrative privileges can use to set up and configure various
aspects of the library, including partitions, I/E station slots, cleaning
slots, control paths, network settings, drive settings, users,
notifications, date and time, licenses, library registration, and email.
• The Operations/Actions menu consists of commands that enable
users to change the library’s mode of operations, import and export
cartridges, load and unload tape drives, move media, lock or unlock
the I/E station, log off, and shut the library down. The menu is called
Actions on the operator panel and Operations on the Web client.
• The Tools menu consists of commands that you can use to maintain
your library such as viewing diagnostic tickets, generating
diagnostic logs, identifying drives, configuring the internal network,
saving and restoring the library configuration, setting system and
security settings, and updating firmware, and performing library
diagnostics.
• The Reports menu provides various kinds of library information.
Administrative users have access to all menu commands, but users’
privileges are more limited.
Figure 20 lists the operator panel menus. Figure 21 lists the Web client
menus.
36
Quantum Scalar i40 and Scalar i80 User’s Guide
Chapter 3: Understanding the User Interface
Menu Trees
Figure 20 Operator Panel
Menus
Operator Panel
Main Menu Bar
Setup
Network Configuration
Date & Time
License Installation
Dedicated Slots
Actions
Tools
Change Partition Mode
IVT
I/E
Diagnostics
Unlock I/E Station
Robotics Test
Import Tape
Tape Drive Test
Cleaning
Import Cleaning Tape
Magazine Test
I/E
Export Tape
Tape Drives (FC)
Configure Partitions
View Current
Partitions
Auto-Create Partitions
Delete Partitions
Account Settings
Export Cleaning Tape
Magazine
Release
Tape Drive
Library
Tape Drives
Media
About Library
Random Move Test
Partitions
Service Network
Network Settings
Reset Factory Defaults
Date/Time
Licenses
Copyright Statement
Unload
Manual Cleaning
Session Timeout
Reset
Modify Password*
Diagnostic Tickets
Change Mode
Password Settings
System Settings
Reports
Shutdown
Shutdown Library
ACCESS KEY
Unload Assist
Logical SN Addr
Restart Library
Logout*
Man Cart Assign
NOTE: If passwords are not
enabled on the operator
panel, all users have access
to all menus and functions.
All Users
SNMP
SMI-S
Security Services
Network IF
Admin Privileges Only
Service Only
* Only Available if LUI
Passwords are enabled
SSH Services
ICMP
Web client
Service User
SNMP V1/V2
SSL
Quantum Scalar i40 and Scalar i80 User’s Guide
37
Chapter 3: Understanding the User Interface
Menu Trees
Figure 21 Web Client Menus
Web Client
Main Menu Bar
Setup
Setup Wizard
Operations
Media
Tools
Reports
All Diagnostic Tickets
System Information
Partitions
Move
Capture Snapshot
Library Configuration
Cleaning Slots
Import
Save/Restore
Configuration
Network Settings
Export
E-mail Configuration
Record
Logged In Users
Save Configuration Record
All Slots
I/E Station Slots
Drive Settings
Cleaning Media
Control Path
Import
Drive Operations
Log Viewer
License
Export
Download SNMP MIB
Advanced Reporting
Notification
Setup
E-Mail Account
Contact Information
Network Management
Network
Partitions
Change Mode
Drive
Drive Resource
Utilization
Diagnostics
Media Integrity Analysis
Drives
About
Load
Robotics
Scalar i40/i80
Unload
Exit
Open Source Licenses
Change Mode
SNMP
I/E Station Unlock
SNMP Trap
Registrations
Release Magazines
User Management
Update Library Firmware
System Shutdown
User Accounts
Shutdown
Remote Authentication
Restart
ACCESS KEY
All Users
Reset LUI Passwords
Log Out
Admin Privileges Only
Date & Time
Register Library
38
Quantum Scalar i40 and Scalar i80 User’s Guide
Chapter 4
Configuring the Library
A Setup Wizard is available to assist you with the initial configuration of
the library. The Setup Wizard, however, contains only a subset of
configuration tasks. The operator panel and Web client menus provide
access to all configuration options that are included in the Setup Wizard
and many that are not.
This chapter covers the Setup Wizard and all of the other configuration
options. Paths to open the appropriate screens on both the operator
panel and the Web client are given for each task. (For complete menu
trees, see Menu Trees on page 36.)
Note: These operations should not be performed concurrently by
multiple administrative users logged in from different
locations. You can access the screens, but you cannot apply
changes while another administrative user is performing the
same operation.
Caution: Always save the library configuration after modifying a
configurable item. This will allow you to restore the most
current settings if necessary. See Saving and Restoring the
Library Configuration on page 100.
Note: Power cycling (powering the library on and off) is not necessary
to configure the library.
Quantum Scalar i40 and Scalar i80 User’s Guide
39
Chapter 4: Configuring the Library
This chapter covers:
• Using the Setup Wizard
• Configuring Network Settings
• Configuring SNMP Settings
• Setting the Date, Time, and Time Zone
• Working With Partitions
• Configuring Cleaning Slots
• Configuring I/E Station Slots
• Configuring Tape Drive Parameters
• Configuring Control Paths
• Adding or Upgrading Licensable Features
• Working With E-mail Notifications
• Configuring the Library E-Mail Account
• Setting Customer Contact Information
• Configuring the Service Port
• Working With Local User Accounts
• Working With LDAP User Accounts (Remote Authentication)
• Setting the Session Timeout
• Configuring System Settings
• Configuring Security Settings
• Saving and Restoring the Library Configuration
• Registering the Library
40
Quantum Scalar i40 and Scalar i80 User’s Guide
Chapter 4: Configuring the Library
Using the Setup Wizard
Using the Setup Wizard
When you first power on the library, the operator panel displays the
Setup Wizard, which walks you through the initial configuration of the
library’s basic operational settings.
The Setup Wizard on the operator panel appears when you first install
your library. It appears once only. It will also appear after SCB
replacement, resetting factory defaults, or downgrading library
firmware. You must either complete the Setup Wizard or cancel out of
it. If you cancel, you accept the library’s default configuration (see
Default Configuration). You can modify the default configuration at any
time later using the Setup Wizard on the Web client, or by using the
Setup menu options from the operator panel or Web client.
Operator Panel
The Setup Wizard on the operator panel is covered in detail in
Chapter 2, Initial Installation and Setup.
Web Client
Click Setup > Setup Wizard. Work through several screens that enable
you to add licenses; set date, time, and time zone; configure cleaning
slots; configure I/E station slots; and auto-create partitions.
Quantum Scalar i40 and Scalar i80 User’s Guide
41
Chapter 4: Configuring the Library
Default Configuration
Default Configuration
The library comes with a default configuration, which you can modify at
any time. The default configuration is as follows:
Feature
Default Configuration
Library host name
library
Network settings
IPv4, DHCP enabled
IPv6 disabled
Number of partitions
Equal to the number of installed tape
drive types (Fibre Channel or SAS).
Storage slots are divided equally
among the partitions.
Number of I/E station slots
5
Number of cleaning slots
0
Configuring Network Settings
The operator panel Setup Wizard allows you to configure network
settings that allow remote access to the library from the Web client. At a
minimum, you must initially configure the network IP address from the
operator panel. After the initial configuration, you can modify the
network settings from either the operator panel or the Web client.
Note: Changing the network settings may interrupt the library
connection and library communication. Your current browser
session may become invalid. If this happens, you must close
your browser and then restart it to reconnect to the library with
your new configuration settings.
42
Quantum Scalar i40 and Scalar i80 User’s Guide
Chapter 4: Configuring the Library
Configuring Network Settings
Note: Make sure that the library is connected to the network before
modifying network settings. If the Ethernet cable is not
installed properly, you cannot configure the network settings.
Install one end of the Ethernet cable in the left-most Ethernet
port of the system control board (SCB) located on the back of
the library. Make sure the other end of the Ethernet cable is
installed in the appropriate LAN port on your LAN.
You can configure the following network settings. Some settings are
only available on the Web client; others are only available on the
operator panel, as described below.
Library Host Name
The host name is the network name you want to assign to the library.
The library name is limited to 12 lowercase alphanumeric characters and
dashes (-).
You can view, but not modify, the library host name on the operator
panel. To modify the library host name, you must use the Web client.
Web Client
1 Select Setup > Network Management > Network.
2 Type a name in the Library Name field, and click Apply.
DHCP
DHCP is enabled by default. When DHCP is enabled, the library obtains
an IP address automatically. If DHCP is disabled, you must manually
enter an IP address, default gateway, and subnet mask/net prefix. You
can enable/disable DHCP from the operator panel or Web client.
Operator Panel
Select Setup > Network Configuration.
Web Client
Select Setup > Network Management > Network.
Quantum Scalar i40 and Scalar i80 User’s Guide
43
Chapter 4: Configuring the Library
Configuring Network Settings
IP Addresses
The library can support both IPv4 and IPv6 network settings at the same
time. For more details see the bullets below.
Caution: If you change the IP address on your library, make sure to
change it on any host applications that access the library.
Note: Be sure to add your library’s IP address to the list of trusted/
allowed sites on your library-supported browser, so the Web
client pages automatically refresh.
• IPv4 Addresses — The library always supports IPv4 network
settings. The library can support either a DHCP-obtained or a static
IPv4 address.
IPv4 addresses must be entered in dot notation (for example,
192.168.0.1). They are limited to numeric characters and do not
allow values exceeding 255 for dot-separated values.
• IPv6 Addresses — IPv6 is disabled by default and can only be
enabled/disabled via the operator panel. Once enabled, you must
use the Web client to modify the address. Unlike IPv4, the library
can support both DHCP-obtained and static IPv6 addresses at the
same time.
IPv6 addresses must be entered in the proper notation. IPv6 address
can be entered in the most common notation, as eight groups of
four hexadecimal digits. 2001:0ff8:55cc:033b:1319:8a2e:01de:1374
is an example of a valid IPv6 address. Also, if one or more of the
four-digit groups contains 0000, you can omit the zeros and replace
them with two colons (::), as long as there is only one double colon
used in an address. Using this notation,
2001:0ff8:0000:0000:0000:0000:01de:1374 is the same as
2001:0ff8::01de:1374.
You can configure IPv4 addresses on the operator panel or Web client.
You can set the library to use IPv6 via the operator panel, but you must
use the Web client to configure a static IPv6 address.
Operator Panel
Select Setup > Network Configuration.
44
Quantum Scalar i40 and Scalar i80 User’s Guide
Chapter 4: Configuring the Library
Configuring SNMP Settings
Web Client
Select Setup > Network Management > Network.
Default Gateway,
Subnet Mask, Network
Prefix, and DNS
Addresses
• Default Gateway — The IP address of the default gateway for your
portion of the Ethernet network. For IPv4, this setting can only be
changed if DHCP is disabled.
• Subnet Mask (IPv4 only) — Available only if DHCP is disabled.
• Network Prefix (IPv6 only). Can be entered only on the Web client.
• Primary DNS Address (optional, Web client only) — Must be entered
as an IP address. This text box is available only if DHCP is disabled.
• Secondary DNS Address (optional, Web client only) — Must be
entered as an IP address. This text box is available only if DHCP is
disabled.
Operator Panel
Select Setup > Network Configuration.
Web Client
Select Setup > Network Management > Network.
Configuring SNMP Settings
Simple Network Management Protocol (SNMP) is a light-weight
protocol designed for remote management and monitoring of
infrastructure devices. The library provides SNMP support, so an external
management application can be configured to receive library SNMP
information. The library supports SNMP by publishing a Management
Information Base (MIB) that can be queried to obtain the status of the
library and many of its individual components. SNMP information can
be obtained from the library using SNMP Traps and GET queries.
Quantum Scalar i40 and Scalar i80 User’s Guide
45
Chapter 4: Configuring the Library
Configuring SNMP Settings
For more information about SNMP, see the Scalar i40 and Scalar i80
Basic SNMP Reference Guide (6-66773-xx).
For information on integrating MIBs with an SNMP management
application, contact your network management application vendor.
Registering External
Management
Applications
Administrative users can register transport protocols, IP addresses, and
port numbers of external management applications to enable them to
receive SNMP traps from the library. (By default, the library ignores all
SNMP SET operations, so external management applications cannot
register themselves to receive SNMP traps from the library.)
After registering the transport protocols, IP addresses, and
corresponding port numbers, you can perform a test to verify that the
library can send the SNMP traps to the addresses.
When registering external management applications to receive SNMP
traps, you can set the following parameters:
• Transport — The transport protocol. This should be the same as the
transport protocol configured on the SNMP trap receiver. Select one
of the following:
• UDP - User Datagram Protocol for IPv4
• UDP6 - User Datagram Protocol for IPv6
• TCP - Transmission Control Protocol for IPv4
• TCP6 - Transmission Control Protocol for IPv6
• Host Name/IP Address — The host name or the IP address of the
external management application you want to register. A host name
may be entered only if DNS is enabled. Otherwise, IP addresses must
entered. For information on DNS, see Default Gateway, Subnet
Mask, Network Prefix, and DNS Addresses on page 45.
• Port — the port number of the external application you want to
register. The default port number for an external application is 162.
You can only perform these functions from the Web client.
Web Client
1 Select Setup > Network Management > SNMP Trap
Registrations.
46
Quantum Scalar i40 and Scalar i80 User’s Guide
Chapter 4: Configuring the Library
Configuring SNMP Settings
2 Click one of the following buttons to perform these actions:
• Create — Adds the IP address and port number of the external
application to the list of registered addresses that will be sent
SNMP traps.
• Delete — Deletes a selected IP address and port number.
• Test — This test simply sends the traps; it does not check to see
if they were received. You must check the external management
applications to verify that the traps were received.
Enabling SNMP
Versions
The library supports SNMP v1, v2c, and v3.
You can enable or disable support for SNMP v1 and v2c. They are
enabled by default. The recommended practice is to disable SNMP v1
and SNMP v2c in highly secure environments.
SNMP v3 is always enabled and cannot be disabled.
The authentication algorithm is set to MD5, and the encryption is
disabled system-wide.
Operator Panel
1 Select Setup > Security Services > SNMP V1/V2
2 Press Modify.
3 Scroll to select Enabled or Disabled and press Apply.
4 Press Exit.
Web Client
1 Select Setup > Network Management > SNMP.
2 Select the SNMP V1 and V2c enabled check box to enable SNMP v1
and v2c. Clear the SNMP V1 and V2c enabled check box to disable
SNMP v1 and v2c.
Enabling SNMP
Authentication Traps
The library allows you to enable or disable SNMP authentication traps.
When the library receives an SNMP message that does not contain the
correct community string or other authentication information, the
Quantum Scalar i40 and Scalar i80 User’s Guide
47
Chapter 4: Configuring the Library
Configuring SNMP Settings
library sends an SNMP authentication trap message to the external
management application, indicating the authentication failure. SNMP
authentication traps are disabled by default.
Web Client
1 Select Setup > Network Management > SNMP.
2 Select the SNMP Authentication Traps check box to enable SNMP
authentication traps. Clear the SNMP Authentication Traps check
box to disable SNMP authentication traps.
Modifying the SNMP
Community String
Administrative users can modify the SNMP community string. The SNMP
community string is a text string that acts as a password to authenticate
GET and GET-NEXT SNMP v1 and SNMP v2c messages exchanged
between the library and an external management application. The
SNMP community string used by the library must match the string used
by the external management application.
The default SNMP community string on the library is: publicCmtyStr.
For security purposes, this string should be modified. When modifying
the community string, adhere to the following guidelines: the
community string is case-sensitive, cannot be empty, and cannot exceed
32 characters.
You can only modify the SNMP community string from the Web client
Web Client
1 Select Setup > Network Management > SNMP.
2 Enter a new community string in the SNMP Community text box
under New Settings.
3 Click Apply.
Downloading the SNMP
MIB
48
The SNMP Management Information Base (MIB) is for library customers,
partners, third-party management software developers, and other
parties interested in integrating the Scalar i40 and Scalar i80 with
commercial management frameworks. The Scalar i40 and Scalar i80
Quantum Scalar i40 and Scalar i80 User’s Guide
Chapter 4: Configuring the Library
Setting the Date, Time, and Time Zone
libraries support SNMP by publishing a MIB that can be queried to
obtain the status of the library and many of its individual components.
Administrative users can download the SNMP MIB from the library. The
MIB can then be installed on an SNMP external management
application.
For more information about the library MIB, see the Scalar i40 and
Scalar i80 Basic SNMP Reference Guide (6-66773-xx) or contact
Quantum Support.
For information on integrating MIBs with an SNMP management
application, contact your network management application vendor.
Web Client
1 Select Tools > Download SNMP MIB.
2 Save the file to a known location.
Setting the Date, Time, and Time Zone
You can either set the library date, time, and time zone settings
manually or configure the Network Time Protocol (NTP). NTP allows you
to synchronize the library date and time with other components in your
IT infrastructure.
If NTP is enabled, the IP address of at least one NTP server must be
configured. Contact your network administrator for NTP server IP
address information.
You can configure the date and time on both the operator panel and
the Web client. You can view the time zone on the operator panel, but
must use the Web client to change it. You can only configure NTP
settings on the Web client.
Note: The following operations should not be performed
concurrently by multiple administrative users logged in from
different locations. You can access the appropriate screens, but
you cannot apply changes while another administrative user is
performing the same operation.
Quantum Scalar i40 and Scalar i80 User’s Guide
49
Chapter 4: Configuring the Library
Setting the Date, Time, and Time Zone
Setting the Date and
Time Manually
Date and time settings are used to log the date and time events take
place and to set the time for automatic backup and restore functions. At
a minimum, you should set the library’s date and time as part of the
initial library configuration.
The time is set to a 24 hour clock. For example, four o’clock in the
afternoon is entered as 16:00.
Operator Panel
1 Select Setup > Date & Time.
2 Modify the date and time using the method described in Navigating
and Editing on the Operator Panel on page 30.
Web Client
1 Select Setup > Date & Time.
2 Refer to the library Web client online help for detailed instructions.
To view the help, click the Help icon in the upper right corner of the
screen.
Setting the Date and
Time Using the Network
Time Protocol
The library supports the Network Time Protocol (NTP). NTP allows you to
synchronize the library date and time with other components in your IT
infrastructure. Administrative users can either modify the date and time
zone settings manually or configure NTP.
If NTP is enabled, the time zone and IP addresses of at least one NTP
server must be configured on the library. Contact your network
administrator for NTP server IP address information.
Details on NTP settings include:
• At least one NTP server must be configured and available.
• NTP is enabled on the Date & Time screen. When NTP is enabled,
you cannot manually configure date and time. For more information
on setting date and time manually, see Setting the Date and Time
Manually on page 50.
• You can enter an IP address for a primary and an alternate (optional)
NTP server.
50
Quantum Scalar i40 and Scalar i80 User’s Guide
Chapter 4: Configuring the Library
Setting the Date, Time, and Time Zone
• NTP server IP addresses must be entered in the proper format. See
Configuring Network Settings on page 42 for the proper format of
IPv4 and IPv6 addresses.
• After you apply NTP settings, system clock synchronization may take
several minutes.
You can only enable and configure NTP on the Web client.
Web Client
1 Select Setup > Date & Time.
2 Refer to the library Web client online help for detailed instructions.
To view the help, click the Help icon in the upper right corner of the
screen.
Setting the Time Zone
To select your time zone from a list, disable Use Custom Time Zone
setting and select your time zone.
If your time zone does not appear on the list, or you want more control
over your time settings, enable Use Custom Time Zone and set a
Universal Coordinated Time (UTC) offset.
You can only set the time zone via the Web client.
Web Client
1 Select Setup > Date & Time.
2 Refer to the library Web client online help for detailed instructions.
To view the help, click the Help icon in the upper right corner of the
screen.
Setting Daylight Saving
Time
If you selected your time zone from the drop-down list (see Setting the
Time Zone on page 51), the library automatically adjusts for daylight
saving time. There is no need to manually reset the clock for time
changes.
Quantum Scalar i40 and Scalar i80 User’s Guide
51
Chapter 4: Configuring the Library
Working With Partitions
However, if you set a custom time zone, the library will not
automatically adjust for daylight saving time. You must enable the Use
Custom Daylight Saving Time setting. Once enabled, you can set start
and stop times to an accuracy of one minute.
You can only set daylight saving time on the Web client.
Web Client
1 Select Setup > Date & Time.
2 Refer to the library Web client online help for detailed instructions.
To view the help, click the Help icon in the upper right corner of the
screen.
Working With Partitions
Partitions are virtual sections within a library that present the
appearance of multiple, separate libraries for purposes of file
management, access by multiple users, or dedication to one or more
host applications. The library must contain at least one unassigned tape
drive and slot to create a partition.
There are two ways to create partitions:
• Automatically — Library resources are assigned proportionately
among the partitions. Tape drives are grouped according to their
interface type (FC or SAS). When you automatically create partitions,
you add to the number of existing partitions. You can create
partitions automatically on either the operator panel or the Web
client. For more information, see Automatically Creating Partitions
on page 53.
• Manually — An administrative user can create partitions one at a
time. Creating partitions manually gives you more control over
resource allocation. When you manually create partitions, you add
to the number of existing partitions. You can only create partitions
manually on the Web client. For more information, see Manually
Creating Partitions on page 55.
52
Quantum Scalar i40 and Scalar i80 User’s Guide
Chapter 4: Configuring the Library
Working With Partitions
You can modify a partition if you need to change its settings. For
example, the partition name, emulation type, media barcode format (to
report to host), and number of assigned tape drives and slots can be
modified. For information on modifying partitions, see Modifying
Partitions on page 57.
When a partition is no longer needed, it can be deleted. For information
on deleting partitions, see Deleting Partitions on page 57.
Administrative users can create, delete, and control access to all library
partitions. Users can be given access to only certain partitions and
denied access to others. For information on changing partition access
for users, see Changing Access to Partitions on page 59.
Details on partitions include:
• A partition consists of one tape drive and one slot at a minimum.
The tape drive or slot cannot be shared with another partition.
• The default configuration for the library is one partition per tape
drive interface type (Fibre Channel or SAS) installed in the library.
• Partition names are limited to 12 lower-case alphanumeric
characters and underscores (_).
• The maximum number of partitions that can be created is equal to
the number of tape drives in the library. The minimum number of
partitions is one.
• Import/export (I/E) station slots are shared between all partitions.
Partitions take temporary ownership of I/E station slots performing
certain operations, such as importing and exporting cartridges.
Automatically Creating
Partitions
Automatic partitioning assigns available library resources
proportionately among the partitions, grouping tape drives according
to their interface type (FC or SAS).
The library must contain at least one unassigned tape drive and one
unassigned slot to automatically create a partition. If no unassigned
tape drives or slots exist, you must modify or delete one or more
partitions to free up resources. For more information, see Modifying
Partitions on page 57 and Deleting Partitions on page 57.
You can select the number of partitions to create, from a minimum of
one to a maximum that equals the number of unassigned tape drives in
your library.
Quantum Scalar i40 and Scalar i80 User’s Guide
53
Chapter 4: Configuring the Library
Working With Partitions
If you choose to create fewer partitions than the default, but more than
one partition, some resources will not be assigned to a partition.
However, if you choose to create one single partition, all available
resources will be assigned to the one partition.
When the library automatically creates partitions, it assigns the first tape
drive in the partition as the control path. You can change the control
paths at any time. See Configuring Control Paths on page 67 more
information.
Before automatically creating partitions, verify that all tape drives are
unloaded and that all cartridges are in their appropriate storage slots.
For information on unloading tape drives, see Unloading Tape Drives on
page 127.
Operator Panel
1 Select Setup > Configure Partitions > Auto-Create Partitions.
(If not available, you do not have available resources. Modify or
delete partitions to create resources.)
2 Use the Up and Down buttons to select the number of partitions
you want to create.
3 Press Apply.
4 Save the library configuration (see Saving the Library Configuration
on page 101).
Web Client
1 Select Setup > Partitions.
2 Click Automatic. (If not available, you do not have available
resources. Modify or delete partitions to create resources.)
The Automatically Create Partitions screen appears.
By default, the library applies the Scalar i40-i80 library emulation
type and Standard media barcode format to each partition. You can
change these settings by modifying the partition after it has been
created (see Modifying Partitions on page 57).
3 Using the Partitions drop-down list, select the number of partitions
to create.
4 Click Apply.
54
Quantum Scalar i40 and Scalar i80 User’s Guide
Chapter 4: Configuring the Library
Working With Partitions
5 Save the library configuration (see Saving the Library Configuration
on page 101).
Manually Creating
Partitions
You can manually create partitions any time after the initial
configuration of the library. The maximum number of partitions that can
be created is equal to the number of tape drives in the library.
The library must contain at least one unallocated tape drive and one
unallocated slot to manually create a partition. If no unallocated tape
drives or slots exist, you must modify or delete partitions to free
resources. For more information, see Modifying Partitions on page 57
and Deleting Partitions on page 57.
When the library automatically creates partitions, it assigns the first tape
drive in the partition as the control path. You can change the control
paths at any time. See Configuring Control Paths on page 67 more
information.
Before automatically creating partitions, verify that all tape drives are
unloaded and that all cartridges are in their appropriate storage slots.
For information on unloading tape drives, see Unloading Tape Drives on
page 127.
You can create partitions manually only on the Web client.
Web Client
1 Select Setup > Partitions.
2 Click Manual.
3 Type a name to describe the new partition into the Enter Name text
box.
4 Select one of the following emulation types from the Emulation
Type drop-down list:
• Scalar i40-i80 (default)
• ADIC Scalar i500
• Quantum Scalar i500
• Quantum Scalar i2000
• ADIC Scalar i2000
Quantum Scalar i40 and Scalar i80 User’s Guide
55
Chapter 4: Configuring the Library
Working With Partitions
5 Select one of the following media barcode formats (for reporting to
host) from the Set Media Barcode Format drop-down list:
• Standard Six — Six character barcode number with or without
a one or two-character media ID, for example, “XXXXXXL4” or
“XXXXXX”. Only the six character barcode is reported to the
host.
• Plus Six — Six character barcode number followed by a media
ID, for example, “XXXXXXL3”. Six character barcode and media
ID are reported to the host.
• Extended — Five to 15 characters total, including a barcode
number and optional media ID. All characters are reported to
the host, regardless of having a media ID or not. If a media ID is
included, the label must have a five to 13 character barcode
followed by a media ID, for example, “XXXXXXXXXXXXXL2”. If
a media ID is not included, the label must have a five to 15
character barcode, for example, “XXXXXXXXXXXXXXX”.
• Media ID Last — Five to 13 character barcode number followed
by media ID, for example, “XXXXXXXXXXXXXLT”. The media ID
is reported to the host last.
• Media ID First — Five to 13 character barcode number
preceded by media ID, for example, “L4XXXXXXXXXXXXX”. The
media ID is reported to the host first.
• Standard — (default) Five to 15 characters total, including a
barcode number and optional media ID. The media ID is not
reported to the host. If a media ID is included, the label must
have a five to 13 character barcode followed by a media ID, for
example, “XXXXXXXXXXXXXL3”. If a media ID is not included,
the label must have a five to 15 character barcode, for example,
“XXXXXXXXXXXXXXX”.
6 Type the number of slots to assign to the new partition into the
Enter Number of Slots text box.
7 Under the Select Drives section, assign one or more available tape
drives to the partition by selecting the check box located to the left
of the tape drive.
8 Click Apply.
9 Save the library configuration (see Saving the Library Configuration
on page 101).
56
Quantum Scalar i40 and Scalar i80 User’s Guide
Chapter 4: Configuring the Library
Working With Partitions
Modifying Partitions
You can modify partition settings any time after a partition is created.
For example, you can modify the name, emulation type, media barcode
format, and number of assigned tape drives and slots.
The library automatically takes the partition offline before modifying it
and places it back online after it has been modified.
The tape drive set as the control path for a particular partition cannot be
deleted from that partition. The check box associated with the control
path is grayed out. For more information on setting the control path,
see Configuring Control Paths on page 67.
Before modifying partitions, verify that all tape drives are unloaded and
that all cartridges are in their appropriate storage slot location. For
information on unloading tape drives, see Unloading Tape Drives on
page 127.
You can modify partitions only on the Web client.
Web Client
1 Select Setup > Partitions.
2 Select a partition and click Modify.
3 Modify any of the settings. For a description of what each setting
means, see Manually Creating Partitions on page 55.
4 Save the library configuration (see Saving the Library Configuration
on page 101).
Deleting Partitions
A partition can be deleted when it is no longer needed. After a partition
is deleted, its resources (tape drives and slots) become unassigned and
can be used to create new partitions or added to existing partitions.
Before deleting a partition, unload cartridges from the tape drives
within the partition and then export all cartridges from the partition.
Remove the cartridges from the I/E station after exporting them. For
information on unloading tape drives, see Unloading Tape Drives on
page 127. For information on exporting cartridges, see Exporting Tape
Cartridges on page 123s. You can also remove cartridges by releasing
the magazine and removing them by hand (see Releasing Magazines on
page 114). If you do this, be sure to only remove cartridges assigned to
Quantum Scalar i40 and Scalar i80 User’s Guide
57
Chapter 4: Configuring the Library
Working With Partitions
that partition (see Viewing the Library Configuration Report on
page 141).
After a partition is deleted, its resources (for example, tape drives and
slots) become available and can be reassigned to new or existing
partitions.
Deleting a partition does not delete users assigned to that partition.
However, if these users are not assigned to other partitions, they will not
be able to perform any library operations. For information on how to
assign a user to another partition, see Changing Access to Partitions on
page 59.
Note: You may need to modify settings in your host application as a
result of deleting a partition. See your host application
documentation.
You can delete partitions on both the operator panel and the Web
client.
Operator Panel
1 Select Setup > Configure Partitions > Delete Partition.
2 Use the Up and Down buttons to select a partition from the list.
3 Press Delete.
4 Save the library configuration (see Saving the Library Configuration
on page 101).
Web Client
1 Select Setup > Partitions.
2 Select a partition and click Delete.
3 Save the library configuration (see Saving the Library Configuration
on page 101).
Viewing the Current
Partitions
58
You can view basic details about all of your partitions, including online/
offline status, control path tape drive, number of tape drives in the
partition, number of storage slots, and number of I/E station slots
available to the partition.
Quantum Scalar i40 and Scalar i80 User’s Guide
Chapter 4: Configuring the Library
Working With Partitions
Operator Panel
1 Select Reports > Partitions.
2 Select a partition and press Select.
Web Client
You can view partition information in several places:
• Library home page (see Web Client Home Page on page 34)
• Library configuration report (see Viewing the Library Configuration
Report on page 141).
• Partition modification screen (select Setup > Configure Partitions,
select a partition, and click Modify).
Changing Access to
Partitions
An administrative user can control which partitions a specified user can
access by modifying the user’s account on the Web client. For more
information, see Working With Local User Accounts on page 78.
Web Client
Select Setup > User Management > User Accounts.
Taking a Partition
Online or Offline
There are two partition modes: online and offline.
• Online — SCSI hosts control the partition. In this mode, all host
application SCSI commands are processed.
• Offline — SCSI hosts cannot control the partition. In this mode,
library operations can be performed via the local or remote user
interface.
Changing the partition mode changes whether or not the specified
partition is online or offline to the host application. Changing a
partition mode using the library interface may affect your host
application. See your host application documentation for more
information.
Quantum Scalar i40 and Scalar i80 User’s Guide
59
Chapter 4: Configuring the Library
Working With Partitions
Note: Some maintenance activities require that the entire library be
taken offline. To take the library offline, change the mode of all
partitions from online to offline.
When you are changing the partition mode, be aware of the following:
• When you access the Change Partition Mode screen, you will see
only partitions to which you have been given access.
• When changing the partition mode from online to offline, all host
application commands in progress at the start of the mode change
are completed.
You can change partition modes from the operator panel or the Web
client.
Operator Panel
1 Select Actions > Change Partition Mode.
The partitions are displayed, along with their online/offline status.
2 Use the Up and Down buttons to select a partition.
3 Press Modify.
4 Uses the Up and Down buttons to change the mode.
5 Press Apply.
Web Client
1 Select Operations > Partitions > Change Mode.
In the partition table under Mode, the Current column indicates
the current mode of the partition. The New column contains an
Online/Offline button. The button toggles between modes.
Note: If a partition is in use, the Online/Offline button is grayed
out.
2 In the partition table, identify the partition that requires a mode
change.
3 Click the Online/Offline button to toggle to the desired mode.
4 Click Apply.
60
Quantum Scalar i40 and Scalar i80 User’s Guide
Chapter 4: Configuring the Library
Configuring Cleaning Slots
5 Save the library configuration (see Saving the Library Configuration
on page 101).
Configuring Cleaning Slots
Cleaning slots are used exclusively to store cleaning cartridges.
Configuring one or more cleaning slots enables the library's AutoClean
feature for all partitions in the library. When AutoClean is enabled, the
library is notified by a tape drive when cleaning is required, and the
library automatically cleans the tape drive using a cleaning cartridge.
You can configure cleaning slots during the initial library configuration
or at any time in the future as long as there are licensed slots available
in the library.
If no licensed slots are available, you must purchase additional slots or
modify or delete a partition to free existing slots (see Working With
Partitions on page 52). Cleaning slots are not assigned to specific
partitions. They are shared by all partitions within a library.
A maximum of four cleaning slots can be configured. Zero cleaning slots
are configured by default.
Cleaning slots do not need to be configured if you clean tape drives
manually. For more information about manual tape drive cleaning, see
Manually Cleaning Tape Drives on page 134. In addition, you do not
need to configure cleaning slots if you use host-based cleaning.
Cleaning slots are not visible to the host application. To use host-based
cleaning, configure zero cleaning slots in the library and set up your
host application to manage the cleaning process. See your host
application documentation for more information.
Note: If you decrease the number of cleaning slots from what is
currently configured, the extra slots become unassigned and
available to use as storage slots with new partitions. For
information on how to assign available storage slots to a new
partition, see Manually Creating Partitions on page 55.
Quantum Scalar i40 and Scalar i80 User’s Guide
61
Chapter 4: Configuring the Library
Configuring Cleaning Slots
Note: If the library contains zero import/export (I/E) station slots, you
will not be able to import or export cleaning cartridges. See
Configuring I/E Station Slots on page 63 for more information.
Note: This operation should not be performed concurrently by
multiple administrative users logged in from different
locations. You can access the screen, but you cannot apply
changes while another administrative user is performing the
same operation.
Operator Panel
1 Select Setup > Dedicated Slots > Cleaning.
2 Press Modify.
3 Use the Up and Down buttons to select a value from zero to 4.
4 Press Apply.
5 Press Exit.
6 Save the library configuration (see Saving the Library Configuration
on page 101).
Web Client
1 Select Setup > Cleaning Slots.
2 Under the New Settings column, select the number of cleaning
slots to configure.
3 Click Apply.
4 Save the library configuration (see Saving the Library Configuration
on page 101).
62
Quantum Scalar i40 and Scalar i80 User’s Guide
Chapter 4: Configuring the Library
Configuring I/E Station Slots
Configuring I/E Station Slots
I/E station slots are used to import and export tape cartridges into and
out of the library without disrupting normal library operations.
I/E station slots can be configured as either I/E station slots or storage
slots. I/E station slots are used to import and export cartridges and are
shared by all partitions. Storage slots are used to store data cartridges
and cleaning cartridges.
An I/E station that has been configured for storage may contain
cleaning slots. These cleaning slots must be deleted before you can
reconfigure the storage slots as I/E station slots. You can view the Library
Configuration Report to determine how I/E slots are configured. For
more information, see Viewing the Library Configuration Report on
page 141. For instructions on deleting cleaning slots, see Configuring
Cleaning Slots on page 61.
You cannot configure I/E station slots if cartridges are currently loaded
in the I/E station(s). Remove all cartridges from the I/E station(s) before
attempting the following procedure.
Each I/E station is configured as a complete unit. When configuring an
I/E station, all the slots in the I/E station are configured the same way.
The Scalar i40 and Scalar i80 are configured with five I/E station slots by
default.
On the Scalar i40, you can configure either zero or five I/E station slots.
The I/E station is located in the first column of the right magazine. On
the Scalar i80, you can configure zero, five, or 10 I/E station slots. If you
configure five, the I/E station is located in the first column of the top
right magazine. If you configure 10, you will have two I/E stations,
located in the first column of the top right magazine and the first
column of the bottom right magazine.
You can configure zero I/E station slots. However, configuring zero I/E
station slots has the following consequences:
• You cannot import and export data or cleaning cartridges using I/E
stations.
• You cannot manually clean tape drives with a cleaning cartridge
using the operator panel.
Quantum Scalar i40 and Scalar i80 User’s Guide
63
Chapter 4: Configuring the Library
Configuring I/E Station Slots
• You will need to bulk load and unload cartridges, disrupting library
operations (see Bulk Loading Tape Cartridges on page 121).
Note: Before using the I/E station to load and unload cartridges, you
need to unlock the I/E station, which allows you to slide the
magazine out just far enough to access the I/E station slots (see
Unlocking the I/E Station on page 113).
Operator Panel
1 Select Setup > Dedicated Slots > I/E.
2 Press Modify.
3 Use the Up and Down buttons to select a value.
4 Press Apply.
5 Press Exit.
6 Save the library configuration (see Saving the Library Configuration
on page 101).
Web Client
1 Select Setup > I/E Station Slots.
The I/E Station Configuration screen appears. The Current
Settings column lists the number of I/E station slots that are
currently configured.
2 Under the New Settings column, select the number of I/E station
slots to configure.
3 Click Apply.
4 Save the library configuration (see Saving the Library Configuration
on page 101).
64
Quantum Scalar i40 and Scalar i80 User’s Guide
Chapter 4: Configuring the Library
Configuring Tape Drive Parameters
Configuring Tape Drive Parameters
You can configure Fibre Channel tape drive loop ID, topology, and speed
using the operator panel or the Web client. On the Web client, you can
also view the actual topology and speed, plus the tape drive’s worldwide node name (WWNN) and other information about the tape drives.
You cannot configure SAS tape drive settings. A SAS tape drive’s SAS
address is automatically and uniquely generated based on a unique
World Wide Name (WWN) that the drive receives when it is configured.
You can view SAS tape drive settings (but not change them) on the Web
client.
Note: If the affected partition is online, it will be taken offline before
the parameters are set, and brought back online after they are
set.
Table 4 Fibre Channel Tape
Drive Configurable Settings
Setting
Description
Loop ID
A unique loop ID is selected by default for all FC tape
drives installed in the library. For example, the tape
drive installed in the top drive bay is assigned a
default loop ID of 61. The tape drive installed in the
bottom drive bay is assigned a default loop ID of 63.
If you change the default loop IDs, make sure each FC
tape drive with a topology setting of Auto (LN), Loop
(L), or Auto (NL) has a unique loop ID.
Requested
Topology*
The requested topology connection mode can be set
to one of the following:
• Auto (LN) — Auto-configure trying L-Port first
• Loop (L) — Force L-Port
• Point to Point — Force N-Port
• Auto (NL) — Auto-configure trying N-Port first
(default)
Quantum Scalar i40 and Scalar i80 User’s Guide
65
Chapter 4: Configuring the Library
Configuring Tape Drive Parameters
Setting
Description
Requested
Speed*
The requested interface speed can be set to Auto
(default), 1 Gb/s, 2 Gb/s, and 4 Gb/s. When you set
the speed to 4 Gb/s on the Web client, a caution
message appears informing you that the 4 Gb/s
speed selection may not be applicable to all FC tape
drives installed in the library. Acknowledge the
message by clicking OK.
* If the requested FC topology and speed settings are not supported, the next
appropriate settings are negotiated. On the Web client, the Setup - Drive
Settings screen displays both the requested and the actual FC topology
connection mode and interface speed. If FC drives are not connected to the
host, the negotiated actual settings appear on the screen as “unknown.”
Operator Panel
1 Select Setup > Tape Drives (FC).
2 Use the Up and Down buttons to select a tape drive and press
Select.
3 Use the Up and Down buttons to select the item to configure
(Speed, Topology, or Loop ID) and press Modify.
4 Use the Up and Down buttons to scroll through the list of options
until you reach the one you want, then press Apply.
5 Continue to modify as above. When finished, press Exit.
6 Save the library configuration (see Saving the Library Configuration
on page 101).
Web Client
1 Select Setup > Drive Settings.
2 View the SAS tape drive settings, if desired.
3 Make changes to any of the Fibre Channel tape drive settings by
using the drop-down lists to select new values.
4 Click Apply.
5 Save the library configuration (see Saving the Library Configuration
on page 101).
66
Quantum Scalar i40 and Scalar i80 User’s Guide
Chapter 4: Configuring the Library
Configuring Control Paths
Configuring Control Paths
A control path is the connection between a partition and host
application. The control path connection is made through a designated
tape drive.
When you create a partition, the library automatically assigns the first
tape drive in the partition as the control path. You can modify the
control path at any time.
Only one tape drive can be selected as the control path per partition. In
the event that the tape drive control path connection to the host
application fails, you can manually select a different control path tape
drive for the partition.
Note: You might need to modify settings in your host application as a
result of modifying the control path. See your host application
documentation for more information.
You can only configure control paths via the Web client.
Web Client
1 Select Setup > Control Path.
2 If more than one partition exists, select a partition and click Next.
3 To select a new control path for the partition, select a tape drive
from the list of tape drives.
4 To delete the control path for the partition, locate the tape drive
that is currently selected as the control path and clear the selection.
5 Click Apply.
6 Save the library configuration (see Saving the Library Configuration
on page 101).
Quantum Scalar i40 and Scalar i80 User’s Guide
67
Chapter 4: Configuring the Library
Adding or Upgrading Licensable Features
Adding or Upgrading Licensable Features
You can increase the functionality of your library by purchasing licenses
for the following upgrades:
• Capacity on Demand (COD)
• Advanced Reporting
For more information about these features, see Licensable Features on
page 11.
A license key can be applied to only one library and is tied to the library's
serial number. If the license is not installed when you receive your
library, you will receive a License Key Certificate that contains an
authorization code and instructions on how to obtain your license key
from the Quantum Web site. Once you install the license key on the
library, the feature becomes available.
Viewing Your License
Keys
To see the licenses you have purchased and obtained, go to the
following Web site: http://www.quantum.com/licensekeys. The license
history for each feature is listed (feature licensed, authorization code,
and date license key was obtained).
Viewing Installed
Licenses
To see which licenses are enabled on your library, go to the following
screens:
Operator Panel
Select either of the following
• Reports > Licenses
• Setup > License Installation.
Web Client
Select Setup > License.
68
Quantum Scalar i40 and Scalar i80 User’s Guide
Chapter 4: Configuring the Library
Adding or Upgrading Licensable Features
About License Keys
Details about license keys include:
• An authorization code to obtain a license key can be used one time
only.
• A license key consists of 5 characters randomly selected from the
following allowable characters: a-h, j-n, p-t, v-z, 2-9, and the
ampersand character (@). Alpha characters are always lower case.
• A given license key can only be used on the library to which it is
assigned and cannot be transferred to another library. The key is
verified when it is applied to the library to make sure it is the proper
key associated with the library serial number.
• License keys do not expire.
Once installed on the library, license keys cannot be removed (unless you
replace the library chassis or system control board (SCB).
• If you replace the library chassis: The license key is associated with
the serial number of the library. If you replace your library chassis,
you must replace all your installed license keys. Request replacement
license keys from Quantum.
• If you replace the SCB: The SCB contains information about your
library configuration. If you replace your SCB, you must reinstall
your license key(s) onto the library. You may be able to reinstall
them yourself if you have saved the license keys or can retrieve them
from the Web sites listed above. In some cases, factory installed
license keys will not be listed on the Web site and you will need to
contact Quantum for a replacement. If you cannot retrieve your
license keys or need assistance, contact Quantum.
Obtaining a License Key
To obtain your license key for a new feature or upgrade:
1 Contact your Quantum technical sales representative to submit your
order for the feature or upgrade.
2 Upon receipt of your order, Quantum will mail you a license key
certificate containing your authorization code.
Quantum Scalar i40 and Scalar i80 User’s Guide
69
Chapter 4: Configuring the Library
Adding or Upgrading Licensable Features
3 On your library, locate the serial number. You will need the serial
number to retrieve your license key from the Web site. To locate the
serial number:
• On the operator panel, select Reports > About Library.
• On the Web client, select Reports > About > Scalar i40/i80.
4 Access the license key Web site: http://www.quantum.com/
licensekeys.
5 Enter the information requested on the screen to obtain your license
key.
You are now ready to apply the license key to the library. See Applying a
License Key on page 70.
Applying a License Key
A license key may be applied to the library during the initial
configuration or whenever licensed features are purchased.
Caution: While you are installing a license key, backup operations
may be interrupted.
Operator Panel
Entering a license key on the operator panel is difficult. It is
recommended that you use the Web client, if possible.
1 Select Setup > License Installation.
The screen displays your current licenses.
2 Press Add.
Five blank digits appear on the screen. The first digit is highlighted.
3 Use the Up and Down buttons to scroll through the list of letters
and numbers until the first number appears. Press the Right button
to advance to the next digit. Repeat for the remaining digits.
4 When all the digits are entered correctly, press Apply.
5 Press OK.
6 Save the library configuration (see Saving the Library Configuration
on page 101).
70
Quantum Scalar i40 and Scalar i80 User’s Guide
Chapter 4: Configuring the Library
Working With E-mail Notifications
Web Client
1 From the Web client, select Setup > License.
2 Type the new license key in the Enter new license key text box.
3 Click Apply.
4 Refresh your Internet browser. Adding a license can sometimes
affect menu display. Refreshing the browser updates all the menus.
5 Save the library configuration (see Saving the Library Configuration
on page 101).
Working With E-mail Notifications
The library can be configured to automatically send e-mail notifications
to specified e-mail addresses whenever an issue of a particular severity
level occurs with one of its components. The information in the e-mail
notification provides details about the issue and the library conditions at
the time of the error.
Before you can configure e-mail notifications, you must configure the
library’s e-mail account so that the library can send notifications to the
designated recipients. See Configuring the Library E-Mail Account on
page 74 for information on how to configure the e-mail account.
The library supports a maximum of 20 e-mail notification recipients,
including the default support e-mail notification. See Creating E-mail
Notifications on page 72 for information on setting up additional e-mail
notifications.
If an e-mail notification is no longer needed, you can delete it. For
information on how to delete an e-mail notification, see Deleting E-mail
Notifications on page 74.
There are three e-mail notification filter levels: low, medium, and high.
• Low — Notifies e-mail recipients of all library issues, including
minor, medium-level, and critical issues.
• Medium — Notifies e-mail recipients of medium-level and critical
issues.
• High — Notifies e-mail recipients of only critical issues.
Quantum Scalar i40 and Scalar i80 User’s Guide
71
Chapter 4: Configuring the Library
Working With E-mail Notifications
The library comes with one default e-mail notification recipient, for
Quantum Technical Support. The filter level is set at high. The e-mail
address of the default technical support notification
([email protected]) cannot be modified, but the notification can
be enabled or disabled. It is disabled by default.
Users with administrative privileges can configure the library e-mail
account and e-mail notifications. Users with user privileges can receive
e-mail notifications, but they cannot configure the library e-mail
account or e-mail notifications.
You can view and configure e-mail notifications from the Web client
only.
Creating E-mail
Notifications
Administrative users can create e-mail notifications. The library supports
a maximum of 20 e-mail notification recipients, including the default
support e-mail notification. Each e-mail notification recipient must have
a unique e-mail address.
To set e-mail notifications, you need to provide the e-mail address and
filter level setting for the recipient. For more information on filter levels,
see Working With E-mail Notifications on page 71.
Each e-mail notification includes an optional Comments text box you
can use to enter important system configuration details, such as the
network environment or third-party software applications that interface
with the library. Such information can help technical support personnel
to troubleshoot the library.
You can create e-mail notifications on the Web client only.
Web Client
1 Select Setup > Notification > Setup.
The Setup - System E-mail Notifications screen appears. The
screen lists all e-mail notifications that have been created.
2 Click Create.
The Create System E-mail Notification screen appears.
3 In the Select Filter Level drop-down list, select the filter level to
assign to the e-mail notification. For more information on filter
levels, see Working With E-mail Notifications on page 71.
72
Quantum Scalar i40 and Scalar i80 User’s Guide
Chapter 4: Configuring the Library
Working With E-mail Notifications
4 In the Enter E-mail Address text box, type the e-mail address that
you want to receive e-mail notifications.
Note: Do not enter more than one e-mail address in the Enter
E-mail Address text box. If you need to send e-mail
notifications to multiple e-mail addresses, create an e-mail
notification for each e-mail address.
5 In the Enter E-mail Comment text box, type a comment (optional).
6 Click Apply.
7 Save the library configuration (see Saving the Library Configuration
on page 101).
Modifying E-mail
Notifications
Administrative users can modify existing e-mail notification settings at
any time after the e-mail notification is created.
Note: The e-mail address of the default technical support notification
(techsup@quantum) cannot be changed, but the notification
can be enabled or disabled.
You can modify e-mail notifications on the Web client only.
Web Client
1 Select Setup > Notification > Setup.
The Setup - System E-mail Notifications screen appears. The
screen lists all the e-mail notifications that have been created.
2 Select an address to modify, and click Modify.
The Modify System E-mail Notification screen appears.
3 Modify any of the following settings:
• Under the New Settings column, select the Enable check box
to enable e-mail notification. Clear the Enable check box to
disable e-mail notification.
• Under the New Settings column, select a new filter level from
the Filter Level drop-down list. For more information on filter
levels, see Working With E-mail Notifications on page 71.
Quantum Scalar i40 and Scalar i80 User’s Guide
73
Chapter 4: Configuring the Library
Configuring the Library E-Mail Account
• In the E-mail Address text box, type a new e-mail address.
• In the E-mail Comment text box, type a new comment.
4 Click Apply.
5 Save the library configuration (see Saving the Library Configuration
on page 101).
Deleting E-mail
Notifications
Administrative users can delete an e-mail notification when it is no
longer needed.
Note: The default [email protected] e-mail notification
cannot be deleted, but the notification can be enabled or
disabled. It is disabled by default.
You can delete e-mail notifications on the Web client only.
Web Client
1 Select Setup > Notification > Setup.
2 Select an e-mail notification and click Delete.
A confirmation dialog box appears.
3 Click OK.
4 Save the library configuration (see Saving the Library Configuration
on page 101).
Configuring the Library E-Mail Account
The library uses the library e-mail account whenever library e-mail
services are used, such as when the library automatically sends e-mail
notifications about library issues.
Before configuring the e-mail account, ask your network administrator
for an IP address, valid login account (optional), and valid password
74
Quantum Scalar i40 and Scalar i80 User’s Guide
Chapter 4: Configuring the Library
Configuring the Library E-Mail Account
(optional) for your SMTP server. E-mail account settings are not casesensitive.
Note: You may use a host name for the SMTP server instead of an IP
address only if the library is set up to use Domain Name System
(DNS) servers. See Default Gateway, Subnet Mask, Network
Prefix, and DNS Addresses on page 45 for more information.
After configuring the e-mail account, you can send a test message to an
e-mail address to verify that the account is configured properly.
You must have administrative privileges to configure the e-mail account.
You can configure the library e-mail account from the Web client only.
Web Client
1 Select Setup > Notification > E-mail Account.
The Setup - E-mail Account screen appears.
2 In the SMTP server text box, type the IP address or host name of the
SMTP server.
Note: IP addresses may be entered using the IPv4 dot notation or
using the IPv6 format. IPv4 addresses must be entered in
dot notation (for example, 192.168.0.1). IPv4 address text
boxes do not allow values exceeding 255 for dot-separated
values.
3 In the Sender E-mail Address text box, type an e-mail address for
the SMTP server (for example, [email protected]). The
sender address indicates the originator of the e-mail message.
4 For Send snapshot with e-mail notifications, do one of the
following:
• To attach a library snapshot file to e-mail notifications, select the
check box.
• To not attach a library snapshot file to e-mail notifications, clear
the check box.
Quantum Scalar i40 and Scalar i80 User’s Guide
75
Chapter 4: Configuring the Library
Configuring the Library E-Mail Account
Note: Send snapshot with e-mail notifications instructs the
library to automatically attach a library snapshot file (ASCII
format) to most e-mail notifications. This feature is turned
off by default. Library snapshot files can also be sent to
specified e-mail addresses using the capture snapshot
operation. The capture snapshot operation allows you to
create the snapshot in ASCII format. See Capturing the
Library Snapshot on page 247.
5 For Authentication, do one of the following:
• If you do not need to configure login account and password
authentication settings, clear the Authentication check box.
Continue with Step 6.
• If you need to configure login account and password
authentication settings, select the Authentication check box.
The Login Account, Password, and Confirm Password text
boxes appear. Do the following:
a In the Login Account text box, type the name of a valid
account on the SMTP server (for example, john.user).
b In the Password text box, type the password for the account
that you specified in the Login Account text box.
c In the Confirm Password text box, retype the password to
confirm it.
6 Click Apply.
7 To test the e-mail account, type an e-mail address into the Send a
test e-mail to text box and click Send e-mail. Check the e-mail
account to verify that an e-mail message was sent from the library.
8 Save the library configuration (see Saving the Library Configuration
on page 101).
76
Quantum Scalar i40 and Scalar i80 User’s Guide
Chapter 4: Configuring the Library
Setting Customer Contact Information
Setting Customer Contact Information
Administrative users can enter contact information into the library for
the person who is the primary customer contact for the library. Keep this
information current to expedite the service process.
When a problem occurs with the library, the contact information is
mailed to [email protected] along with diagnostic ticket
information, assuming that the default e-mail notification has been
configured. For information on configuring the default e-mail
notification see Creating E-mail Notifications on page 72.
You can set customer contact information from the Web client only.
Web Client
1 Select Setup > Notification > Contact Information.
2 Enter or modify any of the information in the following text boxes:
• First Name
• Last Name
• Company Name
• Phone Number
• E-mail Address
• System Description
3 Click Apply.
4 Save the library configuration (see Saving the Library Configuration
on page 101).
Configuring the Service Port
There are two Ethernet ports on the SCB. The left port is for customer
use for remote access via the Web client, and the right port is for service
use only. The default service port IP address is 192.168.177.1.
Quantum Scalar i40 and Scalar i80 User’s Guide
77
Chapter 4: Configuring the Library
Working With Local User Accounts
You should not need to change the service port subnet unless it
happens to conflict with the subnet configured for the customer port. If
there is a conflict you must change it to avoid ambiguity between the
two interfaces.
The instructions below explain how to change the IP address on the
service port. You can only change the subnet (third octet) of the IP
address: 192.168.xxx.1. The other sections must remain as they are. You
may choose a number from 1 to 255.
You can only configure the service network from the operator panel.
Operator Panel
1 Select Tools > Service Network.
Under “Modify Subnet” the first digit of the three-digit octet of the
IP address is highlighted.
2 Use the Left and Right buttons to select a digit to modify. Use the
Up and Down buttons to select a value for the digit. When you
press the Right button to the third digit, its function changes to
Apply.
3 When you finish making changes, press the Right button until its
function changes to Apply, then press Apply.
4 Press OK.
5 Save the library configuration (see Saving the Library Configuration
on page 101).
Working With Local User Accounts
Administrative users can create and modify two types of local user
accounts: user and administrative user. These users have different library
privilege levels and can access different things. The Web client requires
user accounts and user logins; the operator panel does not. You can
configure the operator panel to run with no logins required. You can
also configure the library to use Lightweight Directory Access Protocol
(LDAP) accounts.
78
Quantum Scalar i40 and Scalar i80 User’s Guide
Chapter 4: Configuring the Library
Working With Local User Accounts
This section covers:
• Using the Web Client Default Administrative User Account on
page 79
• Privilege Levels on page 80
• Creating Local User Accounts on the Web Client on page 81
• Modifying Local User Accounts on the Web Client on page 82
• Deleting Local User Accounts on the Web Client on page 82
• Enabling and Creating Passwords on the Operator Panel on page 83
• Disabling Passwords on the Operator Panel on page 85
• Resetting Passwords on the Operator Panel on page 86
You must have administrative privileges to create, modify, and delete
local user accounts.
Using the Web Client
Default Administrative
User Account
The library ships with a default administrative user account for use on
the Web client. The default administrative user account has the
following settings:
• User name: admin
• Password: password.
The first time you access the library via the Web client, when you see the
Login screen, type admin in the User Name text box and password in the
Password text box. As soon as you complete the initial library setup, you
should change the password on the default administrative account. For
information on changing passwords, see Modifying Local User Accounts
on the Web Client on page 82.
Note: You cannot delete the default administrative user account or
modify the user name. You can, however, change the
password.
Note: If you misplace the password for the default administrative
account, contact Quantum Technical Support (see Getting
More Information or Help on page xxiv).
Quantum Scalar i40 and Scalar i80 User’s Guide
79
Chapter 4: Configuring the Library
Working With Local User Accounts
Privilege Levels
User privilege levels are manually assigned to user accounts created
within the library. Controlling access to screens and operations within
the library preserves the integrity of the library and the data that is
stored in it.
Three types of users are defined in Scalar i40 and Scalar i80 libraries:
• Administrative users have access to the entire physical library and
all of its partitions. The library ships with a default administrative
user account. The user name for the default administrative user
account is admin and the password is password. You cannot
modify or delete the user name for the default administrative
account, but you can modify the password. If you misplace the
password for the default administrative account, contact Quantum
Technical Support.
For security purposes, an administrative user can prevent a service
user from logging on to the library remotely, from either the Web
client or over the Ethernet service port. The service user will still be
able to log on to the library from the operator panel interface. For
more information, see Remote Service Login on page 99.
• Users have access to portions of the Actions, Operations, and
Reports menus. Users cannot access the Setup and Tools menus.
Users can perform functions within a partition (such as performing
cartridge and tape drive operations), but cannot perform operations
that affect the physical library (such as creating or deleting
partitions).
• On the Web client, users can only perform operations and view
reports within partitions to which they have been granted
access.
• On the operator panel, users can perform actions and view
reports for all partitions.
• Service users have access to the entire physical library and all of its
partitions as well as to service-only functions. Each library has only
one service user account. When a service user logs in, all other active
users are automatically logged out.
80
Quantum Scalar i40 and Scalar i80 User’s Guide
Chapter 4: Configuring the Library
Working With Local User Accounts
Creating Local User
Accounts on the Web
Client
During or after the initial configuration, you can use the default
administrative user account to create additional local user accounts,
including other accounts with administrative privileges. These
administrative users can themselves create other local administrative
user and user accounts. Users without administrative privileges cannot
create user accounts. The library can contain a total of eighteen user
accounts, including the default administrative user account.
Web Client
1 Select Setup > User Management > User Accounts.
2 Click Create.
The Create User Account screen appears.
3 Type a name for the local user account into the Enter User Name
text box. User names are limited to 1–12 lower-case letters,
numbers, and underscores (_). For example: john_usa.
4 Type a password for the local user account into the Enter Password
text box. Passwords are limited to 6–12 lower-case alphanumeric
characters and can include also include underscores (_), periods (.),
hyphens (-), asterisks (*), and ampersands (@). For example:
pass_19.
5 Retype the password into the Confirm Password text box to
confirm.
6 Select a local user account privilege level by selecting either Admin
or User. For more information on users and administrative users, see
Privilege Levels on page 80.
7 If the new local user account was given user privileges, click Next.
The Create User Account - User Name screen appears, where User
Name is the name of the user account. This screen lists all library
partitions. Select the library partitions that you want the user to
access.
8 Click Apply.
9 Save the library configuration (see Saving the Library Configuration
on page 101).
Quantum Scalar i40 and Scalar i80 User’s Guide
81
Chapter 4: Configuring the Library
Working With Local User Accounts
Modifying Local User
Accounts on the Web
Client
After a local user account has been created, administrative users can
modify the account settings, such as the password, privilege level, and
partition access. You cannot modify the user name. Instead, you will
need to delete the user account and create a new one (see Deleting
Local User Accounts on the Web Client on page 82).
Web Client
1 Select Setup > User Management > User Accounts.
The Setup - Users screen appears.
2 Select a user account and click Modify.
The Modify User Account screen appears, where User Name is the
name of the local user account.
3 Enter your Admin password to verify you have privileges to modify
the account.
4 Modify the password or privilege level, if desired.
5 If the user account has user privileges and you want to modify
partition access, click Next. The Modify User Account - User Name
screen appears, where User Name is the name of the user account.
This screen lists all library partitions, with the user’s assigned
partitions checked. Modify any of the partition selections.
6 Click Apply.
7 Save the library configuration (see Saving the Library Configuration
on page 101).
Deleting Local User
Accounts on the Web
Client
Administrative users can delete other local administrative user and user
accounts when they are no longer needed.
Note: You cannot delete the default administrative user account.
Web Client
1 Select Setup > User Management > User Accounts.
The Setup - Users screen appears.
82
Quantum Scalar i40 and Scalar i80 User’s Guide
Chapter 4: Configuring the Library
Working With Local User Accounts
2 Select a user account and click Delete.
A confirmation dialog box appears.
3 Click OK.
4 Save the library configuration (see Saving the Library Configuration
on page 101).
Enabling and Creating
Passwords on the
Operator Panel
If you do not set passwords on the operator panel, all users will have
access to all functions, including administrative and service functions. If
you want to restrict access to some users, you must set passwords on
the operator panel.
Passwords on the operator panel are disabled by default. Once you
enable and configure passwords on the operator panel, all users must
enter a password on the operator panel to log in. In addition, the
service login is automatically enabled and users with user or admin
privileges cannot access service functions. The service password is only
available to Quantum Support personnel.
Passwords on the operator panel are completely different and separate
from passwords on the Web client. On the Web client, you can create
and set up to 18 unique user accounts with different user names,
passwords, privileges, and partition access. On the operator panel, only
three unique accounts names are allowed, and the user names and
privileges cannot be changed (the only thing you can change is the
password on the user and admin accounts). The user names are:
User Name
Privilege Level
admin
Administrative
user
User
service
Service — Only service users may use this
account. You may not modify the password
for this account.
See Privilege Levels on page 80 for a description of administrative and
user privileges.
In order to use logins and passwords, you must set the passwords for at
least the admin account. You can only do this via the operator panel.
Quantum Scalar i40 and Scalar i80 User’s Guide
83
Chapter 4: Configuring the Library
Working With Local User Accounts
You can enable just the admin password (and NOT the user password).
However, you can not enable just the user password.
Operator Panel
You start out by creating the admin account password. Once created,
you are logged out and need to log back in using the admin password.
Then you can create the User account password.
1 Select Setup > Account Settings > Password Settings.
Admin Password is highlighted.
2 Press Modify.
Disabled is now highlighted.
3 Press the Up button to change the setting to Enabled.
4 Press Apply.
5 You are prompted to create the password. The password is a 4-digit
code (no letters or other characters). The first digit of the code is
highlighted. Use the Up and Down buttons to select a number for
the first digit, then press Right to go to the second digit. As you
move off the digit you created, it displays as a # symbol so that only
the digit you are working on displays actual numbers. If you need to
view or change a digit, press the Left button.
6 When you are finished creating the admin password, press Right
until the Validate Password prompt appears. Re-enter the
password the same way you created it. When finished, press Apply.
A confirmation screen displays.
7 Press OK.
The library logs the session out and the operator panel displays the
login screen, with the User ID of admin highlighted.
8 Press Apply to go to the password line.
9 Using the directional buttons, enter the admin password you
created and press Apply.
10 Select Setup > Account Settings > Password Settings.
11 Press the Down button to highlight User Password and press
Modify.
Disabled is highlighted.
84
Quantum Scalar i40 and Scalar i80 User’s Guide
Chapter 4: Configuring the Library
Working With Local User Accounts
12 Press the Up button to change the setting to Enabled.
13 Press Apply.
14 Create and validate the user password the same way you created
the admin password above.
15 Save the library configuration (see Saving the Library Configuration
on page 101).
Disabling Passwords on
the Operator Panel
If you no longer want to use passwords on the operator panel, you can
disable them. Once you disable the Admin password, the user password
is also automatically disabled. You can only do this on the operator
panel.
Operator Panel
1 Select Setup > Account Settings > Password Settings.
Admin Password is highlighted.
2 Press Modify to modify the Admin password.
Enabled is now highlighted.
3 Press the Down button to change the setting to Disabled.
4 Press Apply.
5 Save the library configuration (see Saving the Library Configuration
on page 101).
Modifying Passwords
on the Operator Panel
Once passwords are created, you can modify them.
Operator Panel
1 Select Setup > Account Settings > Modify Password.
2 Use the Up and Down buttons to select admin or user.
3 Press Apply.
4 Enter the current password and press Apply.
5 Enter a new password and press Apply.
Quantum Scalar i40 and Scalar i80 User’s Guide
85
Chapter 4: Configuring the Library
Working With LDAP User Accounts (Remote Authentication)
6 Re-enter the new password to validate it and press Apply.
7 Save the library configuration (see Saving the Library Configuration
on page 101).
Resetting Passwords on
the Operator Panel
If you forget your operator panel passwords and cannot log in, you
must reset the passwords. Resetting the passwords disables them and
deletes both the admin and user passwords. This means that no login is
required to access the operator panel. You can re-create the passwords
again as needed.
You can only reset operator panel passwords via the Web client.
Web Client
1 Select Setup > User Management > Reset LUI Passwords.
2 Click Apply.
Working With LDAP User Accounts (Remote
Authentication)
Local Authentication vs.
Remote Authentication
Local authentication control is managed on the library. An administrator
sets up accounts and privileges on the library. To use local
authentication, a user must enter a local user name and password.
Remote authentication is managed by a Lightweight Directory Access
Protocol (LDAP) server. Enabling LDAP allows existing user accounts
residing on an LDAP server to be integrated into the library’s current
user account management subsystem. User account information is
centralized and shared by different applications, simplifying user
account management tasks.
To use remote authentication, you must enable LDAP on the library.
Once LDAP is enabled, users can log into the library using either LDAP or
local authentication. To use LDAP authentication, a user must enter a
86
Quantum Scalar i40 and Scalar i80 User’s Guide
Chapter 4: Configuring the Library
Working With LDAP User Accounts (Remote Authentication)
directory service user name and password and specify an LDAP domain.
See Logging In When LDAP or Kerberos is Enabled on page 105.
LDAP logins are only available on the library Web client.
Using Microsoft Active
Directory
The library supports the Microsoft® Active Directory® LDAP server. If
you use Microsoft Active Directory, you must use either:
• Windows® Services for Unix® 2.5
• Kerberos
If you use Kerberos, you don’t need to use Windows Services for Unix
2.5. For specific instructions on configuring Kerberos, see Configuring
Kerberos on page 90.
If you use Windows Services for Unix 2.5:
• When setting up a user account in Microsoft Active Directory, make
sure to populate the UNIX attributes with information. This requires
all Active Directory users to be part of an NIS Domain, or have NIS
Domain information entered. After entering NIS Domain
information for a user, you will need to reset the user’s password.
• The library supports user account information in the schema defined
by RFC 2307. User password schemes must be encrypted using UNIX
crypt. In addition, user names (uid) and passwords (userPassword)
must be created using lowercase characters to be compatible with
the library.
LDAP Server Guidelines
For LDAP users with user privileges, access to library partitions is
determined by group assignment on the LDAP server. Groups must be
created on the LDAP server with names that correspond to the library
partition names. Users with user privileges must be assigned to these
groups on the LDAP server to have access to the corresponding
partitions on the library. LDAP users with administrative privileges have
access to all partitions and administrative functions and do not need to
be assigned to partition-related groups on the LDAP server.
The Web client Login screen displays LDAP login options only when
LDAP is enabled.
Quantum Scalar i40 and Scalar i80 User’s Guide
87
Chapter 4: Configuring the Library
Working With LDAP User Accounts (Remote Authentication)
Enabling and
Configuring LDAP on
the Library
Administrative users can enable and configure Lightweight Directory
Access Protocol (LDAP). LDAP is the industry standard Internet protocol
that provides centralized user account management.
Administrative users can add, delete, and modify only local user account
information. The library Web client does not allow you to create,
modify, or delete user account information on an LDAP server. This must
be done by the directory service provider. For more information on
working with local user accounts, see Working With Local User Accounts
on page 78.
You can configure the Lightweight Directory Access Protocol (LDAP)
settings any time after the initial library configuration. If you want to
configure Kerberos, follow the LDAP configuration steps below, and also
see Configuring Kerberos on page 90.
Before configuring LDAP, obtain the following LDAP parameters from
your network administrator. The items marked “optional” may or may
not be needed; if in doubt, ask your administrator.
• Repository URI — The Uniform Resource Identifier (URI) of the LDAP
server where user account information is stored. The URI includes
the LDAP server host name or IP address and can include the LDAP
server network port. Port 389 is the default.
• Group DN (optional) — A group distinguished name (DN) made up
of one or more parameters.
• User DN (optional) — A user DN made up of one or more
parameters.
• Default domain — Domain that is populated on the login screen by
default.
• Principle authorization — Login used to gain access to the directory
service.
• Credential authorization — Password for the principal
authentication login.
• Library user group — Name of the group you want to associate with
the library. This group is equivalent to the local user privilege level
(see Privilege Levels on page 80). Any member of this group can
manage this library.
• Admin group — Name of the group associated with the library
administrator, equivalent to the local administrative user privilege
88
Quantum Scalar i40 and Scalar i80 User’s Guide
Chapter 4: Configuring the Library
Working With LDAP User Accounts (Remote Authentication)
level. Any member of this group has administrative privileges (see
Privilege Levels on page 80).
You can view, enable, and configure LDAP settings from the Web client
only.
Web Client
1 Select Setup > User Management > Remote Authentication.
The Setup - Remote Authentication screen appears.
2 Under Authentication Type, do one of the following:
• To enable LDAP, select LDAP and continue with Step 3.
• To disable LDAP, select Local Only and continue with Step 4.
• To modify LDAP configuration settings, continue with Step 3.
3 Enter LDAP configuration settings into the following text boxes:
• Repository URI
• Group DN
• User DN
• Default Domain
• Principal
• Credential
• Confirm Credential
• Library User Group
• Admin Group
4 Click Apply to apply any changes.
5 If you enabled LDAP or modified LDAP settings, click the Test LDAP
button to test all the new or changed LDAP settings.
Note: The Test button tests communication between the library
and the LDAP server. If you changed the LDAP settings, click
Apply before using this button.
6 Save the library configuration (see Saving the Library Configuration
on page 101).
Quantum Scalar i40 and Scalar i80 User’s Guide
89
Chapter 4: Configuring the Library
Working With LDAP User Accounts (Remote Authentication)
Configuring Kerberos
Use Kerberos if you want to use Microsoft Active Directory without
Windows Services for Unix 2.5.
Make sure that both the library and the Kerberos server are set to the
same time (within 5 minutes). Otherwise, the authentication will fail. It
is recommended that you use Network Time Protocol (NTP) to
synchronize the time between the library and the Kerberos server. See
Setting the Date and Time Using the Network Time Protocol on page 50.
You can configure the Kerberos® settings any time after the initial
library configuration. Before you can configure Kerberos, you need to
generate the service keytab file on your Kerberos (AD) server. For
instructions, see Generating the Kerberos Service Keytab File on
page 91.
You must have administrative privileges to configure Kerberos.
You can only configure Kerberos on the Web client.
Web Client
1 Select Setup > User Management > Remote Authentication.
The Setup - Remote Authentication screen appears.
2 Under Authentication Type, do one of the following:
• To enable Kerberos, select Kerberos (Active Directory®): and
continue with Step 3.
• To disable Kerberos, select LDAP or Local Only and continue with
Step 6.
• To modify Kerberos configuration settings, continue with
Step 3.
3 Type the Kerberos settings into the following Kerberos fields:
• Realm — The Kerberos realm name, typed in all uppercase
letters. Usually the realm name is the DNS domain name.
• KDC (AD Server) — The server on which Kerberos is installed.
• Domain Mapping — The domain portion of the library’s fully
qualified domain name.
4 Upload the service keytab file. This is a file you generate on your
Kerberos (AD) server. If you have not already generated this file, do
90
Quantum Scalar i40 and Scalar i80 User’s Guide
Chapter 4: Configuring the Library
Working With LDAP User Accounts (Remote Authentication)
so now. For instructions, see Generating the Kerberos Service Keytab
File on page 91. Then click the Browse button to upload the file.
5 Configure the LDAP settings as described in Enabling and
Configuring LDAP on the Library on page 88.
6 Click Apply to apply any changes.
7 If you enabled LDAP or Kerberos, or modified LDAP or Kerberos
settings, click the Test LDAP button to test all the new or changed
LDAP settings.
Note: The Test button tests communication between the library
and the LDAP server. If you changed the LDAP settings, click
Apply before using this button.
8 Save the library configuration (see Saving the Library Configuration
on page 101).
Generating the
Kerberos Service Keytab
File
1 Set up an Active Directory domain on the Windows 2003 server.
2 At the command prompt, enter dcpromo.
3 Windows 2003 servers only: Install Windows Support Tools on the
Windows 2003 server as follows:
a Go to www.microsoft.com and search for “windows server
2003 support tools sp2” or click on the following link:
http://www.microsoft.com/downloads/
details.aspx?FamilyID=96a35011-fd83-419d-939b9a772ea2df90&DisplayLang=en
b Download both support.cab and suptools.msi.
c Run suptools.msi to begin installation.
4 Create a computer account in Active Directory.
• Do not select any of the check boxes during creation.
• The account name will be used for <computer account> fields
shown in the following steps.
Quantum Scalar i40 and Scalar i80 User’s Guide
91
Chapter 4: Configuring the Library
Working With LDAP User Accounts (Remote Authentication)
5 At the command prompt, map SPN to the computer account. Use
the following format:
setspn -A library/<fqdn of library> <computer
account>
For example:
setspn -A library/delos.dvt.mycompany.com
kerbtest
6 At the command prompt, create the keytab file for the SPN. Use one
of the following formats:
• For Windows 2003:
ktpass -out library.keytab -princ
library/<fqdn of library>@<realm>
+rndPass -ptype KRB5_NT_SRV_HST -crypto RC4HMAC-NT -mapUser <realm>/computers/<computer
account>
For example:
ktpass -out library.keytab -princ library/
[email protected]
+rndPass -ptype KRB5_NT_SRV_HST -crypto RC4HMAC-NT -mapUser ourrealm.local/computers/
kerbtest
• For Windows 2008:
ktpass -out library.keytab -princ library/
<fqdn of library>@<realm>
+rndPass -ptype KRB5_NT_SRV_HST -crypto
AES256-SHA1
-mapUser <realm>/computers/<computer account>
For example:
ktpass -out library.keytab -princ library/
[email protected]
+rndPass -ptype KRB5_NT_SRV_HST -crypto
AES256-SHA1
-mapUser ourrealm.local/computers/kerbtest
92
Quantum Scalar i40 and Scalar i80 User’s Guide
Chapter 4: Configuring the Library
Setting the Session Timeout
Setting the Session Timeout
The library automatically logs out a user or administrative user when the
library has detected no activity for a specified length of time. This
always occurs on the Web client, and will occur on the operator panel if
passwords are enabled (see Enabling and Creating Passwords on the
Operator Panel on page 83). The default session timeout is 15 minutes.
You can change that to 30, 45, or 60 minutes. You can only change this
setting on the operator panel.
Operator Panel
1 Select Setup > Account Settings > Session Timeout.
The current timeout setting is highlighted.
2 Use the Up and Down buttons to select the desired timeout.
3 Press Apply.
4 Save the library configuration (see Saving the Library Configuration
on page 101).
Configuring System Settings
You can enable/disable the following system settings on the operator
panel:
• Unload Assist
• Logical Serial Number Addressing
• Manual Cartridge Assignment
• SNMP
• SMI-S
Quantum Scalar i40 and Scalar i80 User’s Guide
93
Chapter 4: Configuring the Library
Configuring System Settings
Unload Assist
When Unload Assist is enabled, the library will unload tape drives when
a move command from the tape drive is received. When Unload Assist is
disabled, the tape drive must be unloaded prior to a move command, or
the move command will fail. This setting is enabled by default.
Operator Panel
1 Select Setup > System Settings > Unload Assist.
2 Press Modify.
3 Scroll to select Enabled or Disabled and press Apply.
4 Make another selection or press Exit.
5 Save the library configuration (see Saving the Library Configuration
on page 101).
Logical Serial Number
Addressing
The library uses the actual tape drive serial numbers by default (logical
SN addressing is disabled). Enabling logical SN addressing enables the
library to assign logical serial numbers to all tape drives in the library.
Specifically, the library assigns a logical serial number to a tape drive in a
specific location, not the serial number of the particular tape drive. If
the tape drive is then replaced by another tape drive in the same library
location, the logical serial number remains the same. From the host
application’s perspective, the replacement tape drive is the same as the
original. This setting is disabled by default.
Caution: If you change the logical serial number addressing setting,
you must power cycle the library (perform a shutdown and
press the power button) or remove each tape drive from
the library in order for the change to take effect.
Operator Panel
1 Select Setup > System Settings > Logical SN Addr.
2 Press Modify.
3 Scroll to select Enabled or Disabled and press Apply.
94
Quantum Scalar i40 and Scalar i80 User’s Guide
Chapter 4: Configuring the Library
Configuring System Settings
4 Make another selection or press Exit.
5 Save the library configuration (see Saving the Library Configuration
on page 101).
Manual Cartridge
Assignment
When manual cartridge assignment is enabled (the default setting), the
I/E Assign screen automatically appears on the operator panel once
cartridges are placed into the I/E station. The I/E Assign screen prompts
you to assign the cartridges to a specific partition or to the system
partition. The cartridges can then be used only by the assigned
partition.
When manual cartridge assignment is disabled, the I/E Assign screen
does not appear on the operator panel, and the cartridges in the I/E
station are visible to all partitions, as well as the system partition, and
can be used by any partition.
The manual cartridge setting is enabled by default. You can only change
this setting on the operator panel.
Understanding Host Application Notification
When manual cartridge assignment is enabled, SCSI Unit Attention 6/
2801 notifies the host application when the I/E station has been
accessed, allowing the host to automatically detect the presence of
media in the I/E station and update its I/E station status information.
When manual cartridge assignment is disabled, host notification via
SCSI Unit Attention 6/2801 depends on the number of configured
partitions:
If multiple partitions are defined, the host application is not notified
when the I/E station has been accessed. Media presence in the I/E
station is reported to any partition requesting it.
If a single partition is defined, the host application is notified when the
I/E station has been accessed. Media presence is reported to the sole
defined partition, as well as to the system partition, when either of
these partitions checks for changes in the status of the I/E station.
For information about using the host to perform tape operations, see
your host application documentation.
Quantum Scalar i40 and Scalar i80 User’s Guide
95
Chapter 4: Configuring the Library
Configuring System Settings
Operator Panel
1 Select Setup > System Settings > Man Cart Assign.
2 Press Modify.
3 Scroll to select Enabled or Disabled and press Apply.
4 Make another selection or press Exit.
5 Save the library configuration (see Saving the Library Configuration
on page 101).
SNMP
Enables or disables SNMP traffic to the library. This setting is enabled by
default.
Operator Panel
1 Select Setup > System Settings >SNMP.
2 Select the setting you want to modify and press Modify.
3 Scroll to select Enabled or Disabled and press Apply.
4 When finished making all changes, press Exit.
5 Save the library configuration (see Saving the Library Configuration
on page 101).
SMI-S
Allows you to enable or disable SMI-S running on the library. This
setting is disabled by default.
Operator Panel
1 Select Setup > System Settings > SMI-S.
2 Press Modify.
3 Scroll to select Enabled or Disabled and press Apply.
4 Make another selection or press Exit.
5 Save the library configuration (see Saving the Library Configuration
on page 101).
96
Quantum Scalar i40 and Scalar i80 User’s Guide
Chapter 4: Configuring the Library
Configuring Security Settings
Configuring Security Settings
You can enable/disable the following security settings on the operator
panel:
• Network Interface
• SSH Services
• Internet Control Message Protocol (ICMP)
• Remote Access Via Web Client
• Remote Service Login
• SSL
Network Interface
Enables or disables all external access to the library. This setting is
enabled by default to allow external access.
Operator Panel
1 Select Setup > Security Services > Network IF.
2 Press Modify.
3 Scroll to select Enabled or Disabled and press Apply.
4 Make another selection or press Exit.
5 Save the library configuration (see Saving the Library Configuration
on page 101).
SSH Services
Enables or disables Secure Shell (SSH) services, such as SSH, from
accessing the library. This setting is enabled by default.
Operator Panel
1 Select Setup > Security Services > SSH Services.
2 Press Modify.
Quantum Scalar i40 and Scalar i80 User’s Guide
97
Chapter 4: Configuring the Library
Configuring Security Settings
3 Scroll to select Enabled or Disabled and press Apply.
4 Make another selection or press Exit.
5 Save the library configuration (see Saving the Library Configuration
on page 101).
Internet Control
Message Protocol
(ICMP)
Enables or disables external attempts to discover the library by pinging
it (by means of the ICMP Echo packets. This setting is enabled by
default.
You may disable this feature if you are using IPv4, but you should NOT
do so if you are using IPv6. Disabling this feature disables all IPv6
communication on the Scalar i40 and Scalar i80. There will be no error
messages, and the library will appear to be working, but it will not be
communicating.
Caution: Do NOT disable ICMP if you are using IPv6!
Operator Panel
1 Select Setup > Security Services > ICMP.
2 Press Modify.
3 Scroll to select Enabled or Disabled and press Apply.
4 Make another selection or press Exit.
5 Save the library configuration (see Saving the Library Configuration
on page 101).
Remote Access Via Web
Client
Enables or disables remote access to the library via the Web client. This
setting is enabled by default (meaning remote access is allowed).
Operator Panel
1 Select Setup > Security Services > Web client.
2 Press Modify.
3 Scroll to select Enabled or Disabled and press Apply.
98
Quantum Scalar i40 and Scalar i80 User’s Guide
Chapter 4: Configuring the Library
Configuring Security Settings
4 Make another selection or press Exit.
5 Save the library configuration (see Saving the Library Configuration
on page 101).
Remote Service Login
Enables or disables remote service user login (from the Web client or
over the Ethernet service port). The service user will still be able to log in
to the library from the operator panel. This setting is enabled by default
(meaning remote service login is allowed).
Operator Panel
1 Select Setup > Security Services > Service User
2 Press Modify.
3 Scroll to select Enabled or Disabled and press Apply.
4 Make another selection or press Exit.
5 Save the library configuration (see Saving the Library Configuration
on page 101).
SSL
Allows you to enable Secure Socket Layer (SSL) for secure data
transmission between the library and remote clients. This setting is
disabled by default.
Enabling SSL settings encrypts all Web browser connections to the Web
client, and it enables SSL-based authentication for SMI-S. SMI-S is the
newest standard of SNMP, which makes sets of data continuously
available. For more information about SMI-S on the library, see SMI-S on
page 96.
Disabling SSL settings creates an unencrypted connection from a Web
browser to the Web client.
See the Quantum Intelligent Libraries SMI-S Reference Guide
(6-01317-xx) for further configuration and access details.
Quantum Scalar i40 and Scalar i80 User’s Guide
99
Chapter 4: Configuring the Library
Saving and Restoring the Library Configuration
Note: Before enabling SSL settings, make sure you enter a name for
the library in the Library Name text box when configuring
network settings (Setup > Network Management >
Network on the Web client; see Library Host Name on
page 43). After enabling SSL settings, use that library name to
access the library. If you do not use that name, you will receive
a security alert. In addition, make sure to complete all the text
boxes listed on the Web client Contact Information screen
(Setup > Notification > Contact Information) before
enabling SSL settings. This information is used to identify
company information in the SSL certificate.
Operator Panel
1 Select Setup > Security Services > SSL.
2 Press Modify to change the setting.
3 Save the library configuration (see Saving the Library Configuration
on page 101).
Saving and Restoring the Library Configuration
The library has many configurable items, such as tape drive IDs,
partitions, user accounts, import/export (I/E) stations, and cleaning slots.
In the event of a hardware failure or firmware upgrade, the save and
restore operations can be used to restore the library's configurable items
to a previous state. The save/restore operation also saves and restores
library firmware and license keys installed on the library.
Note: The save/restore operations should not be performed
concurrently by multiple administrative users logged in from
different locations. You can access the screens, but you cannot
apply changes while another administrative user is performing
the same operation.
100
Quantum Scalar i40 and Scalar i80 User’s Guide
Chapter 4: Configuring the Library
Saving and Restoring the Library Configuration
Saving the Library
Configuration
It is recommended that you save the library configuration after
modifying a configurable item and before upgrading firmware. This
allows you to restore the most current settings if necessary.
This operation saves your current library configuration and library
firmware.
Save your library configuration when it is in a known working state. In
the event of a hardware failure, the saved configuration can be used to
restore the configuration after hardware repairs are made.
Before initiating a firmware upgrade, you should save the library
configuration. You then have the option to restore the configuration
after either a successful or an unsuccessful upgrade.
You can only save the configuration from the Web client.
Web Client
1 Select Tools > Save/Restore Configuration.
2 Select Save System Configuration.
3 Click Apply.
4 When the operation completes successfully, complete the next
screens to save the file to a known location.
Restoring the Library
Configuration
You can restore the library’s configurable items to a previous state using
a saved configuration file. If you updated the library firmware since last
saving the configuration, the library automatically restores the library
firmware to the version that was saved with the configuration.
You can also downgrade library firmware to an earlier version using the
Tools > Update Library Firmware command. Note that you will lose all
your current library configuration information except for network
settings, date and time, and license keys. You can restore the other
configurable items using a configuration file that was saved when the
earlier version of library firmware was installed on the library, or you can
reconfigure your library’s settings.
You can only restore the library configuration via the Web client.
Quantum Scalar i40 and Scalar i80 User’s Guide
101
Chapter 4: Configuring the Library
Registering the Library
Web Client
1 Select Tools > Save/Restore Configuration.
2 Select Restore System Configuration.
3 Click Apply.
4 Use the next screens to browse to the saved configuration file and
upload it to the library.
This operation saves your current library configuration and library
firmware.
Registering the Library
Registering the library activates the warranty. After completing the
initial setup of the library, choose Setup > Register Library on the Web
client to access the online product registration form.
You cannot register the library from the operator panel.
Web Client
Select Setup > Register Library.
102
Quantum Scalar i40 and Scalar i80 User’s Guide
Chapter 5
Performing Library
Operations
This chapter explains how to access and operate your library. Most of
the library functions described here can be found on the Operations
menu of the Web client, or the Actions menu of the operator panel.
This chapter covers:
• Logging In
• Logging Out
• Shutting Down, Restarting, Turning Off, and Removing Power
• Emergency Power-off Procedure
• Unlocking the I/E Station
• Releasing Magazines
• Performing Media Operations
• Cleaning Tape Drives
• Taking a Tape Drive Online or Offline
Quantum Scalar i40 and Scalar i80 User’s Guide
103
Chapter 5: Performing Library Operations
Logging In
Logging In
All users, service users, and administrative users must log in to the
library to perform library functions or view library operations.
(Exception: If passwords are not configured on the operator panel, login
to the operator panel is not needed.)
Simultaneous Logins
Multiple users can be logged in to the library at the same time. The
same user can be logged from multiple locations. Note that multiple
users logged in from different locations cannot make changes to
configuration settings or perform certain library functions
simultaneously. The screens are visible, but access is denied. Whichever
one is logged in first has access to the screen until they exit the screens.
Logging In for the First
Time
When you first boot up the library, the operator panel does not require
you to log in. In fact, if you do not configure passwords for the operator
panel, you never need to log in (see Enabling and Creating Passwords
on the Operator Panel on page 83 for more information).
If you are logging in to the Web client for the first time, use the default
user name and password:
• Default user name: admin
• Default password: password
After you log in for the first time, change the password for the default
admin account. See Modifying Local User Accounts on the Web Client
on page 82.
Note: If you misplace the password for the default admin account,
contact Quantum Technical Support. For contact information,
see Getting More Information or Help on page xxiv.
Logging In Using the
Operator Panel
104
If passwords have not been set on the operator panel, you do not need
to log in, and all operations are allowed to all users. It is recommended
Quantum Scalar i40 and Scalar i80 User’s Guide
Chapter 5: Performing Library Operations
Logging In
that you set passwords on the operator panel (see Enabling and
Creating Passwords on the Operator Panel on page 83).
If passwords have been set on the operator panel, there are three
possible user IDs, admin, user, and service. Login as follows:
1 At the login screen, use the Up and Down buttons to select admin,
user, or service.
2 Press Apply.
3 Enter the first digit of the password using the Up and Down
buttons to scroll to the correct number, then press Right to go to
the next digit. Configure the rest of the digits in the same way.
Note: Only the digit you are currently modifying displays an
actual number. When you finish one digit and move to the
next, the completed digit displays as a cross-hatch symbol
(#).
4 When finished entering all digits, press Apply.
Note: If you misplace the password for the operator panel logins, you
can clear operator panel passwords via the Web client (see
Resetting Passwords on the Operator Panel on page 86).
Logging In Via the Web
Client
1 Establish an Internet connection to the library by typing the library’s
IP address into your Internet browser.
If you do not know your library’s IP address, you can find it on the
operator panel by selecting Reports > Network Settings.
2 At the login screen, enter a user name and its associated password
and click OK.
Logging In When LDAP
or Kerberos is Enabled
When LDAP or Kerberos is enabled, the Login screen displays the
following items in addition to the User Name and Password text boxes:
Use Local Authentication — Select this option to log in using a local
user name and password.
Use LDAP Authentication — Select this option to select or enter a
domain and log in using a directory service user name and password.
Quantum Scalar i40 and Scalar i80 User’s Guide
105
Chapter 5: Performing Library Operations
Logging Out
For more information on LDAP, see Enabling and Configuring LDAP on
the Library on page 88.
For more information on Kerberos, see Configuring Kerberos on
page 90.
Logging Out
Logging out secures the library from being accessed by unauthorized
users. Log out whenever you have finished accessing the library.
You will only be able to log out of the operator panel if passwords have
been configured (see Enabling and Creating Passwords on the Operator
Panel on page 83).
Note: Clicking the close button (X) in the upper-right corner of the
Web client closes the browser window but does not log you
out.
Note: All users are logged out automatically after a configurable
period of inactivity. The default timeout period is 15 minutes,
but you can change this (see Setting the Session Timeout on
page 93).
Operator Panel
1 Select Actions > Logout.
2 Press Yes to confirm.
Web Client
1 Click the
Logout button in the upper right corner of the screen,
or select Operations > Log Out.
2 Click OK to confirm.
106
Quantum Scalar i40 and Scalar i80 User’s Guide
Chapter 5: Performing Library Operations
Shutting Down, Restarting, Turning Off, and Removing Power
Shutting Down, Restarting, Turning Off, and
Removing Power
It is important to shut down the library properly before turning off the
library or completely removing library power.
Caution: You should always perform a shutdown before turning off
the library or completely removing power. Otherwise, the
following could occur:
– The library may not complete closing all data and log
files.
– If you turn off power or unplug the power cord while
writing to tape, the data on the tape could become
corrupted.
– If you unplug the power cord, the robot may become
frozen in the middle of an operation and unable to move
once library power is restored, possibly requiring a
service call.
The steps for shutting down, turning off, and completely removing
library power are:
1 Make sure the connected host applications are not sending
commands to the library and that all library operations have
stopped.
2 Shut down the library using the operator panel or Web client (see
Shutting Down the Library on page 107).
3 Turn OFF the library by pressing the power button on the front
panel (see Turning Off the Library on page 111).
4 Remove library power by disconnecting the power supply cord from
the power supply on the back of the library. If there are two power
supplies, remove the cords to both. See Completely Removing
Library Power on page 111.
Shutting Down the
Library
Shutdown shuts down the library’s operating system and firmware,
closes data and log files, and retracts the picker so that a tape cartridge
or the picker fingers are not stuck part way into a tape drive or
Quantum Scalar i40 and Scalar i80 User’s Guide
107
Chapter 5: Performing Library Operations
Shutting Down, Restarting, Turning Off, and Removing Power
magazine slot. If the robot was in the middle of a get or put operation,
it will attempt to complete the operation before shutting down, by
either pushing the cartridge into the destination slot, or removing it
completely from the slot and stopping in a safe location from which it
can move again once power is restored.
Once the shutdown is complete, you can safely turn off the library by
pressing the power button on the front panel (see Turning Off the
Library on page 111).
Operator Panel
1 Make sure the connected host applications are not sending
commands to the library and that all library operations have
stopped.
2 Press Actions > Shutdown > Shutdown Library.
3 Press Yes to confirm.
A “shutdown in progress” message appears on the operator panel
(see Figure 22).
Figure 22 Shutdown in
Progress Message
4 Wait until the “ready to power down” message appears (see
Figure 23).
Figure 23 Ready to Power
Down Message
108
Quantum Scalar i40 and Scalar i80 User’s Guide
Chapter 5: Performing Library Operations
Shutting Down, Restarting, Turning Off, and Removing Power
5 Turn OFF the library by pressing the power button on the front
panel.
Web Client
1 Press Operations > System Shutdown.
2 Select Shutdown and click Apply.
3 Click OK to confirm.
4 Wait until the “ready to power down” message appears on the
operator panel (see Figure 24).
Figure 24 Ready to Power
Down Message
5 Turn OFF the library by pressing the power button on the front
panel.
Restarting the Library
Restart shuts down and then reboots the library's operating system and
firmware. During the reboot, the library performs an inventory of the
tape drives and magazine slots. The reboot takes approximately 5
minutes.
Operator Panel
1 Make sure the connected host applications are not sending
commands to the library and that all library operations have
stopped.
2 Press Actions > Shutdown > Restart Library.
3 Press Yes to confirm.
Quantum Scalar i40 and Scalar i80 User’s Guide
109
Chapter 5: Performing Library Operations
Shutting Down, Restarting, Turning Off, and Removing Power
4 Several messages appear on the screen, in the order shown in
Figure 25. Do not do anything in response to these messages. The
library will restart and initialize on its own.
Figure 25 Series of Restart
Messages
Web Client
1 Make sure the connected host applications are not sending
commands to the library and that all library operations have
stopped.
2 Press Operations > System Shutdown.
3 Select Restart and click Apply.
4 Press OK to confirm.
5 Several messages appear on the operator, in the order shown in
Figure 25 on page 110. Do not do anything in response to these
messages. The library will restart and initialize on its own.
110
Quantum Scalar i40 and Scalar i80 User’s Guide
Chapter 5: Performing Library Operations
Shutting Down, Restarting, Turning Off, and Removing Power
Turning Off the Library
Turning OFF the library means pressing the power button on the front
panel.
It is recommended that you perform a shutdown via the Web client or
operator panel before turning off the library. If you do not perform a
shutdown, the library attempts to complete all shutdown operations
before turning off the library. However, it may not have enough time to
shut down completely, and operations could be stopped mid-process.
Caution: You should always perform a shutdown before turning off
the library or completely removing power. Otherwise, the
following could occur:
– The library may not complete closing all data and log
files.
– If you turn off power while writing to tape, the data on
the tape could become corrupted.
1 Make sure the connected host applications are not sending
commands to the library and that all library operations have
stopped.
2 Shut down the library (see Shutting Down the Library on page 107).
3 Turn OFF the library by physically pressing the power button on the
library’s front panel. It can take up to 12 seconds for the power to
completely turn off.
Note: Turning off the library does not completely remove library
power (see Completely Removing Library Power on page 111).
Completely Removing
Library Power
Completely removing library power means disconnecting the power
cord from each power supply on the library.
Quantum Scalar i40 and Scalar i80 User’s Guide
111
Chapter 5: Performing Library Operations
Shutting Down, Restarting, Turning Off, and Removing Power
Caution: You should always perform a shutdown and then turn off
library power before completely removing power.
Otherwise, the following could occur:
– The library may not complete closing all data and log
files.
– If you turn off power or unplug the power cord while
writing to tape, the data on the tape could become
corrupted.
– The robot may become frozen in the middle of an
operation and unable to move once library power is
restored, possibly requiring a service call.
1 Make sure the connected host applications are not sending
commands to the library and that all library operations have
stopped.
2 Shut down the library (see Shutting Down the Library on page 107).
3 Turn OFF the library by physically pressing the power button on the
library’s front panel (see Turning Off the Library on page 111). Make
sure the operator panel turns off or the LED on the SCB turns off.
4 Disconnect the power cord(s) from all power supplies on the back of
the library. If there are two power supplies, disconnect both cords.
Power is completely removed from the library when the LED on each
power supply is off.
Emergency Power-off
Procedure
In an emergency, you may need to turn off power immediately to stop
robot motion, bypassing the normal shutdown process.
In an emergency, you can turn off power in one of two ways:
• Press the power button on the front of the library to turn the library
OFF. It may take up to 4 seconds for all motion to completely stop.
Note that this does not completely remove library power (you need
to disconnect the power cords to do that).
• Disconnect the power cord from each power supply on the back of
the library. It may take 1 to 2 seconds for motion to completely
stop.
112
Quantum Scalar i40 and Scalar i80 User’s Guide
Chapter 5: Performing Library Operations
Unlocking the I/E Station
Caution: These methods are not recommended except in case of
emergency where it is vital that library operations be
stopped immediately. If you do not first perform a
shutdown as described in the sections above, the following
could occur:
– The library may not complete closing all data and log
files.
– If you turn off power or unplug the power cord while
writing to tape, the data on the tape could become
corrupted.
– If you unplug the power cord, the robot may become
frozen in the middle of an operation and unable to move
once library power is restored, possibly requiring a
service call.
Taking the Library
Offline
Some maintenance activities require that the entire library be taken
offline. To take the library offline, change the mode of all partitions from
online to offline. See Taking a Partition Online or Offline on page 59 for
instructions.
Unlocking the I/E Station
The I/E station is locked during normal library operation. To access the I/
E station you must first unlock it. Once unlocked, you have 30 seconds
to open the I/E station before it locks again.
Note: If you want to open more than one I/E station, such as when
importing multiple tape cartridges, unlock and open both I/E
stations before you close either of them. Otherwise, if you
open and close one at a time, you must wait for the robot to
complete inventory on the one being closed before it can open
the other one.
Quantum Scalar i40 and Scalar i80 User’s Guide
113
Chapter 5: Performing Library Operations
Releasing Magazines
Operator Panel
1 Select Actions > I/E > Unlock I/E Station.
2 Select which I/E station to unlock, and press Unlock.
3 Wait until the screen displays the “magazine is now unlocked”
message (see Figure 26 on page 114), then pull outward on the
magazine bezel handle to open the I/E station.
If you do not open the magazine within 30 seconds, it locks and you
receive a diagnostic ticket.
Figure 26 Magazine Unlocked
Message
Web Client
1 Select Operations > I/E Station Unlock.
2 Select the I/E station to unlock and click Apply.
3 Click OK to confirm.
4 Wait until the Web client displays the Success message, then pull
outward on the magazine bezel handle to open the I/E station.
If you do not open the magazine within 30 seconds, it locks and you
receive a diagnostic ticket.
Releasing Magazines
Magazines are locked during normal operation. Before you open or
completely remove a magazine, you must release it, either via the user
interface or manually.
114
Quantum Scalar i40 and Scalar i80 User’s Guide
Chapter 5: Performing Library Operations
Releasing Magazines
Note: If you want to remove more than one magazine, such as when
bulk loading tape cartridges, release and remove all the
magazines you want to remove before you close any of them.
Otherwise, if you remove and replace them one at a time, you
must wait for the robot to complete inventory on the one
being replaced before it can release another one.
Caution: If the library is turned ON, always release the magazines via
the user interface. It is easier and will not result in a
diagnostic ticket (see About Diagnostic Tickets on
page 244). Additionally, the library makes sure nothing is
physically blocking the magazine that could cause damage
to library components before allowing you to release it.
Releasing Magazines
via the User Interface
Use this method when the library is turned ON.
Operator Panel
1 Select Actions > Magazine.
2 Select a magazine and press Release.
3 Wait until the screen displays the “magazine is now unlocked”
message (see Figure 27), then pull outward on the magazine bezel
handle to slide the magazine out as far as you wish, or remove it
completely. Once you slide the magazine back into the slot all the
way, it locks again automatically
If you do not open the magazine within 30 seconds, it locks and you
receive a diagnostic ticket.
Figure 27 Magazine Unlocked
Message
Quantum Scalar i40 and Scalar i80 User’s Guide
115
Chapter 5: Performing Library Operations
Releasing Magazines
Web Client
1 Select Operations > Release Magazine.
2 Select a magazine and press Release.
3 Click OK to confirm.
4 Wait until the Web client displays the Success message, then pull
outward on the magazine bezel handle to slide the magazine out as
far as you wish, or remove it completely. Once you slide the
magazine back into the slot all the way, it locks again automatically.
If you do not open the magazine within 30 seconds, it locks and you
receive a diagnostic ticket.
Releasing Magazines
Manually
Use this method when the library is turned OFF. If you use this method
when the library is turned ON, you will receive a diagnostic ticket.
Caution: If you use the manual method to remove magazine(s)
when the library is turned ON you risk a mechanical
collision between the magazine and the robotics that could
seriously damage components.
1 Insert an opened paperclip, small screwdriver, or other object (3.5
mm or less in diameter that will not break off) into the access hole
in the bottom of the magazine bezel (see Figure 28).
2 Use the tool to depress the release latch while gently pulling the
magazine bezel handle to slide the magazine out.
3 If the magazine is on the right side, it will only slide out as far as the
I/E station. To release the magazine fully:
• On the Scalar i40 and the bottom right magazine of the Scalar
i80, reach under the open magazine and insert the tool directly
into the access hole in the library chassis to depress the release
latch, while pulling out on the magazine bezel handle.
• On the top right magazine of the Scalar i80, reach under the
open magazine and press the release latch directly with your
finger, while pulling out on the magazine bezel handle.
116
Quantum Scalar i40 and Scalar i80 User’s Guide
Chapter 5: Performing Library Operations
Performing Media Operations
Figure 28 Magazine Release
Latch Access
Magazine release latch access holes
Performing Media Operations
This section describes how to import, export, load, unload, and move
data cartridges in the library. The following section, Cleaning Tape Drives
on page 128, describes how to perform similar operations with cleaning
cartridges.
Note: The information and procedures in this user’s guide apply
specifically to the library Web client and the operator panel
user interface, not to the host application. Performing media
operations through the library user interface may affect your
host application. See your host application documentation for
information.
Importing Tape
Cartridges
You can use the I/E station to import data cartridges into the library. The
library’s scanner automatically reads the barcode on new cartridges
imported into the library.
Tape cartridges must be present in the I/E station and assigned to a
partition before you can import them. You will select a partition into
which to import the cartridges. If the selected partition is online, it will
be taken offline before the import operation is performed, and brought
back online after the operation is complete. If the library contains
Quantum Scalar i40 and Scalar i80 User’s Guide
117
Chapter 5: Performing Library Operations
Performing Media Operations
multiple partitions, the import operation will not affect operations in
other partitions.
You must have access to the library’s I/E station and the operator panel
to import cartridges.
Note: If your library has zero I/E station slots, you cannot import or
export media using the I/E station. See Configuring I/E Station
Slots on page 63.
Note: Importing cartridges using the library interface may necessitate
performing an inventory on your host application. You can also
import cartridges using your host application. See your host
application documentation for more information.
Note: Note on importing unassigned tape cartridges: When the
manual cartridge assignment setting is enabled (the default
setting), the I/E Assign screen automatically appears on the
operator panel after you have loaded the cartridges into the I/E
station and closed the I/E station. The screen prompts you to
assign the cartridges to a specific partition or to the system
partition. The cartridges can then be used only by the assigned
partition. If you do not wish to assign cartridges to a partition
immediately, or you wish to assign them to different partitions
via the Web client, you can cancel out of this screen and the
cartridges are considered “unassigned.” Alternatively, you can
disable manual cartridge assignment (operator panel, Setup >
System Settings > Man Cart Assign; see Manual Cartridge
Assignment on page 95). In this case, the I/E Assign screen
does not appear on the operator panel and the cartridges are
considered “unassigned.” Unassigned cartridges in the I/E
station are available for use by any partition, including the
system partition. However, you can only import or move
unassigned cartridges into the library when manual cartridge
assignment is disabled. Once imported or moved into a
partition, the cartridges are considered assigned to that
partition and can only be used by that partition.
118
Quantum Scalar i40 and Scalar i80 User’s Guide
Chapter 5: Performing Library Operations
Performing Media Operations
Caution: Some host applications may fail import/export operations
when the I/E station contains cartridges that are assigned
to another partition. Move cartridges from the I/E station
as soon as possible to avoid possible conflicts with the
other partitions.
The process for importing cartridges includes the following steps:
Inserting and Assigning Cartridges
1 Verify that all tape drives are unloaded and that all cartridges are in
their appropriate storage slot locations. Doing this will avoid overloading the library with cartridges.
2 Go to the front of the library and insert cartridges into the I/E
station.
3 Close the I/E station.
The I/E Assign screen appears on the operator panel if Manual
Cartridge Assignment is enabled on the operator panel (Setup >
System Settings).
4
If the I/E Assign screen appears, do the following:
a Using the operator panel, select the partition to which you want
to assign the cartridges. All unassigned cartridges in the I/E
station will be assigned to the same partition.
b Press Apply. (Alternatively, you may press Cancel to bypass this
step if you wish to assign cartridges to different partitions using
the Web client. Note that you must disable manual cartridge
assignment from the operator panel before you can import
unassigned cartridges, as described in the Note above.)
5 Continue using one of these options:
• Importing Cartridges via the Operator Panel on page 119
• Importing Cartridges via Web Client on page 120
Importing Cartridges via the Operator Panel
You can only import one cartridge at a time using the operator panel.
1 Select Actions > Import Tape.
Quantum Scalar i40 and Scalar i80 User’s Guide
119
Chapter 5: Performing Library Operations
Performing Media Operations
2 If the cartridges in the I/E station are assigned to multiple partitions,
select the partition into which you want to import.
3 Use the Up and Down buttons to select a cartridge to import.
4 Press Import.
The library imports the tape cartridge into the first empty slot in the
partition.
Importing Cartridges via Web Client
1 Select Operations > Media > Import.
2 If more than one partition exists, select the partition into which you
want to import cartridges and click Next.
3 The Import Media - Partition (Mode) screen appears, where
Partition is the name of the partition and Mode is the current mode
of the partition. This screen contains a list of cartridges in the I/E
station that are ready for import.
4 Identify the number of empty storage slots that appear in the
Empty Partition Slots field. The number of cartridges you can
import is limited to the number of empty slots that exist in the
partition.
5 Select the cartridges to import into the partition.
Note: You can select all cartridges by selecting the top check box.
You can use the Filter by Barcode text box to filter the
available cartridge barcodes. Click the Help button next to
the Find button for more information about filtering
barcodes. In addition, if not all cartridges appear on the
screen, use the Page 1 of x arrows to view the additional
cartridges.
Note: Bold column headings in the table can be sorted. For
example, selecting the Location column heading will sort
by location coordinates.
6 Click Apply.
7 Click OK to confirm it is OK to take the partition offline.
120
Quantum Scalar i40 and Scalar i80 User’s Guide
Chapter 5: Performing Library Operations
Performing Media Operations
The library imports the tape cartridge(s) into the first empty slot(s)
in the partition.
Bulk Loading Tape
Cartridges
Bulk loading is another way to load media into the library. If zero I/E
station slots are configured, you will always need to bulk load cartridges
into the library. If I/E station slots have been configured, you may want
to perform an initial bulk load when you first start using your library.
The library will perform an inventory after the bulk load is complete.
Before bulk loading, print out the Library Configuration report from the
Web client to see how the physical slots of the library are configured.
The report shows what slots are unavailable or configured as cleaning
slots or as I/E station slots. For information on accessing the report, see
Viewing the Library Configuration Report on page 141.
Place cartridges in their appropriately configured slot location; for
example, cleaning cartridges should not be placed in slots configured
for storage.
To perform an initial bulk load, remove the magazine and manually
insert directly into storage slots as many cartridges as you plan to use
(see Releasing Magazines on page 114). When finished, reinstall the
magazine and push it in until it is completely closed.
After the initial bulk load, you can use the Import Media screen to add
cartridges without interrupting library operations, as long as I/E station
slots have been configured. For more information, see Importing Tape
Cartridges on page 117.
Moving Tape Cartridge
Once a cartridge has been imported into a library using an import/
export (I/E) station and assigned to a partition, it can be moved to a
tape drive for data access, to a storage slot for storage, or back to the I/
E station for removal from the library.
Details on using the library to move media include:
• If your library has zero I/E station slots, you cannot move cartridges
to and from the I/E station. See Configuring I/E Station Slots on
page 63.
• You can move a cartridge from one location to another within a
partition. You can also move unassigned cartridges from the I/E
station to available locations in the library. If you move an
Quantum Scalar i40 and Scalar i80 User’s Guide
121
Chapter 5: Performing Library Operations
Performing Media Operations
unassigned tape cartridge into a slot in a partition, it will become
assigned to that partition and will only be available for use by that
partition.
Note: If you move an unassigned tape cartridge directly from the
I/E station to a tape drive, you will not be able to “unload”
the tape drive later. The tape drive can only unload a
cartridge if that cartridge came from a storage slot in the
partition. You will need to perform a move operation to
move the tape drive to a storage slot or back to the I/E
station.
• Moving cartridges using the library Web client may necessitate
performing an inventory on your host system. You can also move
cartridges using your host application. See your host application
documentation for more information.
• If the partition is online, it will be taken offline before the move is
performed and brought back online after the move is complete. You
will be asked to confirm that you want to take the partition offline.
• You can select only the partitions to which you have been given
access.
• You can only move media within a partition at a time.
You can only perform move commands from the Web client.
Web Client
1 Select Operations > Media > Move.
2 If more than one partition exists, select the partition that contains
the cartridge you want to move and click Next.
The Move Media - Partition (Mode) screen appears, where
Partition is the name of the partition and Mode is the current mode
of the partition.
3 In the Select Media section, select the source cartridge you want to
move.
122
Quantum Scalar i40 and Scalar i80 User’s Guide
Chapter 5: Performing Library Operations
Performing Media Operations
Note: You can use the Filter by Barcode text box to filter the
available cartridge barcodes. Click the Help button next to
the Find button for more information about filtering
barcodes. In addition, if not all cartridges appear on the
screen, use the Page 1 of x arrows to view the additional
cartridges.
Note: Bold column headings in the table can be sorted. For
example, selecting the Location column heading will sort
by location coordinates.
4 In the Select Destination section, select a destination location for
the source cartridge.
5 Click Apply.
6 Click OK to confirm it is OK to take the partition offline.
Exporting Tape
Cartridges
The Export Media operation enables you to export data cartridges from
storage slots to empty I/E station slots for removal from the library.
Details on exporting cartridges include:
• Exporting cartridges using the library Web client may necessitate
performing an inventory on your host application. If the host
application has issued a prevent media removal command to the
library, you will not be able to use the library Web client to export
cartridges. In addition, you can export cartridges using your host
application. For more information, see your host application
documentation.
• If the partition is online, it will be taken offline before the export is
performed, and brought back online after the export is complete.
You will be asked to confirm that you want to take the partition
offline.
• If your library has zero I/E station slots, you cannot export
cartridges. See Configuring I/E Station Slots on page 63.
• If you have AutoClean enabled, you can also export cleaning
cartridges. For information, see Exporting Cleaning Cartridges on
page 133.
Quantum Scalar i40 and Scalar i80 User’s Guide
123
Chapter 5: Performing Library Operations
Performing Media Operations
• You can select only the partitions to which you have been given
access.
• You can only export cartridges if empty I/E station slots are available.
• You must have access to the library’s I/E station and the operator
panel to export cleaning cartridges.
Caution: Some host applications may fail import/export operations
when the I/E station contains cartridges that are assigned
to another partition. Move cartridges from the I/E station
as soon as possible to avoid possible conflicts with the
other partitions.
You can export cartridges using either the operator panel or the Web
client.
Operator Panel
1 Select Actions > I/E > Export Tape.
2 If more than one partition exists, use the Up and Down buttons
select the partition that contains the source cartridge you want to
export, then press Select.
3 A list of all the tape cartridges in storage slots in the selected
partition displays. Use the Up and Down buttons to select a tape
cartridge for export.
4 Press Export.
5 When the screen displays confirmation that the export completed,
press OK.
6 Once the operation completes, you may open the I/E station and
remove the cartridges (see Unlocking the I/E Station on page 113).
Web Client
1 Select Operations > Media > Export.
2 If more than one partition exists, select the partition that contains
the source cartridge you want to export.
3 Click Next.
124
Quantum Scalar i40 and Scalar i80 User’s Guide
Chapter 5: Performing Library Operations
Performing Media Operations
The Export Media - Partition (Mode) screen appears, where
Partition is the name of the partition and Mode is the current mode
(online or offline) of the partition.
4 Note the number of empty I/E station slots that appear in the
Empty I/E Station Slots field. The number of cartridges you can
export is limited to the number of empty I/E station slots. You
cannot export cartridges if all I/E station slots are full.
5 Select one or more cartridges for export.
Note: You can use the Filter by Barcode text box to filter the
available cartridge barcodes. Click the Help button next to
the Find button for more information about filtering
barcodes. In addition, if not all cartridges appear on the
screen, use the Page 1 of x arrows to view the additional
cartridges.
Note: Bold column headings in the table can be sorted. For
example, selecting the Location column heading will sort
by location coordinates.
6 Click Apply.
7 Click OK to confirm it is OK to take the partition offline.
8 Once the operation completes, you may open the I/E station and
remove the cartridges (see Unlocking the I/E Station on page 113).
Loading Tape Drives
The Load Drive operation enables you to load a cartridge from a storage
slot into a tape drive. The storage slot and tape drive must be assigned
to the same partition.
This topic focuses on using the library user interface, not the host
application, to load tape drives. Using the library to load tape drives
may necessitate performing an inventory with the host application. See
your host application documentation for more information.
Details on loading tape drives include:
• The storage slot and tape drive must be assigned to the same
partition.
• The tape cartridge must be compatible with the tape drive.
Quantum Scalar i40 and Scalar i80 User’s Guide
125
Chapter 5: Performing Library Operations
Performing Media Operations
• If the partition is online, it will be taken offline before the load
operation is performed and brought back online after the operation
is complete. You will be asked to confirm that you want to take the
partition offline.
• You can select only partitions to which you have been given access.
• Default tape drive locations are highlighted if the barcode field is
empty or the field is cleared.
You can only load tape drives from the Web client.
Web Client
1 Select Operations > Drive > Load.
2 If more than one partition exists, select the partition that contains
the tape drive you want to unload, and click Next.
3 The Load Drive - Partition (Partition) screen appears, where
Partition is the name of the partition and Partition is the current
mode of the partition (online or offline).
4 In the Select Media section, select the cartridge you want to load
into a tape drive.
Note: You can use the Filter by Barcode text box to filter the
available cartridge barcodes. Click the Help button next to
the Find button for more information about filtering
barcodes. In addition, if not all cartridges appear on the
screen, use the Page 1 of x arrows to view the additional
cartridges.
Note: Bold column headings in the table can be sorted. For
example, selecting the Location column heading will sort
by location coordinates.
5 In the Select Destination section, select the destination tape drive.
6 Click Apply.
7 Click OK to confirm it is OK to take the partition offline.
126
Quantum Scalar i40 and Scalar i80 User’s Guide
Chapter 5: Performing Library Operations
Performing Media Operations
Unloading Tape Drives
The Unload Drive operation allows you to unload a cartridge from a
tape drive to a storage slot. The storage slot and tape drive must be
assigned to the same partition.
This topic focuses on using the library user interface, not the host
application, to unload tape drives. Using the library to unload tape
drives may necessitate performing an inventory with the host
application. See your host application documentation for more
information.
Details about unloading tape drives include:
• The tape drive and storage slot must be assigned to the same
partition.
• Only drives with media loaded appear on the screen.
• You can select only partitions to which you have been given access.
• If the affected partition is online, it will be taken offline before the
unload operation is performed, and brought back online after it is
complete.
You can unload media from the operator panel or the Web client.
Operator Panel
1 Select Actions > Tape Drive > Unload.
2 Use the Up and Down buttons to select a tape drive to unload.
3 Press Unload.
Web Client
1 Select Operations > Drive > Unload.
2 If more than one partition exists, select the partition that contains
the tape drive you want to unload.
3 Click Next.
The Unload Drive - Partition (Mode) screen appears, where
Partition is the name of the partition and Mode is the current mode
of the partition. The screen contains a list of all tape drives in the
partition that are loaded with a cartridge.
4 Select the tape drive you want to unload.
Quantum Scalar i40 and Scalar i80 User’s Guide
127
Chapter 5: Performing Library Operations
Cleaning Tape Drives
Note: If not all drives appear on the screen, use the Page 1 of x
arrows to view the additional cartridges.
Note: Bold column headings in the table can be sorted. For
example, selecting the Location column heading will sort
by location coordinates.
5 Click Apply.
6 Click OK to confirm it is OK to take the partition offline.
The library attempts to unload the tape cartridge and move it into
the storage slot it was in when it was originally loaded into the tape
drive. If that storage slot is full, the library will attempt to move it
into another empty slot in the partition. If no empty slots exist, the
unload operation will fail. If this happens, you can try to perform a
move operation to move the cartridge from the tape drive to an I/E
station instead (see Moving Tape Cartridge on page 121), or free up
a storage slot and try the unload operation again.
Cleaning Tape Drives
Library tape drives require occasional cleaning. Cleaning cartridges are
used to remove accumulated residue from each tape drive’s read/write
head.
Cleaning slots are used exclusively to store cleaning cartridges.
Configuring one or more cleaning slots enables the library’s AutoClean
feature for all partitions in the library. When AutoClean is enabled, the
library is notified by a tape drive when cleaning is required, and the
library automatically cleans the tape drive using a cleaning cartridge. For
more information about the AutoClean feature, see About AutoClean
on page 130.
You can configure cleaning slots during the initial library configuration
or at any time in the future as long as there are licensed slots available
in the library. For instructions on how to configure cleaning slots, see
Configuring Cleaning Slots on page 61.
128
Quantum Scalar i40 and Scalar i80 User’s Guide
Chapter 5: Performing Library Operations
Cleaning Tape Drives
A maximum of four cleaning slots can be configured. Zero cleaning slots
are configured by default.
If no licensed slots are available, you must purchase additional slots or
modify or delete a partition to free existing slots. For information on
how to modify partitions, see Modifying Partitions on page 57. For
information on how to delete partitions, see Deleting Partitions on
page 57. Cleaning slots are not assigned to specific partitions. They are
shared by all partitions within a library.
You do not need to configure cleaning slots if you clean tape drives
manually. For more information about manual tape drive cleaning, see
Manually Cleaning Tape Drives on page 134.
You do not need to configure cleaning slots if you use host-based
cleaning. Cleaning slots are not visible to the host application. To use
host-based cleaning, configure zero cleaning slots in the library and set
up your host application to manage the cleaning process. See your host
application documentation for more information.
Quantum Scalar i40 and Scalar i80 User’s Guide
129
Chapter 5: Performing Library Operations
Cleaning Tape Drives
Valid Cleaning
Cartridges
Use universal cleaning cartridges to clean tape drives. If you attempt to
clean a tape drive using a non-cleaning cartridge, the library may show
that the operation completed, but the tape drive will not be cleaned,
and the library will issue a diagnostic ticket.
Universal cleaning cartridges are designated by labels that begin with
CLN or CLNU or end with C1, C2, C3, C4, or CU. Examples: CLN123,
CLNU123L1, CLN123C1, 123CU, 123C1.
About AutoClean
Configuring one or more dedicated cleaning slots automatically enables
AutoClean see Configuring Cleaning Slots on page 61). Cleaning
cartridges are stored in the designated cleaning slots. When a tape drive
needs cleaning, it notifies the library, and the library automatically
cleans the tape drive using a cleaning cartridge loaded in a cleaning
slot. Automatic cleaning is integrated into routine library operations.
The host application requests the library to move a tape cartridge. If the
tape drive performing the operation needs cleaning, the library will
perform the move operation and then automatically clean the tape drive
with a cleaning cartridge before informing the host application that the
move operation is complete.
When a cleaning cartridge has expired, a diagnostic ticket informs you
to export the expired tape from the library. If more cleaning cartridges
are present, the next cleaning cartridge will be used for the next
cleaning request. If no more cleaning cartridges are available, a
diagnostic ticket informs you that the tape drive needs cleaning and
that a cleaning tape needs to be imported (see Importing Cleaning
Cartridges on page 131 and Exporting Cleaning Cartridges on
page 133).
Enabling AutoClean
130
To enable AutoClean, you must configure at least one cleaning slot in
the library. For information on configuring cleaning slots, see
Configuring Cleaning Slots on page 61.
Quantum Scalar i40 and Scalar i80 User’s Guide
Chapter 5: Performing Library Operations
Cleaning Tape Drives
Importing Cleaning
Cartridges
When AutoClean is enabled (at least one cleaning slot has been
configured), you can import cleaning cartridges from the I/E station to
designated cleaning slots. For information on configuring cleaning slots,
see Configuring Cleaning Slots on page 61.
When manual cartridge assignment is enabled (the default setting), you
cannot import cartridges until you have assigned them to a specific
partition or to the system partition. Cleaning cartridges should always
be assigned to the system partition. Assigning cleaning cartridges to the
system partition makes them available to all partitions in the library. For
more information about manual cartridge assignment, see Manual
Cartridge Assignment on page 95.
You must have access to the library’s I/E station and the operator panel
to import cleaning cartridges.
Caution: Some host applications may fail import/export operations
when the I/E station contains cartridges that are assigned
to another partition. Move cartridges from the I/E station
as soon as possible to avoid possible conflicts with the
other partitions.
Note: If your library has zero I/E station slots, you cannot import or
export cleaning media. See Configuring I/E Station Slots on
page 63.
The process for importing cleaning cartridges includes the following
steps:
Inserting and Assigning Cartridges
1 Verify that there is an available, empty slot that is not assigned to a
partition. If needed, free up access by modifying a partition (see
Modifying Partitions on page 57).
2 Go to the front of the library and insert the cleaning cartridge(s)
into the I/E station.
3 Close the I/E station.
4 If manual cartridge assignment is enabled, the I/E Assign screen
appears on the operator panel. If manual cartridge assignment is
enabled, select the System partition.
Quantum Scalar i40 and Scalar i80 User’s Guide
131
Chapter 5: Performing Library Operations
Cleaning Tape Drives
5 Press Apply.
6 Continue using one of these options:
• Importing Cleaning Cartridges via the Operator Panel on
page 132
• Importing Cleaning Cartridges via the Web Client on page 132
Importing Cleaning Cartridges via the Operator Panel
1 Select Actions > I/E > Import Cleaning Tape.
A list of all the cleaning cartridges present in the I/E station displays.
2 Use the Up and Down buttons to select a cleaning cartridge to
import.
3 Press Import.
The library moves the cleaning cartridge to a previously configured
cleaning slot.
Importing Cleaning Cartridges via the Web Client
1 Select Operations > Cleaning Media > Import.
The Operations - Import Cleaning Media screen appears. This
screen contains a list of the cleaning cartridges in the I/E station. If
no cleaning slots are configured, a message appears stating that the
library cannot import cleaning cartridges.
2 Note the number of empty cleaning slots that appear in the Total
Empty Cleaning Slots field. The number of cleaning cartridges you
can import is limited to the number of empty cleaning slots.
3 Select one or more cleaning cartridges to import. An error appears if
the number of selected cleaning cartridges is more than the number
of empty cleaning slots.
Note: If not all cartridges appear on the screen, use the Page 1 of
x arrows to view the additional cartridges.
Note: Bold column headings in the table can be sorted. For
example, selecting the Location column heading will sort
by location coordinates.
132
Quantum Scalar i40 and Scalar i80 User’s Guide
Chapter 5: Performing Library Operations
Cleaning Tape Drives
Exporting Cleaning
Cartridges
When AutoClean is enabled (at least one cleaning slot has been
configured), you can export one or more cleaning cartridges from
dedicated cleaning slots to the I/E station for removal from the library.
You may need to export expired cleaning cartridges or free up cleaning
slots for data storage.
After exporting cleaning cartridges, you can reduce the number of
configured cleaning slots. The extra slots become available for use as
storage slots. For information on configuring cleaning slots, see
Configuring Cleaning Slots on page 61. For a description of AutoClean,
see About AutoClean on page 130.
Note: If your library has zero I/E station slots, you cannot import or
export cleaning media. See Configuring I/E Station Slots on
page 63.
Caution: Some host applications may fail import/export operations
when the I/E station contains cartridges that are assigned
to another partition. Move cartridges from the I/E station
as soon as possible to avoid possible conflicts with the
other partitions.
The number of cleaning cartridges you can export is limited to the
number of empty I/E station slots.
You can export cleaning cartridges from either the operator panel or the
Web client.
Operator Panel
1 Select Actions > I/E > Export Cleaning Tape.
2 Use the Up and Down buttons to select a cleaning cartridge to
export.
3 Press Export.
The library moves the selected cleaning cartridge to an I/E station
slot.
Quantum Scalar i40 and Scalar i80 User’s Guide
133
Chapter 5: Performing Library Operations
Cleaning Tape Drives
Web Client
1 Select Operations > Cleaning Media > Export.
The Operations - Export Cleaning Media screen appears. This
screen contains a list of the cleaning cartridges in the library. The
media barcode, location coordinates, media type, and cleaning
status (usable/expired) are displayed for each cartridge.
2 Note the number of empty I/E station slots that appear in the
Empty I/E Station Slots field on the right side of the screen. The
number of cleaning cartridges you can export is limited to the
number of empty I/E station slots.
3 Select one or more cleaning cartridges to export. An error appears if
the number of selected cleaning cartridges is more than the number
of empty cleaning slots.
Note: If not all cartridges appear on the screen, use the Page 1 of
x arrows to view the additional cartridges.
Note: Bold column headings in the table can be sorted. For
example, selecting the Location column heading will sort
by location coordinates.
4 Click Apply.
The library moves the selected cleaning cartridge to an I/E station
slot.
Manually Cleaning Tape
Drives
When a tape drive needs cleaning, it notifies the library. If the library’s
AutoClean feature is not enabled (no cleaning slots have been
configured), the library generates a diagnostic ticket informing you that
the tape drive needs cleaning.
Details about manually cleaning tape drives include:
• Be sure to unload the tape drive before attempting to clean it. If the
tape drive is loaded with a cartridge, it will not be available for this
operation.
• Be sure to use a valid cleaning cartridge. If you use a data cartridge,
for example, the operation may complete but the tape drive will not
134
Quantum Scalar i40 and Scalar i80 User’s Guide
Chapter 5: Performing Library Operations
Cleaning Tape Drives
have been cleaned, and the library will issue a diagnostic ticket. See
Valid Cleaning Cartridges on page 130.
• If you have at least one cleaning slot configured (see Configuring
Cleaning Slots on page 61), you use a cleaning tape from either a
configured cleaning slot or the topmost I/E station slot. If manual
cartridge assignment is enabled, assign the cleaning cartridge to the
System partition.
• On the Web client, you can choose to use a configured cleaning
slot or the topmost I/E station slot. If two or more cleaning slots
are configured and have cleaning tapes in them, the library
chooses which cleaning tape to use.
• On the operator panel, the library chooses which to use, in this
order: 1) topmost I/E station slot, and 2) one of the configured
cleaning slots.
• If you have zero cleaning slots configured, you must use a cleaning
tape in the topmost I/E station slot. If manual cartridge assignment
is enabled, assign the cleaning cartridge to the System partition.
• The associated partition is taken offline during the operation and
brought back online when the operation completes. You will be
asked to confirm that you want to take the partition offline.
• When the operation is complete, the library moves the cleaning
cartridge back to the I/E station slot or cleaning slot.
You can clean tape drives manually at any time using commands on the
operator panel or the Web client.
Operator Panel
1 Select Actions > Tape Drive > Manual Cleaning.
2 Use the Up and Down buttons to select a tape drive to clean.
3 Press Clean.
4 When the operation completes, press OK.
Web Client
1 Select Tools > Drive Operations.
2 Select Clean a tape drive and click Next.
Quantum Scalar i40 and Scalar i80 User’s Guide
135
Chapter 5: Performing Library Operations
Cleaning Tape Drives
3 If more than one partition exists, select the partition that contains
the tape drive you want to clean, and click Next.
The Clean Drive - Partition (Mode) screen appears, where Partition
is the name of the partition and Mode is the current mode (online/
offline) of the partition. This screen contains a list of tape drives
assigned to the partition.
4 If you have no cleaning slots configured, skip this step (you will use
the top I/E station slot as the source for your cleaning cartridge). If
you have at least one cleaning slot configured, you are asked to
Select Cleaning Source. Select which location to take the cleaning
cartridge from:
• Use the top I/E slot — Allows you to use a cleaning cartridge
from the topmost I/E station slot. Make sure to install a cleaning
cartridge in the topmost I/E station slot. If manual cartridge
assignment is enabled, assign the cleaning cartridge to the
System partition.
• Use configured cleaning tapes — Allows you to use a cleaning
cartridge from a configured cleaning slot. If two or more
cleaning slots are configured and have cleaning cartridges in
them, the library chooses which cleaning cartridge to use.
5 Select one or more tape drives to clean.
Note: If not all tape drives appear on the screen, use the Page 1
of x arrows to view the additional tape drives.
Note: Bold column headings in the table can be sorted. For
example, selecting the Location column heading will sort
by location coordinates.
6 Click Apply.
7 Click OK to confirm it is OK to take the partition offline.
The library moves the cleaning cartridge to the tape drive and cleans
it. When finished, it moves the cartridge back to the cleaning slot or
I/E station.
136
Quantum Scalar i40 and Scalar i80 User’s Guide
Chapter 5: Performing Library Operations
Taking a Tape Drive Online or Offline
Taking a Tape Drive Online or Offline
There are two tape drive modes: online and offline.
• Online — Tape drive is available for use. This is the normal operating
mode for the tape drive.
• Offline — Tape drive is offline to the host application and is not
available for cartridge load and unload (move) operations initiated
by the host application, but it remains available for Web client or
operator panel initiated move commands.
Note: If a cartridge is already in the tape drive when you take the
tape drive offline, then the host can still read and write
data on the tape.
Some operations require that the tape drive be offline. You can take a
tape drive offline rather than the entire library or partition so as to
minimize disruption of library operations.
This topic focuses on using the library user interface, not the host
application, to change the tape drive mode. Using the library to change
tape drive mode may affect the host application. See your host
application documentation for more information.
Details on changing the tape drive mode include:
• The online/offline state follows the tape drive slot, not the particular
tape drive (if the tape drive were to be moved to a different slot in
the library).
• You can select only tape drives in partitions to which you have been
given access.
• If you change the mode of a control path tape drive to offline, a
caution dialog appears asking you to confirm the mode change. For
information on control path tape drives, see Configuring Control
Paths on page 67.
You can change the tape drive mode from both the operator panel and
the Web client.
Quantum Scalar i40 and Scalar i80 User’s Guide
137
Chapter 5: Performing Library Operations
Taking a Tape Drive Online or Offline
Operator Panel
1 Select Actions > Tape Drive > Change Mode.
2 Use the Up and Down buttons to select a tape drive.
3 Press Modify.
4 Use the Up and Down buttons to select Online or Offline.
5 Press Apply.
The new mode is displayed.
6 Press Exit.
Web Client
1 Select Operations > Drive > Change Mode.
The Change Drive Mode screen appears. This screen lists each tape
drive’s partition, location, state, current mode, activity, and version.
Note: If more than four tape drives are installed in the library, use
the Page 1 of x arrows to view the additional tape drives.
2 Locate the tape drive that you want to take offline or bring online.
In the tape drive table under Mode, the Current column indicates
the current mode of the partition. The New column contains an
Online/Offline button. The button toggles between modes.
3 Toggle the Online/Offline button to the desired mode.
Note: If you change the mode of a control path tape drive to
offline, a caution dialog appears asking you to confirm the
mode change. For information on control path tape drives,
see Configuring Control Paths on page 67.
4 Click Apply.
138
Quantum Scalar i40 and Scalar i80 User’s Guide
Chapter 6
Getting Information About
the Library
There are a number of informational screens and reports you can use to
get information about the library.
This chapter covers:
• Viewing Library Information
• Viewing System Information
• Viewing the Library Configuration Report
• Saving and E-mailing the Library Configuration Record
• Viewing the Network Settings Report
• Viewing the Logged in Users Report
• Viewing the All Slots Report
• Viewing, Saving, and E-mailing Logs
• Viewing Library Information on the Operator Panel
• Using Advanced Reporting
• Viewing the Open Source License Agreement
• Viewing the Copyright Statement
Quantum Scalar i40 and Scalar i80 User’s Guide
139
Chapter 6: Getting Information About the Library
Viewing Library Information
Viewing Library Information
The About screen gives you a quick glance at the following library
settings:
• Library type (Scalar i40 or Scalar i80)
• Library serial number
• Copyright date
• Library firmware version
Web Client
Select Reports > About > Scalar i40/i80.
Viewing System Information
The System Information report contains information about the library.
On the operator panel, the report provides:
• Physical library — serial number, firmware version, board support
package (BSP) version, date and time of last firmware update
• Tape drives — online/offline mode, firmware version, model,
physical serial number, logical serial number
• Robot firmware versions — XY control, picker, camera
On the Web client, the report provides:
• Date & Time — Current date, time, and time zone settings.
• Physical Library — Host name, IPv4 address, serial number, firmware
version of the physical library, IPv6 addresses if IPv6 support is
enabled, board support package (BSP) level, and the date the
firmware was last updated.
140
Quantum Scalar i40 and Scalar i80 User’s Guide
Chapter 6: Getting Information About the Library
Viewing the Library Configuration Report
• Library Partitions — Name, serial number, control path, status, and
number of slots, media, and tape drives configured for each
partition.
• Drives — Location coordinates, vendor, model, type, serial number,
both physical (P-SN) and logical (L-SN), and firmware version.
Operator Panel
1 Select Reports > About Library.
2 Press Next to scroll through all the screens. Press Exit to exit at any
time.
Web Client
Select Reports > System Information.
Viewing the Library Configuration Report
The Library Configuration Report is a dynamic representation of the
various library resources, including tape drives, slots, partitions, and
library chassis. The report shows which slots are assigned to partitions, I/
E stations, configured as cleaning slots, or unassigned; whether the slot
contains a tape drive; and whether a tape drive is the control path for its
partition. You can view all slot location coordinates or media barcodes
at the click of a button, and get detailed information about a specific
resource by clicking on it.
You can view the report on the Web client.
Web Client
1 Select Reports > Library Configuration. The Library Configuration
Report appears in a new window.
2 Do any of the following:
• In the Legend, click a partition name to view information about
the partition.
Quantum Scalar i40 and Scalar i80 User’s Guide
141
Chapter 6: Getting Information About the Library
Viewing the Library Configuration Report
Note: Each partition is assigned a number and color. All slots
and tape drives that are assigned to a partition are
represented in the library map by the partition number
and color.
• In the library map, click a specific slot to view information about
the slot.
• In the library map, click a specific tape drive to view information
about the tape drive.
• In the library map, click the chassis number ( 0 ) below the tape
drives to view information about the chassis.
• Click Show Barcodes to display the barcodes for all imported
cartridges.
• By default, the Library Configuration Report displays the
coordinates for all licensed slots that are assigned to a partition.
To view all library slot coordinates, click Show ALL coordinates.
• To print the report, click the Print icon in the upper right of the
screen.
Clicking on a resource (tape drive, slot, partition, or chassis) brings up a
detailed window containing the following information:
• Tape Drives — The following information is provided for each
installed tape drive:
• Fibre Channel tape drive — interface type, tape drive type,
state (ready/not ready), status (online/offline), assigned partition
name, location coordinates, media barcode (if media is in slot;
“No_Label” means unreadable barcode), media type (if media is
in the slot), element address, vendor, model, form factor (half
height or full height), physical SN, logical SN, world wide node
name (WWNN), world wide port name (WWPN), loop ID,
requested topology, requested speed, actual topology, actual
speed, maximum speed, tape drive firmware level, and whether
the tape drive is the control path for its partition.
• Serial Attached SCSI (SAS) tape drive — interface type, tape
drive type, state (ready/not ready), mode (online/offline),
assigned partition name, location coordinates, media barcode
(if media is in slot; “No_Label” means unreadable barcode),
142
Quantum Scalar i40 and Scalar i80 User’s Guide
Chapter 6: Getting Information About the Library
Saving and E-mailing the Library Configuration Record
media type (if media is in slot), element address, vendor, model,
form factor (half height or full height), physical SN, logical SN,
SAS Address, tape drive firmware level, and whether the tape
drive is the control path for its partition.
• Slots — The following information is provided for each slot: type,
assigned partition name (storage and I/E station slots only), location
coordinates, cartridge barcode (storage and I/E station slots only;
“No_Label” means unreadable barcode), media type, element
address, get count, get retries, put count, and put retries. If the slot
is a cleaning slot, the cleaning status (usable/expired) and cleaning
count (the number of times the cartridge was used to clean a tape
drive) are also displayed.
• Partitions — The following information is provided for each
partition: name, status (online/offline), emulation type, barcode
policy, total number of tape drives, number of active tape drives,
total media, mounted media, total slots, full slots, total I/E station
slots, and full (occupied) I/E station slots.
• Chassis — The following information is provided for each chassis:
manufacturer, model, and serial number.
Saving and E-mailing the Library Configuration Record
The library configuration record is a text file that contains details about
the library’s configuration. The configuration record can be saved or
e-mailed to a specified e-mail address.Information in the library. The
configuration record includes:
• Product information — Vendor, model, product ID, product version
(library firmware version), and serial number
• License information — License keys installed and descriptions,
installation date, and expiration date
• Primary Network Information —Host Name, DHCP enabled/disabled,
IP address, netmask, gateway, Ethernet MAC, Ethernet link speed
(Mbits/s), and Ethernet link present
• Chassis information — Manufacturer, model, serial number, and
location
Quantum Scalar i40 and Scalar i80 User’s Guide
143
Chapter 6: Getting Information About the Library
Saving and E-mailing the Library Configuration Record
• Tape drive information:
• Fibre Channel (FC) tape drives — Partition name, number of
tape drives in partition, drive location, SCSI element address,
online status, active status, ready state, vendor, model, form
factor, serial number, firmware version, drive type, logical serial
number, interface type, World Wide (WWN), loop ID, topology,
actual topology, speed, and actual speed
• Serial Attached SCSI (SAS) tape drives — partition name,
number of tape drives in partition, drive location, SCSI element
address, interface type, drive type, ready state, online status,
barcode, media type, element address, vendor, model, physical
serial number, logical serial number, SAS Address, firmware
level, control path status
Note: The library configuration report lists the native device
identifier as reported by the tape drive. HP tape drives
always report SCSI as the native device identifier, even
if they are Fibre Channel or SAS. For example, if you
have HP L TO-4 Fibre Channel or SAS drives, they will be
listed in the report as HP LTO-4 SCSI drives.
• Partition information:
• Library information — Number of partitions, number of
cleaning slots, number of unassigned slots, number of import/
export (I/E) slots, I/E manual assignment setting
• Partition details — Partition name, number of slots, number of
tape drives, and number of cartridges
Saving the
Configuration Record
Administrative users can use the Tools - Save Configuration Record screen
on the Web client to e-mail the library configuration record.
You can only save the library configuration record from the Web client.
Web Client
1 Select Tools > Save Configuration Record.
2 Save the file to a known location on your computer.
144
Quantum Scalar i40 and Scalar i80 User’s Guide
Chapter 6: Getting Information About the Library
Viewing the Network Settings Report
E-mailing the
Configuration Record
Administrative users can use the Tools - E-mail Configuration Record
screen on the Web client to e-mail the library configuration record.
Note: Do not enter more than one e-mail address in the E-mail
Address text box on the Tools - E-mail Configuration Record
screen. If you need to send the configuration record to multiple
e-mail addresses, repeat the procedure for each e-mail address.
Before you can e-mail the configuration record, the library e-mail
account must be configured. For information on setting up the e-mail
account, see Configuring the Library E-Mail Account on page 74.
You can only e-mail the library configuration record from the Web
client.
Web Client
1 Select Tools > E-mail Configuration Record.
2 Type an e-mail address into the E-mail Address text box.
3 Click Apply.
Viewing the Network Settings Report
The Network Settings report provides information on the following
library settings:
• Network — Host name, primary DNS, and alternate DNS
• IPv4 Settings — DHCP enabled/disabled, IP address, gateway, and
netmask
• IPv6 Settings (if IPv6 is enabled) — DHCP enabled/disabled,
stateless configuration enabled/disabled, static configuration
enabled/disabled, net prefix, gateway, and all IPv6 addresses
• SSL — SSL, port, and cipher
• SMI-S — Access (enabled/disabled) and state (enabled/disabled)
Quantum Scalar i40 and Scalar i80 User’s Guide
145
Chapter 6: Getting Information About the Library
Viewing the Logged in Users Report
• SNMP — Enabled/disabled status for Access, V1, V2, V3, and
encryption; algorithm; and port
• SNMP-Traps — IP addresses and ports
Web Client
Select Reports > Network Settings.
Viewing the Logged in Users Report
The Logged In Users report contains information about the users that
are currently logged in to the library.
The report contains the following information about each user:
• User Name — User name of logged in user
• Privilege — Privilege level of the logged in user (Admin for
administrative user, User for user)
• Login Date/Time — Date and time the user logged into the library
• Last Activity Date/Time — Date and time when the user last logged
into the library
• Login Location — IP address or host name of the system used to
access the library
• User Interface — User interface used to access the system (Web
Client or Operator Panel)
Web Client
Select Reports > Logged in Users. The report appears in a new
window.
146
Quantum Scalar i40 and Scalar i80 User’s Guide
Chapter 6: Getting Information About the Library
Viewing the All Slots Report
Viewing the All Slots Report
The All Slots report contains information on all storage, import/export (I/
E) station, and tape drive slots that are currently assigned to one or
more partitions.
The report contains the following information about each slot:
• Slot Type — I/E station, storage, cleaning, or tape drive slot.
• Barcode — Barcode number of the cartridge installed in the slot. No
barcode number means the slot is empty. “No_Label” means the
barcode is unreadable.
• Partition — Partition that owns the slot (I/E station slots are shared
by all partitions).
• Location — Location coordinates of the slot.
• Element Address — Element address of the slot.
• Get Count — The number of times the picker successfully removed
a tape from the slot.
• Get Retries — The number of times the picker had to perform a
recovery operation to remove a tape from the slot.
• Put Count — The number of times the picker successfully placed a
tape into the slot.
• Put Retries — The number of times the picker had to perform a
recovery operation to place a tape into the slot.
Web Client
Select Reports > All Slots.
Quantum Scalar i40 and Scalar i80 User’s Guide
147
Chapter 6: Getting Information About the Library
Viewing, Saving, and E-mailing Logs
Viewing, Saving, and E-mailing Logs
You can view, save, and e-mail several logs containing information
about the library:
• Cleaning Log
• Diagnostic Tickets Log
• Tape Drive Log
Cleaning Log
The Cleaning Log shows all cleanings that have been performed in the
library. When the log reaches its maximum size, the oldest information
is replaced as new information is added.
The log provides the following information: Date Time (date and time);
Barcode (barcode of the cleaning cartridge); Tape (location coordinates
of the cleaning cartridge); Drive (location coordinates of the tape drive
that was cleaned); Status (pass/fail); Return Code (service use only),
Cleaning Type (Manual, Auto, MoveMedium), Expired (“Invalid”if the
tape is expired or a data tape was improperly used to clean; “-” if not
applicable); Usage Count (“N/A” if the cleaning did not complete);
Reserved.
Web Client
1 Select Reports > Log Viewer.
2 Select Cleaning Log and press Next.
3 The report appears in a new window for viewing.
4 You can save or e-mail the report following the on-screen
instructions.
Note: If you want to e-mail the log file to a recipient, type the
recipient’s name in the text box next to the E-mail button,
and then click the E-mail button. You must have your email notification configured in order to e-mail a log file.
See Configuring the Library E-Mail Account on page 74 for
more information.
148
Quantum Scalar i40 and Scalar i80 User’s Guide
Chapter 6: Getting Information About the Library
Viewing, Saving, and E-mailing Logs
Diagnostic Tickets Log
The Diagnostic Tickets Log records all diagnostic tickets issued by the
library.
The log provides the following information: Num (ticket number to
provide a consecutive listing of tickets in the order issued; the first ticket
issued is assigned number 1, the second ticket 2, and so on); State
(open, unopened, closed); Priority (low, high, urgent); Created (date the
ticket was first issued); Last Updated (date the ticket was last issued);
Cause Code (the number assigned to the fault and which appears in the
full ticket name; for example, DT031- I/E Unlock Warning has cause code
31); Description; and Details.
Web Client
1 Select Reports > Log Viewer.
2 Select Diagnostic Tickets Log and press Next.
3 The report appears in a new window for viewing.
4 You can save or e-mail the report following the on-screen
instructions.
Note: If you want to e-mail the log file to a recipient, type the
recipient’s name in the text box next to the E-mail button,
and then click the E-mail button. You must have your email notification configured in order to e-mail a log file.
See Configuring the Library E-Mail Account on page 74 for
more information.
Tape Drive Log
The library allows you to retrieve tape drive logs using the Web client.
Tape drive log information can be used to help troubleshoot the library,
the tape drive sled, and tape drive issues.
Since the log retrieval process can take up to 30 minutes, the tape drive
and associated partition are automatically taken offline during the
operation and brought back online when the operation completes. You
will be asked to confirm that you want to take the tape drive and
partition offline.
Tape drive log files adhere to the following naming convention:
UDS_ID_SN.DMP, where ID identifies the tape drive coordinate location
within the library and SN identifies the tape drive serial number.
Quantum Scalar i40 and Scalar i80 User’s Guide
149
Chapter 6: Getting Information About the Library
Viewing, Saving, and E-mailing Logs
Web Client
1 Select Tools > Drive Operations.
2 Select Retrieve tape drive log and click Next.
3 If your library contains multiple tape drive interface types, select the
interface type of the tape drive from which you want to retrieve logs
and click Next.
4 The Retrieve Drive Log screen appears. This screen lists the available
tape drives.
5 Select a tape drive from which you want to retrieve logs and click
Next.
Note: If there is more than one page of tape drives, use the Page
1 of x arrows to view the additional tape drives.
Note: Bold column headings in the table can be sorted. For
example, selecting the Location column heading will sort
by location coordinates.
6 Click Apply.
A dialog appears asking you to confirm you want to take the
partition offline.
7 Click OK.
The Progress Window appears, displaying information on the
action, elapsed time, and status of the operation.
8 If the Progress Window displays a “completed” message, you can
close the window and save the file to your computer.
9 If the screen displays a “failure” message, the tape drive log was not
successfully retrieved. Follow the instructions listed in the Progress
Window to resolve any issues that occurred during the operation. If
a complete tape drive log could not be retrieved, you may still be
able to access a partial log. If so, a note will appear stating, “A
complete tape drive log could not be retrieved, but a partial log is
available and may be saved for further analysis once the progress
window is closed.”
150
Quantum Scalar i40 and Scalar i80 User’s Guide
Chapter 6: Getting Information About the Library
Viewing Library Information on the Operator Panel
Viewing Library Information on the Operator Panel
The operator panel provides several brief reports about the library.
Viewing Partition
Information
The operator panel provides an overview of partition information. For
each partition, you can see the following information:
• Online/offline mode
• Control path tape drive location coordinates
• Number of tape drives
• Number of storage slots
• Number of I/E station slots containing a tape cartridge assigned to
the partition
Operator Panel
1 Select Reports > Partitions.
2 Use the Up and Down buttons to select a partition and click Next.
Viewing Network
Settings
A short report on the operator panel displays the library’s network
settings: library name, IP address, and network configuration.
Operator Panel
1 Select Reports > Network Settings.
2 If IPv6 is enabled, the IPv4 information is shown on the first screen.
Press Next to see the IPv6 address information on the next two or
more screens. Although the library can have unlimited IPv6 address,
a maximum of three are shown in this report.
Quantum Scalar i40 and Scalar i80 User’s Guide
151
Chapter 6: Getting Information About the Library
Using Advanced Reporting
Viewing the Date, Time,
and Time Zone
The operator panel displays the current date, time and time zone
configured on the library.
Operator Panel
Select Reports > Date/Time.
Viewing Licenses
The operator panel displays a list of all the licenses currently installed on
the library: number of COD slots licensed, number of unlicensed slots,
and whether Advanced Reporting is licensed.
Operator Panel
Select Reports > Licenses.
Using Advanced Reporting
The Advanced Reporting feature is only available if you have Advanced
Reporting licensed on the library. See Licensable Features on page 11 for
more information.
Advanced Reporting provides the following reports that you can
configure for viewing and analysis:
• Drive Resource Utilization Report — Provides tape drive usage
information, showing you which tape drives are working at
optimum capacity and which are under-utilized. This can help you
allocate your tape drive resources properly.
• Media Integrity Analysis Report — Provides Tape Alert count for
various combinations of tape drives, tape cartridges, and Tape Alert
flags. This can help you determine if a problem is due to a specific
tape drive or tape cartridge.
152
Quantum Scalar i40 and Scalar i80 User’s Guide
Chapter 6: Getting Information About the Library
Using Advanced Reporting
In addition to configuring and viewing the reports, you can also:
• Save and reuse report configurations as templates.
• Save or e-mail the report data.
• Delete the data in the Advanced Reporting log files.
Required Firmware
To use all the features of Advanced Reporting, you should install the
latest released version of library firmware on your library. For
information on installing library firmware, see Upgrading Library
Firmware on page 161.
Using the Reports and
Understanding the
Data
Report data is collected and displayed in a specific manner. The
following notes will help you interpret the reports.
• The data for these reports is collected in log files. When the log files
reach their maximum size, the oldest information is deleted as new
information is added. This may affect how much historical data you
can access.
• The on-screen report contains a chart and a data table. When the
log files are large, it would take an excessively long time to load all
the historical data into the data table. For this reason, the table only
contains a maximum of 1000 rows of data (beginning with the
most recent) even if the log file contains more records. (The chart
displays information for the entire range.) To view all of the data,
you need to save or e-mail the data file. See Saving and E-mailing
Advanced Reporting Data on page 157.
• The reports are built according to data in the log files, not your
current library configuration. For this reason, your library may
contain tape drives or cartridges that do not show up in the report.
Similarly, the report may contain tape drives and cartridges that no
longer reside in the library.
• Information about a tape drive, cartridge, or operation is not
recorded in the Drive Resource Utilization log file until after a tape
cartridge has been mounted (loaded) and unmounted (unloaded)
from the tape drive.
• To see the exact values of each item in the displayed chart, move
your mouse so that it “hovers” over the item you wish to see. An
information bubble appears with the values listed in it. If you click
Quantum Scalar i40 and Scalar i80 User’s Guide
153
Chapter 6: Getting Information About the Library
Using Advanced Reporting
on a bar, point, or slice, the information bubble locks in place and
the hovering feature turns off until you reload the chart. The
hovering feature does not work when the value equals zero.
• Values of zero do not appear in pie charts.
Loading and Reloading
Advanced Reporting
Data
When you first open an Advanced Report configuration screen, the
system loads all the data from the library log file for that report to the
Internet browser in preparation for creating your reports. If there is a lot
of information in the log file, this may take several minutes.
The data that is loaded in the Internet browser remains unchanged until
you log out of your library session or reload the data. If new data is
added to the log file during your session (for example, a Tape Alert
occurs), it will not appear in the on-screen report until you either log out
of the library and log on again, or reload the data. To reload the data
without logging out, click the Reload button on the report
configuration page (see Figure 30 on page 159). This reloads all the
data for that report, which may again take several minutes.
You can see how many records were loaded from the log file for this
report by looking at the Report Data section of the report configuration
page. A note says “XX records read,” where XX is the number of records
(see Figure 30 on page 159).
Configuring the Drive
Resource Utilization
Report
1 From the library menu bar, select Reports > Advanced Reporting >
Drive Resource Utilization.
The Drive Resource Utilization Report configuration page opens.
This may take several minutes.
2 Configure the report by specifying the following:
• Date Range — Specifies the range of time covered by the report.
Choose Last 7 days; Last 4 weeks (default); Last 3 months; or All
History (as far back as there is data in the log file).
• Attribute — Specifies which value is included in the report.
Select one of the following:
• Data Written/Read (default) — The amount of data written
to and read from each tape drive, shown separately in the
chart.
154
Quantum Scalar i40 and Scalar i80 User’s Guide
Chapter 6: Getting Information About the Library
Using Advanced Reporting
• Total Read and Write — The combined total amount of data
written to and read from each tape drive.
• Media Mount Count — The number of tape cartridge
mounts.
• Media Mount Time — The total amount of time media
spent in the selected drive(s).
• Media Motion Time — The total amount of time media
spent in motion while in the tape drive (writing, reading,
rewinding, etc.).
• Chart — How the data is displayed in the chart. Choose Area,
Bar (default), Line, or Pie.
• Type — The chart type. Select one of the following:
• Rollup (default) — Displays the Grouping on the x-axis and
the Attribute amount on the Y-axis.
• Trend — Shows how the Attribute amount changes over
time for the selected Grouping.
• Grouping — Specifies which tape drive(s) or partition(s) to
include in the report. Select one of the following:
• All Drives by Coordinate (default) — Presents the sum total
of the selected attribute for all tape drives according to their
location in the library. If more than one tape drive resided in
that location during the selected range, then the attribute
values for all the tape drives that resided in that location are
combined in the chart.
• All Drives by Physical SN — Presents the sum total of the
selected attribute for all drives according to the physical
tape drive serial number.
• All Partitions — Presents a comparison of all drives grouped
by partition in the physical library.
• Selected Drive by Coordinate — The report chart is based on
an individual tape drive location in the library. If more than
one tape drive resided in that location during the selected
range, then the attribute values for all the tape drives that
resided in that location are combined in the chart.
• Selected Drive by Physical SN — The report chart is based on
an individual tape drive identified by its physical drive serial
number.
Quantum Scalar i40 and Scalar i80 User’s Guide
155
Chapter 6: Getting Information About the Library
Using Advanced Reporting
• Selected Partition — The report chart is based on an
individual partition in the physical library.
Note: See Installed Tape Drive Location Coordinates on
page 8 for an explanation of the location coordinates.
3 Click Next.
The report is generated and appears on the screen.
Configuring the Media
Integrity Analysis
Report
1 From the library menu bar, select Reports > Advanced Reporting >
Media Integrity Analysis.
The Media Integrity Analysis Report configuration page opens. This
may take several minutes.
2 Configure the report by specifying the following:
• Date Range — Specifies the range of time covered by the report.
Choose Last 7 days; Last 4 weeks (default); Last 3 months; or All
History (as far back as there is data in the log file).
• Attributes— Specifies which values are included in the report,
and how they are combined. Select in any combination,
including all (default) and none. If you select no attributes, the
chart displays the Tape Alert count for the selected Grouping.
• Cartridge Barcode — All relevant tape cartridges.
• Drive Physical SN — All relevant tape drives.
• Tape Alert — The Tape Alert flags that were issued. For a
description of all Tape Alert flags, see Appendix B, TapeAlert
Flag Descriptions.
• Chart — How the data is displayed in the chart. Choose Area,
Bar (default), Line, or Pie.
• Type — The chart type. Select one of the following:
• Rollup (default) — Displays the number of Tape Alerts for
the combination of Grouping and Attributes you selected.
• Trend — Shows the occurrence of Tape Alerts over time.
• Grouping— Specifies which drive(s) or tape cartridge(s) on
which to base the report. Choose one of the following:
156
Quantum Scalar i40 and Scalar i80 User’s Guide
Chapter 6: Getting Information About the Library
Using Advanced Reporting
• All (default) — All tape drives and tape cartridges for which
a Tape Alert was issued during the specified range.
• Selected Drive by Physical SN — An individual tape drive.
Only tape drives which issued a Tape Alert during the
specified range appear in the report.
• Selected Cartridge by Barcode — An individual tape
cartridge. Only tape cartridges that were associated with a
Tape Alert during the specified range appear in the report.
• Sorting — Specifies how the data will be sorted. Choose
Alphabetical, Count, or Last Occurrence (default).
3 Click Next.
The report is generated and appears on the screen.
Saving and E-mailing
Advanced Reporting
Data
You cannot save the report as it appears on the screen, but you can save
or e-mail the report data as a comma-separated values (.csv) file. You
can then import the .csv data into a spreadsheet program and
manipulate it to create your own reports for analysis. The .csv file
contains all of the data in the log file that falls within the date range
you specify.
1 Generate a report as described in the sections above.
2 Scroll down to the bottom of the report viewing screen to a box
titled Retrieve the Report Data File. See Figure 29.
3 To save the report data as a .csv file, click Save.
4 To e-mail the report data as a .csv file, type the name of a recipient
in the empty field next to the E-mail button, then click E-mail.
Figure 29 Saving and Emailing the Report Data
Quantum Scalar i40 and Scalar i80 User’s Guide
157
Chapter 6: Getting Information About the Library
Using Advanced Reporting
Creating and Using a
Template
If you want to use the same configuration repeatedly, you can save it as
a template. You can save up to 20 templates for each type of advanced
report. See Figure 30 on page 159.
1 From the report configuration page, make the selections you want.
2 In the Report Templates box at the bottom of the screen, type a
name for the template in the empty field next to the Save button.
The name can have a maximum of 15 characters. You can use only
lowercase letters, numbers, and the underscore character (_) in
template names.
3 Click Save. The report appears in the drop-down menu next to the
Load button.
4 To use a saved template, select the template from the drop-down
list and click Load.
5 To delete a template, select the template from the drop-down list
and click Delete.
Deleting Advanced
Reporting Data
In some circumstances, you may wish to delete the data contained in
the library log files used to build the advanced reports. To do this, click
the Delete button in the Report Data section of either report
configuration page. This deletes the data for both the Drive Resource
Utilization report and the Media Integrity Analysis report. See Figure 30
on page 159.
Caution: Once you delete the data in the log files, you cannot get it
back. The Reload button does NOT retrieve deleted data! It
is recommended that you save all the data for both the
Drive Resource Utilization report and the Media Integrity
Analysis report before deleting the data. See Saving and Emailing Advanced Reporting Data on page 157.
158
Quantum Scalar i40 and Scalar i80 User’s Guide
Chapter 6: Getting Information About the Library
Viewing the Open Source License Agreement
Figure 30 Template and Report
Data Functions
1
Loads the selected template.
2
Template drop-down list.
3
Deletes the selected template.
4
Saves a report configuration as a template.
5
Type name of new report here.
6
Reloads the data from the library log file to the Internet browser.
7
Lists the number of records currently loaded in the Internet browser for this report.
8
Deletes all the Advanced Reporting data.
Viewing the Open Source License Agreement
A number of open source packages were used to create the library
firmware. You can view the open source license agreement on the Web
client.
Web Client
Select Reports > About > Open Source Licenses.
Quantum Scalar i40 and Scalar i80 User’s Guide
159
Chapter 6: Getting Information About the Library
Viewing the Copyright Statement
Viewing the Copyright Statement
Operator Panel
Select Reports > Copyright Statement.
Web Client
Available in the Web client online help. To view the help, click the Help
icon in the upper right corner of the screen.
160
Quantum Scalar i40 and Scalar i80 User’s Guide
Chapter 7
Updating Firmware
This chapter covers updating library and tape drive firmware, including:
• Upgrading Library Firmware
• Updating and Autoleveling Tape Drive Firmware
• About Tape Drive Firmware Autoleveling
• Uploading Tape Drive Firmware Used in Autoleveling
• Deleting Tape Drive Firmware Used in Autoleveling
• Initiating Tape Drive Firmware Autoleveling
Upgrading Library Firmware
The library firmware update operation allows you to update library
firmware using the Web client. With the library firmware update
operation, you can upgrade firmware to a later version or downgrade
firmware to an earlier version. Upgrading library firmware can take up
to 30 minutes.
The latest firmware and installation instructions are available at: http://
www.quantum.com/ServiceandSupport/
SoftwareandDocumentationDownloads/SI40/Index.aspx
Quantum Scalar i40 and Scalar i80 User’s Guide
161
Chapter 7: Updating Firmware
Upgrading Library Firmware
Navigate to the appropriate firmware version and download the file to
your computer hard drive. Library firmware comes bundled with tape
drive firmware, firmware update instructions, and release notes. Verify
with the release notes or technical support that you are updating the
library with the correct version of firmware. For technical support
contact information, see Getting More Information or Help on
page xxiv.
Before updating library firmware, it is recommended to capture the
library snapshot. The library snapshot file saves status information and
trace logs for library components. This information helps technical
support troubleshoot issues that might occur with the firmware
upgrade. For more information, see Capturing the Library Snapshot on
page 247. In addition, it is recommended to save the library
configuration before upgrading the library (in case the upgrade fails)
and again after the upgrade successfully completes. For more
information, see Saving the Library Configuration on page 101.
When you upgrade or downgrade library firmware, the library also
autolevels tape drive firmware, if needed. Autoleveling will not occur if
a tape drive has a cartridge loaded in it. Make sure to unload all tape
drives before updating library firmware. See Updating and Autoleveling
Tape Drive Firmware on page 164.
The library automatically restarts after the firmware update is complete.
Before logging into the library, clear the Web browser cache. See your
Web browser's documentation for instructions on how to clear the
cache.
Caution: After the update process starts, you must wait until it
completes. Do not attempt to interrupt the process in any
way, and do not power cycle the library. Loss of data or
library operability could occur.
Note: If you downgrade library firmware to an earlier version using
the firmware upgrade process, library configuration settings
will be reset to the factory defaults (see Resetting Factory
Defaults on page 261). You must manually reconfigure your
library’s settings.
You can only update firmware from the Web client.
162
Quantum Scalar i40 and Scalar i80 User’s Guide
Chapter 7: Updating Firmware
Upgrading Library Firmware
Web Client
1 Unload tape cartridges from all tape drives installed in the library.
2 Capture a library snapshot (see Capturing the Library Snapshot on
page 247).
3 Save the library configuration (see Saving the Library Configuration
on page 101).
4 Library firmware is available at: http://www.quantum.com/
ServiceandSupport/SoftwareandDocumentationDownloads/SI40/
Index.aspx. Navigate to the appropriate firmware version and
download the file to a known location on your computer.
5 Verify with the release notes or technical support that you are
updating the library with the correct version of firmware.
6 From the Web client, select Tools > Update Library Firmware.
The Tools - Update Library Firmware screen appears.
7 Click Browse.
8 Locate the library firmware file and click Open.
9 Click Apply.
A confirmation dialog box appears asking you to confirm that you
want to update the library firmware and restart the library.
10 Click OK to continue with the library firmware update operation.
The Progress Window appears. The Progress Window contains
information on the action, elapsed time, and status of the
requested operation. The Progress Window closes automatically and
the library shuts down and then reboots. You will need to log back
into the library once it has finished rebooting. Wait for the library to
completely reboot before logging back in to the library. The reboot
takes several minutes.
If Failure appears in the Progress Window, the operation failed.
Follow the instructions listed in the Progress Window to resolve any
issues that occurred during the operation. The library will
automatically reload the previous version of library firmware.
11 Clear the Web browser cache before logging in to the library. See
your Web browser’s documentation for instructions on how to clear
the cache.
12 Log in to the library.
Quantum Scalar i40 and Scalar i80 User’s Guide
163
Chapter 7: Updating Firmware
Updating and Autoleveling Tape Drive Firmware
Note: If the library is still in the process of restarting, the Web
browser may display an error page or message when you
try to access or log in to the Web client.
13 Verify the library firmware installed successfully by viewing the
About Scalar i40/i80 report (on the Web client, select Reports >
About > Scalar i40/i80).
14 Save the library configuration again (see Saving the Library
Configuration on page 101).
Updating and Autoleveling Tape Drive Firmware
The library firmware contains baseline tape drive firmware image that
Quantum has validated. Tape drive firmware is installed at the same
time as library firmware. (You can also install upgrades or patches
separately, which is described in the sections below.)
In addition, the library is equipped with a tape drive autoleveling
feature, that automatically updates firmware on all installed tape drives,
keeping all tape drives of the same type at the same firmware level.
About Tape Drive
Firmware Autoleveling
Tape drive firmware is verified on these occasions:
• whenever a tape drive is added, replaced, or power cycled, or
• when the library is rebooted.
If the firmware installed on the tape drive does not match the tape drive
firmware installed on the library, the tape drive firmware is autoleveled.
Tape drive firmware is also autoleveled when library firmware is updated
(see Upgrading Library Firmware on page 161).
Details about Autoleveling include:
• The autoleveling feature is always enabled.
• The library firmware contains baseline tape drive firmware image
that Quantum has validated. You cannot delete any of the baseline
tape drive firmware images. You may, however, upload separate
164
Quantum Scalar i40 and Scalar i80 User’s Guide
Chapter 7: Updating Firmware
Updating and Autoleveling Tape Drive Firmware
tape drive firmware images to use instead (such as a patch or
upgrade provided by Quantum; see Uploading Tape Drive Firmware
Used in Autoleveling on page 166). If you upload a patch, the patch
will display instead of the baseline image, although the baseline
image will remain, hidden. Tape drives will be autoleveled to the
patch. If you delete the patch, then baseline image will reappear on
the screen and the tape drives will autolevel to the baseline image
(see Deleting Tape Drive Firmware Used in Autoleveling on
page 168).
• If you upgrade library firmware, the baseline tape drive firmware for
that version of library firmware will overwrite the existing baseline
tape drive firmware images. If you did not previously upload a
patch, all the tape drives will be autoleveled to the new baseline. If
you previously uploaded a patch, the patch remains and tape drive
firmware will remain autoleveled to the patch. You will need to
delete the patch in order to have the tape drives autoleveled to the
new baseline (see Deleting Tape Drive Firmware Used in Autoleveling
on page 168).
• If you downgrade library firmware, the baseline tape drive firmware
for that version of library firmware will overwrite the existing
baseline tape drive firmware images as well as any patches you may
have uploaded prior to the downgrade, and all tape drives will be
autoleveled to the new baseline. If you want to continue to use the
patch or a different version of tape drive firmware, you will need to
upload it again. Contact Technical Support if you need help
obtaining firmware (see Getting More Information or Help on
page xxiv).
• Autoleveling will not occur if a tape drive has a cartridge loaded in
it. Make sure to unload tape cartridges from all tape drives before
loading new firmware for autoleveling, or before upgrading library
firmware.
• Autoleveling occurs after the robot completes its initialization. This
means it is possible for a host to see the medium changer initially,
but when the autoleveling starts on the drives it is likely the medium
changer will disappear again. Wait until autoleveling completes
before starting backup applications. (The operator panel displays a
message indicating autoleveling is taking place. Wait until this
message disappears before starting backup applications.)
• If you reset factory defaults, any tape drive firmware images you
loaded will be deleted (see Resetting Factory Defaults on page 261).
Quantum Scalar i40 and Scalar i80 User’s Guide
165
Chapter 7: Updating Firmware
Updating and Autoleveling Tape Drive Firmware
Uploading Tape Drive
Firmware Used in
Autoleveling
Tape drive firmware is included with the library firmware bundle and is
automatically autoleveled on your tape drives when you install library
firmware (see About Tape Drive Firmware Autoleveling on page 164). In
some cases, a tape drive firmware upgrade or patch may be available
outside of the normal library firmware release cycle. In this case, the
tape drive firmware will be available as a separate download from the
Quantum Web site at: http://www.quantum.com/ServiceandSupport/
SoftwareandDocumentationDownloads/SI40/Index.aspx.
Caution: Only install tape drive firmware image files that have been
tested and qualified by Quantum.
If you want to install tape drive firmware from an earlier version that is
no longer available on the Quantum Web site, contact Quantum
Support.
It is not necessary to delete an old version of firmware before uploading
a new version. The new version overwrites the old version.
Note: Uploading tape drive firmware for autoleveling only uploads
the firmware to the library in preparation for autoleveling. It
does not initiate autoleveling or install firmware on the tape
drive. To initiate autoleveling, see Initiating Tape Drive Firmware
Autoleveling on page 169.
You can only upload tape drive firmware on the Web client.
Web Client
1 Tape drive firmware (if released separately) will be available at:
http://www.quantum.com/ServiceandSupport/
SoftwareandDocumentationDownloads/SI40/Index.aspx. Navigate
to the appropriate firmware version and download the file to a
known location on your computer.
2 Verify with the release notes or Quantum Support that you are
updating the library with the correct version of firmware. For
technical support contact information, see Getting More
Information or Help on page xxiv.
3 Select Tools > Drive Operations.
The Tools - Drive Operations screen appears.
166
Quantum Scalar i40 and Scalar i80 User’s Guide
Chapter 7: Updating Firmware
Updating and Autoleveling Tape Drive Firmware
4 Select Upload/remove tape drive firmware for autoleveling and
click Next.
The Tape Drive Firmware Autolevel screen appears. The screen lists
the vendor, type, interface type, form factor, and firmware revision
number for all tape drives that the library supports, whether or not
they are installed in the library.
5 Click Upload.
The Upload Tape Drive Images screen appears. The screen lists the
vendor, type, form factor, and interface type of all tape drives
installed in the library. You can only upload tape drive images for
the listed tape drives.
6 Click Browse.
7 Locate the tape drive firmware image file and click Open.
8 Click Apply. The Progress Window appears. The Progress Window
contains information on the action, elapsed time, and status of the
requested operation. Do one of the following:
• If Complete appears in the Progress Window, the tape drive
firmware upload completed. Check to see if a diagnostic ticket
was generated for this operation. For information on diagnostic
tickets, see About Diagnostic Tickets on page 244. If no
diagnostic ticket(s) exists, continue to next step.
• If Failure appears in the Progress Window, the tape drive
firmware update was not successful. Follow the instructions
listed in the Progress Window to resolve any issues that
occurred during the operation.
9 To initiate autoleveling, see Initiating Tape Drive Firmware
Autoleveling on page 169.
Quantum Scalar i40 and Scalar i80 User’s Guide
167
Chapter 7: Updating Firmware
Updating and Autoleveling Tape Drive Firmware
Deleting Tape Drive
Firmware Used in
Autoleveling
If you installed a tape drive firmware image to override the library's
baseline image used for autoleveling, you can delete it. You cannot
delete the library's baseline tape drive firmware images. For more
information, see About Tape Drive Firmware Autoleveling on page 164.
Note: Deleting tape drive firmware for autoleveling only deletes the
firmware and makes the library's baseline tape drive firmware
available for autoleveling. It does not initiate autoleveling or
install firmware on the tape drives. To initiate autoleveling, see
Initiating Tape Drive Firmware Autoleveling on page 169.
You can only delete tape drive firmware on the Web client.
Web Client
1 Select Tools > Drive Operations.
The Tools - Drive Operations screen appears.
2 Select Upload/remove tape drive firmware for autoleveling and
click Next.
The Tape Drive Firmware Autolevel screen appears. The screen lists
the vendor, type, interface type, form factor, and firmware revision
number for all tape drives that the library supports, whether or not
they are installed in the library.
3 Select the tape drive firmware you want to delete.
4 Click Delete.
The Progress Window appears. The Progress Window contains
information on the action, elapsed time, and status of the
requested operation. Do one of the following:
• If Success appears in the Progress Window, the tape drive
firmware was successfully deleted. The library’s default baseline
tape drive firmware will now be used for autoleveling.
• If Failure appears in the Progress Window, the tape drive
firmware update was not successfully deleted. Follow the
instructions listed in the Progress Window to resolve any issues
that occurred during the operation.
5 To initiate autoleveling, see Initiating Tape Drive Firmware
Autoleveling on page 169.
168
Quantum Scalar i40 and Scalar i80 User’s Guide
Chapter 7: Updating Firmware
Updating and Autoleveling Tape Drive Firmware
Initiating Tape Drive
Firmware Autoleveling
Autoleveling occurs automatically at specific times (whenever a tape
drive is added, replaced, or power cycled; or when the library is
rebooted). If you upload or remove tape drive firmware separately from
library firmware (such as a Quantum-provided upgrade or patch) and
want to autolevel the tape drives immediately, follow these steps:
1 Unload tape cartridges from all tape drives you want to autolevel.
2 Stop all host commands to the tape drives you want to autolevel.
3 Initiate autoleveling by performing one of the following actions:
• Reset (power cycle) the tape drives on which you want to
install firmware. This autolevels only the tape drives you reset.
For instructions, see Resetting a Tape Drive on page 260.
• Restart the library. This verifies and autolevels all tape drives.
(From the Web client, select Operations > System Shutdown.
Select Restart and click Apply. See Restarting the Library on
page 109 for more information.)
The operator panel displays a message indicating autoleveling is
taking place. The firmware install/autolevel takes about 7 minutes in
addition to whatever time it takes to complete the process you
chose above. If the install or autolevel fails, you receive a diagnostic
ticket.
4 Wait until autoleveling is complete before resuming host
commands. To make sure autoleveling is complete, check the system
information report to see if the tape drive firmware is installed on all
intended tape drives. From the Web client, select Reports > System
Information.
Quantum Scalar i40 and Scalar i80 User’s Guide
169
Chapter 7: Updating Firmware
Updating and Autoleveling Tape Drive Firmware
170
Quantum Scalar i40 and Scalar i80 User’s Guide
Chapter 8
Installing, Removing, and
Replacing Components
This chapter describes how to add, remove, and replace hardware
components within your library.
WARNING: Two people are required to lift and install the library.
WARNING: Under no circumstances should a rack be moved while a
library is installed.
This chapter covers:
• Taking ESD Precautions
• Connecting Library Cables
• Installing the Rack Mount Kit (Rail Kit)
• Installing the Library In a Rack
• Removing the Library From a Rack
• Installing the Library in a Desktop Kit
• Removing the Library from a Desktop Kit
• Removing and Replacing the Front Bezel
• Removing and Replacing the Chassis
• Removing and Installing a Filler Plate
Quantum Scalar i40 and Scalar i80 User’s Guide
171
Chapter 8: Installing, Removing, and Replacing Components
Taking ESD Precautions
• Removing and Replacing a Magazine
• Removing and Installing a Power Supply
• Removing and Replacing the System Control Board
• Removing and Replacing a Tape Drive
• Packaging the Library for Moving or Shipping
• Replacing the Robot
Taking ESD Precautions
Some components within the Scalar i40 and Scalar i80 libraries contain
static-sensitive parts. To avoid damaging these parts while performing
installation procedures, always observe the following precautions:
• Use an antistatic wrist strap. If you do not have one, touch the
outside of the library on the sheet metal before touching any
components to discharge static from your body.
• Keep static-sensitive parts in their original shipping containers until
ready for installation. Look for the ESD sticker to identify static
sensitive parts.
• Avoid touching connectors and other components.
Note: Dry climates and cold-weather heating environments have
lower relative humidity and are more likely to produce static
electricity.
172
Quantum Scalar i40 and Scalar i80 User’s Guide
Chapter 8: Installing, Removing, and Replacing Components
Connecting Library Cables
Connecting Library Cables
Connect the cords and cables as follows (see Figure 31 on page 174). It
is recommended that you leave some slack in the cables to allow you to
perform certain replacement procedures in the future.
1 Connect the tape drive cables from the tape drives to the host.
Caution: Use care when handling the fibre optic cables. Do not
crimp or bend the cables. Do not exceed the bend
radius specified by the manufacturer.
2 Connect an Ethernet cable (not supplied with your library) into the
LEFT port on the system control board (SCB). The right SCB port is
for service use only; do not use. Connect the other end of the
Ethernet cable into a live Ethernet jack connected to your network.
3 Connect the power supply cord into the power supply connector.
Plug the other end of the cord into a grounded AC outlet.
Quantum Scalar i40 and Scalar i80 User’s Guide
173
Chapter 8: Installing, Removing, and Replacing Components
Installing the Rack Mount Kit (Rail Kit)
Figure 31 Reinstalled
Components
Filler plate
Power supply
cord
Filler plate
Tape drive cables
Ethernet
cable in LEFT
SCB port
Service port –
do not use
Installing the Rack Mount Kit (Rail Kit)
The instructions for installing the rails are the same for both the Scalar®
i40 and the Scalar i80.
WARNING: If the rack is empty at the time of installation, do NOT
install the library too high in the rack. The weight of the
library may cause the rack to become “top heavy” and
unstable if installed in the top of an empty rack.
174
Quantum Scalar i40 and Scalar i80 User’s Guide
Chapter 8: Installing, Removing, and Replacing Components
Installing the Rack Mount Kit (Rail Kit)
WARNING: Do not stack objects on top of the library such as cables
or other computer equipment. The additional weight
could exceed the amount supported by the rack shelves.
Caution: Make sure the rack mounting rails are level, both left to
right and front to back. If the library is not level in the rack,
it will not work properly.
Supported Rack Types
The Scalar i40 and Scalar i80 libraries are designed to fit in most
standard 19-inch equipment cabinets, including:
• Dell, 08P157 (US-08P157910-3AU-0900),square, 2.48 - 2.72 mm
thick
• SUN, 38U, NGR900R, M6
• Emcor, 10 Series, round hole
• IBM, Machine Type 9306, Model 900, square, 28.25-inch deep, 2.02.25 mm thick
• HP, 10K, PN 245169-001, Asm 10642U GR Metallic, square, 2.02.2 mm thick
• EMC CX500
• Rittal Cable Tester Rack Frame, square
Rack depth of 34 in. (86.3 cm) minimum is recommended; however,
rack depths of 24 to 36 in. (60.9 to 91.4 cm) are supported.
Space Requirements
See the following:
• Physical Specifications on page 269 and
• Air Clearance Requirements on page 271
Quantum Scalar i40 and Scalar i80 User’s Guide
175
Chapter 8: Installing, Removing, and Replacing Components
Installing the Rack Mount Kit (Rail Kit)
Tools Required
• Allen wrench (2.5 mm) — provided in the library accessory kit
• Allen wrench (3 mm) — provided in the library accessory kit
• Magazine lock override tool — an opened paperclip, small
screwdriver, or other object (3.5 mm or less in diameter that will not
break off)
Rack Mount Kit
Contents
Qty
176
The following items are included in the rack mount kit:
Figure
Description
2
Shelf
2
Shelf Extender
16
Allen head screw, countersunk (M5 x 10) – for shelf
assembly
8
T- nut (M5) – for shelf assembly
Quantum Scalar i40 and Scalar i80 User’s Guide
Chapter 8: Installing, Removing, and Replacing Components
Installing the Rack Mount Kit (Rail Kit)
Qty
Figure
Description
8 total
Rail adapter – 4 each of two types are included.
You need 4 for installation; choose the type
appropriate for your rack (for more information,
see Figure 34 on page 180)
8
Allen head screw, countersunk (M4 x 12) – for
mounting shelves to rack
8
Washer, countersunk – for mounting shelves to rack
4
Clip nut (M5 x 0.8) – for securing library in rack
4
Cage nut (M5) – to secure library to rack. Used in
racks with square or round non-threaded holes.
Installing the Rack
Mount Shelves
Before installing the rack mount shelves, you must collect the following
information:
• Type of rack mount rails (square hole, through hole, or threaded
hole)
• Depth of rack
1 Assemble the rack mount shelves included in the accessory kit (left
and right):
a The holes used to attach the two halves of the rack mount
shelves differ depending on the depth of the rack (see Figure 32
on page 178). It is recommended that you use the ones that are
exposed and have the widest spacing.
Quantum Scalar i40 and Scalar i80 User’s Guide
177
Chapter 8: Installing, Removing, and Replacing Components
Installing the Rack Mount Kit (Rail Kit)
Figure 32 Rack Mount Shelf
Depth Requirements
Rear of rack
Use these holes for rack
depths of 24 in (60.9
cm) to 28 in (71.1 cm)
Front of rack
Use these holes for rack
depths of 27 in (68.5
cm) to 36 in (91.4 cm)
Rear of rack
Use these holes for rack
depths of 24 in (60.9
cm) to 28 in (71.1 cm)
Front of rack
Use these holes for rack
depths of 27 in (68.5
cm) to 36 in (91.4 cm)
b Loosely attach the rack mount shelves to the extenders with 4
M5 x 10 Allen screws and T-nuts (see Figure 33).
178
Quantum Scalar i40 and Scalar i80 User’s Guide
Chapter 8: Installing, Removing, and Replacing Components
Installing the Rack Mount Kit (Rail Kit)
Figure 33 Assembling the Left
and Right Rack Mount Shelves
The metal fold
must be toward
the outside of
the shelf as
shown
T-nuts must be oriented as
shown to properly fit in the
shelf adjustment slot
Front of rack
T-nuts
f
Le
ide
t -s
rac
k
t
un
mo
sh
Back of rack
r
de
ten
Ex
elf
M5 x 10 Allen screws
T-nuts must be
oriented as shown
to properly fit in
the shelf
adjustment slot
Ex
te n
de
r
Back of rack
The metal
fold must
be toward
the
outside of
the shelf
as shown
M5 x 10 Allen screws
Quantum Scalar i40 and Scalar i80 User’s Guide
T-nuts
Rig
ht
-si
d
er
ac
k
mo
un
ts
he
lf
179
Chapter 8: Installing, Removing, and Replacing Components
Installing the Rack Mount Kit (Rail Kit)
c Determine the type of rail adapter required for your rack. Each
rail adapter is marked with the specific hole type supported (see
Figure 34).
Figure 34 Rail Adapter Types
Use the rail adapters with
blocks on rails with square
hole patterns
Use the rail adapters with
circle pegs (opposite blocks)
on rails with non-threaded
circle hole patterns
Use the rail adapters with small
circle pegs on rails with threaded
circle hole patterns (M6 on one side
and M5 on the other side)
180
Quantum Scalar i40 and Scalar i80 User’s Guide
Chapter 8: Installing, Removing, and Replacing Components
Installing the Rack Mount Kit (Rail Kit)
d Attach the appropriate rail adapter to the front and back of the
rack mount shelves (right and left) with 2 M5 x 10 Allen screws
per adapter (see Figure 35).
Figure 35 Assembling the LeftHand Rack Mount Shelf
Rail adapter
Arrow must
point up
sh
ft
Le
M5 x 10
Allen screws
Rail adapter
elf
M5 x 10
Allen screws
Arrow must
point up
Rail adapters
M5 x 10
Allen screws
Rig
ht
sh
elf
M5 x 10
Allen screws
Quantum Scalar i40 and Scalar i80 User’s Guide
181
Chapter 8: Installing, Removing, and Replacing Components
Installing the Rack Mount Kit (Rail Kit)
2 Install the left and right rack mount shelves into the rack (the rack
mount shelves adjust 24 to 36 in.) and secure with the following
parts in four locations (see Figure 36 on page 183):
• 2 washers
• 2 M4 x 12 Allen screws
Note: The rack mount shelves must be installed on the inside rack
rails.
182
Quantum Scalar i40 and Scalar i80 User’s Guide
Chapter 8: Installing, Removing, and Replacing Components
Installing the Rack Mount Kit (Rail Kit)
Figure 36 Installing the Rack
Mount Shelves
Washers
M4 x 12
Allen screws
Left shelf
Right shelf
Quantum Scalar i40 and Scalar i80 User’s Guide
183
Chapter 8: Installing, Removing, and Replacing Components
Installing the Rack Mount Kit (Rail Kit)
3 Once the rack mount shelves are secured to the rack, tighten the
Allen screws securing the adjustable shelves (right and left) together
(see Figure 37).
Figure 37 Tightening the Rack
Mount Shelves
Tighten screws to secure
both rack mounting rails
184
Quantum Scalar i40 and Scalar i80 User’s Guide
Chapter 8: Installing, Removing, and Replacing Components
Installing the Rack Mount Kit (Rail Kit)
4 If the rack does not have threaded holes, install a clip nut or a cage
nut in the back side of the rail, in the first empty hole below the rail
adapter. This is what you will screw the library thumbscrews into to
secure the library in the rack. See table below for type of nut, and
Figure 38 on page 186 for installation location.
Type of Rail/Type of Nut
Cage nut
Description
Square rack holes are the most
common type of rack holes. They can
accept either cage nuts which mount
from the back of the rail or clip nuts
which clip on from the side of the
rack rail.
Clip nut
Clip nut
Round, unthreaded holes require clip
nuts to accept mounting hardware.
Threaded holes require neither cage
or clip nuts to accept mounting
hardware.
Quantum Scalar i40 and Scalar i80 User’s Guide
185
Chapter 8: Installing, Removing, and Replacing Components
Installing the Library In a Rack
Figure 38 Location for
Installing the Clip Nut or Cage
Nut
Rail adapter
Clip nut or cage nut installed in the first
empty hole below rail adapter
Installing the Library In a Rack
Caution: Make sure the rack mounting rails are level, both left to
right and front to back. If the library is not level in the rack,
it will not work properly.
WARNING: At least two people are required to lift and install the
library.
1 If tape drives are installed in the library, you may wish to remove
them to reduce weight. To remove tape drives, unscrew the captive
thumbscrews securing them to the back of the library and slide
them out of the library. Set them down gently on a stable surface.
186
Quantum Scalar i40 and Scalar i80 User’s Guide
Chapter 8: Installing, Removing, and Replacing Components
Installing the Library In a Rack
2 Lift the library, place it on the rack shelves, and slide it into the rack
as far as it will go.
3 Open one of the magazines slightly to access the captive
thumbscrew that is attached to the library chassis. You will use this
thumbscrew to secure the library to the rack. To open the magazine,
insert the magazine lock override tool into the access hole in the
bottom of the magazine bezel (see Figure 39 on page 187). Use the
tool to depress the release latch while gently pulling outward on the
magazine bezel handle.
Right-side magazines will only slide out as far as the I/E station (one
column of slots). To release the right-side magazines fully:
• On the Scalar i40 and the bottom right magazine of the Scalar
i80, reach under the open magazine and insert the tool directly
into the access hole in the library chassis to depress the release
latch, while pulling out on the magazine bezel handle.
• On the top right magazine of the Scalar i80, reach under the
open magazine and press the release latch directly with your
finger, while pulling out on the magazine bezel handle.
Figure 39 Magazine Release
Latch Access Holes
Magazine release latch access holes
4 Screw the captive thumbscrew finger-tight into the rack (and
through the clip nut or cage nut, if installed). See Figure 40 on
page 188.
5 Repeat Step 3 and Step 4 for the remaining thumbscrews.
6 Close all the magazines by pushing them in until they click shut.
Quantum Scalar i40 and Scalar i80 User’s Guide
187
Chapter 8: Installing, Removing, and Replacing Components
Removing the Library From a Rack
Figure 40 Securing the
Scalar i40 and Scalar i80 in the
Rack
Removing the Library From a Rack
WARNING: At least two people are required to lift the library and
remove it from a rack.
1 Shut down the library by selecting Actions > Shutdown from the
operator panel.
2 Turn OFF the library by pressing the power button on the front
panel.
3 Disconnect the power supply cord, the Ethernet cable, and all tape
drive cables from the back of the library. If you have multiple tape
drives, label the cables so you can reconnect them to the correct
tape drives later.
188
Quantum Scalar i40 and Scalar i80 User’s Guide
Chapter 8: Installing, Removing, and Replacing Components
Installing the Library in a Desktop Kit
4 Remove all the tape drives from the library (for details, see
Removing and Replacing a Tape Drive on page 231).
5 Remove all the magazines from the library (for details, see Removing
and Replacing a Magazine on page 215).
6 Unscrew the captive thumbscrews in the “rack ears” that secure the
library to the rack (see Figure 40 on page 188).
7 Slide the library out of the rack. Keep the library level as you slide it
out of the rack.
8 Place the library on a flat, stable surface.
Installing the Library in a Desktop Kit
The instructions for installing the Scalar i40 and the Scalar i80 in a
desktop are the same. The only difference is that the Scalar i40 has two
side panels, and the Scalar i80 has four.
Quantum Scalar i40 and Scalar i80 User’s Guide
189
Chapter 8: Installing, Removing, and Replacing Components
Installing the Library in a Desktop Kit
Figure 41 Desktop Kit,
Scalar i40 and Scalar i80
Scalar i40
Scalar i80
190
Quantum Scalar i40 and Scalar i80 User’s Guide
Chapter 8: Installing, Removing, and Replacing Components
Installing the Library in a Desktop Kit
Kit Contents
Tools Required
Item
Quantity
Top cover
1
Side panel
2 for the Scalar i40; 4
for the Scalar i80
Top cover screws
2
Rubber feet
8
• Phillips screwdriver
• Magazine lock override tool — an opened paperclip, small
screwdriver, or other object (3.5 mm or less in diameter that will not
break off)
Quantum Scalar i40 and Scalar i80 User’s Guide
191
Chapter 8: Installing, Removing, and Replacing Components
Installing the Library in a Desktop Kit
Space Requirements
See the following:
• Physical Specifications on page 269 and
• Air Clearance Requirements on page 271
Procedure
WARNING: Two people are required to safely lift the library.
1 If your library is currently installed in a rack, remove the magazines
and tape drives, and then remove the library from the rack. See
Removing the Library From a Rack on page 188.
2 Set the library on the desk or table in your chosen location.
3 Remove all the magazines from the library (if you have not already
done so), as follows:
a Insert the magazine lock override tool into the access hole in the
bottom of the magazine bezel (see Figure 42).
b Use the tool to depress the release latch while gently pulling
outward on the magazine bezel handle. If the magazine is on
the right side, it will only slide out as far as the I/E station. To
release the magazine fully:
• On the Scalar i40 and the bottom right magazine of the
Scalar i80, reach under the open magazine and insert the
tool directly into the access hole in the library chassis to
depress the release latch, while pulling out on the magazine
bezel handle.
• On the top right magazine of the Scalar i80, reach under the
open magazine and press the release latch directly with
your finger, while pulling out on the magazine bezel handle.
192
Quantum Scalar i40 and Scalar i80 User’s Guide
Chapter 8: Installing, Removing, and Replacing Components
Installing the Library in a Desktop Kit
Figure 42 Magazine Release
Latch Access Holes
Magazine release latch access holes
4 Look through the magazine slot openings to be sure the robot is
resting on the floor of the library. If not, reach inside and gently
press down on one of the robot’s side metal rods until the robot
starts moving. It should drift down to rest on the floor of the library.
5 Turn the library carefully on its side (either the left or right side).
Make sure the front end of the library (the “rack ear”) overhangs the
edge of the table so that the library lies flat.
6 Install the eight rubber feet on the bottom of the library, as follows:
a There are eight holes in the bottom of the library into which you
will press the rubber feet. Four holes are located along the right
edge and four along the left edge. Figure 43 shows the
locations of these holes.
b Use your fingers to press the feet into the holes. Twisting the
feet as you push them may make it easier to get them in. See
Figure 43 on page 194.
c Carefully turn the library back to an upright position so that it is
resting on its rubber feet.
Quantum Scalar i40 and Scalar i80 User’s Guide
193
Chapter 8: Installing, Removing, and Replacing Components
Installing the Library in a Desktop Kit
Figure 43 Location of Rubber
Feet on Bottom of Library
7 Install the side panels one at a time (in any order) as follows (see
Figure 44 on page 196):
a Orient the side panel correctly. They are all the same but can
only be installed one way. Line up the eight posts on the inside
of the side panel with the holes in the side wall of the library.
Line up the screw hole in the bottom front of the side panel
with the captive thumbscrew behind the magazine on the
library chassis.
b Press the side panel against the wall so that the posts go into
the holes.
194
Quantum Scalar i40 and Scalar i80 User’s Guide
Chapter 8: Installing, Removing, and Replacing Components
Installing the Library in a Desktop Kit
c Slide the side panel toward the front of the library about half an
inch until it stops and the posts are engaged in the holes. The
side panel should be flush with the side of the library chassis.
d Tighten the thumbscrew at the front of the library to secure the
side panel to the library.
Quantum Scalar i40 and Scalar i80 User’s Guide
195
Chapter 8: Installing, Removing, and Replacing Components
Installing the Library in a Desktop Kit
Figure 44 Installing the side
panels
Holes for side
panel posts
Magazine release
access holes
Captive
thumbscrew
Hole for captive
thumbscrew
Inset showing captive thumbscrew behind
open magazine
196
Quantum Scalar i40 and Scalar i80 User’s Guide
Chapter 8: Installing, Removing, and Replacing Components
Removing the Library from a Desktop Kit
8 Install the top cover as follows (see Figure 45):
a Slide the top cover onto the library, from back to front. The back
of the top cover has two screw holes and overhangs the back of
the library.
b Install the two top cover screws through the top cover and into
the screw holes in the top of the side panels.
Figure 45 Installing the Top
Cover
9 Re-install the magazines and push them in until they close.
10 Re-install tape drives if you removed them previously.
11 Connect the tape drive cables, Ethernet cable, and power cord (see
Connecting Library Cables on page 173).
Removing the Library from a Desktop Kit
To remove the library from a desktop kit, reverse the steps in Installing
the Library in a Desktop Kit on page 189.
Quantum Scalar i40 and Scalar i80 User’s Guide
197
Chapter 8: Installing, Removing, and Replacing Components
Removing and Replacing the Front Bezel
Removing and Replacing the Front Bezel
The procedure is the same for the Scalar® i40 and the Scalar i80. The
pictures show the Scalar i40.
You may perform this procedure with library power ON. If you do, be
careful not to accidentally press the power button and turn the library
off when installing the bezel.
Required Tools
• Phillips #1 screwdriver
Bezel Replacement Kit
Contents
• 1 Bezel
Bezel Replacement
Procedure
1 Stop all library operations.
• 4 screws
2 Open all the magazines in the library a few inches.
a On the operator panel, select Actions > Magazine.
b Select a magazine and press Release.
c When prompted, pull open the magazine a few inches.
d Repeat for all magazines in the library.
3 Prepare to gain access to the bezel screws (see Figure 46 on
page 200 and Figure 47 on page 201 for locations). The method
depends upon how your library is installed. Follow the instructions
in the table below that correspond to your library installation.
198
If your library is...
Follow these steps...
Installed in a rack high enough
to access to the bottom bezel
screws
Unscrew all the thumbscrews that secure the library to
the rack (the Scalar i40 has two thumbscrews; the
Scalar i80 has four). See Figure 47 on page 201.
Quantum Scalar i40 and Scalar i80 User’s Guide
Chapter 8: Installing, Removing, and Replacing Components
Removing and Replacing the Front Bezel
If your library is...
Follow these steps...
Installed in a desktop kit
Release the desktop cover by removing two screws at
rear of the desktop cover, then slide the desktop cover
toward the back of the library two or three inches.
Installed very low in a rack so
that you cannot access the
bottom bezel screws unless you
remove the library from the
rack
Remove the library from the rack (see Removing the
Library From a Rack on page 188).
4 Slide the library one-to-two inches forward out of the rack or over the
edge of the table or desk in order to access the two bottom bezel
screws.
WARNING: Only slide the library out far enough out to access the
two screws on the bottom of the library. The library is
not secured in the rack or on the desk. Pulling it out
too far could cause the library to slide out of the rack
or off the desk.
Caution: Ensure there is enough slack in the power cords and
cables connected in the rear of the library so that you
do not dislodge them when you slide the library
forward.
Caution:
Do not tip the library or tilt it on its side.
5 Make sure all the magazines are pulled out a few inches (or
removed) to allow you to remove and install the bezel without
damaging it.
6 Remove and set aside the two screws securing the bezel to the
bottom of the chassis (see Figure 46 on page 200).
7 Remove and set aside the two screws securing the bezel to the top
of the chassis (see Figure 47 on page 201).
Quantum Scalar i40 and Scalar i80 User’s Guide
199
Chapter 8: Installing, Removing, and Replacing Components
Removing and Replacing the Front Bezel
Figure 46 Bezel Screw
Locations on Bottom of Library
Bottom
bezel
screws
200
Quantum Scalar i40 and Scalar i80 User’s Guide
Chapter 8: Installing, Removing, and Replacing Components
Removing and Replacing the Front Bezel
Figure 47 Bezel Screws
Thumbscrew
securing library
to rack
8 Pull the bezel straight out and off of the library. Do not tip or twist
the bezel as you pull it off.
9 Install the new bezel straight onto the library. Do not tip or twist the
bezel. Slide the top and bottom edges of the bezel to the inside of
the top and bottom layers of the chassis sheet metal. On the Scalar
i80, the bezel will “snap” into place. Install the two top screws, then
the two bottom screws.
Caution:
Quantum Scalar i40 and Scalar i80 User’s Guide
Make sure the power button and all four operator
panel control buttons appear through the holes in the
bezel and are not trapped beneath the bezel.
201
Chapter 8: Installing, Removing, and Replacing Components
Removing and Replacing the Chassis
Caution: Be careful not to accidentally hit the power button and
turn the library off while you are installing the bezel.
10 Reinstall the library in the rack or desktop kit.
11 Close all the magazines.
12 If you turned the library off to perform this procedure, turn it ON
now by pressing the power button on the front panel. Wait until the
library initializes before resuming library operations.
13 If you removed the library from the rack to perform this procedure,
run the Installation and Verification Test (IVT) to ensure the robot,
tape drives, and magazines are all functioning properly. From the
operator panel, select Tools > IVT and follow the instructions on
the screen. The IVT takes about 30 minutes. See Running the
Installation and Verification Test (IVT) on page 255 for more
information about the IVT.
Removing and Replacing the Chassis
DISCLAIMER: Tests have been conducted on the finished product and
have passed Safety Regulatory requirements at time of test.
WARNING: For field/customer replaceable sub-assemblies, all
instructions pertaining to further integration and
operation verification such as those in this document
must be fully complied with. Do not attempt to operate
the product before the product is fully assembled and self
diagnostics show that the product passes, otherwise
serious physical injury may occur to the user. The
manufacturer(s) will not be held liable/responsible if such
precautions are not adhered to.
WARNING: Two people are required to safely lift the library into and
out of its packaging, a rack, or a desktop kit.
202
Quantum Scalar i40 and Scalar i80 User’s Guide
Chapter 8: Installing, Removing, and Replacing Components
Removing and Replacing the Chassis
When you replace a library chassis, you will remove all the components
from your existing library and install them in the new library.
Required Tools
• Phillips #1 screwdriver
• Magazine lock override tool — an opened paperclip, small
screwdriver, or other object (3.5 mm or less in diameter that will not
break off)
Procedure
1 Unpack the new library chassis and place it on a flat, level surface.
2 Verify that the new chassis is the same type (Scalar® i40 or Scalar
i80) as the unit you are replacing.
3 If you had license keys installed on your library, you will need to
install new ones on the replacement library. Contact Quantum
Support to request new license keys.
4 If the library you are replacing is still turned on and operational,
shut down the library by selecting Actions > Shutdown from the
operator panel.
5 Turn OFF the library by pressing the power button on the front
panel.
6 Disconnect the power supply cord, the Ethernet cable, and all tape
drive cables from the back of the library. If you have multiple tape
drives, label the cables so you can reconnect them to the correct
tape drives later.
Quantum Scalar i40 and Scalar i80 User’s Guide
203
Chapter 8: Installing, Removing, and Replacing Components
Removing and Replacing the Chassis
7 Remove all of the following components from the library (see
Figure 48 on page 206).
Component to
Remove
Power Supplies
Instructions
Caution:
Make sure the power supply is unplugged and disconnected
from live power before you remove it.
1 Disconnect the power cord from the back of the power supply.
2 Unscrew the captive thumbscrews.
3 Pull outward on the power supply handle to remove it from the library.
System Control
Board (SCB)
1 Loosen the two captive thumbscrews on the SCB.
2 Grip the thumbscrews and pull outward to slide the SCB out of the library.
3 Place the SCB on an anti-static surface or in an anti-static bag.
Tape Drives
1 Label each tape drive with its location in the library slots. It is
recommended that you reinstall the tape drives in the same location in the
new chassis.
2 Unscrew the captive thumbscrews securing the tape drive sled to the back
of the library. Half-height tape drives have two thumbscrews. Full-height
tape drives have four thumbscrews.
3 Using the handle, pull the drive sled out of the library. It should slide out
smoothly and easily.
Filler Plates
Remove all filler plates (tape drive and power supply).
1 Unscrew the two captive thumbscrews.
2 Pull the filler plate out.
204
Quantum Scalar i40 and Scalar i80 User’s Guide
Chapter 8: Installing, Removing, and Replacing Components
Removing and Replacing the Chassis
Component to
Remove
Magazines
Instructions
1 If your library is a Scalar i80, label the magazines so you can reinstall them
in the same slots.
2 Insert the magazine lock override tool into the access hole in the bottom of
the magazine bezel.
3 Use the tool to depress the release latch while gently pulling outward on
the magazine bezel handle. If the magazine is on the right side, it will only
slide out as far as the I/E station. To release the magazine fully:
• On the Scalar i40 and the bottom right magazine of the Scalar i80, reach
under the open magazine and insert the tool directly into the access
hole in the library chassis to depress the release latch, while pulling out
on the magazine bezel handle.
• On the top right magazine of the Scalar i80, reach under the open
magazine and press the release latch directly with your finger, while
pulling out on the magazine bezel handle.
Quantum Scalar i40 and Scalar i80 User’s Guide
205
Chapter 8: Installing, Removing, and Replacing Components
Removing and Replacing the Chassis
Figure 48 Components to
Remove
Remove
Magazine release
access holes
Remove
8 If the library is in a desktop kit or rack, remove it.
• To remove the library from a rack, unscrew the captive
thumbscrews on the front of the library that secure the library
to the rack, then slide the library out of the rack. Place the
library on a flat, stable surface.
WARNING: Two people are required to safely lift the library
out of a rack.
• To remove the library from a desktop kit, remove the two top
cover screws at the rear of the top cover. Loosen the captive
thumbscrews on the library chassis that are attached to the side
panels of the desktop kit. Slide the side panels one-half inch
toward the rear of the library to disengage the side-panel posts
from the library wall, then pull the side panels off.
206
Quantum Scalar i40 and Scalar i80 User’s Guide
Chapter 8: Installing, Removing, and Replacing Components
Removing and Replacing the Chassis
Do NOT remove the eight rubber “feet” installed on the bottom
of the library (you will remove them later, in Step 10, Sub-Step c
on page 208, once the library is set on its side).
9 Remove the robot restraint from the replacement chassis following
the instructions printed on the restraint (see Figure 49).
• Remove and save the four thumbscrews for use in restraining
the robot in the chassis you are returning.
• Discard the mylar sheet and metal clip.
Figure 49 Removing the Robot
Restraint
Mylar
sheet
Metal clip
10 Restrain the robot in the chassis being returned as follows (see
Figure 50 on page 209):
a Look through the magazine slot openings to be sure the robot is
resting on the floor of the library. If not, reach inside and gently
press down on one of the robot’s side metal rods until the robot
starts moving. It should drift down to rest on the floor of the
library.
Quantum Scalar i40 and Scalar i80 User’s Guide
207
Chapter 8: Installing, Removing, and Replacing Components
Removing and Replacing the Chassis
b Turn the library carefully on its side (either the left or right side).
Make sure the front end of the library (the “rack ear”)
overhangs the edge of the table so that the library lies flat.
Caution: Do not turn the library upside down. Do not turn
the library more than 90 degrees from upright.
c If your library was installed in a desktop kit, remove the eight
rubber “feet” installed on the bottom of the library. You can
remove them by twisting them as you pull them out. Save them
to use on the replacement chassis.
d Take the four thumbscrews you just removed from the
replacement chassis and install them into the floor of the
chassis you are returning in the locations shown in Figure 61.
They will screw through the robot and secure it in place on the
floor of the chassis.
e Do NOT turn the library back to an upright position at this
point. Leave it on its side until you place it in the box.
Caution: If you place the library upright with the robot
restraint thumbscrews installed, you could damage
the chassis or the robot.
208
Quantum Scalar i40 and Scalar i80 User’s Guide
Chapter 8: Installing, Removing, and Replacing Components
Removing and Replacing the Chassis
Figure 50 Restraining the
Robot
Rack “ear” overhangs
edge of desk or table
Four robot restraint
thumbscrews
11 Install the new chassis in a rack or desktop kit. For instructions, see
Installing the Rack Mount Kit (Rail Kit) on page 174 or Installing the
Library in a Desktop Kit on page 189.
WARNING: Two people are required to safely lift the library.
Quantum Scalar i40 and Scalar i80 User’s Guide
209
Chapter 8: Installing, Removing, and Replacing Components
Removing and Replacing the Chassis
12 Install the components you removed from the old chassis into the
new chassis.
Component to
Install
System Control
Board (SCB)
Instructions
Install the SCB before you install the power supply.
1 Position the SCB for installation: The board components face up. The flat
part of the board faces down. The thumbscrews are on the upper side of
the SCB back plate.
2 Install the new SCB by pushing the SCB into the slot until it stops. It should
slide smoothly and easily. When it reaches the end of its travel, press firmly
on the back panel of the SCB to “snap” it into place.
3 Tighten the two thumbscrews finger tight.
4 Connect the Ethernet cable to the LEFT Ethernet port (as viewed from the
back of the library; see Figure 51 on page 212).
Power Supplies
If your library is a Scalar i80 and you have only one power supply, install it in
the top slot. If you have two power supplies, install them both.
Caution:
Make sure the power supply is unplugged and disconnected from
live power before you install it.
1 Push the power supply straight into the slot. You may need to press firmly
on the power supply sheet metal at the very end to plug in the power
supply to the connector on the library. You will feel it snap into place.
The power supply only goes in one way, and should slide in easily. If you
cannot slide it in, you may be trying to install it upside down.
2 Tighten the two thumbscrews finger tight.
3 Connect the power cord to the power supply.
4 Plug the power cord into a grounded AC outlet.
210
Quantum Scalar i40 and Scalar i80 User’s Guide
Chapter 8: Installing, Removing, and Replacing Components
Removing and Replacing the Chassis
Component to
Install
Tape Drives
Instructions
1 Insert the tape drives into the same drive slots they were in the old chassis.
The “shelf” on the bottom of the drive sled fits into the notch in the library
chassis and slides on the plastic guide rails. The tape drive must be level to
slide in smoothly. At the very end of the slide, you will feel a slight “click” as
the tape drive sled connector connects into its mating connector in the
library chassis.
2 Tighten the tape drive’s captive thumbscrews finger tight to secure the tape
drive to the library chassis.
3 Connect all tape drive cables as they were in the old unit. Make sure they
are connected to the host or switch as they were before. For full-height
Fibre Channel tape drives, the cable must go in the LEFT connector (as
viewed from the back of the library; see Figure 51 on page 212).
Filler Plates
Make sure every empty power supply slot and tape drive slot is covered with a
filler plate.
1 Slide the filler plate into the slot.
2 Tighten the thumbscrews.
Magazine
Slide each magazine into its slot and push it in all the way until it stops.
Quantum Scalar i40 and Scalar i80 User’s Guide
211
Chapter 8: Installing, Removing, and Replacing Components
Removing and Replacing the Chassis
Figure 51 Reinstalled
Components
Power supply
cord
Tape drive cables
Ethernet
cable in LEFT
SCB port
13 Turn ON the library by pressing the power button on the front
panel.
14 Wait for the library to initialize. This can take up to 5 to 17 minutes,
depending on library size.
15 You will notice the library has a new diagnostic ticket (DT042)
stating the library’s vital product data (VPD) has changed.
16 Reconfigure host applications to support the new library VPD (serial
number, WWNN, and drive addresses).
17 If you had license keys installed on the old library, install the new
license keys. From the operator panel, select Setup > License
Installation; or from the Web client, select Setup > License. For
further directions, see Applying a License Key on page 70.
18 Run the Installation and Verification Test (IVT) to ensure the robot,
tape drives, and magazines are all functioning properly. From the
212
Quantum Scalar i40 and Scalar i80 User’s Guide
Chapter 8: Installing, Removing, and Replacing Components
Removing and Installing a Filler Plate
operator panel, select Tools > IVT and follow the instructions on
the screen. The IVT takes about 30 minutes.
19 Save the library configuration (from the Web client, select Tools >
Save/Restore Configuration and save the configuration to a known
location).
20 Wrap the removed chassis in the antistatic wrapping that contained
the replacement chassis. Package the removed chassis using the
packaging that contained the replacement chassis. Use the enclosed
RMA information to send the chassis back to Quantum.
Removing and Installing a Filler Plate
A filler plate is required to cover every empty tape drive and power
supply slot on the rear of the library, in order to maintain proper library
cooling. If you remove a tape drive or power supply from the library, you
must cover the opening with a filler plate.
There are two types of filler plates:
• Tape drive
• Power supply
Removing and
Installing a Tape Drive
Filler Plate
The filler plate is half-height in size. If you remove a full-height tape
drive, you must install two filler plates to cover the opening.
Removing a tape drive filler plate
1 Unscrew the two captive thumbscrews and pull the filler plate out.
2 Save the filler plate in case you need to use it again.
Installing a tape drive filler plate
• The tape drive filler plate has no “top” or “bottom” orientation – it
can go in either way (see Figure 52 on page 215).
• Slide the filler plate into the slot and tighten the thumbscrews.
Quantum Scalar i40 and Scalar i80 User’s Guide
213
Chapter 8: Installing, Removing, and Replacing Components
Removing and Installing a Filler Plate
Removing and
Installing a Power
Supply Filler Plate
The power supply filler plate is used only on the Scalar® i80 when only
one power supply is present.
Removing a power supply filler plate
1 Unscrew the two captive thumbscrews.
2 Pull out on the thumbscrews so the filler plate is at a slight angle
and the bottom of the filler plate is still attached in the slot.
3 Lift the filler plate up to disengage the catch at the bottom and pull
the filler plate out of the slot.
Installing a power supply filler plate:
• On the Scalar i80, if you are using only one power supply, you
should install the power supply in the upper slot, and cover the
lower slot with a filler plate (see Figure 52 on page 215).
1 Hold the filler plate with the thumbscrews at the top.
2 Insert the bottom edge of the filler plate into the slot, engaging the
bottom edge of the filler plate into the bottom of the slot.
3 Pivot the filler plate up to fit securely in the hole.
4 Tighten the thumbscrews.
214
Quantum Scalar i40 and Scalar i80 User’s Guide
Chapter 8: Installing, Removing, and Replacing Components
Removing and Replacing a Magazine
Figure 52 Filler Plates Installed
Tape drive filler plate
Single
power
supply
installed
in top
slot
Power
supply
filler
plate
Removing and Replacing a Magazine
The procedure for replacing magazines is the same on the Scalar® i40
and the Scalar i80.
Note: The library can operate with one or more magazines
uninstalled. However, it will operate at reduced speed.
Required Tools
• Phillips #1 screwdriver
Magazine Replacement
Kit Contents
• (1) magazine
• (1) left-side magazine bezel
• (1) right-side magazine bezel
Quantum Scalar i40 and Scalar i80 User’s Guide
215
Chapter 8: Installing, Removing, and Replacing Components
Removing and Replacing a Magazine
• (4) M3 x 6 Phillips head screws
• (4) washers
Creating a Backup Map
of Cartridge Locations
When you transfer tape cartridges from the removed magazine into the
replacement magazine, each cartridge needs to go in the same slot
position it was in previously. One way to do this is to transfer the
cartridges one by one from one magazine to the other. However, if the
cartridges get mixed up or dropped, you need a backup method to
know where to place your cartridges. The library configuration report
provides a convenient backup “map.”
1 On the Web client, select Reports > Library Configuration.
2 Click the Show Barcodes button.
The screen displays a map of the library showing the location of
each cartridge, by barcode.
3 Click the “print” icon in the upper right corner to print the report.
Alternatively, take a screen capture of the report and save or print it,
or copy the map by hand.
Removing the
Magazine from the
Library
You can perform this procedure with library power on.
1 From the operator panel, select Actions > Magazine.
2 Use the Up and Down buttons to select the magazine you want to
remove and press Release.
3 Wait for the operator panel to display the message: “Magazine is
now unlocked. Waiting for the magazine to be moved to the
expected position.”
4 Pull the magazine bezel out and remove the magazine from the
library. If you do not remove the magazine within 30 seconds, the
magazine locks again.
216
Quantum Scalar i40 and Scalar i80 User’s Guide
Chapter 8: Installing, Removing, and Replacing Components
Removing and Replacing a Magazine
Note: If the library is turned off, you can release the magazine
manually by inserting an opened paperclip, small screwdriver,
or other object (3.5 mm or less in diameter that will not break
off) into the access hole in the bottom of the magazine bezel
(see Figure 53). Use the tool to depress the release latch while
gently pulling outward on the magazine bezel handle.
Right-side magazines will only slide out as far as the I/E station.
To release right-side magazines fully:
- On the Scalar i40 and the bottom right magazine of the
Scalar i80, reach under the open magazine and insert the tool
directly into the access hole in the library chassis to depress the
release latch, while pulling out on the magazine bezel handle.
- On the top right magazine of the Scalar i80, reach under the
open magazine and press the release latch directly with your
finger, while pulling out on the magazine bezel handle.
Figure 53 Magazine Release
Latch Access Holes
Magazine release latch access holes
Installing the Magazine
The replacement magazine can be used on either the left or right side of
the library, depending on how it is oriented. Once it is oriented correctly,
the left or right bezel can be attached.
You can perform this procedure with the library powered on.
1 Place the removed magazine in the orientation it would be if it were
installed in the library.
Quantum Scalar i40 and Scalar i80 User’s Guide
217
Chapter 8: Installing, Removing, and Replacing Components
Removing and Replacing a Magazine
2 Place the replacement magazine next to the removed magazine in
the same orientation. Make sure they look the same from all angles.
• The storage slots face inward.
• On the outer wall of the magazine, the silver rollers sit below
the springs (see Figure 54).
Figure 54 Proper Orientation
(Right-Side Magazine)
Springs
Silver rollers
3 Choose the correct bezel (left or right) from the magazine
replacement kit.
Note: If you try to install the wrong bezel, it will not fit and you
will not be able to install it.
4 Push up on the top bezel tabs and fit them over the posts on the
top of the magazine. Turn the magazine over and repeat on the
bottom (see Figure 55 on page 219).
5 Install the two washers and two M3 screws securing the top of the
bezel to the magazine. Install them in the outer hole in each tab
(see Figure 55 on page 219).
218
Quantum Scalar i40 and Scalar i80 User’s Guide
Chapter 8: Installing, Removing, and Replacing Components
Removing and Replacing a Magazine
6 Turn the magazine over and install the two washers and two M3
screws securing the bottom of the bezel to the magazine. Install
them in the outer hole in each tab (see Figure 55).
Figure 55 Removing/Installing
the Magazine Bezel
Bezel
Tab
7 Remove the tape cartridges from the removed magazine and
carefully install them in the exact same slots in the replacement
magazine. Use the map you created if necessary.
8 Slide the magazine into the magazine slot all the way until it stops.
The library performs an inventory on the replaced magazine.
9 Wait for the library to finish its inventory.
Quantum Scalar i40 and Scalar i80 User’s Guide
219
Chapter 8: Installing, Removing, and Replacing Components
Removing and Installing a Power Supply
10 Run the magazine diagnostics test on the replaced magazine to be
sure it is functioning correctly.
a Place a scratch tape in the top I/E station slot.
b If manual cartridge assignment is enabled, assign the scratch
tape to the System partition.
c From the operator panel, select Tools > Diagnostics.
d Continue through the next few screens to run the magazine test
on the replaced magazine.
If a problem is found during testing, you receive a diagnostic ticket.
See Running the IVT Diagnostic Subtests Individually – Robotics,
Tape Drive, and Magazine Tests on page 257 more information.
Removing and Installing a Power Supply
The Scalar® i40 contains one power supply. The Scalar i80 can have up
to two power supplies for redundancy purposes.
An unused power supply slot must be covered by a filler plate.
This document covers:
• Replacing a Power Supply in a Single-Power-Supply System (Scalar
i40 and Scalar i80)
• Adding or Replacing a Redundant Power Supply on the Scalar i80
220
Quantum Scalar i40 and Scalar i80 User’s Guide
Chapter 8: Installing, Removing, and Replacing Components
Removing and Installing a Power Supply
Figure 56 Single Power Supply
System
Scalar i40, single power
supply
Scalar i80, single power
supply installed in top slot
Filler plate covers empty
power supply slot
Figure 57 Redundant Power
Supply System
Scalar i80, dual power
supplies for redundancy
Replacing a Power
Supply in a SinglePower-Supply System
(Scalar i40 and Scalar
i80)
Note: If you have a single power supply in a Scalar i80, it is
recommended that you install it in the upper slot, to provide
better temperature control (see Figure 56).
1 Shut down the library (from the operator panel, select Actions >
Shutdown > Shutdown Library). Wait for the screen to prompt
you to turn off library power.
2 Turn OFF library power by pressing the power button on the front
panel. Wait for the operator panel screen to turn off.
3 Disconnect the power cord from the power supply.
Quantum Scalar i40 and Scalar i80 User’s Guide
221
Chapter 8: Installing, Removing, and Replacing Components
Removing and Installing a Power Supply
Caution: Make sure you disconnect live power from the power
supply before you remove or install it. Otherwise,
damage to the power supply could occur.
4 Unscrew the two captive thumbscrews on the power supply.
5 Using the handle, slowly pull the power supply straight out of the
library.
6 Install the new power supply by pushing it straight in to the slot.
You may need to press firmly on the power supply sheet metal at
the very end to plug in the power supply to the connector on the
library. You will feel it snap into place.
The power supply only goes in one way, and should slide in easily. If
you cannot slide it in, you may be trying to install it upside down.
7 Tighten the two thumbscrews finger tight.
8 Connect the power cord to the power supply.
9 Make sure the power cord is plugged in to a grounded, AC outlet.
10 The power supply LED should turn amber to indicate it is plugged in
but the library is not turned on.
11 Turn ON library power by pressing the power button on the front
panel.
The power supply LED should turn green immediately to indicate
the library is turned on.
If the power supply LED is red, the power supply is not working.
Contact Quantum Support.
Adding or Replacing a
Redundant Power
Supply on the
Scalar i80
You do not need to turn off library power to perform this procedure.
1 If you are adding a new power supply to a Scalar i80, remove the
filler plate and start at Step 6 below.
2 If you have two power supplies, determine which one to remove.
Caution: Make sure you remove the power supply whose LED is
red or off. Do not remove the power supply whose LED
is green.
222
Quantum Scalar i40 and Scalar i80 User’s Guide
Chapter 8: Installing, Removing, and Replacing Components
Removing and Replacing the System Control Board
3 Disconnect the power cord from the power supply you want to
remove.
Caution: Make sure you disconnect live power from the power
supply before you remove or install it. Otherwise,
damage to the power supply could occur.
4 Unscrew the two captive thumbscrews on the power supply.
5 Using the handle, slowly pull the power supply straight out of the
library.
6 Install the new power supply by pushing it straight in to the space.
You may need to press firmly on the power supply sheet metal at
the very end to plug in the power supply to the connector on the
library. You will feel it snap into place.
The power supply only goes in one way, and should slide in easily. If
you cannot slide it in, you may be trying to install it upside down.
7 Tighten the two thumbscrews finger tight.
8 Connect the power cord to the power supply.
9 Make sure the power cord is plugged in to a grounded, AC outlet.
The power supply LED should turn green immediately to indicate
the library is turned on.
If the power supply LED is red, the power supply is not working.
Contact Quantum Support.
Removing and Replacing the System Control Board
These instructions explain how to remove a system control board (SCB)
and replace it with a new one.
The SCB contains your library’s network settings, all configurable
settings, license keys, and firmware. After you replace the SCB, you must
either restore a previously saved configuration, or manually reconfigure
the settings and reinstall the license keys.
Quantum Scalar i40 and Scalar i80 User’s Guide
223
Chapter 8: Installing, Removing, and Replacing Components
Removing and Replacing the System Control Board
Note: When you replace the SCB you will permanently lose all data
previously collected for logs and reports.
The process steps are:
1 Replacing the System Control Board
2 Installing Library Firmware
3 Restoring the Library Configuration or Manually Reconfiguring the
Library
Replacing the System
Control Board
Caution: You must completely remove power from the library before
removing and replacing the system control board.
1 If the library is still operational, save the library configuration. From
the Web client, select Tools > Save/Restore Configuration. Select
Save Configuration and click Apply. Save the configuration to a
known location.
2 If the library is still operational, and you want to save log and report
information for historical purposes, access the logs and reports you
want using the Web client and save them to a known location.
3 If possible, save a library snapshot for future troubleshooting. From
the Web client, select Tools > Capture Snapshot and follow the
instructions.
4 If the library is still operational, shut down the library by selecting
Actions > Shutdown > Shutdown Library from the operator
panel.
5 When prompted, turn OFF the library by pressing the power button
on the front panel. Wait for all the LEDs on the SCB to turn off.
6 Disconnect the power cords from the power supplies on the back of
the library. The Scalar i40 has one power supply. The Scalar i80 may
have one or two power supplies. Make sure you remove all power
cords.
7 Remove the Ethernet cable from the SCB (see Figure 58 on
page 226).
8 Loosen the two captive thumbscrews on the SCB.
224
Quantum Scalar i40 and Scalar i80 User’s Guide
Chapter 8: Installing, Removing, and Replacing Components
Removing and Replacing the System Control Board
9 Grip the thumbscrews and pull outward to slide the SCB out of the
library.
10 Remove the new SCB from its packaging. Wrap the old SCB in the
antistatic bag that the replacement SCB was wrapped in.
11 Position the new SCB for installation as follows: The board
components face up. The flat part of the board faces down. The
thumbscrews are on the upper side of the SCB back plate (see
Figure 58 on page 226).
12 Install the new SCB by pushing the SCB into the slot until it stops. It
should slide smoothly and easily. When it reaches the end of its
travel, press firmly on the back panel of the SCB to “snap” it into
place.
13 Tighten the two thumbscrews finger tight.
14 Connect the Ethernet cable to the LEFT Ethernet port on the SCB (as
viewed from the back of the library; see Figure 58 on page 226).
Quantum Scalar i40 and Scalar i80 User’s Guide
225
Chapter 8: Installing, Removing, and Replacing Components
Removing and Replacing the System Control Board
Figure 58 Ethernet Port
Locations on the SCB
Thumbscrews
Ethernet port
Scalar i40
Thumbscrews
Ethernet port
Scalar i80
15 Continue to Installing Library Firmware on page 226.
Installing Library
Firmware
1 Connect the power cords to the power supplies on the back of the
library. Make sure that each power supply is plugged in to a
grounded, AC outlet.
2 Turn ON the library by pressing the power button on the front
panel.
The LED on the SCB should illuminate green.
The green power LED on the library front panel above the power
button illuminates, and the operator panel screen turns on. The
library goes through a connection and initialization sequence that
takes up to 60 seconds.
226
Quantum Scalar i40 and Scalar i80 User’s Guide
Chapter 8: Installing, Removing, and Replacing Components
Removing and Replacing the System Control Board
3 When initialization is complete, the Library Installation screen
appears on the operator panel, displaying the text, “The library
needs to have its IP Address configured.” The purpose of this screen
is to set the IP address so you can access the library via the Web
client and download firmware. (After you have loaded firmware,
you can change or reconfigure IP addresses if needed.)
4 Press Next.
The screen displays the text, “Current protocol: IPv4. Set protocol to
IPv6?”
5 Select Yes or No.
• If you select Yes, the library assigns an IPv6 address.
• If you select No, you are prompted to select DHCP or assign a
static IP address. If you choose to assign a static IP address, use
the Up and Down buttons to set the numeric value for each
digit, and press the Right button to go to the next digit. When
finished, press Apply. If you choose DHCP, the library assigns an
IPv4 address.
6 When finished viewing or setting the IP address, press Next.
The newly assigned IP address displays on the screen.
7 Take note of the IP address.
8 Download the latest library firmware to a known location on your
computer. Library firmware is available at http://
www.quantum.com. Navigate to the appropriate firmware version
and download the firmware image file.
9 Open an Internet session and enter the library IP address listed on
the operator panel into the Web browser.
The Web client displays a screen instructing you to select the
firmware image you want to load on the library.
10 Click Browse and select the firmware image you downloaded to
install on the library.
11 Click OK, then click OK again to agree to restart the library.
The Web client displays the following message:
Decoding installation bundle...done.
Validating bundle...good.
Installing firmware...library will reboot when complete.
Quantum Scalar i40 and Scalar i80 User’s Guide
227
Chapter 8: Installing, Removing, and Replacing Components
Removing and Replacing the System Control Board
12 Go to the operator panel and wait until the Setup Wizard appears
on the screen. The Setup Wizard screen may take up to 20 minutes
to appear.
13 Continue as follows:
• If you have saved a library configuration that you want to
restore on the library, go to: Restoring the Library Configuration
on page 228.
• If you do NOT have a saved library configuration to restore on
the library, go to: Manually Reconfiguring the Library on
page 229.
Restoring the Library
Configuration
Follow the instructions in this section if you have a saved library
configuration that you want to reinstall on the library.
1 On the operator panel, press Cancel to exit the Setup Wizard.
2 Take note of the library’s IP address (on the operator panel, select
Reports > Network Settings).
3 Access the Web client using the IP address and log in using the
default user name and password:
• User name: admin
• Password: password
Note: Once you restore the configuration, all your former user
names and passwords are restored.
4 Restore the configuration using the Web client as follows:
a Select Tools > Save/Restore Configuration.
b Select Restore System Configuration.
c Click Browse. Navigate to the saved configuration and click
Open.
d Click Apply
e Click OK.
Note: Restoring the configuration does NOT restore your network
settings.
228
Quantum Scalar i40 and Scalar i80 User’s Guide
Chapter 8: Installing, Removing, and Replacing Components
Removing and Replacing the System Control Board
5 Check the library’s date, time, and time zone settings and
reconfigure if necessary. From the Web client, select Setup > Date
& Time.
6 If you changed the IP address from what it was originally, update
host and other applications that access the library.
7 Save the library configuration. From the Web client, select Tools >
Save/Restore Configuration. Select Save Configuration and click
Apply. Save the configuration to a known location.
8 It is recommended that you run the Installation and Verification Test
(IVT). From the operator panel, select Tools > IVT and follow the
instructions. The IVT takes about 30 minutes. If any problems are
detected, the library issues a diagnostic ticket.
9 Package the old SCB in the packaging that shipped with the new
SCB and send the old SCB back to Quantum.
Manually Reconfiguring
the Library
Follow the instructions in this section if you do not have a saved library
configuration.
1 If you had licenses installed on your library, have the license keys
handy so you can install them on the library. If you no longer have
them, you can obtain them at http://www.quantum.com/
licensekeys, or from Quantum Support.
2 When the firmware update is complete, the Setup Wizard appears
on the operator panel screen. The Setup Wizard helps you configure
the date, time, IP address, IPv6 enable/disable, licenses, partitions, I/
E slots, and cleaning slots.
3 Complete the Setup Wizard on the operator panel. If you make a
mistake or do not complete all the screens, you can change the
configuration later using the operator panel or Web client Setup
menus.
Note: You cannot update the library name or time zone on the
operator panel. If the displayed library name or time zone
is incorrect, change it later using the Web client (see Step 8
on page 230).
4 Take note of the library’s IP address (on the operator panel, select
Reports > Network Settings).
Quantum Scalar i40 and Scalar i80 User’s Guide
229
Chapter 8: Installing, Removing, and Replacing Components
Removing and Replacing the System Control Board
5 Access the Web client using the IP address and log in using the
default user name and password:
• User name: admin
• Password: password
6 Optionally, install tape drive firmware for autoleveling. The library
firmware contains baseline tape drive firmware for autoleveling.
Verify your tape drive firmware is at the level you expect. If not:
a Upload the tape drive firmware you want to use. From the Web
client, select Tools > Drive Operations > Upload/remove tape
drive firmware for autoleveling.
b Unload all tape cartridges from the tape drives on which you
want to autolevel firmware.
c Initiate autoleveling by doing one of the following:
• Restart the library (from the operator panel, select Actions
> Shutdown > Restart Library.
• Restart all the tape drives you want to autolevel, as follows:
From the Web client, select Tools > Diagnostics. Confirm
you want to take the partitions offline. Select Drives >
Drive Tests > Drive Reset. Select the applicable partitions
and tape drives, then click Apply, then click OK.
7 If you changed the IP address from what it was originally, update
host and other applications that access the library.
8 Update the library name, time zone, and any other configuration
settings, if required, using the Web client Setup menus.
9 Save the library configuration. From the Web client, select Tools >
Save/Restore Configuration. Select Save Configuration and click
Apply. Save the configuration to a known location.
10 It is recommended that you run the Installation and Verification Test
(IVT). From the operator panel, select Tools > IVT and follow the
instructions. The IVT takes about 30 minutes. If any problems are
detected, the library issues a diagnostic ticket.
11 Package the old SCB in the packaging that shipped with the new
SCB and send the old SCB back to Quantum.
230
Quantum Scalar i40 and Scalar i80 User’s Guide
Chapter 8: Installing, Removing, and Replacing Components
Removing and Replacing a Tape Drive
Removing and Replacing a Tape Drive
It is recommended that you remove and install tape drives with library
power ON — it is faster and keeps non-affected tape drives and
partitions active.
The tape drive always resides in a drive sled, and together they are
effectively one unit. If you order a new or replacement tape drive, it will
already be installed in a sled.
Caution: Do not remove the tape drive from the drive sled.
Note: For multiple tape drive installs in which you are changing
control paths, install and verify the tape drives one at a time,
rather than all at once.
Preparing Partitions
and Control Paths
Depending on the types of tape drives you are removing and installing,
you may need to reconfigure library partitions or change the control
path before you remove and replace the tape drive. There are four
different types of installation, described in the table below. Follow the
instructions in the table before proceeding to the remove/install
procedures.
Type of Installation
Instructions
Adding a new tape drive
No special instructions.
Replacing a tape drive that is
not assigned to a partition
No special instructions.
Quantum Scalar i40 and Scalar i80 User’s Guide
231
Chapter 8: Installing, Removing, and Replacing Components
Removing and Replacing a Tape Drive
Type of Installation
Instructions
Replacing tape drive that is
assigned to a partition with
a tape drive that has the
same:
Install the replacement tape drive in the same slot as the removed
tape drive.
• interface type (Fibre
Channel or SAS), and
• form factor (half-height or
full-height), and
There are no special instructions unless the tape drive you are
replacing is the control path in a partition with multiple tape drives,
and you want the partition to remain online during the replacement
procedure. In this case, select another tape drive as the control path.
From the Web client, use the Setup > Control Path menu path.
• vendor
Replacing a tape drive that is
assigned to a partition with
a tape drive that has a
different:
• interface type (Fibre
Channel or SAS), or
• form factor (half-height or
full-height), or
• vendor
• If the partition contains only one tape drive, delete the partition
before removing the tape drive and then re-create the partition
once you install the replacement tape drive.
• If the partition contains multiple tape drives and the tape drive you
want to replace is not the control path, delete the tape drive from
the partition.
• If the partition contains multiple tape drives and the tape drive you
want to replace is the control path, select another tape drive as
the control path. Then delete the tape drive you want to replace
from the partition.
To delete tape drives from partitions, select Setup > Partitions from
the Web client.
To modify the control path, select Setup > Control Path from the
Web client.
Removing a Tape Drive
from the Library
Caution: Do not remove a tape drive that is currently performing an
operation.
1 Make sure the tape drive you want to remove is empty of media.
From the operator panel, select Actions > Tape Drive > Unload.
2 Take the tape drive you want to remove offline. From the operator
panel, select Actions > Tape Drive > Change Mode. Select the
tape drive and press Modify. Press the Down button to select
Offline, then press Apply.
3 Disconnect the cable from the back of the tape drive.
232
Quantum Scalar i40 and Scalar i80 User’s Guide
Chapter 8: Installing, Removing, and Replacing Components
Removing and Replacing a Tape Drive
4 Unscrew the captive thumbscrews securing the drive sled to the
back of the library. Half-height tape drives have two thumbscrews.
Full-height tape drives have four thumbscrews.
5 Using the handle, pull the drive sled out of the library. It should slide
out smoothly and easily.
6 Wait at least 10 seconds before installing a replacement tape drive
to allow the library to recognize that the tape drive has been
removed.
7 Install a replacement tape drive following the instructions below. If
any empty slots remain, install a filler plate in the empty slot.
8 If you are returning the tape drive to Quantum, wrap it in the
antistatic bag in which the replacement tape drive is wrapped, then
finish packing it in the same packaging materials from the
replacement tape drive. Ship the tape drive to Quantum using the
RMA materials included in the packaging.
Installing a Tape Drive
Tape Drive Slot Location Considerations
Tape drives can only fit in certain slots, as described below and
illustrated in Figure 59. Slots are numbered starting from the bottom
and moving up.
• Scalar i40: Half-height tape drives can be installed in slots 1 and 2.
A full-height tape drive can be installed in slot 1.
• Scalar i80: Half-height tape drives can be installed in slots 1, 2, 3, 4,
and 5. Full-height tape drives can be installed in slots 1, 3, and 5.
The extra space where slot 6 would be cannot hold a half-height
tape drive, but will accommodate a full-height tape drive installed in
slot 5.
If possible, it is recommended to start installing the tape drives at the
bottom slot and work up, without leaving spaces between.
If you are replacing an existing tape drive with a tape drive of the same
interface type, form factor, and vendor, place the replacement tape
drive in the same slot as the removed tape drive.
Quantum Scalar i40 and Scalar i80 User’s Guide
233
Chapter 8: Installing, Removing, and Replacing Components
Removing and Replacing a Tape Drive
Figure 59 Acceptable
Installation Locations for FullHeight Tape Drives
Scalar i40
Scalar i80
Installation Procedure
1 If you need to remove one or more filler plates, unscrew the two
thumbscrews securing the filler plate to the back of the library.
Holding the thumbscrews, pull the filler plate gently out of the
library. Save the filler plate in case you need to use it in the future.
2 Insert the tape drive into the drive slot. The “shelf” on the bottom of
the drive sled fits into the notch in the library chassis and slides on
the plastic guide rails (see Figure 60 on page 235). The tape drive
must be level to slide in smoothly. At the very end of the slide, you
will feel a slight “click” as the tape drive sled connector connects
into its mating connector in the library chassis.
234
Quantum Scalar i40 and Scalar i80 User’s Guide
Chapter 8: Installing, Removing, and Replacing Components
Removing and Replacing a Tape Drive
Figure 60 Installing a Tape
Drive
Notch in library
chassis
Drive sled “shelf”
slides in notch
3 Tighten the tape drive’s captive thumbscrews finger tight to secure
the tape drive to the library chassis.
The tape drive LED illuminates red for up to 30 seconds. Then the
tape drive fan starts and the LED turns amber, indicating the tape
drive is offline. If this is a new installation (not a replacement), the
tape drive will come online automatically.
4 Connect the tape drive cable from the tape drive to the host.
5 If the firmware on the newly installed tape drive is different from
the standard configured on the library, the library will automatically
autolevel the new tape drive’s firmware upon installation (for more
information, see Updating and Autoleveling Tape Drive Firmware on
page 164).
Autoleveling takes about 7 minutes. A message appears on the
operator panel indicating autoleveling is taking place.
If autoleveling is not required, the tape drive takes about 2 minutes
to come ready.
Quantum Scalar i40 and Scalar i80 User’s Guide
235
Chapter 8: Installing, Removing, and Replacing Components
Removing and Replacing a Tape Drive
6 If needed, add the new tape drive to an existing partition or create a
new partition for it. From the Web client, select Setup > Partitions
and complete the necessary screens.
7 Bring the tape drive online, if it is not online already. From the
operator panel, select Actions > Tape Drive > Change Mode.
Select the tape drive you want to bring online and press Modify.
Use the Up and Down buttons to change the mode to Online, then
press Apply.
The tape drive LED turns green.
8 Verify the installation by reviewing the library configuration report
on the Web client (Reports > Library Configuration). Make sure
that the new drive is online, in the correct partition, and has the
control path status that you want. You may need to refresh your
Internet browser.
9 Verify that the host computer and backup applications can see the
new tape drive configuration correctly.
10 If any empty slots remain, install a filler plate in the empty slot.
Caution: Filler plates are required to maintain proper library
cooling. Do not run the library with uncovered slots.
11 Run the tape drive diagnostic test on the newly installed tape drive
to be sure it is functioning correctly.
a Install a scratch tape in the top I/E station slot.
b If manual cartridge assignment is enabled, assign the scratch
tape to the System partition.
c From the operator panel, select Tools > Diagnostics.
d Continue through the next few screens to run the tape drive test
on the replaced tape drive.
If a problem is found during testing, you receive a diagnostic ticket.
See Running the IVT Diagnostic Subtests Individually – Robotics,
Tape Drive, and Magazine Tests on page 257 for more information.
12 Save the library configuration (see Saving the Library Configuration
on page 101).
236
Quantum Scalar i40 and Scalar i80 User’s Guide
Chapter 8: Installing, Removing, and Replacing Components
Packaging the Library for Moving or Shipping
Packaging the Library for Moving or Shipping
Packaging Kit Contents
• Shipping box
• Top foam
• Bottom foam
• Anti-static wrapping
• (4) M5 Thumbscrews to restrain robot
Creating a Backup Map
of Cartridge Locations
You must remove all the tape cartridges before shipping the library. If
you want to maintain the same partitions and magazine slot
assignments in your new location as you are using currently, you will
want to reinstall your tape cartridges in the same slots they are in now.
The library configuration report provides a convenient “map” of your
slot assignments. If you print or copy this map, you will be able to easily
install your cartridges later.
1 On the Web client, select Reports > Library Configuration.
2 Click the Show Barcodes button.
The screen displays a map of the library showing the partitions and
the location of each cartridge, by barcode.
3 Click the “print” icon in the upper right corner to print the report.
Alternatively, take a screen capture of the report and save or print it,
or copy the map by hand.
Procedure
1 As a precautionary measure, save the library configuration: From the
Web client, select Tools > Save/Restore Configuration. Select Save
System Configuration and click Apply. When prompted, save the
file to a known location on your computer.
2 Stop all library and host operations.
Quantum Scalar i40 and Scalar i80 User’s Guide
237
Chapter 8: Installing, Removing, and Replacing Components
Packaging the Library for Moving or Shipping
3 Remove the magazines from the library:
a From the operator panel, select Actions > Magazine.
b Use the Up and Down buttons to select the magazine you want
to remove and press Release.
c Wait for the operator panel to display the message: “Magazine
is now unlocked. Waiting for the magazine to be moved to the
expected position.”
d Pull the magazine bezel out and remove the magazine from the
library. If you do not remove the magazine within 30 seconds,
the magazine locks again.
e Repeat for all magazines in the library.
Caution: Do not put your hands or any other objects into the
magazine openings while library power is on.
4 Remove all the tape cartridges from the magazines.
5 Shut down the library by selecting Actions > Shutdown from the
operator panel. Wait for the operator panel to prompt you to turn
off library power.
6 Turn OFF the library by pressing the power button on the front
panel. Wait for the LED on the SCB to turn off.
7 Disconnect the power supply cord, the Ethernet cable, and all tape
drive cables from the back of the library. If you have multiple tape
drives, label the cables so you can reconnect them to the correct
ones later.
8 If the library is in a rack or desktop kit, remove it.
• To remove the library from a rack:
a Remove all the tape drives from the library. Label tape drives
so you know what order to reinstall them later. They must
be reinstalled in the same slots as they were previously.
Unscrew the thumbscrews and pull the tape drive handle to
remove the drive from the library.
b Unscrew the captive thumbscrews on the front of the library
that secure the library to the rack, then slide the library out
of the rack. Place the library on a flat, stable surface.
238
Quantum Scalar i40 and Scalar i80 User’s Guide
Chapter 8: Installing, Removing, and Replacing Components
Packaging the Library for Moving or Shipping
WARNING: Two people are required to safely remove the
library from the rack.
• To remove the library from a desktop kit, remove the two top
cover screws. Loosen the captive thumbscrews on the library
chassis that are attached to the side panels of the desktop kit.
Slide the side panels one inch toward the rear of the library,
then pull the side panels off.
9 Make sure the robot is sitting on the floor of the library as follows:
Look inside the library through one of the magazine openings. If the
robot is not sitting on the floor of the library, reach inside and
gently press down on one of the robot’s metal side rods until the
robot starts moving. It should drift down to rest on the floor of the
library.
10 Reinstall the empty magazines in the library by pushing them in
until they stop.
11 If you removed the tape drives earlier, reinstall them in their proper
slots. Push them carefully into their slots and tighten the captive
thumbscrews.
12 Restrain the robot as follows (see Figure 61 on page 240):
a Turn the library carefully on its side (either the left or right side).
Make sure the front end of the library (the “rack ear”)
overhangs the edge of the table so that the library lies flat.
Caution: Do not turn the library upside down. Do not turn
the library more than 90 degrees from upright.
b Install four thumbscrews into the floor of the library in the
locations shown in Figure 61 on page 240. They will screw
through the robot and hold it in place on the floor of the library.
Quantum Scalar i40 and Scalar i80 User’s Guide
239
Chapter 8: Installing, Removing, and Replacing Components
Packaging the Library for Moving or Shipping
Figure 61 Restraining the
Robot
Rack “ear” overhangs
edge of desk or table
Four robot restraint
thumbscrews
c Do NOT turn the library back to an upright position at this
point. Leave it on its side until you place it in the box.
Caution: If you place the library upright with the robot
restraint thumbscrews installed, you could damage
the chassis or the robot.
13 Wrap the library in the anti-static wrapping provided in the
packaging kit.
WARNING: Two people are required to safely lift the library.
240
Quantum Scalar i40 and Scalar i80 User’s Guide
Chapter 8: Installing, Removing, and Replacing Components
Packaging the Library for Moving or Shipping
14 Place the library in the packaging as shown in Figure 62.
Figure 62 Packing the Library
for Shipping
Top foam
Library
wrapped in
anti-static
wrap
Bottom foam
Shipping box
Quantum Scalar i40 and Scalar i80 User’s Guide
241
Chapter 8: Installing, Removing, and Replacing Components
Replacing the Robot
Caution: When unpacking the library in its new location, lift it out of
the packaging and immediately place it on its side to
remove the four thumbscrews securing the robot to the
floor of the library. Do not place it upright until you have
removed the four thumbscrews, or you could damage the
chassis or the robot. When placing the library on its side,
do not set it on the “rack ear” or the magazine handle, or
you could damage them.
Replacing the Robot
Robot replacement is a service-only procedure. If the robot fails, you will
need to call Quantum Support for a replacement.
242
Quantum Scalar i40 and Scalar i80 User’s Guide
Chapter 9
Troubleshooting
The Scalar i40 and Scalar i80 libraries include advanced system monitoring
and alerting mechanisms that inform you of library status and issues.
The library provides you with status information about various library
subsystems and components. It also notifies you of issues it detects and
guides you through diagnosing and correcting issues before problems
interfere with backups.
This chapter covers:
• About Diagnostic Tickets
• Capturing the Library Snapshot
• Troubleshooting Library “Not Ready” Messages
• Retrieving Tape Drive Logs
• Interpreting LEDs
• Running the Installation and Verification Test (IVT)
• Running the IVT Diagnostic Subtests Individually – Robotics, Tape
Drive, and Magazine Tests
• Running the Random Move Test
• Performing Library Diagnostics
• Resetting Factory Defaults
Quantum Scalar i40 and Scalar i80 User’s Guide
243
Chapter 9: Troubleshooting
About Diagnostic Tickets
About Diagnostic Tickets
The library uses advanced problem detection, reporting, and
notification technology to alert you of problems as soon as they occur.
The library performs numerous self-tests to monitor the library’s
temperature, voltage and currents, and standard library operations. It
performs these self-tests each time the library is powered on and during
normal operation when the library is idle.
If the self-test detects a problem, the library generates a diagnostic
ticket that identifies the component that is likely causing the problem. If
the problem is not severe, the library continues to provide full
functionality to all unaffected partitions.
The tickets are assigned one of three priority levels:
• Low — The lowest level of priority. A ticket with low priority
indicates that an abnormal condition existed within the library that
warrants investigation and correction but the nature of the
condition may have little or no effect on operations.
• High — The middle level of priority. A ticket with high priority
indicates that a condition exists within the library that impacts
system performance or redundancy. Typical library operations can
continue without immediate corrective action, but a user should
investigate the condition and correct the problem soon.
• Urgent — The highest level of priority. A ticket with urgent priority
indicates that a failure has occurred or a serious condition exists
within the library that requires immediate corrective action. In most
cases, a hardware component is no longer functioning at an
acceptable level or has failed. Typical library operations required for
backup or restore are either not possible or highly unreliable.
The library has a number of visual cues to alert you that one or more
diagnostic tickets exist:
• The library’s ticket indicator LED turns on to indicate that at least
one ticket exists (see Front Panel LEDs on page 251).
• The operator panel displays a health status icon (see Health status
on page 29 for description).
• The Web client displays a subsystem status icon (see Subsystem
Status on page 35).
244
Quantum Scalar i40 and Scalar i80 User’s Guide
Chapter 9: Troubleshooting
About Diagnostic Tickets
You can frequently resolve a simple problem yourself, but if the problem
is complex or involves a field replaceable unit (FRU), you will be directed
to contact service. Only qualified service technicians can service FRUs.
Viewing, Closing, and
Resolving Diagnostic
Tickets
The initial status of all diagnostic tickets is Unopened. Once you select
the Resolve button, the ticket status changes to Opened. When you
close the ticket, its status changes to Closed. You can view Opened and
Unopened tickets on both the operator panel and the Web client, but
you can view Closed tickets only on the Web client.
You can view and close diagnostic tickets on both the operator panel
and the Web client, but only the Web client provides a complete
description of the event and guides you through a series of steps to
resolve the issue. It is recommended that you use the Web client to view
and resolve all your diagnostic tickets.
Only one person at a time can resolve a ticket. Multiple users can,
however, view ticket details simultaneously.
If your Web client session goes down while resolving a diagnostic ticket,
you must wait 3 minutes before you can continue resolving the
diagnostic ticket.
Operator Panel
1 Select Reports > Diagnostic Tickets.
2 Select Library, Tape Drives, or Media as the tickets you want to
view. Press Select.
3 All of the relevant tickets are listed. Scroll through and select the
one you want to view. Press View.
Basic details, such as ticket ID number, short description, priority,
and when the ticket was created and updated, appear.
4 You can either press Close to close the ticket, or press Exit to exit
without closing the ticket.
Web Client
1 You can view all diagnostic tickets by selecting Tools > All
Diagnostic Tickets. Alternatively, you can view library, tape drive,
Quantum Scalar i40 and Scalar i80 User’s Guide
245
Chapter 9: Troubleshooting
About Diagnostic Tickets
and media tickets separately via the Home Page Subsystem Status
buttons (see Subsystem Status on page 35).
Whichever method you choose, the tickets are displayed in order of
last occurrence of each event, beginning with the most recent.
Note: Last Occurrence indicates the last time a ticket event
occurred. This information updates any time the event
recurs. Last Occurrence does NOT update if you open,
close, or resolve the diagnostic ticket.
2 Identify the diagnostic ticket you want to resolve.
Note: You can use the Go to Diagnostic Ticket text box at the
bottom of the screen to locate a specific ticket number. In
addition, if there is more than one page of tickets, use the
Page 1 of x arrows to view the additional tickets.
3 To view more details about the ticket, including the location
coordinates of resources that may be involved, click the Details
button.
4 To resolve the ticket, click the Resolve button. A series of screens
guides you through steps to resolve the issue on your own. If the
situation cannot be resolved, you are instructed to contact technical
support. When you have finished reading all of the Resolution
screens, do one of the following:
• To close the ticket now, click Close. The Tools - All Diagnostic
Tickets window displays, with the ticket no longer in the list.
• To leave the ticket open for future troubleshooting, click Exit.
The ticket remains on the list.
5 You can also close all tickets at once by clicking the Close All Tickets
button.
Caution: Be careful when pressing the Close All Tickets button.
This closes all diagnostic tickets even if they are not
resolved. It is recommended that each diagnostic ticket
be viewed, analyzed, and closed individually.
246
Quantum Scalar i40 and Scalar i80 User’s Guide
Chapter 9: Troubleshooting
Capturing the Library Snapshot
Note: To display all closed tickets, select the Include Closed Tickets
check box at the bottom of the screen. The Tools - All
Diagnostic Tickets screen refreshes, with the Resolve button
unavailable for all closed diagnostic tickets.
Capturing the Library Snapshot
Technical support personnel may ask you to capture a snapshot of the
library so they can better diagnose issues. The Capture Snapshot
operation captures detailed information about the entire library in a
single ASCII file that can be e-mailed to technical support personnel.
The logged information consists of configuration data, status
information, and trace logs for library components. Trace logs collect
problem data and provide support personnel with vital library
information for troubleshooting and solving problems.
You can e-mail the snapshot file to a recipient or download it to a
computer. If you want to e-mail it, ensure that the library e-mail account
is appropriately configured before you perform the Capture Snapshot
operation. If the library e-mail account address is not configured, an
error appears. For information on configuring the e-mail account, see
Configuring the Library E-Mail Account on page 74.
Depending on the library configuration and your connection speed,
saving the snapshot file takes approximately 30 minutes. The resulting
file size can be large. Your firewall file-size limitations could prohibit you
from e-mailing the file.
You can only capture a snapshot via the Web client.
Web Client
1 Select Tools > Capture Snapshot.
2 Select whether to download the file or e-mail it to a recipient, and
click Apply.
Quantum Scalar i40 and Scalar i80 User’s Guide
247
Chapter 9: Troubleshooting
Troubleshooting Library “Not Ready” Messages
Troubleshooting Library “Not Ready” Messages
“Not Ready” Messages
on the Operator Panel
If a “not ready” message appears on the operator panel at startup, it
means the robot cannot move.
If the “not ready” message occurs upon initial installation (first time out
of the box or after a chassis replacement), make sure you removed the
robot restraint as described in Unpacking the Library on page 14.
If the robot has been properly released, or this has happened at a time
other than initial startup, power cycle the library to clear the error. If
that fails, contact Quantum Support.
“Not Ready” Messages
on the Web Client
The Web client user interface includes a header that contains the
company logo, product name, and the three main navigation buttons
(Home, Help, and Logout). In addition, a message in the header alerts
you when the library is not ready. (No message displays in the header
when the library is in a ready state.) For more information on Web client
user interface elements, see Web Client Layout and Functions on
page 32.
Library “not ready” messages continue to display in the header until the
issue has been resolved, and the robot has completed its calibration.
If the library displays a “not ready” message, you may be able to tell
from the message how to remedy the situation. If not, the library
generates a diagnostic ticket whenever the library encounters a
problem. The diagnostic ticket may provide information that can help
you troubleshoot the problem. For more information, see About
Diagnostic Tickets on page 244.
248
Quantum Scalar i40 and Scalar i80 User’s Guide
Chapter 9: Troubleshooting
Troubleshooting Library “Not Ready” Messages
The library “not ready” messages include the following, with possible
solutions listed:
Message
Resolution
Library is not ready
The library is initializing and becoming
ready. Wait for the library to finish
initialization.
Library is becoming ready
Wait for the library to finish
initialization.
Library is not initialized
Most likely a problem with the robot.
Try the following:
• Check the diagnostic ticket and
follow the resolution steps listed (see
About Diagnostic Tickets on
page 244).
• Power cycle the library to clear the
error. If that fails, contact Quantum
Support.
Library needs manual
attention
Most likely a problem with the robot or
other component. Try the following:
• Check the diagnostic ticket and
follow the resolution steps listed (see
About Diagnostic Tickets on
page 244).
• Power cycle the library to clear the
error. If that fails, contact Quantum
Support.
Note: You may not see the “not ready” message in the Web client
until the browser refreshes. Similarly, even if the problem has
been resolved, the “not ready” message will not disappear
from the Web client until the browser refreshes.
Quantum Scalar i40 and Scalar i80 User’s Guide
249
Chapter 9: Troubleshooting
Retrieving Tape Drive Logs
Retrieving Tape Drive Logs
The library allows you to retrieve tape drive logs using the Web client.
Tape drive log information can be used to help troubleshoot the library,
the tape drive sled, and tape drive issues.
Since the log retrieval process can take up to 30 minutes, the tape drive
and associated partition are automatically taken offline during the
operation and brought back online when the operation completes. You
will be asked to confirm that you want to take the tape drive and
partition offline.
Tape drive log files adhere to the following naming convention:
UDS_ID_SN.DMP, where ID identifies the tape drive coordinate location
within the library and SN identifies the tape drive serial number.
You can only retrieve tape drive logs via the Web client.
Web Client
1 Select Tools > Drive Operations.
2 Select Retrieve Tape Drive Log.
3 Click Apply.
4 When the Success message appears, complete the next screens to
save the log file to your computer.
Interpreting LEDs
LEDs provide a visual indication about the status of certain library
components. LEDs can sometimes communicate that a problem exists
when diagnostic tickets cannot.
The following components of the library have LEDs:
• Front panel
• System control board (SCB)
250
Quantum Scalar i40 and Scalar i80 User’s Guide
Chapter 9: Troubleshooting
Interpreting LEDs
• Tape drives
• Power supplies
Front Panel LEDs
There are two LEDs on the front panel, above the power button. They
function as follows:
LED Location
Color
Indicates
Power-on LED
(closest to power
button)
Green
Library power is ON.
Ticket indicator
LED. (farthest from
power button)
Amber
The LED is illuminated when at least
one open or unopened diagnostic
ticket exists.
Figure 63 Front Panel LEDs
Ticket indicator LED
Power-on LED
Quantum Scalar i40 and Scalar i80 User’s Guide
251
Chapter 9: Troubleshooting
Interpreting LEDs
System Control Board
LEDs
The SCB has one health status LED. In addition, each Ethernet port
contains two LEDs, a green “activity indicator” and an amber “link
indicator.” The Ethernet port closest to the center of the library is for
customer use. The Ethernet port farthest from the center of the library is
for service use only.
LED
Color
Indicates
SCB Health
Status LED
Green
Healthy and operational.
Red
Failure. Replacement required.
Ethernet
Port Green
LED (Activity
Indicator)
Green
This LED illuminates when actual
“traffic” is being sent over the Ethernet
cable. The LED may be blinking or on
solid; it blinks more rapidly the more
traffic is being sent over the
connection. When the LED is lit,
communications are in process and
when the LED is off no communication
is occurring.
Ethernet
Port Amber
LED (Link
Indicator)
Amber
This LED illuminates solidly when a
“link” is established, and will be off
when no “link” is present. “Link”
means an Ethernet cable is connected
and the other end of the cable is also
connected to another powered-up and
operational Ethernet device.
Figure 64 System Control
Board LEDs
Customer Ethernet
port LEDs
252
Service Ethernet
port LEDs
Health status LED
Quantum Scalar i40 and Scalar i80 User’s Guide
Chapter 9: Troubleshooting
Interpreting LEDs
Tape Drive/Sled LEDs
The library supports SAS and Fibre Channel tape drives. The drive sled
LEDs for each are described below.
SAS
SAS Tape Drive Sleds have one LED that indicates the following:
Color
Indicates
Green
Healthy and operational.
Amber
Tape drive is offline.
Red
Failure. Replacement required.
Fibre Channel
Fibre Channel tape drive sleds have two LEDs on their rear panel,
indicated on the drive sled as STATUS and LINK (see Figure 65).
LED
Color
Indicates
Status
Green
Healthy and operational.
Amber
Tape drive is offline.
Red
Failure. Replacement required.
Green
On solid — Fibre Channel link is
present
Link
Flashing — Fibre Channel link is
present and communications are in
process
Off
Quantum Scalar i40 and Scalar i80 User’s Guide
No Fibre Channel link is currently
present.
253
Chapter 9: Troubleshooting
Interpreting LEDs
Figure 65 Fibre Channel Tape
Drive LEDs
Link LED
Status LED
Half-height
FC tape
drive
Full-height
FC tape
drive
Link LED
254
Status LED
Quantum Scalar i40 and Scalar i80 User’s Guide
Chapter 9: Troubleshooting
Running the Installation and Verification Test (IVT)
Power Supply LED
Diagnostic tickets typically report all problems related to power
supplies. You can also observe the power supply LED to see if the power
supply is functioning appropriately (see Figure 66). The power supply
LED indicates the following:
LED Color
Indicates
Green
AC power is present and the library front panel
power switch is turned ON.
Amber
AC power is present but the library front panel
switch is turned OFF.
Red
Power supply failure.
Off
No power. Ensure the power supply is correctly
plugged into a wall outlet.
Figure 66 Power Supply LED
Power supply LED
Running the Installation and Verification Test (IVT)
The Installation and Verification Test (IVT) is used to evaluate a newly
installed library. Its purpose is to verify that the robot is functioning
properly, and that the magazines and tape drives are installed correctly
Quantum Scalar i40 and Scalar i80 User’s Guide
255
Chapter 9: Troubleshooting
Running the Installation and Verification Test (IVT)
and reachable by the robot. It also verifies that barcode labels can be
read by the robot scanning operation.
You should run the full IVT upon installation of a new library, and at any
other time you remove, replace, or service components that require you
to move the library into or out of a rack or desktop kit. You must run the
robotics test after a robot replacement.
The full IVT is consists of three subtests. You may run the sub-tests
separately (see Performing Library Diagnostics on page 259). The full IVT
may take up to 30 minutes to complete.
• Robotics Test — a series of tests that evaluate the basic
functionality of the robotics assembly, including picker travel, Ycarriage assembly travel, barcode scanning, calibration sensors, and
several moves of a scratch tape. It also calibrates the robot to the
library. The test takes up to 11 minutes to complete.
• Tape Drive Test — for each installed tape drive, the robot moves a
scratch tape into the tape drive, inventories the scratch tape, and
moves the scratch tape out of the tape drive. The test takes 1–2
minutes per tape drive.
• Magazine Test — moves a scratch tape through all storage slots in
the library. These tests verify the robotics can reach all the slots in
the magazine for both get and put operations. The test takes up to
5 minutes per magazine.
Details on running the IVT subtests include:
The IVT requires you to provide a scratch tape before the test can begin.
You will be prompted to place a scratch tape into the top I/E station slot.
When you close the I/E station, the Assign IE screen appears if Manual
Cartridge Assignment is enabled (Setup > System Settings). Assign the
new scratch tape to the System partition, and then select Apply.
• Before IVT starts, a check is performed to verify a scratch tape is in
the top I/E slot and assigned to the system partition. If it is not, all
three tests will immediately fail.
• The scratch tape must be compatible with all tape drives. If any tape
drive cannot accept the scratch tape, the test will not start and will
fail. For a list of supported media, see Supported Media on
page 273.
• The operator panel displays progress of all three tests. Before a test
begins, its progress is “Scheduled.” When a test begins, its progress
256
Quantum Scalar i40 and Scalar i80 User’s Guide
Chapter 9: Troubleshooting
Running the IVT Diagnostic Subtests Individually – Robotics, Tape Drive, and Magazine Tests
changes to “Running.” Once a test completes, its progress changes
to either “Passed” or “Failed.”
• You can stop the IVT by pressing the Stop button. The progress of
the currently running test changes to “Stopping.” Once stopped,
the current test and all other scheduled tests display “Stopped.”
• Running IVT logs all users off of the Web client.
You can only perform the IVT from the operator panel.
Operator Panel
1 Install a scratch tape in the top I/E station slot.
2 If manual cartridge assignment is enabled, assign the scratch tape
to the System partition.
3 Select Tools > IVT.
4 Press Yes to start the test.
Running the IVT Diagnostic Subtests Individually –
Robotics, Tape Drive, and Magazine Tests
If you do not need to run the full IVT, you can run the robotics, tape
drive, or magazine test separately to check an individual component.
You should do this when you remove, replace, or service a component
that does not require you to remove the library into or out of a rack or
desktop kit.
Details about running the diagnostic subtests is the same as for the full
IVT (see Running the Installation and Verification Test (IVT) on page 255)
with the following exceptions:
• For the Tape Drive and Magazine diagnostics, you will choose just
one device on which to run the diagnostic, rather than all. The tape
drive test only tests the selected tape drive. The magazine test tests
all the slots in the selected magazine.
Quantum Scalar i40 and Scalar i80 User’s Guide
257
Chapter 9: Troubleshooting
Running the Random Move Test
• Once a diagnostic test starts, you cannot stop it. You must let it run
to completion. When complete, the operator panel displays
“passed” or “failed.”
You can only perform the subtests on the operator panel.
Operator Panel
1 Install a scratch tape in the top I/E station slot.
2 Assign the scratch tape to the System partition.
3 Select Tools > Diagnostics.
4 Select Robotics Test, Tape Drive Test, or Magazine Test and press
Select.
5 For the tape drive or magazine test, select which tape drive or
magazine you want to test and press Select.
6 Press Run.
Running the Random Move Test
This will perform a demo that consists of moving a scratch tape into
random slots around the library. Partitions are set offline and the test
runs continuously until you stop it. You can only run this test from the
operator panel.
Operator Panel
1 Install a scratch tape in the top I/E station slot.
2 Assign the scratch tape to the System partition.
3 Select Tools > Random Move Test.
4 Press Run.
5 When you are ready to stop the test, press Stop.
6 When the operator panel displays the message that the test has
stopped, press OK.
258
Quantum Scalar i40 and Scalar i80 User’s Guide
Chapter 9: Troubleshooting
Performing Library Diagnostics
Performing Library Diagnostics
The Diagnostics menu on the Web client contains tests you can run to
determine if tape drives and robotics, are working as they should.
Notes about Diagnostics include:
• Entering Diagnostics takes all your library partitions offline. Be sure
any crucial operations have stopped before you enter Diagnostics.
When you exit Diagnostics, your partitions return to the online/
offline status they were in previously.
• Only users with Admin level privileges can access Diagnostics.
• Only one user can be logged into Diagnostics at a time. Entering
Diagnostics disconnects all other Web client users with the same or
lower privileges (the operator panel user is not logged out, but any
attempted operation using partitions will fail). Users will be unable
to log in to the Web client and will get an error message stating that
Diagnostics is in progress.
• You can only enter Diagnostics from the Web client.
Web Client
1 Select Tools > Diagnostics.
A confirmation dialog appears, alerting you that all other users will
be logged out and library partitions will be taken offline.
2 Click OK.
You are now in a page that looks much like the regular Home page,
but with different choices in the menu bars. Also, you will notice
that all your partitions are offline.
3 Select the test you want to run from the menus. Your choices
include:
• Tape Drive Reset (see Resetting a Tape Drive on page 260 for
more information)
• Robotics Get/Put Test (see Robotics Get/Put Test on page 261 for
more information)
4 To exit Diagnostics, select Exit.
Quantum Scalar i40 and Scalar i80 User’s Guide
259
Chapter 9: Troubleshooting
Performing Library Diagnostics
Resetting a Tape Drive
The Drive Reset operation power cycles the tape drive while the tape
drive remains in the drive sled in the library. You may want to perform a
reset if a tape drive does not come ready or it is not behaving properly
(for example, if a tape is stuck in the drive and will not unload).
The reset may take several minutes. After the reset operation completes,
the tape drive is rebooted and reconfigured. This takes about 60
seconds. Wait 60 seconds before performing further drive operations.
You may perform a tape drive reset from either the operator panel or
the Web client. If you use the Web client, you must enter Diagnostics,
which logs out all users of the same or lower privilege level (see
Performing Library Diagnostics on page 259).
Operator Panel
1 Select Actions > Tape Drive > Reset.
2 Select the tape drive you want to reset and push Reset.
Once the operation completes, the operator panel displays a
message stating that the operation completed, and there will be
diagnostic tickets if it failed.
3 Press OK.
4 Check to see if the library generated diagnostic tickets.
Web Client
1 Enter Diagnostics (Tools > Diagnostics, then click OK to take
partitions offline and log out all other users of the same or lower
privileges).
2 Select Drives > Drive Tests > Drive Reset.
3 If the tape drives are assigned to more than one partition, select the
partition in which the tape drive(s) you want to reset are located.
Select Unassigned if the tape drive(s) you want to reset are not
assigned to a partition. Click Next.
4 Select the tape drive(s) you want to reset.
5 Click Apply.
6 The test runs. When complete, a “success” or “failure” message
appears.
260
Quantum Scalar i40 and Scalar i80 User’s Guide
Chapter 9: Troubleshooting
Resetting Factory Defaults
Robotics Get/Put Test
The Get/Put Test requires the robot to remove one tape cartridge from
the top I/E station slot, and then put the tape cartridge back into the
same slot. To run this test, you must insert a tape into the library’s top
(uppermost) I/E station slot.
You can only perform this test from the Web client, by entering
Diagnostics (see Performing Library Diagnostics on page 259).
Web Client
1 Install a scratch tape in the top I/E station slot.
2 If manual cartridge assignment is enabled, assign the scratch tape
to the System partition.
3 Enter Diagnostics (Tools > Diagnostics, then click OK to take
partitions offline and log out all other users of the same or lower
privileges).
4 Select Robotics > Robotics Get/Put Test.
5 Click Apply.
6 The test runs. When complete, a “success” or “failure” message
appears.
Resetting Factory Defaults
Resetting factory defaults restores the library’s default configuration
(see Default Configuration on page 42).
• Resetting factory defaults clears: most of the library’s
configurable items, such as partitions, user accounts, import/export
(I/E) station slots, cleaning slots, and so on. It also clears all
diagnostic tickets and log information, and deletes user-provided
tape drive firmware used for autoleveling.
• Resetting factory defaults does NOT clear: date and time,
network configuration, or license key settings, nor does it change
the library firmware version.
Quantum Scalar i40 and Scalar i80 User’s Guide
261
Chapter 9: Troubleshooting
Resetting Factory Defaults
You may want to reset factory defaults if you are completely reinstalling
or reconfiguring the library.
If you downgrade from one firmware version to an earlier version,
library configuration settings will be reset to the factory defaults for the
newly installed firmware.
If you upgrade firmware, your library configuration settings remain as
you have set them.
Web Client
On the Web client, this feature is only available to service users using the
service login and password.
Operator Panel
On the operator panel, if logins are disabled (default), this operation is
available to all users. If logins are enabled, this operation is only
available to service users using the service login and password.
1 Select Tools > Reset Factory Defaults.
A message appears stating that configuration data will be cleared
and library rebooted.
2 Press Yes to continue.
262
Quantum Scalar i40 and Scalar i80 User’s Guide
Chapter 10
Working With Cartridges
and Barcodes
This chapter describes how to work with cartridges and barcodes. When
working with tape cartridges, certain considerations should be taken
into account. For example, all tape cartridges in the library must have a
barcode label. In addition, when loading your library, you should be
aware of whether or not your cartridges are write-protected.
This section discusses these types of items in general terms. See
Supported Media on page 273 for information on what type of tape
cartridges are supported for each drive type.
This chapter covers:
• Handling Cartridges Properly
• Write-Protecting Tape Cartridges
• Barcode Requirements
• Installing Barcode Labels
Quantum Scalar i40 and Scalar i80 User’s Guide
263
Chapter 10: Working With Cartridges and Barcodes
Handling Cartridges Properly
Handling Cartridges Properly
To ensure the longest possible life for your cartridges, follow these
guidelines:
• Select a visible location to post procedures that describe proper
media handling.
• Ensure that anyone who handles cartridges has been properly
trained on all procedures.
• Do not drop or strike cartridges. Excessive shock could damage the
internal contents of cartridges or the casings themselves, rendering
the cartridges unusable.
• Do not expose cartridges to direct sunlight or sources of heat,
including portable heaters and heating ducts.
• Do not stack cartridges more than five high.
• The operating temperature range for Linear Tape Open (LTO)
cartridges is 50ºF to 104ºF (10ºC to 40ºC). The operating relative
humidity range is 20% to 80% (non-condensing).
• If cartridges have been exposed to temperatures outside the range
specified above, stabilize the cartridges at normal operating room
temperature for the same amount of time they were exposed to
extreme temperatures or 24 hours, whichever is less. Temperatures
above 125ºF (52ºC) can cause permanent damage.
• Do not place cartridges near sources of electromagnetic energy or
strong magnetic fields, such as computer monitors, electric motors,
speakers, or x-ray equipment. Exposure to electromagnetic energy
or magnetic fields can destroy data and the embedded servo code
written on the media by the cartridge manufacturer, rendering the
cartridges unusable.
• Place identification labels only in the designated slots on the
cartridges.
• If you ship cartridges, ship them in their original packaging or
something stronger.
264
Quantum Scalar i40 and Scalar i80 User’s Guide
Chapter 10: Working With Cartridges and Barcodes
Write-Protecting Tape Cartridges
• Do not insert damaged cartridges into tape drives.
• Do not touch the tape or tape leader.
Caution: Do not degauss cartridges that you intend to reuse.
Write-Protecting Tape Cartridges
All tape cartridges have a write-protect (write-inhibit) switch to prevent
accidental erasure or overwriting of data. Before loading a tape
cartridge into the library, make sure that the write-protect switch is
positioned correctly (either on or off).
Slide the red or orange write-protect switch to the right so that the
padlock shows in the closed position. The switch is located on the left
side of the cartridge front.
Barcode Requirements
Cartridges must have an external barcode label that is machine
readable. A barcode must use only uppercase letters A to Z and/or
numeric values 0 to 9. The library supports Code 39 (3 of 9) type
barcodes.
The supported tape cartridge barcode formats are as follows:
• Standard Six — Six character barcode number with or without a
one or two-character media ID, for example, “XXXXXXL4” or
”XXXXXX”. Only the six character barcode is reported to the host.
• Plus Six — Six character barcode number followed by a media ID,
for example, “XXXXXXL3”. Six character barcode and media ID are
reported to the host.
• Extended — Five to 15 characters total, including a barcode
number and optional media ID. All characters are reported to the
host, regardless of having a media ID or not. If a media ID is
Quantum Scalar i40 and Scalar i80 User’s Guide
265
Chapter 10: Working With Cartridges and Barcodes
Barcode Requirements
included, the label must have a five to 13 character barcode
followed by a media ID, for example, “XXXXXXXXXXXXXL2”. If a
media ID is not included, the label must have a five to 15 character
barcode, for example, “XXXXXXXXXXXXXXX”.
• Media ID Last — Five to 13 character barcode number followed by
media ID, for example, “XXXXXXXXXXXXXLT”. The media ID is
reported to the host last.
• Media ID First — Five to 13 character barcode number preceded by
media ID, for example, “L4XXXXXXXXXXXXX”. The media ID is
reported to the host first.
• Standard — (default) Five to 15 characters total, including a
barcode number and optional media ID. The media ID is not
reported to the host. If a media ID is included, the label must have a
five to 13 character barcode followed by a media ID, for example,
“XXXXXXXXXXXXXL3”. If a media ID is not included, the label must
have a five to 15 character barcode, for example,
“XXXXXXXXXXXXXXX”.
Quantum-supplied barcode labels provide the best results. Barcode
labels from other sources can be used, but they must meet the
following requirements:
• ANSI MH10.8M-1983 Standard
• Number of digits: 5 to 15 (default for LTO is 6+2)
• Background reflection: greater than 25 percent
• Print contrast: greater than 75 percent
• Ratio: greater than 2.2
• Module: minimum .254 mm (10 mil)
• Print tolerance: ± 57 mm
• Additional Requirements:
• Length of the rest zones: 5.25 mm ± 0.25 mm
• No black marks should be present in the intermediate spaces or rest
zones
• No white areas should be present on the bars
266
Quantum Scalar i40 and Scalar i80 User’s Guide
Chapter 10: Working With Cartridges and Barcodes
Installing Barcode Labels
Installing Barcode Labels
Each cartridge in the library must have an external label that is machine
readable to identify the barcode. Most manufacturers offer cartridges
with the labels already applied or with the labels included that you can
attach.
All barcode labels must be applied to the front of a cartridge. Peel off
the label and place it on the cartridge. Verify that the label is oriented so
that the numbers appear above the barcode. The cartridge cannot have
any stickers or labels attached to the top or bottom because if the labels
come loose, they can get caught in the tape drives or become
unreadable by the scanner.
Caution: Do not place a barcode label or any labels on the top or
bottom of a cartridge. Doing so can cause the tape
cartridge and tape drive operations to fail.
Quantum Scalar i40 and Scalar i80 User’s Guide
267
Chapter 10: Working With Cartridges and Barcodes
Installing Barcode Labels
268
Quantum Scalar i40 and Scalar i80 User’s Guide
Appendix A
Specifications
Physical Specifications
Table 5 Base Library
Scalar i40
Scalar i80
Height
5.2 in. (132 mm)
10.4 in. (264 mm)
Width (excluding “rack ears”
17.5 in. (445 mm)
17.5 (445 mm)
Depth (from library front bezel to back
of library; excluding drive sleds)*
31.2 in. (793 mm)
31.2 in. (793 mm)
Weight (one power supply, no tape
drives, and no tape cartridges installed)
34.9 lbs. (15.8kg)
52.4 lbs. (23.8 kg)
Weight (one power supply, two tape
drives, and no tape cartridges installed)
With 2 half-height SAS tape
drives: 44.2 lbs. (20 kg)
With 2 full-height SAS tape
drives: 65.7 lbs. (29.8 kg)
* Depths listed above exclude drive sleds. Drive sleds will add up to 50 mm to the overall length of the library
depending on tape drive type (half-height, full-height, Fibre Channel, SAS). Additionally, when planning space
requirements, take into account installed cables (particularly fibre-optic cable radius on Fibre Channel tape drives).
Quantum Scalar i40 and Scalar i80 User’s Guide
269
Appendix A: Specifications
Capacity
Table 6 Library Installed in a
Desktop Kit
Scalar i40
Scalar i80
Height (with desktop
“feet” installed)
5.3 in. (135.6 mm)
10.6 in. (268.8 mm)
Width
18.9 in. (480 mm)
18.9 in. (480 mm)
Depth (from library front
bezel to back of library;
excludes drive sleds)*
31.2 in. (793 mm)
31.2 in. (793 mm)
* Depths listed above exclude drive sleds. Drive sleds will add up to 50 mm to the overall length of
the library depending on tape drive type (half-height, full-height, Fibre Channel, SAS). Additionally,
when planning space requirements, take into account installed cables (particularly fibre-optic cable
radius on Fibre Channel tape drives).
Capacity
270
Scalar i40
Scalar i80
Form Factor
3U
6U
Maximum number of
tape drives
1 full-height or 2 halfheight tape drives
3 full-height or 5 halfheight tape drives
Number of magazines
2 magazines (20 slots
each
4 magazines (20 slots
each)
Number of cartridge
slots
Base unit: 25
Base unit: 50
Fully licensed: 40
Fully licensed: 80
Maximum native
capacity
25 slots: 20 TB
50 slots: 40 TB
40 slots: 32 TB
80 slots: 64 TB
Number of I/E station
slots
0 or 5
0, 5, or 10
Quantum Scalar i40 and Scalar i80 User’s Guide
Appendix A: Specifications
Environmental Specifications
Environmental Specifications
The environmental specifications of the library are listed below.
Note: Temperature ranges apply to product inlet temperatures, not
necessarily to ambient room temperatures. Airflow restrictions
or other heat-generating equipment within the rack enclosure
may cause a rise over ambient room temperatures.
Operating
Non-Operating
Shipping and Storage
Altitude
–500 to 10,000 ft
(–152 to 3,048 m)
–500 to 10,000 ft
(–152 to 3,048 m)
–500 to 10,000 ft
(–152 to 3,048 m)
Temperature
50º to 95º F
50º to 113º F
–40º to 140º F
(10º to 35º C)
(10º to 45º C)
(–40º to 60º C)
20 to 80%,
non-condensing
10 to 90%,
non-condensing
0 to 95%,
non-condensing
Relative Humidity
Air Clearance Requirements
There must be at least 4 in. (10 cm) of open space in front of and behind
the library for proper air flow
Quantum Scalar i40 and Scalar i80 User’s Guide
271
Appendix A: Specifications
Power Specifications
Power Specifications
Scalar i40
Scalar i80
Line voltage
100 – 240 VAC
100 – 240 VAC*
Line frequency
50 – 60 Hz
50 – 60 Hz*
Rated AC Input Current
100 Volt – 2.8 Amps
100 Volt – 5.0 Amps
240 Volt – 1.4 Amps
240 Volt – 2.5 Amps
100 watts
200 watts
Typical Power Consumption
* A Scalar i80 library with dual power supplies will have these requirement on both AC inputs to the library but
will load share the current draw equally between each supply and from each AC connection.
Communication Interfaces
Library Robot Control
Logical Unit Number (LUN)
Connectivity
Native drive interface (FC, SAS
Library Management
Operator panel
Web client
SNMP protocol
SMI-S protocol
272
Quantum Scalar i40 and Scalar i80 User’s Guide
Appendix A: Specifications
Supported Tape Drives
Supported Tape Drives
Vendor
Type
Interface
HP
LTO-4
Fibre Channel (4 Gb, LC connector)
SAS (3 Gb, SFF-8088 connector)
Supported Media
Cartridge Type
Access
LTO-4
Read/write in LTO-4 tape drives; supports
WORM functionality
LTO-3
Read/write in LTO-4 tape drives; supports
WORM functionality
LTO-2
Read-only in LTO-4 tape drives
Quantum Scalar i40 and Scalar i80 User’s Guide
273
Appendix A: Specifications
Supported Internet Browsers
Supported Internet Browsers
The Internet browser software is not supplied with the Scalar i40 and
Scalar i80 systems; you must obtain and install it independently. The
Scalar i40 and Scalar i80 systems support the following Internet
browsers:
Note: For correct operation of the software, disable any pop-up
blockers.
Microsoft® Windows®
• Internet Explorer® (IE) 6.0 or later
• Mozilla® Firefox® 1.0.6 or later
Linux®
• Firefox 1.0.6 or later
Solaris™
• Firefox 1.0.6 or later
274
Quantum Scalar i40 and Scalar i80 User’s Guide
Appendix B
Tape Alert Flag Descriptions
Tape Alert is an open industry standard that flags errors and provides
possible solutions for storage devices and their media. This section
provides information about Tape Alert flags, including the identifying
number, severity, recommended message, and probable cause. Table 7
explains the severity codes, and Table 8 lists all the existing Tape Alert
flags and their descriptions.
Support for specific Tape Alert flags may vary based on tape drive type
and firmware revision. Not all tape drives support every Tape Alert.
Consult your tape drive SCSI manual for more information.
For more information on Tape Alert, see http://www.t10.org/index.html
for INCITS SCSI Stream Commands - 3 (SSC-3).
Table 7 Tape Alert Flag Severity
Codes
I
Informational.
W
Warning — The system may not be operating optimally.
Continued operation without corrective action may cause a
failure or raise critical Tape Alert flags.
C
Critical — Either a failure has already occurred or a failure is
imminent. Corrective action is required.
Quantum Scalar i40 and Scalar i80 User’s Guide
275
Appendix B: Tape Alert Flag Descriptions
Table 8 Tape Alert Flag
Descriptions
Recommended Application Client
Message
No.
Flag
Severity
1
Read warning
W
The tape drive is having problems
reading data. No data has been lost,
but there has been a reduction in the
performance of the tape.
The drive is having
severe trouble
reading.
2
Write warning
W
The tape drive is having problems
writing data. No data has been lost, but
there has been a reduction in the
capacity of the tape.
The drive is having
severe trouble
writing.
3
Hard error
W
The operation has stopped because an
error has occurred while reading or
writing data which the drive cannot
correct.
The drive had a hard
read or write error.
4
Media
C
Your data is at risk:
Media can no longer
be written/read, or
performance is
severely degraded.
1 Copy any data you require from this
tape.
2 Do not use this tape again.
Probable Cause
3 Restart the operation with a different
tape.
5
Read failure
C
The tape is damaged or the drive is
faulty. Call the tape drive supplier help
line.
The drive can no
longer read data
from the tape.
6
Write failure
C
The tape is from a faulty batch or the
tape drive is faulty:
The drive can no
longer write data to
the tape.
1 Use a good tape to test the drive.
2 If the problem persists, call the tape
drive supplier help line.
276
Quantum Scalar i40 and Scalar i80 User’s Guide
Appendix B: Tape Alert Flag Descriptions
No.
Flag
Severity
7
Media life
W
Recommended Application Client
Message
The tape cartridge has reached the end
of its calculated useful life:
1 Copy any data you need to another
tape.
Probable Cause
The media has
exceeded its
specified life.
2 Discard the old tape.
8
Not data grade
W
The tape cartridge is not data-grade.
Any data you write to the tape is at risk.
Replace the cartridge with a data-grade
tape.
The drive has not
been able to read the
MRS* stripes.
9
Write protect
C
You are trying to write to a writeprotected cartridge. Remove the writeprotection or use another tape.
Write command is
attempted to a
write- protected
tape.
10
Media removal
prevented
I
You cannot eject the cartridge because
the tape drive is in use. Wait until the
operation is complete before ejecting
the cartridge.
Manual or software
unload attempted
when prevent media
removal on.
11
Cleaning media
I
The tape in the drive is a cleaning
cartridge.
Cleaning tape loaded
into drive.
12
Unsupported
format
I
You have tried to load a cartridge of a
type which is not supported by this
drive.
Attempted load of
unsupported tape
format.
13
Recoverable
mechanical
cartridge
failure
C
The operation has failed because the
tape in the drive has experienced a
mechanical failure:
Tape snapped/cut or
other cartridge
mechanical failure in
the drive where
medium can be
demounted.
1 Discard the old tape.
2 Restart the operation with a different
tape.
Quantum Scalar i40 and Scalar i80 User’s Guide
277
Appendix B: Tape Alert Flag Descriptions
No.
Flag
Severity
14
Unrecoverable
mechanical
cartridge
failure
C
Recommended Application Client
Message
The operation has failed because the
tape in the drive has experienced a
mechanical failure:
1 Do not attempt to extract the tape
cartridge.
2 Call the tape drive supplier help line.
Probable Cause
Tape snapped/cut or
other cartridge
mechanical failure in
the drive where
medium cannot be
demounted.
15
Memory chip in
cartridge
failure
W
The memory in the tape cartridge has
failed, which reduces performance. Do
not use the cartridge for further write
operations.
Memory chip failed
in cartridge.
16
Forced eject
C
The operation has failed because the
tape cartridge was manually
demounted while the tape drive was
actively writing or reading.
Manual or forced
eject while drive
actively writing or
reading.
17
Read-only
format
W
You have loaded a cartridge of a type
that is read-only in this drive. The
cartridge will appear as write protected.
Media loaded that is
read-only format.
18
Tape directory
corrupted on
load
W
The directory on the tape cartridge has
been corrupted. File search
performance will be degraded. The tape
directory can be rebuilt by reading all
the data on the cartridge.
Tape drive powered
down with tape
loaded, or
permanent error
prevented the tape
directory being
updated.
19
Nearing media
life
I
The tape cartridge is nearing the end of
its calculated life. It is recommended
that you:
Media may have
exceeded its
specified number of
passes.
1 Use another tape cartridge for your
next backup.
2 Store this tape cartridge in a safe
place in case you need to restore data
from it.
278
Quantum Scalar i40 and Scalar i80 User’s Guide
Appendix B: Tape Alert Flag Descriptions
No.
Flag
Severity
Recommended Application Client
Message
20
Cleaning
required
C
The tape drive needs cleaning:
1 If the operation has stopped, eject
the tape and clean the drive.
Probable Cause
The drive thinks it
has a head clog or
needs cleaning.
2 If the operation has not stopped,
wait for it to finish and then clean
the drive.
Check the tape drive user’s manual for
device-specific cleaning instructions.
21
Cleaning
requested
W
The tape drive is due for routine
cleaning:
The drive is ready for
a periodic cleaning.
1 Wait for the current operation to
finish.
2 Then use a cleaning cartridge.
Check the tape drive user’s manual for
device-specific cleaning instructions.
22
Expired
cleaning media
C
The last cleaning cartridge used in the
tape drive has worn out:
The cleaning tape
has expired.
1 Discard the worn-out cleaning
cartridge.
2 Wait for the current operation to
finish.
3 Then use a new cleaning cartridge.
23
Invalid cleaning
tape
C
The last cleaning cartridge used in the
tape drive was an invalid type:
Invalid cleaning tape
type used.
1 Do not use this cleaning cartridge in
this drive.
2 Wait for the current operation to
finish.
3 Then use a valid cleaning cartridge.
Quantum Scalar i40 and Scalar i80 User’s Guide
279
Appendix B: Tape Alert Flag Descriptions
Recommended Application Client
Message
No.
Flag
Severity
24
Retension
requested
W
The tape drive has requested a
retension operation.
The drive is having
severe trouble
reading or writing,
which will be
resolved by a
retension cycle.
25
Multi-port
interface error
on a primary
port
W
A redundant interface port on the tape
drive has failed.
Failure of one
interface port in a
dual-port
configuration (for
example, Fibre
Channel).
26
Cooling fan
failure
W
A tape drive cooling fan has failed.
Fan failure inside
tape drive
mechanism or tape
drive enclosure.
27
Power supply
failure
W
A redundant power supply has failed
inside the tape drive enclosure. Check
the enclosure user’s manual for
instructions on replacing the failed
power supply.
Redundant power
supply unit failure
inside the tape drive
enclosure or rack
subsystem.
28
Power
consumption
W
The tape drive power consumption is
outside the specified range.
Power consumption
of the tape drive is
outside specified
range.
29
Drive
preventive
maintenance
required
W
Preventive maintenance of the tape
drive is required. Check the tape drive
user’s manual for device-specific
preventive maintenance tasks or call the
tape drive supplier help line.
The drive requires
preventative
maintenance (not
cleaning).
30
Hardware A
C
The tape drive has a hardware fault:
The drive has a
hardware fault that
requires reset to
recover.
1 Eject the tape or magazine.
2 Reset the drive.
3 Restart the operation.
280
Probable Cause
Quantum Scalar i40 and Scalar i80 User’s Guide
Appendix B: Tape Alert Flag Descriptions
No.
Flag
Severity
Recommended Application Client
Message
31
Hardware B
C
The tape drive has a hardware fault:
1 Turn the tape drive off and then on
again.
2 Restart the operation.
3 If the problem persists, call the tape
drive supplier help line.
32
Primary
interface
W
The tape drive has a problem with the
host interface:
1 Check the cables and cable
connections.
Probable Cause
The drive has a
hardware fault that
is not read/write
related or requires a
power cycle to
recover.
The drive has
identified an
interface fault.
2 Restart the operation.
33
Eject media
C
The operation has failed:
Error recovery action.
1 Eject the tape or magazine.
2 Insert the tape or magazine again.
3 Restart the operation.
34
Microcode
update fail
W
The microcode update has failed
because you have tried to use the
incorrect microcode for this tape drive.
Obtain the correct microcode and try
again.
Microcode update
failed.
35
Drive humidity
W
Environmental conditions inside the
tape drive are outside the specified
humidity range.
Drive humidity limits
exceeded.
36
Drive
temperature
W
Environmental conditions inside the
tape drive are outside the specified
temperature range.
Cooling problem.
37
Drive voltage
W
The voltage supply to the tape drive is
outside the specified range.
Drive voltage limits
exceeded.
38
Predictive
failure
C
A hardware failure of the tape drive is
predicted. Call the tape drive supplier
help line.
Predictive failure of
drive hardware.
Quantum Scalar i40 and Scalar i80 User’s Guide
281
Appendix B: Tape Alert Flag Descriptions
No.
Flag
Severity
39
Diagnostics
required
W
Recommended Application Client
Message
The tape drive may have a hardware
fault. Run extended diagnostics to
verify and diagnose the problem. Check
the tape drive user’s manual for devicespecific instructions on running
extended diagnostic tests.
Probable Cause
The drive may have a
hardware fault that
may be identified by
extended diagnostics
(i.e., SEND
DIAGNOSTIC
command).
40
–
46
Obsolete
47
–
49
Reserved
50
Lost statistics
W
Media statistics have been lost at some
time in the past.
Drive or library
powered down with
tape loaded.
51
Tape directory
invalid at
unload
W
The tape directory on the tape cartridge
just unloaded has been corrupted. File
search performance will be degraded.
The tape directory can be rebuilt by
reading all the data.
Error prevented the
tape directory being
updated on unload.
52
Tape system
area write
failure
C
The tape just unloaded could not write
its system area successfully:
Write errors while
writing the system
area on unload.
1 Copy data to another tape cartridge.
2 Discard the old cartridge.
53
282
Tape system
area read
failure
C
The tape system area could not be read
successfully at load time:
1 Copy data to another tape cartridge.
Read errors while
reading the system
area on load.
Quantum Scalar i40 and Scalar i80 User’s Guide
Appendix B: Tape Alert Flag Descriptions
No.
Flag
Severity
54
No start of data
C
Recommended Application Client
Message
The start of data could not be found on
the tape:
1 Check that you are using the correct
format tape.
Probable Cause
Tape damaged, bulk
erased, or incorrect
format.
2 Discard the tape or return the tape to
your supplier.
55
Loading or
threading
failure
C
The operation has failed because the
media cannot be loaded and threaded:
1 Remove the cartridge, inspect it as
specified in the product manual, and
retry the operation.
The drive is unable to
load the media and
thread the tape.
2 If the problem persists, call the tape
drive supplier help line.
56
Unrecoverable
unload failure
C
The operation has failed because the
medium cannot be unloaded:
The drive is unable to
unload the medium.
1 Do not attempt to extract the tape
cartridge.
2 Call the tape driver supplier help line.
57
Automation
interface failure
C
The tape drive has a problem with the
automation interface:
1 Check the power to the automation
system.
The drive has
identified an
interface fault.
2 Check the cables and cable
connections.
3 Call the supplier help line if problem
persists.
58
Microcode
failure
W
The tape drive has reset itself due to a
detected microcode fault. If problem
persists, call the supplier help line.
Microcode bug.
59
WORM
medium —
integrity check
failed
W
The tape drive has detected an
inconsistency during the WORM
medium integrity checks. Someone may
have tampered with the cartridge.
Someone has
tampered with the
WORM medium.
Quantum Scalar i40 and Scalar i80 User’s Guide
283
Appendix B: Tape Alert Flag Descriptions
No.
Flag
Severity
60
WORM
medium —
overwrite
attempted
W
Recommended Application Client
Message
An attempt had been made to
overwrite user data on a WORM
medium:
1 If a WORM medium was used
inadvertently, replace it with a
normal data medium.
Probable Cause
The application
software does not
recognize the
medium as WORM.
2 If a WORM medium was used
intentionally:
a) Check that the software
application is compatible with the
WORM medium format you are
using.
b) Check that the medium is barcoded correctly for WORM.
61
–
64
Reserved
* Media Recognition System (MRS) is a method where pre-defined stripes are placed at the beginning of the media
to identify the media. The MRS stripes are read to determine if the media is of data-grade. Data-grade media
should be used in SCSI streaming devices since it is of the required quality and consistency to be used to store data
(i.e., audio/video grade media should not be used).
284
Quantum Scalar i40 and Scalar i80 User’s Guide
Appendix C
Disposal of Electrical and
Electronic Equipment
This symbol on the product or on its packaging
indicates that this product should not be disposed of
with your other waste. Instead, it should be handed
over to a designated collection point for the recycling
of electrical and electronic equipment. The separate
collection and recycling of your waste equipment at
the time of disposal will help to conserve natural
resources and ensure that it is recycled in a manner
that protects human health and the environment. For more information
about where you can drop off your waste equipment for recycling,
please visit our website at: http://qcare.quantum.com or contact your
local government authority, your household waste disposal service or
the business from which you purchased the product.
Quantum Scalar i40 and Scalar i80 User’s Guide
285
Appendix C: Disposal of Electrical and Electronic Equipment
286
Quantum Scalar i40 and Scalar i80 User’s Guide
Glossary
Numerals
1U, 2U, 3U, etc. Racks manufactured for mounting computer
hardware often define vertical space as “units.” The
components that are mounted in the racks are defined by how
many units of rack space they require. For example, the height
of a unit in a rack is 1.75 inches. If a component is 5.25 inches in
thickness, the component is said to be a 3U component.
A
Arbitrated loop A Fibre Channel configuration that attaches multiple
communicating ports in a loop. Two or more ports can
interconnect, but only two ports can communicate
simultaneously.
Arbitration The submission of a request to gain access to an
arbitrated loop by a device, so that it can transmit data in the
loop.
B
Barcode A printed array of varied rectangular bars and spaces that can
be scanned and read for object identification.
Bus
A transmission channel through which electrical signals are
carried from one device to another device.
Quantum Scalar i40 and Scalar i80 User’s Guide
287
Glossary
C
Cartridge A container that is a protective housing for storage media,
such as cartridges for tapes or optical disks.
Cleaning tape / cleaning cartridge A tape used to clean recording
heads and reading heads on a tape drive.
Cleaning slot The physical home where a cleaning tape or cartridge
resides.
COD (Capacity on Demand) A library feature that allows users to
have a large physical library, but only be licensed to use a subset
of its total capacity. Users pay only for what they are currently
using. License upgrades enable more capacity without causing a
system interruption.
Connectivity The method by which hardware devices or software
communicate with other hardware or software.
Control path The connection between a partition and host
application. The control path connection is made through a
designated tape drive. Only one tape drive can be selected as
the control path per partition.
Controller The PCB or system that translates computer data and
commands into a form suitable for use by the storage disks.
CRU (Customer Replaceable Unit) The smallest hardware component
that can be replaced at a customer installation by a customer.
D
Default A value or setting that is selected by the hardware or software
unless specified otherwise by the user.
DHCP (Dynamic Host Configuration Protocol) A protocol for
assigning dynamic IP addresses to devices on a network. DHCP
supports a mix of static and dynamic IP addresses.
Diagnostic ticket A ticket that alerts service personnel and customers
of an issue with the library. Diagnostic tickets identify which
library components are most likely causing the issue. When
possible, a diagnostic ticket provides instructions for resolving
the issue.
Directory A file that contains a list of other files. Directory is short for
directory file.
288
Quantum Scalar i40 and Scalar i80 User’s Guide
Glossary
Drivers Software programs that enable a computer to communicate
with hard drives, CD ROM drives, printers, and other
peripherals. Drivers are stored on a hard disk and loaded into
memory at boot up.
E
Element ID - Logical An address used by a library to locate and track
library component. The address is specified in programming
logic rather than on the physical location of a component
within a library. When a logical library is used, the logical
element ID masks the physical element ID.
Element ID - Physical An address used by a library to locate and track
library component. The address is based on the physical location
of a component within a library. Applications expect to see
resources at specific IDs.
Ethernet A type of local area network designed to transport data at
rates up to 100 million bits per second. Other software, such as
TCP/IP runs on top of Ethernet to provide high-level networking
services to applications.
Event A condition that matches a numbered, predefined set of
circumstances.
Event log A list of all predefined events logged by library and software
management tools.
F
FC (Fibre Channel) A high speed data transfer architecture. Using
optical fibre to connect devices, Fibre Channel communications
are serial communications that occur at full duplex and achieve
data transfer rates of 200 MBps.
FC-AL (Fibre Channel Arbitrated Loop) A form of Fibre Channel
network in which up to 126 nodes are connected in a loop
topology. See also Arbitrated loop.
FC-AL Device A device that employs Fibre Channel-Arbitrated Loop
and consists of one or more NL_Ports.
Fiber
A thin filament of glass. An optical waveguide consisting of a
core and a cladding which is capable of carrying information in
the form of light. Fiber is also a general term used to cover all
Quantum Scalar i40 and Scalar i80 User’s Guide
289
Glossary
physical media types supported by Fibre Channel, such as
optical fiber, twisted pair, and coaxial cable.
Firewall A set of security tools designed to separate an internal
network from the public Internet in order to keep unauthorized
users out of a restricted network. Firewalls are the primary line
of security defense for businesses.
FL_Port Fabric Loop Port. An F_Port that is capable of supporting an
attached Fibre Channel Arbitrated Loop. An FL_Port on a loop
will have the AL_PA hex’00’ giving the fabric the highest priority
access to the loop. N_Ports or NL_Ports can attach to it in an
Arbitrated Loop topology and are capable of communicating
with FC-AL protocol.
FRU (Field Replaceable Unit) The smallest hardware component that
can be replaced at a customer installation by a certified field
service representative.
G
GUI (Graphical User Interface) A computer environment that
provides a visual view of a system by incorporating windows,
icons, menus, and a pointing device. Also referred to as a
Windows, Icons, Mouse, and Pointers (WIMP) interface.
H
HDD (High Density Drive) A drive that contains increased storage
capacity of bits and/or tracks per square inch.
Home position Accessor axes positioned at 0 vertical and 0 horizontal,
that serve as the point of reference for the position of other
library components. Home position is used as a basis for
calibration.
Host
In general, a host is a computer or program that contains data
and provides services to other computers or devices. In Fibre
Channel terms, a host is a computer that initiates contact with
storage devices.
Hot swappable The ability to replace a defective component while the
system continues to function normally.
HTTP (Hypertext Transfer Protocol) The communication rules by
which a Web browser (client) and a server delivering Web pages
exchange information.
290
Quantum Scalar i40 and Scalar i80 User’s Guide
Glossary
I
I/E
Import/Export. The movement of data or hardware in and out of
processing and storage systems.
I/E slot A bin that contains a single piece of media in the station.
I/E station A door on the front of the library that contains tape
magazines, into which cartridges to be imported are placed
manually or cartridges to be exported are placed by the picker.
Interoperability The capability of two or more hardware devices or
two or more software routines to work together.
IP (Internet Protocol) A protocol that specifies the formats of packets
and addresses. Addresses are formulated as four groups of 2 or
3 digit numbers separated by periods, such as 255.255.255.255.
K
Kernel The heart of the UNIX operating system. The kernel is the part
of the operating system that allocates resources and controls
processes. The design strategy has been to keep the kernel as
small as possible and to put the rest of the UNIX functionality
into separately compiled and executed programs.
L
L_Port Loop Port. It only has the capability to communicate over FC-AL
hubs and through FL_Ports.
LED (Light Emitting Diode) The mode of data transmission for
multimode cables with short wave optical transceivers. Singlemode cables, by comparison, use high powered, long wave
lasers.
Library A large-scale tape device with robotics that can house multiple
tape drives and a significant amount of tape cartridges.
Library Control Module See Control module.
License key An absolute value that can only increase a licensed
feature. For example, a license key can be applied to the library
to enable unlicensed slots.
Logical library See Partition.
Loop
With this Fibre Channel option, the port operates with attached
loop-capable devices. If a point-to-point device is attached, the
appliance is not able to communicate with it.
Quantum Scalar i40 and Scalar i80 User’s Guide
291
Glossary
Loop ID A unique 7-bit value from 0 to 126 that represents the 127
valid AL_PAs (physical addresses) on a loop.
LTO (Linear Tape Open) A family of magnetic tape media that are
“open” in the sense of not being owned by a single proprietor.
LTO comes in two formats, Accelis and Ultrium. Accelis is the
fast access implementation, while Ultrium is the high capacity
implementation.
LUN (Logical Unit Number) A unique identifier used on a SCSI bus to
distinguish between devices that share the same bus. A LUN can
be an end user, a file, or an application. In storage technology, a
single large storage device might be divided into smaller pieces,
either to make the vast storage space more manageable or
because the storage space is dedicated to different servers,
drives, or applications. When the storage space is divided into
smaller parts, each part is configured with its own SCSI unique
identifier, or LUN.
M
Magazine A container for removable media storage used in tape
libraries.
Media A material that stores data, such as tapes in cartridges or
optical disks.
Media ID A barcode number attached to a specific piece of media.
Media type A format/size of media, for example, LTO.
Medium See Media.
Mixed media The ability of a library to simultaneously support
multiple types of storage media.
N
N_Port Node Port. It only has the capability to communicate through
an F-Port. It is a port on a computer, disk drive, and so on,
through which the device does its Fibre Channel communication
as a direct fabric-attached port for use with the point-to-point
or fabric topology. It is identified by a world wide name.
NL_Port Node Loop Port. It has the capability to communicate over
both FC-AL hubs and through F_Ports.
292
Quantum Scalar i40 and Scalar i80 User’s Guide
Glossary
O
Online A status for a component that indicates it is active and
available for use.
OS (Operating System) A control program for a computer that
allocates computer resources, schedules tasks, and provides the
user with a way to access the resources.
P
Partition An abstraction of an underlying physical library that may
present a different personality, capacity, or both to a host. It is a
representation of real physical elements, combined to create a
grouping that is different from the physical library. Also a logical
portion of the physical library that is viewed by the host as if it is
a complete library. Partitions present the appearance of
multiple, separate libraries for purposes of file management,
access by multiple users, or dedication to one or more host
application.
Pathname A list of directories separated by slashes (/) and ending with
the name of a directory or nondirectory file. A pathname is used
to trace a path through the file structure to locate or identify a
file.
Picker The robotic hand that handles cartridges.
Point to Point A Fibre Channel topology that consists of a dedicated
connection between two devices: a sending device and a
receiving device.
R
Rack Mount An industry standard communication and computer
equipment rack cabinet.
S
SAN (Storage Area Network) A dedicated network that connects
storage devices and servers in a pool, providing consolidated
storage and storage management. Storage interconnects
between many initiators and target devices. The SAN allows for
sharing resources (target devices) among multiple servers
(initiators).
SCSI (Small Computer System Interface) A set of standards for a
high-speed, parallel interface that connects processing devices
Quantum Scalar i40 and Scalar i80 User’s Guide
293
Glossary
to peripheral devices, such as storage subsystems. The acronym
is pronounced “scuzzy.”
Server A powerful, centralized computer (or program) designed to
provide information to clients (smaller computers or programs)
upon request.
Setup wizard A tool for initially configuring the library. It appears the
first time the user starts the library. However, it can be used to
modify configurable items anytime after the initial
configuration.
Sled The hardware that houses tape drives in the library.
SMI-S (Storage Management Initiative Specification) An industry
standard SMI-S application programming interface (API)
developed by SNIA that facilitates the management of multivendor devices in a storage area networks (SANs) environment.
Snapshot A rapid, point-in-time image of a volume created initially on
the same disk as the original by duplicating metadata rather
than copying the full data set. Snapshots are often used to
protect against data corruption (viruses, etc.) or to create test or
pre-production environments. Snapshots are also often used as
a first step for creating non-disruptive point-in-time backups,
and for copying datasets to a second disk to create a full
duplicate copy of the volume. Snapshots are created on disk,
and in the same format as the original data. Snapshots are also
referred to as point-in-time copies and as shadow copies.
SNMP (Simple Network Management Protocol) The protocol
governing network management and the monitoring of
network devices and their functions. Similar in function to SAM,
except SNMP governs LAN, whereas SAM governs SAN.
SSL (Secure Sockets Layer) A protocol that provides encrypted
communications on the Internet. SSL is layered beneath
application protocols such as HTTP, SMTP, Telnet, FTP, Gopher,
and NNTP and is layered above the connection protocol TCP/IP.
Storage device An appliance containing data that can be accessed,
added to, changed, or deleted by the user. The storage media
types include tapes and optical disks. A storage device can be a
single disk drive, or constitute thousands of tapes in a large
tape library.
Storage slot The physical home where a data cartridge resides.
294
Quantum Scalar i40 and Scalar i80 User’s Guide
Glossary
Subsystem status A feature that provides predictive alerts, warning of
any loss of connectivity or device failure using local or remote
alerts. Subsystem status allows administrators to correct faults
before they affect backup or other data transfer operations.
T
Tape drive A device that spins disks and tapes while it reads and writes
data in storage.
TCP/IP (Transmission Control Protocol/Internet Protocol) The
communications protocol used by the Internet. It runs on top of
Ethernet to provide high-level networking services to
applications.
Topology The logical and/or physical arrangement of stations on a
network.
Trap
An SNMP alert that is sent when predefined conditions are met.
For example, an error trap tests for an error condition and
provides a recovery routine.
U
User ID An alphanumeric value that the password database associates
with a login name. Also, UID.
UTC (Coordinated Universal Time) The world-wide standard for time,
commonly considered to be the equivalent of “Greenwich Mean
Time” and “Zulu time.” For all of these time standards, zero (0)
hours is midnight in Greenwich England, which lies on the zero
longitudinal meridian. The sequence of the letters in the
acronym is a compromise between the English and French terms
(Temps Universel Coordonné).
W
WORM (Write Once, Read Many) A common type of data storage
medium, in which data can be read and reread, but not altered,
after it has been recorded.
WWNN (World Wide Node Name) A unique number assigned by a
recognized naming authority. The world wide name is integral
to Fibre Channel operations.
Quantum Scalar i40 and Scalar i80 User’s Guide
295
Glossary
WWPN (World Wide Port Name) The WWPN is a 64-bit, hard-coded
address for each port on an FC-connected device. It is used to
identify available SAN devices at end points.
X
X-axis, X-position The horizontal position of the library’s robotic arm.
Y
Y-axis, Y-position The vertical position of the library’s robotic arm.
296
Quantum Scalar i40 and Scalar i80 User’s Guide
Index
A
About Library 140
advanced reporting 11, 152
all slots report 147
buttons
back, browser 31
navigation 3
navigation/selection 30
operator panel 30
power 3
authentication traps 47
C
contact information
customer 77
Quantum xxiv
cabling the library 173
control path 67
authorization code 68
AutoClean 130
autoleveling 164
configuration
default 42
host software 26
initial 19
library 39
restoring 101
saving 101
Capacity on Demand 11
copyright 160
capturing the library snapshot 247
customer contact information 77
B
cartridges, see tape cartridges 264
back button, browser 31
chassis,removing and replacing 202
barcode
formats, media 56
labels, installing 267
requirements 265
scanner 3
cleaning cartridges
exporting 133
importing 131
valid 130
bezel, library, replacing 198
cleaning log 148
default administrative account 79
cleaning slots, configuring 61
default configuration 42
cleaning tape drives 128
automatic 130
manually 134
default gateway 45
browser back button 31
browsers, supported 274
bulk loading cartridges 121
COD, see Capacity on Demand 11
community string 48
Quantum Scalar i40 and Scalar i80 User’s Guide
D
date, setting 50
daylight saving time, setting 51
default password 80, 104
default user name 80, 104
defaults, resetting factory 261
297
Index
desktop kit
installing library in 189
removing library from 197
DHCP 43
diagnostic tickets
about 244
log 149
viewing, closing, and resolving
244, 245
filler plate
power supply, removing and
installing 214
tape drive, removing and
installing 213
firmware 164
library, downgrading 101
library, upgrading 161
tape drive, upgrading 164
diagnostics 259
resetting a tape drive 260
robotics get/put 261
front panel 2
disposal information 285
G
DNS addresses 45
downgrading library firmware 101
drive resource utilization report 154
internet control message protocol
98
IP address
configuring 44
IPv4 44
IPv6 44
library 105
IVT 255
K
Kerberos 87, 90
Kerberos service keytab file 91
gateway 45
get/put test 261
L
E
e-mail account, library 74
e-mail notifications
about 71
creating 72
deleting 74
modifying 73
send snapshot 75
emergency power-off procedure
112
ESD precautions 172
exporting
cleaning cartridges 133
tape cartridges 123
external management applications
46
F
factory defaults, resetting 261
LDAP
accounts 86
configuring 88
server guidelines 87
H
health status icons 29
home page 33, 34
host name 43
host software configuration 26
I
I/E station slots, configuring 63
I/E station, unlocking 113
I/E station, unlocking more than
one 113
ICMP 98
importing
cleaning cartridges 131
tape cartridges 117
tape cartridges, unassigned
118
installation and verification test 255
installation, initial 13
Internet browsers, supported 274
298
LEDs 250
front panel 251
power supply 255
power-on 3
system control board 252
tape drive/sled 253
ticket indicator 3
library configuration
record 143
report 141
saving 101
library name 43
library not ready messages 248
licensable features 68
license key certificate 68
license keys
about 69
applying 70
chassis replacement and 69
obtaining 69
SCB replacement and 69
Quantum Scalar i40 and Scalar i80 User’s Guide
Index
viewing 68
licenses
report 152
viewing 68
loading tape drives 125
local user accounts
about 78
creating 81
deleting 82
modifying 82
location coordinates
slot 4
tape drive 8
logged in user’s report 146
logging in
first time 25, 104
Kerberos enabled 105
LDAP enabled 105
operator panel 104
simultaneous 104
Web client 105
logging out 32, 106
automatically 106
logical serial number addressing 94
logs
cleaning 148
diagnostic tickets 149
tape drive 149, 250
M
magazines
description 4
releasing 114
removing and replacing 215
test 257
MIB, SNMP 48
move test 258
moving tape cartridges 121
moving the library 237
N
navigation buttons 3
network interface 97
network prefix 45
network settings
changing 42
configuring 42
report 145, 151
passwords, Web client
creating 81
default 80, 104
misplaced 104
modifying 82
popup blockers 31
NTP 50
power button 3
O
online/offline
library 113
partitions 59
tape drives 137
power supply
description 7
removing and installing 220
power-off, emergency 112
power-on LED 3
privilege levels 80
open source license agreement 159
operator panel
buttons 30
description 2
functions 28
layout 28
passwords 83
R
rack
installing library in 186
removing library from 188
rack mount kit, installing 174
rail kit, see rack mount kit 174
random move test 258
P
mask, subnet 45
packaging the library 237
media barcode formats 56
partitions
about 52
access 59
automatic creation 53
menu trees 36
passwords, operator panel
creating 83
disabling 85
misplaced 86
modifying 85
resetting 86
network time protocol 50
manual cartridge assignment 95
media integrity analysis report 156
deleting 57
description 10
manual creation 55
modifying 57
reports 151
taking online/offline 59
viewing 58
Microsoft Active Directory 87
Quantum Scalar i40 and Scalar i80 User’s Guide
registering the library 102
releasing magazines 114
remote access, enabling/disabling
98
remote authentication 86
remote service login 99
299
Index
removing power 107, 111
snapshot, capturing 247
reports
about 140
advanced reporting 152
all slots 147
date/time 152
drive resource utilization 154
library configuration 141
licenses 152
logged in users 146
media integrity analysis 156
network settings 145, 151
operator panel 151
partition 151
system information 140
SNMP
authentication traps 47
community string 48
configuring 45
enabling/disabling 96
MIB, downloading 48
versions 47
specifications 269
SSH services, enabling/disabling 97
SSL, enabling/disabling 99
subnet mask 45
test 257
unloading 127
Tape Alerts 275
TCP 46
tests
installation and verification
(IVT) 255
magazine 257
random move 258
robotics 257
robotics get/put 261
tape drive 257
ticket indicator LED 3
subsystem status 35
time zone, setting 51
time, setting 50
resetting tape drive 260
system control board
description 7
removing and replacing 223
restart 107, 109
system information report 140
traps 47
restoring the library configuration
101
system settings 93
troubleshooting 243
system summary 34
turning off 107, 111
T
U
tape cartridges
bulk loading 121
exporting 123
importing 117
map, creating 216
moving 121
proper handling 264
unassigned 118
write protecting 265
UDP 46
resetting factory defaults 261
robot 3
get/put test 261
releasing 16
replacing 242
robotics test 257
S
saving the library configuration 101
scanner,barcode 3
SCB, see system control board 7
secure socket layer, enabling/
disabling 99
security settings 97
service port 77
session timeout 93
setup wizard 19, 41
shipping the library 237
shut down 107
slots, location coordinates 4
SMI-S, enabling/disabling 96
300
timeout 93
unassigned tape cartridges,
importing 118
unload assist 94
unloading tape drives 127
unlocking the I/E station 113
unpacking, library 14
tape drives 164
cleaning, about 128
cleaning, automatically 130
cleaning, manual 134
description 8
loading 125
location coordinates 8
log 149
online/offline 137
paramaters, configuring 65
removing and replacing 231
resetting 260
upgrading library firmware 161
upgrading tape drive firmware 164
user name, default 80, 104
W
Web client
description 31
display 34
home page 33, 34
Quantum Scalar i40 and Scalar i80 User’s Guide
Index
WORM 11
write protecting cartridges 265
Quantum Scalar i40 and Scalar i80 User’s Guide
301
Index
302
Quantum Scalar i40 and Scalar i80 User’s Guide