1
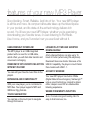
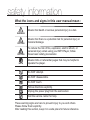
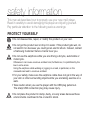
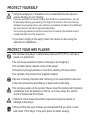
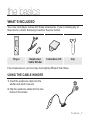
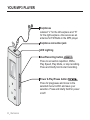
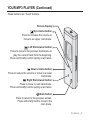
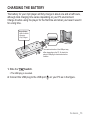
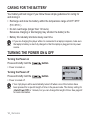
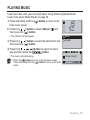
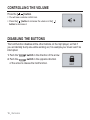
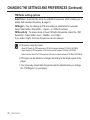
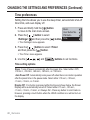
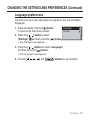
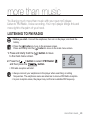
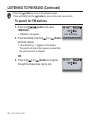
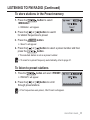
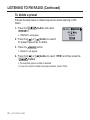
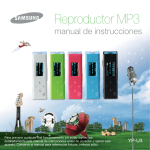
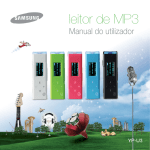
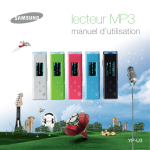
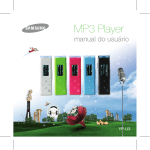
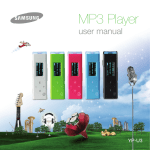
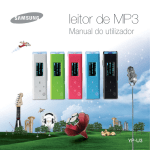
MP3 Player user manual YP-U3 features of your new MP3 Player Good looking. Smart. Reliable. And lots of fun. Your new MP3 player is all this and more. Its compact silhouette takes up the tiniest space in your pocket, and its state-of-the-art technology delivers rich sound. You’ll love your new MP3 player, whether you’re exercising, downloading your favorite tunes, or even listening to FM Radio. Use it once, and you’ll wonder how you ever lived without it. USER-FRIENDLY INTERFACE! The MP3 player is an USB-integrated product with no need for a USB cable, which offers you with fast data transfer and convenient recharging. FREEDOM OF MY FAVORITE SELECTION WITH MP3 PLAYER! You can edit your favorite music files in the playlist. EXPANSION AND COMPATIBILITY With your new player, you’re not limited to MP3 files. Your player supports MP3 and WMA and Ogg formats. TOUCH NAVIGATION! You can tap on the touch pad to navigate through the menus. LONGER PLAY TIME AND SHORTER DOWNLOADING! A fully charged battery can play up to 15 hours of music (when using the earphone). Download times are shorter. Because of its USB 2.0 capability, the player is much faster than models with USB 1.1. ACOUSTIC WONDER Your new MP3 player has built-in DNSe (Digital Natural Sound engine), Samsung’s™ unique sound technology created to deliver richer, deeper sound for an unbelievable listening experience. WHERE FORM MEETS FUNCTION Sure, it’s sleek and good-looking. But it’s easy to hold and use, too. safety information What the icons and signs in this user manual mean : Means that death or serious personal injury is a risk. WARNING CAUTION Means that there is a potential risk for personal injury or material damage. CAUTION To reduce the risk of fire, explosion, electric shock, or personal injury when using your MP3 Player, follow these basic safety precautions: NOTE Means hints or referential pages that may be helpful to operate the player. Do NOT attempt. Do NOT disassemble. Do NOT touch. Follow directions explicitly. Unplug the power plug from the wall socket. Call the service center for help. These warning signs are here to prevent injury to you and others. Please follow them explicitly. After reading this section, keep it in a safe place for future reference. safety information This manual describes how to properly use your new mp3 player. Read it carefully to avoid damaging the player and injuring yourself. Pay particular attention to the following serious warnings: PROTECT YOURSELF Do not disassemble, repair, or modify this product on your own. CAUTION CAUTION Do not get the product wet or drop it in water. If the product gets wet, do not switch it on because you could get an electric shock. Instead, contact a Samsung Customer Service Center near you. Do not use the earphone while you are driving a bicycle, automobile or motorcycle. Otherwise it can cause a serious accident and, furthermore, it is prohibited by the law in some areas. Using the earphone while walking or jogging on a road, in particular, on the crosswalk can lead to a serious accident. For your safety, make sure the earphone cable does not get in the way of your arm or other surrounding objects while you are taking exercise or a walk. Take caution when you use the player with the USB plug pulled out. The sharp USB connection plug may cause injury. WARNING Do not place the product in damp, dusty, or sooty areas because these environments could lead to fire or electric shock. PROTECT YOURSELF WARNING Using the earphone or headphone for an extended time can cause a serious damage to your hearing. If you are exposed to a sound in higher than 85db for an extended time, you will be adversely affecting your hearing. The higher the sound is, the more seriously damaged your hearing may be (an ordinary conversation is made in 50 to 60db and the noise level on the road is approximately 80db). You are strongly advised to set the volume level to medium (the medium level is usually less than 2/3 of the maximum). If you feel a ringing in the ear(s), lower the volume or stop using the earphone or headphone. PROTECT YOUR MP3 PLAYER Do not leave the player in temperatures above 95°F (35°C), such as a sauna or a parked car. Do not cause excessive impact on the player by dropping it. Do not place heavy objects on top of the player. Prevent any foreign particles or dust from entering into the product. Do not place the product near magnetic objects. Be sure to backup important data. Samsung is not responsible for data loss. Use only accessories provided by or approved by Samsung. CAUTION CAUTION NOTE Do not spray water on the product. Never clean the product with chemical substances such as benzene or thinner, as it may cause fire, electric shock or deteriorate the surface. Failure to follow these instructions may lead to physical injuries or damage to the player. When printing this user manual, we recommend that you print in color and check “Fit to Page” in the print option for better viewing. contents THE BASICS 7 7 7 8 11 12 12 13 14 14 15 16 16 17 17 19 22 23 25 28 SAMSUNG MEDIA STUDIO 29 29 30 31 33 33 34 36 37 What’s included Using the cable winder Your MP3 Player Screen displays Using the touch button Using the clip Charging the battery Caring for the battery Turning the Power on & off Playing music Controlling the volume Disabling the buttons Changing the settings and preferences Music preferences FM Radio preferences Time preferences Language preferences System preferences Resetting the system PC requirements Installing Samsung Media Studio Organizing folders and files using Samsung Media Studio To add folders To add files Transferring files to the Player with Samsung Media Studio Using as a Removable Disk Disconnecting from your PC contents LISTENING TO MUSIC 38 38 39 39 39 39 40 40 41 42 43 44 45 46 46 Listening by category Pausing Searching within a track Playing from the beginning of the current track Playing the previous or next track To search a music file To switch back to the current play screen Creating a playlist using Samsung Media Studio Adding music files to an existing playlist Transferring a playlist to your player using Media Studio Creating a playlist on your MP3 player Playing a playlist User button custom function To set user button mode contents MORE THAN MUSIC 49 TROUBLESHOOTING 49 50 51 51 52 53 54 55 55 Listening to FM radio To search for FM stations To store stations in the preset memory To listen to preset stations To delete a preset Voice recording To stop recording Recorded file names To listen to a previously recorded file 56 Troubleshooting 59 60 61 Menu tree Product specifications License 56 APPENDIX 59 the basics WHAT’S INCLUDED Your new mp3 player comes with these accessories. If you’re missing any of these items, contact Samsung Customer Service Center. Player Earphones/ Cable Winder Installation CD Clip The accessories in your box may look slightly different than these. USING THE CABLE WINDER 1. Insert the earphone cable into the winder and wind it around. 2. Clip the earphone cable into the two holes of the winder. the basics _ 7 YOUR MP3 PLAYER Earphones Labeled “L” for the left earpiece and “R” for the right earpiece. Also serves as an antenna for FM Radio in the MP3 player. Earphone connection jack LED Lighting User/Recording button Press to set section repetition, DNSe, Play Speed, Play Mode, or stop recording. Press and briefly hold to start recording. Power & Play/Pause button Press for play/pause and move to the selected menu/confirm and save your selection. Press and briefly hold for power on/off. 8 _ the basics YOUR MP3 PLAYER (Continued) These buttons are ‘Touch’ buttons. Screen display Up volume button Press to increase the volume or move to an upper item/menu. Left file browser button Press to move to the previous track/menu or play the current track from the beginning. Press and briefly hold to quickly scan tracks. Down volume button Press to reduce the volume or move to a lower item/menu. Right file browser button Press to move to next track/menu. Press and briefly hold to quickly scan tracks. Back button Press to return to the previous screen. Press and briefly hold to move to the main menu. the basics _ 9 YOUR MP3 PLAYER (Continued) Hold switch Push in the direction of the arrow to lock the button functions. USB plug Microphone Clip hook 10 _ the basics USB switch Slides the USB plug in and out SCREEN DISPLAYS Music 5 6 7 1 DNSe, Play Speed Indicator 2 2 Battery Indicator 3 3 Repeat A-B, Play Mode Indicator 4 Play Time Indicator 5 Current Music Number/ Total Number Indicator 6 Play/Pause, Search Indicator 7 Music Title Indicator 8 Play Status Bar 1 Singer-Song 1 8 4 FM Radio 4 1 1 Mono/Stereo Indicator 5 2 2 Battery Indicator 6 3 3 Current Frequency(MHz) Indicator 4 Preset number Indicator 5 FM Radio Indicator 6 Manual/Preset Indicator 7 Frequency Location Indicator 7 NOTE The screen pictures are for illustration purposes only. The actual screen may differ. the basics _ 11 USING THE TOUCH BUTTON Tap on touch screen with your fingertip. NOTE To avoid damage to the touch screen, do not use any object other than your fingers to operate the touch screen. Do not tap on the touch screen if your fingers are not clean. Do not tap on the touch screen with gloves on. USING THE CLIP Fasten the clip by inserting its protruding part to the clip hook. 12 _ the basics CHARGING THE BATTERY The battery for your mp3 player will fully charge in about one and a half hours, although total charging time varies depending on your PC environment. Charge it before using the player for the first time and when you haven’t used it for a long time. Screen Display USB Connected Charging... Fully Charged 2 1 1. Slide the The insertion direction of the USB port may differ, depending on the PC. So check the player’s USB plug for the direction before insertion. switch. The USB plug is revealed. 2. Connect the USB plug to the USB port ( ) on your PC as in the figure. the basics _ 13 CARING FOR THE BATTERY Your battery will last longer if you follow these simple guidelines for caring for and storing it. • Recharge and store the battery within the temperature range of 40°F~95°F (5°C~35°C ). • Do not overcharge (longer than 12 hours). Excessive charging or discharging may shorten the battery’s life. • Battery life naturally shortens slowly over time. NOTE If you are charging the player while it is connected to a laptop computer, make sure the laptop’s battery is also fully charged or that the laptop is plugged into its power source. TURNING THE POWER ON & OFF Turning the Power on Press and briefly hold the button. Power is turned on. Turning the Power off Press and briefly hold the Singer-Song 1 button. Power is turned off. NOTE Your mp3 player will be automatically turned off when none of the buttons have been pressed for a specific length of time in the pause mode. The factory setting for <Auto Power Off> is 1 minute, but you can change this length of time. See page 22 for more information. 14 _ the basics PLAYING MUSIC Load music files onto your new mp3 player using Samsung Media Studio. Learn more about Media Studio on page 29. 1. Press and briefly hold the [ main menu screen. ] button to move to the 2. Press the [ , ] button to select <Music> then press the [ ] button. and The <Music> list will appear. 3. Press the [ , ] button to select the desired list and then press the [ ] button. Music Music Playlist 4. Press the [ , , , ] button to select the file to play and then press the button. The music will start playing. NOTE Singer-Song 1 Press the [ ] button to move to the previous screen. Press and briefly hold the [ ] button to move to the main menu. the basics _ 15 CONTROLLING THE VOLUME Press the [ , ] button. You will see a volume control icon. Press the [ ] button to increase the volume or the [ button to decrease it. ] DISABLING THE BUTTONS The hold function disables all the other buttons on the mp3 player, so that if you accidentally bump one-while working out, for example-your music won’t be interrupted. 1. Push the switch in the direction of the arrow. switch in the opposite direction 2. Push the of the arrow to release the hold function. 16 _ the basics Hold! CHANGING THE SETTINGS AND PREFERENCES Your mp3 player comes with settings and preferences that were set up at the factory, but you can change these pre-set values to truly customize your player. NOTE Press the [ ] button to move to the previous screen. Press and briefly hold the [ ] button to move to the main menu screen. Music preferences 1. Press and briefly hold the [ ] button to move to the main menu screen. 2. Press the [ , ] button to select <Settings> and then press the [ Music User Button Mo.. FM Radio ] button. Time The <Settings> menu appears. 3. Press the [ , ] button to select <Music> and then press the [ ] button. The <Music> menu appears. DNSe 3D-User Set User EQ Set Play Mode 4. Use the [ , , , ] and buttons to choose the settings you prefer. Press the [ Press the [ Press the [ NOTE ] button to move to the previous item. ] button to move to the next item/select the menu. , ] button to move up or down through the current menu. If the <Settings> screen is open and you don’t push any buttons for about 40 seconds, the unsaved settings will be lost, and the player will return to the previous function. the basics _ 17 CHANGING THE SETTINGS AND PREFERENCES (Continued) Music setting options DNSe : Select the right sound for each music genre. Choose either <3D-User>, <3D-Studio>, <3D-Stage>, <3D-Club>, <Concert Hall>, <Normal>, <Rock>, <House>, <Dance>, <Jazz>, <Ballad>, <Rhythm & Blues>, <Classical>, or <User EQ>. 3D-User Set : Sets 3D sound effect and bass enhancement for 3D-User. <3D> can be set between 0~5 levels, and <Bass Enhance> between 0~3 levels. If <3D-User Set> is selected, <DNSe> will be changed to <3D-User>. User EQ Set : Select a sound effect (EQ). If <User EQ Set> is selected, <DNSe> will be changed to <User EQ>. In <User EQ Set> settings, use [ , , , ] button to button. Press the [ ] or select the desired User EQ Set and then press the button to save. [ ] button to select <YES> and then press the Play Mode : Select playback mode such as repeat settings. Select from <Normal>, <Repeat Folder>, <Repeat All>, <Repeat One>, <Shuffle Folder>, and <Shuffle All>. Play Speed : Adjust the playback speed of music/voice recording. Select <x0.7>, <x0.8>, <x0.9>, <x1.0>, <x1.1>, <x1.2>, or <x1.3>. (The higher the number is, the faster the playback speed is.) Skip Interval : Set the length of the segment the file will skip when you press the [ ] or [ ] button during playback. Select either <1 Track>, <3 sec>, <5 sec>, <7 sec>, <10 sec>, <30 sec>, or <1 min>. Tag : Allows you to select to display or not to display the file’s music information, if any. Select either <Off> or <On>. NOTE If the file was developed with a variable bit rate(VBR) or Ogg file, the actual length of the skip interval may not be exactly what you select. The play speed and skip interval will return to the default (play speed: x1.0, skip interval: 1 Track) each time you turn on the player. If the play speed is set to other than x1.0, <DNSe> will be switched to <Normal>. The adjusted play speed may differ from the actual speed, depending on the file. What is DNSe? Digital Natural Sound Engine (DNSe) is a sound effect function for MP3 players developed by Samsung. It supports the best stereophonic sound effect to the music. 18 _ the basics CHANGING THE SETTINGS AND PREFERENCES (Continued) FM Radio preferences You can set FM radio frequencies automatically and also select the FM receiving area and sensitivity. 1. Press and briefly hold the [ ] button to move to the main menu screen. 2. Press the [ , ] button to select <Settings> and then press the [ ] button. The <Settings> menu appears. 3. Press the [ , ] button to select <FM Radio> and then press the [ ] button. Music User Button Mo.. FM Radio Time Auto Preset FM Region FM Sensitivity The <FM Radio> menu appears. 4. Use the [ , , , ] and buttons to set functions. the basics _ 19 CHANGING THE SETTINGS AND PREFERENCES (Continued) FM Radio setting options Auto Preset : Automatically scans for available frequencies, which enables you to quickly find a desired frequency. ► page 21 FM Region : You can change an FM area setting in preparation for overseas travel. Select either <Korea/US>, <Japan>, or <Other Countries>. FM Sensitivity : To receive more or fewer FM radio frequencies, adjust the <FM Sensitivity>. Select either <Low>, <Middle>, and <High>. If you select <High>, the more frequencies can be received. Frequency range by region - Korea/US: Search for FM frequencies in 100 kHz increments between 87.5 MHz~108.0 MHz. - Japan: Search for FM frequencies in 100 kHz increments between 76.0 MHz~108.0 MHz. - Other Countries: Search for FM frequencies in 50 kHz increments between 87.50 MHz~108.00 MHz. NOTE FM region can be deleted or changed according to the target region of the player. Your previously stored radio frequencies will be deleted when you change the <FM Region> on your player. 20 _ the basics CHANGING THE SETTINGS AND PREFERENCES (Continued) To set Auto Preset You can preset up to 20 stations in your MP3 player’s memory and return to them with the press of just one button. Have the MP3 player find and store stations automatically. 1. Press the [ , ] button to select <Auto Preset> and then press the [ ] button. The Auto Preset confirmation window will appear. Auto Preset... 2. Press the [ , ] button to select <YES> and then press the button. <Auto Preset....> will appear and up to 20 frequencies are automatically set. Press the [ , ] button to scan for a desired preset frequency. To cancel Auto Preset If you want to cancel the auto preset, press any button in the process. The auto preset setting is canceled, and only frequencies set up to that point are stored. NOTE Always connect your earphones to the player when searching or setting frequencies. The earphones serve as antennas to receive FM Radio reception In poor reception areas, the player may not find an available FM frequency. If no frequencies were preset, <No Preset> will appear. You may want to re-set the stored stations if you’re going to listen to your MP3 player in a different city. To delete the preset stations and store new ones, simply repeat the process. the basics _ 21 CHANGING THE SETTINGS AND PREFERENCES (Continued) Time preferences Setting the time allows you to use the sleep timer, set automatic shut-off time limits, and even display off. 1. Press and briefly hold the [ ] button to move to the main menu screen. 2. Press the [ , ] button to select <Settings> and then press the [ Music User Button Mo.. FM Radio ] button. Time The <Settings> menu appears. 3. Press the [ , ] button to select <Time> and then press the [ ] button. The <Time> menu appears. 4. Use the [ , , , ] and buttons to set functions. Time setting options Sleep : Turns off power automatically after the preset time. Select either <Off>, <15 min >, <30 min>, <60 min>, <90 min>, or <120 min>. Auto Power Off : Automatically turns power off when there is no button operation after the preset time in the pause mode. Select either <15 sec>, <30 sec>, <1 min>, <3 min>, or <5 min>. Display Off : If no button is pressed within the time set shown below, the Screen Display will be automatically turned off. Select either <15 sec>, <30 sec>, <1 min>, <3 min>, <5 min>, or <Always On>. Press any button to turn it back on. However, pressing a touch button when the HOLD condition is on will not turn on the display. 22 _ the basics CHANGING THE SETTINGS AND PREFERENCES (Continued) Language preferences The menus on your new mp3 player can appear in any one of multiple languages. 1. Press and briefly hold the [ ] button to move to the main menu screen. 2. Press the [ , ] button to select <Settings> and then press the [ Language System ] button. The <Settings> menu appears. 3. Press the [ , ] button to select <Language> and then press the [ ] button. The <Language> menu appears. 4. Use the [ , , , ] and buttons to set functions. the basics _ 23 CHANGING THE SETTINGS AND PREFERENCES (Continued) Language setting options Menu : Set the menu language. Select <English>, <한국어>, <Français>, <Deutsch>, <Italiano>, <日本語>, <汉语(简体)>, <漢語(繁體)>, <Español>, <Русский>, <Magyar>, <Nederlands>, <Polski>, <Português> , <Svenska>, <ไทย>, <Bahasa inggris>, <Український>, <Tiếng Việt>, <Bulgarian>, <Čeština>, <Dansk>, <Soumi>, <Ελληνικά>, <Norsk>, <Português BR>, <Română>, <Slovensky>, <Slovenščina>, <Español(Castellano)> or <Türkçe>. ID3 Tag : Set the language in which the track information will appear. Select from <Afrikaans>, <Basque>, <Catalan>, <Chinese (S)>, <Chinese(T)>, <Czech>, <Danish>, <Dutch>, <English>, <Estonian>, <Finnish>, <French>, <German>, <Greek>, <Hrvatski>, <Hungarian>, <Icelandic>, <Italian>, <Japanese>, <Korean>, <Norwegian>, <Polish>, <Portuguese>, <Romany>, <Russian>, <Slovak>, <Slovene>, <Spanish>, <Swedish>, <Turkish> <Vietnamese>, <Thai>, <Indonesian>, <Ukrainian>, <Bulgarian> and <Romanian>. The supported languages can be changed or added. NOTE What is ID3 Tag? This is what is attached to an MP3 to carry information relevant to the file, such as the title, artist, album, year, genre and a comment field. 24 _ the basics CHANGING THE SETTINGS AND PREFERENCES (Continued) System preferences Choose the voice recording bit rate, delete a file, resume that’s right for you. 1. Press and briefly hold the [ ] button to move to the main menu screen. 2. Press the [ , ] button to select <Settings> and then press the [ Language System ] button. The <Settings> menu appears. 3. Press the [ press the [ , ] button to select <System> and then ] button. The <System> menu appears. 4. Use the [ , , , ] and buttons to set functions. the basics _ 25 CHANGING THE SETTINGS AND PREFERENCES (Continued) System setting options Voice Recording Bit Rate : You can select the voice recording quality. Select either <32kbps> <64kbps> or <128kbps>. (The higher the number is, the better the audio quality and the larger the file size becomes.) Delete File : You can delete a file. ► page 27 Resume : Specifies the starting point to restart playback after playback is stopped. If set to <Off>, the last file will play from the beginning. If set to <On>, the last file will play from the point it was previously stopped. Beep : Sets the beep sound for button operations to on or off. Select either <Off> or <On>. Volume Limit : You can avoid hearing damage by setting the limit of the volume when using the earphone. <On> will limit the maximum volume level up to 20. The maximum volume level when Volume Limit is set to <Off> is 40. Even if you select <Off>, the volume will be set back to 20 to avoid hearing damage when you turn the player back on. LED Effect : Select LED backlight effect. Select either <Off> <Button> (turns on when a button is pressed) <Random> or <Always on>. Default Set : Returns all settings to the default value. Select either <YES> or <NO>. <YES> initializes all settings to default. <NO> cancels default settings. Format : Formats the internal memory. Select either <YES> or <NO>. Selecting <YES> will format the internal memory and delete all files on the player. Selecting <NO> does not format the internal memory. About : Checks the firmware version, number of tracks, remaining memory. NOTE Regarding the Built-In Memory 1GB=1,000,000,000 bytes : actual formatted capacity may be less as the internal firmware uses a portion of the memory. 26 _ the basics CHANGING THE SETTINGS AND PREFERENCES (Continued) To Delete a File 1. Press the [ , ] button to select <Delete File> and then press the [ 2. Press the [ , your choice. Voice Recording.. ] button. Delete File Resume ] button to select a folder of ] button to move to the file list of 3. Use the [ selected folder. 4. Press the [ , ] button to select a file to delete and then press the [ ] button. Beep Recorded Music Playlist <Delete?> will appear. 5. Press the [ , ] button to select <YES> and then press the button. Delete? The selected file will be deleted. CAUTION Files cannot be restored after they are deleted. Please check before deleting files. Deleting a file will stop playing the current music. NOTE the basics _ 27 RESETTING THE SYSTEM If your mp3 player won’t turn on, won’t play music, or isn’t recognized by your computer when you connect it, you may have to reset the system. 1 2 Push the switch in the direction of the arrow. and Press and briefly hold the buttons at the same time to reset the system. The system will be initialized. Your settings and files will not be affected. 28 _ the basics Samsung Media Studio Samsung Media Studio is the easy-to-use software application that helps you organize your files on your PC. With your files already sorted and organized in Media Studio, you can quickly transfer them to your mp3 without searching your entire hard drive for the right file. PC REQUIREMENTS Your PC system must meet the following minimum specifications in order to install and run Media Studio: • Pentium 300MHz or higher • USB Port 2.0 • Windows 2000/XP/Vista • DirectX 9.0 or higher • 100MB of free hard disc space • CD Rom Drive (2X or higher) • Windows Media Player 9.0 or higher • Resolution 1024 X 768 or higher • Internet Explorer 6.0 or higher samsung media studio _ 29 INSTALLING SAMSUNG MEDIA STUDIO CAUTION Ensure that you run the <Media Studio> installer in your PC’s administrator account. Otherwise, <Media Studio> will not be installed. To find the administrator account, please refer to your PC’s user manual. 1. Insert the Installation CD provided with the player into the CD-ROM drive. 2. Click <Install Now>. 3. Click <Next>. <Media Studio> installation starts and then creates an icon on your desktop when installation is complete. CAUTION Next > Handle with care when you use a vertically installed CD-ROM to load / remove the installation CD. 30 _ samsung media studio ORGANIZING FOLDERS AND FILES USING SAMSUNG MEDIA STUDIO Media Studio enables you to select and organize files and folders before transferring them to your player. This will make scanning files on your mp3 player easier and faster. 2 The insertion direction of the USB port may differ, 1 1. Slide the depending on the PC. So check the player’s USB plug for the direction before insertion. switch. The USB plug is revealed. 2. Connect the USB plug to the USB port ( ) on your PC as in the figure. <USB Connected> appears on the screen display of the player. <Media Studio> will automatically start when the player is connected to your PC. If the program does not start automatically, double click the <Media Studio> icon the desktop. Ejecting the USB Plug Slide the player. Inserting the USB Plug switch to eject the USB plug from the 2 Inserting the USB Plug Push the USB plug back into the player while sliding the switch. switch when you push Be sure to slide and hold the the USB plug into the player. Otherwise, the player may be CAUTION damaged. NOTE on 1 You are recommended to format the player on the PC by the FAT32 file system. samsung media studio _ 31 ORGANIZING FOLDERS AND FILES USING SAMSUNG MEDIA STUDIO (Continued) [YP-U3] [YP-U3] 3. Click the Click icon. to display music list. All functions are disabled during connection. NOTE CAUTION If you connect the USB plug to the PC in the Low Battery condition, the player will be charged for several minutes before connecting to the PC. Connect the player to the computer directly rather than through a USB hub to avoid an unstable connection. 32 _ samsung media studio ORGANIZING FOLDERS AND FILES USING SAMSUNG MEDIA STUDIO (Continued) To add folders 4. Click <Add Folder> on the bottom of <Media Studio>. The <Open Folder> window will appear. 5. Select the folder to add and click <OK>. The files of the selected folder are added to the list on the left side the <Media Studio> Screen. To add files 4. Click <Add File> on the bottom of <Media Studio>. The <Open> window will appear. 5. Select the files to add and click <Open>. The files are added to the list on the left side the <Media Studio> Screen. NOTE Samsung Media Studio has a thorough Help function. If you can’t find the answer to your question about Media Studio, click <MENU> → <Help> → <Help> on the top of the <Media Studio> program. samsung media studio _ 33 TRANSFERRING FILES TO THE PLAYER WITH SAMSUNG MEDIA STUDIO <Media Studio> file transfer is the easiest way to get files from your PC to your mp3 player. [YP-U3] 3 4 [YP-U3] 5 1. Slide the switch. The USB plug is revealed. 2. Connect the USB plug to the USB port ( ) on your PC. <USB Connected> appears on the screen display of the player. Media Studio will automatically start when the player is connected to your PC. If the program does not start automatically, double click the <Media Studio> icon the desktop. CAUTION Connect the player to your computer directly rather than through a USB hub to avoid an unstable connection. 34 _ samsung media studio on TRANSFERRING FILES TO THE PLAYER WITH SAMSUNG MEDIA STUDIO (Continued) 3. Click the Click icon. to display music list. 4. Select the file to transfer from the list on the left side. 5. Click the icon. The file you selected is transferred to the player. CAUTION NOTE Do not disconnect the USB plug during file transfer. Disconnecting during transfer may damage the player or your PC. Music recognition technology and related data are provided by Gracenote and Gracenote CDDB® Music Recognition ServiceSM. CDDB is a registered trademark of Gracenote. The Gracenote logo and logotype, the Gracenote CDDB logo and logotype, and the “Powered by Gracenote CDDB” logo are trademarks of Gracenote. Music Recognition Service and MRS are service marks of Gracenote. samsung media studio _ 35 USING AS A REMOVABLE DISK You can use the player as a removable storage device. Before you start - Connect the player to your PC. 1. Open files/folders to transfer from your PC. 2. Open <My Computer> <U3> from the desktop. 3. Select the files/folders to transfer from your PC and drag and drop them to a folder of your choice in the <U3>. The selected folders or files are transferred to the player. CAUTION The file transfer message will appear during file download or upload. Disconnecting the USB plug while the message is displayed may cause malfunction of the player. The order of music files displayed in Windows Explorer may differ from the play order on your device. If you transfer a DRM file(charged file) to the removable disk, the file will not be played. What is DRM? Digital Rights Management (DRM) is a technology and service to prevent the illegal use of digital contents and protect the profit and rights of copyright holders. DRM files are charged music files applied with the illegal copy protection technology of legally purchased MP3 music. 36 _ samsung media studio DISCONNECTING FROM YOUR PC Follow the steps below to prevent damage to the player and data when disconnecting from your PC. 1. Place the mouse cursor on top of the icon on the taskbar at the bottom right corner of the desktop and click the left mouse button. 1 2. Click the <Safely Remove USB Mass Storage Device Drive> message. 3. Disconnect the player from your PC. 2 CAUTION Do not disconnect the player from the PC during file transfer. This may cause damage to data and the player. You cannot remove the player while files within the player are being played on your PC. Please retry after file playback is finished. samsung media studio _ 37 listening to music Before you start - Connect the earphones, then turn on the player, and check the battery. NOTE Press the [ ] button to move to the previous screen. Press and briefly hold the [ ] button to move to the main menu screen. LISTENING BY CATEGORY 2 3 Music Playlist 4 Singer-Song 1 Music 1. Press and briefly hold the [ 2. Press the [ , ] button to move to the main menu screen. ] button to select <Music> and then press the [ ] button. The <Music> list will appear. 3. Press the [ , ] button to select the desired list and then press the [ 4. Press the [ , , button. , ] button. ] button to select the file to play and then press the The music will start playing. Music List Music : You can search for a music file. Playlists : You can search for a music file or album in the playlist. MP3, WMA and Ogg music files are compatible with the player. NOTE MP1 or MP2 files which only have a changed extension to MP3, may not play on the player. A file without an ID3 Tag (music information) is displayed as [Unknown]. 38 _ listening to music PAUSING 1. Press the button while the music is playing. The music playback will be paused. 2. Press the button again. The music will play from the point where it stopped. SEARCHING WITHIN A TRACK 1. Press and briefly hold the [ playing. ] or [ ] button while the selected track is It searches to the beginning or the end of the track. 2. Release the button at the point you wish to start. It starts playing from the point you release the button. PLAYING FROM THE BEGINNING OF THE CURRENT TRACK 1. Press the [ ] button after 3 seconds of play. The current track starts playing from the beginning. PLAYING THE PREVIOUS OR NEXT TRACK 1. Press the [ ] button within 3 seconds of play. The previous track will start playing. 2. Press the [ ] button. The next track will start playing. CAUTION When playing VBR files, the previous track may not play even if you press the [ ] button within 3 seconds of the play. listening to music _ 39 TO SEARCH A MUSIC FILE 1. Press the [ playing. ] button while the selected music file is The file list of the folder will appear. 2. Press the [ ] button to move to the upper folder. 3. Press the [ , 4. Use the [ 5. Press the [ Singer-Song 1 Singer-Song 2 Singer-Song 3 Singer-Song 4 ] button to select a folder of your choice. ] button to move to the file list of the selected folder. , ] button to select a file of your choice. 6. Press the button. The music file will start playing. TO SWITCH BACK TO THE CURRENT PLAY SCREEN You can return to the current play screen at any time while using other functions. 1. Press and briefly hold the [ to the main menu screen. ] button to move 2. Press the [ , ] button to select <Now Playing> and then press the [ ] button. The player switches back to the current play screen. 40 _ listening to music Now Playing CREATING A PLAYLIST USING SAMSUNG MEDIA STUDIO With Samsung <Media Studio>, you can create your own collection, or album, of audio files. Before you start - Connect the player to your PC. Media Studio must be installed on your PC. [YP-U3] My Album OK 2 1 [YP-U3] 3 5 New Album 1. Click <My Album> on the top of <Media Studio>. The <My Album> window appears. 2. Click <New Album> on the bottom. The <Creation> window appears. 3. Type in the album title and click [OK]. A new album (playlist) will be named and stored in the <My Album> section of <Media Studio>. listening to music _ 41 CREATING A PLAYLIST USING SAMSUNG MEDIA STUDIO (Continued) Adding music files to an existing playlist [YP-U3] My PC 1 2 4 My Album 5 3 1. Click <My PC> on the top of <Media Studio>. The <My PC> window appears. 2. Click <My Album> in the right corner of the window. The <My Album> window appears. 3. Double click on an album in the right window. 4. Select files that you want to transfer in the <My PC> window. 5. Click . The selected files will be added to the album (playlist). 42 _ listening to music CREATING A PLAYLIST USING SAMSUNG MEDIA STUDIO (Continued) Transferring a Playlist to your player using Media Studio [YP-U3] 1 [YP-U3] My Album 2 Portable 3 4 1. Click <My Album> on the top of <Media Studio>. The <My Album> window appears. 2. Click <Portable> in the right corner of the window. The <Portable> window appears. 3. Select an album in the <My Album> list. 4. Click . The selected album will be transferred to the player folder by folder in <Music> of the main menu → <Playlist>. listening to music _ 43 CREATING A PLAYLIST ON YOUR MP3 PLAYER If you’ve already downloaded files to your mp3 player, you can create a <Favorite> Playlist without Media Studio or your PC. Choose the method below that best suits you. 3 Singer-Song 1 Singer-Song 2 Singer-Song 3 Singer-Song 4 1. Press and briefly hold the [ 2. Press the [ button. , 4 Singer-Song 1 Singer-Song 2 Singer-Song 3 Singer-Song 4 ] button to move to the main menu screen. ] button to select <Music> and then press the [ ] The <Music> list will appear. 3. Press the [ , ] button to select <Music> and then press the [ ] button. The file list of the Music folder will appear. 4. Press the [ , ] buttons to add files to the playlist and then press the button. The selected file will be marked with and is added to the playlist. You can check the playlist in <Music> of the main menu → <Playlist> → <Favorite.spl>. NOTE If you want to delete a file in <Favorite.spl>, select a marked file to delete and button again. then press the 44 _ listening to music PLAYING A PLAYLIST Before you start - See pages 41~43 to see how to create and transfer playlists to your player. To create a playlist on the player, refer to page 44. 1. Press and briefly hold the [ main menu screen. ] button to move to the Music Playlist 2. Press the [ , ] button to select <Music> and then press the [ ] button. The <Music> list will appear. 3. Press the [ press the [ , ] button to select <Playlist> and then ] button. The <Playlist> will appear. If there is no playlist found, you will see a <No file.> message on the screen. 4. Press the [ , ] button to select the playlist of your choice, and then press the [ ] button. The music files saved in the selected playlist will appear. If you want to play a playlist created on the player, select the <Favorite.spl> folder. 5. Press the [ press the , ] button to select the file to play and then button. The music will start playing. listening to music _ 45 USER BUTTON CUSTOM FUNCTION You can set the button to control one of four modes listed below. After setting, you can access the mode directly with the button. To set User Button Mode Use the button during playback for simple mode change. 1. Press and briefly hold the [ ] button to move to the main menu screen. 2. Press the [ , ] button to select <Settings> and then press the [ Music User Button Mo.. FM Radio ] button. Time The <Settings> menu will appear. 3. Press the [ press the [ , ] button to select <User Button Mode> and then ] button. The <User Button Mode> menu will appear. 4. Press the [ press the , ] button to select the user button mode and then button. User Button Mode List Repeat A-B : Sets section repeat. DNSe : Allows you to select an appropriate sound effect for music. Play Speed : Adjusts the playback speed between fast and slow. Play Mode : Selects the repeat playback mode. 46 _ listening to music USER BUTTON CUSTOM FUNCTION (Continued) To set Section Repeat This function enables you to listen to specific parts of a track repeatedly. Recommended for language learning. 2 3 Singer-Song 1 Singer-Song 1 1. Set the User Button Mode to <Repeat A-B> and play a file of your choice. 2. Press the to repeat. button at the beginning of the section you want The starting point is set and <AJ> will appear in the screen display window. 3. Press the button again to set the ending of the section you want to repeat. <AQB> will appear on the screen and the specified section starts to play repeatedly. To cancel Section Repeat Press the button again during Section Repeat. Section Repeat will be canceled. NOTE Section Repeat will be automatically canceled in the following case. The starting point of the section repeat is set but the ending point is not set until after the current track ends. listening to music _ 47 USER BUTTON CUSTOM FUNCTION (Continued) To use the DNSe button Set the User Button Mode to <DNSe> and press the button. DNSe mode changes in the following order each time the button is pressed (Normal) (Rock) (House) (Dance) (Jazz) (Ballad) (Rhythm & Blues) (User EQ) (3D-User) (3D-Studio) (Classical) (3D-Stage) (3D-Club) (Concert Hall). To use the Play Speed button Set the User Button Mode to <Play Speed> and press the button. Playback speed changes in the following order each time the button is pressed <NOR>, <x1.1>, <x1.2>, <x1.3>, <x0.7>, <x0.8>, <x0.9>. To use the Play Mode button Set the User Button Mode to <Play Mode> and press the button. Playback mode changes in the following order each time the button is pressed (Normal) (Repeat Folder) (Repeat All) (Repeat One) (Shuffle Folder) (Shuffle All). NOTE What is DNSe? Digital Natural Sound Engine (DNSe) is a sound effect function for MP3 players developed by Samsung. It supports the best stereophonic sound effect to the music. 48 _ listening to music more than music You’ll enjoy much more than music with your new mp3 player. Listen to FM Radio, Voice recording. Your mp3 player brings this and more right to the palm of your hand. LISTENING TO FM RADIO Before you start - Connect the earphones, then turn on the player, and check the battery. NOTE Press the [ ] button to move to the previous screen. Press and briefly hold the [ ] button to move to the main menu screen. 1. Press and briefly hold the [ to the main menu screen. ] button to move 2. Press the [ , ] button to select <FM Radio> and then press the button. FM Radio FM radio reception will start. NOTE Always connect your earphones to the player when searching or setting frequencies. The earphones serve as antennas to receive FM Radio reception. In poor reception areas, the player may not find an available FM frequency. more than music _ 49 LISTENING TO FM RADIO (Continued) NOTE Press the [ ] button to move to the previous screen. Press and briefly hold the [ ] button to move to the main menu screen. To search for FM stations 1. Press the <MANUAL>. button and select Auto Searching.... <MANUAL> wıll appear. 2. Press and briefly hold the [ and then release. ] or [ ] button <Auto Searching....> appears on the display. The search will stop at the frequency nearest from the point the button is released. OR, ] button to progress 2. Press the [ ] or [ through the frequencies one by one. 50 _ more than music LISTENING TO FM RADIO (Continued) To store stations in the Preset memory 1. Press the <MANUAL>. button to select <MANUAL> wıll appear. Save? 2. Press the [ ] or [ ] button to search for station frequencies to preset. button. 3. Press the <Save?> will appear. 4. Press the [ press the ] or [ ] button to select a preset number and then button. The selected station is set as a preset number. NOTE To scan for a preset frequency automatically, refer to page 21. To listen to preset stations 1. Press the button and select <PRESET>. <PRESET> will appear. 2. Press the [ ] or [ ] button to scroll through preset stations. If no frequencies were preset, <No Preset> will appear. NOTE more than music _ 51 LISTENING TO FM RADIO (Continued) To delete a preset Follows the step below to delete frequencies while listening to FM Radio. 1. Press the <PRESET>. button and select <PRESET> wıll appear. Delete? 2. Press the [ ] or [ ] button to search for preset frequencies to delete. button. 3. Press the <Delete?> will appear. 4. Press the [ ] or [ button. ] button to select <YES> and then press the The selected preset number is deleted. If you don’t want to delete the preset number, select <NO>. 52 _ more than music VOICE RECORDING You can record your own voice, speeches, lectures, and other outside sounds with your mp3 player. You can also adjust the quality of the recording by selecting a different bit rate. For more information on setting the voice recording bit rate, see page 26. Method 1 You can record a voice recording at any time while using other functions. button. Press and briefly hold the Voice recording will start as soon as the file name is displayed. Method 2 1. Press and briefly hold the [ ] button to move to the main menu screen. 2. Press the [ , ] button to select <Voice Record> and then press the [ Voice Record ] button. The <Voice Record> list appears. 3. Press the [ , [ ] button. ] button to select <Record> and then press the The confirmation window will appear. 4. Press the [ , ] button to select <YES> and then press the button. Voice recording will start as soon as the file name is displayed Voice Record List Record : You can make a voice-recording. Recorded Files : You can play and listen to recorded files. more than music _ 53 VOICE RECORDING (Continued) To stop recording 1. Press the recording to stop. button when you want The confirmation window will appear. Check recorded file? 2. Press the [ , ] button to select <YES> or <NO> and then press the button. <YES> the just recorded file will play. <NO> the just recorded file will not play. The recorded file is stored in the <Voice Record> <Recorded Files>. CAUTION of the main menu → Do not place the microphone too close or too far away during recording, as this can affect the recording quality. Voice recording is not enabled if the memory is full or the battery capacity is low. You can make a voice recording for about 66 hours (based on 32Kbps, 1GB) NOTE Press the button if you want to pause recording. FM radio stations cannot be recorded. 54 _ more than music VOICE RECORDING (Continued) Recorded file names While recording, the MP3 player generates a file name automatically. The filename follows the format <VNNNN.mp3>, where V indicates the voice recording file and NNNN defines the recording number. For example, file name V0003.mp3 is the third voice-recording file to be saved. To listen to a previously recorded file 1. Press and briefly hold the [ screen. 2. Press the [ press the [ ] button to move to the main menu , ] button to select <Voice Record> ] button. and then The <Voice Record> list will appears. 3. Press the [ press the [ , ] button to select <Recorded Files> and then ] button. The <Recorded files> list will appear. 4. Use [ , 5. Press the ] button to select a recorded file of your choice. button. The recorded file will start playing. more than music _ 55 troubleshooting If you have a problem with your new mp3 player, check for a solution in this list. If the problem persists, contact Samsung Customer Service Center near you. PROBLEM SOLUTION Power will not turn on. • Power will not turn on if the battery is completely drained. Recharge the battery and turn the power on again. • In Hold state, press and briefly hold the and buttons at the same time to reset the system. Buttons do not work. switch is in the direction • Check if the of the arrow position. • Check if you pressed the right button, then press again. • In Hold state, press and briefly hold the and buttons at the same time to reset the system. The screen will not turn on. • If <Display Off> is selected from <Settings> → <Time>, the screen display will be turned off. Press any button and see if it turns on. However, pressing a touch button when the HOLD condition is on will not turn on the display. • The screen may not be visible under direct sunlight. 56 _ troubleshooting PROBLEM SOLUTION Power is turning off. • Check the battery status. • The power is automatically turned off when the battery is completely drained. Recharge the battery. • If <Auto Power Off> is selected from <Settings> → <Time>, the Power in the pause mode will be turned off. Turn on the Player. Battery life differs from the manual. • The battery life can vary depending on the sound mode and display setting. • Battery life may be shortened when the player is left for extended periods in low or high temperatures. Media Studio Program Malfunction • Check if your PC meets the basic system requirements. • Check the USB plug if it’s correctly connected and try again. Connection to your PC is disabled. The file transfer rate is too slow. • Press <Start> on the toolbar of your PC to run Windows Update. Select Key Updates and Service Packs, then update all. Reboot your PC and reconnect. • If you are running multiple programs including <Media Studio> on your PC, the file transfer rate will be slow. Exit unnecessary programs and try transferring again. troubleshooting _ 57 PROBLEM SOLUTION Player isn’t playing. • Check if the available file has been saved in the memory. • Check if the music file is damaged. • Check if there is enough battery power. File upload doesn’t work. • Check if the USB plug is securely connected. Reconnect if necessary. • Check if the memory is full. • In Hold state, press and briefly hold the and buttons at the same time to reset the system. Files or data are missing. • Check if the USB plug has been disconnected during file or data transmission. If this is the case, it may cause serious damage not only to files/data but also to the product. You have to be extra cautious as Samsung is not responsible for data loss. Abnormal play time display during play. • Check if the file is in Variable Bit Rate (VBR) format. Abnormal display of file name. • Go to <Settings> → <Language> → <ID3 Tag> in the main menu screen and set an appropriate language. The product is hot. • Heat may be generated during recharging. This has no effect on the product life or functions. 58 _ troubleshooting appendix MENU TREE Here’s a quick look at how the menus and functions are organized on your new mp3 player. Menu Select Screen Music Music FM Radio User Button Mode Voice Record FM Radio Time Settings Now Playing Language System DNSe Repeat A-B Auto Preset Sleep Menu Voice Recording Bit Rate 3D-User Set DNSe FM Region Auto Power Off ID3 Tag Delete File User EQ Set Play Speed FM Sensitivity Display Off Play Mode Play Mode Resume Beep Play Speed Volume Limit Skip Interval LED Effect Tag Default Set Format About appendix _ 59 PRODUCT SPECIFICATIONS Model Name Power Built-in Battery Power File Compatibility Supported Number of Folders and Files Earphone Output Output Frequency Range Signal to Noise Ratio Play Time Temperature Range for Operation Case Weight Dimension (WxHxD) YP-U3 3.7V (Li-Polymer Rechargeable) 250 mAh MPEG1/2/2.5 Layer3(8kbps~320kbps, 8kHz~48kHz) WMA(48kbps~192kbps,8kHz~48kHz) , Ogg(Q0~Q10) Folder: Max. 2000, File: Max. 2000 (excluding folder) 20mW (16Ω) 20Hz~20KHz 90dB with A filter (Based on 1KHz 0dB) 15 hours of music play (MP3 128kbps, Volume 15, Normal sound mode) -5~35°C (23~95°F) Plastics 22.8g 80 X 25.4 X 11 mm FM Frequency 87.5~108.0 MHz FM Signal to Noise 55 dB Ratio FM T.H.D 1% FM Useable Sensitiivity 10dBμ The contents of this Manual are subject to change without prior notice for further improvement. 60 _ appendix LICENSE The product player accompanying this user manual is licensed under certain intellectual property rights of certain third parties. This license is limited to private non-commercial use by end-user consumers for licensed contents. No rights are granted for commercial use. The license does not cover any product player other than this product player and the license does not extend to any unlicensed product player or process conforming to ISO/IEC 11172-3 or ISO/IEC 13818-3 used or sold in combination with this product player. The license only covers the use of this product player to encode and/or decode audio files conforming to the ISO/IEC 11172-3 or ISO/IEC 13818-3. No rights are granted under this license for product features or functions that do not conform to the ISO/IEC 11172-3 or ISO/IEC 13818-3. appendix _ 61 CONTACT SAMSUNG WORLD WIDE If you have any questions or comments relating to Samsung products, please contact the SAMSUNG customer care center. Country CANADA MEXICO U.S.A ARGENTINE BRAZIL CHILE COSTA RICA ECUADOR EL SALVADOR GUATEMALA JAMAICA PANAMA PUERTO RICO REP. DOMINICA TRINIDAD & TOBAGO Customer Care Center 1-800-SAMSUNG (7267864) 01-800-SAMSUNG (7267864) 1-800-SAMSUNG (7267864) 0800-333-3733 0800-124-421, 4004-0000 800-726-7864 (SAMSUNG) 0-800-507-7267 1-800-10-7267 800-6225 1-800-299-0013 1-800-234-7267 800-7267 1-800-682-3180 1-800-751-2676 1-800-7267-864 Web Site www.samsung.com/ca www.samsung.com/mx www.samsung.com www.samsung.com/ar www.samsung.com/br www.samsung.com/cl www.samsung.com/latin www.samsung.com/latin www.samsung.com/latin www.samsung.com/latin www.samsung.com/latin www.samsung.com/latin www.samsung.com/latin www.samsung.com/latin www.samsung.com/latin VENEZUELA 0-800-100-5303 www.samsung.com/latin COLOMBIA BELGIUM CZECH REPUBLIC 01-8000112112 02 201 2418 844 000 844 www.samsung.com.co www.samsung.com/be www.samsung.com/cz DENMARK 70 70 19 70 www.samsung.com/dk FINLAND 030-6227 515 3260 SAMSUNG or 08 25 08 65 65 ( 0,15/Min) www.samsung.com/fi 01805-121213 ( 0,14/Min) 06-80-SAMSUNG (7267864) 800-SAMSUNG (7267864) www.samsung.de www.samsung.com/hu www.samsung.com/it FRANCE GERMANY HUNGARY ITALIA 62 _ appendix www.samsung.com/fr Country LUXEMBURG NETHERLANDS NORWAY POLAND PORTUGAL SLOVAKIA SPAIN SWEDEN Customer Care Center 0032 (0)2 201 24 18 0900 20 200 88 ( 0,10/Min) 815-56 480 0 801 801 881 80 8 200 128 0800-SAMSUNG (726786) 902 10 11 30 0771-400 200 Web Site www.samsung.lu www.samsung.com/nl www.samsung.com/no www.samsung.com/pl www.samsung.com/pt www.samsung.com/sk www.samsung.com/es www.samsung.com/se U.K 0870 SAMSUNG (7267864) www.samsung.com/uk Republic of Ireland Switzerland RUSSIA KAZAHSTAN UZBEKISTAN UKRAINE LITHUANIA LATVIA ESTONIA AUSTRALIA CHINA HONG KONG INDIA INDONESIA JAPAN MALAYSIA PHILIPPINES SINGAPORE THAILAND TAIWAN VIETNAM SOUTH AFRICA 0818 717 100 0800-7267864 8-800-200-0400 8-800-080-1188 8-800-120-0400 8-800-502-0000 8-800-77777 800-7267 800-7267 1300 362 603 800-810-5858, 010-6475 1880 3698 -4698 3030 8282, 1800 110011 0800-112-8888 0120-327-527 1800-88-9999 1800-10-SAMSUNG (7267864) 1800-SAMSUNG (7267864) 1800-29-3232, 02-689-3232 0800-329-999 1 800 588 889 0860 7267864 (SAMSUNG) 800SAMSUNG (7267864) 8000-4726 www.samsung.com/uk www.samsung.com/ch www.samsung.ru www.samsung.kz www.samsung.uz www.samsung.com/ur www.samsung.lt www.samsung.com/lv/index.htm www.samsung.ee www.samsung.com/au www.samsung.com.cn www.samsung.com/hk www.samsung.com/in www.samsung.com/id www.samsung.com/jp www.samsung.com/my www.samsung.com/ph www.samsung.com/sg www.samsung.com/th www.samsung.com/tw www.samsung.com/vn www.samsung.com/za U.A.E www.samsung.com/mea appendix _ 63 REV.1.0