1
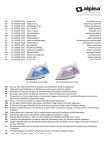
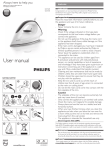
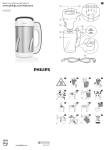
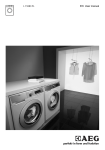
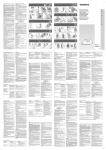
GC140 - GC130 Series
2
3
4
NY
NY LO N
NIL L O N
ON
S I
S E
S
O
L IE
DAK
1
CO
L A I N E C OL G
WO O L A
LANA
T TO
O O N N LI N
DO L
N IN E N
LIN O
Ironing
English
Introduction
Congratulations on your purchase and welcome to
Philips! To fully benefit from the support that Philips offers,
register your product at www.philips.com/welcome.
Note:The iron may give off some smoke when you use it for
the first time.This stops after a short while.
Important
Read this user manual carefully before you use the
appliance and save it for future reference.
2 Specific types only: Let the iron heat up for two
minutes.
If you set the temperature dial to a lower setting after
ironing at a high temperature, let the iron cool down for
five minutes before you continue ironing.
-
-
-
-
-
Danger
Never immerse the iron in water.
Warning
Check if the voltage indicated on the type plate
corresponds to the local mains voltage before you
connect the appliance.
Do not use the appliance if the plug, the mains cord
or the appliance itself shows visible damage, or if the
appliance has been dropped.
If the mains cord is damaged, you must have it
replaced by Philips, a service centre authorised by
Philips or similarly qualified persons in order to avoid
a hazard.
Never leave the appliance unattended when it is
connected to the mains.
This appliance is not intended for use by persons
(including children) with reduced physical, sensory
or mental capabilities, or lack of experience and
knowledge, unless they have been given supervision
or instruction concerning use of the appliance by a
person responsible for their safety.
Children should be supervised to ensure that they
do not play with the appliance.
Do not let the mains cord come into contact with
the hot soleplate of the iron.
Caution
Only connect the appliance to an earthed wall
socket.
Check the mains cord regularly for possible damage.
Always place and use the iron on a stable, level and
horizontal surface.
The soleplate of the iron can become extremely hot
and may cause burns if touched.
When you have finished ironing, when you clean the
appliance and also when you leave the iron even for
a short while: put the iron on its heel and remove
the mains plug from the wall socket.
The appliance is intended for household use only.
Electromagnetic fields (EMF)
This Philips appliance complies with all standards
regarding electromagnetic fields (EMF). If handled
properly and according to the instructions in this user
manual, the appliance is safe to use based on scientific
evidence available today.
Before first use
1 Remove any sticker or protective foil from the
soleplate.
2 Let the iron heat up to maximum temperature and
pass the iron over a piece of damp cloth for several
minutes to remove any residues from the soleplate.
Using the appliance
Setting the temperature
1 Put the iron on its heel.
2 To set the required ironing temperature, turn the
temperature dial to the appropriate position (Fig. 1).
Check the laundry care label for the required ironing
temperature:
- 1 Synthetic fabrics (e.g. acrylic, viscose, polyamide,
polyester)
- 1 Silk
- 2 Wool
- 3 Cotton, linen
If you do not know what kind or kinds of fabric an article
is made of, determine the right ironing temperature by
ironing a part that is not visible when you wear or use
the article.
Silk, woollen and synthetic materials: iron the reverse side
of the fabric to prevent shiny patches.
Start ironing the articles that require the lowest ironing
temperature, such as those made of synthetic fibres.
1 Set the recommended ironing temperature
(see section ‘Setting the temperature’ above).
3 Specific types only: let the iron heat up until the
temperature light first goes out and then goes on
again (Fig. 2).
Note:The temperature light goes on from time to time
during ironing.
4 Start ironing.
Cleaning
1 Remove the mains plug from the wall socket and let
the iron cool down.
2 Wipe the soleplate with a damp cloth and a nonabrasive (liquid) cleaning agent.
To keep the soleplate smooth, avoid hard contact with
metal objects. Never use a scouring pad, vinegar or
other chemicals to clean the soleplate.
3 Clean the upper part of the iron with a damp cloth.
Storage
1 Remove the mains plug from the wall socket.
2 Wind the mains cord round the cord storage
facility (Fig. 3).
3 Store the iron on its heel in a safe and dry place.
-
Environment
Do not throw away the appliance away with the
normal household waste at the end of its life,
but hand it in at an official collection point for
recycling. By doing this, you help to preserve the
environment (Fig. 4).
Guarantee & service
If you need service or information or if you have a
problem, please visit the Philips website at www.philips.
com or contact the Philips Consumer Care Centre
in your country (you find its phone number in the
worldwide guarantee leaflet). If there is no Consumer
Care Centre in your country, go to your local Philips
dealer.
Troubleshooting
This chapter summarises the most common problems
you could encounter with the appliance. If you are unable
to solve the problem with the information below, contact
the Consumer Care Centre in your country.
Problem
Possible cause
Solution
The iron is
plugged in but
the soleplate is
cold.
There is a
connection
problem.
Check the
mains cord, the
plug and the
wall socket.
The
temperature dial
is set to MIN.
Set the
temperature
dial to the
required
position.
3 Put the mains plug in an earthed wall socket.
4239.000.4726.3
2/9
Deutsch
Einführung
Herzlichen Glückwunsch zu Ihrem Kauf und willkommen
bei Philips! Um den Support von Philips optimal nutzen
zu können, registrieren Sie Ihr Produkt bitte unter www.
philips.com/welcome.
Wichtig
Lesen Sie diese Bedienungsanleitung vor dem Gebrauch
des Geräts aufmerksam durch und bewahren Sie sie für
eine spätere Verwendung auf.
-
-
-
-
-
Gefahr
Tauchen Sie das Bügeleisen nicht in Wasser.
Warnhinweis
Prüfen Sie vor Inbetriebnahme des Geräts, ob die auf
dem Typenschild angegebene Betriebsspannung mit
der örtlichen Netzspannung übereinstimmt.
Verwenden Sie das Gerät nicht, wenn der
Netzstecker, das Netzkabel oder das Gerät selbst
beschädigt ist oder das Gerät heruntergefallen ist.
Ist das Netzkabel defekt, darf es nur von einem
Philips Service-Center oder einer von Philips
autorisierten Werkstatt durch ein OriginalErsatzkabel ausgetauscht werden, um Gefährdungen
zu vermeiden.
Lassen Sie das Gerät nicht unbeaufsichtigt, solange es
mit dem Stromnetz verbunden ist.
Dieses Gerät ist für Benutzer (einschl. Kinder) mit
eingeschränkten physischen, sensorischen oder
psychischen Fähigkeiten bzw. ohne jegliche Erfahrung
oder Vorwissen nur dann geeignet, wenn eine
angemessene Aufsicht oder ausführliche Anleitung
zur Benutzung des Geräts durch eine verantwortliche
Person sichergestellt ist.
Achten Sie darauf, dass Kinder nicht mit dem Gerät
spielen.
Lassen Sie das Netzkabel nicht mit der heißen
Bügelsohle in Kontakt kommen.
Achtung
Schließen Sie das Gerät nur an eine geerdete
Steckdose an.
Überprüfen Sie das Netzkabel regelmäßig auf
mögliche Beschädigungen.
Verwenden Sie das Bügeleisen immer auf einer
stabilen, ebenen und waagerechten Unterlage.
Achten Sie darauf, dass Sie die heiße Bügelsohle nicht
berühren, um Verbrennungen zu vermeiden.
Wenn Sie das Bügeln beenden, das Gerät reinigen
oder den Raum nur kurz verlassen, stellen Sie das
Bügeleisen aufrecht und ziehen Sie den Netzstecker
aus der Steckdose.
Dieses Gerät ist nur für den Gebrauch im Haushalt
bestimmt.
Elektromagnetische Felder (EMF;
Electro Magnetic Fields)
Dieses Philips Gerät erfüllt sämtliche Normen bezüglich
elektromagnetischer Felder (EMF). Nach aktuellen
wissenschaftlichen Erkenntnissen ist das Gerät sicher im
Gebrauch, sofern es ordnungsgemäß und entsprechend
den Anweisungen in dieser Bedienungsanleitung
gehandhabt wird.
Vor dem ersten Gebrauch
1 Entfernen Sie Aufkleber bzw. Schutzfolie von der
Bügelsohle.
2 Lassen Sie das Bügeleisen auf Maximaltemperatur
aufheizen und bügeln Sie einige Minuten lang auf
einem feuchten Tuch, um eventuell verbliebene
Rückstände von der Bügelsohle zu entfernen.
Das Gerät benutzen
Die Temperatur einstellen
1 Stellen Sie das Bügeleisen senkrecht.
- 3 Baumwolle, Leinen
Wenn Sie nicht wissen, um welche Art von Gewebe es
sich handelt, ermitteln Sie die richtige Temperatur durch
Bügeln einer Stelle, die normalerweise nicht sichtbar ist.
Seide, Wolle und Synthetikfasern: Bügeln Sie den Stoff von
links, um glänzende Stellen zu vermeiden.
Beginnen Sie stets mit den Textilien, die eine niedrige
Temperatureinstellung erfordern, etwa mit synthetischen
Stoffen.
3 Stecken Sie den Netzstecker in eine geerdete
Steckdose.
Bügeln
Hinweis: Beim ersten Gebrauch gibt das Gerät
möglicherweise etwas Rauch ab. Dies geht nach kurzer Zeit
vorüber.
Problem
Mögliche
Ursache
Lösung
Der
Netzstecker
ist mit der
Steckdose
verbunden,
aber die
Bügelsohle
bleibt kalt.
Es gibt ein
Problem mit der
Stromversorgung.
Überprüfen Sie
das Netzkabel,
den Netzstecker
und die
Steckdose.
Der
Temperaturregler
ist auf MIN
gestellt.
Stellen Sie den
Temperaturregler
auf die
erforderliche
Position.
1 Stellen Sie die empfohlene Bügeltemperatur ein
(siehe “Die Bügeltemperatur einstellen”).
2 Nur bestimmte Typen: Warten Sie ca. 2 Minuten, bis
sich das Bügeleisen aufgeheizt hat.
Wenn Sie den Temperaturregler nach dem Bügeln bei
einer hohen Temperatur niedriger stellen, warten Sie mit
dem weiteren Bügeln etwa 5 Minuten, bis das Bügeleisen
sich abgekühlt hat.
3 Nur bestimmte Typen: Lassen Sie das Bügeleisen
aufheizen, bis sich die Temperaturanzeige zuerst
aus- und dann wieder anschaltet (Abb. 2).
Hinweis: Die Temperaturanzeige leuchtet während des
Bügelns gelegentlich auf.
4 Beginnen Sie mit dem Bügeln.
Reinigung
1 Ziehen Sie den Netzstecker aus der Steckdose, und
lassen Sie das Bügeleisen abkühlen.
2 Wischen Sie die Bügelsohle mit einem feuchten
Tuch und etwas Spülmittel ab.
Damit die Bügelsohle glatt bleibt, sollte sie nicht
in Berührung mit Metallgegenständen kommen.
Verwenden Sie zum Reinigen der Bügelsohle
weder Scheuerschwämme noch Essig oder andere
Chemikalien.
3 Reinigen Sie den oberen Teil des Bügeleisens mit
einem feuchten Tuch.
Aufbewahrung
1 Ziehen Sie den Netzstecker aus der Steckdose.
2 Legen Sie das Netzkabel um die
Kabelaufwicklung (Abb. 3).
3 Bewahren Sie das Gerät aufrecht gestellt an einem
sicheren und trockenen Ort auf.
-
Umweltschutz
Werfen Sie das Gerät am Ende seiner Lebensdauer
nicht in den normalen Hausmüll, sondern bringen Sie
es zum Recycling zu einer offiziellen Sammelstelle.
Auf diese Weise tragen Sie zum Umweltschutz
bei (Abb. 4).
Garantie und Kundendienst
Benötigen Sie weitere Informationen oder treten
Probleme auf, besuchen Sie bitte die Philips Website
(www.philips.com) oder setzen Sie sich mit einem
Philips Service-Center in Ihrem Land in Verbindung
(Telefonnummer siehe Garantieschrift). Sollte es in Ihrem
Land kein Service-Center geben, wenden Sie sich bitte an
Ihren Philips-Händler.
Fehlerbehebung
In diesem Kapitel sind die häufigsten Probleme aufgeführt,
die beim Gebrauch Ihres Geräts auftreten können.
Sollten Sie ein Problem mithilfe der nachstehenden
Informationen nicht beheben können, wenden Sie sich
bitte an das Philips Service-Center in Ihrem Land.
2 Stellen Sie die gewünschte Bügeltemperatur durch
Drehen des Temperaturreglers ein (Abb. 1).
Prüfen Sie das Etikett im Wäsche-/Kleidungsstück auf die
erforderliche Bügeltemperatur:
- 1 Synthetikfasern ( z. B. Acryl, Viskose, Polyamid,
Polyester)
- 1 Seide
- 2 Wolle
4239.000.4726.3
3/9
Español
Introducción
Enhorabuena por la compra de este producto y
bienvenido a Philips. Para sacar el mayor partido de la
asistencia que Philips le ofrece, registre su producto en
www.philips.com/welcome.
Importante
Antes de usar el aparato, lea atentamente este manual
de usuario y consérvelo por si necesitara consultarlo en
el futuro.
-
-
-
-
-
Peligro
No sumerja nunca la plancha en agua.
Advertencia
Antes de enchufar el aparato, compruebe si el voltaje
indicado en la placa de modelo se corresponde con
el voltaje de red local.
No utilice el aparato si la clavija, el cable de
alimentación o el propio aparato tienen daños
visibles, o si el aparato se ha caído.
Si el cable de alimentación está dañado, debe ser
sustituido por Philips o por un centro de servicio
autorizado por Philips, con el fin de evitar situaciones
de peligro.
No deje nunca el aparato desatendido cuando esté
enchufado a la red.
Este aparato no debe ser usado por personas
(adultos o niños) con su capacidad física, psíquica
o sensorial reducida, ni por quienes no tengan los
conocimientos y la experiencia necesarios, a menos
que sean supervisados o instruidos acerca del uso
del aparato por una persona responsable de su
seguridad.
Asegúrese de que los niños no jueguen con este
aparato.
No permita que el cable de alimentación entre en
contacto con la suela caliente de la plancha.
Precaución
Conecte el aparato sólo a un enchufe con toma de
tierra.
Compruebe el cable de alimentación con regularidad
por si estuviera dañado.
Ponga y utilice siempre la plancha sobre una
superficie estable, plana y horizontal.
La suela de la plancha puede calentarse mucho y, si
se toca, puede causar quemaduras.
Cuando haya acabado de planchar, cuando limpie el
aparato o cuando deje la plancha aunque sólo sea
durante un momento, ponga la plancha sobre su
talonera y desenchúfela de la red.
El aparato está diseñado sólo para uso doméstico.
Campos electromagnéticos (CEM)
Este aparato Philips cumple todos los estándares
sobre campos electromagnéticos (CEM). Si se utiliza
correctamente y de acuerdo con las instrucciones de este
manual, el aparato se puede usar de forma segura según
los conocimientos científicos disponibles hoy en día.
Antes de utilizarlo por primera vez
1 Quite cualquier pegatina o lámina protectora de la
suela.
2 Deje que la plancha se caliente hasta la temperatura
máxima y pásela durante unos minutos sobre un
paño húmedo para eliminar cualquier residuo que
pudiera haber en la suela.
Uso del aparato
Ajuste de la temperatura
1 Ponga la plancha sobre su base de apoyo.
2 Para seleccionar la temperatura de planchado
adecuada, gire el control de temperatura hasta la
posición correspondiente (fig. 1).
Compruebe en la etiqueta de la prenda la temperatura
de planchado apropiada:
- 1 Fibras sintéticas (por ejemplo, acrílico, viscosa,
poliamida, poliéster)
- 1 Seda
- 2 Lana
- 3 Algodón, lino
Si no sabe de qué tipos de tejido está hecha la prenda,
determine la temperatura correcta planchando una parte
de la misma que no se vea cuando la use o la lleve puesta.
4239.000.4726.3
Seda, lana y fibras sintéticas: planche las prendas por el
revés para evitar que aparezcan brillos en la tela.
Empiece planchando las prendas que requieran la
temperatura más baja de planchado, como las de fibras
sintéticas.
3 Conecte el aparato a un enchufe con toma de
tierra.
Planchado
Nota: La plancha puede despedir un poco de humo al usarla
por primera vez. Dejará de hacerlo al cabo de un rato.
1 Seleccione la temperatura de planchado
recomendada (consulte la sección “Ajuste de la
temperatura”).
2 Sólo en modelos específicos: deje que la plancha se
caliente durante dos minutos.
Si coloca el control de temperatura en una posición
inferior después de planchar a temperatura alta, deje
que la plancha se enfríe durante cinco minutos antes de
continuar planchando.
3 Sólo en modelos específicos: deje que la plancha
se caliente hasta que el piloto de temperatura
se apague primero y se encienda de nuevo más
tarde (fig. 2).
Nota: Durante el planchado el piloto de temperatura se
ilumina de vez en cuando.
4 Comience a planchar.
Limpieza
1 Desenchufe el aparato de la toma de corriente y
deje que se enfríe.
2 Limpie la suela con un paño húmedo y un limpiador
líquido no abrasivo.
Con el fin de mantener la suela lisa, evite un contacto
fuerte con objetos metálicos. No utilice nunca
estropajos, vinagre ni productos químicos para limpiar
la suela.
3 Limpie la parte superior del aparato con un paño
húmedo.
Almacenamiento
1 Desenchufe el aparato de la toma de corriente.
2 Enrolle el cable de red alrededor del
recogecable (fig. 3).
3 Guarde la plancha sobre su base de apoyo en un
lugar seco y seguro.
-
Medio ambiente
Al final de su vida útil, no tire el aparato junto con
la basura normal del hogar. Llévelo a un punto de
recogida oficial para su reciclado. De esta manera,
ayudará a conservar el medio ambiente (fig. 4).
Garantía y servicio
Si necesita información o si tiene algún problema, visite la
página Web de Philips en www.philips.com, o póngase en
contacto con el Servicio de Atención al Cliente de Philips
en su país (hallará el número de teléfono en el folleto
de la garantía mundial). Si no hay Servicio de Atención al
Cliente de Philips en su país, diríjase a su distribuidor local
Philips.
Guía de resolución de problemas
En este capítulo se resumen los problemas más
frecuentes que pueden surgir. Si no puede resolver
el problema con la siguiente información, póngase en
contacto con el Servicio de Atención al Cliente de su país.
Problema
Posible causa
Solución
La plancha
está
enchufada
pero la
suela está
fría.
Hay un
problema de
conexión.
Compruebe el cable de
alimentación, la clavija y
el enchufe.
El control de
temperatura
está en MIN.
Coloque el control
de temperatura en la
posición adecuada.
4/9
Français
Introduction
Félicitations pour votre achat et bienvenue dans l’univers
Philips ! Pour profiter pleinement de l’assistance Philips,
enregistrez vos produits sur le site à l’adresse suivante :
www.philips.com/welcome.
Important
Lisez attentivement ce mode d’emploi avant d’utiliser
l’appareil et conservez-le pour un usage ultérieur.
-
-
-
-
Danger
Ne plongez jamais le fer dans l’eau.
Avertissement
Vérifiez que la tension indiquée sur la plaque
signalétique correspond bien à la tension secteur
locale avant de brancher l’appareil.
N’utilisez jamais l’appareil si la fiche, le cordon
d’alimentation ou l’appareil lui-même est
endommagé, ou si le fer est tombé.
Si le cordon d’alimentation est endommagé, il doit
être remplacé par Philips, un Centre Service Agréé
ou un technicien qualifié afin d’éviter tout accident.
Ne laissez jamais l’appareil sans surveillance pendant
qu’il est branché.
Cet appareil n’est pas destiné à être utilisé par
des personnes (notamment des enfants) dont les
capacités physiques, sensorielles ou intellectuelles
sont réduites, ou par des personnes manquant
d’expérience ou de connaissances, à moins que
celles-ci ne soient sous surveillance ou qu’elles aient
reçu des instructions quant à l’utilisation de l’appareil
par une personne responsable de leur sécurité.
Veillez à ce que les enfants ne puissent pas jouer avec
l’appareil.
Évitez tout contact entre le cordon d’alimentation et
la semelle du fer à repasser lorsqu’elle est chaude.
Attention
Branchez l’appareil uniquement sur une prise de
terre.
Vérifiez régulièrement l’état du cordon
d’alimentation.
Placez et utilisez toujours le fer à repasser sur une
surface stable, plane et horizontale.
La semelle du fer à repasser peut devenir très chaude
et peut par conséquent provoquer des brûlures si
vous la touchez.
Lorsque vous avez fini de repasser, pendant que vous
nettoyez l’appareil ou même si vous laissez le fer sans
surveillance pendant un bref instant, placez le fer à
repasser sur le talon et débranchez-le du secteur.
L’appareil est destiné à un usage domestique
uniquement.
Champs électromagnétiques (CEM)
Cet appareil Philips est conforme à toutes les normes
relatives aux champs électromagnétiques (CEM). Il
répond aux règles de sécurité établies sur la base des
connaissances scientifiques actuelles s’il est manipulé
correctement et conformément aux instructions de ce
mode d’emploi.
Avant la première utilisation
1 Ôtez tout autocollant ou film de protection de la
semelle.
2 Laissez chauffer le fer jusqu’à la température
maximale et repassez un chiffon humide pendant
quelques minutes afin d’enlever tout résidu de la
semelle.
Utilisation de l’appareil
Réglage de la température
1 Posez le fer à repasser sur son talon.
2 Pour régler la température de repassage, tournez le
thermostat sur la position adéquate (fig. 1).
Consultez l’étiquette de lavage pour vérifier la
température de repassage recommandée :
- 1 Fibres synthétiques (par ex. acrylique, viscose,
polyamide, polyester)
- 1 Soie
- 2 Laine
- 3 Coton, lin
4239.000.4726.3
Si vous ne connaissez pas la composition du tissu,
repassez en commençant par la température la plus basse
sur une partie interne de l’article et invisible de l’extérieur.
Soie, laine et autres fibres synthétiques : repassez à
l’envers afin d’éviter les taches.
Commencez toujours le repassage par les articles en
fibres synthétiques nécessitant la température la plus
basse.
3 Branchez le cordon d’alimentation sur une prise
secteur.
Repassage
Problème
Cause possible
Solution
Le fer à
repasser est
branché, mais
la semelle est
froide.
Il s’agit d’un
problème de
branchement.
Vérifiez le cordon
d’alimentation, la
fiche et la prise
secteur.
Le thermostat
est réglé sur
MIN.
Réglez le
thermostat sur
la température
requise.
Remarque : Le fer peut fumer légèrement lors de la
première utilisation. Ce phénomène est normal et cesse
après un bref instant.
1 Sélectionnez la température de repassage
recommandée (voir la section « Réglage de la
température » ci-dessus).
2 Certains modèles uniquement : laissez chauffer le
fer pendant deux minutes.
Si vous réglez la température sur un niveau plus bas
après avoir repassé à une température élevée, laissez
refroidir le fer pendant cinq minutes avant de poursuivre
le repassage.
3 Certains modèles uniquement : laissez chauffer
le fer jusqu’à ce que le voyant de température
s’éteigne, puis se rallume (fig. 2).
Remarque : Le voyant de température s’allume de temps en
temps pendant le repassage.
4 Commencez le repassage.
Nettoyage
1 Assurez-vous que l’appareil a été débranché et que
le fer a refroidi.
2 Nettoyez la semelle avec un chiffon humide et un
détergent (liquide) non abrasif.
Évitez le contact de la semelle avec tout objet
métallique afin de ne pas l’endommager. N’utilisez
jamais de tampons à récurer, vinaigre ou autres produits
chimiques pour nettoyer la semelle.
3 Nettoyez la partie supérieure du fer à repasser
avec un chiffon humide.
Rangement
1 Retirez le cordon d’alimentation de la prise secteur.
2 Enroulez le cordon d’alimentation sur le
talon (fig. 3).
3 Posez le fer sur son talon et placez-le dans un
endroit sûr et sec.
-
Environnement
Lorsqu’il ne fonctionnera plus, ne jetez pas
l’appareil avec les ordures ménagères. Déposez-le
à un endroit assigné à cet effet, où il pourra être
recyclé. Vous contribuerez ainsi à la protection de
l’environnement (fig. 4).
Garantie et service
Si vous souhaitez obtenir des informations
supplémentaires ou si vous rencontrez un problème,
rendez-vous sur le site Web de Philips à l’adresse www.
philips.com ou contactez le Service Consommateurs
Philips de votre pays (vous trouverez le numéro
de téléphone correspondant sur le dépliant de
garantie internationale). S’il n’existe pas de Service
Consommateurs Philips dans votre pays, renseignez-vous
auprès de votre revendeur Philips local.
Dépannage
Ce chapitre présente les problèmes les plus courants
que vous pouvez rencontrer avec votre appareil.
Si vous ne parvenez pas à résoudre le problème
à l’aide des informations ci-dessous, contactez le
Service Consommateurs Philips de votre pays.
5/9
Italiano
Introduzione
Congratulazioni per l’acquisto e benvenuti in Philips! Per
trarre il massimo vantaggio dall’assistenza Philips, registrate
il vostro prodotto su www.philips.com/welcome.
Importante
Prima di utilizzare l’apparecchio, leggete attentamente il
presente manuale utente e conservatelo per eventuali
riferimenti futuri.
-
-
-
-
-
Pericolo
Non immergete mai il ferro nell’acqua.
Avvertenza
Prima di collegare l’apparecchio, controllate che la
tensione indicata sulla placchetta corrisponda a quella
della rete locale.
Non utilizzate l’apparecchio nel caso in cui la spina,
il cavo di alimentazione o l’apparecchio stesso siano
danneggiati o in presenza di rotture.
Nel caso in cui il cavo di alimentazione fosse
danneggiato, dovrà essere sostituito presso i centri
autorizzati Philips, i rivenditori specializzati oppure
da personale debitamente qualificato, per evitare
situazioni pericolose.
Non lasciate mai l’apparecchio incustodito quando è
collegato alla presa di corrente.
L’apparecchio non è destinato a persone (inclusi
bambini) con capacità mentali, fisiche o sensoriali
ridotte, fatti salvi i casi in cui tali persone abbiano
ricevuto assistenza o formazione per l’uso
dell’apparecchio da una persona responsabile della
loro sicurezza.
Adottate le dovute precauzioni per evitare che i
bambini giochino con l’apparecchio.
Evitate che il cavo di alimentazione venga a contatto
con la piastra del ferro calda.
Attenzione
Collegate l’apparecchio esclusivamente a una presa di
messa a terra.
Verificate periodicamente le condizioni del cavo di
alimentazione.
Posizionate e utilizzate sempre il ferro su una
superficie piana, stabile e orizzontale.
La piastra del ferro può surriscaldarsi eccessivamente
e provocare scottature se a contatto con la pelle.
Dopo aver utilizzato l’apparecchio, durante le
operazioni di pulizia o se lasciate l’apparecchio
incustodito anche per un breve periodo, mettete il
ferro in posizione verticale e scollegate la spina dalla
presa a muro.
Questo apparecchio è destinato esclusivamente a
uso domestico.
Campi elettromagnetici (EMF)
Questo apparecchio Philips è conforme a tutti gli
standard relativi ai campi elettromagnetici (EMF). Se
utilizzato in modo appropriato seguendo le istruzioni
contenute nel presente manuale utente, l’apparecchio
consente un utilizzo sicuro come confermato dai risultati
scientifici attualmente disponibili.
Prima di utilizzare l’apparecchio per la
prima volta
1 Rimuovete gli eventuali adesivi o il foglio di
protezione dalla piastra.
2 Riscaldate il ferro alla massima temperatura e
passatelo su uno straccio umido per vari minuti, per
eliminare eventuali residui dalla piastra.
Modalità d’uso dell’apparecchio
Impostazione della temperatura
1 Ponete il ferro in posizione verticale.
2 Impostate la temperatura di stiratura desiderata
ruotando il termostato sulla posizione
appropriata (fig. 1).
Verificate sull’etichetta del capo la temperatura di
stiratura richiesta:
- 1 Tessuti sintetici (ad esempio acrilico, viscosa,
poliammide, poliestere)
- 1 Seta
- 2 Lana
- 3 Cotone, lino
4239.000.4726.3
Se non si conosce il tessuto del capo da stirare, si
consiglia di stirare un angolo nascosto per determinare la
temperatura più indicata.
Seta, lana e fibre sintetiche: stirate il capo a rovescio per
evitare aloni lucidi.
Iniziate a stirare i capi che richiedono una temperatura di
stiratura più bassa, ad esempio i tessuti sintetici.
3 Inserite la spina in una presa di messa a terra.
Stiratura
Nota La prima volta che si utilizza il ferro, si potrebbe
notare la fuoriuscita di vapore; tuttavia scompare dopo poco
tempo.
1 Impostate la temperatura di stiratura consigliata
(si veda più avanti la sezione “Impostazione della
temperatura”).
2 Solo alcuni modelli: lasciate riscaldare il ferro per
due minuti.
Se regolate il termostato su una impostazione inferiore
dopo aver stirato a una temperatura più alta, è necessario
lasciare raffreddare il ferro da stiro per cinque minuti
prima di continuare la stiratura.
3 Solo alcuni modelli: lasciate riscaldare il ferro
finché la spia della temperatura non si spegne e poi
si riaccende (fig. 2).
Nota Durante la stiratura, la spia della temperatura si
accende regolarmente.
4 Iniziate a stirare.
Pulizia
1 Togliete la spina dalla presa e lasciate raffreddare il
ferro.
2 Pulite la piastra con un panno umido e con un
detergente (liquido) non abrasivo.
Per mantenere la piastra perfettamente liscia, evitate il
contatto con oggetti metallici. Per pulire la piastra, non
utilizzate pagliette, aceto o altre sostanze chimiche.
3 Per pulire la parte superiore del ferro utilizzate un
panno umido.
Come riporre l’apparecchio
1 Scollegate la spina dalla presa a muro.
2 Avvolgete il cavo attorno all’apposito
supporto (fig. 3).
3 Riponete il ferro in posizione verticale, in un
ambiente sicuro e asciutto.
-
Tutela dell’ambiente
Per contribuire alla tutela dell’ambiente, non
smaltite l’apparecchio con i normali i rifiuti
domestici, ma consegnatelo a un centro di raccolta
autorizzato (fig. 4).
Garanzia e assistenza
Se avete bisogno di assistenza o informazioni o in caso
di problemi, visitate il sito Web Philips all’indirizzo www.
philips.com oppure contattate il Centro Assistenza
Clienti Philips del vostro Paese (per conoscere il numero
di telefono consultate l’opuscolo della garanzia). Se nel
vostro Paese non esiste un Centro Assistenza Clienti,
rivolgetevi al vostro rivenditore Philips.
Risoluzione dei guasti
In questo capitolo vengono riportati i problemi più
ricorrenti legati all’uso dell’apparecchio. Se non riuscite
a risolvere i problemi con le informazioni seguenti, vi
preghiamo di contattare il Centro Assistenza Clienti
Philips del vostro paese.
Problema
Possibile
causa
Soluzione
Il ferro è
collegato
alla presa di
corrente ma
la piastra è
fredda.
Si è
verificato un
problema di
alimentazione.
Verificate il cavo di
alimentazione, lo
spinotto e la presa a
muro.
Il termostato
è impostato
su MIN.
Impostate il
termostato sulla
posizione richiesta.
6/9
Nederlands
Inleiding
Gefeliciteerd met uw aankoop en welkom bij Philips!
Als u volledig wilt profiteren van de ondersteuning die
Philips biedt, registreer uw product dan op www.philips.
com/welcome.
Belangrijk
Lees deze gebruiksaanwijzing zorgvuldig door
voordat u het apparaat gaat gebruiken. Bewaar de
gebruiksaanwijzing om deze indien nodig te kunnen
raadplegen.
-
-
-
-
-
-
Gevaar
Dompel het strijkijzer nooit in water.
Waarschuwing
Controleer of het voltage aangegeven op het
typeplaatje overeenkomt met de plaatselijke
netspanning voordat u het apparaat aansluit.
Gebruik het apparaat niet indien de stekker, het
netsnoer of het apparaat zelf zichtbaar beschadigd
is. Gebruik het apparaat ook niet meer als het is
gevallen.
Indien het netsnoer beschadigd is, moet u het
laten vervangen door Philips, een door Philips
geautoriseerd servicecentrum of personen met
vergelijkbare kwalificaties om gevaar te voorkomen.
Laat het apparaat nooit onbeheerd achter terwijl het
op netspanning is aangesloten.
Dit apparaat is niet bedoeld voor gebruik door
personen (waaronder kinderen) met verminderde
lichamelijke, zintuiglijke of geestelijke vermogens,
of die gebrek aan ervaring of kennis hebben, tenzij
iemand die verantwoordelijk is voor hun veiligheid
toezicht op hen houdt of hen heeft uitgelegd hoe het
apparaat dient te worden gebruikt.
Houd toezicht op kinderen om te voorkomen dat ze
met het apparaat gaan spelen.
Voorkom dat het netsnoer in aanraking komt met de
hete zoolplaat van het strijkijzer.
Let op
Sluit het apparaat alleen aan op een geaard
stopcontact.
Controleer regelmatig of het netsnoer niet
beschadigd is.
Plaats en gebruik het strijkijzer altijd op een stabiele,
vlakke en horizontale ondergrond.
De zoolplaat van het strijkijzer kan zeer heet worden
en bij aanraking brandwonden veroorzaken.
Als u klaar bent met strijken, als u het strijkijzer
schoonmaakt en als u bij het strijkijzer wegloopt
(als is het maar even), zet dan het strijkijzer op de
achterkant en haal de stekker uit het stopcontact.
Het apparaat is uitsluitend bedoeld voor
huishoudelijk gebruik.
Elektromagnetische velden (EMV)
Dit Philips-apparaat voldoet aan alle richtlijnen met
betrekking tot elektromagnetische velden (EMV). Mits
het apparaat op de juiste wijze en volgens de instructies
in deze gebruiksaanwijzing wordt gebruikt, is het veilig te
gebruiken volgens het nu beschikbare wetenschappelijke
bewijs.
Voor het eerste gebruik
1 Verwijder eventuele stickers of beschermfolie van
de zoolplaat.
2 Laat het strijkijzer opwarmen tot de
maximumtemperatuur en beweeg het strijkijzer
vervolgens gedurende een paar minuten over een
vochtige doek om mogelijke resten van de zoolplaat
te verwijderen.
Het apparaat gebruiken
De temperatuur instellen
1 Zet het strijkijzer op zijn achterkant.
2 Stel de vereiste strijktemperatuur in door de
temperatuurregelaar naar de juiste stand te
draaien (fig. 1).
Raadpleeg het wasetiket van het te strijken artikel voor
de juiste strijktemperatuur:
- 1 Synthetische stoffen (bijv. acryl, viscose, polyamide,
polyester)
- 1 Zijde
4239.000.4726.3
- 2 Wol
- 3 Katoen, linnen
Als u niet zeker weet van welk materiaal het artikel
gemaakt is, probeer de gekozen strijktemperatuur dan
eerst uit op een plek die niet zichtbaar is wanneer u het
artikel draagt of gebruikt.
Zijde, wol en synthetische materialen: strijk de binnenkant
van de stoffen om glimmende plekken te voorkomen.
Strijk eerst de artikelen die op de laagste temperatuur
gestreken moeten worden, zoals artikelen gemaakt van
synthetische stoffen.
3 Steek de stekker in een geaard stopcontact.
Strijken
Probleem
Mogelijke
oorzaak
Oplossing
De stekker
zit in het
stopcontact,
maar de
zoolplaat is
koud.
Er is een
aansluitprobleem.
Controleer het
netsnoer, de stekker
en het stopcontact.
De
temperatuurregelaar staat
op MIN.
Stel de
temperatuurregelaar
in op de vereiste
strijktemperatuur.
Opmerking: Er kan wat rook uit het strijkijzer komen
wanneer u het voor de eerste keer gebruikt. Dit houdt na
korte tijd op.
1 Stel de aanbevolen strijktemperatuur in (zie ‘De
temperatuur instellen’ hierboven).
2 Alleen bepaalde typen: laat het strijkijzer twee
minuten opwarmen.
Als u na het strijken op een hoge temperatuur de
temperatuurregelaar instelt op een lagere stand, laat het
strijkijzer dan vijf minuten afkoelen voordat u verdergaat
met strijken.
3 Alleen bepaalde typen: laat het strijkijzer opwarmen
tot het temperatuurlampje uitgaat en vervolgens
weer gaat branden (fig. 2).
Opmerking: Het temperatuurlampje gaat tijdens het strijken
af en toe aan.
4 Begin met strijken.
Schoonmaken
1 Haal de stekker uit het stopcontact en laat het
strijkijzer afkoelen.
2 Veeg de zoolplaat schoon met een vochtige
doek en een niet-schurend (vloeibaar)
schoonmaakmiddel.
Houd de zoolplaat glad door te voorkomen dat deze
hard in aanraking komt met metalen voorwerpen.
Gebruik nooit een schuurspons, azijn of andere
chemicaliën om de zoolplaat te reinigen.
3 Maak de bovenkant van het strijkijzer schoon met
een vochtige doek.
Opbergen
1 Haal de stekker uit het stopcontact.
2 Wind het snoer rond de snoerhaspel (fig. 3).
3 Berg het strijkijzer op door het op zijn achterkant
op een veilige en droge plaats neer te zetten.
-
Milieu
Gooi het apparaat aan het einde van zijn levensduur
niet weg met het normale huisvuil, maar lever het in
op een door de overheid aangewezen inzamelpunt
om het te laten recyclen. Op die manier levert u een
bijdrage aan een schonere leefomgeving (fig. 4).
Garantie & service
Als u service of informatie nodig hebt of als u een
probleem hebt, bezoek dan de Philips-website (www.
philips.nl), of neem contact op met het Philips Consumer
Care Centre in uw land (u vindt het telefoonnummer
in het ‘worldwide guarantee’-vouwblad). Als er geen
Consumer Care Centre in uw land is, ga dan naar uw
Philips-dealer.
Problemen oplossen
Dit hoofdstuk behandelt in het kort de problemen die u
kunt tegenkomen tijdens het gebruik van het apparaat. Als
u er niet in slaagt het probleem op te lossen met behulp
van de onderstaande informatie, neem dan contact op
met het Consumer Care Centre in uw land.
7/9
Português
Introdução
Parabéns pela sua compra e bem-vindo(a) à Philips! Para
poder beneficiar de todas as vantagens da assistência
Philips, registe o seu produto em www.philips.com/
welcome.
Importante
Leia cuidadosamente este manual do utilizador antes de
utilizar o aparelho e guarde-o para uma eventual consulta
futura.
-
-
-
-
-
Se desconhecer o tipo ou os tipos de material da peça,
calcule a temperatura certa experimentando primeiro
numa parte que não fique à vista quando vestir ou usar
a roupa.
Seda, lã e tecidos sintéticos: passe o tecido pelo lado do
avesso para evitar a formação de lustro.
Comece por passar as peças que necessitem de
temperatura mais baixa, como é o caso das fibras
sintéticas.
3 Ligue a ficha a uma tomada com terra.
Passar a ferro
Perigo
Nota: O ferro pode libertar algum fumo quando for utilizado
pela primeira vez. É normal e pára passado pouco tempo.
Aviso
1 Seleccione a temperatura pretendida (consulte a
secção ‘Selecção da temperatura’ em baixo).
Nunca mergulhe o ferro dentro de água.
Verifique se a voltagem indicada na sinalética
corresponde à voltagem eléctrica local, antes de ligar
o aparelho.
Não utilize o aparelho se a ficha, o fio ou o próprio
aparelho apresentarem sinais visíveis de danos ou se
tiver deixado cair o aparelho.
Se o fio estiver danificado, deve ser sempre
substituído pela Philips, por um centro de assistência
autorizado da Philips ou por pessoal devidamente
qualificado para se evitarem situações de perigo.
Nunca deixe o aparelho sozinho quando estiver
ligado à corrente.
Este aparelho não deve ser utilizado por pessoas
(incluindo crianças) com capacidades físicas,
sensoriais ou mentais reduzidas, ou com falta de
experiência e conhecimento, a não ser que lhes
tenha sido dada supervisão ou instruções relativas à
utilização do aparelho por uma pessoa responsável
pela sua segurança.
As crianças devem ser vigiadas para assegurar que
não brincam com o aparelho.
Não deixe que o fio de alimentação entre em
contacto com a base quente do ferro.
Atenção
Ligue sempre o aparelho a uma tomada com terra.
Verifique regularmente se o fio de alimentação se
encontra danificado.
Coloque e utilize sempre o ferro sobre uma
superfície estável, plana e horizontal.
A base do ferro pode ficar extremamente quente e
causar queimaduras se for tocada.
Quando terminar de passar, quando limpar o
aparelho e também quando abandonar o ferro
mesmo por pouco tempo: coloque o ferro em
posição de descanso e retire a ficha de alimentação
da tomada eléctrica.
Este aparelho destina-se apenas a utilização
doméstica.
Campos Electromagnéticos — EMF
(Electro Magnetic Fields)
Este aparelho Philips cumpre todas as normas
relacionadas com campos electromagnéticos (EMF).
Se for manuseado correctamente e de acordo com as
instruções presentes no manual do utilizador, o aparelho
proporciona uma utilização segura, como demonstrado
pelas provas científicas actualmente disponíveis.
Antes da primeira utilização
1 Retire todos os autocolantes ou película de
protecção da base do ferro.
2 Deixe o ferro aquecer até à temperatura máxima e
passe-o sobre um pedaço de pano húmido durante
alguns minutos para remover todos os resíduos da
base.
Utilizar o aparelho
Regular a temperatura
1 Coloque o ferro em posição de descanso.
2 Para regular o ferro para a temperatura pretendida,
rode o botão da temperatura para a posição
apropriada (fig. 1).
Verifique a etiqueta da peça de roupa para saber qual a
temperatura que deve seleccionar:
- 1 Tecidos sintéticos (p. ex.: acrílico, viscose, poliamida,
poliéster)
- 1 Seda
- 2 Lã
- 3 Algodão, linho
4239.000.4726.3
2 Apenas tipos específicos: permita que o ferro de
engomar aqueça durante dois minutos.
Se colocar o botão de temperatura numa regulação
inferior depois de engomar a uma alta temperatura,
permita que o ferro arrefeça durante cinco minutos antes
de continuar a engomar.
3 Apenas tipos específicos: permita que o ferro
aqueça até que a luz de temperatura se apague e
acenda novamente (fig. 2).
Nota: A luz da temperatura acende-se ocasionalmente
enquanto passa a ferro.
4 Comece a passar a ferro.
Limpeza
1 Retire a ficha da tomada eléctrica e deixe o ferro
arrefecer.
2 Limpe a base com um pano húmido e agente de
limpeza (líquido) não abrasivo.
Para conservar a base do ferro macia, deve evitar
o contacto com objectos metálicos. Nunca utilize
esfregões, vinagre ou produtos químicos para limpar a
base do ferro.
3 Limpe a parte de cima do ferro com um pano
húmido.
Arrumação
1 Retire a ficha eléctrica da tomada.
2 Enrole o fio do ferro no compartimento
próprio (fig. 3).
3 Arrume o ferro na posição de descanso, num local
seguro e seco.
-
Ambiente
Não deite fora o aparelho com o lixo doméstico
normal no final da sua vida útil; entregue-o num
ponto de recolha oficial para reciclagem. Ao fazê-lo,
ajuda a preservar o ambiente (fig. 4).
Garantia e assistência
Se necessitar de reparações, informações ou se tiver
problemas, visite o Web site da Philips em www.philips.pt
ou contacte o Centro de Assistência ao Consumidor local
(pode encontrar o número de telefone no folheto de
garantia mundial). Se não existir um Centro de Assistência
no seu país, visite o seu representante Philips local.
Resolução de problemas
Este capítulo resume alguns dos problemas mais comuns
que pode encontrar no aparelho. Se não conseguir
resolver o problema através das indicações dadas a seguir,
contacte o Centro de Atendimento ao Cliente Philips no
seu país.
Problema
Causa provável
Solução
O ferro
está ligado
mas a base
continua fria.
Ocorreu um
problema com
a ligação.
Verifique o cabo de
alimentação eléctrica,
a ficha e a tomada
de parede.
O botão de
temperatura
está na posição
MIN.
Regule a
temperatura para a
posição pretendida.
8/9
Ütüleme
Türkçe
Giriş
Ürünümüzü satın aldığınız için teşekkür ederiz; Philips’e
hoş geldiniz! Philips tarafından sunulan destekten
tam faydalanmak için lütfen ürününüzü şu adreste
kaydettirin: www.philips.com/welcome.
Önemli
Cihazı kullanmadan önce bu kullanım kılavuzunu okuyun
ve gelecekte de başvurmak üzere saklayın.
-
-
-
-
-
Tehlike
Ütüyü asla suya batırmayın.
Uyarı
Cihazı bağlamadan önce, model plakasında belirtilen
gerilimin ana şebeke gerilimiyle aynı olduğunu kontrol
edin.
Fiş, kablo veya cihazın kendisinde gözle görülür bir
hasar varsa veya cihaz düşmüşse, cihazı kullanmayın.
Cihazın elektrik kablosu hasarlıysa, bir tehlike
oluşturmasını önlemek için mutlaka Philips’in yetki
verdiği bir servis merkezi veya benzer şekilde
yetkilendirilmiş kişiler tarafından değiştirilmesini
sağlayın.
Cihazı, ana şebeke elektriğine bağlıyken denetimsiz
bırakmayın.
Bu cihaz, güvenliklerinden sorumlu kişilerin nezareti
veya talimatı olmadan, fiziksel, motor ya da zihinsel
becerileri gelişmemiş veya bilgi ve tecrübe açısından
yetersiz kişiler tarafından (çocuklar da dahil)
kullanılmamalıdır.
Küçük çocukların cihazla oynamaları engellenmelidir.
Elektrik kablosunun sıcak ütü tabanına temas
etmesine izin vermeyin.
Dikkat
Bu cihazı sadece toprak hatlı bir prize takılı kullanın.
Olası hasarlara karşı elektrik kablosunu düzenli olarak
kontrol edin.
Ütüyü her zaman sabit, düz ve yatay bir yüzeyde
bulundurun ve kullanın.
Ütünün tabanı aşırı ısınabilir ve dokunulduğunda
yanıklara yol açabilir.
Ütüleme işlemini bitirdikten sonra, cihazı
temizlediğinizde ve ütülemeye kısa bir süre için olsa
bile ara verdiğinizde: ütüyü dik olarak arka kısmının
üzerine oturtun ve elektrik fişini prizden çekin.
Bu cihaz sadece evde kullanım için tasarlanmıştır.
Elektromanyetik alanlar (EMF)
Bu Philips cihazı elektromanyetik alanlarla (EMF) ilgili
tüm standartlarla uyumludur. Bu cihaz, gereği gibi ve bu
kılavuzdaki talimatlara uygun şekilde kullanıldığında,
bugünün bilimsel verilerine göre kullanımı güvenlidir.
İlk kullanımdan önce
1 Tabanın altında bulunan etiket ya da koruyucu
folyoyu çıkartın.
2 Ütünün maksimum sıcaklığa kadar ısınmasını
bekleyin ve taban üzerinde kalan tortuyu
temizlemek için ütüyü birkaç dakika boyunca nemli
bir bez parçası üzerinden geçirin.
Cihazın kullanımı
Sıcaklığın ayarlanması
1 Ütünüzü arka kısmı üzerine oturtun.
2 Sıcaklık kadranını uygun konuma çevirerek istenilen
ütüleme sıcaklığını ayarlayın (Şek. 1).
Kullanılması gereken ütüleme sıcaklığını öğrenmek için
yıkama talimatları etiketini kontrol edin.
- 1 Sentetik kumaşlar (örneğin viskoz, naylon,
polyester)
- 1 İpekli
- 2 Yünlü
- 3 Pamuklu, ketenli
Elbisenin ne tür kumaştan yapıldığını bilmiyorsanız, elbiseyi
giydiğinizde görünmeyen bir bölümünü ütüleyerek doğru
ütüleme sıcaklığını belirleyin.
İpekli, yünlü ve sentetik giysiler: parlama olmaması için
kumaşı tersten ütüleyin.
Ütüleme işlemine, sentetik ürünler gibi en az ütüleme
sıcaklığı isteyen elbiseleri ütüleyerek başlayın.
Not: Cihazı ilk kullanışınızda bir miktar duman çıkması
normaldir. Bu durum, kısa bir süre sonra geçecektir.
1 Önerilen ütü sıcaklığını ayarlayın (bkz. yukarıdaki
‘Sıcaklığın ayarlanması’ bölümü).
2 Sadece belirli modellerde: Ütünün iki dakika
ısınmasını bekleyin.
Yüksek bir sıcaklıkta ütü yaptıktan sonra sıcaklık kadranını
daha düşük bir sıcaklığa ayarlarsanız, ütülemeye devam
etmeden önce beş dakika ütünün soğumasını bekleyin.
3 Sadece belirli modellerde: sıcaklık ışığı önce sönene,
sonra tekrar yanana kadar ütünün ısınmasını
bekleyin (Şek. 2).
Not: Sıcaklık ışığı, ütüleme esnasında zaman zaman
yanacaktır.
4 Ütülemeye başlayın.
Temizleme
1 Elektrik fişini prizden çıkarın ve ütüyü soğumaya
bırakın.
2 Nemli bir bez ve aşındırıcı olmayan (sıvı) temizlik
maddesi kullanarak tabanı temizleyin.
Ütü tabanının düzlüğünü koruması için, metal cisimlerle
sert temasından kaçının. Ütü tabanını temizlemek için
ovma bezleri, sirke ve başka kimyasallar kullanmayın.
3 Ütünün üst kısmını nemli kumaşla silin.
Saklama
1 Cihazın fişini prizden çekin.
2 Elektrik kablosunu kablo saklama bölümünün
etrafına sarın (Şek. 3).
3 Ütüyü arka kısmının üzerinde kuru ve güvenli bir
zeminde saklayın.
-
Çevre
Kullanım ömrü sonunda cihazı, normal ev atıklarınızla
birlikte atmayın; bunun yerine, geri dönüşüm için
resmi toplama noktalara teslim edin. Böylece,
çevrenin korunmasına yardımcı olursunuz (Şek. 4).
Garanti ve Servis
Servise ya da daha fazla bilgiye ihtiyaç duyarsanız veya bir
sorunla karşılaşırsanız,
www.philips.com.tr adresindeki Philips Internet sitesini
ziyaret edin veya ülkenizde bulunan Philips Müşteri
Merkezi ile iletişim kurun (telefon numarasını dünya
çapında geçerli garanti belgesinde bulabilirsiniz). Ülkenizde
bir Müşteri Merkezi yoksa, yerel Philips bayiine başvurun.
Sorun giderme
Bu bölümde, cihazda en sık karşılaşabileceğiniz
sorunlar özetlenmektedir. Sorunu aşağıdaki bilgilerle
çözemiyorsanız, bulunduğunuz ülkedeki Müşteri Hizmetleri
Merkezi ile iletişim kurun.
Sorun
Nedeni
Çözüm
Ütünün
fişi prize
bağlı, ancak
ütü tabanı
ısınmıyor.
Bağlantı
sorunu var.
Cihazın fişini, elektrik
kablosunu ve prizi
kontrol ediniz.
Sıcaklık
kadranı
MIN olarak
ayarlanmış.
Sıcaklık kadranını
istenilen konuma getirin.
3 Cihazın fişini topraklı prize takınız.
4239.000.4726.3
9/9