1
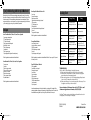
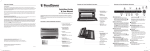
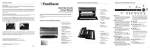
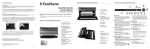
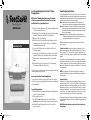
How to Vacuum Package Using Your FoodSaver® Vacuum
Packaging Canister
®
Vacuum Packaging System
Quick Marinator
Instructions For Use
NOTE: FoodSaver Vacuum Packaging Canisters can only be used with
a FoodSaver® appliance that has an Accessory Port. Please check your
QuickStart Guide to see if your appliance has one.
1. Place your FoodSaver® appliance on a flat, dry surface and plug the power
cord into a standard electrical outlet.
2. Place the item(s) to be vacuum packaged inside the canister. Leave at least
one inch (1”) between the contents and the rim of the canister.
3. Wipe rim to ensure it is clean and dry.
4. Place the lid on top of the canister. If the canister has latches, put them
in an upright position so that the lid fits on the base. Push the latches
downward until they snap into place.
5. Insert one end of the Accessory Hose into the Accessory Port on your
FoodSaver® appliance.
6. Insert the other end of the Accessory Hose into the hole on the top of the
canister lid. Twist the gray tip of hose while inserting to ensure a tight fit.
7. Follow the steps for vacuum packaging as outlined in your QuickStart
Guide.
8. Remove the Accessory Hose from the Accessory Port on the appliance
before vacuum packaging in FoodSaver® Bags.
Allow hot foods to cool to room temperature before vacuum packaging. Otherwise, the
contents may bubble up out of the canister.
®
How to Open the FoodSaver Vacuum Packaging Canister
To open, press and hold down the gray rubber button in the center of the lid
until you no longer hear air escaping. This will release the vacuum and allow you
to easily remove the lid.
Care and Cleaning Instructions
1. Wash all FoodSaver® accessories in warm water using a mild dishwashing
soap. Do not immerse lids in water.
2. Dry thoroughly before using.
3. FoodSaver® Vacuum Packaging Canister bases (but not the lids) are
top–rack dishwasher safe. Lids should be wiped down with a damp cloth.
4. FoodSaver® Vacuum Packaging Canisters should not be used in the
microwave or freezer.
T020-00110 update.indd 1
Vacuum Packaging and Food Safety
Vacuum packaging extends the life of foods by removing most of the air from sealed
containers, thereby reducing oxidation. Vacuum packaging helps preserve flavor and
overall quality. It also helps inhibit the growth of aerobic microorganisms, which can
lead to the problems noted below under certain conditions:
Mold – Easily identified by its fuzzy characteristic. Mold cannot grow in a low
oxygen environment, therefore vacuum packaging can virtually eliminate it.
Yeast – Results in fermentation, which can be identified by smell and taste. Yeast
needs water, sugar and a moderate temperature to grow. It can also survive
with or without air. Slowing the growth of yeast requires refrigeration, while
freezing stops it completely.
Bacteria – Right conditions, clostridium botulinum (the organism that causes
Botulism) can grow without air and cannot be detected by smell or taste.
Although it is extremely rare, it can be very dangerous.
As with any other storage container, it is important to inspect food for spoilage
prior to consuming.
To preserve foods safely, it is important to maintain low temperatures. You can
significantly reduce the growth of microorganisms at temperatures of 40°F (4°C) or
below. Freezing at 0°F (-17°C) does not kill microorganisms, but stops them from
growing. For long-term storage, always freeze perishable foods that have been vacuum
packaged.
It is important to note that vacuum packaging is not a substitute for canning and it
cannot reverse the deterioration of foods. It can only slow down changes in quality. It
is difficult to predict how long foods will retain their top-quality flavor, appearance or
texture because it depends on the age and the condition of the food on the day it was
vacuumed packaged.
NOTE: Vacuum packaging is NOT a substitute for refrigeration or freezing. Any
perishable foods that require refrigeration must still be refrigerated or frozen after
vacuum packaging.
Preparation Guidelines
Vegetables need to be blanched before vacuum packaging. This process stops the
enzyme action, which leads to loss of flavor, color and texture. To blanch vegetables,
place them in boiling water or in the microwave until they are cooked, but still crisp.
Blanching times range from 1 to 2 minutes for leafy greens and peas; 3 to 4 minutes
for snap peas, sliced zucchini or broccoli; 5 minutes for carrots; and 7 to 11 minutes
for corn on the cob. Then, immerse the vegetables in cold water to stop the cooking
process. Finally, dry the vegetables on a towel before vacuum packaging.
Cruciferous vegetables (broccoli, Brussels sprouts, cabbage, cauliflower, kale, turnips)
naturally emit gases during storage. Therefore, after blanching, they must be stored in
the freezer only.
IMPORTANT: Uncooked mushrooms, raw garlic and soft cheese should never be
vacuum packaged.
7/13/07 11:18:15 AM
Tips for Marinating with the Quick Marinator
Marinating with your FoodSaver vacuum packaging system opens the pores of your food during
the process of vacuuming, so marinating is complete in as little as 20 minutes. Not only is your food
infused more quickly – but the marinade also penetrates deeper for more intense flavor! You can
create meals in minutes – and won’t get stuck if you forgot to marinate yesterday! In just 20 minutes,
you’ll be ready for grilling, roasting or any other method of preparation!
®
Recipes
Asian Citrus Marinade Beef, Chicken, Fish, Lamb, Pork, or Vegetables
12
/ cup orange or pineapple juice
2 1/2 Tbsp. fresh lemon juice
2 1/2 Tbsp. fresh lime juice
1 Tbsp. ginger, peeled and chopped
2 garlic cloves, crushed
1 Tbsp. light brown sugar
14
/ cup peanut oil
1 Tbsp. tarragon vinegar
14
/ tsp. red pepper flakes (optional for extra spiciness)
Whisk all ingredients in a medium bowl until well blended.
Korean Marinade Beef, Chicken, Fish, Lamb, Pork, or Vegetables
12
/ cup soy sauce
12
/ cup mirin
1 Tbsp. fresh ginger, minced
1 Tbsp. garlic cloves, crushed
2 green onions, chopped
2 Tbsp. dark brown sugar
1 Tbsp. orange peel, minced
2 tsp. dark sesame oil
Whisk all ingredients in a medium bowl until well blended.
Sweet Honey-Basil Marinade Chicken or Pork
14
/ cup honey
12
/ cup red wine vinegar
2 garlic cloves, crushed
1 large shallot, peeled and roughly chopped
1 Tbsp. soy sauce
2 1/2 Tbsp. orange juice
2 Tbsp. white wine
14
/ cup fresh basil, washed and roughly chopped
14
/ tsp. salt
14
/ tsp. ground black pepper
Whisk all ingredients in a medium bowl until well blended.
Tarragon Mustard Marinade
14
/ cup extra-virgin olive oil
14
/ cup dry white wine or vermouth
2 Tbsp. Dijon mustard
2 Tbsp. fresh tarragon, chopped
12
/ tsp. salt
12
/ tsp. black pepper, freshly ground
Whisk all ingredients in a medium bowl until well blended. Makes 11/2 cups; enough for 41/2 pounds
of chicken, pork or fish.
Texas Bar-B-Que Sauce & Marinade
2 Tbsp. vegetable oil
12
/ small white onion, chopped
2 cloves garlic, chopped
12
/ cup ketchup
14
/ cup cider vinegar
2 Tbsp. soy sauce
2 Tbsp. dark brown sugar
1 Tbsp. Worcestershire sauce
1 tsp. dry mustard
12
/ tsp. celery seed
In a medium-sized saucepan, heat the oil and sauté the onion and garlic for 5 minutes. Add the
remaining ingredients and simmer, stirring frequently, until slightly thickened, about 10 minutes. Cool
the marinade before using. Makes 2 cups; enough for 6 pounds of beef, chicken or pork.
Cooking Chart
Broiling / Grilling
Baking
Pork
Closest to heat source.
12 minutes per inch - turn
once.
Not recommended.
Beef
Closest to heat source.
10 minutes per inch - turn
once.
Not recommended.
Shrimp
Closest to heat source.
3-4 minutes per side.
Bake at 400°F (200°C)
for 6-8 minutes.
Fish
Closest to heat source.
5-6 minutes per inch - turn
once.
Bake at 400°F (200°C)
for 6-10 minutes per inch.
Poultry with bone
Furthest from heat source.
12-14 minutes per side.
Bake at 350°F (175°C)
for 25-30 minutes.
Poultry without bone
Closest to heat source.
4-5 minutes per side.
Bake at 350°F (175°C)
for 20-25 minutes.
Vegetables
Closest to heat source.
Until tender.
Bake at 450°F (230°C)
until tender.
Troubleshooting
If the FoodSaver® Vacuum Packaging Canister will not vacuum:
1. Make sure the rubber gasket rim on the lid is free from food materials.
2. Examine the rim of the canister for any cracks or scratches. Any gaps can
prevent the canisters from vacuuming properly.
3. Make sure the canister is not too full for vacuum packaging. Always leave at
least one inch (1”) between the contents and the lid.
4. Make sure the Accessory Hose is securely inserted into the Accessory Port on
the appliance and in the port on the canister lid.
If you need assistance: Call Consumer Services at 1-800-777-5452 or e–mail
[email protected]. In Canada, call 1-877-804-5383.
FoodSaver® Canisters come in a variety of shapes and sizes which can be used in
the refrigerator, on the countertop or in the pantry.
T020-00110-000 (06/06)
T220-00450
T020-00110 update.indd 2
Printed in China
www.foodsaver.com
7/13/07 11:18:16 AM