1
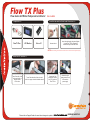
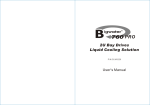
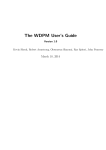
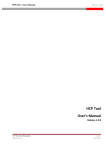
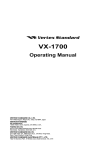
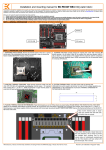
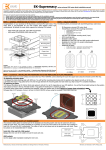
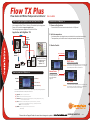
Flow TX Plus
Flow meter with Water Temperature Indicator
How to upgrade your BigWater series with Flow TX Plus >>
You can apply the Flow TX Plus to fit into any Thermaltake liquid cooling system.
Please visit our website at www.thermaltake.com.
The following diagrams are BigWater 735 with Flow TX Plus.
Application with BigWater 735
P/N : CL-W0138
How to use the LCD Monitor >>
1. Power on the function:
- Press the ON/OFF button to start the alarm function of LCD panel.
2. Set the temperature:
- Set the temperature by turning the temp controller with the cross-head screw driver.
- The temperature you set will be shown on the panel remarked with alarm temp.
Copper
waterblock
3. Monitor Switch:
Press "REC" Button
120mm
Radiator
Pump
Install Flow TX Plus in
Thermaltake Armor
chassis with
BigWater 735
Liquid
tank
"MAX" Status
Note:
Flow TX Plus
D. How to install the Monitor >>
Normal Status
How to operate the LCD Monitor >>
ON / OFF (A)
RECORD (D)
RESET (E)
When the screen is shown MAX
, it means the highest temperature you have recorded. In the
meanwhile, T1 is the highest temperature you set, T2 is the
highest temperature that the sensor detected.
O
T1 is the highest alarm
temperature you set, T2
Press "REC" Button
is the temperature that
the sensor detected
right now.
"MIN" Status
o
C/ F switch (B)
Temp. Controller (C)
Note:
When the screen is shown MIN
, it means the lowest temperature you have recorded. In the
meanwhile, T1 is the lowest temperature you set, T2 is the
lowest temperature that the sensor detected.
There are two temperature shown on the screen (T1, T2). T1 always mean pre-setting temperature
as well as T2 representatives the temperature from sensor.
(A) ON / OFF: power on or power off switch.
(B ) oC/ oF : Celsius and Fahrenheit display switch.
(C) Alarm set : Reset the alarm temp. Please adjust the pre-setting temperature by using
the cross-head screw driver.
(D) REC: Whatever it shows the temperature you would like to set, ( the screen
should be shown without MIN or MAX, see fig 1), please press the button
"REC" to record the temperature.
(E ) RESET: Show the highst and lowest temperature record.
(MAX & MIN)
Please visit our Support Section for more technical support or update at
REVISION A.2007.05
O4618
Flow TX Plus
Flow meter with Water Temperature Indicator
P/N : CL-W0138
Install the tube with the Quick Install Connectors >>
Components >>
>
LCD Monitor
Flow TX Plus
Velcro X 1
Insert the tube through the nut and tighten
it on the Flow TX Plus. Repeat the
installation steps for the other side.
Unscrew the nut
NOTE: Before installing, please make sure that the connectors on Flow TX Plus are tightened properly.
Install the LCD monitor >>
>
>
Tear off one side of the
velcro and stick it on
the down side of
LCD monitor
Tear off the other side of the velcro and
stick it in a proper location inside the chassis
>
Connect the 2 pin
temperature sensor
from LCD monitor to
Flow TX Plus
Please visit our Support Section for more technical support or update at
Connect the 4-pin
power connector from
LCD monitor to
power supply.
REVISION A.2007.05