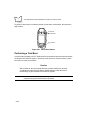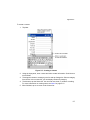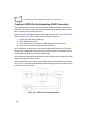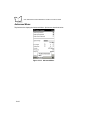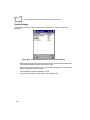
1
PPT 2800 Series Product Reference Guide for Pocket PC 2002 PPT 2800 Series Product Reference Guide for Pocket PC 2002 72-54894-03 Revision A August 2002 2001-2002 by Symbol Technologies, Inc. All rights reserved. No part of this publication may be reproduced or used in any form, or by any electrical or mechanical means, without permission in writing from Symbol. This includes electronic or mechanical means, such as photocopying, recording, or information storage and retrieval systems. The material in this manual is subject to change without notice. The software is provided strictly on an “as is” basis. All software, including firmware, furnished to the user is on a licensed basis. Symbol grants to the user a non-transferable and non-exclusive license to use each software or firmware program delivered hereunder (licensed program). Except as noted below, such license may not be assigned, sublicensed, or otherwise transferred by the user without prior written consent of Symbol. No right to copy a licensed program in whole or in part is granted, except as permitted under copyright law. The user shall not modify, merge, or incorporate any form or portion of a licensed program with other program material, create a derivative work from a licensed program, or use a licensed program in a network without written permission from Symbol. The user agrees to maintain Symbol’s copyright notice on the licensed programs delivered hereunder, and to include the same on any authorized copies it makes, in whole or in part. The user agrees not to decompile, disassemble, decode, or reverse engineer any licensed program delivered to the user or any portion thereof. Symbol reserves the right to make changes to any software or product to improve reliability, function, or design. Symbol does not assume any product liability arising out of, or in connection with, the application or use of any product, circuit, or application described herein. No license is granted, either expressly or by implication, estoppel, or otherwise under any Symbol Technologies, Inc., intellectual property rights. An implied license only exists for equipment, circuits, and subsystems contained in Symbol products. Symbol, Spectrum One, and Spectrum24 are registered trademarks of Symbol Technologies, Inc. Other product names mentioned in this manual may be trademarks or registered trademarks of their respective companies and are hereby acknowledged. Symbol Technologies, Inc. One Symbol Plaza Holtsville, New York 11742-1300 http://www.symbol.com ii Contents About This Guide Introduction . . . . . . . . . . . . . . . . . . . . . . . . . . . . . . . . . . . . . . . . . . . . . . . . . . . . . . . . . . . . . . . . . . . . xi Chapter Descriptions . . . . . . . . . . . . . . . . . . . . . . . . . . . . . . . . . . . . . . . . . . . . . . . . . . . . . . . . . . . . . xi Notational Conventions . . . . . . . . . . . . . . . . . . . . . . . . . . . . . . . . . . . . . . . . . . . . . . . . . . . . . . . . . . xii Related Documents . . . . . . . . . . . . . . . . . . . . . . . . . . . . . . . . . . . . . . . . . . . . . . . . . . . . . . . . . . . . . xiii Service Information . . . . . . . . . . . . . . . . . . . . . . . . . . . . . . . . . . . . . . . . . . . . . . . . . . . . . . . . . . . . . xiii Symbol Support Center . . . . . . . . . . . . . . . . . . . . . . . . . . . . . . . . . . . . . . . . . . . . . . . . . . . . . . xiv Chapter 1. Getting Started Chapter Contents. . . . . . . . . . . . . . . . . . . . . . . . . . . . . . . . . . . . . . . . . . . . . . . . . . . . . . . . . . . . . . 1-1 Introduction . . . . . . . . . . . . . . . . . . . . . . . . . . . . . . . . . . . . . . . . . . . . . . . . . . . . . . . . . . . . . . . . . . 1-3 Unpacking the Terminal . . . . . . . . . . . . . . . . . . . . . . . . . . . . . . . . . . . . . . . . . . . . . . . . . . . . . . . . . 1-3 Parts of the PPT 2800 . . . . . . . . . . . . . . . . . . . . . . . . . . . . . . . . . . . . . . . . . . . . . . . . . . . . . . . . . . 1-4 Accessories . . . . . . . . . . . . . . . . . . . . . . . . . . . . . . . . . . . . . . . . . . . . . . . . . . . . . . . . . . . . . . . . . . 1-6 Installing Batteries . . . . . . . . . . . . . . . . . . . . . . . . . . . . . . . . . . . . . . . . . . . . . . . . . . . . . . . . . . . . . 1-6 Charging the Battery . . . . . . . . . . . . . . . . . . . . . . . . . . . . . . . . . . . . . . . . . . . . . . . . . . . . . . . . . . . 1-8 Using the Cradle to Charge the Battery . . . . . . . . . . . . . . . . . . . . . . . . . . . . . . . . . . . . . . . . . 1-8 Charging Spare Batteries . . . . . . . . . . . . . . . . . . . . . . . . . . . . . . . . . . . . . . . . . . . . . . . . . . . 1-10 Using the Synchronization Cable to Charge the Battery . . . . . . . . . . . . . . . . . . . . . . . . . . . 1-11 Checking Battery Power . . . . . . . . . . . . . . . . . . . . . . . . . . . . . . . . . . . . . . . . . . . . . . . . . . . . . . . 1-12 Attaching the Handstrap . . . . . . . . . . . . . . . . . . . . . . . . . . . . . . . . . . . . . . . . . . . . . . . . . . . . . . . 1-13 Attaching the Wrist Strap . . . . . . . . . . . . . . . . . . . . . . . . . . . . . . . . . . . . . . . . . . . . . . . . . . . 1-13 Starting the PPT 2800 . . . . . . . . . . . . . . . . . . . . . . . . . . . . . . . . . . . . . . . . . . . . . . . . . . . . . . . . . 1-15 Aligning the Screen . . . . . . . . . . . . . . . . . . . . . . . . . . . . . . . . . . . . . . . . . . . . . . . . . . . . . . . 1-15 Setting Time and Date . . . . . . . . . . . . . . . . . . . . . . . . . . . . . . . . . . . . . . . . . . . . . . . . . . . . . 1-17 Setting Up Your Terminal. . . . . . . . . . . . . . . . . . . . . . . . . . . . . . . . . . . . . . . . . . . . . . . . . . . . . . . 1-17 Chapter 2. Operating the PPT 2800 Chapter Contents. . . . . . . . . . . . . . . . . . . . . . . . . . . . . . . . . . . . . . . . . . . . . . . . . . . . . . . . . . . . . . 2-1 iii PPT 2800 Series Product Reference Guide for Pocket PC 2002 Introduction . . . . . . . . . . . . . . . . . . . . . . . . . . . . . . . . . . . . . . . . . . . . . . . . . . . . . . . . . . . . . . . . . . 2-3 Using the Power Button . . . . . . . . . . . . . . . . . . . . . . . . . . . . . . . . . . . . . . . . . . . . . . . . . . . . . . . . . 2-3 Controlling the Contrast/Backlight. . . . . . . . . . . . . . . . . . . . . . . . . . . . . . . . . . . . . . . . . . . . . . . . . . 2-3 Using the Stylus . . . . . . . . . . . . . . . . . . . . . . . . . . . . . . . . . . . . . . . . . . . . . . . . . . . . . . . . . . . . . . . 2-3 Today Screen . . . . . . . . . . . . . . . . . . . . . . . . . . . . . . . . . . . . . . . . . . . . . . . . . . . . . . . . . . . . . . . . . 2-4 Status Icons . . . . . . . . . . . . . . . . . . . . . . . . . . . . . . . . . . . . . . . . . . . . . . . . . . . . . . . . . . . . . . . 2-5 Selecting Programs. . . . . . . . . . . . . . . . . . . . . . . . . . . . . . . . . . . . . . . . . . . . . . . . . . . . . . . . . . . . . 2-6 PPT 2800 Application Buttons . . . . . . . . . . . . . . . . . . . . . . . . . . . . . . . . . . . . . . . . . . . . . . . . . 2-7 Using the Navigation Bar and Command Bar . . . . . . . . . . . . . . . . . . . . . . . . . . . . . . . . . . . . . . . . . 2-8 Using Pop-up Menus. . . . . . . . . . . . . . . . . . . . . . . . . . . . . . . . . . . . . . . . . . . . . . . . . . . . . . . . . . . . 2-8 Notifications. . . . . . . . . . . . . . . . . . . . . . . . . . . . . . . . . . . . . . . . . . . . . . . . . . . . . . . . . . . . . . . . . . . 2-9 Entering Information . . . . . . . . . . . . . . . . . . . . . . . . . . . . . . . . . . . . . . . . . . . . . . . . . . . . . . . . . . . 2-10 Entering Information Using the Input Panel . . . . . . . . . . . . . . . . . . . . . . . . . . . . . . . . . . . . . . 2-10 Selecting Text . . . . . . . . . . . . . . . . . . . . . . . . . . . . . . . . . . . . . . . . . . . . . . . . . . . . . . . . . . . . 2-13 Writing on the Screen . . . . . . . . . . . . . . . . . . . . . . . . . . . . . . . . . . . . . . . . . . . . . . . . . . . . . . 2-13 Drawing on the Screen . . . . . . . . . . . . . . . . . . . . . . . . . . . . . . . . . . . . . . . . . . . . . . . . . . . . . 2-17 Recording a Message . . . . . . . . . . . . . . . . . . . . . . . . . . . . . . . . . . . . . . . . . . . . . . . . . . . . . . 2-18 Entering Data via the Bar Code Scanner (Scan Wedge). . . . . . . . . . . . . . . . . . . . . . . . . . . . 2-18 Using My Text . . . . . . . . . . . . . . . . . . . . . . . . . . . . . . . . . . . . . . . . . . . . . . . . . . . . . . . . . . . . . . . . 2-20 Finding Information . . . . . . . . . . . . . . . . . . . . . . . . . . . . . . . . . . . . . . . . . . . . . . . . . . . . . . . . . . . . 2-21 Scanning . . . . . . . . . . . . . . . . . . . . . . . . . . . . . . . . . . . . . . . . . . . . . . . . . . . . . . . . . . . . . . . . . . . . 2-22 Scanning PDF417 Bar Codes . . . . . . . . . . . . . . . . . . . . . . . . . . . . . . . . . . . . . . . . . . . . . . . . 2-22 Resetting Your PPT 2800 Terminal . . . . . . . . . . . . . . . . . . . . . . . . . . . . . . . . . . . . . . . . . . . . . . . 2-23 Performing a Warm Boot . . . . . . . . . . . . . . . . . . . . . . . . . . . . . . . . . . . . . . . . . . . . . . . . . . . . 2-23 Performing a Cold Boot . . . . . . . . . . . . . . . . . . . . . . . . . . . . . . . . . . . . . . . . . . . . . . . . . . . . . 2-24 Chapter 3. Customizing Your PPT 2800 Chapter Contents . . . . . . . . . . . . . . . . . . . . . . . . . . . . . . . . . . . . . . . . . . . . . . . . . . . . . . . . . . . . . . 3-1 Introduction . . . . . . . . . . . . . . . . . . . . . . . . . . . . . . . . . . . . . . . . . . . . . . . . . . . . . . . . . . . . . . . . . . 3-3 Adjusting Settings . . . . . . . . . . . . . . . . . . . . . . . . . . . . . . . . . . . . . . . . . . . . . . . . . . . . . . . . . . . . . . 3-3 Flash Storage . . . . . . . . . . . . . . . . . . . . . . . . . . . . . . . . . . . . . . . . . . . . . . . . . . . . . . . . . . . . . . . . . 3-3 FFS Partitions . . . . . . . . . . . . . . . . . . . . . . . . . . . . . . . . . . . . . . . . . . . . . . . . . . . . . . . . . . . . . 3-3 Working with FFS Partitions. . . . . . . . . . . . . . . . . . . . . . . . . . . . . . . . . . . . . . . . . . . . . . . . . . . 3-4 Non-FFS Partitions . . . . . . . . . . . . . . . . . . . . . . . . . . . . . . . . . . . . . . . . . . . . . . . . . . . . . . . . . 3-6 Downloading Partitions to the Terminal . . . . . . . . . . . . . . . . . . . . . . . . . . . . . . . . . . . . . . . . . . 3-6 Assigning Applications to Application Buttons . . . . . . . . . . . . . . . . . . . . . . . . . . . . . . . . . . . . . . . . 3-6 Assigning User-Written Applications to Buttons . . . . . . . . . . . . . . . . . . . . . . . . . . . . . . . . . . . . . . . 3-7 Adding Programs . . . . . . . . . . . . . . . . . . . . . . . . . . . . . . . . . . . . . . . . . . . . . . . . . . . . . . . . . . . . . . 3-8 Adding a Program from the Internet. . . . . . . . . . . . . . . . . . . . . . . . . . . . . . . . . . . . . . . . . . . . . 3-8 Adding a Program to the Start Menu . . . . . . . . . . . . . . . . . . . . . . . . . . . . . . . . . . . . . . . . . . . . 3-9 Removing Programs . . . . . . . . . . . . . . . . . . . . . . . . . . . . . . . . . . . . . . . . . . . . . . . . . . . . . . . . . . . 3-10 iv Contents Chapter 4. Communications Chapter Contents. . . . . . . . . . . . . . . . . . . . . . . . . . . . . . . . . . . . . . . . . . . . . . . . . . . . . . . . . . . . . . Introduction . . . . . . . . . . . . . . . . . . . . . . . . . . . . . . . . . . . . . . . . . . . . . . . . . . . . . . . . . . . . . . . . . . Installing ActiveSync Software. . . . . . . . . . . . . . . . . . . . . . . . . . . . . . . . . . . . . . . . . . . . . . . . . . . . Performing an ActiveSync for the First Time . . . . . . . . . . . . . . . . . . . . . . . . . . . . . . . . . . . . . . . . . Performing ActiveSync using the Synchronization Cable. . . . . . . . . . . . . . . . . . . . . . . . . . . . Performing ActiveSync using the Cradle . . . . . . . . . . . . . . . . . . . . . . . . . . . . . . . . . . . . . . . . Performing Subsequent ActiveSync Operations . . . . . . . . . . . . . . . . . . . . . . . . . . . . . . . . . . . . . . Performing a Remote ActiveSync. . . . . . . . . . . . . . . . . . . . . . . . . . . . . . . . . . . . . . . . . . . . . . 4-1 4-3 4-3 4-3 4-5 4-6 4-8 4-8 Chapter 5. Applications Chapter Contents. . . . . . . . . . . . . . . . . . . . . . . . . . . . . . . . . . . . . . . . . . . . . . . . . . . . . . . . . . . . . . 5-1 Introduction . . . . . . . . . . . . . . . . . . . . . . . . . . . . . . . . . . . . . . . . . . . . . . . . . . . . . . . . . . . . . . . . . . 5-3 Calendar . . . . . . . . . . . . . . . . . . . . . . . . . . . . . . . . . . . . . . . . . . . . . . . . . . . . . . . . . . . . . . . . . . . . 5-3 Creating Appointments . . . . . . . . . . . . . . . . . . . . . . . . . . . . . . . . . . . . . . . . . . . . . . . . . . . . . . 5-4 Using the Summary Screen . . . . . . . . . . . . . . . . . . . . . . . . . . . . . . . . . . . . . . . . . . . . . . . . . . 5-5 Creating Meeting Requests . . . . . . . . . . . . . . . . . . . . . . . . . . . . . . . . . . . . . . . . . . . . . . . . . . 5-5 Contacts. . . . . . . . . . . . . . . . . . . . . . . . . . . . . . . . . . . . . . . . . . . . . . . . . . . . . . . . . . . . . . . . . . . . . 5-6 Using the Summary Screen . . . . . . . . . . . . . . . . . . . . . . . . . . . . . . . . . . . . . . . . . . . . . . . . . . 5-8 Tasks . . . . . . . . . . . . . . . . . . . . . . . . . . . . . . . . . . . . . . . . . . . . . . . . . . . . . . . . . . . . . . . . . . . . . . . 5-9 Using the Summary Screen . . . . . . . . . . . . . . . . . . . . . . . . . . . . . . . . . . . . . . . . . . . . . . . . . 5-11 Notes . . . . . . . . . . . . . . . . . . . . . . . . . . . . . . . . . . . . . . . . . . . . . . . . . . . . . . . . . . . . . . . . . . . . . . 5-12 Inbox . . . . . . . . . . . . . . . . . . . . . . . . . . . . . . . . . . . . . . . . . . . . . . . . . . . . . . . . . . . . . . . . . . . . . . 5-14 Synchronizing E-mail Messages. . . . . . . . . . . . . . . . . . . . . . . . . . . . . . . . . . . . . . . . . . . . . . 5-14 Connecting Directly to an E-mail Server. . . . . . . . . . . . . . . . . . . . . . . . . . . . . . . . . . . . . . . . 5-14 Using the Message List . . . . . . . . . . . . . . . . . . . . . . . . . . . . . . . . . . . . . . . . . . . . . . . . . . . . 5-16 Creating E-mail Messages . . . . . . . . . . . . . . . . . . . . . . . . . . . . . . . . . . . . . . . . . . . . . . . . . . 5-18 Managing E-mail Messages and Folders . . . . . . . . . . . . . . . . . . . . . . . . . . . . . . . . . . . . . . . 5-19 Chapter 6. Companion Programs Chapter Contents. . . . . . . . . . . . . . . . . . . . . . . . . . . . . . . . . . . . . . . . . . . . . . . . . . . . . . . . . . . . . . 6-1 Introduction . . . . . . . . . . . . . . . . . . . . . . . . . . . . . . . . . . . . . . . . . . . . . . . . . . . . . . . . . . . . . . . . . . 6-3 Pocket Word . . . . . . . . . . . . . . . . . . . . . . . . . . . . . . . . . . . . . . . . . . . . . . . . . . . . . . . . . . . . . . . . . 6-3 Typing Mode . . . . . . . . . . . . . . . . . . . . . . . . . . . . . . . . . . . . . . . . . . . . . . . . . . . . . . . . . . . . . . 6-5 Writing Mode . . . . . . . . . . . . . . . . . . . . . . . . . . . . . . . . . . . . . . . . . . . . . . . . . . . . . . . . . . . . . 6-6 Drawing Mode . . . . . . . . . . . . . . . . . . . . . . . . . . . . . . . . . . . . . . . . . . . . . . . . . . . . . . . . . . . . 6-7 Recording Mode . . . . . . . . . . . . . . . . . . . . . . . . . . . . . . . . . . . . . . . . . . . . . . . . . . . . . . . . . . . 6-7 Pocket Excel . . . . . . . . . . . . . . . . . . . . . . . . . . . . . . . . . . . . . . . . . . . . . . . . . . . . . . . . . . . . . . . . . 6-8 Tips for Working in Pocket Excel . . . . . . . . . . . . . . . . . . . . . . . . . . . . . . . . . . . . . . . . . . . . . . 6-9 MSN® Messenger . . . . . . . . . . . . . . . . . . . . . . . . . . . . . . . . . . . . . . . . . . . . . . . . . . . . . . . . . . . . 6-10 Setting Up Your Account . . . . . . . . . . . . . . . . . . . . . . . . . . . . . . . . . . . . . . . . . . . . . . . . . . . 6-10 v PPT 2800 Series Product Reference Guide for Pocket PC 2002 Working with Contacts . . . . . . . . . . . . . . . . . . . . . . . . . . . . . . . . . . . . . . . . . . . . . . . . . . . . . . 6-11 Chatting with Contacts . . . . . . . . . . . . . . . . . . . . . . . . . . . . . . . . . . . . . . . . . . . . . . . . . . . . . . 6-12 Chapter 7. Pocket Internet Explorer Chapter Contents . . . . . . . . . . . . . . . . . . . . . . . . . . . . . . . . . . . . . . . . . . . . . . . . . . . . . . . . . . . . . . 7-1 Introduction . . . . . . . . . . . . . . . . . . . . . . . . . . . . . . . . . . . . . . . . . . . . . . . . . . . . . . . . . . . . . . . . . . 7-3 Mobile Favorites . . . . . . . . . . . . . . . . . . . . . . . . . . . . . . . . . . . . . . . . . . . . . . . . . . . . . . . . . . . . . . . 7-3 Favorite Links . . . . . . . . . . . . . . . . . . . . . . . . . . . . . . . . . . . . . . . . . . . . . . . . . . . . . . . . . . . . . 7-3 Creating Mobile Favorites . . . . . . . . . . . . . . . . . . . . . . . . . . . . . . . . . . . . . . . . . . . . . . . . . . . . 7-3 Saving Memory on your Terminal . . . . . . . . . . . . . . . . . . . . . . . . . . . . . . . . . . . . . . . . . . . . . . 7-4 Using AvantGo Channels . . . . . . . . . . . . . . . . . . . . . . . . . . . . . . . . . . . . . . . . . . . . . . . . . . . . . . . . 7-5 Using Pocket Internet Explorer . . . . . . . . . . . . . . . . . . . . . . . . . . . . . . . . . . . . . . . . . . . . . . . . . . . . 7-6 Browsing the Web . . . . . . . . . . . . . . . . . . . . . . . . . . . . . . . . . . . . . . . . . . . . . . . . . . . . . . . . . . 7-8 Chapter 8. Connections Chapter Contents . . . . . . . . . . . . . . . . . . . . . . . . . . . . . . . . . . . . . . . . . . . . . . . . . . . . . . . . . . . . . . 8-1 Introduction . . . . . . . . . . . . . . . . . . . . . . . . . . . . . . . . . . . . . . . . . . . . . . . . . . . . . . . . . . . . . . . . . . 8-3 Transferring Items Using Infrared . . . . . . . . . . . . . . . . . . . . . . . . . . . . . . . . . . . . . . . . . . . . . . . . . . 8-4 Connecting to an ISP . . . . . . . . . . . . . . . . . . . . . . . . . . . . . . . . . . . . . . . . . . . . . . . . . . . . . . . . . . . 8-4 Connecting to Your Network . . . . . . . . . . . . . . . . . . . . . . . . . . . . . . . . . . . . . . . . . . . . . . . . . . . . . . 8-7 Creating a Modem Connection to a Network . . . . . . . . . . . . . . . . . . . . . . . . . . . . . . . . . . . . . . 8-7 Disconnecting . . . . . . . . . . . . . . . . . . . . . . . . . . . . . . . . . . . . . . . . . . . . . . . . . . . . . . . . . . . . . . . . . 8-9 Connecting Directly to an E-mail Server . . . . . . . . . . . . . . . . . . . . . . . . . . . . . . . . . . . . . . . . . . . . . 8-9 Setting Up an E-mail Service . . . . . . . . . . . . . . . . . . . . . . . . . . . . . . . . . . . . . . . . . . . . . . . . . . 8-9 Getting Help Connecting . . . . . . . . . . . . . . . . . . . . . . . . . . . . . . . . . . . . . . . . . . . . . . . . . . . . . . . . 8-10 Chapter 9. Spectrum24 Network Configuration Chapter Contents . . . . . . . . . . . . . . . . . . . . . . . . . . . . . . . . . . . . . . . . . . . . . . . . . . . . . . . . . . . . . . 9-1 Introduction . . . . . . . . . . . . . . . . . . . . . . . . . . . . . . . . . . . . . . . . . . . . . . . . . . . . . . . . . . . . . . . . . . 9-3 Configuring the PPT 2842 (2 MB Radio). . . . . . . . . . . . . . . . . . . . . . . . . . . . . . . . . . . . . . . . . . . . . 9-4 Network Adapters Properties . . . . . . . . . . . . . . . . . . . . . . . . . . . . . . . . . . . . . . . . . . . . . . . . . . 9-4 Using PPT 2842 Spectrum24 Settings . . . . . . . . . . . . . . . . . . . . . . . . . . . . . . . . . . . . . . . . . . 9-6 Using NICTT with the PPT 2842 . . . . . . . . . . . . . . . . . . . . . . . . . . . . . . . . . . . . . . . . . . . . . . 9-13 Configuring the PPT 2846 (11 MB Radio). . . . . . . . . . . . . . . . . . . . . . . . . . . . . . . . . . . . . . . . . . . 9-19 Network Adapters Properties . . . . . . . . . . . . . . . . . . . . . . . . . . . . . . . . . . . . . . . . . . . . . . . . . 9-19 Using NICTT with the PPT 2846 . . . . . . . . . . . . . . . . . . . . . . . . . . . . . . . . . . . . . . . . . . . . . . 9-21 Chapter 10. Wireless Wide Area Network Configuration Chapter Contents . . . . . . . . . . . . . . . . . . . . . . . . . . . . . . . . . . . . . . . . . . . . . . . . . . . . . . . . . . . . . 10-1 Introduction . . . . . . . . . . . . . . . . . . . . . . . . . . . . . . . . . . . . . . . . . . . . . . . . . . . . . . . . . . . . . . . . . 10-3 vi Contents Multi-Network Support for IP Data over GPRS . . . . . . . . . . . . . . . . . . . . . . . . . . . . . . . . . . . . . . 10-3 Creating a GPRS Dial Up Networking (DUN) Connection . . . . . . . . . . . . . . . . . . . . . . . . . . 10-4 Sample Network Parameter Registry File. . . . . . . . . . . . . . . . . . . . . . . . . . . . . . . . . . . . . . . 10-5 Configuring a CDPD WAN Connection (PPT 2833) . . . . . . . . . . . . . . . . . . . . . . . . . . . . . . . . . . 10-8 Configuration Wizard . . . . . . . . . . . . . . . . . . . . . . . . . . . . . . . . . . . . . . . . . . . . . . . . . . . . . . 10-8 Maintenance Screens and Menus . . . . . . . . . . . . . . . . . . . . . . . . . . . . . . . . . . . . . . . . . . . 10-13 Modem Menu . . . . . . . . . . . . . . . . . . . . . . . . . . . . . . . . . . . . . . . . . . . . . . . . . . . . . . . . . . . 10-19 Advanced Menu . . . . . . . . . . . . . . . . . . . . . . . . . . . . . . . . . . . . . . . . . . . . . . . . . . . . . . . . . 10-20 Help . . . . . . . . . . . . . . . . . . . . . . . . . . . . . . . . . . . . . . . . . . . . . . . . . . . . . . . . . . . . . . . . . . 10-22 Configuring a GPRS WAN Connection (PPT 2837) . . . . . . . . . . . . . . . . . . . . . . . . . . . . . . . . . 10-23 Connecting via GPRS. . . . . . . . . . . . . . . . . . . . . . . . . . . . . . . . . . . . . . . . . . . . . . . . . . . . . 10-26 Configuring a GSM WAN Connection (PPT 2837) . . . . . . . . . . . . . . . . . . . . . . . . . . . . . . . . . . 10-28 Connecting via GSM. . . . . . . . . . . . . . . . . . . . . . . . . . . . . . . . . . . . . . . . . . . . . . . . . . . . . . 10-32 Chapter 11. Software Installation on Development PC Chapter Contents. . . . . . . . . . . . . . . . . . . . . . . . . . . . . . . . . . . . . . . . . . . . . . . . . . . . . . . . . . . . . Introduction . . . . . . . . . . . . . . . . . . . . . . . . . . . . . . . . . . . . . . . . . . . . . . . . . . . . . . . . . . . . . . . . . Before You Install the SDK . . . . . . . . . . . . . . . . . . . . . . . . . . . . . . . . . . . . . . . . . . . . . . . . . . Symbol Windows CE SDK . . . . . . . . . . . . . . . . . . . . . . . . . . . . . . . . . . . . . . . . . . . . . . . . . . . . . . Installing the SDK on the Development PC . . . . . . . . . . . . . . . . . . . . . . . . . . . . . . . . . . . . . . . . . Installing the SDK . . . . . . . . . . . . . . . . . . . . . . . . . . . . . . . . . . . . . . . . . . . . . . . . . . . . . . . . . Installing Other Development Software . . . . . . . . . . . . . . . . . . . . . . . . . . . . . . . . . . . . . . . . . . . . 11-1 11-3 11-3 11-3 11-4 11-4 11-4 Chapter 12. Configuring the Terminal Chapter Contents. . . . . . . . . . . . . . . . . . . . . . . . . . . . . . . . . . . . . . . . . . . . . . . . . . . . . . . . . . . . . 12-1 Introduction . . . . . . . . . . . . . . . . . . . . . . . . . . . . . . . . . . . . . . . . . . . . . . . . . . . . . . . . . . . . . . . . . 12-3 Starting Terminal Configuration Manager . . . . . . . . . . . . . . . . . . . . . . . . . . . . . . . . . . . . . . . . . . 12-3 Defining Script Properties . . . . . . . . . . . . . . . . . . . . . . . . . . . . . . . . . . . . . . . . . . . . . . . . . . . . . . 12-6 Creating the Script for the Hex Image . . . . . . . . . . . . . . . . . . . . . . . . . . . . . . . . . . . . . . . . . . . . . 12-8 Open a New or Existing Script . . . . . . . . . . . . . . . . . . . . . . . . . . . . . . . . . . . . . . . . . . . . . . . 12-8 Copy Components to the Script . . . . . . . . . . . . . . . . . . . . . . . . . . . . . . . . . . . . . . . . . . . . . . 12-9 Save the Script . . . . . . . . . . . . . . . . . . . . . . . . . . . . . . . . . . . . . . . . . . . . . . . . . . . . . . . . . . . 12-9 Building the Image . . . . . . . . . . . . . . . . . . . . . . . . . . . . . . . . . . . . . . . . . . . . . . . . . . . . . . . . . . . 12-10 Sending the Hex Image . . . . . . . . . . . . . . . . . . . . . . . . . . . . . . . . . . . . . . . . . . . . . . . . . . . . . . . 12-12 Saving the Script . . . . . . . . . . . . . . . . . . . . . . . . . . . . . . . . . . . . . . . . . . . . . . . . . . . . . . . . 12-12 Connect The Terminal and Development PC . . . . . . . . . . . . . . . . . . . . . . . . . . . . . . . . . . . 12-12 Begin the Send in TCM . . . . . . . . . . . . . . . . . . . . . . . . . . . . . . . . . . . . . . . . . . . . . . . . . . . 12-12 Setting Up IPL to Receive the File . . . . . . . . . . . . . . . . . . . . . . . . . . . . . . . . . . . . . . . . . . . 12-13 Error Messages . . . . . . . . . . . . . . . . . . . . . . . . . . . . . . . . . . . . . . . . . . . . . . . . . . . . . . . . . . . . . 12-18 IPL Error Detection . . . . . . . . . . . . . . . . . . . . . . . . . . . . . . . . . . . . . . . . . . . . . . . . . . . . . . . 12-18 TCM Error Messages . . . . . . . . . . . . . . . . . . . . . . . . . . . . . . . . . . . . . . . . . . . . . . . . . . . . . 12-19 Creating a Splash Screen . . . . . . . . . . . . . . . . . . . . . . . . . . . . . . . . . . . . . . . . . . . . . . . . . . . . . 12-20 vii PPT 2800 Series Product Reference Guide for Pocket PC 2002 Creating a Splash Screen on Color Terminals. . . . . . . . . . . . . . . . . . . . . . . . . . . . . . . . . . . 12-20 Creating a Splash Screen on Monochrome Terminals . . . . . . . . . . . . . . . . . . . . . . . . . . . . 12-20 Loading the Splash Screen via TCM . . . . . . . . . . . . . . . . . . . . . . . . . . . . . . . . . . . . . . . . . . 12-21 Chapter 13. Maintenance and Troubleshooting Chapter Contents . . . . . . . . . . . . . . . . . . . . . . . . . . . . . . . . . . . . . . . . . . . . . . . . . . . . . . . . . . . . . 13-1 Introduction . . . . . . . . . . . . . . . . . . . . . . . . . . . . . . . . . . . . . . . . . . . . . . . . . . . . . . . . . . . . . . . . . 13-3 Maintaining the PPT 2800. . . . . . . . . . . . . . . . . . . . . . . . . . . . . . . . . . . . . . . . . . . . . . . . . . . . . . . 13-3 Troubleshooting . . . . . . . . . . . . . . . . . . . . . . . . . . . . . . . . . . . . . . . . . . . . . . . . . . . . . . . . . . . . . . 13-3 Appendix A. Block Recognizer Characters Appendix B. Demo Program Introduction . . . . . . . . . . . . . . . . . . . . . . . . . . . . . . . . . . . . . . . . . . . . . . . . . . . . . . . . . . . . . . . . . . .B-1 Scan Demo (VC Scan) . . . . . . . . . . . . . . . . . . . . . . . . . . . . . . . . . . . . . . . . . . . . . . . . . . . . . . . . . .B-3 Scanning Data Fields. . . . . . . . . . . . . . . . . . . . . . . . . . . . . . . . . . . . . . . . . . . . . . . . . . . . . . . .B-3 Scanning Options . . . . . . . . . . . . . . . . . . . . . . . . . . . . . . . . . . . . . . . . . . . . . . . . . . . . . . . . . .B-4 ActiveX Demo (VB Scan) . . . . . . . . . . . . . . . . . . . . . . . . . . . . . . . . . . . . . . . . . . . . . . . . . . . . . . . .B-4 HTML Scan Demo. . . . . . . . . . . . . . . . . . . . . . . . . . . . . . . . . . . . . . . . . . . . . . . . . . . . . . . . . . . . . .B-5 Wedge On/Off . . . . . . . . . . . . . . . . . . . . . . . . . . . . . . . . . . . . . . . . . . . . . . . . . . . . . . . . . . . . .B-5 ScanBrowse. . . . . . . . . . . . . . . . . . . . . . . . . . . . . . . . . . . . . . . . . . . . . . . . . . . . . . . . . . . . . . .B-6 Files . . . . . . . . . . . . . . . . . . . . . . . . . . . . . . . . . . . . . . . . . . . . . . . . . . . . . . . . . . . . . . . . . . . . . . . .B-7 MagStripe Reader . . . . . . . . . . . . . . . . . . . . . . . . . . . . . . . . . . . . . . . . . . . . . . . . . . . . . . . . . . . . . .B-8 Sounds (Audio Sample) . . . . . . . . . . . . . . . . . . . . . . . . . . . . . . . . . . . . . . . . . . . . . . . . . . . . . . . . .B-9 Images (ImageViewer Sample). . . . . . . . . . . . . . . . . . . . . . . . . . . . . . . . . . . . . . . . . . . . . . . . . . .B-10 CE Apps . . . . . . . . . . . . . . . . . . . . . . . . . . . . . . . . . . . . . . . . . . . . . . . . . . . . . . . . . . . . . . . . . . . .B-11 About . . . . . . . . . . . . . . . . . . . . . . . . . . . . . . . . . . . . . . . . . . . . . . . . . . . . . . . . . . . . . . . . . . . . . .B-12 Utilities. . . . . . . . . . . . . . . . . . . . . . . . . . . . . . . . . . . . . . . . . . . . . . . . . . . . . . . . . . . . . . . . . . . . . .B-12 Control Panel . . . . . . . . . . . . . . . . . . . . . . . . . . . . . . . . . . . . . . . . . . . . . . . . . . . . . . . . . . . . .B-13 Appendix C. GSM Demo Program Introduction . . . . . . . . . . . . . . . . . . . . . . . . . . . . . . . . . . . . . . . . . . . . . . . . . . . . . . . . . . . . . . . . . . .C-1 GsmDemo Screens. . . . . . . . . . . . . . . . . . . . . . . . . . . . . . . . . . . . . . . . . . . . . . . . . . . . . . . . . . . . .C-1 Main Screen . . . . . . . . . . . . . . . . . . . . . . . . . . . . . . . . . . . . . . . . . . . . . . . . . . . . . . . . . . . . . . . . . .C-2 Read SMS . . . . . . . . . . . . . . . . . . . . . . . . . . . . . . . . . . . . . . . . . . . . . . . . . . . . . . . . . . . . . . . .C-3 Send SMS . . . . . . . . . . . . . . . . . . . . . . . . . . . . . . . . . . . . . . . . . . . . . . . . . . . . . . . . . . . . . . . .C-5 Dial # . . . . . . . . . . . . . . . . . . . . . . . . . . . . . . . . . . . . . . . . . . . . . . . . . . . . . . . . . . . . . . . . . . . .C-6 GsmDemo Menu Commands . . . . . . . . . . . . . . . . . . . . . . . . . . . . . . . . . . . . . . . . . . . . . . . . . . . . .C-7 Options Menu/Settings Screen . . . . . . . . . . . . . . . . . . . . . . . . . . . . . . . . . . . . . . . . . . . . . . . .C-7 Help Menu . . . . . . . . . . . . . . . . . . . . . . . . . . . . . . . . . . . . . . . . . . . . . . . . . . . . . . . . . . . . . . .C-12 File Menu . . . . . . . . . . . . . . . . . . . . . . . . . . . . . . . . . . . . . . . . . . . . . . . . . . . . . . . . . . . . . . . .C-12 viii Contents Appendix D. Technical Specifications Environment. . . . . . . . . . . . . . . . . . . . . . . . . . . . . . . . . . . . . . . . . . . . . . . . . . . . . . . . . . . . . . . . . . D-1 COM Port Definitions . . . . . . . . . . . . . . . . . . . . . . . . . . . . . . . . . . . . . . . . . . . . . . . . . . . . . . . . . . . D-2 Pin-Outs . . . . . . . . . . . . . . . . . . . . . . . . . . . . . . . . . . . . . . . . . . . . . . . . . . . . . . . . . . . . . . . . . . . . . D-3 Index Feedback ix PPT 2800 Series Product Reference Guide for Pocket PC 2002 x About This Guide Introduction The PPT 2800 Series Product Reference Guide for Pocket PC 2002 provides information about the PPT 2800 Series terminal using the Pocket PC 2002 Operating System, and its accessories. The PPT 2800 Series includes the following variations of the terminal: • PPT 2800: batch • PPT 283x: Wireless WAN radio • PPT 284x: Spectrum24 LAN radio Chapter Descriptions Topics covered in this guide are as follows: • Chapter 1, Getting Started explains the physical buttons and controls on your PPT 2800 terminal, how to install and charge the batteries, start your PPT 2800 terminal for the first time, and attach the handstrap and wriststrap. • Chapter 2, Operating the PPT 2800 explains how to use your terminal, including instructions for powering on and resetting the terminal, entering information, scanning, and using the stylus. • Chapter 3, Customizing Your PPT 2800 explains how to adjust settings on the terminal, and add and delete programs. • Chapter 4, Communications explains how to use Microsoft® ActiveSync™ for communications between the terminal and desktop computer. • Chapter 5, Applications describes how to use the Calendar, Contacts, Tasks, Notes and Inbox applications. xi PPT 2800 Series Product Reference Guide for Pocket PC 2002 • Chapter 6, Companion Programs describes how to use Pocket Word, Pocket Excel, and MSN® Messenger. • Chapter 7, Pocket Internet Explorer explains how to set up favorite links and channels, and browse the web on your terminal. • Chapter 8, Connections describes how to connect the terminal to your network and e-mail server, and transfer information via infrared. • Chapter 9, Spectrum24 Network Configuration describes how to configure the Spectrum24 wireless connection. • Chapter 10, Wireless Wide Area Network Configuration describes how to configure the terminal for CDPD or GSM connection. • Chapter 11, Software Installation on Development PC provides instructions for installing the Software Developer’s Kit on your host PC. • Chapter 12, Configuring the Terminal describes how to install and use the Terminal Configuration Manager (TCM) and Initial Program Loader (IPL). • Chapter 13, Maintenance and Troubleshooting provides information to help you take proper care of your PPT 2800 terminal and solve problems that may come up. • Appendix A, Block Recognizer Characters details how to write letters on your terminal using the Block Recognizer so they are correctly translated into text. • Appendix B, Demo Program provides an overview of the PPT 2800 demo program applications, such as scanning, setup, diagnostic utilities, and file management. • Appendix C, GsmDemo Program describeds how to use the GSM Demo program, which allows you to explore what features GSM and the PPT 2837 terminal offer. • Appendix D, Technical Specifications includes a table listing the technical specifications for the terminal. Notational Conventions This document uses these conventions: • “terminal” or “PPT 2800” refers to any model of PPT 2800. • “User” refers to anyone using an application on the PPT 2800. • “You” refers to the End User, System Administrator or Technical Support person using this manual as a reference to install, configure, operate, maintain and troubleshoot the PPT 2800. • Italics are used to highlight specific items in the general text, and to identify chapters and sections in this and related documents. It also identifies names of screens, menus, menu items, and fields within screens. xii About This Guide • Courier text identifies buttons to be tapped or clicked on screens. • Bullets (•) indicate: • • lists of alternatives or action items. • lists of required steps that are not necessarily sequential. Numbered lists indicate a set of sequential steps, i.e., those that describe step-bystep procedures. Related Documents The following documents provide more information on your PPT 2800 terminal. • PPT 2800 Quick Reference Guide, p/n 72-54893-xx • CRD 2700-1000S Cradle Quick Reference Guide, p/n 70-38707-xx • CRD 2700-4000E 4-Slot Ethernet Cradle Quick Reference Guide, p/n 72-50357-xx • CHX700-4000C 4-Slot Charging Cradle Quick Reference Guide, p/n 72-50367-xx • MDM 3000 Series Modem Module Quick Reference Guide, p/n 72-42908-xx • VCA 3000 Charging Adapter Quick Reference Guide, p/n 72-51938-xx • TRG 3000 Trigger Handle Quick Reference Guide, p/n 72-51422-xx • Symbol Windows CE Software Developer’s Kit (SDK), available at http://devzone.symbol.com. Service Information If you have a problem with the PPT 2800 equipment, contact the Symbol Support Center. If your problem cannot be resolved over the phone, you may need to return your equipment for servicing. If that is necessary, you will be given special directions. Note:Symbol Technologies is not responsible for any damages incurred during shipment if the approved shipping container is not used. Shipping the units improperly can possibly void the warranty. If the original shipping container has not been kept, contact Symbol to have another sent to you. xiii PPT 2800 Series Product Reference Guide for Pocket PC 2002 Symbol Support Center For service information, warranty information or technical assistance contact or call the Symbol Support Center in: United States 1 Symbol Technologies, Inc. One Symbol Plaza Holtsville, New York 11742-1300 1-800-653-5350 Canada Symbol Technologies Canada, Inc. 2540 Matheson Boulevard East Mississauga, Ontario, Canada L4W 4Z2 905-629-7226 United Kingdom Symbol Technologies Symbol Place Winnersh Triangle, Berkshire RG41 5TP United Kingdom 0800 328 2424 (Inside UK) +44 118 945 7529 (Outside UK) Asia/Pacific Symbol Technologies Asia, Inc. 230 Victoria Street #04-05 Bugis Junction Office Tower Singapore 188024 337-6588 (Inside Singapore) +65-337-6588 (Outside Singapore) Australia Symbol Technologies Pty. Ltd. 432 St. Kilda Road Melbourne, Victoria 3004 1-800-672-906 (Inside Australia) +61-3-9866-6044 (Outside Australia) Austria/Österreich Symbol Technologies Austria GmbH Prinz-Eugen Strasse 70 / 2.Haus 1040 Vienna, Austria 01-5055794-0 (Inside Austria) +43-1-5055794-0 (Outside Austria) Denmark/Danmark Symbol Technologies AS Dr. Neergaardsvej 3 2970 Hørsholm 7020-1718 (Inside Denmark) +45-7020-1718 (Outside Denmark) Europe/Mid-East Distributor Operations Contact your local distributor or call +44 118 945 7360 Finland/Suomi Oy Symbol Technologies Kaupintie 8 A 6 FIN-00440 Helsinki, Finland 9 5407 580 (Inside Finland) +358 9 5407 580 (Outside Finland) France Symbol Technologies France Centre d'Affaire d'Antony 3 Rue de la Renaissance 92184 Antony Cedex, France 01-40-96-52-21 (Inside France) +33-1-40-96-52-50 (Outside France) xiv About This Guide Germany/Deutchland Symbol Technologies GmbH Waldstrasse 66 D-63128 Dietzenbach, Germany 6074-49020 (Inside Germany) +49-6074-49020 (Outside Germany) Italy/Italia Symbol Technologies Italia S.R.L. Via Cristoforo Columbo, 49 20090 Trezzano S/N Navigilo Milano, Italy 2-484441 (Inside Italy) +39-02-484441 (Outside Italy) Latin America Sales Support 7900 Glades Road Suite 340 Boca Raton, Florida 33434 USA 1-800-347-0178 (Inside United States) +1-561-483-1275 (Outside United States) Mexico/México Symbol Technologies Mexico Ltd. Torre Picasso Boulevard Manuel Avila Camacho No 88 Lomas de Chapultepec CP 11000 Mexico City, DF, Mexico 5-520-1835 (Inside Mexico) +52-5-520-1835 (Outside Mexico) Netherlands/Nederland Symbol Technologies Kerkplein 2, 7051 CX Postbus 24 7050 AA Varsseveld, Netherlands 315-271700 (Inside Netherlands) +31-315-271700 (Outside Netherlands) Norway/Norge Symbol’s registered and mailing address: Symbol Technologies Norway Hoybratenveien 35 C N-1055 OSLO, Norway Symbol’s repair depot and shipping address: Symbol Technologies Norway Enebakkveien 123 N-0680 OSLO, Norway +47 2232 4375 South Africa Symbol Technologies Africa Inc. Block B2 Rutherford Estate 1 Scott Street Waverly 2090 Johannesburg Republic of South Africa 11-809 5311 (Inside South Africa) +27-11-809 5311 (Outside South Africa) Spain/España Symbol Technologies S.L. C/ Peonias, 2 Edificio Piovera Azul 28042 Madrid, Spain 91 324 40 00 (Inside Spain) +34 91 324 40 00 (Outside Spain) xv PPT 2800 Series Product Reference Guide for Pocket PC 2002 Sweden/Sverige “Letter” address: Symbol Technologies AB Box 1354 S-171 26 SOLNA Sweden Visit/shipping address: Symbol Technologies AB Solna Strandväg 78 S-171 54 SOLNA Sweden Switchboard: 08 445 29 00 (domestic) Call Center: +46 8 445 29 29 (international) Support E-Mail: [email protected] 1 Customer support is available 24 hours a day, 7 days a week. If you purchased your Symbol product from a Symbol Business Partner, contact that Business Partner for service. For the latest version of this guide go to:http://www.symbol.com/manuals. xvi Chapter 1 Getting Started Chapter Contents Introduction . . . . . . . . . . . . . . . . . . . . . . . . . . . . . . . . . . . . . . . . . . . . . . . . . . . . . . . . . . . . . . . . . . 1-3 Unpacking the Terminal . . . . . . . . . . . . . . . . . . . . . . . . . . . . . . . . . . . . . . . . . . . . . . . . . . . . . . . . . 1-3 Parts of the PPT 2800 . . . . . . . . . . . . . . . . . . . . . . . . . . . . . . . . . . . . . . . . . . . . . . . . . . . . . . . . . . 1-4 Accessories . . . . . . . . . . . . . . . . . . . . . . . . . . . . . . . . . . . . . . . . . . . . . . . . . . . . . . . . . . . . . . . . . . 1-6 Installing Batteries . . . . . . . . . . . . . . . . . . . . . . . . . . . . . . . . . . . . . . . . . . . . . . . . . . . . . . . . . . . . . 1-6 Charging the Battery . . . . . . . . . . . . . . . . . . . . . . . . . . . . . . . . . . . . . . . . . . . . . . . . . . . . . . . . . . . 1-8 Using the Cradle to Charge the Battery . . . . . . . . . . . . . . . . . . . . . . . . . . . . . . . . . . . . . . . . . 1-8 Charging Spare Batteries . . . . . . . . . . . . . . . . . . . . . . . . . . . . . . . . . . . . . . . . . . . . . . . . . . . 1-10 Using the Synchronization Cable to Charge the Battery . . . . . . . . . . . . . . . . . . . . . . . . . . . 1-11 Checking Battery Power . . . . . . . . . . . . . . . . . . . . . . . . . . . . . . . . . . . . . . . . . . . . . . . . . . . . . . . 1-12 Attaching the Handstrap . . . . . . . . . . . . . . . . . . . . . . . . . . . . . . . . . . . . . . . . . . . . . . . . . . . . . . . 1-13 Attaching the Wrist Strap . . . . . . . . . . . . . . . . . . . . . . . . . . . . . . . . . . . . . . . . . . . . . . . . . . . 1-13 Starting the PPT 2800 . . . . . . . . . . . . . . . . . . . . . . . . . . . . . . . . . . . . . . . . . . . . . . . . . . . . . . . . . 1-15 Aligning the Screen . . . . . . . . . . . . . . . . . . . . . . . . . . . . . . . . . . . . . . . . . . . . . . . . . . . . . . . 1-15 Setting Time and Date . . . . . . . . . . . . . . . . . . . . . . . . . . . . . . . . . . . . . . . . . . . . . . . . . . . . . 1-17 Setting Up Your Terminal. . . . . . . . . . . . . . . . . . . . . . . . . . . . . . . . . . . . . . . . . . . . . . . . . . . . . . . 1-17 1-1 PPT 2800 Series Product Reference Guide for Pocket PC 2002 1-2 Getting Started Introduction This chapter explains the physical buttons and controls on your PPT 2800 terminal, how to install and charge the batteries, attach the handstrap, and start your PPT 2800 terminal for the first time. Unpacking the Terminal Carefully remove all protective material from around the terminal and save the shipping container for later storage and shipping. Verify that you received all equipment listed on the packing slip and inspect the equipment for damage. If you are missing any equipment or if you find any damaged equipment, contact the Symbol Technologies Support Center immediately. See page xiv for contact information. 1-3 PPT 2800 Series Product Reference Guide for Pocket PC 2002 Parts of the PPT 2800 Front View Scan Trigger WAN Antenna APP5 Button (Start Menu) Scan LED Scroll Button Scroll Button Right Scan Trigger Action Button LCD (monochrome) TFT LCD (color) Power Button Function Button Application Buttons Left View Left Scan Trigger Figure 1-1. Parts of the PPT 2800 1-4 Getting Started Back View Stylus IR Port Stylus Silo Handstrap Connector Speaker Microphone Battery Cover Switch Reset Button Battery Compartment Lithium-Ion Battery Battery Cover Latch Battery Cover Latch Battery Cover Handstrap Connectors Bottom View Serial Port Top View (2D Scanning Terminal) Top View (1D Scanning Terminal) Scan Window Figure 1-2. Parts of the PPT 2800 (continued) 1-5 PPT 2800 Series Product Reference Guide for Pocket PC 2002 Accessories The following accessories are available for the PPT 2800: • Synchronization Charging Cable synchronizes the PPT 2800 with a desktop computer, and can also be used to charge the terminal using an external power supply. • CRD 2700-1000S Single-Slot Charging Cradle and CHX 2700-4000C 4-Slot Charging Cradle can also be used to charge the terminal. • CRD 2700-4000E 4-Slot Ethernet Cradle charges the PPT 2800 and synchronizes the terminal with a desktop computer. • VCD X700-R000 Vehicle Cradle powers the terminal and charges its battery, and can be used to communicate with other devices such as printers. • MDM 3003 Snap-On Modem Module allows dial-up connections of the PPT 2800 terminal to a remote host computer, while maintaining the portability of the terminal. • VCA 3000 Auto Charging Adapter connects to the cigarette lighter in a vehicle to charge the terminal. • TRG 3000 Trigger Handle adds a trigger in scanning gun form to the PPT 2800, increasing comfort when using the terminal in scan-intensive applications for extended periods of time. • MSR 3006 Magstripe Reader Attachment snaps on to the PPT 2800 to add magstripe capabilities. Installing Batteries Before using your PPT 2800, install the lithium-ion battery. The battery fits behind the battery cover on the back of the PPT 2800. To install the battery in your PPT 2800: 1-6 Getting Started 1. Open the latches on the battery cover and lift the battery cover away from the PPT 2800. Latch Latch Figure 1-3. Removing the Battery Cover 2. Insert the lithium-ion battery in the battery compartment with the battery tether positioned properly (as shown below), making sure the battery snaps into place. Tether Figure 1-4. Inserting the Battery 3. Replace the battery cover by inserting the bottom first, then pressing the top in firmly while securing the latches. Note: Be careful to position the battery latches completely open while placing the battery cover on the terminal. Charge the battery in the terminal for approximately 2 1/2 hours before initial use. 1-7 PPT 2800 Series Product Reference Guide for Pocket PC 2002 Charging the Battery Before using your terminal for the first time, charge the battery. Also, when battery voltage is low, a warning message appears indicating the battery needs to be charged. You can charge the battery using either the CRD 2700 cradle or the Synchronization Cable. Your terminal is equipped with a memory backup battery which automatically charges from the fully-charged lithium-ion battery. This backup battery retains data in memory when the terminal’s battery is removed, and takes about 10 hours to charge when you first use your terminal. Note: If you remove your lithium-ion battery before the backup battery is fully charged, data may be lost. For this reason, DO NOT remove the battery within the first ten hours of use. Using the Cradle to Charge the Battery To charge the terminal’s battery using the CRD 2700 cradle: 1. Connect the power supply to the power port on the back of the cradle, and the other end of the power supply to a wall outlet. Power Port Figure 1-5. Connecting the Power Supply 1-8 Getting Started 2. Connect the cradle to your computer by plugging the serial cable into the serial port on the back of the cradle, and the other end of the cable into the serial port on your computer. Serial Port Figure 1-6. Connecting the Cradle to the Host Computer 3. Insert the PPT 2800 terminal in the cradle. Terminal Charge LED Figure 1-7. Inserting the Terminal in the Cradle 4. The Terminal Charge LED turns red to indicate charging, then green when the battery is fully charged. Note: If the cradle is not connected to the host computer via serial cable, the Terminal Charge LED shuts off when the battery is fully charged. The terminal’s battery is fully charged after approximately 2 1/2 hours. 1-9 PPT 2800 Series Product Reference Guide for Pocket PC 2002 Note: If the battery in the terminal is low, the Terminal Charge LED may flicker or turn yellow during an ActiveSync operation. The LED returns to red when the operation is complete. Charging Spare Batteries To charge a spare battery, insert the battery in the spare battery charging slot in the back of the cradle, oriented so the contacts are facing down and towards the back of the cradle. Press the battery down into the slot until firmly seated. The Spare Battery Charge LED turns red to indicate charging, then green when the battery is fully charged. The battery is fully charged after approximately 2 1/2 hours. Spare Battery Charge LED Figure 1-8. Charging the Spare Battery 1-10 Getting Started Using the Synchronization Cable to Charge the Battery To charge the terminal’s battery using the optional Synchronization Cable: 1. Insert the cable into the bottom of the terminal. Synchronization Cable Figure 1-9. Inserting the Cable in the Terminal 2. Plug the power cable into a wall outlet and plug the other end into the battery charging receptacle on the side of the Synchronization Cable. Battery Charging Receptacle Figure 1-10. Connecting the Power Cable 1-11 PPT 2800 Series Product Reference Guide for Pocket PC 2002 Checking Battery Power To check whether the battery in the terminal is charged, tap Start, Settings, System, Power to display the following Battery Status screen. Figure 1-11. Battery Status Screen To save battery power, set your terminal to turn off after a specified number of minutes on battery power. 1-12 Getting Started Attaching the Handstrap The PPT 2800 has an optional handstrap which increases comfort when holding the terminal for extended periods of time. To attach the handstrap to the back of the terminal: 1. Thread the round metal piece through the metal handstrap connector on the back of the terminal. 2. Slide the flat metal piece into the handstrap connection on the bottom of the terminal. Thread round metal piece through this connector Slide flat metal piece up and into this connector Figure 1-12. Attaching the Handstrap 3. Adjust the velcro strap to fit your hand. Attaching the Wrist Strap An optional wrist strap is available which helps prevent damage to the terminal if you drop it. To attach the wrist strap: 1. Thread the elastic band on the wrist strap through the metal handstrap connector on the back of the terminal. 1-13 PPT 2800 Series Product Reference Guide for Pocket PC 2002 2. Slip the strap through the elastic band on the other side of the connector, and pull it through to secure the strap to the connector. Thread elastic band through this connector Figure 1-13. Attaching the Wriststrap 3. Slide your hand through the strap. 1-14 Getting Started Starting the PPT 2800 After installing and charging the battery, start the terminal by pressing the red power button. If the terminal does not power on, reset it. See Performing a Cold Boot on page 2-24. Power Button Figure 1-14. Power Button As the terminal initializes its unique Flash File system, the Symbol splash screen displays for about a minute. When the Welcome screen appears, tap anywhere on the screen to continue to the Align screen. Aligning the Screen To align your PPT 2800 so the cursor on the touch screen aligns with the tip of your stylus: 1. If necessary, adjust the contrast on the PPT 2800 so the screen is clear and readable. See Controlling the Contrast/Backlight on page 2-3 for instructions. 2. Remove the stylus from its storage silo on the back of the PPT 2800. 3. Tap the center of each target that appears on the screen with the tip of the stylus. Tap the target firmly and accurately at each location on the screen. The target will continue to move until the screen is aligned. Figure 1-15. Tapping the Target 1-15 PPT 2800 Series Product Reference Guide for Pocket PC 2002 4. Follow the directions on the screen which lead you through a simple exercise illustrating how to use the stylus and pop-up menus. Figure 1-16. Using Pop-up Menus 5. Use the drop-down menu to set your time zone, and tap Next. Figure 1-17. Setting Time Zone on the PPT 2800 1-16 Getting Started Note: These initial setup screens appear each time you perform a hard reset. Setting Time and Date The Time and Date screen does not appear after setting the time zone. Use the clock control panel applet to set the time and date after a cold boot. Figure 1-18. Setting Time and Date Setting Up Your Terminal Refer to the following chapters for setting up your terminal: • For customizing the settings on your PPT 2800, see Chapter 3, Customizing Your PPT 2800. • To set up ActiveSync to synchronize your terminal with your desktop computer, see Chapter 4, Communications. • To set up connections with a network, ISP, or e-mail server, see Chapter 8, Connections. 1-17 PPT 2800 Series Product Reference Guide for Pocket PC 2002 • To configure your PPT 284X for Spectrum24, see Chapter 9, Spectrum24 Network Configuration. • To configure your PPT 283X for WWAN support, see Chapter 10, Wireless Wide Area Network Configuration. • To install development software on your development PC, see Chapter 11, Software Installation on Development PC. • To configure your terminal using the Terminal Configuration Manager, see Chapter 12, Configuring the Terminal. 1-18 Chapter 2 Operating the PPT 2800 Chapter Contents Introduction . . . . . . . . . . . . . . . . . . . . . . . . . . . . . . . . . . . . . . . . . . . . . . . . . . . . . . . . . . . . . . . . . . 2-3 Using the Power Button . . . . . . . . . . . . . . . . . . . . . . . . . . . . . . . . . . . . . . . . . . . . . . . . . . . . . . . . . 2-3 Controlling the Contrast/Backlight . . . . . . . . . . . . . . . . . . . . . . . . . . . . . . . . . . . . . . . . . . . . . . . . . 2-3 Using the Stylus . . . . . . . . . . . . . . . . . . . . . . . . . . . . . . . . . . . . . . . . . . . . . . . . . . . . . . . . . . . . . . . 2-3 Today Screen . . . . . . . . . . . . . . . . . . . . . . . . . . . . . . . . . . . . . . . . . . . . . . . . . . . . . . . . . . . . . . . . 2-4 Status Icons . . . . . . . . . . . . . . . . . . . . . . . . . . . . . . . . . . . . . . . . . . . . . . . . . . . . . . . . . . . . . . 2-5 Selecting Programs . . . . . . . . . . . . . . . . . . . . . . . . . . . . . . . . . . . . . . . . . . . . . . . . . . . . . . . . . . . . 2-6 PPT 2800 Application Buttons . . . . . . . . . . . . . . . . . . . . . . . . . . . . . . . . . . . . . . . . . . . . . . . . 2-7 Using the Navigation Bar and Command Bar . . . . . . . . . . . . . . . . . . . . . . . . . . . . . . . . . . . . . . . . 2-8 Using Pop-up Menus . . . . . . . . . . . . . . . . . . . . . . . . . . . . . . . . . . . . . . . . . . . . . . . . . . . . . . . . . . . 2-8 Notifications . . . . . . . . . . . . . . . . . . . . . . . . . . . . . . . . . . . . . . . . . . . . . . . . . . . . . . . . . . . . . . . . . . 2-9 Entering Information . . . . . . . . . . . . . . . . . . . . . . . . . . . . . . . . . . . . . . . . . . . . . . . . . . . . . . . . . . 2-10 Entering Information Using the Input Panel . . . . . . . . . . . . . . . . . . . . . . . . . . . . . . . . . . . . . 2-10 Selecting Text . . . . . . . . . . . . . . . . . . . . . . . . . . . . . . . . . . . . . . . . . . . . . . . . . . . . . . . . . . . . 2-13 Writing on the Screen . . . . . . . . . . . . . . . . . . . . . . . . . . . . . . . . . . . . . . . . . . . . . . . . . . . . . . 2-13 Drawing on the Screen . . . . . . . . . . . . . . . . . . . . . . . . . . . . . . . . . . . . . . . . . . . . . . . . . . . . . 2-17 Recording a Message. . . . . . . . . . . . . . . . . . . . . . . . . . . . . . . . . . . . . . . . . . . . . . . . . . . . . . 2-18 Entering Data via the Bar Code Scanner (Scan Wedge) . . . . . . . . . . . . . . . . . . . . . . . . . . . 2-18 Using My Text . . . . . . . . . . . . . . . . . . . . . . . . . . . . . . . . . . . . . . . . . . . . . . . . . . . . . . . . . . . . . . . 2-20 Finding Information . . . . . . . . . . . . . . . . . . . . . . . . . . . . . . . . . . . . . . . . . . . . . . . . . . . . . . . . . . . 2-21 Scanning . . . . . . . . . . . . . . . . . . . . . . . . . . . . . . . . . . . . . . . . . . . . . . . . . . . . . . . . . . . . . . . . . . . 2-22 Scanning PDF417 Bar Codes . . . . . . . . . . . . . . . . . . . . . . . . . . . . . . . . . . . . . . . . . . . . . . . 2-22 Resetting Your PPT 2800 Terminal . . . . . . . . . . . . . . . . . . . . . . . . . . . . . . . . . . . . . . . . . . . . . . . 2-23 Performing a Warm Boot . . . . . . . . . . . . . . . . . . . . . . . . . . . . . . . . . . . . . . . . . . . . . . . . . . . 2-23 Performing a Cold Boot . . . . . . . . . . . . . . . . . . . . . . . . . . . . . . . . . . . . . . . . . . . . . . . . . . . . 2-24 2-1 PPT 2800 Series Product Reference Guide for Pocket PC 2002 2-2 Operating the PPT 2800 Introduction This chapter provides basic instructions for using and navigating your PPT 2800 terminal. Using the Power Button Press the red power button on the lower left-hand side of the terminal to turn the PPT 2800 on and off. Controlling the Contrast/Backlight The Function button allows you to adjust the contrast of the screen and control the backlight. Power Button Function Button Figure 2-1. Power and Function Buttons To adjust the contrast (monochrome LCD) or backlight (color TFT LCD): 1. Press and hold the Function button. 2. Press the “up” scroll button at the top of the terminal to lighten the screen, or the “down” scroll button to darken the screen. To turn the backlight on or off: 1. Press and hold the Function button. 2. Press any Application button. Using the Stylus Your PPT 2800 has a stylus for selecting items and entering information. The stylus functions as a mouse. 2-3 PPT 2800 Series Product Reference Guide for Pocket PC 2002 • Tap: Touch the screen once with the stylus to open items and select options. • Drag: Hold the stylus on the screen and drag across the screen to select text and images. Drag in a list to select multiple items. • Tap-and-hold: Tap and hold the stylus on an item to see a list of actions available for that item. On the pop-up menu that appears, tap the action you want to perform. Today Screen When you turn on your terminal for the first time each day (or after 4 hours of inactivity), the Today screen appears. You can also display it by tapping , then Today. On the Today screen, you can see important information for the day. Figure 2-2. Today Screen 2-4 Operating the PPT 2800 Status Icons You may see the following status icons on the command bar located at the bottom of the screen: Table 2-1. Status Icons Icon Meaning Turns all sounds on and off. Backup battery is low. Main batteries are charging. Main batteries are low. Main batteries are very low. Main batteries are full. Connection is active. Synchronization is beginning or ending. Synchronization is occuring. Notification that one or more instant messages were received. Notification that one or more e-mail messages were received. There are more notification icons than can be displayed. Tap to display remaining icons. 2-5 PPT 2800 Series Product Reference Guide for Pocket PC 2002 Selecting Programs To select a program, tap Start, Programs, then the program name. (To select which programs appear on the Program menu, see Chapter 3, Customizing Your PPT 2800.) Figure 2-3. Start Menu Note: Some programs have abbreviated labels for check boxes and dropdown menus. To see the full label, hold the stylus on the label. Drag the stylus off the label so that the command is not carried out. 2-6 Operating the PPT 2800 PPT 2800 Application Buttons Table 2-2 lists the default programs you can access by pressing an application button on the front of the terminal. The icons on the buttons identify the programs they access. Table 2-2. Program Icons Icon Button Program Description App 1 Calendar Keep track of your appointments and create meeting requests. App 2 Contacts Keep track of your friends and colleagues. App 3 Tasks Keep track of your tasks. App 4 Notes Create handwritten or typed notes, drawings, and recordings. You can assign a different application to each application button. See Assigning Applications to Application Buttons on page 3-6. 2-7 PPT 2800 Series Product Reference Guide for Pocket PC 2002 Using the Navigation Bar and Command Bar The navigation bar at the top of the screen displays the active program and current time, and allows you to select programs and close screens. Use the command bar at the bottom of the screen to perform tasks in programs. The command bar includes menu names, buttons, and the input panel button. To create a new item in the current program, tap New. To see the name of a button, hold the stylus on the button. Drag the stylus off the button so the command is not carried out. Figure 2-4. Screen Navigation Using Pop-up Menus With pop-up menus, you can quickly choose an action for an item. For example, use the pop-up menu in the contact list to delete a contact, make a copy of a contact, or send an email message to a contact. The actions in the pop-up menus vary from program to program. 2-8 Operating the PPT 2800 To access a pop-up menu, hold the stylus on the item you want to perform the action on. When the menu appears, lift the stylus, and tap the action to perform, or tap outside the menu to close it without performing an action. Figure 2-5. Pop-up Menu Notifications Your PPT 2800 notifies you when you have something to do. For example, if you've set up an appointment in Calendar, a task with a due date in Tasks, or an alarm in Clock, you'll be notified in any of the following ways: • a message box appears on the screen • a sound, which you can set, is played • a light flashes on your terminal. To choose reminder types and sounds for your terminal, tap the Start menu, then Settings. In the Personal tab, tap Sounds & Notifications. Select the desired options. 2-9 PPT 2800 Series Product Reference Guide for Pocket PC 2002 Entering Information To enter information, you may: • Use the input panel to enter typed text, either using the soft keyboard or writing characters. • Write directly on the screen. • Draw pictures on the screen. • Speak into the microphone to record a message. • Scan bar code data into data fields. • Use Microsoft® ActiveSync® to synchronize or copy information from your desktop computer to your terminal. For more information on ActiveSync, see Chapter 4, Communications or ActiveSync Help on your desktop computer. Note: Microsoft Transcriber input method is not included on your PPT 2800. You may download Transcriber from Microsoft’s website and install it in the terminal’s RAM. Entering Information Using the Input Panel Use the input panel to enter information in any program. You can either type using the soft keyboard or write using Block Recognizer, or Letter Recognizer. In any case, the characters appear as typed text on the screen. To show or hide the input panel, tap the Input Panel button. Tap the arrow next to this button to view input methods. Select input method settings Select an input method Input Panel Button Tap to see your choice Figure 2-6. Input Panel Button 2-10 Operating the PPT 2800 When you use the input panel, your terminal anticipates the word you are typing or writing and displays it above the input panel. When you tap the displayed word, it is inserted into your text at the insertion point. The more you use your terminal, the more words it learns to anticipate. To change input settings, such as the number of words suggested at one time, tap Options from the Input Panel menu, and tap the tabs to see each setting screen. Figure 2-7. Input Panel Options Using the Soft Keyboard To type with the soft keyboard: 1. Tap the arrow next to the Input Panel button, then Keyboard. 2. On the soft keyboard, tap the keys with your stylus. Figure 2-8. Soft Keyboard 2-11 PPT 2800 Series Product Reference Guide for Pocket PC 2002 Using the Block Recognizer To use Block Recognizer: 1. Tap the arrow next to the Input Panel button, then Block Recognizer. 2. Write a letter in the left side of the box, or a number in the right side, using special character strokes. Figure 2-9. Block Recognizer When you write a letter, it is converted to typed text on the screen. For specific instructions on using Block Recognizer, with Block Recognizer open, tap the question mark next to the writing area, or see Appendix A, Block Recognizer Characters. Using the Letter Recognizer To use Letter Recognizer: 1. Tap the arrow next to the Input Panel button, then Letter Recognizer. 2. Write letters or numbers in the writing area, just as you would on paper. Write capital letters in the left side of the box, numbers in the right side, and lower case letters in the center. Figure 2-10. Letter Recognizer When you write a letter, it is converted to typed text on the screen. For instructions on using Letter Recognizer, with Letter Recognizer open, tap the question mark next to the writing area. 2-12 Operating the PPT 2800 Selecting Text To edit or format typed text, select it by dragging the stylus across the text. Cut, copy, and/ or paste text by holding the selected words then tapping an editing command on the popup menu, or by tapping the command on the Edit menu. Writing on the Screen In any program that accepts writing, such as the Notes program and the Notes tab in Calendar, Contacts, and Tasks, you can use your stylus to write directly on the screen. To write on the screen, tap the Pen button to switch to writing mode. Lines appear on the screen to guide you. Figure 2-11. Writing on the Screen Note: Some programs that accept writing do not have the Pen button. See the documentation for that program to find out how to switch to writing mode. 2-13 PPT 2800 Series Product Reference Guide for Pocket PC 2002 Selecting Writing To select writing to edit or format: 1. Tap and hold the stylus next to the text you want to select until the insertion point appears. 2. Drag the stylus across the text. If you accidentally write on the screen, tap Tools, then Undo and try again. You can also select text by tapping the Pen button to deselect it, then dragging the stylus across the screen. You can cut, copy, and paste written text in the same way you work with typed text: tap and hold the selected words, then tap the command from the pop-up menu, or select the command from the Edit menu. 2-14 Operating the PPT 2800 Converting Writing to Text To convert your writing to text, tap Tools, then Recognize. To convert certain words, select them before tapping Recognize on the Tools menu (or tap and hold the selected words, then tap Recognize on the pop-up menu). If a word is not recognized, it is left as writing. Figure 2-12. Writing on the Screen If the conversion is incorrect, select different words from a list of alternates or return to the original writing. Tap and hold the incorrect word only. On the pop-up menu, tap Alternates. 2-15 PPT 2800 Series Product Reference Guide for Pocket PC 2002 A list of alternate words appears. Tap the word you want to use, or tap the writing at the top of the menu to return to the original writing. Figure 2-13. Alternate List Writing Tips • Write neatly. • Write on the lines and draw descenders below the line. Cross of the "t" and write apostrophes below the top line so they are not confused with the word above. Write periods and commas above the line. • For better recognition, try increasing the zoom level to 300% using the Tools menu. • Leave large gaps between words so your terminal can easily tell where words begin and end. • Hyphenated words, foreign words that use special characters such as accents, and some punctuation cannot be converted. 2-16 Operating the PPT 2800 • If you add writing to a word to change it (such as changing a "3" to an "8") after you attempt to recognize the word, the writing you add is not included if you try to recognize the writing again. Drawing on the Screen Drawing on the screen is similar to writing on the screen. To create a drawing, cross three ruled lines on your first stroke. A drawing box appears. Subsequent strokes in or touching the drawing box become part of the drawing. Drawings that do not cross three ruled lines are treated as writing. Figure 2-14. Drawing on the Screen Note: To change the zoom level, tap Tools, then a zoom level. Selecting a Drawing To select a drawing to edit or format, tap and hold the stylus on the drawing until the selection handle appears. 2-17 PPT 2800 Series Product Reference Guide for Pocket PC 2002 To select multiple drawings, deselect the Pen button, then drag to select the drawings you want. To cut, copy, and paste drawings, tap and hold the selected drawing, then tap an editing command on the pop-up menu, or tap the command on the Edit menu. To resize a drawing, deselect the Pen button and drag a selection handle. Recording a Message You may record a message to capture thoughts, reminders, and phone numbers. In Calendar, Tasks, and Contacts, you can include a recording in the Notes tab. In the Notes program, you can either create a stand-alone recording or include a recording in a written note. To include the recording in a note, open the note first. To create a recording: 1. Hold the terminal’s microphone near your mouth or other source of sound. 2. Tap the Record button. A beep sounds, instructing you to begin recording. 3. While holding down the Record button, make your recording. 4. When you are finished, tap the Stop button. Two beeps sound. The new recording appears in the note list or as an embedded icon. Entering Data via the Bar Code Scanner (Scan Wedge) Using the Scan Wedge program, the integrated bar code scanner on your terminal can scan data into data fields in the same way data is entered via the keyboard. See HTML Scan Demo on page B-5 for more information. 2-18 Operating the PPT 2800 To play a recording, tap it in the list or tap its icon in the note. Figure 2-15. Recording Screen 2-19 PPT 2800 Series Product Reference Guide for Pocket PC 2002 Using My Text When using Inbox or MSN Messenger, use My Text to quickly insert preset or frequently used messages into the text entry area. To insert a message, tap My Text and tap a message. Figure 2-16. Using My Text Note: You can add text after inserting a My Text message before sending it. To edit a My Text message, in the Tools menu, tap Edit, then My Text Messages. Select the message you wish to edit and make the changes. 2-20 Operating the PPT 2800 Finding Information The Find feature locates information. On the Start menu, tap Find. Enter the text you want to find, select a data type, then tap Go. To find information taking up storage space on your terminal, select Larger than 64 KB in Type. You can also use the File Explorer to find files and organize them into folders. On the Start menu, tap Programs, then File Explorer. Figure 2-17. File Explorer Note: To move files in File Explorer, tap and hold the item, then tap Cut or Copy and Paste on the pop-up menu. 2-21 PPT 2800 Series Product Reference Guide for Pocket PC 2002 Scanning The PPT 2800 has an integrated scanner which allows you to collect data by scanning one or two-dimensional bar codes. See Appendix B, Demo Program for a sample scanning application. To scan bar codes with the PPT 2800, first start your scanning application. Then: 1. Aim the scan window at the bar code. 2. Press either the right, left, or center scan trigger. Make sure the red scan beam covers the entire bar code. The green scan LED lights and a beep sounds to indicate a successful decode. Figure 2-18. Scanning Scanning PDF417 Bar Codes The 2D scanning PPT 2800 terminal supports PDF417 bar code scanning. The raster pattern has multiple scanning rows to accommodate the PDF417 symbol’s multiple rows. 1. Point the scanner at the bar code and press the trigger. 2. Center the aiming pattern on the bar code. 3. As the raster pattern spreads, keep the pattern horizontal to the bar code. 3/4” 3/4” Figure 2-19. Raster Pattern 4. The terminal indicates a successful scan by changing the LED from red to green, beeping one or more times, and/or displaying the bar code data on the screen. 2-22 Operating the PPT 2800 “Tall” PDF Bar Codes If the PDF417 symbol is “tall,” the vertical scan pattern may not be high enough to cover it. Move the scan pattern slowly down toward the bottom of the symbol, keeping the beam horizontal to the rows, then slowly back up toward the top. Figure 2-20. Scanning Tall PDF Bar Code The scan beam does not have to be perfectly parallel with the top and bottom of the symbol (up to a 4o tilt will work). Resetting Your PPT 2800 Terminal If your PPT 2800 terminal stops responding to input from buttons or the screen, reset it by performing a warm or cold boot. Performing a Warm Boot A warm boot restarts the terminal and saves all stored records and entries. Caution Files that remain open during a warm boot may not be retained. 2-23 PPT 2800 Series Product Reference Guide for Pocket PC 2002 To perform a warm boot, hold down both the up and down scroll buttons, then press the App 4 button. Up & Down Scroll Buttons App 4 Button Figure 2-21. Warm Boot Buttons Performing a Cold Boot A cold boot also restarts your PPT 2800 terminal, but erases all stored records and entries not saved in the Flash File system. Therefore, never perform a cold boot unless a warm boot does not solve your problem. Caution With a cold boot, the current date and time, formats, preferences, and other settings are restored to their factory default settings, unless they are restored using .reg files located in the Flash File system. Note: You can restore any data previously synchronized with your computer during the next ActiveSync operation. 2-24 Operating the PPT 2800 To perform a cold boot: 1. Remove the battery cover. 2. While holding down the Function button, use the tip of the stylus (or similar object without a sharp tip) to gently press the reset button. Function Button Reset Button Figure 2-22. Cold Boot Buttons 3. Replace the battery cover and press the Power button. 4. As the terminal initializes its unique Flash File system, the Symbol splash screen displays for about a minute. 5. See Aligning the Screen on page 1-15 to perform an initial setup of the terminal. 2-25 PPT 2800 Series Product Reference Guide for Pocket PC 2002 2-26 Chapter 3 Customizing Your PPT 2800 Chapter Contents Introduction . . . . . . . . . . . . . . . . . . . . . . . . . . . . . . . . . . . . . . . . . . . . . . . . . . . . . . . . . . . . . . . . . . 3-3 Adjusting Settings . . . . . . . . . . . . . . . . . . . . . . . . . . . . . . . . . . . . . . . . . . . . . . . . . . . . . . . . . . . . . 3-3 Flash Storage . . . . . . . . . . . . . . . . . . . . . . . . . . . . . . . . . . . . . . . . . . . . . . . . . . . . . . . . . . . . . . . . 3-3 FFS Partitions . . . . . . . . . . . . . . . . . . . . . . . . . . . . . . . . . . . . . . . . . . . . . . . . . . . . . . . . . . . . . 3-3 Working with FFS Partitions . . . . . . . . . . . . . . . . . . . . . . . . . . . . . . . . . . . . . . . . . . . . . . . . . . 3-4 Non-FFS Partitions . . . . . . . . . . . . . . . . . . . . . . . . . . . . . . . . . . . . . . . . . . . . . . . . . . . . . . . . . 3-6 Downloading Partitions to the Terminal . . . . . . . . . . . . . . . . . . . . . . . . . . . . . . . . . . . . . . . . . 3-6 Assigning Applications to Application Buttons . . . . . . . . . . . . . . . . . . . . . . . . . . . . . . . . . . . . . . . . 3-6 Assigning User-Written Applications to Buttons. . . . . . . . . . . . . . . . . . . . . . . . . . . . . . . . . . . . . . . 3-7 Adding Programs . . . . . . . . . . . . . . . . . . . . . . . . . . . . . . . . . . . . . . . . . . . . . . . . . . . . . . . . . . . . . . 3-8 Adding a Program from the Internet . . . . . . . . . . . . . . . . . . . . . . . . . . . . . . . . . . . . . . . . . . . . 3-8 Adding a Program to the Start Menu . . . . . . . . . . . . . . . . . . . . . . . . . . . . . . . . . . . . . . . . . . . 3-9 Removing Programs . . . . . . . . . . . . . . . . . . . . . . . . . . . . . . . . . . . . . . . . . . . . . . . . . . . . . . . . . . 3-10 3-1 PPT 2800 Series Product Reference Guide for Pocket PC 2002 3-2 Customizing Your PPT 2800 Introduction This chapter provides basic instructions for customizing your terminal by adjusting settings and installing additional software. Adjusting Settings To view available options for your terminal settings, tap Start, Settings, then the Personal or System tab at the bottom of the screen. You may want to adjust the following: • Clock: change the time or set alarms • Buttons: assign programs to the application hardware buttons • Menus: customize what appears on the Start menu and enable a pop-up menu from the New button • Owner Information: enter your contact information • Password: limit access to your terminal • Power: maximize battery life • Today: customize the information displayed on the Today screen. Flash Storage Programs pre-installed on your terminal are stored in ROM (read-only memory). You cannot remove, modify, or accidentally lose this software. You may add programs and data files to RAM (random access memory). In addition to the RAM-based storage standard on Pocket PC terminals, the PPT 2800 is also equipped with a non-volatile Flash-based storage area which can store data (partitions) that can not be corrupted by a cold boot. This Flash area is divided into two categories: Flash File System (FFS) Partitions and Non-FFS Partitions. FFS Partitions The PPT 2800 terminal includes three FFS partitions. These partitions appear to the terminal as a hard drive that the OS file system can write files to and read files from. Data is retained even if power is removed. 3-3 PPT 2800 Series Product Reference Guide for Pocket PC 2002 The three FFS Partitions appear as three separate folders in the Windows CE file system and are as follows: • Platform: The Platform FFS Partition contains Symbol-supplied programs and Dynamic Link Libraries (DLLs). This FFS is configured to include DLLs that control system operation. Since these drivers are required for basic terminal operation, only experienced users should modify the content of this partition. • Application: The Application FFS Partition is used to store application programs needed to operate the terminal. This partition includes the Symbol demo program, which can be overwritten with your own program. • Data: The Data FFS Partition is optional and if present contains user data files generated by your custom programs. The default PPT 2800 image does not contain a Data FFS partition. Working with FFS Partitions Because the FFS partitions appear as folders under the Windows CE file system, they can be written to and read like any other folder. For example, an application program can write data to a file located in the Application folder just as it would to the Windows folder. However, the file in the Application folder is in non-volatile storage and is not lost on a cold boot (e.g., when power is removed for a long period of time). Standard tools such as ActiveSync can be used to copy files to and from the FFS partitions. They appear as the “Application,” “Platform,” and “Data” folders to the ActiveSync explorer. This is useful when installing applications on the PPT 2800. Applications stored in the Application folder are retained even when the terminal is cold booted, just as the PPT 2800 Demo program is retained in memory. Windows CE expects certain files to be in the Windows folder, residing in volatile storage. Windows CE maintains the System Registry in volatile storage. There are two device drivers included in the Windows CE image to assist developers in configuring the terminal following a cold boot: Regmerge.dll and CopyFile.dll. RegMerge.dll Regmerge.dll is a built-in driver that allows registry edits to be made to the Windows CE Registry. Regmerge.dll runs very early in the boot process and looks for registry files (.reg files) in certain Flash File System folders during a cold boot. It then merges the registry changes that are in these files into the system registry located in RAM. Since the registry is re-created on every cold boot from the default ROM image, the Regmerge.dll driver is necessary to make registry modifications persistent over cold boots. 3-4 Customizing Your PPT 2800 Regmerge.dll is configured to look in two specific folders for .reg files in the following order: \Platform \Application Regmerge.dll continues to look for .reg files in these folders until all folders are checked. This allows folders later in the list to override folders earlier in the list. This way, it is possible to override Registry changes made by the Platforms partitions folders. Take care when using Regmerge.dll to make Registry changes. The SDK contains examples of .reg files. Note: Regmerge.dll only merges the .reg files on cold boots. The merge process is skipped during a warm boot. Typically, you should not need to make modifications to registry values for drivers loaded before Regmerge.dll. However, sometimes during software development, you may need to modify these values. Since these early loading drivers read these keys before Regmerge.dll gets a chance to change them, you must warm boot the terminal after a cold boot. The warm boot does not re-initialize the registry, and the early loading driver reads the new registry values. Do not use Regmerge.dll to modify built-in driver registry values, or merge the same Registry value to two files in the same folder, as the results are undefined. CopyFile.dll CopyFile.dll copies files from one folder to another on a cold boot. Files can be copied from a non-volatile partition (Application or Platform) to the Windows or other volatile partition during a cold re-boot. During a cold boot CopyFile.dll looks for files with a .CPY extension on the FFS partition. These files are text files containing the source and destination for the desired files to be copied separated by “>”. The following example from the file application.cpy is contained on the default application partition shipped with the PPT 2800. 3-5 PPT 2800 Series Product Reference Guide for Pocket PC 2002 Non-FFS Partitions Non-FFS Partitions include additional software and data pre-loaded on your terminal that can be upgraded. Unlike FFS Partitions, these partitions are not visible when the operating system is running. They also contain system information. Non-FFS Partitions include the following: • Windows CE: the complete Windows CE operating system is stored on Flash devices. If necessary, the entire OS image may be downloaded to the terminal using files provided by Symbol. The current OS partition on the terminal is included as part of the TCM installation package. Any upgrades must be obtained from Symbol. This partition is mandatory for the PPT 2800. • Splash Screen: a bitmap smaller than 16 Kb, displayed as the terminal cold-boots. You may download a customized screen to display (see Chapter 12, Configuring the Terminal). • IPL (Initial Program Loader): This program interfaces with the host computer and allows you to download via serial cable or cradle any or all of the partitions listed above, as well as updated versions of IPL. Use caution downloading updated IPL versions; incorrect downloading of an IPL causes permanent damage to your terminal. IPL is mandatory for the PPT 2800. • Partition Table: Identifies where each partition is loaded in the terminal. Downloading Partitions to the Terminal TCM is used to specify a hex destination file for each partition and download each file to the terminal. This download requires a program loader stored on the terminal. The terminal comes with a program loading utility, Initial Program Loader (IPL), stored in the terminal's write-protected flash. See Chapter 12, Configuring the Terminal for details on using IPL and TCM to download partitions to the PPT 2800. Assigning Applications to Application Buttons The physical application buttons on the front of your terminal access, by default, Calendar, Contacts, Tasks and Notes. To re-assign a different application to a button: 1. Tap Start, then Settings. 3-6 Customizing Your PPT 2800 2. On the Personal tab, tap Buttons. Figure 3-1. Buttons Screen 3. Tap the button on the list that you want to change, then use the Button assignment drop-down menu to select a new application for that button. 4. Tap OK. Assigning User-Written Applications to Buttons Use Regmerge.dll to modify the registry during a cold boot to assign user-written applications to the application buttons. These buttons remain assigned after a cold boot. See the Help file on the SDK for more information. Note: Although located in the Flash File System, we recommend copying user applications to the Windows directory (using CopyFile.dll) and running them from there. See the Help file for more information. 3-7 PPT 2800 Series Product Reference Guide for Pocket PC 2002 Adding Programs Install the appropriate software on your desktop computer before installing it on your terminal. 1. Tap Start, then Settings. On the System tab, tap About. In the Version tab, note the information in Processor. 2. Download the program to your desktop computer (or insert the CD or disk that contains the program into your desktop computer). You may see a single *.xip file, *.exe file, a *.zip file, or a Setup.exe file. 3. Read any installation instructions, Read Me files, or documentation that comes with the program. Many programs provide special installation instructions. 4. Connect your terminal and desktop computer. 5. Double-click the *.exe file. If the file is an installer, the installation wizard begins. Follow the directions on the screen. Once the software is installed on your desktop computer, the installer transfers the software to your terminal. If the file is not an installer, an error message states that the program is valid but is designed for a different type of computer. Move this file to your terminal. If you cannot find installation instructions for the program in the Read Me file or documentation, use ActiveSync Explore to copy the program file to the Program Files folder on your terminal. For more information on copying files using ActiveSync, see ActiveSync Help. When installation is complete, tap Start, Programs, then the program icon to select it. Adding a Program from the Internet 1. Tap Start, then Settings. On the System tab, tap About. In the Version tab, note the information in Processor. 2. Download the program to your terminal from the Internet using Pocket Internet Explorer. You may see a single *.xip, *.exe, *.zip file, or a Setup.exe file. 3. Read any installation instructions, Read Me files, or documentation that comes with the program. Many programs provide special installation instructions. 4. Tap the file, such as a *.xip or *.exe file, to launch the installation wizard. Follow the directions on the screen. 3-8 Customizing Your PPT 2800 Adding a Program to the Start Menu Tap Start, Settings, Menus, the Start Menu tab, then the check box for the program. Figure 3-2. Menus Screen If you do not see the program listed, either use File Explorer to move the program to the Start Menu folder or use ActiveSync on the desktop computer to create a shortcut to the program and place the shortcut in the Start Menu folder. Using File Explorer to Add to the Start Menu 1. Tap Start, Programs, File Explorer, and locate the program (tap the folder list, labeled My Documents by default, then My Device to list all folders on the terminal). 2. Tap and hold the program and tap Cut on the pop-up menu. 3. Open the Start Menu folder in the Windows folder, tap and hold a blank area of the window, and tap Paste on the pop-up menu. The program appears on the Start menu. For more information on using File Explorer, see Finding Information on page 2-21. 3-9 PPT 2800 Series Product Reference Guide for Pocket PC 2002 Note: Avoid placing direct links in the Start Menu to programs located in flash memory (Application or Platform). Copy these programs to the Windows folder first. Using ActiveSync to Add to the Start Menu 1. Use the Explorer in ActiveSync on your desktop computer to explore your terminal’s files and locate the program. 2. Right-click the program, then click Create Shortcut. 3. Move the shortcut to the Start Menu folder in the Windows folder. The shortcut appears on the Start menu. For more information, see ActiveSync Help. Removing Programs To remove a program, tap Start, then Settings. On the System tab, tap Remove Programs. Figure 3-3. Remove Programs Screen If the program does not appear in the list of installed programs, use File Explorer on your terminal to locate the program, tap and hold the program, then tap Delete on the pop-up menu. 3-10 Chapter 4 Communications Chapter Contents Introduction . . . . . . . . . . . . . . . . . . . . . . . . . . . . . . . . . . . . . . . . . . . . . . . . . . . . . . . . . . . . . . . . . . Installing ActiveSync Software. . . . . . . . . . . . . . . . . . . . . . . . . . . . . . . . . . . . . . . . . . . . . . . . . . . . Performing an ActiveSync for the First Time . . . . . . . . . . . . . . . . . . . . . . . . . . . . . . . . . . . . . . . . . Performing ActiveSync using the Synchronization Cable. . . . . . . . . . . . . . . . . . . . . . . . . . . . Performing ActiveSync using the Cradle . . . . . . . . . . . . . . . . . . . . . . . . . . . . . . . . . . . . . . . . Performing Subsequent ActiveSync Operations . . . . . . . . . . . . . . . . . . . . . . . . . . . . . . . . . . . . . . Performing a Remote ActiveSync. . . . . . . . . . . . . . . . . . . . . . . . . . . . . . . . . . . . . . . . . . . . . . 4-3 4-3 4-3 4-5 4-6 4-8 4-8 4-1 PPT 2800 Series Product Reference Guide for Pocket PC 2002 4-2 Communications Introduction The CRD 2700 Cradle serves as an essential data communications device, enabling you to synchronize the information on your PPT 2800 terminal with the information on your desktop computer usign ActiveSync® software. With customized or third party software, it can also be used to synchronize your PPT 2800 terminal with corporate databases and other host computers. Setting up the CRD 2700 cradle involves installing the ActiveSync software to enable synchronization, and connecting your cradle to your computer. Installing ActiveSync Software Using ActiveSync, you can synchronize the information on your PPT 2800 terminal with the information on your desktop computer. Changes you make on your terminal or desktop computer appear in both places after you synchronize. With ActiveSync software you can: • Work with terminal-compatible desktop applications on your desktop computer. ActiveSync replicates data from your PPT 2800 terminal (such as Calendar and Contacts) so you can view, enter and modify any data stored on your PPT 2800 terminal with the desktop application. • Synchronize Microsoft Word and Microsoft Excel files between your terminal and desktop computer. Your files are automatically converted to the correct format. • Back up the data stored on your PPT 2800 terminal. Synchronization is a one-step procedure that ensures your data is always safe and up-to-date. • Copy (rather than synchronize) files between your terminal and desktop computer. • Control when synchronization occurs by selecting a synchronization mode, e.g., you may synchronize continually while the terminal is in the cradle, or only when you select the synchronize command. • Select the types of information to synchronize, and control how much data is synchronized. Performing an ActiveSync for the First Time Before synchronization, install ActiveSync 3.5 on your desktop computer. You may download ActiveSync from the Microsoft Website. ActiveSync components are already installed on your terminal. 4-3 PPT 2800 Series Product Reference Guide for Pocket PC 2002 After installation is complete, the ActiveSync Setup Wizard helps you connect your PPT 2800 to your desktop computer, set up a partnership so you can synchronize information between your terminal and desktop computer, and customize synchronization settings. Your first synchronization occurs automatically when you finish using the wizard (see Performing ActiveSync using the Synchronization Cable on page 4-5 and Performing ActiveSync using the Cradle on page 4-6). During the first synchronization, information stored in Microsoft Outlook (Calendar, Contacts, and Tasks) on your desktop computer is copied to your terminal. You can now disconnect your terminal from your computer. Figure 4-1. ActiveSync See Performing Subsequent ActiveSync Operations on page 4-8 to synchronize again. Note: You must perform your first ActiveSync operation with a local, direct connection. To retain partnerships after a cold boot, capture partnership registry information in a .reg file and save it in the Flash File System. See the Help file for details. 4-4 Communications For more information about using ActiveSync, start ActiveSync on your desktop computer, then see ActiveSync Help. Performing ActiveSync using the Synchronization Cable To perform an ActiveSync operation for the first time using the synchronization cable: 1. After installing the ActiveSync software, restart your desktop computer. 2. Insert the cable into the bottom of the terminal. Synchronization Cable Figure 4-2. Inserting the Cable in the Terminal 3. Connect the other end of the cable to the serial communications port on your desktop computer. Serial Port Figure 4-3. Connecting the Synchronization Cable to the Computer Note: The synchronization cable requires a dedicated port. It cannot share a port with an internal modem or other device. If you are unsure 4-5 PPT 2800 Series Product Reference Guide for Pocket PC 2002 about the location of the serial port on your computer, refer to the user’s manual supplied with the computer. 4. On the desktop computer, enter a name for your PPT 2800 terminal and click the Next button. Follow the instructions on the screen to set up a partnership that allows synchronization of information between the two devices. Items to be synchronized may be customized, and you may select to synchronize continuously as information changes, upon connection, or manually by clicking the Sync button on the toolbar of your desktop computer. Note: Every PPT 2800 terminal should have a unique name. Never try to synchronize more than one PPT 2800 terminal to the same user name. Performing ActiveSync using the Cradle To perform an ActiveSync operation for the first time using the cradle: 1. After installing the ActiveSync software, restart your desktop computer. 2. Connect your CRD 2700 cradle to your computer by plugging the cable from the cradle into the serial communications port on your desktop computer. Serial Port Figure 4-4. Connecting the Cradle to the Computer 4-6 Communications Note: The CRD 2700 cable requires a dedicated port. It cannot share a port with an internal modem or other device. If you are unsure about the location of the serial port on your computer, refer to the user’s manual supplied with the computer. 3. Turn on the PPT 2800 terminal and slide it into the cradle. Figure 4-5. Inserting the Terminal in the Cradle The curved edge on the bottom of the PPT 2800 terminal should align smoothly with the cradle when it is inserted properly. 4. On the desktop computer, enter a name for your PPT 2800 terminal and click the Next button. Follow the instructions on the screen to set up a partnership that allows synchronization of information between the two computers. Items to be synchronized may be customized, and you may select to synchronize continuously as information changes, upon connection, or manually by clicking the Sync button on the toolbar of your desktop computer. Note: Every PPT 2800 terminal should have a unique name. Never try to synchronize more than one PPT 2800 terminal to the same user name. 4-7 PPT 2800 Series Product Reference Guide for Pocket PC 2002 Performing Subsequent ActiveSync Operations After you complete the first ActiveSync operation, you just need to place the terminal in the connected cradle or connect the synchronization cable and synchronization occurs automatically. Performing a Remote ActiveSync You can also sync your PPT 2800 remotely using a modem. See Creating a Modem Connection to a Network on page 8-7 to set up your terminal for a modem ActiveSync. Before leaving your desktop computer, prepare the computer for a remote ActiveSync: 1. Start ActiveSync on your desktop computer. 2. On the File menu, select Connection Settings. 3. Select Allow network (Ethernet) and Remote Access Service (RAS) server connection with this desktop computer. 4. Leave your computer on and logged on. To remotely sync your PPT 2800 terminal with your desktop computer: 1. Insert the terminal in the modem cradle, or attach the snap-on modem. If using the cradle, set the Sync Select switch on the back of the cradle to the Modem position. 2. On the PPT 2800, select Start, ActiveSync. 3. Tap theSync icon. 4-8 Chapter 5 Applications Chapter Contents Introduction . . . . . . . . . . . . . . . . . . . . . . . . . . . . . . . . . . . . . . . . . . . . . . . . . . . . . . . . . . . . . . . . . . 5-3 Calendar . . . . . . . . . . . . . . . . . . . . . . . . . . . . . . . . . . . . . . . . . . . . . . . . . . . . . . . . . . . . . . . . . . . . 5-3 Creating Appointments . . . . . . . . . . . . . . . . . . . . . . . . . . . . . . . . . . . . . . . . . . . . . . . . . . . . . . 5-4 Using the Summary Screen . . . . . . . . . . . . . . . . . . . . . . . . . . . . . . . . . . . . . . . . . . . . . . . . . . 5-5 Creating Meeting Requests . . . . . . . . . . . . . . . . . . . . . . . . . . . . . . . . . . . . . . . . . . . . . . . . . . 5-5 Contacts. . . . . . . . . . . . . . . . . . . . . . . . . . . . . . . . . . . . . . . . . . . . . . . . . . . . . . . . . . . . . . . . . . . . . 5-6 Using the Summary Screen . . . . . . . . . . . . . . . . . . . . . . . . . . . . . . . . . . . . . . . . . . . . . . . . . . 5-8 Tasks . . . . . . . . . . . . . . . . . . . . . . . . . . . . . . . . . . . . . . . . . . . . . . . . . . . . . . . . . . . . . . . . . . . . . . . 5-9 Using the Summary Screen . . . . . . . . . . . . . . . . . . . . . . . . . . . . . . . . . . . . . . . . . . . . . . . . . 5-11 Notes . . . . . . . . . . . . . . . . . . . . . . . . . . . . . . . . . . . . . . . . . . . . . . . . . . . . . . . . . . . . . . . . . . . . . . 5-12 Inbox . . . . . . . . . . . . . . . . . . . . . . . . . . . . . . . . . . . . . . . . . . . . . . . . . . . . . . . . . . . . . . . . . . . . . . 5-14 Synchronizing E-mail Messages. . . . . . . . . . . . . . . . . . . . . . . . . . . . . . . . . . . . . . . . . . . . . . 5-14 Connecting Directly to an E-mail Server. . . . . . . . . . . . . . . . . . . . . . . . . . . . . . . . . . . . . . . . 5-14 Using the Message List . . . . . . . . . . . . . . . . . . . . . . . . . . . . . . . . . . . . . . . . . . . . . . . . . . . . 5-16 Creating E-mail Messages . . . . . . . . . . . . . . . . . . . . . . . . . . . . . . . . . . . . . . . . . . . . . . . . . . 5-18 Managing E-mail Messages and Folders . . . . . . . . . . . . . . . . . . . . . . . . . . . . . . . . . . . . . . . 5-19 5-1 PPT 2800 Series Product Reference Guide for Pocket PC 2002 5-2 Applications Introduction Your PPT 2800 terminal includes Calendar, Contacts, Tasks, Inbox, and Notes applications. You can use these programs individually or together. For example, e-mail addresses stored in Contacts can be used to address e-mail messages in Inbox. Using ActiveSync, you can synchronize information in these applications between your desktop computer and your terminal. Each time you synchronize, ActiveSync compares the changes you made on your terminal and desktop computer and updates both with the latest information. For information on using ActiveSync, see Chapter 4, Communications, and ActiveSync Help on the desktop computer. You can switch to any of these programs by tapping them on the Start menu. Calendar Use Calendar to schedule appointments such as meetings. You can view your appointments in different ways (Agenda, Day, Week, Month, and Year) and easily change views using the View menu. Figure 5-1. Calendar Application 5-3 PPT 2800 Series Product Reference Guide for Pocket PC 2002 Note: You can customize the Calendar display, such as changing the first day of the week, by tapping Options on the Tools menu. Creating Appointments To create an appointment: 1. To select Calendar, press the App1 button or select Calendar from the menu. 2. If you are in Day or Week view, tap the desired date and time for the appointment. 3. Tap New. Figure 5-2. Entering an Appointment 4. Using the input panel, enter the subject and a location. Tap first to select the field. 5. If needed, tap the date and time to change them. 6. Enter other desired information. Hide the input panel to see all available fields. 7. To add notes, tap the Notes tab. You can enter text, draw, or create a recording. For more information on creating notes, see Notes on page 5-12. 8. When finished, tap OK to return to the calendar. 5-4 Applications Note: If you select Remind me in an appointment, your terminal notifies you according to the options set in , Settings, Personal tab, Sounds & Reminders. Using the Summary Screen When you tap an appointment in Calendar, a summary screen displays. Tap Edit to change the appointment. Figure 5-3. Appointment Summary Screen Creating Meeting Requests You can use Calendar to set up meetings with users of Outlook or Pocket Outlook. The meeting notice is created automatically and sent either when you synchronize Inbox or when you connect to your e-mail server. Indicate how you want meeting requests sent by tapping Tools, then Options. If you send and receive e-mail messages through ActiveSync, select ActiveSync. To schedule a meeting: 1. Create an appointment. 5-5 PPT 2800 Series Product Reference Guide for Pocket PC 2002 2. In the appointment details, hide the input panel, then tap Attendees. 3. From the list of e-mail addresses you've entered in Contacts, select the meeting attendees. The meeting notice is created and placed in the Outbox folder. For more information on sending and receiving meeting requests, see Calendar Help and Inbox Help on your terminal. Contacts Contacts maintains a list of associates and friends so you can easily locate information at home or on the road. Using the infrared (IR) port, you can share Contacts information with other terminal users. Figure 5-4. Contact Application Note: To change the way information is listed, tap Tools, then Options. 5-6 Applications To create a contact: 1. Tap New. Figure 5-5. Creating a Contact 2. Using the input panel, enter a name and other contact information. Scroll down to see all fields. 3. To assign the contact to a category, scroll to and tap Categories. Select a category from the list. In the contact list, you can display contacts by category. 4. To add notes, tap the Notes tab. You can enter text, draw, or create a recording. For more information on creating notes, see Notes on page 5-12. 5. When finished, tap OK to return to the contact list. 5-7 PPT 2800 Series Product Reference Guide for Pocket PC 2002 You may find a contact in one of four ways: • In the contact list, enter a contact name in the box under the navigation bar. To show all contacts again, clear text from the box or tap the button to the right of the box. • In the contact list, tap the category list (labeled All Contacts by default) and select the type of contact to display. To show all contacts again, select All Contacts. To view a contact not assigned to a category, select None. • To view the names of companies your contacts work for, in the contact list, tap View > By Company. The number of contacts that work for that company appears to the right of the company name. • Tap Start, Find, enter the contact name, select Contacts for the type, then tap Go. Using the Summary Screen When you tap a contact in the contact list, a summary screen displays. Figure 5-6. Contacts Summary Screen 5-8 Applications Tasks Use Tasks to keep a “to do” list. Figure 5-7. Task Application Note: To change the way information displays in the list, tap Tools, then Options. 5-9 PPT 2800 Series Product Reference Guide for Pocket PC 2002 To create a task: 1. Tap New. Figure 5-8. Creating a Task 2. Using the input panel, enter a description. 3. You can enter a start date and due date or enter other information by first tapping the field. If the input panel is open, hide it to see all available fields. 4. To assign the task to a category, tap Categories and select a category from the list. In the task list, you can display tasks by category. 5. To add notes, tap the Notes tab. You can enter text, draw, or create a recording. For more information on creating notes, see Notes on page 5-12. 6. Tap OK to return to the task list. Note: To create a task with only a subject, tap Entry Bar on the Tools menu. Then tap Tap here to add a new task and enter your task information. 5-10 Applications Using the Summary Screen When you tap a task in the task list, a summary screen displays. To change the task, tap Edit. Figure 5-9. Task Summary Screen 5-11 PPT 2800 Series Product Reference Guide for Pocket PC 2002 Notes Capture thoughts, reminders, ideas, drawings, and phone numbers with Notes. You can create a written note or a recording. You can also include a recording in a note. If a note is open when you create the recording, it is included in the note as an icon. If the note list is displayed, it is created as a stand-alone recording. Figure 5-10. Notes Application 5-12 Applications To create a note: 1. Tap New. 2. Create your note by writing, drawing, typing, and recording. For more information about using the input panel, writing and drawing on the screen, and creating recordings, see Chapter 2, Operating the PPT 2800. Figure 5-11. Creating a Note 5-13 PPT 2800 Series Product Reference Guide for Pocket PC 2002 Inbox Use Inbox to send and receive e-mail messages in the following ways: • Synchronize e-mail messages with Microsoft Exchange or Outlook on your desktop computer. • Send and receive e-mail messages by connecting directly to an e-mail server through an Internet service provider (ISP) or a network. Synchronizing E-mail Messages To synchronize e-mail messages, first enable Inbox synchronization in ActiveSync options. For information on enabling Inbox synchronization, see ActiveSync Help on the desktop computer. During synchronization: • E-mail messages are copied from the Inbox folder of Exchange or Outlook on your desktop computer to the ActiveSync folder on your terminal. By default, you receive messages from the last 3 days only, the first 100 lines of each message, and file attachments of less than 100 KB in size. • E-mail messages in the Outbox folder on your terminal are transferred to Exchange or Outlook, then sent from those programs. • E-mail messages in subfolders must be selected in ActiveSync on your desktop computer to be transferred. Note: You can also synchronize e-mail messages with your desktop computer from a remote location. For more information, see Chapter 8, Connections. Connecting Directly to an E-mail Server You can also send and receive e-mail messages by connecting to an e-mail server using a modem or network card connected to your terminal. You'll need to set up a remote connection to a network or an ISP, and a connection to your e-mail server. For more information, see Chapter 8, Connections. When you connect to the e-mail server, new messages are downloaded to the terminal Inbox folder, messages in the terminal Outbox folder are sent, and messages that were deleted on the e-mail server are removed from the terminal Inbox. 5-14 Applications Messages that you receive directly from an e-mail server are linked to your e-mail server rather than your desktop computer. When you delete a message on your terminal, it's also deleted from the e-mail server the next time you connect. You can work online or offline. When working online, you read and respond to messages while connected to the e-mail server. Messages are sent as soon as you tap Send, which saves space on your terminal. When working offline, once you've downloaded new message headers or partial messages, you can disconnect from the e-mail server, then decide which messages to download completely. The next time you connect, Inbox downloads the complete messages you've marked for retrieval and sends the messages you've created. 5-15 PPT 2800 Series Product Reference Guide for Pocket PC 2002 Using the Message List Messages you receive display in the message list. By default, the most recently received messages are listed first. Figure 5-12. Inbox Application 5-16 Applications When you receive a message, tap it in the list to open it. Unread messages display in bold. Figure 5-13. Viewing a Message When you connect to your e-mail server or synchronize with your desktop computer, Inbox downloads by default only messages from the last 5 days, the first 100 lines of each new message, and file attachments of less than 100 KB in size. The original messages remain on the e-mail server or your desktop computer. You can mark the messages that you want to retrieve completely the next time you synchronize or connect to your e-mail server. In the message list, tap and hold the message you want to retrieve. On the pop-up menu, tap Mark for Download. The icons in the Inbox message list indicates message status. You specify your downloading preferences when you set up the service or select your synchronization options. You can change them at any time: 5-17 PPT 2800 Series Product Reference Guide for Pocket PC 2002 • Change options for Inbox synchronization using ActiveSync options. For more information, see ActiveSync Help. • Change options for direct e-mail server connections in Inbox on your terminal. Tap Tools, then Options. On the Service tab, tap the service you want to change. Tap and hold the service and select Delete to remove it. Creating E-mail Messages To create an e-mail message: 1. Tap New. 2. In the To field, enter an e-mail or SMS address of one or more recipients, separating each with a semicolon, or select a name from the contact list by tapping the Address Book button. All e-mail addresses entered in the e-mail fields in Contacts appear in the Address Book. Figure 5-14. Creating a Message 5-18 Applications 3. Enter your message. To enter preset or frequently used messages, tap My Text and select a message. 4. Tap Send when you're finished. If you’re working offline, the message is transferred to the Outbox folder and sent the next time you synchronize. If you are sending an SMS message and want to know if it was received, tap Edit, Options, and select Request SMS text message delivery notification before sending the message. Managing E-mail Messages and Folders By default, messages are displayed in one of five folders for each service you've created: Inbox, Deleted Items, Drafts, Outbox, and Sent Items. The Deleted Items folder contains messages that have been deleted on the terminal. The behavior of the Deleted and Sent Items folders depends on the options you selected. In the message list, tap Tools, then Options. On the Message tab, select your options. To organize messages into additional folders, tap Tools, then Manage Folders to create new folders. To move a message to another folder, in the message list, tap and hold the message, then tap Move to on the pop-up menu. Folder Behavior with ActiveSync and Direct Connection to Server The behavior of the folders you create depends on whether you are using ActiveSync, SMS, POP3, or IMAP4. • If you use ActiveSync, e-mail messages in the Inbox folder in Outlook are automatically synchronized with your terminal. You can select to synchronize additional folders by designating them for ActiveSync. The folders you create and the messages you move are mirrored on the server. For example, if you move two messages from the Inbox folder to a folder named Family, and you have designated Family for synchronization, the server creates a copy of the Family folder and copies the messages into that folder. You can then read the messages while away from your desktop computer. • If you use SMS, messages are stored in the Inbox folder. • If you use POP3 and you move e-mail messages to a folder you created, the link is broken between the messages on your terminal and their copies on the mail server. The next time you connect, the mail server notes the messages missing from the terminal Inbox and deletes them from the server. This prevents you from having duplicate copies of a message, but it also means that you no longer have access to messages moved to folders created from anywhere except the terminal. • If you use IMAP4, the folders you create and the e-mail messages you move are mirrored on the server. Therefore, messages are available to you anytime you 5-19 PPT 2800 Series Product Reference Guide for Pocket PC 2002 connect to your mail server, whether it is from your terminal or desktop computer. This synchronization of folders occurs whenever you connect to your mail server, create new folders, or rename/delete folders when connected. 5-20 Chapter 6 Companion Programs Chapter Contents Introduction . . . . . . . . . . . . . . . . . . . . . . . . . . . . . . . . . . . . . . . . . . . . . . . . . . . . . . . . . . . . . . . . . . 6-3 Pocket Word . . . . . . . . . . . . . . . . . . . . . . . . . . . . . . . . . . . . . . . . . . . . . . . . . . . . . . . . . . . . . . . . . 6-3 Typing Mode . . . . . . . . . . . . . . . . . . . . . . . . . . . . . . . . . . . . . . . . . . . . . . . . . . . . . . . . . . . . . . 6-5 Writing Mode . . . . . . . . . . . . . . . . . . . . . . . . . . . . . . . . . . . . . . . . . . . . . . . . . . . . . . . . . . . . . 6-6 Drawing Mode . . . . . . . . . . . . . . . . . . . . . . . . . . . . . . . . . . . . . . . . . . . . . . . . . . . . . . . . . . . . 6-7 Recording Mode . . . . . . . . . . . . . . . . . . . . . . . . . . . . . . . . . . . . . . . . . . . . . . . . . . . . . . . . . . . 6-7 Pocket Excel . . . . . . . . . . . . . . . . . . . . . . . . . . . . . . . . . . . . . . . . . . . . . . . . . . . . . . . . . . . . . . . . . 6-8 Tips for Working in Pocket Excel . . . . . . . . . . . . . . . . . . . . . . . . . . . . . . . . . . . . . . . . . . . . . . 6-9 MSN® Messenger . . . . . . . . . . . . . . . . . . . . . . . . . . . . . . . . . . . . . . . . . . . . . . . . . . . . . . . . . . . . 6-10 Setting Up Your Account . . . . . . . . . . . . . . . . . . . . . . . . . . . . . . . . . . . . . . . . . . . . . . . . . . . 6-10 Working with Contacts . . . . . . . . . . . . . . . . . . . . . . . . . . . . . . . . . . . . . . . . . . . . . . . . . . . . . 6-11 Chatting with Contacts . . . . . . . . . . . . . . . . . . . . . . . . . . . . . . . . . . . . . . . . . . . . . . . . . . . . . 6-12 6-1 PPT 2800 Series Product Reference Guide for Pocket PC 2002 6-2 Companion Programs Introduction The PPT 2800 contains the companion programs Microsoft Pocket Word, Microsoft Pocket Excel, Microsoft Money, and MSN® Messenger. To select a companion program, tap Programs on the menu, then the program name. Note: Microsoft Reader is not included in this implementation of Pocket PC 2002. Pocket Word Pocket Word works with Microsoft Word on your desktop computer to give you access to copies of your documents. You can create new documents on your PPT 2800, or copy documents from your desktop computer to your terminal. Synchronize documents between your desktop computer and your PPT 2800 so that you have the most up-to-date information in both locations. To create a new document in Pocket Word, such as a letter, meeting minutes, or a trip report, tap Start, Programs, Pocket Word, then New. A blank document appears. Or, if you've selected a template for new documents in the Options dialog box, that template appears with appropriate formatting applied. You can open only one document at a time; when you open a second document, you'll be asked to save the first. You can save a document in a variety of formats, including Word (.doc), Pocket Word (.psw), Rich Text Format (.rtf), and Plain Text (.txt). 6-3 PPT 2800 Series Product Reference Guide for Pocket PC 2002 Pocket Word contains a list of the files stored on your device. Tap a file in the list to open it. To delete, make copies of, or send a file, tap and hold a file in the list. Then, select the appropriate action on the pop-up menu. Figure 6-1. Using Pocket Word You can enter information in Pocket Word in one of four modes (writing, drawing, typing, and recording) displayed on the View menu. Tap the Show/Hide Toolbar button on the command bar to show or hide each mode’s toolbar. To change the zoom magnification, tap View, then Zoom. Select the percentage. Select a higher percentage to enter text and a lower one to see more of your document. If you're opening a Word document created on a desktop computer, select Wrap to Window on the View menu to see the entire document. 6-4 Companion Programs Typing Mode Use the input panel to enter typed text into a document. See Entering Information on page 2-10 for more information. To format or edit text, select the text using your stylus instead of the mouse to drag across the text. To search a document for the text you want, tap Edit, then Find/Replace. Figure 6-2. Formatting Text 6-5 PPT 2800 Series Product Reference Guide for Pocket PC 2002 Writing Mode In writing mode, use your stylus to write directly on the screen. Ruled lines are displayed as a guide, and the zoom magnification increases to allow you to write more easily. For more information, see Writing on the Screen on page 2-13. Figure 6-3. Writing on the Screen in Pocket Word If you cross three ruled lines in a single stylus stroke, the writing becomes a drawing, and can be edited and manipulated as described in the following section. Written words are converted to graphics (metafiles) when a Pocket Word document is converted to a Word document on your desktop computer. 6-6 Companion Programs Drawing Mode In drawing mode, use your stylus to draw on the screen. Gridlines appear as a guide. When you lift your stylus after the first stroke, a drawing box indicates the boundaries of the drawing. Every subsequent stroke within or touching the drawing box becomes part of the drawing. For more information, see Drawing on the Screen on page 2-17. Figure 6-4. Drawing on the Screen in Pocket Word Recording Mode In recording mode, you may embed a recording into your document. Recordings are saved as .wav files. For more information, see Recording a Message on page 2-18. For more information on using Pocket Word, tap Start, then Help. 6-7 PPT 2800 Series Product Reference Guide for Pocket PC 2002 Pocket Excel Pocket Excel works with Microsoft Excel on your desktop computer to provide easy access to copies of your workbooks. You can create new workbooks on your PPT 2800, or copy workbooks from your desktop computer to your PPT 2800. Synchronize workbooks between your desktop computer and your PPT 2800 so you have up-to-date content in both locations. To create a new workbook in Pocket Excel, such as an expense report or mileage log, tap Start, Programs, Pocket Excel, then New. A blank workbook appears. Or, if you've selected a template for new workbooks in the Options dialog box, that template appears with appropriate text and formatting already provided. You can open only one workbook at a time; when you open a second workbook, you'll be asked to save the first. You can save a workbook in a variety of formats, including Pocket Excel (.pxl) and Excel (.xls). Pocket Excel lists the files stored on your PPT 2800. Tap a file in the list to open it. To delete, make copies of, or send a file, tap and hold a file in the list, then select the appropriate action from the pop-up menu. 6-8 Companion Programs Pocket Excel provides fundamental spreadsheet tools, such as formulas, functions, sorting, and filtering. To display the toolbar, tap View, then Toolbar. Figure 6-5. Using Pocket Excel If your workbook contains sensitive information, you can protect it with a password. Open the workbook, tap Edit, then Password. Every time you open the workbook, you must enter the password, so choose one easy for you to remember but hard for others to guess. Tips for Working in Pocket Excel When working in large worksheets in Pocket Excel: • View in full-screen mode to see as much of your worksheet as possible. Tap View, then Full Screen. To exit full-screen mode, tap Restore. • Show and hide window elements. Tap View, then the elements you want to show or hide. 6-9 PPT 2800 Series Product Reference Guide for Pocket PC 2002 • Freeze panes on a worksheet. First select the cell where you want to freeze panes. Tap View, then Freeze Panes. You may want to freeze the top and leftmost panes in a worksheet to keep row and column labels visible as you scroll through a sheet. • Split panes to view different areas of a large worksheet. Tap View, then Split. Drag the split bar to where you want it. To remove the split, tap View, then Remove Split. • Show and hide rows and columns. To hide a row or column, select a cell in that row or column. Tap Format, then Row or Column, then Hide. To show a hidden row or column, tap Tools, then Go To, then type a reference that is in the hidden row or column. Tap Format, then Row or Column, then Unhide. For more information on using Pocket Excel, tap Start, then Help. MSN® Messenger With the MSN Messenger instant messaging program on your PPT 2800 you can: • see who is online • send and receive instant messages • have instant message conversations with groups of contacts. To use MSN Messenger, you need a Microsoft Passport™ account or a Microsoft Exchange e-mail account. You need a Passport to use MSN Messenger Service. If you have a Hotmail® or MSN account, you already have a Passport. Once you have either a Microsoft Passport or a Microsoft Exchange account, you can set up your account. To switch to MSN Messenger, tap Start, Programs, then tap MSN Messenger. Setting Up Your Account Before you can connect, set up the Passport or Exchange account and sign in: 1. In the Tools menu, tap Options. 2. In the Accounts tab, enter your Passport or Exchange account information. 3. Tap the sign-in screen and enter your e-mail address and password. If you use MSN Messenger on your desktop computer, your contacts automatically appear on your terminal. 6-10 Companion Programs Working with Contacts The MSN Messenger window is divided into Online and Not Online categories. From this view, while connected, you can chat, send e-mail, block the contact from chatting with you, or delete contacts from your list using the pop-up menu. Figure 6-6. MSN Messenger Contacts Note: To see others online without being seen, in the Tools menu, tap My Status and select Appear Offline. You appear offline but remain on the blocked contact's list. To unblock a contact, tap and hold the contact, then tap Unblock on the pop-up menu. 6-11 PPT 2800 Series Product Reference Guide for Pocket PC 2002 Chatting with Contacts Tap a contact name to open a chat window. Enter your message in the text entry area at the bottom of the screen, or tap My Text to enter a preset message, and tap Send. To invite another contact to a multi-user chat, in the Tools menu, tap Invite and tap the contact you want to invite. Figure 6-7. Sending a Message To switch back to the main window without closing a chat, tap the Contacts button. To revert back to your chat window, tap Chats and select the person you were chatting with. 6-12 Companion Programs To know if the contact you are chatting with is responding, look for the message under the text entry area. Figure 6-8. Receiving a Message For more information on using MSN Messenger, tap Start, then Help. 6-13 PPT 2800 Series Product Reference Guide for Pocket PC 2002 6-14 Chapter 7 Pocket Internet Explorer Chapter Contents Introduction . . . . . . . . . . . . . . . . . . . . . . . . . . . . . . . . . . . . . . . . . . . . . . . . . . . . . . . . . . . . . . . . . . Mobile Favorites. . . . . . . . . . . . . . . . . . . . . . . . . . . . . . . . . . . . . . . . . . . . . . . . . . . . . . . . . . . . . . . Favorite Links . . . . . . . . . . . . . . . . . . . . . . . . . . . . . . . . . . . . . . . . . . . . . . . . . . . . . . . . . . . . . Creating Mobile Favorites. . . . . . . . . . . . . . . . . . . . . . . . . . . . . . . . . . . . . . . . . . . . . . . . . . . . Saving Memory on your Terminal. . . . . . . . . . . . . . . . . . . . . . . . . . . . . . . . . . . . . . . . . . . . . . Using AvantGo Channels. . . . . . . . . . . . . . . . . . . . . . . . . . . . . . . . . . . . . . . . . . . . . . . . . . . . . . . . Using Pocket Internet Explorer . . . . . . . . . . . . . . . . . . . . . . . . . . . . . . . . . . . . . . . . . . . . . . . . . . . Browsing the Web . . . . . . . . . . . . . . . . . . . . . . . . . . . . . . . . . . . . . . . . . . . . . . . . . . . . . . . . . 7-3 7-3 7-3 7-3 7-4 7-5 7-6 7-8 7-1 PPT 2800 Series Product Reference Guide for Pocket PC 2002 7-2 Pocket Internet Explorer Introduction With Microsoft Pocket Internet Explorer, you can view Web or WAP pages in the following ways: • During synchronization with your desktop computer, download your favorite links and mobile favorites stored in the Mobile Favorites subfolder in Internet Explorer on the desktop computer. • Connect to an Internet service provider (ISP) or network and browse the Web. First create the connection (see Chapter 8, Connections). To select Pocket Internet Explorer, tap , then Internet Explorer. Mobile Favorites Items stored in the Mobile Favorites subfolder in the Favorites folder in Internet Explorer on your desktop computer are synchronized with your terminal. This folder was created automatically when you installed ActiveSync. Favorite Links Synchronization updates the list of favorite links both in the Mobile Favorites folder on your desktop computer and in Pocket Internet Explorer on your terminal. Unless you mark the favorite link as a mobile favorite, only the link is downloaded to your terminal; you must connect to your ISP or network to view the content. For more information on synchronization, see ActiveSync Help on the desktop computer. Creating Mobile Favorites If you are using Microsoft Internet Explorer 5 or later on your desktop computer, you can download mobile favorites. Synchronizing mobile favorites downloads Web content to your terminal so you can view Web pages while disconnected from your ISP and desktop computer. Use the Internet Explorer plug-in installed with ActiveSync to create mobile favorites: 1. In Internet Explorer on your desktop computer, click Tools, then Create Mobile Favorite. 2. To change the link name, enter a new name in the Name box. 3. If desired, select a desired update schedule in Update. 7-3 PPT 2800 Series Product Reference Guide for Pocket PC 2002 4. Click OK. Internet Explorer downloads the latest version of the Web page to your desktop computer. 5. To download the pages linked to the mobile favorite you just created, in Internet Explorer on the desktop computer, right-click the mobile favorite, then click Properties. On the Download tab, specify the number of links deep you want to download. To conserve terminal memory, only go one level deep. 6. Synchronize your terminal and desktop computer. Mobile favorites stored in the Mobile Favorites folder in Internet Explorer are downloaded to your terminal. If you did not specify an update schedule in step 3, you must manually download content to keep the information updated on your desktop computer and terminal. Before synchronizing, in Internet Explorer on your desktop computer, click Tools, then Synchronize. Note the last time content was downloaded to the desktop computer; if necessary, manually download content. You can add a button to the Internet Explorer toolbar for creating mobile favorites. In Internet Explorer on your desktop computer, click View, Toolbars, then Customize. Saving Memory on your Terminal Mobile favorites take up storage memory on your terminal. To minimize the amount of memory used: • In the settings for the Favorites information type in ActiveSync options, turn off pictures and sounds or stop some mobile favorites from downloading. For more information, see ActiveSync Help. • Limit the number of downloaded linked pages. In Internet Explorer on the desktop computer, right-click the mobile favorite you want to change, then select Properties. On the Download tab, specify 0 or 1 for the number of linked pages to download. 7-4 Pocket Internet Explorer Using AvantGo Channels AvantGo is a free interactive service that gives you access to personalized content and thousands of popular Web sites. Subscribe to AvantGo channels directly from your terminal, then synchronize with your desktop computer, or connect to the Internet to download the content. For more information, visit the AvantGo Web site. To sign up for AvantGo: 1. In ActiveSync options on the desktop computer, turn on synchronization for the AvantGo information type. 2. In Pocket Internet Explorer on your terminal, tap the Favorites button to display your list of favorites. 3. Tap the AvantGo Channels link. 4. Tap the Activate button. 5. Follow the directions on the screen. You must synchronize your terminal with your desktop computer, then tap the My Channels button to complete setup. When synchronization is complete, tap the AvantGo Channels link in your list of favorites to see a few of the most popular channels. To add or remove channels, tap the Add or Remove link. 7-5 PPT 2800 Series Product Reference Guide for Pocket PC 2002 Using Pocket Internet Explorer With Pocket Internet Explorer, you can browse mobile favorites and channels downloaded to your terminal without connecting to the Internet. You can also connect to the Internet through an ISP or a network connection and browse the Web. Hide Pictures Button Favorites Button Home Button Refresh Button Figure 7-1. Pocket Internet Explorer 7-6 Pocket Internet Explorer To view mobile favorites and channels, tap the Favorites button to display your list of favorites, then tap the page you want to view. Figure 7-2. Mobile Favorites You'll see the page that was downloaded the last time you synchronized with your desktop computer. If the page is not on your terminal, the favorite is dimmed. Synchronize with your desktop computer again to download the page to your terminal, or connect to the Internet to view the page. 7-7 PPT 2800 Series Product Reference Guide for Pocket PC 2002 Browsing the Web 1. Connect to your ISP or network using Connections; see Chapter 8, Connections. 2. Once connected, go to a specific Web page in one of the following ways: • Tap the Favorites button, then tap the favorite you want to view. • Tap View, then Address Bar. In the address bar at the top of the screen, enter the Web address and tap Go. Tap the arrow to choose from previously entered addresses. 3. To end the connection, tap Tools, then Disconnect. Note: If you select Pocket Internet Explorer before setting up the network connections, a screen may appear allowing you to proceed to the connection settings screen. After you select your settings, you return to Pocket Internet Explorer. To add a favorite link while using the terminal, go to the Web page you want to add, tap and hold on the page, and tap Add to Favorites. 7-8 Chapter 8 Connections Chapter Contents Introduction . . . . . . . . . . . . . . . . . . . . . . . . . . . . . . . . . . . . . . . . . . . . . . . . . . . . . . . . . . . . . . . . . . Transferring Items Using Infrared . . . . . . . . . . . . . . . . . . . . . . . . . . . . . . . . . . . . . . . . . . . . . . . . . Connecting to an ISP . . . . . . . . . . . . . . . . . . . . . . . . . . . . . . . . . . . . . . . . . . . . . . . . . . . . . . . . . . . Connecting to Your Network . . . . . . . . . . . . . . . . . . . . . . . . . . . . . . . . . . . . . . . . . . . . . . . . . . . . . Creating a Modem Connection to a Network . . . . . . . . . . . . . . . . . . . . . . . . . . . . . . . . . . . . . Disconnecting . . . . . . . . . . . . . . . . . . . . . . . . . . . . . . . . . . . . . . . . . . . . . . . . . . . . . . . . . . . . . . . . Connecting Directly to an E-mail Server . . . . . . . . . . . . . . . . . . . . . . . . . . . . . . . . . . . . . . . . . . . . Setting Up an E-mail Service . . . . . . . . . . . . . . . . . . . . . . . . . . . . . . . . . . . . . . . . . . . . . . . . . Getting Help Connecting . . . . . . . . . . . . . . . . . . . . . . . . . . . . . . . . . . . . . . . . . . . . . . . . . . . . . . . . 8-3 8-4 8-4 8-7 8-7 8-9 8-9 8-9 8-9 8-1 PPT 2800 Series Product Reference Guide for Pocket PC 2002 8-2 Connections Introduction Your terminal can exchange information with other Windows-powered devices via the cradle or cable, or through the following connection options: • Use the infrared (IR) port to send and receive files between two terminals. SeeTransferring Items Using Infrared on page 8-4. • Connect to your Internet service provider (ISP) to send and receive e-mail messages using Inbox and view Web or WAP pages using Pocket Internet Explorer. See Connecting to an ISP on page 8-4. The communication software for creating an ISP connection is already installed on your terminal. Your service provider provides software needed to install other services, such as paging and fax services. • Connect to a network to send and receive e-mail messages using Inbox, view Web or WAP pages using Pocket Internet Explorer, and synchronize with your desktop computer. See Connecting to Your Network on page 8-7. • Wirelessly via Spectrum24 LAN. See Chapter 9, Spectrum24 Network Configuration. • Connect to your desktop computer to synchronize remotely. See ActiveSync Help on your desktop computer or Connections Help on your terminal. 8-3 PPT 2800 Series Product Reference Guide for Pocket PC 2002 Transferring Items Using Infrared Using infrared (IR), you can send and receive information, such as contacts and appointments, between two Windows-powered devices. To send information: 1. Open the program where you created the item you want to send and locate the item in the list. 2. Align the IR ports so that they are unobstructed and within close range. 3. Tap and hold the item, and tap Beam [item] on the pop-up menu. Note: You can also send items, but not folders, from File Explorer. Tap and hold the item, then tap Beam File on the pop-up menu. To receive information, align the IR ports so that they are unobstructed and within close range. When information is sent from the other device, your terminal receives it automatically. Note: In order for IR receive to work automatically, you must first check the Receive all incoming beams and select discoverable mode checkbox in Start/Settings/Connections/Beam. If this box is not checked, select Start Programs Infrared Receive before receiving data from another device. Connecting to an ISP You may use a modem to connect to your Internet Service Provider (ISP). Once connected, you can send and receive e-mail messages and view Web or WAP pages. To create a modem connection to an ISP, use the modem cradle or snap-on modem. See the Quick Reference Guide for each device for connection information. 1. Get the ISP dial-up access telephone number, user name, password, and TCP/IP settings from your ISP. Some ISPs require information in front of the user name, such as MSN/username. 8-4 Connections 2. Tap Start, then Settings. On the Connections tab, tap Connections. Select Internet Settings from the drop-down menu and tap Modify. Figure 8-1. Creating a Modem Connection to an ISP 3. In the Modem tab, tap New. 4. Enter a name for the connection. 5. In the Select a modem list, select Hayes Compatible on COM7. 6. In Baud Rate select 57600. 7. You should not need to change any settings in Advanced. Most ISPs now use a server-assigned address. If the ISP you are connecting to does not use a serverassigned address, tap Advanced, then review the TCP/IP and Name Servers tabs and enter the addresses per their instructions. When finished, tap OK. 8. On the Make New Connection screen, tap Next. 9. Enter the access phone number and tap Next. 10. Select other desired options, and tap Finish to return to the Internet Settings Modem tab. 11. Tap OK to return to the Connections screen above. 8-5 PPT 2800 Series Product Reference Guide for Pocket PC 2002 12. On the Dialing Locations tab, specify your current location and phone settings (most phone lines are tone). These settings apply to all connections you create. Figure 8-2. Dialing Locations Tab 13. Tap Dialing Patterns... and enter the dial patterns appropriate for your phone system. For example, if you dial 9 before calling a local number, the pattern is: 9,G 14. Tap OK until you exit Connection Settings. To start the connection, use one of the following programs and the terminal will connect automatically: • Send and receive e-mail messages using Inbox. You first must provide the information it needs to communicate with the e-mail server. For instructions, see Connecting Directly to an E-mail Server on page 8-9. • Visit Web and WAP pages using Pocket Internet Explorer. For more information, see Chapter 7, Pocket Internet Explorer. 8-6 Connections Connecting to Your Network If you have access to a network, you can send e-mail messages, view intranet pages, synchronize your terminal, and possibly access the Internet. You can connect to your network in one of the following ways: • Create a modem connection using an RAS account. Your network administrator must first set up an RAS account for you. • Wirelessly via Spectrum24 LAN. See Chapter 9, Spectrum24 Network Configuration. Creating a Modem Connection to a Network To create a modem connection, use the modem cradle or snap-on modem. See the Quick Reference Guide for each device for connection information. 1. Obtain the dial-up access telephone number, user name, password, domain name, and TCP/IP settings from your network administrator. 2. Tap Start, then Settings. On the Connections tab, tap Connections. In the center drop-down menu, select Work Settings and tap Modify. Figure 8-3. Creating a Modem Connection to a Network 8-7 PPT 2800 Series Product Reference Guide for Pocket PC 2002 3. In the Modem tab, tap New. 4. Enter a name for the connection. 5. In the Select a modem list, select Hayes Compatible on COM7. 6. In Baud Rate select 57600. 7. You should not need to change any settings in Advanced. Most ISPs now use a server-assigned address. If the ISP you are connecting to does not use a serverassigned address, tap Advanced, then review the TCP/IP and Name Servers tabs and enter the addresses per their instructions. When finished, tap OK. 8. On the Make New Connection screen, tap Next. 9. Enter the access phone number and tap Next. 10. Select other desired options, and tap Finish to return to the Internet Settings Modem tab. 11. Tap OK to return to the Connections screen above. 12. In the bottom drop-down menu (My network card connects to:), select The Internet. 13. On the Dialing Locations tab, specify your current location and phone settings (most phone lines are tone). These settings apply to all connections you create. Figure 8-4. Dialing Locations Tab 8-8 Connections 14. Tap Dialing Patterns... and enter the dial patterns appropriate for your phone system. For example, if you dial 9 before calling a local number, the pattern is: 9,G 15. Tap OK until you exit Connection Settings. To start the connection, use one of the following programs and the terminal will connect automatically: • Send and receive e-mail messages using Inbox. Before you can use Inbox, provide the information it needs to communicate with the e-mail server. See Connecting Directly to an E-mail Server. • Synchronize. For more information, see ActiveSync Help on the desktop computer. Disconnecting Choose one of the following ways to disconnect: • When connected via dial-up or VPN, tap the Connection icon on your navigation bar, then tap End. • When connected via cable or serial cradle, detach your terminal from the cable or cradle. • When connected via Infrared, move the terminal away from the desktop computer. Connecting Directly to an E-mail Server You can set up a connection to an e-mail server to send and receive e-mail messages using a modem or network connection and Inbox on your terminal. Note: The ISP or network must use a POP3 e-mail server and an SMTP gateway. You can use multiple e-mail services to receive your messages. For each e-mail service you intend to use, first set up and name the e-mail service. If you use the same service to connect to different mailboxes, set up and name each mailbox connection. Setting Up an E-mail Service In Inbox on your terminal, tap Services, then New Service. Follow the instructions in the New Service wizard on the screen. For an explanation of a screen, tap Start, then Help. 8-9 PPT 2800 Series Product Reference Guide for Pocket PC 2002 When finished, tap Services, then Connect to connect to your e-mail server. For more information on using the Inbox program, see Inbox on page 5-14. Getting Help Connecting See the following for more connection information: • Inbox on page 5-14 • Online Help on the terminal. Tap Start, then Help. Tap View, All Installed Help, then Inbox or Connections. • ActiveSync Help on the desktop computer. In ActiveSync, click Microsoft ActiveSync Help on the Help menu. • Maintenance and Troubleshooting on page 13-1. 8-10 Chapter 9 Spectrum24 Network Configuration Chapter Contents Introduction . . . . . . . . . . . . . . . . . . . . . . . . . . . . . . . . . . . . . . . . . . . . . . . . . . . . . . . . . . . . . . . . . . 9-3 Configuring the PPT 2842 (2 MB Radio) . . . . . . . . . . . . . . . . . . . . . . . . . . . . . . . . . . . . . . . . . . . . 9-4 Network Adapters Properties . . . . . . . . . . . . . . . . . . . . . . . . . . . . . . . . . . . . . . . . . . . . . . . . . 9-4 Using PPT 2842 Spectrum24 Settings . . . . . . . . . . . . . . . . . . . . . . . . . . . . . . . . . . . . . . . . . . 9-6 Using NICTT with the PPT 2842. . . . . . . . . . . . . . . . . . . . . . . . . . . . . . . . . . . . . . . . . . . . . . 9-13 Configuring the PPT 2846 (11 MB Radio) . . . . . . . . . . . . . . . . . . . . . . . . . . . . . . . . . . . . . . . . . . 9-19 Network Adapters Properties . . . . . . . . . . . . . . . . . . . . . . . . . . . . . . . . . . . . . . . . . . . . . . . . 9-19 Using NICTT with the PPT 2846. . . . . . . . . . . . . . . . . . . . . . . . . . . . . . . . . . . . . . . . . . . . . . 9-21 9-1 PPT 2800 Series Product Reference Guide for Pocket PC 2002 9-2 Spectrum24 Network Configuration Introduction Wireless LANs allow PPT 2800 series terminals to communicate wirelessly, and to send captured data “real time” to a host device. Before a terminal can be used on a Spectrum24 LAN your facility must be set up with the equipment required to run the wireless LAN and the terminal must be properly configured. Refer to the documentation which came with your access points for instructions on setting up the required hardware. The PPT 284x terminal Spectrum24 settings and NICTT settings configure and monitor the Spectrum24 connection. 9-3 PPT 2800 Series Product Reference Guide for Pocket PC 2002 Configuring the PPT 2842 (2 MB Radio) Before the PPT 2842 can be used, it must be properly configured for the Spectrum24 Wireless LAN. 1. Select Settings from the Start menu. 2. Select Network Adapters from the Connections tab. 3. Select Spectrum24 WLAN Driver. Figure 9-1. Network Adapters Network Adapters Properties Tap Properties to view the current adapter IP configuration settings. DHCP (Dynamic Host Configuration Protocol) obtains a leased IP address and network configuration information from a remote server. An access point sends out a DHCP request searching for a DHCP server to acquire the network configuration and firmware filenames. 9-4 Spectrum24 Network Configuration Use the property screens to view and adjust the IP address, subnet, gateway, DNS, and WINS. Figure 9-2. IP Network Adapter Property Screens • IP Address: A 32-bit (max) value expressed as four decimal numbers from 0 to 255, separated by periods (e.g., 157.235.90.24) that the terminal uses to transmit and receive data. The IP address of the adapter is required to be in the same subnet as that of the access point for the devices to interoperate in Infrastructure mode. • Subnet Mask: A 32-bit value expressed as four decimal numbers from 0 to 255, separated by periods (e.g., 255.255.0.0) which allows TCP/IP to determine the network ID portion of an IP address. Required in order for the subnet to exist. Its purpose is to mask out IP addresses that are not part of the subnet. The network administrator usually has the required subnet mask. • Gateway: Used to connect to the corporate network. The network administrator usually has the IP address required for the default gateway. • DNS (Domain Name System): The IP address of a server containing a database of host names and their associated IP addresses so that when a host name is used, it can be resolved into its IP address. • WINS (Windows Internet Name Service): A NetBIOS Name Server that registers your NetBIOS names and resolves into IP addresses, similar to DNS. 9-5 PPT 2800 Series Product Reference Guide for Pocket PC 2002 Using PPT 2842 Spectrum24 Settings On the Start menu, select Settings, the System tab, then Spectrum24 FH Settings. Figure 9-3. Spectrum24 Setup The ESS ID identifies the radio network and is used to differentiate between different radio networks. All PPT 2842 terminals on the same network must be set up with the same ESS ID Code. The ESS ID on the terminal is the same as that of the access points in your facility. Enter an ESSID (802.11 Extended Service Set Identifier) matching the access point ESSID to enable the terminal to communicate with the access point. This value is a unique 32character (maximum) string that identifies the wireless local area network. If the ESSID is unknown, ask the IS department for assistance. Advanced Settings Only system administrators should modify the advanced settings. Select the Advanced button to view and edit the advanced property screens and create a password for these screens. The advanced property screens control all aspects of the terminal, including Mobile Unit, Encryption, and WLAN Adapter settings. 9-6 Spectrum24 Network Configuration Mobile Unit Properties Figure 9-4. Mobile Unit Property Screen The Mobile Unit tab in Advanced Properties configures the adapter's ESSID, Preferred and Mandatory BSSIDs, and Power Management. • Enter a 32-character (maximum) case-sensitive ESS ID (802.11 Extended Service Set Identifier) in the ESSID field to identify the wireless local area network. This identifier must match the ESSID in the 802.11 access point(s) on your network in order for your WLAN adapter to communicate with the access point(s). If you don't know your ESSID, ask your IS department personnel for assistance. • The Preferred BSS ID is the IEEE MAC address of the access point (AP) where the adapter prefers to associate. The adapter gives higher priority to this AP when communicating on the network. • The Mandatory BSS ID address is the IEEE MAC address of the access point (AP) where the adapter must associate. The adapter only associates to this access point when communicating on the network. 9-7 PPT 2800 Series Product Reference Guide for Pocket PC 2002 • In the Power Management section of the screen, select one of the two power modes, Continuous Access Mode (CAM) and Power Save Poll (PSP) mode. CAM yields the best performance but uses the most power, and is the preferred mode for systems running on AC power. PSP saves significant amounts of power over CAM, so is preferred for systems running on battery power. • If you select PSP mode, also select a Beacon Algorithms to allow more control over the PSP process. Beacon Algorithms 1 through 10 control the number of ticks the adapter sleeps before waking up to check for data. Each tick is 1/10th of a second. For example, PSP Beacon Algorithm 1 wakes the adapter every 1/10th of a second to look for data. This is the fastest PSP mode of operation. PSP Beacon Algorithm 10 sleeps 10/10ths of a second (or 1 second) before waking up to look for data. Beacon Algorithm 11 automatically varies the PSP algorithm between the minimum and maximum values, depending on the amount of data being sent or received by the adapter. To control these values, set the Beacon Minimum and Beacon Maximum values. Micro AP Properties MicroAP properties are not supported by the PPT 2842. 9-8 Spectrum24 Network Configuration Encryption Properties Use the Encryption tab in Advanced Properties to control encryption options. Figure 9-5. Encryption Properties Screen The Encryption tab allows you to encrypt WLAN data packets to protect your data from inspection by systems that may intercept wireless data over the network. • In the Mobile Unit Authentication Options section, select either the Open System or the Shared Key algorithm from the drop-down menu: • If you select Open System, the terminal can associate with APs that have Open System or Open System and Shared Key enabled. The data packets transmitted by terminals or APs over the WLAN are not encrypted. • If you select Shared Key, the terminal can associate and communicate with access points that use the Shared Key or Open System and Shared Key algorithms. Shared Key uses a 40-bit encryption key known by both the terminal and the AP to encrypt the data over the network. The terminal must provide this shared key in order to associate with the AP. 9-9 PPT 2800 Series Product Reference Guide for Pocket PC 2002 • Shared Encryption Keys are the 40-bit values used by the terminal and the AP to encrypt the wireless data packets. To change the default values, enter 10 hexadecimal digits for each of the four keys. Click on the key to use, or press the Reset Keys button to reset the keys back to the default values. The Shared Encryption Key must match that of the access point in order for the terminal to associate. 9-10 Spectrum24 Network Configuration WLAN Adapter Properties Select the WLAN Adapter tab to configure hardware and radio settings and set an optional password for user access to the Advanced Properties screens. Figure 9-6. WLAN Adapter Screen Caution Modifying the contents of the hardware settings may cause your adapter card to stop working properly. These options are recommended for advanced users only. • Check Diversity Antenna if you have a dual antenna on your WLAN adapter card. Diversity can improve communication in highly reflective environments. Do not check this if you do not have a dual antenna WLAN adapter card or a secondary antenna, as this can cause poor wireless network performance. • In the Radio Link Rate section, select 1MB Support to communicate only at 1MB per second. Select 2MB Support to communicate at only 2MB per second. Select Both 1MB and 2MB Support to communicate at the best available data rate. 9-11 PPT 2800 Series Product Reference Guide for Pocket PC 2002 If you select 2MB and have only a 1MB WLAN adapter, the adapter only communicates at 1MB. On Spring adapter cards, this option is disabled, and defaults to 1MB. • To create a password, tap Password. Figure 9-7. Password Screen Enter a case-sensitive password (10 characters maximum) in the New Password field and the Confirm New Password field, and select OK. This enables a password screen to appear when Advanced is selected from the Spectrum24 Setup screen. To disable the password, enter the current password in the Current Password field, and leave the New Password and Confirm New fields blank. 9-12 Spectrum24 Network Configuration Using NICTT with the PPT 2842 The NICTT (wireless LAN) icon located on the bottom of the terminal screen indicates terminal signal strength as shown below. Tap the NICTT icon to make changes to the network configuration, or view the status of your network connection. Icon Status Excellent signal strength Very good signal strength Good signal strength Fair signal strength Poor signal strength Out-of-network range (not associated) Adapter not found 9-13 PPT 2800 Series Product Reference Guide for Pocket PC 2002 General Tab Use the General tab in NICTT to configure the PPT 2842 with the correct ESS ID. The ESS ID identifies the radio network and is used to differentiate between different radio networks. All PPT 2842 terminals on the same network must be set up with the same ESS ID Code. The ESS ID on the terminal is the same as that of the access points in your facility. The General tab displays driver firmware and revision information, and allows you to change the ESSID on the NIC 802.11. Figure 9-8. PPT 2842 NICTT Properties - General Tab Note: A PC Card adapter installation displays PCMCIA as the Adapter Type. 9-14 Spectrum24 Network Configuration Power Tab The Power tab allows automatic or manual setting of the adapter power management mode. Figure 9-9. PPT 2842 NICTT Properties - Power Tab • Select either Continuous Access Mode (CAM) or Power Save Polling (PSP) mode. CAM yields the best performance but uses the most power, so is preferred for systems running on AC power. PSP saves significant amounts of power over CAM, ideal for systems running on battery power. • If you select PSP mode, set a Power Save Poll (PSP) Option, which specifies the number of ticks the adapter sleeps before waking up to check for data. Each tick is 0.1 second. • Select Let adapter manage power to automatically vary the PSP options depending on the amount of data that is being sent or received by the adapter. 9-15 PPT 2800 Series Product Reference Guide for Pocket PC 2002 Signal Tab Use the Signal tab to display a real-time graph of the signal quality of the adapter to the associated access point, including the number of times the adapter has roamed to and from APs, and the network status. Signal quality indicates how well the adapter receives the transmitted signal of the associated access point. Figure 9-10. PPT 2842 NICTT Properties - Signal Tab 9-16 Spectrum24 Network Configuration Transmission Tab The Transmission tab displays a real-time graph as a series of ICMP ping tests initiated by the user. The transmission quality test does not run all the time because it consumes network bandwidth. The transmission quality test also displays a description of the transmission quality. Figure 9-11. PPT 2842 NICTT Properties - Transmission Tab Note: You must obtain a DHCP lease before running the Transmission Quality test. 9-17 PPT 2800 Series Product Reference Guide for Pocket PC 2002 Options Tab The Options tab controls system sounds, and whether specified settings are temporary. Figure 9-12. PPT 2842 NICTT Properties - Options Tab Enable System Sounds: You can enable or disable NICTT system sounds. NICTT uses standard wav-table sounds supplied by the Windows operating system. NICTT plays a wav file when it detects the PPT 2842 roaming between Spectrum24 APs, and also during a transmission test. Temporary Settings: Check These settings are only temporary to use temporary values only until the next reboot. When not checked, any value entered in NICTT is saved and used even after a warm boot (a cold boot clears these values). 9-18 Spectrum24 Network Configuration Configuring the PPT 2846 (11 MB Radio) Before the PPT 2846 can be used, it must be properly configured for the Spectrum24 Wireless LAN. 1. Select Settings from the Start menu. 2. Select Network Adapters from the Connections tab. 3. Select Spectrum 24 802.11b. Figure 9-13. Network Adapters Network Adapters Properties Tap Properties to view the current adapter IP configuration settings. DHCP (Dynamic Host Configuration Protocol) obtains a leased IP address and network configuration information from a remote server. An access point sends out a DHCP request searching for a DHCP server to acquire the network configuration and firmware filenames. 9-19 PPT 2800 Series Product Reference Guide for Pocket PC 2002 Use the property screens to view and adjust the IP address, subnet, gateway, DNS, and WINS. Figure 9-14. IP Network Adapter Property Screens • IP Address: A 32-bit (max) value expressed as four decimal numbers from 0 to 255, separated by periods (e.g., 157.235.90.24) that the terminal uses to transmit and receive data. The IP address of the adapter is required to be in the same subnet as that of the access point for the devices to interoperate in Infrastructure mode. • Subnet Mask: A 32-bit value expressed as four decimal numbers from 0 to 255, separated by periods (e.g., 255.255.0.0) which allows TCP/IP to determine the network ID portion of an IP address. Required in order for the subnet to exist. Its purpose is to mask out IP addresses that are not part of the subnet. The network administrator usually has the required subnet mask. • Gateway: Used to connect to the corporate network. The network administrator usually has the IP address required for the default gateway. • DNS (Domain Name System): The IP address of a server containing a database of host names and their associated IP addresses so that when a host name is used, it can be resolved into its IP address. • WINS (Windows Internet Name Service): A NetBIOS Name Server that registers your NetBIOS names and resolves into IP addresses, similar to DNS. 9-20 Spectrum24 Network Configuration Using NICTT with the PPT 2846 The NICTT (wireless LAN) icon located on the bottom of the terminal screen indicates terminal signal strength as shown below. Tap the NICTT icon to make changes to the network configuration, or view the status of your network connection. Icon Status Excellent signal strength Very good signal strength Good signal strength Fair signal strength Poor signal strength Out-of-network range (not associated) Adapter not found 9-21 PPT 2800 Series Product Reference Guide for Pocket PC 2002 Mode Tab Figure 9-15. PPT 2846 NICTT Properties - Mode Tab The Mode tab in NICTT configures the adapter's ESSID and operating mode. • Use the Operating Mode drop-down menu to select one of the following operating modes for the terminal: Note: The PPT 2846 does not support Ad Hoc mode. 9-22 • If you select Infrastructure, enter a 32-character maximum ESSID (802.11 Extended Service Set Identifier) in the 802.11 ESSID field to identify the wireless local area network. This ESSID must match the access point ESSID for the adapter to communicate with the access point. • If you select Enhanced Ad Hoc, enter the channel number in the Channel field. The first adapter configured in the Ad Hoc network defines the channel number used in the Ad Hoc network. Each adapter is required to use the same channel to transmit and receive data to its peers. Spectrum24 Network Configuration Check the Send long preamble headers checkbox if the other devices in your network are using a long preamble. Devices using Ad Hoc mode must use the same preamble setting to interoperate. The adapter uses a long preamble heading by default. Note that this is a Symbol Technologies operating mode and only works with other Symbol adapters enabled in the same mode. • If you select Ad Hoc, enter a 32-character maximum ESSID (802.11 Extended Service Set Identifier) in the 802.11 ESSID field to identify the wireless local area network. This ESSID must match the ESSID of other devices using the Ad Hoc mode. Enter the channel number in the Channel field. The first adapter configured in the Ad Hoc network defines the channel number used in the Ad Hoc network. Each adapter is required to use the same channel to transmit and receive data to its peers. Check the Send long preamble headers checkbox if the other devices in your network are using a long preamble. Devices using Ad Hoc mode must use the same preamble setting to interoperate. The adapter uses a long preamble heading by default. 9-23 PPT 2800 Series Product Reference Guide for Pocket PC 2002 Info Tab Figure 9-16. PPT 2846 NICTT Properties - Info Tab The Info tab in NICTT provides information about the terminal, such as firmware and hardware versions, adapter type, and operating mode. 9-24 Spectrum24 Network Configuration IP Config Tab Figure 9-17. PPT 2846 NICTT Properties - IP Config Tab The IP Config tab allows you to adjust IP configuration settings. • Select DHCP (Dynamic Host Configuration Protocol) to obtain a leased IP address and network configuration information from a remote server. DHCP is the default setting, and when selected, IP address fields are read only. • Select Static to manually enter the following fields: • IP Address: A 32-bit (max) value expressed as four decimal numbers from 0 to 255, separated by periods (e.g., 157.235.90.24) that the terminal uses to transmit and receive data. The IP address of the adapter is required to be in the same subnet as that of the access point for the devices to interoperate in Infrastructure mode. • Subnet Mask: A 32-bit value expressed as four decimal numbers from 0 to 255, separated by periods (e.g., 255.255.0.0) which allows TCP/IP to determine the network ID portion of an IP address. Required in order for the subnet to exist. Its purpose is to mask out IP addresses that are not part of the subnet. The network administrator usually has the required subnet mask. • Gateway: Used to forward IP packets to and from a remote destination. See 9-25 PPT 2800 Series Product Reference Guide for Pocket PC 2002 your network administrator for the IP address required for the default gateway. • DNS (Domain Name System): The IP address of a server containing a database of host names and their associated IP addresses so that when a host name is used, it can be resolved into its IP address. • WINS (Windows Internet Name Service): A NetBIOS Name Server that registers your NetBIOS names and resolves into IP addresses, similar to DNS. • MAC Address: An IEEE 48-bit address the adapter is given at the factory which uniquely identifies the adapter at the physical layer level. • Host Name: User-assigned host name. Power Tab Figure 9-18. PPT 2846 NICTT Properties - Power Tab Select the Power tab to set Radio Transmission Power and a Power Saving Mode. Adjusting the Radio Transmission Power level enables you to expand or confine the transmission area with respect to other wireless devices that may be operating nearby. Reducing a coverage area in high traffic areas improves transmission quality by reducing the noise in that coverage area. 9-26 Spectrum24 Network Configuration • • • In Infrastructure mode, there are two transmission power options in the Infrastructure drop-down menu: • Select Automatic to use the power level defined by the access point. Automatic mode is the default mode for adapters operating in Infrastructure mode. • Select Power Plus to set the adapter transmission power one level higher than the level set for the access point. In Enhanced Ad Hoc or Ad Hoc mode, there are five transmission power options available in the drop-down menu: • Select Maximum power to set the adapter to the highest transmission power level. This is best suited for operation in highly reflective environments and areas where other devices could be operating nearby. Also use maximum power when attempting to communicate with devices at the outer edge of a coverage area. • Choose 50%, 25% or 10% to set the transmit power level to that percentage of the maximum power level. • Choose Minimum power to set the adapter to the lowest transmission power level. Use this level when communicating with other devices in very close proximity, or when little or no radio interference from other devices is expected. Check Automatic Power Saving Mode to switch to the Best Network Performance when the AC power supply is used. When using the battery, select an appropriate setting between Best Network Performance and Acceptable Network Performance based on real-time analysis of the network usage. Automatic Power Saving Mode is the default setting and extends the operating time before the battery must be recharged. • Uncheck Automatic Power Saving Mode to select Manual Power Saving Mode, which allows you to set the slider to a performance level suited to the intended operation. There are 6 settings ranging from the best network performance, which uses the most battery power, to acceptable network performance, which uses the least battery power. Note: Power savings modes are not available in Enhanced Ad Hoc operating mode. 9-27 PPT 2800 Series Product Reference Guide for Pocket PC 2002 Options Tab Figure 9-19. PPT 2846 NICTT Properties - Options Tab Use the Options tab to enable or disable the suspend wireless network option and system sounds, and set temporary settings. • Check the Allow Pocket PC to suspend when wireless network is used to allow the terminal to automatically turn off (suspend) operation based on user inactivity. This prevents battery drain. The terminal does not suspend when idle if you disable this option. • Check Enable Sounds to issue a sound when performing a ping test and associating with an access point. This notifies you when a ping is completed and when a roam to an access point occurs. • Check International Roaming to enable this setting, used in countries outside of the United States. • Changes to settings you make using the Symbol Status are usually saved to the registry and used to initialize the adapter when it is inserted. Check These settings are only temporary to prevent your changes from being saved to the registry. If not checked, any value entered is saved in the registry. 9-28 Spectrum24 Network Configuration Encryption Tab Figure 9-20. PPT 2846 NICTT Properties - Encryption Tab, Open System Selected Use the Encryption tab in NICTT to control encryption options. This allows you to encrypt WLAN data packets to protect your data from inspection by systems that may intercept wireless data over the network. • Select an Encryption Algorithm matching the security established in your network. The AP and the terminal’s adapter must use the same encryption algorithm: • The Open System does not encrypt any of the data packets that travel over the WLAN, meaning the data packets transmitted by terminals or APs are not encrypted. Select this if no security is needed on the network. 9-29 PPT 2800 Series Product Reference Guide for Pocket PC 2002 • The 40-bit Shared Key Algorithm uses a 40-bit encryption key known by both the terminal and the AP to encrypt the data over the network. Figure 9-21. PPT 2846 NICTT Properties Encryption Tab, 40-bit Shared Key Selected 9-30 Spectrum24 Network Configuration • The 128-bit Shared Key Algorithm uses a 128-bit encryption key known by both the terminal and the AP to encrypt the data over the network. This option provides a higher level of security than the 40-bit encryption while maintaining an 11 Mbps data rate. Figure 9-22. PPT 2846 NICTT Properties Encryption Tab, 128-bit Shared Key Selected 9-31 PPT 2800 Series Product Reference Guide for Pocket PC 2002 • Select Kerberos if your network employs the Kerberos system. Enter the Key Distribution Center (KDC) and Realm values. The KDC is located on a server and maintains information about the access points and users it supports, and also permits the transmission and receipt of data once the credentials of the user are verified. Enter the name of the realm that hosts the Kerberos KDC in the Realm field. Figure 9-23. PPT 2846 NICTT Properties - Encryption Tab, Kerberos Selected 9-32 Spectrum24 Network Configuration Ping Tab Figure 9-24. PPT 2846 NICTT Properties - Ping Tab Use the Ping tab to send and receive ICMP ping packets across the network to the specified IP address. • Enter an IP address as a dotted string (e.g., 122.78.3.141). • Select the size of packets sent from the Size drop-down menu. • Select Start Test to begin the continuous ping test. Select Stop Test to terminate the ping test. • The average mega-bits per second, signal strength, data rate currently in use, test statistics and round trip times are displayed for each test. • The associated access point’s MAC address is also displayed. • The signal strength level and the data transmission rate are displayed in real-time bar graphs. 9-33 PPT 2800 Series Product Reference Guide for Pocket PC 2002 Signal Tab Figure 9-25. PPT 2846 NICTT Properties - Signal Tab The Signal tab is only available in Infrastructure mode (selected on the Mode tab). Use the Signal tab to display a real-time graph of the signal quality of the adapter to the associated access point, including the number of times the adapter has roamed to and from APs, the current data rate, and the network status. Signal quality indicates how well the adapter receives the transmitted signal of the associated access point. 9-34 Spectrum24 Network Configuration APs Tab Figure 9-26. PPT 2846 NICTT Properties - APs Tab The APs tab is only available in Infrastructure mode (selected on the Mode tab). Use the APs tab with the Infrastructure operating mode to view access points with the same ESSID as the adapter. View the AP MAC address, signal level and channel of known access points. • The currently associated access point’s icon includes a radio wave radiating from the antennae to indicate the associate status. Tap on an icon to display a menu: • Select Set Mandatory to prohibit the adapter from associating with the specified access point. The letter “m” displays on top of the access point’s icon when this option is selected. • Select Set Roaming to allow the adapter to roam to this access point if it has a better signal quality. These settings are temporary and are not saved to the registry. • Tap the Refresh button to update the list of the known APs. 9-35 PPT 2800 Series Product Reference Guide for Pocket PC 2002 9-36 Chapter 10 Wireless Wide Area Network Configuration Chapter Contents Introduction . . . . . . . . . . . . . . . . . . . . . . . . . . . . . . . . . . . . . . . . . . . . . . . . . . . . . . . . . . . . . . . . . 10-3 Multi-Network Support for IP Data over GPRS . . . . . . . . . . . . . . . . . . . . . . . . . . . . . . . . . . . . . . 10-3 Creating a GPRS DUN Connection . . . . . . . . . . . . . . . . . . . . . . . . . . . . . . . . . . . . . . . . . . . 10-4 Sample Network Parameter Registry File. . . . . . . . . . . . . . . . . . . . . . . . . . . . . . . . . . . . . . . 10-5 Configuring a CDPD WAN Connection (PPT 2833) . . . . . . . . . . . . . . . . . . . . . . . . . . . . . . . . . . 10-8 Configuration Wizard . . . . . . . . . . . . . . . . . . . . . . . . . . . . . . . . . . . . . . . . . . . . . . . . . . . . . . 10-8 Maintenance Screens and Menus . . . . . . . . . . . . . . . . . . . . . . . . . . . . . . . . . . . . . . . . . . . 10-13 Modem Menu . . . . . . . . . . . . . . . . . . . . . . . . . . . . . . . . . . . . . . . . . . . . . . . . . . . . . . . . . . . 10-19 Advanced Menu . . . . . . . . . . . . . . . . . . . . . . . . . . . . . . . . . . . . . . . . . . . . . . . . . . . . . . . . . 10-20 Help . . . . . . . . . . . . . . . . . . . . . . . . . . . . . . . . . . . . . . . . . . . . . . . . . . . . . . . . . . . . . . . . . . 10-22 Configuring a GPRS WAN Connection (PPT 2837) . . . . . . . . . . . . . . . . . . . . . . . . . . . . . . . . . 10-23 Connecting via GPRS. . . . . . . . . . . . . . . . . . . . . . . . . . . . . . . . . . . . . . . . . . . . . . . . . . . . . 10-26 Configuring a GSM WAN Connection (PPT 2837) . . . . . . . . . . . . . . . . . . . . . . . . . . . . . . . . . . 10-28 Connecting via GSM. . . . . . . . . . . . . . . . . . . . . . . . . . . . . . . . . . . . . . . . . . . . . . . . . . . . . . 10-32 10-1 PPT 2800 Series Product Reference Guide for Pocket PC 2002 10-2 Wireless Wide Area Network Configuration Introduction Before a terminal can be used on a CDPD/GSM wireless network, you must select a provider and establish a service plan, and the terminal must be properly configured. Multi-Network Support for IP Data over GPRS Before transferring IP data on a GPRS network, you must establish a Packet Data Protocol (PDP) context. The GPRS network parameters consist of the following items: • Access Point Name (APN) • PDP Address (if not provided dynamically by the network) • Header Compression • Data Compression • Quality of Service Requested • • Precedence • Delay • Peak Throughput • Mean Throughput • Reliability Quality of Service Minimum • Precedence • Delay • Peak Throughput • Mean Throughput • Reliability 10-3 PPT 2800 Series Product Reference Guide for Pocket PC 2002 Creating a GPRS Dial Up Networking (DUN) Connection The software platform includes a virtual GPRS driver designated COM9. In the software architecture, this driver is positioned between an application or operating system service above, and the physical modem port below. Use the connection manager to create a GPRS DUN connection (see Configuring a GPRS WAN Connection (PPT 2837) on page 10-23 for detailed instructions): 1. Specify the GPRS virtual COM9 port. 2. Enter *99# and the number. 3. If your network does not assign IP or DNS addresses, enter the values. 4. Enter any required login ID and password information. When connecting, the DUN service calls into the COM9 virtual GPRS driver. The virtual driver powers up and registers the modem on the network, attaches to the GPRS service, and sets up the GPRS PDP context using the network parameters. The GPRS context is activated when the DUN service dials the *99# number. The GPRS network parameters are different for each service provider, and the APN or DNS address may change from time to time. Use the registry file, the GUI utility, and the registry-aware virtual GPRS driver to remedy this. Figure 10-1 illustrates the relationship between the registry entries, the registry file, the virtual driver and the GUI utility. Figure 10-1. GPRS Connection Relationship 10-4 Wireless Wide Area Network Configuration • The registry file contains the GPRS parameters for a particular network provider. The entries in this file are read during cold boot and placed with the active registry settings. • When PDP context is established, the virtual GPRS driver reads the Active registry entries. • The parameter setting utility allows you to view and modify the GPRS network parameter settings. When modifying the settings you may apply the new settings to the active parameters settings only, or also to the registry file. If you choose to affect the active parameters only, the new parameters are used for all subsequent PDP contexts until a cold boot occurs. A default registry file is included on the terminal in the platform directory. You may create and install a registry file for your specific network, or edit the existing registry settings using the GIU utility. The GUI utility is included in the GsmDemo. Sample Network Parameter Registry File The following sample provides 3 contexts, with one of them the active context. ; -------------------------------------------------------------------; GPRS Network Specific Parameters [HKEY_LOCAL_MACHINE\Drivers\BuiltIn\Seriald3] "CurrentContext"=dword:1 "Version"="1.0" [HKEY_LOCAL_MACHINE\Drivers\BuiltIn\Seriald3\Context1] ; ; 1st of 3 selectable Contexts ; "ContextID"=dword:1 "ContextName"="VoiceStream" "PDPType"="IP" "APN"="internet3.voicestream.com" "PDPAddress"="" "DataCompression"=dword:0 "HDRCompression"=dword:0 "QosMinPrecedence"=dword:0 "QosMinDelay"=dword:0 "QosMinReliability"=dword:3 10-5 PPT 2800 Series Product Reference Guide for Pocket PC 2002 "QosMinPeak"=dword:0 "QosMinMean"=dword:0 "QosReqPrecedence"=dword:0 "QosReqDelay"=dword:0 "QosReqReliability"=dword:3 "QosReqPeak"=dword:0 "QosReqMean"=dword:0 [HKEY_LOCAL_MACHINE\Drivers\BuiltIn\Seriald3\Context2] ; ; 2nD of 3 selectable Contexts ; "ContextID"=dword:2 "ContextName"="Telstra" "PDPType"="IP" "APN"="telstra.internet" "PDPAddress"="" "DataCompression"=dword:0 "HDRCompression"=dword:0 "QosMinPrecedence"=dword:0 "QosMinReliability"=dword:0 "QosMinDelay"=dword:0 "QosMinPeak"=dword:0 "QosMinMean"=dword:0 "QosReqPrecedence"=dword:0 "QosReqDelay"=dword:0 "QosReqReliability"=dword:0 "QosReqPeak"=dword:0 "QosReqMean"=dword:0 [HKEY_LOCAL_MACHINE\Drivers\BuiltIn\Seriald3\Context3] ; ; Last of 3 selectable Contexts ; 10-6 Wireless Wide Area Network Configuration "ContextID"=dword:3 "ContextName"="OmniTel" "PDPType"="IP" "APN"="web.omnitel.it" "PDPAddress"="" "DataCompression"=dword:0 "HDRCompression"=dword:0 "QosMinPrecedence"=dword:0 "QosMinDelay"=dword:0 "QosMinReliability"=dword:0 "QosMinPeak"=dword:0 "QosMinMean"=dword:0 "QosReqPrecedence"=dword:2 "QosReqDelay"=dword:4 "QosReqReliability"=dword:3 "QosReqPeak"=dword:6 "QosReqMean"=dword:1f 10-7 PPT 2800 Series Product Reference Guide for Pocket PC 2002 Configuring a CDPD WAN Connection (PPT 2833) Before the PPT 2833 terminal can be used, you must get an account with an internet service provider. All CDPD identification and address information is entered through the Preferences application on the PPT 2833 terminal. To configure your PPT 2833 terminal for use on a CDPD network, tap Configuration Wizard on the Modem menu in Modem Manager. Configuration Wizard The first time the Modem Manager software is started, or when Configuration Wizard is selected from the Modem menu within Modem Manager, the Configuration Wizard prompts you through the steps to configure and set up the terminal for operation. Figure 10-2. Configuration Wizard Welcome Screen At any time, you can choose to cancel the Configuration Wizard by tapping Cancel. If you do choose to cancel, the Configuration Wizard appears the next time the Modem Manager is selected. It is recommended that once you begin the setup process you continue until it is completed. 10-8 Wireless Wide Area Network Configuration 1. To begin configuration, tap Next. The Choose Service Provider screen displays. Figure 10-3. Choose Service Provider Screen 2. Select a Wireless Provider from the drop-down menu, and tap Next. The Contact Service Provider screen displays: Figure 10-4. Contact Service Provider Screen 10-9 PPT 2800 Series Product Reference Guide for Pocket PC 2002 This screen tells you to note the modem Equipment ID number shown. Tap Next to continue. 3. The Enter Modem Settings screen displays: Figure 10-5. Enter Modem Settings Screen 4. Enter the required information and tap Next to continue. You are prompted to confirm the settings. Verify the information you entered is accurate and tap Next. The Modem Configured screen displays. 10-10 Wireless Wide Area Network Configuration Figure 10-6. Modem Configured Screen 5. After you have waited the appropriate amount of time indicated by your service provider, tap Next. The Checking Network screen tells you to wait for your modem to register with the network. 10-11 PPT 2800 Series Product Reference Guide for Pocket PC 2002 Figure 10-7. Checking Network Screen 6. A screen displays indicating that the modem successfully connected. Note: The Configuration Wizard does not proceed until a CDPD carrier selection is made. 10-12 Wireless Wide Area Network Configuration Maintenance Screens and Menus The PPT 2833 terminal includes menu commands to make it fast and easy to configure and check the status of your modem. This section explains the menu commands specific to the Modem Manager. Status Screen The Status tab of the Modem Manager displays modem parameters. The modem's status is updated every 3 seconds. Figure 10-8. Modem Manager Status Screen 10-13 PPT 2800 Series Product Reference Guide for Pocket PC 2002 The following information is available from this screen: Setting Description Cellular Signal Present When checked, it indicates that the modem has identified a cellular signal. CDPD Service Detected When checked, it indicates that the modem has identified and is synchronized to a CDPD signal in the area. Modem Ready Registered When checked, it indicates that the modem has successfully registered with a CDPD service provider in the coverage area. A working data connection exists and can be used by other applications to transmit and receive data. Until this checkbox is selected, the modem can neither transmit nor receive data. Signal Strength Measures Received Signal Strength from the wireless base station. These values range from one to ten bars. The greater the number of bars, the better the performance of the modem. Error Detect When checked, it indicates that a large number of errors have been detected by the modem. The modem may continue to operate but with a severely reduced performance, caused by the increased likelihood of connection retries and data errors when communicating with the wireless base station. System Busy When checked, it indicates that the currently detected CDPD system is busy. The modem may continue to operate but at a decreased level of performance. Provider Displays the CDPD channel’s System Provider’s Identifier. RF Channel Shows the CDPD channel currently active. If the terminal is not registered or is searching for a channel, the value displayed is either "Searching A" or "Searching B”, depending on the state of the modem. Once a channel is detected, a numeric value for the channel displays. Reg Error This shows either "None" or a numeric value between 1 and 7. "None" indicates a successful registration without any errors. If a numeric error code is displayed, an error has occurred. Tap the button to display details about the error. 10-14 Wireless Wide Area Network Configuration Configuration Screen Figure 10-9. Modem Manager Configuration Screen On the Config tab, you can edit configuration settings. The following settings are available: Setting Description IP Address This is the current IP address of the modem. Tap to enter a new IP address. Primary DNS This is the current Primary DNS address of the modem. Tap to enter a new DNS address. Secondary DNS This is the current Secondary DNS address of the modem. Tap to enter a new DNS address. Side Preference Configure the side preferences for the modem. All CDPD systems are categorized into "A" systems or "B" systems. This setting determines how the modem searches for a CDPD system among the two system category choices. See Side Preference Drop-Down on page 10-16. Sleep Mode Allows or disallows the modem to enter the low-power mode. This feature only functions on Wireless IP networks that support it. See Sleep Mode Drop-Down on page 10-16 for detailed information. 10-15 PPT 2800 Series Product Reference Guide for Pocket PC 2002 Setting Auto Power-Off Description When enabled, this shuts off the modem when the session is disconnected. Side Preference Drop-Down Setting Description A only The modem searches for a CDPD system on the "A" side only. For users who do not roam, this selection can sometimes speed the registration process, as the modem does not have to look on the "B" side as well before it can register. B only Same as "A only" except on the "B" side. A Preferred The modem searches for a CDPD system on the "A" side first and attempt registration on any system it finds. However, if the modem cannot register on the "A" side, it then attempts to find service on the "B" side. For users who roam, this setting would be appropriate if the home system was on the "A" side. B Preferred The modem searches for a CDPD system on the "B" side first and attempt registration on any system it finds. However, if the modem cannot register on the "B" side, it attempts to find service on the "A" side. For users who roam, this setting would be appropriate if the home system was on the "B" side. Sleep Mode Drop-Down Setting Description Enabled The modem attempts to enter a low-power mode if it is not required to carry out any communications with a Network. The modem may respond sluggishly to the first communication request when it is required again. Disabled The modem is not allowed to enter sleep mode. 10-16 Wireless Wide Area Network Configuration Provider Screen Figure 10-10. Modem Manager Provider Screen On the Provider tab, you can modify provider settings. The following settings are available. Setting Description Selected Service Provider Selects the CDPD channel’s System Provider’s Identifier. Service Preference Configures the preferences for the service ID parameters. Refer to Service ID Preferences on page 10-18 for detailed information. Service ID Parameters Configures all identification values for a particular system or Wireless IP network: SPI is the current CDPD Base Station Service Provider Identifier. SPNI is the current CDPD Base Station Service Provider Network Identifier. WASI is the current CDPD Base Station Wide Area Service Identifier. 10-17 PPT 2800 Series Product Reference Guide for Pocket PC 2002 Service ID Preferences Setting Description Only use selected service provider The modem attempts to detect only the system in the Service ID parameters for registration. This is useful when you want to prevent roaming to any other system but your home system. Prefer to use selected service provider The modem first attempts to register on the system described by the SPI/WASI/SPNI entries. If no system is found, the modem attempts to register on the remaining available systems in the area. This is useful when you spend most time in one area and occasionally roam, or in cases where you have two systems but prefer service on one due to, for example, rate advantages. In these cases, enter the Network ID parameters that reflect the system you most often will register on. Don’t use selected service provider The modem attempts to register on any system but that reflected in the Network ID entries. This is useful if you want to block registration on systems in your area that you do not have an agreement with. This may speed up the registration process in some areas. Use any service provider The SPI/WASI/SPNI entries are ignored. This is the default configuration and ensures that the modem attempts to register on any valid system that it can find. 10-18 Wireless Wide Area Network Configuration Modem Menu Tap Modem to display the Modem Menu. Options are described below. Figure 10-11. Modem Menu Setting Description Save Settings Saves any settings made in the Modem Manager Configuration and Provider screens. Disconnect Terminates the active Network session with the modem. If you have configured the AutoOff preference to turn the modem off when the session is disconnected, the modem may also power down. If disconnected, the Modem Manager can no longer perform 3-second updates. Configuration Wizard Launches the Configuration Wizard to configure your modem. 10-19 PPT 2800 Series Product Reference Guide for Pocket PC 2002 Advanced Menu Tap Advanced to display the Advanced Menu. Options are described below Figure 10-12. Advanced Menu 10-20 Wireless Wide Area Network Configuration Modem Information Tap Modem Information to view the modem manufacturer, equipment ID and model, and firmware version. Figure 10-13. Modem Information Screen 10-21 PPT 2800 Series Product Reference Guide for Pocket PC 2002 Ping Screen Tap Ping to send a packet to a particular IP address to determine if it is online. From this screen you can send a PING request to another network device whose network address you already know. This is useful to verify network connectivity. Figure 10-14. Ping Screen As with other PING applications, enter the IP address of the other network device in the IP field, then select the desired payload size. Tapping Send sends the PING. A status line displays a "Success" or "Fail" message to indicate whether or not the PING was successful. There is a 20 second timeout for a response before a "Success" or "Fail" message may display. There are some limitations on this PING implementation: • The size of PING payload is limited to 99 bytes. If a payload of greater than that is entered, a data error message will be displayed. • The delay to wait for response is fixed at 20 seconds. Tap OK to return to the Modem Manager screen. Help Select Help from the Start menu for more information on Modem Manager. 10-22 Wireless Wide Area Network Configuration Configuring a GPRS WAN Connection (PPT 2837) To set up a new connection configuration: 1. Tap Settings from the Start menu. 2. Tap the Connections tab, and select Connections. 3. On the Connections screen, tap the Modify button under the Internet Settings drop-down. Figure 10-15. Connections & Internet Settings Screens 4. On the Internet Settings screen, tap New... The Make New Connection screen displays. 10-23 PPT 2800 Series Product Reference Guide for Pocket PC 2002 Figure 10-16. Make New Connection Screen 5. Enter GPRS as the name for your connection, then select Virtual GPRS modem on COM9 from the drop-down menu. Set the Baud Rate to 57600. 6. Tap Next. Figure 10-17. Entering Phone Number 10-24 Wireless Wide Area Network Configuration 7. Enter your area code and set the phone number to *99#. The area code must match the area code in the dialing locations screen. Tap Next. Figure 10-18. Dialing Settings 8. Uncheck Wait for dial tone before dialing, and tap Finish. Your new connection is created. 10-25 PPT 2800 Series Product Reference Guide for Pocket PC 2002 Connecting via GPRS To connect using the GPRS WAN connection you created: 1. Select Settings from the Start menu. 2. Tap the Connections icon on the Connections tab. 3. Tap the Dialing Locations tab. Figure 10-19. Dialing Locations Tab 10-26 Wireless Wide Area Network Configuration 4. Set the area code to match the area code entered earlier. Tap Dialing Patterns. Figure 10-20. Dialing Patterns Screen 5. On the Dialing Patterns screen, edit the patterns as shown above, deleting the “9,” from each location. 6. Tap OK until you return to the Connections screen, and select the Connections tab. Tap Connect. 7. On the username/password screen that appears, just tap OK. There is no username or password for a GPRS connection. The terminal attempts connection. Note: For the GPRS connection to work, first set up the network-specific PDP Context and Quality of Service parameters using the GSM Demo. See Appendix C, GSM Demo Program. You can obtain the network-specific parameter values from your network provider. 10-27 PPT 2800 Series Product Reference Guide for Pocket PC 2002 Configuring a GSM WAN Connection (PPT 2837) To set up a new connection configuration: 1. Tap Settings from the Start menu. 2. Tap the Connections tab, and select Connections. 3. On the Connections screen, tap the Modify button under the Internet Settings drop-down. Figure 10-21. Connections & Internet Settings Screens 10-28 Wireless Wide Area Network Configuration 4. On the Internet Settings screen, tap New... The Make New Connection screen displays. Figure 10-22. Make New Connection Screen 5. Enter a name for your connection, then select Virtual GSM modem on COM8 from the drop-down menu. Set the Baud Rate to 9600. 10-29 PPT 2800 Series Product Reference Guide for Pocket PC 2002 6. Your modem settings and TCP/IP address should be set automatically, but if you need to set them manually, tap the Advanced button and enter the information in the Port Settings, TCP/IP, and Name Servers tabs. Figure 10-23. Advanced Settings 7. When you have completed entering your settings, tap OK, then select Next from the Make New Connection screen. Figure 10-24. Entering Phone Number 10-30 Wireless Wide Area Network Configuration 8. Enter a phone number that connects to a Remote Access Server (RAS) to browse the Internet. The area code should be that of the RAS server modem. Tap Next. Figure 10-25. Connection Settings 9. Uncheck Wait for dial tone before dialing, and tap Finish. Your new connection is created. 10-31 PPT 2800 Series Product Reference Guide for Pocket PC 2002 Connecting via GSM To connect using the GSM WAN connection you created: 1. Select Settings from the Start menu. 2. Tap the Connections icon on the Connections tab. 3. Tap the Dialing Locations tab, then tap Dialing Patterns. Figure 10-26. Dialing Screens 4. On the Dialing Patterns screen, edit the patterns as shown above, deleting the “9,” from each location. 5. Tap OK until you return to the Connections screen, and select the Connections tab. Tap Connect. 6. Enter a valid username and password on the screen that appears. The terminal attempts connection. 10-32 Chapter 11 Software Installation on Development PC Chapter Contents Introduction . . . . . . . . . . . . . . . . . . . . . . . . . . . . . . . . . . . . . . . . . . . . . . . . . . . . . . . . . . . . . . . . . Before You Install the SDK . . . . . . . . . . . . . . . . . . . . . . . . . . . . . . . . . . . . . . . . . . . . . . . . . . Symbol Windows CE SDK . . . . . . . . . . . . . . . . . . . . . . . . . . . . . . . . . . . . . . . . . . . . . . . . . . . . . . Installing the SDK on the Development PC . . . . . . . . . . . . . . . . . . . . . . . . . . . . . . . . . . . . . . . . . Installing the SDK . . . . . . . . . . . . . . . . . . . . . . . . . . . . . . . . . . . . . . . . . . . . . . . . . . . . . . . . . Installing Other Development Software . . . . . . . . . . . . . . . . . . . . . . . . . . . . . . . . . . . . . . . . . . . . 11-3 11-3 11-3 11-4 11-4 11-4 11-1 PPT 2800 Series Product Reference Guide for Pocket PC 2002 11-2 Software Installation on Development PC Introduction To develop applications to run on the PPT 2800, the Symbol Windows CE Software Developer’s Kit (SDK) is available. This SDK contains PPT 2800-specific software not available in the standard Microsoft Windows CE Platform SDK. The minimum system configuration required to install the SDK is: • IBM-compatible PC with Pentium 150 MHz processor or higher • Windows®98 second edition, or Windows® NT operating system version 4.0 with Service Pack 5 or later, or Microsoft Windows 2000 operating system • 24MB RAM for Windows 98, 32 MB RAM for Windows NT • 100MB available hard disk space • CD-ROM drive • One available serial port • Mouse. Also, be sure the drive you are installing to accepts long filenames (larger than the 8.3 filename convention). Before You Install the SDK Before you install the Symbol Windows CE SDK, install the following tools: • Microsoft eMbedded Visual Tools 3.0 • Windows CE Platform SDK for Pocket PC • Microsoft ActiveSync version 3.5. Symbol Windows CE SDK The SDK installation program loads the required Windows CE components on the development PC used to create the image files (via Terminal Configuration Manager) for download to the terminal. The Symbol SDK includes: • Symbol-provided files • Printer drivers • TCM scripts • Sample code 11-3 PPT 2800 Series Product Reference Guide for Pocket PC 2002 • This Product Reference Guide. Installing the SDK on the Development PC The Symbol SDK installs through Windows in the directory C:\SYMBOL WINDOWS CE SDK, and also installs files in the Windows CE Tools directory (generated by the CE Tool Kit). Installing the SDK Install the SDK from the Symbol website www.symbol.com. Follow the installation prompts. Once installation of the SDK is complete, use eMbedded Visual C++ or eMbedded Visual Basic to view the active Windows CE configuration, Microsoft Pocket PC, and display the directory in which the SDK is installed. Installing Other Development Software Developing applications for the PPT 2800 may require installing other development software such as application development environments on the development PC. Follow the installation instructions provided with this software. 11-4 Chapter 12 Configuring the Terminal Chapter Contents I Introduction . . . . . . . . . . . . . . . . . . . . . . . . . . . . . . . . . . . . . . . . . . . . . . . . . . . . . . . . . . . . . . . . 12-3 Starting Terminal Configuration Manager . . . . . . . . . . . . . . . . . . . . . . . . . . . . . . . . . . . . . . . . . . 12-3 Defining Script Properties . . . . . . . . . . . . . . . . . . . . . . . . . . . . . . . . . . . . . . . . . . . . . . . . . . . . . . 12-6 Creating the Script for the Hex Image . . . . . . . . . . . . . . . . . . . . . . . . . . . . . . . . . . . . . . . . . . . . . 12-8 Open a New or Existing Script . . . . . . . . . . . . . . . . . . . . . . . . . . . . . . . . . . . . . . . . . . . . . . . 12-8 Copy Components to the Script . . . . . . . . . . . . . . . . . . . . . . . . . . . . . . . . . . . . . . . . . . . . . . 12-9 Save the Script . . . . . . . . . . . . . . . . . . . . . . . . . . . . . . . . . . . . . . . . . . . . . . . . . . . . . . . . . . . 12-9 Building the Image . . . . . . . . . . . . . . . . . . . . . . . . . . . . . . . . . . . . . . . . . . . . . . . . . . . . . . . . . . . 12-10 Sending the Hex Image . . . . . . . . . . . . . . . . . . . . . . . . . . . . . . . . . . . . . . . . . . . . . . . . . . . . . . . 12-12 Saving the Script . . . . . . . . . . . . . . . . . . . . . . . . . . . . . . . . . . . . . . . . . . . . . . . . . . . . . . . . 12-12 Connect The Terminal and Development PC . . . . . . . . . . . . . . . . . . . . . . . . . . . . . . . . . . . 12-12 Begin the Send in TCM . . . . . . . . . . . . . . . . . . . . . . . . . . . . . . . . . . . . . . . . . . . . . . . . . . . 12-12 Setting Up IPL to Receive the File . . . . . . . . . . . . . . . . . . . . . . . . . . . . . . . . . . . . . . . . . . . 12-13 Error Messages . . . . . . . . . . . . . . . . . . . . . . . . . . . . . . . . . . . . . . . . . . . . . . . . . . . . . . . . . . . . . 12-18 IPL Error Detection . . . . . . . . . . . . . . . . . . . . . . . . . . . . . . . . . . . . . . . . . . . . . . . . . . . . . . . 12-18 TCM Error Messages . . . . . . . . . . . . . . . . . . . . . . . . . . . . . . . . . . . . . . . . . . . . . . . . . . . . . 12-19 Creating a Splash Screen . . . . . . . . . . . . . . . . . . . . . . . . . . . . . . . . . . . . . . . . . . . . . . . . . . . . . 12-20 Creating a Splash Screen on Color Terminals . . . . . . . . . . . . . . . . . . . . . . . . . . . . . . . . . . 12-20 Creating a Splash Screen on Monochrome Terminals . . . . . . . . . . . . . . . . . . . . . . . . . . . . 12-20 Loading the Splash Screen via TCM . . . . . . . . . . . . . . . . . . . . . . . . . . . . . . . . . . . . . . . . . 12-21 12-1 PPT 2800 Series Product Reference Guide for Pocket PC 2002 12-2 Configuring the Terminal Introduction This chapter describes the Terminal Configuration Manager (TCM), and how it is used to specify and load files into the flash memory of the PPT 2800 using the terminal’s Initial Program Loader (IPL). In TCM, you create a script that contains the information (commands to copy files) for building the image. TCM works with directory windows which display the directory structure of your script and the source directories, files, and scripts from which you pull components. You can open multiple scripts, drag and drop items from a drive/directory to the script, rename and delete files in the script, etc. Upon building the image, TCM adds all the files, directories, and scripts referenced in the script to the image. The SDK includes a number of standard scripts and demos/samples for you to use as a base for creating your own scripts. These scripts can be found in the SYMSDK\SCRIPTS directory. Note: Before you create a script to build a hex image, identify the files required (system files, drivers, applications, etc.) and locate the files’ source directories to make the script building process easier. The required processes for building a hex image in TCM include: • Starting TCM • Creating or modifying a script • Building the hex image • Sending the hex image. Starting Terminal Configuration Manager To start TCM, double click on the TCM icon in the SYMSDK group. The following screen appears, displaying two directory windows; Script1 and File Explorer. Each directory 12-3 PPT 2800 Series Product Reference Guide for Pocket PC 2002 window is split; the left half (or pane) of the window displays the directory tree for the current drive, and the right half displays the directory contents for the current drive. The following table lists the components of the TCM start-up screen. Table 12-1. TCM Screen Components Component Script Window 12-4 Description Associated with a script file containing the information to create a Flash Disk image. This window is the target window, or the primary TCM window in which you can create a script or change a script file’s contents by copying, deleting, and renaming files and directories. More than one script window can be open at a time. The Script Window consists of two panes, the Directory Tree Pane on the left and the Directory Contents Pane on the right. Subordinate directories and files of each volume are listed in the Directory Contents Pane. Configuring the Terminal Table 12-1. TCM Screen Components (continued) Component Description File Explorer A read-only source window for files and/or directories to include in the script being built. Tool Bar Contains the tools, illustrated below, for taking action on a script. Create a new script file. Check script for existing files. Open a script file. Select the hex image to load. Save a script file. Tile windows. View script properties. Build and send the hex image to the terminal. Build a script. Preferences. View large icons. About TCM. View small icons. View list. 12-5 PPT 2800 Series Product Reference Guide for Pocket PC 2002 Defining Script Properties Before a script is created, the script properties must be defined. This defines the type of terminal, flash type, number of disks being created, and the memory configuration of each disk volume. To define the script properties: 1. With TCM open, click on the Script Window to make it the active window. 2. Under the Script menu, select the Properties option. OR Click on from the tool bar. The Script Properties window displays. 3. Under the Terminal drop-down menu, select 2800CPPC. 4. In the Flash Type field, select 2818C Flash Type. 5. Under the Disks drop-down menu, select the number of disk volumes to be created. 12-6 Configuring the Terminal Note: The options available under the disks drop-down menu changes depending on the flash type. Some flash types only have one option for the number of disk volumes, others have two options. 6. If you have selected three volumes under the Disk drop-down menu, you have the option to change the memory configuration of the second and third volumes. To do so, click on the up or down arrow for either of the volumes, until the memory configuration of each is set to the desired value. You will notice that as you change the values for one of the volumes, the other volume is automatically changed accordingly. 7. For each disk volume, determine the Read/Write access option. 8. The Script File Path displays the path of the selected script file. 9. Select a Cushion percentage from the Cushion drop-down menu to specify the percent of flash reserved for cushion. Choosing a higher number reduces disk storage space, but also increases write performance on fragmented disks or disks becoming full. To speed the writing process, select as high a number as your storage needs permit (up to 25%). 12-7 PPT 2800 Series Product Reference Guide for Pocket PC 2002 Creating the Script for the Hex Image On start-up, TCM displays the screen shown on page 12-3, with the Script1 window and File Explorer window pointing to the following directory: Symbol Windows CE SDK(xxxx)\SymbolPlatforms\PPTxxxx\TCMScripts The Script1 Window directory pane displays three volumes: Volume1, Volume2, and Volume3. Depending on the type of flash chip you have, the number of volumes may change. Files can be added to each of the volumes. With TCM, you can: • Create a new script file or open an existing script • Drag and drop existing files and directories to that script • Set the script parameters • Save the script • Review and modify the script. Each process is described in the sections that follow. Open a New or Existing Script Scripts are created in the Script Window. To open a new script: • Choose New from the File menu, OR • Click on from the tool bar. To open an existing script (e.g., a standard script provided in the SDK): • Choose Open from the File menu and select the script file name, OR • Click on • Double click on an existing script in the Script Browser window. from the toolbar and select the script file name, OR Note: If you open and make changes to an existing script, saving the changes writes over the existing script. If you wish to use an original or Symbol-supplied standard script as a base and save the changes in a new script, use Save As instead of Save after making the changes, and save to a different filename. 12-8 Configuring the Terminal Copy Components to the Script Copy files or directories to the script being generated: 1. Click on the File Explorer Window to make it the active window. 2. Click on the source directory in the Directory Tree Pane. TCM displays the directory contents in the Contents Pane. 3. Click on the file(s) and/or directory in File Explorer. Note: Optionally, use the standard Windows Shift+Left-click and Control+Left-click features to select multiple files and directories. 4. Drag and drop the selected file(s) and/or directory from File Explorer to the target directory in the Script Window, OR Click on the target directory and select the File Explorer Copy icon from the toolbar. Save the Script To save the changes to a new script: 1. From the File menu, choose Save As, OR On the toolbar, click on . 2. Enter the path and filename. TCM appends a .TCM extension to the script. 3. Choose the OK button. Note: If you save an untitled script, TCM by default saves the script to the directory that the Script Browser is pointing to. To save changes to an existing script: • From the File menu, choose Save, OR • On the toolbar, click . 12-9 PPT 2800 Series Product Reference Guide for Pocket PC 2002 Note: If you open and make changes to an existing script, saving the changes writes over the existing script. If you wish to use an original or Symbol-supplied standard script as a base and save the changes in a new script, use Save As instead of Save after making the changes, and save to a different filename. Building the Image As part of the build, TCM performs a check on the script which verifies that all files referenced in the script exist. If the image is bootable, TCM verifies that the boot files are available. Note: Performing a check is more important for previously existing scripts to ensure that files referenced in the script are still in the designated locations. To check a script: 1. In the Script Window, select the script. 2. Save the script, if not already saved. 3. From the Script menu, choose Check, OR On the toolbar, choose . 4. TCM verifies that files referenced in the script exist on available drives and lists an error message in the Errors found box for any missing files. 5. Choose the OK button to exit. To build a script: 1. In the Script Window, select the script to be built. 2. From the Script menu, select Build, OR 12-10 Configuring the Terminal On the toolbar, choose . The Configure Build window appears. 3. Select the item to build. If you select to build an application, specify the application. 4. Select ASCII format for your hex image, or Compression, which reduces the size of most hex images in order to speed downloading. Click OK. 5. TCM performs a check. If the script is has no errors, TCM proceeds with the build. If the Build Fails If the build fails, TCM displays a message indicating which file(s) are missing. If the total amount of flash required by the script exceeds the image size, a TCM error results. To correct this, reduce the number of files in the volume, or make the disk nonbootable. Refer to Defining Script Properties on page 12-6 for more information on setting the image size appropriately. 12-11 PPT 2800 Series Product Reference Guide for Pocket PC 2002 Sending the Hex Image Once the hex file is built, you are ready to download it to the terminal. A Hex image download requires both TCM and a program loader stored on the terminal. The terminal comes with a program loading utility, Initial Program Loader (IPL), stored in the terminal’s write-protected flash. To run IPL, the terminal must be inserted in a cradle or connected to a development PC by direct serial connection. Saving the Script If you made changes to the script since last saving it, save the script again. Connect The Terminal and Development PC To send the hex file to the terminal, first link the terminal and development PC by one of the following devices: • Direct serial link • Cradle (refer to Chapter 1, Getting Started for more information on setting up the cradle). Begin the Send in TCM In TCM on the PC: 1. Select the script. 2. From the File menu, choose Load Terminal, OR On the toolbar, choose 12-12 . The Load Terminal screen displays. Configuring the Terminal 3. If the correct hex file is not displayed in the Hex File to Load field, click on the Browse button and navigate to the correct hex file to be downloaded. 4. Click on the Comm Port drop-down menu and select the COM port being used. Ports already in use display in the Unavailable Ports field. 5. Click on the Baud Rate drop-down menu and select the appropriate baud rate. Your options are 2400, 4800, 9600, 19200,38400, 57600, 115200. 6. On the Protocol drop-down menu, select None. 7. Click OK to load the file, or Multiple Hex File Download if more than one file is being loaded. Setting Up IPL to Receive the File To set up IPL on the terminal to receive the files being downloaded via TCM: 1. Cold boot the terminal by pressing the reset button inside the battery compartment while holding down the Function button. 2. Press and hold the App1 and App4 buttons. While holding down these buttons, press and hold the battery door switch inside the battery compartment (on the left). This all must occur within 3 seconds after resetting the terminal. 12-13 PPT 2800 Series Product Reference Guide for Pocket PC 2002 3. Continue to hold these buttons, including the battery door switch, until the IPL Baud Rate menu displays: IPL VER X.XX IPL Key Sequence -> 115,200 57,600 38,400 19,200 9600 Auto Baud Press Up/Down to select Baud Rate Action to Continue If necessary, adjust the contrast by holding down the Function button and pressing the up scroll button to darken the screen, or the down scroll button to lighten the screen. 4. The version number on the top of the screen identifies the version of IPL you are using. After the version number one of the following messages appears, indicating why IPL was invoked: • IPL Key Sequence: IPL key sequence was pressed. • Partition Table not found: indicates no partition table was found. • Partition Table Checksum Error: indicates a checksum error was detected in the partition table. Use the up and down scroll buttons on the terminal to scroll to the appropriate baud rate, then press the Action button to accept the selected baud rate. If no selection is made within 10 seconds, the baud rate 115,200 is automatically selected. 12-14 Configuring the Terminal 5. IPL displays the Main Menu which lists the partitions/applications that can be downloaded. IPL Ver X.XX IPL Key Sequence Windows CE Platform Application Data Splash Screen IPL Partition Table Auto Select Press Up/Down to select partition Press Action to begin download 6. Use the up and down scroll buttons to select the partition to be received, then press the Action button, or select Auto Select to download several partitions in sequence. Note: Auto Select is the default, and will be selected if no other selection is made within 10 seconds. If updating the IPL hex image or partition table hex image, you MUST reboot the terminal into IPL after downloading the image before other images can be downloaded. If the platform application or data partition sizes are changed, you must download a new partition table first. 12-15 PPT 2800 Series Product Reference Guide for Pocket PC 2002 7. The following screen displays: IPL VER X.XX Partition Name Waiting for Data at Baud Rate XXX,XXX Press Action to return to Main Menu Partition Name reflects the selection made on the Main Menu, and “Baud Rate XXX,XXX” displays the selection chosen from the baud rate menu. This screen continues to display until the first character of the image to be downloaded is received from the host. While this screen is displayed, pressing the Action button returns IPL to the Main Menu screen. 8. Insert the terminal in a cradle, or connect it to a host PC with a serial cable. 9. Return to the host PC, and select the OK button on the Load Terminal dialog box. 10. As soon as the first character of data is received, IPL displays the receiving screen: IPL VER X.XX Partition Name Downloading Data Processing XXXXX KB of YYYYY KB image Note: If the Pre-erase Attribute bit is set on the partition being downloaded, the message “Pre-Erasing Flash” also appears. This screen indicates that the area selected in the Main Menu screen is currently downloading, and displays until an entire image is received, or until an error is detected. As more data is received, the Receiving Screen is updated to reflect the current status. To process the data, IPL must receive, erase, and write the entire image. With the exception of the disk images, IPL receives the entire image before starting the 12-16 Configuring the Terminal erase, and completes the erase before starting to write. With disk images, IPL multiplexes all three operations as data is received. 11. When the entire image is received, IPL indicates that the download is complete. IPL VER X.XX Partition Name Download Complete Press Action to return to Main Menu Cold Boot Exits IPL If Auto Select was selected on the Main Menu, the text “Auto Select Enabled” appears in place of “Cold Boot Exits IPL.” 12. If Auto Select was selected on the Main Menu, IPL immediately returns to the Waiting for Data Screen to wait for the next image. If any other selection was made on the Main Menu, IPL stays at the success screen until you press Action. Once the screen is acknowledged, IPL returns to the Main Menu to wait for a new selection. 13. When all partitions are downloaded successfully, cold boot the terminal by pressing the reset button inside the battery compartment while holding down the Function button. 14. Close TCM on the host PC by selecting Exit from the File menu. 12-17 PPT 2800 Series Product Reference Guide for Pocket PC 2002 Error Messages IPL Error Detection While receiving data, IPL performs many checks on the data to ensure that the data is received correctly. If an error is detected, IPL immediately aborts the download, and reports the error on an error screen: IPL VER X.XX Download Failed! Error Condition Press Action to return to Main Menu This screen displays until you press Action. Once the screen is acknowledged, IPL returns to the Main Menu screen to wait for a new selection. The cause of the error displays under the Download Failed! indication. The errors that can be reported, and the probable cause of the error, are as follows: Error Description Invalid Image This error occurs if another record is received before the Header Record. Ensure the Header Record is the first record downloaded. Partition Not Defined The destination code is part of the Header record and is used as an index into the partition table. The partition table entry located at this index contains partition information for the data downloaded. If the AutoSelect option is selected, a check is made to ensure that valid partition information exists in the partition table at this index. The check verifies that the Area Name and Sector Size are both nonzero. If not, this error occurs. Wrong Partition If a specific partition is selected from the partition list, and the destination code of the Header record downloaded does not match the index of that partition, this error occurs. Image Too Big The size of the image is also part of the Header record. If the data to be written exceeds the size of the partition as indicated in the partition table, this error occurs. 12-18 Configuring the Terminal Error Description Incorrect Byte Count Image data is processed until the End Of File (EOF - Record Type 01) record is received. This error occurs if IPL detects that the number of bytes received does not equal the number of bytes sent. Unable to Verify Partition Data If the Receive and Verify bit is set for that partition, the data is verified, the flash sector erased, and the data written to the flash part. If this data can not be verified, this error occurs. Transmission Errors The following error messages may appear if an error occurs during transmission: Checksum Error occurs if an invalid checksum is detected in the record. Invalid Record occurs if a record is not defined in the Symbol Hex File Format. Connection Lost occurs if one of the handshaking lines is deasserted during download. Address Out of Sequence occurs if the address of the data received is not sequential. TCM Error Messages TCM validates the cells in your partition table when you select the Execute button. Cells highlighted in red contain an error. Partition loading is disabled until all errors are corrected. Following are errors that TCM may encounter, and possible solutions. Error Error - Partition Size Description The size of a partition must be an integral multiple of the FFSSectorSizeInBytes specified by the .ini file. When the user enters a partition size, TCM rounds up to the next highest integral multiple of the sector size and displays this value in the partition table grid. This error check is made upon value entry, independent of the Execute button. Error - Image Larger than If the required size of the binary image file is larger than the associated Partition partition size, the Partition Size cell in the partition grid turns red to highlight the error. The Required Size cell indicates the actual size required. Error - Total size of all FFS Partition If the total memory allocated to the 3 FFS partitions is greater than the total Flash Memory on the terminal, the Used FFS Memory display box turns red. Decrease the size of one or more of the partitions, then recheck the configuration using the Execute button. 12-19 PPT 2800 Series Product Reference Guide for Pocket PC 2002 Error Error - Source/ Destination Path Verification Description If the directory paths specified by the Source and Destination cells do not exist, the cell containing the non-existent path turns red to highlight the error. Creating a Splash Screen To generate a custom splash screen, use a bitmap editor, such as Paintbrush. Creating a Splash Screen on Color Terminals 1. Create a color bitmap with dimensions of BX x BY where: • BX is less than or equal to 240 pixels • BY is less than or equal to 320 pixels 2. For best quality, use a relatively high resolution color image (for example, 16-bit color). Lower resolution images will also work. 3. Save the file as a 24-bit .bmp bitmap. Creating a Splash Screen on Monochrome Terminals 1. Create a 16-color bitmap with dimensions of BX x BY where: • BX is less than or equal to 240 pixels • BY is less than or equal to 320 pixels 2. Be sure to create the file with 16 colors where 4 bits are used for each pixel of data in the file. IPL will not load if the number of bits of data for each pixel (bpp) is not correct. 3. Save the file as a 4-bit, 16-color .bmp bitmap. 12-20 Configuring the Terminal Loading the Splash Screen via TCM To load the bitmap: 1. Click TCM.exe in the TCM directory. 2. Connect the PPT 2800 to the development PC and invoke IPL to prepare the terminal to receive the splash screen download. 3. Select Load Terminal from the File menu on the development PC. 4. Select your splash screen hex file to begin downloading to the PPT 2800. 5. Close TCM. 12-21 PPT 2800 Series Product Reference Guide for Pocket PC 2002 12-22 Chapter 13 Maintenance and Troubleshooting Chapter Contents Introduction . . . . . . . . . . . . . . . . . . . . . . . . . . . . . . . . . . . . . . . . . . . . . . . . . . . . . . . . . . . . . . . . . 13-3 Maintaining the PPT 2800 . . . . . . . . . . . . . . . . . . . . . . . . . . . . . . . . . . . . . . . . . . . . . . . . . . . . . . 13-3 Troubleshooting . . . . . . . . . . . . . . . . . . . . . . . . . . . . . . . . . . . . . . . . . . . . . . . . . . . . . . . . . . . . . . 13-3 13-1 PPT 2800 Series Product Reference Guide for Pocket PC 2002 13-2 Maintenance and Troubleshooting Introduction This chapter includes instructions on cleaning and storing your terminal, and provides troubleshooting solutions for potential problems during terminal operating. Maintaining the PPT 2800 For trouble-free service, observe the following tips when using your PPT 2800: • Take care not to scratch the screen of your PPT 2800. When working with your PPT 2800, use the supplied stylus or plastic-tipped pens intended for use with a touchsensitive screen. Never use an actual pen or pencil or other sharp object on the surface of the PPT 2800 screen. • Although your PPT 2800 is water and dust resistant, do not expose it to rain or moisture for an extended period of time. In general, treat your PPT 2800 as you would a pocket calculator or other small electronic instrument. • The touch-sensitive screen of your PPT 2800 contains glass. Take care not to drop your PPT 2800 or subject it to strong impact. • Protect your PPT 2800 from temperature extremes. Do not leave it on the dashboard of a car on a hot day, and keep it away from heat sources. • Do not store or use your PPT 2800 in any location that is extremely dusty, damp or wet. • Use a soft lens cloth to clean your PPT 2800. If the surface of the PPT 2800 screen becomes soiled, clean it with a soft cloth moistened with a diluted window-cleaning solution. Troubleshooting Table 13-1. Troubleshooting Problem PPT 2800 terminal does not turn on. Possible Solution Adjust the contrast/backlight. Make sure batteries are installed properly. Replace the batteries. If your PPT 2800 terminal still does not operate, try a soft reset; see Resetting Your PPT 2800 Terminal on page 2-23. 13-3 PPT 2800 Series Product Reference Guide for Pocket PC 2002 Table 13-1. Troubleshooting (continued) Problem Possible Solution PPT 2800 does not emit sound. Check the System Volume slider in the Sounds & Notifications properties screen (under Start/Settings) to make sure the volume is not turned down. PPT 2800 turns itself off. Your PPT 2800 terminal is designed to turn itself off after a period of inactivity. This period can be set from one to five minutes, in one-minute intervals. Check the Power screen (in the System tab under Start/Settings), and change the setting if you need a longer delay before the automatic shutoff feature activates. PPT 2800 stops responding to screen input. Perform a soft reset. See Resetting Your PPT 2800 Terminal on page 2-23. PPT 2800 responds inaccurately to Align the screen. Choose Align Screen from the System tab stylus taps. under Start/Settings, or hold down the Function button and press the Action button. PPT 2800 doesn’t recognize my handwriting. If you’re using the Block Recognizer input method, characters must be written a certain way. See Appendix A, Block Recognizer Characters for information about how to write character strokes. Make the character strokes in the lower character entry area on the screen — not on the display part of the screen. Make sure you are writing lower-case letters, upper-case letters, and numbers in the appropriate sections of the writing area. See Entering Information Using the Input Panel on page 2-10. Tapping the screen buttons or icons does not activate the corresponding feature. Align the screen. Choose Screen from the System tab under Start/Settings, or hold down the Function button and press the Action button. A message appears stating that Delete unused memos and records. If necessary, you can save your PPT 2800 terminal memory is these records on your computer. full. If you are copying files to your terminal, adjust the memory allocation. Select Start, then Settings, and select the System tab. Tap Memory and adjust the slider. Remove programs you no longer use. Select Start, then Settings, and select the System tab. Tap Remove Programs, select the unused program and tap Remove. 13-4 Maintenance and Troubleshooting Table 13-1. Troubleshooting (continued) Problem Possible Solution PPT 2800 is not communicating with the desktop PC. Ensure the PPT 2800 is connected to the desktop PC via serial cable, or is placed in a cradle connected to the desktop PC. Confirm that the PPT 2800 and desktop PC are communicating at the same baud rate. Consult ActiveSync Help on your desktop PC. Beamed data does not transmit. Confirm that the terminals are 5” apart, and that the path between the two devices is clear of obstacles. Adjust the room lighting or move to a different location. When receiving beamed data an out of memory message appears. Your PPT 2800 terminal requires at least twice the amount of memory available as the data you are receiving. For example, if you are receiving a 30K application, you must have at least 60K free. Your PPT 2800 does not accept scan input. Verify that the terminal is loaded with a scanning application. See your System Administrator. Check to be sure the bar code symbol is not defaced. Be sure you are within proper scanning range. Be sure the terminal is programmed to accept the type of bar code you are scanning. If you are expecting a beep on a good decode and don’t hear one, check that the application is set to generate a beep on good decode. If the PPT 2800 stops emitting a laser beam when you press the trigger, check your battery level. When the battery is low, the scanner shuts off before the terminal notifies you of the very low battery condition. Your PPT 2800 is not dialing out. Ensure the modem is connected to the terminal and the telephone jack. Verify the phone jack is connected to a working ouside line. Ensure you have set the modem up properly (see Chapter 8, Connections). 13-5 PPT 2800 Series Product Reference Guide for Pocket PC 2002 Table 13-1. Troubleshooting (continued) Problem Your PPT 2800 is dialing but not connecting. Possible Solution Ensure the network you are calling supports Point-to-Point Protocol (PPP) Ask your networking administrator. Ensure the location is correct. Select Start, then Settings, and select the Connections tab. Tap the Connections icon. Tap Dialing Locations and verify the settings are correct for your current location. Tap Dialing Patterns to make sure the correct patterns are being dialed. Verify you are dialing the right number. Check the Connecting dial-out screen. Confirm the host modem is receiving a call when you dial out. Ensure you have set the modem up properly (see Chapter 8, Connections). Note: If, after performing these checks, the terminal is still not reading symbols, contact your distributor or Symbol Technologies. 13-6 Appendix A Block Recognizer Characters Using the Block Recognizer, you can write characters directly on your terminal screen with your stylus. These characters are translated into typed text. Use Block Recognizer to enter text, for example, to write a note or to fill in fields in a dialog box. Figure A-2 provides examples of how to write characters in lowercase. The Block Recognizer input panel is divided into two writing areas. Letters written in the left area (labeled abc) create lowercase letters. Use the right area (labeled 123) for writing numbers, symbols, special characters, and punctuation. Figure A-1. Using Block Recognizer A-1 PPT 2800 Series Product Reference Guide for Pocket PC 2002 The following chart illustrates some of the characters you can write (the dot on each character is the starting point for writing). Figure A-2. Character Chart For specific instructions on using Block Recognizer, with Block Recognizer open, tap the question mark next to the writing area. A-2 Appendix B Demo Program Introduction The PPT 2800’s demo program illustrates how to use some of the terminal’s many applications. If the demo program is not already on your PPT 2800 (check the Start menu), you may download the program from the Symbol Windows CE Software Developer’s Kit (SDK). See Chapter 3, Customizing Your PPT 2800 for instructions on adding programs to your terminal. The following options are available via the demo program, and are described in this chapter. • Utilities accesses the Control Panel and Diagnostics. • Sample scanning applications for Visual C/C++, Visual Basic, and Pocket Internet Explorer. • File Explorer file management utility. • Sample MagStripe reader application. • CE Apps accesses standard Microsoft Windows CE applications. • Audio sample application demonstrates how to record, play back, and save audio files. • ImageViewer application illustrates how to manipulate displayed image files. B-1 PPT 2800 Series Product Reference Guide for Pocket PC 2002 To initiate the demo program, select PPT 2800 Demo from the Start menu. The initial demo program screen appears. Figure B-1. Main Demo Screen B-2 Demo Program Scan Demo (VC Scan) The Visual C/C++ sample scanning application enables the terminal’s scanner, allows the user to change scan parameters, and displays scanned data. To access the demo, tap VC Scan on the main demo screen. Figure B-2. Scan Sample Screen Scanning Data Fields After a bar code is scanned, the following data appears in the screen: • Data displays the data encoded in the scanned bar code. • Type indicates the hex type scanned. • SRC indicates the scanner being used, and the bar code type scanned (e.g., Code 128). • Time displays the time the bar code was scanned. • Len indicates the number of digits in the bar code. • Evt indicates the status of the scan demo. B-3 PPT 2800 Series Product Reference Guide for Pocket PC 2002 Scanning Options The following options are available in the Scan screen: • Scan provides an alternative to the trigger buttons on the terminal. • View displays the bar code content in a separate screen. • Params is used to change scanning parameter options, such as: • beep time (length of decode beep) • beeper frequency (tone) • LED-on time (length of time LED remains on upon decode) • Code ID (AIM, Symbol) • Wav File (sound of decode beep). • Codes selects the code types the terminal is able to decode, and sets the options for each code type. • Cancel closes the Scan screen. ActiveX Demo (VB Scan) The ActiveX scan test uses the ActiveX Scan Control to perform bar code scanning. Upon a successful decode, the decoded data and bar code type are displayed. To access the demo, tap VB Scan on the main demo screen. Figure B-3. ActiveX Scan Test Sample Screen B-4 Demo Program HTML Scan Demo The HTML Scan demo provides the HTML application ScanBrowse. You may also use this application to turn the Scan Wedge in ScanBrowse on and off. To access the demo, tap HTML Scan on the main demo screen. Figure B-4. HTML Scan Demo Screen Wedge On/Off These icons enable and disable the Scan Wedge. When enabled, the taskbar icon for the Scan Wedge appears in the task tray, and allows data to be scanned into edit fields. Note: The Pocket PC Task Tray is only visible on the Today screen. B-5 PPT 2800 Series Product Reference Guide for Pocket PC 2002 ScanBrowse ScanBrowse uses Pocket Internet Explorer to render the HTML code and the Scan Wedge to scan data into scan enabled fields. Figure B-5. Scan Browse Screen In this sample HTML application, the scan wedge is configured (via ScanWedge.reg) to bracket all scanned data with “{{“ and “}}” to allow the HTML application to differentiate scanned data from keyboard-entered data. B-6 Demo Program Files Tap Files on the main demo screen for a file browser utility, File Explorer, that provides similar Windows Explorer-like functionality on Pocket PC terminals. File Explorer allows the user to browse, cut, copy, paste, and delete files as well as execute the program. It also provides file transfer capability via the IrDA port. Figure B-6. File Explorer Screen You can also access Microsoft File Explorer by selecting Programs under the Start menu. B-7 PPT 2800 Series Product Reference Guide for Pocket PC 2002 MagStripe Reader Select MagStripe on the demo’s main menu for a sample MagStripe application. Figure B-7. MagStripe Screen B-8 Demo Program Sounds (Audio Sample) Tap Sounds on the main demo screen for an audio sample, which demonstrates how to record, play back, and save sounds. Figure B-8. Audio Sample Screen Audio Files are opened from and saved to \Application\wav\ by default, and are configured by the following registry key: HLCU\software\Symbol\settings “WavDirectory” = “\\Application\wav” B-9 PPT 2800 Series Product Reference Guide for Pocket PC 2002 Images (ImageViewer Sample) Tap Images on the main demo screen for an ImageViewer application, which demonstrates how to manipulate picture images programmatically. Figure B-9. ImageViewer Screen ImageViewer supports color .bmp files, and both color and mono .jpg files. The application uses screen swiping and buttons to control images. Following is a description of each button: Button B-10 Description Button Description Pan Up (panning mode), increase vertical size of image. Pan Down (panning mode), decrease vertical size of image. Pan left (panning mode), decrease horizontal size of image. Pan right (panning mode), increase horizontal size of image. Restore the image to its original size. Locate the image in the upper left corner of screen. Lock the aspect ratio of the image when resizing. Set mode to "resize." Demo Program Button Description Button Description Set mode to "fine panning." Set mode to "rough panning." Open an image file. Exit the Image Viewer application. Save the current image. About screen. CE Apps Tap CE Apps on the main menu to access the following standard Windows CE applications: • Note Taker • Calculator • Tasks • Calendar • Solitaire. Figure B-10. CE Apps Screen B-11 PPT 2800 Series Product Reference Guide for Pocket PC 2002 About Select the About button on the demo’s main screen to view information about the demo program. Utilities Tap Utilities on the main demo screen for diagnostic options that ensure various aspects of the terminal are functioning correctly. Figure B-11. Utilities Screen • Configure accesses the Control Panel screen. See the Control Panel section. • Calibrate allows you to re-calibrate the screen. • LED Test tests the green decode LED-on and LED cycle to ensure it is functioning properly. This option also allows you to view the state of the LED (on or off). • Key Test identifies each button on the terminal (except the Scan buttons) when each button is pressed. • Display Test tests the pixels on the screen. • Memory Test demonstrates how to query available memory, calculate memory load (%), and how to write code that properly handles system hibernate messages. • Main Menu returns to the demo’s main screen. B-12 Demo Program Control Panel Tap Configure on the Utilities screen to access the Control Panel, where you can specify settings for your terminal. Figure B-12. Control Panel Screen About and System Versions Tap About on the Control Panel to view the version of the Control Panel. Tap System Versions to view version information for the applications on your terminal. Figure B-13. About and System Versions Screen B-13 PPT 2800 Series Product Reference Guide for Pocket PC 2002 On the System Versions screen: • Platform indicates the operating system running on your PPT 2800 (Pocket PC). • OS Version specifies the version of the operating system. • OEM Name is the OEM name of the terminal. • OEM Version indicates the build version of the operating system. • IPL Version identifies the build version of the system loader. Unique Unit ID Tap Unique Unit ID on the Control Panel to view the terminal’s unique unit ID (a 16-byte hex number identifier), and the version numbers for RCM (Resource Coordinator Manager) API, Rescoord (Resource Coordinator) DLL, UUID DLL, and Temperature DLL. Figure B-14. Unique Unit ID Screen Note: PPT 2800 Series Terminals do not support the Temperature DLL. B-14 Demo Program Persist Persist allows changes made by the Control Panel to remain in effect after a cold boot. When enabled, Persist creates .reg files which save specific settings that are made and restore the settings to the registry after a cold boot. Toggle Persist to Yes to retain these changes made after a cold boot. Figure B-15. Persist Note: Not all options support Permanent Persistence. B-15 PPT 2800 Series Product Reference Guide for Pocket PC 2002 Touch Calibrate Select Touch Calibrate to re-align the screen. Figure B-16. Align Screen Printer Settings Select Printer Settings on the Control Panel to select the printer you’ll use with the terminal, and specify printer settings. Figure B-17. Printer Settings Screen B-16 Demo Program • Selected Printer allows you to select the printer to use. To change the printer, tap the Selected Printer field to scroll through the available printers. • Printer Parameter allows you to set the communication parameter associated with the selected printer. To change this setting, tap the Printer Parameter field, then select the communication parameter for your printer. • Version Info displays the Printer API version number. Communication Settings Select Comm Settings on the Control Panel to specify the settings to use when communicating with other devices. Figure B-18. Communication Settings Screen Tap Port to select the appropriate communication settings to be used by ActiveSync. Scroll through the communication settings to select the appropriate value. B-17 PPT 2800 Series Product Reference Guide for Pocket PC 2002 Display Settings Select Display Settings on the Control Panel to customize the display contrast and backlight. Figure B-19. Display Settings Screen (Color Terminal Shown) • Tap Display Contrast (monochrome terminals only) to increment the contrast value. The terminal’s display changes along with the value. • Tap Intensity (color terminals only) to increment the intensity value. The terminal’s display changes along with the value. • Tap Backlight to toggle the backlight on or off. • API Version displays the current version of the Display API. B-18 Demo Program Audio Settings Select Audio Settings on the Control Panel to specify the beeper volume and view the version numbers for the Audio and Notify APIs. Figure B-20. Audio Settings Screen • Tap Beeper Volume to toggle the beeper volume between low, medium, and high. As you change the value, the beeper sounds to demonstrate the level. • API Version displays the version number of the Audio API. • Notify API Version displays the version number of the Notify API. B-19 PPT 2800 Series Product Reference Guide for Pocket PC 2002 Scanner Settings Select Scanner Settings on the Control Panel to specify scanner-related parameters. Figure B-21. Scanner Settings Screen Tap Scanner Version to view the version numbers for the hardware, decoder, PPD, MDD, and API. Refer to the Help file on the SDK for details on the available parameter options. B-20 Appendix C GSM Demo Program Introduction GsmDemo allows you to explore what features GSM and the PPT 2837 terminal offer you, including sending and receiving SMS messages, and setting up GPRS parameters. GsmDemo Screens To start GsmDemo: 1. Select Programs from the Start menu. 2. Tap the File Explorer. 3. Navigate to the Application folder and select GsmDemo. C-1 PPT 2800 Series Product Reference Guide for Pocket PC 2002 Main Screen When GsmDemo opens, it opens the internal serial port to the GSM modem and attempts to register with a network.The following screen displays. The Network Status field displays the following messages as the modem attempts to connect: Opening GSM COM Port, Checking SIM Card, Configuring Modem, Searching, then Registered Home if the search is successful (Registered Roam if out of network). Figure C-1. GsmDemo Main Screen If the PIN is enabled on the SIM, the Enter PIN screen appears, and the demo will not register until you enter the PIN. Network Status Displays Not Registered, Initializing Modem, Registered, or Registration Failed. Signal strength Displays signal strength. Dial # Sets dial properties and places call (see Dial # on page C-6). Send SMS Sends a message to another terminal or modem (see Send SMS on page C-5). Read SMS Displays a message from another terminal or modem (see Read SMS on page C-3). C-2 GSM Demo Program Read SMS To read your SMS messages: 1. Tap Read SMS on the main screen. The following screen displays, listing the messages available for viewing: Figure C-2. Read SMS Screen 2. Tap a message you’d like to read, then tap Read to open the message. 3. To delete a message, tap the message, then tap Delete to delete the message. C-3 PPT 2800 Series Product Reference Guide for Pocket PC 2002 Figure C-3. Read SMS Screen 4. Tap Delete to delete the message and return to the Read SMS screen. C-4 GSM Demo Program Send SMS To send an SMS message: 1. Tap Send SMS on the main screen. Figure C-4. Send SMS Screen 2. Enter the phone number of the message recipient and the message. 3. Tap Send to send the message. A successful message screen displays. C-5 PPT 2800 Series Product Reference Guide for Pocket PC 2002 Dial # The Dial # feature controls the dial properties of the modem. Select Dial # on the main menu: Figure C-5. Dial Screen C-6 Phone Number Phone number to dial. Status Indicates if modem is connected to the specified number. Mute Mic Turns microphone off. Speaker Volume Slide bar controls volume of speaker. Dial Dials the number specified. Hangup Disconnects the session. GSM Demo Program GsmDemo Menu Commands This section explains the menu commands specific to GsmDemo, accessed from the bottom of the screen. Options Menu/Settings Screen Select Settings from the Options menu to view or change the status of the SIM card. Figure C-6. Settings Screen Tap Modify Address if you need to change the service center phone number if the number is missing, its phone number has changed, or you wish to choose an alternate service center. C-7 PPT 2800 Series Product Reference Guide for Pocket PC 2002 On the Service center address screen, enter the new service center number in the New address field and tap Enter Address. Figure C-7. Service Center Address Screen C-8 GSM Demo Program Tap Enter PIN on the Settings screen to enter a new PIN number. Enter the PIN # in the Enter PIN number: field and tap Enter Pin. Figure C-8. PIN # Screen C-9 PPT 2800 Series Product Reference Guide for Pocket PC 2002 Tap Change Band on the Settings screen to make any changes. Tap Change to register the change. Figure C-9. Change Band Screen Note: The modem resets (powercycles) when you change the band, indicated in the Network Status screen. C-10 GSM Demo Program Tap GPRS Parameters on the Settings screen to alter GPRS parameters. Tap the PDP Context, Minimum Quality of Service, and Required Quality of Service tabs to move between screens. Figure C-10. GPRS Parameters Screens Make the required changes (supplied by the service provider) using the drop-down menus, and tap OK to return to the Settings screen. C-11 PPT 2800 Series Product Reference Guide for Pocket PC 2002 Help Menu The Help menu provides information about your GSM modem. Figure C-11. GsmDemo Help Menu Select About on the Help menu for version information regarding the GsmDemo. Select Modem Info for model information regarding your GSM modem, and select DLL Info for DLL version information. Figure C-12. Help Screens File Menu Use the File menu to exit the GsmDemo applicaiton. Tap File, then Exit. C-12 Appendix D Technical Specifications Environment Table D-1 summarizes the PPT 2800’s intended operating environment. Table D-1. PPT 2800 Operating Environment Operating Temperature -20° C to 50° C (-4° F to 122° F) Storage Temperature -25° C to 50° C (-13° F to 122° F) Humidity 5% to 90% non-condensing Electrostatic Discharge (ESD) 8 kVdc air; 4 kVdc contact Drop to Concrete 1.2 meters (4 feet) Sealing IP54 (windblown rain and dust) Decode Distance 3” - 10.5” (7.6 cm - 26.7 cm) Size 1-D Scanning Terminal: 7”L x 3.625”W x 1”H (177.8mm x 92mm x 25.4mm) 2-D Scanning Terminal: 7.625”L x 3.625”W x 1”D (grip area) x 1.5”D (scanner bay) (193.7mm x 92mm x 25.4mm x 38.1mm) Weight (including battery) 1-D Scanning Terminal: 10.3 oz / 288 gm (batch); 11.8 oz / 330 gm (wireless) 2-D Scanning Terminal: 13.8 oz / 391 gm (batch); 15.3 oz / 434 gm (wireless) D-1 PPT 2800 Series Product Reference Guide for Pocket PC 2002 COM Port Definitions Table D-2. PPT 2800 COM Port Definitions COM Port D-2 Definition COM1 Serial/Cradle COM2 Raw IrDA COM3 IRComm COM4 Scanning COM5 Reserved COM6 WAN COM7 VCOM Ext Power COM8 V2COM Ext Power Technical Specifications Pin-Outs Pin 1 Figure D-1. ActiveSync Port (COM1) Table D-3. PPT 2800 ActiveSync Port (COM1) Pin-Outs Pin Description 1 ext ±5 volts 2 DSR 3 RXD 4 RTS 5 TXD 6 CTS 7 DCD 8 RI 9 DTR 10 RS232_gnd 11 Power_GND 12 9 Volts_In 13 NC 14 NC D-3 PPT 2800 Series Product Reference Guide for Pocket PC 2002 D-4 Index Numerics 11 Mbps advanced properties . . . . . . . . . . . . . 9-21 APs . . . . . . . . . . . . . . . . . . . . . . . . . . 9-35 encryption . . . . . . . . . . . . . . . . . . . . . 9-29 info . . . . . . . . . . . . . . . . . . . . . . . . . . . 9-24 IP config . . . . . . . . . . . . . . . . . . . . . . . 9-25 mode . . . . . . . . . . . . . . . . . . . . . . . . . 9-23 options . . . . . . . . . . . . . . . . . . . . . . . . 9-28 ping . . . . . . . . . . . . . . . . . . . . . . . . . . 9-33 power . . . . . . . . . . . . . . . . . . . . . . . . . 9-26 signal . . . . . . . . . . . . . . . . . . . . . . . . . 9-34 2 Mbps advanced properties . . . . . . . . . . . . . 9-13 general . . . . . . . . . . . . . . . . . . . . . . . . 9-14 options . . . . . . . . . . . . . . . . . . . . . . . . 9-18 power . . . . . . . . . . . . . . . . . . . . . . . . . 9-15 signal . . . . . . . . . . . . . . . . . . . . . . . . . 9-16 transmission . . . . . . . . . . . . . . . . . . . 9-17 A accessories . . . . . . . . . . . . . . . . . . . . . . . . . 1-6 cables . . . . . . . . . . . . . . . . . . . . . . . . . 1-6 cradles . . . . . . . . . . . . . . . . . . . . . . . . . 1-6 ActiveSync . . . . . . . . . . . . . . . . . . . . . . . . . 4-3 adding programs to Start menu . . . . . 3-10 installing . . . . . . . . . . . . . . . . . . . . . . . . 4-3 local operation . . . . . . . . . . . . . . . . . . . 4-8 remote . . . . . . . . . . . . . . . . . . . . . . . . . 4-8 using cable . . . . . . . . . . . . . . . . . . . . . 4-5 using cradle . . . . . . . . . . . . . . . . . . . . . 4-6 via modem . . . . . . . . . . . . . . . . . . . . . . 4-8 adding programs . . . . . . . . . . . . . . . . . . . . . 3-8 to Start menu . . . . . . . . . . . . . . . . . . . 3-9 adjusting backlight . . . . . . . . . . . . . . . . . . . 2-3 adjusting terminal settings . . . . . . . . . . . . . 3-3 aligning screen . . . . . . . . . . . . . . . . .1-15, B-16 applications . . . . . . . . . . . . . . . . . . . . . . . . 5-1 button assignment . . . . . . . . . . . . 3-6, 3-7 calendar . . . . . . . . . . . . . . . . . . . . . . . 5-3 meeting requests . . . . . . . . . . . . . 5-5 summary screen . . . . . . . . . . . . . 5-5 contacts . . . . . . . . . . . . . . . . . . . . . . . 5-6 summary screen . . . . . . . . . . . . . 5-8 GsmDemo . . . . . . . . . . . . . . . . . . . . . . C-1 dial properties . . . . . . . . . . . . . . . C-6 file menu . . . . . . . . . . . . . . . . . . C-12 help menu . . . . . . . . . . . . . . . . . C-12 main screen . . . . . . . . . . . . . . . . . C-2 menu commands . . . . . . . . . . . . . C-7 options menu . . . . . . . . . . . . . . . . C-7 read SMS . . . . . . . . . . . . . . . . . . . C-3 screens . . . . . . . . . . . . . . . . . . . . C-1 send SMS . . . . . . . . . . . . . . . . . . C-5 settings . . . . . . . . . . . . . . . . . . . . C-7 text messages . . . . . . . . . . . . . . . C-3 inbox . . . . . . . . . . . . . . . . . . . . . . . . . 5-14 connecting to e-mail server . . . . 5-14 creating messages . . . . . . . . . . 5-18 managing . . . . . . . . . . . . . . . . . . 5-19 message list . . . . . . . . . . . . . . . . 5-16 synchronizing e-mail . . . . . . . . . 5-14 notes . . . . . . . . . . . . . . . . . . . . . . . . . 5-12 tasks . . . . . . . . . . . . . . . . . . . . . . . . . . 5-9 summary screen . . . . . . . . . . . . 5-11 appointments . . . . . . . . . . . . . . . . . . . . . . . 5-4 attaching handstrap . . . . . . . . . . . . . . . . . 1-13 Index-1 PPT 2800 Series Product Reference Guide for Pocket PC 2002 audio sample . . . . . . . . . . . . . . . . . . . . . . . B-9 audio settings . . . . . . . . . . . . . . . . . . . . . . B-19 AvantGo channels . . . . . . . . . . . . . . . . . . . 7-5 B batteries charging . . . . . . . . . . . . . . . . . . . . . . . 1-8 charging spare batteries . . . . . . . . . . 1-10 charging using cable . . . . . . . . . . . . . 1-11 checking power . . . . . . . . . . . . . . . . . 1-12 installing . . . . . . . . . . . . . . . . . . . . . . . 1-6 removing battery cover . . . . . . . . . . . . 1-7 block recognizer . . . . . . . . . . . . . . . . . . . . 2-12 booting cold . . . . . . . . . . . . . . . . . . . . . . . . . . 2-24 warm . . . . . . . . . . . . . . . . . . . . . . . . . 2-23 buttons assigning applications . . . . . . . . . . 3-6, 3-7 function . . . . . . . . . . . . . . . . . . . . . . . . 2-3 power . . . . . . . . . . . . . . . . . . . . . 1-15, 2-3 C cable pinouts . . . . . . . . . . . . . . . . . . . . . . . . D-3 cables . . . . . . . . . . . . . . . . . . . . . . . . . . . . . 1-6 connecting power cable . . . . . . . . . . 1-11 inserting in terminal . . . . . . . . . . . 1-11, 4-5 performing ActiveSync . . . . . . . . . . . . 4-5 synchronization . . . . . . . . . . . . . . . . . 1-11 calendar application . . . . . . . . . . . . . . . . . . 5-3 creating appointments . . . . . . . . . . . . 5-4 meeting requests . . . . . . . . . . . . . . . . 5-5 summary screen . . . . . . . . . . . . . . . . . 5-5 calibrating screen . . . . . . . . . . . . . . . . . . . B-16 CE applications . . . . . . . . . . . . . . . . . . . . B-11 channels . . . . . . . . . . . . . . . . . . . . . . . . . . . 7-5 chapter descriptions . . . . . . . . . . . . . . . . . . . . xi character chart . . . . . . . . . . . . . . . . . . . . . . A-2 character recognizer . . . . . . . . . . . . . . . . . A-1 charging batteries . . . . . . . . . . . . . . . . . . . . 1-8 spare battery . . . . . . . . . . . . . . . . . . . 1-10 using cable . . . . . . . . . . . . . . . . . . . . 1-11 using cradle . . . . . . . . . . . . . . . . . . . . 1-8 Index-2 cleaning terminal . . . . . . . . . . . . . . . . . . . . 13-3 command bar . . . . . . . . . . . . . . . . . . . . . . . 2-8 icons . . . . . . . . . . . . . . . . . . . . . . . . . . . 2-5 communication settings . . . . . . . . . . . . . . .B-17 communications . . . . . . . . . . . . . . . . . . . . . 4-1 ActiveSync . . . . . . . . . . . . . . . . . . . . . . 4-3 companion programs Pocket Excel . . . . . . . . . . . . . . . . . . . . 6-8 Pocket Word . . . . . . . . . . . . . . . . . . . . 6-3 connecting . . . . . . . . . . . . . . . . . . . . . . . . . . 8-3 disconnecting . . . . . . . . . . . . . . . . . . . . 8-9 infrared . . . . . . . . . . . . . . . . . . . . . . . . . 8-4 to development PC . . . . . . . . . . . . . 12-12 to e-mail server . . . . . . . . . . . . . . . . . . 8-9 to ISP . . . . . . . . . . . . . . . . . . . . . . . . . . 8-4 to network . . . . . . . . . . . . . . . . . . . . . . 8-7 via modem . . . . . . . . . . . . . . . . . . . . . . 8-7 contacting Symbol . . . . . . . . . . . . . . . . . . . . xiii contacts application . . . . . . . . . . . . . . . . . . . 5-6 summary screen . . . . . . . . . . . . . . . . . 5-8 control panel . . . . . . . . . . . . . . . . . . . . . . .B-13 cradle charging batteries . . . . . . . . . . . . . . . . 1-8 charging spare batteries . . . . . . . . . . 1-10 connecting . . . . . . . . . . . . . . . . . . . . . . 4-6 connecting power supply . . . . . . . . . . . 1-8 connecting to host . . . . . . . . . . . . . . . . 1-9 inserting terminal . . . . . . . . . . . . . 1-9, 4-7 performing ActiveSync . . . . . . . . . 4-3, 4-6 performing modem ActiveSync . . . . . . 4-8 cradles . . . . . . . . . . . . . . . . . . . . . . . . . . . . . 1-6 creating messages . . . . . . . . . . . . . . . . . . 5-18 creating splash screen . . . . . . . . . . . . . . 12-20 customizing the PPT 2800 . . . . . . . . . . . . . 3-1 D demo program . . . . . . . . . . . . . . . . . . . . . . .B-1 about . . . . . . . . . . . . . . . . . . . . . . . . .B-12 ActiveX . . . . . . . . . . . . . . . . . . . . . . . . .B-4 audio . . . . . . . . . . . . . . . . . . . . . . . . . .B-9 audio settings . . . . . . . . . . . . . . . . . . .B-19 CE applications . . . . . . . . . . . . . . . . .B-11 communications . . . . . . . . . . . . . . . . .B-17 Index control panel . . . . . . . . . . . . . . . . . . . B-13 display . . . . . . . . . . . . . . . . . . . . . . . . B-18 file explorer . . . . . . . . . . . . . . . . . . . . . B-7 GSM . . . . . . . . . . . . . . . . . . . . . . . . . . C-1 HTML scan . . . . . . . . . . . . . . . . . . . . . B-5 images . . . . . . . . . . . . . . . . . . . . . . . . B-10 ImageViewer . . . . . . . . . . . . . . . . . . . B-10 magstripe . . . . . . . . . . . . . . . . . . . . . . . B-8 MSR sample . . . . . . . . . . . . . . . . . . . . B-8 printer . . . . . . . . . . . . . . . . . . . . . . . . B-16 Scan Wedge . . . . . . . . . . . . . . . . . . . . B-5 ScanBrowse . . . . . . . . . . . . . . . . B-5, B-6 scanner . . . . . . . . . . . . . . . . . . . . . . . . B-3 scanner settings . . . . . . . . . . . . . . . . B-20 sounds . . . . . . . . . . . . . . . . . . . . . . . . . B-9 utilities . . . . . . . . . . . . . . . . . . . . . . . . B-12 disconnecting . . . . . . . . . . . . . . . . . . . . . . . 8-9 display settings . . . . . . . . . . . . . . . . . . . . . B-18 drawing on screen . . . . . . . . . . . . . . . . . . 2-17 E e-mail connection . . . . . . . . . . . . . . . . . . . . 8-9 creating messages . . . . . . . . . . . . . . 5-18 inbox . . . . . . . . . . . . . . . . . . . . . . . . . 5-14 entering characters . . . . . . . . . . . . . . . . . . 2-12 entering information . . . . . . . . . . . . . . . . . 2-10 drawing on screen . . . . . . . . . . . . . . . 2-17 recording message . . . . . . . . . . . . . . 2-18 scanning . . . . . . . . . . . . . . . . . . . . . . 2-18 writing on screen . . . . . . . . . . . . . . . . 2-13 entering text . . . . . . . . . . . . . . . . . . . . . . . 2-10 error messages . . . . . . . . . . . . . . 12-18, 12-19 Excel pocket . . . . . . . . . . . . . . . . . . . . . . . . . 6-8 F favorite links . . . . . . . . . . . . . . . . . . . . . . . . 7-3 file explorer . . . . . . . . . . . . . . . . . . . . 2-21, B-7 finding information . . . . . . . . . . . . . . . . . . 2-21 flash file system . . . . . . . . . . . . . . . . . . . . . 3-3 downloading partitions . . . . . . . . . . . . . 3-6 non-FFS partitions . . . . . . . . . . . . . . . . 3-6 IPL . . . . . . . . . . . . . . . . . . . . . . . . 3-6 splash screen . . . . . . . . . . . . . . . partitions . . . . . . . . . . . . . . . . . . . . . . . copyfile . . . . . . . . . . . . . . . . . . . . regmerge . . . . . . . . . . . . . . . . . . . flash storage . . . . . . . . . . . . . . . . . . . . . . . function button . . . . . . . . . . . . . . . . . . . . . . 3-6 3-3 3-5 3-4 3-3 2-3 G GsmDemo . . . . . . . . . . . . . . . . . . . . . . . . . C-1 dial properties . . . . . . . . . . . . . . . . . . . C-6 file menu . . . . . . . . . . . . . . . . . . . . . . C-12 help menu . . . . . . . . . . . . . . . . . . . . . C-12 main screen . . . . . . . . . . . . . . . . . . . . C-2 menu commands . . . . . . . . . . . . . . . . C-7 options menu . . . . . . . . . . . . . . . . . . . C-7 read SMS . . . . . . . . . . . . . . . . . . . . . . C-3 screens . . . . . . . . . . . . . . . . . . . . . . . . C-1 send SMS . . . . . . . . . . . . . . . . . . . . . . C-5 settings . . . . . . . . . . . . . . . . . . . . . . . . C-7 text messages . . . . . . . . . . . . . . . . . . . C-3 H handstrap attaching . . . . . . . . . . . . . . . . . . . . . . 1-13 I icons status . . . . . . . . . . . . . . . . . . . . . . . . . 2-5 images demo . . . . . . . . . . . . . . . . . . . . . . . . . B-10 ImageViewer . . . . . . . . . . . . . . . . . . . . . . B-10 inbox application . . . . . . . . . . . . . . . 5-14, 5-18 connecting to e-mail server . . . . . . . . 5-14 managing . . . . . . . . . . . . . . . . . . . . . 5-19 message list . . . . . . . . . . . . . . . . . . . 5-16 synchronizing e-mail . . . . . . . . . . . . . 5-14 infrared connection . . . . . . . . . . . . . . . . . . 8-4 Initial Program Loader . . . . . . . . . . . 3-6, 12-12 input panel . . . . . . . . . . . . . . . . . . . . . . . . 2-10 block recognizer . . . . . . . . . . . . . . . . 2-12 letter recognizer . . . . . . . . . . . . . . . . 2-12 installing SDK . . . . . . . . . . . . . . . . . . . . . . 11-3 Index-3 PPT 2800 Series Product Reference Guide for Pocket PC 2002 IPL . . . . . . . . . . . . . . . . . . . . . . . . . . 3-6, 12-12 error messages . . . . . . . . . . . . . . . . 12-18 setup . . . . . . . . . . . . . . . . . . . . . . . . 12-13 ISP connection . . . . . . . . . . . . . . . . . . . . . . 8-4 L letter recognizer . . . . . . . . . . . . . . . . . . . . 2-12 loading applications . . . . . . . . . . . . . . . . 12-12 loading software . . . . . . . . . . . . . . . . . . . 12-12 loading splash screen . . . . . . . . . . . . . . 12-21 M magstripe . . . . . . . . . . . . . . . . . . . . . . . . . . B-8 maintaining terminal . . . . . . . . . . . . . . . . . 13-3 mobile channels . . . . . . . . . . . . . . . . . . . . . 7-5 mobile favorites . . . . . . . . . . . . . . . . . . 7-3, 7-7 creating . . . . . . . . . . . . . . . . . . . . . . . . 7-3 modem connection . . . . . . . . . . . . . . . . . . . 8-7 MSR . . . . . . . . . . . . . . . . . . . . . . . . . . . . . . B-8 N navigation bar . . . . . . . . . . . . . . . . . . . . . . 2-8 network configuring CDPD WAN . . . . . . . . . . 10-8 configuring GPRS WAN . . . . . . . . . 10-23 configuring GSM WAN . . . . . . . . . . 10-28 network adapter properties . . . . . . . . . . . . . . . . . . 9-4, 9-19 network connection . . . . . . . . . . . . . . . . . . 8-7 via modem . . . . . . . . . . . . . . . . . . . . . 8-7 NICTT 11 Mbps . . . . . . . . . . . . . . . . . . . . . . 9-21 2 Mbps . . . . . . . . . . . . . . . . . . . . . . . 9-13 APs . . . . . . . . . . . . . . . . . . . . . . . . . . 9-35 encryption . . . . . . . . . . . . . . . . . . . . . 9-29 general . . . . . . . . . . . . . . . . . . . . . . . 9-14 info . . . . . . . . . . . . . . . . . . . . . . . . . . 9-24 IP config . . . . . . . . . . . . . . . . . . . . . . 9-25 mode . . . . . . . . . . . . . . . . . . . . . . . . . 9-22 options . . . . . . . . . . . . . . . . . . . 9-18, 9-28 ping . . . . . . . . . . . . . . . . . . . . . . . . . . 9-33 Index-4 power . . . . . . . . . . . . . . . . . . . . 9-15, 9-26 signal . . . . . . . . . . . . . . . . . . . . . . . . . 9-16 transmission . . . . . . . . . . . . . . . . . . . . 9-17 notational conventions . . . . . . . . . . . . . . . . . xii notes application . . . . . . . . . . . . . . . . . . . . 5-12 O operating environment . . . . . . . . . . . . . . . .D-1 P partitions downloading . . . . . . . . . . . . . . . . . . . . . 3-6 FFS . . . . . . . . . . . . . . . . . . . . . . . . . . . 3-3 non-FFS . . . . . . . . . . . . . . . . . . . . . . . . 3-6 IPL . . . . . . . . . . . . . . . . . . . . . . . . 3-6 splash screen . . . . . . . . . . . . . . . . 3-6 parts of PPT 2800 . . . . . . . . . . . . . . . . . . . . 1-4 PDF417 raster . . . . . . . . . . . . . . . . . . . . . . . . . 2-22 scanning . . . . . . . . . . . . . . . . . . . . . . . 2-22 pin-outs . . . . . . . . . . . . . . . . . . . . . . . . . . . .D-3 Pocket Excel . . . . . . . . . . . . . . . . . . . . . . . . 6-8 Pocket Internet Explorer . . . . . . . . . . . . . . . 7-1 browsing web . . . . . . . . . . . . . . . . . . . . 7-8 channels . . . . . . . . . . . . . . . . . . . . . . . . 7-5 favorite links . . . . . . . . . . . . . . . . . . . . . 7-3 mobile favorites . . . . . . . . . . . . . . 7-3, 7-7 using . . . . . . . . . . . . . . . . . . . . . . . . . . 7-6 Pocket Word . . . . . . . . . . . . . . . . . . . . . . . . 6-3 pop-up menus . . . . . . . . . . . . . . . . . . . . . . . 2-8 power button . . . . . . . . . . . . . . . . . . . 1-15, 2-3 power cable connecting . . . . . . . . . . . . . . . . . . . . . 1-11 printer settings . . . . . . . . . . . . . . . . . . . . . .B-16 programs adding . . . . . . . . . . . . . . . . . . . . . . . . . 3-8 adding to Start menu . . . . . . . . . . . . . . 3-9 button assignment . . . . . . . . . . . . 3-6, 3-7 flash file system . . . . . . . . . . . . . . . . . . 3-3 removing . . . . . . . . . . . . . . . . . . . . . . 3-10 selecting . . . . . . . . . . . . . . . . . . . . . . . . 2-6 Index R recording . . . . . . . . . . . . . . . . . . . . . . . . . . 2-18 removing programs . . . . . . . . . . . . . . . . . . 3-10 resetting . . . . . . . . . . . . . . . . . . . . . . . . . . 2-23 cold boot . . . . . . . . . . . . . . . . . . . . . . 2-24 warm boot . . . . . . . . . . . . . . . . . . . . . 2-23 S scanner settings . . . . . . . . . . . . . . . . . . . . . . . B-20 scanning . . . . . . . . . . . . . . . . . . . . . 2-18, 2-22 2D bar codes . . . . . . . . . . . . . . . . . . . 2-22 raster . . . . . . . . . . . . . . . . . . . . . . . . . 2-22 scripts building . . . . . . . . . . . . . . . . . . . . . . 12-10 checking . . . . . . . . . . . . . . . . . . . . . 12-10 creating . . . . . . . . . . . . . . . . . . . . . . . 12-8 demo,samples . . . . . . . . . . . . . . . . . . 12-3 opening in TCM . . . . . . . . . . . . . . . . . 12-8 saving . . . . . . . . . . . . . . . . . . . . . . . . 12-9 standard . . . . . . . . . . . . . . . . . . . . . . . 12-3 SDK . . . . . . . . . . . . . . . . . . . . . . . . . . . . . 11-3 installing . . . . . . . . . . . . . . . . . . . . . . . 11-4 installing on development PC . . . . . . 11-4 system requirements . . . . . . . . . . . . . 11-3 selecting a drawing . . . . . . . . . . . . . . . . . . 2-17 selecting programs . . . . . . . . . . . . . . . . . . . 2-6 selecting text . . . . . . . . . . . . . . . . . . . . . . . 2-13 selecting writing . . . . . . . . . . . . . . . . . . . . 2-14 service information . . . . . . . . . . . . . . . . . . . .xiii setting date . . . . . . . . . . . . . . . . . . . . . . . . 1-17 setting time . . . . . . . . . . . . . . . . . . . . . . . . 1-17 setting time zone . . . . . . . . . . . . . . . . . . . . 1-16 settings adjusting . . . . . . . . . . . . . . . . . . . . . . . 3-3 sound settings . . . . . . . . . . . . . . . . . . . . . . . B-19 sounds demo . . . . . . . . . . . . . . . . . . . . . . . B-9 specifications . . . . . . . . . . . . . . . . . . . . . . . D-1 Spectrum24 APs . . . . . . . . . . . . . . . . . . . . . . . . . . 9-35 configuring . . . . . . . . . . . . . . . . . . . . . . 9-1 configuring 11 Mbps . . . . . . . . . . . . . 9-21 configuring 2 Mbps . . . . . . . . . . . . . . 9-13 configuring PPT 2842 . . . . . . . . . 9-4, 9-19 encryption . . . . . . . . . . . . . . . . . . . . . 9-29 general . . . . . . . . . . . . . . . . . . . . . . . 9-14 info . . . . . . . . . . . . . . . . . . . . . . . . . . 9-24 IP config . . . . . . . . . . . . . . . . . . . . . . 9-25 mode . . . . . . . . . . . . . . . . . . . . . . . . . 9-22 options . . . . . . . . . . . . . . . . . . . 9-18, 9-28 ping . . . . . . . . . . . . . . . . . . . . . . . . . . 9-33 power . . . . . . . . . . . . . . . . . . . . 9-15, 9-26 signal . . . . . . . . . . . . . . . . . . . . 9-16, 9-34 transmission . . . . . . . . . . . . . . . . . . . 9-17 Spectrum24 settings . . . . . . . . . . . . . . . . . 9-6 advanced . . . . . . . . . . . . . . . . . . . . . . 9-6 encryption properties . . . . . . . . . 9-9, 9-11 Micro AP properties . . . . . . . . . . . . . . 9-8 mobile unit properties . . . . . . . . . . . . . 9-7 splash screen . . . . . . . . . . . . . . . . . . . . . . . 3-6 creating . . . . . . . . . . . . . . . . . . . . . . 12-20 loading . . . . . . . . . . . . . . . . . . . . . . 12-21 Start menu adding programs . . . . . . . . . . . . . . . . . 3-9 selecting programs . . . . . . . . . . . . . . . 2-6 starting the PPT 2800 . . . . . . . . . . . . . . . 1-15 status icons . . . . . . . . . . . . . . . . . . . . . . . . 2-5 stylus . . . . . . . . . . . . . . . . . . . . . . . . . . . . . 2-3 symbol support center . . . . . . . . . . . . . . . . . xiv synchronization cable . . . . . . . . . . . . . . . 1-11 connecting . . . . . . . . . . . . . . . . . 1-11, 4-5 T tasks application . . . . . . . . . . . . . . . . . . . . 5-9 summary screen . . . . . . . . . . . . . . . . 5-11 TCM . . . . . . . . . . . . . . . . . . . . . . . . . . . . . 12-1 building hex image . . . 12-3, 12-10, 12-11 components . . . . . . . . . . . . . . . . . . . 12-4 creating script . . . . . . . . . . . . . . . . . . 12-8 defining properties . . . . . . . . . . . . . . 12-6 error messages . . . . . . . . . . . . . . . . 12-19 file browser window . . . . . . . . . . . . . 12-5 hex image download . . . . . . . . . . . . 12-12 loading splash screen . . . . . . . . . . . 12-21 saving script . . . . . . . . . . . . . . . . . . . 12-9 Index-5 PPT 2800 Series Product Reference Guide for Pocket PC 2002 script window . . . . . . . . . . . . . . . . . . 12-4 starting . . . . . . . . . . . . . . . . . . . . . . . 12-3 tool bar . . . . . . . . . . . . . . . . . . . . . . . 12-5 technical specifications . . . . . . . . . . . . . . . D-1 Terminal Configuration Manager . . . . . . . 12-1 Today screen . . . . . . . . . . . . . . . . . . . . . . . 2-4 tools and utilities Spectrum24 settings . . . . . . . . . . . . . . 9-6 troubleshooting . . . . . . . . . . . . . . . . . . . . 13-3 U unpacking . . . . . . . . . . . . . . . . . . . . . . . . . . 1-3 using stylus . . . . . . . . . . . . . . . . . . . . . . . . 2-3 using the PPT 2800 . . . . . . . . . . . . . . . 2-1, 5-1 Index-6 scanning . . . . . . . . . . . . . . . . . . . . . . . 2-22 utilities . . . . . . . . . . . . . . . . . . . . . . . . . . . .B-12 W web browser . . . . . . . . . . . . . . . . . . . . . . . . 7-8 Word Pocket . . . . . . . . . . . . . . . . . . . . . . . . . 6-3 writing on screen . . . . . . . . . . . . . . . . . . . . 2-13 WWAN configuring . . . . . . . . . . . . . . . . . . . . . 10-1 configuring CDPD . . . . . . . . . . . . . . . 10-8 configuring GPRS . . . . . . . . . . . . . . 10-23 configuring GSM . . . . . . . . . . . . . . . 10-28 Tell Us What You Think... We’d like to know what you think about this Manual. Please take a moment to fill out this questionnaire and fax this form to: (631) 738-3318, or mail to: Symbol Technologies, Inc. One Symbol Plaza M/S B-4 Holtsville, NY 11742-1300 Attention: Technical Publications Manager IMPORTANT: If you need product support, please call the appropriate customer support number provided. Unfortunately, we cannot provide customer support at the fax number above. User’s Manual Title:___________________________________________ (please include revision level) How familiar were you with this product before using this manual? Very familiar Slightly familiar Not at all familiar Did this manual meet your needs? If not, please explain. ___________________________________________________________ ___________________________________________________________ What topics need to be added to the index, if applicable? ___________________________________________________________ ___________________________________________________________ What topics do you feel need to be better discussed? Please be specific. ___________________________________________________________ ___________________________________________________________ What can we do to further improve our manuals? ___________________________________________________________ ___________________________________________________________ PPT 2800 Series Product Reference Guide for Pocket PC 2002 72-54894-03 Revision A — August 2002 2 Symbol Technologies, Inc. One Symbol Plaza, Holtsville N.Y. 11742