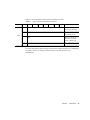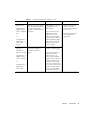
1
Sun StorEdge™
RAID Manager 6.22
Installation and Support
Guide for Solaris™
Sun Microsystems, Inc.
901 San Antonio Road
Palo Alto, CA 94303-4900 USA
650 960-1300
Fax 650 969-9131
Part No. 805-7756-10
September 1999, Revision A
Send comments about this document to: [email protected]
Copyright 1999 Sun Microsystems, Inc., 901 San Antonio Road • Palo Alto, CA 94303 USA. All rights reserved.
Portions copyright 1999 LSI Logic, Inc. All rights reserved.
This product or document is protected by copyright and distributed under licenses restricting its use, copying, distribution, and decompilation.
No part of this product or document may be reproduced in any form by any means without prior written authorization of Sun and its licensors,
if any. Third-party software, including font technology, is copyrighted and licensed from Sun suppliers.
Parts of the product may be derived from Berkeley BSD systems, licensed from the University of California. UNIX is a registered trademark in
the U.S. and other countries, exclusively licensed through X/Open Company, Ltd. For Netscape Communicator™, the following notice applies:
Copyright 1995 Netscape Communications Corporation. All rights reserved.
Sun, Sun Microsystems, the Sun logo, AnswerBook, docs.sun.com, OpenWindows, Solaris, Sun Enterprise Volume Manager, and StorEdge are
trademarks, registered trademarks, or service marks of Sun Microsystems, Inc. in the U.S. and other countries. All SPARC trademarks are used
under license and are trademarks or registered trademarks of SPARC International, Inc. in the U.S. and other countries. Products bearing
SPARC trademarks are based upon an architecture developed by Sun Microsystems, Inc. The OPEN LOOK and Sun™ Graphical User Interface
was developed by Sun Microsystems, Inc. for its users and licensees. Sun acknowledges the pioneering efforts of Xerox in researching and
developing the concept of visual or graphical user interfaces for the computer industry. Sun holds a non-exclusive license from Xerox to the
Xerox Graphical User Interface, which license also covers Sun’s licensees who implement OPEN LOOK GUIs and otherwise comply with Sun’s
written license agreements.
RESTRICTED RIGHTS: Use, duplication, or disclosure by the U.S. Government is subject to restrictions of FAR 52.227-14(g)(2)(6/87) and
FAR 52.227-19(6/87), or DFAR 252.227-7015(b)(6/95) and DFAR 227.7202-3(a).
DOCUMENTATION IS PROVIDED “AS IS” AND ALL EXPRESS OR IMPLIED CONDITIONS, REPRESENTATIONS AND WARRANTIES,
INCLUDING ANY IMPLIED WARRANTY OF MERCHANTABILITY, FITNESS FOR A PARTICULAR PURPOSE OR NONINFRINGEMENT, ARE DISCLAIMED, EXCEPT TO THE EXTENT THAT SUCH DISCLAIMERS ARE HELD TO BE LEGALLY INVALID.
Copyright 1999 Sun Microsystems, Inc., 901 San Antonio Road • Palo Alto, CA 94303 Etats-Unis. Tous droits réservés.
Des portions de ce produit sont protégées par un copyright (1999) de LSI Logic, Inc. Tous droits réservés.
Ce produit ou document est protégé par un copyright et distribué avec des licences qui en restreignent l’utilisation, la copie, la distribution, et la
décompilation. Aucune partie de ce produit ou document ne peut être reproduite sous aucune forme, par quelque moyen que ce soit, sans
l’autorisation préalable et écrite de Sun et de ses bailleurs de licence, s’il y en a. Le logiciel détenu par des tiers, et qui comprend la technologie
relative aux polices de caractères, est protégé par un copyright et licencié par des fournisseurs de Sun.
Des parties de ce produit pourront être dérivées des systèmes Berkeley BSD licenciés par l’Université de Californie. UNIX est une marque
déposée aux Etats-Unis et dans d’autres pays et licenciée exclusivement par X/Open Company, Ltd. La notice suivante est applicable à
Netscape Communicator™ : Copyright 1995 Netscape Communications Corporation. All rights reserved.
Sun, Sun Microsystems, le logo Sun, AnswerBook, docs.sun.com, OpenWindows, Solaris, Sun Enterprise Volume Manager, et StorEdge sont des
marques de fabrique ou des marques déposées, ou marques de service, de Sun Microsystems, Inc. aux Etats-Unis et dans d’autres pays. Toutes
les marques SPARC sont utilisées sous licence et sont des marques de fabrique ou des marques déposées de SPARC International, Inc. aux EtatsUnis et dans d’autres pays. Les produits portant les marques SPARC sont basés sur une architecture développée par Sun Microsystems, Inc.
L’interface d’utilisation graphique OPEN LOOK et Sun™ a été développée par Sun Microsystems, Inc. pour ses utilisateurs et licenciés. Sun
reconnaît les efforts de pionniers de Xerox pour la recherche et le développement du concept des interfaces d’utilisation visuelle ou graphique
pour l’industrie de l’informatique. Sun détient une licence non exclusive de Xerox sur l’interface d’utilisation graphique Xerox, cette licence
couvrant également les licenciés de Sun qui mettent en place l’interface d’utilisation graphique OPEN LOOK et qui en outre se conforment aux
licences écrites de Sun.
CETTE PUBLICATION EST FOURNIE "EN L’ETAT" ET AUCUNE GARANTIE, EXPRESSE OU IMPLICITE, N’EST ACCORDEE, Y
COMPRIS DES GARANTIES CONCERNANT LA VALEUR MARCHANDE, L’APTITUDE DE LA PUBLICATION A REPONDRE A UNE
UTILISATION PARTICULIERE, OU LE FAIT QU’ELLE NE SOIT PAS CONTREFAISANTE DE PRODUIT DE TIERS. CE DENI DE
GARANTIE NE S’APPLIQUERAIT PAS, DANS LA MESURE OU IL SERAIT TENU JURIDIQUEMENT NUL ET NON AVENU.
Contents
1.
Introduction
1
About This Guide
2
About This Software
What’s New
3
3
Other Features
4
About the Installation Procedure
Understanding the Restrictions
5
6
Hardware and Software Requirements
Hardware Configuration
9
Operating Environment
10
9
Host Adapters, Hubs, and Switches
Checking the Hardware
11
11
Configuring the Solaris Environment to Support Sun StorEdge RAID
Manager 12
Patches Required to Support the Solaris Operating Environment
The rmparams File
13
Setting Up Other Scriptable Notification Options
SNMP Notification
12
14
14
Contents
iii
2.
Installing the Software on a Standard Configuration
Selecting the Appropriate Installation Procedure
16
Upgrading to Sun StorEdge RAID Manager 6.22
17
Requirements
▼
17
To Upgrade to RAID Manager 6.22
18
Installing the Sun StorEdge RAID Manager Software
▼
15
To Mount the CD-ROM
20
20
Sun StorEdge RAID Manager Installation Options
swmtool
pkgadd
21
21
21
▼
To Install RAID Manager Using swmtool
▼
To Install RAID Manager Using pkgadd
▼
To Verify the Installation
22
25
30
Removing an Earlier Version of Sun StorEdge RAID Manager
Deinstalling RAID Manager
3.
Initial Startup
33
35
Setting the Logical Unit Limit
36
Setting the LUN Limit in the rmparams File
Setting the Controller’s Fibre Channel Loop ID
Starting the Software
36
38
40
Setting Up Independent Controllers
Assigning Names to the Modules
42
43
Verifying and Upgrading Controller Firmware
44
Determining the Controller Firmware Version
Upgrading the Controller Firmware Version
Running Recovery Guru/Health Check
Completing the Installation
iv
32
44
45
48
51
Sun StorEdge RAID Manager 6.22 Installation and Support Guide for Solaris • September 1999
Determining the Current Configuration
52
Determining If Any Changes Are Necessary
Configuring RAID Modules
58
63
Configuring Logical Units on the RAID Module
63
Adding Logical Units to the Operating Environment
What’s Next?
4.
64
Customizing the Installation
65
Changing the rmparams File
66
▼
To Edit the rmparams File
67
Setting Up Scriptable Notification Options
Editing Example
70
70
Setting Up SNMP Notification
▼
To Set Up the NMS
▼
To Enable SNMP
73
Disabling SNMP
74
72
72
SNMP Trap Message Description
5.
64
Operating Environment Support
Naming Conventions
75
77
78
Module Names
78
Controller and LUN Names
78
Creating and Deleting Logical Units
Number of LUNs
79
79
Creating LUNs
79
Deleting LUNs
80
The Background Monitor
81
Stopping the arraymon Process
Starting the arraymon Process
81
82
Contents
v
Using Sun StorEdge™ Volume Manager
82
Redundant Controller Support (RDAC)
83
Disabling RDAC
85
Command-Line Interface
man Pages
86
86
Adding New RAID Modules to the Configuration
Deinstalling RAID Manager
6.
Troubleshooting
88
89
Resolving Problems
90
Locating Solutions
Category
90
91
Component Search
91
Application Search
94
Software Search
96
Configuration Application
Firmware Upgrade
General
87
97
99
100
Recovery Guru/Health Check
Replacing Controllers
103
107
Problems Bringing the New Controller Online
Problem Summary
108
Incompatible Firmware Detected
Problem Summary
108
109
109
Upgrading Firmware from 2.05.00 Through 2.05.03 to 3.X for a Replaced
Controller In Slot A 113
vi
Sun StorEdge RAID Manager 6.22 Installation and Support Guide for Solaris • September 1999
A.
Specifications
115
Hardware Specifications
116
Host-RAID Module Configurations
Host Systems
117
Host Adapters
117
SCSI Host Adapters
117
Fibre Channel Host Adapters
Boot Device Host Adapters
Fibre Channel Hubs
▼
118
118
118
Fibre Channel Fabric Switches
Required Patches
116
118
119
To Install Required Patches
119
Controller Firmware Upgrade Notes
Firmware Autosynch
121
122
Supporting The Modify Group/LUN Options
B.
Reference Material
NVRAM Settings
123
123
rmparams File Listing
124
rmscript File Listing
128
man Pages
122
131
Contents
vii
viii
Sun StorEdge RAID Manager 6.22 Installation and Support Guide for Solaris • September 1999
Figures
FIGURE 3-3
Main Program Group 40
FIGURE 3-4
Firmware Upgrade Screen 46
FIGURE 3-5
Recovery Main Screen
FIGURE 3-6
Recovery Screen/Exceptions Found
FIGURE 3-7
Recovery Procedure Screen 50
FIGURE 3-8
Configuration Application Main Screen 53
FIGURE 3-9
Main Module Profile Screen
FIGURE 5-1
Device Name Example
FIGURE 5-2
Example of RDAC I/O Connection Redundancy
48
49
56
78
84
Figures
ix
x
Sun StorEdge RAID Manager 6.22 Installation and Support Guide for Solaris • September 1999
Tables
TABLE 1-1
Restrictions for the Solaris Operating Environment 6
TABLE 1-2
Required Changes for Solaris Operating Environment 12
TABLE 2-1
Package Descriptions
TABLE 2-2
Tasks Performed During Installation
TABLE 2-3
Tasks Performed During System Reboot 28
TABLE 2-4
Removing Earlier Versions of Sun StorEdge RAID Manager
TABLE 1
21
26
32
SCSI Host Adapters 36
TABLE 2
Fibre Channel Host Adapters
TABLE 3-1
Fibre Channel Loop ID Byte Definition
TABLE 3-2
Configuration Display Columns 54
TABLE 3-3
Possible Parameters to Change
TABLE 4-1
Changeable Parameters in rmparams File 68
TABLE 4-2
SNMP Trap Message Descriptions 75
TABLE 6-1
Troubleshooting Entries by Category 91
TABLE 6-2
Troubleshooting Entries Organized by Component
91
TABLE 6-3
Troubleshooting Entries Organized by Application
94
TABLE 6-4
Troubleshooting Entries Organized by Software 96
TABLE 6-5
Configuration Application Changes Troubleshooting
TABLE 6-6
Controller Firmware Upgrade Troubleshooting 99
37
39
59
97
Tables
xi
xii
TABLE 6-7
Troubleshooting Generally Applicable to All Applications 100
TABLE 6-8
Recovery Guru/Health Check Troubleshooting
TABLE 6-9
Determining Which Upgrade Procedure to Follow 110
TABLE A-1
Supported Platforms for Sun StorEdge A1000, A3000, and A3500
TABLE A-2
Supported SCSI Host Adapters
TABLE A-3
Supported Fibre Channel Host Adapters 118
TABLE A-4
Controller Firmware Upgrade
103
117
117
121
Sun StorEdge RAID Manager 6.22 Installation and Support Guide for Solaris • September 1999
CHAPTER
1
Introduction
This chapter introduces the Sun StorEdge™ RAID Manager software in the Solaris™
operating environment. It gives an overview of the RAID Manager storage
management software, the hardware and software requirements, and the guidelines
you must follow before installing the software.
Note – In this manual, the terms Sun StorEdge RAID Manager and RAID Manager
are used interchangeably.
■
About This Guide—page 2
■
About This Software—page 3
■
About the Installation Procedure—page 5
■
Understanding the Restrictions—page 6
■
Hardware and Software Requirements—page 9
■
Configuring the Solaris Environment to Support Sun StorEdge RAID Manager—
page 12
■
SNMP Notification—page 14
Note – See “Common Definitions” in the Sun StorEdge RAID Manager User’s Guide
or the Online Help glossary for an explanation of important RAID Manager terms.
1
About This Guide
The Sun StorEdge RAID Manager Installation and Support Guide provides installation,
setup, and troubleshooting information for Sun StorEdge™ RAID Manager 6.22 in
the Solaris operating environment.
Note – Before you attempt to install the RAID Manager software, be sure to read the
Sun StorEdge RAID Manager Release Notes for the latest installation and operation
procedures.
Use the Installation and Support Guide to:
■
Determine the hardware and software required to install the storage management
software
■
Install the storage management software
■
Set up software parameters
■
Identify storage management features unique to the Solaris environment
■
Troubleshoot the installation if necessary
In addition to this manual you also received the following manuals:
2
■
Sun StorEdge RAID Manager Release Notes (805-7758-xx). This manual contains
important information about the installation and operation of the Sun StorEdge
RAID Manager software that was not available at the time this manual was
published.
■
Sun StorEdge RAID Manager User’s Guide (806-0478-xx). This manual describes
how to use the storage management software after installation. Once you have
installed and set up the software, refer to this guide for information on using the
software and maintaining the RAID Modules.
Sun StorEdge RAID Manager 6.22 Installation and Support Guide for Solaris • September 1999
About This Software
Note – The Sun StorEdge RAID Manager 6.22 software is backward compatible with
previously released firmware. However, the new features described in the following
paragraphs are only available if the controller firmware level in both controllers is at
3.01.02.xx or higher.
What’s New
This release of Sun StorEdge RAID Manager supports the following new features:
■
Support for the Solaris 2.6 and Solaris 7 operating environments.
■
Faster Logical Unit (LUN) creation. The controller performs background
formatting to create logical units faster.
■
SMART/PFA support. Through the use of Self-Monitoring Analysis and
Reporting Technology (SMART), the storage management software now reports
Predictive Failure Analysis (PFA) flags on drives.
■
Firmware autosynch. If you replace a controller with firmware level 3.00.X or
higher, the firmware on the new controller automatically synchronizes with the
firmware on the remaining controller.
Note – The controller autosynch feature requires the setting of two NVSRAM bits
for it to work. At the time this manual was published, this feature was not
supported by Sun.
■
Fibre Channel Loop ID. A new nvutil option enables you to set the controller’s
Fibre Channel Loop ID.
■
Backup Log redirection. You can now set the location for your old log file when
the threshold limit is reached.
■
Parity Check/Repair Enhancement. You may now choose not to repair errors
during parity check/repair.
Chapter 1
Introduction
3
Other Features
The storage management software also supports these new features:
■
Dynamic Expansion Capabilities. The Modify Group/LUN feature in the
Configuration Application enables you to change the RAID Level of existing
LUNs, add more capacity to drive groups, defragment data storage space, and
change LUN segment size.
Note – The dynamic expansion options require controller firmware level 3.01.02.xx
or higher.
■
Performance Monitor. This feature in the Status Application enables you to
monitor I/O activity on selected controllers and LUNs for a selected RAID
Module while it is in use. This monitoring allows you to gather useful
information for evaluating system performance and determining possible
methods for improvement.
■
Module Profile support for Fibre Channel host connections.
■
Weekly auto parity check.
■
Additional failure types detected and appropriate recovery procedures added in
the Recovery Guru.
■
Support for two additional configurations: independent controller and multi-host.
See the Sun Storage RAID Manager User’s Guide for more details on supported
configurations.
■
RAID Module selection enhancements (included in the Select Module option):
■
■
■
■
Easily remove a RAID Module and its association to the storage management
software.
RAID Module selection window enables you to select a RAID Module before
you enter an application.
Find feature to easily select a RAID Module from a list.
■
Additional battery management functions are provided by the raidutil utility.
(For more information, read the raidutil man page.)
■
Enhancements to caching features:
■
■
4
Provide a user-supplied name to a RAID Module and also provide comments
for easier identification.
An operating status of the cache parameter is now displayed in the caching
parameters option and in Module Profile → LUNs to let you know when write
caching has been enabled but is currently not active.
Module Profile → Controllers now includes the microprocessor cache size of
the controller.
Sun StorEdge RAID Manager 6.22 Installation and Support Guide for Solaris • September 1999
About the Installation Procedure
Start the installation procedure with the next section in this chapter, “Understanding
the Restrictions” on page 6.
Note – Before you attempt to install the RAID Manager software, be sure to read the
Sun StorEdge RAID Manager Release Notes for the latest installation and operation
procedures.
■
Continue with each section, step by step, for the installation procedure you are
performing, through the end of Chapter 3, “Initial Startup.”
■
If you are upgrading from a previous version of storage management software,
you can stop the installation procedure after completing the tasks in “Completing
the Installation” on page 51.
After you have completed the installation procedure:
■
You may need to go to Chapter 4, “Customizing the Installation” to add or
modify features in the storage management software. However, you do not need
to customize the installation to run the software.
■
You also may want to review the material in Chapter 5, “Operating Environment
Support” to learn more about how the storage management software operates in
the Solaris environment.
After you have completed all installation and customizing tasks in this book:
■
Refer to the Sun StorEdge RAID Manager User’s Guide for complete information on
how to operate the storage management software.
■
You may need to refer back to Chapter 5, “Operating Environment Support” from
time to time for features unique to the Solaris operating environment.
Chapter 1
Introduction
5
Understanding the Restrictions
Table 1-1 identifies the known restrictions for using this software in the Solaris
operating environment. In some cases, there are notes for working around the
restrictions. For more detailed information on troubleshooting the installation, see
Chapter 6 of this guide.
Note – Always check for a README file on any installation media and the Sun
StorEdge RAID Manager Release Notes. They may contain important information that
was not available at the time this Installation and Support Guide was prepared.
TABLE 1-1
6
Restrictions for the Solaris Operating Environment (1 of 3)
Restriction
Application
Workaround
RDAC failover does not work during
system dump if the dump/swap device is
a RAID Module LUN different from the
LUN used for the boot device.
Installation
and Setup
Do not create a RAID Module LUN having
only dump/swap areas. It is acceptable to
put the dump/swap area on the same LUN
as the boot device.
When adding a RAID Module with the
same name as an existing module, the
name of the existing module changes.
Installation
and Setup
The new module name is the old module
name with a revision number appended
(for example, module_name becomes
module_name2).
Either use unique module names or change
the names after adding the new module.
Note that any existing scripts or
applications that depend on the existing
module name must be modified.
During installation, the system may hang
for several minutes. A “No such device or
address” message may be displayed on the
console.
Installation
and Setup
Wait several minutes for the operation to
be completed.
Do not use A3000 controllers with 2.04.X or
2.05.04 controller firmware as replacements in a module running 3.01.X
firmware.
In SCSI systems, use replacements with a
minimum firmware level of 2.05.06.
In Fibre Channel systems, use replacements with a minimum firmware level of
3.00.X.
General
None.
If you are not certain what firmware
version a spare controller has, do not use it.
Obtain spare controllers (with the
minimum firmware required) from your
local solution center.
Sun StorEdge RAID Manager 6.22 Installation and Support Guide for Solaris • September 1999
TABLE 1-1
Restrictions for the Solaris Operating Environment (2 of 3)
Restriction
Application
Workaround
Redundant controllers must have the same
cache size. Mis-matched cache sizes on
controllers acting as a redundant pair can
result in operation errors and possible data
corruption.
General
None.
On some systems, the storage management
software can only support multi-initiator
configurations with Sun™ Cluster
software.
General
Refer to the Sun Cluster Software Planning
and Installation Guide, or check with your
Sun service provider, for multi-initiator
issues.
The command line raidutil utility does
not always generate an error message, even
when an operation fails. For example,
using raidutil -R to reset the controller
battery age without LUN 0 created causes
the operation to fail. However, there is no
error message.
General
Anytime you use the raidutil utility to
perform an operation, it is a good idea to
verify that it completed successfully. For
example, after creating LUNs, you might
want to use the command-line utility lad
to verify your configuration.
The amount of time it takes to perform
operations may increase as the number of
configured LUNs increases. For example,
changing caching parameters can take up
to 30 seconds per LUN and up to 15
minutes if changing 32 LUNs. Also, large
cache sizes could increase the time.
General
None.
If you are using a SUN host adapter and a
cable disconnects, storage management
software applications may hang, especially
if you are using Sun Enterprise Volume
Manager™.
General
Reboot the host system.
Do not reset the SCSI bus or turn a module
off and then on again if the module
contains Dead LUNs.
General
None.
If you reset the SCSI bus, or turn off a
module and turn it on again, the LUNS are
lost and you must use the Configuration
application to recreate them.
The storage management software may be
unresponsive if you power down a RAID
Module.
General
Make sure the storage management
software is closed before powering down a
RAID Module.
Version checking is not performed if the
only file to download is the bootware file.
Maintenance
and Tuning
When upgrading controller firmware,
always download both the appware file
and the bootware file.
Chapter 1
Introduction
7
TABLE 1-1
Restrictions for the Solaris Operating Environment (3 of 3)
Restriction
Application
Workaround
The system may lock up when a controller
that has been offline is brought back online
during heavy I/O activity.
Recovery
Bring the controller back online when there
is little I/O activity.
Using Recovery operations to revive or fail
an actual bad drive may result in the RAID
Controller not being reported. This also
occurs if you replace a failed Hot Spare
drive with a bad drive.
A series of time-outs in the RAID
Controller, the storage management
software, and the SCSI host adapter driver
eventually cause the host to stop retries. As
a result, all SCSI operations to the
controller fail until you reboot the host.
Recovery
Reboot if a controller disappears after a
drive replacement or revival.
For detailed information on the Manual
Recovery Options in the Recovery
application, see Chapter 6 of this guide.
When a drive failure causes a RAID 0 Dead
LUN, using Recovery Guru to format the
LUN will cause a system panic.
Recovery
1. Perform the directed Recovery Guru
actions up to and including replacement
of the failed drive.
2. When the Guru asks for confirmation of
the LUN format operation, close all
storage management applications and
reboot the Solaris host.
3. When the reboot is complete, restart the
storage management software and use
Options → Manual Recovery →
Logical Units and Format the
affected LUNs.
When you replace a failed drive, this
software allows 35 seconds for the
controller to initialize the new drive.
However, if you have a controller and are
in a Dead LUN situation (single Drive
Failure for RAID 0 or Multiple Drive
Failure for RAID 1, 3, or 5), Recovery Guru
does not perform a format on the LUNs. If
you do not manually format the LUNs,
subsequent file system mounts will fail.
Recovery,
Recovery Guru
1. After inserting the replacement drive,
wait for the drive’s activity light to go
off before clicking OK (that is, wait for
more than 35 seconds).
2. If you do not wait and you see the
“LUN is still Dead due to remaining
drive failures” message, you need to use
Options → Manual Recovery →
Logical Units and Format the
affected LUNs.
3. If the affected LUNs had file systems
that failed to mount, use the newfs
command to create a new file system.
Continue with the next section “Hardware and Software Requirements” .
8
Sun StorEdge RAID Manager 6.22 Installation and Support Guide for Solaris • September 1999
Hardware and Software Requirements
Before installing the storage management software, make sure that you have all of
the hardware and software components installed.
■
Hardware Configuration—page 9
■
Operating Environment—page 10
■
Host Adapters, Hubs, and Switches—page 11
■
Checking the Hardware—page 11
Hardware Configuration
The following hardware is required:
■
A graphics card with a minimum 800 x 600 resolution.
■
A mouse or similar pointing device.
■
RAID modules with two A3x00 controllers.
■
A minimum controller firmware version depending on the controller model.
See Table A-4 on page 121 for a list of supported firmware levels.
Note – You can install Sun StorEdge RAID Manager with firmware versions before
2.5.2; however, you must immediately upgrade the firmware to version 2.5.2 or later
after you have completed the installation. In some cases, it may be necessary to
upgrade to an intermediate firmware level before upgrading to a later firmware level.
Refer to “Verifying and Upgrading Controller Firmware” on page 44 for instructions
on determining the current firmware level and downloading controller firmware.
■
One or two host machines with a Host-RAID Module configuration supported by
the software. See “Host-RAID Module Configurations” on page 116 for
information on supported configurations.
See Table A-1 on page 117 for a list of platforms currently supported for the Sun
StorEdge A3x00 and A3500FC systems.
Note – Unless the A3000 or A3500 is uniquely identified, both types of systems are
referred to as “A3x00” throughout this document.
Chapter 1
Introduction
9
Operating Environment
The Solaris 2.6 or Solaris 7 operating environment must be installed on one of the
following:
■
The host machines connected by a SCSI or Fibre Channel cable to the RAID
Modules, or
■
LUN 0 of a RAID Module if you want to use the module as a boot device. This
involves preparing the host system to boot from the RAID Module and installing
all software.
You can use one of the following commands to obtain version information about
your Solaris operating environment.
■
Type the following at the system prompt:
uname -a
The version is specified as 5.6 (for Solaris 2.6 software) or 5.7 (for Solaris 7
software).
■
Type the following at the system prompt:
cat /etc/release
The /etc/release file includes version information as shown in the following
example.
Solaris 2.6 5/98 s297s_hw3smccServer_09 SPARC
Copyright 1998 Sun Microsystems, Inc. All Rights Reserved.
Assembled on 24 April 1998
If the /etc/release file does not exist, your system may be running a version
earlier than Solaris 2.6 5/98.
10
Sun StorEdge RAID Manager 6.22 Installation and Support Guide for Solaris • September 1999
Host Adapters, Hubs, and Switches
See “Hardware Specifications” on page 116 for information on the host adapters,
hubs, and switches tested with the storage management software.
Checking the Hardware
Use the following checklist to make sure that the RAID Modules have been correctly
connected to the host system. If necessary, refer to the documentation supplied with
the RAID Module:
■
Cable connections are correct and secure?
■
Termination are correct and secure?
■
Host-side IDs are set properly?
Each controller in each RAID Module must have a unique host-side ID (that is, no
two devices on the same SCSI Bus or Fibre Channel loop can have the same hostside ID).
Note – For the greatest level of I/O path protection, provide each controller in a
RAID Module with its own data path connection (that is, cable and host adapter)
into the host system.
If the host system is networked, see “SNMP Notification” on page 14 to set up and
enable the SNMP option.
Chapter 1
Introduction
11
Configuring the Solaris Environment to
Support Sun StorEdge RAID Manager
TABLE 1-2 summarizes the changes you need to make to fully support Sun StorEdge
RAID Manager with the Solaris operating environment.
TABLE 1-2
Required Changes for Solaris Operating Environment
Task To Perform
Purpose
For More Details, Go To
Install patches to
support Sun StorEdge
RAID Manager.
To ensure proper operation of Sun
StorEdge RAID Manager with the
Solaris operating environment
“Patches Required to Support the Solaris
Operating Environment” on page 12
Edit the rmparams
file.
To increase LUN support per host
adapter and/or enable SNMP
notification
“The rmparams File” on page 13
Edit the rmscript
file.
To set up scriptable event
notifications (such as third-party
vendor’s paging, Fax, and so on)
“Setting Up Other Scriptable Notification
Options” on page 14
Set the SNMP
notification.
To enable or disable this remote
notification option
“SNMP Notification” on page 14
Patches Required to Support the Solaris
Operating Environment
Software patches are available to ensure proper operation of the RAID Manager
software in the Solaris operating environment. Make sure that all required patches
are installed properly before installing the Sun StorEdge RAID Manager software.
Refer to the Sun StorEdge RAID Manager Release Notes (805-7758-xx) for a list of
patches (including patch ID numbers) required to use the Sun StorEdge RAID
Manager software in your Solaris operating environment.
12
Sun StorEdge RAID Manager 6.22 Installation and Support Guide for Solaris • September 1999
The rmparams File
The rmparams file is used to store several configurable options available through
Sun StorEdge RAID Manager. You need to change options in this file if you:
■
Want to increase the number of controllers allowed on the system.
■
Want to support more than eight LUNs on your RAID modules (see “Setting the
Logical Unit Limit” on page 36).
■
Want to enable/disable SNMP notification.
■
Are upgrading the storage management software and want to make customized
changes to this file. Use the original rmparams file that you saved to determine
the changes you want to make. Remember, the new file contains new parameters
for this version, so do not replace it with the old file.
■
Are installing this software for the first time and want to review the changes you
can make.
For more information about the rmparams file and how to change the options in this
file, see:
■
“Changing the rmparams File” on page 66.
■
“rmparams File Listing” on page 124.
■
the rmparams man page for a description of the format this file uses.
Chapter 1
Introduction
13
Setting Up Other Scriptable Notification Options
You can edit the rmscript file. For example, if you want to install third-party
notification software to perform various events (such as faxing or paging), you
would add the appropriate script for each event near the end of this file. Consult the
third-party’s software documentation for specific details.
For more information in this guide about the rmscript file and how to set up other
scriptable notification options, see:
■
“Setting Up Scriptable Notification Options” on page 70.
■
“rmscript File Listing” in Appendix B for the file’s contents.
■
the rmscript man page for a description of the format this file uses.
SNMP Notification
Using Simple Network Management Protocol (SNMP) traps, the Sun StorEdge
RAID Manager software can provide remote notification of RAID events to
designated network management stations (NMS).
To enable SNMP notification on your host, you must edit the /etc/raid/
rmparams file so that the software will know where to direct the SNMP trap
messages when a RAID event has occurred. For instructions on editing the
rmparams file, see “Changing the rmparams File” on page 66.
For detailed information about enabling or disabling SNMP, see “Setting Up SNMP
Notification” on page 72.
14
Sun StorEdge RAID Manager 6.22 Installation and Support Guide for Solaris • September 1999
CHAPTER
2
Installing the Software on a
Standard Configuration
This chapter leads you through the steps for installing or upgrading the storage
management software on a single host, multi-host, or independent controller
configuration:
■
Selecting the Appropriate Installation Procedure—page 16
■
Upgrading to Sun StorEdge RAID Manager 6.22—page 17
■
Installing the Sun StorEdge RAID Manager Software—page 20
■
Removing an Earlier Version of Sun StorEdge RAID Manager—page 32
■
Deinstalling RAID Manager—page 33
Before you install the storage management software on your system, make sure you
do the following:
■
Read the Sun StorEdge A3500/A3500FC Hardware Configuration Guide (805-4981-xx).
■
Prepare the host system by installing the appropriate host adapter cards for SCSI
or Fibre Channel-Arbitrated Loop (FC-AL) connections. Refer to the
documentation that came with your host adapter and A3500/A3500FC system for
instructions.
■
Install the Sun StorEdge A3500/A3500FC system and connect it to the host as
described in the Sun StorEdge A3500/A3500FC Controller Module Guide
(805-4980-xx).
15
Selecting the Appropriate Installation
Procedure
The procedure you use to install the storage management software depends on
whether you are upgrading a previously installed version or installing the software
for the first time.
16
Upgrade?
First-Time Installation?
Continue with “Upgrading to Sun
StorEdge RAID Manager 6.22” on page 17.
Go to “Installing the Sun StorEdge RAID
Manager Software” on page 20.
Sun StorEdge RAID Manager 6.22 Installation and Support Guide for Solaris • September 1999
Upgrading to Sun StorEdge RAID
Manager 6.22
Before you attempt to upgrade your current version of RAID Manager, read the
following notes.
■
Do not add or remove any new peripherals or devices to/from your system until
you have completed upgrading to the latest version of RAID Manager software.
■
Be sure to save a copy of the /etc/osa/rmparams file and the /usr/lib/osa/
bin/rmscript file before starting the upgrade procedure. You can refer to these
files after the upgrade and decide if you need to customize the new files with any
changes you may have made. Do not copy the old files over the new files. This
action will destroy new parameters and scripts that were installed with the latest
version of Sun StorEdge RAID Manager software.
■
If you are upgrading from Sun StorEdge RAID Manager 6.0, the RAID module
numbers/names will change. In the newer versions of the software the module
name is derived from the host machine where the Sun StorEdge RAID Manager
software is installed. With Sun StorEdge RAID Manager 6.0 the modules were
labeled “RAID Module XX.” The newer versions label the modules
“<hostname>_XXX.” For example, if the host machine running the storage
management software is named “hobo”, the RAID module names will be
“hobo_XXX.”
■
If you are upgrading from Sun StorEdge RAID Manager 6.0 or 6.1, LUNs created
in these environments will not be able to use the new dynamic drive
group/LUN features included in Sun StorEdge RAID Manager 6.22. In order to
use the new features, you must first delete and recreate any LUNs created in
earlier versions of RAID Manager.
■
Refer to the Sun StorEdge RAID Manager Release Notes (805-7758) for information
about preserving the device names of LUNs that have valid data; see Bug ID
4118532 in the section that discusses “Known Issues.”
Requirements
To complete this upgrade procedure, you need:
■
Sun StorEdge RAID Manager 6.22 CD
■
The appropriate patches (if any) for your configuration
Chapter 2
Installing the Software on a Standard Configuration
17
▼
To Upgrade to RAID Manager 6.22
1. Repair any hardware failures on the A3x00 arrays.
2. Prepare any layered volume management applications for upgrade.
■
For Solstice DiskSuite, see the Solstice DiskSuite 4.1 Reference Guide (802-6724).
■
For Volume Manager, see the Sun StorEdge Volume Manager 2.6 Installation Guide
(805-5707).
3. Prepare for upgrading to the latest version of Sun StorEdge RAID Manager
software.
a. Save a copy of the current /kernel/drv/sd.conf file.
b. Save a copy of the current /etc/path_to_inst file.
c. Save a copy of the current configuration:
i. From any application, select File → Save Module Profile.
ii. Make sure all information is selected, and select OK.
iii. Save to a location that is separate from the storage management software to
ensure it will not be removed during the software removal procedure.
iv. Preserve the device names of LUNs that have valid data; see the description
for Bug ID 4118532 in the Sun StorEdge RAID Manager Release Notes (8057758) under “Known Issues.”
4. Exit the Sun StorEdge RAID Manager software.
Make sure an earlier version of Sun StorEdge RAID Manager software is not
currently open or running.
5. Unmount any file systems and stop any I/O to the RAID modules connected to the
host on which the Sun StorEdge RAID Manager software is being upgraded.
6. Remove the earlier version of RAID Manager from your system.
Go to “Removing an Earlier Version of Sun StorEdge RAID Manager” on page 32.
7. If you want to upgrade your Solaris operating environment, go to Step 8.
Otherwise, skip Step 8 and go to Step 9
8. Install your new Solaris operating environment (optional).
Refer to your SPARC: Installing Solaris Software and SPARC: Hardware Platform Guide
for more information on upgrading Solaris. Return to this document to continue
with the upgrade to Sun StorEdge RAID Manager 6.22 software.
9. Install all required patches as outlined in the Sun StorEdge RAID Manager Release
Notes (805-7758-xx).
18
Sun StorEdge RAID Manager 6.22 Installation and Support Guide for Solaris • September 1999
It is important that you apply the latest device driver patches to your Solaris
operating environment before downloading any RAID controller firmware or
executing any hardware patches. This step is required to ensure that no problems
arise while executing the hardware patches on your current system. A reboot of the
current operating environment is required to load and initialize the newly patched
device drivers.
10. Install the Sun StorEdge RAID Manager 6.22 software; refer to “Installing the Sun
StorEdge RAID Manager Software” on page 20.
11. Verify installation of the software; refer to “To Verify the Installation” on page 30.
12. Re-install layered volume management applications as described in the
Installation Guide for each application (see Step 2 above).
Caution – If the Sun Storage Volume Manager 2.6 software is installed on your
system, a default feature known as Dynamic Multi-Pathing (DMP) is active by
default. The Sun StorEdge RAID Manager software and the A3x00 RAID array do
not support DMP. Redundant I/O pathing is maintained internally by the Sun
StorEdge RAID Manager software. Therefore, you must disable the DMP feature in
Volume Manager and reboot the system.
Refer to the Sun StorEdge Volume Manager 2.6 Release Notes (805-5708) and the Sun
StorEdge Volume Manager 2.6 System Administrator’s Guide (805-5706) for detailed
information about disabling the DMP feature in Volume Manager.
Chapter 2
Installing the Software on a Standard Configuration
19
Installing the Sun StorEdge RAID
Manager Software
Caution – Be sure all hardware is connected to your host system before installing the
software. Failure to do so could result in the storage management software not
recognizing the RAID Modules.
▼
To Mount the CD-ROM
Note – Depending on how your workstation is configured, your CD-ROM drive
may be mounted automatically. If the CD-ROM drive is not mounted, you must
mount it before you can install the software.
1. Is the CD-ROM mounted?
Yes? Continue with Step 4.
No? Continue with Step 2.
2. If no mount point directory exists, create one.
3. Mount the CD-ROM drive by typing:
# mount -F hsfs -o ro /dev/dsk/cXtXdXsX /cdrom
Where cXtXdXsX is the device node of the CD-ROM (for example, c0t6d0s0) and
/cdrom is the mount point.
4. Load the disc with the label side facing up into the CD-ROM drive.
5. Continue with “Sun StorEdge RAID Manager Installation Options.”
20
Sun StorEdge RAID Manager 6.22 Installation and Support Guide for Solaris • September 1999
Sun StorEdge RAID Manager Installation Options
There are two methods (swmtool and pkgadd) that can be used to install the Sun
StorEdge RAID Manager software. The swmtool process provides a graphical user
interface (GUI) that simplifies the task of installing the Sun StorEdge RAID Manager
software package clusters. pkgadd is the standard command line interface
installation process. Refer to TABLE 2-1 for package descriptions.
After mounting the CD-ROM drive, you can use one of the following methods to
install the software for use with the Solaris operating environment.
swmtool
The swmtool (Software Manager) utility is the recommended method to use
when installing software package clusters from the software CD. To use swmtool,
you must install the X Window system on your system and run OpenWindows™.
For instructions on using swmtool, refer to “To Install RAID Manager Using
swmtool” on page 22.
Note – swmtool is the installation method described throughout this chapter
(unless otherwise noted). Instructions on how to use the pkgadd utility are also
provided if you prefer this method of installation.
pkgadd
The pkgadd utility is another method used to install software package clusters from
the software CD. pkgadd differs from swmtool in that you do not need to run
OpenWindows; you can invoke the pkgadd command at the system prompt. For
instructions on using pkgadd, refer to “To Install RAID Manager Using pkgadd” on
page 25.
TABLE 2-1
Package Descriptions
Cluster Name
Description
SUNWosafw
Open Storage Array (firmware)
SUNWosar
Open Storage Array (root)
SUNWosau
Open Storage Array (usr)
SUNWosamn
Open Storage Array (man pages)
Chapter 2
Installing the Software on a Standard Configuration
21
▼
To Install RAID Manager Using swmtool
Before you begin this procedure, do the following:
■
Install any software patches that may be required for your Solaris environment.
Refer to the Sun StorEdge RAID Manager Release Notes for patch ID numbers.
■
Make sure the installation media device you are using is attached to your system
when you boot the system.
Caution – This installation procedure requires you to reboot your system.
Therefore, make sure that other users are not on the system when installing this
software.
1. Start the OpenWindows environment.
2. Load the Sun StorEdge RAID Manager CD into your CD-ROM drive with the
label side facing up.
If there is another CD in the drive, remove it by typing eject in a shell window.
3. Open File Manager.
4. Open a command window and (if you are not already superuser) become
superuser using the su command and superuser password.
5. Start Software Manager by typing:
# /usr/sbin/swmtool
Admintool:Software is displayed.
6. Select Edit... Add.
The Set Source Media window is displayed.
7. Select Mounted Directory if you are running Volume Management or Local CDROM as your media type.
8. Type the path to the source media in the Directory Name:
# /cdrom/cdrom0
The Software Manager window is displayed with the Sun StorEdge RAID Manager
packages to be installed.
22
Sun StorEdge RAID Manager 6.22 Installation and Support Guide for Solaris • September 1999
9. Click on the Open Storage Array packages to be installed.
Click on Customize if you need to change the Sun StorEdge RAID Manager
packages.
10. Click the Add button.
The Software Manager: Command Input/Output window is displayed with preinstallation information followed by this prompt:
Do you want to continue with this installation?
11. Respond with <y> (yes).
Installation messages are displayed in the Software Manager: Command Input/
Output window.
It may take one to two minutes before you notice certain tasks occurring (see
TABLE 2-2).
The following message is displayed after the installation process has been
completed:
Installation of SUNWxxxx was successful.
where SUNWxxxx is the specific package name.
12. Quit the Software Manager program.
Caution – Install the software patches for your Solaris environment if you have not
done so already. Failure to do so may cause your system to boot improperly. Refer to
the patch information in the Sun StorEdge RAID Manager Release Notes.
13. Shut down the system by typing:
# shutdown -y -i0 -g1
See the shutdown(1M) man page for more information. Using the shutdown
command is more efficient than using the halt command.
Caution – Make sure that you use the boot -r option for the reboot required in
Step 14 and in future reboots following any changes in RAID configuration. This
option ensures that the system is reconfigured according to your changes.
Chapter 2
Installing the Software on a Standard Configuration
23
14. Reboot the system by typing:
ok> boot -r
Several additional tasks are performed as the system reboots. You may notice some
of these shown in TABLE 2-3.
15. When a message appears (The system is ready) on your screen, do you see the
NVSRAM settings are correct message?
No
Continue with Step 16.
Yes
Continue with “To Verify the Installation” on
page 30.
16. If the NVSRAM message says that settings were changed, turn off the power to
the RAID module controllers and then on again to implement the new NVSRAM
settings.
On SCSI RAID Modules, you can reboot the system again by typing:
# shutdown -y -i0 -g1
ok> boot
After the system reboots, continue with “To Verify the Installation” on page 30.
24
Sun StorEdge RAID Manager 6.22 Installation and Support Guide for Solaris • September 1999
▼
To Install RAID Manager Using pkgadd
Before you begin this procedure, do the following:
■
Install any software patches that may be required for your Solaris environment.
Refer to the Sun StorEdge RAID Manager Release Notes for patch ID numbers.
■
Make sure the installation media device you are using is attached to your system
when you boot the system.
Caution – This installation procedure requires you to reboot your system.
Therefore, make sure that other users are not on the system when installing this
software.
1. Load the Sun StorEdge RAID Manager CD into your CD-ROM drive with the
label side facing up.
If there is another CD in the drive, remove it by typing eject in a shell tool
window.
2. Become superuser by using the su command and entering your superuser
password.
3. Type:
# /usr/sbin/pkgadd -d /cdrom/cdrom0/Product package_name
Note – The argument to the -d option must be a full path name to a device or
directory. If you do not specify the device on which the package resides, pkgadd
checks the default spool directory (/var/spool/pkg). If the package is not there,
the installation fails.
A list of all packages on the CD is displayed, including the storage management
software and all firmware packages.
4. Select all to download all packages on the CD.
To install Sun StorEdge RAID Manager, choose the packages in the following order:
1. SUNWosar
2. SUNWosafw
3. SUNWosamn
4. SUNWosau
Chapter 2
Installing the Software on a Standard Configuration
25
5. Follow the instructions on the screen to install the packages provided on the CDROM.
You may see a message that the installation process includes certain scripts with
super-user privileges.
6. During installation, information is displayed and followed by this prompt:
Do you want to continue with this installation?
7. Respond with <y> (yes).
It may take one to two minutes before you notice certain tasks occurring (see
TABLE 2-2). The README file is now available for your review.
TABLE 2-2
Tasks Performed During Installation
What You Will See
Automatic Task Occurring
Installing RAID Manager as Files are copied to the host
<rm6> and a listing of directories system.
and files being copied.
Installing man pages
Why Is the Task Being Done?
All of the files are being copied to the
appropriate directories.
Reference man pages are copied man pages associated with Sun StorEdge
to the host system.
RAID Manager are being copied to the
appropriate directory.
kernel/drv/sd.conf already sd.conf file is updated.
exists. OK to modify?
This file is used to specify the logical unit
(LUN) support for the operating system,
but initially has only LUN 0 defined for
each SCSI ID. Therefore, this file is edited
to add multiple LUN support (0-7) for
each controller in each RAID Module
connected to the host system.
Adding RAID Manager
changes to
/etc/syslog.conf
syslog.conf file is updated.
Sun StorEdge RAID Manager logs certain
failure messages from the arraymon
daemon and the graphical user interface
(GUI) applications to the syslogd
daemon. This file is edited to ensure that
Solaris consistently logs these messages to
this file.
RAID Manager README file
/etc/raid/README
The README file is displayed.
The README file provides important
information about the software.
26
Sun StorEdge RAID Manager 6.22 Installation and Support Guide for Solaris • September 1999
8. When you finish reviewing the README file, quit pkgadd.
You see a message indicating whether or not you need to reboot the system. In either
case, you can remove the installation CD by typing:
# eject cdrom
Caution – Install the software patches for your Solaris environment if you have not
done so already. Failure to do so may cause your system to start up improperly.
Refer to the Sun StorEdge RAID Manager Release Notes (805-7758) for a list of required
patches.
9. Did the message tell you that you need to reboot the system?
If No?
Go to “To Verify the Installation” on page 30.
If Yes?
Continue with Step 10.
10. Shut down the system by typing:
# shutdown -y -i0 -g1
Refer to the shutdown(1M) man page for more information, if needed. Using the
shutdown command is preferred over the halt command.
Caution – Make sure that you use the boot -r option for the reboot required in
Step 11 and in future reboots following any changes in RAID configuration. This
option ensures that the system is reconfigured according to your changes.
Chapter 2
Installing the Software on a Standard Configuration
27
11. Reboot the system by typing:
ok> boot -r
Several additional tasks are performed as the system reboots. TABLE 2-3 shows some
of the tasks you may see occurring.
TABLE 2-3
Tasks Performed During System Reboot
What You Will See
Automatic Task Occurring
Why Is the Task Being Done?
“Setting up RAID device
access...”
“Re-generating rdriver.conf
file...”
The software is setting up
the correct device nodes
for Redundant Disk
Array Controller (RDAC)
support.
To ensure the software device
access.
“RDAC Driver re-loaded...”
The RDAC Driver is
loaded.
The RDAC Driver provides
failover support for data
connections.
(For a description of RDAC
and the protection it
provides, see “CommandLine Interface” on page 86.)
Example if NO changes were made:
NVRAM settings on the
controller(s) in the RAID
Module being checked
and, if necessary,
corrected by the nvutil
program.
Certain configuration settings
must be set so that the
software can communicate
correctly with the controllers
in the RAID Module.
“The NVRAM settings of controller
cXtXdX (1TXXXXXXX) are correct.
nvutil command succeeded.”
Example if changes were made:
“The NVRAM value of Unconfigured
LUNs bit field of controller
cXtXdX (1TXXXXXXX) at offset 0x11
is invalid, the value is 0x20
(the valid value should be 0x0).
The incorrect NVRAM settings of
controller cXtXdX (1TXXXXXXX)
have been fixed.
Reboot the system for the new
settings to take effect.
nvutil command succeeded”
Note: If you have trouble
getting the software to
recognize the RAID Modules,
review the nvutil man page.
Note: If you have trouble getting the
software to recognize the RAID Modules,
review “NVRAM Settings” on page 123.
28
Sun StorEdge RAID Manager 6.22 Installation and Support Guide for Solaris • September 1999
TABLE 2-3
Tasks Performed During System Reboot (Continued)
What You Will See
Automatic Task Occurring
Why Is the Task Being Done?
“Array monitor initiated...”
The monitor daemon
(arraymon) is started.
The array monitor daemon
(arraymon) automatically
checks the RAID Module(s)
for any problems/events and
provides appropriate
notification.
“RDAC Daemons Initiated...”
The RDAC daemons are
started.
The RDAC daemons provide
fail-over support for the I/O
data connections.
“RDAC Resolution Daemon locked in
memory...”
RDAC is set up to resolve
errors.
If errors occur, RDAC can
resolve them.
12. When a message appears (The system is ready) on your screen, do you see the
NVSRAM settings are correct message?
No
Yes
Continue with Step 13.
Continue with “To Verify the Installation” on
page 30.
13. If the NVSRAM message says that settings were changed, turn off the power to
the RAID module controllers and then on again to implement the new NVSRAM
settings.
On SCSI RAID Modules, you can reboot the system again by typing:
# shutdown -y -i0 -g1
ok> boot
After the system reboots, continue with “To Verify the Installation” on page 30.
Chapter 2
Installing the Software on a Standard Configuration
29
▼
To Verify the Installation
1. At the command line, type:
pkginfo -l package_name
A list showing statistics (version information, installation date, file information, and
so on) about the software appears. The status field reads “completely installed” if
the installation was successful.
2. At the command line type:
ps -ef | grep arraymon
A confirmation line shows the array monitor (arraymon) as an active process, for
example:
root
root
1724
5520
1
5512
0
Aug 02 ?
0 16:31:18 pts/6
0:14 /usr/lib/osa/bin/arraymon
0:00 grep arraymon
3. At the command line type:
ps -ef | grep rdaemon
A confirmation line shows the rdac resolution/restart daemons as two active
processes, for example:
root
root
root
30
1764
1745
5522
1745
1
5512
0
Aug 02 ?
0
Aug 02 ?
0 16:31:40 pts/6
0:00 /usr/lib/osa/bin/rdaemon 29 156 5
0:00 /usr/lib/osa/bin/rdaemon 29 156 5
0:00 grep rdaemon
Sun StorEdge RAID Manager 6.22 Installation and Support Guide for Solaris • September 1999
4. Is the confirmation line displayed?
No
Yes
Continue with Step 5.
Go to Chapter 3, “Initial
Startup”.
5. If the previous steps are unsuccessful, do the following:
a. Shut down the system by typing:
shutdown -y -i0 -g1
b. Reboot the system by typing:
boot -r
c. Repeat Steps 1-3.
d. If you still have problems, uninstall Sun StorEdge RAID Manager and then
reinstall it.
When you have successfully installed the storage management software, go to
Chapter 3, “Initial Startup.”
Chapter 2
Installing the Software on a Standard Configuration
31
Removing an Earlier Version of Sun
StorEdge RAID Manager
If you need to remove Sun StorEdge RAID Manager (for example, to re-install the
software if there is some problem during the installation procedure), use the
pkgrm(1) utility. Based on the current version of RAID Manager software installed
on your system, remove the packages in the order they are listed in TABLE 2-4.
TABLE 2-4
Removing Earlier Versions of Sun StorEdge RAID Manager
RAID Manager Version
Remove These Packages
6.0
SUNWosau
SUNWosar
SUNWosaab
SUNWosamn
6.1
SUNWosau
SUNWosar
SUNWosaab
SUNWosahb
SUNWosaib
SUNWosamn
SUNWosafw
6.1.1/6.1.1 Update 1/6.1.1 Update 2
SUNWosau
SUNWosar
SUNWvtsse
SUNWosamn
SUNWosafw
Note – Certain critical files remain after you remove the packages. Be sure to keep
these files in order to make any system changes to the new version of storage
management software.
The rmlog.log file also remains after using pkgrm to remove the software.
Although keeping this file should not cause any problems, you may want to
manually delete it.
32
Sun StorEdge RAID Manager 6.22 Installation and Support Guide for Solaris • September 1999
1. Type the following command to remove each package listed above for your
current version of Sun StorEdge RAID Manager software:
pkgrm package_name
2. Follow the instructions on the screen to remove each package.
Deinstalling RAID Manager
If you need to deinstall the RAID Manager software, use the pkgrm(1) utility and
follow the instructions on the screen.
The rmlog.log file also remains after using the pkgrm utility to deinstall the
software. Although keeping this file should not cause any problems, you may want
to manually delete it.
Note – You cannot use pkgrm on the RAID Manager software if the RAID module is
the boot device.
Chapter 2
Installing the Software on a Standard Configuration
33
34
Sun StorEdge RAID Manager 6.22 Installation and Support Guide for Solaris • September 1999
CHAPTER
3
Initial Startup
This chapter contains procedures for operating the Sun StorEdge RAID Manager
software and determining if the system configuration meets your needs.
■
Setting the Logical Unit Limit—page 36
■
Setting the Controller’s Fibre Channel Loop ID—page 38
■
Starting the Software—page 40
■
Setting Up Independent Controllers—page 42
■
Assigning Names to the Modules—page 43
■
Verifying and Upgrading Controller Firmware—page 44
■
Running Recovery Guru/Health Check—page 48
■
Completing the Installation—page 51
■
Determining the Current Configuration—page 52
■
Determining If Any Changes Are Necessary—page 58
■
Configuring RAID Modules—page 63
■
What’s Next?—page 64
35
Setting the Logical Unit Limit
Each host adapter used with the storage management software has a maximum
number of LUNs it can support. This limit depends on the operating environment
version and installed patches.
By default, the storage management software limits all host adapters to eight LUNs
(whether the module has a single controller or redundant controllers—therefore, if
you have a RAID module with two active controllers, the total number of LUNs
between them cannot be more than eight). You must make changes to your software
if your configuration allows more than eight LUNs per host adapter.
Refer to the Sun StorEdge RAID Manager Release Notes (805-7758-xx) for detailed
information about the number of LUNs per RAID module that are supported for the
various combinations of host connection, host adapter, Solaris operating
environment version, and patch level.
Note – For best results, configure all 32 LUNs on your RAID modules if you make
changes to support 32 LUNS. If you do not have all the LUNs configured, you may
notice system delays at start-of-day.
Setting the LUN Limit in the rmparams File
You should change the System_MaxLUNsPerController parameter in the
/etc/osa/rmparams file if any of your host adapters support 32 LUNs.
The following procedure applies only to the host adapters listed in TABLE 1 and
TABLE 2.
TABLE 1
36
SCSI Host Adapters
Type of Host
Adapter
Product Description
Part Number
Sbus
Differential Fast-Wide Intelligent SCSI-2 (DWIS)
X1062A
Sbus
Ultra Differential Fast-Wide SCSI (UDWIS)
X1065A
Sun StorEdge RAID Manager 6.22 Installation and Support Guide for Solaris • September 1999
Note – Refer to the Sun Storage RAID Manager Release Notes for information about
the Dual-Channel UltraSCSI Host Adapter PCI (part number X6541A).
TABLE 2
Fibre Channel Host Adapters
Type of Host
Adapter
Product Description
Part Number
Sbus
Sun StorEdge Sbus FC-100 Host Adapter
X6730A
PCI
Sun StorEdge PCI FC-100 Host Adapter
X6729A
Caution:
Do not use the Sbus HBA card with a part number of 501-3060.
1. Using any text editor, open the /etc/osa/rmparams file. (See “Changing the
rmparams File” on page 66.)
2. Change the System_MaxLunsPerController parameter to 32.
3. Save the rmparams file, and back it up to the /usr/lib/osa directory.
Note – When you installed this software, a copy of the rmparams file named
rmparams.install was saved to the /usr/lib/osa directory. If necessary, you
can use this file to return to your installation settings.
Anytime you make changes to the rmparams file, save a copy of the new file to the
/usr/lib/osa/rmparams.save directory. If the /etc/osa/rmparams file is
corrupted or lost, you can resume normal operation by copying the backup file to /
etc/osa/rmparams.
4. Run the following script:
/usr/lib/osa/bin/genscsiconf
This adds 32 LUN support for targets 4 - 5 to the /kernel/drv/rdriver.conf
file and/or to the /kernel/drv/sd.conf file, depending on the type of host
connection and on the rmparams settings you have entered.
5. Shut down and reboot the Solaris operating environment by typing:
# shutdown -y -i0 -g0
ok> boot -r
6. If you are using a Fibre Channel configuration, continue with the next section,
“Setting the Controller’s Fibre Channel Loop ID” on page 38. Otherwise, continue
with “Starting the Software” on page 40.
Chapter 3
Initial Startup
37
Setting the Controller’s Fibre Channel
Loop ID
If you are using a fibre channel-arbitrated loop (FC-AL) configuration and have
more than 15 controllers on the same loop, you must use the nvutil utility to set
the preferred loop ID for the controllers on the loop.
If you have 15 or fewer controllers on the same loop, you do not have to set the loop
ID. Default values will be assigned when you start the loop. However, each
controller in the loop must be set to a unique ID (through switches on the controller
tray). Continue with the next section, “Starting the Software” on page 40.
Note – You must specify a device name for the controller whose preferred loop ID
you want to set. Otherwise, the loop ID you specify will be assigned to every
controller on the loop.
To set the preferred loop ID, type the following:
nvutil -i <Loop ID number> <device name>
where <Loop ID number> is the preferred loop ID you want to set, and
<device name> is the device name for the controller.
You may select a value between 0 and 125 in hexadecimal. Loop ID 126 is reserved
for an FL_Port or an N/FL_Port. Loop ID 127 indicates that the device does not have
a hard (or preferred) address. The Loop ID is assigned an arbitration priority with 0
being lowest and 126 being highest. Note that the Loop ID is not the same thing as
the Arbitrated Loop Physical Address (AL_PA), but rather an index to valid AL_PAs.
Bit 7 of Byte 3 is used to indicate one of two modes of operation. If bit 7 is set to 0,
then bits 6-0 specify a base value that is added to the Host Bus SCSI ID to create the
Loop ID. If bit 7 is set to 1, then bits 6-0 indicate the Loop ID.
38
Sun StorEdge RAID Manager 6.22 Installation and Support Guide for Solaris • September 1999
Table 3-1 shows possible values and the resulting Loop IDs.
TABLE 3-1
Bit
Fibre Channel Loop ID Byte Definition
7
6
5
4
3
2
1
0
Result
0
0x00 - 0x7f
Loop ID Base (added
to Host Bus SCSI ID)
1
0x00 - 0x7d
Loop ID (Host Bus
SCSI ID ignored)
1
0x7e
No Loop operation;
initializes as Point-toPoint or Fabric only
1
0x7f
No preferred address
Value
For more information about setting controller fibre channel loop IDs, see “Setting FC
Loop IDs” in the Sun StorEdge A3500/A3500FC Controller Module Guide
(805-4980-xx).
Chapter 3
Initial Startup
39
Starting the Software
Note – You must have administrator privileges to access this software.
1. Start Open Windows (or CDE), if it is not already running.
2. Start the Sun StorEdge RAID Manager software by typing:
/usr/lib/osa/bin/rm6
The program group (Figure 3-3) appears and you are ready to select the various
applications. For a description of some key terms used in the applications, see the
“Common Definitions” section in the Sun StorEdge RAID Manager User’s Guide or the
Online Help glossary.
FIGURE 3-3
40
Main Program Group
Sun StorEdge RAID Manager 6.22 Installation and Support Guide for Solaris • September 1999
3. This software uses the iso8859 font/character set for its various displays. If you do
not have these fonts installed, then this software uses available fonts, which could
cause minor display problems. If you suspect this is happening, verify that you
have the correct Sun font packages installed:
a. At the system prompt, type:
pkginfo SUNWxwoft SUNWxwcft
b. Make sure that at least one of these font packages exists. If they are missing,
install them now.
4. Do your modules have an Independent Controller configuration?
No
Yes
Go to “Assigning Names to the Modules”
on page 43.
Go to “Setting Up Independent
Controllers” on page 42.
Chapter 3
Initial Startup
41
Setting Up Independent Controllers
If your RAID Modules are using an Independent Controller configuration, you need
to perform the procedure below to indicate the configuration to the storage
management software (for a definition of the Independent Controller configuration,
see the Sun StorEdge RAID Manager User’s Guide or the Online Help).
1. Start any storage management software application.
2. When the Module Selection screen is displayed, highlight the module that has
independent controllers, and select Edit.
3. Click the box next to “Independent Controllers?” and select OK.
The main Module Selection screen displays again, and the “Indep. Cntrls?” column
now says Yes.
4. Assign names to the modules, if desired, and add any comments (you may want to
add location details or other unique information to further clarify the module
name).
Note – If you upgraded the storage management software from version 6.0, the
RAID Module names may have changed from <RAID Module XX> to
<hostname_XXX>. Using the Module Profile you saved, reassign the original names,
if desired.
If you enter characters like “.”, “%”, “:”, or “;” in the name, they will be replaced
with “_”.
5. Repeat this procedure for all modules using this configuration.
6. Continue with “Verifying and Upgrading Controller Firmware” on page 44.
42
Sun StorEdge RAID Manager 6.22 Installation and Support Guide for Solaris • September 1999
Assigning Names to the Modules
The installation procedure assigns default names to each RAID Module in the
following form:
<hostname_XXX>
You can assign other names to the modules, if desired, to aid in identifying them.
Note – If you upgraded the storage management software from version 6.0, the
RAID Module names may have changed from <RAID Module XX> to
<hostname_XXX>. Using the Module Profile you saved, reassign the original names,
if desired.
If you do not want to assign names to the modules at this time, continue with the
next section, “Verifying and Upgrading Controller Firmware” on page 44.
Otherwise, perform the following procedure:
1. Start any storage management software application.
2. When the Module Selection screen is displayed, highlight the module you want to
rename, and select Edit.
3. Assign a name to the module and add any comments (you may want to add
location details or other unique information to further clarify the module name).
Note – Do not use period characters in RAID module names. Using period
characters in RAID module names can cause the storage management software to
function unpredictably.
If you enter characters like “.”, “%”, “:”, or “;” in the name, they will be replaced
with “_”.
Sun StorEdge RAID Manager automatically assigns alpha-numeric module names
that reflect the host system name. However, if the host name contains reserved
characters (for example, the periods in a host system with the name v4d1000b.test.com or in an IP address such as <user>.124.000.02.002), the corresponding
module names will cause some CLI commands to fail and the Sun StorEdge RAID
Manager GUI windows to be displayed incorrectly. Refer to the storutil man page
for details on renaming RAID modules.
Chapter 3
Initial Startup
43
4. Perform this procedure on each RAID Module you want to assign a name to.
5. Continue with the next section, “Verifying and Upgrading Controller Firmware”
on page 44.
Verifying and Upgrading Controller
Firmware
If your RAID Modules do not have the most recent version of controller firmware,
you need to download the correct version to the RAID Module controllers (including
any previously installed RAID Modules). Use the following procedures to determine
the current firmware level and to download new firmware, if necessary. See
“Controller Firmware Upgrade Notes” on page 121 for more information.
Determining the Controller Firmware Version
Note – Be sure to perform these steps from each host machine if your RAID
Modules have the independent controller configuration. In addition, be sure to check
the firmware level on all RAID modules attached to the host system.
You can quickly see what controller firmware version a RAID Module’s controllers
have by using Module Profile:
1. Start the storage management software by typing:
/usr/lib/osa/bin/rm6
2. Start the Maintenance/Tuning application.
3. Select the RAID Module you want to check.
4. Select Module Profile → Controllers.
5. Verify the firmware level is correct (see “Controller Firmware Upgrade Notes” on
page 121).
6. Select Close when finished viewing.
7. Check all the RAID modules on your system.
44
Sun StorEdge RAID Manager 6.22 Installation and Support Guide for Solaris • September 1999
8. Do all controllers on your system have the required version of firmware?
No
Yes
You must upgrade to the most recent version immediately.
Continue with “Upgrading the Controller Firmware
Version” on page 45.
Go to with “Running Recovery
Guru/Health Check” on page 48.
Upgrading the Controller Firmware Version
You may need to use this procedure to download new controller firmware.
1. Determine whether you can upgrade the firmware in the Online or Offline mode.
For detailed information on which method you should use to upgrade controller
firmware, see the Sun StorEdge RAID Manager User’s Guide.
Tip – If you must use the Offline mode, make sure that you stop all I/O to the
controllers you are going to upgrade.
2. Start the Maintenance/Tuning application.
3. Select the RAID Module containing the controllers you want to upgrade.
Note – You can select All RAID Modules to download firmware to all controllers in
all RAID Modules. If you are upgrading to the latest firmware level, you may need
to upgrade to an intermediate level first. Refer to the Sun StorEdge RAID Manager
Release Notes (805-7758-xx) for a list of firmware levels and upgrade paths.
4. Click on the Firmware Upgrade icon or select Options → Firmware upgrade
from the pull-down menus.
5. Read the Important Notes, and then select OK.
6. A screen is displayed asking you to select one procedure:
■
Online to upgrade firmware while the selected RAID module receives I/O.
■
Offline to upgrade firmware when the selected RAID module is not
receiving I/O.
After selecting Online or Offline, the screen displays the message “Verifying the
controller state” while the software checks the selected RAID modules for
restrictions based on the type of firmware upgrade you selected. If there are no
restrictions, a screen like Figure 3-4 on page 46 is displayed.
Chapter 3
Initial Startup
45
This display shows the controllers in the selected RAID Modules and their
current firmware levels. Make sure both controllers are highlighted here if
you want to download firmware to both controllers. Note that for firmware
levels 3.0 and higher, the fibre channel level is the same as the firmware level
because the fibre channel firmware is contained in the firmware file.
This screen displays the
compatible firmware files
found using the
fwcompat.def file. Highlight
the version level you want to
download.
Note that for firmware
versions 3.0 or higher, the
firmware (appware) file
contains the fibre channel
firmware, so no fibre channel
The path is updated to show
the files currently selected in
the Compatibility display. You
can also enter a file name
here to download that file.
Click here to begin the download after
you have selected the firmware files to
load.
FIGURE 3-4
46
Click here to cancel without
downloading any new files.
Firmware Upgrade Screen
Sun StorEdge RAID Manager 6.22 Installation and Support Guide for Solaris • September 1999
7. Perform the following step to download firmware:
■
Highlight the version level you want to download and select OK.
You either receive notification that a problem occurred, or you have a final
confirmation that the upgrade process is about to begin.
8. Select OK.
Do not select any other options or exit the Maintenance/Tuning Application until
the upgrade process is complete. You can, however, monitor the upgrade progress.
When the upgrade is finished (this should take about 5 minutes), you see a
Summary Report indicating whether the upgrade is Successful or Failed.
Note – If you selected All RAID Modules, it is possible that the upgrade was
successful for some modules, but not for others. The Summary Report should
indicate which modules were not successful and give an appropriate cause.
9. After the download is completed, select OK.
You return to the Maintenance/Tuning screen.
10. You are finished with this procedure. Continue with the next section, “Running
Recovery Guru/Health Check” on page 48.
Chapter 3
Initial Startup
47
Running Recovery Guru/Health Check
Use the following steps to ensure that the RAID Modules attached to your host
system are all operational.
Note – Be sure to perform this step from each host machine if you are using the
independent controller configuration.
Use the following procedure to run Recovery Guru/Health Check.
1. Start the Recovery application.
2. Select All RAID Modules to check all the modules on your system. A screen like
Figure 3-5 is displayed.
3. Click the Recovery Guru/Health Check icon or select Options → Recovery Guru
from the pull-down menus.
Click here to run Recovery Guru/
Health Check on the selected
modules. You can also start by
selecting Options → Recovery
Guru.
FIGURE 3-5
48
Recovery Main Screen
Sun StorEdge RAID Manager 6.22 Installation and Support Guide for Solaris • September 1999
4. The software checks all the selected modules for non-optimal statuses.
■
If all of the RAID Modules have an Optimal status, then you are finished with this
procedure. Go to the next section, “Completing the Installation” on page 51.
■
If a non-optimal status is found, a screen like Figure 3-6 is displayed. Continue
with Step 5.
5. If exceptions are found, highlight the exception and click on Show Procedures for
recommendations on how to fix the problem (see Figure 3-7 on page 50)
This area displays the results of
the check. If a non-optimal status
is found, highlight the line and
click Show Procedure for
recovery information.
Click here for help.
Click here to display information on the highlighted failure. This
information includes recovery information. See Figure 3-7 on page 50
for a sample screen.
FIGURE 3-6
Recovery Screen/Exceptions Found
Chapter 3
Initial Startup
49
6. Print out the procedure, if desired.
7. Follow the procedure given to recover from the component failure.
8. After correcting any problems, reselect Recovery Guru/Health Check until all
RAID Modules are Optimal.
9. Continue with the next section, “Completing the Installation”.
Select File here to print the information displayed in the
procedure screen, or to set up the printer before
printing. Select Edit to copy text to the clipboard.
Although this looks like a standard Help
screen, these buttons are grayed out.
The first part of this area gives detailed
status information on the failure. In this
case, the message indicates that drive
[1,0] has failed. A hot spare drive has
taken over for the failed drive is currently
reconstructing. LUNs 0 and 3 are
affected by this failure.
The rest of this area gives information on
the cause of the failure and on how to
recover from it. Read the instructions
carefully. If necessary, print them out by
selecting File → Print Topic from the pulldown menus.
In this case, there is no action to take until
the reconstruction is finished. Then you
should run Health Check again for
information on how to replace the failed
drive.
FIGURE 3-7
50
Recovery Procedure Screen
Sun StorEdge RAID Manager 6.22 Installation and Support Guide for Solaris • September 1999
Completing the Installation
If you are upgrading from a previous version of Sun StorEdge RAID Manager, you
are probably finished with the installation procedure and should do the following:
1. If you added new RAID modules as part of the new software installation, skip the
next section, “Determining the Current Configuration.”
2. If you made changes in the rmscript or rmparams files during your previous
installation, re-enter those changes in the new file (see Chapter 4, “Customizing
the Installation” for more information).
3. Otherwise, go to “What’s Next?” on page 64 and decide what you need to do next.
If you are installing Sun StorEdge RAID Manager for the first time, you should do
the following:
1. Examine the configuration of your RAID Modules and make any necessary
changes.
2. Go to the next section, “Determining the Current Configuration.”
Chapter 3
Initial Startup
51
Determining the Current Configuration
Now that you have successfully installed the software, you need to use it to identify
each RAID Module connected to your host system and determine the module’s
current configuration (number of drives, number of controllers, logical units, and so
on).
Note – You must perform this step from each host machine if using the independent
controller configuration.
Note – Most RAID Modules come pre-configured with logical units already defined.
This logical unit configuration may or may not be desirable for your particular
environment.
This software has assigned a name to each RAID Module connected to your host
system. These designations are shown in the RAID Module selection list near the top
of each application’s screen (see Figure 3-8 on page 53).
Perform the following steps for each RAID Module to identify the module and
determine its current configuration. If you need a definition of a Drive Group, RAID
Module, or Logical Unit, see the “Common Definitions” section in the Sun StorEdge
RAID Manager User’s Guide or the Online Help glossary.
1. Use the following steps to view the current drive groups and logical units in a
RAID Module.
a. Start the Configuration Application.
The Select Module main screen appears. If you have more than one RAID Module
connected to your host system, each RAID Module appears in the list.
b. Highlight the first RAID Module in the list, and select OK.
The Configuration application main screen is displayed (see Figure 3-8). Table 3-2
on page 54 describes the items that are displayed.
c. View the current drive groups and logical units.
As you highlight an element in the Module Information area on the left of the
screen, the display on the right changes to show those elements. You cannot select
or highlight any item in right side of the display (it is information only).
52
Sun StorEdge RAID Manager 6.22 Installation and Support Guide for Solaris • September 1999
This is the currently
selected RAID module.
These buttons are active or grayed out
depending on what RAID Module structure is
currently selected in the Module Information
area to the left
The Detailed
Information area gives
information on the drive
groups and logical units
in the RAID Module.
The items displayed
here depend on what is
selected in the Module
Information area to the
left.
The information shown
in this example is
displayed when the
RAID Module itself is
selected.
SeeTable 3-2 for a
description of the
elements in the display.
The Module Information area shows the RAID Module as a directory tree
structure. At the top is the RAID Module, then the controllers, then the drive
groups owned by the controller, then the logical units and drives in that drive
group. At the bottom of the display (not shown here) are the hot spares and
unassigned drives. Clicking on the different structures changes the display in
the Detailed Information area to the right.
FIGURE 3-8
Configuration Application Main Screen
Chapter 3
Initial Startup
53
TABLE 3-2
Configuration Display Columns
Column Heading
Explanation
Group/Ctl
The controller (A or B) or drive group.
Drives
The number of drives in the drive group.
Total (MB)
The total capacity of the drive group, after accounting for RAID level.
Remaining (MB)
The total capacity remaining in the drive group.
LUN
The logical units (LUNs) in the drive group.
Name/ID
The name or ID of the controller, logical unit, or drive, depending on the display.
• Controller and logical unit names are usually assigned by the operating
environment and cannot be changed.
• Drive IDs are the channel number and SCSI ID of the drives.
RAID Level
The RAID level of the logical unit.
Capacity (MB)
The capacity of the logical unit.
Status
The current status of the logical unit. If a status other than Optimal appears here,
run Health Check to determine what the problem is and, if necessary, what
action to take.
2. Use the following steps to physically locate and label a RAID Module.
a. In the Module Information Area, highlight the RAID Module you want to
locate.
b. Select Locate Module → Start.
The green drive activity lights flash on the drives in the selected module.
c. Physically locate the RAID Module with the flashing activity or fault lights.
Once you have identified the RAID Module, place a sticker label on it for
future reference.
The label should correspond to the name of the RAID Module you selected in
Step b (for example, <hostname>_001, <hostname>_002, and so on).
d. Click Stop to stop the flashing of the activity lights.
54
Sun StorEdge RAID Manager 6.22 Installation and Support Guide for Solaris • September 1999
Note – It is strongly recommended that you save the profile of each RAID Module
during initial installation and any time you change your configuration. You can use
this information as a reference if you need to perform any recovery or maintenance
tasks. See Step 3.
3. Use the following steps to save and print a RAID Module’s profile information.
a. Select the desired RAID Module, then select File → Save Module Profile.
A screen shows the different types of information you can save.
b. Make sure All is selected (all of the buttons should be depressed), and select
OK to save all of the types of information.
A screen display prompts you to enter a file name.
c. Enter an appropriate path and file name on the Selection line, and select OK.
The information is saved to the path and file name you specified.
d. Print the Module Profile information you saved in Step c using your host
system’s printer utility.
4. Use the following steps to view a RAID Module’s profile. (Optional)
a. Select the desired RAID Module → Module Profile.
A summary information screen appears (see Figure 3-9) showing information
about the controllers, drives, and logical units in the RAID Module.
b. Select Controllers, Drives, or LUNs for more detailed information on these
components.
c. Select Close to exit the profile information.
Chapter 3
Initial Startup
55
This display gives information on the selected module.
Click here to view detailed
information on the RAID
module controllers.
Click here to view detailed
information on the RAID
module drives.
Click here to view detailed
information on the RAID
module logical units.
Click here to exit this screen
FIGURE 3-9
56
Main Module Profile Screen
Sun StorEdge RAID Manager 6.22 Installation and Support Guide for Solaris • September 1999
5. Use the following steps to view details on specific drives in a drive group.
(Optional)
a. If you want to know which specific drives are in a particular drive group,
highlight Drives (in the Module Information display) and select the List/
Locate Drives button or select Options → List/Locate drives from the
pull-down menus.
b. Select the drives you want to locate (click Select All if you want to locate all the
drives in the group), then click Locate.
c. Use the drive location information [x,y] provided in the list to physically locate
individual drives in the module.
[x,y] corresponds to a specific drive in the RAID Module, and indicates the
channel number and SCSI ID for that drive, where the channel number is always
listed first. You can also select Locate to flash the drives’ activity lights in the
RAID Module.
d. Select OK to exit the drive information.
6. Repeat Steps 1 through 3 (and 4 -5 if desired) for each RAID Module connected to
your host system.
You should have enough information to understand the configuration for each RAID
Module.
7. Continue with the next section, “Determining If Any Changes Are Necessary.”
Chapter 3
Initial Startup
57
Determining If Any Changes
Are Necessary
In the previous section (“Determining the Current Configuration”) you should have
performed the following tasks for each RAID Module connected to your host
system:
• Reviewed each module’s current configuration (controllers, drives,
and logical units/drive groups).
Step 1 on page 52.
• Identified each RAID Module using Locate Module, and placed a
sticker label on it.
Step 2 on page 54.
• Saved the Module Profile information to a file using File → Save
Module Profile, and printed the information.
Step 3 on page 55.
Now, you need to determine if you need to make any changes to the configuration to
meet the requirements of your environment.
1. Use Table 3-3 and the Module Profile information you printed to assist you in
determining if any changes are necessary.
2. After you determine if you want to change the configuration, continue with the
next section, “Configuring RAID Modules” on page 63.
58
Sun StorEdge RAID Manager 6.22 Installation and Support Guide for Solaris • September 1999
TABLE 3-3
Parameter
Possible Parameters to Change (1 of 4)
Description
Why Change?
For More Details
Applicable controller
modes are single active,
active/passive, or active/
active.
If you have an active/
passive controller pair,
you should consider
changing it to active/
active for best
performance.
• See the Maintenance/
Tuning chapter in the
Sun StorEdge RAID
Manager User’s Guide.
General Parameters
Controller Mode
Maintenance/
Tuning
Auto Parity
Check/Repair
Maintenance/
Tuning →
Options → Auto
Parity Settings
Hot Spare Drives
Configuration →
Create Hot Spare
Monitoring
Interval
Status →
Options → Log
Settings
An automatic parity check/
repair process runs each
week or each day at a
specific time.
If you want to disable the
check/repair or change
the time when it runs.
• Use the online help for
the Maintenance/Tuning
Application.
Default is auto parity
enabled once per week.
A hot spare drive is a drive
that acts as a standby if a
drive fails in a RAID 1, 3, or
5 logical unit.
The hot spare adds another
level of redundancy to your
RAID Module.
If you want to create new
or additional hot spare
drives for added
protection.
The array monitor checks
the RAID Modules
periodically looking for
events and failures.
The default is to check
every 5 minutes.
If you want to increase or
decrease the frequency of
the checking interval. If
you have a lot of
modules, you may need
to increase this interval
because the amount of
time needed to check and
return results can
increase.
• See the Configuration
chapter in the Sun
StorEdge RAID Manager
User’s Guide.
• Use the online help for
the Configuration
Application.
• See the Status chapter in
the Sun StorEdge RAID
Manager User’s Guide.
• Use the online help for
the Status Application.
Chapter 3
Initial Startup
59
TABLE 3-3
Parameter
Possible Parameters to Change (2 of 4)
Description
Why Change?
For More Details
If the current RAID Level
is not appropriate for
your environment, or you
need to change the
number of drives.
• See the Configuration
chapter in the Sun
StorEdge RAID Manager
User’s Guide.
Logical Unit Parameters
RAID Level
Configuration →
Options →
Modify
Specifies how the data is
striped across the drives
and whether the drive
group has redundancy.
or
If you do not have the
minimum controller
firmware level, you
cannot use the dynamic
capacity options, and you
need to delete and
recreate the logical unit/
drive group you want to
change.
Configuration →
Delete, then
Create LUN
LUN Capacity
Configuration →
Delete, then
Create LUN →
Options
60
Specifies in megabytes (MB)
how much capacity is
available on the logical unit.
• Use the online help for
the Configuration
Application.
If you want to increase
the capacity of the LUN
group (you will need to
delete the LUN and
recreate it).
Sun StorEdge RAID Manager 6.22 Installation and Support Guide for Solaris • September 1999
TABLE 3-3
Possible Parameters to Change (3 of 4)
Parameter
Description
Why Change?
For More Details
Segment Size
Specifies in 512-byte blocks
how much data is written to
one drive before data is
written to another drive in
the group.
If the segment size is not
appropriate for your
environment.
• See the Configuration
chapter in the Sun
StorEdge RAID Manager
User’s Guide.
Configuration →
Modify Group/
LUN → Segment
Size
or
Configuration →
Delete, then
Create LUN →
Options
Drive Group
Capacity
(Number of
Drives in Group)
Configuration →
Modify Group/
LUN → Capacity
or
Configuration →
Delete, then
Create LUN
Specifies in megabytes (MB)
how much capacity is
available in the drive
group.
If you do not have the
minimum controller
firmware level, you
cannot use the dynamic
capacity options, and you
will be required to delete
and recreate the logical
unit/drive group you
want to change.
• Use the online help for
the Configuration
Application.
If you want to increase
the size of a drive group.
If you do not have the
minimum controller
firmware level, you
cannot use the dynamic
capacity options, and you
will have to delete and
recreate the drive group
you want to change. Also,
if you want to decrease the
number of drives in the
group, you must delete
the LUN and recreate it.
Chapter 3
Initial Startup
61
TABLE 3-3
Possible Parameters to Change (4 of 4)
Parameter
Description
Why Change?
For More Details
Caching
Parameters
Specifies the caching
parameters for each logical
unit.
If you want to enable or
disable any of these
parameters.
• If you are creating new
logical units, see the
Configuration chapter in
the Sun StorEdge RAID
Manager User’s Guide or
use the online help.
• To change caching
parameters on existing
logical units, see the
Maintenance/Tuning
chapter in the Sun
StorEdge RAID Manager
User’s Guide or use the
online help.
Determines what controller
owns which logical units/
drive groups.
To reassign or balance the
logical units/drive
groups between
controllers in an active/
active controller pair.
• If you are creating new
logical units, see the
Configuration chapter in
the Sun StorEdge RAID
Manager User’s Guide or
use the online help.
• To change LUN
Assignments on existing
logical units, see the
Maintenance/Tuning
chapter in the Sun
StorEdge RAID Manager
User’s Guide or use the
online help.
Determines how quickly
reconstruction occurs on a
logical unit when a failed
drive is replaced.
To increase or decrease
the reconstruction
performance.
• See the Maintenance/
Tuning chapter in the
Sun StorEdge RAID
Manager User’s Guide.
• Use the online help for
the Maintenance/Tuning
Application.
Configuration →
Create LUN →
Options
Maintenance/
Tuning
LUN Assignment
and LUN
Balancing
Configuration →
Create LUN →
Options
Maintenance/
Tuning
Reconstruction
Rate
Maintenance/
Tuning
62
Sun StorEdge RAID Manager 6.22 Installation and Support Guide for Solaris • September 1999
Configuring RAID Modules
Do you need to make changes to your RAID Module configuration?
No
Yes
Go to “Adding Logical Units to the
Operating Environment” on page 64.
Go to “Configuring Logical Units on the
RAID Module” below.
Configuring Logical Units on the RAID Module
Use the Configuration Application in the RAID Manager software to view the
current logical unit configuration and to make any necessary changes.
Note – Refer to the Sun StorEdge RAID Manager User’s Guide for detailed
information on using the Configuration Application.
1. Start the Sun StorEdge RAID Manager software by typing:
/usr/lib/osa/bin/rm6
2. Start the Configuration application. The Configuration application main screen is
displayed.
3. Set up the logical units with the desired drives, RAID levels, and parameters.
4. Continue with the next section, “Adding Logical Units to the Operating
Environment.”
Chapter 3
Initial Startup
63
Adding Logical Units to the Operating
Environment
1. After you create or delete logical units (LUNs) using the Configuration
Application, you do not need to reboot your system. However, you must make the
logical units (whether you created new logical units or not) a part of the operating
environment. The following considerations apply:
■
Creating the logical unit creates partitions and node names for the new device,
and automatically adds Redundant Disk Array Controller (RDAC) support to the
new LUNs (if RDAC is enabled).
■
After creating the logical unit, you may need to re-partition it (with the Solaris
format command) and add file systems, if desired.
Refer to your Solaris documentation for details on adding a drive, if necessary.
Remember, each logical unit (not a drive group) is seen by the operating
environment as one drive.
2. Continue with the next section, “What’s Next?” on page 64.
What’s Next?
Now that you have successfully completed the installation of the software, do one of
the following:
■
Refer to the Sun StorEdge RAID Manager User’s Guide for detailed information on
how to use each application.
Note that Chapter 5, “Operating Environment Support” gives information specific
to the Solaris operating environment.
64
■
Go to Chapter 4, “Customizing the Installation” if you want to set up SNMP
notification or make other changes to the software.
■
Go to Chapter 6, “Troubleshooting” for troubleshooting tips on common problems
you may encounter as you use this software with the Solaris operating
environment.
Sun StorEdge RAID Manager 6.22 Installation and Support Guide for Solaris • September 1999
CHAPTER
4
Customizing the Installation
This chapter describes how to customize your installation and make changes to fully
support the storage management software in the Solaris operating environment. If
you are upgrading this software from a previous version, be sure to review this
material to determine if you want to make any changes.
■
Changing the rmparams File—page 66
■
Setting Up Scriptable Notification Options—page 70
■
Setting Up SNMP Notification—page 72
65
Changing the rmparams File
The /etc/osa/rmparams file is used to store several configurable options available
through Sun StorEdge RAID Manager.
You need to change options in this file if you:
■
Want to increase the number of controllers allowed on the system.
■
Want to support more than eight LUNs on your RAID modules (see “Setting the
Logical Unit Limit” on page 36).
■
Want to enable/disable SNMP notification.
Note – You must edit the rmparams file enable SNMP notification (see “Setting Up
SNMP Notification” on page 72).
■
Are upgrading the storage management software and want to make customized
changes to this file. Use the original rmparams file that you saved to determine
the changes you want to make. Remember, the new file contains new parameters
for this version, so do not replace it with the old file.
■
Are installing this software for the first time and want to review the changes you
can make.
TABLE 4-1 shows a list of the parameters in the file that you may need to change
during (or after) initial installation. Most options (other than the ones shown in
TABLE 4-1) in the rmparams file should not be changed, and many of the other
options should only be changed through the graphical user interface (GUI).
A listing of the entire rmparams file is provided in “rmparams File Listing” on page
124. For more information, see the rmparams man page.
Note – Because of the critical nature of the rmparams file, a backup copy of this file
has been installed in the /usr/lib/osa/ directory and is named
rmparams.install. If the /etc/osa/rmparams file becomes corrupted or
missing, copy this file to the /etc/osa directory to resume normal operation. If you
make any changes to this file directly or use the options in the GUI that write to this
file (such as log settings, auto parity settings, and so on), always copy the new
version of the file to the /etc/osa directory.
66
Sun StorEdge RAID Manager 6.22 Installation and Support Guide for Solaris • September 1999
▼
To Edit the rmparams File
1. Before making any changes to the rmparams file for the first time, save the
original file and copy it to the backup file /usr/lib/osa/rmparams.orig.
2. Make any necessary changes to the rmparams file using TABLE 4-1.
3. Save the rmparams file, and copy it to the backup file
/usr/lib/osa/rmparams.current.
Caution – You need to increase the System_MaxLunsPerController parameter
if you are running Solaris 2.6 software and can support more than eight LUNs on
any RAID Module, because this parameter also affects the highest LUN number that
the Sun StorEdge RAID Manager software displays. For example, if you have LUNs
0, 3, and 31 configured on a RAID Module, LUN 31 would not appear in the display
if this parameter were only set to 8.
Note – Remember that this limit applies to a RAID Module (whether it has a single
controller or redundant controllers). Therefore, if you have a RAID Module with 2
active controllers, the total number of LUNs between them cannot be more than 32.
4. Continue with “Setting Up Scriptable Notification Options.”
Chapter 4
Customizing the Installation
67
TABLE 4-1
Changeable Parameters in rmparams File
Parameter
Description
When To Change
How To Change
SNMP_Target_IP_Address=127.0.0.1
Provides the SNMP
IP Address for
remote notification.
If you want to
enable SNMP
notification.
See “Setting Up
SNMP Notification”
on page 72.
SNMP_Community_Name=NONE
Provides the
community name to
be used for SNMP
remote notification.
If you want to
enable SNMP
notification.
See “Setting Up
SNMP Notification”
on page 72.
SNMP_Action_Number=0
Indicates the SNMP
trap notification
option you want to
use.
If you want to
enable SNMP.
Change this value to
1 or 2.
A value of 1 sends
SNMP traps to the
designated NMS
station. A value of 2
writes all relevant
data to the /usr/
lib/osa/bin/
trap.dat file.
SNMP writes to this
file when there is a
trap. When an
SNMP daemon
process finds the file,
it performs the
requested action,
and deletes the file.
Therefore, the file is
not actually “stored”
in this location.
Important: Setting
this parameter to 0
will completely
disable the SNMP
option.
System_DefaultModuleSelect=TRUE
68
Determines whether
the Select Module
main screen is
displayed
each time you open
an application.
If you want to
disable the Module
Selection screen so
that it is not
displayed each time
you open an
application.
Edit the rmparams
file and change
TRUE to FALSE.
Sun StorEdge RAID Manager 6.22 Installation and Support Guide for Solaris • September 1999
TABLE 4-1
Changeable Parameters in rmparams File
Parameter
Description
When To Change
How To Change
System_MaxControllers=32
Determines the
maximum number of
RAID Controllers
supported by Sun
StorEdge RAID
Manager.
If you have more
than 32 RAID
controllers.
Edit the rmparams
file and change “32”
to the appropriate
number.
System_MaxLunsPerController=81
Determines the
maximum number of
logical units
supported per RAID
Module, and also sets
the highest LUN
number displayed by
this software.
After determining if
you can support
more than eight
LUNs (see “Setting
the Logical Unit
Limit” on page 36).
Edit the rmparams
file and change the
number of LUNs, for
example, 32.
Important: 1You need to increase the System_MaxLunsPerController parameter if you can support more
than eight LUNs on any RAID Module because this parameter also affects the highest LUN number that the
storage management software displays. For example, if you have LUNs 0, 3, and 31 configured on a RAID
Module, LUN 31 would not appear in the displays if this parameter were only set to 8.
Note: Remember that this limit applies to a RAID Module (whether it has a single controller or redundant
controllers). Therefore, if you have a RAID Module with two active controllers, the total number of LUNs
between them cannot be more than 32.
Chapter 4
Customizing the Installation
69
Setting Up Scriptable Notification
Options
The rmscript file is accessed by the status monitor and automatic parity check
whenever these utilities find an exception. By default, no action is taken. You can
edit this file to specify a set of actions to take when an error is found.
For example, if you want to install third-party notification software to perform
various events (such as faxing or paging), you would add the appropriate script for
each event near the end of this file (making sure the last line is always rm $1).
Consult the third-party’s software documentation for specific details.
Note – If you installed an upgrade of the storage management software, you may
want to refer to the /usr/lib/osa/bin/rmscript file to determine if you want to
make additional customized changes to the new file. Remember, the new file
contains a new script for this version, so you must not replace it with the old file.
For more information, read the rmevent man page. From this software’s installation
directory, type:
man rmevent
Editing Example
The following procedure provides an example for editing the rmscript file to add
two scripts for extracting information during a defined event and dispatching a
paging command.
Caution – The last line in the rmscript file must always be rm $1. Therefore,
when editing this file, always place any new event script above this line.
70
Sun StorEdge RAID Manager 6.22 Installation and Support Guide for Solaris • September 1999
1. To look for AEN events and create a command for a sendpage, add the following
event script near the end of the rmscript file:
# Use AWK to parse the common fields of the record.
eval ‘awk -F\~ ´NF > 0 {print ”TYPE=” $6 ”;HOST=” $1 ”;CONTROLLER=” $2 \
”;DATE=” $5 ”;TIME=” $6}´ < $1‘
# Simple test for AEN events. If one received, send a page to
# someone interested in any AEN event.
if [ $TYPE = ”00” ]
then sendpage ”John H. User” ”AEN event on $HOST”
fi
2. To look for parity errors and create a command for a sendpage, add the following
event script below the event script you added in Step 1:
# Similar test, but for parity errors.
if [ $TYPE = ”20” ]
then sendpage ”John H. User” ”Parity errors found on ($HOST, $CONTROLLER)”
fi
Chapter 4
Customizing the Installation
71
Setting Up SNMP Notification
This software can provide remote notification of RAID events to designated network
management stations (NMS) using Simple Network Management Protocol (SNMP)
traps. Use the information in this section to set up the NMS, to enable or disable this
notification option for specific hosts, and to understand the contents of an SNMP
trap message.
To enable SNMP notification on your host, you must edit the /etc/osa/rmparams
file so that the software will know where to direct the SNMP trap messages when a
RAID Event has occurred. See “Changing the rmparams File” on page 66.
You need to set up your designated NMS only once. Use the following procedure to
compile the Sun StorEdge RAID Manager Management Information Base (MIB) into
your NMS.
▼
To Set Up the NMS
Note – The MIB was written to standard version 1 SNMP syntax. It was designed
specifically for Sun StorEdge RAID Manager. It is not applicable to other vendor
RAID products.
1. Copy the /usr/lib/osa/rm6traps.mib file to the network management station.
2. Follow the steps required by your specific network management station to
compile the MIB.
Note – For details on the required steps, consult your network administrator or the
documentation specific to the NMS product you are using.
72
Sun StorEdge RAID Manager 6.22 Installation and Support Guide for Solaris • September 1999
▼
To Enable SNMP
1. Edit the /etc/osa/rmparams file as follows:
a. Include the IP address of the host that has the SNMP-trap proxy agent. For
example:
SNMP_Target_IP_Address=129.146.243.54
b. Define the community name. For example:
SNMP_Community_Name=public
2. Make sure the /etc/resolv.conf file exists, even if it is empty.
3. Make sure that the /etc/osa/locks/rmparams.lock file is writable by root.
This can be a problem if the Sun StorEdge RAID Manager software is NFS mounted.
4. Make sure that the /usr/lib/osa/rm6traps.mib file is compiled and imported
by the network management system.
For example, if you are using SunNet Manager, the command
mib2schema rm6traps.mib creates the following files:
■
rm6traps.mib.schema
■
rm6traps.mib.oid
■
rm6traps.mib.traps
The rm6traps.mib.schema and rm6traps.mib.oid files are placed in the
/opt/SUNWconn/snm/agents directory.
The rm6traps.mib.traps file is appended to the
/var/opt/SUNWconn/snm/snmp.traps file.
When an array event occurs, the script rmscript(1M) takes the information passed
by arraymon(1M) and constructs an SNMP trap message and then sends it to the
host defined in the /etc/osa/rmparams file.
See your network management system documentation for more information on how
to install SNMP devices.
5. Make sure the host system is connected to the network with the NMS station.
6. Enable this notification on your host. You must edit three parameters in the
/etc/osa/rmparams file so that the software will know where to direct the
SNMP trap messages when a RAID Event has occurred.
Chapter 4
Customizing the Installation
73
Disabling SNMP
Perform the following steps to disable this notification on your host and stop this
software from sending SNMP traps:
1. In the /etc/osa/rmparams file,
■
Delete the SNMP_Target_IP_Address line.
Or
■
Change the value of the SNMP_Community_Name line to NONE.
Or
■
Change the value of the SNMP_Action_Number line to 0
See “Changing the rmparams File” on page 66.
2. Save the rmparams file and copy it to the /etc/default directory. It is critical
that you have a backup copy of this file.
74
Sun StorEdge RAID Manager 6.22 Installation and Support Guide for Solaris • September 1999
SNMP Trap Message Description
TABLE 4-2 describes the contents of an SNMP trap message for Sun StorEdge RAID
Manager.
Note – If the trap type is other than informational, use the Status or Recovery
Applications to get more information or specific instructions on how to remedy the
problem. Do not remove the SNMP message until the problem has been corrected
since most trap notifications associated with this software are not persistent.
TABLE 4-2
SNMP Trap Message Descriptions
Item
Description
Host IP Address
The standard IP address dot notation for the host where the RAID Module is
attached.
Host Name
The text name assigned to the host.
Trap Type
There are four trap types:
Informational – No failure has occurred. Information is provided that an event,
such as a logical unit creation, has occurred.
Degraded Array – A subsystem component failure has occurred. The module is
still operational but now lacks redundancy in some area. (For example, a drive
failure resulting in a degraded logical unit, a power supply failure, or a failure of
one controller in a controller pair.)
Failed Array – A failure has occurred that leaves a module or logical unit unable
to communicate. (For example, a failure of the controller in a single-controller
RAID Module or a multiple drive failure resulting in a dead logical unit.)
Critical – This is a small category of failures that may require timely intervention
to correct. (For example, the two-minute warning from an uninterruptible power
supply or a warning that write-back cache has been disabled due to a low battery.)
Affected RAID Module
Indicates which RAID Module had the event (for example, RAID Module 01).
Condition Description
A brief description of the event.
Chapter 4
Customizing the Installation
75
76
Sun StorEdge RAID Manager 6.22 Installation and Support Guide for Solaris • September 1999
CHAPTER
5
Operating Environment Support
This chapter covers the following topics related to operating the storage
management software in the Solaris environment:
■
Naming Conventions—page 78
■
Creating and Deleting Logical Units—page 79
■
The Background Monitor—page 81
■
Using Sun StorEdge™ Volume Manager—page 82
■
Redundant Controller Support (RDAC)—page 83
■
Command-Line Interface—page 86
■
Adding New RAID Modules to the Configuration—page 87
■
Deinstalling RAID Manager—page 88
77
Naming Conventions
Module Names
By default, module names are assigned in the order in which the system detects the
module. The default name displayed is derived from the name of the host machine
where the storage management software is installed, for example, <hostname>_001,
<hostname>_002, and so on.
You can also assign your own names to modules. See “Assigning Names to the
Modules” on page 43 for more information about naming RAID modules.
The controllers and logical units in the module have unique device names. See the
next section, “Controller and LUN Names” for more information.
Controller and LUN Names
The storage management software uses device names in the form c<x>t<y>d<z>,
where <x>, <y>, and <z> are numeric values giving the hardware location of the
subsystem hardware. Figure 5-1 shows the format of the device name.
C1t0d2
Host Bus Adapter Number
RAID Controller’s ID Number
FIGURE 5-1
Logical Unit (LUN) Number
Device Name Example
Note that the RAID Module controller has the same device name as LUN 0 on that
RAID module (both use d0).
This software includes the device name in various screen displays, and the address
usually indicates the path to a specific logical unit. If you transfer LUN ownership
between controllers (Maintenance/Tuning → LUN Balancing), the device name
is updated.
78
Sun StorEdge RAID Manager 6.22 Installation and Support Guide for Solaris • September 1999
Creating and Deleting Logical Units
Number of LUNs
The number of logical units per RAID module depends on the type of host adapters
you are using, on the hardware configuration, on the Solaris operating environment
version, and on the installed patches. The number of LUNs should be set during
installation. If you need to change the number of allowed LUNs after installation,
see “Setting the Logical Unit Limit” on page 36.
There is a maximum value of 255 LUNs per host adapter. This limit cannot be
exceeded.
Refer to the Sun StorEdge RAID Manager Release Notes (805-7758-xx) for detailed
information about the number of LUNs per RAID module that are supported for the
various combinations of host connection, host adapter, Solaris operating
environment version, and patch level.
Creating LUNs
After you create logical units (LUNs) using the Configuration application, you do
not need to reboot your system. You do have to make them part of the operating
environment. The following considerations apply:
■
Creating the logical unit creates partitions and node names for the new device,
and automatically adds RDAC support to the new LUN (if RDAC is enabled).
■
After creating the logical unit, you may need to re-partition it (with the Solaris
format command) and add file systems, if desired.
Refer to your Solaris software documentation for details on adding a drive.
Remember, each logical unit (not a drive group) is seen by the operating
environment as one drive.
Chapter 5
Operating Environment Support
79
Deleting LUNs
Caution – If you are using the RAID Module as a boot device (see Chapter 3), do
not delete LUN 0 or use File → Reset Configuration, or you will lose your boot
device.
Before deleting LUNs with this software, or using File → Reset Configuration,
perform the following procedure:
1. Unmount any file systems on the affected logical units (or stop all I/O to the LUNs
if there are no file systems).
2. Delete the logical units with the storage management software (or reset the
configuration).
3. Refer to your Solaris software documentation for other procedures required to
delete a drive.
Note – When you delete a logical unit, the device nodes for that logical unit remain
on the system. These nodes will be deleted the next time you reboot (with the boot
-r command). In the meantime, these nodes should not cause any problems unless
the operating environment tries to access them (in this case, you will receive an error
message).
80
Sun StorEdge RAID Manager 6.22 Installation and Support Guide for Solaris • September 1999
The Background Monitor
The storage management software has a background monitor (arraymon) that
automatically polls all RAID Modules and checks for problems and events at
specified intervals. If any problems or events are detected, the information is written
to the default log file. This becomes an historical record of past component failures,
general status changes, and configuration changes.
You can change the 5-minute default polling interval. For best results, use the
default value or smaller to ensure that you are notified about problems and events as
close as possible to the time when they occur.
Caution – Setting this value too small (with Status → Options → Log
Settings) may cause the check to affect system I/O performance. Setting this value
too large may delay notification of serious problems.
Stopping the arraymon Process
Caution – You should stop arraymon only if you are specifically instructed to do so
by Recovery Guru, troubleshooting documentation, or your customer services
representative. However, doing so means that none of the RAID Modules connected
to the host will be checked during this time. Be sure to restart the monitor when
instructed.
1. Type the following:
ps -ef | grep arraymon
2. Note the process number of the arraymon daemon and use it in the next step.
3. Type:
kill -9 <process_number>
Chapter 5
Operating Environment Support
81
Starting the arraymon Process
The arraymon process automatically starts when you run the storage management
software. However, it is necessary to manually start this process if you have stopped
it for some reason.
1. Type:
/etc/init.d/amdemon start
2. Run Recovery Guru/Health Check to make sure that no problems have occurred
while you had the disk array monitor stopped.
Using Sun StorEdge™ Volume Manager
If you are using Sun Storage Volume Manager software and want to perform any
RAID Manager software operation that requires exclusive access to LUNs, you must
first remove the affected logical units or drive groups from the control of Volume
Manager and then unmount the devices.
Note – If the Sun Storage Volume Manager 2.6 software is installed on your system,
a default feature known as Dynamic Multi-Pathing (DMP) is active by default. The
Sun StorEdge RAID Manager software and the A3x00 RAID array do not support
DMP. Redundant I/O pathing is maintained internally by the Sun StorEdge RAID
Manager software. Therefore, you must disable the DMP feature in Volume Manager
and reboot the system.
Refer to the Sun StorEdge Volume Manager 2.6 Release Notes (805-5708) and the Sun
StorEdge Volume Manager 2.6 System Administrator’s Guide (805-5706) for detailed
information about disabling the DMP feature in Volume Manager.
Some storage management operations that require exclusive access to LUNs include:
■
■
■
82
Deleting logical units with Delete for LUNs and File → Reset
Configuration (Configuration)
Formatting a LUN with Options → Manual Recovery → Logical Units
(Recovery)
Upgrading firmware with Firmware Upgrade → Offline method
(Maintenance/Tuning).
Sun StorEdge RAID Manager 6.22 Installation and Support Guide for Solaris • September 1999
For example, you would perform the following steps to remove a drive:
1. Remove the LUN from its disk group by typing:
vxdg [-g groupname] rmdisk <diskname>
For example, type: vxdg -g rootdg rmdisk disk01
2. Remove the LUN from Volume Manager control by typing:
vxdisk rm <devname>
For example, type:
vxdisk rm c1t0d0s2
3. Place the physical LUN offline by typing:
vxdisk offline <devname>
For example, type:
vxdisk offline c1t0d0s2
Refer to the Sun StorEdge Volume Manager 2.6 System Administrator’s Guide (805-5706)
for more information on removing drives.
Redundant Controller Support (RDAC)
The storage management software supports redundant controllers on a Solaris
system using the Redundant Disk Array Controller (RDAC) driver. The RDAC
driver and its associated resolution daemons are installed automatically. For RAID
Modules with redundant controllers, this host-based driver layer manages the I/O
connection and creates special path names to the devices that you can use instead of
the standard device nodes.
If a component fails on the data connection (interface cable/terminator, controller,
host adapter, and so on) and the host loses communication with a controller, the
RDAC driver automatically re-routes all I/O operations to the other controller.
Figure 5-2 on page 84 illustrates how RDAC provides this redundancy. Normally, the
host application generates a request for I/O which goes through just the SCSI driver
to get to the controllers/drives. With RDAC installed, though, the RDAC driver and
resolution daemon are added for transparent failover. This does not affect
performance.
Chapter 5
Operating Environment Support
83
In the Figure 5-2, the host generates a request for I/O to Controller A, but Controller
A fails. Use the information in the legend list to follow the I/O connection.
FIGURE 5-2
Example of RDAC I/O Connection Redundancy
Legend:
1. I/O request fails.
2. Failed I/O returns to RDAC driver.
3. RDAC driver requests RDAC resolution daemon for assistance.
4. RDAC resolution daemon performs failover through the SCSI driver and transfers
logical units to other controller (controller B).
84
Sun StorEdge RAID Manager 6.22 Installation and Support Guide for Solaris • September 1999
5. RDAC resolution daemon tells the RDAC driver that the new path is ready and
RDAC driver resends the I/O request back down to controller B where it is
serviced. (The host application is unaware of the transactions that have taken
place to complete the I/O.)
Disabling RDAC
You can disable the RDAC protection by editing the Rdac_SupportDisabled
parameter in the /etc/osa/rmparams file and setting the value to TRUE. You also
need to run the script /usr/lib/osa/bin/hot_add or reboot your system (using
the boot command) for this change to take effect. See the rmparams man page for
an explanation of this parameter.
Caution – If you do not have RDAC protection, certain features do not work as
described in the Sun StorEdge RAID Manager User’s Guide:
Recovery. Recovery Guru/Health Check displays the Data Path Failure type;
however, the fault light on the RAID Module will not light when RDAC is disabled.
Therefore, thoroughly verify that the interface cable/terminator is not removed or
damaged before proceeding with any controller-related recovery procedure.
Maintenance/Tuning. Does not check for I/Os or verify that LUNs are Optimal
before upgrading firmware, balancing LUNs, or changing controller mode.
Firmware Upgrade. The Online method for Firmware Upgrade is grayed out. Before
selecting the Offline method of Firmware Upgrade, you must stop I/O and unmount
any file systems contained on the affected LUNs.
LUN Balancing and Controller Mode. Make sure you stop I/Os or they may fail.
Also, if the LUNs contain file stems, you must first unmount them.
Chapter 5
Operating Environment Support
85
Command-Line Interface
Although you can perform most necessary storage management tasks through the
storage manager software, there are utilities that enable you to perform these tasks
through the command line. Some tasks are carried out automatically by daemon
processes that run from system startup to system shutdown. For a list and a
description of these utilities, see the “Command-Line Interface” in the Sun StorEdge
RAID Manager User’s Guide.
man Pages
Several man page files were copied to the following directories during this
software’s installation:
■
/usr/share/man/man1m
■
/usr/share/man/man4
■
/usr/share/man/man7
The man pages provide supplementary information for storage management and
administration. For more information about the man page files, see “man Pages” on
page 131.
To install the man pages, perform the following steps:
1. Become superuser (if you are not already superuser) using the su command and
the superuser password.
2. Type the following at the system prompt:
# /bin/catman -w
Note – It may take several minutes for /bin/catman -w to run, depending on your
system’s processor speed and on which version of the Solaris operating environment
you are running.
To access the man pages, type:
man <manpagename>
86
Sun StorEdge RAID Manager 6.22 Installation and Support Guide for Solaris • September 1999
For example, to read the rm6 man page (which gives an overview of this software),
type:
man rm6
Adding New RAID Modules to the
Configuration
If you need to add new RAID Modules to your system after installing the storage
management software, use the following procedure to be sure this software
recognizes the new module and that its configuration meets your needs.
Tip – This procedure assumes that you have not changed the Rdac_HotAddDisabled
parameter in the /usr/lib/osa/rmparams file. If you have changed the
parameter, you may need to shut down and reboot the system after adding the
module (see the rmparams man page for details).
1. Physically connect the RAID Module to your system. Consult the appropriate
hardware documentation for this procedure.
2. Execute the following script:
/usr/lib/osa/bin/hot_add
Note – You do not need to reboot the system.
Chapter 5
Operating Environment Support
87
3. Go to Chapter 3, “Initial Startup” to perform the following steps:
■
Verifying and Upgrading Controller Firmware—page 44
■
Running Recovery Guru/Health Check—page 48
■
Determining the Current Configuration—page 52
■
Determining If Any Changes Are Necessary—page 58
■
Configuring RAID Modules—page 63
Deinstalling RAID Manager
If you need to remove the storage management software (for example, to reinstall if
there is some problem during the installation procedure), use the pkgrm utility and
follow the instructions on the screen. See also “Removing an Earlier Version of Sun
StorEdge RAID Manager” on page 32.
The rmlog.log file remains after using pkgrm to remove the software. Although
keeping this file should not cause any problems, you may want to manually delete
it.
Note – You cannot use the pkgrm utility on the storage management software if the
RAID Module is the boot device.
88
Sun StorEdge RAID Manager 6.22 Installation and Support Guide for Solaris • September 1999
CHAPTER
6
Troubleshooting
This chapter contains the following sections:
■
Resolving Problems—page 90
■
Replacing Controllers—page 107
The troubleshooting tables that follow provide probable cause and action to take for
specific problems you may have as you use the storage management software in the
Solaris operating environment.
Tip – If you cannot find the problem you are looking for, read the Sun StorEdge
RAID Manager Release Notes and consult the Online Help for additional
troubleshooting information. Also, see “Understanding the Restrictions” on page 6,
for additional information.
This chapter includes important information that you may need when replacing
failed controllers.
89
Resolving Problems
The troubleshooting tables that follow provide probable cause and action to take for
specific problems you may have as you use the storage management software in the
Solaris operating environment.
Tip – If you cannot find the problem you are looking for, consult the Online Help
for additional troubleshooting information. Also, see “Understanding the
Restrictions” on page 6 for additional information.
Locating Solutions
To quickly find the problem-solution you are looking for, use the following tables to
locate the problem you are having. It is possible for an entry to appear in more than
one table:
90
■
Category–Organizes problems into general use or specific option groups (page
91).
■
Component–Organizes problems by hardware components, such as controllers,
drives, modules, and so on. (page 91).
■
Application–Organizes problems for each storage management application,
including a group for options common to all applications (page 94).
■
Software–Organizes problems by operating system, storage management
software, or command-line options (page 96).
Sun StorEdge RAID Manager 6.22 Installation and Support Guide for Solaris • September 1999
Category
Table 6-1 groups problems into sections for general use or specific options.
TABLE 6-1
Troubleshooting Entries by Category
Category
See Page
“Configuration Application”
97
“Firmware Upgrade”
99
“General”
100
“Recovery Guru/Health Check”
103
Component Search
Table 6-2 lists individual problems by hardware components, such as controllers,
drives, LUNs, RAID Modules, and so on.
TABLE 6-2
Troubleshooting Entries Organized by Component (1 of 3)
Component
Problem
See Details
Batteries
Age did not reset for both controllers
102
Battery alert displayed after a controller is replaced or
power-cycled
106
Failed during alternate replacement
100
Firmware upgrade failed
99
Unable to highlight during firmware download
99
LUN creation error after deleting all LUNs or using Reset
configuration
98
Not visible to storage management software
101
Passive, no LUNs owned after replacement
105
Failure detected after replacement
103
Controllers
Fans
Chapter 6
Troubleshooting
91
TABLE 6-2
Troubleshooting Entries Organized by Component (2 of 3)
Component
Problem
Drives
Lights don’t flash (Configuration
See Details
→ List/Locate Drives)
All drives failed in a drive group
105
Failed status, but LUN is Optimal
104
Fault light comes on after replacing failed drive
104
Fault lights lit (drives continue to fail)
104
Missing information in Manual Recovery
screen
92
97
→ Drives
105
Number of drives incomplete or wrong during LUN
creation
97
Removed drive; no failure reported
103
Status other than Optimal
104
Sun StorEdge RAID Manager 6.22 Installation and Support Guide for Solaris • September 1999
TABLE 6-2
Troubleshooting Entries Organized by Component (3 of 3)
Component
Problem
See Details
LUNs
Error message during LUN creation after deleting all
LUNs or using Reset Configuration
98
Less capacity shows than selected during configuration
97
Missing information in Manual Recovery
screen
RAID Modules
Power Supplies
→ LUNs
105
No Such Device or Address message displayed during
LUN creation
98
Not visible to storage management software
101
Number of drives incomplete or wrong during LUN
creation
97
Optimal LUN status with failed drives
104
Reconstructing status appears, but no drives replaced
104
Status other than Optimal
104
Status remains Reconstructing
105
Not visible under Format
100
Failure detected after replacing fan or power supply
103
Listed after being removed
101
Status other than Optimal
104
Status doesn’t update after a recovery procedure
106
Failure detected after replacement
103
Chapter 6
Troubleshooting
93
Application Search
Table 6-3 lists individual problems for each storage management application,
including a group for options common to all applications.
TABLE 6-3
Application
Problem
See Details On
Common To Any
Application
Can’t select some options
101
“Cannot secure access to LUNs” message
102
Select Module lists a RAID Module removed from
the system
101
Status doesn’t update after a recovery procedure
106
Less capacity shows than selected during
configuration
97
List/Locate Drives doesn’t work
97
LUN creation error after deleting all LUNs or using
Reset Configuration
98
No Such Device or Address message is displayed
98
Number of drives incomplete or wrong during LUN
creation
97
Number of Drives field shows fewer drives than
expected
97
Reset Configuration doesn’t work
97
Reconstructing status appears, but no drives
replaced
104
Status remains Reconstructing
105
Configuration
Status
94
Troubleshooting Entries Organized by Application (1 of 2)
Sun StorEdge RAID Manager 6.22 Installation and Support Guide for Solaris • September 1999
TABLE 6-3
Troubleshooting Entries Organized by Application (2 of 2)
Application
Problem
See Details On
Recovery
All drives failed in a drive group
105
Controller mode is Passive, no LUNs owned after
replacement
105
Drive fault lights lit (drives continue to fail)
104
Drive status other than Optimal
103
Failed status, but LUN is Optimal
104
Fault light comes on after replacing failed drive
104
Failure detected after replacing fan or power supply
103
LUN status other than Optimal
104
Missing information in Manual Recovery → Drives
screen
105
Missing information in Manual Recovery
Logical Units screen
Maintenance/Tuning
→
105
Reconstructing status appears, but no drives
replaced
104
Recovery Guru takes a long time
103
Removed drive, but Recovery Guru doesn’t report a
failure
103
Status doesn’t update after a recovery procedure
106
Status other than Optimal
104
Status remains Reconstructing
105
Controller mode is Passive, no LUNs owned after
replacement
105
Firmware upgrade failed
99
Chapter 6
Troubleshooting
95
Software Search
Table 6-4 lists individual problems by operating system, storage management
software, and command line options.
TABLE 6-4
Software
Problem
See Details On
Storage Management
“Cannot secure access to LUNs” message
102
Can’t select some options
101
Controllers/LUNs not visible
101
Failure detected after replacing fan or power supply
103
“Not all files removed” message when uninstalling
the software
100
RAID Module listed after being removed
101
Script file commands fail
100
Battery age doesn’t reset for both controllers
102
Command Line
96
Troubleshooting Entries Organized by Software
Sun StorEdge RAID Manager 6.22 Installation and Support Guide for Solaris • September 1999
Configuration Application
Table 6-5 lists problems you may have as you use options in the Configuration
Application.
TABLE 6-5
Configuration Application Changes Troubleshooting (1 of 2)
Number of Drives field (in the Create LUN main screen) show less than the number of drives in the unassigned drive group.
Cause: There may be failed or unresponsive drives in the unassigned drive group. Failed drives are not
available for configuration; therefore, they are not displayed in this list.
Less capacity shows than I selected during configuration.
When using five or more drives to create a LUN, you may see a capacity slightly less than you selected
during configuration; for example, you see 1.97 GB instead of 2 GB on a RAID 5, 9-drive LUN. This can occur
because the capacity you select is based on stripe size, which depends on segment size times the number of
drives.
List/Locate Drives
→ Locate doesn’t work.
Action: It is not possible to flash the drive activity lights for a particular drive group if any of the drives has
a status other than Optimal. For an explanation of possible drive statuses and recommended action to take,
see the Online help.
Cause: Use Module Profile to verify that all drives are Optimal and try again. If any of the drives are not
Optimal, select Recovery Guru\Health Check (in the Recovery application) to correct the problem.
Reset Configuration doesn’t work.
Caution: Any time you use Reset Configuration, you will lose all data on your drives.
Only select this option as a last resort if your configuration is inaccessible or you want
to start over. You will need to use Create LUN to re-configure your drive groups/
LUNs.
Cause: If this software detects any drives as removed or unresponsive, Reset Configuration will not
work. Also, Reset Configuration will not work on an Active/Passive pair. If the selected RAID Module has an
Independent Controller configuration, the Reset Configuration option is grayed out.
Action: Reboot the system. Use Module Profile to verify that all drives are Optimal and that the
controller is not in an Independent Controller configuration (neither controller is marked Inaccessible). Try
File → Reset Configuration again.
Caution: Any time you use Reset Configuration, you will lose all data on your drives. Select this option only
as a last resort if your configuration is inaccessible or you want to start over. You will need to use Create LUN
to reconfigure your drive groups/LUNs.
Chapter 6
Troubleshooting
97
TABLE 6-5
Configuration Application Changes Troubleshooting (2 of 2)
LUN Creation error message is displayed after deleting all LUNs or using File
→ Reset
Configuration.
Cause: Most likely the controller has 64 or 128 MB cache and requires a reset after deleting all LUNs/drive
groups before re-creating new LUNs/drive groups.
Action: Turn off power to the affected RAID Module. Turn the power back on and try the LUN creation
procedure again.
No Such Device Or Address message is displayed during LUN creation
Cause: Most likely this is an incorrect error message. The LUN creation operation should be completed
successfully, although it may take several minutes.
Action: Wait several minutes for the operation to be completed.
98
Sun StorEdge RAID Manager 6.22 Installation and Support Guide for Solaris • September 1999
Firmware Upgrade
Table 6-6 lists problems you may have while upgrading firmware.
TABLE 6-6
Controller Firmware Upgrade Troubleshooting
Determine which controller firmware version is downloaded without the storage management software installed.
Use a serial or SCSI diagnostic tool to check the controller firmware version currently installed.
Firmware upgrade does not complete successfully.
Cause: This should not happen unless you try to perform some other activity on the module while
upgrading controller firmware.
Note: If you are upgrading firmware to a redundant controller pair, the progress bar
reaches 50% very quickly after downloading a file to the first controller. However, it may
take another couple of minutes to reach 100% if it is downloading to a second controller in
the module. Do not assume the controller has hung unless the firmware upgrade has not
completed after ten minutes or so.
Action:
• To avoid this problem, wait for the controller firmware upgrade to be completed before selecting any other
option or exiting the Maintenance/Tuning application.
• If it occurs, turn off power to the RAID Module and turn it back on; then, immediately try to upgrade the
firmware again.
Tip: If you are not upgrading the firmware again immediately, check the firmware version
of the module’s controllers using Module Profile. The controller firmware could be in an
unusable state if some files completed the download process before the controller hung. In
this case, your module will not perform properly until the firmware is upgraded.
Unable to highlight some controllers for firmware download. (Bug 4163706)
If you selected the controller (especially if it is an independent controller), ignore the unhighlighted status,
select the appropriate firmware file for download, and click OK.
Chapter 6
Troubleshooting
99
General
Table 6-7 lists general problems you could have in all applications.
TABLE 6-7
Troubleshooting Generally Applicable to All Applications (1 of 3)
Controller failed while bringing its alternate Online.
Cause: You have a RAID Module with two controllers, one is Offline and the other is Online (Optimal).
When you bring the offline controller online, you could see the alternate controller Fail or go Offline.
Action: Bring the newly failed controller Online using the same procedure.
While uninstalling this software, “not all files were removed” message is displayed.
Cause: If you see this message after performing the uninstall procedure (see page 88), the auto parity
check/repair service was probably running. The software has been successfully uninstalled; however, there
may be some files that were not removed from the installation directory.
Action: Delete any remaining files from the installation directory, then delete the directory.
A RAID Module I have removed from my system causes long delays or hangs the system and the logical units are not
visible to the storage management software (using Options → Manual Recovery → LUNs → Format to
format the logical unit).
Cause: Moving a RAID Module from one host to another host can confuse the storage management
software, particularly when the original device name for the RAID Module is the same as a RAID Module on
the new host. This causes a duplicate entry in the mnf file.
Action: In the Configuration application, go the Module Selection screen, select the RAID module you want
to remove, and click Remove. (If you want to add the RAID Module to your system again, return to the
Module Selection screen, select the RAID module you want to add, and click Add.) The mnf file can also be
edited at the command line by running the lad utility or any other storage management application to
regenerate the file.
Commands run in a batch file fail unexpectedly.
Cause: Utility commands such as fwutil or rdacutil -u that require a controller reboot may return
before the controller is ready to accept commands. If the next command is executed before the controller is
ready to accept commands, the controller will return an error status.
Action: Include a delay command in the batch file to allow enough time for the controller to finish its
action.
100
Sun StorEdge RAID Manager 6.22 Installation and Support Guide for Solaris • September 1999
TABLE 6-7
Troubleshooting Generally Applicable to All Applications (2 of 3)
Some controllers/logical units are not visible to the storage management software, but are visible to the host.
Cause: It is possible that controllers or logical units might not be visible to the storage management
software, but will remain visible to the operating environment. Any time an operation is being performed
that requires exclusive access to the logical units (LUNs), these LUNs may not appear on the screen except in
the application where the operation was initiated.
The software uses a file (\program files\Raidmgr\lunlocks for Windows NT and
/etc/osa/lunlocks for Solaris) to hide these LUNs from the other applications, so that no other
operations can be performed on them until the current operation is complete. For example, if you started a
format in the Recovery application, these LUNs show a “Formatting” status in Recovery, but may not
appear in any other application. Operations that require exclusive access include Delete for LUNs and File
→ Reset Configuration (Configuration application); formatting a LUN with Options → Manual
Recovery → Logical Units (Recovery application); and Firmware Upgrade → Offline method
(Maintenance/Tuning application).
Should the utility/application holding the LUN lock come to an abnormal termination, these LUNs may
remain hidden from the other applications.
Action:
1. Wait for the operation to be completed, or perform operations on a different RAID Module.
2. If you still do not see controllers or LUNs that you know exist, do the following:
• Close all your applications and exit the storage management software completely.
• In Windows NT, run the clean.bat -all script to delete certain.mnf, mutex, and lock files that are
associated with RAID Manager and could be hiding information from this software.
In the Solaris environment, type the following at the system prompt: rm /etc/osa/lunlocks.
3. Restart the application where you had the problem and verify that the controller/LUNs are now visible.
A RAID Module is listed that I have removed from my system.
Cause: The storage management software does not automatically remove modules from configuration; thus,
a module you remove will continue to be listed in the RAID Module Selection box and the Module Selection
screen.
Action: Use Select Module → Remove after physically removing the RAID Module. See the Online Help
for the specific procedure to follow.
I cannot select some options.
Cause: Some options are grayed out or are unavailable because:
•
•
•
•
The
The
The
The
selected RAID Module does not support that option.
option cannot be performed for the item you selected.
option is not active until you select some item.
option is no longer applicable because a maximum has been reached.
Action: Recheck your selection and try again.
For more specific information, see the Procedures section in the User’s Guide that describes the particular
option, or consult Online Help, “Why Are Some Options Grayed Out?”
Chapter 6
Troubleshooting
101
TABLE 6-7
Troubleshooting Generally Applicable to All Applications (3 of 3)
Battery age did not reset for both controllers.
Cause: When you use the raidutil command to reset a battery’s age, the command affects only one
controller at a time.
Action: Perform the battery reset command (with raidutil) for each controller in a RAID Module as
needed.
“Cannot secure access to the LUNs” message is displayed (operations won’t run for a selected RAID Module).
Cause: Most likely a second application has requested exclusive access to the selected RAID Module when
some other application has already secured access. Many operations require exclusive access to the affected
drive group/LUNs until its operation is completed (this software “locks” these components to secure this
access).
Also, if the affected LUNs are under some other software’s control, the storage management software cannot
gain exclusive access. Either this message is displayed, or the second request is denied and you see an error
message indicating that the module has I/Os occurring or that file systems are present.
Action: Wait for any operation that has secured exclusive access to the LUNs to be completed before
performing another operation on the same RAID Module.
Operations requiring exclusive access include: Delete for LUNs and File → Reset Configuration
(Configuration); formatting a LUN with Options → Manual Recovery → Logical Units
(Recovery); and Firmware Upgrade → Offline method (Maintenance/Tuning).
Caution: If you are using more than one network management station, or if you
are using the storage management software on more than one host, use caution
when performing the tasks that need exclusive access to ensure that the two hosts
do not sent conflicting commands to the controllers in the RAID Modules.
Component/module status other than Optimal.
Cause: Statuses other than Optimal can indicate many things and usually warrant attention because the
module is not operating in a normal condition. The most common causes are:
• At least one drive has failed.
• A drive has been replaced and is reconstructing.
• A logical unit is formatting.
• A controller has been placed offline or has failed.
• A module component had failed, such as a power supply or fan.
Action: For Failed or Offline drives, Dead or Degraded logical units, or Dead controllers (or Offline
controllers that you did not place offline), select Recovery Guru/Health Check and follow the step-bystep procedure it provides. For an explanation of the possible drive, LUN, or controller statuses and any
recommended action to take, see the Online Help.
Tip: Do not rely only on logical unit (LUN) status information to determine if a recovery procedure is
necessary. For example, if you have hot spares configured for a RAID Module and a drive fails, the hot spare
takes over for the failed drive. Therefore, you have an Optimal LUN with a failed drive. Depending on how
many hot spares you have configured for the module, you can have multiple failed drives and still have an
Optimal LUN.
102
Sun StorEdge RAID Manager 6.22 Installation and Support Guide for Solaris • September 1999
Recovery Guru/Health Check
Table 6-8 lists problems you may have in running Recovery Guru/Health Check or
the Manual Recovery Options in the Recovery Application.
TABLE 6-8
Recovery Guru/Health Check Troubleshooting (1 of 4)
Recovery Guru/Health Check results take a long time to display.
Cause: Normally you see Recovery Guru/Health Check’s results in a few seconds. However, if you
have selected All RAID Modules or there are I/O operations running, you might notice a delay. Also,
there could be instances where an unresponsive component or other status change affects the controller's
ability to provide a result in Recovery Guru/Health Check, although such occurrences are rare.
Action: If you experience long delays in performing Recovery Guru/Health Check, you might try
checking one RAID Module at a time or selecting Recovery Guru/Health Check at a time of low system
I/O.
Note: A background check occurs at regular intervals for all RAID Modules (results are
logged to Message Log); the default setting is five minutes. You can change the frequency of
this check by using Options → Log Settings.
Recovery Guru/Health Check doesn’t report a drive failure when I remove a drive.
If there is no I/O occurring for that drive, Recovery Guru/Health Check reports an Unresponsive Drive.
If there is I/O occurring, the controller will fail the drive (and Recovery Guru/Health Check reports
this, too).
Caution: You should never remove drives from a module unless the controller has
marked them as failed. Doing so could result in data loss for the affected logical
unit/drive group. If you suspect problems with a drive, it is best to select
Recovery Guru/Health Check and follow the instructions provided.
Software detects a failure even after I replaced a fan or power supply (recover from a Module Component Failure).
Cause: The software continues to report the condition as a failure for approximately 10 minutes after
replacing a fan or power supply due to the controller’s polling interval.
Action: Wait for the controller to poll the module (default is 10 minutes) after performing this recovery
procedure before re-selecting Recovery Guru.
Drive status other than Optimal.
Cause: You have a Failed, Offline, or Replaced drive (which is reconstructing), or a logical unit is being
formatted. For an explanation of possible drive statuses and the recommended action to take, see the Online
Help.
Action: For Failed or Offline drives, select Recovery Guru/Health Check and follow the step-by-step
procedures provided. No action is required if the drives are Replaced or the LUN is Reconstructing or
Formatting. However, if the drives remain Replaced and the LUN status was Dead, Recovery Guru/
Health Check may report the RAID Module as Optimal. If this occurs, you need to manually begin the
format process for the LUN/drive group (Options → Manual Recovery → LUNs → Format).
Chapter 6
Troubleshooting
103
TABLE 6-8
Recovery Guru/Health Check Troubleshooting (2 of 4)
Drives continue to fail (fault lights lit).
Caution: It is possible that a drive channel has failed. A drive channel failure is
indicated when all the drives on the same channel are Failed or Unresponsive.
Depending how the logical units have been configured across these drives, the
status of the logical units may be Dead, Degraded, or Optimal (if hot spare drives
are in use).
Action: Select Recovery Guru/Health Check and follow the step-by-step procedure given.
Drive fault light came on after I replaced a failed drive.
Cause: This light may come on momentarily when a drive in a RAID 1, 3, or 5 LUN begins reconstruction.
Action: Wait a few minutes for the fault light to go off and the drive activity lights to begin flashing
steadily. This indicates that reconstruction is occurring. The drive’s status changes to Replaced and the
logical unit’s status changes to Reconstructing.
However, if the fault remains on, select Recovery Guru/Health Check and follow the procedure
provided.
Failed Drive status appears, but logical unit status is still Optimal.
Cause: A drive on the logical unit has failed and a hot spare has taken over for it.
Note: To see if a hot spare is being used, use List/Locate Drives in the
Configuration application. The hot spare’s drive status is either In Use or Standby (not
being used).
Action: Select Recovery Guru/Health Check and follow the procedure provided.
Logical unit status other than Optimal.
Cause: You have a Failed drive or a Replaced drive which is reconstructing, or a logical unit is being
formatted. For an explanation of possible logical unit statuses and any recommended action to take, see the
Online Help.
Action: For Dead or Degraded logical units, select Recovery Guru/Health Check and follow the stepby-step procedures it provides for restoring the logical units. However, if the drives remain Replaced and the
LUN status was Dead, Recovery Guru may report the LUN as Optimal. If this occurs, you need to
manually begin the format process for the LUN/drive group (Options → Manual Recovery → LUNs →
Format).
LUN status changed to Reconstructing, but no drives have been replaced.
Cause: A hot spare has taken over for a failed drive and the data is being reconstructed on it. The logical
unit’s status returns to Optimal as soon as reconstruction is completed.
104
Sun StorEdge RAID Manager 6.22 Installation and Support Guide for Solaris • September 1999
TABLE 6-8
Recovery Guru/Health Check Troubleshooting (3 of 4)
LUN status doesn’t change from Reconstructing.
Caution: This could occur after a Manual Recovery task is completed,
especially LUN Reconstruction, or because data was reconstructed on a hot spare
(the hot spare drive becomes In Use, the LUN status changes to Reconstructing, but
may not return to Optimal when reconstruction is completed).
Tip: If reconstruction was interrupted on a hot spare drive because another drive failed in
the same drive group/LUN, the LUN is probably Dead (with two Failed drives) and you
have lost data. You should select Recovery Guru\Health Check and follow the
procedure provided to replace the newly failed drive.
Action: Wait for the background monitor to run (default is five minutes) and to update the status, or
To update immediately, do one of the following:
• Re-select the RAID Module.
• Exit and re-enter the application.
All Drives in a Drive Group fail.
Cause: If all the drives in a configured drive group fail and are then physically replaced, Recovery Guru/
Health Check will still show the replaced drives as failed. Their status is not upgraded to Replaced,
although the LUN status will show Dead LUN.
Action: In this case, follow the Recovery Guru\Health Check procedure to reformat the LUNs in the
drive group.
Tip: If you turn the power to the RAID Module off and then on again, the LUNs in the
drive group are deleted, and the replaced drives are returned to the unassigned drive
group, still failed. Follow the procedure given in Health Check to recreate the deleted
LUNs.
Controller mode is Passive and it doesn’t own any LUNs after replacing a Failed controller.
Cause: After you use Recovery Guru to replace a failed controller and Options → Manual Recovery
→ Controller Pairs to place it back Online, the controller is Optimal but in the Passive mode rather
than Active. This is most likely to occur for controller B.
Action: With the newly replaced controller Optimal, use Controller Mode → Change To Active/
Active (Maintenance/Tuning) to make the controller Active. You can either redistribute drive groups/
LUNs during this mode change, or later you can use LUN Balancing (Maintenance/Tuning) to assign
specific drive group/LUNs to each active controller.
Information is missing in the Options
→ Manual
Recovery
→ Drives screen.
Cause: The drives for the selected RAID Module are unassigned (that is, they are not part of a configured
drive group). For these drives, there is no LUN, RAID Level, or logical unit status to report. However, you
should still see information for the drives’ location and status.
Action: Select another module, or use the Configuration application to create logical units using those
unassigned drives.
No LUN information appears in the Options
→ Manual
Recovery
→ Logical
Units screen.
Chapter 6
Troubleshooting
105
TABLE 6-8
Recovery Guru/Health Check Troubleshooting (4 of 4)
Cause: There are no configured logical units for the selected RAID Module (that is, all the drives are
unassigned). There is no LUN, drive group, RAID Level, or logical unit status to report.
Action: Select another module, or use the Configuration application to create logical units using those
unassigned drives.
Component status isn’t updated after a recovery procedure has been performed.
Cause: A configuration change may not be detected yet. For example, a drive is failed, then replaced and its
status becomes Replaced, but does not return to Optimal after reconstruction is completed.
Action: Try selecting a different RAID Module, then switching back and re-selecting Options → Manual
Recovery, or exit, then reselect the Recovery application.
A Battery Alert is displayed after a controller is replaced or power-cycled.
Cause: Recovery Guru/Health Check has probably returned a false result.
Action: Wait at least 15 minutes, then run Recovery Guru/Health Check again before taking any action on
the battery alert.
106
Sun StorEdge RAID Manager 6.22 Installation and Support Guide for Solaris • September 1999
Replacing Controllers
It is best to use Recovery Guru/Health Check (Recovery Application) to diagnose
and correct problems with your RAID Module components. The following
procedures are to be used only for the specific conditions described and are not
generic. Therefore, do not use them for replacing any failed controller.
Caution – Be sure to check the README file on this software’s CD-ROM for last
minute updates to the “Replacing Controllers” section.
Do not use controllers with 2.04.X or 2.05.04 firmware as replacements in a module
running 3.X firmware. Instead, use the following minimum firmware levels:
-- In SCSI systems, use replacements with a minimum firmware 2.05.06.
-- In Fibre Channel systems, use replacements with a minimum 3.01.X.
If you are not certain what firmware version a spare controller has, do not use it and
contact your local Sun solution center or Sun service provider.
When you cold-swap a controller (replace a controller in a RAID Module while the
module is turned off), the World Wide Name (WWN) changes to prevent duplicate
WWNs. You must reboot the host system so it can recognize the new controller.
Caution – There is at least one cold-swapping scenario that could cause data
corruption. If you have two arrays on the same loop or switch and cold-swap both
controllers in one array for the controllers in the other array, or if you swap the
entire controller module, you MUST reboot the host system. Because they were
swapped together, the controller pairs will not change their Node Name. Therefore,
unless you reboot the host, the Fibre Channel host adapter will track the controller
pairs to the new -- and incorrect -- media.
If you have replaced a failed controller already and experience problems, begin with
one of the following procedures as recommended:
■
“Problems Bringing the New Controller Online” on page 108.
■
“Incompatible Firmware Detected” on page 109.
Chapter 6
Troubleshooting
107
Problems Bringing the New Controller Online
You have replaced a controller and either your system crashed or you saw a message
while trying to bring the new controller Online. The message told you to check your
controller connections and to consult this section if there are still problems.
Problem Summary
One problem that could be preventing you from bringing the controller back online
is that the new replacement controller has 2.05.X firmware while the remaining
operational controller in your RAID Module has 2.04.X or 3.X firmware.
Caution – If your system crashed and is using Fibre Channel controllers running
3.X firmware, your new replacement controller must have 3.01.X firmware at a
minimum. If the controller has an earlier version, this is probably what caused your
system to crash. Obtain a replacement controller with 3.X firmware and begin the
recovery procedure again.
4. Exit all storage management applications.
5. Re-start the Recovery Application and make sure that the affected RAID Module
is selected.
6. Select Manual Recovery → Controller Pairs, highlight the controller that is
Offline, and select Place Online.
Once the controller is placed Online, you see an incompatible firmware detected
message. Refer to the next section, “Incompatible Firmware Detected” on page 109.
108
Sun StorEdge RAID Manager 6.22 Installation and Support Guide for Solaris • September 1999
Incompatible Firmware Detected
You replaced a controller and saw a message after the new controller was brought
Online telling you that incompatible firmware has been detected and to consult this
section.
Problem Summary
The correct procedure for upgrading the controller firmware depends on the
controller firmware versions of both controllers and on the controller slot location of
the new replacement controller. Use the following steps to determine the correct
procedure to use.
1. Using the Recovery Application, select Module Profile → Controllers and
determine the following:
■
Record the controller name/ID for both controllers. Be sure to note which is
currently controller A and which is controller B. You will need this information to
identify the controllers during this procedure.
■
Record the firmware version of both controllers. Be sure to note which version
applies to the old controller and which to the new, replaced controller. You will
need this information to determine the correct procedure to follow for upgrading
the controller firmware.
Chapter 6
Troubleshooting
109
2. Use TABLE 6-9 to determine how to proceed.
TABLE 6-9
Determining Which Upgrade Procedure to Follow
Controller Firmware Version
on Current Controller
Controller Firmware Version
on Replacement Controller
2.04.X
2.04.X, 2.05.X
Download the 2.04.X firmware to the replaced
controller using the normal procedure
(Maintenance/Tuning → Firmware Upgrade
→ Offline method). This will return your RAID
module to its original state. Consult the Sun StorEdge
RAID Manager User’s Guide or Online Help for
further details.
Note: You may want to upgrade the 2.04.X
firmware in the current controller to match the
firmware in the replacement controller (upgrading
your system to the latest version is usually
recommended). If you decide to upgrade, you may
need to upgrade to an intermediate level of
firmware first. Use Table A-4 on page 121 to
determine if an intermediate upgrade is required.
2.05.X
2.04.X, 2.05.X
Download the 2.05.X firmware to the replaced
controller using the normal procedure
(Maintenance/Tuning → Firmware Upgrade
→ Offline method). This will return your RAID
module to its original state. Consult the Sun StorEdge
RAID Manager User’s Guide or Online Help for
further details.
Note: You may want to upgrade the 2.05.X
firmware in the current controller to match the
firmware in the replacement controller (upgrading
your system to the latest version is usually
recommended).
110
Action to Take
Sun StorEdge RAID Manager 6.22 Installation and Support Guide for Solaris • September 1999
TABLE 6-9
Determining Which Upgrade Procedure to Follow
Controller Firmware Version
on Current Controller
Controller Firmware Version
on Replacement Controller
Action to Take
3.00.X or later
2.04.X, 2.05.04
Caution: Do not use these versions as replacement
controllers in a system running 3.X. Obtain a
replacement controller with the minimum
recommended firmware:
• In SCSI systems, use replacements with a
minimum firmware 2.05.06.
• In Fibre Channel systems, use replacements with a
minimum 3.01.X.
If you are not certain what firmware version a spare
controller has, do not use it. Obtain spare controllers
from your local solution center.
2.05.00 through 2.05.03
• For SCSI systems, continue with Step 3 on page
112.
• For Fibre Channel systems, do not use these
versions as replacement controllers. Use
replacements with a minimum 3.01.X. If you are
not certain what firmware version a spare
controller has, do not use it. Obtain spare
controllers from your local solution center.
2.05.05 or later
• For SCSI systems, select only the replaced
controller to upgrade the firmware using the
normal procedure (Maintenance/Tuning →
Firmware Upgrade → Offline method).
Consult the Sun StorEdge RAID Manager User’s
Guide or Online Help for further details.
• For Fibre Channel systems, do not use these
versions as replacement controllers. Use
replacements with a minimum 3.01.X. If you are
not certain what firmware version a spare
controller has, do not use it. Obtain spare
controllers from your local solution center.
Chapter 6
Troubleshooting
111
3. Which controller slot location is the new, replaced controller placed in (the new
controller has a firmware version of 2.05.00 through 2.05.03)?
In Slot A
In Slot B
You must use the procedure on page 113.
Select only the replaced controller to upgrade the
firmware using the normal procedure
(Maintenance/Tuning → Firmware Upgrade
→ Offline method). Consult the Sun StorEdge
RAID Manager User’s Guide or Online Help for
further details.
You may want to call your local solution
center or Sun service provider for
additional support with this procedure.
Note: You may need to upgrade to an intermediate
level of firmware first. Use Table A-4 on page 121 to
determine if an intermediate upgrade is required.
112
Sun StorEdge RAID Manager 6.22 Installation and Support Guide for Solaris • September 1999
Upgrading Firmware from 2.05.00 Through
2.05.03 to 3.X for a Replaced Controller In Slot A
Caution – This procedure is very difficult and takes a long time. You may want to
contact your local solution center for additional support.
Use this procedure only to upgrade to controller firmware 3.01.X in a SCSI system
that was originally running 3.00.X or later. The Firmware Upgrade option
(Maintenance/Tuning Application) does not allow you to downgrade from controller
firmware 3.X.
You must use this procedure to upgrade the controller firmware on the replaced
controller if it has controller firmware versions 2.05.00 through 2.05.03. Trying to
upgrade the firmware on the controller while it remains in slot A can cause the
controller to panic and the firmware upgrade to fail.
1. Stop all I/Os to the affected RAID Module.
2. Exit all storage management applications.
3. One at a time, pull both controllers out of their slots and label them with their
controller name/IDs (which you recorded from Module Profile → Controllers in
Step 1 on page 109).
Tip – Make sure at least 1 minute has elapsed before inserting the controller
indicated in Step 4.
4. Insert the controller that has firmware 3.X (controller B) firmly into controller slot
A of the RAID Module. Do NOT insert the second controller until instructed to do
so later in this procedure!
Make sure at least 1 minute has elapsed before continuing with Step 5.
5. From the command line, use the lad utility to determine when the storage
management software sees this controller.
A list of devices is displayed. This could take several minutes. Look for the
controller name/ID for the controller now in slot A in this list. When it appears,
continue with Step 6.
6. From the command line, use the rdacutil utility to place this controller in the
Active mode. For example, type:
rdacutil -m 1 <controller name/ID>
where <controller name/ID> is the name that the lad utility now displays.
Chapter 6
Troubleshooting
113
7. Insert the new replacement controller (that has controller firmware 2.5.X and was
controller A) firmly into controller slot B of the RAID Module.
Make sure at least 1 minute has elapsed before continuing with Step 8.
8. Exit all storage management applications.
9. Re-start the software, select the Maintenance/Tuning Application, and highlight
the correct RAID Module.
10. Select Firmware Upgrade → Offline.
You must use the Offline procedure in order to select a single controller for
downloading firmware.
11. Highlight the controller in slot B (it shows firmware level 2.5.X downloaded
currently), and highlight the appropriate firmware files in the Compatible Files/
Versions list.
Note – Because you are upgrading to firmware level 3.X, you may need to upgrade
to an intermediate level first. Use Table A-4 on page 121 to determine if an
intermediate upgrade is required.
12. Select OK to begin the upgrade. Wait for this procedure to finish before
continuing to Step 13 or using the Firmware Upgrade option again if intermediate
upgrades are required.
13. Select Controller Mode. The controllers should appear as an Active/Passive pair.
Note – You may want to use Controller Mode to change the pair to Active/Active.
This option enables you to balance drive group/LUNs between the controller, or you
can use LUN Balancing later to change the LUN assignment.
114
Sun StorEdge RAID Manager 6.22 Installation and Support Guide for Solaris • September 1999
APPENDIX
A
Specifications
This appendix describes the configuration specifications for this software.
■
Hardware Specifications—page 116
■
Required Patches—page 119
■
Controller Firmware Upgrade Notes—page 121
115
Hardware Specifications
Host-RAID Module Configurations
The following host-RAID Module configurations are supported:
■
Single-Host Configuration. One host machine has two host adapters, each
connected to one of the controllers in the RAID Module.
■
Independent Controller Configuration. Two host machines are connected to a
dual-controller RAID Module. One host machine is connected by a SCSI host
adapter to one controller, and a second host machine is connected by another host
adapter to the other controller.
■
Multi-Host Configuration. A pair of server-host adapter systems is connected to
one or more RAID Modules.
Note – Multi-host configurations are only supported with Sun™ Cluster 2.x
software.
■
Fibre Channel Configuration. Any of the above configurations can be used with
Fibre Channel controllers instead of SCSI controllers, depending on the Solaris
operating environment version and installed patches.
For an explanation of a RAID Module, see the “Common Definitions” section in the
Sun Storage RAID Manager User’s Guide or the Online Help glossary. For more
information on the types of Host-RAID Module configurations supported by the
storage management software, see “RAID Module Configurations” in the Sun
Storage RAID Manager User’s Guide.
116
Sun StorEdge RAID Manager 6.22 Installation and Support Guide for Solaris • September 1999
Host Systems
TABLE A-1 provides a list of platforms supported for the Sun StorEdge A1000, A3000,
and A3500 systems at the time this manual was published. Refer to the Sun StorEdge
RAID Manager Release Notes for updates to this list.
TABLE A-1
Supported Platforms for Sun StorEdge A1000, A3000, and A3500
Sun StorEdge A1000
Sun StorEdge A3000
Sun StorEdge A3500
Sun Ultra 1
Sun Ultra 5 S
Sun Ultra 10
Sun Ultra 30
Ultra E250
Ultra E450
Ultra E3000
Ultra E4000
Ultra E5000
Ultra E6000
Ultra
Ultra
Ultra
Ultra
Ultra
Ultra
Sun
Sun
Sun
Sun
Sun
Sun
Sun
Sun
E450
E3000
E4000
E5000
E6000
E10000
Enterprise
Enterprise
Enterprise
Enterprise
Enterprise
Enterprise
Enterprise
Enterprise
2
250
450
3000/3500
4000/4500
5000/5500
6000/6500
10000
Host Adapters
Refer to the documentation that was shipped with your host adapter card for
instructions on installing the SCSI or PCI host adapter and connecting it to your host
machine.
SCSI Host Adapters
TABLE A-2 lists the SCSI host adapters that have been tested with the RAID Manager
software:
TABLE A-2
Supported SCSI Host Adapters
Host Adapter
Product Description
Part Number
Sbus
Differential Fast-Wide Intelligent SCSI-2 (DWIS)
X1062A
Sbus
Ultra Differential Fast-Wide SCSI (UDWIS)
X1065A
PCI
Dual-Channel UltraSCSI Host Adapter PCI
X6541A
Appendix A
Specifications
117
Fibre Channel Host Adapters
TABLE A-3 lists the Fibre Channel host adapters that have been tested with the RAID
Manager software:
TABLE A-3
Supported Fibre Channel Host Adapters
Host Adapter
Product Description
Part Number
Sbus
Sun StorEdge Sbus FC-100 Host Adapter
X6730A
PCI
Sun StorEdge PCI FC-100 Host Adapter
X6729A
Caution:
Do not use the Sbus HBA card with a part number of 501-3060.
Boot Device Host Adapters
At this time, Sun supports limited boot device host adapters only for SCSI
controllers. Contact your local Sun solution center or Sun service provider for more
information about this feature.
Fibre Channel Hubs
The Sun StorEdge FC-100 Hub (part number X6732A) has been tested with the RAID
Manager software.
Fibre Channel Fabric Switches
At this time, Sun does not support the Fibre Channel fabric switches.
118
Sun StorEdge RAID Manager 6.22 Installation and Support Guide for Solaris • September 1999
Required Patches
Software patches for the Solaris operating environment are available to ensure
proper operation of the storage management software in the Solaris operating
environment. Make sure that all required patches are installed properly before
installing the Sun StorEdge RAID Manager software.
For a list of the patches (including patch ID numbers) required to use the Sun
StorEdge RAID Manager product in a Solaris operating environment, refer to the
Sun StorEdge RAID Manager Release Notes.
Note – You must reboot the operating environment with the boot command for the
changes to take effect. Therefore, make sure that other users are not on the system
when installing patches.
▼
To Install Required Patches
Perform the following steps before installing the Sun StorEdge RAID Manager
software:
1. Determine the Solaris version you have by using one of the following methods.
■
Type the following at the system prompt:
uname -a
The version is specified as 5.6 (for Solaris 2.6 software) or 5.7 (for Solaris 7
software).
Or
■
Type the following at the system prompt:
cat /etc/release
Appendix A
Specifications
119
The /etc/release file includes version information as shown in the following
example.
Solaris 2.6 5/98 s297s_hw3smccServer_09 SPARC
Copyright 1998 Sun Microsystems, Inc. All Rights Reserved.
Assembled on 24 April 1998
If the /etc/release file does not exist, your system is running a version earlier
than Solaris 2.6 5/98.
2. Install the correct patch or patches (for your version of Solaris software) on your
host system.
For a list of the patches (including patch ID numbers) required to use the Sun
StorEdge RAID Manager product in your Solaris operating environment, refer to the
Sun StorEdge RAID Manager Release Notes.
Note – For the Solaris 2.6 operating environment, you have the option of installing
the required patches as described in the Sun StorEdge RAID Manager Release Notes or
downloading and installing the Solaris 2.6 Recommended Patch Cluster.
3. After installing the appropriate patches, reboot the Solaris system for the changes
to take effect by typing:
boot
120
Sun StorEdge RAID Manager 6.22 Installation and Support Guide for Solaris • September 1999
Controller Firmware Upgrade Notes
If you are upgrading to firmware level 3.01.X, you may need to upgrade to an
intermediate level first. Use TABLE A-4 to determine if an intermediate upgrade is
required.
Tip – If you are upgrading from any 2.04.X version to 3.01.X, do not skip the
recommended intermediate upgrade using 2.05.06. Doing so will cause the upgrade
to fail after loading the appware file, and the controller will hang.
TABLE A-4
Controller Firmware Upgrade
If you have firmware version
Upgrade
2.4.1d
• to 2.4.4.1
• then to 2.5.6.32
• then to 3.01.02.xx
2.4.4.1 through 2.5.2.32
• to 2.5.6.32
• then to 3.01.02.xx
2.5.6.32
• directly to 3.01.02.xx
Note – Refer to the Sun StorEdge RAID Manager Release Notes for updates on
controller firmware levels.
■
With firmware level 3.X and higher, the Fibre Channel code is included in the
firmware (appware) file.
■
Note that controller firmware level 3.01.X or higher is required for some storage
management features documented in the Sun StorEdge RAID Manager User’s
Guide. This means that the features are not available on controllers that do not
support firmware level 3.01.X.
■
The storage management software does NOT allow you to downgrade controller
firmware from 3.01.X to 2.X. If you attempt to begin the downgrade process from
3.01.X to 2.X by downloading one file at a time from the Path line, the bootware
file download will fail and the controller will be inaccessible. You will have to
contact your local Sun solution center or Sun service provider to recover the
module.
Appendix A
Specifications
121
■
Also, if you are upgrading a controller that has ever had a 2.04.X version to
3.01.X, any configured drive groups that are using full capacity (do not have at
least 38 MB remaining space) will not support the new storage management
features (such as the Modify Group/LUN options in the Configuration
Application). If this occurs and you wish to support these features, perform the
procedure in “Supporting The Modify Group/LUN Options” on page 122.
Firmware Autosynch
The storage management software includes an optional NVSRAM entry that
automatically synchronizes controller firmware versions on dual controllers. For
more information about this feature, consult the Sun StorEdge RAID Manager User’s
Guide or contact your local Sun solution center or Sun service provider.
Note – The controller autosynch feature requires the setting of two NVSRAM bits
for it to work. At the time this manual was published, this feature was not
supported by Sun.
Supporting The Modify Group/LUN Options
After you have upgraded the controller firmware to 3.01.X, it is possible that drive
groups that did not have remaining space do not support the dynamic configuration
options in the Configuration Application → Modify Group/LUN. If you want
the drive group to support these options, do the following:
1. Back up data on the affected drive group.
Note – You may also want to use File → Save Module Profile for a snapshot
of the configuration information for the affected drive group/LUNs for later
reference.
2. Select Configuration → Delete and highlight all the LUNs for the affected
drive group to delete. Select OK. Select OK again at the confirmation screen.
3. Turn the power off to the RAID Module, and then turn the power back on.
This creates the necessary space on the drive group.
4. Select Configuration → Create LUN to recreate the drive group and its LUNs.
5. Restore the data from backup.
122
Sun StorEdge RAID Manager 6.22 Installation and Support Guide for Solaris • September 1999
APPENDIX
B
Reference Material
This appendix includes the following reference material:
■
NVRAM Settings—page 123
■
rmparams File Listing—page 124
■
rmscript File Listing—page 128
■
man Pages—page 131
NVRAM Settings
During installation of the software, the nvutil program (which is part of the
installation package) will automatically check and, if necessary, change any NVRAM
settings on the controllers in the RAID Modules necessary to run Sun StorEdge
RAID Manager. Thus, in most cases, you should have no concerns about NVRAM
settings and will need to read no further in this section.
However, if you have a RAID Module that has two controllers and you are not
seeing both controllers using the Module Profile option in any of the applications
(such as Configuration or Status), or you are seeing unusual behavior, you may need
to change some NVRAM settings. You can use the command line nvutil program
for this purpose. View the nvutil man page for on-line usage instructions.
Note – If you make any changes with nvutil, reboot the system. If you do not
want to shut down your system, cycling power on the RAID Module without a
reboot is sufficient unless you have changed the values at offset 0x0011 or 0x0024.
123
rmparams File Listing
The following is a complete listing of the rmparams file. Note that some values/
entries may not be the same as the file on your system.
Note – The rmparams man page documents the parameters that are considered safe
for users to modify. All other parameters should be left alone.
Caution – Because of the critical nature of the rmparams file, a backup copy of this
file has been installed in the /usr/lib/osa/ directory and is named
rmparams.install. If the /etc/osa/rmparams file becomes corrupted or
missing, copy this file to the /etc/osa directory to resume normal operation. If you
make any changes to this file directly or use the options in the GUI that write to this
file (such as log settings, auto parity settings, and so on), always copy the new
version of the file to the /etc/osa directory.
# System Parameters
System_AltDevDirRoot=/dev/osa/dev/rdsk
System_LunlocksDirPath=/etc/osa/lunlocks
System_MaxLunsPerController=8
System_MaxControllers=32
System_NamefileDirPath=/etc/osa/mnf
System_RmHomeDirectory=/usr/lib/osa
System_NametempDirPath=/etc/osa/nametmp
System_TimestampDirPath=/etc/osa/timestamps
System_RmBootHomeDirectory=/usr/lib/osa/bin
System_RmFirmwareDirectory=fw
System_MaxHostAdapters=32
System_MaxSCSIid=15
System_MaxLunsPerHostAdapter=255
System_SafePassThroughLun=0
System_LunReDistribution=TRUE
System_NvsramDefDirPath=/usr/lib/osa/fw/
System_RdacBlkDirectory=/dev/osa/dev/dsk
System_RdacChrDirectory=/dev/osa/dev/rdsk
System_UnprotectedOfflineUpgradeAllowed=FALSE
System_DefaultModuleSelect=FALSE
System_CreateLunsExactSize=TRUE
# Array Monitor Parameters
Monitor_PollInterval=5
Monitor_ParityTime=02:00
124
Sun StorEdge RAID Manager 6.22 Installation and Support Guide for Solaris • September 1999
Monitor_PchkEnabled=1
Monitor_ParityName=bin/parityck -aqf
Monitor_ParityDay=Sunday
# Graphical Viewer Parameters
Viewer_Log_Opened
= rmlog.log
Viewer_Controller= All DiskArrays
Viewer_Select1= NONE
Viewer_Inequallity1= NONE
Viewer_Conjunction1= NONE
Viewer_Phrase1= NONE
Viewer_Select2= NONE
Viewer_Inequallity2= NONE
Viewer_Conjunction2= NONE
Viewer_Phrase2= NONE
Viewer_LogSize=40
Help_Files_Directory
Help_Files_GlossaryName
= help/
= help/glossary.txt
# Parity Assurance Parameters
# Limits for Parity_Amount is 1000 to 32767
# Limits for Parity_Delay is 0 to 10
Parity_Amount=32767
Parity_Delay=0
Parity_RepairBadBlock=TRUE
# Notification Parameters
Notify_LogName=rmlog.log
Notify_LogEnabled=1
Notify_ScriptName=/usr/lib/osa/bin/rmscript
# The System_CatalogLanguage parameter corresponds to
# the set ID in the RAID Manager message catalog.
# Supporting a new language involves adding a new set
# to the messages.cat file and setting
# the System_CatalogLanguage parameter to the new set ID.
# The currently defined sets are:
#
#
Set ID Language
#
______ ________
#
#
101
ENGLISH
#
# The RAID Manager reserves sets 101 and above for
# its use; sets 1-100 are available for user
# customization.
System_CatalogLanguage=101
Appendix B
Reference Material
125
# RDAC driver/Resolution Daemon Failover parameters
Rdac_SupportDisabled=FALSE
Rdac_SinglePathSupportDisabled=FALSE
Rdac_HotAddDisabled=PARTIAL
Rdac_HotAddIDs:4:5:
Rdac_NativeScsiDrivers:sd:ssd:
Rdac_ExposeDualPath=FALSE
Rdac_RetryCount=7
Rdac_OriginalPathRetryCount=0
Rdac_NoAltOffline=FALSE
Rdac_Forced_Quiescence_Flag=TRUE
Rdac_Fail_Flag=TRUE
Rdac_Quiescence_Timeout=5
Rdac_Clear_Path_Timeout=5
Rdac_Ioctl_Retry_Flag=TRUE
Rdac_NoReconfig=FALSE
Rdac_DR_Timeout=5
# SNMP Trap Notification Daemon Definitions
SNMP_Number_Of_Target_NMS=1
SNMP_Target_IP_Address=127.0.0.1
SNMP_Target_IP_Address_2=127.0.0.1
SNMP_Target_IP_Address_3=127.0.0.1
SNMP_Target_IP_Address_4=127.0.0.1
SNMP_Target_IP_Address_5=127.0.0.1
SNMP_Target_IP_Address_6=127.0.0.1
SNMP_Target_IP_Address_7=127.0.0.1
SNMP_Target_IP_Address_8=127.0.0.1
SNMP_Community_Name=public
SNMP_Community_Name_2=public
SNMP_Community_Name_3=public
SNMP_Community_Name_4=public
SNMP_Community_Name_5=public
SNMP_Community_Name_6=public
SNMP_Community_Name_7=public
SNMP_Community_Name_8=public
SNMP_Action_Number=0
#if the snmp action number is 0 no notifications are sent
#if the snmp action number is 1 SNMP version one trap are sent
#if the snmp action number is 2 all relevent data is written
#to the file trap.dat
126
Sun StorEdge RAID Manager 6.22 Installation and Support Guide for Solaris • September 1999
#******************************************************
#*** IDENTIFICATION ***
#******************************************************
#
# Name:
rmparams
# Title:
RAID Manager Parameters File
# Version:
(see bill-of-materials)
# Revision:
(see bill-of-materials)
# Update Date: (see bill-of-materials)
# Programmer: rmj
# Documents:
#
#
# Description:
# The RAID Manager Parameters File holds runtime parameters
# for the RAID Manager. The RAID Manager programs access
# these values via the GetParam and PutParam interfaces
# (params.c). This scheme provides some control over
# RAID Manager behavior without use of command line options
# or program recompilation.
#
#***************************************************************
#
Appendix B
Reference Material
127
rmscript File Listing
The following is a complete listing of the rmscript file. Note that some values and
entries may not be the same as the file on your system.
Caution – The last line in the rmscript file must always be rm $1.
#!/bin/sh
#*****************************************************************
#
# NAME:
%name%
# SUMMARY:
Initial RAID Manager event notification script for
#
Unix systems.
# COMPONENT:
%subsystem%
# VERSION:
%version%
# UPDATE DATE: %date_modified: %
#
# CONTACTS:
#
Originator: jgatica
#
Owner:
?
#
Backup:
?
#
Updater:
%created_by:
%
#
#
Copyright 1995, 1996, 1997 by Symbios Logic Inc.
#
# DESCRIPTION:
# This script is called by the RAID Manager application or daemon
# every time a new event has been detected. The application
# creates an event record and saves it in a file whose name is
# passed as the first argument to this script.
#
# After initial installation, users may change this script to add
# or remove features, such as mailing the superuser account, etc.
# However, this script should always call putplog to update the
# proprietary log (disabling of this can be done via the parameter
# file), and it must delete the event file when it is done with it.
#
#
# NOTES:
#
#
# REFERENCE:
# 1. PIP0003C.DOC, Source Code Integrity Measures
128
Sun StorEdge RAID Manager 6.22 Installation and Support Guide for Solaris • September 1999
#
#
# CODING STANDARD WAIVERS:
#
#
#*****************************************************************
PATH=$PATH:/etc/raid/bin:/etc/raid/lib
export PATH
# Add the event to the proprietary log
putplog $1
# Add the event to the syslog
EVTYPE=‘cut -d˜ -f6 $1‘
if [ EVTYPE != 30 ]
then
(case $EVTYPE in
#
An AEN event
00) awk -F˜ ’NF > 0 { printf "AEN event Host=%s Ctrl=%s
Dev=%s\n ASC=%s ASCQ=%s FRU=%s LUN=%s LUN Stat=%s\n
Sense=%s", $1, $2, $3, substr($7,1,2), substr($7,3,2),
$8, $9, $10, $11 }’ < $1;;
#
#
Mode Page events are ignored for now
10) ;;
#
#
Parity event
20) awk -F˜ ’NF > 0 { printf "Parity event Host=%s Ctrl=%s
Dev=%s\n Start Blk=%s End Blk=%
# Blks=%s LUN=%s ", $1, $2, $3, $7, $8, $9, $10 }’ < $1;;
#
#
Text events are ignored for now
90) ;;
#
esac) | ( if [ -x "/usr/ucb/logger" ]
then
/usr/ucb/logger -t raid -p user.err
elif [ -x "/usr/bin/logger" ]
then
/usr/bin/logger -t raid -p user.err
fi
)
# Mail the superuser that an event has occurred
(awk -F˜ ’NF > 0 { printf "An array event has been detected on
Controller %s \n Device %s at Host %s - Time %s %s\n",
$2, $3, $1, $4, $5 }’ < $1; echo "\nGo to the Message Log
in the Status Application for details" ) | mailx -s "raid Event" root
Appendix B
Reference Material
129
# If a network is available, does resolv.conf exist and is non-zero?
if [ -s "/etc/resolv.conf" ]
then
case $EVTYPE in
00) cCode="‘cut -d˜ -f7 $1‘"
cCode="‘echo 0000$cCode‘";;
20)cCode="‘cut -d˜ -f11 $1‘";;
90)cCode="‘cut -d˜ -f11 $1‘";;
esac
ctrlName="‘cut -d˜ -f2 $1‘"
hostName="‘cut -d ˜ -f1 $1‘"
if [ -x "/usr/bin/getent" ]
then
hostIP="‘getent hosts $hostName | awk ’/^[0-9][0-9]*[.]/ {print $1}’‘"
else
hostIP="‘nslookup $hostName | grep Address | tail -1 | awk
’{ print $2 }’"
fi
trapcntl $cCode $ctrlName $hostIP $hostName
fi
fi
# Delete the event file (needed since arraymon does not do this)
rm $1
130
Sun StorEdge RAID Manager 6.22 Installation and Support Guide for Solaris • September 1999
man Pages
The following man pages provide supplementary information for disk array
management and administration.
■
arraymon
■
drivutil
■
fwutil
■
genscsiconf
■
healthck
■
hot_add
■
lad
■
logutil
■
nvutil
■
parityck
■
perfutil
■
raidcode
■
raidutil
■
rdac
■
rdac_address
■
rdac_disks
■
rdacutil
■
rdaemon
■
rdriver
■
rm6
■
rmevent
■
rmparams
■
rmscript
■
storutil
■
symconf
Some tasks are carried out automatically by daemon processes that run from system
startup to system shutdown. There are, however, command line utilities that enable
you to embed customized and interactive operations.
Appendix B
Reference Material
131
For an overview of the Sun StorEdge RAID Manager graphical user interface,
command line programs, daemon programs, driver modules, and customizable
elements, see the rm6 man page.
132
Sun StorEdge RAID Manager 6.22 Installation and Support Guide for Solaris • September 1999
Index
NUMERICS
2.5.3 controller firmware, upgrading, 113
32 LUN support, 36
genscsiconf script and, 37
patches required, 36
rmparams file
modifying, 36
parameter, 69
A
adding RAID modules, 87
administrator privileges
when required, 40
appware file
downloading, 7
arbitrated loop physical address, 38
arraymon
stopping and restarting, 81
see also background monitor
auto parity check/repair
changing time for, 59
described, 59
fails unexpectedly, 100
Battery age reset, 102
troubleshooting, 102
battery age reset
restriction, 7
Battery Alert message, 106
battery management, 4
Blank screen
manual recovery
drives, 105
logical units, 105
boot device
dump/swap device and, 6
host adapters supported, 118
LUN 0 and, 80
RAID module as, 10
reset configuration and, 80
boot -r, 37
bootware file
downloading requirements, 7
bringing replaced controller online, 108
Brocade switches, 118
C
B
background monitor, 81
see also arraymon
Batch file
delay command, 100
cables
checking, 11
cache parameters
changing, 62
Cannot secure access to LUNs message, 102
Index
133
Capacity
less than expected, 97
changes to support RAID Manager, 12
Channel failure, 104
checking
cable connections, 11
hardware, 11
hardware and software, 9
module status, 48
clean.bat script
when to use, 101
Command line commands
fwutil, 100
raidutil, 102
rdacutil, 100
command line utilities
lad, 7
man pages for, 86
raidutil -R, 7
Component failures
unexpected, 103
Component status
unexpected, 106
Configuration
resetting, 97
configuration
adding RAID modules, 87
changing parameters, 59
determining
changes, 58
controller firmware version, 44
current setup, 52
fibre channel support, 116
host-RAID module types, 116
host-RAID Module types supported, 116
Modify Group/LUN options support, 122
Configuration application
List/Locate, Locate won’t work, 97
main screen
defined, 52
illustrated, 53
reset won’t work, 97
starting, 52
supporting the Modify Drive Group/LUNs
option, 122
troubleshooting, 97
134
Controllers
mode
passive after replacing, 105
not Active after replacing, 105
not visible, 101
resetting battery age, 102
troubleshooting, 100
controllers
balancing LUNs, 62
can’t bring online, 108
firmware mismatch, 109
firmware upgrade versions, 121
incompatible softwarereplacing controllers
firmware
mismatch
or
incompatible
software, 109
lock-up bringing back online, 8
mode
changing, 59
names of, 78
replacing notes, 107
restrictions on replacements, 6
setting loop IDs, 38
upgrading firmware, 45
upgrading firmware in slot A, 113
see also firmware
creating logical units
troubleshooting, 79
D
daemons
arraymon
starting, 82
stopping, 81
RDAC, 83
starting, 29
stopping, 85
dead LUNs
formatting after failure, 8
resetting bus and, 7
system panic and, 8
deleting logical units
troubleshooting, 80
device name
controller, 38
defined, 78
illustrated, 78
Sun StorEdge RAID Manager 6.22 Installation and Support Guide for Solaris • September 1999
drive groups
changing capacity, 61
drivers
RDAC, 28, 83
Drives
failed, 97
failures
all in drive group, 105
keep failing, 104
fault light on, 104
number for drive group
unexpected, 97
removing, 103
Recovery guru, 103
status
non-optimal, 103
unresponsive, 97, 103
drives
locating, 57
dump/swap device, 6
dynamic expansion capacity, 60, 61
firmware required, 4
see also Modify Group/LUN options
E
editing module name and comments, 42, 43
enhancements, 3, 4
error messages
see messages
Exclusive access, 101, 102
F
Failed drives, 97
all in drive group, 105
Fans
replacing, 103
Fault light
drives, 104
features
new, 3, 4
Fibre Channel
Solaris 7, 116
fibre channel, 4, 11
configurations supported, 116
host adapters, 118
hubs supported, 118
loop IDs, 38
switches supported, 118
Files
batch, failed, 100
clean.bat, 101
lunlocks, 101
files
rmparams
listing, 124
see command line utilities
see also man pages
see also rmparams
see also rmparams file
see also rmscript
Firmware
upgrading
unsuccessful, 99
firmware
autosynch, 122
checking version, 44
intermediate upgrade versions, 121
mismatch detected, 109
required, 60, 61, 121
supporting Modify Group/LUN options, 122
upgrading, 45
required, 9
restrictions, 7
troubleshooting, 99
versions, 121
upgrading on slot A, 113
fonts required, 41
fwutil command
restriction, 100
see also Command line commands
G
genscsiconf script, 37
graphics card, 9
Index
135
H
hardware
checking, 11
fibre channel hubs, 118
fibre channel switches, 118
host systems, 117
requirements, 9
specifications, 116
Health Check
running a, 48
Health check
how long it takes, 103
see also Recovery Guru
host adapter
boot device and, 118
fibre channel, 118
logical unit limits, 36, 79
LUN limit per, 79
required hardware, 118
SCSI, 117, 118
Symbios, 117
host systems, 117
host-RAID module configuration types
defined, 116
host-side ID, 11
Hot spare
in use, 104
logical unit status and, 104
troubleshooting, 105
hot spare
described, 59
hot_add script, 85, 87
hubs (fibre channel), 118
Vixel, 118
I
identifying module configuration, 52
incompatible software detected, 109
independent controller configuration, 4
defined, 116
indicating, 42
installation
before beginning, 9
No Such Device message displayed, 6
remove package, 32, 88
136
starting, 5
verification, 30
Installation and Support Guide
description, 2
L
List/Locate Drives
locate won’t work, 97
locating solutions for problems, 90
Logical unit
cannot secure access message, 102
capacity
less than expected, 97
not visible to software, 101
parameters, 97
status
non-optimal, 102, 104
remains at Reconstructing, 105
shows Reconstructing, 104
logical unit
adding to operating system, 64, 79
balancing, 62
changing
cache parameters, 62
capacity, 60
drive group capacity, 61
parameters, 59
reconstruction rate, 62
segment size, 61
creating, 79
deleting, 80
limits
per host adapter, 36, 69, 79
per module, 79
names of, 78
partitions, 79
RAID level
changing, 60
reboot required, 79, 80
removing Veritas control of, 82
setting number of, 36
loop IDs, 38
LUN 0
reset configuration and, 80
lunlocks file, 101
Sun StorEdge RAID Manager 6.22 Installation and Support Guide for Solaris • September 1999
M
man pages, 86
can’t access, 86
locations of, 86
overview, 131
Manual recovery
drives
blank screen, 105
logical units
blank screen, 105
message log, 81
Messages
cannot secure access to LUNs, 102
not all files removed, 100
messages
Battery Alert, 106
non-optimal Health Check results, 48
see also trap messages
MIB file, 72
mismatch firmware detected, 109
Modify Group/LUN options, 60, 61
supporting with 3.00.X firmware, 122
module names
defined, 78
restrictions, 6
module profile
main screen illustrated, 56
module selection screen, 4, 42, 43
disabling, 68
Module status
non-optimal, 102
unexpected, 106
monitoring interval
changing, 59
mouse, 9
multi-host configuration, 4
multi-initiator configuration
defined, 116
support for, 116
N
names
module, 78
NMS
see SNMP
No Such Device or Address message, 6
Not all files removed message during
uninstall, 100
notification
see rmscript
see SNMP
Number of drives
limitation, 97
NVRAM settings, 123
NVSRAM
downloading, 45
nvutil
see also NVRAM settings
O
online
can’t bring controller, 108
P
parameters
changing configuration, 59
logical unit, 59
polling interval, 81
parity check/repair
default auto setting, 59
patches
required for 32 LUN support, 36
PCI host adapter, 117
pkgadd
installing update software, 25
pkginfo, 41
polling interval, 81
see also background monitor
Power supplies
replacing, 103
preparing to install, 9
problems, finding help, 90
PTI host adapter, 117
Index
137
R
Raid array monitor
stopping and restarting, 101
RAID level
changing, 60
RAID Module
configurations supported, 116
removing configuration, 101
RAID module
adding new, 87
boot device, 10
checking cables, 11
checking status, 48
configurations supported, 116
configuring, 63
default configuration, 52
editing name and comments, 4, 42, 43
identifying configuration, 4, 52
independent controllers and, 42
locating, 54
logical unit limits, 79
naming conventions, 42, 43, 78
powering down, 7
saving profile, 55
viewing profile, 55
raidutil utility, 4, 7
RDAC
creating logical units and, 79
defined, 83
disabling, 85
driver, 83
driver loaded, 28
dump/swap device and, 6
illustrated, 84
not supported
effects, 85
starting daemons, 29
RDAC_HotAddDisabled parameter, 87
rdacutil command
restriction, 100
see also Command line commands
reboot
dead luns and, 7
when required, 79, 80
Reconstruction
drive fault light, 104
138
reconstruction
changing rate of, 62
Recovery Guru
troubleshooting, 103
Recovery guru, 104, 105
removing modules, 101
takes a long time, 103
removing, 32, 88
replacing controllers, 107
can’t bring online, 108
replacement controller restriction, 6
restriction on firmware version, 6
Reset configuration, 97
doesn’t work, 97
reset configuration
LUN 0 and, 80
Restrictions
batch file failed, 100
can’t see controllers, 101
cannot secure access to LUNs, 102
LUNs not visible, 101
restrictions
firmware versions for replacement controllers, 6
LUN limits, 79
software and operating system, 6
rmparams
file contents, 124
rmparams file
32 LUN support, 13, 36, 66
backing up, 36
backup copy, 66
man page for, 66
modifying, 66
for 32 LUN support, 36
for SNMP, 73
Rdac_HotAddDisabled parameter, 87
when to change, 66
rmscript
backup copy of, 70
scriptable notification, 14, 70
Sun StorEdge RAID Manager 6.22 Installation and Support Guide for Solaris • September 1999
S
screen illustrations
configuration application, 53
module profile, 56
scriptable notification
see rmscript
scripts
genscsiconf, 37
hot_add, 85, 87
rmscript, 70
SCSI, 11, 117
host adapters, 117, 118
SCSI ID
see host-side ID
segment size
changing, 61
settings, NVRAM, 123
shutdown, 37
simple network management protocol
see SNMP
single-initiator configuration
defined, 116
slot A controller, 113
SNMP
disabling, 13, 66, 74
enabling, 13, 66, 73
MIB file and, 72
set up NMS, 72
trap messages
contents, 75
SNMP_Action_Number parameter, 68
SNMP_Community_Name parameter, 68
SNMP_Target_IP_Address parameter, 68
Software
can’t view LUNs, 101
exclusive access required, 101, 102
options grayed out, 101
software
administrator privileges required, 40
background monitor, 81
features, 3
incompatible versions detected, 109
installing, 20
standard configuration, 15
requirements, 9
restrictions, 6
starting, 40
support changes, 12
troubleshooting, 96
uninstalling, 32, 88
version level, 2
version required, 10
Solaris
adding logical units to, 64, 79
device name, 78
installing with, 20
LUN limits, 79
requirements, 10
restrictions with software, 6
versions supported, ?? to 3, 3 to ??
Solaris 7
Fibre Channel, 116
solutions, locating, 90
starting
background monitor, 82
storage management software, 40
start-of-day
delays during, 36
Status
non-optimal, 103
unexpected, 106
Sun host adapter, 117
switches (fibre channel)
Brocade, 118
swithces (fibre channel), 118
Symbios host adapter, 117
System_DefaultModuleSelect parameter, 68
System_MaxLunsPerController parameter, 37, 69
Index
139
T
V
trap messages
contents, 75
see also SNMP
Troubleshooting
failed drives, 104
List/Locate won’t work, 97
resetting battery age, 102
second controller fails, 100
uninstalling, 100
troubleshooting
application search, 94
components search, 91
Configuration application, 97
general for all applications, 100
locating solutions, 90
Recovery Guru/Health Check, 103
replacing controllers, 107
can’t bring online, 108
firmware mismatch, 109
incompatible software, 109
software search, 96
verifying installation, 30
Veritas, 82
cable disconnects and, 7
removing LUNs from control of, 82
Vixel hubs, 118
U
Unassigned drives
failed, 97
Uninstalling
not all files removed message, 100
Unresponsive drives, 97, 103
upgrading firmware, 44
requirements, 121
troubleshooting, 99
upgrading firmware 2.5.3 or earlier, 113
User Guide
when to use, 2, 64
utilities
see also command line utilities
140
Sun StorEdge RAID Manager 6.22 Installation and Support Guide for Solaris • September 1999