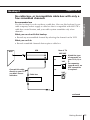
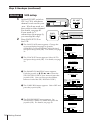
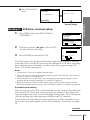
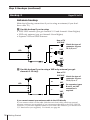
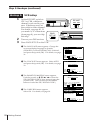
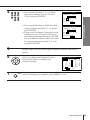
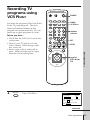
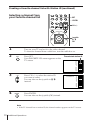
1
3-861-047-11(1) Video Cassette Recorder Operating Instructions Owner’s record The model and serial numbers are located at the rear of the unit. Record these numbers in the spaces provided below. Refer to them whenever you call upon your Sony dealer regarding this product. Model No. _________________________ Serial No. _________________________ j G SLV-797HF SLV-798HF ©1998 by Sony Corporation WARNING To prevent fire or shock hazard, do not expose the unit to rain or moisture. CAUTION RISK OF ELECTRIC SHOCK DO NOT OPEN CAUTION : TO REDUCE THE RISK OF ELECTRIC SHOCK, DO NOT REMOVE COVER (OR BACK). NO USER-SERVICEABLE PARTS INSIDE. REFER SERVICING TO QUALIFIED SERVICE PERSONNEL. This symbol is intended to alert the user to the presence of uninsulated “dangerous voltage” within the product’s enclosure that may be of sufficient magnitude to constitute a risk of electric shock to persons. This symbol is intended to alert the user to the presence of important operating and maintenance (servicing) instructions in the literature accompanying the appliance. CAUTION To prevent electric shock, do not use this polarized AC plug with an extension cord, receptacle or other outlet unless the blades can be fully inserted to prevent blade exposure. WARNING The AC power cord must be changed at qualified service shop. Precautions 2 Safety • Operate the unit only on 120 V AC, 60 Hz. • If anything falls into the cabinet, unplug the unit and have it checked by qualified personnel before operating it any further. • This unit is not disconnected from the AC power source (mains) as long as it is connected to the wall outlet, even if the unit itself has been turned off. • One blade of the plug is wider than the other for the purpose of safety and will fit into the power outlet only one way. If you are unable to insert the plug fully into the outlet, contact your Sony dealer. • Unplug the unit from the wall outlet if you do not intend to use it for an extended period of time. To disconnect the cord, pull it out by the plug, never by the cord. Installing • Allow adequate air circulation to prevent internal heat buildup. Introduction • Do not place the unit on surfaces (rugs, blankets, etc.) or near materials (curtains, draperies) that may block the ventilation slots. • Do not install the unit near heat sources such as radiators or air ducts, or in a place subject to direct sunlight, excessive dust, mechanical vibration or shock. • Do not install the unit in an inclined position. It is designed to be operated in a horizontal position only. • Keep the unit and cassettes away from equipment with strong magnets, such as microwave ovens or large loudspeakers. • Do not place heavy objects on the unit. • If the unit is brought directly from a cold to a warm location, moisture may condense inside the VCR and cause damage to the video head and tape. When you first install the unit, or when you move it from a cold to a warm location, wait for about one hour before operating the unit. Information For customers in the USA You are cautioned that any changes or modifications not expressly approved in this manual could void your authority to operate this equipment. This equipment has been tested and found to comply with the limits for a Class B digital device, pursuant to Part 15 of the FCC Rules. These limits are designed to provide reasonable protection against harmful interference in a residential installation. This equipment generates, uses, and can radiate radio frequency energy and, if not installed and used in accordance with the instructions, may cause harmful interference to radio communications. However, there is no guarantee that interference will not occur in a particular installation. If this equipment does cause harmful interference to radio or television reception, which can be determined by turning the equipment off and on, the user is encouraged to try to correct the interference by one or more of the following measures: • Reorient or relocate the receiving antenna. • Increase the separation between the equipment and receiver. • Connect the equipment into an outlet on a circuit different from that to which the receiver is connected. • Consult the dealer or an experienced radio/ TV technician for help. Caution Television programs, films, video tapes and other materials may be copyrighted. Unauthorized recording of such material may be contrary to the provisions of the copyright laws. Also, use of this recorder with cable television transmission may require authorization from the cable television transmission and/or program owner. Table of contents Getting Started Step 1: Unpacking Step 2: Setting up the remote commander Step 3: Hookups Selecting a language Setting the clock Setting up cable box control Presetting channels Setting up VCR Plus+* Basic Operations 52 54 58 59 Playing a tape Recording TV programs Locating a channel by Station ID Recording TV programs using VCR Plus+ 62 Setting the timer manually Additional Operations 65 Playing/searching at various speeds 68 Searching for a selected point on the tape 70 Skip searching automatically 71 Creating a favorite channel list with Station ID 73 Recording TV programs using the quick timer 74 Checking/changing/canceling timer settings Getting Started 4 5 7 31 32 38 43 47 76 Recording stereo and bilingual programs 78 Searching using the index function 79 Adjusting the picture 80 Changing menu options 81 Editing with another VCR Additional Information 83 General setup information 85 Troubleshooting 88 Specifications 89 Index to parts and controls 94 Index back cover Quick reference to using the VCR * VCR Plus+ and PlusCode are trademarks of Gemstar Development Corporation. VCR Plus+ system is manufactured under license from Gemstar Development Corporation. Introduction 3 Getting Started Step 1 Unpacking Check that you have received the following items with the VCR: 4 • Remote commander • Cable Mouse (cable box controller) • Size AA (R6) batteries • 75-ohm coaxial cable with F-type connectors • Audio/video cable (3-phono, 1 mini to 3-phono, 1-mini) • Jack cover Getting Started Step 2 Setting up the remote commander Inserting the batteries Using the remote commander Getting Started Insert two size AA (R6) batteries by matching the + and – on the batteries to the diagram inside the battery compartment. Insert the negative (–) end first, then push in and down until the positive (+) end clicks into position. Remote sensor You can use this remote commander to operate this VCR and a Sony TV or AV receiver. Buttons on the remote commander marked with a dot (•) can be used to operate your Sony TV. The RECEIVER VOL +/– and MUTING buttons can be used to operate your Sony AV receiver. TV RECEIVER / VIDEO 1 2 3 4 5 6 7 8 9 MUTING 0 RECEIVER VOL +/– To operate Set TV RECEIVER / VIDEO to the VCR VIDEO and point at the remote sensor on the VCR a Sony TV or AV receiver TV RECEIVER and point at the remote sensor on the TV or AV receiver Notes • With normal use, the batteries should last about three to six months. • If you do not use the remote commander for an extended period of time, remove the batteries to avoid possible damage from battery leakage. • Do not use a new battery with an old one. • Do not use different types of batteries. • Some Sony AV receivers may not be operated with the remote continued commander. Getting Started 5 Step 2: Setting up the remote commander (continued) Controlling other TVs with the remote commander The remote commander is preprogrammed to control non-Sony TVs. If your TV is listed in the table below, set the appropriate manufacturer’s code number. 1 Set TV RECEIVER/ VIDEO at the top of the remote commander to TV RECEIVER . 2 Hold POWER down, and enter your TV’s code number(s) using the number buttons. Then release POWER. Now you can use the POWER, VOL +/–, CH +/–, and TV/VIDEO buttons to control your TV. You can also use the buttons marked with a dot (•) to control a Sony TV. To control the VCR, reset TV RECEIVER / VIDEO to VIDEO . Tip • If you set your TV‘s code number correctly while the TV is turned on, the TV turns off automatically. Code numbers of controllable TVs If more than one code number is listed, try entering them one at a time until you find the one that works with your TV. Manufacturer Code number Manufacturer Code number Manufacturer Code number Sony 01 JVC 09 RCA 04,10 Akai 04 KMC 03 Sampo 12 AOC 04 Magnavox 03,08,12 Sanyo 11 Centurion 12 Marantz 04,13 Scott 12 Coronado 03 MGA/Mitsubishi 04,12,13,17 Sears 07,10,11 Curis-Mathes 12 NEC 04,12 Sharp 03,05,18 Daytron 12 Panasonic 06,19 Sylvania 08,12 Emerson 03, 04, 14 Philco 03,04 Teknika 03,08,14 Fisher 11 Philips 08 Toshiba 07 General Electric 06,10 Pioneer 16 Wards 03,04,12 Gold Star 03, 04, 17 Portland 03 Yorx 12 Hitachi 02,03 Quasar 06,18 Zenith 15 J.C.Penny 04,12 Radio Shack 05,14 Notes • If the TV uses a different remote control system from the one programmed to work with the VCR, you cannot control your TV with the remote commander. • If you enter a new code number, the code number previously entered will be erased. • When you replace the batteries of the remote commander, the code number automatically resets to 01 (Sony). Reset the appropriate code number. 6 Getting Started Step 3 Hookups Selecting the best hookup option If you have Use Refer to TV that has audio/video inputs Audio/video (A/V) hookup, then follow one of the hookups below. Pages 8 and 9 Cable box that is compatible with the VCR’s cable box control feature Hookup 1 Pages 10 to 12 No cable box or incompatible cable box with only a few scrambled channels Hookup 2 Pages 13 to 15 Antenna only, no cable TV Hookup 3 Pages 16 to 18 Incompatible cable box with many scrambled channels Hookup 4 Pages 19 to 22 DSS* receiver Hookup 5 Pages 23 to 25 Incompatible cable box with only a few scrambled channels, using an A/B switch Hookup 6 Pages 26 to 30 Getting Started There are many ways in which your VCR can be hooked up. To hook up your VCR so that it works best for you, first scan through the table below. Then use the accompanying diagrams and procedures on the following pages to set up your VCR. After you’ve completed the connections, follow the instructions for setup. During setup, if you need more details on the procedure described, page numbers are provided where you can find complete, step-by-step instructions. After you’ve completed the setup, you’re ready to use your VCR. Procedures differ depending on the hookup you used. For an overview, refer to “Quick reference to using the VCR” on the back cover. Before you get started • Turn off the power to all equipment. • Do not connect the AC power cords until all of the connections are completed. • Be sure you make connections firmly. Loose connections may cause picture distortion. • If your TV doesn’t match any of the examples provided, see your nearest Sony dealer or qualified technician. * DSS is a registered trademark of DIRECTV, Inc., a unit of Hughes Electronics Corporation. continued Getting Started 7 Step 3: Hookups (continued) Audio/video (A/V) hookup Pages 8 and 9 If your TV has audio/video (A/V) input jacks, you will get a better picture and sound if you hook up your VCR using these connections. In addition, for a true “home theater” experience, you should connect the audio outputs of your VCR or TV to your stereo system. If your TV doesn’t have A/V inputs, see the following pages for antenna or cable hookups. If your TV has the S-Link* (A/V bus control) function, hook up your VCR using the connection shown on page 9. Your TV will automatically switch to the A/V inputs for your VCR when you play back or operate menu on the VCR. If you’re not planning to use your VCR to record programs, you’re finished setting up the VCR after you’ve made the connections shown on pages 8 and 9. If you want to record off-air or off your cable TV system, complete these connections first, and then go to the following pages for antenna or cable hookups. * S-Link is a trademark of Sony Corporation. A Use this hookup if your TV has stereo jacks VCR Stereo receiver TV AUDIO VIDEO AUX IN LINE-1 IN IN LINE OUT VIDEO AUDIO OUT AUDIO * * Audio cable (not supplied) Audio/video cable (supplied) * Do not connect the miniplugs for this hookup. B Use this hookup if your TV doesn’t have stereo jacks VCR Stereo receiver TV AUDIO VIDEO AUX IN LINE-1 IN LINE OUT IN VIDEO AUDIO Video cable (not supplied) 8 Getting Started Audio cable (not supplied) C Use this hookup if your TV has the S-Link function Stereo receiver VCR TV AUDIO VIDEO LINE-1 IN S-LINK LINE OUT AUX IN IN VIDEO AUDIO OUT AUDIO Audio/video cable (supplied) Audio cable (not supplied) Note • To play a tape in stereo, you must use the A/V connection. Getting Started S-LINK A/V hookup: VCR setup After you’ve connected your TV and completed antenna or cable hookup, use the following procedure to set up the VCR. Press MENU and select ADVANCED OPTIONS. MENU TIMER SET / CHECK TUNER PRESET CLOCK SET LANGUAGE SET VCR Plus+ CHANNELS CABLE BOX CONTROL ADVANCED OPTIONS Use t o s e l ec t an i t e m, t h e n p u s h OK Set AUTO ANT SEL to OFF and press OK. page1 ADVANCED OPTIONS AUTO ANT SEL AUTO STEREO AUDIO MIX TUNER AUDIO SHARPNESS ON OFF ON OFF ON OFF MAIN SAP L – – H Use t o s e l ec t an i t e m, t h e n p u s h For details, see page 80. Caution Connections between the VCR’s VHF/UHF connector and the antenna terminals of the TV receiver should be made only as shown in the following instructions. Failure to do so may result in operation that violates the regulations of the Federal Communications Commission regarding the use and operation of RF devices. Never connect the output of the VCR to an antenna or make simultaneous (parallel) antenna and VCR connections at the antenna terminals of your receiver. Note to CATV system installer (in USA) This reminder is provided to call the CATV system installer ’s attention to Article 82040 of the NEC that provides guidelines for proper grounding and, in particular, specifies that the cable ground shall be connected to the grounding system of the building, as close to the point of cable entry as practical. continued Getting Started 9 Step 3: Hookups (continued) Pages 10 to 12 Hookup 1 Using cable box control Recommended use You should use this hookup if you have a cable box, especially if your cable system scrambles all or most channels. This hookup allows the VCR’s cable box control feature to control the channel on the cable box, simplifying the recording process. A list of compatible cable boxes is on pages 39 and 40. What you can do with this hookup • Record any channel using the VCR’s cable box control feature to select channels on the cable box What you can’t do • Record with the cable box turned off • Record one channel while watching another channel Cable Mouse Wall Cable box IN OUT or or Rear of TV VHF/UHF A Match the type of connector on your TV: A, B, or C. VHF B For connector types B and C, no UHF connection is UHF required. VHF C VCR CONTROL S OUT CABLE BOX CONTROL IN (PLUG ) POWER VHF/UHF IN UHF OUT Positioning the Cable Mouse Place the Cable Mouse so that it hangs out over the cable box front. Side view 10 Getting Started Hookup 1: VCR setup 1 RF UNIT CH3 CH4 Getting Started 2 3 Set the RF UNIT switch to CH 3 or CH 4, whichever channel is not used in your area. If both are used, set the switch to either channel. For details, see page 83. If you made A/V connections (from page 8), you can skip this step. EASY SET UP Turn on your cable box. Press EASY SET UP on the VCR. 1 The LANGUAGE menu appears. Change the on-screen display language to Spanish (ESPAÑOL) or French (FRANÇAIS) if desired, and press the joystick (OK). For details, see page 31. SET UP LANGUAGE ENGLISH ESPAÑOL FRANÇAIS Use t o s e l ec t Th e n p u s h OK Pu s h EASY SET UP t o q u i t 2 The CLOCK SET menu appears. Select AUTO and press the joystick (OK). For details, see page 32. SET UP CLOCK SET AUTO MANUAL Use t o s e l ec t Th e n p u s h OK Pu s h EASY SET UP t o q u i t 3 The SMART CH MAPPING menu appears. Push the joystick to >/./?// to enter the ZIP/POSTAL CODE in your area and press the joystick (OK). (You can also use the number buttons to enter the ZIP/POSTAL CODE.) 4 The CABLE BOX menu appears. Select ON. For details, see page 38. SET UP SMART CH MAPPING ZIP / POSTAL CODE 123–– E n t e r y o u r Z I P / POSTAL CODE u s i n g 0 – 9 , o r k e y s, and t h e n p u s h OK CABLE BOX SET UP CABLE BOX CONTROL CABLE MOUSE ON OFF BOX CODE NO. – –– BOX OUTPUT CH CH3 Use t o s e l ec t Pu s h EASY SET UP t o q u i t 5 Enter your cable box code number and push the joystick to .. CABLE BOX SET UP CABLE BOX CONTROL CABLE MOUSE ON OFF BOX CODE NO. – –– BOX OUTPUT CH CH3 En t e r y o u r CABLE BOX Cod e No. u s i n g 0 – 9 k e y s Re f e r t o t h e Ope r a t i n g Ma nu a l f o r t h e Cod e continued Getting Started 11 Step 3: Hookups (continued) 6 Select your cable box output channel and press the joystick (OK). CABLE BOX SET UP CABLE BOX CONTROL CABLE MOUSE ON OFF BOX CODE NO. 0 18 BOX OUTPUT CH CH3 SET UP SET UP i s d o n e / Use t o s e l e c t CABLE BOX CH. Then push OK . Normal display Hookup 1: VCR Plus+ channel setup 1 Press MENU and select SET VCR Plus+ CHANNELS. 2 Push the joystick to ?// to select AUTO and press the joystick (OK). MENU TIMER SET / CHECK TUNER PRESET CLOCK SET LANGUAGE SET VCR Plus+ CHANNELS CABLE BOX CONTROL ADVANCED OPTIONS Use t o s e l ec t an i t e m, t h e n p u s h OK SMART CHANNEL MAPPING AUTO 3 Press POWER to turn off the VCR. MANUAL Use t o s e l ec t Th e n p u s h OK Pu s h MENU t o q u i t The VCR receives the program information signal from 0:00 am to 5:00 am while the VCR is turned off, and set up the channel for VCR Plus+ recording. After channel setup is finished, you can record TV programs using VCR Plus+. For details, see page 48. Notes • To use auto VCR Plus+ channel setup feature, leave the cable box on. • It takes about 1 hour to complete channel setup. • The VCR can receive the program information signal only while the VCR is turned off and no timer recordings are set. • If the channels in your area don’t carry the program information signals, set the program guide channels manually. For details, see page 50. • If the Choose your Cable CH MAP menu appears the first time you turn on the VCR after finishing channel setup, select the MAP number. For details, see page 49. Automatic clock setting Once you’ve set up the VCR, it automatically sets the clock the first time you turn off the VCR. After that, whenever you turn off the VCR, it checks the time and adjusts the clock, even for Daylight Saving Time. The VCR sets the clock by picking up a time signal provided by some TV channels. If you want to use the timer to record right away, or if the channels in your area do not carry time signals, set the clock manually. For details, see page 36. Note • To use the automatic clock setting feature, leave the cable box on. 12 Getting Started Pages 13 to 15 Hookup 2 No cable box, or incompatible cable box with only a few scrambled channels What you can do with this hookup • Record any unscrambled channel by selecting the channel on the VCR Getting Started Recommended use Use this hookup if you do not have a cable box. Also use this hookup if your cable company cannot supply a cable box that is compatible with the VCR’s cable box control feature, and your cable system scrambles only a few channels. What you can’t do • Record scrambled channels that require a cable box VCR Wall Rear of TV VHF/UHF IN OUT or or Connect this cable directly to your TV if you don't have a cable box. VHF/UHF A Match the type of connector on your TV: A, B, or C. VHF B For connector types B and C, no UHF connection UHF is required. VHF C Cable box IN OUT UHF continued Getting Started 13 Step 3: Hookups (continued) Hookup 2: VCR setup 1 2 Set the RF UNIT switch to CH 3 or CH 4, whichever channel is not used in your area. If both are used, set the switch to either channel. For details, see page 83. If you made A/V connections (from page 8), you can skip this step. RF UNIT CH3 CH4 EASY SET UP Press EASY SET UP on the VCR. 1 The LANGUAGE menu appears. Change the on-screen display language to Spanish (ESPAÑOL) or French (FRANÇAIS) if desired, and press the joystick (OK). For details, see page 31. 2 The CLOCK SET menu appears. Select AUTO and press the joystick (OK). For details, see page 32. SET UP LANGUAGE ENGLISH ESPAÑOL FRANÇAIS Use t o s e l ec t Th e n p u s h OK Pu s h EASY SET UP t o q u i t CLOCK SET SET UP AUTO MANUAL Use t o s e l ec t Th e n p u s h OK Pu s h EASY SET UP t o q u i t 3 The SMART CH MAPPING menu appears. Push the joystick to >/./?// to enter the ZIP/POSTAL CODE in your area and press the joystick (OK). (You can also use the number buttons to enter the ZIP/POSTAL CODE.) 4 The CABLE BOX menu appears. Select OFF and press the joystick (OK). SET UP SMART CH MAPPING ZIP / POSTAL CODE 123–– E n t e r y o u r Z I P / POSTAL CODE u s i n g 0 – 9 , o r k e y s, and t h e n p u s h OK CABLE BOX SET UP CABLE BOX CONTROL CABLE MOUSE ON OFF Use t o s e l ec t Pu s h EASY SET UP t o q u i t 5 The TUNER PRESET menu appears. Set ANTENNA/CABLE to CABLE and press the joystick (OK). For details, see page 43. TUNER PRESET SET UP ANTENNA / CABLE ANT CABLE Use t o s e l ec t Th e n p u s h OK Pu s h EASY SET UP t o q u i t 14 Getting Started 6 The AUTO PRESET starts. SET UP AUTO PRESET TUNER PRESET SET UP SET UP i s d o n e PROCESS I NG / P l e a s e wa i t . Hookup 2: VCR Plus+ channel setup 1 Press MENU and select SET VCR Plus+ CHANNELS. 2 Push the joystick to ?// to select AUTO and press the joystick (OK). MENU TIMER SET / CHECK TUNER PRESET CLOCK SET LANGUAGE SET VCR Plus+ CHANNELS CABLE BOX CONTROL ADVANCED OPTIONS Use t o s e l ec t an i t e m, t h e n p u s h OK SMART CHANNEL MAPPING AUTO 3 Press POWER to turn off the VCR. Getting Started Normal display MANUAL Use t o s e l ec t Th e n p u s h OK Pu s h MENU t o q u i t The VCR receives the program information signal from 0:00 am to 5:00 am while the VCR is turned off, and set up the channel for VCR Plus+ recording. After channel setup is finished, you can record TV programs using VCR Plus+. For details, see page 48. Notes • It takes about 1 hour to complete channel setup. • The VCR can receive the program information signal only while the VCR is turned off and no timer recordings are set. • If the channels in your area don’t carry the program information signals, set the program guide channels manually. For details, see page 50. • If the Choose your Cable CH MAP menu appears the first time you turn on the VCR after finishing channel setup, select the MAP number. For details, see page 49. Automatic clock setting Once you’ve set up the VCR, it automatically sets the clock the first time you turn off the VCR. After that, whenever you turn off the VCR, it checks the time and adjusts the clock, even for Daylight Saving Time. The VCR sets the clock by picking up a time signal provided by some TV channels. If you want to use the timer to record right away, or if the channels in your area do not carry time signals, set the clock manually. For details, see page 36. continued Getting Started 15 Step 3: Hookups (continued) Pages 16 to 18 Hookup 3 Antenna hookup Make the following connections if you’re using an antenna (if you don’t have cable TV). A Use this hookup if you’re using: • VHF/UHF antenna (you get channels 2–13 and channels 14 and higher) • UHF-only antenna (you get channels 14 and higher) • Separate VHF and UHF antennas Rear of TV VHF/UHF A or VCR VHF Match the type of connector on your TV: A, B, or C. B VHF/UHF IN OUT or UHF VHF C UHF B Use this hookup if you’re using a VHF-only antenna (you get channels 2–13 only) Rear of TV VHF/UHF A or VHF B VCR VHF/UHF IN OUT or UHF VHF C Match the type of connector on your TV: A, B, or C. For connector types B and C, no UHF connection is required. UHF If you cannot connect your antenna cable to the VCR directly If your antenna cable is a flat cable (300-ohm twin lead cable), attach an external antenna connector (not supplied) so you can connect the cable to the VHF/UHF IN connector. If you have separate cables for VHF and UHF antennas, you should use a U/V band mixer (not supplied). For details, see page 84. 16 Getting Started Hookup 3: VCR setup 1 RF UNIT CH3 CH4 Getting Started 2 Set the RF UNIT switch to CH 3 or CH 4, whichever channel is not used in your area. If both are used, set the switch to either channel. For details, see page 83. If you made A/V connections (from page 8), you can skip this step. EASY SET UP Press EASY SET UP on the VCR. 1 The LANGUAGE menu appears. Change the on-screen display language to Spanish (ESPAÑOL) or French (FRANÇAIS) if desired, and press the joystick (OK). For details, see page 31. 2 The CLOCK SET menu appears. Select AUTO and press the joystick (OK). For details, see page 32. SET UP LANGUAGE ENGLISH ESPAÑOL FRANÇAIS Use t o s e l ec t Th e n p u s h OK Pu s h EASY SET UP t o q u i t CLOCK SET SET UP AUTO MANUAL Use t o s e l ec t Th e n p u s h OK Pu s h EASY SET UP t o q u i t 3 The SMART CH MAPPING menu appears. Push the joystick to >/./?// to enter the ZIP/POSTAL CODE in your area and press the joystick (OK). (You can also use the number buttons to enter the ZIP/POSTAL CODE.) 4 The CABLE BOX menu appears. Select OFF and press the joystick (OK). SET UP SMART CH MAPPING ZIP / POSTAL CODE 123–– E n t e r y o u r Z I P / POSTAL CODE u s i n g 0 – 9 , o r k e y s, and t h e n p u s h OK CABLE BOX SET UP CABLE BOX CONTROL CABLE MOUSE ON OFF Use t o s e l ec t Pu s h EASY SET UP t o q u i t 5 The TUNER PRESET menu appears. Set ANTENNA/CABLE to ANT and press the joystick (OK). For details, see page 43. TUNER PRESET SET UP ANTENNA / CABLE ANT CABLE Use t o s e l ec t Th e n p u s h OK Pu s h EASY SET UP t o q u i t continued Getting Started 17 Step 3: Hookups (continued) 6 The AUTO PRESET starts. SET UP AUTO PRESET TUNER PRESET SET UP SET UP i s d o n e PROCESS I NG / P l e a s e wa i t . Normal display Hookup 3: VCR Plus+ channel setup 1 Press MENU and select SET VCR Plus+ CHANNELS. 2 Push the joystick to ?// to select AUTO and press the joystick (OK). MENU TIMER SET / CHECK TUNER PRESET CLOCK SET LANGUAGE SET VCR Plus+ CHANNELS CABLE BOX CONTROL ADVANCED OPTIONS Use t o s e l ec t an i t e m, t h e n p u s h OK SMART CHANNEL MAPPING AUTO 3 Press POWER to turn off the VCR. MANUAL t o s e l ec t Use Th e n p u s h OK Pu s h MENU t o q u i t The VCR receives the program information signal from 0:00 am to 5:00 am while the VCR is turned off, and set up the channel for VCR Plus+ recording. After channel setup is finished, you can record TV programs using VCR Plus+. For details, see page 48. Notes • It takes about 1 hour to complete channel setup. • The VCR can receive the program information signal only while the VCR is turned off and no timer recordings are set. • If the channels in your area don’t carry the program information signals, set the program guide channels manually. For details, see page 50. • If the Choose your Cable CH MAP menu appears the first time you turn on the VCR after finishing channel setup, select the MAP number. For details, see page 49. Automatic clock setting Once you’ve set up the VCR, it automatically sets the clock the first time you turn off the VCR. After that, whenever you turn off the VCR, it checks the time and adjusts the clock, even for Daylight Saving Time. The VCR sets the clock by picking up a time signal provided by some TV channels. If you want to use the timer to record right away, or if the channels in your area do not carry time signals, set the clock manually. For details, see page 36. 18 Getting Started Hookup 4 Pages 19 to 22 Hookup 4 Incompatible cable box with many scrambledPages 19 to 21 channels What you can do with this hookup • Record any channel by selecting the channel on the cable box What you can’t do • Record with the cable box turned off • Record one channel while watching another channel • Select channels directly on the VCR Wall Cable box IN OUT Getting Started Recommended use Use this hookup if your cable company cannot supply a cable box that is compatible with the VCR’s cable box control feature, and your cable system scrambles all or most channels. Rear of TV VHF/UHF A Match the type of connector on your TV: A, B, or C. or VHF B For connector types B and C, no UHF connection UHF or is required. VHF C VCR VHF/UHF IN UHF OUT continued Getting Started 19 Step 3: Hookups (continued) Hookup 4: VCR setup 1 2 3 Set the RF UNIT switch to CH 3 or CH 4, whichever channel is not used in your area. If both are used, set the switch to either channel. For details, see page 83. If you made A/V connections (from page 8), you can skip this step. RF UNIT CH3 CH4 EASY SET UP Turn on your cable box. Press EASY SET UP on the VCR. 1 The LANGUAGE menu appears. Change the on-screen display language to Spanish (ESPAÑOL) or French (FRANÇAIS) if desired, and press the joystick (OK). For details, see page 31. 2 The CLOCK SET menu appears. Select MANUAL, press the joystick (OK), and set the clock manually. For details, see page 36. SET UP LANGUAGE ENGLISH ESPAÑOL FRANÇAIS Use t o s e l ec t Th e n p u s h OK Pu s h EASY SET UP t o q u i t CLOCK SET SET UP AUTO MANUAL Use t o s e l ec t Th e n p u s h OK Pu s h EASY SET UP t o q u i t 3 The SMART CH MAPPING menu appears. Push the joystick to >/./?// to enter the ZIP/POSTAL CODE in your area and press the joystick (OK). (You can also use the number buttons to enter the ZIP/POSTAL CODE.) 4 The CABLE BOX menu appears. Select OFF and press the joystick (OK). SET UP SMART CH MAPPING ZIP / POSTAL CODE 123–– E n t e r y o u r Z I P / POSTAL CODE u s i n g 0 – 9 , o r k e y s, and t h e n p u s h OK CABLE BOX SET UP CABLE BOX CONTROL CABLE MOUSE ON OFF Use t o s e l ec t Pu s h EASY SET UP t o q u i t 5 The TUNER PRESET menu appears. Set ANTENNA/CABLE to ANT and press the joystick (OK). For details, see page 43. TUNER PRESET SET UP ANTENNA / CABLE ANT CABLE Use t o s e l ec t Th e n p u s h OK Pu s h EASY SET UP t o q u i t 20 Getting Started 5 The AUTO PRESET starts. SET UP AUTO PRESET TUNER PRESET SET UP SET UP i s d o n e PROCESS I NG / P l e a s e wa i t . Hookup 4: VCR Plus+ channel setup 1 Find the VCR Plus+ Channel Listing in your program guide. For details, see page 47. 2 Enter all the channels you want to record and the cable box output channel (usually 2, 3, or 4). For details, see page 50. 1 Press MENU and select SET VCR Plus+ CHANNELS. Getting Started Normal display MENU TIMER SET / CHECK TUNER PRESET CLOCK SET LANGUAGE SET VCR Plus+ CHANNELS CABLE BOX CONTROL ADVANCED OPTIONS Use t o s e l ec t an i t e m, t h e n p u s h OK 2 Push the joystick to ?// to select MANUAL. SMART CHANNEL MAPPING AUTO MANUAL Use t o s e l ec t Th e n p u s h OK Pu s h MENU t o q u i t 3 Enter the program guide channel, then the cable box output channel. 4 Press the joystick (OK). SET VCR Plus+ CHANNELS GUIDE CH TV CH 33 – 3 Pu s h 0 – 9 k e y s t o s e t p r o g r a m GUIDE CH O r , p u s h OK t o s e e VCR Plus+ CHANNEL LIST 5 Press MENU. Program guide channel Cable box output channel continued Getting Started 21 Step 3: Hookups (continued) Automatic clock setting To use the Auto Clock Set feature with this hookup, you need to manually select a channel that carries a time signal: 1 2 Tune the cable box to a channel that carries a time signal. 3 Turn off the VCR. It automatically sets the clock and adjusts for Daylight Saving Time by picking up the time signal. Select AUTO in the CLOCK SET menu to turn on the Auto Clock Set feature. If you want to use the timer to record right away, or if the channels in your area do not carry time signals, set the clock manually. For details, see page 36. Note • To use the automatic clock setting feature, leave the cable box on. 22 Getting Started Hookup 5 Pages 23 to 25 DSS (Digital Satellite System) receiver Getting Started Recommended use Use this hookup if you have a DSS receiver. It allows the VCR’s cable box control feature to control the channel on the DSS receiver, simplifying the recording process. A list of compatible DSS receivers is on page 40. DSS (Digital Satellite System) is a satellite broadcast that provides superior digital-quality video and crisp digital-quality audio. A variety of program packages are available through your program providers. It also has program guides that are sorted by program categories. What you can do with this hookup • Record any channels using the VCR’s cable box control feature to select channels on the DSS receiver. What you can’t do • Record with the DSS receiver turned off • Record any channels from cable or an antenna (To record channels from cable or an antenna, turn off the cable box control feature.) • Use a cable box Rear of TV VHF/UHF • Record programs with VCR Plus+ Wall or A Match the type of connector on your TV: A,B or C. VHF B or VCR CONTROL S OUT AUDIO CABLE BOX CONTROL IN (PLUG ) POWER VHF/UHF VIDEO or IN LINE-1 IN OUT VHF LINE OUT For connector types B and C, no UHF connection is required. C UHF Cable Mouse VHF/UHF LINE OUT AUDIO VIDEO DSS receiver Positioning the Cable Mouse Place the Cable Mouse so that it hangs out over the DSS receiver front. IN OUT Side view continued Getting Started 23 Step 3: Hookups (continued) Hookup 5: 1 2 3 VCR setup Set the RF UNIT switch to CH 3 or CH4, whichever channel is not used in your area. If both are used, set the switch to either channel. For details, see page 83. If you made A/V connections (from page 8), you can skip this step. RF UNIT CH3 CH4 EASY SET UP Turn on your DSS receiver. Press EASY SET UP on the VCR. 1 The LANGUAGE menu appears. Change the on-screen display language to Spanish (ESPAÑOL) or French (FRANÇAIS) if desired, and press the joystick (OK). For details, see page 31. SET UP LANGUAGE ENGLISH ESPAÑOL FRANÇAIS Use t o s e l ec t Th e n p u s h OK Pu s h EASY SET UP t o q u i t 2 The CLOCK SET menu appears. Select AUTO and press the joystick (OK). For details, see page 32. SET UP CLOCK SET AUTO MANUAL Use t o s e l ec t Th e n p u s h OK Pu s h EASY SET UP t o q u i t 3 The SMART CH MAPPING menu appears. Push the joystick to >/./?// to enter the ZIP/POSTAL CODE in your area and press the joystick (OK). (You can also use the number buttons to enter the ZIP/POSTAL CODE.) 4 The CABLE BOX menu appears. Select ON. For details, see page 38. SET UP SMART CH MAPPING ZIP / POSTAL CODE 123–– E n t e r y o u r Z I P / POSTAL CODE u s i n g 0 – 9 , o r k e y s, and t h e n p u s h OK CABLE BOX SET UP CABLE BOX CONTROL CABLE MOUSE ON OFF BOX CODE NO. – –– BOX OUTPUT CH CH3 Use t o s e l ec t Pu s h EASY SET UP t o q u i t 24 Getting Started 5 Enter your DSS receiver code number and push the joystick to .. For details, see page 38. CABLE BOX SET UP CABLE BOX CONTROL CABLE MOUSE ON OFF BOX CODE NO. – –– BOX OUTPUT CH CH3 En t e r y o u r CABLE BOX Cod e No. u s i n g 0 – 9 k e y s Re f e r t o t h e Ope r a t i n g Ma nu a l f o r t h e Cod e CABLE BOX SET UP CABLE BOX CONTROL CABLE MOUSE ON OFF BOX CODE NO. 6 50 BOX OUTPUT CH LINE SET UP SET UP i s d o n e / Use t o s e l e c t CABLE BOX CH. Then push OK . Getting Started 6 Set your DSS receiver output channel (BOX OUTPUT CH) to LINE and press the joystick (OK). Normal display Automatic clock setting Once you’ve set up the VCR, it automatically sets the clock the first time you turn off the VCR. After that, whenever you turn off the VCR, it checks the time and adjusts the clock, even for Daylight Saving Time. The VCR sets the clock by picking up a time signal provided by some TV channels. If you want to use the timer to record right away, or if the channels in your area do not carry time signals, set the clock manually. For details, see page 36. Note • To successfully record a program from the DSS receiver, proceed as follows: – Leave the DSS receiver on all the time. – Turn off the display (menu screen, channel number, etc.) of the DSS receiver. – To record or receive locked channels, unlock the channel before the VCR starts recording. – To set pay-per-view programs in the timer setting, order the pay-per-view program before the VCR starts recording. – Some programs are copy protected. You cannot record these programs. continued Getting Started 25 Step 3: Hookups (continued) Hookup 6 Pages 26 to 30 Incompatible cable box with only a few scrambled channels, using an A/B switch Recommended use By using an A/B switch (not supplied), this hookup allows you to record both scrambled and unscrambled channels conveniently. What you can do with this hookup • Record any unscrambled channel by selecting the channel directly on the VCR (the A/B switch is set to A) • Record any scrambled channel by selecting the channel on the cable box (the A/B switch is set to B) What you can’t do • Record one scrambled channel while watching another channel (the A/B switch is set to B) Wall Cable box Splitter Rear of TV VHF/UHF A IN OUT or VHF B A/B switch A B UHF or VHF C VCR VHF/UHF IN UHF OUT Match the type of connector on your TV: A, B, or C. For connector types B and C, no UHF connection is required. 26 Getting Started Hookup 6: VCR setup 1 RF UNIT CH3 CH4 Getting Started 2 3 Set the RF UNIT switch to CH 3 or CH 4, whichever channel is not used in your area. If both are used, set the switch to either channel. For details, see page 83. If you made A/V connections (from page 8), you can skip this step. EASY SET UP Set the A/B switch to “A.” Press EASY SET UP on the VCR. 1 The LANGUAGE menu appears. Change the on-screen display language to Spanish (ESPAÑOL) or French (FRANÇAIS) if desired, and press the joystick (OK). For details, see page 31. SET UP LANGUAGE ENGLISH ESPAÑOL FRANÇAIS Use t o s e l ec t Th e n p u s h OK Pu s h EASY SET UP t o q u i t 2 The CLOCK SET menu appears. Select AUTO and press the joystick (OK). For details, see page 32. SET UP CLOCK SET AUTO MANUAL Use t o s e l ec t Th e n p u s h OK Pu s h EASY SET UP t o q u i t 3 The SMART CH MAPPING menu appears. Push the joystick to >/./?// to enter the ZIP/POSTAL CODE in your area and press the joystick (OK). (You can also use the number buttons to enter the ZIP/POSTAL CODE.) 4 The CABLE BOX menu appears. Select OFF and press the joystick (OK). SET UP SMART CH MAPPING ZIP / POSTAL CODE 123–– E n t e r y o u r Z I P / POSTAL CODE u s i n g 0 – 9 , o r k e y s, and t h e n p u s h OK CABLE BOX SET UP CABLE BOX CONTROL CABLE MOUSE ON OFF Use t o s e l ec t Pu s h EASY SET UP t o q u i t continued Getting Started 27 Step 3: Hookups (continued) 5 The TUNER PRESET menu appears. Set ANTENNA/CABLE to CABLE and press the joystick (OK). For details, see page 43. TUNER PRESET SET UP ANTENNA / CABLE CABLE ANT Use t o s e l ec t Th e n p u s h OK Pu s h EASY SET UP t o q u i t 6 The AUTO PRESET starts. SET UP AUTO PRESET TUNER PRESET SET UP SET UP i s d o n e PROCESS I NG / P l e a s e wa i t . Normal display 4 Preset the cable box output channel (usually 2, 3, or 4). For details, see page 45. 1 Press MENU and select TUNER PRESET. 2 Enter the cable box output channel. Set MANUAL SET to ADD and press the joystick (OK). MENU TIMER SET / CHECK TUNER PRESET CLOCK SET LANGUAGE SET VCR Plus+ CHANNELS CABLE BOX CONTROL ADVANCED OPTIONS Use t o s e l ec t an i t e m, t h e n p u s h OK TUNER PRESET ANTENNA / CABLE ANT AUTO PRESET MANUAL SET ADD AFT ON FINE TUNING CH3 CABLE ERASE OFF S e l e c t CH w i t h 0 – 9 . Pu s h ENTER. t o ADD / ERASE 28 Getting Started Hookup 6: VCR Plus+ channel setup Press MENU and select SET VCR Plus+ CHANNELS. 2 Push the joystick to ?// to select AUTO and press the joystick (OK). MENU TIMER SET / CHECK TUNER PRESET CLOCK SET LANGUAGE SET VCR Plus+ CHANNELS CABLE BOX CONTROL ADVANCED OPTIONS Use t o s e l ec t an i t e m, t h e n p u s h OK SMART CHANNEL MAPPING AUTO 3 Press POWER to turn off the VCR. MANUAL Use t o s e l ec t Th e n p u s h OK Pu s h MENU t o q u i t Getting Started 1 The VCR receives the program information signal from 0:00 am to 5:00 am while the VCR is turned off, and set up the channel for VCR Plus+ recording. After channel setup is finished, you can record TV programs using VCR Plus+. For details, see page 48. Notes • To use the smart channel mapping feature, set the A/B switch to A. • It takes about 1 hour to complete channel setup. • The VCR can receive the program information signal only while the VCR is turned off and no timer recordings are set. • If the channels in your area don’t carry the program information signals, set the program guide channels manually. For details, see page 50. • If the CH MAP SELECT menu appears the first time you turn on the VCR after finishing channel setup, select the MAP number. For details, see page 49. VCR Plus+ channel setup for scrambled channels To set the program guide channels for scrambled channels, enter all the scrambled channels you want to record and the cable box output channel (usually 2, 3, or 4) after finishing smart channel mapping. For details, see page 50. 1 Find the VCR Plus+ Channel Listing in your program guide. For details, see page 47. 2 Press MENU and select SET VCR Plus+ CHANNELS, then press the joystick (OK). MENU TIMER SET / CHECK TUNER PRESET CLOCK SET LANGUAGE SET VCR Plus+ CHANNELS CABLE BOX CONTROL ADVANCED OPTIONS Use t o s e l ec t an i t e m, t h e n p u s h OK continued Getting Started 29 Step 3: Hookups (continued) 3 Push the joystick to ?// to select MANUAL. SMART CHANNEL MAPPING AUTO MANUAL Use t o s e l ec t Th e n p u s h OK Pu s h MENU t o q u i t 4 Enter the program guide channel, then the cable box output channel. 5 Press the joystick (OK). SET VCR Plus+ CHANNELS GUIDE CH TV CH 25 – 3 Pu s h 0 – 9 k e y s t o s e t p r o g r a m GUIDE CH O r , p u s h OK t o s e e VCR Plus+ CHANNEL LIST 6 Press MENU. Program guide channel Cable box output channel Automatic clock setting Once you’ve set up the VCR, it automatically sets the clock the first time you turn off the VCR. After that, whenever you turn off the VCR, it checks the time and adjusts the clock, even for Daylight Saving Time. The VCR sets the clock by picking up a time signal provided by some TV channels. If you want to use the timer to record right away, or if the channels in your area do not carry time signals, set the clock manually. For details, see page 36. Note • To use the automatic clock setting feature, set the A/B switch to A. 30 Getting Started Selecting a language You can change the on-screen display language. 2 3 4 5 6 7 8 9 Getting Started 1 0 MENU Joystick >/./?/// OK 1 • MENU Press MENU, then push the joystick to >/. to move the cursor to LANGUAGE and press the joystick (OK). LANGUAGE ENGLISH ESPAÑOL FRANÇAIS OK When using the EASY SET UP procedure, skip this step. PLAY Push the joystick to >/. to select ENGLISH, ESPAÑOL, or FRANÇAIS, then press the joystick (OK). PLAY 2 Use t o s e l ec t an i t e m, t h e n p u s h OK OK Getting Started 31 Setting the clock Using the Auto Clock Set feature Some TV and cable channels transmit time signals with their broadcasts. Your VCR can pick up this time signal to automatically set the clock. The Auto Clock Set feature works only if a channel in your area is broadcasting a time signal. If broadcasters in your area are not yet sending time signals, set the time manually (page 36). 1 2 3 4 5 6 7 8 9 0 Before you start… • Turn on the VCR and the TV. • Set the TV to the VCR channel (channel 3 or 4). If your TV is connected to the VCR using A/V connections, set the TV to video input. • Press TV/VIDEO to display the VIDEO indicator in the VCR’s display window. • Press INPUT SELECT so that a channel number appears in the VCR’s display window. 1 • MENU Press MENU, then push the joystick to >/. to move the cursor to CLOCK SET and press the joystick (OK). MENU Joystick >/./?/// OK CLOCK SET AUTO MANUAL PLAY Use t o s e l ec t Th e n p u s h OK Pu s h MENU t o q u i t OK 2 PLAY Push the joystick to ?// to select AUTO, then press the joystick (OK). AUTO CLOCK SET FULL AUTO YES NO OK Use t o s e l ec t Pu s h MENU t o q u i t 32 Getting Started 3 PLAY Push the joystick to ?// to select YES, then press the joystick (OK). OK To activate the Auto Clock Set function, turn off the VCR. The VCR automatically sets the clock by searching for a channel that carries a time signal and sets your time zone and Daylight Saving Time (if applicable). If your clock is set to the wrong time zone or Daylight Saving Time, you can adjust these settings without turning off the Auto Clock Set feature (page 34). Getting Started 4 Notes • The clock cannot be set automatically if you don’t receive a channel that carries a time signal in your area. If so, set the clock manually. • If there are only a few channels in your area that carry time signals, setting the clock automatically may take up to about 30 minutes. If nothing happens even after you wait about 30 minutes, set the clock manually. • If you use Hookup 1, make sure you leave the cable box on. continued Getting Started 33 Setting the clock (continued) If the clock is not activated 1 2 3 4 5 6 7 8 9 Number buttons 0 Joystick >/./?/// OK 1 Follow steps 1 and 2 in “Using the Auto Clock Set feature.” The AUTO CLOCK SET menu is displayed. AUTO CLOCK SET FULL AUTO Use YES NO t o s e l ec t Pu s h MENU t o q u i t 2 PLAY OK Push the joystick to ?// to select NO for FULL AUTO. AUTO CLOCK SET FULL AUTO CLOCK SET CH TIME ZONE DAYLIGHT SAVING YES NO –– AUTO AUTO Use 0 – 9 k e y s t o s e l e c t CLOCK SET CHANNEL Pu s h MENU t o q u i t 34 Getting Started 3 Push the joystick to >/. to highlight the item you want to set, then push the joystick to?// to make the setting. PLAY OK 2 3 4 5 6 7 8 9 0 FULL AUTO CLOCK SET CH TIME ZONE DAYLIGHT SAVING Use YES NO 123 EASTERN ON t o s e l ec t Pu s h MENU t o q u i t Getting Started 1 • For CLOCK SET CH Leave the setting to “– –” to have the VCR automatically search for a channel that carries a time signal. Press the number buttons to select a channel that carries a time signal. Use this option if you know of a channel that carries a time signal. Most PBS member stations broadcast a time signal. For the fastest response, select your local PBS station. AUTO CLOCK SET • For TIME ZONE Select the time zone of your area, or select AUTO to have the VCR automatically set your time zone. The options are: AUTO n ATLANTIC n EASTERN n CENTRAL n MOUNTAIN n PACIFIC n ALASKA n HAWAII n AUTO • For DAYLIGHT SAVING Select ON or OFF (standard time), or AUTO to have the VCR automatically set the daylight saving time. 4 Press the joystick (OK). PLAY OK 5 To activate the Auto Clock Set function, turn off the VCR. Note • If you use both the cable box control feature and the Auto Clock Set feature, the VCR automatically changes channels on the cable box until a channel that carries a time signal is found, whenever you turn off the VCR. If you want to stop the search, change the channel on the cable box with the channel buttons either on the VCR or on the remote commander. continued Getting Started 35 Setting the clock (continued) Using Manual clock set 1 2 3 4 5 6 7 8 9 0 MENU Joystick >/./?/// OK 1 • MENU PLAY OK 2 PLAY Press MENU, then push the joystick to >/. to move the cursor to CLOCK SET and press the joystick (OK). When using the EASY SET UP procedure, skip this step. Push the joystick to ?// to select MANUAL and press the joystick (OK). CLOCK SET AUTO MANUAL Use t o s e l ec t Th e n p u s h OK Pu s h MENU t o q u i t CLOCK SET 1 / 1 / 1 9 9 8 THU OK Use t o s e l ec t c u r r e n t MONTH Th e n, p u s h DAY 36 Getting Started t o set 1 2 : 0 0 AM 3 Push the joystick to >/. to set the month. PLAY CLOCK SET 1 1 / 1 / 1 9 9 8 SUN 1 2 : 0 0 AM OK Use t o s e l ec t c u r r e n t MONTH Th e n, p u s h DAY PLAY OK Push the joystick to / to flash the day and push the joystick to >/. to set the day. The day of the week is set automatically. CLOCK SET 1 1 / 1 6 / 1 9 9 8 MON Use t o s e l ec t c u r r e n t DAY Th e n, p u s h YEAR 5 1 2 : 0 0 AM t o set Getting Started 4 t o set Set the year, hour and minutes in the same way as the day. PLAY OK 6 Press the joystick (OK) to start the clock. PLAY OK Getting Started 37 Setting up cable box control (Skip this section if you are using Hookup 2, 3, 4, or 6.) 1 2 3 4 5 6 7 8 9 Your VCR includes a cable box control feature that allows the VCR to control most brands of cable boxes/DSS receivers via the Cable Mouse. With cable box control, the VCR controls channels on the cable box/DSS receiver for timer recording. You can also use the VCR’s remote commander to change channels on the cable box/DSS receiver whenever the cable box/DSS receiver is turned on even if the VCR is turned off. To use cable box control, you need to connect the Cable Mouse (pages 10 and 23) and set the code number and output channel. Number buttons 0 CH +/– MENU Joystick >/./?/// OK This VCR is programmed with codes necessary to control channel selection on most brands of cable boxes at the time this VCR was manufactured. It is possible that new cable boxes may be introduced that cannot be controlled with this VCR’s Cable Mouse. If you have a cable box that is incompatible with this VCR, contact your cable operator –– they may be able to provide you with a compatible cable box. 1 • MENU PLAY OK 2 PLAY OK Press MENU, then push the joystick to >/. to move the cursor to CABLE BOX CONTROL and press the joystick (OK). When using the EASY SET UP procedure, skip this step. Push the joystick to ?// to select ON, then push the joystick to .. CABLE BOX CONTROL CABLE MOUSE ON OFF Use t o s e l ec t Pu s h MENU t o q u i t CABLE BOX CONTROL CABLE MOUSE BOX CODE NO. BOX OUTPUT CH ON OFF – –– CH3 En t e r y o u r CABLE BOX Cod e No. u s i n g 0 – 9 k e y s Re f e r t o t h e Ope r a t i n g Ma nu a l f o r t h e Cod e 38 Getting Started 3 1 2 3 4 5 6 7 8 9 0 Press the number buttons to enter the cable box/DSS receiver code number, then push the joystick to .. Find your cable box/DSS receiver code number from the chart below. CABLE BOX CONTROL CABLE MOUSE BOX CODE NO. BOX OUTPUT CH ON OFF 1 23 CH3 Use t o s e l e c t CABLE BOX CH. Th e n p u s h OK OK 4 PLAY OK If you want to control a cable box, push the joystick to ?// to select the output channel for the cable box, then press the joystick (OK). Getting Started PLAY If you want to control a DSS receiver, select LINE, then press the joystick (OK). Cable box and DSS receiver brand and the corresponding code numbers If more than one code number is listed, try entering them one by one, until you come to the correct code for your equipment. Cable box brand Code numbers Cable box brand Code numbers ABC 018, 022, 024, 028, 217 Eastern 013, 285 Antronix 218 Electricord 089 Archer 033, 050, 164, 218, 808 Electus 055 BBT 278 Focus 411 Cable Star 067 Garrard 164 Cabletenna 033 GC Electronics 027, 067, 341 Cable time 172, 388, 459 GE 243, 244 Century 164 GEC 097 Citizen 164, 326, 327 Gemini 026, 068, 081 Clyde Cablevision 097 General Instrument 022, 287, 487 Colour Voice 036, 042 Hamlin 020, 031, 045, 270, 284 Comband 243, 244 Hitachi 022 Comtronics 051, 071 Jasco 164, 326 Decsat 434 Jerrold Diamond 046 014, 022, 025, 026, 035, 037, 058, 109, 287, 487 Eagle Comtronics 051 Linsay 451 continued Getting Started 39 Setting up cable box control (continued) Cable box brand Code numbers Cable box brand Code numbers Macom 044 STS 167 Magnavox 038, 043, 080 Sylvania 012 Memorex 011 T-Cable Teletext 116 Movie Time 089, 167, 214 Tandy 269 Northcoast 325 Tatung 108 Novaplex 629 Teknica 157 NSC 074, 081, 167, 214 TeleCaption 232 Oak 018, 030, 259 Teleservice 292 Panasonic 032, 118 Texscan 012, 107 Paragon 011 TFC 321 Philips 036, 038, 039, 040, 041, 042, 071, 301 Timeless 429 Tocom 023, 024 Pioneer 034, 155, 271, 544, 695 Toshiba 011 Popular Mechanics 411 Tudi 297 Pulsar 011 TV86 074 Radio shack 808 TV COM 018, 030, 259 RCA 032 Uniden 236 Realistic 218 Unika 033, 164, 218 Recoton 411 United Artists 018 Regal 031, 270, 284, 290 United Cable 014 Regency 013 Universal Rembrandt 081 033, 050, 067, 088, 089, 164, 202, 218, 333 Samsung 051, 155 Videoway 261 Scientific Atlanta 017, 019, 028, 288 Vidtech 255 Seam 521 Viewstar Sharp 324 038, 071, 074, 122, 222, 269, 300 Signal 051 Zenith 011, 065, 536 Signature 022 Zentek 411 Wave Master 576 DSS receiver brand Code numbers SL Marx 051 Spectravision 069 Sprucer 032, 318 Standard Components 107, 166 40 Starcom 014, 026, 058, 109 RCA 577 Stargate 026, 051 Sony 650 Getting Started Getting Started To ensure correct operation • Place the Cable Mouse so that it hangs out over the cable box/DSS receiver front. • Do not place the cable box/DSS receiver on top of the VCR. • Position the cable box/DSS receiver away from the VCR. • Point the remote commander at the VCR, not at the cable box/DSS receiver. Side view 1 2 3 4 5 6 7 8 9 0 : Signal flow To check the cable box control setting 1 Press CH +/– on the remote commander. Does the channel indicator on the cable box/DSS receiver change? (Point the remote commander at the VCR, not at the cable box/DSS receiver.) 2 Press all 10 number buttons (0 to 9) on the remote commander. Does the channel indicator on the cable box/DSS receiver change? If the answer to both 1 and 2 is “yes,” you have made the correct setting. continued Getting Started 41 Setting up cable box control (continued) If you cannot get your VCR to control the cable box/DSS receiver • Check that the Cable Mouse is connected to the CABLE BOX CONTROL jack on the VCR. • Check the position of the Cable Mouse. • Place the cable box/DSS receiver and VCR away from each other. Do not place the cable box/DSS receiver on top of the VCR. • Try the setup again making sure to use the correct control code. If the cable box still does not respond, try the other codes that are listed. If your cable box still does not operate with the Cable Mouse, contact your cable company to see if they can provide you with a compatible cable box. Note • Make sure you turn off the VCR when you plug in or unplug the Cable Mouse. If you unplug the Cable Mouse and plug it in again, turn on the VCR before you use the cable box/DSS receiver control feature. 42 Getting Started Presetting channels (Skip this section if you are using cable box/DSS receiver control.) MENU Getting Started Joystick >/./?/// OK This VCR is capable of receiving VHF channels 2 to 13, UHF channels 14 to 69 and unscrambled CATV channels 1 to 125. First, we recommend that you preset the receivable channels in your area using automatic presetting. Then, if there are any unwanted channels, disable them manually. If you have decided which channels you wish to preset, set them directly using manual presetting. Before you start… • Turn on the VCR and the TV. • Set the TV to the VCR channel (channel 3 or 4). If your TV is connected to the VCR using A/V connections, set the TV to video input. • Press TV/VIDEO to display the VIDEO indicator in the VCR’s display window. Presetting all receivable channels automatically 1 • MENU PLAY OK Press MENU, then push the joystick to >/. to move the cursor to TUNER PRESET and press the joystick (OK). When using the EASY SET UP procedure, skip this step. TUNER PRESET CH2 ANTENNA / CABLE ANT AUTO PRESET MANUAL SET ADD AFT ON FINE TUNING CABLE ERASE OFF S e l e c t CH w i t h 0 – 9 . Pu s h ENTER. t o ADD / ERASE continued Getting Started 43 Presetting channels (continued) 2 • To preset cable TV channels: Push the joystick to ?// to set ANTENNA/CABLE to CABLE. PLAY OK TUNER PRESET ANTENNA / CABLE ANT AUTO PRESET MANUAL SET ADD AFT ON FINE TUNING CH2 CABLE ERASE OFF Use t o s e l ec t an i t e m, t h e n p u s h • To preset VHF and UHF channels: PLAY Push the joystick to ?// to set ANTENNA/CABLE to ANT. OK TUNER PRESET ANTENNA / CABLE ANT AUTO PRESET MANUAL SET ADD AFT ON FINE TUNING CH2 CABLE ERASE OFF Use t o s e l ec t an i t e m, t h e n p u s h 3 Push the joystick to >/. to select AUTO PRESET then press the joystick (OK). PLAY All receivable channels are preset in numerical sequence. When no more receivable channels can be found, presetting stops and the picture from the lowest numbered channel is displayed on the TV screen. OK TUNER PRESET ANTENNA / CABLE ANT AUTO PRESET MANUAL SET ADD AFT ON FINE TUNING CH2 CABLE ERASE OFF T o s t a r t AUTO PRESET, p u s h OK Tip • When receiving a VHF, UHF, or CATV channel, the display changes as follows each time you press DISPLAY. / Channel number, program name, and station’s call letters (if the broadcaster sends those services) . Remaining tape length, and time counter . The bar indicator and pointer for searching a specific point . No display 44 Getting Started Presetting/disabling channels manually 1 2 3 4 5 6 7 8 9 Number buttons, ENTER 0 Getting Started CH +/– MENU Joystick >/./?/// OK 1 • MENU Press MENU and select TUNER PRESET, then press the joystick (OK). PLAY OK 2 1 2 3 5 6 7 8 9 • CH •To preset a channel: 1 Press the number buttons to enter the channel number, then press ENTER. 2 Push the joystick to ?// to set MANUAL SET to ADD. •To disable a channel: 1 Press CH +/– to select the channel number. 2 Push the joystick to ?// to set MANUAL SET to ERASE. 3 PLAY CH2 ANTENNA / CABLE ANT AUTO PRESET MANUAL SET ADD AFT ON FINE TUNING CABLE ERASE OFF S e l e c t CH w i t h 0 – 9 . Pu s h ENTER. t o ADD / ERASE 4 0 TUNER PRESET TUNER PRESET CH5 ANTENNA / CABLE ANT AUTO PRESET MANUAL SET ADD AFT ON FINE TUNING CABLE ERASE OFF S e l e c t CH w i t h 0 – 9 . Pu s h ENTER. t o ADD / ERASE TUNER PRESET CH5 ANTENNA / CABLE ANT AUTO PRESET MANUAL SET ADD AFT ON FINE TUNING CABLE ERASE OFF S e l e c t CH w i t h 0 – 9 . Pu s h ENTER. t o ADD / ERASE Repeat step 2 to preset or disable channels as required, then press the joystick (OK). OK continued Getting Started 45 Presetting channels (continued) If the picture is not clear Normally, the Auto Fine Tuning (AFT) function automatically tunes in channels clearly. If, however, the picture of a channel is not clear, you can also use the manual tuning function. 1 2 3 4 5 6 7 8 9 Number buttons, ENTER 0 MENU Joystick >/./?/// OK 1 • MENU Press MENU and select TUNER PRESET, then press the joystick (OK). PLAY OK 2 ANTENNA / CABLE ANT AUTO PRESET MANUAL SET ADD AFT ON FINE TUNING CH2 CABLE ERASE OFF S e l e c t CH w i t h 0 – 9 . Pu s h ENTER. t o ADD / ERASE 1 2 3 4 5 6 8 9 7 TUNER PRESET Press the number buttons to select the channel you want to fine-tune, then press ENTER. 0 TUNER PRESET ANTENNA / CABLE ANT AUTO PRESET MANUAL SET ADD AFT ON FINE TUNING CH5 CABLE ERASE OFF S e l e c t CH w i t h 0 – 9 . Pu s h ENTER. t o ADD / ERASE 3 PLAY OK Push the joystick to >/. to select FINE TUNING. The fine tuning meter appears. TUNER PRESET ANTENNA / CABLE ANT AUTO PRESET MANUAL SET ADD AFT ON FINE TUNING CH5 CABLE ERASE OFF Pu s h 4 PLAY OK Push the joystick to ?// to adjust to a clearer picture. Note that the AFT setting switches to OFF. TUNER PRESET ANTENNA / CABLE ANT AUTO PRESET MANUAL SET ADD AFT ON FINE TUNING Pu s h 46 Getting Started CH5 CABLE ERASE OFF Setting up VCR Plus+ To find the guide channel numbers, look at the “Channel Line-up Chart” in the program guide for your area that features VCR PlusCodes. It usually looks like the example to the right. 5:30 14 MOVIE Musical (2hrs.) 33044 2 SPORT Golf (1hr. 25min.) 42060 CNN WS 9974 6:30 2 3 4 DRAMA Comedy (2hrs.) 17390 5 SCIENCE AND TECHNOLOGY (1hr. 15min.) 73457 Example of “Channel Line-up Chart” CABLE CH VCR Plus+ GUIDE CH CABLE TV AMC American Movie Classics 35 17 BRV Bravo (program grid only) 54 20 CNN Cable News Network 42 21 CSP C-SPAN 22 DIS The Disney Channel 53 25 DSC The Discovery Channel 37 34 ESN ESPN 34 35 FAM The Family Channel 47 HBO Home Box Office 33 5 LE 16 MP The VCR can set the guide channels automatically (see page 48), but you may have to set the guide channels manually depending on your area or the way you hooked up your VCR (see page 50). PlusCode 28 27 LIF Lifetime 46 29 MAX Cinemax 45 MTV Music Television 48 NIK Nickelodeon 38 SC Sports Channel 59 30 31 38 SA How to set up your VCR Setting up your VCR involves coordinating the TV channel number (the number you turn to on your TV or VCR to watch a program) with the guide channel (the number that’s assigned to that channel in your program guide). Example of “PlusCode” Getting Started How VCR Plus+ works Whenever you want to record a TV program, all you need to do is look up the program’s “PlusCode,” a number assigned to each program published in the TV section of most newspapers, cable TV listings, and even TV GUIDE magazine. Then, just enter the PlusCode of the program you want and the VCR is automatically programmed to record that show. It’s that simple. 39 SCA Sports Channel America 70 45 SHO Showtime 41 17 TBS TBS SuperStation 43 44 TMC The Movie Channel 58 49 TNN The Nashville Network 49 50 TNT Turner Network Television 52 51 USA USA Network 44 continued Getting Started 47 Setting up VCR Plus+ (continued) POWER Setting up VCR Plus+ automatically (Smart Channel Mapping) The VCR can automatically set the guide channels in your area from ZIP/POSTAL CODE you entered in EASY SET UP. The VCR receives the program information signal and renews the data everyday after you complete the following procedure. 1 2 3 4 5 6 7 8 9 0 MENU Joystick >/./?/// OK 1 Set up the VCR using the EASY SET UP function. 2 • MENU PLAY OK 3 PLAY OK 48 Getting Started Press MENU, then push the joystick to >/. to move the cursor to SET VCR Plus+ CHANNELS and press the joystick (OK). The SMART CHANNEL MAPPING menu appears. Push the joystick to ?// to select AUTO and press the joystick (OK). The instruction shown on the right appears on the TV screen for few seconds, then the screen returns to the normal display. SMART CHANNEL MAPPING AUTO MANUAL t o s e l ec t Use Th e n p u s h OK Pu s h MENU t o q u i t VCR w i l l l o o k f o r c h a n n e l ma p p i n g s i g n a l a f t e r you t u r n i t o f f If the program information signal in your area has several channel map patterns, the Choose your Cable CH MAP menu appears, and you must select the channel map. See “To select the channel map” on this page. • POWER Getting Started 4 Choose your Cable CH MAP 1 2 3 4 5 6 7 8 MAP KABC 125 CNN 98 KCBS 4 MTV 55 KAET 14 –––– –– WNET 35 –––– –– Use t o s e l ec t Th e n p u s h OK Pu s h MENU t o q u i t Press POWER to turn off the VCR. The VCR sets the program guide channels from 0:00 am to 5:00 am while the VCR is turned off. (It takes about 1 hour to complete channel mapping.) Channel map Station ID number To select the channel map If the program information signal in your area Choose your Cable CH MAP has several channel map patterns (up to 8), the 1 2 3 4 5 6 7 MAP KABC 125 CNN Choose your Cable CH MAP menu appears: KCBS 4 MTV KAET 14 –––– WNET 35 –––– Use t o s e l ec t Th e n p u s h OK Pu s h MENU t o q u i t 8 • the first time you turn on the VCR after completing channel mapping • after selecting AUTO and pressing the joystick (OK) on the SMART CHANNEL Channel number MAPPING menu In this case, you have to select the channel map on the Choose your Cable CH MAP menu. 98 55 –– –– 1 Find the VCR Plus+ Channel Listing in your program guide. For details, see page 47. 2 Push the joystick to ?// to select the channel map number you want by checking the channel number in the program guide. 3 Press the joystick (OK). Notes • It takes about 1 hour to complete channel mapping. • The VCR can receive the program information signal only while the VCR is turned off and no timer recordings are set. • The VCR cannot set the guide channels correctly unless you enter the ZIP/POSTAL CODE in your area. • When you move to a different area, you must set up the VCR again and enter your new ZIP/POSTAL CODE in the EASY SET UP procedure. continued Getting Started 49 Setting up VCR Plus+ (continued) Setting up VCR Plus+ manually 1 2 3 4 5 6 To set the guide channels manually, use the Channel Line-up Chart to check that the guide channel numbers match the TV channel your VCR receives. For example, if HBO is listed in the Channel Line-up Chart on channel 33, and your VCR receives HBO on channel 5, you need to coordinate these numbers using the following procedure. If the guide and TV channel numbers are the same, you can skip this procedure. 7 8 9 1 • MENU Press MENU, then push the joystick to >/. to move the cursor to SET VCR Plus+ CHANNELS and press the joystick (OK). PLAY Number buttons, ENTER 0 MENU Joystick >/./?/// OK SMART CHANNEL MAPPING AUTO MANUAL t o s e l ec t Use Th e n p u s h OK Pu s h MENU t o q u i t OK 2 Push the joystick to ?// to select MANUAL and press the joystick (OK). PLAY OK SET VCR Plus+ CHANNELS TV CH GUIDE CH –– – –– Pu s h 0 – 9 k e y s t o s e t p r o g r a m GUIDE CH O r , p u s h OK t o s e e VCR Plus+ CHANNEL LIST 3 1 2 3 4 5 6 7 8 9 0 Enter the guide channel number assigned in the program guide and press ENTER. SET VCR Plus+ CHANNELS GUIDE CH TV CH 33 – 33 Pu s h 0 – 9 k e y s y o u r TV CH to se t Th e n p u s h ENTER 50 Getting Started 4 1 2 3 4 5 6 7 8 9 • If you made Hookup 1, 2, or 3: Enter the actual number on your TV (and VCR) and press ENTER. SET VCR Plus+ CHANNELS GUIDE CH TV CH 33 – 5 Pu s h 0 – 9 k e y s y o u r TV CH 0 to se t Th e n p u s h ENTER 5 GUIDE CH TV CH 33 – 3 Pu s h 0 – 9 k e y s y o u r TV CH to se t Th e n p u s h ENTER Repeat steps 3 and 4 for each guide channel number that doesn‘t match. 6 When you have set all channels, press the joystick (OK) to confirm your channel settings. PLAY OK 7 SET VCR Plus+ CHANNELS Getting Started • If you made Hookup 4: Enter the cable output channel (usually 2, 3, or 4) and press ENTER. • If you made Hookup 6: Enter the actual number on your TV (and VCR) for an unscrambled channel and press ENTER. For a scrambled channel, enter the cable box output channel (usually 2, 3, or 4) and press ENTER. • MENU VCR Plus+ CHANNEL LIST page 1 GUIDE TV GUIDE TV 59 – 47 2 – 73 5 – 4 61 – 3 17 – 55 77 – 35 28 – 9 86 –120 43 –118 90 – 22 Use t o c hange page Pu s h MENU t o q u i t After all settings are complete, press MENU to exit. Getting Started 51 Basic Operations Playing a tape 6 EJECT COUNTER RESET DISPLAY 1 2 3 4 5 6 7 8 9 0 SMART CUE OK/ · PLAY/ P PAUSE/ )# FF/ p STOP/ 03 REW 1 2 Turn on your TV and set it to the video channel. Insert a tape. The VCR turns on and starts playing automatically if you insert a tape with its safety tab removed. 3 PLAY OK 52 Basic Operations Press the joystick ·. When the tape reaches the end, it will rewind automatically. Additional tasks To Push the joystick to Stop play p STOP Pause play P PAUSE Resume play after pause P PAUSE or press the joystick · Fast-forward the tape )# FF during stop Rewind the tape 03 REW during stop Eject the tape Press 6 EJECT. To skip playback You can skip a portion of playback you don‘t want to watch such as a commercial and restart playback by pressing a single button. Press SMART CUE during playback of the scene you want to skip. The VCR starts searching. 2 Press SMART CUE again when you find the scene you want to watch. The VCR stops searching, rewinds a few seconds, then resumes normal playback. If you press and hold SMART CUE while the VCR is skip searching, the VCR will stop searching, and continue rewinding until you release SMART CUE. Tip • You can change the length of rewinding time on the ADVANCED OPTION menu. See page 80. Basic Operations 1 To use the time counter At the point on the tape that you want to find later, press COUNTER RESET. The counter in the display window resets to “0:00:00.” Search for the point afterwards by referring to the counter. VIDEO EP To display the counter on the TV screen, press DISPLAY. Notes • Tapes recorded in the LP mode on other VCRs can be played back on this VCR but the picture quality cannot be guaranteed. • While setting the menu on the TV screen, you cannot use the joystick for tape operation. • The counter resets to “0:00:00” whenever a tape is reinserted. • The counter stops counting when it comes to a portion with no recording. Basic Operations 53 Recording TV programs DISPLAY COUNTER/ REMAIN TV/VIDEO 1 2 3 4 5 6 7 8 9 INPUT SELECT SP/EP 0 r REC CH +/– 1 Turn on your TV and set it to the video channel. To record from a cable box, turn it on. 2 54 Basic Operations Insert a tape with its safety tab in place. 3 INPUT SELECT Press INPUT SELECT until a channel number appears in the display window. VIDEO CH EP 4 • CH Press CH +/– to select the channel you want to record. VIDEO CH EP 5 SP / EP Press SP/EP to select the tape speed, SP or EP. EP (Extended Play) provides recording time three times as long as SP (Standard Play), however, SP produces better picture quality. VIDEO CH SP REC Press r REC to start recording. The recording indicator lights up red in the display window. Recording indicator VIDEO SP CH Basic Operations 6 To stop recording Press p STOP. continued Basic Operations 55 Recording TV programs (continued) To check the remaining tape length Press DISPLAY. The white bar indicates the approximate length of tape remaining. With the display on, press COUNTER/REMAIN to check the remaining time. Each time you press COUNTER/REMAIN, the time counter and the remaining time appear alternately. The remaining time with indicator also appears in the display window. the S SP E 0 : 00 : 22 Remaining tape length Time counter TAPE REMAINING 1 : 46 To check the remaining time of a T-140 or T-180 tape, set TAPE SELECT in the ADVANCED OPTIONS menu to “180.” (For details, see page 80.) To watch another TV program while recording 1 Press TV/VIDEO to turn off the VIDEO indicator in the display window. 2 If the TV is connected to the VCR’s LINE OUT jacks, set the TV to TV input; if not, skip this step. 3 Select another channel on the TV. To select the channel using the shuttle ring To select a channel in step 4 above, you can also use the shuttle ring. During stop, turn the shuttle ring clockwise for higher channels or counterclockwise for lower channels. The VCR switches the channel in the preset order. To save a recording To prevent accidental erasure, break off the safety tab as illustrated. To record on a tape again, cover the tab hole with adhesive tape. Safety tab 56 Basic Operations Tips • To select a channel, you can use the number buttons on the remote commander. Enter the channel number, then press ENTER. • You can select a video source form the LINE-1 IN or LINE-2 IN jacks using INPUT SELECT. • The display appears on the TV screen indicating information about the tape, but the information won’t be recorded on the tape. • If you don’t want to watch TV while recording, you can turn off the TV. When using a cable box, make sure to leave it on. Notes • The remaining time may not be indicated accurately for short tapes such as T-20 or T-30, or tapes recorded in the LP mode. • The display doesn’t appear during still (pause) mode or slow-motion playback. • It may take up to one minute for the VCR to calculate and display the remaining time after you press DISPLAY. Basic Operations Basic Operations 57 Locating a channel by Station ID You can select the TV program from station ID. 1 2 3 4 5 6 7 8 9 ENTER 0 CH +/– 1 Turn on your TV and set it to the video channel. To record from a cable box, turn it on. 2 ENTER 3 • CH 4 ENTER Press ENTER. The station ID appears on the TV screen. Press CH +/– to select the station ID you want. The selected station ID 3 9 10 12 13 15 19 22 43 45 E! MTV WGN ABC HBO CBS HBO2 22 TNT ESPN 3 9 10 12 13 15 19 22 43 45 E! MTV WGN ABC HBO CBS HBO2 22 TNT ESPN Press ENTER. Note • If the TV channel has no station ID, the channel number appears on the TV screen. 58 Basic Operations Recording TV programs using VCR Plus+ Just enter the program’s PlusCode listed in the TV program guide. The date, times and channel number of that program are set automatically. You can preset up to eight programs at a time. CLEAR VCR Plus+ 1 2 3 4 5 6 7 8 9 Number buttons 0 SET SP/EP Joystick >/./?/// OK 1 VCR Plus+ Press VCR Plus+. Basic Operations Before you start… • Check that the VCR clock is set to the correct time. • Turn on your TV and set it to the video channel. When using a cable box, turn it on. • Insert a tape with its safety tab in place. Make sure the tape is longer than the total recording time. POWER VCR Plus+ P l u s Co d e –––––––– SP / EP EP En t e r p r o g r a m’ s us i ng 0–9 k ey s P l u s Co d e To c h a n g e t a p e s p e e d, p u s h SP / EP continued Basic Operations 59 Recording TV programs using VCR Plus+ (continued) 2 1 2 3 4 5 6 8 9 7 0 Press the number buttons to enter the program’s PlusCode. If you make a mistake, press CLEAR and re-enter the correct number. VCR Plus+ SP / EP EP P l u sCo d e 53 29 2 –– – Us e ONCE keys f o r : DA I L Y WEEKLY T o c o n f i r m : SET T o c a n c e l : CLEAR 3 SP / EP Press SP/EP to select the tape speed, SP or EP. VCR Plus+ P l u sCo d e 53 29 2 –– – Us e ONCE SP / EP SP keys f o r : DA I L Y WEEKLY T o c o n f i r m : SET T o c a n c e l : CLEAR 4 PLAY OK Push the joystick to ?// to select ONCE, DAILY, or WEEKLY, then press SET: To record Select Only once ONCE Everyday Monday to Friday DAILY Once a week WEEKLY SET CLEAR 5 6 VCR Plus+ SP / EP P l u s Co d e 53292––– SP RECORDING TIME DATE START STOP CH 9 / 2 5 FRI 8 : 0 0 PM 11 : 3 0 PM 5 2 EP T0 s e t t i me r, p u s h POWER T0 c a n c e l, p u s h CLEAR The date, start and stop times, channel number and tape speed appear on the TV screen. If the information is not correct, press CLEAR to cancel the setting. To enter another setting, repeat steps 1 to 4. • POWER Press POWER to turn off the VCR. The indicator appears in the display window and the VCR stands by for recording. When using a cable box, leave it on. To stop recording To stop the VCR while recording, press p STOP. 60 Basic Operations To use the VCR after setting the timer To use the VCR before a timer recording begins, just press POWER. The indicator turns off and the VCR switches on. Remember to press POWER to reset the VCR in timer recording standby after using the VCR. You can also do the following tasks while the VCR is recording: • • • • Reset the counter. Display tape information on the TV screen. Check the timer settings. Watch another TV program. To lock the VCR after setting the timer (Child Lock) While the VCR turns on, hold POWER down on the VCR until the H indicator appears in the display window. The VCR turns off and the H indicator remains lit. The VCR will not work except for timer recording. To unlock the VCR, hold POWER down on the VCR until the H indicator disappears from the display window. The VCR is unlocked and turns on. Tips • To cancel VCR plus+ recording, press VCR Plus+ before pressing SET in step 4 above. • When you are recording a program in the SP mode and the remaining tape becomes shorter than the recording time, the tape speed is automatically changed to the EP mode. Note that some noises will appear on the picture when the tape speed is changed. If you want to keep the tape speed, set AUTO TAPE SPEED to OFF in the ADVANCED OPTIONS menu (page 80). Basic Operations To stop timer recording while the VCR is locked, press p STOP. The recording stops and the VCR is unlocked. Notes • If the VCR doesn’t accept the PlusCode, this means that: – the PlusCode is incorrect. – ONCE, DAILY, or WEEKLY was selected incorrectly. You cannot select DAILY or WEEKLY for a program that airs more than seven days ahead. • The VCR will be unlocked when: – you stop timer recording by pressing p STOP – you insert a tape – the AC power cord is disconnected or power supply stops Basic Operations 61 Setting the timer manually POWER If VCR Plus+ is not available in your area, follow the instructions below to set the timer to record programs. Before you start… • Check that the VCR clock is set to the correct time. • Turn on your TV and set it to the video channel. When using a cable box, turn it on. • Insert a tape with its safety tab in place. Make sure the tape is longer than the total recording time. 1 2 3 4 5 6 7 8 9 INPUT SELECT 0 MENU Joystick >/./?/// OK 1 62 • MENU Basic Operations Press MENU and select TIMER SET/ CHECK. 11 / 16MON TIMER SET / CHECK DATE START STOP CH – / –– – : –– – : –– –– – – / –– – : –– – : –– –– – – / –– – : –– – : –– –– – – / –– – : –– – : –– –– – – / –– – : –– – : –– –– – – / –– – : –– – : –– –– – – / –– – : –– – : –– –– – – / –– – : –– – : –– –– – 2 Set the date, start and stop times, channel number and tape speed: PLAY OK 1 Push the joystick to / to highlight each item in turn. 2 Push the joystick to ./> to set each item. To correct a setting, push the joystick to ? to return to that setting and reset. 11 / 16MON TIMER SET / CHECK DATE START STOP CH 11 / 1 8 WED – : – – – : –– – – SP – / –– – : –– – : –– –– – – / –– – : –– – : –– –– – – / –– – : –– – : –– –– – – / –– – : –– – : –– –– – – / –– – : –– – : –– –– – – / –– – : –– – : –– –– – – / –– – : –– – : –– –– – When you set the channel number, the Channel number Station ID Station ID appears on the TV screen. You 11 / 16MON TIMER SET / CHECK can set it while checking the Station ID. DATE START STOP ABC To record the same program every day or the same day every week, push the joystick to . while the date is highlighting. For details, see “Daily/ weekly recording” on the next page. INPUT SELECT 7: –: –: –: –: –: –: –: 0 0 AM –– –– –– –– –– –– –– 8: –: –: –: –: –: –: –: 0 0 AM –– –– –– –– –– –– –– 12 –– –– –– –– –– –– –– SP – – – – – – – To record from a source connected to the LINE –1 IN or LINE –2 IN jacks, press INPUT SELECT to display “L1” or “L2” in the “CH” position. Push the joystick to . to confirm the setting. PLAY OK 4 The cursor appears at the beginning of the line. To enter another setting, move the cursor to the next line and repeat step 2. Basic Operations 3 11 / 1 8 WED – / –– – / –– – / –– – / –– – / –– – / –– – / –– Press the joystick (OK). PLAY OK 5 • POWER Press POWER to turn off the VCR. The indicator appears in the display window and the VCR stands by for recording. When using a cable box, leave it on. continued Basic Operations 63 Setting the timer manually (continued) Daily/weekly recording In step 2 above, push the joystick to . to select the recording pattern. Each time you push the joystick to ., the indication changes as shown below. Push the joystick to > to change the indication in reverse order. the current date n SUN-SAT n MON-SAT n MON-FRI n EVERY SAT ..... n EVERY MON n EVERY SUN n 1 month later n (date counts down) n the current date Tips • To set the channel, you can also use the CH +/– or number buttons. • You can set the channel with the shuttle ring during stop. • To set the tape speed, you can also use the SP/EP button. • When you are recording a program in the SP mode and the remaining tape becomes shorter than the recording time, the tape speed is automatically changed to the EP mode. Note that some noises will appear on the picture when the tape speed is changed. If you want to keep the tape speed, set AUTO TAPE SPEED to OFF in the ADVANCED OPTIONS menu (page 80). • To lock the VCR after setting the timer, see page 61. Notes • If you are using cable box control, you cannot select “L1” or “L2.” • The station ID appears on the TV screen only when you complete Smart Channel Mapping and the VCR receives the program information signal (see page 48). 64 Basic Operations Additional Operations Playing/searching at various speeds 1 2 3 4 5 6 7 8 9 0 ×2 & SLOW · PLAY 0 REW Joystick )# FF/ 03 REW/ · PLAY Playback options Operation View the picture during fast-forward or rewind During fast-forward, keep pushing the joystick to )# FF. During rewind, keep pushing the joystick to 03 REW. Play at high speed • During playback, push the joystick to )# FF or 03 REW. • During playback, keep pushing the joystick to )# FF or 03 REW. When you release the joystick, normal playback resumes. Play at twice the normal speed During playback, press ×2. Play in slow motion During playback or pause, press & SLOW. Play frame by frame During pause, push the joystick to )# FF or 03 REW. Keep pushing the joystick to play one frame each second. Rewind and start play During stop, hold 0 REW on the VCR, and press · PLAY on the VCR. continued Additional Operations 65 Playing/searching at various speeds (continued) Using the shuttle ring on the VCR JOG With the shuttle ring on the VCR, you can operate a variety of playback options. There are two ways for using the shuttle ring, normal mode and jog mode. Shuttle ring To use the shuttle ring in normal mode During playback or pause, turn the shuttle ring clockwise or counterclockwise. Each change in the shuttle ring position changes the playback mode, and the corresponding mark appears on the TV screen for a few seconds in the following way if the on-screen display function is on: Playback mode Normal speed Double speed High speed X2 Mark on the TV screen Slow motion Pause Slow motion in reverse High speed in reverse Double speed in reverse Normal speed in reverse –X2 –X1 To use the shuttle ring in jog mode Use this mode for frame-by-frame playback. Press JOG to enter the jog mode. The JOG button lights up. If you change to the jog mode during any playback mode, the playback pauses so you can see a still picture. Each change in the shuttle ring position shifts the picture one frame. To shift frames in reverse, turn the shuttle ring counterclockwise. The frame shift speed depends on the speed you turn the shuttle ring. To resume normal playback, press JOG again. The JOG indicator goes off. 66 Additional Operations To resume normal playback Press the joystick ·. Tip • Adjust the picture using the TRACKING +/– buttons on the VCR if: – Streaks appear while playing in slow motion. – Bands appear at the top or bottom while pausing. – The picture shakes while pausing. Notes • The sound is muted during these operations. • Tapes recorded in the LP mode on other VCRs can be played back on this VCR but the picture quality cannot be guaranteed. • The picture may have snow: – when playing at high speed in reverse – when playing in reverse slow motion – when playing in reverse. • If the playback mode mark doesn’t appear on the TV screen, press DISPLAY. Additional Operations 67 Searching for a selected point on the tape You can easily find a specific point by moving the pointer on the TV screen. The VCR fast-forwards or rewinds to the point you indicate and starts playback automatically. DISPLAY 1 2 3 4 5 6 7 8 9 0 Joystick ?// 1 Press DISPLAY repeatedly until the bar indication appears on the TV screen. A cursor ( ) indicating the current position of the tape appears on the bar indication. If the cursor does not appear, play the tape a few moments (by pressing the joystick · PLAY or pushing the joystick to )# FF or 03 REW) until the cursor appears. 2 0 120 0 120 Push the joystick to ?// to move the pointer (+) to the point where you want to start playback. The VCR starts searching and the cursor ( ) moves toward the pointer. When the VCR locates the marked point, playback starts. To cancel searching Press the joystick · PLAY or push the joystick to STOP p. To turn off the bar indication Press DISPLAY again. 68 Additional Operations Notes • The figure on the bar indication represents the total time length of the inserted tape as shown below. The total time length may not be displayed correctly for: – tapes other than T-60, T-120, or T-160 – tapes recorded in more than one tape speed mode. Tape type Total time length SP LP EP T-60 or shorter 60 120 180 from T-80 to T-140 120 240 360 T-160 or longer 160 320 480 • If you move the pointer (+) on the bar indication during search, the VCR searches for the new reset point. • With the scroll bar indication on, the joystick ()# FF// and 03 REW/?) on the remote commander work only for moving the pointer (+), while the )# FF and 03 REW buttons on the VCR work normal tape operation. Note, however, if you press these buttons on the VCR, searching is canceled. Additional Operations 69 Skip-searching automatically You can spot check a whole tape quickly. At intervals, the VCR skips playback while searching forward or backward. 1 2 3 4 5 6 7 8 9 0 Joystick )# FF / 03 REW Push the joystick to ) # FF (or 0 3 REW) for two seconds more than two seconds during stop. “SKIP” indicator appears on the TV screen. SKIP The VCR searches forward (or backward) for about two minutes on the counter, then fastforwards (or rewinds) for about ten minutes on the counter. The VCR repeats this operation until it stops at the end (or beginning) of the tape. search forward # ) fast-forward search forward # ) fast-forward To cancel skip-search Push the joystick to · PLAY or p STOP. Note • The VCR automatically fast-forwards (or rewinds) any portion with no recording. 70 Additional Operations Creating a favorite channel list with Station ID 7 8 9 SET 0 CH +/– You can create your favorite channel list of the TV channels with Station ID. You can store up to 10 channels with Station ID and select the channel from your favorite channel list. Joystick >/./?// Creating your favorite channel list 1 SET 2 • CH 3 PLAY Press SET. The FAVORITE CH screen appears on the TV screen. Press CH +/– to select the station ID you want to replace. You can also use the joystick >/. instead. Press the joystick to ?// to select the station ID you want to set. The selected station ID FAVORITE CH 12 15 9 13 19 3 45 43 22 10 ABC CBS MTV HBO HBO2 E! ESPN TNT 22 WGN FAVORITE CH 12 15 27 13 19 3 45 43 22 10 ABC CBS TOP HBO HBO2 E! ESPN TNT 22 WGN OK 4 5 Repeat steps 2 and 3 to set the station IDs as required. SET Press SET. Note • If the TV channel has no station ID, the channel number appears on the TV screen. continued Additional Operations 71 Creating a favorite channel list with Station ID (continued) Selecting a channel from your favorite channel list 7 8 9 SET 0 ENTER CH +/– Joystick >/. OK 1 2 Turn on your TV and set it to the video channel. To choose a channel from a cable box, turn the cable box on. SET 3 • CH 4 ENTER Press SET. Your FAVORITE CH screen appears on the TV screen. Press CH +/– to select the station ID you want to select. You can also use the joystick to >/. instead. The selected station ID FAVORITE CH 12 15 27 13 19 3 45 43 22 10 ABC CBS TOP HBO HBO2 E! ESPN TNT 22 WGN FAVORITE CH 12 15 27 13 19 3 45 43 22 10 ABC CBS TOP HBO HBO2 E! ESPN TNT 22 WGN Press ENTER. You can also use the joystick (OK) instead. Note • If the TV channel has no station ID, the channel number appears on the TV screen. 72 Additional Operations Recording TV programs using the quick timer After starting recording in the normal way, you can have the VCR stop recording automatically after a specified duration. 1 2 3 4 5 6 7 8 9 QUICK TIMER 0 1 While recording, press QUICK TIMER once. The indicator appears in the display window. VIDEO CH EP 2 Press QUICK TIMER repeatedly to set the duration. Each press advances the time in increments of 30 minutes. 0:00 0:30 1:00 10:30 11:00 The duration decreases minute by minute to 0:00, then the VCR stops recording and turns off automatically. To extend the duration Press QUICK TIMER repeatedly to set to the new duration. To stop while recording Press p STOP. Using the quick timer during stop mode 1 2 Press QUICK TIMER. 3 Press QUICK TIMER repeatedly to set the recording duration. The recording starts. Press CH +/– or INPUT SELECT to select the channel you want to record. Additional Operations 73 Checking/ changing/ canceling timer settings POWER CLEAR Before you start… • Turn on your TV and set it to the video channel. 1 2 3 4 5 6 7 8 9 0 MENU Joystick >/./?/// OK 1 2 Press POWER to turn on the VCR. Press MENU and select TIMER SET/CHECK: • If you want to change a setting, go on to the next step. • If you do not need to change the settings, press the joystick (OK), then turn off the VCR to return to recording standby. 3 11 / 16MON TIMER SET / CHECK DATE START STOP CH 11 / 1 8 WED 7 : 0 0 AM 8 : 0 0 AM 6 SP 11 / 2 2 SUN 10 : 3 0 PM 11 : 1 5 PM 5 0 EP MON – SAT 1 : 0 0 AM 3 : 0 0 AM LINE1 EP EVERY SUN 12 : 5 5 PM 1 : 3 0 PM 1 2 SP – / –– – : –– – : –– –– – – / –– – : –– – : –– –– – – / –– – : –– – : –– –– – – / –– – : –– – : –– –– – Push the joystick to >/. to select the setting you want to change: • To change the setting, push the joystick to ?// to highlight the item you want to change, and push the joystick to >/. to reset it. Then, push the joystick to / repeatedly until the cursor appears at the beginning of the line. • To cancel the setting, press CLEAR. 4 Press the joystick (OK). If any timer settings remain, turn off the VCR to return to recording standby. 74 Additional Operations When the timer settings overlap The program that starts first has priority and the second program starts recording only after the first program has finished. If the programs start at the same time, the program listed first in the menu has priority. Program 1 about 20 seconds Program 2 Will be cut off about 20 seconds will be cut off Program 1 Program 2 Additional Operations 75 Recording stereo and bilingual programs Recording stereo programs This VCR automatically receives and records stereo programs. When a stereo program is received, the STEREO indicator lights up. If there is noise in the stereo program, set AUTO STEREO in the ADVANCED OPTIONS menu to OFF. The sound will be recorded in monaural (on both hi-fi and normal audio tracks) but with less noise. For details, see page 80. Recording bilingual programs Normally, this VCR records only the main sound. When a SAP (Second Audio Program) is received, the SAP indicator lights up. To record only SAP sound, set TUNER AUDIO in the ADVANCED OPTIONS menu to SAP. For details, see page 80. Selecting the sound during playback Press AUDIO MONITOR to select the sound you want. (The sound being recorded will not change.) 76 To listen to On-screen display Display window Stereo/main (left and right channels) STEREO STEREO Left channel only LEFT CH STEREO Right channel only RIGHT CH STEREO Monaural No indicator No indicator Additional Operations How sound is recorded on a video tape The VCR records sound onto two separate tracks. Hi-fi audio is recorded onto the main track along with the picture. Monaural sound is recorded onto the normal audio track along the edge of the tape. Monaural sound Normal audio track Hi-fi audio track (main track) Stereo sound (left/right channels) Notes • To play a tape in stereo, you must use the A/V connections. • When you play a tape recorded in monaural, the sound is heard in monaural regardless of the AUDIO MONITOR setting. • If the AUDIO MONITOR button does not function, check that AUDIO MIX in the ADVANCED OPTIONS menu is set to OFF. Additional Operations 77 Searching using the index function The VCR marks the tape with an index signal at the point where each recording begins. Use these signals as references to find a specific recording. The VCR can search up to 99 index signals ahead of or behind the current position. 1 2 1 2 3 4 5 6 7 8 9 0 Insert an indexed tape into the VCR. Press =/+ INDEX SEARCH repeatedly to specify how many index signals ahead or behind you want to search: • To search ahead, press + INDEX SEARCH. • To search backwards, press = INDEX SEARCH. The VCR starts searching and the index number on the TV screen counts down to zero. Playback starts automatically from that point. To stop searching Press p STOP. 78 =/+ INDEX SEARCH Additional Operations INDEX SEARCH 8 Adjusting the picture Adjusting the tracking Although the VCR automatically adjusts the tracking when playing a tape (the indicator flashes in the display window, then goes off), distortion may occur if the tape was recorded in poor condition. In this case, manually adjust the tracking. Press the TRACKING +/– buttons to display the tracking meter. The distortion should disappear as you press one of the two buttons indicator lights up). To resume (the automatic tracking adjustment, eject the tape and reinsert it. NORMAL TRACKING Tracking meter About Adaptive Picture Control (APC) Adaptive Picture Control (APC) automatically improves recording and playback quality by adjusting the VCR to the condition of the video heads and tape. To maintain better picture quality, we recommend that you set APC to ON in the ADVANCED OPTIONS menu (with the APC indicator in the display window lit). For details, see page 80. APC playback The APC function automatically works on all types of tapes, including rental tapes and tapes that were not recorded with APC. APC recording Whenever you insert a tape and first start recording, the VCR adjusts to the tape using the APC function (the APC indicator flashes rapidly). This adjustment is retained until the tape is ejected. Notes • Auto tracking adjustment cannot be guaranteed to work with on tapes recorded in the LP mode on other VCRs. • The APC function does not work if the tape speed is automatically changed from the SP to EP mode during a timer recording, unless the tape has been recorded in the EP mode with the APC function. • There is a delay of a few seconds before the VCR actually starts recording while the VCR analyzes the tape. To avoid the delay, first set the VCR to recording pause (the APC indicator flashes slowly) and press r REC to have the VCR analyze the tape (the APC indicator flashes rapidly). After the APC indicator stops flashing, press P PAUSE to start recording immediately. If you want to start recording quickly without using the APC function, first set the VCR to recording pause (the APC indicator flashes slowly) and press P PAUSE to start recording. Additional Operations 79 Changing menu options 1 2 Press MENU and select ADVANCED OPTIONS. Push the joystick to >/. to select the option to change, then push the joystick to ?// to change the setting. The ADVANCED OPTION menu has 2 pages. To select page 2, push the joystick to . repeatedly until page 2 appears. To select page 1, push the joystick to > repeatedly until page 1 appears. 3 Press the joystick (OK) to return to the original screen. Page 1 ADVANCED OPTIONS AUTO ANT SEL AUTO STEREO AUDIO MIX TUNER AUDIO SHARPNESS page1 ON OFF ON OFF ON OFF MAIN SAP L – – H Use t o s e l ec t an i t e m, t h e n p u s h Page 2 ADVANCED OPTIONS APC DIMMER AUTO TAPE SPEED TAPE SELECT SMART CUE page2 ON OFF ON OFF ON OFF AUTO 180 MEDIUM Use t o s e l ec t an i t e m, t h e n p u s h Menu choices Initial settings are indicated in bold print. 80 Menu option Set this option to AUTO ANT SEL ON if your TV is connected only to VHF/UHF OUT on the VCR. To play a tape , set the TV to the VCR channel (channel 3 or 4). OFF if your TV is connected to both VHF/UHF OUT and LINE OUT on the VCR. To play a tape, set the TV to the VCR input. AUTO STEREO ON to receive stereo programs, OFF to reduce noise. The sound changes to monaural. AUDIO MIX ON to listen to the sound recorded on hi-fi and normal audio tracks at the same time. The AUDIO MONITOR button will not function. OFF to listen to hi-fi and normal audio tracks separately. Select the sound using the AUDIO MONITOR button. TUNER AUDIO MAIN to record the main sound on both hi-fi and normal audio tracks. SAP to record the SAP (Second Audio Program) sound on both hi-fi and normal audio tracks. SHARPNESS L (Low) through H (High) to adjust the sharpness of the picture. L to turn off the sharpness control. APC ON to switch on the APC (Adaptive Picture Control) function and improve picture quality, OFF to switch off APC. DIMMER ON to make the display window dim, OFF to make it brighter. AUTO TAPE SPEED ON to change the timer recording tape speed automatically to the EP mode when the remaining tape becomes shorter than the recording time, OFF to keep the tape speed. TAPE SELECT AUTO or 180 (when using a T-140 or T-180) to select the tape length and display the remaining time correctly. SMART CUE MEDIUM to set the automatic rewinding time on skip playback to a medium length, SHORT to set to short, LONG to set to long. Additional Operations Editing with another VCR How to hook up to record on this VCR This VCR (Recorder) TV LINE-2 IN Other VCR (Player) LINE OUT : Signal flow VMC-810 audio/video cable (not supplied) How to hook up to a stereo system Connect LINE-2 IN AUDIO on this VCR to the audio output jacks on the stereo system, using the RK-C510KS audio cable (not supplied). If the other VCR has a CONTROL S OUT jack for synchronized editing Hook up to record on the other VCR, then connect the VCRs via the CONTROL S jacks. The CONTROL S connection lets you control (pause and release pause) both VCRs from the recording VCR. Notes • Make sure you connect the plugs to jacks of the same color. • If the other VCR is a monaural type and connected to this VCR‘s LINE-2 IN jacks, connect the audio plug to the AUDIO L (white) jack. The sound is recorded on both right and left channels. When connecting to the AUDIO R (red) jack, the sound is recorded only on the right channel. • If you connected this VCR to both the LINE IN and LINE OUT jacks of the other VCR, select the input correctly to prevent a humming noise. • You can also use the LINE-1 IN jacks instead. If the other VCR is a monaural type, the sound is recorded only on the channel whose jack is connected to the audio plug. To record on both right and left channels, connect the audio plug to the AUDIO R/L jacks using a VMC-910MS audio/video cable (not supplied). • If the CONTROL S IN jack is used for S-Link (A/V bus control) with a TV, the CONTROL S connection cannot be used for editing. continued Additional Operations 81 Editing with another VCR (continued) Operation (when recording on this VCR) Before you start editing • Turn on your TV and set it to the video channel. • Press INPUT SELECT to display “L1” or “L2” in the display window. • Press SP/EP to select the tape speed, SP or EP. P PAUSE r REC 1 Insert a source tape with its safety tab removed into the other (playback) VCR. Search for the point to start playback and set it to playback pause. 2 Insert a tape with its safety tab in place into this (recording) VCR. Search for the point to start recording and press P PAUSE. 3 4 Press r REC on this VCR and set it to recording pause. To start editing, press the P PAUSE buttons on both VCRs at the same time. To stop editing Press the p STOP buttons on both VCRs. Tips • To edit more precisely, press the P PAUSE buttons on the VCRs to release pause. • To cut out unwanted scenes while editing, press P PAUSE on this VCR when an unwanted scene begins. When it ends, press P PAUSE again to resume recording (Assemble Editing). Note • If you start recording following the procedure above, the VCR won‘t start recording with the APC function. To record a tape with the APC function, press r REC again during recording pause in step 3 so that the VCR analyzes the tape. Then when you start recording in step 4, press P PAUSE immediately after the APC indicator stops flashing. If you press P PAUSE before the APC indicator stops flashing, the APC function is canceled. 82 Additional Operations Additional Information General setup information Setting the RF unit When connecting the VCR to the TV using only the antenna cable, you must set the RF UNIT switch on the rear of the VCR so that the TV can receive the correct signal from the VCR. TV RF UNIT CH3 CH4 TV/VIDEO CHANNEL +/– 1 Set the RF UNIT switch on the rear of the VCR to CH3 or CH4, whichever channel is not used in your area. If both are used, set the switch to either channel. 2 3 Press POWER to turn on the VCR. 4 Press CHANNEL +/– to display a channel number in the display window. Select an active channel number in your area. 5 Turn on your TV and set it to the channel you selected in step 1 (channel 3 or 4). Press TV/VIDEO to turn on the VIDEO indicator in the VCR’s display window. The selected TV channel broadcast appears on the TV screen. If the channels change when you press CHANNEL +/– on the VCR, you have made the correct setting. Whenever you use the VCR, set the TV to the channel selected in step 1. continued Additional Information 83 General setup information (continued) Attaching the external antenna connector 300-ohm twin lead cable When using a 300-ohm twin lead cable for VHF/UHF antenna, use the EAC-32 antenna connector (not supplied) to connect the antenna to the VCR. 1 2 3 EAC-32 Antenna connector (not supplied) Loosen the screws on the antenna connector. Wind the twin leads around the screws on the antenna connector. Retighten the screws. Attaching a UHF/VHF band mixer 300-ohm twin lead cable When using both 75-ohm coaxial cable and 300-ohm twin lead cable for VHF/ UHF antenna, use the EAC-66 UHF/ VHF band separator/mixer (not supplied) to connect the antenna to the VCR. EAC-66 UHF/VHF band separator/ mixer (not supplied) 75-ohm coaxial cable 1 2 3 4 84 Loosen the screws on the mixer. Wind the twin leads around the screws on the mixer. Retighten the screws. Connect the 75-ohm coaxial cable to the mixer. Additional Information Troubleshooting Symptom Remedy The POWER switch does not function. • Connect the AC power cord securely. • Make sure the VCR is not locked. To unlock, hold POWER down on the VCR until H indicator disappears. The power is turned on but the VCR does not operate. • Moisture condensation occurs. Turn the power off, unplug the AC power cord and leave the VCR to dry for over an hour. The clock has stopped and “–:– –” lights in the display window. • The clock stops if the VCR is disconnected from the wall outlet for more than one hour. Reset the clock (and timer). The playback picture does not appear on the TV screen. • Make sure the TV is set to the channel for the VCR. If you are using a monitor, set it to video input. The picture is not clear. • Adjust the tracking with the TRACKING +/– buttons. • The video heads are dirty (see below). Clean the video heads using the Sony T-25CLD, T-25CLDR, or T25CLW video head cleaning cassette. If these cleaning cassettes are not available in your area, have the heads cleaned at your nearest Sony service facility (a standard service charge will be required). Do not use a commercially available liquid type cleaning cassette other than Sony’s, as they may damage the video heads. • The video heads may have to be replaced. Consult your local Sony dealer for more information. The picture rolls vertically during picture search. • Adjust the vertical hold control on the TV or monitor. The picture has no sound. • The tape is defective. Use a new tape. Playback Clock Power If you have any questions or problems not covered below, please consult your nearest Sony dealer. Symptoms caused by contaminated video heads • Normal picture • Rough picture initial contamination • Unclear picture • No picture (or black & white screen appears) terminal continued Additional Information 85 Symptom Remedy A TV program does not appear on the TV screen. • Make sure the TV is set to the channel for the VCR. If you are using a monitor, set it to video input. TV reception is poor. • Adjust the TV antenna. The tape starts playing as soon as it is inserted. • The safety tab has been removed. To record on this tape, cover the tab hole. The tape ejects when you press r REC. • Check that the safety tab has not been removed. Nothing happens when you press r REC. • Make sure the tape is not at its end. • Select the correct source with the INPUT SELECT button. Select a channel number when recording TV programs; select “L1” or “L2” when recording from other equipment. The timer does not operate. • • • • • • Timer recording Recording Troubleshooting (continued) 86 Additional Information Check that the clock is set. Make sure a tape has been inserted. Check that the safety tab has not been removed. Make sure the tape is not at its end. Make sure a program has been set for timer recording. Make sure your timer settings have not already passed the current time. • Check that the cable box is turned on. • The clock stops if the VCR is disconnected from the wall outlet for more than one hour. Reset the clock and timer. • When you use cable box control, make sure the CABLE BOX CONTROL option is set to ON. Others Symptom Remedy A tape cannot be inserted. • Check that a tape isn’t already in the tape compartment. The remote commander does not function. • Make sure you are pointing the remote commander at the remote sensor on the VCR. • Replace all the batteries in the remote commander with new ones if they are weak. • If you are not using S-Link, make sure that both miniplugs are unconnected. The channels on the VCR cannot be changed. • Make sure the CABLE BOX CONTROL option is set to OFF. The tracking meter does not appear on the screen. • The recording condition of the tape is very poor and tracking cannot be adjusted. You cannot control other TVs. • Set your TV’s code number. The code number resets to 1 when you replace the batteries of the remote commander. The VCR needs to be cleaned. • Clean the cabinet, panel and controls with a dry, soft cloth, or a soft cloth slightly moistened with a mild detergent solution. Do not use any type of solvent, such as alcohol or benzine. Additional Information 87 Specifications System Timer section Format VHS NTSC standard Video recording system Rotary head helical scanning FM system Video heads Double azimuth four heads Video signal NTSC color, EIA standards Tape speed SP: 33.35 mm/s (1 3/8 inches/s) EP: 11.11 mm/s (7/16 inches/s) LP: 16.67 mm/s (11/16 inches/s), playback only Maximum recording/playback time 8 hrs. in EP mode (with T-160 tape) Fast-forward and rewind time Approx. 3 min. (with T-120 tape) Clock Quartz locked Timer indication 12-hour cycle Timer setting 8 programs per month (max.) Power back-up Built-in self-charging capacitor Back-up duration: up to 1 hour at a time Channel coverage VHF 2 to 13 UHF 14 to 69 CATV A-8 to A-1, A to W, W+1 to W+84 Antenna 75-ohm antenna terminal for VHF/UHF Power requirements 120 V AC, 60 Hz Power consumption 24 W Operating temperature 5 °C to 40 °C (41 °F to 104 °F) Storage temperature – 20 °C to 60 °C (– 4 °F to 140 °F) Dimensions Approx. 430 × 107 × 287 mm (w/h/d) Approx. (17 × 4 1/ 4 × 12 3/8 inches) including projecting parts and controls Mass Approx. 4.3 kg (9 lb 8 oz) Inputs and outputs Supplied accessories LINE-1 IN and -2 IN VIDEO IN, phono jack (1 each) Input signal: 1 Vp-p, 75 ohms, unbalanced, sync negative AUDIO IN, phono jack (2 each) Input level: 327 mVrms Input impedance: more than 47 kilohms LINE OUT VIDEO OUT, phono jack (1) Output signal: 1 Vp-p, 75 ohms, unbalanced, sync negative AUDIO OUT, phono jack (2) Standard output: 327 mVrms Load impedance: 47 kilohms Output impedance: less than 10 kilohms S-LINK (CONTROL S IN) Mini jack (1) CABLE BOX CONTROL (CONTROL S OUT) Stereo mini jack (plug in power) (1) Remote commander (1) Size AA (R6) batteries (2) 75-ohm coaxial cable with F-type connectors (1) Audio/video cable (3 phono, 1 mini to 3 phono, 1 mini) (1) Cable Mouse (cable box controller) (1) Jack cover (1) Tuner section 88 General Additional Information Design and specifications are subject to change without notice. Index to parts and controls Refer to the pages indicated in parentheses ( ) for details. Front panel 1 POWER switch/indicator (60) 0 p STOP button (82) 2 SP/EP button (55, 60) !¡ Shuttle ring (56, 66) 3 TV/VIDEO button (56) !™ P PAUSE button (82) 4 Tape compartment !£ ) FF (fast forward) button (53, 65) 5 CHANNEL/TRACKING +/– buttons (55, 67, 79) !¢ 0 REW (rewind) button (53, 65) 6 6 EJECT button (53) !∞ EASY SET UP button (11, 14, 17, 20, 24, 27) 7 · PLAY button (52, 65) !§ INPUT SELECT button (55, 57) 8 JOG button (66) !¶ Remote sensor (5) 9 r REC (record) button (55, 82) !• LINE-2 IN VIDEO/AUDIO L/R jacks (81) continued Additional Information 89 Index to parts and controls (continued) Display window STEREO VIDEO APC SAP LP SP EP 1 Timer indicator (60) 7 Tracking indicator (79) 2 SAP (Second Audio Program) indicator (76) 8 Child Lock indicator (61) 3 STEREO indicator (76) 4 Tape speed indicator (55) 5 VIDEO indicator (56, 83) 6 APC (Adaptive Picture Control) indicator (79) 90 CH Additional Information 9 Line/channel indicator (55, 82) 0 Time counter/clock indicator (53) !¡ Remaining time indicator (56) !™ Tape/recording indicator (55) Rear panel 1 AC power cord (7) 2 S LINK (CONTROL S IN) jack (9, 81) 3 CABLE BOX CONTROL (CONTROL S OUT) jack (10, 23) 4 LINE-1 IN AUDIO L/R/VIDEO jacks (23, 81) 5 RF (Radio Frequency) UNIT switch (83) 6 VHF/UHF IN connector (10, 13, 16, 19, 23, 26) 7 VHF/UHF OUT connector (10, 13, 16, 19, 23, 26) 8 LINE OUT AUDIO L/R/VIDEO jacks (8) continued Additional Information 91 Index to parts and controls (continued) Remote commander 1 TV RECEIVER / VIDEO remote control switch (5) 2 6 EJECT button (53) 3 COUNTER RESET button (53) 4 DISPLAY button (53, 68) 1 2 3 4 5 6 7 8 9 0 5 =/+ INDEX SEARCH buttons (78) 6 CLEAR button (74) 7 QUICK TIMER button (73) 8 INPUT SELECT button (55, 57, 82) 9 SP (Standard Play)/EP (Extended Play) button (55) 0 ×2/RECEIVER VOL (volume) + button (5, 65) !¡ r REC (record) button (55) !™ MUTING button (5) !£ & SLOW/RECEIVER VOL (volume) – button (5, 65) !¢ MENU button (31, 80) 92 Additional Information !∞ POWER switch (60) !§ COUNTER/REMAIN button (56) !¶ AUDIO MONITOR button (76) !• TV/VIDEO button (83) !ª VCR Plus+ button (59) 1 2 3 4 5 6 7 8 9 0 @º Number buttons and ENTER button (50, 60) @¡ SET button (60, 71) @™ CH (channel) +/– buttons (55) @£ VOL (volume) +/– buttons @¢ SMART CUE button (53) @∞ Joystick · PLAY/OK (52, 65) P PAUSE/> (53) p STOP/. (53) 03 REW (rewind)/? (53, 65) )# FF (fast forward)// (53, 65) Additional Information 93 Index A, B E, F, G R Accessories supplied 4 Adjusting picture 79 tracking 79 AFT (Auto Fine Tuning) 46 Antenna hookup 16 APC (Adaptive Picture Control) 79 Audio track 77 Audio/video (A/V) hookup 8 Auto Clock Set feature 32 Auto Tape Speed 80 Easy Set Up 11, 14, 17, 20, 24, 27 Editing 82 EP mode 55 Recording 54 bilingual programs 76 SAP broadcasts 76 saving 56 stereo broadcasts 76 using VCR Plus+ 59 while watching another program 56 C Cable Box Control cable box code number chart 39 setting 38 Cable hookup 10 Cable Mouse 38 Canceling timer settings 74 Changing timer settings 74 Channel line-up chart 47 Child Lock 61 Cleaning the video heads 85 Clock setting 34 Connecting cable TV 10 external antenna connector 84 UHF/VHF band mixer 84 Counter 53 D Disabling channels 45 DSS (Digital Satellite System) 23 Dubbing. See Editing. 94 Additional Information H Hi-fi audio track 77 I, J, K S Index searching 78 L Language selecting 31 Locking the VCR 61 LP mode 57, 67 M Monitoring audio during playback 76 T, U N, O Normal audio track 77 P Picture adjustment. See Adjusting Playback 52 at various speeds 65 frame-by-frame 65 skip 53 slow motion 65 Presetting channels 43 Q Quick timer Safety tab 56 SAP (Second Audio Program) 76 Searching at various speeds 65 for a selected point 68 skip-search 70 S-Link 8 SP mode 55 73 Timer recording 62 canceling timer settings 74 changing timer settings 74 checking timer settings 74 daily/weekly recording 60 overlapping timer recordings 75 using VCR Plus+ 59 Tracking adjustment. See Adjusting V, W, X, Y, Z VCR Plus+ channel setup 47 recording 59 Additional Information 95