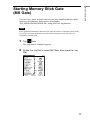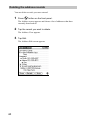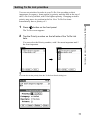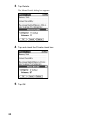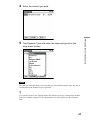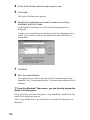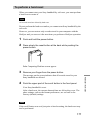
1
4-649-957-12 (2) Personal Entertainment Organizer PEG-S300 Operating Instructions © 2000 Sony Corporation WARNING To prevent fire or shock hazard, do not expose the unit to rain or moisture. To avoid electrical shock, do not open the cabinet. Refer servicing to qualified personnel only. Owner’s Record The model number and serial number are located at the rear of the product. Record the serial number in the space provided below. Refer to them whenever you call upon your Sony dealer regarding this product. Model No. PEG-S300 Serial No.______________ The socket - outlet shall be installed near the equipment and shall be easily accessible. If you have question about this product, call the Sony Customer Information Center at 1877-760-7669; or write to the Sony Customer Information Center at 12451 Gateway Boulevard Fort Myers, FL 33913. The number below is for FCC-related matters only. Declaration of Conformity Trade Name: SONY Model No.: PEG-S300 Responsible Party: Sony Electronics Inc. Address: 1 Sony Drive, Park Ridge, NJ 07656 USA Telephone No.: 201-930-6972 This device complies with part 15 of the FCC Rules. Operation is subject to the following two conditions: (1) This device may not cause harmful interference, and (2) this device must accept any interference received, including interference that may cause undesired operation. CAUTION You are cautioned that any changes or modifications not expressly approved in this manual could void your authority to operate this equipment. The supplied interface cable must be used with the equipment in order to comply with the limits for a digital device pursuant to Subpart B of Part 15 of FCC Rules. NOTE: This equipment has been tested and found to comply with the limits for a Class B digital device, pursuant to Part 15 of the FCC Rules. These limits are designed to provide reasonable protection against harmful interference in a residential installation. This equipment generates, uses, and can radiate radio frequency energy and, if not installed and used in accordance with the instructions, may cause harmful interference to radio communications. However, there is no guarantee that interference will not occur in a particular installation. If this equipment does cause harmful interference to radio or television reception, which can be determined by rotating the equipment off and on, the user is encouraged to try to correct the interference using one or more of the following measures:– Reorient or relocate the receiving antenna. – Increase the separation between the equipment and receiver. – Connect the equipment into an outlet on a circuit different from that to which the receiver is connected. – Consult the dealer or an experienced radio/TV technician for help. 2 On the supplied software • Copyright laws prohibit reproducing the software or the software manual in whole or in part, or renting the software without the permission of the copyright holder. • In no event will SONY be liable for any financial damage or loss of profits, including claims made by third parties, arising out of the use of the software supplied with this player. • In the event a problem occurs with this software as a result of defective manufacturing, SONY will replace it at SONY’s option or issue a refund. However, SONY bears no other responsibility. • The software provided with this player cannot be used with equipment other than that which it is designated for use with. • Please note that, due to continued efforts to improve quality, the software specifications may be changed without notice. Program 2000 Sony Corporation, 2000 Palm, Inc. or its subsidiaries. All rights reserved. Documentation 2000 Sony Corporation Memory Stick Gate Sony, Memory Stick, the Memory Stick logo, OpenMG, and PictureGear are trademarks of Sony Corporation. Walkman is a registered trademark of Sony corporation Graffiti, HotSync, PalmModem, and Palm OS are registered trademarks, and the HotSync logo and Palm are trademarks of Palm, Inc. or its subsidiaries. IBM and PC/AT are registered trademarks of International Business Machines Corporation. Microsoft, Windows, Outlook and the Windows 98 logo are registered trademarks of Microsoft Corporation. MMX and Pentium are registered trademarks of Intel Corporation. AvantGo, the AvantGo Client and the AvantGo logo are registered trademarks of AvantGo, Inc. TrueSync is a registered trademark of Starfish Software, Inc. QuickTime and the QuickTime logo are trademarks used under license. QuickTime is registered in the U.S. and other countries. All other trademarks are trademarks of their respective owners. CAUTION Please contact your nearest Sony dealer regarding the problem you are experiencing with your Sony product. 3 Table of Contents About this manual ............................. 8 Managing applications ....................... 9 Using the Applications Launcher ..................................................... 9 Selecting applications .................. 9 Categorizing applications .......... 10 Changing the Applications Launcher display ......... 11 Memory Stick Gate Using Memory Stick media ............. 13 To insert/remove Memory Stick media ........................... 13 To enable write-protection ........ 15 To format Memory Stick media ..................................... 16 Starting Memory Stick Gate (MS Gate) .......................... 17 Copying data in the Sony handheld to Memory Stick media ......... 19 Copying data on Memory Stick media to the Sony handheld ........................................... 21 Deleting the data in the Memory Stick media ......... 23 MS Gate menu commands ............... 24 Tools menus ............................... 24 Options menus ........................... 24 Managing Schedules and Events (the Date Book) What you can do with the Date Book ........................................... 25 Scheduling events ............................ 26 To schedule a timed event for the current date .................. 26 4 To schedule a timed event for another date ................. 28 To schedule an untimed event ... 29 Scheduling repeating or continuous events ........ 30 Changing the Date Book view ......... 33 To display the Date Book views ..................................... 33 Working in Week view .............. 34 Working in Month view ............ 35 Working in Agenda view ........... 36 Changing Date and Time view .. 37 Editing the events created in the Date Book .................................. 38 Changing a time for an event ..... 38 Changing a date for an event ..... 39 Setting an alarm ......................... 40 Setting events as the private data ..................................... 42 Deleting events .......................... 43 The Date Book menu commands .... 44 The Date Book Record menus ... 44 The Options menus .................... 45 Managing Addresses and Phone Numbers (the Address Book) What you can do with the Address Book .................................. 47 To create a new Address Book record ........................................... 48 Pasting images to address information ........................................... 50 To view address records .................. 53 To search address records ................ 56 To edit address records .................... 57 Modifying the address records .. 57 Duplicating an address record ... 58 Deleting the address records ...... 60 Managing the Tasks and Things to Do (the To Do List) What you can do with the To Do List ........................................... 68 Creating To Do List items ............... 69 Viewing To Do List items ............... 70 Changing the To Do List display by category .................. 70 Setting To Do List priorities ...... 71 Checking off To Do List items ........ 72 Changing priorities and due dates ... 73 Assigning a category ................. 73 Changing the due date of a To Do item .................. 74 Deleting items from the To Do List ........................................... 76 Viewing completed and due items in the To Do List ................... 77 The To Do List menu commands .... 79 The To Do List Record menus .. 79 The Options menus .................... 80 Using the Memo Pad (the Memo Pad) What you can do with the Memo Pad ........................................... 81 Creating memos ............................... 82 Reviewing memos ........................... 84 Sorting memos ................................. 85 Setting the display order ............ 86 Editing memos ................................. 87 Assigning a category ................. 87 Defining a memo as a private memo ........................... 87 Deleting the existing memos ..... 89 Memo Pad menu commands ........... 90 The Memo Pad Record menus .. 90 The Options menus .................... 92 Managing Expenses (the Expense) What you can do with the Expense ........................................... 93 Recording expenses ......................... 94 Sorting Expense items ..................... 96 Changing the date of an Expense item ........................................... 97 Adding detailed information to an Expense item ..................... 99 Printing an expense report ............. 101 Changing the currency and symbols display ............................. 103 Changing the currency ............. 103 Creating a new currency symbol ................................... 105 The Expense menu commands ...... 107 The Expense Record menus .... 107 The Options menus .................. 107 Using the Calculator (the Calculator) Calculating with the Calculator ..... 108 Using the Calculator buttons ... 108 The Calculator menu commands ... 110 The Calculator Edit menu ........ 110 The Options menus .................. 110 5 Memory Stick Gate Specifying the category of an address record .............. 62 Changing the Address Book Preferences .................. 63 The Address Book menu commands ........................................... 65 The Address Book Record menus ..................................... 65 The Options menus .................... 67 Handy Functions Finding records .............................. 111 Using the Find option .............. 111 Using the Phone Lookup option ................................... 113 Entering the owner information ..... 115 In case you assigned the password using the security application ... 116 Locking your Sony handheld by passwords ........................ 119 Protecting data ............................... 122 Assigning a password .............. 122 Changing and deleting passwords ................................... 124 Masking and hiding records .... 125 Viewing the private records ..... 126 Beaming between Palm OS PDA .. 128 Beaming information ............... 128 To beam a record, business card, category of records .... 129 To receive beamed information ................................... 130 Tips on beaming information .. 131 Edit menus ..................................... 132 To use the Edit menu ............... 132 Choosing fonts ............................... 134 To change the font style .......... 134 Installing Add-on Applications in Sony Handheld Add-on applications you can install ......................................... 135 Installing applications from Memory Stick media ...................... 136 Installing applications from a computer .......................... 137 Deleting an add-on application ...... 139 Installing accompanied software to a computer .......................... 140 6 Installing PictureGear Lite ...... 140 Installing TrueSync ................. 141 Installing AvantGo .................. 141 Exchanging and Updating Data Using HotSync Operations What you can do with HotSync ..... 142 Performing HotSync ...................... 143 When performing HotSync for the first time .................... 143 Performing HotSync with the cradle (local HotSync) ................................... 144 Changing the HotSync settings ..... 146 Customizing HotSync application settings ............................. 147 Creating a user profile ................... 149 Creating a profile ..................... 149 Transferring a created profile .. 150 Synchronizing with external data created on the computer (File Link) ....................... 151 Customizing your Sony handheld (Preferences) What you can do with Preferences ......................................... 152 Viewing Preference ................. 152 Assigning applications to buttons ................................... 153 Changing the full-screen pen stroke activities ................ 155 Assigning applications to HotSync buttons ............................. 157 Changing the digitizer preferences ......................................... 158 Formatting the time, date, and numbers ........................... 159 To choose a country default .... 159 To choose the time, date, and numbers formats ........ 160 Memory Stick Gate Setting the general preferences ...... 163 To set the time ......................... 163 To set the date .......................... 163 Setting the auto shutoff ............ 164 Setting sounds .......................... 165 Turn On/Off the Beam Receive ................................... 165 Additional information Troubleshooting ............................. 166 Operating problems ................. 166 Tapping and Writing problems ................................... 167 Application problems .............. 168 HotSync problems ................... 169 Beaming problems ................... 172 Rechanging problems .............. 172 Passward problems .................. 173 Memory Stick media problems ................................... 173 Precautions .................................... 174 Notes on use ............................ 174 Notes on charging .................... 175 Resetting your Sony handheld ....... 176 To reset (soft reset) .................. 176 To perform a hard reset ........... 177 Getting Help .................................. 178 Specifications ................................ 179 Limited Warranty Statement ......... 180 Index .............................................. 184 7 About this manual This guide explains how to: Use an application with a built-in Sony Personal Entertainment Organizer (hereafter referred to as Sony handheld) Install an application Synchronize data with your computer (HotSync® software) Configure Preferences For an overview of Sony handheld, see “Read This First.” 8 Memory Stick Gate Managing applications This chapter explains how to switch between applications on the Sony handheld, how to personalize application settings, and how to categorize applications into related groups. Using the Applications Launcher The Applications Launcher displays all the available applications on the Sony handheld by default. You can also display selected applications by arranging them into categories. To open the Applications Launcher Tap icon. Tap the Home icon Selecting applications The Sony handheld is equipped with a variety of applications. All the applications installed on the Sony handheld appear in the Applications Launcher. In addition to providing a way for you to open applications, the Applications Launcher displays the current time, battery level, and application category. To open an application, choose from the following options • Tap the Home icon , then tap the icon of the application you want to open. If you have many applications installed on the Sony handheld, tap the scroll bar to see all the available applications. 9 • Top the Home icon , then rotate the Jog Dial to select the application. Push the Jog Dial to launch the selected application. , , or • Press an application button display the selected application immediately. on the front panel to To switch between applications Tap the Applications icon or press an application button on the front panel of the Sony handheld. The Sony handheld automatically saves your work in the current application and displays it when you return to that application. Categorizing applications The category feature enables you to manage the number of application icons that appear onscreen in the Applications Launcher. You can assign an application to a category and then display a single category or all your applications. To categorize an application 1 Tap icon, on the front of the Sony handheld. 2 Tap icon. 3 From the App menu, tap Category. 4 Tap the drop-down list next to each application. z To create a new category for an application, tap Edit Categories from the application’s drop-down list. Tap New, enter the category name, then tap OK to add the category. Tap OK. 5 10 Tap Done. To display applications by category Tap 2 Do one of the following: Memory Stick Gate 1 icon. • Tap the Home icon categories. repeatedly to cycle through all the • Tap the drop-down list in the upper right corner of the screen; then tap the category you want to display. • Push the Jog Dial repeatedly. Changing the Applications Launcher display By default, the Applications Launcher displays applications as icons. As an alternative, you can display applications in a list format. To change the view of applications 1 Tap icon. 2 Tap icon. 3 Tap the Options, then tap Preferences. 4 Tap the View By dropdown list and select List. 5 Tap OK. 11 To display the last-selected category of applications 1 Tap icon. 2 Tap icon. 3 Tap Options, then tap Preferences. 4 In the Preferences dialog box, tap Remember Last Category check box. 5 Tap OK. Each time you return to the Applications Launcher, the last category of applications you selected is displayed. If you do not select the Remember Last Category option, all applications are displayed when you select the Applications Launcher. 12 Using Memory Stick media This new compact, portable, and versatile IC recording medium has a data capacity exceeding that of a floppy disk. The media is specially designed for exchanging and sharing digital data with compatible products. Because it is removable, the media can be used for external data storage. You will find it easy to exchange data between Sony handhelds, or by using a Memory StickTM media, between your computer and a Sony handheld. The supplied software, Memory Stick Gate (MS Gate) is used to exchange Memory Stick media data for your Sony handheld. Notes on a MagicGate Memory Stick media The Sony handheld does not support MagicGate Memory Stick media (MagicGate Memory Stick is for copyright-protected files, e.g., audio files). If you attempt to insert a MagicGate Memory Stick media into the Memory Stick slot and operate by using MS Gate or Windows® Explorer, the copyright protected files or directories may be permanently damaged or corrupted. Use a device that supports the MagicGate Memory Stick media such as a Memory Stick Walkman®, or a Sony VAIO® computer with software such as OpenMGTM Jukebox. To insert/remove Memory Stick media Insert the Memory Stick media into the Memory Stick slot with the arrow facing up and toward the slot. Memory Stick indicator Lights orange while accessing Memory Stick media Note • Insert the Memory Stick media in the right direction. If the Memory Stick media is forced in the wrong way, it may be damaged. 13 Memory Stick Gate Memory Stick Gate To remove Memory Stick media First, make sure that data is not being written on or read from the Memory Stick media. Then gently push the Memory Stick media in (like a button). The Memory Stick media pops out a little from the Sony handheld, then just pull the Memory Stick media out. k Push the Memory Stick media Pull the Memory Stick media out Notes on using the Memory Stick media When you use a Memory Stick media, follow these precautions: • Do not touch the terminal parts with your fingers or with any metal object. • • • • Do not allow any mechanical shock, stress, or blow. Do not attempt any modification. Keep it dry. Avoid using or keeping in places subject to: – High temperatures, or direct sunlight, such as in a parked car – high humidity or corrosive air – static electricity. • Carry and store in the original case. • Make backups of important data. • Do not remove the Memory Stick media while data is being accessed. • Data may be lost or damaged if: – the Memory Stick media is removed while data is being accessed. – the Memory Stick media is used in a place subject to static electricity. • If the Sony handheld battery is not sufficient, you cannot exchange data with the Memory Stick media. 14 Memory Stick Gate Do not format Memory Stick media for Sony handheld with any application other than MS Gate. Otherwise, the Memory Stick media might not work correctly. When you insert a Memory Stick media that was initialized by another device, a dialog box appears asking if you want to format the Memory Stick media. If you format it, you can use the Memory Stick media in your Sony handheld. Note however, that all the data already stored on that Memory Stick media will be deleted. With some HACK software (e.g., DA software, etc.), your Sony handheld might not recognize that a Memory Stick media is removed or inserted. Close these applications when you use Memory Stick media. To enable write-protection Memory Stick media include a write-protect tab so that important data will not be deleted by mistake. Slide the tab to the right for write-protect mode, or to the left for unprotect mode. xNot write-protected Slide the tab to the left for not write-protect mode. You can write data. xWrite-protected Slide the tab to the right for write-protect mode. You can read but not write data. Use the write-protect mode when you do not want to write or delete data on the inserted Memory Stick media. Back side of the Memory Stick media. LOCK Not writeprotected Writeprotected LOCK LOCK 15 To format Memory Stick media Commercially available Memory stick media are already formatted and you can use them as soon as you buy them. Follow this procedure if you need to format Memory Stick media again: 1 Tap icon. The Application Launcher appears. 2 Rotate the Jog DialTM to select MS Gate, then press the Jog Dial. MS Gate starts up. 3 Tap icon. The Menu screen appears. 4 Tap Option-Format. The confirmation message appears. 5 Tap OK. To cancel formatting Tap Cancel instead of OK in step 5 above. zWhat is formatting Formatting defines the recording format for the Memory Stick media so that you can access data with your Sony handheld. Notes • When you format Memory Stick media on which data is already stored, that data will be deleted. Be mindful that you do not delete important data by mistake. • Be sure to use your Sony handheld to format Memory Stick media if you intend to use it with your Sony handheld. If you use the computer to format Memory Stick media for use with a Sony handheld, some data may not be accessed correctly. 16 • If you failed to initialize the Memory Stick media as a result of pulling out it during initialization or other, the Memory Stick media is not recognized with your computer. In this case, remove the Memory Stick media and reinstall it, then initialize it again. Memory Stick Gate Starting Memory Stick Gate (MS Gate) You can copy, move or delete data in your Sony handled and also in the directory on a Memory Stick media (stored under \PALM\PROGRAMS\MSFILES), using MS Gate Application. Note Some applications handle the data stored in other directories in a Memory Stick media. You need to use each application to perform data operation, because they are not compatible with MS Gate. 1 Tap icon. The Application Launcher appears. 2 Rotate the Jog Dial to select MS Gate, then press the Jog Dial. 17 MS Gate starts up and data lists appear on the Sony handheld screen. Tap this icon to view the Sony handheld or Memory Stick media content information. With each tap of the icon, the content information switches between the Sony handheld and Memory Stick media. type : Kind of file size : Size of file creator : Creator ID of file version : Version of file Display the files which belongs to the same creator (ID) as one grouped item. Tap this icon to view the Sony handheld or Memory Stick media content information. Note If the “Handheld full” dialog box appears during startup MS Gate, no data is shown. In order to increase the space, delete unnecessary data or applications from your Sony handled. 18 Not only save data onto your computer using the HotSync but also you can save the data inside the Sony handheld to a Memory Stick media by using MS Gate. Note A Memory Stick media cannot be used while the remaining battery power is low, because duplicating data consumes battery power. In that case, connect the AC adapter. 1 Insert a Memory Stick media into the Sony handheld. 2 Tap icon. The Application Launcher appears. 3 Rotate the Jog Dial to select MS Gate, then press the Jog Dial. MS Gate starts, and a list of data in the Sony handheld is displayed. 4 Select the data you want to copy to the Memory Stick media by tapping. z You can tap and select multiple files. Note You cannot copy data marked with (no-copy mark). 19 Memory Stick Gate Copying data in the Sony handheld to Memory Stick media 5 Tap COPY. The data selected in step 4 is copied to the Memory Stick media. To copy all data as one batch Tap SelectAll in step 4 above. To cancel the selection of selected data Tap ClearAll. Moving the data in the Sony handheld to a Memory Stick media If there is not much free memory space of the Sony handheld, it is convenient to move the data, instead of copying, to the Memory Stick media. In step 5 above, tap MOVE. The data on the Sony handheld is deleted after saving on the Memory Stick media. 20 Memory Stick Gate Copying data on Memory Stick media to the Sony handheld You can also copy data saved on a Memory Stick media to the Sony handheld by using MS Gate. 1 Insert the Memory Stick media into the Sony handheld. 2 Tap icon. The Application Launcher appears. 3 Rotate the Jog Dial to select MS Gate, then press the Jog Dial. MS Gate starts and a list of data on the Sony handheld is displayed. 4 Press the Jog Dial. You can also select MS from the dropdown list in the upper right corner. You can also select MS by tapping the tab which has displayed. A list of data on the Memory Stick media is displayed. 21 5 Select the data you want to copy to the Sony handheld by tapping. z Make sure your Sony handheld has enough space before copying. 6 Tap COPY. The data selected in step 5 in the Memory Stick media is copied to the Sony handheld. To copy all the data at once Tap SelectAll in step 5 above. To cancel the selection of the selected data Tap ClearAll. If you want to move the data in the Memory Stick media to the Sony handheld You can also move the data, instead of copying, from the Memory Stick media to the Sony handheld. Tap MOVE in step 6 above. The data in the Memory Stick media is deleted after saving on the Sony handheld. 22 Memory Stick Gate Deleting the data in the Memory Stick media You can delete unnecessary data saved on the Memory Stick media by using MS Gate. 1 Insert the Memory Stick media in the Sony handheld. 2 Tap 3 Turn the Jog Dial to select MS Gate, then press the Jog Dial. icon. MS Gate starts and a list of data in the Sony handheld is displayed. 4 Press the Jog Dial. A list of data in the Memory Stick media is displayed. You can also tap the tab which has displayed to select MS. 5 Select the data to delete by tapping. 6 Tap DELETE. The data in the Memory Stick media you selected in step 5 is deleted. To delete all data at once Tap SelectAll in step 5 above. To cancel the selection of selected data Tap ClearAll in step 6 above. 23 MS Gate menu commands MS Gate uses unique menu commands for exchanging data between a Sony handheld and a Memory Stick media. Tools menus The contents of the Tools Menu depend on the displayed screen. Select All Selects all data displayed in the tab you select. Clear All Cancels the selected data. MOVE Moves selected data to the Sony handheld or Memory Stick media. The Move files screen appears. Tap OK. COPY Copies selected data to the Sony handheld or Memory Stick media. The Copy files screen appears. Tap OK. DELETE Deletes selected data from the Sony handheld or Memory Stick media. The Delete files screen appears. Tap OK. Options menus Format Formats the Memory Stick media you inserted in the Sony handheld. For more information, see “To format a Memory Stick media” on page 16. About MS Gate Shows the version information of MS Gate. 24 Managing Schedules and Events (the Date Book) The Date Book lets you quickly and easily schedule appointments or any activity associated with a date or date and time. When you open the Date Book, the current date and a list of times for a standard business day are displayed. Use the Date Book to: • Schedule events: timed events, which have both times and dates; untimed events, for example, birthdays or anniversaries; repeating events, such as a weekly meeting held on the same day at the same time; continuous events, such as a vacation or three-day conference; and all day events, which reflect the default hours of a day as set by the user. • Display your schedule in different ways: by Day, Week, Month, or Agenda view. • Set an alarm to sound minutes, hours, or days before a scheduled appointment. • Attach notes to events to describe or clarify the Date Book entries. • Rearrange or delete events from your schedule. To open the Date Book Press the Date Book button on the frontpanel. Today’s schedule appears. The date is displayed at the top left of the screen. z Press the Date Book button repeatedly to cycle through the Day, Week, Month, and Agenda views. The Date Book views are displayed at the bottom left of the screen. Date Book button 25 Managing Schedules and Events (the Date Book) What you can do with the Date Book Scheduling events You can use the Date Book to keep a variety of events you will carry out in a day as plans. When you start the Date Book, it initially displays a screen showing the working time slot for the day. When you make a plan, its contents are displayed to the side of the time and the time slot is automatically set to 1 hour. You can also make plans, such as birthdays, holidays, and anniversaries, in which only the date is fixed but neither start nor end times are set. The untimed events appear at the top of the Date Book screen marked with mark. To schedule a timed event for the current date 1 Press button on the front panel. The Date Book starts up. 2 26 With the current day selected, tap the line next to the time that corresponds to the start of the event. 3 Enter a description of the event. You can enter up to 255 characters in length. If the event is one hour long, and skip to Step 7. If the event is longer or shorter than an hour, tap directly on the time to open the Set Time dialog box. 5 Set the duration of the event in either of the following ways: • Tap the time columns in the Set Time dialog box to set the Start Time; Tap End Time; then tap the time columns to set the End Time. • Tap All Day if the event lasts all day. (The default hours of a standard business day are set by the user, and may be changed using the Preferences command in the Date Book application.) 6 Tap OK. 27 Managing Schedules and Events (the Date Book) 4 7 Tap a blank area at an edge of the screen to deselect the event. Note If an event has the same start and end time, the time is only displayed once. z You can open the Set Time dialog box (to select a start time) by making sure no event is selected, and then writing a number on the number side of the Graffiti writing area. To schedule a timed event for another date 1 Press button on the front panel. The Date Book starts up. 2 Select the date you want in one of the following ways: (A) Tap the day of the week on top of the Date Book screen. To move to another week, tap a scroll arrow shown on both sides of the day of week area. (B) Tap Go To. The Go To Date dialog box appears. Specify the year, month, and day. 28 3 Complete the steps “To schedule a timed event for the current date.” In the Go to Date dialog box, you can also use the scroll button on the front panel to move forward or backward one month at a time. To schedule an untimed event 1 Select the date that you want for the event as described in “To schedule an event for another date.” 2 Tap New. 3 Tap No Time, so that no start or end times are defined for the new event. 4 Enter a description of the event. 29 Managing Schedules and Events (the Date Book) z 5 Tap a blank area on the screen to deselect the untimed event. z You can create a new untimed event by making sure no event is selected and then writing letters in the Graffiti writing area. When you start writing, the untimed event appears at the top of the screen. Changing the timed event to the untimed event 1 Tap the time of the event in the Date Book screen. Set Time screen appears. 2 Tap No Time. Scheduling repeating or continuous events The Repeat function lets you schedule events that recur at regular intervals or extend over a period of consecutive days. Example of repeating or continuous events Repeating events include a birthday and a weekly guitar lesson that falls on the same day of the week and the same time of day. Continuous events might include a business trip or a vacation. 1 Press button on the front panel. The Date Book starts up. 2 Tap the description of the event. 3 Tap Details. The Event Details dialog box appears. 30 4 Tap Repeat. The Change Repeat dialog box appears. Tap either Day, Week, Month, or Year to set how often the event repeats. For a continuous event, tap Day. 6 Enter a number that corresponds to how often you want the event to repeat on the every line. For example, if you select Month and enter the number 2, the event repeats every other month. 7 If you tapped Day in Step 5, tap End on, and from the dropdown list, tap Choose Date. The Ending On screen appears. Select the ending day in the screen. 8 Tap OK. The Date Book screen returns. Make sure that is displayed to the right of the Date Book item. 31 Managing Schedules and Events (the Date Book) 5 About scheduling repeating or continuous events • If you change the start date of a repeating event, your Sony handheld calculates the number of days you moved the event. Your Sony handheld then automatically changes the end date to maintain the duration of the repeating event. • If you change the repeat interval (e.g., daily to weekly) of a repeating event, past occurrences (prior to the day on which you change the setting) are not changed, and your Sony handheld creates a new repeating event. • If you change the date of an occurrence of a repeating event (e.g., from January 14 to January 15) and apply the change to all occurrences, the new date becomes the start date of the repeating event. Your Sony handheld adjusts the end date to maintain the duration of the event. • If you change other repeat settings (e.g., time, alarm, private) of a repeating event and apply the change to all occurrences, your Sony handheld creates a new event. The start date of this new event is the day on which the setting is changed. Past occurrences (prior to the day of the change) are not changed. • If you apply a change to a single occurrence of repeating event (e.g., time), that occurrence no longer shows the Repeat icon. 32 Changing the Date Book view 1 Press button on the front panel. The Date Book starts and displays the events of the day. 2 Rotate the Jog Dial to view the events for yesterday or tomorrow. You can advance or retrace the schedule display one day at a time. To display the Date Book views In addition to displaying the time for a specific day, you can also display a whole week, a month, or an agenda. You can also display the current time. Press the Jog Dial when no event is selected. Each press of the Jog Dial cycles through daily calendar, weekly calendar, monthly calendar, schedule for the day, and daily calendar. z You can also select the Date Book view by tapping an icon in the Date Book screen. Click one of the following icons to rotate on the corresponding calendar view: • : Day view • : Week view • : Month view • : Agenda view 33 Managing Schedules and Events (the Date Book) The events you created in the Date Book can be displayed for checking the events. Working in Week view Week view displays a calendar of your events for an entire week. This view lets you quickly review your appointments and available time slots. In addition, the graphical display helps you spot overlaps and conflicts in your schedule. 1 Press button on the front panel. The Date Book starts up. 2 Press the Jog Dial. The Week view appears. This screen shows the untimed events or available time slots. 3 Rotate the Jog Dial to select the day for which you want to review. 4 Press the Jog Dial. The contents of the selected event appear. zTips for using Week view • To reschedule an event while in Week view, tap and drag the event to a different time or day. • Tap a blank time on any day to move to that day and have the time selected for a new event. • Tap any day or date that appears at the top of the Week view to move directly to that day without selecting an event. 34 • The Week view displays the time span defined by the Start Time and End Time in the Date Book Preferences settings. If you have an event before or after this time span, a bar appears at the top or bottom of that day’s column. Use the onscreen scroll arrows to scroll to the event. An event conflict (time overlap) appears in the Week view as overlapping time bars and in the Day view as overlapping brackets to the left of the conflicting times. Working in Month view The Month view screen shows which days have events scheduled. Dots and lines in the Month view indicate events, repeating events, and untimed events. 1 Press button on the front panel. The Date Book starts up. 2 Press the Jog Dial twice. The Month view screen appears. 35 Managing Schedules and Events (the Date Book) Spotting event conflicts 3 Rotate the Jog Dial to select the day for which you want to review. Rotating the Jog Dial allows you to select the next day. 4 Press the Jog Dial. The contents of the selected day appear. z Tips for using Month view • Tap a day in the Month view to display that day in the Day view. • Tap the scroll arrows month. in the upper right corner to move forward or backward a • Tap Go To to open the Go to Date dialog box to select a different month. • Use the scroll buttons on the front panel of your Sony handheld to move between months. Press the upper half of the scroll button to display the previous month, the lower half of the scroll button to display the next month. Working in Agenda view The Agenda view lets you view appointments, untimed events, and To Do List items in a single screen. Although it is primarly a viewing option, you can also use the Agenda view to check off completed To Do List items. 1 Press 2 Press the Jog Dial three times. button on the front panel. The Agenda view screen appears. 36 zTips for using Agenda view • Tap any appointment while in Agenda view to display the Day View of the appointment. Changing Date and Time view The Date Book lets you see the current time. Tap and hold the date in the title bar of the Date Book. The current time appears. When you release the stylus, the menu bar appears. If you want to avoid displaying the menu when releasing the stylus, drag the stylus away from the date indication after the time appears. 37 Managing Schedules and Events (the Date Book) • Check off completed To Do List items in the Agenda view, or tap a description of an item to go directly into the To Do List application. Editing the events created in the Date Book You can easily edit existing events you created in the Date Book. Changing a time for an event 1 Press button on the front panel. The Date Book starts up. 2 Tap the event you want to edit. 3 Tap Details. The Event Details dialog box appears. 38 4 Tap Time. The Set Time dialog box appears. Tap the time columns in the Set Time dialog box to set the Start Time. 6 Tap the columns to set the End Time. 7 Tap OK. 8 Tap OK in the Event Details dialog box. Managing Schedules and Events (the Date Book) 5 Changing a date for an event 1 Press button on the front panel. The Date Book starts up. 2 Tap the date of the event you want to change. 3 Tap Details. The Event Details dialog box appears. 39 4 Tap Date. The Set Date dialog box appears. 5 Specify the due date using one of the following ways: Specify the year, month, and day in the calendar. 6 Exit this area by either selecting Today, or by tapping a day of a month. 7 Tap OK in the Event Details dialog box. Setting an alarm You can set an alarm for minutes, hours or days before an event. When you set an alarm, an icon appears to the right of the event with the alarm. 1 Press button on the front panel. The Date Book starts up. 2 Tap the event to which you want to assign an alarm. 3 Tap Details. The Event Details dialog box appears. 40 4 Tap the Alarm check box to select it. The alarm is set. Tap Days. 6 Tap at “5” next to the Alarm check box and enter any number from 0 to 99 (inclusive) as the number of time units. 7 Tap OK. to change the time unit; select Minutes, Hours, or Setting an alarm for an untimed event You can set a silent alarm for an untimed event that displays a reminder message on-screen before the day of the event. The alarm triggers at the specified period of minutes, hours, or days before midnight of the day on which the untimed event begins. Example: If you set a 5-minute alarm for an untimed event that occurs on February 4, the reminder message will appear at 11:55 p.m. on the night of February 3. The reminder remains onscreen until you rotate on your Sony handheld and tap OK to rotate off the reminder. 41 Managing Schedules and Events (the Date Book) 5 Setting events as the private data You can define the events as private data. If the password is set in the event for data protection, you need to enter the password to display the private data of the Date Book. 1 Press button on the front panel. The Date Book starts up. 2 Tap the event you want to define as private data. 3 Tap Details. The Event Details dialog box appears. 42 4 Tap and check the Private check box. 5 Tap OK. Deleting events You can delete the existing events in the Date Book. 1 Press button on the front panel. The Date Book starts up. 2 Tap the event of which you want to delete. 3 Tap Details. The Event Details dialog box appears. 4 Tap Delete. The Delete Event dialog box appears. 5 Tap OK to carry out the delete function. Tap Cancel to cancel the delete function. If you check Save archive copy on PC, the deleted data from your Sony handheld is saved to Palm Desktop for Sony software during the next HotSync. 43 Managing Schedules and Events (the Date Book) Note If you delete the times of the repeating events, all the related events that are defined in conjunction with the repeating event will be deleted. When you delete the event with the Delete Event command, you can specify whether a single event is to be deleted as an exception, or all of the related events are to be deleted. The Date Book menu commands The Date Book has menu commands to arrange or edit the event data. This section describes the menu commands that are unique to the Date Book. For the description of the menu commands common to all Sony handheld applications, see “Edit menu” in “Handy Functions.” The Date Book Record menus New Event Creates a new event. The Set Time dialog box appears in which you can select the starting and ending times. Delete Event Deletes the currently selected event. The Delete Event dialog box appears. Tap OK to delete the event and Cancel to cancel the delete function. Note By default, all events you deleted from the Date Book are restored when HotSync with a computer is executed. To delete events completely, tap and uncheck Save archive copy on PC in the Delete Event dialog box. Attach Note Attach notes to the current event. This menu opens up a dialog box for entering comments. Delete Note Deletes notes from the current event. This menu opens up the Delete Note dialog box. Tap Yes to delete comments and No to cancel the delete function. 44 Purge Notes • When you execute the discard function, any repeating events that expire before the specified date will be deleted. • By default, all events you discarded are restored when HotSync with a computer is executed. To delete the events completely, tap and uncheck Save archive copy on PC in the Delete Event dialog box. Beam Event Sends the current event to another Sony handheld via the infrared communications port. The Options menus Font You can select the fonts of the Date Book. The Select Font dialog box appears when you choose this menu item. Select desired fonts. Preferences • Start/End Time: Defines the start and end times for Date Book screens. If the time slots you select do not fit on one screen, you can tap the scroll to scroll up and down. arrows • Alarm Preset: Automatically sets an alarm for each new event. The silent alarm for untimed events is defined by minutes, days, or hours before midnight of the date of the event. • Alarm Sound: Sets the tone of the alarm. • Remind Me: Defines how many times the alarm sounds. The choices are Once, Twice, 3 Times, 5 Times, and 10 Times. • Play Every: Defines how often the alarm sounds. The choices are Minute, 5 minutes, 10 minutes, and 30 minutes. 45 Managing Schedules and Events (the Date Book) You can specify a certain period based on Sony handheld calendar and discard any schedules that were formed before your specified date. You can save the memory space of your Sony handheld. This command opens the Purge dialog box. Tap OK to carry out the discard function and Cancel to cancel the discard function. Display Options Allows you to change Date Book’s appearance and which events display. • Show Time Bars: Activates the time bars that appear in the Day View. The time bars show the duration of an event and illustrate event conflicts. • Compress Day View: Controls how times appear in the Day View. When Compress Day View is off, all time slots display. When it is on, start and end times display for each event, but blank time slots toward the bottom of the screen disappear to minimize scrolling. • Month View settings: These check boxes apply to the Month View of the Date book. You can activate any or all of these settings to show that you have Timed, Untimed, or Daily Repeating events in the Month View only. About the Date Book Shows version information for Date Book. 46 Managing Addresses and Phone Numbers (the Address Book) The Address Book lets you keep names, addresses, telephone numbers, and other information about your personal or business contacts. The Address Book allows you to: • Quickly enter, look up, or duplicate names, addresses, phone numbers, and other information. • Enter up to five phone numbers (home, work, fax, mobile, and so on) or e-mail addresses for each name. • Define which phone number appears in the Address list for each Address Book record. • Attach a note to each Address Book record, in which you can enter additional information about the record. • Assign Address Book records to categories so that you can organize and view them in logical groups. • Paste images to address information using the PictureGear Pocket application. To open the Address Book Press the Address Book button on the front panel. Address Book opens and displays the list of all your records. Note Press the Address Book button repeatedly to cycle through the categories in which you have records. Address Book botton 47 Managing Addresses and Phone Numbers (the Address Book) What you can do with the Address Book To create a new Address Book record You can prepare the address record by entering it directly into your Sony handheld or by importing records from your computer using the Palm Desktop for Sony software. See “Exchanging and Updating Data Using HotSync Operations” for instructions on uploading information from a computer to your Sony handheld. 1 Press the Address Book button on the front panel. The Address screen appears. 2 Tap New. The Address Edit screen appears. 3 Enter the last name of the person you want to add to the Address Book. In all fields except e-mail addresses and those beginning with numbers, the first character of the field is automatically converted to an uppercase character. You do not need to hold down the CapsLock key while entering the first character of a name. 4 Tap First name. The cursor shifts to the first name field. You can also use the Graffiti software to move the cursor to the next field by entering . 48 5 Enter the first name in the First name field. 6 Enter the other items of information refering to step 4 and 5. 7 To enter the item that do not appear on screen, tap proceed to the next page. 8 After entering all necessary information, tap Done. to Managing Addresses and Phone Numbers (the Address Book) The Address Book screen is restored. 49 Pasting images to address information You can paste images to address information. If you paste an image such as a photograph of a person or restaurant, you will find it easy to remember later. You need to install PictureGear Pocket application from the Memory Stick media supplied with your Sony handled before pasting images. For more information about installation, refer to “Installing applications from Memory Stick media”. 1 Press the button on the front panel. The Address Book appears and you can view the list of all your contacts. 2 Tap the address you would like to add an image to. The Address View screen appears. 3 Tap Edit. The Address Edit screen appears. 50 4 Tap No Image in the upper right. Tap No Image. Managing Addresses and Phone Numbers (the Address Book) The PG Pocket screen appears. 5 Tap the image you want to paste. The image you selected is pasted to the address information. 51 6 Tap Done. Returns to the Address screen. A mark is displayed to the left of the address information you pasted an image to. A mark is displayed. Note If you change the category of the Address information, which attaches the image pasted, using Sony Palm desktop software on your computer, the images does not associate with the Address information when you perform HotSync operation next time. Use your Sony handheld to change Address information which include images. 52 To view address records 1 Press the button on the front panel. 2 Rotate the Jog Dial to select the address record you want to view. If the address record you want to view is not shown, continue rotateing the Jog Dial around to scroll up and down the whole list. 3 Press the Jog Dial. The selected address record appears. 4 To return to the list of addresses, press the Jog Dial. Return to the Address screen. z You can use the Scroll buttons to display the address list and scroll up and down the Address screen. You can also use the stylus and scroll bar to scroll a screen. If you want to view images pasted to Address information, tap a image on the Address screen. The image fills the screen. To return the Address screen, tap the image again. To view the next page of addresses Rotate the Jog Dial in the Address screen. The preceding next page or previous page of data will be displayed. z You can also select the category to display from the list. Tap corner of the screen. at the upper right 53 Managing Addresses and Phone Numbers (the Address Book) The Address screen appears and shows a list of addresses that are currently booked. To view addresses by category Press the Jog Dial when the list of address is shown but none are selected. Each press of the Jog Dial steps through the address categories displayed. z You can also select the category of information to be displayed from the category list. Tap at the upper right corner of the screen and select the desired category. To sort the address list You can set up the address list so that the items of the address records appear not in the order of last and first name but in the order of company and last name when Address Book is started. Note that the way the Address Book is displayed changes but none of its contents are changed when you changed the order of the address records. 1 Press button on the front panel. The Address screen appears and shows a list of addresses that have currently been booked. 2 54 Tap icon. The menus of the Address Book appear. Managing Addresses and Phone Numbers (the Address Book) 3 Tap Options, and then tap Preferences. The Address Book Preferences dialog box appears. 4 Tap the desired display format in the List By field. Select a desired display format in which address entries should be displayed when the Address Book starts up. 5 Tap OK. The items of address records appear in the order that is determined by the Address Book. Notes • Tap Last Name, First Name to sort alphabetically by an individual’s last name and then first name. • Tap Company, Last Name to sort alphabetically by the company name, and then an individual’s last name. 55 To search address records You can search your Address Book quickly. 1 Press button on the front panel. The Address screen appears and shows a list of addresses that have currently been booked. 2 Enter the first character of the record you want to search for. The list scrolls to the first entry that begins with that letter. If yo write another letter, the list scrolls to the first entry that starts with those two letters. For example, writing an “s” scrolls to “Sands,” and writing “sm” scrolls further to “Smith.” If you sort the list by company name, the Look Up feature scrolls to the first letter of the company name. 3 Tap the record you want to view. The record you selected is shown. 56 To edit address records You can modify or add the records you created. Managing Addresses and Phone Numbers (the Address Book) Modifying the address records 1 Press button on the front panel. The Address screen appears and shows a list of addresses that have currently been booked. 2 Tap the record you want to modify. The Address View appears. 3 Tap Edit. The Address Edit screen appears. 57 4 Tap the field that you want to edit. You can now edit the information you tapped. 5 Edit the record. 6 When modification is complete, tap Done. Returns to the Address screen. Duplicating an address record You can copy existing address records you created. This feature is useful when you want to enter the records of two or more persons working for the same company. 1 Press button on the front panel. The Address screen appears and shows a list of addresses that have currently been booked. 58 2 Tap the record you want to copy. The Address View appears. 3 Tap the Address View tab at the top of the screen, and tap the Duplicate Address from the Record menu. The string “Copy” is appended to the end of the First name field of the copied information. 4 When duplicating is complete, tap Done. Returns to the Address screen. 59 Managing Addresses and Phone Numbers (the Address Book) The record you selected in Step 2 is copied. Deleting the address records You can delete records you once entered. 1 Press button on the front panel. The Address screen appears and shows a list of addresses that have currently been booked. 2 Tap the record you want to delete. The Address View appears. 3 Tap Edit. The Address Edit screen appears. 60 4 Tap Details. The Address Entry Details dialog box appears. Managing Addresses and Phone Numbers (the Address Book) 5 Tap Delete. The Delete Address dialog box appears. 6 Tap OK. The record you selected in Step 2 is deleted. If you check Save archive copy on PC, the deleted data from your Sony handheld is saved to Palm Desktop for Sony software during the next HotSync. 61 Specifying the category of an address records You can categorize the records you entered. This feature is useful for viewing the records according to the categories. 1 Press button on the front panel. The Address screen appears and shows a list of addresses that have currently been booked. 2 Tap the records you want to categorize. The Address View appears. 3 Tap Edit. The Address Edit screen appears. 62 4 Tap “Unfiled” at the upper right corner of the screen. A list of categories appears. Tap a desired category. The category of the records you selected in Step 2 is selected. Changing the Address Book Preferences You can change the types of records to be shown and hidden when viewing the Address Book by changing the Address Book Preferences. 1 Press button on the front panel. The Address screen appears and shows a list of addresses that have currently been booked. 2 Tap the records for which you want to change the settings. The Address View appears. 3 Tap Edit. The Address Edit screen appears. 63 Managing Addresses and Phone Numbers (the Address Book) 5 4 Tap Details The Address Entry Details dialog box appears. 5 Change desired settings. Show in List: Select the type of records to be shown in the Address and select either Book about the record currently selected. Tap Work, Home, Fax, Other, or E-mail. and select Category: Specify the category of the record. Tap either Business, Personal, Quick List, or Unfiled. You can also add categories by choosing Edit Category. Private: The record which needs to be protected is invisible when this option is set to ON. To enable protection, tap and check s. For a description of protecting data, see “Protecting data” in “Handy Functions.” 6 64 Tap OK. The settings for the address record you selected in Step 5 are saved. The Address Book menu commands The Address Book Record menus The items shown in the Address menu vary depending on the screen in which it is shown. 65 Managing Addresses and Phone Numbers (the Address Book) The Address Book has menu commands for arranging and editing ordinary data. Here is a description of the menu commands that are unique to the Address Book. For a description of the menu commands common to all Sony handheld applications, see “Edit menu” in “Handy Functions.” Address • Duplicate Address: Makes a copy of the current record and displays the copy in Address Edit so you can make changes to the copied record. The copy has the same category and attached notes as the original record. • Beam Category: Sends all the address records in the currently selected category to another Sony handheld via the infrared communications port. • Beam Business Card: Sends the current business card to another Sony handheld via the infrared communications port. You can also send a business card via the infrared communications port by pressing and holding down the Address Book button for longer than 2 seconds. This menu item is highly useful because you can exchange visiting cards with other Sony handhelds with ease. Address View • Delete Address: Deletes the current address record. The Delete Address dialog box appears when you choose this menu. Tap OK to delete the address record and Cancel the delete function. Note By default, all records you deleted from the Address are restored when HotSync with a computer is executed. To wipe out all records completely, tap and uncheck Save backup copy on PC in the Delete Address dialog box. • Duplicate Address: Makes a copy of the current record and displays the copy in Address Edit so you can make changes to the copied record. The copy has the same category and attached notes as the original record. • Beam Address: Sends the current address record to another Sony handheld via the infrared communications port. • Attach Note: Adds comments to the current address record. Choosing this menu opens up a screen for entering comments. • Delete Note: Deletes comments from the current address record. Choosing this menu opens up the Delete Note dialog box. Tap Yes to delete comments and No to cancel the delete function. • Select Business Card: Defines the current address record on a business card. • Beam Business Card: Sends the current business card to another Sony handheld via the infrared communications port. You can also send a business card via the infrared communications port by pressing and holding down the Address Book button for longer than 2 seconds. This menu item is highly useful because you can exchange visiting cards with other Sony handhelds with ease. 66 The Options menus You can select the fonts of the Address Book. The Select Font dialog box appears when you choose this menu item. Select desired fonts. Preferences Remember last category. Determines how Address Book appears when you return to it from another application. If you select this check box, Address Book shows the last category you selected. If you clear it, Address Book displays the All category. Rename Custom Fields These custom fields appear at the end of the Address Edit screen. Rename them to identify the kind of information you enter in them. The names you give the custom fields appear in all entries. Security You can set to show or hide the currently selected address. About Address Book Shows the version information of the Address Book. 67 Managing Addresses and Phone Numbers (the Address Book) Font Managing the Tasks and Things to Do (the To Do List) What you can do with the To Do List The To Do List is a convenient place to create reminders and prioritize the things that you have to do. Use the To Do List to: • Make a quick and convenient list of things to do. • Assign a priority level to each task. • Assign a due date for any or all of your To Do List items. • Assign To Do List items to categorize so that you can organize and view them in logical groups. • Sort your To Do List items either by due date, priority level, or category. • Attach notes to individual To Do List items for a description or clarification of the task. To open the To Do List Press the To Do List button on the front panel. To Do List opens and displays the category of items you last viewed. Note Press the To Do List application button repeatedly to cycle through the categories in which you have items. To Do List botton 68 Creating To Do List items A To Do List item is a reminder of some task you have to complete. 1 Press button on the front panel. The To Do screen appears. Managing the Tasks and Things to Do (the To Do List) 2 Tap New. A new To Do item is added to the To Do List. 3 Enter the text of the To Do item. The text can be longer than one line. 4 Tap anywhere onscreen to deselect the To Do List item. The item is deselected and the new item is recorded to the To Do List. z If no To Do List item is currently selected, writing in the Graffiti writing area automatically creates a new item. 69 Viewing To Do List items The items you recorded in the To Do List can be displayed for checking the items. 1 Press button on the front panel. The To Do screen appears. 2 Rotate the Jog Dial to select the screen you want to view. 3 Press the Jog Dial. The contents of the item you selected appear. If the item does not fit in the screen, rotate the Jog Dial to scroll the screen. 4 To return to the To Do screen, press the Jog Dial. The To Do list box reappears. Changing the To Do List display by category Press the Jog Dial when the To Do list is displayed but no To Do entry is selected. Each press of the Jog Dial cycles through the categories of To Do items. z You can also select the category of the To Do items to be displayed from the Category list. Tap at the upper right corner of the screen and select a desired category. 70 Setting To Do List priorities You can set priorities for tasks in your To Do List according to their importance or urgency. Items appear by priority and due date at the top of the To Do List by default, with 1 the highest priority. Changing an item’s priority may move its position in the list. New To Do List items automatically have a priority of 1. Press button on the front panel. The To Do screen appears. 2 Tap the Priority number on the left side of the To Do List item. You can select the Priority number, with 1 the most important and 5 the least important. z You can also set the priority from the To Do Item Details dialog box. 71 Managing the Tasks and Things to Do (the To Do List) 1 Checking off To Do List items You can check off a To Do List item to indicate that you’ve completed it. 1 Press button on the front panel. The To Do screen appears. 2 72 Tap the check box on the left side of the item. Changing priorities and due dates You can change the To Do List to display the due date assigned to an item, change its priority, and assign a category to the task. Managing the Tasks and Things to Do (the To Do List) Assigning a category You can assign a category to the task in the To Do List. 1 Press button on the front panel. The To Do screen appears. 2 Tap the contents of the To Do item you want to define a category for. 3 Tap Details. The To Do Item Details dialog box appears. 4 Tap in Category and tap a desired category. The To Do item you selected in Step 2 is classified into the selected category. 73 Changing the due date of a To Do item You can assign a date the task in the To Do List. 1 Press button on the front panel. The To Do screen appears. 2 Tap the contents of the To Do item you want to change the due date. 3 Tap Details. The To Do Item Details dialog box appears. 4 Tap of Due Date and tap a desired date. You can select one of the following options: • Today: Sets the date of the To Do item to today. • Tomorrow: Sets the date of the To Do item to tomorrow. • One week later: Sets the date of the To Do item to one week later. • No date: Sets no date. 74 • Choose Date: Allows you to select a desired date. Due Date screen appears. Select a desired date from the calendar. Tap OK. z If you have checked Show in the To Do Preferences, you can set the date directly from the To Do list by tapping the date in the To Do List. 75 Managing the Tasks and Things to Do (the To Do List) 5 Deleting items from the To Do List You can delete items from the To Do List. 1 Press button on the front panel. The To Do screen appears. 2 Tap the item you want to delete. 3 Tap Details. The To Do Item Details dialog box appears. 4 Tap Delete. The Delete To Do dialog box appears. 5 Tap OK to delete the To Do item. The To Do item you selected in Step 2 is deleted. To cancel the delete function, tap Cancel instead of OK. If you check Save archive copy on PC, the deleted data from your Sony handheld is saved to Palm Desktop for Sony during the next HotSync. 76 Viewing completed and due items in the To Do List You can sort To Do List items by priority, due date, or category. Press button on the front panel. Managing the Tasks and Things to Do (the To Do List) 1 The To Do screen appears. 2 Tap Show. The To Do Preferences appears. 3 Change the view as you like. You can choose from the following settings: Show Completed Item Displays your completed items in the To Do List. If you rotate off this setting, your To Do items disappear from the list when you complete (check) them. Items that no longer appear on the list because you rotate off this setting have not been deleted. They are still in the memory of your Sony handheld. Purge completed items to remove them from memory. 77 Show Only Due Items Shows only the items that are currently due, past due, or have no due date specified. When this setting is active, items that are not yet due do not appear in the list until their due date. Record Completion Date Replaces the due date with the actual date when you complete (check) the item. If you do not assign a due date to an item, the completion date still records when you complete the item. Show Due Dates Displays the due dates associated with items in the To Do List and displays an exclamation mark next to items that remain incomplete after the due date passes. Show Priorities Shows the priority setting for each item. Show Categories Shows the category for each item. 4 78 Tap OK. The To Do List menu commands The To Do List has menu commands for specifying data types and editing ordinary data. Here is a description of the menu commands that are unique to the To Do List. For a description of the menu commands common to all Sony handheld applications, see “Edit menu” in “Handy functions.” Delete Item Deletes the current To Do item. The Delete To Do dialog box appears when you choose this menu item. Tap OK to delete the entry and Cancel to cancel the delete function. Note By default, all To Do items you deleted from the To Do List are restored when HotSync with a computer is executed. To wipe out all To Do items completely, tap and uncheck Save archive copy on PC in the Delete To Do dialog box. Attach Note Adds comments to the current To Do item. Choosing this menu item opens up a screen for entering comments. Delete Note Deletes comments from the current To Do item. Choosing this menu item opens up the Delete Note dialog box. Tap Yes to delete comments or No to cancel the delete function. 79 Managing the Tasks and Things to Do (the To Do List) The To Do List Record menus Purge This menu item allows you to delete any completed To Do items from the To Do List. To Do items are recorded in the To Do list as they are completed. Run this command to save memory if you find too many recorded To Do items in your Sony handheld. When you run this command, the Purge dialog box appears. Tap OK to carry out the discard function or Cancel to cancel the discard function. Note By default, all To Do items you discarded are restored when HotSync with a computer is executed. To delete To Do items completely, tap and uncheck Save archive copy on PC in the Purge dialog box. Beam Item Sends the current To Do item to another Sony handheld via the infrared communications port. Beam Category Sends all the To Do items in the currently selected category to another Sony handheld via the infrared communications port. The Options menus Font You can select the fonts of the To Do List. The Select Font dialog box appears when you choose this menu item. Phone Lookup Phone Number Lookup screen appears. Security You can set to show or hide the current item. About To Do List Shows the version information of the To Do List. 80 Using the Memo Pad (the Memo Pad) What you can do with the Memo Pad You can use the Memo Pad to make brief memos and show TXT or CSV (Comma Separated Value) document files, which are created on a computer, on your Sony handheld. The Memo Pad allows you to: • Make memos and jot down various types of information. • Read TXT or CSV document files from a computer through HotSync for display on your Sony handheld. • Categorize the memos into business, private, and other categories. To open the Memo Pad Press the Memo Pad button on the front panel. The Memo Pad opens to display the last Memo Pad screen that you viewed. Memo Pad button Note Press the Memo Pad button repeatedly to cycle through the categories in which you have memos. 81 Using the Memo Pad (the Memo Pad) • Copy memos you wrote with other applications. Creating memos A memo can contain up to 4,000 characters. The number of memos you can store is limited only by the memory available on your Sony handheld. 1 Press button on the front panel. The Memo Pad starts up. 2 Tap New. A new memo is created. 82 3 Enter memo text. Use the Enter key to start a new line (if you are using a software keyboard). 4 Tap Done when you finished. z You can also create a new memo by beginning your memo in the Graffiti writing area in the Memo screen. The first letter is automatically capitalized and begins your new memo. Using the Memo Pad (the Memo Pad) 83 Reviewing memos The Memo List displays the first line of a memo. This makes it easy to locate and review your memos. 1 Press button on the front panel. The Memo Pad starts and shows a Memo list. 2 Rotate the Jog Dial to select the memo you want to view. If the desired memo is not found on the screen, rotate the Jog Dial to scroll up or down the memo list. 3 Press the Jog Dial. The text of the memo you selected appears. If the memo text does not fit in the screen, rotate the Jog Dial to scroll the screen. 4 To rerotate to the memo list, press the Jog Dial. The Memo list box reappears. Viewing memos by categories Press the Jog Dial when the memo list is displayed but no memo is selected. Each press of the Jog Dial cycles through the categories of memos. z You can also select the category of memos to be displayed from the Category list. Tap V at the upper right corner of the screen and select a desired category. 84 Sorting memos You can change the order in which the Memo Pad shows your memos. 1 Press button on the front panel. The Memo Pad starts and shows a list of memos. Tap icon. Using the Memo Pad (the Memo Pad) 2 A menu of commands appears. 3 Tap Preferences from Options. The Memo Preferences dialog box appears. 4 Choose one of the following options: 85 • Tap Manual to sort new memos in the sequence in which you create them. • Tap Alphabetic to sort the existing memos in numerical and alphabetical sequence. 5 Tap OK. Setting the display order You can change the order of memos using manual mode, then move memos according to your preferred order in the Memo Pad screen. Moving memos Tap a memo in the Memo screen and drag it into another location. The memo is moved to the location where you released the stylus. When a memo is relocated, its memo number is renumbered accordingly. Note The Memo Pad’s display order setting is not reflected in the Palm Desktop for Sony software. Consequently, there may be discrepancies between the order in which memos are displayed between your Sony handheld and Palm Desktop for Sony software. 86 Editing memos Assigning a category You can assign a category for each memo so that memos can be arranged by category. Use the Category of the screen to specify and edit a category. Using the Memo Pad (the Memo Pad) Defining a memo as a private memo You can designate memos as private data. If a password is set in a memo for data protection, you need to enter the password when viewing the private data. 1 Press button on the front panel. The Memo Pad starts and shows a list of memos. 2 Tap the memo you want to define as private data. The contents of the memo you tapped appears. 87 3 Tap Details. The Memo Details dialog box appears. 88 4 Tap and check the Private check box. 5 Tap OK. Deleting the existing memos You can delete memos that are no longer necessary. 1 Press button on the front panel. The Memo Pad starts and shows a list of memos. 2 Tap the memo you want to delete. The contents of the memo you tapped appears. Using the Memo Pad (the Memo Pad) 3 Tap Details. The Memo Details dialog box appears. 4 Tap Delete. The Delete Memo dialog box appears. 5 Tap OK. The memo you selected in Step 2 is deleted. To cancel the delete function, tap Cancel instead of OK. 89 Memo Pad menu commands The Memo Pad has menu commands for specifying data types and editing ordinary data. Here is a description of the menu commands that are unique to the Memo Pad. For a description of the menu commands common to all Sony handheld applications, See “Edit menu” in “Handy Functions.” The Memo Pad Record menus Memo Beam Category Sends all the memos in the currently selected category to another Sony handheld via the infrared communications port. 90 Memo Screen New Memo Creates a new memo. Delete Memo Deletes the current memo. The Delete Memo dialog box appears when you choose this menu item. Tap OK to delete the memo or Cancel to cancel the delete function. By default, all memos you deleted from the Memo Pad are restored when HotSync with a computer is executed. To wipe out all memos completely, tap and uncheck Save archive copy on PC in the Delete Memo dialog box. Beam Memo Sends the current memo to another Sony handheld via the infrared communications port. 91 Using the Memo Pad (the Memo Pad) Note The Options menus Font You can select the fonts of the Memo Pad. The Select Font dialog box appears when you choose this menu item. Phone Lookup The Phone Number Lookup screen appears. Preferences Used to specify the way in which memos are to be displayed. The Memo Preferences appears when you choose this menu item. Security You can set to show or hide the currently selected memo. About Memo Pad Shows the version information of the Memo Pad. 92 Managing Expenses (the Expense) What you can do with the Expense You can use the Expense for many disbursement purposes such as recording expenditures for business trips and personal expenses as a cash book. The Expense allows you to: • Record dates, types of expenses, amount spent, payment method, and other details associated with any money that you spend. Managing Expenses (the Expense) • Assign expense items to categories so that you can organize and view them in logical groups. • Keep track of vendors (companies) and people involved with each particular expense. • Log miles traveled for a particular date or expense category. • Sort your expenses by date or expense type. 93 Recording expenses The Expense allows you to record the date, expense type, and amount you spent. You can sort Expense items into categories or add other information to an item. 1 Tap icon. The Applications Launcher appears. 2 Rotate the Jog Dial to select Expense, the press the Jog Dial. The Expense screen appears. 3 94 Tap New. Enter the amount you paid. 5 Tap Expense Type and select an expense type from the drop-down list box. Managing Expenses (the Expense) 4 Note The item you entered in Step 4 is saved when you selected the Expense Type. No item is recorded unless the Expense Type is specified. z You can also create a new Expense item in the Expense screen by writing on the number side of the Graffiti writing area. The first number you write begins your new Expense item. 95 Sorting Expense items You can change the view of the Expense. 1 Tap icon. The Applications Launcher appears. 2 Rotate the Jog Dial to select Expense, then press the Jog Dial. The Expense screen appears. 3 Tap Show. The Show Options dialog box appears. 4 Select a desired display mode option. • Sort by: Enables you to sort expense items by date or type. • Distance: Enables you to display Mileage entries in miles or kilometers. • Show Currency: Shows or hides the currency symbol in the Expense list 5 96 Tap OK. Changing the date of an Expense item The Expense automatically shows in each expense item the date on which the record is booked. If you recall and want to record a past payment date in an expense item, you can change the payment date of the record to the correct date. 1 Tap icon. 2 Managing Expenses (the Expense) The Applications Launcher appears. Rotate the Jog Dial to select Expense, then press the Jog Dial. The Expense list screen appears. 3 Tap the expense item date of which you want to change. The date is displayed in reverse. 97 4 Tap the date area of the selected expense item. The Date screen appears. 5 98 Tap the desired date. Adding detailed information to an Expense item You can add various detailed information to an expense item. The information you added is shown in the Receipt Details screen. 1 Tap icon. The Applications Launcher appears. Rotate the Jog Dial to select Expense, then press the Jog Dial. Managing Expenses (the Expense) 2 The Expense screen appears. 3 Tap the expense item to which you want to add detailed information. 4 Tap Details. The Receipt Details dialog box appears. 99 5 Specify detailed information. • Category: Specify the category of the expense item. The Expense has two sample categories named “New York” and “Paris” which may be used to sort expense items by the destination of business trip. To rename an existing category or add a new category, choose Edit Categories from the drop-down list box. • Type: Select the type of expense from the drop-down list box. • Payment: Select the payment method from the drop-down list box. • Currency: Select a currency in which you made the payment. The Expense can show a maximum of four currencies. You can also change the currencies to be displayed. • Vendor: Enter the name of the vendor associated with the expense. • City: Enter the name of the payee (normally company name) and the name of the city where the company is located. For example, you may specify “Rose Cafe” as the payee of business lunch charge and “Tokyo” as the location. • Attendees: The Expense opens the Attendees screen which looks like a memo screen of the Memo Pad. In this screen, you can enter the name of attendees and purposes of expenditure. Tapping Address Lookup causes the Expense to display the address information that is stored in Address Book. 6 100 Tap OK. Printing an expense report By performing a HotSync operation to transfer your latest Expense data to your computer, Palm Desktop for Sony software makes it easy to print it out. You can use the Expense data as an expense report by changing the print preferences. Perform a HotSync operation to transfer the Expense data from Sony handheld to the computer. 2 Select Print from the File menu on the Expense list screen of the Palm Desktop for Sony software. The Print dialog box appears. 3 Change the Print Range options as needed. • Categories displayed: Prints all the Expense data in categories being displayed. To display data in all categories, choose All from the category selection list on the upper right of the Expense list area (left screen). • Selected categories: Prints only selected parts of the Expense data. 4 Change the Print Options as needed. • Prints only an Expense overview: Prints only daily amounts of disbursement for each expense type in a tabular format. Select this option to use a disbursement record as an expense report. • Prints only the Expense data: Prints all disbursement records for each expense type. • Prints both: Prints both an overview and disbursement records. • Prints currency: Valid when printing an Expense overview. When you click this option, you can indicate total amounts of a single currency in a table. This is useful when your data is represented in several currencies. • Output comments: When you click this option, you can also print comments attached to expense data. 101 Managing Expenses (the Expense) 1 5 Click OK. This starts printing the data. Notes • The unit of Travelling Distance is either km. (kilometers) or mi. (miles). • When you select Prints currency, Travelling Distance values are converted in amounts of allowances per distance paid when travelling expenses are calculated. 102 Changing the currency and symbols display You can change the types and symbols of currencies to be used in the Expense. Changing the currency 1 Tap icon. 2 Rotate the Jog Dial to select Expense, then press the Jog Dial. The Expense screen appears. 3 Tap the expense item currency type of which you want to change. 4 Tap Details. The Receipt Details dialog box appears. 103 Managing Expenses (the Expense) The Applications Launcher appears. 5 Tap the currency drop-down list box and tap Edit currencies. The Select Currencies dialog box appears. 104 6 Tap the drop-down list box and select the name of country whose currency is to be displayed. 7 Tap OK. Creating a new currency symbol You can create your own custom currency symbol and add it to the dropdown list. 1 Tap icon. The Applications Launcher appears. 2 Rotate the Jog Dial to select Expense, then press the Jog Dial. 3 Tap 4 Tap Options - Custom Currencies. Managing Expenses (the Expense) The Expense screen appears. icon. The Custom Currencies dialog box appears. 105 5 Tap one of four country name text boxes. The Currency Properties dialog box appears. 6 Enter the name of the country and a currency symbol, then tap OK. z To use a newly defined currency symbol as a standard currency symbol, it is necessary to select the target currency symbol in advance in the Preferences. To use a currency symbol only for a specific expense item, select the currency symbol in the Receipt Details dialog box of that expense item. 106 The Expense menu commands The Expense has menu commands for specifying data types and editing ordinary data. Here is a description of the menu commands that are unique to the Expense. The Expense Record menus Delete Item The Delete Expense dialog box appears when you choose this menu item. Tap OK to delete the record and Cancel to cancel the delete function. Note By default, all expense items you deleted from the Expense are restored when HotSync with a computer is executed. To wipe out all records completely, tap and uncheck Save backup copy on PC in the Delete Expense dialog box. Purge This menu item allows you to delete any category that is no longer used from the category set for the expense items. Saving unnecessary categories of expense items saves memory. When you select this command, a screen for confirming the deletion of all data in the selected category is displayed. The Options menus Preferences Used to specify the standard currency symbols. The Preferences dialog box appears when you choose this menu item. Select the currencies to be designated as default currencies. Custom Currencies You can create and add a new currency if you cannot find the currency you want to use in the Expense. About Expense Shows the version information of the Expense. 107 Managing Expenses (the Expense) Deletes the current expense item. Using the Calculator (the Calculator) Calculating with the Calculator The Calculator lets you perform general mathematical functions, such as addition, subtraction, multiplication, and division. 1 Tap . The Calculator screen appears. 2 Perform calculations using the Calculator. To use the Calculator tap the numbers and symbol icons on the screen with the stylus. Using the Calculator buttons The Calculator has several buttons to help you perform calculations. CE Clears the last number you entered. Use this button if you make a mistake while entering a number in the middle of a calculation. This button enables you to re-enter the number without starting the calculation over. 108 C Clears the entire calculation and enables you to begin a fresh calculation. +/– Toggles the current number between a negative and positive value. If you want to enter a negative number, enter the number first and then press the +/– button. M+ Places the current number in memory. Each new number you enter with the M+ button is added to the total stored in memory. The number that you add can be either a calculated value or any number you enter by pressing the number buttons. Pressing this button has no effect on the current calculation (or series of calculations); it merely places the value into memory until it is recalled. Using the Calculator (the Calculator) MR Recalls the stored value from memory and inserts it in the current calculation. MC Clears any value that is stored in the Calculator memory. 109 The Calculator menu commands The Calculator Edit menu Copy and Paste These commands may be used to copy a number from the Calculator and paste it into another application. Similarly, you can also paste numeric values you copied from another application such as the Expense into the Calculator. The Options menus Recent Calculations You can review the last calculation you made. This command is useful when you confirm a calculation you once made at a later time. About Calculator Shows the version information of the Calculator. 110 Handy Functions Finding records Your Sony handheld lets you find information in several ways: • In all applications, starting with the current application, you can locate selected text. • In the Date Book, the To Do List, the Memo Pad, you can find a telephone number from the Phone Lookup to display the Address List screen and let you add the information that appears in this list to a record. • In the Address Book, you can use the Find option to enter the first letters of a name to scroll immediately to that name. • In the Expense application, you can use the Lookup to display the names in your Address Book that have data in the Company field. You can add these names to a list of attendees associated with an Expense record. The Find option lets you locate text in any or all applications. For example, if the text appears in the Address Book and the Date Book, the Find option displays both occurrences in the Find dialog box. 1 Tap icon. The Find dialog box appears. 111 Handy Functions Using the Find option 2 Enter text you want to find. You can find the alphabet, symbols, and numerics. 3 Tap OK. Find starts and the find result list displays all words which include the text you entered. The notes attached to each record can also be found. 4 Tap desired data from the find result list. The application including found data automatically starts up to display data. Tap Stop to stop the search at any time. Tap FindMore to restart Find. Note The Find option is not case sensitive; searching for “sony” also finds “Sony”. z Select text in an application before tapping the Find icon to automatically place the text in the Find dialog box. 112 Using the Phone Lookup option The Phone Lookup option lets you find a telephone number from the Address list to an entry in another application. For example, you can add a telephone number from the Address list to an entry in the Memo Pad using the Phone Lookup. 1 Display the record in which you want to insert a phone number. The record can be in the Date Book, the To Do List, or the Memo Pad. 2 Tap icon. The menu of the application appears. 3 Tap Options-Phone Lookup. Handy Functions The Phone Number Lookup screen appears. 113 4 Tap a phone number you want to add. z To quickly find a phone number Enter the first few letters of the name you want to find in the Look Up field in the lower screen. 5 Tap Add. The Phone Lookup closes and the name and phone number are added to the record displayed in the step 1. To utilize the Phone Lookup with Graffiti You can use the Phone Lookup to write Lookup command in the text Graffiti area. , the ShortCut for the Phone You will find it easy to use the Phone Lookup without displaying the Phone Lookup screen by performing the following. Entering a new name with the Phone Lookup For example, you write John with Graffiti to enter the name and phone number of John Smith. The name and phone number of John Smith are added, when John Smith is the only one in records. If records include many Johns, the Phone Number Lookup screen appears. Phone Lookup by text You drag and highlight text before you write with Graffiti. The Phone Lookup starts up to exchange the selected text for the found name and phone number. If many records for the selected text are included, the Phone Number Lookup screen appears. 114 Entering the owner information You can enter a name, company name, or phone number of the Sony handheld owner. If you use the Security application to rotate off and lock your Sony handheld with a password, information that you enter in the Preferences appears the next time you rotate on your Sony handheld. 1 Tap icon. The Application Launcher starts up. 2 From the dropdown list in the upper right corner, select System. The System screen appears. Handy Functions 3 Tap . The preferences screen appears. 115 From the dropdown list in the upper right corner, select Owner. 4 Enter the owner information. If you enter more text than can fit on one screen, a scroll bar appears at the right side of the screen. In case you assigned the password using the security application If you use the security application to assign a password, to enter/edit the owner information, you have to unlock the Owner Preferences screen to change the information. 1 Tap icon. The Application Launcher starts up. 2 Select System from the dropdown list in the upper right corner. The System screen appears. 116 3 Tap . The Preferences screen appears. From the dropdown list in the upper right corner, select Owner. 5 Tap Unlock. Handy Functions 4 The Unlock Message dialog box appears. 117 6 118 Enter your current password (the one you entered in the Security application); then tap OK. Locking your Sony handheld by passwords You can lock your Sony handheld with a password to protect information. You must then enter the password when you rotate on your device to gain access to the information on it. Notes • When your Sony handheld had been locked, you must enter the correct password to restart. • If you forgot the password, you must perform a hard reset to resume using your Sony handheld. Performing a hard reset deletes all records in your Sony handheld. (You can restore all data that was backed up in the computer using HotSync.) 1 Back up the data in your Sony handheld using the HotSync. 2 Assign a password, as described in “Assigning a password” (124 page). 3 Tap icon and select System from the dropdown list in the upper right corner. The System screen appears. 119 Handy Functions See “Exchanging and Updating Data using Hot Sync Operations” for more information. 4 Tap . The Security dialog box appears. 5 Tap Lock & Turn Off. The System Lockout dialog box appears. 120 6 Tap Off & Lock. Your device is rotated off and is locked. You must then enter the password when you rotate on your device to gain access to the information on it. Handy Functions 121 Protecting data Your Sony handheld includes a Security application that lets you set options to protect data from unauthorized users. The Security application lets you hide records that you have defined as private, with or without a password. Assigning a password You can assign a password to protect your private records and to lock your Sony handheld. 1 Tap the icon and select System from the dropdown list in the upper right corner. The System screen appears. 2 Tap . The Security dialog box appears. 3 Tap Unassigned. The Password dialog box appears. 122 4 Enter your password and tap OK. The dialog box for verifying the password appears. 5 Enter the same password entered in Step 4 again to verify it and tap OK. Your password is assigned. Handy Functions 123 Changing and deleting passwords You can change or delete the password you assigned. 1 Tap the icon and select System from the dropdown list in the upper right corner. The System screen appears. 2 Tap . The Security dialog box appears. 3 Tap Assigned. The Password dialog box appears. 4 Enter your current password and tap OK. The dialog box to enter a new password appears. 5 When you want to change a password, enter a new password and tap OK. When you want to delete, tap Delete. If you forget your password If you forget your password, you can delete it. Note, however, that deleting a forgotten password also deletes all entries and records marked as Private. (You can restore the synchronized data in your computer using the HotSync operation.) 1 124 Tap Lost Password in the above step 3. The Delete Password dialog box appears. 2 Tap Yes. Passwords and all private data are deleted. Masking and hiding records 1 Tap the icon and select System from the dropdown list in the upper right corner. The System screen appears. 2 Tap . The Security dialog box appears. 3 Tap Current Privacy. The Show/Mask/Hide Records dropdown list appears. 125 Handy Functions You can mask or hide your private data. Assigning a password requires you to enter a password before private entries can be viewed. Private records are usually set as invisible but the records are saved. Follow this procedure to mask/hide records. 4 Tap Mask or Hide Records. This option lets you mask/hide records entered as private in the Address List, the Memo Pad, the Date Book or the To Do. Viewing the private records Follow this procedure to view private records protected by the Security application. 1 Tap icon and select System from the dropdown list in the upper right corner. The System screen appears. 2 Tap . The Security dialog box appears. 3 Tap Current Privacy. Without a password, the private records are displayed again in applications. With a password, the Show Records screen appears. 126 4 When the Show Private Records appears, enter a password and tap OK. Handy Functions 127 Beaming between Palm OS PDA Beaming information Your Sony handheld is equipped with an IR (infrared) port that you can use to beam information to another Palm OS® PDA device that’s close by and also has an IR port. The IR port is located at the top of Sony handheld, behind the small dark shield. You can beam the following information between the Palm OS PDA: • The record currently displayed in the Address Book, the Date Book, the To Do List, or the Memo Pad. • All records of the category currently displayed in the Address Book, the Date Book, the To Do List, or the Memo Pad applications. • A special Address Book record you designate as your business card. • An application installed in RAM memory. Note Some applications are copy-protected and cannot be beamed, as indicated by a lock icon in the side of applications. To select a business card 128 1 Create an Address Book record that contains the information you want on your business card. 2 3 Tap icon. Tap Record, and then tap Select Business Card. 4 Tap Yes. To beam a record, business card, category of records 1 Locate the record, business card, or category you want to beam. 2 Tap 3 Tap Record, and then tap one of the following: icon. • The Beam command for an individual record • In Address Book only: Beam Business Card • Beam Category When the Beam Status dialog box appears, point the IR port directly at the IR port of the receiving organizer. z For best results, Sony handheld should 10 to 20 centimeters (approximately 4 to 8 inches) apart, and the path between the two organizers must be clear of obstacles. Beaming distance to other Palm OS PDA handhelds may be different. 5 Wait for the Beam Status dialog box to indicate that the transfer is complete before you continue working on your Sony handheld. To beam an application 1 Tap icon. 2 Tap icon. 129 Handy Functions 4 3 Tap App, and then tap Beam. 4 Tap the application you want to transfer. Note Some applications are copy-protected and cannot be beamed. These are listed with a lock icon next to them. 5 Tap Beam. 6 When the Beam Status dialog box appears, point the IR port directly at the IR port of the receiving organizer. 7 Wait for the Beam Status dialog box to indicate that the transfer is complete before you continue working on your Sony handheld. To receive beamed information 130 1 Rotate on your Sony handheld. 2 Point the IR port directly at the IR port of the transmitting Sony handheld to open the Beam dialog box. 3 Select a category for the incoming information, create a new category, or leave the information unfiled. 4 Tap Yes. Tips on beaming information • You can press the business card. button for about two seconds to beam your • You can use the Graffiti Command stroke/B ( entry. ) to beam the current Handy Functions 131 Edit menus The Edit menu is available with any screen where you enter or edit text. In general, commands available in the Edit menu apply to text that you select in an application. To use the Edit menu 1 Tap icon. The Menu appears. 2 Select Edit The Edit menu appears. Notes You can also double tap to select a word, or triple tap to select a line of text. You can also drag across the text to select additional words, or drag down to select a group of lines. The following commands may appear in an Edit menu: 132 Undo Reverses the action of the last edit command. For example, if you used Cut to remove text, Undo restores the tect you removed. Undo also reverses deletions done by using backspace. Cut Removes the selected text and stores it temporarily in the memory of your organizer. You can paste the text you cut into another area of the current application or into a different application. Copy Copies the selected text and stores it temporarily in the memory of your organizer You can paste the text that you copy into another area of the current application or into a different application. Paste Inserts the text that you cut or copied at the selected point in a record. The text you paste replaces any selected text. If you did not previously cut or copy text, Paste does nothing. Select all Selects all of the text in the current record or screen. This enables you to cut or copy all of the text and paste it elsewhere. Key board Opens the onscreen keyboard. When you finish with the onscreen keyboard, tap Done. Graffiti Help Opens screens that show all the Graffiti character strokes. Use this command anytime you forget a stroke for a character. Handy Functions 133 Choosing fonts In all basic applications except Expense, you can change the font style to make text easier to read. You can choose a different font style for each application. To change the font style 134 1 2 Open an application. 3 4 Tap Options, then tap Font. 5 Tap OK. Tap icon. Tap the font style you want to use. Installing Add-on Applications in Sony Handheld Add-on applications you can install In the factory configuration, Sony handheld comes with various applications such as the Date Book, the Address Book, the To Do List, the Memo Pad, the Expense, the Calculator, and the e-mail software. In addition to these applications, you can install add-on applications such as games or other software to run on the Palm OS. For information on the latest third-party applications available to Sony handheld, see our official Sony handheld Web site (http://www.sony.com/handheld/). Note If you perform a HotSync before a hard reset, a backup of all add-on applications is made in your computer. In this case, perform another HotSync after hard-resetting to resume your preferences set before the first hard-reset. Installing Add-on Applications in Sony handheld 135 Installing applications from Memory Stick media The supplied Memory Stick media contains the following add-on applications and data. • PictureGear Pocket (with samples for a still picture) • gMedia (with samples for moving pictrue) MS Gate lets you install these applications and data to your Sony handheld. 1 Insert the supplied Memory Stick media in the Memory Stick slot of your Sony handheld. 2 Start MS Gate in your Sony handheld. 3 Press the Jog Dial. The contents of the Memory Stick media appear. 4 Tap the application you want to install. 5 Tap Copy. The selected application is installed in your Sony handheld. z The supplied Install CD-ROM also contains applications and data contained in Memory Stick media. You can install them from Palm Desktop for Sony software by performing HotSync. For more information about installation, refer to “Installing application from a computer”. 136 Installing applications from a computer 1 Copy or download the application program you want to install to the Add-on folder in the Sony Handheld folder on your computer. (example : C :\Program Files\Sony Handheld\Add-on) If you want to copy to a different folder, you need to specify the folder in step 5. 2 Double click the Palm Desktop for Sony icon on the Windows® desktop. The Palm Desktop for Sony software starts. Installing Add-on Applications in Sony handheld 3 Click Install. The Install Tool dialog box appears. 137 4 From a list of User, select a user name to use. 5 Click Add. The Open File dialog box appears. 6 Specify the application you want to install on the Sony handheld, and click Open. In the Install Tool dialog box, a list of specified applications is displayed. If unnecessary applications are displayed in the list of applications to install, you can select unnecessary applications and click Delete to delete them. 7 Click Exit. 8 Run the local HotSync. The application you selected in step 6 will be installed on the Sony handheld. See “Performing HotSync” for more details about the local HotSync. z From the Windows® Start menu, you can directly display the Install Tool dialog box. If you click Start, and select Programs - Sony Handheld - Install Tool; the Install Tool dialog box appears. Also, if you double click a .prc format file, the Install Tool dialog box is displayed. 138 Deleting an add-on application You can delete added-on applications if Sony handheld runs short of memory or if the applications are no longer needed. You can only delete added-on applications which you installed yourself, patch files, or extended functions. You cannot delete the standard applications provided with Sony handheld, such as the Address Book or the Memo Pad. 1 Tap icon. The Applications Launcher appears. 2 Tap icon. The menu appears on the application start-up screen. 3 Tap App - Delete. The Delete screen appears. Tap the application you want to delete, and tap Delete. A confirmation message appears asking if you are sure you want to delete the application. 5 Tap Yes. The application selected in Step 4 is deleted. To cancel the deletion, tap No instead of Yes. 6 Tap Done. The application start-up screen reappears. 139 Installing Add-on Applications in Sony handheld 4 Installing accompanied software to a computer You can install software for your computer, contained in the supplied installation CD-ROM. Installing PictureGear Lite PictureGear Lite allows you to transfer animations or still pictures to and from a Sony handheld and your computer. You can view transferred animations or still pictures on the Sony handheld by using an application such as PictureGear Pocket or gMedia. 1 Insert the Install CD-ROM in the CD-ROM drive. In a few moments, the CD-ROM will be recognized and the installer window appears. 2 Click Install PictureGearTM Lite. 3 Click Install PictureGear Lite 4.2. A dialog box is displayed to confirm the installation. 4 Click Yes. The PictureGear Lite software installation starts. After this, follow the instructions on screen to finish installation. To start PictureGear Lite From the Start Menu, click Programs - PictureGear 4.2Lite – PictureGear4.2Lite. For information on how to use PictureGear Lite, see the on-line Help “Help for PictureGear.” 140 Installing TrueSync® 1 Insert the Install CD-ROM in the CD-ROM drive. In a few moments, the CD-ROM will be recognized and the installer window appears. 2 Click Install TrueSync. 3 Read the Software License Agreement shown on the screen, then click Next. Follow the instructions in the windows to finish installation. Installing AvantGo® 1 Insert the Install CD-ROM in the CD-ROM drive. 2 Click Install AvantGo. AvantGo installation starts. Follow the instructions in the windows to finish the installation. 141 Installing Add-on Applications in Sony handheld In a few moments, the CD-ROM will be recognized and the installer window appears. Exchanging and Updating Data Using HotSync Operations What you can do with HotSync HotSync allows you to synchronize data between the applications on Sony handheld and the Palm Desktop for Sony software on the computer. You can synchronize your data by connecting your Sony handheld directly to your computer with the cradle. • Synchronize the Date Book, the Address Book, the To Do List, the Memo Pad, and the Expense data on Sony handheld with that on the computer. • Manage several units of Sony handheld simultaneously through the computer. • HotSync allows backup copies to be created automatically in the computer, safely saving the Sony handheld data. • Install to your Sony handheld add-on applications downloaded from the Internet or other sources to the computer. Note You cannot perform IR HotSync with a computer that has the Windows 2000 Professional operating system installed. 142 Performing HotSync “HotSync” is a technology which automatically synchronizes Sony handheld application data with Palm Desktop for Sony software data on the computer. You can also reduce time required for completing HotSync by limiting to only the necessary data to be processed by HotSync. When performing HotSync for the first time When performing a HotSync operation for the first time, you need to enter user information both in Sony handheld and Palm Desktop for Sony software. When you enter user information and then perform HotSync, the Sony handheld user name is recognized automatically, so you do not have to enter the same information repeatedly. When you need to manage several units of Sony handheld through a single computer, you must predefine a user profile for each unit of Sony handheld. For more information, see “Creating a user profile” (page 150). 1 If there is no icon in your task tray, from the Windows Start menu, point to Programs, click Sony Handheld – HotSync Manager, to start HotSync Manager. 2 Turn on your Sony handheld and place it on the cradle. Place the back of Sony handheld snugly into the cradle. 3 Press the HotSync button on the cradle. The Users dialog box appears. 143 Exchanging and Updating Data using HotSync Operations Click the icon on the task tray at the lower right corner and select Local from the shortcut menu. 4 Enter the user name and click OK. This starts the HotSync operation. The message appears to show the completion of HotSync when the operation is finished. Notes • Even if HotSync operation performed via an USB connector on a cradle, “Serial” is indicated. • Do not remove or move your Sony handled from a cradle during HotSync operation. • Do not push HotSync button during HotSync operation. It might cause errors to force to quit the operation. • Do not enter power saving mode during HotSync operation. If your computer enters power saving mode during HotSync operation, HotSync Manager forced to quit your computer. Performing HotSync with the cradle (local HotSync) Once you run HotSync in this way, you can perform it more quickly in subsequent sessions. 1 Place your Sony handheld on the cradle. 2 Press the button on the front panel of the cradle. The HotSync operation starts. A message appears to show the completion of HotSync when the operation is finished. Note Do not remove the Sony handheld from the cradle till the HotSync operation is finished. Palm Desktop for Sony way not quit normaly. 144 If the Hotsync operation do not start • Make sure that the If the icon is shown on the task tray. icon is not shown on the task tray, click Start and select Programs - Palm Desktop for Sony software and press the button again. • Make sure that the user name of the Palm Desktop for Sony software is correct. Exchanging and Updating Data using HotSync Operations 145 Changing the HotSync settings You can change how to start the HotSync Manager or the local HotSync settings. 1 Click the icon on the Windows® task tray and select Setup from the shortcut menu. The Setup dialog box appears. 2 Click the General tab to change the setting as needed. If you do not know the appropriate setting, select Always available. • Always available: Places the HotSync Manager in the Startup folder, and allows HotSync to start monitoring the USB port immediately upon Windows® startup. This allows you to perform HotSync even when the Palm Desktop for Sony software is not running. • Available only when the Palm Desktop is running: Starts the HotSync Manager when the Palm Desktop for Sony software starts up. • Manual: Starts the HotSync Manager only when you select HotSync Manager from the Start menu on Windows®. 3 Click the Local tab to change the setting for the connection between the computer and cradle as needed. • Serial Port: You can specify a computer port to use when you perform a HotSync using a serial port. Note that you cannot use the Modem tab serial port for HotSync. • Speed: Specifies the data transfer rate between Sony handheld and the computer. First, use As Fast As Possible; if there is a problem, change the value to a lower rate. 146 4 Click OK when you have completed the settings. Customizing HotSync application settings For each application, you can define a set of options that determines how records are handled during synchronization. These options are called a “conduit.” By default, a HotSync operation synchronizes all files between your Sony handheld and Palm Desktop for Sony software. In general, you should leave the settings to synchronize all files. The only reason you might want to change these settings is to overwrite data on either your Sony handheld or Palm Desktop for Sony software, or to avoid synchronizing a particular type of file because you do not use it. In addition to the conduits for the Date Book, the Address Book, the To Do List, the Memo Pad, and the Expense, Palm Desktop for Sony software includes System and Install conduits. The System conduit backs up the system information stored on your Sony handheld. The Install conduit installs add-on applications on your Sony handheld. 1 Or, select Custom from the HotSync menu of the Palm Desktop for Sony software. The Custom dialog box appears. 2 From the list at the top, select the user name you are using on Sony handheld. 3 Select an application in the Conduit list. 147 Exchanging and Updating Data using HotSync Operations Click the icon on the Windows tasktray and select Custom from the HotSync Manager menu. 4 Click Change. The Change HotSync Action dialog box appears. 5 Click the direction in which you want to write data,or click Do Nothing. 6 Repeat steps 2 to 5 to modify conduit settings for other applications (or users). 7 Click OK. 8 Click Done. The conduit settings you have changed are implemented. Notes • To have the setting affect only the next HotSync operation, deselect Set At Default. Thereafter, the HotSync Actions revert to their default settings. • To use a new setting as the default, select the Set As Default option. Thereafter, whatever you selected as the default setting is used when you click the Default button in the Custom dialog. 148 Creating a user profile If your company introduce many units of Sony handheld, a predefined profile containing, for example, a company phone list can be transferred to these units before deploying them to users. Notes • This feature is designed only for first time HotSync operation, before you assign a User ID to a particular Sony handheld. • For the procedure to send a profile after setting user names, see “Synchronizing with external data created on the computer (the File Link).” Creating a profile 1 Start the Palm Desktop for Sony software. 2 Select Users from the Tools menu. The Users dialog box appears. Exchanging and Updating Data using HotSync Operations 3 Click Profiles. The Profiles dialog box appears. 4 Click New. The New Profile dialog box appears. 149 5 Enter a profile name and click OK. 6 Repeat steps 4 and 5 for each profile to be created. 7 Click OK. 8 Select profiles you want to edit from the User list, and create data such as a company phone list. Transferring a created profile 1 Place on the cradle a Sony handheld for which a User ID is not yet specified. 2 Press the button on the cradle. The Users dialog box appears. 3 Click Profiles. The Profiles dialog box appears. 4 Select the profile you want to transfer to Sony handheld, and click OK. 5 Click Yes. The selected profile will be sent to the Sony handheld. Next time you perform a HotSync operation, the Palm Desktop for Sony software shows a dialog box where you can specify a user name for this Sony handheld. 150 Synchronizing with external data created on the computer (File Link) The File Link feature lets you import the Address Book and the Memo Pad information into your Sony handheld from a separate external file such as a company phone list. HotSync Manager stores the data in a separate category on your Palm Desktop for Sony software and your Sony handheld. You can set the File Link feature to check for changes to the external file when you perform a HotSync operation. With File Link, you can import data stored in any of the following file formats: • Comma-delimited (*.csv) • Palm Desktop for Sony software software’s Memo Pad archive (*.mpa) • Palm Desktop for Sony software software’s Address Book archive (*.aba) • Text (*.txt) 151 Exchanging and Updating Data using HotSync Operations For information on how to set up the File Link, see the Palm Desktop for Sony software Online Help. Customizing your Sony handheld (Preferences) What you can do with Preferences You can customize your Sony handheld’s operation settings and default settings by changing Preferences. General Set the date and time, the auto shut-off interval, the Stay on in cradle feature, the Beam Receive feature, and the system, alarm, and game sounds. Formats Set the country default and the formats for dates, times, calendar, and numbers. Connection Configure serial, modem, and infrared communication settings. Owner Assign your name, phone number, and other owner information to your Sony handheld. Buttons Assign different applications to the buttons on the front panel of your Sony handheld and the HotSync® button on the cradle, and reassign the full-screen pen stroke command. ShortCuts Define a list of Graffiti® abbreviations. Digitizer Calibtate the screen on your organizer. Viewing Preference 1 Tap icon. The Application Launcher starts up. 2 Rotate the Jog Dial to select the Prefs and press the Jog Dial. The preferences screen appers. 152 3 From the dropdown list, select the preferences you want to change. Assigning applications to buttons Buttons preferences let you assign different applications to the buttons on the front of Sony handheld. For example, you can assign the To Do List button to start the Expense application. On the Preferences screen, Select Buttons from the dropdown list in the upper right. 2 Tap the application you want to assign to the button. Customizing your Sony handheld (Preferences) 1 153 To launch the original applications When you have assigned another application to the button, you can launch the original application with the application launcher. To reset to the default settings When you want to initialize the allocation for the application button, tap Default in the step 2. All application buttons are reset to the Factory (default) setting. 154 Changing the full-screen pen stroke activities You can change whether the full-screen pen stroke activities the Graffiti Help application or one of your applications launcher controls using Buttons preferences. 1 On the Preferences screen, select Buttons from the dropdown list in the upper right corner. Customizing your Sony handheld (Preferences) 155 2 Tap Pen. The Pen dialog box appears. 3 From the dropdown list, tap the function you want to start when you set the full-screen pen stroke. • Backlights rotates on the backlight of your Sony handheld. It’s convenient for you to switch ON/OFF of the backlight without using the power button. • Keyboard opens the onscreen keyboard for entering text characters. • Graffiti Help opens a series of screens that show the complete Graffiti character set. • Rotate Off & Lock rotates off and locks your Sony handheld. You must assign your password to lock the Sony handheld. When locked, you need to enter the password to use your Sony handheld. • Beam Data beams the current record to another Palm OS PDA. 4 Tap OK. Return to the Buttons Preferences dialog box. 156 Assigning applications to HotSync buttons Buttons preferences let you assign different applications to the HotSync buttons on the cradle and the modem. 1 On the Preferences screen, select Buttons from the dropdown list in the upper right corner. 2 Tap Hotsync. The Hotsync Buttons dialog box appears. Tap Application you want to change from the dropdown list. The allocation for the application button is changed. 4 Tap OK. Return to the Buttons Preferences dialog box. 157 Customizing your Sony handheld (Preferences) 3 Changing the digitizer preferences The Digitizer Preferences screen opens the digitizer calibration screen. This is the same screen that appears when you start your Sony handheld for the first time. You can recalibrate your screen after a hard reset, or if your digitizer drifts. On the Preferences screen, select Digitizer from the dropdown list in the upper right corner. The Digitizer display alignment screen appears. This screen is displayed also when you start up your Sony handheld for the first time. From the second time you use your Sony handheld, you can change the digitizer preferences following the instructions appearing on the screen. 158 Formatting the time, date, and numbers To choose a country default When you select a country, the time, date, the week’s starting day, and number formats are adjusted. For example, in England, time often is expressed using a 24-hour clock; in the United States, time is expressed using a 12-hour clock with an AM or PM suffix. A country default appears in all applications on your Sony handheld. However, you can customize your own settings such as the format setting for the time of day. 1 On the Preferences screen, select Formats from the dropdown list in the upper right corner. Customizing your Sony handheld (Preferences) 159 2 From the dropdown list of preset to, choose a country name you perform the standard setting. 3 Tap OK. To choose the time, date, and numbers formats You can select the preferred formats of the time, date, week’s starting, and numbers. These formats appear in all applications. 1 160 Tap the Time dropdown list in the Format Preferences, and select a format. 2 Tap the Date dropdown list in the Format Preferences, and select a format. 3 Tap the Week starts dropdown list in the Format Preferences, and select whether Sunday or Monday. This setting controls the Day, Week, Month, and Agenda views in The Date Book and all other aspects of your Sony handheld that displays a calendar. Customizing your Sony handheld (Preferences) 161 4 162 Tap the Numbers dropdown list and select a format. Setting the general preferences To set the time 1 From the upper right of the dropdown list in the upper rright corner preferences, tap the General. 2 Tap the Set Time. 3 Tap the 4 Tap the Minute box and tap minute. 5 Tap AM or PM to specify the morning or afternoon. or arrow to set the hour. or arrow to set to the You can display time based on a 24-hour clock. See “Formatting the time, date, and numbers” To set the date 1 From the upper right of the dropdown list, tap the PrefsGeneral. 163 Customizing your Sony handheld (Preferences) The Set Time screen appears. 2 Tap the current date. The Set Date screen appears. 3 Tap the set the year. 4 Tap the current month. 5 Tap the current date. beside the year at the top of the screen to Setting the auto shutoff Your Sony handheld automatically rotates off the power and backlight after a period of inactivity, to conserve battery power. You can set how long your Sony handheld automatically shuts off according to your settings. 1 From the upper right of the dropdown list of Preferences, tap the General. 2 Tap the Auto Off from the dropdown list and tap an option. You can select 30 seconds 1 minute, 2 minutes, or 3 minutes. 3 164 If you do not want to let your Sony handled turn off power automatically while it is connected to the cradle, tap the check box of “Stay on in Cradle” to set to On. Setting sounds You can select the sounds for system alerts, alarms, games, and sound on/ off during operations. 1 From the upper right of the dropdown list on Prefernces screen, tap the General. 2 Tap the System Sound dropdown list and select the desired sound level or off. Ratating off the System Sound also tuns off the chime tones used during HotSync operations. 3 Tap the Alarm Sound dropdown list and select the desired sound level or off. 4 Tap the Game Sound dropdown list and select the desired sound level or off. The Game Sound setting works only with games that are programmed to respond to it. Turn On/Off the Beam Receive If you turn off the Beam Receive, you cannot receive data using Beam, but you can conserve the Sony handheld battery. 1 On the Preferences screen, select General from the dropdown list in the upper right corner. 2 Tap Beam Receive dropdown list, and select On or Off. • On: Rotates “On” the Beam Receive. • Off: Rotates “Off” the Beam Receive. 165 Customizing your Sony handheld (Preferences) You can turn the Beam Receive on or off . Additional information Troubleshooting This section describes how to solve common problems you may encounter when using your Sony handheld. Many problema have simple solutions, so try these suggestions before you call Sony Customer Information Services Center. Note Thousands of third-party add-on applications have been written for the Palm OS platform. Sony does not support such a large number of thirdparty applications. If you are having a problem with a third-party application, please contact the developer or publisher of that software. Operating problems I do not see anything on my Sony handheld's screen. Try each of these in turn: t Tap the contrast adjustment icon and adjust the contrast. t Recharge the unit. If your Sony handheld still dose not operate, try a soft reset. See “Resetting your Sony handheld” in “Additional Information.” I get a warning message telling me my Sony handheld memory is full. t Purge records from Date Book and To Do List. This deletes To Do List items and past Date Book events from the memory of your Sony handheld. t Delete unused memos and records. If necessary, you can save these records. See explanations for each application. t If you have installed additional applications on your Sony handheld, remove them to recover memory. See “Deleting an add-on application.” 166 My Sony handheld keeps turning itself off. t Your Sony handheld is designed to turn itself off after a period of inactivity. This period can be set at one, two, or three minutes. See “Setting the auto shut off.” My Sony handheld is not making any sounds. t Check the System Sound setting. See “Setting sounds.” My Sony handheld has frozen, t Perform a soft reset. See “Resetting your Sony handheld” in “Additional Information.” Tapping and Writing problems When I tap the buttons or screen icons, my Sony handheld activates the wrong feature. t Calibrate the screen. See “Changing the digitizer preferences.” When I tap the Menu icon, nothing happens. t Not all applications or screens have menus. Try changing to a different application. I cannot get my Sony handheld to recognize my handwriting. t For your Sony handheld to recognize handwriting input with the stylus, you need to Graffiti® writing. See “Using Graffiti writing to enter data” in Read This First. t Write Graffiti strokes for letters in the left-hand side, and the strokes for numbers in the right-hand side of the Graffiti writing area. t Make sure that Graffiti is not shifted into extended or punctuation modes. See “Using Graffwriting to enter data” in Read This First. 167 Additional information t Make the Graffiti character strokes in the Graffiti writing area, not on the display part of the screen. Application problems I tapped the Today button, but it dose not show the correct date. t Your Sony handheld is not set to the current date. Make sure the Set Date box in the General Preferences screen display the current date. See “Setting the general preferences.” I know I entered some records, but they do not appear in the application. t Check the categories drop-down list (upper-right corner). Choose All to display all of the records for the application. t Check Security and confirm that Private Records is set to Show private records. t In To Do List, tap Show and see if Show Only Due Items is selected. I am having problems listing memos the way I want to see them. t If you cannot manually arrange the order of the memos in the list screen, check the Memo Preference setting. Make sure that Sort by is set to Manual. t If you choose to view your memos alphabetically on Plam Desktop for Sony software and then perform a HotSync operation, the memos on your Sony handheld still appear in the order defined in the Memo Preferences setting. In other words, the sort settings you use with Palm Desktop for Sony software are not transferred to your Sony handheld. I created an event in Date Book, but it does not appear in the Week View. t In the Week View, you cannot select overlapping events that have the same start time. If you have two or more events with the same start time, choose the Day View to see the overlapping events. 168 HotSync problems I cannot do a HotSync operation; what should I check to make sure I am doing it correctly? t Check the Windows system tray to make sure the HotSync Manager is running. If it is not, open HotSync Manager from Start menu. t Make sure the cradle is connected securely. I did a HotSync operation, but one of my applications did not synchronize. t Click the HotSync Manager and choose Custom. Check that the correct conduit is active. I am using Outlook® as my PIM, but I cannot do a HotSync operation. t Click the HotSync Manager and choose Custom. Check that the correct conduit is active. t Check that the correct conduit is installed. Reinstall the HotSync Manager and make sure the correct conduit is selected. I cannot launch the HotSync Manager. t Make sure you are not running another program, such as network and facsimile softwares, that uses the serial port you selected in the Setup dialog box. My Sony handheld appears to freeze when I place it near my computer. t Move your Sony handheld away from the computer’s infrared port. I tried to do a local HotSync operation, but it did not complete successfully. Try each of these in turn: t Make sure HotSync Manager is running. If HotSync Manager is running, exit, and restart it. t Make sure you selected Local from the HotSync Manger menu or the Palm Desktop for Sony software menu. 169 Additional information t Back up the Palm Desktop for Sony software, uninstall it, then reinstall it. t Check the cable connection between the cradle and the USB connector on your computer. t Try a lower baud rate setting on the Local tab in the Setup dialog. t Read the HotSync Log for the user account for which you are performing a HotSync operation. t Make sure your Sony handheld is seated in the cradle correctly. t Make sure the gold-plated connectors on the cradle and your Sony handheld are clean. Use a pencil eraser to clean them. I cannot perform an IR HotSync operation. t Be sure the HotSync Manager is running and the Serial Port for local operations is set to the simulated port for infrared communication. t On your Sony handheld, be sure the HotSync application is set to Local, with the option IR to a PC/Handheld. t Be sure the IR port of your Sony handheld is aligned directly opposite to, and within a few inches of, the infrared device of your computer. t IR HotSync operations do not work after you receive a low battery warning. Check the battery power of your Sony handheld. Recharge the internal battery. When I tap the HotSync button on the cradle, nothing happens on Palm Desktop for Sony software and my Sony handheld times out. t Check Palm Desktop for Sony software HotSync Setup options to confirm that you have the correct settings for local HotSync operations. t If you are experiencing intermittent success, try a lower speed setting on the Local tab in the Setup dialog box in the HotSync Manager. t Close and restart HotSync Manager on your computer. t Make a copy of your Palm folder. Uninstall, then reinstall Palm Desktop software. t Turn on your Sony handheld and tap the icon, then tap Local. 170 icon. Tap the HotSync When I perform a HotSync operation, my information does not transfer to Palm Desktop for Sony software . t If you have performed a HotSync operation successfully, but you cannot find the data from your Sony handheld on Palm Desktop for Sony software, check to see you have the correct user name selected for viewing data. t Click the HotSync Manager and choose Custom. Check that all conduits are set to synchronize files. My Sony handheld displays the message “Waiting for sender” when it is near my computer’s infrared port. t Your computer’s infrared port may be set to search automatically for the presence of other infrared devices. Do the following to turn off this option: 1. In the Windows® taskbar, click Start. 2. Choose Settings, and then choose Control Panel. 3. Double-click Infrared. 4. Click the Options tab. 5. Deselect the option Search for and provide status for devices in range. 6. Click Apply and OK. t Move your Sony handheld away from the computer’s infrared port. t If the computer running Palm Desktop for Sony software synchronizes with more than one Sony handheld, each Sony handheld must have a unique name. Assign a user name to your Sony handheld the first time you perform a HotSync operation. t Please be aware that synchronizing more than one Sony handheld with the same user name causes unpredictable results and, potentially, loss of your personal information. 171 Additional information I want to synchronize my computer with more than one Sony handheld. Beaming problems I cannot beam data to another Palm OS PDA. t Confirm that your Sony handheld and the other Palm OS PDA are between ten centimeters (approximately 4”) and twenty centimeters (approximately 8”) apart, and that the path between the two handhelds is clear of obstacles. Beaming distance to other Palm OS PDAs may be different. t Move your Sony handheld closer to the receiving handheld. When someone beams data to my Sony handheld, I get a message telling me it is out of memory. t Your Sony handheld requires at least twice the amount of memory available as the data you are receiving. For example, if you are receiving a 30K application, you must have at least 60K free. t Perform a soft reset. See “To reset (soft reset)” for more information. Recharging problems When I place my Sony handheld in the cradle, it does not recharge. t Confirm that your Sony handheld is well seated in the cradle. t Confirm that your recharger is plugged into an AC outlet that has power. t Confirm that you are using the cradle and AC adapter that came with the device. t Confirm your Sony handheld is turned off or it will not fully charge. 172 Password problems I forgot the password, and my Sony handheld is not locked. t You can use Security to delete the password, but your Sony handheld deletes all entries marked as private. However, if you perform a HotSync operation before you delete the password: the HotSync process backs up all entries, whether or not they are marked private. Then, you can follow these steps to restore your private entries: 1. Use the Palm Desktop for Sony software and the cradle or infrared communication to synchronize your data. 2. Tap Forgotten Password in Security to remove the password and delete all private records. 3. Perform a HotSync operation to synchronize your data and restore the private records by transferring them from your computer to your Sony handheld. I forgot the password and my Sony handheld is locked. t If you assign a password and lock your Sony handheld, you must perform a hard reset to continue using your Sony handheld. See “To perform a hard reset” for more information. Memory Stick media problems I cannot copy/move Data on a Memory Stick media to the Sony handheld Even though I inserted the Memory Stick media, the message “Please insert Memory Stick media” appears. t Your Memory Stick media is not recognized by your Sony handheld. Remove and insert it again. 173 Additional information t Your Sony handheld requires at least twice the amount of memory available as the data you are copying/moving. For example, if you are copying/moving a 30K application, you must have at least 60K free. Precautions This chapter provides information on how to correctly use and charge. Notes on use Sony handheld is well designed to provide years of reliable use. However, be sure to follow these precautions. • Do not scratch or damage your Sony handheld screen or the Graffiti writing area. Always use the point of the supplied stylus or a plastic tipped pointer, etc., for tapping on the screen. Do not use a pen, pencil, or any other sharp object on the screen. • Your Sony handheld is not waterproof. Do not expose your Sony handheld to rain or moisture. Be careful that water does not get inside through the crevice around the front button. Treat your Sony handheld like any other portable electronic equipment. • The Sony handheld screen is made of glass. Do not drop or subject it to shock. Do not carry Sony handheld in your back pocket. If you sit down with your Sony handheld in the back pocket, it may break the glass of the screen. • Avoid subjecting your Sony handheld to high or cold temperatures. Do not put your Sony handheld on the dashboard of your car under the sun. • Keep away from heaters. • Do not use and keep in areas with a high concentration of dust or moisture. • Clean your Sony handheld with a soft dry cloth. 174 Notes on charging Follow these precautions, when you charge Sony handheld. • It takes about three hours to charge for the first time. You can usually use Sony handheld for about fifteen days with a full charge. Charge the Sony handheld everyday. It only takes a few minutes to charge if you do it everyday. You can save battery power by not using the backlight function and by shortening the auto-shutoff time. (Sony handheld automatically rotates off when you don’t use your computer for a certain period of time.) See “Setting the auto shutoff” on page 164. • When the battery runs down through normal usage, a caution message appears. If this caution is displayed, back up all data with HotSync before you charge Sony handheld to prevent mistaken loss of data. • You can view data entered in your Sony handheld while charging. See Read This First for more information. • Even if the battery gradually runs out and your Sony handheld cannot be rotated on, the system safely keeps data for one week. In this case, the system maintains sufficient battery power to keep data. Start charging as soon as possible whenever you cannot rotate it on even though you push the battery button. • If the battery remainder status remains at 0 for too long, data may be lost. Be sure to charge the battery as soon as possible. • When the battery remainder status reads 0, you do not have to change the battery. You should charge the battery with the cradle as soon as possible. Do not disassemble your Sony handheld and take off the battery. Additional information 175 Resetting your Sony handheld Normally, you do not have to reset your Sony handheld. However, if the system behaves abnormally or does not respond to the button or stylus on the screen, and insufficient memory or other reasons, you must reset your Sony handheld. To reset (soft reset) If you perform a soft reset, the system keeps data recorded in your Sony handheld. 1 Take out the stylus pin by twisting the upper part of the stylus. 2 Slowly press the reset button at the back of Sony handheld using the stylus. The system shuts down and then restarts. After restarting, the system displays “Palm Computing Platform,” and then the preferences screen for setting the time and date appears. 176 To perform a hard reset When you cannot start your Sony handheld by soft reset, you must perform a hard reset to restart it. Note All records stored are deleted by hard reset. Do not perform the hard reset unless you cannot start Sony handheld by the soft reset. However, you can restore only records stored in your computer with the HotSync and you can see it the next time you perform a HotSync operation. 1 Push and hold the power button. 2 Press slowly the reset button at the back while pushing the power button. Palm Computing Platform screen appear. 3 Remove your finger from the power button. 4 Push the upper part of the scroll button in the front panel. Your Sony handheld is reset. After a hard reset, the current data and time are left as they were. The other settings, such as the format preferences, are set back to the Factory (default) settings. Note If the scroll button was used just prior to hard-resetting, the hard-reset may not be performed. 177 Additional information The message on the screen indicates that all records stored in your Sony handheld are deleted. Getting Help This section describes how to get help and support from Sony. About Sony’s support options Sony provides several support options for your Sony handheld. When you have questions about your Sony handheld and its related software, check these options for answers: ❒ This guide explains how to use your Sony handheld. ❒ The Sony handheld support Web site (http://www.sony.com/peg/support/) provides the latest information on your Sony handheld. On this Web site, you will find: • Frequently Asked Questions (FAQs) • An electronic version of the Operating Instructions • Installation information • Software updates • On-line knowledge base ❒ The Sony e-mail support service answers your questions by electronic mail. Just send your question, and a customer service representative will send you a reply. To send a question to Sony e-mail support, use the e-mail form at (http://www.sony.com/peg/support/). ❒ The Sony fax-back service provides you with answers to commonly asked questions. You can use this automated service to request a list of available -topics and then select the topics that you want to receive. To contact the Sony fax-back service, call 1-877-760-SONY (extension 7669) . ❒ The Sony Customer Information Services Center offers information about your Sony handheld and other Sony products that work with your computer. To contact Sony Customer Information Services Center, call 1-877-760-SONY (extension 7669) . 178 Specifications Power requirements AC power adapter (supplied) DC5.7V (dedicated connector) Battery Lithium ion battery (built-in) Battery life 15 days* (based on an average of 30 minutes use per day) Memory 8MB (DRAM) LCD display mode 160 × 160 dot (monochrome) External input/output Interface connector IrDA (1.2) Memory Stick slot Dimensions Approx. 2 7/8 × 4 5/8 × 5/8 inches (70.9 x 114.7 x 15.2 mm) (w/h/d) Mass Approx. 4.27 oz (121g) (supplied stylus included) Operating temperature 41ºF - 95ºF (5ºC - 35ºC) Design and specifications are subject to change without notice. 179 Additional information * The battery life span varies depending on the temperature and conditions of use. Limited Warranty Statement Sony Personal Entertainment Organizer Warranty The limited warranty on your hardware covers parts and labor against defects in material or workmanship for a period of three months from the original date of purchase. You can extend the warranty period for an additional nine months by registering your Sony handheld. See “Customer registration” in Read This First. Once you register your Sony handheld, the limited warranty period is twelve months from the original date of purchase. This warranty does not cover the battery included. For the purpose of this Limited Warranty “SONY” means SONY ELECTRONICS INC. for Products purchased in the United States of America. SONY warrants this Sony handheld hardware product (“the Product”) against defects in material or workmanship as follows: 1. Labor: For a period of ninety (90) calendar days from the original date of purchase from SONY or a SONY authorized reseller, SONY will repair defects in material or workmanship in the Product at no charge, or pay the associated labor charges to a SONY authorized service facility. The ninety (90) day warranty period is extendible only to the original purchaser, for an additional period of nine (9) months, for a total of twelve (12) months from date of purchase when the Product is registered electronically prior to the expiry of ninety (90) days from the original date of purchase. After the applicable period you must pay for all labor charges. 2. Parts: For a period of ninety (90) calendar days from the original date of purchase from SONY or a SONY authorized reseller, SONY will supply, at no charge, new or rebuilt, at SONY’s option, replacement parts in exchange for defective parts. Any replacement parts will be warranted for the remainder of the original warranty period or ninety (90) calendar days from installation by SONY’s authorized service facility, whichever is longer. The ninety (90) day warranty period is extendible only to the original purchaser, for an additional period of nine (9) months, for a total of twelve (12) months from date of purchase when the Product is registered prior to the expiry of ninety (90) days from the original date of purchase. All defective parts replaced under this Limited Warranty will become the property of SONY. This Limited Warranty covers only the hardware components packaged with the Product. It does not cover the technical assistance for hardware or software usage and it does not cover any software products whether or not contained in the 180 Product. SONY excludes all warranties express or implied in respect of any software provided with the product and any such software is provided AS IS unless expressly provided for in any enclosed software limited warranty. Please refer to the End User License Agreements included with the Product for your rights and obligations with respect to the software. This Limited Warranty is non-transferable. Proof of purchase in the form of a bill of sale (which is evidence that the Product is within the warranty period) must be presented to obtain warranty service. In addition, if replacement parts are required and you wish to receive the most expedient service available, you will be required to provide SONY with a credit card authorization to bill your credit card in the event you fail to return the original parts in the postage-paid envelope we provide. The credit card will only be charged for SONY’s list price for the part if the original part has not been returned within thirty (30) days. With respect of certain components you may be entitled to express warranty service during the warranty period, subject to certain restriction. Please contact SONY as indicated below for further information. With respect to all service provided, it is your responsibility prior to Product service to backup the data stored in its memory. It is likely that the contents of the memory will be lost or reformatted in the course of service and SONY will not be responsible for any damage to or loss of any programs, data or other information stored on any media or any part of any Product serviced hereunder or any consequential damages resulting therefrom. Be sure to remove all third party hardware, software, features, parts, options, alterations, and attachments not warranted by SONY prior to sending the Product to SONY for service. SONY is not liable for any loss or damage to these items. 181 Additional information IF DURING THE REPAIR OF THE PRODUCT THE CONTENTS OF THE MEMORY ARE ALTERED, DELETED OR IN ANY WAY MODIFIED, SONY IS NOT RESPONSIBLE WHATSOEVER. YOUR PRODUCT WILL BE RETURNED TO YOU CONFIGURED AS ORIGINALLY PURCHASED (SUBJECT TO AVAILABILITY OF SOFTWARE AND ANY SUBSEQUENT REVISION). This Limited Warranty does not cover any consumable items supplied with the Product; cosmetic damages; damage or loss to any software programs, data, or media; or damage due to (1) acts of God, accident, misuse, abuse, negligence, commercial use or modifications of this Product; (2) improper operation or maintenance of this Product; (3) connection to improper voltage supply; or (4) attempted repair by any party other than a SONY authorized service facility. This warranty does not cover physical damage to the surface of the product, including cracks or scratches on the LCD touchscreen or outside casing. This Limited Warranty does not apply when the malfunction results from the use of the Product in conjunction with accessories, products or ancillary or peripheral equipment, or where it is determined by SONY that there is no fault with the Product itself. This Limited Warranty is valid only in the United States of America. This Limited Warranty is invalid if the factory-applied serial number has been altered or removed from the product. Repair or replacement of defective parts or hardware as provided under this Limited Warranty is the exclusive remedy of the consumer. SONY SHALL NOT BE LIABLE FOR ANY INCIDENTAL OR CONSEQUENTIAL DAMAGES OR OTHER DAMAGES INCLUDING BUT NOT LIMITED TO, LOSS OF PROFITS, LOSS OF REVENUE, LOSS OF DATA, LOSS OF USE OF THE PRODUCT OR ANY ASSOCIATED EQUIPMENT, DOWNTIME AND PURCHASER’S TIME OR FOR BREACH OF ANY EXPRESS OR IMPLIED WARRANTY, BREACH OF CONTRACT, NEGLIGENCE, STRICT LIABILITY OR ANY OTHER LEGAL THEORY RELATED TO THIS PRODUCT. EXCEPT TO THE EXTENT PROHIBITED BY APPLICABLE LAW, ANY IMPLIED WARRANTY OF MERCHANTABILITY OR FITNESS FOR A PARTICULAR PURPOSE ON THIS PRODUCT IS LIMITED IN DURATION TO THE DURATION OF THIS WARRANTY. Some states do not allow the exclusion or limitation of incidental or consequential damages, or allow limitations on how long an implied warranty lasts, so the above limitations or exclusions may not apply to you. This Limited Warranty give you specified legal rights, and you many have other rights which vary from state to state. Technical Support: Although technical support is not provided free of charge under this Limited Warranty, SONY has established a telephone number for technical support. Charges may apply for technical support, unless and to the extent that free technical support for a limited period is provided in writing as a feature of your Product. Prior to placing you call, please have available the model and serial number for your Product, date of purchase, a list of all options installed in your Product and a detailed description of the problem. 182 For Product support, online knowledge base, frequently asked questions, and free updates via the Internet: http://www.sony.com/peg/support/. For Product information, service assistance, resolution of a service problem, or technical assistance, call 1-877-760-SONY (7669) . Save this for future reference. 2000 Sony Electronics Inc. Reproduction in whole or in part without written permission is prohibited. All rights reserved. SONY is a registered trademark of Sony Corporation. It Is Important That You Register Your Personal Entertainment Organizer By registering, you receive the following benefits: • Your 90-day limited hardware warranty is automatically extended to a full year from the original date of purchase. • One Year Hardware Telephone Support. Additional information 183 Index A information .................................. 130 item ................................................. 80 memo .............................................. 91 receive ................................... 130, 165 AC Adapter ................................ 19,172 Address Book category ........... 54, 62, 63, 64, 66, 67 delete ......................................... 61, 66 duplicate ................................... 59, 66 modify ............................................ 57 overview ......................................... 47 pasting image ................................ 50 remember last category ................ 67 rename custom fields ................... 67 search .............................................. 56 Calculator +/– ................................................ 109 C .................................................... 109 CE .................................................. 108 M+ ................................................. 109 MC ................................................. 109 MR ................................................. 109 calculator buttons ....................... 108 Alarm .............................. 40, 41, 45, 151 sound ................................ 25, 44, 165 Currency ............ 96, 100, 101, 103, 106 Applications application buttons ..................... 153 application launcher .................. 16, 17, 19, 21,115,116,152 HotSync buttons .......................... 157 select .................................................. 9 Attach Note Address Book ................................ 66 Date Book ....................................... 44 To Do List ....................................... 79 Auto shutoff ..................................... 164 B Backup .......... 14, 65, 106, 135, 142, 181 Battery battery level ..................................... 9 notes on charging ........................ 174 Beaming address .................................... 66, 131 application ................................... 129 business card ......................... 66, 129 category ............................ 66, 90, 129 event ................................................ 45 184 Country default ............................... 159 Cursor ................................................. 48 D Date Book agenda view ................................... 37 date and time view ....................... 37 event ................................................ 26 event conflicts ................................ 35 month view .................................... 35 overview ......................................... 25 purge ............................................... 45 repeating or continuous events ... 30 start/end time ............................... 45 the Date Book view ....................... 33 time overlap ................................... 34 title bar ............................................ 36 week view ...................................... 34 Delete Note Address Book ................................ 66 Date Book ....................................... 44 To Do List ....................................... 79 Deleting add-on applications .................... 139 address records .............................. 60 data in the Memory Stick media . 23 event ................................................ 43 memos ............................................ 89 passwords .................................... 126 To Do items .................................... 76 G document files CSV (Comm a Separated Value) ........ 81 TXT .................................................. 81 H Graffiti Graffiti writing ..... 28, 30, 69, 83, 95, 167 Graffiti Help ................. 132, 155, 156 Edit menu .................................. 132-133 Cut ................................................. 132 HotSync conduit .......................................... 146 cradle .................................... 142, 143 local HotSync ............................... 144 overview ....................................... 142 serial port ..................................... 146 speed ............................................. 146 E-mail .......................................... 47,135 I Duplicating .................................. 58, 66 E Expense expense items .............................. 107 menu commands ......................... 107 overview ......................................... 93 show options ................................. 96 external data storage ........................ 13 F Field .................................................... 48 File Link ........................................... 151 Find finding records ..................... 111-112 phone lookup ........................ 113-114 Format .......................................... 16, 24 the recording format ..................... 16 Internet .............................. 142, 144,183 Keyboard ............................ 82, 133, 156 onscreen ................................ 133, 156 L lock ............................................. 119-121 M MagicGate Memory Stick media .... 13 Memo Pad assigning a category ..................... 87 move ............................................... 86 overview ......................................... 81 private memo ................................ 87 sort ................................................... 85 Memory Stick media format ............................................. 16 insert/remove ................................ 13 Memory Stick indicator ................ 13 185 Index Font Address Book ................................ 67 change the font style ................... 134 Date Book ....................................... 45 Memo Pad ...................................... 92 To Do List ....................................... 80 Installing accompanied software ............... 140 add-on applications .................... 135 from a computer .......................... 137 from a Memory Stick media ...... 136 PictureGear Lite .......................... 140 Memory Stick slot ......................... 13 write-protection ............................. 15 Printing expense report ............................. 101 Memory Stick Gate (MS Gate) ... 17-23 copying the data ....................... 19-22 creator ID ........................................ 17 deleting the data ............................ 23 moving the data ...................... 20, 22 options menu ................................. 23 tools menu ...................................... 23 Private events ........................................ 42, 64 masking and hiding records ...... 125 private memo ................................ 87 private records ............................. 126 Menu commands Address Book ................................ 65 Calculator ..................................... 110 Date Book ....................................... 44 Expense ......................................... 107 Memo Pad ...................................... 90 MS Gate .......................................... 23 To Do List ....................................... 79 Reset .................................................. 176 default settings ............................ 154 hard reset ...................................... 177 soft reset ....................................... 176 Modem ............................. 145, 151, 157 Security Address Book ................................ 67 Memo Pad ...................................... 91 Protecting data ............................ 122 To Do List ....................................... 80 O owner information .......................... 114 P Palm Desktop for Sony software ..................... 42, 47, 60, 86, 100, 135 Palm OS ............................................ 127 Passwords ......................... 119,122, 124 assign ............................................ 122 changing/deleting ...................... 124 forgotten ....................................... 124 Paste .................................... 50, 110, 131 image .............................................. 50 PictureGear Lite .............................. 140 PictureGear Pocket ................... 47, 136 Power button ........................... 157, 177 Preferences Address Book ................................ 67 digitizer ........................................ 158 186 R S Scroll button .................................... 177 Setting alarm ............................................... 40 auto shutoff .................................. 164 events as the private data ............ 42 general preferences ..................... 163 HotSync ................................. 142-150 sounds ........................................... 165 the display order ........................... 86 To Do List priorities ...................... 68 Sony Personal Entertainment Organizer ....................................... 8 Sorting address list ..................................... 53 expense items ................................ 96 memos ............................................ 84 Stylus ............... 37,53, 86, 108, 167, 174 Symbols .................................... 103, 105 T telephone number ................... 46, 80, 92, 110, 112, 181 To Do List ........................................... 68 checking off items ......................... 72 due date ....... 40, 68, 71, 73-75, 77-78 Troubleshooting .............................. 166 U unlock ........................................ 118-119 user profile ....................................... 149 V Version Address Book ................................ 65 Calculator ..................................... 108 Date Book ....................................... 44 Expense ......................................... 107 Memo Pad ...................................... 90 MS Gate .................................... 17, 24 To Do List ....................................... 79 Index Printed on recycled paper 187 188 Index 189 190 Index 191 Printed in Japan