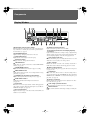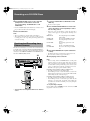
1
SL-PR300PPcover1.fm Page 1 Thursday, August 30, 2001 1:41 PM DISC SELECTOR CD1 CD2 CD REC CD EDIT CD3 1 FINALIZE 2 4 8 0 > _10 PLAY MODE DISPLAY 3 5 7 6 9 MULTI JOG REC LEVEL COMPACT DISC RECORDER SL-PR300 OPEN / CLOSE POWER DISC SELECTOR 3 3 DISC 2 2 DISC 1 1 DISC CONTROL CD CD-R/RW REPEAT OPEN / CLOSE DIGITAL •REC FADE SYNCHRO PHONES REC MUTE MIN MAX CD + MIX BALANCE LINE PLAY MODE CD EDIT CD REC SYNCHRO Compact Disc Recorder REC SELECTOR LINE FINALIZE REC ECTOR SEL – MENU SET CANCEL REC/ REC MUTE CD Operating Instructions MEN U PITCH+ SET PITCH– PITCH CEL CAN 0 COMPACT DISC RECORDER RAK-PR300 Model No. Before connecting, operating or adjusting this product, please read these instructions completely. Please keep this manual for future reference. SL-PR300 RQT6087-Y M0901YN0 PP SL-PR300PP.fm Page 2 Thursday, August 30, 2001 1:37 PM Dear Customer Thank you for purchasing this product. For optimum performance and safety, please read these instructions carefully. Supplied Accessories Remote control (RAK-PR300) . . . . . . . . . . . . . 1 pc. Please check and identify the supplied accessories. Use numbers indicated in parentheses when asking for replacement parts. (Only for U.S.A.) To order accessories contact 1-800-332-5368 or web site (http://www.panasonic.com). Batteries for remote control . . . . . . . . . . . . . . 2 pcs. Stereo connection cables (RJL2P004B08A) . . . 2 pcs. Table of Contents Listening Caution .......................................3 IMPORTANT SAFETY INSTRUCTIONS .....4 Features.......................................................4 Concerning CDs..........................................5 Connections ................................................6 Analog Connections .......................................................... 6 Digital Connections ........................................................... 7 Components................................................8 Main Unit ........................................................................... 8 Display Window .............................................................. 10 Using the Remote Control .......................11 Remote Control............................................................... 11 Inserting the Batteries ..................................................... 12 Using the Remote Control............................................... 12 Power STANDBY/ON Operations ............13 Turning the Power On and Standby Mode...................... 13 Listening to CDs .......................................14 3-CD Changer Continuous Playback .............................. 14 CDR Playback Operations .............................................. 15 Using the Remote Control to Control Playback............... 16 Direct Playback of a Specific Track................................. 17 Forward and Reverse Search ......................................... 17 Skipping Tracks .............................................................. 18 Repeat Playback ............................................................. 18 Random Playback ........................................................... 19 CD Playback Pitch Control.............................................. 19 Disc Lock Function.......................................................... 19 Programming Playback Using Main Unit Controls .......... 20 Programming Playback Using the Remote Control......... 21 Recording onto CD-R/RW Discs............. 23 Add Finalize Feature .......................................................23 Manual Recording ...........................................................24 Synchronized Recording of 3-CD Changer Playback .....26 1 Disc Dubbing ................................................................28 Listening Edit Recording .................................................29 Program Edit Recording ..................................................30 Setting the Unit for High-speed Recording......................32 Setting the Auto Track Spacing Function ........................32 Synchronized Recording from External Sources.............33 Mixed Input Recording ....................................................34 Special Recording Edit Operations ....... 36 Skipping a Recorded Track on a CD-R or CD-RW (Track Skip)..................................................................36 Erasing a Track or Tracks (Erase Function)....................36 Erasing All Tracks (Disc Erase Function)........................37 Finalizing a Disc ..............................................................38 Making Recording of a Finalized CD-RW Disc Possible (Unfinalize Function) ....................................................38 Bypassing the FS Converter (Sampling Frequency Converter) for More Efficient Digital Recording ...........39 Setting Up Synchronized Start Recording for External Digital Source (CD, MD, and DAT only).......................40 Resetting the Unit to the Factory Default Settings ..........40 Setting the Clock...................................... 41 Timer Operations ..................................... 43 Timer Play (wake-up play)...............................................43 Timer Recording (Unattended Recording from a Broadcast Receiver or Other Source) ...........................................45 CD and CDR Messages ........................... 46 SCMS (Serial Copy Management System) .....................48 Glossary ..........................................................................48 Troubleshooting....................................... 49 Specifications........................................... 50 2 RQT6087 SL-PR300PP.fm Page 3 Thursday, August 30, 2001 1:37 PM The model number and serial number of this product can be found on either the back or the bottom of the unit. Please note them in the space provided below and keep for future reference. MODEL NUMBER ________________________________ SERIAL NUMBER ________________________________ User memo: DATE OF PURCHASE ____________________________ DEALER NAME __________________________________ DEALER ADDRESS ______________________________ ________________________________________________ TELEPHONE NUMBER ___________________________ WARNING: TO REDUCE THE RISK OF FIRE, ELECTRIC SHOCK OR PRODUCT DAMAGE, DO NOT EXPOSE THIS APPARATUS TO RAIN, MOISTURE, DRIPPING OR SPLASHING AND ENSURE THAT NO OBJECTS FILLED WITH LIQUIDS, SUCH AS VASES, ARE PLACED ON THE APPARATUS. CAUTION: TO PREVENT ELECTRIC SHOCK MATCH WIDE BLADE OF PLUG TO WIDE SLOT, FULLY INSERT. CAUTION! THIS PRODUCT UTILIZES A LASER. USE OF CONTROLS OR ADJUSTMENTS OR PERFORMANCE OF PROCEDURES OTHER THAN THOSE SPECIFIED HEREIN MAY RESULT IN HAZARDOUS RADIATION EXPOSURE. DO NOT OPEN COVERS AND DO NOT REPAIR YOURSELF. REFER SERVICING TO QUALIFIED PERSONNEL. The laser product label has not been attached to this product. Listening Caution EST. 1924 Selecting fine audio equipment such as the unit you’ve just purchased is only the start of your musical enjoyment. Now it’s time to consider how you can maximize the fun and excitement your equipment offers. This manufacturer and the Electronic Industries Association’s Consumer Electronics Group want you to get the most out of your equipment by playing it at a safe level. One that lets the sound come through loud and clear without annoying blaring or distortion—and, most importantly, without affecting your sensitive hearing. We recommend you to avoid prolonged exposure to excessive noise. Sound can be deceiving. Over time your hearing “comfort level” adapts to higher volumes of sound. So what sounds “normal” can actually be loud and harmful to your hearing. Guard against this by setting your equipment at a safe level BEFORE your hearing adapts. To establish a safe level: • Start your volume control at a low setting. • Slowly increase the sound until you can hear it comfortably and clearly, and without distortion. Once you have established a comfortable sound level: • Set the dial and leave it there. Taking a minute to do this now will help to prevent hearing damage or loss in the future. After all, we want you listening for a lifetime. THE FOLLOWING APPLIES ONLY IN THE U.S.A. CAUTION: This equipment has been tested and found to comply with the limits for a Class B digital device, pursuant to Part 15 of the FCC Rules. These limits are designed to provide reasonable protection against harmful interference in a residential installation. This equipment generates, uses and can radiate radio frequency energy and, if not installed and used in accordance with the instructions, may cause harmful interference to radio communications. However, there is no guarantee that interference will not occur in a particular installation. If this equipment does cause harmful interference to radio or television reception, which can be determined by turning the equipment off and on, the user is encouraged to try to correct the interference by one or more of the following measures: • Reorient or relocate the receiving antenna. • Increase the separation between the equipment and receiver. • Connect the equipment into an outlet on a circuit different from that to which the receiver is connected. • Consult the dealer or an experienced radio/TV technician for help. Any unauthorized changes or modifications to this equipment would void the user’s authority to operate this device. This device complies with Part 15 of the FCC Rules. Operation is subject to the following two conditions: (1) This device may not cause harmful interference, and (2) this device must accept any interference received, including interference that may cause undesired operation. 3 RQT6087 SL-PR300PP.fm Page 4 Thursday, August 30, 2001 1:37 PM IMPORTANT SAFETY INSTRUCTIONS Read these operating instructions carefully before using the unit. Follow the safety instructions on the unit and the safety precautions listed below. Keep these operating instructions handy for future reference. Safety 1. Power source—Connect the unit to a power source of the type described in these instructions or as marked on the unit. 2. Polarization—The unit is equipped with a polarized power plug where one blade is wider than the other. This safety feature ensures that the plug fits into your household AC outlet only one way. If the plug doesn’t fit one way, try reversing it. If the plug still doesn’t fit, contact an electrician to replace the obsolete outlet. Do not attempt to defeat the safety purpose of the plug. 3. Power cord protection—Route the AC power supply cord so that it will not be walked on or pinched by items placed on or against it. Never take hold of the plug or cord with wet hands. Always grasp the plug body firmly when connecting and disconnecting it. 4. Overloading—When connecting the AC power supply cord, be careful not to overload the household AC outlet, extension cord, or outlet from any other device as this can result in fire or electric shock. 5. Nonuse periods—Turn the unit off when it is not in use. Unplug the unit from the household AC outlet if it is not to be used for a long time. Unplug the unit during lightning storms. 6. Attachments and accessories — Use only the attachments and accessories recommended in these operating instructions. Installation 2. Foreign material—Ensure objects and liquids do not get into the unit. Avoid exposing the unit to excessive smoke, dust, mechanical vibration, and shock. 3. Magnetism—Situate the unit away from equipment and devices that generate strong magnetic fields. 4. Stacking—Do not place heavy objects on top of this unit. 5. Surface—Place the unit on a flat, level surface. 6. Carts and stands—Use the unit only with carts and stands recommended by the manufacturer. Move carts with care. Sudden stops, excessive force, and uneven surfaces can cause carts to overturn. 7. Wall and ceiling mounting—Do not mount the unit on walls or ceilings, unless specified in the instructions. Environment 1. Water and moisture—Do not use the unit near water, such as near a bathtub or swimming pool. Avoid damp basements. 2. Heat—Situate the unit away from heat sources, such as radiators. Do not situate where temperatures fall below 5°C (41°F) or rise above 35°C (95°F). Maintenance Unplug the unit from the household AC outlet before cleaning. Clean with a damp cloth. Do not use abrasive pads, scouring powders or solvents. Service Placement 1. Ventilation—Situate the unit so that it receives proper ventilation. Do not install in a confined space such as a bookcase or cabinet. To prevent the risk of electric shock or fire due to overheating ensure curtains and other materials do not obstruct the unit’s ventilation. Proper Ventilation To avoid risk of electric shock and fire and to protect from damage, position the main unit as follows: Front: Open space with no obstructions. Sides: At least 3 cm (1-3/16 in.) of space on each side. Top: At least 5 cm (1-31/32 in.) of space between the top of the unit and the nearest object. Back: At least 15 cm (5-29/32 in.) of space between the back panel and the nearest object/wall. Bottom: Place the unit on a flat, level surface with no obstructions. 1. Damage requiring service—The unit should be serviced by qualified service personnel if: (a) The AC power supply cord or the plug has been damaged; or (b) Objects or liquids have gotten into the unit; or (c) The unit has been exposed to rain; or (d) The unit does not operate normally or exhibits a marked change in performance; or (e) The unit has been dropped, or the cabinet damaged. 2. Servicing—Do not attempt to service the unit beyond that described in these operating instructions. Refer all other servicing to authorized servicing personnel. 3. Replacement parts—When parts need replacing ensure the servicer uses parts specified by the manufacturer or parts that have the same characteristics as the original parts. Unauthorized substitutes may result in fire, electric shock, or other hazards. 4. Safety check—After repairs or service, ask the servicer to perform safety checks to confirm that the unit is in proper working condition. Features 4 RQT6087 The following is a list of some of the functions and conveniences obtained by having a 3-CD changer and CDR combined in a single unit. • Compatibility between 3-CD changer and CDR assured. • High-speed recording from source discs in the 3-CD changer to the target disc in the CDR unit (4x for CD-R, 2x for CD-RW). • Digital optical and coaxial I/O (input/output) terminals, and analog I/O terminals are provided for external audio signal source connections. • Sampling frequency converter capable of converting digital signals with sampling frequency of 32 kHz and 48 kHz to digital signals with a sampling frequency of 44.1 kHz for quality recording from a variety of sources. • No sampling frequency conversion of 44.1 kHz signals for optimal recording of CDs. • • • • • Mixing and recording of 3-CD changer playback and an external source input. Many convenient recording options including: one-button full CD and single track recording, Listening and Program Edit recording, manual recording, synchronized start/stop recording, and mixed input recording. CD playback pitch control that can adjust the speed of play up to 12% faster or slower than the normal speed to alter the pitch for singing along with songs or other customized uses. Timer playback and timer recording that can be set for one-time or everyday operation. OPC (Optimize Power Control), power adjustment performed for best possible recording onto CD-R and CD-RW media. SL-PR300PP.fm Page 5 Thursday, August 30, 2001 1:37 PM Compatible Disc Formats The following disc formats can be used for recording in the CDR. In addition to the marks shown on the right, the phrases shown below or their equivalent should also be present somewhere on the packaging or accompanying documentation: FOR CONSUMER FOR CONSUMER USE FOR MUSIC USE ONLY Discs that cannot be used for recording are as follows: • Discs bearing marks other than those shown above • Discs intended for professional use and/or marked “FOR PROFESSIONAL USE ONLY” • Discs intended for recording computer data In addition to the two disc formats shown above, the following disc format can also be played in either the 3-CD changer or CDR. Notes • The unit can playback audio data recorded on CD-G, CD-EXTRA and CD-Text discs as well, however the text information of CDText discs cannot be displayed. • If a CD-R or CD-RW has been recorded using a personal computer, playback is only possible if the disc is recorded in the CDDigital Audio format. • You can play CD-R and CD-RW discs recorded in the music CD format. Some of them, however, may not be played depending on the disc characteristics or recording condition. • Do not use a CD-R or CD-RW disc that has been recorded in any format other than the music CD format or a CD-RW disc that has been used in any format other than the music CD format with this unit. Using such a disc with this unit may cause loud sound to damage the speakers or cause hearing disorder. English Concerning CDs A – D Handling precautions • If you are taking the CD from a cold to a warm environment, moisture may form on the CD. Wipe this off with a soft, dry, lint-free cloth before using the CD. • Do not write on the label side with a ball-point pen or other writing instrument. • Do not use record cleaning sprays, benzine, thinner, static electricity prevention liquids or any other solvent. • Do not attach labels or stickers to CDs. (Do not use CDs with exposed adhesive from tape or left over peeled off stickers.) • Do not use scratch-proof protectors etc. • Do not use CDs printed with label printers available on the market. a How to return CDs to their case b Face label upwards and press down. c How to hold CDs Notes on playing unfinalized CD-R or CD-RW discs with the 3-CD changer • • • • It will take some time before play starts. CD-R or CD-RW discs of short recording time may not be played. An unfinalized CD-RW may not be played properly. For example, sound files that you have deleted may be played. In such a case, finalize the disc first or use the CDR of this unit for play. You cannot skip tracks on an unfinalized CD-R or CD-RW disc. d Do not touch the recorded surface. e How to clean CDs Do not use irregularly shaped CDs. CDs of the sort can damage the unit. f Wipe from inside outward. Storage precautions Be sure to store CDs in their cases to protect them from dust, scratches and warping. Do not place or store CDs in the following places • Locations exposed to direct sunlight • Humid or dusty locations • Locations directly exposed to a heat vent or heating appliance • In the glove compartment or on the rear deck of an automobile 5 RQT6087 SL-PR300PP.fm Page 6 Thursday, August 30, 2001 1:37 PM Connections Before making connections, be sure that the power of this unit and all other system components is first turned off. Analog Connections Use the stereo connection cables to connect this unit’s LINE terminals with those for the TAPE/CD/VCR on the receiver, etc. Recording signals (line input) TAPE /CDR Amplifier, receiver etc. Accessory pin cables OUT IN (REC) (PLAY) Playback signals This Unit AC power supply cord to household AC outlet LINE REC ( IN ) PLAY ( OUT ) DIGITAL IN COAXIAL Notes • Misconnections can be avoided by using the white plugs of the stereo connection cables for the LEFT channel and the red plugs for the RIGHT channel. • Insert the plugs all the way in. Incomplete connections may cause noise. 6 RQT6087 OPTICAL DIGITAL OUT COAXIAL OPTICAL SL-PR300PP.fm Page 7 Thursday, August 30, 2001 1:37 PM English Connections Digital Connections Digital Optical and Coaxial Cable Connections Optical Cable Input/Output Terminals • Connect a receiver or amplifier with digital audio capability via the optical Input/Output cables. A single cable transmits stereo signals (L/R channels) as digital data. • If analog audio connections are also being made, try using the digital connectors on the receiver/amplifier that are labeled the same way as the analog terminals. • Make sure the optical cable (not supplied) can be connected to the amplifier, etc. before purchasing it. • Do not bend the optical cable at a sharp angle. • The filament in the cable shines red when activated. This beam sends the digital signal. It is not harmful to the eyes, but please keep the protective cap on the terminal when not in use. Notes • Connect an external digital recording device to the digital output terminal on an amplifier or receiver, and then connect the amplifier or receiver to this unit. • The sound from an external device cannot be digitally output from this unit. To listen to the sound from the external device, connect an amplifier or receiver to the LINE OUT (PLAY) terminal on this unit. CD player, etc. Input signal To OPTICAL OUTPUT terminal Coaxial digital cable (not supplied) Optical digital cable (not supplied) LINE REC ( IN ) PLAY ( OUT ) This Unit DIGITAL IN COAXIAL OPTICAL DIGITAL OUT COAXIAL OPTICAL How to use optical terminals for connections 1 Remove the protective cap. Optical digital cable (not supplied) To OPTICAL INPUT terminal Output signal • When the terminal is not going to be used, fit this protective cap back in position. Receiver or amplifier with digital optical terminal Coaxial digital cable (not supplied) 2 Check that the end of the optical digital cable is not dirty, and insert it securely. Coaxial Cable Terminals • Coaxial Input/Output terminals are provided on this unit for enhanced connectivity. Simply connect the corresponding Input/Output terminals of other components using coaxial cables for fast, easy data transfer. 7 RQT6087 SL-PR300PP.fm Page 8 Thursday, August 30, 2001 1:37 PM Components Main Unit MULTI JOG REC LEVEL COMPACT DISC RECORDER SL-PR300 OPEN / CLOSE POWER DISC SELECTOR 3 3 DISC 2 2 DISC 1 1 DISC OPEN / CLOSE DIGITAL PHONES MIN MAX CD MIX BALANCE LINE PLAY MODE CD EDIT CD REC Description (For details, refer to page in parentheses.) POWER button and STANDBY lamp Press to switch the unit from on to standby mode or vice versa. In standby mode, the unit is still consuming a small amount of power. When the unit is connected to the AC mains supply, the STANDBY lamp lights up in standby mode and goes out when the unit is turned on. (see page 13) CD Trays 1, 2, and 3 (numbered from bottom to top) Load CDs in these trays for 3-CD changer playback. (see page 14) DISC SELECTOR and OPEN/CLOSE 0 Buttons Press to select the tray(s) that you want to play when CDs are loaded in the 3-CD changer. Icons show the currently selected trays in the display window. Use the OPEN/CLOSE 0 buttons to open and close the corresponding disc trays. (see page 14) CDR Disc Tray Load a recordable CD-R or CD-RW in this tray for recording. CD playback is also possible using this tray. REC SELECTOR and Source Selection Lamps Use to select the type of source the signal is to be recorded from. The selected source is indicated by activation of the lamp under the source name (located to the left). (see page 24, 33) OPEN/CLOSE 0 Button Press to open and close the CDR disc tray. MULTI JOG/REC LEVEL Control Use this control for selecting and setting use options, changing clock settings, skipping forward/backward through tracks on a CD, etc. Also use it to adjust the level of the source signal when recording discs. 8 + REC SELECTOR LINE SYNCHRO FINALIZE RQT6087 – MENU SET CD CANCEL REC/ REC MUTE MIX BALANCE Control Use the MIX BALANCE control to adjust the mixing levels of independent signals being recorded simultaneously. (see page 35) CDR Control Operation Buttons SYNCHRO: Press to select synchronized recording. (see page 33) MENU: Press to enter the menu options. SET: Press to enter an operation or selection. CANCEL: Press to cancel an operation or selection. FINALIZE: Press to finalize a CD-R/RW disc when recording has been completed. (see page 38) STOP s: Press to stop recording or playing of the CDR. (see page 15, 25) PLAY p: Press to start playing, or resume recording if the CDR is in the recording pause mode. (see page 15, 25) PAUSE S: Press to pause play or recording. (see page 16) REC/ REC MUTE: Use to start recording, or when recording to mute the recording signal. (see page 25, 29, 35) Display Window Displays operation modes and system information. (see page 10) SL-PR300PP.fm Page 9 Thursday, August 30, 2001 1:37 PM CD Control Operation Buttons PLAY MODE: Press repeatedly to select one of the play modes for the 3-CD changer. (see page 19, 20) CD EDIT: Press to select either Listening Edit or Program Edit recording mode. (see page 29, 30) CD REC: Press to perform synchronized recording of the currently selected CD in the 3-CD changer. (see page 26, 27) STOPs: Press to stop play of the selected disc in the 3-CD changer. (see page 15) PLAYp: Press to start play of the selected disc in the 3-CD changer. (see page 14) PAUSES: Press to pause play of the selected disc in the 3-CD changer. (see page 15) Headphones Jack Use this jack to connect headphones (not supplied) to the unit. English Components PHONES LEVEL (Volume) Control Use this to adjust the volume being output to headphones connected to the unit. Note Avoid listening for prolonged periods of time to prevent hearing damage. Remote Control Sensor This sensor receives commands from the remote control. Note In this manual, procedures using buttons on the front panel of the unit are depicted by the name of the button in capital letters with the button illustration immediately after it. Procedures using the buttons on the remote control are depicted by the button illustration with the name of the button in small letters and parentheses immediately after it. Example: CD Control PAUSE S button (Front panel) S (pause) button (Remote control) 9 RQT6087 SL-PR300PP.fm Page 10 Thursday, August 30, 2001 1:37 PM Components Display Window PROGRAM RANDOM REPEAT ALL 1CD CD PLAYER LISTENING EDIT PROGRAM EDIT CD REC 1CD – PITCH + 1 2 3 6 7 8 11 12 13 16 17 18 4 9 14 19 CD numbers and play status displays Indicate whether discs are loaded in any of the 3-CD changer disc trays, which disc is currently selected, and the operation status of the current disc. (see page 15) PLAY MODE indicators Light according to which play mode has been selected. CD PLAYER indicator Lights when the 3-CD changer is selected for play. Information display Displays track, time, and operation information. SKIP ON indicator Lights when the currently selected disc contains SKIP TRACK markers. (see page 36) CD RECORDER indicator Lights when the CDR has been selected for play or recording. HIGH SPEED indicator Lights when the high-speed (4x, 2x) recording function is being performed. (see page 32) RQT6087 CD RECORDER SYNCHRO REC HIGH SPEED AUTO TRACK OVER CD CD-R L CD–RW FINALIZED R– 40 30 20 15 10 6 3 0 dB CDR deck operation indicators Light to indicate the operation mode of the CDR. Recording type indicators and sampling frequency indicators Light to indicate whether the recording is analog or digital. During digital recording, the appropriate frequency indicator lights to indicate the sampling frequency of the source being played back. Timer operation indicators Indicate that a Timer play or recording function has been set, and whether it is set for everyday or one-time operation. Music calendar Indicates the number of tracks on the currently selected CD or CDR, and the track on the disc that is being played or recorded. EDIT recording indicators Indicates if the listening edit or program edit mode is being used. (see page 29, 30) SYNCHRO (synchronized) recording indicator Lights to indicate synchronized recording is on. (see page 27) 1CD indicator Lights at the time either the 1CD or 1 Track recording mode is selected. Also lights together with REPEAT and 1CD of the PLAY MODE indicators if REPEAT 1 is selected when setting the repeat play mode. (see page 18) AUTO TRACK indicator Lights when automatic track marking has been turned on. (see page 26) PITCH (+/–) indicators Indicate that the pitch of CD play has been adjusted in one direction or the other. (see page 19) Level meters Indicate the levels of the right and left channels during playback and recording operations. When the input signal exceeds 0 dB, the OVER indicator lights. (see page 25) 3-CD changer operation indicators Light to indicate the operation mode of the 3-CD changer. Disc format indicators Light to indicate the type of disc that is loaded in the CDR, and whether or not it is finalized. 10 5 SKIP ON ANALOG DAILY DIGITAL 10 32kHz 15 ONCE 44.1kHz 20 48kHz CD REC indicator Indicates a CD loaded in the 3-CD changer is being recorded by the CDR. SL-PR300PP.fm Page 11 Thursday, August 30, 2001 1:37 PM English Using the Remote Control Remote Control s (stop) Button Press to stop playback of the currently selected disc in the 3-CD changer or stop playback/recording of the disc in the CDR. DISC SELECTOR CD1 CD2 CD3 CD REC CD EDIT FINALIZE DISPLAY 1 2 3 4 5 6 7 8 9 0 > _10 PLAY MODE CONTROL CD CD-R/RW REPEAT •REC FADE SYNCHRO REC MUTE p (play) Button Press to play the currently selected CD. r (reverse) Button Press to perform fast reverse search of the CD currently being played. (see page 17) REC SELECTOR Button Press to select the source for recording to the CDR. P MULTI JOG Control (menu) Button Press to select menu operations. Pitch 0 Button Press to restore playback speed of the CD player to normal. R RECLECTO SE MEN U PITCH+ SET PITCH– PITC H0 CEL CAN COMPACT DISC RECORDER RAK-PR300 When following the procedures in this manual, the buttons on the remote control have the same function as the corresponding buttons on the main unit. POWER Button Press to turn the power of this unit on or to put it in the standby mode. (see page 13) DISPLAY Button Press to change the type of information that is shown in the information display (see page 27). FINALIZE Button Press to start finalization of a CD-R or CD-RW. (see page 38) CD and CDR Deck Selection Buttons Press to select the deck you want to use, 3-CD changer or CDR. (see page 17) SYNCHRO Button Press to select synchronized recording. (see page 33) FADE Button Press to create fade-in and fade-out of data being recorded. (see page 25) CD1, CD2, CD3 Disc Selection Buttons Use these to select the disc(s) to be played by the 3-CD changer. (see page 13, 17) F (forward skip) Button Press to skip forward to other tracks on the disc. (see page 18) CD REC Button Press to start the CD REC function. (see page 27, 28) S (pause) Button Press to pause playback of the currently selected disc. (see page 16) CD EDIT Button Press repeatedly to select Listening Edit or Program Edit functions. (see page 29, 30) f (forward) Button Press to perform fast forward search of the currently selected CD. (see page 17) Number Buttons Press to select tracks for playback. (see page 17) MENU Button Press to access Menu options. PLAY MODE Button Press repeatedly to select a play mode for the 3-CD changer. (see page 19, 21) PITCH+ Button Press to increase the speed of CD playback. REPEAT Button Press repeatedly to select one of the repeat play modes. (see page 18) 1 REC/REC MUTE Button Press to put the unit into recording pause mode from CDR stop mode. Press to mute recording signal during recording. (see page 25, 31) R (reverse skip) Button Press to skip back to the beginning of previous tracks. (see page 18) pMULTI JOG Control (menu) Button Press to select menu operations. SET Button Press to enter a selection on the menu. Also used for registering tracks in the program mode. CANCEL Button Press to cancel an operation. PITCH – Button Press to decrease the speed of CD playback. 11 RQT6087 SL-PR300PP.fm Page 12 Thursday, August 30, 2001 1:37 PM Using the Remote Control Inserting the Batteries 1 Using the Remote Control Press down on the point shown by the arrow at the top of the compartment cover, and lift the cover to open the compartment. MULTI JOG REC LEVEL COMPACT DISC RECORDER SL-PR300 OPEN / CLOSE POWER DISC SELECTOR 3 3 DISC 2 2 DISC OPEN / CLOSE DIGITAL DISC 1 PHONES MIN CD – + REC SELECTOR LINE MIX BALANCE 1 LINE MAX PLAY MODE CD EDIT CD REC SYNCHRO FINALIZE 30° MENU SET CD CANCEL REC/ REC MUTE 30° DISC SELECTOR 2 Place the two accompanying batteries in the remote control making sure to match the battery polarities with the markings (“+”/“–”) inside the compartment. CD1 CD2 CD REC CD EDIT CD3 FINALIZE 1 2 4 5 7 8 DISPLAY 3 6 9 > _10 0 PLAY MODE CONTROL CD CD-R/RW REPEAT •REC FADE SYNCHRO REC MUTE RECLECTOR SE MENU PITCH+ SET PITCH– (R6, AA, UM-3) PITCH EL CANC 0 COMPACT DISC RECORDER RAK-PR300 3 • • • • • • • • Place the cover over the compartment and press down lightly until it locks in place. Align the poles (+ and –) properly when inserting the batteries. Do not mix old and new batteries or different types of batteries. Do not recharge ordinary dry cell batteries. Do not heat or disassemble the batteries. Do not allow them to contact flame or water. Remove the batteries if the unit is not to be used for a long time. Do not keep together with metallic objects such as necklaces. Do not use batteries if the covering has been peeled off. Do not use rechargeable type batteries. Mishandling of batteries can cause electrolyte leakage which can damage items the fluid contacts and may cause a fire. If electrolyte leaks from the batteries, consult your dealer. Wash thoroughly with water if electrolyte comes in contact with any part of your body. 12 RQT6087 • Point the remote control toward the left side of the front panel of the main unit before you begin pressing buttons. • The remote control can be operated at a distance of up to approximately 7m (23ft) from the main unit. This distance will be less if the remote control is operated from a position that is not directly in front or on the same level as the main unit. • When the distance over which the remote control can be operated starts to drop, the batteries are nearing the end of their service life. • The batteries provided are for checking system operations only. Replace them with new batteries as soon as possible. • Do not drop the remote control or subject it to strong impact. • Do not expose the main unit and remote control to direct sunlight or other intense sources of light. • Do not place objects blocking the path of signals being transmitted from the remote control to the main unit. • Take care to keep the remote control signal sensor and end of the remote control unit free from dust. • If this system is installed in a rack with glass doors, the thickness and color of the glass doors might make it necessary to use the remote control a shorter distance from the system. • Do not place heavy items on the unit. • Do not disassemble or reconstruct it. • Do not spill water or other liquids onto it. SL-PR300PP.fm Page 13 Thursday, August 30, 2001 1:37 PM • The clock display is shown in the information display. It flashes if the clock has not been set. If the POWER ( ) button is pressed during a recording operation, the standby lamp flashes while the unit brings the operation to an end. Once the operation has stopped, the unit enters the standby mode and the standby lamp lights steady. From the time the button is pressed until the standby lamp lights steady, the unit will not respond to any button pressed on the front panel of the main unit or remote control. Turning the Power On and Standby Mode POWER ( ) DISC SELECTOR 1, 2, 3 0 0 MULTI JOG REC LEVEL COMPACT DISC RECORDER SL-PR300 OPEN / CLOSE POWER DISC SELECTOR 3 3 DISC 2 2 DISC OPEN / CLOSE DIGITAL DISC 1 PHONES MIN MAX CD – + REC SELECTOR LINE MIX BALANCE 1 LINE PLAY MODE CD EDIT English Power STANDBY/ON Operations CD REC SYNCHRO MENU SET CD CANCEL REC/ REC MUTE FINALIZE Turning the power on by pressing a function button when the unit is in the standby mode The unit can be turned on and a function selected simply by pressing one of the buttons shown in the figure below p p Function Operation 3-CD changer The function is set to 3-CD changer. The CD PLAYER indictor is shown in the display window. If one of these buttons is pressed when a CD is in the corresponding CD tray, continuous play starts from the CD tray corresponding to the button pressed. These buttons do not function during program and random play modes. 3-CD changer The function is set to 3-CD changer. The CD PLAYER indicator is shown in the display window. CDR The function is set to CDR. The CD RECORDER indicator is shown in the display window. Main unit DISC SELECTOR CD1, CD2, CD3 CD1 CD2 CD3 CD REC CD EDIT FINALIZE DISPLAY 1 2 3 4 5 6 7 8 3 ) 2 9 > _10 0 PLAY MODE POWER ( CONTROL CD CD-R/RW REPEAT •REC FADE 1 SYNCHRO REC MUTE p R RECLECTO SE MEN U PITCH+ Remote control SET CD1 PITCH– PITC H0 CD2 CD3 EL CANC COMPACT DISC RECORDER RAK-PR300 Main unit (3-CD control) To turn power to the unit on Press the POWER control. ( ) button on the front panel or remote Main Unit Remote Control Main unit (CDR control) POWER • The currently selected CD function is shown in the information display. To put the unit in standby mode during operation Press the POWER control. ( ) button on the front panel or remote Main Unit • When the PLAY p button for either the 3-CD changer or CDR is pressed on the main unit, the power is turned on and the corresponding tray is selected. If a disc is loaded in the selected tray, playback begins. • When one of the 3-CD changer OPEN/CLOSE 0 buttons or the CDR OPEN/CLOSE 0 button is pressed, the power is turned on and the tray opens, but the currently selected function (3-CD changer or CDR) does not change. • If the power cord is unplugged from the wall socket for more than a few seconds, the internal clock, program, etc. of the main unit may require resetting. When this occurs, please set the clock (and timer functions) again. Remote Control POWER 13 RQT6087 SL-PR300PP.fm Page 14 Thursday, August 30, 2001 1:37 PM Listening to CDs 3 3-CD Changer Continuous Playback 1, 2 3 CD PLAYER COMPACT DISC RECORDER SL-PR300 OPEN / CLOSE DISC SELECTOR 3 3 DISC 2 2 DISC OPEN / CLOSE DIGITAL MIN MAX DISC 1 CD – + REC SELECTOR LINE MIX BALANCE 1 LINE PLAY MODE CD EDIT CD REC SYNCHRO MENU FINALIZE SET CD CANCEL REC/ REC MUTE s p S Example: Loading a CD for playback in tray DISC1. 1 Press the DISC1 OPEN/CLOSE 0 button to open the tray. • The power comes on, and tray DISC1 opens. 2 1 6 2 7 3 8 4 9 5 DIGITAL HIGH SPEED AUTO TRACK 44.1kHz L– R 40 30 20 15 10 6 3 0 dB MULTI JOG REC LEVEL POWER PHONES Press the DISC SELECTOR 1 button. • The function is set to CD, and DISC1 playback starts from track 1. Load a CD and close the tray by pressing the DISC1 OPEN/CLOSE 0 button again. Place the CD with its label side facing up. 1 Place an 8-cm CD in the center cutout. • “CD READ DISC” flashes in the information display while the disc is being read. • Follow steps 1 and 2, repeating the process for DISC2 and DISC3, pressing the appropriate OPEN/CLOSE 0 buttons, and load CDs in trays DISC2 and DISC3 as well. • The unit will not respond to commands when a specified tray is being opened or closed or while the unit is switching CD trays. • 3-CD changer trays cannot be opened during recording even if recording from an external source. (This prevents noise and vibration from lowering the quality of the recording.) • The track number is cleared from the music calendar when the corresponding track has finished playing. • In this example, playback proceeds through all of the tracks on DISC1, DISC2 and DISC3, and stops automatically after the last track on DISC3 has finished playing. This pattern changes depending on the first disc selected for play, as described in the following section. When one or more CDs are already in the trays. • Press the button of the CD tray that you want to start playback from. Continuous play will start playback from the CD in that tray. • When play starts from DISC2 The CDs are played in the sequence of DISC2 DISC3 DISC1, and then playback stops automatically. • When play starts from DISC3 The CDs are played in the sequence of DISC3 DISC1 DISC2, and then playback stops automatically. If one of the trays does not contain a CD, play skips to the CD in the next tray in the sequence. Î Î Î Î Notes • The DISC SELECTOR 1, 2, and 3 buttons do not function during program and random play modes. • If a tray is opened and closed when it is not the current tray in use, the unit temporarily assigns the tray a NO DISC status. When it becomes time to play the disc in this tray, the disc information is read, and if there is no disc, the unit will move on to the next tray. • The total track time does not always match total play time (time shown in display window) exactly because the playback time includes lead-in and lead-out spaces as well. Playing CDs using the CD Control PLAY p button Press the CD Control PLAY p button to select the 3-CD changer function. This automatically starts playback of the disc in the currently selected tray. • The currently selected tray is indicated by the red “ “mark appearing to the immediate right of the CD icon in the display window. 14 RQT6087 SL-PR300PP.fm Page 15 Thursday, August 30, 2001 1:37 PM Stopping CD playback To stop playback at any time • Stop playback of a disc in the 3-CD changer by pressing the CD Control STOP s button. The total number of tracks and playing time is shown in the information display. English Listening to CDs CDR Playback Operations 2 1 MULTI JOG REC LEVEL COMPACT DISC RECORDER SL-PR300 OPEN / CLOSE POWER DISC SELECTOR 3 3 DISC 2 2 DISC OPEN / CLOSE DIGITAL DISC 1 PHONES MIN MAX CD + REC SELECTOR LINE MIX BALANCE 1 LINE PLAY MODE CD EDIT CD REC SYNCHRO MENU SET • When all the tracks on a CD have been played through, playback stops automatically. s CD CANCEL REC/ REC MUTE FINALIZE To stop playback temporarily • If the CD Control PAUSE S button is pressed, playback is paused temporarily. When the CD Control PLAY p button is pressed, playback resumes from the place where it was paused. – 3 S 1 Press the CDR OPEN/CLOSE 0 button to open the CDR disc tray. 2 Load a disc in position and close the tray by pressing the CDR OPEN/CLOSE 0 button again. OPEN / CLOSE • This button works when the 3-CD changer is selected as the playback source. Removing a CD from the 3-CD changer To remove a CD from the 3-CD changer, press the OPEN/CLOSE 0 button next to the tray holding the CD to be removed. To remove the CD that is currently being played back, it is recommended that playback first be ended by pressing the CD Control STOP s button before pressing the OPEN/CLOSE 0 button. After pressing the OPEN/CLOSE 0 button, the tray will open and the CD can be removed. Press the OPEN/CLOSE 0 button once more to close the tray. Number of CDs and play status display The display window shows whether or not a CD has been loaded into each of the CD trays as well as the play status of the CD. • When a CD-R or CD-RW is loaded in the CDR, the unit determines the format of the disc and whether it is finalized or not. 3 Press the CDR Control PLAY p button to select the CDR function and start playback at track 1. • Playback stops automatically at the end of the last track on the disc. To stop CDR playback • Stop playback of a disc in the CDR by pressing the CDR Control STOP s button. The total number of tracks and play time will be shown in the information display. This icon lights in sequence when a CD is playing, and blinks when play is paused. If no disc is loaded, the light remains out and “NO DISC” is shown in the information display. This lights when the CD in the tray has been selected to be played. 15 RQT6087 SL-PR300PP.fm Page 16 Thursday, August 30, 2001 1:37 PM Listening to CDs To stop CDR playback temporarily • Pressing the CDR Control PAUSE S button at any time when a CD is playing in the CDR pauses playback. Press the CDR Control PLAY p button to resume playback. Using the Remote Control to Control Playback CD1, CD2, CD3 • When playback is paused, the S indicator is shown in the display window. DISC SELECTOR CD1 CD2 CD3 CD REC CD EDIT FINALIZE DISPLAY 1 2 3 4 5 6 7 8 0 > _10 PLAY MODE 9 CONTROL CD CD-R/RW REPEAT •REC FADE SYNCHRO REC MUTE Removing a CD from the CDR R RECLECTO SE 1 2 MEN U PITCH+ • To remove a CD from the CDR, press the CDR OPEN/CLOSE 0 button. To remove a CD when it is being played back, it is recommended that playback first be ended by pressing the CDR Control STOP s button before pressing the OPEN/CLOSE 0 button. After pressing the OPEN/CLOSE 0 button, the tray will open and the CD can be removed. Press the OPEN/CLOSE 0 button once more to close the tray. Notes • When an unfinalized CD-R or CD-RW is loaded in the CDR and the CDR OPEN/CLOSE 0 button is pressed to open the CDR disc tray, “FINALIZE?” is shown in the information display. If you do not wish to finalize the CD at that time, press the CDR OPEN/CLOSE 0 button again. For more information on finalizing a CD, see page 38. • If playback of an unfinalized disc is stopped or if tracks are skipped (forward or reverse), some data of the track (or beginning of next track in the case of skipping) may be cut (not read) when playback starts again. • The total track time does not always match total playback time (time shown in the information display) exactly because the playback time includes lead-in and lead-out spaces as well. 16 RQT6087 SET PITCH– PITC H0 EL CANC COMPACT DISC RECORDER RAK-PR300 1 Press the CD or CDR button to select the deck. CD button: To control discs in the 3-CD changer CDR button: To control the disc in the CDR • Pressing the CD1, CD2 or CD3 button automatically sets the unit to the 3-CD changer and starts playback of the disc in the selected tray. • When the CD function is selected, the CD PLAYER indicator is shown in the display window. When the CDR function is selected, the CD RECORDER indicator is shown. 2 Press the command button of the operation you want to perform. • The buttons on the remote control perform the same operations as the corresponding buttons on the main unit. • The command is applied to the 3-CD changer or CDR depending on the function currently selected. SL-PR300PP.fm Page 17 Thursday, August 30, 2001 1:37 PM Direct Playback of a Specific Track 1 DISC SELECTOR CD1 CD2 CD3 CD REC CD EDIT FINALIZE 2 DISPLAY 1 2 3 4 5 6 7 8 9 > _10 0 PLAY MODE CONTROL CD CD-R/RW REPEAT •REC FADE 1 SYNCHRO Forward and Reverse Search REC MUTE R RECLECTO SE Direct Track Selection (selecting another track during playback) Press the number button(s) corresponding to the track to be played (step 2). The display will change to indicate the corresponding track number, playback of the current track will stop and playback of the newly selected track will begin. • To select a track on a CD in another tray, repeat steps 1 and 2. • Direct track selection cannot be initiated by pressing the ≥10 button alone: this button must be used in combination with one of the other number buttons (0 through 9). This function is not possible when either program or random play mode is in use. MEN U PITCH+ 1 Press the CD and CDR Deck Selection button (CD or CDR) corresponding to the tray holding the CD currently playing. 2 Press the r (reverse) or f (forward) button corresponding to the direction you want search. Release the button when you find the location you want to play. SET PITCH– PITC H0 EL CANC COMPACT DISC RECORDER RAK-PR300 1 English Listening to CDs Press the CD and CDR Deck Selection button corresponding to the tray holding the CD and track to be played. For a CD in the 3-CD changer REC MUTE r/f R RECLECTO SE MEN U PITCH+ CONTROL CD CD-R/RW SET CD1 CD2 CD3 PITCH– PITC H0 EL CANC COMPACT DISC RECORDER RAK-PR300 For a CD in the CDR CONTROL CD CD-R/RW 2 Press the number button(s) of the track you want to play. The track number corresponding to the buttons pressed is shown in the information display, and playback of that track starts. Reverse search Forward search • If playback is paused when a search is performed, there is no sound heard during the search. When the search is complete the pause mode is resumed. • When forward or reverse searching is performed during playback of an unfinalized disc, the information display and/or the search function may not operate properly depending on the type of disc being played. To select a two-digit track number Press the ≥10 button and then the two numbers you want within 5 seconds or so. Example: Track 15 Press ≥10, then 1, and then 5. Example: Track 20 Press ≥10, then 2, and then 0. 17 RQT6087 SL-PR300PP.fm Page 18 Thursday, August 30, 2001 1:37 PM Listening to CDs Skipping Tracks Repeat Playback To skip forward or backward to different tracks on the currently selected CD, use the MULTI JOG control on the main unit or the R (reverse) or F (forward) buttons on the remote control. MULTI JOG control MULTI JOG REC LEVEL COMPACT DISC RECORDER SL-PR300 OPEN / CLOSE POWER DISC SELECTOR 3 3 DISC 2 2 DISC OPEN / CLOSE MIN MAX – + PLAY MODE DIGITAL DISC 1 PHONES CD CD EDIT MIX BALANCE 1 CD REC SYNCHRO CONTROL CD CD-R/RW REPEAT REC SELECTOR LINE LINE PLAY MODE The repeat playback mode can be selected by pressing the REPEAT button on the remote control when the main unit is set to either 3-CD changer or CDR function. Please note, however, that the REPEAT ALL setting (for repeating all of the CDs loaded in the 3-CD changer) can only be set when the main unit is set to 3CD changer (CD PLAYER indicator is shown in display window). MENU SET REPEAT CD FADE SYNCHRO REC MUTE CANCEL FINALIZE •REC REC/ REC MUTE R RECLECTO SE MEN U PITCH+ • REC FADE SET SYNCHRO REC MUTE PITCH– PITC H0 EL CANC R/F COMPACT DISC RECORDER RAK-PR300 R RECLECTO SE MEN U PITCH+ SET PITCH– PITC H0 EL CANC Setting the repeat play mode COMPACT DISC RECORDER RAK-PR300 • When the last track on a CD loaded in the 3-CD changer is advanced to the next track, playback moves to the first track on the next CD. It is not possible to skip forward when playing the last track of a CD loaded in the CDR. Main Unit • Turn the MULTI JOG control counterclockwise one notch to return to the beginning of the current track, or keep turning it until the track number you are searching for is shown in the information display. • Turn the MULTI JOG control clockwise one notch to move to the beginning of the next track, or keep turning it until the track number you are searching for is shown in the information display. Remote Control Press the CD and CDR Deck Selection button (CD or CDR) corresponding to the tray holding the CD currently playing, and then press the desired search direction. • Press the R (reverse skip) button once to return to the beginning of the current track, or press it repeatedly until the track number you are searching for is shown in the information display. • Press the F (forward skip) button once to move to the beginning of the next track, or press it repeatedly until the track number you are searching for is shown in the information display. 18 RQT6087 Press the REPEAT button on the remote control. The REPEAT indicator will be shown in the PLAY MODE section of the display window. Press the button repeatedly to choose the desired setting. The selection in the information display changes in the following order: “REPEAT ALL” :Repeat playback of all of the CDs loaded in the 3-CD changer (3-CD changer only). Ð Ð “REPEAT 1” : Ð “REPEAT 1CD” :Repeat playback of the CD currently playing Repeat playback of the track currently playing Repeat off (normal display). Using repeat mode during program or random play modes If the repeat playback mode is activated while the unit is in the program or random play modes, the following settings are possible: “REPEAT ALL” :Random mode - Repeats random playback of all of the CDs loaded in the 3-CD changer. Program mode - Repeats playback of the entire program. “REPEAT 1” : Repeats playback of the track currently playing. The setting selection will be shown by the ALL or 1CD indicator being lit in the PLAY MODE section of the display window. Notes • Repeat playback mode cannot be used during CD REC or CD EDIT recording operations. • Play is repeated in the selected mode when the DISC SELECTOR 1, 2, or 3 button (main unit or remote control), CD Control PLAY p button of the main unit or p (play) button of the remote control is pressed. SL-PR300PP.fm Page 19 Thursday, August 30, 2001 1:37 PM To adjust the pitch of a CD during playback Random Playback When in the 3-CD changer stop mode (CD PLAYER indicator is shown in the display window), press the PLAY MODE button (main unit/remote control) repeatedly until “CD RANDOM” is shown in the information display. The RANDOM indicator will be shown in the PLAY MODE section of the display window. Note • The random playback mode cannot be used for discs loaded in the CDR. OPEN / CLOSE POWER DISC SELECTOR 3 3 DISC 2 2 DISC OPEN / CLOSE MAX DISC 1 CD CD EDIT 1 SYNCHRO MENU SET R RECLECTO SE PITCH+/PITCH– MEN U PITCH+ SET PITCH– PITCH 0 PITC H0 EL CANC – + COMPACT DISC RECORDER REC/ REC MUTE > _10 0 PLAY MODE CD CANCEL FINALIZE PLAY MODE SYNCHRO MIX BALANCE CD REC PLAY MODE FADE REC SELECTOR LINE LINE PLAY MODE •REC REC MUTE RAK-PR300 DIGITAL MIN To increase the speed of playback, press PITCH+. To decrease the speed of playback, press PITCH–. Each press of a button increases or decreases playback speed 1%. MULTI JOG REC LEVEL COMPACT DISC RECORDER SL-PR300 PHONES English Listening to CDs CONTROL CD CD-R/RW REPEAT •REC FADE SYNCHRO REC MUTE R RECLECTO SE MEN U PITCH+ SET PITCH– PITC H0 EL CANC • To restore the playback speed to normal, press PITCH 0. • The adjusted playback speed can only be recorded using analog recording functions such as mixed recording. • Even if the pitch has been adjusted, when digital synchronized recording is performed, the pitch is automatically restored to 0. • The amount of pitch adjustment (+/–/0) is shown in the information display when one of the pitch buttons is pressed. • When the speed of CD playback is changed using the pitch control buttons, there is no signal output from the DIGITAL OUT OPTICAL terminal. • Pitch control cannot be used for the CDR. COMPACT DISC RECORDER RAK-PR300 • Random play is started by pressing the CD Control PLAY p button on the main unit or the p (play) button on the remote control. • When activated, tracks are chosen randomly for playback from the CDs loaded in the 3-CD changer. The tracks chosen will be lit in the music calendar and the SKIP ON lamp turns off. • Selection is made only once, from 1 to 99 tracks, and playback ends after the last track is played. • Tracks assigned a SKIP TRACK mark will not be chosen. • The CD tray, track number and playback time of the CD currently being played are shown in the information display. • Track selection with the number buttons is not accepted during the random playback mode. Disc Lock Function The Disc Lock function can be used to make it impossible for children or anyone else to take CDs out of or load new ones into the 3CD changer and CDR. This function helps to ensure that timer play and recording functions are performed correctly. • When the power is in standby, press the DISC1 OPEN/CLOSE 0 button while holding down the CD Control STOP s button on the front panel. “TRAY LOCKED” will be shown in the information display for 3 seconds, after which it is no longer possible to remove or load CDs. 0 MULTI JOG REC LEVEL COMPACT DISC RECORDER SL-PR300 OPEN / CLOSE POWER To release the random playback mode When the unit is in the 3-CD changer stop mode, press the PLAY MODE button repeatedly until the RANDOM indicator is cleared from the PLAY MODE section of the display window. DISC SELECTOR 3 3 DISC 2 2 DISC 1 1 DISC OPEN / CLOSE DIGITAL PHONES MIN MAX CD – + REC SELECTOR LINE MIX BALANCE LINE PLAY MODE CD EDIT CD REC SYNCHRO FINALIZE MENU SET CD CANCEL REC/ REC MUTE s CD Playback Pitch Control There are 3 CD pitch control buttons on the remote control that can be used to vary the speed of CD playback up to 12% faster or slower than the standard playback speed. This function can be useful in changing the pitch when matching the playback speed of the CD with another source. To cancel the Disc Lock function. Repeat the same step followed to lock the trays. “TRAY UNLOCKED” will be shown in the information display for 3 seconds, after which the Disc Lock function is canceled. Note • The Disc Lock function is canceled if the AC power cord is unplugged from the wall outlet. 19 RQT6087 SL-PR300PP.fm Page 20 Thursday, August 30, 2001 1:37 PM Listening to CDs 4 Programming Playback Using Main Unit Controls Select the disc source (CD tray) by turning the MULTI JOG control, and then press the SET button. MULTI JOG REC LEVEL It is possible to select your own program (order of tracks being played) using the program playback mode. Any of the tracks (1-99) on the CDs in the trays of the 3-CD changer can be selected. If you want to program and record tracks, see “Program Edit Recording” on page 30. – SET + 1. Select the disc. 1 MULTI JOG REC LEVEL COMPACT DISC RECORDER SL-PR300 OPEN / CLOSE POWER DISC SELECTOR 3 3 DISC 2 2 DISC 1 1 DISC OPEN / CLOSE DIGITAL PHONES MIN MAX CD CD EDIT CD REC + 2 7 CD3 • When the SET button is pressed, next the programming step and track number columns will flash. MIX BALANCE MENU SET CD CANCEL REC/ REC MUTE 5 Select and enter a track number (1-99) by turning the MULTI JOG control, and then press the SET button. MULTI JOG REC LEVEL 3,4,5 – + SET Load CDs into the trays of the 3-CD changer. • Only tracks on the CDs loaded in the 3-CD changer can be registered into the program. Note • To close a tray, press the 0 button for the tray number that is open. If you press the 0 button for a tray number other than that for the tray that is open, the program may not be played correctly. 2 CD2 REC SELECTOR LINE SYNCHRO FINALIZE 1 – LINE PLAY MODE CD1 4,5 2. Enter the selection. 1. Select the track. 2. Enter the selection. • The following is an example of track 2 on the CD in tray DISC1 being entered as Step 01. Press the PLAY MODE button when the unit is in the CD stop mode. • The CD PLAYER indicator is shown in the display window, PROGRAM indicator is shown in the display window, and if no program has been registered, “PG NO PROGRAM” is shown in the information display. • When the SET button is pressed, the programming of Step 01 is registered, and programming for Step 02 is ready. Program step Disc source number Track number 6 3 Press the SET button to start program registration. • The information display will show the following, and disc source columns will flash. Programming Disc source step number Track number 20 RQT6087 Repeat steps 4 and 5 to program up to a maximum of 32 steps. • If you try to program over 32 steps, “MEMORY FULL” is shown in the information display, and the programming function ends automatically. • Pressing the CD Control STOP s button on the main unit ends the programming function. SL-PR300PP.fm Page 21 Thursday, August 30, 2001 1:37 PM 7 English Listening to CDs Press the CD Control PLAY p button to start programmed play. • During playback, the disc number, track number and play time of the track are shown in the information display. • The numbers of the tracks that have been played are cleared from the music calendar. They are displayed again when programmed play is completed. • Operation stops automatically (and “STOP” is shown in the information display) when all of the programmed tracks have been played. • If the CD Control PLAY p button is pressed at a specific step in a program, the programming function will end and playback will start from Step 01, not the step currently shown in the information display. To clear a step (track) from the program To erase a programmed track, turn the MULTI JOG Control while in the CD stop mode until the track you want to erase is shown in the information display. Press the CANCEL button to erase the track from the program. The step number for each track following the one erased is automatically reduced by one (i.e., steps are renumbered). To erase the entire program, press the CANCEL button until “PG NO PROGRAM” is shown in the information display. To change the contents of the program In the CD stop mode, press the SET button followed by the CANCEL button. Programmed tracks will be erased in the reverse order of when they were entered (starting from the last track programmed). Press the CANCEL button twice to erase one track. Continue erasing in this manner until all of the tracks you wanted to remove are erased. Enter new tracks into the program by following programming steps 4 and 5. To check the contents of the program To check the tracks you have entered into the program, press the CD Control STOP s button, and use the MULTI JOG Control to review the programmed tracks. The program steps (PG S**) and track numbers will be shown in the information display one at a time as you toggle through the program (S: Step; **: step number). Programming Playback Using the Remote Control If you want to program and record tracks, see “Program Edit Recording” on page 30. DISC SELECTOR 3 PLAY MODE CD2 CD3 CD EDIT FINALIZE DISPLAY 1 2 3 4 5 6 7 8 0 > _10 PLAY MODE 9 CONTROL CD CD-R/RW REPEAT •REC FADE SYNCHRO REC MUTE R RECLECTO SE 2 MEN U PITCH+ SET PITCH– PITC H0 EL CANC 4 COMPACT DISC RECORDER RAK-PR300 1 Load CDs into the trays of the 3-CD changer. • Only tracks on the CDs loaded in the 3-CD changer can be registered into the program. Note • To close a tray, press the 0 button for the tray number that is open. If you press the 0 button for a tray number other than that for the tray that is open, the program may not be played correctly. 2 Press the CD Deck Selection button to place the unit in the CD mode. • The CD PLAYER indicator is shown in the display window. 3 Press the PLAY MODE button. • The PROGRAM indicator is shown in the display window, and if no program has been registered, “PG NO PROGRAM” is shown in the information display. 4 Press the SET button. • The information display will show the following. Program step Disc source number Track number To return to continuous playback In the CD stop mode, repeatedly press the PLAY MODE button on the main unit until the total playing time is shown in the information display. Main Unit CD1 CD REC 5 Select the disc source (CD tray) using the R (reverse) or F (forward) buttons, and then press the SET button. SET 1.Select the disc source. CD1 CD2 2. Enter the selection. CD3 • When the SET button is pressed, next the program step and track number columns will flash. (Continued on the next page) 21 RQT6087 SL-PR300PP.fm Page 22 Thursday, August 30, 2001 1:37 PM Listening to CDs 6 Select a track number (1-99) using the R (reverse) or F (forward) buttons, and then press the SET button. SET 1. Select the track. 7 2. Enter the selection. Repeat steps 5 and 6 to program up to a maximum of 32 steps. • If you try to program over 32 steps, “MEMORY FULL” will be shown in the information display, and the programming function ends automatically. • Pressing the s (stop) button ends the programming function. 8 Press the p button to start program play. • During playback, the disc number, track number and play time of the track are shown in the information display. • The numbers of the tracks that have been played are cleared from the music calendar. They are displayed again when programmed play is completed. • Operation stops automatically (and “STOP” is shown in the information display) when all programmed tracks have been played. • If the p (play) button is pressed at a specific step in a program, the programming function will end and playback will start from Step 01, not the step currently shown in the information display. To clear a step (track) from the program To remove a programmed track, while in the CD stop mode, press the R (reverse skip) or F (forward skip) buttons until the track you want to erase is shown in the information display. Press the CANCEL button to erase the track from the program. The step number for each track following the one erased is automatically reduced by one (i.e., steps are renumbered). To erase the entire program, press the CANCEL button until “PG NO PROGRAM” is shown in the information display. To change the contents of the program In the CD stop mode, press the SET button followed by the CANCEL button. Programmed tracks will be erased in the reverse order of when they were entered (starting from the last track programmed). Press the CANCEL button twice to erase one track. Continue erasing in this manner until all of the tracks you wanted to remove are erased. Enter new tracks into the program by following programming steps 5 and 6. To check the contents of the program To check the tracks you have entered into the program, press the s (stop) button, and use the R (reverse skip) or F (forward skip) buttons to review the programmed tracks. The program steps (PG S**) and track numbers will be shown in the information display one at a time as you toggle through the program (S: Step; **: step number). To return to continuous playback In the CD stop mode, repeatedly press the PLAY MODE button on the remote control until the total playing time is shown in the information display. Remote Control PLAY MODE 22 RQT6087 SL-PR300PP.fm Page 23 Thursday, August 30, 2001 1:37 PM Your attention is drawn to the fact that recording pre-recorded tapes or discs or other published or broadcast material may infringe copyright laws. Notes on Recording • Do not use CD-R or CD-RW discs with dust and/or scratches on the surface as this may cause the recording to sound rough and may cause skipping when played backed. It may even cause the unit to malfunction. • When using a recording function (one of the recording indicators in the display window is illuminated), do not subject the unit to any shock or vibration. • Before recording on a CD-R disc, it is recommended to make a sample recording on a CD-RW disc. • If the source CD being recorded from the 3-CD changer is itself a first-generation digital copy, digital recording cannot be performed. When this occurs, the recording type will switch from digital to analog automatically. English Recording onto CD-R/RW Discs Synchronized recording from external sources (See page 33) Start recording from an external source as soon as the CDR detects the signal being input. (High-speed recording is not possible.) Mixed input recording (See page 34) Simultaneously record the inputs from two analog sources. (Recording level and mixing balance can be adjusted manually.) Add Finalize Feature 2,4 MULTI JOG REC LEVEL COMPACT DISC RECORDER SL-PR300 OPEN / CLOSE POWER DISC SELECTOR 3 3 DISC 2 2 DISC OPEN / CLOSE DIGITAL DISC 1 PHONES MIN MAX CD – + REC SELECTOR LINE MIX BALANCE 1 LINE PLAY MODE CD EDIT CD REC SYNCHRO MENU SET CD CANCEL REC/ REC MUTE FINALIZE Read through this section before recording. - Discs not manufactured for holding audio data (such as discs for standard computer use) cannot be recorded using this CDR. - Discs with a format other than CD-DA (Compact Disc-Digital Audio) cannot be recorded. - The recording of discs over 80 minutes in length is not supported. - Multi-session discs cannot be recorded. 1 3,5 DISC SELECTOR Types of recording The following types of recording are possible with this unit. Manual recording (See page 24) Manually control the recording source used and the tracks you want to record. The following is a list of possible settings. (Highspeed recording is not possible.) • DIGITAL (digital recording from external sources connected to the DIGITAL IN OPTICAL terminal or COAXIAL terminal) • CD (digital/analog recording of CDs loaded in the 3-CD changer) • LINE (analog recording of external sources connected to the LINE IN terminal) Synchronized one-button recording of one entire CD (See page 26) Press the CD REC button while the main unit is in the stop mode to instantly dub the entire selected CD in the 3-CD changer to a CD-R or CD-RW disc. New to this feature is an automatic disc finalization function that can be set before recording begins. Synchronized one-button recording of a single track (See page 27) Press the CD REC button while the unit is playing or paused to instantly dub the current track on a CD in the 3-CD changer to a CD-R or CD-RW disc. Listening Edit recording (See page 29) Select tracks to be recorded from one or all of the CDs in the 3-CD changer while listening to them. New to this feature is an automatic disc finalization function that can be set before recording begins. (High-speed recording; CD-R 4x, CD-RW 2x) Program Edit recording (See page 30) Program tracks to be recorded from one or all of the CDs loaded in the 3-CD changer. New to this feature is an automatic disc finalization function that can be set before recording begins. (High-speed recording; CD-R 4x, CD-RW 2x) CD1 CD2 CD3 CD REC CD EDIT FINALIZE DISPLAY 1 2 3 4 5 6 7 8 9 > _10 0 PLAY MODE CONTROL CD CD-R/RW REPEAT •REC FADE SYNCHRO REC MUTE 3,5 R RECLECTO SE MEN U PITCH+ 1 SET PITCH– 2,4 PITC H0 EL CANC COMPACT DISC RECORDER RAK-PR300 Automatically finalize at the end of a recording onto a CD-R disc when recording the sound from the 3-CD changer using the CD REC button. The Add Finalize feature is disabled at the time of purchase. This feature can also be set to enable finalization at the end of a recording. To enable the Add Finalize feature Place the unit in the stop mode and follow the steps below. 1 Press the MENU button. • “TRACK ERASE” is shown in the information display. 2 3 4 5 Turn the MULTI JOG to display “FINALIZE”. Press the SET button. Turn the MULTI JOG to select “ON”. Press the SET button. Finalization will be performed upon completion of a recording with the CD REC button. - To disable the Add Finalize feature, follow the steps 1 through 3 in the above procedure and select “OFF” in step 4. 23 RQT6087 SL-PR300PP.fm Page 24 Thursday, August 30, 2001 1:37 PM Recording onto CD-R/RW Discs To disable/enable the Add Finalize feature with the remote control 1 2 3 4 5 Manual Recording Press the MENU button. Press the P or p button to select "FINALIZE". 6 21 4 Press the SET button. MULTI JOG REC LEVEL COMPACT DISC RECORDER SL-PR300 Press the P or p button to select "OFF" or "ON". OPEN / CLOSE POWER DISC SELECTOR 3 3 DISC 2 2 DISC OPEN / CLOSE DIGITAL DISC 1 PHONES Press the SET button. MIN MAX CD – + REC SELECTOR LINE MIX BALANCE 1 LINE PLAY MODE CD EDIT CD REC SYNCHRO MENU SET CD CANCEL REC/ REC MUTE FINALIZE Analog recording level adjustment When recording analog signals, and the main unit is recording or stopped in the recording pause mode, after pressing the MENU button on either the main unit or remote control, the recording level can be adjusted using the MULTI JOG control on the main unit. The recording level is shown in the information display as “REC LEVEL” (a value ranging from -80 to 0, the default being -12). (Recording level adjustment is not possible when recording using digital signals.) When CD ANALOG recording is selected, the recording level is set automatically to the CD in the 3-CD changer. To increase the recording level from LINE IN When recording the sound from LINE IN, if the recording level is still low after adjustment of the analog recording level stated above, change “LINE IN GAIN” to “HIGH”. “LINE IN GAIN” is set to “LOW” at the time of purchase. Place the unit in the stop mode and follow the steps below. 1 Press the MENU button. • “TRACK ERASE” is shown in the information display. 2 3 Turn the MULTI JOG to select "LINE IN GAIN". Press the SET button. • “LOW” is shown in the information display. 4 5 Turn the MULTI JOG to select "HIGH". Press the SET button. • The recording level further increases. • To change “LINE IN GAIN” back to “LOW”, follow steps 1 through 3 in the above procedure and select “LOW” in step 4. To increase the recording level with the remote control 1 2 Press the MENU button. 3 4 5 Press the SET button. Press the P or p button to select "LINE IN GAIN". Press the P or p button to select "HIGH". Press the SET button. Sampling rate converter The main unit is equipped with a sampling rate converter to ensure that the original digital signals will be recorded regardless of the sampling frequency (32kHz, 44.1kHz or 48kHz) of the signal from the source. 24 RQT6087 5 3 1 2 Insert a recordable CD-R or CD-RW. Select a recording source. Use the REC SELECTOR button to select the recording source. Press the button repeatedly to toggle between sources. The source type will appear in the display window, and a lamp (DIGITAL, CD or LINE) will light on the front panel showing the selected source. The order of toggling and appearance of the sources in the information display (starting from OPTICAL IN) are as follows. OPTICAL IN: Record digital signals via the OPTICAL terminal. COAXIAL IN: Record via the COAXIAL terminal. CD DIGITAL: Record digital signals from 3-CD changer. CD ANALOG*: Record analog signals from 3-CD changer. LINE IN: Record via the LINE IN terminal. CD+LINE MIX**: Record via 3-CD changer and LINE mix. Notes • *In accordance with the SCMS (Serial Copy Management System), recording systems are not allowed to create a secondgeneration digital copy of a first generation copy (refer to SCMS see page 48). Therefore, if the CD-R or CD-RW disc loaded in the 3-CD changer is a first-generation digital copy, this recording selection must be used. If you attempt to record the disc using the digital setting, “SCMS PROTECT” is shown in the information display and recording will not be allowed. • ** MIX (combined) source recording is only possible in analog. • If a source has already been selected, the corresponding lamp will light and the selection will be shown in the display window. • When playback is stopped and the CDR is selected, press the DISPLAY button on the remote control repeatedly to show the recording time remaining on the disc. • High-speed recording is not possible when recording manually. SL-PR300PP.fm Page 25 Thursday, August 30, 2001 1:37 PM 3 Press 1REC/REC MUTE to put the CDR in recording pause mode. English Recording onto CD-R/RW Discs To record silence in the recording MULTI JOG REC LEVEL COMPACT DISC RECORDER SL-PR300 OPEN / CLOSE POWER • The disc is read and OPC performed if required. • The remaining recording time on the CD-R or CD-RW disc is shown in the information display. 4 DISC SELECTOR 3 3 DISC 2 2 DISC OPEN / CLOSE DIGITAL DISC 1 PHONES MIN MAX CD – + REC SELECTOR LINE MIX BALANCE 1 LINE PLAY MODE CD EDIT CD REC SYNCHRO FINALIZE MENU SET CD CANCEL REC/ REC MUTE When analog signals are to be recorded, adjust the recording level while playing the source. MULTI JOG REC LEVEL – + 1 • Press the MENU button first and turn the MULTI JOG to adjust the recording level. Then press the SET button. • Adjust the volume in such a way that the 0 dB display is not exceeded when the loudest sound is applied. •REC FADE SYNCHRO REC MUTE R RECLECTO SE 1 MEN U PITCH+ SET PITCH– PITC H0 EL CANC OVER COMPACT DISC RECORDER L R RAK-PR300 40 30 20 15 10 6 3 0 dB The OVER indicator should not be made to light as this may cause distortion in the recording. • When CD ANALOG recording is selected, the recording level is set automatically to the CD in the 3-CD changer. 5 Press the CDR Control PLAY p button to start recording. 6 Play the sound of the source to be recorded. When recording is complete Press the CDR Control STOP s button to stop. The p indicator in the display window flashes and operation stops. Notes • You cannot record from multiple CDs. If create a program that changes CDs, a blank track of a few seconds will be added and recording will stop. • When “UNLOCK” is shown in the information display, the DIGITAL IN terminal is not connected properly to the source unit. • Upon completion of recording, the p indicator flashes in the display window. Operating any button while this indicator is flashing may render the disc being recorded unusable. Always wait until the p indicator stops flashing before proceeding with the next operation. • When digital input signals are supplied, they will be recorded in their original digital form as long as the source signal is not from a first-generation digital copy (refer to SCMS on see page 48). There is no need to adjust the recording level. 1 Press the 1REC/REC MUTE button where you want record a four-second silence. • To record a silence longer than four seconds, keep pressing the 1REC/REC MUTE button as long as you want. Notes • Four seconds of silence will be recorded regardless of whether or not the button is held down for fewer or more than four seconds. After the four seconds of silence, the unit stops in the recording pause mode after the button is released. • The REC MUTE function cannot be used at the beginning of recording started from the recording pause mode Fade In/Fade Out Recording (analog only) This feature can be used to record analog sound other than CD ANALOG. Located immediately below the CONTROL CD button on the remote control is a special button (FADE) that allows you to perform fade in and fade out of sound at the beginning and end of tracks when you are recording analog signals. To fade in at the beginning of a track, put the CDR into the recording pause mode and press the FADE button to start recording. To fade out at the end of a track, press the FADE button during the recording process. The signal will fade out and the CDR will stop in the recording pause mode. • This function cannot be used when recording digital signals. Automatic and manual track marking A track mark specifies the end of one track and the beginning of another. The unit inserts track marks automatically when the AUTO TRACK function is turned on, or you can turn off the function and insert them manually. AUTO TRACK function on • Tracks are automatically marked in the recording. For digital sources, the track information recorded in the digital source signal is used. For analog recording, periods of silence (no audio input from the recording source) are interpreted as track separations and a track mark is inserted. 25 RQT6087 SL-PR300PP.fm Page 26 Thursday, August 30, 2001 1:37 PM Recording onto CD-R/RW Discs AUTO TRACK function off • Manual track marking offers you the flexibility of placing track marks anywhere you like in the recording. • Manual track marking is not possible when the AUTO TRACK function is on. To add track marks automatically 2,4 MULTI JOG REC LEVEL COMPACT DISC RECORDER SL-PR300 OPEN / CLOSE POWER DISC SELECTOR 3 3 DISC 2 2 DISC OPEN / CLOSE DIGITAL DISC 1 PHONES MIN MAX CD – + REC SELECTOR LINE MIX BALANCE 1 LINE PLAY MODE CD EDIT CD REC SYNCHRO MENU SET CD CANCEL 1 3,5 CANCEL DISC SELECTOR CD1 CD2 CD3 CD EDIT FINALIZE DISPLAY 1 2 3 4 5 6 7 8 0 > _10 PLAY MODE 9 CONTROL CD CD-R/RW REPEAT •REC FADE SYNCHRO R RECLECTO SE MEN U PITCH+ PITC H0 EL CANC 2 Press the SET button (main unit/remote control). • The AUTO TRACK indicator in the display window will turn off. • Press the CANCEL button (main unit/remote control) to cancel the procedure and return to the normal display. 3 During recording, press the SET button (main unit/remote control) to insert a track mark. Notes • Even if automatic track marking is turned off, automatic track marking will be performed during synchronized one-button recording. When this occurs, manual track marking is temporarily disabled. • Tracks must be at least four seconds in length. Pressing the SET button less than four seconds after the previous track mark creates a new track mark once 4 seconds of recording has been performed. . 1 SET PITCH– Follow the procedure written for selecting the AUTO TRACK function, but in step 4, select AUTO TR OFF. Synchronized Recording of 3-CD Changer Playback REC MUTE 2,4 3,5 1 REC/ REC MUTE FINALIZE CD REC To add track marks manually CANCEL Performing synchronized one-button recording of one entire CD COMPACT DISC RECORDER RAK-PR300 1 2 3 4 When the unit is in the stop mode, press the MENU button (main unit/remote control). 2 MULTI JOG REC LEVEL COMPACT DISC RECORDER SL-PR300 OPEN / CLOSE POWER DISC SELECTOR 3 3 DISC 2 2 DISC OPEN / CLOSE DIGITAL Turn the MULTI JOG control or press the P/p (menu) button on the remote control until “AUTO TRACK” is shown in the information display. Press the SET button (main unit/remote control). Turn the MULTI JOG control or press the P/p (menu) button on the remote control to select “AUTO TR ON”. • “ON” will flash in the information display. (The default setting for this function is on.) 5 1 Press the SET button (main unit/remote control). DISC 1 PHONES MIN MAX CD – + REC SELECTOR LINE MIX BALANCE 1 LINE PLAY MODE CD EDIT CD REC SYNCHRO MENU SET 1 CD CANCEL REC/ REC MUTE FINALIZE 3 1 3 DISC SELECTOR CD1 CD2 CD3 CD REC CD EDIT FINALIZE DISPLAY 1 2 3 4 5 6 7 8 0 > _10 PLAY MODE 9 CONTROL CD CD-R/RW REPEAT •REC FADE SYNCHRO REC MUTE 1 R RECLECTO SE MEN U PITCH+ SET PITCH– • The AUTO TRACK indicator is now shown in the display window. • Press the CANCEL button (main unit/remote control) to cancel the procedure and return to the normal display. Note • In order to prevent the beginning of a song from being cutoff when changing tracks, digital sources provide a safety variance of 12 frames and analog sources 19 frames. 26 RQT6087 PITC H0 EL CANC COMPACT DISC RECORDER RAK-PR300 Note • It is only possible to record from a CD loaded in the 3-CD changer using this feature. SL-PR300PP.fm Page 27 Thursday, August 30, 2001 1:37 PM 1 Select and stop the CD to be recorded. Example: To record the CD loaded in tray DISC1. • Only the selected CD is recorded. 1 2 Load a recordable CD-R or CD-RW disc into the CDR and close the tray. • The disc is read if required. 3 Press the CD REC button (main unit/remote control) to start recording. “DISC DUBBING” is shown in the information display • When a blank disc is in the CDR tray, “UPDATE OPC” is shown following “DISC DUBBING”. When “ADD FINALIZE?” is shown in the information window: • No response (no input) assumes that finalization is to be performed, or you can press the SET button (main unit/remote control) to confirm that finalization is to be done. Press the CANCEL button (main unit/remote control) to keep the disc unfinalized. Note • This message will not be shown if the menu FINALIZE function setting is “ON”. The default setting is “OFF”. The 3-CD changer and CDR start simultaneously. (This is called synchronized recording) • Recording starts from the first track of the CD. Remaining play time of track being recorded CD PLAYER CD REC CD 1 6 2 7 3 8 4 9 5 10 Remaining recording time on CD-R or CD-RW DIGITAL 44.1kHz To stop the recording at any time Press the CDR or CD Control STOP s button on the main unit or the s (stop) button on the remote control. “STOP DUBBING” flashes in the information display, and the unit stops recording. Notes • There is no need to adjust the recording level when recording a digital signal. • If the source CD being recorded from the 3-CD changer is itself a first-generation digital copy, digital recording cannot be performed. When this occurs, the recording type will switch from digital to analog automatically. • This type of recording cannot be started during CD playback. It must start from the beginning of the first track of the CD. • When the CD REC button is pressed, the function is automatically switched to CD. This means that when the CD to be recorded has been selected, recording can proceed straightaway. • Upon completion of recording, “STOP DUBBING” flashes in the information display. Always wait for the “STOP DUBBING” message to be cleared before proceeding with the next operation. • When you try to eject the disc from the CDR tray, “FINALIZE?” is shown in the information display. To finalize the disc, press either the SET or FINALIZE button (main unit/remote control). To skip the finalization process, press the OPEN/ CLOSE 0 button one more time or the CANCEL button (main unit/remote control). • Depending on the disc, the entire CD may not be recorded. In such a case, use the 1 Disc Dubbing feature (see page 28) to record. Performing synchronized one-button recording of a single track 1 SYNCHRO REC HIGH SPEED AUTO TRACK CD-R L– R English Recording onto CD-R/RW Discs 2 40 30 20 15 10 6 3 0 dB • When a digital CD is recorded, its signals are recorded in their original form. Track marks are inserted automatically where one track changes to the next and track numbers change accordingly. When the recording of the last song in the CD is complete, “STOP DUBBING” flashes and recording automatically stops. When recorded without canceling "ADD FINALIZE?" “FINALIZE” is shown in the information window after recording is stopped and finalization is automatically performed. MULTI JOG REC LEVEL COMPACT DISC RECORDER SL-PR300 OPEN / CLOSE POWER DISC SELECTOR 3 3 DISC 2 2 DISC 1 1 DISC OPEN / CLOSE DIGITAL PHONES MIN MAX CD – + REC SELECTOR LINE MIX BALANCE LINE PLAY MODE CD EDIT CD REC SYNCHRO FINALIZE s MENU SET CD CANCEL REC/ REC MUTE 3 1 3 Checking a track number during recording Press the DISPLAY button on the remote control. DISC SELECTOR CD1 CD2 CD3 CD REC CD EDIT FINALIZE 2 3 4 5 6 7 8 0 > _10 PLAY MODE Remote Control DISPLAY 1 9 CONTROL CD CD-R/RW REPEAT •REC FADE SYNCHRO REC MUTE s DISPLAY R RECLECTO SE MEN U PITCH+ SET PITCH– PITC H0 Disc source Track number CD-R or CD-RW track number EL CANC COMPACT DISC RECORDER RAK-PR300 27 RQT6087 SL-PR300PP.fm Page 28 Thursday, August 30, 2001 1:37 PM Recording onto CD-R/RW Discs 1 Select a disc and start playback. Example: When planning to record a track on DISC1 1 2 • Upon completion of recording, “STOP DUBBING” is shown in the information display. Always wait for the “STOP DUBBING” message to be cleared before proceeding with the next operation. 1 Disc Dubbing Insert a recordable CD-R or CD-RW disc in the CDR disc tray. • You can make a complete copy of a CD that you want to record onto a CD-R/CD-RW disc. When recording a CD with song numbers but no silence between songs such as a live CD, for example, you can use the 1 DISC DUBBING feature to make a recording without any silence. 1 • The disc is read. 3 While the disc is playing back the track you want to record or if that track is being paused, press CD REC (main unit/remote control). MULTI JOG REC LEVEL COMPACT DISC RECORDER SL-PR300 OPEN / CLOSE POWER DISC SELECTOR 3 3 DISC 2 2 DISC OPEN / CLOSE DIGITAL DISC 1 PHONES MIN Main Unit 2 3 MAX CD – + REC SELECTOR LINE MIX BALANCE 1 LINE PLAY MODE CD EDIT CD REC SYNCHRO Remote Control MENU SET CD CANCEL REC/ REC MUTE FINALIZE CD REC CD REC 1 3 4,5 1 “1TR DUBBING” is shown in the information display. • When a blank disc is in the CDR tray, “UPDATE OPC” is shown following “1TR DUBBING”. When “ADD FINALIZE?” is shown in the information window: • No response (no input) assumes that finalization is to be performed, or you can press the SET button (main unit/remote control) to confirm that finalization is to be done. Press the CANCEL button (main unit/remote control) to keep the disc unfinalized. Note • This message will be shown if the menu FINALIZE function setting is “ON”. The default setting is “OFF”. The CD restarts playback from the beginning of the track and the CDR starts recording simultaneously. • When a track is recorded, its digital signals are recorded in their original form. A new track mark is automatically placed at the beginning of the track being recorded. DISC SELECTOR CD1 CD2 CD3 CD REC CD EDIT FINALIZE DISPLAY 1 2 3 4 5 6 7 8 0 > _10 PLAY MODE 9 CONTROL CD CD-R/RW REPEAT •REC FADE SYNCHRO REC MUTE 1 4,5 R RECLECTO SE MEN U PITCH+ 3 SET PITCH– PITC H0 EL CANC 3 COMPACT DISC RECORDER RAK-PR300 1 Select and stop the CD to be recorded. Example: To record the CD loaded in tray DISC1. • Only the selected CD is recorded. 1 When recording completes “STOP DUBBING” flashes and recording automatically stops. When recorded without canceling “ADD FINALIZE?“ “FINALIZE” is shown in the information window after recording is stopped and finalization is automatically performed. To stop recording at any time Press the CD or CDR Control STOP s button on the main unit or the s (stop) button on the remote control to end recording. The recording mode is released after “STOP DUBBING” is shown in the information display. Notes • There is no need to adjust the recording level when recording a digital signal. • If the source CD being recorded from the 3-CD changer is itself a first-generation digital copy, digital recording cannot be performed. When this occurs, the recording type will switch from digital to analog automatically. 28 RQT6087 2 Load a recordable CD-R or CD-RW disc into the CDR and close the tray. • The disc is read. 3 Press the MENU button (main unit/remote control), and then turn the MULTI JOG control on the main unit or press the P or p button on the remote control until “1 DISC DUBBING” is shown in the information display. 4 Press the SET button. “DUBING READY?” is shown in the information display. • Only the selected CD is recorded. 5 Press the SET button. SL-PR300PP.fm Page 29 Thursday, August 30, 2001 1:37 PM “DISC DUBBING?” is shown in the information display. • When a blank disc is in the CDR tray, “UPDATE OPC” is shown following “DISC DUBBING”. The 3-CD changer and CDR start simultaneously. • Recording starts from the first track of the CD. When recording completes, “STOP DUBBING” flashes and recording automatically stops. Notes • Recording can only start if the total time of the tracks on the source disc is less than the time remaining on the disc being recorded to. If the track time on the source disc is longer, the message “SHORT REMAIN” is shown in the information display and the dubbing function is ended. • If a track on the source disc is of SCMS format, the message “SCMS PROTECT” is shown in the information display, and the dubbing function is ended. • In the 1 Disc Dubbing mode, finalize the disc manually. Listening Edit Recording “LISTEN EDIT” is shown in the information display for 3 seconds, the LISTENING EDIT edit recording indicator is shown in the display window. • The CD trays of the 3-CD changer cannot be opened once the listening edit mode is activated. • If tracks have already been programmed for the CDs, “LAST LPG OK?” is shown in the information display. Press the SET button on either the remote control or the main unit or press the PLAY button on the main unit to record the same programmed tracks. Recording starts. To program new tracks, press the CANCEL button and then proceed to step 4. 4 SET 2 1 The track is stored in the memory, and operation moves on to the next track. MULTI JOG REC LEVEL COMPACT DISC RECORDER SL-PR300 OPEN / CLOSE POWER DISC SELECTOR 3 3 DISC 2 2 DISC 1 1 DISC OPEN / CLOSE DIGITAL PHONES MIN MAX CD – + REC SELECTOR LINE MIX BALANCE LINE PLAY MODE CD EDIT CD REC SYNCHRO MENU SET 4 1 5 CD2 CD REC CD EDIT When the first track has been stored in memory FINALIZE DISPLAY 2 3 4 5 6 7 8 3 9 •REC FADE CD PLAYER LISTENING EDIT SYNCHRO REC MUTE CD REC PITCH– PITC H0 EL CANC CANCEL COMPACT DISC RECORDER RAK-PR300 Select and stop the CD to be recorded. Load a recordable CD-R or CD-RW in the CDR tray. • The disc is read. Press the CD EDIT button (main unit/remote control) to select the Listening Edit mode. Main Unit CD EDIT 2 7 3 8 4 9 5 10 DIGITAL 44.1kHz SYNCHRO REC HIGH SPEED AUTO TRACK CD-R L– R 40 30 20 15 10 6 3 0 dB “1” is cleared from the music calendar. SET 3 6 MEN U PITCH+ 1 2 Recording time remaining on the CD-R/RW disc (pre-calculated) CONTROL CD CD-R/RW REPEAT R RECLECTO SE 4 Play time of second track > _10 0 5 1 The track is not stored in the memory, and operation moves on to the next track. CD3 1 PLAY MODE CANCEL CANCEL DISC SELECTOR CD1 b. When the track is not to be recorded CD CANCEL REC/ REC MUTE FINALIZE 1 Program the tracks while the CD is playing by assigning a tag to each track on the disc. • This is done by pressing either the SET button (main unit/ remote control) to add the track to the program or the CANCEL button (main unit/remote control) to skip the track. a. When the track now playing is to be recorded Selected tracks can be programmed and recorded. 3 English Recording onto CD-R/RW Discs Remote Control CD EDIT After making the last programming choice, “START TO DUB?” is shown in the information display. Press the SET button (main unit/ remote control) to continue or the CANCEL button (main unit/ remote control) to end the function. Note • Up to 32 steps can be included in the programming. The same track cannot be programmed twice. When there is not much recording time left on the CD-R or CDRW disc, tracks that are longer than the remaining time (precalculated) can be programmed but “NO REM” is shown in the information display. 5 Press the CDR Control PLAY p or 1 REC/REC MUTE button on the main unit or the 1 REC/ REC MUTE button on the remote control. Recording of the selected songs will begin. 29 RQT6087 SL-PR300PP.fm Page 30 Thursday, August 30, 2001 1:37 PM Recording onto CD-R/RW Discs When “ADD FINALIZE?” is shown in the information window: • No response (no input) assumes that finalization is to be performed, or you can press the SET button (main unit/remote control) to confirm that finalization is to be done. Press the CANCEL button (main unit/remote control) to keep the disc unfinalized. Notes • This message will be shown if the menu FINALIZE function setting is “ON”. The default setting is “OFF”. • When a blank disc is in the CDR tray, “UPDATE OPC” is shown following “ADD FINALIZE?”. Program Edit Recording This type of recording allows you to make a program of your favorite tracks on any of the CDs loaded in the 3-CD changer in any order you like. 3 1 4,5 2 4,5 MULTI JOG REC LEVEL COMPACT DISC RECORDER SL-PR300 OPEN / CLOSE POWER DISC SELECTOR 3 3 DISC 2 2 DISC 1 1 DISC OPEN / CLOSE DIGITAL PHONES MIN MAX CD – + REC SELECTOR LINE MIX BALANCE LINE PLAY MODE CD EDIT CD REC SYNCHRO MENU SET The recording process starts. • Only the tracks selected from the CDs in the 3-CD changer are recorded. • Playback starts from the first track selected. The playing time of the track and the remaining playing time of the CD-R or CDRW disc are shown in the information display. • As high-speed recording is performed (CD-R 4x, CD-RW 2x), there is no audio output during the recording process. CD CANCEL REC/ REC MUTE FINALIZE 7 CANCEL DISC SELECTOR CD1 CD2 CD3 CD REC CD EDIT FINALIZE 2 3 4 5 6 7 8 PLAY MODE 4,5 When recorded without canceling “ADD FINALIZE?” “FINALIZE” is shown in the information window after recording is stopped and finalization is automatically performed. 9 > _10 0 When recording completes “STOP DUBBING” flashes and recording automatically stops. 3 DISPLAY 1 CONTROL CD CD-R/RW REPEAT •REC FADE 7 SYNCHRO REC MUTE R RECLECTO SE MEN U PITCH+ SET PITCH– PITC H0 To stop the recording at any time Press the CD Control STOP s or CDR Control STOP s button on the main unit or the s (stop) button on the remote control to stop the recording process. The recording mode is released after “STOP DUBBING” is shown in the information display. Notes • There is no need to adjust the recording level when recording a digital signal. • The last program information (the most recently created program still stored in the unit's memory) will be erased if the trays of the 3-CD changer are opened. CANCEL EL CANC COMPACT DISC RECORDER RAK-PR300 1 Load CDs in the 3-CD changer. Note • To close a tray, press the 0 button for the tray number that is open. If you press the 0 button for a tray number other than that for the tray that is open, the program may not be played correctly. 2 Load a recordable CD-R or CD-RW disc in the CDR tray. • The disc is read. 3 Press the CD EDIT button (main unit/remote control) twice to select the Program Edit mode. Main Unit Remote Control CD EDIT CD EDIT • The unit may be required to read the TOC (Table of Contents) of the CDs loaded in the 3-CD changer. If this is done, “TOC READING” is shown in the information display. 30 RQT6087 SL-PR300PP.fm Page 31 Thursday, August 30, 2001 1:37 PM If tracks have already been programmed for the CDs, “LAST P-PG OK?” is shown in the information display. Press the SET button on either the remote control or the main unit or press the PLAY button on the main unit to record the same programmed tracks. Recording starts. To program new tracks, press the CANCEL button and then proceed to step 4. • If you press the CANCEL button, the playing time remaining time on the CD-R or CD-RW disc in the CDR is shown in the information display. 4 Select and enter the disc number. MULTI JOG REC LEVEL – SET + 1. Select the disc. When recording completes “STOP DUBBING” flashes and recording automatically stops. 2. Enter the selection. • The disc source can be selected using the MULTI JOG control on the main unit or the R/F buttons on the remote control. • When the SET button (main unit/remote control) is pressed, the programming and track numbers shown in the information display start flashing. 5 Note • This message will not be shown if the menu FINALIZE function setting is “ON”. The default setting is “OFF”. When a blank disc is in the CDR tray, “UPDATE OPC” is shown following “ADD FINALIZE?”. The recording process starts. • Only the tracks selected from the CDs in the 3-CD changer are recorded. • Playback starts from the first track selected. The playing time of the track and the remaining playing time of the CD-R or CDRW disc are shown in the information display. • As high-speed recording is performed (CD-R 4x, CD-RW 2x), there is no audio output during the recording process. English Recording onto CD-R/RW Discs When recorded without canceling "ADD FINALIZE?" “FINALIZE” is shown in the information window after recording is stopped and finalization is automatically performed. To stop the recording at any time Press the CD Control STOP s or CDR Control STOP s button on the main unit or the s (stop) button on the remote control to stop the recording process. The recording mode is released after “STOP DUBBING” is shown in the information display. Select and enter a track number. MULTI JOG REC LEVEL – + 1. Select the track. SET 2. Enter the selection. • After the track is entered, the amount of time remaining on the CD-R or CD-RW disc is shown in the information display. 6 Repeat steps 4 and 5 to continue programming tracks. • Up to 32 steps can be programmed. The same track may be programmed more than once. • Programming ends when 32 steps have been registered or if there is no more time remaining on the CD-R or CD-RW. 7 Press the CDR Control PLAY p or 1 REC/REC MUTE button on the main unit or the 1REC/REC MUTE button on the remote control. When “ADD FINALIZE?” is shown in the information window: • No response (no input) assumes that finalization is to be performed, or you can press the SET button (main unit/remote control) to confirm that finalization is to be done. Press the CANCEL button (main unit/remote control) to keep the disc unfinalized. 31 RQT6087 SL-PR300PP.fm Page 32 Thursday, August 30, 2001 1:37 PM Recording onto CD-R/RW Discs Setting the Unit for High-speed Recording High-speed recording is only possible for digital recording from the 3-CD changer to the CD. 2,4 MULTI JOG REC LEVEL COMPACT DISC RECORDER SL-PR300 OPEN / CLOSE POWER DISC SELECTOR 3 3 DISC 2 2 DISC OPEN / CLOSE DIGITAL DISC 1 PHONES MIN MAX CD – + REC SELECTOR LINE MIX BALANCE 1 LINE PLAY MODE CD EDIT Notes • High-speed recording is only possible for digital recording from the 3-CD changer to the CDR. It can be used for 1-track dubbing, 1-disc dubbing, listening edit and program edit modes. • There is no audio output from any of the output terminals (LINE OUT, DIGITAL OUT OPTICAL, DIGITAL OUT, COAXIAL, PHONES) during high-speed recording. Therefore, the only way to monitor the process is using the recording level meter in the display window. CD REC SYNCHRO MENU SET CD CANCEL FINALIZE REC/ REC MUTE 1 3,5 CANCEL DISC SELECTOR CD1 CD2 CD3 CD REC CD EDIT FINALIZE 2 3 4 5 6 7 8 When the automatic track spacing function is turned on, the unit automatically records 2 seconds of silence at the beginning of each track when performing synchronized one-button recording or using the listening edit or program edit modes to record from the 3-CD changer to the CDR. 2,4 DISPLAY 1 9 > _10 0 PLAY MODE Setting the Auto Track Spacing Function •REC MULTI JOG REC LEVEL COMPACT DISC RECORDER SL-PR300 CONTROL CD CD-R/RW REPEAT FADE OPEN / CLOSE POWER SYNCHRO DISC SELECTOR 3 3 DISC 2 2 DISC 1 1 DISC OPEN / CLOSE DIGITAL PHONES REC MUTE MIN MAX CD 2,4 MEN U PITCH+ SET PITCH– PITC H0 EL CANC + REC SELECTOR LINE MIX BALANCE LINE PLAY MODE CD EDIT CD REC SYNCHRO MENU SET CD CANCEL REC/ REC MUTE FINALIZE R RECLECTO SE – 1 3,5 1 3,5 CANCEL CANCEL COMPACT DISC RECORDER RAK-PR300 DISC SELECTOR 1 2 3 When the unit is in the stop mode, press the MENU button (main unit/remote control). Turn the MULTI JOG control or press the P/p (menu) button on the remote control until “DUB-SPEED” is shown in the information display. 4 Turn the MULTI JOG control or press the P/p (menu) button on the remote control to select “HIGH” or “1x”. • Press the CANCEL button (main unit/remote control) to cancel the procedure and return to the normal display. 5 Pess the SET button. CD2 CD3 CD EDIT FINALIZE DISPLAY 1 2 3 4 5 6 7 8 0 > _10 PLAY MODE 9 CONTROL CD CD-R/RW REPEAT •REC FADE SYNCHRO REC MUTE R RECLECTO SE Press the SET button (main unit/remote control). • The current setting is shown in the display window. (The setting is HIGH by default.) • The speed for recording to CD-R discs is four times the normal recording speed, and that for recording to CD-RW discs is two times the normal recording speed. CD1 CD REC MEN U PITCH+ 3,5 SET PITCH– PITC H0 EL CANC 1 2,4 CANCEL COMPACT DISC RECORDER RAK-PR300 1 When the unit is in the stop mode, press the MENU button (main unit/remote control). 2 Turn the MULTI JOG control or press the P/p (menu) button on the remote control until “TRACK SPACE” is shown in the information display. 3 Press the SET button (main unit/remote control). • The current setting is displayed on the screen. (The setting is on by default.) 32 RQT6087 SL-PR300PP.fm Page 33 Thursday, August 30, 2001 1:37 PM 4 Turn the MULTI JOG control or press the P/p (menu) button on the remote control and choose the setting “TR SPACE ON” or “TR SPACE OFF”. • Press the CANCEL button (main unit/remote control) to cancel the procedure and return to the normal display. 5 Press the SET button. Notes • There is no indicator to show the status of this function. • This function will work when you begin recording from the recording pause mode except when performing synchronized one-button recording. Synchronized Recording from External Sources This unit offers the ability to record from various external sources to the CDR using synchronized START and START&STOP functions. This feature is applicable to external digital audio equipment connected via the DIGITAL IN OPTICAL and COAXIAL terminals and the LINE IN (REC) terminal. 21 MULTI JOG REC LEVEL OPEN / CLOSE DISC SELECTOR 3 3 DISC 2 2 DISC 1 1 DISC OPEN / CLOSE DIGITAL PHONES MIN MAX CD – + REC SELECTOR LINE MIX BALANCE LINE PLAY MODE CD EDIT CD REC SYNCHRO MENU CD CANCEL REC/ REC MUTE FINALIZE 3 SET s DISC SELECTOR CD1 CD2 CD3 CD REC CD EDIT FINALIZE DISPLAY 1 2 3 4 5 6 7 8 9 > _10 0 PLAY MODE CONTROL CD CD-R/RW REPEAT •REC FADE SYNCHRO REC MUTE 3 s 2 R RECLECTO SE MEN U PITCH+ SET PITCH– PITC H0 EL CANC COMPACT DISC RECORDER RAK-PR300 Load a recordable CD-R or CD-RW disc in the CDR tray. • The disc is read if required. 2 Press the REC SELECTOR button on the main unit or the remote control repeatedly to select the recording source. • Each press of the selection button on either the main unit or remote control, toggles one step through the following source choices. OPTICAL IN: Record digital signals via the OPTICAL terminal. COAXIAL IN: Record via the COAXIAL terminal. CD DIGITAL: Record digital signals from 3-CD changer. CD ANALOG: Record analog signals from 3-CD changer. LINE IN: Record via the LINE IN terminal. CD+LINE MIX: Record via 3-CD changer and LINE mix. 3 Press the SYNCHRO button (main unit/remote control). • The CDR is put into the synchronized recording pause mode. • The source device must be stopped at this time. 4 COMPACT DISC RECORDER SL-PR300 POWER 1 English Recording onto CD-R/RW Discs Start playing of the source unit Notes • When recording with the SYNCHRO button, recording starts when the input level is detected. If the track starts very quietly (with a low input level), the beginning of the track may not be recorded. When recording from an analog source, such as records or tapes, recording may not start if the recording level is too low. When this occurs, please perform manual recording. Performing synchronized recording of a digital source • Recording is started based on the digital signal. • Track marking is based on track information recorded in the digital signal. For digital sources other than CD, MD and DAT, track marking is based on silent track space. Performing synchronized recording of an analog source • Recording is started when the unit detects an audio signal. • Track marking is based on silent track space which the unit interprets to be track breaks. If automatic track marking has been turned off, manual track marking is necessary during the recording process. To stop recording at any time Press the CDR Control STOP s button on the main unit or the s (stop) button on the remote control. • Synchronized recording to the CDR from an external source. 33 RQT6087 SL-PR300PP.fm Page 34 Thursday, August 30, 2001 1:37 PM Recording onto CD-R/RW Discs Setting the START or START&STOP function for synchronized recording from an external source If the signal is going to be recorded from CD, MD or DAT player, it is possible to set the unit to perform synchronized start and stop. With other types of digital audio equipment only synchronized start of recording is possible. 2,4 MULTI JOG REC LEVEL COMPACT DISC RECORDER SL-PR300 OPEN / CLOSE POWER DISC SELECTOR 3 3 DISC 2 2 DISC OPEN / CLOSE DIGITAL DISC 1 PHONES MIN MAX CD – + REC SELECTOR LINE MIX BALANCE 1 LINE PLAY MODE CD EDIT CD REC SYNCHRO MENU SET • If the setting is set to “START&STOP”, recording stops automatically when the signal from the source is stopped, a disc is changed, or if a track search is performed. • This function is very convenient for recording single songs from external digital CD or MD players. • This function is only for use with externally connected digital audio equipment. It cannot be used with the 3-CD changer. Note • When performing synchronized start recording from an external component, it is possible that part of the signal at the beginning of the first track will not be recorded. If this should occur, please perform manual recording. CD CANCEL REC/ REC MUTE FINALIZE Mixed Input Recording 1 3,5 6 21 MULTI JOG REC LEVEL COMPACT DISC RECORDER SL-PR300 OPEN / CLOSE POWER CD2 CD3 DISC SELECTOR 3 3 DISC 2 2 DISC DISC SELECTOR CD1 OPEN / CLOSE DIGITAL DISC 1 PHONES CD REC CD EDIT FINALIZE DISPLAY MIN 1 2 3 4 5 6 MAX CD 7 8 MIX BALANCE 1 LINE PLAY MODE CD EDIT CD REC SYNCHRO MENU SET REC/ REC MUTE 9 CONTROL CD CD-R/RW REPEAT •REC FADE SYNCHRO REC MUTE 45 3 6 R RECLECTO SE MEN U PITCH+ 1 6 SET PITCH– 2,4 CD CANCEL > _10 0 3,5 + REC SELECTOR LINE FINALIZE PLAY MODE – PITC H0 4 DISC SELECTOR CD1 CD2 CD3 CD REC CD EDIT FINALIZE DISPLAY EL CANC 1 2 3 4 5 6 7 8 0 > _10 COMPACT DISC RECORDER RAK-PR300 PLAY MODE 1 2 3 Turn the MULTI JOG control or press the P/p (menu) button on the remote control until “D-IN SYNCHRO” is shown in the information display. Turn the MULTI JOG control or press the P/p (menu) button on the remote control to select “START” or “START&STOP”, shown in the information display. • When “START” is selected, only the start of recording is done synchronously with the start of the digital signal. • Press the CANCEL button if you do not want to perform this procedure. The setting is not changed. 5 Press the SET button. • The type of synchronized recording being performed is not indicated in the information display during actual recording. When recording is started, only the SYNCHRO indicator is shown in the display window until recording ends. 34 RQT6087 •REC FADE SYNCHRO REC MUTE 2 R RECLECTO SE 4 PITC H0 MEN U PITCH+ 5 4 SET PITCH– EL CANC COMPACT DISC RECORDER Press the SET button (main unit/remote control). • The current setting is shown in the information display. 4 3 With the unit in the stop mode, press the MENU button (main unit/remote control). 9 CONTROL CD CD-R/RW REPEAT RAK-PR300 1 Load a recordable CD-R or CD-RW in the CDR disc tray. • The disc is read. 2 Press the REC SELECTOR button on the main unit or the remote control to select the recording source combination. CD LINE CD + LINE has been selected. SL-PR300PP.fm Page 35 Thursday, August 30, 2001 1:37 PM • Select “CD + LINE” to mix and record a CD loaded in the 3-CD changer with the signals from an external source via the LINE IN terminal. 3 English Recording onto CD-R/RW Discs Press the 1 REC/REC MUTE button (main unit/ remote control) to put the CDR in the recording pause mode. • The remaining recording time on the disc is shown in the information display. 4 Press the MENU button (main unit/remote control) and use the MULTI JOG/REC LEVEL and MIX BALANCE controls to adjust the recording level and mixing balance while playing the two sources. . MULTI JOG REC LEVEL – MIX BALANCE LINE CD CD recording level is reduced. + MIX BALANCE LINE CD Line input recording level is reduced. • Adjust the recording level so that the 0 dB display of the level meter is not exceeded when the highest signal is applied. • The pitch controls may be used to adjust the speed of CD playback for mixing and recording purposes. • When you have finished adjusting the recording level and the mix balance, set the sources back to the point where you want to start recording from. 5 Press the CDR Control PLAY p button on the main unit to start recording. 6 Start playback of the sources to be recorded. To stop recording at any time Press the CDR Control STOP s button on the main unit or the s (stop) button on the remote control. The Play p indicator in the display window will flash and operation stops. 35 RQT6087 SL-PR300PP.fm Page 36 Thursday, August 30, 2001 1:37 PM Special Recording Edit Operations Skipping a Recorded Track on a CD-R or CD-RW (Track Skip) Occasionally, there may be tracks on a disc that are partial, repeated, or are otherwise unwanted. Before a CD-R or CD-RW is finalized, it is possible to enter a skip marker for that track in the PMA (Program Memory Area). A maximum of 21 skip marks can be inserted on one disc. When a disc is finalized, the information of tracks assigned a skip mark is written to the disc’s TOC (Table of Contents) and those tracks will never be played (i.e., just as if they had never been recorded.) 2,4 OPEN / CLOSE DISC SELECTOR 3 3 DISC 2 2 DISC 1 1 DISC OPEN / CLOSE DIGITAL MIN MAX CD – + REC SELECTOR LINE MIX BALANCE LINE PLAY MODE CD EDIT Press the SET button (main unit/remote control). • A skip marker is entered into the PMA for the selected track and WRITE SKIP is shown in the information display. When the process is finished, the normal display is shown. • The track to be skipped is cleared from the music calendar. Notes • Even if a track is skipped, the recorded information is not erased and the time remaining on the CD-R or CD-RW does not change. • Tracks that have been assigned a skip marker are only skipped during playback on this unit and other CD players that support the track skip function. • You cannot use the track skip function when recording to unfinalized CD-R discs or CD-RW discs from the 3-CD changer. MULTI JOG REC LEVEL COMPACT DISC RECORDER SL-PR300 POWER PHONES 5 CD REC SYNCHRO MENU SET 1 CD CANCEL REC/ REC MUTE FINALIZE Erasing a Track or Tracks (Erase Function) (CD-RW only) 1 3,5 3,5 CANCEL MULTI JOG REC LEVEL COMPACT DISC RECORDER SL-PR300 OPEN / CLOSE POWER CD2 CD3 DISC SELECTOR 3 3 DISC 2 2 DISC DISC SELECTOR CD1 OPEN / CLOSE DIGITAL DISC 1 PHONES CD REC CD EDIT FINALIZE 1 2 3 4 5 6 7 8 MAX MIX BALANCE 1 LINE PLAY MODE CD EDIT CD REC SYNCHRO FADE SYNCHRO 2 R RECLECTO SE MEN U PITCH+ 1 4,6 DISC SELECTOR CD1 CD2 CD3 CD REC CD EDIT FINALIZE SET PITCH– PITC H0 EL CANC CANCEL RAK-PR300 2 3 4 5 6 7 8 0 > _10 9 CONTROL CD CD-R/RW REPEAT •REC Note DISPLAY 1 PLAY MODE FADE SYNCHRO REC MUTE Once a skip marker has been entered for a track, it cannot be removed. 3,5 When the unit is in the stop mode, press the MENU button (main unit/remote control). R RECLECTO SE MEN U PITCH+ SET PITCH– PITC H0 EL CANC 2 4,6 CANCEL COMPACT DISC RECORDER Turn the MULTI JOG control or press the P (menu) button on the remote control until “TRACK SKIP” is shown in the information display. Press the SET button (main unit/remote control). • “SKIP (track number)?” is shown in the information display. • Press the CANCEL button (main unit/remote control) if you do not wish to perform this procedure. 4 REC/ REC MUTE 9 COMPACT DISC RECORDER 3 CD CANCEL CONTROL CD CD-R/RW REPEAT •REC 2 SET FINALIZE REC MUTE 1 MENU > _10 0 2,4 3,5 + REC SELECTOR LINE DISPLAY MIN PLAY MODE CD – Turn the MULTI JOG control or press the P/p (menu) button on the remote control to select the track number to be skipped. RAK-PR300 1 Load the unfinalized CD-RW to be edited in the CDR disc tray. • The number of tracks and play time are shown in the information display. 2 When the unit is in the stop mode, press the MENU button (main unit/remote control). 3 Turn the MULTI JOG control or press the P/p (menu) button on the remote control until “TRACK ERASE” is shown in the information display. *Please refer to the Glossary for a brief definition of acronyms. (see page 48) 36 RQT6087 SL-PR300PP.fm Page 37 Thursday, August 30, 2001 1:37 PM 4 Press the SET button (main unit/remote control). • “ERASE (start track) – (last track)?” is flashed in the information display. (Initially, the start track and last track are both the last track number recorded on the CD-RW.) • Press the CANCEL button (main unit/remote control) if you do not wish to perform this procedure. 5 Note • If the disc is damaged or there is disc related trouble, this function may not be possible. 1 MULTI JOG REC LEVEL COMPACT DISC RECORDER SL-PR300 OPEN / CLOSE POWER DISC SELECTOR 3 3 DISC 2 2 DISC 1 1 DISC OPEN / CLOSE DIGITAL PHONES If needed, use the MULTI JOG control or press the P/p (menu) button on the remote control to select the number of tracks you want to erase preceding the last track. MIN MAX CD – + REC SELECTOR LINE LINE PLAY MODE CD EDIT 3 MIX BALANCE CD REC SYNCHRO MENU SET 2 CD CANCEL REC/ REC MUTE FINALIZE • Please note that all tracks following the start track will be erased. For example, when track 8 on an 11 track CD-RW is assigned as the start track, tracks 8, 9, 10, and 11 will be erased. 6 English Special Recording Edit Operations 4,5 CANCEL DISC SELECTOR Press the SET button (main unit/remote control). • “ERASE TRACK” is flashed in the information display, the selected tracks are erased, and the normal display is shown when erasing has been completed. • Each track that was erased is cleared from the music calendar. • Tracks can only be erased starting from the last track recorded on a disc. CD1 CD2 CD3 CD REC CD EDIT FINALIZE 2 3 4 5 6 7 8 0 > _10 PLAY MODE 3 DISPLAY 1 9 CONTROL CD CD-R/RW REPEAT •REC FADE SYNCHRO REC MUTE R RECLECTO SE MEN U PITCH+ SET PITCH– Notes • Once a track is erased, the recording cannot be restored. • Do not turn the power off, disconnect the AC power cord from the wall outlet or subject the unit to vibration during the erase operation. Doing so may ruin the CD-RW disc. Erasing All Tracks (Disc Erase Function) (CD-RW only) The Disc Erase function is used to erase the entire contents of the CD-RW. This unit uses a unique high-speed (2x) erasing function that is different from normal erasure procedures. Erasing is performed all the way through the disc’s TOC (Table of Contents). “ERASE DISC” flashes in the information display during the erasing process. PITC H0 EL CANC 2 4,5 CANCEL COMPACT DISC RECORDER RAK-PR300 1 Load the CD-RW to be erased in the CDR disc tray. • The number of tracks and play time are shown in the information display. 2 When the unit is in the stop mode, press the MENU button (main unit/remote control). 3 Turn the MULTI JOG control or press the R/F (menu) button on the remote control until “DISC ERASE” is shown in the information display. 4 Press the SET button (main unit/remote control). • “ERASE DISC?” is shown in the information display. • Press the CANCEL button (main unit/remote control) if you do not wish to perform this procedure. 5 Press the Set button (main unit/remote control). • Full disc erasure takes a few minutes to perform. During the procedure, the length of the level meter is used to indicate approximately how much time is remaining until erasure is complete. When the erasure has been completed, the normal display is shown. 37 RQT6087 SL-PR300PP.fm Page 38 Thursday, August 30, 2001 1:37 PM Special Recording Edit Operations 1 Finalizing a Disc Finalizing a disc marks the final process in recording on a CD-R or CD-RW disc. In this process, a TOC (Table Of Contents) is written to the disc. When this procedure is completed, it will be possible to play the CD-R or CD-RW disc on CD players compatible with CDR and/or CD-RW discs. • Please note that once a CD-R disc has been finalized, it is no longer possible to record to that disc. • If the power of the unit is turned off or the AC power cord unplugged from the wall outlet during the finalizing process, the recording may be lost and the disc may no longer be usable. • Even after a CD-RW disc has been finalized, further recording and/or editing is possible if the TOC information on the disc is erased using the Unfinalize function. • When an unfinalized CD-R or CD-RW disc is loaded in the CDR and the OPEN/CLOSE 0 button is pressed to open the CDR disc tray, “FINALIZE?” is shown in the information display. To skip the finalization process, press the OPEN/CLOSE 0 button one more time. The disc will be ejected in the unfinalized state. MULTI JOG REC LEVEL COMPACT DISC RECORDER SL-PR300 OPEN / CLOSE POWER DISC SELECTOR 3 3 DISC 2 2 DISC OPEN / CLOSE DIGITAL DISC 1 PHONES MIN MAX CD – + REC SELECTOR LINE MIX BALANCE 1 LINE PLAY MODE CD EDIT CD REC SYNCHRO MENU SET FINALIZE CANCEL REC/ REC MUTE CD Press the FINALIZE button (main unit/remote control). • “FINALIZE?” is shown in the information display. • If you want to cancel the finalization process at this point, press the CANCEL button (main unit/remote control). 2 Press the FINALIZE button again to start the finalizing process. • The length of time that this process requires is about 2 minutes. During the procedure, the length of the level meter is used to indicate approximately how much time is remaining until finalization is complete. • The 3-CD changer of this unit is compatible with finalized CDRW discs, however, not all CD players can play back CD-RW disc even after they have been finalized. • During the finalization process, it will not be possible to remove or load discs in the 3-CD changer, nor is playback of CDs loaded in the 3-CD changer possible. Making Recording of a Finalized CD-RW Disc Possible (Unfinalize Function) Once a CD-R disc has been finalized, further recording on that disc cannot be performed. However, if you erase the TOC (Table of Contents) on a CD-RW disc, the disc can be recorded on again. 1 3 1,2 CANCEL MULTI JOG REC LEVEL COMPACT DISC RECORDER SL-PR300 OPEN / CLOSE POWER DISC SELECTOR 3 3 DISC 2 2 DISC 1 1 DISC OPEN / CLOSE DIGITAL PHONES MIN CD2 CD REC CD EDIT FINALIZE DISPLAY 2 3 4 5 6 7 LINE PLAY MODE CD EDIT CD REC SYNCHRO MENU SET CD CANCEL REC/ REC MUTE 8 1,2 9 2 > _10 0 MIX BALANCE CD3 1 PLAY MODE MAX + REC SELECTOR LINE FINALIZE DISC SELECTOR CD1 CD – CONTROL CD CD-R/RW REPEAT •REC FADE SYNCHRO 1 REC MUTE R RECLECTO SE MEN U PITCH+ SET PITCH– PITC H0 EL CANC CANCEL 4,5 CANCEL Load a finalized CD-RW disc into the CDR disc tray. • The CD-RW and FINALIZED indicators will be shown in the display window if the CD-RW disc that has been finalized. 2 When the unit is in the stop mode, press the MENU button (main unit/remote control). 3 Turn the MULTI JOG control on the main unit or press the P/p (menu) button on the remote control until “UNFINALIZE” is shown in the information display. 4 Press the SET button (main unit/remote control). COMPACT DISC RECORDER RAK-PR300 • “UNFINALIZE?” is shown in the information display. • Press the CANCEL button (main unit/remote control) to cancel the procedure and return to the normal display. 38 RQT6087 SL-PR300PP.fm Page 39 Thursday, August 30, 2001 1:37 PM 5 English Special Recording Edit Operations Press the SET button again to confirm the operation. 2,4 • “UNFINALIZE” is shown in the information display as the unfinalizing procedure is performed. The procedure takes a little over a minute, and the level meter is used to indicate approximately how much time is remaining until unfinalization is complete. Upon completion, the normal display is shown. OPEN / CLOSE is trademark of Digital Theater Systems, Inc. *2HDCD is a registered trademark of Pacific Microsonic, Inc. Note • When recording from the 3-CD changer, the sampling rate converter is always turned off. 3 2 OPEN / CLOSE DIGITAL DISC 1 PHONES MIN MAX CD – + REC SELECTOR LINE MIX BALANCE 1 LINE PLAY MODE CD EDIT CD REC SYNCHRO MENU SET CD CANCEL REC/ REC MUTE FINALIZE 1 3,5 CANCEL DISC SELECTOR * known as Sampling Rate Converter. *1dts DISC SELECTOR 3 DISC 2 DISC Bypassing the FS Converter (Sampling Frequency Converter*) for More Efficient Digital Recording The FS converter of this unit performs the conversion of digital signals from sources that use sampling frequencies other than 44.1 kHz to the sampling frequency of 44.1 kHz, which is necessary for recording the signals to a CD-R or CD-RW disc. • When the FS converter is turned off, the converter is bypassed if the digital signal of the source has a sampling frequency of 44.1 kHz and when analog and multiple input recording are performed. • If source sampling frequencies of 32 kHz or 48 kHz are detected, the FS converter is activated automatically and the signal is routed through it. • When the FS converter is turned on, all signals to be recorded are routed through it regardless of the sampling frequency, even the 44.1 kHz digital signal is passed through it as the converter works as a filter to reduce signal fluctuation in the disc recording. For this reason, having the function set to “ON” is recommended for most recording purposes. • When recording specially encoded discs such as dts*1, HDCD*2, etc., be sure to turn the converter off (setting to “OFF”) using the following procedure (see step 4). MULTI JOG REC LEVEL COMPACT DISC RECORDER SL-PR300 POWER CD1 CD2 CD3 CD REC CD EDIT FINALIZE DISPLAY 1 2 3 4 5 6 7 8 0 > _10 PLAY MODE 9 CONTROL CD CD-R/RW REPEAT •REC FADE SYNCHRO REC MUTE 2,4 3,5 R RECLECTO SE MEN U PITCH+ 1 SET PITCH– PITC H0 EL CANC CANCEL COMPACT DISC RECORDER RAK-PR300 1 When the unit is in the stop mode, press the MENU button (main unit/remote control). 2 Turn the MULTI JOG control on the main unit or press the P/p (menu) button on the remote control until “CONVERTER” is shown in the information display. 3 Press the SET button (main unit/remote control). • The “CONVERTER ON” is shown and “ON” flashes in the information display. (The default setting is “ON”.) • Press the CANCEL button (main unit/remote control) if you do not wish to perform this procedure. 4 Turn the MULTI JOG control on the main unit or press the P/p (menu) button on the remote control to select “ON” or “OFF”. • Press the CANCEL button (main unit/remote control) if you do not want to perform this procedure. The setting is not changed. 5 Press the SET button (main unit/remote control). 39 RQT6087 SL-PR300PP.fm Page 40 Thursday, August 30, 2001 1:37 PM Special Recording Edit Operations Setting Up Synchronized Start Recording for External Digital Sources (CD, MD, and DAT only) When performing digital synchronized start recording of an externally connected digital source, synchronized start recording begins when a digital signal is encountered in the record pause mode. However, it is also possible to set this unit to start and stop recording when you are recording a single track. Note • Pressing the SYNCHRO button when unlocked displays “UNLOCK” in the information window and releases the synchronized condition. Resetting the Unit to the Factory Default Settings By performing the following procedure, all menu settings stored in the unit are cleared and the unit is reset to the factory default settings. 2,4 MULTI JOG REC LEVEL COMPACT DISC RECORDER SL-PR300 OPEN / CLOSE POWER DISC SELECTOR 3 3 DISC 2 2 DISC 1 1 DISC OPEN / CLOSE – OPEN / CLOSE POWER CD REC SELECTOR LINE MAX LINE PLAY MODE CD EDIT CD REC SYNCHRO MENU SET FINALIZE DISC SELECTOR 3 3 DISC 2 2 DISC 1 1 OPEN / CLOSE DIGITAL MIX BALANCE PHONES MIN MULTI JOG REC LEVEL COMPACT DISC RECORDER SL-PR300 + DISC DIGITAL PHONES 2 CD + REC SELECTOR LINE MIX BALANCE CD CANCEL MIN MAX LINE PLAY MODE CD EDIT CD REC SYNCHRO MENU REC/ REC MUTE CANCEL SET CD CANCEL REC/ REC MUTE FINALIZE 1 3,5 – 1 3,4 CANCEL DISC SELECTOR CD1 CD2 CD3 CD REC CD EDIT FINALIZE 1 2 DISC SELECTOR 5 6 7 8 9 > _10 0 CONTROL CD CD-R/RW REPEAT •REC CD2 CD3 CD EDIT FINALIZE DISPLAY 3 4 PLAY MODE CD1 CD REC DISPLAY FADE 1 2 3 4 5 6 7 8 0 > _10 PLAY MODE 9 CONTROL CD CD-R/RW REPEAT SYNCHRO •REC REC MUTE FADE SYNCHRO REC MUTE 2,4 3,5 R RECLECTO SE MEN U PITCH+ 1 2 3,4 SET PITCH– PITC H0 EL CANC CANCEL R RECLECTO SE MEN U PITCH+ 1 SET PITCH– PITC H0 EL CANC CANCEL COMPACT DISC RECORDER RAK-PR300 COMPACT DISC RECORDER RAK-PR300 1 When the unit is in stop mode, press the MENU button (main unit/remote control). 1 2 When the unit is in stop mode, press the MENU button (main unit/remote control). Turn the MULTI JOG on the main unit or press the P / p button on the remote control until “DIN SYNCHRO” appears in the display. 2 3 Press the SET button (main unit/remote control). Turn the MULTI JOG control on the main unit or press the P / p (menu) button on the remote control until “SET DEFAULT” is shown in the information display. 3 Press the SET button (main unit/remote control). • The current setting appears in the display. 4 Turn the MULTI JOG on the main unit or press the P / p button on the remote control to select “START” or “START&STOP”. • When “START” is selected, only the start of the digital signal is recorded synchronously. • When “START&STOP” is selected, both the start and stop of single track recording are controlled by information in the source digital signal. • Press the CANCEL button if you do not want to perform this procedure. The setting is not changed. 5 Press the SET button (main unit/remote control). • Please note that the type of synchronized recording being performed as set in the above procedure is not indicated in the display during actual recording. Even when recording is started, only the “SYNCHRO” indicator remains lit until recording is stopped. • Even if this setting is set to “START&STOP”, recording is concluded automatically if the source is stopped, the disc is changed, or if a track search is performed. RQT6087 40 • “SET DEFAULT?” is shown in the information display. • Press the CANCEL button (main unit/remote control) if you do not want to perform this procedure. 4 Press the SET button (main unit/remote control). • The unit is reset to the factory default settings and returns to the stop mode. At the time of purchase DUB- SPEED FINALIZE AUTO TRACK TRACK SPACE CONVERTER D- IN SYNCHRO LINE IN GAIN HIGH (CD- R:4x,CD- RW:2x) OFF ON ON ON START LOW SL-PR300PP.fm Page 41 Thursday, August 30, 2001 1:37 PM 5 English Setting the Clock Press the SET button (main unit). 2,4,6 MULTI JOG REC LEVEL OPEN / CLOSE POWER DISC SELECTOR 3 3 DISC 2 2 DISC 1 1 DISC MIN MAX – OPEN / CLOSE DIGITAL PHONES CD + CD EDIT SET + REC SELECTOR LINE MIX BALANCE LINE PLAY MODE – MULTI JOG REC LEVEL COMPACT DISC RECORDER SL-PR300 CD REC SYNCHRO MENU SET 1 CD CANCEL FINALIZE 3,5,7 Time Time forward backward Press the SET button. Turn the MULTI JOG control until “PM 1:00” is displayed. REC/ REC MUTE CANCEL Set the clock immediately after turning on the power to the main unit for the first time. Additionally, should there be a power blackout that lasts for longer than a few seconds, or if the AC power cord of the unit is unplugged from the wall socket for longer than a few seconds, please check to see if the clock needs to be reset again before using any other operation. • This unit uses a 12-hour clock to indicate time. • Adjust the clock regularly to maintain accuracy. The hour column stops flashing and the minutes column starts flashing. 6 Turn the MULTI JOG control on the main unit until the minutes column reads “15”. 7 Press the SET button. MULTI JOG REC LEVEL The time can be set regardless of the unit’s power switch being turned on or off. Example Setting the time to 1:15 PM when first using the system. (When the time is to be reset, the present time will flash.) In case of the power on mode 1 Press the MENU button (main unit) while the unit is in the stop mode. If the time has not been set, the system will go directly to the “XX HH:MM” setting (shown in the information display), bypassing the timer settings. (The only commands that the unit accepts at this time are the MENU, SET and JOG control functions. Pressing of any other button such as CD Control button, CDR Control button or the or CANCEL buttons will end the setting mode.) 2 3 4 Turn the MULTI JOG to select “CLOCK/TIMER”. Press the SET button. Turn the MULTI JOG control on the main unit the hour column reads “PM 1”. – SET + Time backward Time forward Press the SET button. Turn the MULTI JOG control “PM 1:15” is displayed. until “PM 1:15” is displayed. In case of the standby mode 1 2 Press the MENU button (main unit). Follow the instructions for steps 4-7 above. • The current time “PM 1:15” is shown in the information display. • If the CANCEL button is pressed while setting the minutes column, the procedure returns to the previous step, and the hour column starts flashing. This is convenient for correcting the hour column. Ways to change or adjust the time display There are two different ways for accessing the time setting function in order to adjust the time. With the main unit in the standby mode, press the MENU button three times. - The present time is shown in the information display. - Follow the instructions for steps 4-7 above. 41 RQT6087 SL-PR300PP.fm Page 42 Thursday, August 30, 2001 1:37 PM Setting the Clock When the power to the unit is on, press the MENU button one time. - TRACK ERASE is shown in the information display. - Using the MULTI JOG Control, change the information display to “CLOCK/TIMER”. - Press the SET button. - Press the MENU button twice. - The present time is shown in the information display. - Follow the instructions for steps 4-7 above. • For instructions on how to use the daily timer and one-time timer, please refer to the following pages. To ascertain the correct time In most areas, there is a telephone number you can call for the correct time. Consult your telephone directory for assistance. 42 RQT6087 SL-PR300PP.fm Page 43 Thursday, August 30, 2001 1:37 PM 8 Timer Play (wake-up play) Before proceeding with timer programming, make sure that the present time has been set correctly. (see page 41) • With the exception of the MENU and SET buttons, the timer settings must be made using the controls on the front panel of the main unit. 1,18 4~16 2 OPEN / CLOSE POWER DISC SELECTOR 3 3 DISC 2 2 DISC 1 1 DISC OPEN / CLOSE DIGITAL PHONES MIN MAX CD – CD EDIT MULTI JOG REC LEVEL – + Time backward Time forward Press the SET button. “AM 7:00” is displayed. + MIX BALANCE CD REC SYNCHRO FINALIZE MENU SET CD CANCEL REC/ REC MUTE 9 2 SET REC SELECTOR LINE LINE PLAY MODE Press the SET button. * The hour column stops flashing and the minute column starts flashing. Turn the MULTI JOG control until “AM 7:00” is displayed. MULTI JOG REC LEVEL COMPACT DISC RECORDER SL-PR300 English Timer Operations 3 5~17 Turn the MULTI JOG control on the main unit to set the minutes column to “15”. 10 Press the SET button. • The off time of the timer is shown and the hour column flashes. MULTI JOG REC LEVEL Example: Setting the unit to turn on and play a CD from 7:15 AM to 8:15 AM. – SET + Note • The setting of the DAILY TIMER (activated every day) and ONCE-TIMER (only conducted once and then erased from memory) is performed following the same instructions after selecting the desired timer function. 1 2 Turn the MULTI JOG control until “AM 7:15” is displayed. Press the SET button. “OFF AM 12:00” is displayed. The end time flashes. Insert the CD you want to play into the DISC1 tray. Press the MENU button. • “TRACK ERASE” is shown in the information window. 4 Turn the MULTI JOG control until “CLOCK/ TIMER” is shown in the information display. 5 Press the SET button. • “DAILY TIMER” is shown in the information window. To set DAILY TIMER Proceed to step 6. To set ONCE TIMER Press the MENU button and display “ONCE TIMER”, and then proceed to step 6. 6 Time forward Turn on the power. 1 3 Time backward 11 Turn the MULTI JOG control on the main unit to set the hour column to “AM 8”. 12 Press the SET button. • The hour column stops flashing and the minutes column flashes. MULTI JOG REC LEVEL – Time backward SET + Time forward Turn the MULTI JOG control until “AM 8:00” is displayed. Press the SET button. “AM 8:00” is displayed. Press the SET button. SET The start time flashes. 13 Turn the MULTI JOG control on the main unit to set the minutes column to “15”. (Continued on the next page) 7 Turn the MULTI JOG control on the main unit to set the hour column to “AM 7”. 43 RQT6087 SL-PR300PP.fm Page 44 Thursday, August 30, 2001 1:37 PM Timer Operations 14 Clearing a timer operation Press the SET button. - From Standby Mode • “PLAY” is displayed. MULTI JOG REC LEVEL – SET + MULTI JOG REC LEVEL COMPACT DISC RECORDER SL-PR300 OPEN / CLOSE POWER DISC SELECTOR 3 3 DISC 2 2 DISC OPEN / CLOSE DIGITAL Time backward Time forward DISC 1 PHONES MIN MAX CD + REC SELECTOR LINE MIX BALANCE 1 LINE PLAY MODE CD EDIT CD REC SYNCHRO MENU SET CD CANCEL REC/ REC MUTE FINALIZE Turn the MULTI JOG control until “AM 8:15” is displayed. – Press the SET button. “PLAY” is displayed. 1 2 • If “REC” flashes rather than “PLAY”, turn the MULT JOG control until “PLAY” is shown flashing. Note • If the CANCEL button is pressed while setting the minutes column, the procedure returns to the previous step, and the hour column starts flashing. This is convenient for correcting the hour column. 15 While “PLAY” is flashing, press the SET button. 1 Press the MENU button to display “DAILY TIMER” or “ONCE TIMER”. 2 Press the CANCEL button (main unit/remote control). • “DAILY OFF” or “ONCE OFF” is shown in the information display, the DAILY p (or ONCE p) indicator is cleared from the display window, and the timer operation is canceled. SET - With Unit Power Turned On 16 18 The timer programming is displayed once, and then the normal display is restored. Set the power to standby mode. Notes • Make sure that the unit is put in standby for timer functions to operate. • Match the connected receiver or other source with the unit’s setting, and adjust the volume to the appropriate level. • Timer play starts at the programmed start time, and the power is switched to the standby mode at the programmed end time. (The unit power is turned on about two minutes before the programmed start time.) 44 RQT6087 3 2 DISC 1 1 OPEN / CLOSE DIGITAL PHONES Press the SET button. DAILY DISC SELECTOR 3 DISC 2 DISC MAX CD – + REC SELECTOR LINE MIX BALANCE LINE PLAY MODE CD EDIT CD REC SYNCHRO MENU SET CD CANCEL REC/ REC MUTE FINALIZE • The Daily Timer “DAILY” indicator is shown in the display window confirming that the play mode is set. • When setting the ONCE TIMER, the “ONCE” indicator is shown in the display window confirming that the play mode is set. Example: DAILY TIMER SET OPEN / CLOSE POWER MIN 17 MULTI JOG REC LEVEL COMPACT DISC RECORDER SL-PR300 Turn the MULTI JOG control on the main unit to set the function to CD or CDR. 1 2 1 Follow steps 1 through 5 in "Timer Play (wakeup play)" to display "DAILY TIMER" or "ONCE TIMER". 2 Press the CANCEL button (main unit/remote control). • “DAILY OFF” or “ONCE OFF” is shown in the information display the DAILY p (or ONCE p) indicator is cleared from the display window, and the timer operation is canceled. SL-PR300PP.fm Page 45 Thursday, August 30, 2001 1:37 PM Timer Recording (Unattended Recording from a Broadcast Receiver or Other Source) 6 2,4 7 MULTI JOG REC LEVEL COMPACT DISC RECORDER SL-PR300 OPEN / CLOSE POWER DISC SELECTOR 3 3 DISC 2 2 DISC 1 1 DISC OPEN / CLOSE DIGITAL PHONES MIN MAX CD – + REC SELECTOR LINE MIX BALANCE LINE PLAY MODE CD EDIT CD REC SYNCHRO MENU SET CD CANCEL REC/ REC MUTE FINALIZE Notes • Match the timer of the connected source with the unit’s setting. • Recording starts at the programmed start time, and the power will be switched to back to the standby mode at the programmed end time. (The unit power is turned on about two minutes before the programmed start time.) • When an operation is completed once using the Once Timer mode, the timer program is cleared. • If digital signals are not received when timed recording starts using the DIGITAL IN setting, “UNLOCK” is shown in the information display and no signals will be recorded. • When using the timer to record a digital satellite broadcast program, for instance, check to see if the broadcast station with the program you want to record is tuned in correctly before programming the timer start and end times. English Timer Operations 3,5 1 Perform steps 1 to 13 of the Timer Play (wakeup play) procedure. (see page 43) 2 When “PLAY” is flashing in the information display, turn the MULTI JOG control on the main unit to select “REC”. 3 Press the SET button. MULTI JOG REC LEVEL – SET + 4 Turn the MULTI JOG control on the main unit within 30 seconds after step 3 to select the source to be recorded from. 5 Press the SET button. MULTI JOG REC LEVEL – 6 + SET Load a recordable CD-R or CD-RW disc into the CDR. • The disc is read. 7 Set the power to standby mode. • The present time is shown in the information display. 45 RQT6087 SL-PR300PP.fm Page 46 Thursday, August 30, 2001 1:37 PM CD and CDR Messages Note: Items with ( ) marks are confirmation displays CD Messages Message Significance Remedy CD NO DISC (indicates the disc tray number) There is no disc in the selected tray. If no disc has been inserted, insert a CD-ROM (CD-DA formatted) or a CD-R or CD-RW disc. CD DISC NG (indicates the disc tray number) Disc related trouble has occurred and the disc in the selected tray cannot be played. Replace the disc. ALL SKIP TR All the tracks on the disc have TRACK SKIP markers. (Depending on the playback function, playback may proceed to the next disc without displaying anything.) Replace the disc with one that contains tracks that can be played. CANNOT PLAY Displayed when a CD for which all of its tracks are marked to be skipped is loaded into the 3-CD changer and the PLAY button pushed. CDR Messages Message 46 RQT6087 Significance Remedy OPC ERROR OPC adjustments cannot be done to comply with the disc loaded in the CDR. When this occurs, record and erase functions are not possible. (Playback is possible.) Replace the disc with a CD-R or CD-RW that can be recorded on. OPC FULL Although time remains on the disc, the PCA (Power Calibration Area) is full, preventing further recording and erasing (playback is possible). Recording is possible if the disc has been recorded to by another unit and the adjustment information has been maintained. Replace the disc with a CD-R or CD-RW that can be recorded on. CDR NO DISC A CD, CD-R or CD-RW has not been inserted. Insert a CD, CD-R or CD-RW. BLANK DISC A CD-R or CD-RW with nothing recorded on it has been inserted. Playback and erase functions are not possible. CDR DISC NG Disc related trouble has occurred and the disc in the tray cannot be played or recorded on. Replace the disc. PMA FULL Although time remains on the disc, the PMA area is full, preventing further recording. PMA is an abbreviation of Program Memory Area. Replace the disc with a CD-R or CD-RW that can be recorded on. Finalization of the disc is recommended. NO R/RW DISC A CD-R or CD-RW disc has not been inserted. Insert a CD-R or CD-RW. ALREADY FINAL The disc loaded in the CDR is a finalized CD-R or CD-RW When using a CD-RW, perform the Unfinalize function to allow further recording. NO AUDIO DISC The disc inserted is not for music. Replace with a disc intended for music. ALL SKIP TR All the tracks on the disc have TRACK SKIP markers. (Depending on the playback function, playback may proceed to the next disc without displaying anything.) Replace the disc with one that contains tracks that can be played. SL-PR300PP.fm Page 47 Thursday, August 30, 2001 1:37 PM English CD and CDR Messages Message Significance Remedy NO R/RW DISC The disc inserted is a CD for computer data. Recording and erase functions are not possible. Check to see if the CD-ROM is recorded in audio format. If not, replace with a disc recorded using the CD-DA format. DISC FULL The CD-R or CD-RW has no available time. Replace with another recordable CD-R or CD-RW. Finalization of the disc is recommended. TNO FULL 99 tracks have been recorded on the disc. Further recording is not possible. Finalize the disc. Replace the disc to perform further recording. CANNOT REC Recording is not possible. This may be caused by poor connections or disc trouble. Check connections and/or replace the disc. UNLOCK When performing digital recording of an external component, the digital signal from the component is not being sent or the signal being sent cannot be recorded by this unit. Check the connection between the component and this unit and confirm that the digital signal being output from the component is compatible with this unit. SCMS PROTECT In accordance with SCMS regulations, digital recording cannot be performed. Switch the source selection to select input from the analog connections, and perform analog recording. NOT AUDIO IN The digital signal is not an audio format. Set the source component to output a digital audio signal. For example, if a data track on a CD is selected, switch to a track that contains audio data. NOT REC MUTE The 1 REC/REC MUTE button has been pressed at a time when the function cannot be performed. See page 25 for information on when the muting function can be used, and press the 1 REC/REC MUTE button when the function can be performed. SHORT REMAIN Not enough time remains on the disc to continue synchronized recording from the 3CD changer to the CDR. Replace the disc with a disc that contains sufficient recording time. CANNOT FIN Trouble with the CD-RW has prevented finalization from being performed. Replace the disc. NO RW DISC A CD-RW has not been inserted. Erase and Unfinalize functions are not possible. CANNOT ERASE Trouble with the CD-RW has prevented an erase function from being performed. Replace the disc. CANNOT UNFIN Trouble with the CD-RW has prevented the Unfinalize function from being performed. Replace the disc. DAO DISC The Unfinalize function cannot be performed with discs recorded using the “DISC at Once” recording system. SKIP FULL The maximum number of 21 tracks on the disc that can be skipped has been reached. Skip marking more than 21 tracks is not possible with this unit. 47 RQT6087 SL-PR300PP.fm Page 48 Thursday, August 30, 2001 1:37 PM CD and CDR Messages Due to copyright and other considerations, the following restriction is now in place for CD-R and CD-RW discs onto which the digital signals of CDs have been copied. SCMS (Serial Copy Management System) The following is a brief description of some of the acronyms used in this manual. ATIP (Absolute Time in Pregroove) The digital quality of CDs and other digital media can be recorded to CD-R and CD-RW using the CDR function of this unit. However, it is not possible to make a second generation digital copy from a first generation copy. This restriction, known as SCMS (Serial Copy Management System), is intended to prevent unlimited digital copying in the interests of artists and other copyright holders. This unit is designed to comply with SCMS restrictions. OK Glossary NO The reflected light returned from the pregroove of a CD-R disc generates a carrier signal providing tracking, motor control and focus signals. Additional information including the Recommended Optimum Recording Power value is also encoded in a frequency modulation of the carrier signal. CD-R (Compact Disc-Recordable) Recordable disc media. Also often referred to as write-once discs as data can only be recorded one time. CD-RW (Compact Disc-ReWritable) Recordable disc media to which data can be recorded and erased repeatedly. OPC (Optimized Power Control) Source CD Digital Recording First generation copy (CD-R or CD-RW) Second generation copy (CD-R or CDRW) The copyright laws allow recordings to be made for the personal enjoyment of the individual user but they do not allow such recordings to be used for any other purpose without permission from the rightful owner of the copyrights. Notes • If digital recording of a first generation digital copy is attempted, “SCMS PROTECT” is shown in the information display, and the recording operation is canceled. • In the case of synchronized recording operations, Listening Edit recording and Program Edit recording, when the first-generation copy is a finalized CD-R or CD-RW disc loaded in the 3CD changer, the recording type is automatically changed from digital to analog, and the recording type indicators light accordingly. (If high-speed dubbing is turned on, it will be turned off when the recording type is changed.) 48 RQT6087 Analysis of recordable CD media to determine the optimum power setting for recording of data to the disc. PCA (Power Calibration Area) A space reserved at the beginning of a disc for calibrating the laser power needed to record that disc. PMA (Program Memory Area) On a recordable disc, it is the area that “temporarily” holds the information about the recordings on the disc: the track numbers and the track starting and stopping points when written in a session that is not yet closed (unfinalized disc). When the session is closed (the disc is finalized), this information is written to the TOC. TOC (Table of Contents) The area on a CD to which is recorded various information of the disc contents such as the number of tracks, their starting points, and the total length of the data area. SL-PR300PP.fm Page 49 Thursday, August 30, 2001 1:37 PM Before requesting service, make the below checks. If you are in doubt about some of the check points, or if the remedies indicated in the chart do not solve the problem: In the U.S.A., contact the Panasonic Customer Call Center at 1-800-211-7262, or e-mail [email protected], or web site (http://www.panasonic.com). In Canada, contact Panasonic Canada Inc. Customer Care Centre at 905-624-5505, web site (www.panasonic.ca), or an Authorized Service Centre closest to you. Remedial action/check Ref • A CD-R or CD-RW with nothing recorded on it has been inserted. (“BLANK DISC” is displayed.) • Replace the disc with one on which tracks have been recorded. The time display flashes in the display window. • A power failure has occurred or the power cord has been disconnected. • Set the clock and re-program the timer. 41 Play fails to start • The CD has been inserted upside down. • Insert it properly with the label side facing up. 14 • Condensation has formed on the lens. • Turn on the power and wait for a couple of hours. Specific parts are not played properly. • The CD is scratched. • Replace the CD. 14 Recording is not possible • The CD-R or CD-RW was loaded in the tray upside-down. • Load the disc with the label side up. 15 • The CD-R or CD-RW is already finalized. • Further recording on a finalized CDRW is only possible if the Unfinalize function is used. • Replace with a disc that can be recorded on. 38 • The source being copied is already a digital copy itself. • Perform analog recording of the source. 24 • There is dust or scratches on the surface of the disc. • Clean the disc using a commercially available disc cleaner. If this is not effective, replace the disc. 23 Timer fails to start. • Present time is not correct. • The timer display fails to appear. • Set the time properly. • Set the timer properly. 41 No remote control operations. • The batteries in the remote control have discharged. • Replace them with two fresh batteries (AA (15F), R6, SUM-3). 12 • The remote control sensor is exposed to direct sunlight or some other intense source of light. • Move the unit so that the sensor is not exposed to direct sunlight, a lighting fixture or some other intense source of light. 12 CDR CD PLAYER COMMON No sound. TIMER Cause REMOTE CONTROL Symptom English Troubleshooting If the unit fails to operate properly even when the remedial action suggested above has been taken: This unit uses a microcomputer to perform a large number of operations. If it fails to operate no matter which button is pressed, disconnect the power cord, and then wait a few moments before re-connecting it. Then set the time and re-program the timer. Notes • If something important is going to be recorded, always test-record first to check that the recording turns out properly before proceeding with the actual recording. • The manufacturer assumes no liability whatsoever for any damages resulting from missed opportunities or accidental erasure that occurs while conducting recording or play operations due to malfunctioning of or trouble in the unit, or for any incidental damage. 49 RQT6087 SL-PR300PP.fm Page 50 Thursday, August 30, 2001 2:40 PM Specifications CD Player Section System Pitch control Signal-to-noise ratio Dynamic range Frequency response Wow and flutter Total harmonic distortion Clock display Compact disc digital audio system ±12 % 97 dB (1 kHz) 93 dB (1 kHz) 20 Hz - 20 kHz (±1 dB) Less than measurable limit 0.0063 % (1 kHz) CDR Section System Compact disc digital audio recording system Sampling frequency 44.1 kHz Frequency response 20 Hz - 20 kHz (±1 dB) Inputs: Analog (LINE IN) 300 mV (Full scale –12 dB)/50 kΩ Digital OPTICAL x 1 COAXIAL x 1 Sampling frequency: 32 kHz, 44.1 kHz, 48 kHz Signal-to-noise ratio 94 dB (during playback, 1 kHz) Dynamic range 91 dB (during playback, 1 kHz) Wow and flutter Less than measurable limit Total harmonic distortion 0.0063 % (during playback, 1 kHz) 12-hour display Common Specifications Output terminals: Analog LINE x 1 set, 2 V/5 kΩ (Full scale) Headphones x 1, 4 mW/32 Ω OPTICAL x 1 COAXIAL x 1 Digital Power requirements Power consumption AC 120 V, 60 Hz 40 W power ON mode 5 W STANDBY mode Dimensions (W x H x D) 436 mm x 128 mm x 337 mm (17-3/16 in. x 5 in. x 13-1/4 in.) Mass 6.3 kg (13.9 lbs) Notes • Specifications are subject to change without notice. • Mass and dimensions are approximate. Timer Section Timer system DAILY TIMER operation (ON/OFF timer) ONCE TIMER operation (ON/OFF timer) Product service Product information Damage requiring service—The unit should be serviced by qualified service personnel if: (a) The AC power supply cord or plug has been damaged; or (b) Objects or liquids have gotten into the unit; or (c) The unit has been exposed to rain; or (d) The unit does not operate normally or exhibits a marked change in performance; or (e) The unit has been dropped, or the cabinet damaged. 2. Servicing—Do not attempt to service the unit beyond that described in these operating instructions. Refer all other servicing to authorized servicing personnel. 3. Replacement parts—When parts need replacing ensure the servicer uses parts specified by the manufacturer or parts that have the same characteristics as the original parts. Unauthorized substitutes may result in fire, electric shock, or other hazards. 4. Safety check—After repairs or service, ask the servicer to perform safety checks to confirm that the unit is in proper working condition. 1. 50 RQT6087 In the U.S.A., contact the Panasonic Customer Call Center at 1-800211-7262 or e-mail [email protected], or web site (http://www.panasonic.com). In Canada, contact Panasonic Canada Inc. Customer Call Centre at 905-624-5505, web site (www.panasonic.ca/fdbckca.htm), or an Authorized Service Centre closest to you. Panasonic Consumer Electronics Company, Division of Matsushita Electric Corporation of America Panasonic Sales Company, Division of Matsushita Electric of Puerto Rico, Inc. (“PSC”) One Panasonic Way Secaucus, New Jersey 07094 http://www.panasonic.com Ave. 65 de Infantería, Km. 9.5 San Gabriel Industrial Park, Carolina, Puerto Rico 00985 © 2001 Matsushita Electric Industrial Co., Ltd. Printed in Malaysia Panasonic Canada Inc. 5770 Ambler Drive Mississauga, Ontario L4W 2T3 www.panasonic.ca