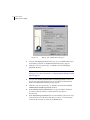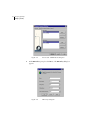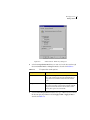
1
Symantec Enterprise VPN Client V7.0 Installation and Configuration Guide Supported Platforms Windows NT/98/2000/ME/XP Part Number: 16-30-00031 ii Copyright notice The software described in this book is furnished under a license agreement and may be used only in accordance with the terms of the agreement. Copyright notice Copyright 1998-2002 Symantec Corporation. All Rights Reserved. Any technical documentation that is made available by Symantec Corporation is the copyrighted work of Symantec Corporation and is owned by Symantec Corporation. Portions copyright eHelp Corporation. All rights reserved. No warranty The technical documentation is being delivered to you AS-IS and Symantec Corporation makes no warranty as to its accuracy or use. Any use of the technical documentation or the information contained therein is at the risk of the user. Documentation may include technical or other inaccuracies or typographical errors. Symantec reserves the right to make changes without prior notice. No part of this publication may be copied without the express written permission of Symantec Corporation, 20330 Stevens Creek Blvd., Cupertino, CA 95014. Trademarks Microsoft, MS-DOS, Windows, and Windows NT are registered trademarks of Microsoft Corporation. IBM, OS/2, and OS/2 Warp are registered trademarks of International Business Machines Corporation. Novell and NetWare are registered trademarks of Novell Corporation. 3Com and EtherLink are registered trademarks of 3Com Corporation. Compaq is a registered trademark of Compaq Corporation. Zip and Jaz are registered trademarks of Iomega Corporation. SuperDisk is a trademark of Imation Enterprises Corporation. Rainwall is a registered trademark of Rainfinity Corporation. This product includes software developed by the Apache Software Foundation. Other product names mentioned in this manual may be trademarks or registered trademarks of their respective companies and are hereby acknowledged. iii Technical support Technical support As part of Symantec Security Response, our global technical support group maintains support centers throughout the world. Our primary role is to respond to specific questions on product feature/function, installation and configuration as well as author content for our web accessible Knowledge Base. We work collaboratively with the other functional areas within Symantec to answer your questions in a timely fashion, such as working with Product Engineering as well as our Security Research Centers to provide Alerting Services and Virus Definition Updates for virus outbreaks and security alerts. Highlights of our offerings include: • A range of support options giving you the flexibility to select the right amount of service for any size organization • Telephone and Web support components providing rapid response and upto-the-minute information • Software assurance delivering automatic software upgrade protection • Content updates for virus definitions and security signatures ensuring the highest level of protection • Global support from Symantec Security Response experts available 24x7 world wide in a variety of languages • Advanced features such as the Symantec Alerting Service and Technical Account Manager role offer enhanced response and proactive security support Please reference our website for current information on Support Programs. Registration and licensing If the product you are implementing requires Registration and/or a License Key, the fastest and easiest way to register your service is to access our licensing and registration site at www.symantec.com/certificate. Alternatively, you may go to http://www.symantec.com/techsupp/ent/enterprise.html, select the product you wish to register and, from the Product Home Page select the Licensing and Registration link. iv Technical support Contacting support Customers with a current support agreement may contact the Technical Support team via phone or web at www.symantec.com/techsupp. When contacting support please be sure to have the following information available • Product release level • Hardware information Available memory, disk space, NIC information • Operating system Version and patch level • Network topology Router, gateway and IP address information • Problem description n Error messages/log files n Troubleshooting performed prior to contacting Symantec n Recent software configuration changes and/or network changes Customer service Contact Enterprise Customer Service online at http://www.symantec.com, select the appropriate Global Site for your country, then chose 'Service and Support'. Customer Service is available to assist with the following types of issues • Questions regarding product licensing or serialization • Update product registration with address or name changes • General product information (e.g. features, language availability, dealers in your area) • Latest information on product updates and upgrades • Information on upgrade insurance and maintenance contracts • Information on Symantec Value License Program • Advice on Symantec's technical support options • Non-technical presales questions • Missing or defective CD-ROMs or manuals Contents Copyright notice . . . . . . . . . . . . . . . . . . . . . . . . . . . . . . . . . . . . . . . . . . . . . . . . . . . . . . . . . . i-ii Trademarks . . . . . . . . . . . . . . . . . . . . . . . . . . . . . . . . . . . . . . . . . . . . . . . . . . . . . . . . . . . . . . . i-ii Technical support . . . . . . . . . . . . . . . . . . . . . . . . . . . . . . . . . . . . . . . . . . . . . . . . . . . . . . . . . i-iii Highlights of our offerings include: . . . . . . . . . . . . . . . . . . . . . . . . . . . . . . . . . . . i-iii Registration and licensing . . . . . . . . . . . . . . . . . . . . . . . . . . . . . . . . . . . . . . . . . . . i-iii Contacting support . . . . . . . . . . . . . . . . . . . . . . . . . . . . . . . . . . . . . . . . . . . . . . . . . i-iv Customer service . . . . . . . . . . . . . . . . . . . . . . . . . . . . . . . . . . . . . . . . . . . . . . . . . . i-iv 5 1 Introducing Symantec Enterprise VPN Client Tunnels and VPNs . . . . . . . . . . . . . . . . . . . . . . . . . . . . . . . . . . . . . . . . . . . . . . . . . . . . . . . . . 1-6 Security gateways . . . . . . . . . . . . . . . . . . . . . . . . . . . . . . . . . . . . . . . . . . . . . . . . . . . . . . . . . . 1-7 Using an SEVPN server . . . . . . . . . . . . . . . . . . . . . . . . . . . . . . . . . . . . . . . . . . . . . 1-7 Using a third-party VPN server . . . . . . . . . . . . . . . . . . . . . . . . . . . . . . . . . . . . . . . 1-7 Typical tunnel environments . . . . . . . . . . . . . . . . . . . . . . . . . . . . . . . . . . . . . . . . . . . . . . . . 1-8 Security protocols . . . . . . . . . . . . . . . . . . . . . . . . . . . . . . . . . . . . . . . . . . . . . . . . . . . . . . . . . 1-9 Internet Security Association and Key Management Protocol . . . . . . . . . . . . . . 1-9 Internet Key Exchange policy . . . . . . . . . . . . . . . . . . . . . . . . . . . . . . . . . . . . . . . . 1-9 IP Security protocol . . . . . . . . . . . . . . . . . . . . . . . . . . . . . . . . . . . . . . . . . . . . . . . 1-10 Extended user authentication methods . . . . . . . . . . . . . . . . . . . . . . . . . . . . . . . 1-11 Strong extended user authentication methods . . . . . . . . . . . . . . . . . . . . . . . . . 1-11 Other extended user authentication methods . . . . . . . . . . . . . . . . . . . . . . . . . . 1-12 Related documentation . . . . . . . . . . . . . . . . . . . . . . . . . . . . . . . . . . . . . . . . . . . . . . . . . . . . 1-13 Online documentation . . . . . . . . . . . . . . . . . . . . . . . . . . . . . . . . . . . . . . . . . . . . . . . . . . . . 1-14 15 2 Installing and uninstalling Symantec Enterprise VPN Client Pre-installation requirements . . . . . . . . . . . . . . . . . . . . . . . . . . . . . . . . . . . . . . . . . . . . . . . 2-16 Unsupported network adapters . . . . . . . . . . . . . . . . . . . . . . . . . . . . . . . . . . . . . . 2-17 2 Installing Symantec Enterprise VPN Client . . . . . . . . . . . . . . . . . . . . . . . . . . . . . . . . . . . 2-17 Uninstalling Symantec Enterprise VPN Client . . . . . . . . . . . . . . . . . . . . . . . . . . . . . . . . . 2-24 Uninstalling RaptorMobile . . . . . . . . . . . . . . . . . . . . . . . . . . . . . . . . . . . . . . . . . . . . . . . . . 2-24 25 3 Getting started Using the Symantec Enterprise VPN Client user interface . . . . . . . . . . . . . . . . . . . . . . . 3-26 Using the online help . . . . . . . . . . . . . . . . . . . . . . . . . . . . . . . . . . . . . . . . . . . . . . 3-28 Starting Symantec Enterprise VPN Client . . . . . . . . . . . . . . . . . . . . . . . . . . . . . . . . . . . . . 3-29 Validate logon password . . . . . . . . . . . . . . . . . . . . . . . . . . . . . . . . . . . . . . . . . . . 3-31 Changing your logon password . . . . . . . . . . . . . . . . . . . . . . . . . . . . . . . . . . . . . 3-32 Setting your user options . . . . . . . . . . . . . . . . . . . . . . . . . . . . . . . . . . . . . . . . . . . . . . . . . . 3-33 Checking the SEVPN Client version number . . . . . . . . . . . . . . . . . . . . . . . . . . . . . . . . . . 3-35 Using digital certificates . . . . . . . . . . . . . . . . . . . . . . . . . . . . . . . . . . . . . . . . . . . . . . . . . . . 3-36 Configuring a digital certificate . . . . . . . . . . . . . . . . . . . . . . . . . . . . . . . . . . . . . 3-36 Restoring the default digital certificate . . . . . . . . . . . . . . . . . . . . . . . . . . . . . . . . 3-38 Starting with a digital certificate . . . . . . . . . . . . . . . . . . . . . . . . . . . . . . . . . . . . . 3-38 Remote policies . . . . . . . . . . . . . . . . . . . . . . . . . . . . . . . . . . . . . . . . . . . . . . . . . . . . . . . . . . 3-42 Using multiple remote policies . . . . . . . . . . . . . . . . . . . . . . . . . . . . . . . . . . . . . . 3-44 Using Personal Firewall port control . . . . . . . . . . . . . . . . . . . . . . . . . . . . . . . . . . . . . . . . . 3-45 Selecting the port control type . . . . . . . . . . . . . . . . . . . . . . . . . . . . . . . . . . . . . . 3-45 Adding a port or IP protocol . . . . . . . . . . . . . . . . . . . . . . . . . . . . . . . . . . . . . . . . 3-46 Deleting a port or IP protocol . . . . . . . . . . . . . . . . . . . . . . . . . . . . . . . . . . . . . . . 3-47 Enabling the ports for file and print sharing . . . . . . . . . . . . . . . . . . . . . . . . . . . 3-48 Disabling the ports for file and print sharing . . . . . . . . . . . . . . . . . . . . . . . . . . 3-48 49 4 Managing gateways Adding a gateway . . . . . . . . . . . . . . . . . . . . . . . . . . . . . . . . . . . . . . . . . . . . . . . . . . . . . . . . . 4-50 Defining an IKE policy . . . . . . . . . . . . . . . . . . . . . . . . . . . . . . . . . . . . . . . . . . . . . 4-53 Viewing or editing the IKE policy . . . . . . . . . . . . . . . . . . . . . . . . . . . . . . . . . . . . 4-56 Connecting a gateway . . . . . . . . . . . . . . . . . . . . . . . . . . . . . . . . . . . . . . . . . . . . . . . . . . . . . 4-56 Disconnecting a gateway . . . . . . . . . . . . . . . . . . . . . . . . . . . . . . . . . . . . . . . . . . . . . . . . . . . 4-58 Viewing the gateway properties . . . . . . . . . . . . . . . . . . . . . . . . . . . . . . . . . . . . . . . . . . . . . 4-58 Deleting a gateway . . . . . . . . . . . . . . . . . . . . . . . . . . . . . . . . . . . . . . . . . . . . . . . . . . . . . . . . 4-58 3 59 5 Managing tunnels Adding a tunnel . . . . . . . . . . . . . . . . . . . . . . . . . . . . . . . . . . . . . . . . . . . . . . . . . . . . . . . . . . 5-60 Defining a VPN policy . . . . . . . . . . . . . . . . . . . . . . . . . . . . . . . . . . . . . . . . . . . . . 5-62 Viewing or editing the VPN policy . . . . . . . . . . . . . . . . . . . . . . . . . . . . . . . . . . . 5-69 Connecting a tunnel . . . . . . . . . . . . . . . . . . . . . . . . . . . . . . . . . . . . . . . . . . . . . . . . . . . . . . 5-70 Disconnecting a tunnel . . . . . . . . . . . . . . . . . . . . . . . . . . . . . . . . . . . . . . . . . . . . . . . . . . . . 5-70 Disconnecting inactive tunnels . . . . . . . . . . . . . . . . . . . . . . . . . . . . . . . . . . . . . . 5-70 Viewing the tunnel properties . . . . . . . . . . . . . . . . . . . . . . . . . . . . . . . . . . . . . . . . . . . . . . 5-72 Viewing the tunnel status . . . . . . . . . . . . . . . . . . . . . . . . . . . . . . . . . . . . . . . . . . . . . . . . . . 5-73 Deleting a tunnel . . . . . . . . . . . . . . . . . . . . . . . . . . . . . . . . . . . . . . . . . . . . . . . . . . . . . . . . . 5-75 77 6 Viewing log and system data Viewing the log data . . . . . . . . . . . . . . . . . . . . . . . . . . . . . . . . . . . . . . . . . . . . . . . . . . . . . . 6-78 Viewing the system information . . . . . . . . . . . . . . . . . . . . . . . . . . . . . . . . . . . . . . . . . . . . . 6-79 81 7 Shutting down the SEVPN Client Logging off from SEVPN Client . . . . . . . . . . . . . . . . . . . . . . . . . . . . . . . . . . . . . . . . . . . . . 7-82 Deleting the logged on user . . . . . . . . . . . . . . . . . . . . . . . . . . . . . . . . . . . . . . . . . . . . . . . . . 7-83 4 Chapter 1 Introducing Symantec Enterprise VPN Client Symantec Enterprise VPN Client enables a remote computer to safely send information across a public network, such as the Internet, into a private network that is protected behind a firewall. The connection between the remote client and the protected network is made using a private tunnel, or Virtual Private Network (VPN). A VPN spans the insecure public network between two private networks, providing what appears to be a continuous, physical private network. Symantec Enterprise VPN Client connects the PC to the VPN server, which provides access to the private network. To ensure the safe transmission of data in the tunnels, SEVPN Client uses a suite of standardized security protocols including the Internet Security Association and Key Management Protocol (ISAKMP), the Internet Key Exchange (IKE) policy, and the IP Security (IPSec) protocol. For more information, see Security protocols on page 9. SEVPN Client can be used with a Symantec Enterprise Firewall (SEF) with Symantec Enterprise VPN (SEVPN), or any IPSec compliant third-party VPN server and firewall. Access to SEVPN Client is password protected to prevent others from using the tunnels into the VPN server, even if your computer is stolen. For added security, SEVPN Client supports extended user authentication with the VPN server and port control for system hardening, which restricts the ports through which data packets can be received. 6 Introducing Symantec Enterprise VPN Client Tunnels and VPNs Tunnels and VPNs A tunnel is a connection between two peers that carries packets of a protocol, encapsulated in the protocol defined by the tunneling architecture. A VPN is a secure tunnel that uses encryption and authentication to protect information while it is on the public network so that only the peers involved in a communication can read the data. By definition, VPN connections are only established between trusted end systems. When you use SEVPN Client, the encryption and authentication are transparent, except when you are required to enter a password or key. The SEVPN Client uses VPNs that use the IPSec protocol to encrypt the data transmitted over the network. Tunnels are established and configured at the VPN server. When you are ready to open a tunnel, you must connect a security gateway between the SEVPN Client and the VPN server. After the connection is established and the tunnels are opened, you can access the private network as if your remote PC was behind the VPN server; that is, it appears as if you are working from inside the protected network. Symantec Enterprise VPN Client can accommodate multiple tunnels and VPN servers. Introducing Symantec Enterprise VPN Client Security gateways Security gateways A gateway is a computer or router that is part of two different networks, which is used to move data from one network to the other. A security gateway restricts access between two networks. Security gateways are configured at the VPN server and in the SEVPN Client. Every gateway can accommodate multiple tunnels. Therefore, when you add or remove a security gateway from the SEVPN Client database, you are also adding or removing all of the tunnels that are associated with the security gateway. If you are using an SEVPN, the tunnels are automatically downloaded every time the gateway is connected. Gateways and their tunnels must be connected each time you reboot your PC. After the gateways and tunnels are connected, they remain connected until you disconnect them, an inactivity timeout occurs, a dial-up connection is lost, or you exit Windows or shut down the SEVPN Client. Using an SEVPN server When the connection between the SEVPN Client and an SEVPN server is established, the protocol parameters for the gateway and its associated tunnels are automatically downloaded into the SEVPN Client database and the tunnels are connected, which provides a secure link to your host. Additionally, you can choose to have the gateway and its tunnels automatically connected when you log onto SEVPN Client. Note: If you are using an SEVPN server, the protocol parameters for the security gateway cannot be changed through the SEVPN Client user interface. You can, however, add and configure new gateways using the user interface. Using a third-party VPN server When you are using a third-party VPN server, you must enter all of the definitions for the gateways and tunnels, as SEVPN Client does not query thirdparty VPN servers for this information. 7 8 Introducing Symantec Enterprise VPN Client Typical tunnel environments Typical tunnel environments Symantec Enterprise VPN Client is a flexible security solution that acts at the routing, (or IP; Internet Protocol) layer. It enables you to create the type of secure environment that best suits the needs of your users. The following environments are made possible with a SEVPN Client tunnel: • Telecommuting Traditionally, telecommuters have used costly public telephone lines to dial in to their company’s private network. With a SEVPN Client tunnel, users connect to their private network through a connection using any local Internet Service Provider (ISP) and the Internet. • Branch office In the past, businesses created their own expensive network backbone or used leased lines to connect branch offices to the private network at company headquarters. Now, the SEVPN Client system at the branch office can be set up to securely route IP traffic from the users at the branch office, over the Internet, and to the private network at company headquarters. The VPN server on the private network then routes the traffic to the correct destination system on the private network. • Business-to-business SEVPN Client can be used to provide a secure link between two companies. In this case, a tunnel server is located at each site. Access to each company’s private network is protected by firewall systems, which are configured to allow the passage of the secure authenticated tunnel traffic. • Within a business Within a company there are levels of sensitive information that must be protected on a need-to-know basis. For example, a computer that stores a company’s salary and financial data would be used by the finance department, but would be unavailable to other individuals in the company. In this type of environment, the SEVPN Client tunnel is set up within the company’s private network to limit access to the information to authorized individuals, while protecting the integrity of the information. Introducing Symantec Enterprise VPN Client Security protocols Security protocols Symantec Enterprise VPN Client uses a suite of standardized security protocols to ensure the safe transmission of data in the VPN tunnels between the SEVPN Client and the VPN server. SEVPN Client supports the following protocols: • Internet Security Association and Key Management Protocol (ISAKMP) • Internet Key Exchange (IKE) • IP Security (IPSec) Internet Security Association and Key Management Protocol The Internet Security Association and Key Management Protocol (ISAKMP) is a framework that defines the implementation of an IKE key exchange protocol, and dynamically negotiates the IPSec security parameters for a specific VPN. This protocol defines how the key exchange protocols are implemented, and how SEVPN Client and the VPN server negotiate their security association; that is, how the two entities use security services to securely communicate. For example, the ISAKMP application in the VPN server negotiates with its peer application in the SEVPN Client to determine the type of encryption, authentication, and key exchange you want to use for the IPSec protocol for a specific VPN. The negotiation occurs in two phases. In phase 1, a protected communications channel is established by authenticating each peer. In phase 2, the actual security methods used in the tunnel are dynamically negotiated. Before ISAKMP, all VPN tunnels were based on static configurations, meaning that system administrators had to manually generate all tunnel information and then exchange that information with the peer entity on the other end of the tunnel. The ISAKMP protocol provides for greater security and flexibility in setup procedures. Internet Key Exchange policy The Internet Key Exchange (IKE) policy establishes a shared security policy and authenticated keys by implementing a combination of key exchange protocols (Oakley) within the ISAKMP framework, providing authentication of the IPSec peers, negotiating IPSec security associations, and establishing IPSec keys. Before IPSec traffic can be passed through a tunnel, the VPN server must be able to verify the identity of its peer. This is done by manually entering shared keys into both peers, or by using a digital certificate from a certification authority. 9 10 Introducing Symantec Enterprise VPN Client Security protocols The IKE policy negotiations must be protected. Therefore, each entity must agree on a common shared IKE policy, which is why the set up must match between the VPN server and the SEVPN Client. IP Security protocol The IP Security (IPSec) protocol is a framework of open standards that provides data confidentiality, data integrity, and data authentication between participating peers. IPSec authenticates, encrypts, and encapsulates IP packets in a VPN tunnel. IPSec provides these security services by acting at the IP layer, protecting and authenticating IP packets between IPSec complaint devices. It uses IKE to handle the negotiation of protocols and algorithms based on local policy, and to generate the encryption and authentication keys to be used by IPSec. The IPSec protocol uses the SHA-1 and MD5 algorithms for authentication, and the DES, 3DES, and AES algorithms for encryption of the IP packets in a data stream. Note: Triple-DES (3DES) and AES encryption are not available in the DES only version of the SEVPN Client. Data confidentiality Data confidentiality ensures that only the peers involved in a communication can read the data. The sender encrypts the data packets before they are transmitted across a network so that no attacker can read them. This is commonly provided by using data encryption and keys that are only available to the peers involved in the communication. Data integrity Data integrity ensures that any modification to the contents in a data packet during transit can be detected. The receiver authenticates the packets sent to ensure that the data has not been altered during transmission. A secret or public key, such as a digital certificate, allows the recipients of a piece of protected data to verify that it has not been modified in transit. Introducing Symantec Enterprise VPN Client Security protocols Extended user authentication methods For added security, your VPN server administrator can configure the VPN server so that you must use an extended user authentication method to connect the SEVPN Client to a security gateway. This method is in addition to your SEVPN Client logon password and the phase 1 authentication using preshared keys or a digital certificate. Extended user authentication takes place between phase 1 and phase 2 IKE negotiations. After you enter the required information for the selected authentication method, phase 2 negotiations can take place and tunnels can be downloaded from the VPN server. Your VPN server administrator can configure the VPN server to use different forms of extended user authentication, and must supply you with a user name and password for the specified method. Refer to the SEVPN documentation for the authentication schemes that are available, or to the appropriate third-party security gateway documentation for information on using your specific authentication method. Strong extended user authentication methods Strong extended user authentication methods use single-use passwords. The SEVPN Client supports the following strong extended user authentication methods: • CRYPTOCardTM • DefenderTM tokens • S/KeyTM • SecurIDTM (ACE/Server) CRYPTOCard authentication CRYPTOCard authentication is a strong challenge/response authentication method based on cryptographically generated passwords. A numeric challenge received from the firewall is entered into the CRYPTOCard hardware token. The token generates a one-time password that is used to authorize your access to SEVPN Client. A separate server behind the firewall validates the password. Defender token authentication Defender token authentication is a strong challenge/response authentication method based on cryptographically generated passwords. A numeric challenge 11 12 Introducing Symantec Enterprise VPN Client Security protocols received from the Defender Security Server is entered into a hardware or software token. The token combines the challenge with a private password, and then generates a one-time DES encrypted password. A separate server behind the firewall validates the password. S/Key authentication S/Key authentication is a connection-based authentication method, which is built into the SEVPN Client. It generates a new one-time password (a series of six fourletter words) for each connection made by the user to the VPN server. The password is based on a user password, a seed value, and a server built into the VPN server that validates the password and decrements the user’s connection count. Although the SEVPN Client S/Key password remains the same, the password string sent to the VPN server is different for each connection. The VPN server administrator supplies you with the S/Key password if this method is being used to authenticate your SEVPN Client connection. The VPN server administrator also controls the number of times the S/Key password can be used to generate the VPN server access password string. SecurID (ACE/Server) authentication SecurID authentication is a time-based authentication method consisting of a smart ACE card that produces a new six digit password every 60 seconds, and a server process that resides on a separate system behind the firewall that validates the password. Other extended user authentication methods Other extended user authentication methods that are not as strong as the previous ones, use multi-use passwords. The SEVPN Client supports the following alternative extended user authentication methods: • Gateway password • Lightweight Directory Access Protocol (LDAP) • NT Domain Gateway password authentication Gateway password authentication involves a multi-use password that is entered and maintained in the VPN database by the VPN server administrator and is used Introducing Symantec Enterprise VPN Client Related documentation to authenticate SEVPN Client users. The password is assigned by the VPN server administrator to individual SEVPN Client entities. Lightweight Directory Access Protocol (LDAP) authentication LDAP authentication is a protocol for accessing online directory services. It runs directly over TCP/IP, and can be used to access a stand-alone LDAP directory service, or to access a directory service that is back-ended by the X.500 data model. NT Domain authentication NT Domain authentication is a multi-use password authentication method used on some SEVPN for Windows NT systems. The password is entered and maintained in the Windows NT Primary Domain Controller (PDC) by the Windows NT system administrator. This enables administrators to store user names and passwords within the PDC using Windows NT, rather than the SEVPN database. Related documentation The Symantec Enterprise VPN Client documentation set includes: • Symantec Enterprise VPN Client Installation and Configuration Guide Describes the features and architecture of SEVPN Client and the components of its user interface (UI). Provides step-by-step instructions for starting SEVPN Client, and for managing gateways and tunnels. This manual is for system administrators or anyone responsible for configuring or managing SEVPN Client. • Symantec Enterprise VPN Client Quick Start Card Describes system requirements and how to install the SEVPN Client software on the remote client machine. • Symantec Enterprise VPN Client Online Help Describes the components of the SEVPN Client user interface, and provides task-specific instructions for managing gateways and tunnels. Provides a glossary which defines terms used in the SEVPN Client documentation. 13 14 Introducing Symantec Enterprise VPN Client Online documentation • Symantec Enterprise VPN Client Release Notes Describes supplemental product information such as feature updates, software corrections, documentation changes, and known limitations and workarounds. The Symantec Enterprise Firewall and Symantec Enterprise VPN documentation set includes: • Symantec Enterprise Firewall and Symantec Enterprise VPN Configuration Guide Describes the features and architecture of SEF/SEVPN and the components of its user interface (UI). Provides step-by-step instructions for configuring SEF/SEVPN. • Symantec Enterprise Firewall, Symantec Enterprise VPN, and VelociRaptor Firewall Appliance Reference Guide Describes firewall, VPN server, and appliance concepts and applications. Online documentation An online version of the Symantec Enterprise VPN Client documentation set is located in the \DOC directory on the Symantec CD-ROM. You can read the documents using Adobe Acrobat Reader. To obtain Acrobat Reader, download it free of charge from the Symantec Corporation Web site at www.symantec.com or from the Adobe Web site at www.adobe.com. Chapter 2 Installing and uninstalling Symantec Enterprise VPN Client You install the SEVPN Client V7.0 from the Symantec Corporation CD-ROM. After installation, the files reside in the default location C:\Program Files\Symantec\VPNClient directory. If you are upgrading from a previous version of the product, the old configuration files are placed in a backup directory. 16 Installing and uninstalling Symantec Enterprise VPN Client Pre-installation requirements Pre-installation requirements Symantec Enterprise VPN Client requires that the following hardware and software are present on your system: • • • One of the following operating systems: - Windows NT Server/Workstation with Service Pack 6a or higher - Windows 98 - Windows 98SE - Windows 2000 with Service Pack 1 or 2 - Windows ME - Windows XP Professional Hardware - Pentium 166 or higher - 9 MB free hard drive space for files Microsoft TCP/IP This protocol must be installed and bound to the network adapter(s) that will be used by the SEVPN Client. You can verify this by connecting to the Internet, browsing to, and attempting to ping the IP address of the VPN server. • Network adapter Your network adapter must be installed and configured as you intend to use it with the SEVPN Client. The SEVPN Client supports the Microsoft Dial-Up Adapter and network interface cards (NICs). These network interface configurations are supported: - PPP - One or more NICs (Ethernet/Token Ring) - PPP and one of more NICs (Ethernet/Token Ring) Installing and uninstalling Symantec Enterprise VPN Client Installing Symantec Enterprise VPN Client Unsupported network adapters The SEVPN Client does not support the following network adapters: • Linksys EC2t Combo PCMCIA Ethernet card • IBM Auto 16/4 Token Ring PCMCIA card • HP EN-1207D-TX PCI 10/100 Fast Ethernet Model Note: Refer to the SEVPN Client Release Notes for a comprehensive list of unsupported network adapters. Installing Symantec Enterprise VPN Client Before you install or uninstall SEVPN Client, you must close all other applications. For example, you may encounter errors if you attempt to install or uninstall SEVPN Client while your dial-up application is running. Note: Before installing, be sure to uninstall any previous version of RaptorMobile (see Uninstalling RaptorMobile on page 24). When uninstalling on Windows NT systems, previously defined tunnel information may be lost. Your SEVPN Client CD-ROM is for either DES only or 3DES/DES/AES (as indicated on the CD-ROM). Note: You must have administrative privileges for the Microsoft platform onto which you are installing the SEVPN Client. To install the SEVPN Client 1 Insert the SEVPN Client disc into your CD-ROM drive. 2 Browse to the VPNClient folder. 3 If you are installing the DES version of SEVPN Client, open the DES folder. If you are installing the 3DES version of SEVPN Client, open the 3DES folder. 4 Open the folder for the appropriate operating system (Win98, WinNT, etc). 5 Double click on setup. 6 Click OK. The installation wizard opens and the Welcome page appears (see Figure 2-1). 17 18 Installing and uninstalling Symantec Enterprise VPN Client Installing Symantec Enterprise VPN Client Figure 2-1 7 Welcome page Click Next. The License Agreement page appears (see Figure 2-2). Figure 2-2 License Agreement page Installing and uninstalling Symantec Enterprise VPN Client Installing Symantec Enterprise VPN Client 8 Click Yes to accept the terms of the License Agreement. The View Release Notes page appears (see Figure 2-3). If you click No, you will exit the installation process. Figure 2-3 9 View Release Notes page Select whether you want to review the Release Notes. - Select Yes, I wish to read the Release Notes now to open the Release Notes document; close the document to continue with the installation, or - Select No, I wish to read the Release Notes later if you do not want to read the Release Notes. The Choose Destination Location page appears (see Figure 2-4). Note: If you are upgrading from a previous version of the product, this page does not appear. The new files automatically install in the same folder as the previous version. 19 20 Installing and uninstalling Symantec Enterprise VPN Client Installing Symantec Enterprise VPN Client Figure 2-4 Choose Destination Location page 10 Select the folder where you want to install the SEVPN Client, then click Next. The default location is C:\Program Files\Symantec\VPNClient. The SEVPN Client Installation Options page appears (see Figure 2-5 on page 20). Figure 2-5 SEVPN Client Installation Options page Installing and uninstalling Symantec Enterprise VPN Client Installing Symantec Enterprise VPN Client 21 11 Select the installation options, as follows. - Select the Create a Start Menu folder option to add a folder to your Start menu. - Select the Add to desktop option to add an SEVPN Client shortcut icon to your desktop. 12 Click Next. If you selected the Create a Start Menu folder option in the Installation Options page, the Select Program Folder page appears (see Figure 2-6 on page 21). Figure 2-6 Select Program Folder page 13 Specify the program folder where you want the SEVPN Client icons to be installed; that is, specify the program folder you want to add to your Start menu. The default program folder name is Symantec Enterprise VPN Client: - In the Program Folders box, type the new folder name, or - In the Existing Folders list, select the name of an existing program folder. 14 Click Next. The Installation Review page appears (see Figure 2-7 on page 22). 22 Installing and uninstalling Symantec Enterprise VPN Client Installing Symantec Enterprise VPN Client Figure 2-7 Installation Review page 15 Review the installation configuration parameters. If you want to edit any of the installation parameters, click Back to display previous pages. 16 Click Next to start the installation. After a few moments, the Setup Complete page appears (see Figure 2-8 on page 23). Installing and uninstalling Symantec Enterprise VPN Client Installing Symantec Enterprise VPN Client Figure 2-8 Setup Complete page 17 Select whether you want to restart your computer now or later, then click Finish to complete the installation. Note: You must restart your computer before you can use the SEVPN Client. 23 24 Installing and uninstalling Symantec Enterprise VPN Client Uninstalling Symantec Enterprise VPN Client Uninstalling Symantec Enterprise VPN Client To uninstall the SEVPN Client 1 On the taskbar, click the Start button, and then point to Programs. 2 Choose Symantec Enterprise VPN Client and click Uninstall. The SEVPN Client uninstalls from your system. 3 Reboot your machine. Uninstalling RaptorMobile To uninstall RaptorMobile 1 On the taskbar, click the Start button, and then point to Programs. 2 Choose Axent, point to RaptorMobile, and then click Uninstall. RaptorMobile uninstalls from your system. 3 Reboot your machine. Chapter 3 Getting started After installing the Symantec Enterprise VPN Client, check with your VPN server administrator to ensure that you have a valid account on the VPN server, and that the gateways and tunnels are properly configured at the VPN server. 26 Getting started Using the Symantec Enterprise VPN Client user interface Using the Symantec Enterprise VPN Client user interface The Symantec Enterprise VPN Client dialog box, shown in Figure 3-1 on page 27, is the main dialog box for the SEVPN Client user interface (UI). The user interface enables you to access and manage Symantec system or third-party gateways and VPN tunnels on a client system. You can use the SEVPN Client user interface to: • Add security gateways • Connect and disconnect security gateways • Add tunnels • Connect and disconnect tunnels • Configure a digital certificate • Implement port control for system hardening • Set the user options Note: For complete descriptions of all of the features available in the user interface, see the SEVPN Client Online Help system. Getting started Using the Symantec Enterprise VPN Client user interface Figure 3-1 Symantec Enterprise VPN Client dialog box The Symantec Enterprise VPN Client dialog box contains the following tabs: • Gateways tab—Use this tab to view the address, state, and associated tunnels for each gateway, connect or disconnect a gateway, add or delete a gateway, view the properties of an existing gateway and its associated tunnels, and to add a tunnel. • Policies tab—Use this tab to view, define, edit, or delete the IKE and VPN policies. • Port Control tab—Use this tab to specify the port control type, to add or delete the individual ports and protocols that you want enabled when a restricted method is in effect, and to enable the ports required for file and print sharing. • Options tab—Use this tab to set the user options, view the log and system data, delete a user, change your SEVPN Client logon password, and configure a digital certificate. When you change a parameter in the Options tabs, you are prompted with the confirmation message shown in Figure 3-2 on page 28 before you can select another tab. • About tab—Use this tab to view the version and copyright information for SEVPN Client. 27 28 Getting started Using the Symantec Enterprise VPN Client user interface Figure 3-2 Apply preference changes message box The SEVPN Client dialog box contains the following buttons: • Minimize button—Minimizes the Symantec Enterprise VPN Client dialog box and places the SEVPN Client icon in the system tray; the SEVPN Client program remains active. • Log Off button—Disconnects and closes all tunnels and shuts down SEVPN Client. • Help button—Opens the online help topic for the top-most tab in the SEVPN Client dialog box. Using the online help Symantec Enterprise VPN Client offers two levels of online help: • SEVPN Client online help Click the Help button in any dialog box to open a help topic specific to the window you are using. From the help topic you can jump to task-specific procedures. You can also click the Help Topics button in any help window to open the main directory for access to help on all SEVPN Client topics. • SEVPN Client context-sensitive help Click the question mark button (?) in the upper-right corner of each dialog box, then click on the field that you want information on to open an information box. Click again anywhere in the page to make the box disappear. You can also click the field in question and press the F1 key to access help on that field. Getting started Starting Symantec Enterprise VPN Client Starting Symantec Enterprise VPN Client Note: After you start the SEVPN Client, you must add and then connect a security gateway and its tunnels to the SEVPN Client. For more information, see Adding a gateway on page 50 and Adding a tunnel on page 60. To start the SEVPN Client 1 On the taskbar, click the Start button, and then point to Programs. 2 Choose Symantec Enterprise VPN Client and click Symantec Enterprise VPN Client. The logon dialog box appears. The dialog box varies depending on the method used to authenticate the key exchange. If you are using a shared key, the SEVPN Client Logon dialog box appears (see Figure 3-3). If you are using a digital certificate, see Starting with a digital certificate on page 38. Figure 3-3 3 SEVPN Client Logon dialog box In the User name field, type your SEVPN Client logon name. The first time, the name of the machine on which you installed the SEVPN Client is the default. 29 30 Getting started Starting Symantec Enterprise VPN Client 4 In the Logon password field, type your logon password. The first time, you will be prompted to verify whatever you type into the Logon password field. Note: Passwords are case-sensitive. When you enter a password, asterisks (*) display instead of the characters you type. 5 Click Reset to clear the database for the specified user. A warning box appears. - Click Yes to clear the database for the specified user, or 6 Click No to cancel the reset command and return to the SEVPN Client Logon dialog box. To save your password so that it will be entered automatically the next time you log on to SEVPN Client, check the Save password checkbox. For more information, see Setting your user options on page 33. Caution: Saving your password reduces the security of your system, since anyone with access to your computer can log on as you and connect to your internal network. Note: You can choose to save your logon password after you log on. 7 Click OK. The SEVPN Client validates your user name and password, and the SEVPN Client dialog box appears. - If you are a new user, you must validate your logon password to complete the start up. - If you are using a dial-up connection, you must confirm the identification information for your Internet Service Provider (ISP) to complete the start up. Note: After the start up is complete and the SEVPN Client dialog box appears, you can start using the SEVPN Client. For more information, see Adding a gateway on page 50 and Adding a tunnel on page 60. Getting started Starting Symantec Enterprise VPN Client Validate logon password If you are a new user, you must validate your logon password when the New User Password dialog box appears Figure 3-4 New User Password dialog box 1 In the Verify password field, type the password you typed in the Logon password field in the SEVPN Client Logon dialog box. 2 Click OK. The SEVPN Client validates your user name and password, and the SEVPN Client dialog box appears. 3 If you are using a dial-up connection, the Auto Dialer dialog box appears (see Figure 3-5). Note: The Auto Dialer dialog box displays identification information on the Internet Service Provider (ISP) you selected to use for the dial-up connection to the SEVPN Client. For information on configuring the SEVPN Client to use a specific ISP for the dial-up connection, see Setting your user options on page 33. 31 32 Getting started Starting Symantec Enterprise VPN Client Figure 3-5 4 Auto Dialer dialog box Click OK to accept the information in the Auto Dialer dialog box, or modify the information as needed. Note: Any changes you make in the Auto Dialer dialog box, except for the Save password option, are valid for this logon only. To save the identification information in the Auto Dialer dialog box, you must reconfigure the ISP on your system or select a different ISP. 5 In the User name field, type your user name for the selected ISP. 6 In the Password field, type your system password for the selected ISP. 7 In the Phone number field, type the phone number for the selected ISP. 8 Select the Save password option to save your system password for the selected ISP. 9 Click OK. The SEVPN Client connects to your ISP, and the SEVPN Client dialog box appears (see Figure 3-1 on page 27). Changing your logon password To change your Symantec Enterprise VPN Client logon password 1 In the SEVPN Client dialog box, click the Options tab. 2 Click Change Password. The Change SEVPN Client Password dialog box appears (see Figure 3-6). Getting started Setting your user options Figure 3-6 3 Change SEVPN Client Password dialog box In the Old password field, type the logon password you are currently using. Note: Passwords are case-sensitive. When you enter a password, asterisks (*) display instead of the characters you type. 4 In the New password field, type a different logon password. 5 In the Verify password field, type your new logon password. The text must exactly match the text typed in the New password field. 6 Click OK. Setting your user options The SEVPN Client user options enable you to: • Save your logon and certificate passwords after you log on • Save your extended authentication user names and passwords • Disconnect tunnels that are inactive for a specified period of time • Select the Internet Service Provider (ISP) to use for your dial-up connection Caution: Saving your password(s) reduces the security of your system, as anyone with access to your computer can log on as you and connect to your internal network. To set your user options 1 In the SEVPN Client dialog box, click the Options tab. 33 34 Getting started Setting your user options Figure 3-7 Options tab - SEVPN Client dialog box 2 Select the Save logon passwords checkbox to save your SEVPN Client logon and certificate passwords. A Save Password warning message appears. 3 Click Yes to save your password(s), or click No to clear the Save logon passwords checkbox. Note: You can also choose to save your logon and certificate passwords during log on. For more information, see Starting Symantec Enterprise VPN Client on page 29. 4 Select the Save extended authentication usernames/passwords checkbox to save the user names and passwords for your extended user authentication method. A Save Password warning message appears. 5 Click Yes to save your password(s), or click No to clear the Save extended authentication usernames/passwords checkbox. 6 In the Disconnect inactive tunnels after box, type the number of minutes you want to allow the tunnels to remain inactive before they are disconnected. 7 In the Auto-dial on program start list, select the Windows phone book entry for the Internet Service Provider (ISP) that you want to use for the dial-up connection the next time you start up the SEVPN Client. Getting started Checking the SEVPN Client version number The SEVPN Client automatically enters the name of every ISP that is installed on your system into the list. The next time you logon to the SEVPN Client, the configuration parameters for the selected ISP display in the Auto Dialer dialog box. For more information, see Starting Symantec Enterprise VPN Client on page 29. 8 Check the Using PPPoE connection checkbox to change the data packet size to work correctly with PPPoE (Point-to-Point Protocol over Ethernet). PPPoE is sometimes utilized on DSL connections. Checking the SEVPN Client version number To check the version number of SEVPN Client and to view the copyright information: • In the SEVPN Client dialog box, click the About tab. Figure 3-8 About tab - SEVPN Client dialog box 35 36 Getting started Using digital certificates Using digital certificates A digital certificate allows devices to be automatically authenticated to each other without defining a pre-shared key. To configure the SEVPN Client to use a digital certificate, your VPN server administrator must provide you with: • A profile containing the certificate (for example, user.epf) • A password to decrypt your private key in the profile Note: The Entrust profile file must be placed in the same directory where the SEVPN Client is installed; that is C:\Program Files\Symantec\VPN Client. The profile and password are created at the Certificate Authority (CA) server. For information on configuring a digital certificate, see the Symantec Enterprise Firewall and Symantec Enterprise VPN Configuration Guide. Configuring a digital certificate After a digital certificate is configured on your system, you can use it to authenticate to the SEVPN server when connecting a gateway. For more information, see Connecting a gateway on page 56. To configure a digital certificate 1 In the SEVPN Client dialog box, click the Options tab. 2 Click Configure Certificate. The Configure Certificate dialog box appears. Getting started Using digital certificates Figure 3-9 3 Click Configure new certificate. An SEVPN Client message box appears. Figure 3-10 4 Configure Certificate dialog box Entrust profile message box In the Enter Entrust profile file field, type the profile name provided by your VPN server administrator; for example, user.epf. Note: The Entrust profile file must be placed in the same directory where the SEVPN Client is installed, that is C:\Program Files\Symantec\VPN Client. 5 Click OK. An SEVPN Client message box appears. 6 In the Enter password for decrypting your private key field, type the Entrust password provided by your VPN server administrator. 37 38 Getting started Using digital certificates 7 Click OK. An SEVPN Client message box appears indicating whether the certificate has been configured. 8 Click OK to return to the Configure Certificate dialog box. The Configure Certificate dialog box displays identification information on the certificate as shown in Table 3-1. Table 3-1 Configure Certificate field descriptions Configure Certificate field Description Version The version of the X.509 standard that applies to the certificate Issuer (CA) DN The X.500 name of the authority that signed the certificate Subject DN The distinguished name of the user whose public key the certificate identifies Subject commonName The user’s common name Distribution point An ID for Certificate Revocation List (CRL) requests Valid From The date and time the certificate is first valid Valid Through The date and time the certificate expires Restoring the default digital certificate To restore the default digital certificate 1 In the SEVPN Client dialog box, click the Options tab. 2 Click Configure Certificate. 3 Click Restore defaults. An SEVPN Client message box appears if the certificate is properly configured. 4 Click OK to return to the Configure Certificate dialog box. Starting with a digital certificate To start the SEVPN Client with a digital certificate 1 On the taskbar, click the Start button and point to Programs. 2 Choose Symantec, point to Symantec Enterprise VPN Client, and then click Symantec Enterprise VPN Client. The logon dialog box appears. The dialog Getting started Using digital certificates box varies depending on the method used to authenticate the key exchange. Figure 3-11 shows the logon screen for Entrust certificates. Figure 3-11 SEVPN Client logon with certificate screen 3 In the User name field, type your SEVPN Client logon name. The first time, the name of the machine on which you installed the SEVPN Client is the default. 4 In the Logon password field, type your logon password. The first time you will be prompted to verify whatever you type into the Logon password field. Note: Passwords are case-sensitive. When you enter a password, asterisks (*) display instead of the characters you type. 5 Click Reset to clear the database for the specified user. A warning box appears. - Click Yes to clear the database for the specified user, or 6 Click No to cancel the reset command and return to the SEVPN Client Logon dialog box. Type your certificate password in the Certificate password field. Note: You must authenticate using both your SEVPN Client logon and certificate passwords. If you do not enter your certificate password, you are prompted for it when you click OK to complete the logon. 39 40 Getting started Using digital certificates 7 Select whether to save your passwords by checking the Save password checkbox. If you elect to save the passwords, both your logon password and your certificate password will be automatically entered the next time you log on. Caution: Saving your password(s) reduces the security of your system, as anyone with access to your computer can log on as you and connect to your internal network. Note: You can choose to save your logon and certificate passwords after you log on. For more information, see Setting your user options on page 33. 8 Click OK. The SEVPN Client validates your user name and passwords, and the SEVPN Client dialog box appears. - If you did not enter your certificate password in the SEVPN Client Logon dialog box, you will be prompted to enter it to complete the start up. - If you are using a dial-up connection, you must confirm the identification information for your Internet Service Provider (ISP) to complete the start up. Note: After the start up is complete and the SEVPN Client dialog box appears, you can start using the SEVPN Client. For more information, see Adding a gateway on page 50 and Adding a tunnel on page 60. 9 In the Verify password box, type the password you typed in the Logon password box in the SEVPN Client Logon dialog box. 10 Click OK. The SEVPN Client validates your user name and password, and the SEVPN Client dialog box appears. 11 If you did not enter your certificate password in the SEVPN Client Logon dialog box, you must enter it now. An Entrust Password message box appears. Getting started Using digital certificates Figure 3-12 Entrust certificate password message box 12 In the Enter your Entrust certificate password field, type your certificate password. 13 Click OK. The SEVPN Client validates your certificate password, and the SEVPN Client dialog box appears. 14 If you are using a dial-up connection, the Auto Dialer dialog box appears (see Figure 3-5 on page 32). Note: The Auto Dialer dialog box displays identification information on the Internet Service Provider (ISP) you selected to use for the dial-up connection to the SEVPN Client. For information on configuring the SEVPN Client to use a specific ISP for the dial-up connection, see Setting your user options on page 33. 15 Click OK to accept the information in the Auto Dialer dialog box, or modify the information as needed. Note: Any changes you make in the Auto Dialer dialog box, except for the Save password option, are valid for this logon only. To save the identification information in the Auto Dialer dialog box, you must reconfigure the ISP on your system, or select a different ISP. 16 In the User name field, type your user name for the selected ISP. 17 In the Password field, type your system password for the selected ISP. 18 In the Phone number field, type the phone number for the selected ISP. 19 Select the Save password option to save your system password for the selected ISP. 20 Click OK. The SEVPN Client connects to your ISP, and the SEVPN Client dialog box appears. 41 42 Getting started Remote policies Remote policies The Remote Policy feature of Symantec Enterprise VPN Client allows Symantec Enterprise VPN Server administrators to create auto-configuration files to simplify the initial configuration of SEVPN Clients connecting to Symantec Enterprise security gateways. Instead of the SEVPN Client having to provide the basic configuration information, the Remote Policy is detected and processed on the SEVPN Client machine as a post-installation step. The following information is included in each Remote Policy: • IP address of the security gateway • Phase 1 ID of the security gateway • Phase 1 ID of the SEVPN Client • Authentication method that SEVPN Client must use (certificate or shared secret) The SEVPN server administrator will distribute the Remote Policy files by one of several methods: • On a diskette • Via email • FTP transfer from a secure FTP site If the Remote Policy file is placed in the same directory with setup.exe, the installation procedure will automatically copy the Remote Policy to the directory in which the SEVPN Client is installed. If the Remote Policy is received after the installation of SEVPN Client, do the following 1 Copy the Remote Policy file to the C:\Program Files\Symantec\VPNClient directory. 2 Start SEVPN Client. A dialog box appears with the message Remote Policy Bundle found Load Bundle username.rmn. Getting started Remote policies Figure 3-13 3 Click Yes. If a password is required, a dialog box prompts you for the Remote Policy Install Password. Figure 3-14 4 Remote Policy Found dialog box Remote Policy Password dialog box Enter the password given to you by the SEVPN system administrator. Once the policy has been opened, the SEVPN Client version is checked to ensure it is compatible with the policy. The user.dat file is then updated for each gateway entry found in the remote policy. If the gateway definition already exists in the configuration files, it is overwritten. If a gateway record is found with an authentication method of Certificate, a message box tells the user to get a certificate from the administrator and run raptcert.exe before connecting to the gateway. Figure 3-15 Certificate message box 43 44 Getting started Remote policies Special processing is required for a default-ikeuser. If the phase 1 ID is defaultikeuser, dynamic user authentication must be used. The SEVPN Client user is prompted for the user ID for the external authentication server. this value is used as the phase 1 ID for that gateway connection. If the user does not enter an ID, the application generates a phase 1 ID based on the time of the policy. This ensures that all phase 1 IDs are unique for each gateway. Figure 3-16 default-ikeuser message box When a policy is loaded by the SEVPN Client, it is logged to the client log file. Any errors are also logged. After a remote policy is processed on the SEVPN Client, the remote policy file is moved to the C:\Program Files\Symantec\VPNClient\oldpolicies folder. If you need to restore the security gateway information provided in an old remote policy, log off the SEVPN Client, move the required remote policy file from the oldpolicies folder to the VPNClient folder, and log on to the SEVPN Client. You will be prompted to accept the remote policy. Using multiple remote policies It is possible to have multiple remote policies on your SEVPN Client system. For example, if you need to connect through two different firewalls, a remote policy can be generated for you on each firewall. If you copy both remote policies to the VPNClient directory, when you start SEVPN Client you are prompted for each policy in turn. If you accept both policies, the security gateway information for each policy is listed on the SEVPN Client Gateways tab. Getting started Using Personal Firewall port control Using Personal Firewall port control Use the Personal Firewall port control and system hardening features to restrict the ports through which data packets can be received. Selecting the port control type To select the type of port control you want to use for your system 1 In the SEVPN Client dialog box, click the Port Control tab. Figure 3-17 2 Port Control tab - SEVPN Client dialog box In the Port Control Type list, select a port control type: Wide Open, Restricted, or Restricted + Recent Calls, as described in Table 3-2. Table 3-2 Port Control type field descriptions Port Control type Description Wide Open If you do not want any port restrictions, all packets are accepted. 45 46 Getting started Using Personal Firewall port control Table 3-2 Port Control type field descriptions Port Control type Description Restricted To limit traffic to the ports that are designated as enabled, Restricted + Recent Calls To limit traffic to the ports that are designated as enabled, with the addition of traffic received from any external IP address that was recently sent traffic from your SEVPN Client system. This is the default port control type. 3 Click Apply. Adding a port or IP protocol To add a port or IP protocol to the VPN Client database 1 In the SEVPN Client dialog box, click the Port Control tab. 2 Click New.... The New Port Control dialog box appears. Note: The options that are available in the New Port Control dialog box vary depending on whether you are adding a port or IP protocol. Figure 3-18 Port number option - New Port Control dialog box 3 Select Port number and protocol(s) to add a port number through which you want the data packets to pass, and to select the protocol(s) accepted on that port. 4 In the Port Number box, type the port number through which you want the data packets to pass. 5 Select the TCP checkbox to accept the Transmission Control Protocol (TCP) on the specified port. Getting started Using Personal Firewall port control 6 Select the UDP checkbox to accept the User Datagram Protocol (UDP) on the specified port. Note: You must select at least one type of protocol (TCP or UDP). You can select both if you want to accept both protocol types through the same port. 7 Click OK. 8 Select IP protocol to add an IP protocol to the SEVPN Client database. The New Port Control dialog box appears. Figure 3-19 9 IP protocol option - New Port Control dialog box In the Protocol number field, type the number of the IP protocol; this information can be supplied by your VPN server administrator. 10 Click OK. Deleting a port or IP protocol To delete a port or IP protocol from the SEVPN Client database 1 In the SEVPN Client dialog box, click the Port Control tab (see Figure 3-17 on page 45). 2 In the Enabled Ports list, select the port or IP protocol that you want to delete. 3 Click Delete. 47 48 Getting started Using Personal Firewall port control Enabling the ports for file and print sharing To enable the ports that are needed for file and print sharing 1 In the SEVPN Client dialog box, click the Port Control tab. 2 Select the Enable File/Print Sharing checkbox. Note: This option enables the UDP port numbers 137, 138, and 139, and the TCP port number 138 that are needed for file and print sharing. Windows NT uses these ports to pass NetBios packets using the IP protocol. Disabling the ports for file and print sharing To disable the ports that are needed for file and print sharing 1 In the SEVPN Client dialog box, click the Port Control tab. 2 Clear the Enable File/Print Sharing checkbox. Chapter 4 Managing gateways A gateway is a computer or router that is part of two different networks used to move data from one network to the other. A security gateway restricts access between two networks. Security gateways are configured at the VPN server and in the SEVPN Client. Every gateway can accommodate multiple tunnels. Therefore, when you add or remove a security gateway from the SEVPN Client database, you are also adding or removing all of the tunnels that are associated with the security gateway. If you are using a Symantec Enterprise VPN (SEVPN) Server, the tunnels are automatically downloaded every time the gateway is connected. Gateways and their tunnels must be connected each time you reboot your PC. After the gateways and tunnels are connected, they remain connected until you disconnect them, an inactivity timeout occurs, a dial-up connection is lost, or you exit Windows or shut down the SEVPN Client. Note: If you are using an SEVPN, the protocol parameters for the security gateway cannot be changed through the SEVPN Client user interface. You can, however, add and configure new gateways using the user interface. 50 Managing gateways Adding a gateway Adding a gateway Note: Both Symantec and third-party gateways can be added to the SEVPN Client database. However, only the tunnels associated with SEVPN gateways are automatically downloaded into the database. To add a security gateway to the SEVPN Client database 1 In the SEVPN Client dialog box, click the Gateways tab. Figure 4-1 2 Gateways tab - SEVPN Client dialog box Click New.... The Security Gateway dialog box appears. Managing gateways Adding a gateway Figure 4-2 Gateway tab - Security Gateway dialog box 3 In the IP address field, type the IP address assigned to the gateway on the VPN server. The address can be a true dotted decimal IP address or a resolvable DNS name. This address is supplied by the VPN server administrator. 4 If you are connecting to a Symantec Enterprise VPN server, select the Symantec Enterprise Gateway checkbox. This option is selected by default. It is not selected if you are using a third-party VPN server. 5 If you want the specified gateway to be automatically connected each time you start up the SEVPN Client, select the Auto-connect on SEVPN Client start up checkbox. 6 If you want to use an Entrust X.509 digital certificate for authentication, select the Certificate option. Note: This option is only available if you have an Entrust certificate installed on your system. 7 If you want to use a shared key for authentication, select the Shared secret option, and type the key in the adjacent box. 51 52 Managing gateways Adding a gateway 8 In the Client ID box, type your user name as it is configured at the VPN server; that is, the user Phase 1 ID on the VPN server. This entry defaults to your SEVPN Client logon name. 9 Click the Advanced tab. Figure 4-3 Advanced tab - Security Gateway dialog box 10 In the Gateway ID field, type the identifier that allows phase 1 negotiations to move forward; this is typically the IP address for the security gateway. The Gateway ID, also known as the Remote Phase 1 ID, must be the same as the VPN server Phase 1 ID. If you are using an SEVPN server, you are finished entering the information required for adding a security gateway. If you are using a third-party VPN server, you must select or define an IKE policy. The IKE policy is used to negotiate a phase 1 secure link between the SEVPN Client and the security gateway. 11 In the IKE policy list, select an IKE policy for the new gateway: Strong, Very Strong, or user-defined. The IKE policies, described in Table 4-1 on page 53, are pre-configured in the SEVPN Client and cannot be edited or deleted from the VPN Client database. Managing gateways Adding a gateway Table 4-1 IKE policy settings Parameter Strong IKE policy Very Strong IKE policy Data integrity MD5 SHA-1 Data privacy DES 3DES Diffie-Hellman Group2 Group2 Time expiration (minutes) 1080 1080 Note: The Very Strong IKE Policy is not available in the DES only version of the SEVPN Client. 12 Click New to define a new IKE policy for the third-party VPN server. The IKE Policy dialog box appears. For instructions on defining an IKE policy, see Defining an IKE policy on page 53. 13 In the Policy Summary group box, view the IKE policy parameters for the gateway. 14 Click OK. The SEVPN Client adds the gateway to its database. Defining an IKE policy An IKE policy must be defined in order for the SEVPN Client to create a secure link with a security gateway. Then, using the secure link, the SEVPN Client can negotiate IPSec tunnels. To define an IKE policy 1 In the SEVPN Client dialog box, click the Policies tab. 53 54 Managing gateways Adding a gateway Figure 4-4 2 Policies tab - SEVPN Client dialog box In the IKE Policies group box, click New.... The IKE Policy dialog box appears. Figure 4-5 IKE Policy dialog box Managing gateways Adding a gateway 3 In the Name field, type the name or user reference for the IKE policy. Up to 31 characters are allowed. 4 In the Data integrity list, select the type of authentication you want used on the tunnel data: SHA-1, MD5, or Any, as described in Table 4-2. Table 4-2 Data integrity options Data integrity option Description SHA-1 To use an algorithm that generates a 160-bit message digest. This is the default value. MD5 To use an algorithm that creates a 128-bit message digest. The message digest protects data from tampering while in transit from the source to the destination. The MD5 algorithm is faster than the SHA-1 algorithm because it generates a shorter digest; however, it is less secure than SHA-1. Any To automatically negotiate SHA-1 or MD5. 5 In the Data privacy list, select the type of encryption you want used on the tunnel data: 3DES, DES, Any, or None, as described in Table 4-3. Table 4-3 Data privacy options Data privacy option Description 3DES To use the Triple Data Encryption Standard encryption algorithm that uses three 56-bit keys to encrypt and decrypt a message. 3DES is not available in the DES-only version of SEVPN Client. DES To use the Data Encryption Standard encryption algorithm that uses a 56-bit key to encrypt and decrypt a message. Any To automatically negotiate 3DES or DES. None If you do not want data in the tunnel to be encrypted. 6 In the Diffie-Hellman list, select the key exchange method you want used to generate the keys for phase 1 and phase 2 negotiations: GROUP1 or GROUP2, as described in Table 4-4. 55 56 Managing gateways Connecting a gateway Table 4-4 Diffie-Hellman options Diffie-Hellman option Description GROUP1 GROUP1 uses a key that is 768 bits long. GROUP2 GROUP2 uses a key that is 1024 bits long. This is the default value. 7 In the Time expiration (minutes) list, type or select the number of minutes you want the shared key to be valid for phase 1 negotiations. The default value is 1080 minutes (18 hours). 8 Click OK. Viewing or editing the IKE policy You can view the parameters for any IKE policy. However, you can only edit the parameters for a user-defined IKE policy. To view or edit an IKE policy 1 In the SEVPN Client dialog box, click the Policies tab. 2 In the IKE Policies group box, select the IKE policy that you want to view. 3 Click Properties.... The IKE Policy dialog box appears (see Figure 4-5 on page 54). For descriptions of the parameters in the IKE Policy dialog box, see Defining an IKE policy on page 53 or the SEVPN Client Online Help system. 4 If you are viewing a user-defined IKE policy, you can edit the policy parameters as needed. Connecting a gateway The connection between the SEVPN Client and the VPN server is made by connecting a security gateway. To connect the SEVPN Client to a security gateway 1 In the SEVPN Client dialog box, click the Gateways tab. Managing gateways Connecting a gateway Figure 4-6 Gateways tab - SEVPN Client dialog box 2 Select the gateway that you want to connect to the SEVPN Client. 3 Click Connect. The SEVPN Client connects to the selected gateway at the VPN server. If you are using an SEVPN server, the tunnels associated with the gateway are automatically downloaded and connected, which provides a secure link to your host. After the connection is established, you can access the private network as if your remote PC were behind the VPN server; that is, it appears as if you are working from inside the protected network. Note: If your VPN server is configured to use extended user authentication, you might be required to enter additional authentication information before the gateway is connected. After the gateway is connected, the following changes occur in the Gateways tab: - The State column changes from DISCONNECTED to CONNECTED. - The Tunnels column is updated to reflect the number of connected tunnels. - The Connect button changes to Disconnect. - The Progress Log displays the current session’s gateway and tunnel activity, in real-time. 57 58 Managing gateways Disconnecting a gateway Disconnecting a gateway To disconnect a security gateway 1 In the SEVPN Client dialog box, click the Gateways tab. 2 Select the gateway that you want to disconnect from the SEVPN Client. 3 Click Disconnect. The SEVPN Client closes the tunnels associated with the gateway, disconnects the gateway at the VPN server, and removes the secure link to the host. The gateway configuration parameters remain in the SEVPN Client database. Viewing the gateway properties To view the properties of an existing gateway 1 In the SEVPN Client dialog box, click the Gateways tab. 2 Select the gateway whose properties you want to view. 3 Click Properties.... The Security Gateway dialog box appears (see Figure 4-1 on page 50). For descriptions of the parameters in the Security Gateway dialog box, see Adding a gateway on page 50 or the SEVPN Client Online Help system. Deleting a gateway To delete a security gateway and its associated tunnels from the SEVPN Client database 1 In the SEVPN Client dialog box, click the Gateways tab. 2 Select the gateway that you want to delete. 3 Click Delete. A message box appears. 4 Click Yes to delete the gateway and its associated tunnels from the SEVPN Client database, or click No to cancel the delete command and return to the Gateways tab. Chapter 5 Managing tunnels This chapter describes how to define and connect tunnels and how to configure the policies that determine the nature of the traffic within the tunnels. 60 Managing tunnels Adding a tunnel Adding a tunnel To define a tunnel, you must define the gateway, an IKE policy, a VPN policy, and the protected network behind the gateway. Tunnels can only be added if you are using a third-party VPN server. To add a tunnel 1 In the SEVPN Client dialog box, click the Gateways tab (see Figure 4-6 on page 57). 2 Select a gateway to a third-party VPN server. To determine whether a gateway is to a third-party VPN server, click Properties. The Symantec Enterprise Gateway checkbox should be unchecked. 3 Click Tunnels.... The Tunnels dialog box appears. Figure 5-1 4 Tunnels dialog box Click New.... The Secure Tunnel dialog box appears. Managing tunnels Adding a tunnel Figure 5-2 Secure Tunnel dialog box 5 In the Tunnel name field, type the name or user reference for the tunnel. Up to 63 characters are allowed. 6 In the IP address field, type the IP address of the protected network behind the VPN server. The IP address must be a true dotted decimal IP address, not a DNS resolvable name. This address is supplied by the VPN server administrator. 7 In the Network mask field, type the protected network’s mask. Similar to an IP address, the network mask defines how the assigned address space is split between hosts and networks. This address is supplied by the VPN server administrator. 8 In the VPN policy list, select a VPN policy for the tunnel. The drop down list gives you the choices STRONG and VERY STRONG. These policies, which are described in Table 5-1, are pre-configured and cannot be edited or deleted from the SEVPN Client database. Note: The VERY STRONG VPN Policy is not available in the DES only version of the SEVPN Client. 61 62 Managing tunnels Adding a tunnel Table 5-1 VPN policy descriptions Parameter STRONG VPN policy VERY STRONG VPN policy Data integrity MD5 SHA-1 Data privacy DES 3DES Data compression None None Encapsulation mode Tunnel Tunnel Data integrity protocol Apply to ESP Apply to ESP Perfect forward secrecy Yes Yes Diffie-Hellman Group2 Group2 Data volume limit (kilobytes) 2100000 2100000 Lifetime timeout (minutes) 480 480 Inactivity timeout (minutes) 0 0 9 If you want to define a new VPN policy, click New. The VPN Policy dialog box appears. 10 In the Policy Summary group box, view the IPSec parameters for the specified gateway. Note: For descriptions of the parameters in the Policy Summary group box, see Defining a VPN policy on page 62 or the SEVPN Client Online Help system. 11 Click OK to return to the Tunnels dialog box. Defining a VPN policy To define a VPN policy 1 In the SEVPN Client dialog box, click the Policies tab. The Policies tab appears. Managing tunnels Adding a tunnel Figure 5-3 2 Policies tab - SEVPN Client dialog box In the VPN Policies group box, click New.... The IPSec/IKE tab on the VPN Policy dialog box appears. 63 64 Managing tunnels Adding a tunnel Figure 5-4 IPSec/IKE tab - VPN Policy dialog box 3 In the Name field, type the name or user reference for the VPN policy. Up to 31 characters are allowed. 4 In the Data integrity list, select the type of authentication you want used on the tunnel data: SHA1, MD5, Any, or None, as described in Table 5-2. Table 5-2 Data integrity options Data integrity option Description SHA1 To use an algorithm that generates a 160-bit message digest. This is the default value. MD5 To use an algorithm that generates a 128-bit message digest. The message digest protects data from tampering while in transit from the source to the destination. The MD5 algorithm is faster than the SHA1 algorithm because it generates a shorter digest; however, it is less secure than SHA1. Any To automatically negotiate SHA1 or MD5. None If you do not want to authenticate the tunnel data. Managing tunnels Adding a tunnel 5 In the Data privacy list, select the type of encryption you want used on the tunnel data: 3DES, DES, AES, AES_STRONG, AES_VERY_STRONG, or None, as described in Table 5-3. Table 5-3 Data privacy options Data privacy option Description 3DES To use the Triple Data Encryption Standard encryption algorithm that uses three 56-bit keys to encrypt and decrypt messages. This is the default value. Note: Triple-DES (3DES) encryption is not available in the DES only version of the SEVPN Client. DES To use the Data Encryption Standard encryption algorithm that uses a 56-bit key to encrypt and decrypt messages. AES To use the Advanced Encryption Standard encryption algorithm that uses a 128-bit key to encrypt and decrypt messages. Note: AES encryption is not available in the DES only version of the SEVPN Client. AES_STRONG To use the Advanced Encryption Standard encryption algorithm that uses a 192-bit key to encrypt and decrypt messages. Note: AES_STRONG encryption is not available in the DES only version of the SEVPN Client. AES_VERY_STRONG To use the Advanced Encryption Standard encryption algorithm that uses a 256-bit key to encrypt and decrypt messages. Note: AES_VERY_STRONG encryption is not available in the DES only version of the SEVPN Client. None If you do not want to encrypt the tunnel data. 65 66 Managing tunnels Adding a tunnel 6 In the Data compression list, select the type of compression you want used on the tunnel data: LZS, DEFLATE, Any, or None, as described in Table 5-4. Table 5-4 Data compression options Data compression option Description LZS The LZS algorithm compresses the data by searching for redundant strings and replacing them with special tokens that are shorter than the original string. This algorithm creates tables of the strings and replacement tokens that contain pointers to the previous data streams. Then, it uses the pointers to remove redundant strings from new data streams. Note: Several CPU cycles are required to perform the LZS compression. DEFLATE DEFLATE uses an algorithm that provides the same level of compression as LZS, but consumes less CPU power. Any Any automatically negotiates LZS or DEFLATE. None If you do not want to compress the data in the tunnel. This is the default value. 7 Click the Advanced tab. Managing tunnels Adding a tunnel Figure 5-5 8 Advanced tab - VPN Policy dialog box Select the Encapsulation Mode that you want used on the data sent through the tunnel: Tunnel mode or Transport mode, as described in Table 5-5. Table 5-5 Encapsulation mode options Encapsulation mode Description Tunnel mode If you want to encapsulate an entire IP packet within an IPSec (AH or ESP) header; this is the default method of encapsulation used within a tunnel. This is the default mode. Transport mode To encapsulate only the data portion of the IP packet. This option can only be selected when a tunnel endpoint (the protected network) has the same IP address as the gateway. This option saves bandwidth. 9 Select the Data Integrity Protocol (that is, the type of IPSec header) in which the data integrity algorithm is included: Apply to ESP or Apply to AH, as described in Table 5-6. 67 68 Managing tunnels Adding a tunnel Table 5-6 Data integrity protocol options Data integrity protocol option Description Apply to ESP To apply a data integrity algorithm to the ESP header. This is the default value. Apply to AH If you want the data integrity algorithm applied to the AH header. 10 Select the Perfect forward secrecy check box to enable an administrator to set up the parameters for generating keys and for preventing attackers from guessing past keys. If you select Perfect forward secrecy, you must specify a Diffie-Hellman group to be used for the key exchange. 11 In the Diffie-Hellman list, select the key exchange method you want used to generate the keys for phase 1 and phase 2 negotiations: GROUP1 or GROUP2 as described in Table 5-7. Table 5-7 Diffie-Hellman options Diffie-Hellman option Description GROUP1 GROUP1 uses a key that is 768 bits long. GROUP2 GROUP2 uses a key that is 1024 bits long. This is the default selection. 12 Click the Timeouts tab. Managing tunnels Adding a tunnel Figure 5-6 Timeouts tab - VPN Policy dialog box 13 In the Data volume limit (kilobytes) list, type or select the number of kilobytes of data you want to allow through the tunnel before it is rekeyed. The default is 2100000 kilobytes; that is, 2.1 gigabytes (GB). 14 In the Lifetime timeout (minutes) list, type or select the number of minutes you want to allow the tunnel to exist before it is rekeyed. The default is 480 minutes (eight hours). 15 In the Inactivity timeout (minutes) list box, type or select the number of minutes you want to allow the tunnel to remain inactive (that is, have no data passing through it) before it is terminated. The default is 0 minutes, which means that the timeout is not used. 16 Click OK to return to the Policies tab. Viewing or editing the VPN policy You can view the parameters for any VPN policy. However, you can only edit the parameters for a user-defined VPN policy. To view or edit a VPN policy 1 In the SEVPN Client dialog box, click the Policies tab. 69 70 Managing tunnels Connecting a tunnel 2 In the VPN Policies group box, select the VPN policy that you want to view. 3 Click Properties.... The IPSec/IKE tab on the VPN Policy dialog box appears. Note: For description of the parameters in the VPN Policy dialog box, see Defining a VPN policy on page 62 or the SEVPN Client Online Help system. 4 If you are viewing a user-defined VPN policy, you can edit the policy parameters as needed. You cannot edit the pre-configured policies. Connecting a tunnel All of the tunnels associated with a security gateway are automatically connected when you connect the SEVPN Client to the security gateway. You cannot connect individual tunnels. Disconnecting a tunnel To disconnect a tunnel you must disconnect the tunnel’s security gateway. You cannot disconnect individual tunnels. You can, however, configure the SEVPN Client to disconnect tunnels that remain inactive beyond a specified period of time. Disconnecting inactive tunnels To configure the SEVPN Client to disconnect inactive tunnels 1 In the SEVPN Client dialog box, click the Options tab. Managing tunnels Disconnecting a tunnel Figure 5-7 2 Options tab - SEVPN Client dialog box In the Disconnect inactive tunnels after field, type the number of minutes you want to allow the tunnels to remain inactive, (that is, have no data passing through them) before they are disconnected. The default value is 30 minutes. 71 72 Managing tunnels Viewing the tunnel properties Viewing the tunnel properties To view the identification parameters for any tunnel, and the IPSec parameters for a third-party tunnel 1 In the SEVPN Client dialog box, click the Gateways tab (see Figure 4-6 on page 57). 2 Select the gateway associated with the tunnel whose properties you want to view. 3 Click Tunnels.... The Tunnels dialog box appears (see Figure 5-1 on page 60). Note: For descriptions of the identification parameters in the Tunnels dialog box, see the SEVPN Client Online Help system. 4 If you are using a third-party VPN server and want to view the IPSec parameters for the tunnel, select a tunnel and click Properties.... The Tunnel Properties dialog box appears. Figure 5-8 Tunnel Properties dialog box Managing tunnels Viewing the tunnel status Note: The Properties... button does not appear if you are using a Symantec Enterprise Firewall. Note: For descriptions of the identification parameters in the Secure Tunnel dialog box, see Adding a tunnel on page 60 or the SEVPN Client Online Help system. For descriptions of the IPSec parameters in the Policy Summary group box in the Secure Tunnel dialog box, see Defining a VPN policy on page 62 or the SEVPN Client Online Help system. 5 Click OK to return to the Tunnels dialog box. Viewing the tunnel status To view the identification, VPN policy, and IPSec parameters being used for a tunnel 1 In the SEVPN Client dialog box, click the Gateways tab (see Figure 4-6 on page 57). 2 Select the gateway associated with the tunnel whose properties you want to view. 3 Click Tunnels.... The Tunnels dialog box appears. 4 Select a tunnel and click Status.... The Secure Tunnel Information dialog box appears. 73 74 Managing tunnels Viewing the tunnel status Figure 5-9 Secure Tunnel Information dialog box The Secure Tunnel Information dialog box displays the parameters being used for the selected tunnel. The information in the dialog box is read-only. - For descriptions of the parameters in the Tunnel Summary section, see Adding a tunnel on page 60 or the SEVPN Client Online Help system. - For descriptions of the parameters in the Tunnel Settings section, see Defining a VPN policy on page 62 or the SEVPN Client Online Help system. Note: The Tunnel state, which does not appear in the procedure for adding a tunnel, can be either Connected, Disconnected, or Connect on Demand. Connect on Demand is a status of the tunnels downloaded from a SEVPN server. This state indicates that the number of tunnels associated with the gateway exceeds the number of tunnels that are configured for automatic negotiation. This limitation, which is specified at the VPN server, reduces the connection time for the SEVPN Client. When a user group is created at the VPN server, the maximum number of tunnels to be automatically negotiated when the connection is made between the SEVPN Client and the VPN server Managing tunnels Deleting a tunnel is specified. When the connection is made, the definitions for the tunnels associated with the specified gateway are downloaded to the client. - If the number of tunnels associated with the gateway are less than or equal to the specified number of tunnels configured for negotiation, all of the tunnels are automatically connected. - If the number of tunnels associated with the gateway exceeds the number of tunnels configured for negotiation, then all of the tunnels are in the Connect on Demand state. After the download is complete, you can use the tunnels as needed. This means that the tunnels are template tunnels that are loaded to the driver, and are negotiated only when there is traffic from the SEVPN Client to the protected network that matches the tunnel endpoints. The Connect on Demand state is reported in the SEVPN Client user interface in the Tunnels dialog box and in the Secure Tunnels Information dialog box; these dialog boxes show the state for individual tunnels. When you start passing data over the network, individual tunnels are negotiated, leaving some tunnels in the Connect on Demand state, changing some to the Connected state, and possibly changing some to the Disconnected state. 5 Click Close to return to the Tunnels dialog box. Deleting a tunnel To delete a third-party tunnel 1 In the SEVPN Client dialog box, click the Gateways tab. 2 Click Tunnels.... The Tunnels dialog box appears. 3 Select the tunnel that you want to delete. 4 Click Delete. 75 76 Managing tunnels Deleting a tunnel Chapter 6 Viewing log and system data Use the Log and System Information windows to review data on the current session’s activity, the operating system, the network adapter(s) and statistics, the current IP routing table, and the tunnel summaries. 78 Viewing log and system data Viewing the log data Viewing the log data To view the log data 1 In the SEVPN Client dialog box, click the Options tab (see Figure 3-7 on page 34). 2 Click Display Log.... The Log window appears (see Figure 6-1). This window displays a detailed description of the current session’s activity, including all notification and process information. The most recent activity in the log will appear at the bottom of the Log window. Note: The Log window displays a snapshot of the data; it does not display real-time data. You can resize the Log window to make viewing easier. The window can be left open while performing other operations in the SEVPN Client. Figure 6-1 Log window 3 Click Clear to clear the log data in the window and the SEVPN Client database. 4 Click Refresh to update the snapshot of the data in the window. 5 Click Close to close the window. Viewing log and system data Viewing the system information Viewing the system information To view the system information 1 In the SEVPN Client dialog box, click the Options tab (see Figure 3-7 on page 34). 2 Click System Information.... The System Information window appears (see Figure 6-2). This window displays information on the operating system, the network adapter(s) and statistics, the current IP routing table, and the tunnel summaries. Note: The System Information window displays a snapshot of the data; it does not display real-time data. Figure 6-2 System Information window 3 Click Refresh to update the snapshot of the data in the window. 4 Click Reset Counters to reset the packet and byte counters in the Symantec Enterprise VPN Client Information section in the lower part of the display to zero. 5 Click Close to close the window. 79 80 Viewing log and system data Viewing the system information Chapter 7 Shutting down the SEVPN Client You can shut down the SEVPN Client by logging off from the SEVPN Client or by deleting the logged on user. When you shut down the SEVPN Client, all tunnels are closed, the gateways are disconnected, and the secure link to the host is removed. 82 Shutting down the SEVPN Client Logging off from SEVPN Client Logging off from SEVPN Client To log off from the SEVPN Client 1 In the SEVPN Client main window box, click Log Off. The Shut down confirmation dialog box appears. Figure 7-1 2 Shut down confirmation dialog box Click Yes to continue the shutdown. The SEVPN Client disconnects and closes all tunnels and shuts down the application. Shutting down the SEVPN Client Deleting the logged on user Deleting the logged on user Note: Deleting the logged on user also shuts down the SEVPN Client. Deleting the user removes all information for the user, including the tunnel database, from the SEVPN Client. To delete the logged on user 1 In the SEVPN Client dialog box, click the Options tab (see Figure 3-7 on page 34). 2 Click Delete User.... A message box appears. Figure 7-2 3 Delete user confirmation message box Click Yes if you want to delete the user. The Verify Password dialog box appears. Click No to cancel the delete user command. Figure 7-3 Verify Password dialog box 4 In the Verify password field, type the SEVPN Client logon password for the logged on user. 5 Click OK to delete the user. The SEVPN Client verifies the password, the logged on user is deleted from the SEVPN Client database, and the Symantec Enterprise VPN Client logon dialog box is redisplayed to allow you to log on again. 6 Click Cancel if you do not want to delete the user. 7 Click No to cancel the delete user command. 83 84 Shutting down the SEVPN Client Deleting the logged on user Index Numerics 3DES 10, 55, 65 A ACE/Server authentication 12 AES 10, 55, 65 Authentication 10, 55, 64, 67 Authentication method for key exchange 51 other 12 strong 11 Auto-connect on RaptorMobile start up 51 Auto-dial on program start 34 B Bandwidth 67 C CA 9, 36 Certificate 51 Certificate authority 9, 36 Certificate password 39 Change password 32 Client ID 52 Compliance 5 Configure certificate 36 Configure new certificate 37 Connect on demand 74 Context-sensitive help 28 Copyright 35 CRYPTOCard authentication 11 D Data compression 66 Data confidentiality 10 Data integrity 10, 55, 64, 67 Data integrity protocol 67 Data privacy 55, 65 Data volume limit 69 Decrypting 37 Defender token authentication 11 Deflate 66 DES 10, 12, 55, 65 Dial-up connection configuring 32, 34, 41 logging on 31, 41 Diffie-Hellman 55, 68 Digital certificate configuring 36–?? logging on 40 password 36 profile 36 restoring defaults 38 using 9, 10 Disconnect inactive tunnels 34, 71 Disconnect on hang-up 7, 49 DNS resolvable name 61 E Enable file/print sharing 48 Enabled ports 47 Encapsulation mode 67 Encryption 10, 12, 55 Enter Entrust profile 37 Enter password for decrypting your private key 37 Enter your Entrust certificate password 41 Entrust password 36 Entrust profile 36 Extended user authentication method description of 11 86 Index File and print sharing 48 IPSec 5, 9, 10 IPSec header 67 ISAKMP 5, 9 ISP 8 configuring 32, 34, 41 logging on 31, 41 G K other 12 strong 11 using 5, 57 F Gateway adding 50–53 connecting 56 deleting 58 description of 7 disconnecting 58 downloading from 49 viewing properties 58 Gateway ID 52 Gateway password authentication 12 GROUP1 55 Group1 68 GROUP2 55 Group2 68 Key exchange protocols 9 L LDAP authentication 13 Lifetime timeout 69 Lightweight directory access protocol authentication 13 Log data 78 Log off button, description of 28 Logon password 29, 30, 31, 39, 40 LZS 66 M MD5 10, 55, 64 Minimize button, description of 28 I IKE 5, 9 phase 1 and phase 2 negotiation 9, 11 policy negotiation 10 IKE policy 52 defining 53–56 editing 56 viewing 56 Inactivity timeout 7, 49, 69 Internet 5, 8 Internet Key Exchange 5, 9 Internet protocol 8 Internet Security Association and Key Management Protocol 5, 9 Internet Service Providers 8 IP address 51, 61 IP protocol 47 IP routing table 79 IP Security protocol 5, 9, 10 N Name 55, 64 Negotiation, phase 1 and phase 2 9, 11 Network adapter(s) and statistics 79 Network mask 61 New password 33 Notification and process information 78 NT Domain authentication 13 O Old password 33 Online help 26, 28 Operating system 79 Other extended user authentication method 12 P Packet and byte counters 79 Index 87 Password 32, 41 authenticating 39 certificate 39 changing 32 dial-up connection 32, 41 digital certificate 36 ISP 32, 41 logon 29, 30, 39 saving 30, 34, 40 Password protection 5 PDC 13 Perfect forward secrecy 68 Personal Firewall 45 Phase 1 ID user 52 VPN server 52 Phase 1 IKE negotiation 9, 11, 52, 55, 68 Phase 2 IKE negotiation 9, 11 Phone number 32, 41 Policy summary 53, 62 Port control 5, 26, 45 Port control type 45 Port number 46 Port number and protocol(s) 46 PPPoE connection 35 Profile 36 Progress log 57 Protocol number 47 Save extended authentication usernames/passwords 34 Save logon passwords 34 Save password(s) 32, 41 Secret key 10 Secure link 7, 58 SecurID authentication 12 Security features IKE 5, 9 IP Security 5, 9, 10 ISAKMP 5, 9 Security gateway adding 50–53 connecting 56 deleting 58 description of 7 disconnecting 58 downloading from 49 viewing properties 58 Security protocols 5, 9 Session activity 78 SHA-1 10, 55, 64 Shared secret 51 Snapshot of data 78, 79 State 57 Strong extended user authentication method 11 System hardening 5, 26, 45 System information 79 R T Raptor Firewall/PowerVPN Server 51 Raptor system, downloading from 7 Refresh 78, 79 Remote Phase 1 ID 52 Remote policies 42 Remote policy 61 Remote VPN policy 61 Reset 30, 39 Reset counters 79 Restore defaults 38 TCP 46 Third-party documentation 11 server, downloading from 7 Time expiration 56 Transport mode 67 Triple-DES 10, 55, 65 Tunnel adding 60–62 connecting 70 deleting 75 description of 6 disconnecting 70 S S/Key authentication 12 88 Index disconnecting inactive tunnels 70 numbers connected 57 summaries 79 viewing properties 72 viewing status 73 Tunnel environment branch office 8 business-to-business 8 telecommuting 8 within a business 8 Tunnel mode 67 Tunnel name 61 U UDP 47 User interface 26 User name 29, 32, 39, 41 User options auto-dial on program start 34 disconnect inactive tunnels 34 saving passwords 34 setting 33–35 User phase 1 ID 52 V Verify password 31, 33, 40, 83 Version RaptorMobile 35 Virtual private network, description of 5, 6 VPN policy 61 defining 62–69 editing 69 viewing 69 VPN policy, remote 61 VPN server phase 1 ID 52 VPN, description of 5, 6 W Windows phone book entry 34 Windows primary domain controller 13