1
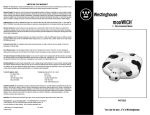
MICROWAVE
WST3504
You can be sure...if it’s Westinghouse
PRECAUTIONS TO AVOID POSSIBLE EXPOSURE TO EXCESSIVE
MICROWAVE ENERGY
a. Do not attempt to operate this oven with the door open since open-door operation can result in harmful exposure to microwave
energy. It is important not to defeat or tamper with the safety interlocks.
b. Do not place any object between the oven front face and the door or allow soil or cleaner residue to accumulate on sealing surfaces.
c. Do not operate the oven if it is damaged. It is particularly important that the oven door close properly and that there is no damage to
the: (1) door (bent), (2) hinges and latches (broken or loosened), (3) door seals and sealing surfaces.
d. The oven should not be adjusted or repaired by anyone except properly qualified service personnel.
IMPORTANT SAFETY INSTRUCTIONS
When using electrical appliances, basic safety precautions should always be followed including the following:
WARNING –To reduce the risk of burns, electric shock, fire,injury to persons, or exposure to excessive microwave energy:
1. Read all instructions before using the appliance.
2. Read and follow the specific “PRECAUTIONS TO AVOID POSSIBLE EXPOSURE TO EXCESSIVE MICROWAVE ENERGY ” found on page 2.
3. This appliance must be grounded. Connect only to properly grounded outlet. See “GROUNDING INSTRUCTIONS ” found on page 3.
4. Install or locate this appliance only in accordance with the provided installation instructions.
5. Some products such as whole eggs with / without shells and sealed containers – for example, closed glass jars – are able to
explode and should not be heated in this oven.
6. Use this appliance only for its intended use as described in the manual. Do not use corrosive chemicals or vapors in this
appliance. This type of oven is specifically designed to heat,cook,or dry food. It is not designed for industrial or laboratory use.
7. As with any appliance, close supervision is necessary when used by children.
8. Do not operate this appliance if it has a damaged cord or plug, if it is not working properly, or if it has been damaged or dropped.
9. This appliance should be serviced only by qualified service personnel. Contact nearest authorized service facility for
examination, repair or adjustment.
10. Do not cover or block any openings on the appliance.
11. Do not store this appliance outdoors. Do not use this product near water – for example ,near a kitchen sink, in a wet basement
or near a swimming pool or similar locations.
12. Do not immerse cord or plug in water.
13. Keep cord away from heated surfaces.
14. Do not let cord hang over edge of table or counter.
15. See surface door cleaning instructions on page 16.
16. To reduce the risk of fire in the oven cavity:
a. Do not overcook food. Carefully attend appliance when paper, plastic or other combustible materials are placed inside the
oven to facilitate cooking.
b. Remove wire twist-ties from paper or plastic bags before placing bag in oven.
c. If materials inside the oven ignite, keep oven door closed, turn oven off and disconnect the power cord or shut off power at
the fuse or circuit breaker panel.
d. Do not use the cavity for storage purposes. Do not leave paper products, cooking utensils or food in the cavity when not in use.
17. Liquids such as water, coffee or tea are able to be overheated beyond the boiling point without appearing to be boiling. Visible
bubbling or boiling when the container is removed from the microwave oven is not always present.
THIS COULD RESULT IN VERY HOT LIQUIDS SUDDENLY BOILING OVER WHEN THE CONTAINER IS DISTURBED OR A SPOON OR OTHER
UTENSIL IS INSERTED INTO THE LIQUID.
SAVE THESE INSTRUCTIONS
1
LIMITED ONE YEAR WARRANTY
ADDITIONAL IMPORTANT SAFETY INSTRUCTIONS
Warranty: This Westinghouse® • product is warranted by Salton, Inc. to be free from defects in materials or workmanship for a period of (1) year from the original
purchase date. This product warranty covers only the original consumer purchaser of the product.
Warranty Coverage: This warranty is void if the product has been damaged by accident in shipment, unreasonable use, misuse, neglect, improper service, commercial
use, repairs by unauthorized personnel, normal wear and tear, improper assembly, installation or maintenance abuse or other causes not arising out of defects in
materials or workmanship. This warranty is effective only if the product is purchased and operated in the USA, and does not extend to any units which have been
used in violation of written instructions furnished with the product or to units which have been altered or modified or to damage to products or parts thereof which
have had the serial number removed, altered, defaced or rendered illegible.
Implied Warranties: ANY IMPLIED WARRANTIES WHICH THE PURCHASER MAY HAVE ARE LIMITED IN DURATION TO ONE (1) YEAR FROM THE DATE OF PURCHASE.
Some states do not allow limitations on how long an implied warranty lasts, so the above limitation may not apply to you.
Warranty Performance: During the above one-year warranty period, a product with a defect will be either repaired or replaced with a reconditioned comparable model
(at our option) when the product is returned to the Repair Center, or the purchase price refunded. The repaired or replacement product will be in warranty for the
balance of the one-year warranty period and an additional one-month period. No charge will be made for such repair or replacement.
Service and Repair: Should the appliance malfunction, you should first call toll-free 1 (800) 934-7455 between the hours of 9:00 am and 5:00 pm Central Standard
Time and ask for CONSUMER SERVICE stating that you are a consumer with a problem. Please refer to model number WST3504 when you call.
In-Warranty Service (USA): For an appliance covered under the warranty period, no charge is made for service or postage.
Call for return authorization (1 800 934-7455).
1. Oversize foods or oversize metal utensils should not be inserted in a microwave oven as they may create a fire or risk of electric shock.
2. Do not clean with metal scouring pads.
3. Do not store any materials other than manufacturer ’s recommended accessories in this oven when not in use.
WARNING:
TO REDUCE THE RISK OF INJURY TO PERSONS:
1. Liquids such as water, coffee or tea are able to be overheated beyond the boiling point without appearing to be boiling.
2. Do not use narrow necked containers to boil or reheat liquids.
3. To reduce the risk of injury, stir the liquid several times before heating.
4. The liquid may splash out during or after heating or when adding ingredients (instant coffee, etc) resulting in possible harm or
injury to persons.
5. After heating, allow the container to stand in microwave oven for at least 40 seconds before removing the container.
6. Do not heat water and oil, or a fat together which may cause a violent eruption.
Out-of Warranty Service: A flat rate charge by model is made for out-of-warranty service. Include $15.00 (U.S.) for return shipping and
handling. We will notify you by mail of the amount of the charge for service and require you to pay in advance for the repair or replacement.
For Products Purchased in the USA, but Used in Canada: You may return the product insured, packaged with sufficient protection, and postage and insurance prepaid
to the USA address listed below. Please note that all customs duty / brokerage fees, if any, must be paid by you and we will require you to pay the cost of customs
duty / brokerage fees to us in advance of our performing any service.
Risk During Shipment: We cannot assume responsibility for loss or damage during incoming shipment. For your protection, carefully package the product for shipment
and insure it with the carrier. Be sure to enclose the following items with your appliance: any accessories related to your problem, your full return address and daytime
phone number, a note describing the problem you experienced, a copy of your sales receipt or other proof of purchase to determine warranty status. C.O.D.
shipments cannot be accepted.
To return the appliance, ship to:
Attn: Repair Center
Salton, Inc.
708 South Missouri Street
Macon, MO 63552
To contact us, please write to, call, or email:
Salton, Inc.
P.O. Box 6916
Columbia, MO 65205-1637
1(800) 934-7455
Email: [email protected]
Limitation of Remedies: No representative or person is authorized to assume for Salton, Inc. any other liability in connection with the sale of our products. There
shall be no claims for defects or failure of performance or product failure under any theory of tort, contract or commercial law including, but not limited to negligence,
gross negligence, strict liability, breach of warranty and breach of contract. Repair, replacement or refund shall be the sole remedy of the purchaser under this
warranty, and in no event shall Salton be liable for any incidental or consequential damages, losses or expenses. Some states do not allow the exclusion or
limitation of incidental or consequential damages, so the above limitation or exclusion may not apply to you.
Legal Rights: This warranty gives you specific legal rights, and you may also have other rights which vary from state to state.
WESTINGHOUSE™, H and “YOU CAN BE SURE...IF IT'S WESTINGHOUSE™" are trademarks
of WESTINGHOUSE ELECTRIC CORPORATION and used under license by Salton, Inc.
For more information on Salton products: Visit our website: www.eSalton.com
“© 2003 Salton, Inc. All Rights Reserved”
Printed in China
21
P/N 61392
2
GROUNDING INSTRUCTIONS
NOTES:
This appliance must be grounded. In the event of an electrical short circuit, grounding reduces the risk of electric shock by providing
an escape wire for the electric current. This appliance is equipped with a cord having a grounding wire with a grounding plug. The
plug must be plugged into an outlet that is properly installed and grounded.
WARNING – Improper use of the grounding can result in a risk of electric shock.
Consult a qualified electrician or serviceman if the grounding instructions are not completely understood, or if doubt exist as to whether
the appliance is properly grounded.
• Do not use an extension cord. If the power supply cord is too short, have a qualified electrician or service man install an
outlet near the appliance.
Testing Containers and Utensils
Some non-metallic containers and utensils become extremely hot when used in a microwave oven. To avoid risk of scalding, use the
following procedure to determine if a container or utensil is safe for microwave use:
1. Fill a microwave-safe container with 1 cup (250 ml)of cold water. Place it in the microwave oven along with the container
or utensil in question.
2. Turn the oven on maximum power for 1 minute. Do not exceed 1 minute cooking time.
3. Carefully feel the container. If the empty container is warm,do not use it for microwave cooking.
Materials You Can Use in a Microwave Oven
Cooking
Accessories
3
(not included
with Microwave)
Remarks
Dinnerware
Microwave-safe only. Follow manufacturer ’s instructions. Do not use cracked or chipped dishes.
Glass jars
Always remove lid. Use only to heat food until just warm. Most glass jars are not heat resistant and may break.
Glassware
Heat-resistant oven glassware only. Make sure there is no metallic trim. Do not use cracked or chipped dishes.
Oven cooking bags
Follow manufacturer ’s instructions. Do not close with metal tie. Make slits to allow steam to escape.
Paper plates
Use microwave-safe plates only for short-term cooking/warming only. Do not leave oven unattended while cooking.
Paper towels
Use microwave-safe paper towels only to cover food for reheating and absorbing fat. Use with supervision for short-term cooking only.
Parchment
Use as a cover to prevent spattering or a wrap paper for steaming.
Plastic containers
Use microwave-safe containers only. Follow the manufacturer ’s instructions. Containers should be labeled “Microwave-Safe.”
Some plastic containers soften as the food inside gets hot. “Boiling bags ” and tightly closed plastic bags should be slit, pierced,
or vented as directed by package.
Plastic wrap
Microwave-safe only. Use to cover food during cooking to retain moisture. Do not allow plastic wrap to touch food.
Wax paper
Use a cover to prevent splattering and to help retain moisture.
20
Materials to Avoid in a Microwave Oven
BEFORE CALLING FOR SERVICE
YOU CAN OFTEN CORRECT OPERATING PROBLEMS YOURSELF. IF YOUR MICROWAVE OVEN FAILS TO WORK OPERATING PROBLEM IN THE LIST BELOW
AND TRY THE SOLUTIONS LISTED FOR EACH PROBLEM.
Note: If the Microwave Oven still does not work properly, please contact Service and Repair
located on Warranty page.
Problem
Microwave Oven does not start
• Is the power cord plugged in?
• Is the door closed?
• Is the cooking time set?
Arcing or Sparking
• Are you using approved cookware?
• Is the Microwave Oven empty?
Incorrect time of day
• Have you tried to reset the time of the day?
Unevenly Cooked Foods
•
•
•
•
•
Are you using approved cookware?
Is the glass turntable in the Microwave Oven?
Did you turn or stir the food while it was cooking?
Where the foods completely defrosted?
Was the time/cooking power level correct?
Overcooked Food
• Was the time /cooking power level correct?
Improper Defrosting
•
•
•
•
Undercooked Foods
19
Possible Causes
Are you using approved cookware?
Were the foods completely defrosted?
Was the time/cooking power level correct?
Are the ventilation ports clear?
• Are you using approved cookware?
• Was the time/cooking power level correct?
• Did you turn or stir the food during the defrosting cycle?
Cooking
Accessories
(not included with Microwave)
Remarks
Aluminum pan or tray
May cause arcing. Transfer food into microwave-safe dish.
Food carton with
metal handle
May cause arcing. Transfer food into microwave-safe dish.
Metal or metal-trimmed
utensils
Metal shields the food from microwave energy and may cause arcing.
Metal twist ties
May cause arcing and could cause a fire in the oven.
Plastic foam
Plastic foam may melt or contaminate the liquid inside when exposed to high temperature.
Wood
Wood will dry out and may split. Avoid using wooden containers or utensils in the oven.
How Your Microwave Oven Works
The microwave oven has an electronic tube called a magnetron that produces microwaves, very short radio
waves. The microwaves then pass through a wave-guide and into the oven cavity. The microwaves penetrate the
food and cause water molecules within the food to vibrate extremely rapidly. This vibration causes considerable
friction or heat between the water molecules resulting in a rapid rise in temperature. This type of heating is very
efficient and the cooking time is therefore shorter than in a conventional oven. The rate of heating depends on
the moisture content, shape, volume and amount of food present. Metallic materials totally reflect microwaves.
Non-metallic materials such as glass, paper and plastics are partially transparent to microwaves. Microwaves do
not directly heat the oven walls and most cooking utensils because they do not absorb microwave energy.
However, they frequently get very warm through being in direct contact with hot food.
4
Food (Continued)
GETTING TO KNOW YOUR WESTINGHOUSE MICROWAVE OVEN
Model WST3504 Parts and Accessories
P/N22385
Question
Answer
Why are scrambled eggs
sometimes a little dry
after cooking?
• Eggs will dry out when they are overcooked even if the same recipe is used each time.
The cooking time may need to be varied for one of these reasons:
• Eggs vary in size.
• Eggs are at room temperature one time and at refrigerator temperature
another time.
• Eggs continue cooking during standing time.
Is it possible to pop popcorn in
a Microwave Oven?
• Yes, if using one of the two methods described below:
1. Microwave-popping devices designed specifically for microwave cooking.
2. Prepackaged commercial microwave popcorn that is made for specific
times and power output needed.
• Follow exact directions given by each manufacturer for its popcorn
popping product and do not leave the Microwave Oven unattended while the
corn is being popped. If corn fails to pop after the suggested time, discontinue
cooking. Overcooking could result in an Microwave Oven fire.
• CAUTION: Never use a brown paper bag for popping corn or attempt to pop
leftover kernels. Do not pop prepackaged commercial microwave popcorn
directly on the Glass Turntable, place the popcorn bag on a plate.
Why do baked apples
sometimes burst
during cooking?
• The peel has not been removed from the top half of each apple to allow for
expansion of the interior of the apple during cooking. As in conventional
cooking methods, the interior of the apple expands during the cooking process.
Why do baked potatoes
sometimes burn
during cooking?
• If the cooking time is too long, fire could result. At the end of the recommended
cooking time, potatoes should be slightly firm.
• CAUTION: Do not overcook.
Why is additional time required
for cooking food stored in the
refrigerator?
• As in conventional cooking, the initial temperature of food affects total cooking
time. You need more time to cook food taken out of a refrigerator than for food
at room temperature.
P/N22386
Power Supply
Power Consumption
Microwave Output
Frequency
Input Current
Overall Dimensions
120 V AC, 60 Hz
1150 W
700 W
2450 MHz
10 AMPS
18 •” x 12 7/16” x 11 1/32”
Open Cavity Dimensions
12 3/16” x 7 31/32” 11x 5/8”
Effective capacity of Microwave Oven Cavity
0.6 Cu. Ft.
oz
1
cup
lb
1. DISPLAY- Indicates the time of day, cooking time settings and cooking functions.
2
POPCORN
BEVERAGE
AUTO
DEFROST
CLOCK
REHEAT
TIMER
1
2
3
4
5
6
3
2. POPCORN & BEVERAGE - Allows you to cook popcorn and beverage without having to select
cooking times and power levels.
3. AUTO DEFROST- Is an accurate defrosting method for frozen meat, poultry and fish up to 4.0 lbs.
4
6
5
7
4. CLOCK - Allows you to enter the time of day.
5. REHEAT - Allows you to reheat food quickly without having to select cooking times and
power levels.
6. TIMER - Allows you to set time, not a cooking time.
7. NUMBER PADS - Allows you to enter cooking time, power level, quantities and weights.
7
8
8. TIME - Allows you to set a cooking time.
9
9. POWER - Allows you to set the power level.
5
8
TIME
0
POWER
9
10. STOP/CLEAR - Allows you to “Stop” the Microwave Oven or “Clear” entries.
10
STOP
CLEAR
ADD
MINUTE
START
11
11. START - Allows you to “Start” all entries (except the popcorn, beverage, auto defrost, clock
and reheat which start automatically) and to turn Child Lock “On” or “off.”
12
12. ADD MINUTE - Allows you to cook from 1 minute to 10 minutes.
18
TROUBLESHOOTING
Questions and Answers
Question
Answer
Why is the Microwave Oven light
not on during cooking?
• There may be several reasons why the Microwave Oven light is not on.
• Have you: Set a cooking time? Pressed “START”?
Why does steam come out of the
air exhaust vent?
• Steam is normally produced during cooking. The Microwave Oven has been designed to vent
this steam.
Will the microwave be damaged if it • Yes. Never operate the Microwave Oven empty or without the glass turntable.
operates empty?
Does Microwave energy pass
through the viewing screen in
the door?
• No. The metal screen bounces the energy back to the Microwave Oven cavity. The holes (or
ports) allow only light to pass though. They do not let microwave energy pass though.
Why does a tone sound when a pad
on the control panel is pressed?
• The tone tells you that the setting has been entered.
Can my Microwave Oven be
damaged if food is cooked for
too long?
• Like any other cooking appliance, it is possible to overcook food to the point that the food
creates smoke and even possibly fire, resulting in damage to the inside of the Microwave
Oven. It is always best to be near the Microwave Oven while you are cooking.
• The microcomputer controlling your Microwave Oven may temporarily become scrambled and
When the Microwave Oven is
fail to function as programmed when you plug in for the first time or when power resumes
plugged into wall outlet for the first
after a power interruption. Unplug the Microwave Oven from the 120 volt household outlet
time0 it might not work properly.
and then plug it back in to reset the microcomputer.
What is wrong?
Why do I see reflection around the
outlet case?
• The light is from the Microwave Oven light which is located between the Microwave Oven
cavity and the outer wall of the Microwave Oven.
What are the various sounds I hear
when the Microwave Oven is
operating?
• The clicking sound is caused by a mechanical switch turning the Microwave Oven’s
magnetron “ON” and “OFF.”
• The heavy hum and clunk is from the change in power the magnetron draws as it is turned
“ON” and “OFF” by a mechanical switch. The change in blower speed is from the change in
line voltage caused by the magnetron being turned “ON” and “OFF.”
BEFORE USING FOR THE FIRST TIME
1. Read all instructions in this manual carefully.
2. Carefully unpack your Microwave Oven and remove all packaging materials.
3. Place your Microwave Oven on a level surface such as a countertop or table. Be sure the
sides, back and top of the Microwave Oven are at least four inches away from any walls,
cabinets or objects on the counter or table.
4. Remove all stickers from the Microwave Oven except the rating label located on the back.
5. Wash Glass Turntable and Turntable Roller Rest in warm, soapy water. Rinse and dry
thoroughly before placing in the Microwave Oven.
6. Remove any dust that may have accumulated during packaging. Simply wipe the Microwave
Oven exterior with a clean, damp cloth.
7. Do not use abrasive cleansers.
8. Do not put the Microwave Oven, cord or plug in water.
9. When you are ready to use the Microwave Oven, plug the cord into a 120V AC outlet.
10. To avoid scratching, marring or discoloration, do not store anything on top of the
Microwave Oven during operation.
CAUTION: Always wear protective, insulated Microwave Oven mitts on hands when touching hot
Microwave Oven or hot dishes and food or when inserting or removing baking dish and food.
CAUTION: Never use metal bakeware or aluminum inside of Microwave Oven.
Food
Question
Answer
What is wrong when baked foods
have a hard, dry brown spot?
A hard, dry brown spot indicates overcooking. Shorten the cooking or reheating time.
Why do eggs
sometimes pop?
17
When baking, frying or poaching eggs, the yolk may pop due to steam build-up inside the
yolk membrane. To prevent this, simply pierce the yolk with a wooden toothpick before cooking.
CAUTION: Never Microwave eggs in the shell.
6
USING YOUR MICROWAVE OVEN
BEVERAGE and POPCORN
Use the function to cook beverage and popcorn without entering a Cook Time or Power
MAINTENANCE
Cleaning and Care
Routine cleaning will enhance the performance and reliability of your Westinghouse MicrowaveOven. Clean the oven on a weekly
basis or more often if needed.
Example: To cook a 3.5 oz. bag of microwave popcorn
Display Shows
1. Press POPCORN 3.5 oz
2. After 5 seconds the Microwave Oven will automatically
start counting down.
3. At the end of cooking time 5 short tones will sound.
To ensure safe and efficient operation, be sure to keep the inner door, door seal, hinges and latches clean and free of food residue.
3.5 oz
• Wipe spills and splatters from the interior after each use to avoid arcing.
• Clean all oven surfaces with soft, lint-free cloths and a mild, non-abrasive detergent.
• Wash the turntable roller ring by hand.
• The glass turntable may be washed in the dishwasher.
NOTE:
Level. Refer to COOKING TABLE below for more information.
Directions: Follow package instructions. Use popcorn package which is made especially for microwave cooking. Heat only 1 package
at a time. Do not leave the Microwave Oven unattended while popping popcorn. When popping prepackaged popcorn; Fold each end
of the bag in half toward the center top of the bag. Place carefully so the bag does not touch the Microwave Oven walls.
• Never use any type of chemicals, solvents or abrasive cleaners on the oven surface.
• Unplug the oven before cleaning exterior surfaces or vents -OR -Clean with the oven door open to prevent the oven from
accidentally turning on.
After Cleaning
• Be sure to replace the turntable roller ring and turntable in the proper position.
• If necessary, press STOP/CANCEL to clear the display window.
• If the oven was unplugged, plug it back in and reset the clock.
COOKING TABLE
Table 2. Cleaning and Care of the Microwave Oven
CATEGORY
PRESS
DISPLAY SHOWS
SERVING SIZE
1 time
1 cup
2 times
2 cups
BEVERAGE
3 times
Surface
Cleaning Surface
Door
Wipe the window on both sides with a damp cloth to remove any spills or spatters. Do not use any type of abrasive cleaner.
Gently wipe around the inside of the doorframe, seals, latches and hinges to remove any food particles and condensation.
Exterior
Clean with mild soap and water. Rinse and dry with a soft cloth. Do not use any type of abrasive cleaner.
Interior
Clean with mild soap and water. Rinse and dry with a soft cloth. Do not use any type of abrasive cleaner. For heavier soil, use
baking soda or a mild soap. Rinse thoroughly with hot water. NEVER USE OVEN CLEANERS INTENDED FOR CONVENTIONAL OVENS.
3 cups
4 times
Go back to 1 cup
1 time
3.5 oz.
2 times
3.O oz.
3 times
1.5 oz.
4 times
Go back to 3.5 oz.
Odor Removal
Control Panel
Turntable and Turntable
Roller Ring
POPCORN
7
Wave Guide Cover
Vents
To remove odors:combine 1 cup water,grated peel and juice of 1 lemon and several whole cloves in a 2 cup, microwave-safe,
glass measuring cup. Boil for several minutes using 100%power. Leave the liquid in oven until it cools. Wipe the interior with a
soft, dry cloth.
Open the oven door before cleaning. GENTLY wipe the panel with a slightly dampened cloth. Dry with a soft cloth. Do not scrub
or use any detergents, solvents, chemicals or abrasive cleaners. Close the oven door and press STOP/CLEAR.
You may remove the turntable and roller ring from the oven for cleaning. Wash them in warm water using a mild detergent. For
stubborn stains use a mild cleanser and scouring sponge. The glass turntable (not the roller ring) may be washed in the
dishwasher.
The wave-guide cover is a light brown mica panel located on the right side of the oven interior. Carefully clean with mild soap
and water. Rinse and dry with a soft cloth. Do not use any type of abrasive cleaner.
Do not remove the wave-guide cover.
To maintain efficient cooling and ventilation do not allow dust to accumulate on the vents and air intake (located on the rear of
the oven). To keep them clean use a sponge dampen with warm soapy water to clear away.
16
Poultry Cooking Table
Poultry
Microwave power
AUTO DEFROST
The auto defrost feature provides you with the best defrosting method for frozen foods. The cooking guide will show you
which defrost sequence is recommended for the food you are defrosting. For added convenience, the Auto Defrost includes
a built-in beep mechanism that reminds you to check, turn over, separate or rearrange to get best defrost result. (Available
weight is 0.5~4.0 lbs).
Cooking Time Per Pound
CHICKEN
Whole
Breast (boned)
Portions
8
8
8
12 to 14 minutes
10 to 12 minutes
11 t0 13 minutes
TURKEY
Whole
8
13 to 15 minutes
Example: To defrost 1.5 lbs of ground beef.
1. Press “AUTO DEFROST” 3 times
2. After 5 seconds, the Microwave Oven will automatically start counting down.
3. At the end of cooking time 5 short tones will sound.
NOTE: The times listed above are only a guide. Allow for difference in individual tastes and preferences. The times may
also vary due to the shape, cut and composition of the food. If whole poultry is stuffed, the weight of the stuffed bird
should be used when calculating the cooking time.
Fish
Arrange fish in a large shallow non-metallic dish or casserole.
• Cover with pierced microwave plastics wrap or casserole lid.
• Place the dish on the turntable.
• Cook according to the instructions in the Fresh Fish Cooking Table below. Flakes of butter can be added to the fish if desired.
• After standing time, check to see that the fish is thoroughly cooked. The fish should be opaque and flake easily.
Fresh Fish Cooking Table
Fish
Fish Fillets
Whole Mackerel,
Cleaned and Prepared
Microwave Power
Cooking Time
Per Pound
Butter
HIGH
5 to 7 minutes
Add 1 to 2 tbsp lemon juice
HIGH
5 to 7 minutes
•
Display Shows
1.5 lb
Note: The Microwave Oven will beep (5 short tones) during the DEFROST cycle. At this time open the door and turn,
separate or rearrange the food. Remove any portions that have thawed. Return frozen portions to the Microwave
Oven to resume the defrost cycle.
AUTO DEFROST TABLE
Press
Display Shows Serving Sze
1 time
.5 lbs
2 times
1.0 lbs
3 times
1.5 lbs
7 times
3.5 lbs
8 times
4.0 lbs
DEFROSTING TIPS
• For best results, remove fish, shellfish, meat and poultry from its original closed paper or plastic package (wrapper).
Whole Trout,
Cleaned and Prepared
6 to 9 minutes
•
The wrap will hold steam and juice close to the foods which can cause the outer surface of the foods to cook.
• For best results, shape your ground meat into the form of a doughnut before freezing. When defrosting, scrape off
thawed meat when the beep sounds continue defrosting.
HIGH
• Place foods in a shallow container or on a microwave roasting rack to catch drippings.
Salmon Steaks
HIGH
6 to 8 minutes
Add 1 to 2 tbsp lemon juice
• Food should still be somewhat icy in the center when removed from the Microwave Oven.
• The turn table must be used at all times. There may be some foods that are too large to fit inside the microwave oven.
15
8
CLOCK
COOKING TIPS
Meat
Example: To set the clock for 11:30.
Display Shows
1. Press CLOCK pad to set the time of day.
2. Press 1 1 3 0
3. Press Start
NOTE: This is a 12-hour clock
11: 30
REHEAT
You can use this feature to reheat Soup, Casserole and Single (plated meal)
•
•
•
•
No special techniques are required. Meat should be prepared as with conventional cooking.
Always thoroughly defrost meat before cooking (seasoned if desired).
Place the meat on a microwave roasting rack or microwave-proof plate and place on the turntable.
Cook according to the Meat Cooking Table (below). Use longer time for large cuts of meats and shorter time for small cuts of
meats. For thicker chops, use longer time.
• Turn the meat over halfway through the cooking time.
• Make sure meat, especially pork, is thoroughly cooked before eating.
Meat
Display Shows After 5 seconds
1. Press REHEAT pad 1 time
Cooking Time
Per Pound
8
8
HIGH (100%)
10 to 12 minutes
12 to 14 minutes
7 to 9 minutes
Soup
2 times
Cass
3 times
Sing
2. The Microwave Oven will automatically start counting down.
BEEF
Standing/Rolled Rib
-Medium
-Well-done
Ground Beef (to brown for
casserole) Hamburgers,
Fresh or defrosted
(4 oz. Each)
-2 patties
-4patties
Soup = 8oz Soup
Cass = 1.5 cups of casserole
Sing = 8oz meat, potatoes, vegetables
TIMER
This feature lets you set the time, not cooking time.
Example: To set 15 minutes.
1.Press the Timer pad
2. 1 5 0 0
3. Press the “START” pad and it will automatically begin to count down.
Loin, Leg
Bacon
-4 slices
-6silces
Display Shows
00:00
15:00
4. 8
5. Press the “START” pad and it will automatically begin to count down.
6. At the end of cooking time 5 short tones will sound.
HIGH (100%)
HIGH (100%)
3 to 5 minutes
4 to 6 minutes
8
13 to 16 minutes
HIGH (100%)
HIGH (100%)
3 to 4 minutes
4 to 6 minutes
Meat Cooking Table
This feature lets you program a specific cook time and power level. For best results, there are 10
power level settings. Refer to “Microwave Power Level table” below for more information.
Example: To cook for 5minutes, 30 seconds at 80% power.
1. Press the Time pad
2. 5 3 0
3. Power
\
PORK
Cooking Time
Display Shows
00:00
5:30
P:HI
Display Shows
P: 80
9
Microwave Power
NOTE: The times listed above are only a guide. Allow for difference in individual tastes and preferences. The times may also vary due
to the shape, cut and composition of the food.
Poultry
•
•
•
•
•
No special techniques are required. Poultry should be prepared as with conventional cooking (season if desired).
Poultry should be thoroughly defrosted. Remove giblets and any metal clamps.
Prick the skin and brush lightly with vegetable oil unless the poultry is self-basing
All poultry should be placed on a Microwave roasting rack or a Microwave-proof plate and placed on the Glass Turntable.
Cook according to the instructions in the Poultry Cooking Table below. Turn over halfway though the cooking time. Because of
its shape, poultry has a tendency to cook unevenly, especially in very bony parts. Turning over during roasting helps to cook
these areas evenly.
• Make sure poultry is thoroughly cooked when the juices run clear from the inside thigh. Pierced with a sharp knife through
the thickest part to ensure that the juices are clear and the flesh is firm.
14
HINTS AND TIPS FOR MICROWAVE COOKING
Microwave Power Levels
Your Microwave Oven has 10 cooking Power Levels to let you cook and heat a wide variety of foods. Refer to the
table below for suggestions:
• BROWNING
Meat and poultry with high fat content that are cooked for 10 or 15 minutes or longer will brown lightly. Foods cooked a \
shorter time can be bushed with a browning agent, such as Worcestershire sauce, soy sauce or barbecue sauce.
• COVERING
Traps heat, steam, and causes the food to cook quickly. Use a lid or microwave-safe plastic wrap with one corner folded
\ back to vent the excess steam. Lids on glass casseroles can become hot during cooking. Handle carefully. Waxed paper
will prevent the food from splattering in the Microwave Oven and help retain heat. When warming bread items, use
waxed paper, napkins or paper towels. To absorb extra moisture, wrap sandwiches and fatty foods in paper towels.
Microwave Power Level Table
Power Level
Use
10
(High)
Boiling water.
Making candy.
Cooking poultry pieces, fish and vegetables.
Cooking tender cuts of meat.
Whole poultry.
9
Reheating rice, pasta and vegetables..
8
Reheating prepared foods quickly.
Reheating sandwiches.
7
Reheating prepared foods quickly.
Reheating sandwiches.
Stirring blends flavors and redistributes the heat in foods. Always stir from the outside toward the center of the dish.
\ Food on the outside of the dish heats first.
6
Cooking veal.
Cooking whole fish.
Cooking puddings and custard.
• TURNING
5
Cooking ham, whole poultry and lamb.
Cooking rib roast and sirloin tip.
4
Thawing meat, poultry and seafood.
3
Cooking less tender cuts of meat.
Cooking pork chops and roast.
2
Taking chill out of fruit.
Softening butter.
1
Keeping casseroles and main dishes warm.
Softening butter and cream cheese.
• SPACING
Arrange individual foods, such as baked potatoes, cupcakes and hors d’oeuvres in a circle and at least 1 inch apart. This
will help the food cook evenly.
• STIRRING
Large foods such as roasts, poultry and chops should be turned over so that the top and bottom cook evenly.
• ARRANGEMENT
Do not stack food. Arrange a single layer on the dish for even cooking. Because dense foods cook slowly, place thicker
portions of meat, poultry, fish and vegetables toward the outside of the dish.
• TESTING FOR DONENESS
Because foods cook quickly in a Microwave Oven, you need to test frequently for doneness.
• STANDING TIME
Depending on density, food often needs to stand from 2 to 15 minutes after you remove it from the Microwave Oven.
Usually you need to cover food during standing time to retain heat. Remove most foods when they are slightly
undercooked and they will finish cooking during standing time. The internal temperature of food will rise about 10
degrees during standing time.
• PIERCING
Pierce the shell, skin or membrane of foods before cooking to prevent them from bursting. Foods that require piercing
include yolks and whites of eggs, hot dogs, clams, oysters and whole vegetables such as potatoes and squash.
• REHEATING
Reheat only precooked refrigerated food. Stir large amounts of food halfway through reheating time.
13
STOP/CLEAR
To “Stop” the Microwave Oven, Clear Entries or Cancel Lock:
When the Microwave Oven is operating, display shows time left is 15:00:
Display Shows
15:00
1. Press the “STOP/CLEAR” pad and the Microwave Oven will “Stop”
2. Press the START pad and the Microwave Oven will “Start” counting down
OR
Press the “STOP/CLEAR” twice to Cancel operating
When the Microwave Oven is in setting status:
Press the “STOP/CLEAR” pad to Cancel setting
When the Microwave Oven is locked:
Press the “STOP/CLEAR” pad 3 times to Cancel Child Lock
Display Shows
15:00
10
COOKWARE GUIDE
ADD MINUTE
This simplified control lets you quickly set and start Microwave cooking without pressing the number
pads. If you press “ADD MINUTE”, it will add 1 minute up to 10 minutes at full power.
Example: To cook for 2 minutes at 100% power.
Use
Display
Shows
Display shows:
1. Press “ADD MINUTE” twice
2. Press “START” and it will automatically begin to count down.
02:00
P-HI
P-H6
During operation, you can also press “Add Minute” button to increase the
cooking time by 1 -10 minutes except for Pre-Programmed Auto Cooking
and Defrosting Functions.
CHILD LOCK
You can use this safety feature to lock the control panel so that children cannot use the Microwave Oven
unsupervised or when you are cleaning the Microwave Oven.
To set CHILD LOCK:
Display Shows
1. Press the “START” pad 3 times
Press the “STOP/CLEAR” pad 3 times to Cancel Child Lock
WARNING: Do not use aluminum foil during cooking cycle.
11
Most heat-resistant, non-metallic cookware is safe for use in your Microwave Oven. However, to test cookware before
using, follow these steps:
1. Place the empty cookware in the Microwave Oven.
2. Measure 1 cup of water in a glass measuring cup and place it in the Microwave Oven beside the cook ware.
3. Microwave on 100% power for 1 minute. If the dish is warm, it should not be used for microwave cooking.
CHILD
DO NOT USE
Microwave Oven Proof Glass
Metal Utensil
• Glass treated for use in high-intensity heat includes utility
dishes, bread dishes, pie plates, cake plates, liquid measuring
cups, casseroles and bowls without metallic trim.
China
• Metal shields food Microwave energy and can cause products
to cook unevenly. Avoid metal skewers, thermometers or
foil trays.
• Metal utensils can cause arcing, which is a discharge of
electric current. Arcing can damage your Microwave Oven.
• Bowls, cups, serving plates and platters without metallic trim
can be used in your microwave oven.
Metal Decoration
Plastic
• Do not use metal-trimmed or metal-banded dinnerware,
casserole dishes, etc.
• When using plastic wrap as a cover, make sure that the dish
is deep enough so the plastic wrap does not touch the food.
As the food heats, it may melt the plastic wrap or soften from
the heat of the food.
Wood
Paper
Tightly Closed Containers
• Microwave-safe paper towels, waxed paper, paper napkins
and paper plates with no metallic trim or design can be used
in your Microwave Oven.
• Refer to the manufacturer’s label for use of any paper product
in the Microwave Oven.
• Place plastic wrap loosely over the top of the dish and secure
it by pressing the wrap to the sides of the dish.
• Vent by turning back one corner of the plastics wrap. This will
allow excess steam to escape.
• Use plastic dishes, cups, containers and plastic bags only
• For short cooking time use these with care because the
plastics may soften from the heat of the food.
• Tightly closed cookware can explode. Be sure to leave an
opening for steam to escape from covered cookware.
• Wooden bowels, boards and baskets will dry out and may
split or crack when you use them in the Microwave Oven.
Brown Paper
• Avoid using brown paper bags. They absorb heat and
could burn.
Metal Twist Ties
• Always remove metal twist ties as they can become hot and
cause a fire.
Aluminum Foil
• Avoid aluminum foil because it may cause arcing, unless
otherwise instructed in a cook book. Arcing may occur if foil
is too close to the oven wall or door and will cause damage
to your oven.
12
HINTS AND TIPS FOR MICROWAVE COOKING
Microwave Power Levels
Your Microwave Oven has 10 cooking Power Levels to let you cook and heat a wide variety of foods. Refer to the
table below for suggestions:
• BROWNING
Meat and poultry with high fat content that are cooked for 10 or 15 minutes or longer will brown lightly. Foods cooked a \
shorter time can be bushed with a browning agent, such as Worcestershire sauce, soy sauce or barbecue sauce.
• COVERING
Traps heat, steam, and causes the food to cook quickly. Use a lid or microwave-safe plastic wrap with one corner folded
\ back to vent the excess steam. Lids on glass casseroles can become hot during cooking. Handle carefully. Waxed paper
will prevent the food from splattering in the Microwave Oven and help retain heat. When warming bread items, use
waxed paper, napkins or paper towels. To absorb extra moisture, wrap sandwiches and fatty foods in paper towels.
Microwave Power Level Table
Power Level
Use
10
(High)
Boiling water.
Making candy.
Cooking poultry pieces, fish and vegetables.
Cooking tender cuts of meat.
Whole poultry.
9
Reheating rice, pasta and vegetables..
8
Reheating prepared foods quickly.
Reheating sandwiches.
7
Reheating prepared foods quickly.
Reheating sandwiches.
Stirring blends flavors and redistributes the heat in foods. Always stir from the outside toward the center of the dish.
\ Food on the outside of the dish heats first.
6
Cooking veal.
Cooking whole fish.
Cooking puddings and custard.
• TURNING
5
Cooking ham, whole poultry and lamb.
Cooking rib roast and sirloin tip.
4
Thawing meat, poultry and seafood.
3
Cooking less tender cuts of meat.
Cooking pork chops and roast.
2
Taking chill out of fruit.
Softening butter.
1
Keeping casseroles and main dishes warm.
Softening butter and cream cheese.
• SPACING
Arrange individual foods, such as baked potatoes, cupcakes and hors d’oeuvres in a circle and at least 1 inch apart. This
will help the food cook evenly.
• STIRRING
Large foods such as roasts, poultry and chops should be turned over so that the top and bottom cook evenly.
• ARRANGEMENT
Do not stack food. Arrange a single layer on the dish for even cooking. Because dense foods cook slowly, place thicker
portions of meat, poultry, fish and vegetables toward the outside of the dish.
• TESTING FOR DONENESS
Because foods cook quickly in a Microwave Oven, you need to test frequently for doneness.
• STANDING TIME
Depending on density, food often needs to stand from 2 to 15 minutes after you remove it from the Microwave Oven.
Usually you need to cover food during standing time to retain heat. Remove most foods when they are slightly
undercooked and they will finish cooking during standing time. The internal temperature of food will rise about 10
degrees during standing time.
• PIERCING
Pierce the shell, skin or membrane of foods before cooking to prevent them from bursting. Foods that require piercing
include yolks and whites of eggs, hot dogs, clams, oysters and whole vegetables such as potatoes and squash.
• REHEATING
Reheat only precooked refrigerated food. Stir large amounts of food halfway through reheating time.
13
STOP/CLEAR
To “Stop” the Microwave Oven, Clear Entries or Cancel Lock:
When the Microwave Oven is operating, display shows time left is 15:00:
Display Shows
15:00
1. Press the “STOP/CLEAR” pad and the Microwave Oven will “Stop”
2. Press the START pad and the Microwave Oven will “Start” counting down
OR
Press the “STOP/CLEAR” twice to Cancel operating
When the Microwave Oven is in setting status:
Press the “STOP/CLEAR” pad to Cancel setting
When the Microwave Oven is locked:
Press the “STOP/CLEAR” pad 3 times to Cancel Child Lock
Display Shows
15:00
10
CLOCK
COOKING TIPS
Meat
Example: To set the clock for 11:30.
Display Shows
1. Press CLOCK pad to set the time of day.
2. Press 1 1 3 0
3. Press Start
NOTE: This is a 12-hour clock
11: 30
REHEAT
You can use this feature to reheat Soup, Casserole and Single (plated meal)
•
•
•
•
No special techniques are required. Meat should be prepared as with conventional cooking.
Always thoroughly defrost meat before cooking (seasoned if desired).
Place the meat on a microwave roasting rack or microwave-proof plate and place on the turntable.
Cook according to the Meat Cooking Table (below). Use longer time for large cuts of meats and shorter time for small cuts of
meats. For thicker chops, use longer time.
• Turn the meat over halfway through the cooking time.
• Make sure meat, especially pork, is thoroughly cooked before eating.
Meat
Display Shows After 5 seconds
1. Press REHEAT pad 1 time
Cooking Time
Per Pound
8
8
HIGH (100%)
10 to 12 minutes
12 to 14 minutes
7 to 9 minutes
Soup
2 times
Cass
3 times
Sing
2. The Microwave Oven will automatically start counting down.
BEEF
Standing/Rolled Rib
-Medium
-Well-done
Ground Beef (to brown for
casserole) Hamburgers,
Fresh or defrosted
(4 oz. Each)
-2 patties
-4patties
Soup = 8oz Soup
Cass = 1.5 cups of casserole
Sing = 8oz meat, potatoes, vegetables
TIMER
This feature lets you set the time, not cooking time.
Example: To set 15 minutes.
1.Press the Timer pad
2. 1 5 0 0
3. Press the “START” pad and it will automatically begin to count down.
Loin, Leg
Bacon
-4 slices
-6silces
Display Shows
00:00
15:00
4. 8
5. Press the “START” pad and it will automatically begin to count down.
6. At the end of cooking time 5 short tones will sound.
HIGH (100%)
HIGH (100%)
3 to 5 minutes
4 to 6 minutes
8
13 to 16 minutes
HIGH (100%)
HIGH (100%)
3 to 4 minutes
4 to 6 minutes
Meat Cooking Table
This feature lets you program a specific cook time and power level. For best results, there are 10
power level settings. Refer to “Microwave Power Level table” below for more information.
Example: To cook for 5minutes, 30 seconds at 80% power.
1. Press the Time pad
2. 5 3 0
3. Power
\
PORK
Cooking Time
Display Shows
00:00
5:30
P:HI
Display Shows
P: 80
9
Microwave Power
NOTE: The times listed above are only a guide. Allow for difference in individual tastes and preferences. The times may also vary due
to the shape, cut and composition of the food.
Poultry
•
•
•
•
•
No special techniques are required. Poultry should be prepared as with conventional cooking (season if desired).
Poultry should be thoroughly defrosted. Remove giblets and any metal clamps.
Prick the skin and brush lightly with vegetable oil unless the poultry is self-basing
All poultry should be placed on a Microwave roasting rack or a Microwave-proof plate and placed on the Glass Turntable.
Cook according to the instructions in the Poultry Cooking Table below. Turn over halfway though the cooking time. Because of
its shape, poultry has a tendency to cook unevenly, especially in very bony parts. Turning over during roasting helps to cook
these areas evenly.
• Make sure poultry is thoroughly cooked when the juices run clear from the inside thigh. Pierced with a sharp knife through
the thickest part to ensure that the juices are clear and the flesh is firm.
14
Poultry Cooking Table
Poultry
Microwave power
AUTO DEFROST
The auto defrost feature provides you with the best defrosting method for frozen foods. The cooking guide will show you
which defrost sequence is recommended for the food you are defrosting. For added convenience, the Auto Defrost includes
a built-in beep mechanism that reminds you to check, turn over, separate or rearrange to get best defrost result. (Available
weight is 0.5~4.0 lbs).
Cooking Time Per Pound
CHICKEN
Whole
Breast (boned)
Portions
8
8
8
12 to 14 minutes
10 to 12 minutes
11 t0 13 minutes
TURKEY
Whole
8
13 to 15 minutes
Example: To defrost 1.5 lbs of ground beef.
1. Press “AUTO DEFROST” 3 times
2. After 5 seconds, the Microwave Oven will automatically start counting down.
3. At the end of cooking time 5 short tones will sound.
NOTE: The times listed above are only a guide. Allow for difference in individual tastes and preferences. The times may
also vary due to the shape, cut and composition of the food. If whole poultry is stuffed, the weight of the stuffed bird
should be used when calculating the cooking time.
Fish
Arrange fish in a large shallow non-metallic dish or casserole.
• Cover with pierced microwave plastics wrap or casserole lid.
• Place the dish on the turntable.
• Cook according to the instructions in the Fresh Fish Cooking Table below. Flakes of butter can be added to the fish if desired.
• After standing time, check to see that the fish is thoroughly cooked. The fish should be opaque and flake easily.
Fresh Fish Cooking Table
Fish
Fish Fillets
Whole Mackerel,
Cleaned and Prepared
Microwave Power
Cooking Time
Per Pound
Butter
HIGH
5 to 7 minutes
Add 1 to 2 tbsp lemon juice
HIGH
5 to 7 minutes
•
Display Shows
1.5 lb
Note: The Microwave Oven will beep (5 short tones) during the DEFROST cycle. At this time open the door and turn,
separate or rearrange the food. Remove any portions that have thawed. Return frozen portions to the Microwave
Oven to resume the defrost cycle.
AUTO DEFROST TABLE
Press
Display Shows Serving Sze
1 time
.5 lbs
2 times
1.0 lbs
3 times
1.5 lbs
7 times
3.5 lbs
8 times
4.0 lbs
DEFROSTING TIPS
• For best results, remove fish, shellfish, meat and poultry from its original closed paper or plastic package (wrapper).
Whole Trout,
Cleaned and Prepared
6 to 9 minutes
•
The wrap will hold steam and juice close to the foods which can cause the outer surface of the foods to cook.
• For best results, shape your ground meat into the form of a doughnut before freezing. When defrosting, scrape off
thawed meat when the beep sounds continue defrosting.
HIGH
• Place foods in a shallow container or on a microwave roasting rack to catch drippings.
Salmon Steaks
HIGH
6 to 8 minutes
Add 1 to 2 tbsp lemon juice
• Food should still be somewhat icy in the center when removed from the Microwave Oven.
• The turn table must be used at all times. There may be some foods that are too large to fit inside the microwave oven.
15
8
USING YOUR MICROWAVE OVEN
BEVERAGE and POPCORN
Use the function to cook beverage and popcorn without entering a Cook Time or Power
MAINTENANCE
Cleaning and Care
Routine cleaning will enhance the performance and reliability of your Westinghouse MicrowaveOven. Clean the oven on a weekly
basis or more often if needed.
Example: To cook a 3.5 oz. bag of microwave popcorn
Display Shows
1. Press POPCORN 3.5 oz
2. After 5 seconds the Microwave Oven will automatically
start counting down.
3. At the end of cooking time 5 short tones will sound.
To ensure safe and efficient operation, be sure to keep the inner door, door seal, hinges and latches clean and free of food residue.
3.5 oz
• Wipe spills and splatters from the interior after each use to avoid arcing.
• Clean all oven surfaces with soft, lint-free cloths and a mild, non-abrasive detergent.
• Wash the turntable roller ring by hand.
• The glass turntable may be washed in the dishwasher.
NOTE:
Level. Refer to COOKING TABLE below for more information.
Directions: Follow package instructions. Use popcorn package which is made especially for microwave cooking. Heat only 1 package
at a time. Do not leave the Microwave Oven unattended while popping popcorn. When popping prepackaged popcorn; Fold each end
of the bag in half toward the center top of the bag. Place carefully so the bag does not touch the Microwave Oven walls.
• Never use any type of chemicals, solvents or abrasive cleaners on the oven surface.
• Unplug the oven before cleaning exterior surfaces or vents -OR -Clean with the oven door open to prevent the oven from
accidentally turning on.
After Cleaning
• Be sure to replace the turntable roller ring and turntable in the proper position.
• If necessary, press STOP/CANCEL to clear the display window.
• If the oven was unplugged, plug it back in and reset the clock.
COOKING TABLE
Table 2. Cleaning and Care of the Microwave Oven
CATEGORY
PRESS
DISPLAY SHOWS
SERVING SIZE
1 time
1 cup
2 times
2 cups
BEVERAGE
3 times
Surface
Cleaning Surface
Door
Wipe the window on both sides with a damp cloth to remove any spills or spatters. Do not use any type of abrasive cleaner.
Gently wipe around the inside of the doorframe, seals, latches and hinges to remove any food particles and condensation.
Exterior
Clean with mild soap and water. Rinse and dry with a soft cloth. Do not use any type of abrasive cleaner.
Interior
Clean with mild soap and water. Rinse and dry with a soft cloth. Do not use any type of abrasive cleaner. For heavier soil, use
baking soda or a mild soap. Rinse thoroughly with hot water. NEVER USE OVEN CLEANERS INTENDED FOR CONVENTIONAL OVENS.
3 cups
4 times
Go back to 1 cup
1 time
3.5 oz.
2 times
3.O oz.
3 times
1.5 oz.
4 times
Go back to 3.5 oz.
Odor Removal
Control Panel
Turntable and Turntable
Roller Ring
POPCORN
7
Wave Guide Cover
Vents
To remove odors:combine 1 cup water,grated peel and juice of 1 lemon and several whole cloves in a 2 cup, microwave-safe,
glass measuring cup. Boil for several minutes using 100%power. Leave the liquid in oven until it cools. Wipe the interior with a
soft, dry cloth.
Open the oven door before cleaning. GENTLY wipe the panel with a slightly dampened cloth. Dry with a soft cloth. Do not scrub
or use any detergents, solvents, chemicals or abrasive cleaners. Close the oven door and press STOP/CLEAR.
You may remove the turntable and roller ring from the oven for cleaning. Wash them in warm water using a mild detergent. For
stubborn stains use a mild cleanser and scouring sponge. The glass turntable (not the roller ring) may be washed in the
dishwasher.
The wave-guide cover is a light brown mica panel located on the right side of the oven interior. Carefully clean with mild soap
and water. Rinse and dry with a soft cloth. Do not use any type of abrasive cleaner.
Do not remove the wave-guide cover.
To maintain efficient cooling and ventilation do not allow dust to accumulate on the vents and air intake (located on the rear of
the oven). To keep them clean use a sponge dampen with warm soapy water to clear away.
16
TROUBLESHOOTING
Questions and Answers
Question
Answer
Why is the Microwave Oven light
not on during cooking?
• There may be several reasons why the Microwave Oven light is not on.
• Have you: Set a cooking time? Pressed “START”?
Why does steam come out of the
air exhaust vent?
• Steam is normally produced during cooking. The Microwave Oven has been designed to vent
this steam.
Will the microwave be damaged if it • Yes. Never operate the Microwave Oven empty or without the glass turntable.
operates empty?
Does Microwave energy pass
through the viewing screen in
the door?
• No. The metal screen bounces the energy back to the Microwave Oven cavity. The holes (or
ports) allow only light to pass though. They do not let microwave energy pass though.
Why does a tone sound when a pad
on the control panel is pressed?
• The tone tells you that the setting has been entered.
Can my Microwave Oven be
damaged if food is cooked for
too long?
• Like any other cooking appliance, it is possible to overcook food to the point that the food
creates smoke and even possibly fire, resulting in damage to the inside of the Microwave
Oven. It is always best to be near the Microwave Oven while you are cooking.
• The microcomputer controlling your Microwave Oven may temporarily become scrambled and
When the Microwave Oven is
fail to function as programmed when you plug in for the first time or when power resumes
plugged into wall outlet for the first
after a power interruption. Unplug the Microwave Oven from the 120 volt household outlet
time0 it might not work properly.
and then plug it back in to reset the microcomputer.
What is wrong?
Why do I see reflection around the
outlet case?
• The light is from the Microwave Oven light which is located between the Microwave Oven
cavity and the outer wall of the Microwave Oven.
What are the various sounds I hear
when the Microwave Oven is
operating?
• The clicking sound is caused by a mechanical switch turning the Microwave Oven’s
magnetron “ON” and “OFF.”
• The heavy hum and clunk is from the change in power the magnetron draws as it is turned
“ON” and “OFF” by a mechanical switch. The change in blower speed is from the change in
line voltage caused by the magnetron being turned “ON” and “OFF.”
BEFORE USING FOR THE FIRST TIME
1. Read all instructions in this manual carefully.
2. Carefully unpack your Microwave Oven and remove all packaging materials.
3. Place your Microwave Oven on a level surface such as a countertop or table. Be sure the
sides, back and top of the Microwave Oven are at least four inches away from any walls,
cabinets or objects on the counter or table.
4. Remove all stickers from the Microwave Oven except the rating label located on the back.
5. Wash Glass Turntable and Turntable Roller Rest in warm, soapy water. Rinse and dry
thoroughly before placing in the Microwave Oven.
6. Remove any dust that may have accumulated during packaging. Simply wipe the Microwave
Oven exterior with a clean, damp cloth.
7. Do not use abrasive cleansers.
8. Do not put the Microwave Oven, cord or plug in water.
9. When you are ready to use the Microwave Oven, plug the cord into a 120V AC outlet.
10. To avoid scratching, marring or discoloration, do not store anything on top of the
Microwave Oven during operation.
CAUTION: Always wear protective, insulated Microwave Oven mitts on hands when touching hot
Microwave Oven or hot dishes and food or when inserting or removing baking dish and food.
CAUTION: Never use metal bakeware or aluminum inside of Microwave Oven.
Food
Question
Answer
What is wrong when baked foods
have a hard, dry brown spot?
A hard, dry brown spot indicates overcooking. Shorten the cooking or reheating time.
Why do eggs
sometimes pop?
17
When baking, frying or poaching eggs, the yolk may pop due to steam build-up inside the
yolk membrane. To prevent this, simply pierce the yolk with a wooden toothpick before cooking.
CAUTION: Never Microwave eggs in the shell.
6
Food (Continued)
GETTING TO KNOW YOUR WESTINGHOUSE MICROWAVE OVEN
Model WST3504 Parts and Accessories
P/N22385
Question
Answer
Why are scrambled eggs
sometimes a little dry
after cooking?
• Eggs will dry out when they are overcooked even if the same recipe is used each time.
The cooking time may need to be varied for one of these reasons:
• Eggs vary in size.
• Eggs are at room temperature one time and at refrigerator temperature
another time.
• Eggs continue cooking during standing time.
Is it possible to pop popcorn in
a Microwave Oven?
• Yes, if using one of the two methods described below:
1. Microwave-popping devices designed specifically for microwave cooking.
2. Prepackaged commercial microwave popcorn that is made for specific
times and power output needed.
• Follow exact directions given by each manufacturer for its popcorn
popping product and do not leave the Microwave Oven unattended while the
corn is being popped. If corn fails to pop after the suggested time, discontinue
cooking. Overcooking could result in an Microwave Oven fire.
• CAUTION: Never use a brown paper bag for popping corn or attempt to pop
leftover kernels. Do not pop prepackaged commercial microwave popcorn
directly on the Glass Turntable, place the popcorn bag on a plate.
Why do baked apples
sometimes burst
during cooking?
• The peel has not been removed from the top half of each apple to allow for
expansion of the interior of the apple during cooking. As in conventional
cooking methods, the interior of the apple expands during the cooking process.
Why do baked potatoes
sometimes burn
during cooking?
• If the cooking time is too long, fire could result. At the end of the recommended
cooking time, potatoes should be slightly firm.
• CAUTION: Do not overcook.
Why is additional time required
for cooking food stored in the
refrigerator?
• As in conventional cooking, the initial temperature of food affects total cooking
time. You need more time to cook food taken out of a refrigerator than for food
at room temperature.
P/N22386
Power Supply
Power Consumption
Microwave Output
Frequency
Input Current
Overall Dimensions
120 V AC, 60 Hz
1150 W
700 W
2450 MHz
10 AMPS
18 •” x 12 7/16” x 11 1/32”
Open Cavity Dimensions
12 3/16” x 7 31/32” 11x 5/8”
Effective capacity of Microwave Oven Cavity
0.6 Cu. Ft.
oz
1
cup
lb
1. DISPLAY- Indicates the time of day, cooking time settings and cooking functions.
2
POPCORN
BEVERAGE
AUTO
DEFROST
CLOCK
REHEAT
TIMER
1
2
3
4
5
6
3
2. POPCORN & BEVERAGE - Allows you to cook popcorn and beverage without having to select
cooking times and power levels.
3. AUTO DEFROST- Is an accurate defrosting method for frozen meat, poultry and fish up to 4.0 lbs.
4
6
5
7
4. CLOCK - Allows you to enter the time of day.
5. REHEAT - Allows you to reheat food quickly without having to select cooking times and
power levels.
6. TIMER - Allows you to set time, not a cooking time.
7. NUMBER PADS - Allows you to enter cooking time, power level, quantities and weights.
7
8
8. TIME - Allows you to set a cooking time.
9
9. POWER - Allows you to set the power level.
5
8
TIME
0
POWER
9
10. STOP/CLEAR - Allows you to “Stop” the Microwave Oven or “Clear” entries.
10
STOP
CLEAR
ADD
MINUTE
START
11
11. START - Allows you to “Start” all entries (except the popcorn, beverage, auto defrost, clock
and reheat which start automatically) and to turn Child Lock “On” or “off.”
12
12. ADD MINUTE - Allows you to cook from 1 minute to 10 minutes.
18
Materials to Avoid in a Microwave Oven
BEFORE CALLING FOR SERVICE
YOU CAN OFTEN CORRECT OPERATING PROBLEMS YOURSELF. IF YOUR MICROWAVE OVEN FAILS TO WORK OPERATING PROBLEM IN THE LIST BELOW
AND TRY THE SOLUTIONS LISTED FOR EACH PROBLEM.
Note: If the Microwave Oven still does not work properly, please contact Service and Repair
located on Warranty page.
Problem
Microwave Oven does not start
• Is the power cord plugged in?
• Is the door closed?
• Is the cooking time set?
Arcing or Sparking
• Are you using approved cookware?
• Is the Microwave Oven empty?
Incorrect time of day
• Have you tried to reset the time of the day?
Unevenly Cooked Foods
•
•
•
•
•
Are you using approved cookware?
Is the glass turntable in the Microwave Oven?
Did you turn or stir the food while it was cooking?
Where the foods completely defrosted?
Was the time/cooking power level correct?
Overcooked Food
• Was the time /cooking power level correct?
Improper Defrosting
•
•
•
•
Undercooked Foods
19
Possible Causes
Are you using approved cookware?
Were the foods completely defrosted?
Was the time/cooking power level correct?
Are the ventilation ports clear?
• Are you using approved cookware?
• Was the time/cooking power level correct?
• Did you turn or stir the food during the defrosting cycle?
Cooking
Accessories
(not included with Microwave)
Remarks
Aluminum pan or tray
May cause arcing. Transfer food into microwave-safe dish.
Food carton with
metal handle
May cause arcing. Transfer food into microwave-safe dish.
Metal or metal-trimmed
utensils
Metal shields the food from microwave energy and may cause arcing.
Metal twist ties
May cause arcing and could cause a fire in the oven.
Plastic foam
Plastic foam may melt or contaminate the liquid inside when exposed to high temperature.
Wood
Wood will dry out and may split. Avoid using wooden containers or utensils in the oven.
How Your Microwave Oven Works
The microwave oven has an electronic tube called a magnetron that produces microwaves, very short radio
waves. The microwaves then pass through a wave-guide and into the oven cavity. The microwaves penetrate the
food and cause water molecules within the food to vibrate extremely rapidly. This vibration causes considerable
friction or heat between the water molecules resulting in a rapid rise in temperature. This type of heating is very
efficient and the cooking time is therefore shorter than in a conventional oven. The rate of heating depends on
the moisture content, shape, volume and amount of food present. Metallic materials totally reflect microwaves.
Non-metallic materials such as glass, paper and plastics are partially transparent to microwaves. Microwaves do
not directly heat the oven walls and most cooking utensils because they do not absorb microwave energy.
However, they frequently get very warm through being in direct contact with hot food.
4
GROUNDING INSTRUCTIONS
NOTES:
This appliance must be grounded. In the event of an electrical short circuit, grounding reduces the risk of electric shock by providing
an escape wire for the electric current. This appliance is equipped with a cord having a grounding wire with a grounding plug. The
plug must be plugged into an outlet that is properly installed and grounded.
WARNING – Improper use of the grounding can result in a risk of electric shock.
Consult a qualified electrician or serviceman if the grounding instructions are not completely understood, or if doubt exist as to whether
the appliance is properly grounded.
• Do not use an extension cord. If the power supply cord is too short, have a qualified electrician or service man install an
outlet near the appliance.
Testing Containers and Utensils
Some non-metallic containers and utensils become extremely hot when used in a microwave oven. To avoid risk of scalding, use the
following procedure to determine if a container or utensil is safe for microwave use:
1. Fill a microwave-safe container with 1 cup (250 ml)of cold water. Place it in the microwave oven along with the container
or utensil in question.
2. Turn the oven on maximum power for 1 minute. Do not exceed 1 minute cooking time.
3. Carefully feel the container. If the empty container is warm,do not use it for microwave cooking.
Materials You Can Use in a Microwave Oven
Cooking
Accessories
3
(not included
with Microwave)
Remarks
Dinnerware
Microwave-safe only. Follow manufacturer ’s instructions. Do not use cracked or chipped dishes.
Glass jars
Always remove lid. Use only to heat food until just warm. Most glass jars are not heat resistant and may break.
Glassware
Heat-resistant oven glassware only. Make sure there is no metallic trim. Do not use cracked or chipped dishes.
Oven cooking bags
Follow manufacturer ’s instructions. Do not close with metal tie. Make slits to allow steam to escape.
Paper plates
Use microwave-safe plates only for short-term cooking/warming only. Do not leave oven unattended while cooking.
Paper towels
Use microwave-safe paper towels only to cover food for reheating and absorbing fat. Use with supervision for short-term cooking only.
Parchment
Use as a cover to prevent spattering or a wrap paper for steaming.
Plastic containers
Use microwave-safe containers only. Follow the manufacturer ’s instructions. Containers should be labeled “Microwave-Safe.”
Some plastic containers soften as the food inside gets hot. “Boiling bags ” and tightly closed plastic bags should be slit, pierced,
or vented as directed by package.
Plastic wrap
Microwave-safe only. Use to cover food during cooking to retain moisture. Do not allow plastic wrap to touch food.
Wax paper
Use a cover to prevent splattering and to help retain moisture.
20
LIMITED ONE YEAR WARRANTY
ADDITIONAL IMPORTANT SAFETY INSTRUCTIONS
Warranty: This Westinghouse® • product is warranted by Salton, Inc. to be free from defects in materials or workmanship for a period of (1) year from the original
purchase date. This product warranty covers only the original consumer purchaser of the product.
Warranty Coverage: This warranty is void if the product has been damaged by accident in shipment, unreasonable use, misuse, neglect, improper service, commercial
use, repairs by unauthorized personnel, normal wear and tear, improper assembly, installation or maintenance abuse or other causes not arising out of defects in
materials or workmanship. This warranty is effective only if the product is purchased and operated in the USA, and does not extend to any units which have been
used in violation of written instructions furnished with the product or to units which have been altered or modified or to damage to products or parts thereof which
have had the serial number removed, altered, defaced or rendered illegible.
Implied Warranties: ANY IMPLIED WARRANTIES WHICH THE PURCHASER MAY HAVE ARE LIMITED IN DURATION TO ONE (1) YEAR FROM THE DATE OF PURCHASE.
Some states do not allow limitations on how long an implied warranty lasts, so the above limitation may not apply to you.
Warranty Performance: During the above one-year warranty period, a product with a defect will be either repaired or replaced with a reconditioned comparable model
(at our option) when the product is returned to the Repair Center, or the purchase price refunded. The repaired or replacement product will be in warranty for the
balance of the one-year warranty period and an additional one-month period. No charge will be made for such repair or replacement.
Service and Repair: Should the appliance malfunction, you should first call toll-free 1 (800) 934-7455 between the hours of 9:00 am and 5:00 pm Central Standard
Time and ask for CONSUMER SERVICE stating that you are a consumer with a problem. Please refer to model number WST3504 when you call.
In-Warranty Service (USA): For an appliance covered under the warranty period, no charge is made for service or postage.
Call for return authorization (1 800 934-7455).
1. Oversize foods or oversize metal utensils should not be inserted in a microwave oven as they may create a fire or risk of electric shock.
2. Do not clean with metal scouring pads.
3. Do not store any materials other than manufacturer ’s recommended accessories in this oven when not in use.
WARNING:
TO REDUCE THE RISK OF INJURY TO PERSONS:
1. Liquids such as water, coffee or tea are able to be overheated beyond the boiling point without appearing to be boiling.
2. Do not use narrow necked containers to boil or reheat liquids.
3. To reduce the risk of injury, stir the liquid several times before heating.
4. The liquid may splash out during or after heating or when adding ingredients (instant coffee, etc) resulting in possible harm or
injury to persons.
5. After heating, allow the container to stand in microwave oven for at least 40 seconds before removing the container.
6. Do not heat water and oil, or a fat together which may cause a violent eruption.
Out-of Warranty Service: A flat rate charge by model is made for out-of-warranty service. Include $15.00 (U.S.) for return shipping and
handling. We will notify you by mail of the amount of the charge for service and require you to pay in advance for the repair or replacement.
For Products Purchased in the USA, but Used in Canada: You may return the product insured, packaged with sufficient protection, and postage and insurance prepaid
to the USA address listed below. Please note that all customs duty / brokerage fees, if any, must be paid by you and we will require you to pay the cost of customs
duty / brokerage fees to us in advance of our performing any service.
Risk During Shipment: We cannot assume responsibility for loss or damage during incoming shipment. For your protection, carefully package the product for shipment
and insure it with the carrier. Be sure to enclose the following items with your appliance: any accessories related to your problem, your full return address and daytime
phone number, a note describing the problem you experienced, a copy of your sales receipt or other proof of purchase to determine warranty status. C.O.D.
shipments cannot be accepted.
To return the appliance, ship to:
Attn: Repair Center
Salton, Inc.
708 South Missouri Street
Macon, MO 63552
To contact us, please write to, call, or email:
Salton, Inc.
P.O. Box 6916
Columbia, MO 65205-1637
1(800) 934-7455
Email: [email protected]
Limitation of Remedies: No representative or person is authorized to assume for Salton, Inc. any other liability in connection with the sale of our products. There
shall be no claims for defects or failure of performance or product failure under any theory of tort, contract or commercial law including, but not limited to negligence,
gross negligence, strict liability, breach of warranty and breach of contract. Repair, replacement or refund shall be the sole remedy of the purchaser under this
warranty, and in no event shall Salton be liable for any incidental or consequential damages, losses or expenses. Some states do not allow the exclusion or
limitation of incidental or consequential damages, so the above limitation or exclusion may not apply to you.
Legal Rights: This warranty gives you specific legal rights, and you may also have other rights which vary from state to state.
WESTINGHOUSE™, H and “YOU CAN BE SURE...IF IT'S WESTINGHOUSE™" are trademarks
of WESTINGHOUSE ELECTRIC CORPORATION and used under license by Salton, Inc.
For more information on Salton products: Visit our website: www.eSalton.com
“© 2003 Salton, Inc. All Rights Reserved”
Printed in China
21
P/N 61392
2