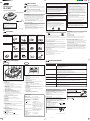
1
Main Features
This unit is incorporated with an MP3 decoder. You can play
back MP3 files (tracks) recorded on CD-Rs, CD-RWs, and CDROMs.
XL-PM1
Electronic anti-Shock Protection (ESP)
MP3/CD-R/CD-RW Playback
CO
MP
DIGI
AC
TA
T
L AU
DIO
HB
THE FOLLOWING NOTICES ARE APPLIED ONLY FOR U.S.A.:
S
What is MP3?
+10
ES
P
ME
C
D
e
Lin
OPE
N
IN
4.5
MP3 is an abbreviation of Motion Picture Experts Group (or MPEG)
Audio Layer 3. MP3 is simply a file format with a data compression
ratio of 1:10 (128 Kbps*). That means, by using MP3 format, one CDR or CD-RW can contain 10 times as much data volume as a regular
CD can.
V
ut
O
Volume
COMPACT
DIGITAL AUDIO
Model No.
Serial No.
C
LVT0788-001A
Printed in China
0601KSMMDWSAM
This device complies with Part 15 of the FCC Rules.
Operation is subject to the following two conditions: (1) This device
may not cause harmful interference, and (2) this device must
accept any interference received, including interference that may
cause undesired operation.
POWERED BY NICKEL-CADMIUM BATTERY.
MUST BE RECYCLED OR DISPOSED OF PROPERLY.
ATTENTION:
The product that you have purchased is powered by a
rechargeable battery. The battery is recyclable. At the end of it’s
useful life, under various state and local laws, it may be illegal to
dispose of this battery into the municipal waste stream.
Check with your local solid waste officials for details in your area
for recycling options or proper disposal.
Any unauthorized changes or modifications to this equipment
would void the user’s authority to operate this device.
INFORMATION (For Canada)
This digital apparatus does not exceed the Class B limits for radio
noise emissions from digital apparatus as set out in the
interference-causing equipment standard entitled “Digital
Apparatus”, ICES-003 of the Department of Communications.
RC
RB
• This player can only read MP3 files that are recorded in the format
that is compliant with ISO 9660 Level 1 or Level 2.
• The player can read or play an MP3 file only with the extension code
—“.mp3”.
• ID3* tags cannot be shown on the display.
Enter below the Model No. and Serial No. which
are located on the top or bottom of the cabinet.
Retain this information for future reference.
V
* Bit rate is the average number of bits that one second of audio data will
consume. The unit used is Kbps (1000 bits per second).
To get a better audio quality, choose a higher bit rate. The most popular bit
rate for encoding (recording) is 128 Kbps.
MP3 File Compatibility
For customer Use:
J
THIS PRODUCT UTILIZES A LASER.
USE OF CONTROLS OR ADJUSTMENTS OR PERFORMANCE
OF PROCEDURES OTHER THAN THOSE SPECIFIED HEREIN
MAY RESULT IN HAZARDOUS RADIATION EXPOSURE.
DO NOT OPEN COVERS AND DO NOT REPAIR YOURSELF.
REFER SERVICING TO QUALIFIED PERSONNEL.
* An MP3 file can contain file information called “ID3 Tag” where its album
name, performer, track title, etc. are recorded. There are two versions–ID3v1
(ID3 Tag version 1) and ID3v2 (ID3 Tag version 2).
Ni-Cd
[J/C]
Precautions
This unit has been designed to play back the following discs:
ELECTR
Do not route the cord
of the AC adaptor in a
way it will be walked
on or be pinched.
When not in use,
disconnect the AC
adaptor from the AC
outlet.
When unplugging your
player, always pull the
plug, not the cord.
C
IND
U
• Audio CD
RIES
•A
Do not handle the AC
adaptor with wet
hands.
NI
ST
O
S
Safety
Usable Discs
Listening precautions
EST. 1924
SO
•
SU
CAUTION!
N
RE
This equipment has been tested and found to comply with the
limits for a Class B digital device, pursuant to Part 15 of the FCC
Rules.
These limits are designed to provide reasonable protection against
harmful interference in a residential installation.
This equipment generates, uses and can radiate radio frequency
energy and, if not installed and used in accordance with the
instructions, may cause harmful interference to radio
communications. However, there is no guarantee that interference
will not occur in a particular installation. If this equipment does
cause harmful interference to radio or television reception, which
can be determined by turning the equipment off and on, the user is
encouraged to try to correct the interference by one of the following
measures:
• Reorient or relocate the receiving antenna.
• Increase the separation between the equipment and receiver.
• Connect the equipment into an outlet on a circuit different from
that to which the receiver is connected.
• Consult the dealer or an experienced radio/TV technician for
help.
RB
RC
P
Even if the player is knocked or jolted while listening to a disc,
playback will not be interrupted but will continue without any
interruption.
Instruction Manual
R
RA EPE
ND AT/
OM
OU
CAUTION!
TO REDUCE THE RISK OF FIRE OR ELECTRIC SHOCK, DO
NOT EXPOSE THIS APPLIANCE TO RAIN OR MOISTURE.
MP3 Playback on CD-R/CD-RW
PORTABLE CD PLAYER
GR
WARNING:
CIATI
O
• CD Recordable (CD-R)
Do not play your headphones or earphones at a high volume. Hearing
experts advise against continuous extended play.
If you experience a ringing in your ears, reduce volume or discontinue
use.
Do not use while operating a motorized vehicle. It may create a traffic
hazard and is illegal in many areas.
You should use extreme caution or temporarily discontinue use in
potentially hazardous situations.
Handling
Do not leave your player
in direct sunlight or near
a heat source.
Do not use your player
on uneven or unstable
surfaces.
Do not touch the lens
with your finger or
scratch it.
Do not allow dust or
other contaminants to
come into contact with
or to penetrate into
your player.
Do not place any
object on the top of
your player.
Do not place your
player in a steamy or
humid location.
Do not attempt to take
apart, repair or modify
your player.
Do not insert anything
other than a CD
(CD-R or CD-RW)
inside your player.
Even if your headphones or earphones are an open-air type designed
to let you hear outside sounds, don’t turn up the volume so high that
you can’t hear what’s around you.
Sound can be deceiving. Over time your hearing “comfort level” adapts
to higher volumes of sound. So what sounds “normal” can actually be
loud and harmful to your hearing.
Guard against this by setting your equipment at a safe level BEFORE
your hearing adapts.
To establish a safe level:
Do not place your
player near equipment
generating strong
magnetic fields.
Buttons and Controls
• CD ReWritable (CD-RW)
In addition to the above discs, this unit can play back audio data
recorded on CD-Text, CD-G (CD Graphics) and CD-Extra.
Notes on playing a CD-R or CD-RW:
• The player can play back only finalized CD-Rs/CD-RWs.
• The player can play back CD-Rs or CD-RWs recorded on a personal
computer only if it has been recorded in the CD audio format or
recorded in MP3 format.
• Some CD-Rs and CD-RWs may not be played back because of their
disc characteristics, damage or stains.
• CD-RWs may require a longer readout time. This is caused by the
fact that the reflectance of CD-RWs is lower than for regular CDs.
• MP3 discs (either CD-R or CD-RW) require a longer readout time.
(It differs due to the complexity of the group/file configuration.)
• When both audio CD format tracks and MP3 files are recorded on a
CD-R or CD-RW, this player plays back only one of them which is
recognized first.
• Start your volume control at a low setting.
• Slowly increase the sound until you can hear it comfortably and
clearly, and without distortion.
Once you have established a comfortable sound level:
• Set the dial and leave it there.
Troubleshooting Guide
Main Unit
Display
Check
Problem
1
2 34 5
GR
OU
6
SU
DIG
CO
ITAL
AU
MPA
8
REP
HBS 1 ALL
ESP BATT
CT
Are the batteries inserted correctly?
Is the battery exhausted?
Is the AC adaptor connected correctly?
Is the lid closed?
S
Playback does not start.
•
•
•
•
Is the disc inserted correctly?
Is the disc damaged or deformed?
Has the player been locked with the HOLD switch?
Has the player been moved from a cold place to a hot place?
Abrupt change of temperature may cause condensation to form on the lens. Keep your player in a
warm place until the condensation on the lens has vaporized.
No sound through headphones.
• Is the volume control at the minimum setting?
• Are the headphones connected correctly?
A sound or tracks is skipped.
• Was the unit jolted or knocked?
• Are there dust, fingerprints or scratches on the disc?
Disc cannot be played back.
• Are no MP3 files recorded on the disc?
• Do MP3 files have the extension code—.mp3?
• Are MP3 files recorded in the format compliant with ISO 9660 Level 1 or Level 2?
Noise is generated.
• Are you playing a compatible disc? While playing a non-MP3 file, you will hear a noise. (Note it may
not be an MP3 file although it has the extension code—.mp3.)
“Sorry” appears on the display.
• Have you inserted an incompatible MP3 disc? Some MP3 discs may not be played back because of
their disc characteristics, damage or stains.
+ 10
ES
P
ME
e
O
IN
6
V
4.5
7
8
ut
1 Operation indicator
2 CD indicator
Volume
9 p q w er
t y
Lights up while loading an audio CD format disc.
3 MP3 indicator
Lights up while loading an MP3 disc.
4 RANDOM indicator
1 Lid
By sliding the OPEN switch to the right, you can open the lid and
load a disc.
2 7 (stop) button
Press this button to stop playback.
– Pressing this button while in stop mode shuts off the power
(“OFF” appears on the display).
3 GROUP button
• Press this button to skip groups while playing an MP3 disc.
• Press and hold this button to turn on or off Group play while
playing an MP3 disc.
4 REPEAT/RANDOM button
• Press this button to select Repeat play.
• Press and hold this button to turn on or off Random play.
5 4 / ¢ (reverse skip/forward skip) button
• Press this button to skip tracks (files) in the reverse way.
• Press and hold this button to search for a particular point on a
track (file) in the reverse way.
6 EXT BATT (external battery) connectors
7 HBS button
Press this button to reinforce the bass sounds.
8 HOLD switch
By sliding this switch to the right, you can prohibit button
operations.
9 OPEN switch
By sliding this switch to the right, you can open the lid and place a
disc.
p ESP/RESUME button
• Press this button to turn on or off ESP (Electronic anti-Shock
Protection) while loading an audio CD.
• Press this button to turn on or off Resume play while loading an
MP3 disc.
q Volume control
w 6 (play/pause) button
Press this button to (re)start or pause playback.
– Pressing this button while the power is off turns on the player.
e
(Headphones) jack
r Line Out jack
t DC Input jack (DC IN 4.5V
y +10 button
)
Press this button to skip 10 tracks (files) at a time.
XL-PM1[J]_f
•
•
•
•
RANDOM
DIO
Lin
N
Unit has no power.
CD MP3
C
D
O PE
1 23 4 5
EXT BATT
R
RA EPE
ND AT/
OM
P
HB
RE
7
1
Lights up during Random play (tracks are played at random).
5 REPEAT 1/ALL indicator
Lights up during Repeat play.
• REPEAT 1: Select to play a track repeatedly.
• REPEAT ALL: Select to play all tracks on a disc repeatedly.
6 ESP indicator
Lights up while Electronic anti-Shock Protection is in use. (Without
this indicator lit, ESP is always active for MP3 playback.)
7 Main display
Group number, track number, playing time, etc. appear while
operating the player.
8 BATT indicator
• Always lights up when the power is on.
• Flashes when the batteries are discharged.
Specifications
Portable CD player
Type:
Compact disc player
Signal detection system: Non-Contact optical pick up
(semiconductor laser)
Number of channels:
2 channels (stereo)
Frequency range:
20 Hz to 20,000 Hz
Output:
(Headphones):
3.5 mm dia. stereo x 1
5.5 mW, per channel, at 16 Ω
impedance
Line Out:
(3.5 mm dia. stereo x 1) 670 mV/47 kΩ
Power requirements : DC 3 V (LR03, “AAA” size battery x 2)
DC 2.4 V (rechargeable battery x 2)
EXT BATT:
DC 3 V (LR6, “AA” size battery x 2)
DC IN 4.5 V
Dimensions (W x H x D):Excluding buttons and controls
130 mm X 30 mm X 143 mm
(5-1/8 in. x 1-3/16 in. x 5-11/16 in.)
Mass (without batteries) :Approx. 242 g (0.54 lbs)
AC adaptor
Input power source:
Output voltage:
3 Connect the AC adaptor to the DC
When purchasing rechargeable batteries
For safety, JVC’s portable CD players have been designed not to allow
you to charge dry cell batteries.
It is recommended to use the rechargeable Ni-Cd batteries
—P-4SPA/2B (in USA) or P-4SPC/2B (in Canada)—two batteries
included in the package.
• If the recommended batteries are not available, purchase the
equivalent.
7 Charging procedure:
—P-4SPA or P-4SPC:
Strip the sheath covering the terminals of the
rechargeable battery before inserting into the battery
compartment.
6mm
2 Insert rechargeable batteries (not
supplied), by matching the
polarity (+ and –).
• For details, see “When using the player
outdoors” on the reverse page.
AC 120 V , 60 Hz
DC 4.5 V, 500 mA
To be continued on the right column
Accessories
Headphones (1), External battery case (1), AC adaptor (1)
01.6.14, 10:10 AM
).
4 Connect the plug of the AC
adaptor to an AC outlet.
Battery charging starts (and completes in
6 hours).
DC IN
C
D
Lin
e
O
IN
5V
4.
ut
5 When battery charging is completed, unplug the AC
adaptor from the power outlet and the DC Input jack
(DC IN 4.5V
).
1 ONLY when using the rechargeable battery
• As shown in the illustration, with a
knife carefully strip the sheath of the
negative (–) terminal by 6 mm.
• If the sheath is not stripped,
charging will not start.
Input jack (DC IN 4.5V
7 To use the player for much longer hours
By connecting the external battery case (supplied), you can extend the
use time of this player.
• Use two “AA” (LR6) alkaline 1.5 V dry-cell batteries (not supplied).
Preparations
How to Supply the Power
MP3 group/file configuration
Hierarchy
Root
Before starting play....
• Turn the Volume control to the minimum (to the right).
• Connect the headphones to the Headphones jack ( ).
1 Open the battery compartment lid
of the external battery case.
You can select the best power source for your own needs.
Disc Playback
6
7
1
1
O
1
2
: Groups
pe
: MP3 files
n
When using the player indoors
C
D
2 Insert two batteries, by matching
Use the AC adaptor supplied with your player.
the polarity (+ and –) on the
batteries with the + and –
markings on the battery
compartment.
1 Connect the AC adaptor to the DC
Input jack (DC IN 4.5V
).
2 Connect the plug of the AC
Lin
e
O
IN
5V
4.
ut
9
10
11
2
*
8
1 Slide the OPEN switch in the direction of
12
3
the arrow to open the lid.
13
14
DC IN
adaptor to an AC outlet.
3 Close the lid.
When not in use, disconnect the AC
adaptor from the AC outlet.
C
D
Lin
e
O
IN
2 Place a disc.
EXT BATT
5V
4.
ut
4 Insert the fixing screw and the
external battery case connectors
on the external battery case into
the rear of the player.
7 To enjoy the player’s sounds through your audio system
Using a stereo connection
LINE OUT
cable—one end with stereo miniplug, the other end with two pin
plugs (not supplied), you can
listen to the playback sound of
(White)
this player through your audio
system.
(Red)
• Connect the cable to amplifier
Stereo connection cable
after turning it off.
(not supplied)
• Do not connect the cable to
the PHONO jacks on the amplifier.
• Adjust the volume level on the amplifier.
EXT BATT
C
D
Lin
e
O
IN
5V
4.
Amplifier
ut
CD/AUX
RANDOM
CD MP3
of the arrow to secure external
battery case tightly in position.
*
Track number
R
Disc played
When using the player outdoors
Use two “AAA” (LR03) alkaline 1.5 V dry-cell batteries or rechargeable
batteries (both not supplied).
• When using dry-cell batteries: It is recommended to use Alkaline
batteries (longer battery life than Manganese batteries).
• When using rechargeable batteries: See also “When purchasing
rechargeable batteries” on the reverse page.
1 Open the battery compartment lid.
Main unit
External
battery case
Main unit &
External battery case
Audio CD
6 hours
16 hours
22 hours
MP3 disc
4 hours
11 hours
15 hours
Cautions on handling batteries
• Do not charge dry-cell batteries.
• Do not mix the new batteries with the old ones.
• Do not expose batteries to heat or flame.
• Remove the batteries if they are not in use for a long time.
• Remove dry-cell batteries when connecting the AC
adaptor.
1 Connect a car audio cassette
Car audio system
Cigar lighter
adaptor (not supplied) to the
headphones jack ( ) on the
player.
2 Insert two batteries, by matching
the polarity (+ and –) on the
batteries with the + and –
markings indicated on the player.
RANDOM
REP
HBS 1 ALL
ESP BATT
How are MP3 files recorded and played back?
MP3 “files (tracks)” can be recorded in “group” —folders or
directories, in PC terminology.
During recording, the files and groups can be arranged in a way
similar to arranging files and folders/directories of computer data.
“Root” is similar to the root of a tree. Every file and group can be
linked to the root.
In compliance with ISO 9660, the maximum allowable depth of
nested directories—so-called “hierarchy”—is eight (inclusive of
the root).
Flashes.
To resume play, press 6 (play/pause) again.
To stop playback, press 7 (stop).
• When you stop playback during MP3 playback, see “Resuming
Playback—Only for MP3.”
RANDOM
CD MP3
REP
HBS 1 ALL
ESP BATT
Total track number
Total playing time
To turn off the power, press 7 (stop) again.
• When you turn off the player during MP3 playback, see “Resuming
Playback—Only for MP3.”
MP3
REP
HBS
1 ALL
If the player is left in stop mode for 10 seconds, it
automatically turns off—Auto power off.
• Adjust the Volume control on this
player properly.
D
C
IN
4.
DC IN
5V
Volume
(Headphones)
When removing the batteries, open the
battery compartment lid, then pull the strap so
that the batteries come out.
Strap
If your car audio system has an line input jack, connect to
the Line Out jack on the unit using a cord with stereo miniplug—3.5 mm diameter (not supplied).
To remove the disc, slide the OPEN switch in
the direction of the arrow to open the lid, then
remove the disc.
• Hold the disc as illustrated when removing it
from the player.
• When you open then close the lid while the
power is on, the player automatically turns off.
Playback order, file search order, and group search order of the
MP3 files recorded on a disc are determined by the writing (or
encoding) application; therefore, playback order may be different
from the one you have intended while recording the groups and
the files.
The illustration above shows an ordinary example of how MP3
files are recorded on a CD-R or CD-RW, how they are played
back, and how they are searched on this player.
• The numbers in circles next to the MP3 files ( ) indicate the
playback order and search order of the MP3 files. Normally this
player plays back MP3 files in the recorded order.
• The numbers inside the groups indicate the playback order and
search order of the groups on an MP3 disc. Normally this unit
plays back MP3 files in the groups in the recorded order.
The group marked with asterisk (*) will be skipped since they
are not including any MP3 files.
DO NOT open the lid during play.
Do not operate the player while driving.
Disc Playback (Continued)
19
CD MP3
2 Insert the car audio cassette
3 Replace the lid.
6
27
20
21
RANDOM
adaptor into your car audio
system as in the figure.
16
17
18
To stop playback for a moment
Press 6 (play/pause) during play.
When using the player in a car
When purchasing a car audio cassette adaptor (not supplied), check
whether it can be used for your car audio system.
5
Playing time
EX.: When playing an audio CD
Battery Life (Using alkaline batteries)
25
26
8
REP
HBS 1 ALL
ESP BATT
Once the disc type (CD or MP3) is
recognized, playback starts.
5 Turn the LOCK knob in the direction
24
*
5
4 Press 6 (play/pause).
L
15
3
4
3 Push the lid to close it.
+1
0
22
23
7
4
• When placing a disc, press down the portions
around the center hole until the disc is fixed in
place correctly as in the figure.
Maintenance
Other Functions
Playing a Group—For Only MP3
While playing back an MP3 disc, you can select a group—Group play.
Locating a Particular Point
To turn on or off Group play
You can locate a particular point in a track or file during play—Search.
Press and hold ¢ or 4.
• ¢ : Fast-forwards the tracks (or files) .
• 4 : Fast-reverses the tracks (or files) .
Skipping Tracks or Files
20
30
+10
40
41
42
43
RANDOM
CD MP3
REP
HBS 1 ALL
ESP BATT
RANDOM
CD MP3
REP
HBS 1 ALL
ESP BATT
• When Group play is turned on (“On group”), you can select a
group and play back files in a group by pressing GROUP (then move
to another group).
ESP BATT
+10
Total group number
Total file number
7 During playback
The +10 button works only if a disc (or a group—during
Group play) includes more than 10 tracks (files).
Playing Repeatedly
• Each time you press the button, Repeat play
changes and the following indicator lights up
on the display.:
ALL
1
Press GROUP repeatedly while loading
an MP3 disc.
RANDOM
CD MP3
REP
HBS 1 ALL
ESP BATT
1:
To repeat the current track or file.
REP ALL: To repeat playback of all tracks or files.
To cancel Repeat play, press REPEAT/RANDOM so that the
indictor goes off.
REP
Playing at Random
You can play back all track(s) and file(s) at random—Random play.
Random play ends when all tracks or files are
played once.
• Each time you press and hold the button, the
RANDOM indicator lights up or goes off
alternately.
REPEAT/
RANDOM
RANDOM
CD MP3
REP
HBS 1 ALL
ESP BATT
You cannot use Repeat play and Random play at the same
time.
2
RANDOM
REP
HBS 1 ALL
ESP BATT
• Irregular-shape discs
(heart-shape, octagonal, etc.)
Continued use of such shape discs can
damage the unit.
To cancel Hyper-Bass Sound, press HBS again
so that “Off Hbs” appears on the display.
Using Electronic Anti-Shock Protection
With Electronic anti-Shock Protection (ESP) turned on, playback will
not be interrupted but will continue normally if the player is knocked or
jolted while listening to a disc.
• This function minimizes sound interruption caused by vibrations, by
utilizing audio data stored in the buffer before being reproduced as
sounds.
• While playing an MP3 disc, ESP is always activated though
the ESP indicator is not lit. (You cannot cancel it).
Press ESP/RESUME, while loading an
audio CD disc, so that the ESP indicator
lights up on the display.
ESP
RANDOM
The unit
• Wipe the unit with a soft cloth.
• When removing stubborn dirt, use a cloth which has been dipped in
water or soapy water and wrung out, then wipe the unit again with a
dry cloth.
• If you intend to use a chemically treated cleaning cloth, read its
instruction manual first.
• Do not use alcohol or paint thinner.
The lens
RESUME
RANDOM
CD MP3
REP
HBS 1 ALL
ESP BATT
• When ESP is turned on, the data is stored—:
For audio CD format discs: Up to 45-second signals
For MP3 discs:
Up to 100-seconds signals
Open the lid and clean the lens as shown in the figure.
Use a cotton swab to gently wipe off any fingerprints.
• If moisture has formed on the lens, you need to wait about one hour
for the moisture to evaporate.
Lens
Air blower for
camera lens
ESP
Lens
ESP is automatically canceled when the voltage power
drops (below 1.7 V).
Preventing Unintended Operations
ESP
• Each time you press the button, Resume play
turns on (“On RESU”) or off (“Off RESU”)
alternately.
• Deformed discs
Place a heavy book (4 kg – 5 kg) on the disc for at
least one day.
Service
When you start playing an MP3 disc, Resume play is automatically
activated.
Resume play works as follows:
• When you stop or turn off the player during MP3 playback, this
player will start the last file you have listened to, next time you start
playback.
CD MP3
RANDOM
REP
HBS 1 ALL
ESP BATT
To cancel ESP, press ESP/RESUME again so that the
indicator goes off.
Resuming Playback—Only for MP3
To cancel Resume play, press ESP/
RESUME while loading an MP3 file.
To cancel Random play, press and hold REPEAT/RANDOM again so
that the RANDOM indicator goes off.
XL-PM1[J]_f
GROUP
• Each time you press the button, the next group
is selected, and the first file in that group starts
playing.
Group play cannot be possible on MP3 discs without
groups (folders) recorded.
REP
• Cleaning your discs
Wash the disc with a neutral detergent diluted in
water, and then wipe gently with a soft dry cloth from
the center of the disc to the outside.
CD MP3
• Each time you press the button, the ESP
indicator lights up or goes off alternately.
To skip groups during Group play
Canceled
Press and hold REPEAT/RANDOM so
that the RANDOM indicator lights up on the
display.
Playing time
REPEAT/
RANDOM
REP
REP
ESP BATT
• When Group play is turned off (“Off group”), you can select and
play back files in the same way as you select tracks for an audio CD.
(Indications are also the same as while playing an audio CD.)
You can play back a track(s) or file(s) or entire disc repeatedly
—Repeat play.
Press REPEAT/RANDOM briefly.
The current file number
in the group and the
group number alternate
(scroll).
HBS
• Each time you press the button, Group play
turns on (“On Hbs”) or off (“Off Hbs”)
alternately.
To cancel Group play, press and hold GROUP
again so that “Off group” appears on the display.
Indications on the display
7 Before playback
• Handling your discs
Carefully pick up the disc by its edge
without touching the disc’s surface.
You can reinforce the bass sound—HBS (Hyper-Bass Sound).
Press HBS.
RANDOM
Example: To select track (or file) number 43, while playing back track (or file)
number 15.
+10
GROUP
• Each time you press and hold the button,
Group play turns on (“On group”) or off (“Off
group”) alternately.
REP
HBS 1 ALL
ESP BATT
To skip 10 tracks or files at a time
Press +10 while playing back a disc.
15
Press and hold GROUP while loading an
MP3 disc.
CD MP3
To go to another track (or file)—Skip
Press ¢ or 4 repeatedly.
• ¢ : Skips to the beginning of the next or
succeeding tracks (or files) .
• 4 : Goes back to the beginning of the
current or previous tracks (or files) .
Discs
Reinforcing the Bass
You can prevent unintended operations while carrying the player, etc.
Slide the HOLD switch to the right (in
the direction of the arrow) to lock the
buttons.
HOLD
• When the HOLD switch is set to the right
position, no button can work. If you press a
button, “HOLD” will appear on the display.
RESUME
To unlock the button operations, slide the
HOLD switch back to the left position.
CD MP3
REP
HBS 1 ALL
ESP BATT
To cancel Resume play, press ESP/RESUME
again so that “Off RESU” appears on the display.
01.6.14, 2:22 PM
HOLD
Damage Requiring Service—The unit should be serviced by
qualified service personnel when:
(a)
(b)
(c)
(d)
The AC adaptor is damaged; or
Objects have fallen or liquid has been spilled into the unit; or
The unit has been exposed to rain; or
The unit does not appear to operate normally or exhibits a marked
change in performance; or
(e) The unit has been dropped, or the enclosure damaged.