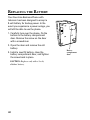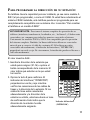
1
TABLE OF CONTENTS
TABLE OF CONTENTS ............................................................................................. 1
INTRODUCTION ..................................................................................................... 4
BEFORE YOU BEGIN .............................................................................................. 5
PARTS CHECKLIST ............................................................................................. 5
MODULAR JACK REQUIREMENTS ......................................................................... 6
GETTING STARTED ............................................................................................ 6
INSTALLATION ....................................................................................................... 7
DESKTOP INSTALLATION .................................................................................. 7
WALL MOUNT INSTALLATION .......................................................................... 9
SETTING UP YOUR STATION ADDRESS ............................................................... 11
CHANGING THE PHONE
TO A 2-9450 MODEL ............................................................................... 13
SYSTEM VERIFICATION ..................................................................................... 14
OTHER STATIONS ........................................................................................ 14
YOUR STATION ........................................................................................... 14
CLOCK SETUP ................................................................................................ 15
PROGRAMMING THE HOUR FORMAT ................................................................ 15
SETTING THE TIME ....................................................................................... 15
HEADSET ....................................................................................................... 15
BASIC OPERATION ............................................................................................... 16
MAKING OUTSIDE CALLS ................................................................................. 16
USING THE HANDSET ................................................................................... 16
USING THE SPEAKERPHONE ........................................................................... 16
USING THE HEADSET ................................................................................... 17
RECEIVING INCOMING CALLS ............................................................................. 17
USING THE HANDSET ................................................................................... 17
USING THE SPEAKERPHONE ........................................................................... 17
USING THE HEADSET ................................................................................... 18
SWITCHING BETWEEN USING THE SPEAKERPHONE, HANDSET, AND HEADSET ......... 18
TIMER ........................................................................................................... 18
MUTE ........................................................................................................... 19
DO NOT DISTURB ........................................................................................... 19
HOLD ............................................................................................................ 20
PLACING A CALL ON HOLD ............................................................................ 20
PICKING UP A CALL ON HOLD ....................................................................... 20
FLASH ........................................................................................................... 20
TEMPORARY TONE .......................................................................................... 20
REDIAL .......................................................................................................... 21
1
REVIEWING THE REDIAL BUFFER ..................................................................... 21
AUTOMATIC BUSY REDIAL ................................................................................ 21
WHEN YOU RECEIVE A BUSY SIGNAL ............................................................. 21
BUSY REDIAL IS CANCELLED WHEN ................................................................ 22
TRANSFER ...................................................................................................... 22
TRANSFERRING A CALL TO ANOTHER STATION .................................................. 22
RECEIVING A TRANSFER FROM ANOTHER STATION ............................................. 23
PRIVACY ........................................................................................................ 24
PROVIDING PRIVACY ON A CALL ..................................................................... 24
VOLUME ........................................................................................................ 24
RINGER VOLUME ......................................................................................... 24
SPEAKERPHONE, HANDSET, AND HEADSET VOLUME .......................................... 25
CONFERENCE .................................................................................................. 25
INTERCOM ...................................................................................................... 26
ONE-TOUCH INTERCOM ................................................................................. 26
INTERCOMING A STATION .............................................................................. 26
OVERRIDING A STATION USING DO NOT DISTURB ............................................ 27
RECEIVING AN INTERCOM .............................................................................. 27
PAGING ALL STATIONS ................................................................................. 27
PAGING A GROUP ........................................................................................ 28
DISABLING OR ENABLING PAGE ...................................................................... 28
MEMORY ....................................................................................................... 29
STORING A NUMBER .................................................................................... 29
CHANGING A STORED NUMBER ...................................................................... 30
STORING A CHAIN OF NUMBERS .................................................................... 30
STORING THE LAST NUMBER DIALED .............................................................. 31
STORING A PAUSE ....................................................................................... 31
STORING A FLASH ....................................................................................... 31
SPECIAL MEMORY STORAGE INFORMATION ...................................................... 31
DIALING A STORED NUMBER ......................................................................... 32
CHAIN DIALING ........................................................................................... 32
REVIEWING A NUMBER STORED IN A MEMORY LOCATION ................................... 33
STORING A MEMO ....................................................................................... 33
REVIEWING A MEMO .................................................................................... 33
STORING A MEMO INTO A PERMANENT MEMORY LOCATION ............................... 33
DATA PORT .................................................................................................... 34
2
SPECIAL FEATURES .............................................................................................. 35
ADJUSTING THE RINGERS ................................................................................. 35
ADJUSTING THE CONTRAST OF THE DISPLAY ........................................................ 35
SETTING THE PRIORITY LINE .............................................................................. 36
PROGRAMMING THE PAUSE DURATION ................................................................ 36
PROGRAMMING THE FLASH DURATION ................................................................ 36
PROGRAMMING THE EXTENSION NUMBER ........................................................... 37
PROGRAMMING A PAGE GROUP ......................................................................... 37
PROGRAMMING THE PULSE/TONE MODE ............................................................. 37
ADJUSTING DO NOT DISTURB .......................................................................... 38
ADJUSTING THE AUTOMATIC BUSY REDIAL TIME INTERVAL .................................... 38
ADJUSTING THE WAIT FOR BUSY TONE DETECT .................................................. 38
SETTING AUTO INTERCOM ................................................................................ 39
CHANGING A STATION ADDRESS ........................................................................ 39
TROUBLESHOOTING GUIDE ................................................................................... 40
REPLACING THE BATTERY ...................................................................................... 42
GENERAL PRODUCT CARE .................................................................................... 43
SERVICE ............................................................................................................ 44
INDEX ............................................................................................................... 45
LIMITED WARRANTY ............................................................................................ 47
CAUTION
RISK OF ELECTRIC SHOCK
DO NOT OPEN
WARNING:
TO PREVENT FIRE
OR ELECTRICAL SHOCK HAZARD,
DO NOT EXPOSE THIS PRODUCT
TO RAIN OR MOISTURE.
THE LIGHTNING
FLASH AND ARROWHEAD WITHIN THE
TRIANGLE IS A
WA R N I N G S I G N
ALERTING YOU OF
"DANGEROUS
VOLTAGE" INSIDE
THE PRODUCT.
CAUTION: TO REDUCE THE
RISK OF ELECTRIC SHOCK,
DO NOT REMOVE COVER
(OR BACK). NO USERS E R V I C E A B L E PA R T S I N SIDE. REFER SERVICING
TO QUALIFIED SERVICE
PERSONNEL.
THE EXCLAMATION
POINT WITHIN THE
TRIANGLE IS A
WARNING
SIGN
ALERTING YOU OF
I M P O R T A N T
INSTRUCTIONS
A C C O M PA N Y I N G
T H E P R O D U C T.
SEE MARKING ON BOTTOM / BACK OF PRODUCT
3
INTRODUCTION
Your Four-Line Business Phone with Intercom is a full-featured phone
ideally suited for home or office use. It is designed to receive up to 4
incoming telephone lines and to serve up to 16 station users. In an
installed system, your phone provides such features as: 32 memory
locations, busy redial, hold, conference call, intercom, call transfer, LCD
display, and speakerphone capabilities.
Please read this user’s guide carefully to familiarize yourself with all the
features of your new phone. Also, make sure to retain this guide for future
reference.
4
BEFORE YOU BEGIN
PARTS CHECKLIST
Make sure your package includes the following items:
STORE IN
TIMER
TIME SET
MEMO
REVIEW
1
2
3
4
5
6
7
8
LOWER
PAGE
9
10
11
13
14
BUSY REDIAL
FLASH
12
15
PAUSE
PRIVACY
GHI
16
TRANSFER
1
ABC
2
DEF
3
4
JKL
5
MNO
6
8
WXYZ
7
TUV
*
OPER
PQRS
CONF CALL
LINE 4
LINE 3
9
LINE 2
VOLUME
TONE
HEADSET
MUTE
0
SPEAKERPHONE
#
HOLD
LINE 1
INTERCOM
Base unit
Line cords
Handset
Handset cord
AC power supply
CAUTION: Use only the ATLINKS USA, Inc. 5-2418 power supply that is
compatible with this unit. Using other power supplies may damage the unit.
5
MODULAR JACK REQUIREMENTS
You need an RJ14 type modular jack, which is the most
common type of phone jack and might look like the one
pictured here. If you don’t have a modular jack, call your local
phone company to find out how to get one installed.
GETTING STARTED
VERY IMPORTANT: In order to have full system operation of your phone (i.e.
intercom, transfer, page, etc.), lines 1 and 2 must be connected and common
to all phones connected to the system. Only other 2-9451 or 2-9450 models are
compatible for full system operation. Also, the telephone lines must be
connected before AC power is connected. The phone may not install properly, otherwise.
Your Four-Line Business Phone with Intercom is designed for easy
installation in your home or office. It is important, however, to follow these
few simple guidelines:
• Take a few minutes to read this material so that you thoroughly
understand the sequence of steps to be followed for proper
installation of your business phone.
• As you read the instructions, you may require additional line
cords or other components not included with this product. These
items will be indicated by the words not provided.
NOTE: Make sure you keep these instructions for future reference. You may
need to add stations or make changes to the system later.
6
INSTALLATION
IMPORTANT: It is imperative you follow these steps in sequence for proper
installation of the phone. Telephone line cords must be connected before AC
power connection is made. The phone may not install properly, otherwise.
Also, without AC power or the battery installed, pulse dialing and the flash
function will not operate.
1. Carefully turn over the phone. On the
bottom is the battery compartment door.
Remove the screw on the door with a
screwdriver and open the door.
2. Install a 9V battery, paying close attention
to the battery polarity. Close the battery
compartment door, and tighten the screw
back in place. Carefully turn the phone over
again.
Battery
compartment
door
NOTE: The backup battery is important because should you experience a
power outage, you will still be able to use the phone.
DESKTOP INSTALLATION
1. Connect an end of one of the long
telephone line cords to the jack on
the back of the phone labeled LINE
1,2. Connect the other end to the
wall jack(s) labeled 1 & 2. There are
two possibilities for this connection.
1
• One 2-line RJ14 wall jack.
Connect the other end of the line
cord to the wall jack.
OR
7
• Two single RJ11 wall jacks.
Connect the other end of the line cord
to a 2-line adapter (not
provided). Then connect the adapter to
the wall jacks with two short telephone line cords (also not provided).
If you want to connect LINE 3 and 4, use
the same procedure as in step 1.
2
STORE IN
1
3. Plug the AC power supply cord into
the jack on the back of the unit labeled
AC 9V. Thread the cord behind the
strain relief to stabilize the cord to
prevent it from disconnecting easily.
Then plug the AC power supply into
an electrical outlet.
TIME SET
MEMO
2
REVIEW
3
7
8
10
11
12
14
BUSY REDIAL
15
FLASH
PAUSE
2
16
TRANSFER
1
ABC
4
JKL
5
MNO
7
TUV
8
WXYZ
PRIVACY
GHI
PQRS
DEF
3
6
9
CONF CALL
LINE 4
LINE 3
LINE 2
VOLUME
*
TONE
HEADSET
MUTE
0
OPER
SPEAKERPHONE
#
HOLD
3
4. Follow the steps in “Setting Up Your
Station Address” to continue installing your phone.
CAUTION: Use only the ATLINKS USA, Inc. 5-2418 power supply that is
compatible with this unit. Using other power supplies may damage the unit.
8
LOWER
4
6
9
13
2. For the handset, connect one end of
the coiled handset cord to the jack on
the side of the base unit. Take the
other end of the cord and plug it into
the jack at the bottom of the handset.
Then place the handset in the cradle.
TIMER
5
PAGE
LINE 1
INTERCOM
WALL MOUNT INSTALLATION
1. Turn the handset hook 180º until it clicks
into place.
STORE IN
1
1
5
PAGE
2. Connect one end of the telephone line
cord to the jack on the back of the
phone labeled LINE 1,2. For full 4-line
use, connect a line cord to the LINE 3,4
jack. Thread the LINE 1,2 line cord
through the hole in the wall mount
bracket. Insert the wall mount bracket
onto the bottom of the base unit by
lining up the tabs, making sure to route
the AC power cord and the LINE 3,4
line cord into the slot at the bottom of
the bracket. Snap it into place. Connect
the LINE 1, and LINE 3,4 line cords to
their respective wall jacks.
3. Hold the phone against the wall plate
(not included) so that the posts on the
wall plate slide into the keyholes on the
wall mount bracket. Slide the phone
down firmly so that it locks securely
into place.
9
13
2
3
9
4. For the handset, connect one end of the
coiled handset cord to the jack on the
side of the base unit. Take the other end
of the cord and plug it into the jack at the
bottom of the handset. Then place the
handset in the cradle.
5. Plug the AC power supply cord into the
jack on the back of the unit labeled AC 9V.
Thread the cord behind the strain relief
to stabilize the cord to prevent it from
disconnecting easily. Then plug the AC
power supply into an electrical outlet.
STORE IN
TIMER
TIME SET
MEMO
2
3
4
5
6
7
8
9
10
11
13
14
BUSY REDIAL
FLASH
LOWER
12
15
PAUSE
2
16
TRANSFER
1
ABC
4
JKL
5
MNO
7
TUV
8
WXYZ
PRIVACY
GHI
PQRS
DEF
3
6
9
CONF CALL
LINE 4
LINE 3
LINE 2
VOLUME
*
TONE
HEADSET
MUTE
0
OPER
SPEAKERPHONE
#
HOLD
4
6. Follow the steps in “Setting Up Your
Station Address” to continue installing
your phone.
CAUTION: Use only the ATLINKS USA, Inc. 5-2418 power supply that is
compatible with this unit. Using other power supplies may damage the unit.
10
REVIEW
1
PAGE
5
LINE 1
INTERCOM
SETTING UP YOUR STATION ADDRESS
Your phone has the ability to be set up as either a 2-9451 (the default), or a 29450. If you have an existing 2-9450 system, this phone can be set to be fully
compatible with your system. See “Changing the Phone to a 2-9450 Model.”
VERY IMPORTANT: In order to have full system operation of your phone
(i.e. intercom, transfer, page, etc.), lines 1 and 2 must be connected and
common to all phones connected to the system. Only other 2-9451 or 2-9450
models are compatible for full system operation. Also, the telephone lines
must be connected before AC power is connected. The phone may not install
properly, otherwise.
The display reads Addr-.
1. Enter the station address number you want
to assign (01-16) or press the
corresponding memory button. The display
indicates what station you have entered.
2. Press the # key to confirm.The INTERCOM
indicator flashes red as it checks the
system line connections and station
address. If the line cords are connected
properly and the station address is valid,
you will hear a confirmation tone. This
indicates that the station address has been
successfully assigned.
TONE
STORE IN
1
DATA PORT
TIMER
REDIAL
LINE
TIME SET
3
EXT.
NUMBER
MEMO
2
1234
REVIEW
3
5
6
7
8
9
10
11
12
13
14
BUSY REDIAL
FLASH
15
PAUSE
LOWER
4
16
TRANSFER
CONF CALL
1
ABC
2
DEF
3
4
JKL
5
MNO
6
LINE 3
7
TUV
8
WXYZ
9
LINE 2
*
OPER
PRIVACY
GHI
PQRS
LINE 4
VOLUME
TONE
HEADSET
MUTE
0
SPEAKERPHONE
#
HOLD
LINE 1
INTERCOM
INTERCOM
indicator
11
3. Push the index cover lock to the left
and lift up the acrylic memory index
cover. Remove the memory index card.
In pencil, write all the user’s names
next to the respective stations on the
memory index card.
Index
cover
lock
4. Replace the memory index card, lower
the index cover back into place, and
push the index cover lock to the right
to secure the cover.
STORE IN
NOTE: If you hear an error tone, the
station address number you pressed has
already been assigned to another phone
or the line cords are not properly
connected. Check the line cord
connections, or change the station address
if necessary.
NOTE: If you have lines 3 and 4 on your
phone, you must program extension
numbers for correct operation of the
transfer feature. See “Programming the
Extension Number.”
Lines 3 and 4 DO NOT have to be common for all phones on the system; therefore, the system can have a total of up to
34 lines connected.
12
Memory
index
card
Memory
index
cover
BUSY REDIAL
1
2
3
5
6
7
8
9
10
11
12
13
14
15
16
TIMER
TIME SET
FLASH
MEMO
PAUSE
REVIEW
TRANSFER
1
ABC
2
4
JKL
5
MNO
7
TUV
8
WXYZ
*
OPER
PRIVACY
GHI
PQRS
DEF
3
4
LOWER
CONF CALL
LINE 4
6
LINE 3
9
LINE 2
VOLUME
TONE
HEADSET
MUTE
0
SPEAKERPHONE
#
HOLD
LINE 1
INTERCOM
CHANGING THE PHONE
TO A 2-9450 MODEL
This phone can also be set up to be
compatible with an existing 2-9450
system.
STORE IN
1. Press PROGRAM, which is under
the acrylic memory index cover
and memory index card.
3. Press the # key to confirm. The
display reads Addr-.
4. Enter the station address number
you want to assign (01-16) or press
the corresponding memory button.
The display indicates what station
you have entered.
5. Press the # key to confirm.The
INTERCOM indicator flashes red
as it checks the system line
connections and station address.
If the line cords are connected
properly and the station address
is valid, you will hear a
confirmation tone. This indicates
that the station address has been
successfully assigned.
2
3
5
6
7
8
9
10
11
12
13
14
15
16
TIMER
TIME SET
MEMO
REVIEW
4
LOWER
PAGE
BUSY REDIAL
2. Press 0.
1
FLASH
PAUSE
TRANSFER
ABC
2
4
JKL
5
MNO
6
LINE 3
7
TUV
8
WXYZ
9
LINE 2
GHI
PQRS
DEF
3
CONF CALL
1
PRIVACY
LINE 4
PROGRAM
button
VOLUME
*
TONE
HEADSET
MUTE
0
OPER
SPEAKERPHONE
#
HOLD
LINE 1
INTERCOM
INTERCOM
indicator
NOTE : If you program the 29451 as a 2-9450, the Page
Group feature will not be
available. Line 3 and line 4 must
be common for all phones on
the system.
13
SYSTEM VERIFICATION
The following procedures should be used to test the system’s
configuration and identify possible line connection errors. The phone must
be connected to the AC power outlet, lines 1 and 2 must be connected to
the LINE 1,2 jack, and the phone must be programmed with a station
address number.
OTHER STATIONS
1. Press LINE 1.
2. Look at all the other stations. If they all indicate line 1 is being used, the
connection is correct.
OR
1. Press the INTERCOM button. The display reads INT- and the INTERCOM
indicator comes on.
2. Enter a station address to check by using the keypad. The display
indicates what station you have entered. If the station you entered is
connected to the system, a paging sound will be heard at the station
you are calling and the INTERCOM indicator will flash red. If the station
is not connected to the system, you will hear an error tone, and intercom will be cancelled.
YOUR STATION
1. Press REVIEW.
2. Press INTERCOM. The display will read Addr- with the two-digit station
address (01-16).
NOTE: To change the station address, see “Changing a Station Address.”
14
CLOCK SETUP
PROGRAMMING THE HOUR FORMAT
The clock is capable of being set to a 12- or 24-hour format. The default is
12-hour mode.
1. Press PROGRAM.
2. Press TIME SET.
3. Press 0 for 12-hour mode, or 1 for 24-hour mode.
4. Press # to confirm.
SETTING THE TIME
1. Press TIME SET.
2. Enter the 4-digit time. For instance, in 12-hour mode, 9:00 a.m. would
be 0900.
HEADSET
An optional headset can be used as an alternative to using the handset, and is especially useful
for long calls. Contact Hello-Direct, Plantronics,
or your local telephone products dealer for the
availability of a compatible headset.
Connect the coiled headset cord to the headset
jack on the bottom of the base unit.
When the headset is not in use, simply press
the HEADSET button to turn off headset
mode and return to normal handset or
speakerphone mode.
Headset
jack
CAUTION: Use only an UL registered headset. Using a
non-registered headset may damage the unit.
15
BASIC OPERATION
Your phone provides the convenience of accessing 4 separate telephone
lines, each obtained from the telephone company and each having its own
phone number. This is generally applicable to small offices. It provides for
16 telephones (or stations) to share multiple lines. Each station is
interconnected to all others by an intercom.
MAKING OUTSIDE CALLS
USING THE HANDSET
1. Pick up the handset and the phone will select an open line.
2. Wait for a dial tone.
3. Dial a phone number.
4. Hang up the handset when finished.
USING THE SPEAKERPHONE
1. Press the SPEAKERPHONE button and the phone will select an open line.
2. Wait for a dial tone.
3. Dial a phone number.
4. Press SPEAKERPHONE when finished.
NOTE: Only one-way conversation is possible in speakerphone mode. When
you are speaking, you are transmitting. When you are listening, you are
receiving. You can’t do both at the same time. The phone will automatically
switch between transmitting and receiving depending on the level of the voice
or the room noise picked up by the speakerphone mic.
16
USING THE HEADSET
1. Press the HEADSET button. The HEADSET indicator blinks.
2. Press the line you want.
3. Wait for a dial tone.
4. Dial a phone number.
5. Press HEADSET to turn it off.
NOTE: If the headset is not connected, an error tone is heard when the
HEADSET button is pressed.
RECEIVING INCOMING CALLS
USING THE HANDSET
When the phone rings, the corresponding line’s indicator flashes rapidly.
1. Pick up the handset. The line is automatically selected.
2. When you are finished, hang up the handset.
USING THE SPEAKERPHONE
When the phone rings, the corresponding line’s indicator flashes rapidly.
1. Press the SPEAKERPHONE button. The speakerphone comes on
automatically and selects a line.
2. When you are finished, press SPEAKERPHONE.
17
USING THE HEADSET
1. When the phone rings, the corresponding line’s indicator flashes rapidly.
2. Press the line button. If the headset mode is not on, you must first press
HEADSET. The HEADSET indicator blinks.
3. When you are finished, press the HEADSET.
NOTE: Whether you are making or receiving a call, the caller will be
disconnected if you press another line without putting the call on hold first.
SWITCHING BETWEEN USING THE SPEAKERPHONE, HANDSET, AND HEADSET
To switch to the speakerphone, press SPEAKERPHONE. The speakerphone
indicator will come on.
To switch to the handset, pick up the handset. The speakerphone or
headset will go off.
To switch to the headset, press HEADSET. The headset indicator will
come on.
TIMER
During a phone conversation, a call will be timed. The call time and timer
symbol show on the display. When finished, the total time of the call stays
on the display for 15 seconds. To review the timer once it has disappeared
from the display, press the TIMER button. To review the call timer for all 4
lines, continue pressing TIMER.
18
MUTE
Use the MUTE button to interrupt a phone conversation to talk privately
with someone else in the room. A conversation can be muted with
speakerphone, handset, or headset use.
1. Press MUTE to activate the mute feature. The mute indicator will
come on.
2. Press MUTE again to turn it off.
NOTE: Switching from speakerphone to handset or headset cancels mute.
DO NOT DISTURB
This feature can be set at individual telephones to disable (silence) an
incoming ring signal, intercom, or page. To program the duration of Do
Not Disturb, see “Adjusting Do Not Disturb.”
1. While the phone is not in use, press PRIVACY. The indicator blinks and the
display shows, in hours, how long the ringer will be disabled. When there
is an incoming call or an intercom call, the status indicators will function
as normal but no ringing or voice announcements will be heard.
2. To cancel, press PRIVACY again.
NOTE: To override Do Not Disturb, see “Intercom.” Do Not Disturb is
automatically cancelled when you place or answer a call.
19
HOLD
PLACING A CALL ON HOLD
1. Press HOLD. The indicator for the line on hold flashes green.
2. Hang up or press another line button.
The phone emits a beep every 30 seconds as a reminder. At the other
stations, the indicator will blink red but no beep will be heard.
NOTE: If you put a call on HOLD while in PRIVACY mode, no one but you
can access the line on hold. Anyone trying to access the line will receive an
error tone.
PICKING UP A CALL ON HOLD
1. Lift the handset, or press SPEAKERPHONE or HEADSET.
2. Press the line on hold.
NOTE: The call on hold can be picked up at any station using this procedure.
FLASH
Use the FLASH button to activate custom calling services such as call waiting
or call transfer, which are available through your local phone company.
TEMPORARY TONE
If you have pulse (rotary) service, and want to access customer calling
services that require tone dialing (such as getting information from a local
bank), you can use this feature.
• Press the TONE button ( * ) after you have connected to the customer
calling service to enable tone dialing.
When you hang up, the phone automatically resumes pulse dialing.
TIP: Temporary Tone can also be used while storing numbers in memory by
pressing TONE ( * ) at the necessary point in the storage sequence.
20
REDIAL
1. Pick up the handset, or press SPEAKERPHONE or HEADSET.
2. The line is automatically selected. (For headset, press the line you want.)
3. Wait for a dial tone.
4. Press REDIAL.
NOTE: The redial function will not operate if the number to be redialed
contains more than 30 digits. If the number is longer than that, you will hear
an error tone.
REVIEWING THE REDIAL BUFFER
1. Press REVIEW.
2. Press REDIAL. The last number stored in the redial buffer shows on
the display.
AUTOMATIC BUSY REDIAL
If the phone number dialed is busy, your telephone can automatically
redial the number up to 10 times. It will use the line currently selected to
make the calls.
WHEN YOU RECEIVE A BUSY SIGNAL
1. Hang up the phone.
2. Press BUSY REDIAL. The busy redial indicator will flash between redial
attempts and the speaker will beep when a connection is made. If you
do not pick up the handset or speakerphone within 60 seconds, the
telephone will disconnect.
21
BUSY REDIAL IS CANCELLED WHEN
• You press BUSY REDIAL again.
or
• A call comes in on the same line between redial attempts.
or
• You pick up the handset or press SPEAKERPHONE.
or
• Ten attempts have been made and the line is still busy.
NOTE: Auto busy redial is factory set to a 30 second interval between call
attempts. You can reprogram the interval if you desire. See “Adjusting
Busy Redial.”
TRANSFER
TRANSFERRING A CALL TO ANOTHER STATION
1. With the caller on the line, press TRANSFER.
2. Within 5 seconds of pressing TRANSFER, press the 2-digit station
location button (01-16) or memory button where you wish to transfer the
call. The line’s indicator blinks yellow until the party you are
transferring to picks up the call. Once picked up, the indicator will turn
solid red. The indicator on the receiving party’s line will rapidly flash
yellow and ring at a different frequency until he or she picks up the call.
• If the transferred call has not been picked up at the other station
within 30 seconds, you will hear a beep at your station. The transfer
cancels, the line is put on hold, and the line indicator flashes green.
22
• If the party at the other station doesn’t pick up the transferred call,
and you wish to attempt to transfer to another station, press the line
you want and repeat the transfer process.
• If the station number you pressed is not valid, you will hear an error
tone and the transfer cancels.
• If the party you pressed is in Do Not Disturb mode, DND shows on
the display. The transfer is cancelled and the call is put on hold.
• If the party’s station is busy, BUSY shows on the display.
RECEIVING A TRANSFER FROM ANOTHER STATION
If a call is being transferred to your station, you will hear a different ring
sound. The indicator of the line being transferred to you flashes yellow. To
answer the call, press that line button.
If you are on the line when a call is being transfered to you, you will hear 3
pending beeps to alert you of the call and the light will flash yellow. You
can put your current call on hold by pressing HOLD, then pick up the new
transfered call by pressing the line button.
NOTE: During the transfer, the only two stations that can access the line being
transferred are: a) the transferring station, or; b) the station receiving the transfer.
23
PRIVACY
While in use, a line can be secured so that no one else can listen to the
conversation. This feature only applies to 2-9450/ 2-9451 phones, however.
Other phones which are not compatible with these models can still access
the line.
PROVIDING PRIVACY ON A CALL
At any time during a conversation, you can use the Privacy feature to
secure the line.
1. While on a line, press PRIVACY. The indicator will come on.
2. To cancel, press PRIVACY again or hang up.
NOTE: If you put a call on hold while in Privacy, no one but you can access the
line on hold.
VOLUME
The ringer, speaker, and handset/headset volumes can be set
independently with the VOLUME up and down buttons. Your telephone
comes with preset settings which can be adjusted to individual taste. To
return to the preset settings, press both the up and down buttons
simultaneously. There are 15 possible volume settings per mode. A tone
will indicate when the top or bottom level is reached.
RINGER VOLUME
1. While the phone is on the hook, press the VOLUME up or down button.
The phone will ring with the current setting.
24
2. While holding the up or down button, the ringer volume will sound the
current setting. Release when you’ve reached the desired volume level.
Tapping either button, while the phone is ringing, will allow you to
adjust the volume one step at a time. The phone will store the setting
once the button is released.
NOTE: To turn the ringer off, on, or change the ringing pattern,
see “Adjusting the Ringers.”
SPEAKERPHONE, HANDSET, AND HEADSET VOLUME
• While the phone is in use, press the VOLUME up or down buttons
to the desired volume. The phone will store the setting once the button
is released.
NOTE: The handset and headset volumes will return to the default settings
after you hang up the phone.
CONFERENCE
This feature allows you to have a 3-way conversation using any
combination of 2 lines.
To connect
1. To place a call, press the line you want. If you already have someone on
the line, skip to step 2.
2. Press HOLD.
3. Place a call on another line.
4. Press CONFERENCE.
5. Talk to both parties.
NOTE: If you have more than one line on hold, and you are attempting a
conference, you must select the line you want to conference.
25
To disconnect one of the parties
Simply press the line of the person you want to continue talking to, and
the other party will be automatically disconnected.
To disconnect both parties
Simply hang up the handset, or press SPEAKERPHONE or HEADSET.
NOTE: By pressing HOLD first, you may then disconnect from each party
individually.
INTERCOM
ONE-TOUCH INTERCOM
You can intercom a station by simply pressing the station number
(memory keys 1-16). The handset must be hung up and neither the
speakerphone nor the headset can be in use for this feature to work.
INTERCOMING A STATION
1. If the INTERCOM indicator is red, it is in use. Wait until the indicator
goes out.
2. Press INTERCOM. The indicator will turn green. (Pick up the handset if
you want to use it instead.)
3. Press the 2-digit station number (01-16) or memory button you want.
The station you want will ring and its INTERCOM indicator will flash red.
If the station called does not answer in 90 seconds, intercom will be
cancelled. When the person you want to call answers, the speakerphone
will automatically come on. If you want to use the handset, pick it up.
For the headset, press HEADSET.
4. To end the conversation, hang up or press INTERCOM.
26
NOTE: You will hear an error tone if the station address is not valid or not
connected to the system. If the station you want to reach is busy, the display
will show BUSY and the party will hear a pending tone, alerting him of the
intercom. If the party’s station is in Do Not Disturb (DND) mode, your
station’s PRIVACY indicator will flash. To override DND, see “Overriding a
Station Using Do Not Disturb.”
OVERRIDING A STATION USING DO NOT DISTURB
1. Press INTERCOM.
2. Press the memory location for the station you want to reach. If the
station is in Do Not Disturb (DND), the display will read DND and the
PRIVACY indicator will flash.
3. To override DND, press LOWER, then PRIVACY. The intercom will then
ring at the desired station.
NOTE: This only overrides the privacy at the station you are trying to reach.
All other stations using DND will be unaffected.
RECEIVING AN INTERCOM
The INTERCOM indicator will flash red to let you know someone is trying
to intercom you. The display will also read Int- followed by the station
address attempting to reach you. Press INTERCOM. (Pick up the handset or
press HEADSET if you want to use it instead.)
PAGING ALL STATIONS
1. Lift the handset.
2. Press PAGE and listen for the beep. The other stations will automatically
activate their speakphones and receive your page.
3. Talk into the handset. You will have 30 seconds paging in this mode.
After 30 seconds, the page will be cancelled.
4. When finished, hang up.
NOTE: If no page group number is assigned, all stations will be paged.
27
PAGING A GROUP
1. Lift the handset.
2. Press LOWER.
3. Press PAGE.
4. Press the one digit (1-9) number for the group you want to page. Press 0
to page all stations.
5. Listen for the beep. The other stations in the specified group will
automatically activate their speakphones and receive your page.
6. Talk into the handset. You will have 30 seconds paging in this mode.
After 30 seconds, the page will be cancelled.
7. When finished, hang up.
NOTE: To program your own page group number, see “Programming Your
Page Group.”
Also, phones which have the page function disabled or those that are in Do
Not Disturb mode cannot be paged. Paging can only be done from the
handset or headset.
DISABLING OR ENABLING PAGE
The station page can be disabled or enabled on each individual station.
The default is set to enable.
1. With the handset hung up, press STORE IN.
2. Press PAGE.
3. Press 0 for disable, 1 for enable.
4. Press # to confirm.
28
MEMORY
Each of the 16 memory buttons has the capability of storing 2 separate
telephone numbers (up to 30 digits each). Each memory button accesses
an upper and a lower memory location. The LOWER button accesses those
numbers stored in the lower memory locations.
STORING A NUMBER
1. Press the STORE IN button. The STORE indicator comes on.
2. Enter the phone number you want to store using the keypad digits. The
numbers you enter show on the display.
3. Press STORE IN again. The STORE indicator blinks red.
4. Press the memory location button (1-16) where you want to store the
number. If you want to store it in upper memory, simply press the
memory location button. If you want to store it in lower memory, press
the LOWER button. The red indicator comes on. Press the memory
location button where you want to store the number.
5. For future reference, you may want to write the name or number of the
party you have stored in this location in the corresponding space on the
memory index card.
6. Repeat steps 1-5 for any additional numbers you want to store, up to a
total of 32.
7. To cancel the storing procedure at any time, press STORE IN. If the
indicator is blinking, press it once. If it is continuously lit, press it twice.
NOTE: The storage procedure will automatically cancel after 15 seconds if no
keys are pressed.
Also, when pulse mode is used, pressing the TONE “*” key before
programming will store all digits in tone.
29
CHANGING A STORED NUMBER
If you want to change the stored number, simply enter the new number
over the old number using the previous memory storing procedure. To
erase a stored number, press STORE IN twice, then the memory location
you want to erase.
STORING A CHAIN OF NUMBERS
You can link together a dialing sequence of phone numbers in separate
memory locations by combining them in a single memory location or have
another memory location stored in one of the locations to be linked.
For example
Memory Location
Local access number of long
distance company
6
Authorization code (ID)
7
Where entire sequence is to be stored
including long distance phone number
8
Storing
1. Press STORE IN.
2. Press memory location 6.
3. Press PAUSE.
4. Press memory location 7.
5. Press PAUSE.
6. Enter long distance number.
7. Press STORE IN.
8. Press location 8, where the entire location is to be stored.
9. Write the name for this location on the memory index card.
NOTE: When a chain number is stored in a memory location, it cannot be
stored as another chain number sequence in a separate memory location.
30
STORING THE LAST NUMBER DIALED
You can quickly and easily store into memory the last number dialed by
pressing the redial button. Follow steps #1-7 of “Storing a Number, ” but
press REDIAL instead of entering the number through the keypad.
STORING A PAUSE
Use the PAUSE button to insert a pause when a delay is needed in the
dialing sequence (for example, when you must dial a 9 to get an outside
line or when you must enter codes to access your bank’s information line).
STORING A FLASH
Use the FLASH button to insert a flash into your stored numbers for
special features from your telephone company which may require it.
SPECIAL MEMORY STORAGE INFORMATION
If more than 30 digits are attempted to be stored, an error tone will occur
and the sequence will stop.
Because 30 is the maximum number of digits you can store in a single
memory location, it is important to note the number of digits consumed
when you store function keys. Memory digits are used as follows:
Button pressed
Digits used
Telephone keypad number
1
Pause button
1
Flash button
1
Tone/pulse switching
2
Memory location
3
Redial button
amount of redialed number
31
DIALING A STORED NUMBER
1. Pick up the handset, press SPEAKERPHONE, or press HEADSET.
2. Press the line you want.
3. Wait for a dial tone.
4. Press the memory button of the person you want to call. If the number
is stored in lower memory, press the LOWER button first. The number
automatically dials.
CHAIN DIALING
This process allows you to dial a succession of stored numbers from
separate memory locations. This is useful when you must dial several
sequences of numbers, such as with frequent calls via a telephone
company long distance provider.
For example
Memory location
Local access number of long
distance company
6
Authorization code (ID)
7
Long distance phone number
8
Using
1. Press the line you want.
2. Press memory location 6. (Press pause if needed.)
3. Press memory location 7. (Press pause if needed.)
4. Press memory location 8.
32
REVIEWING A NUMBER STORED IN A MEMORY LOCATION
1. Press REVIEW.
2. Press the memory location you want to review. The display shows the
number stored in that location.
NOTE: If the memory location contains a chain dial number, the display
shows the number of the memory location only.
STORING A MEMO
With this feature, you are able to temporarily store a number into memory
(up to 30 digits), even while you are on the phone.
1. Press MEMO.
2. Enter the phone number you want to store using the keypad digits.
3. Press MEMO to exit.
REVIEWING A MEMO
1. Press REVIEW.
2. Press MEMO. The number will be displayed on the display.
STORING A MEMO INTO A PERMANENT MEMORY LOCATION
1. Press STORE IN.
2. Press MEMO.
3. Press STORE IN.
4. Press the memory location key where you want to store the memo.
33
DATA PORT
This phone is equipped with a DATA PORT jack for you to connect an
auxiliary phone device, such as a fax machine, computer modem,
answering machine, or even a cordless phone.
The DATA PORT switch on the back of the phone controls the Data Port
function by enabling you to choose the line that the DATA PORT uses,
either line 1, line 2, line 3, or line 4.
You can use the DATA PORT to hook up your fax machine, for example,
and then set the DATA PORT switch to LINE 4 in order to receive faxes on
the phone number for line 4.
In the event that you are talking to someone on line 4 and want that
person to fax something to you, change the DATA PORT switch to LINE 2
or LINE 3, and give the person the phone number for line 2 or line 3. Your
fax machine now can receive calls on line 2 or line 3.
IMPORTANT: Be sure to switch the fax machine back to the normal line when
you are done because outside callers who do not know that you have switched
lines will not be able to reach your fax machine if they dial the line 4 number.
34
SPECIAL FEATURES
ADJUSTING THE RINGERS
The ringers for all 4 of the lines can be set independent of one another.
1. Press STORE IN.
2. Press the desired line button.
3. Press 0-4 for different ringer sounds (0 disables).
4. Press # to confirm.
NOTE: The line indicators will still continue to flash for incoming calls even
with the ringer disabled.
ADJUSTING THE CONTRAST OF THE DISPLAY
1. Press STORE IN.
2. Press VOLUME up to increase the contrast, VOLUME down to decrease.
3. Press # to confirm.
NOTE: To change the display to the default contrast setting, press + and together, then # to confirm.
35
SETTING THE PRIORITY LINE
A priority line allows you to select one of the 4 lines to have precedence
over the other 3 lines.
1. Press STORE IN.
2. Press LOWER.
3. Press any line button to enter Priority Line mode.
4. Press the line button you want to have priority.
5. Press # to confirm.
NOTE: To change the priority line, repeat the same process but choose a
different line in step 4.
PROGRAMMING THE PAUSE DURATION
1. Press PROGRAM.
2. Press PAUSE.
3. Press the amount for the duration (0-9); i.e. 1=100ms, 9=900ms. The
default is 0 for automatic dial tone detect.
4. Press # to confirm.
PROGRAMMING THE FLASH DURATION
1. Press PROGRAM.
2. Press FLASH.
3. Press the amount for the duration (1-9); i.e. 1=100ms, 9=900ms. The
default is 6.
4. Press # to confirm.
36
PROGRAMMING THE EXTENSION NUMBER
The line 3 and line 4 extension numbers are used for some of the
advanced functions utilized by the system.
1. Press PROGRAM.
2. Press the line you want to set.
3. Enter the 4-digit extension number (0-9 for each digit).
4. Press # to confirm.
PROGRAMMING A PAGE GROUP
Your station can be assigned to one of a total of 9 groups for the paging
functions. Each station in a page group must be programmed as follows:
1. Press PROGRAM.
2. Press PAGE. PAGE shows on the display.
3. Press the page group number (0-9) you want to assign to your station.
4. Press # to confirm.
NOTE: The default is 0 for no page group assignment.
PROGRAMMING THE PULSE/TONE MODE
1. Press PROGRAM.
2. Press the asterisk (*) key.
3. Press 0 for tone, 1 for pulse.
4. Press # to confirm.
37
ADJUSTING DO NOT DISTURB
The length of time before the Do Not Disturb feature is cancelled can be
adjusted from 1 to 9 hours, or unlimited.
1. Press STORE IN.
2. Press PRIVACY.
3. Press the keypad digit (1-9) for the desired length of time, or 0 for
unlimited.
4. Press # to confirm.
ADJUSTING THE AUTOMATIC BUSY REDIAL TIME
INTERVAL
The busy redial default for the time between call attempts is set for 30
seconds but can be adjusted in 10 second increments between 0 and
90 seconds.
1. Press PROGRAM.
2. Press BUSY REDIAL.
3. Press the keypad digit 0-9 to set the desired length of time
corresponding to 0-90 seconds.
4. Press # to confirm.
ADJUSTING THE WAIT FOR BUSY TONE DETECT
The time the phone waits until it receives a busy tone can also be
adjusted.
1. Press PROGRAM.
2. Press LOWER.
3. Press BUSY REDIAL.
4. Press the keypad digit 0-5 to set the desired length of time
corresponding to 0.5-5.5 seconds.
5. Press # to confirm.
38
SETTING AUTO INTERCOM
The intercom function requires picking up the handset or pressing
INTERCOM when you receive an intercom call. For “hands-free” operation, the phone can be set to automatically answer in the speakerphone
mode when being intercommed.
TIP: You can use this feature for room monitoring.
1. Press PROGRAM.
2. Press LOWER.
3. Press INTERCOM.
4. Press the digit for the desired default mode. Press 1 for automatic
intercom operation during intercom, or 0 for manual intercom
operation.
5. Press # to confirm.
CHANGING A STATION ADDRESS
1. Press PROGRAM.
2. Press INTERCOM. The display reads Addr-.
3. Press the new 2-digit station address (01-16) or memory location button
you want.
4. Press # to confirm. The indicator will blink red while the phone checks
the new station location. If it is already assigned, you will hear an error
tone. You must then select another one. The INTERCOM indicator will
turn off.
39
TROUBLESHOOTING GUIDE
In case of difficulty, please check the following Troubleshooting Guide
before seeking service.
Problem
Solution
No dial tone
• Check installation:
–– Are the telephone line cords connected to the phone and
the wall jack? Are they damaged?
• Does the hook switch pop up when the handset is lifted?
• Check the SPEAKERPHONE button. Is the indicator off?
• Is the pulse/tone mode programmed correctly? Pulse or tone
may not be compatible with your local dialing service.
• Disconnect the phone from the wall jack and connect another
phone to the same jack. If there is no dial tone in the second
phone, the problem might be your wiring or local service.
Dial tone is OK, but the
phone does not dial out.
• Make sure the pulse/tone mode is programmed correctly.
You cannot be heard by
the other party.
• Is the handset or headset cord inserted properly and
securely?
• Is MUTE on?
Phone does not ring.
• Is the ringer turned off?
• Is Do Not Disturb activated?
• You may have too many extension phones on your line. Try
unplugging some phones.
• See solutions for “No dial tone.”
40
Problem
Solution
Incoming voice too low
or none at all.
• Check setting of volume control.
Indicator and tone
feedback flutter when
dialing in pulse mode
• This is normal as power is fluctuating as phone dials.
Memory dialing
doesn’t work
• Did you program the memory location keys correctly?
• Did you follow proper dialing sequence?
• Make sure the pulse/tone mode is programmed correctly.
Battery LOW indicator
blinks or is solid
• The 9V battery needs replacing or is not installed.
Intercom does not
function correctly
• Make sure lines 1 and 2 are connected properly and
common to all phones on the system.
• Make sure all station addresses involved have been
assigned.
Transfer does not
function correctly
• Make sure lines 1 and 2 are connected properly and
common to all phones on the system.
• Check the connections for lines 3 and 4.
• Make sure the extension number has been programmed for
lines 3 and 4.
Display reads Addr-
• The station address needs to be re-assigned due to a
duplicate station address in the system. See “Changing the
Station Address”.
41
REPLACING THE BATTERY
Your Four-Line Business Phone with
Intercom has been designed to accept a
9-volt battery for backup power. In the
event you experience a power outage, you
will still be able to use the phone.
1. Carefully turn over the phone. On the
bottom is the battery compartment
door. Remove the screw on the door
with a screwdriver.
2. Open the door and remove the old
battery.
3. Install a new 9V battery, close the
battery compartment door, and tighten
the screw back in place.
CAUTION: Replace only with a 9-volt,
alkaline battery.
42
Battery
compartment
door
GENERAL PRODUCT CARE
To keep your telephone working and looking good, follow these guidelines:
• Avoid putting the phone near heating appliances and devices that
generate electrical noise (for example, motors or fluorescent lamps).
• DO NOT expose to direct sunlight or moisture.
• Avoid dropping the handset, as well as other rough treatment to
the phone.
• Clean the phone with a soft cloth.
• Never use a strong cleaning agent or abrasive powder because this will
damage the finish.
• Retain the original packaging in case you need to ship the phone at a
later date.
43
SERVICE
The FCC requires this product to be serviced only by the manufacturer or
its authorized service agents. In accordance with FCC requirements,
changes or modifications not expressly approved by ATLINKS USA, Inc.
could void the user’s authority to operate this product. For instructions on
how to obtain service, refer to the warranty included in this guide or call
Consumer Information at 1-800-448-0329.
Or refer inquiries to:
ATLINKS USA, Inc.
Manager, Consumer Relations
P O Box 1976
Indianapolis, IN 46206
Attach your sales receipt to the booklet for future reference or jot down the
date this product was purchased or received as a gift. This information will
be valuable if service should be required during the warranty period.
Purchase date _____________
44
Name of store _______________________
INDEX
A
G
Adjusting Do Not Disturb 37
Adjusting the Automatic Busy Redial
Time Interval 38
Adjusting the Contrast of the
Display 35
Adjusting the Ringers 35
Adjusting the Wait for Busy Tone
Detect 38
Automatic Busy Redial 21
General Product Care 43
B
Basic Operation 16
C
Changing a Station Address 39
Changing the Phone to a 2-9450
Model 13
Cleaning the Phone 43
Clock Setup 15
Conference 25
D
DATA PORT jack 34
Desktop Installation 7
Do Not Disturb 19
F
Flash 20
H
Headset 15
Hold 20
I
Installation 7
Intercom 26
Introduction 4
L
Limited Warranty 47
M
Making Outside Calls 16
Memory 29
Modular Jack Requirements 6
Mute 19
P
Parts Checklist 5
Product Care 43
Programming a Page Group 37
Programming the Extension Number 37
Programming the Flash Duration 36
Programming the Pause Duration 36
Programming the Pulse/Tone Mode 37
45
INDEX
R
T
Receiving Incoming Calls 17
Redial 21
Replacing the Battery 42
Timer 18
TONE Button 20
Transfer 22
Troubleshooting Guide 40
S
Service 44
Setting Auto Intercom 39
Setting the Priority Line 36
Setting Up Your Station Address 11
Special Features 35
System Verification 14
46
V
Volume 24
W
Wall Mount Installation 9
LIMITED WARRANTY
What your warranty covers:
•
Defects in materials or workmanship.
For how long after your purchase:
•
One year, from date of purchase.
(The warranty period for rental units begins with the first rental or 45 days from date of shipment to the rental firm,
whichever comes first.)
What we will do:
•
Provide you with a new or, at our option, a refurbished unit. The exchange unit is under warranty for the remainder of
the original product’s warranty period.
How you get service:
•
Properly pack your unit. Include any cables, etc., which were originally provided with the product. We recommend
using the original carton and packing materials.
•
”Proof of purchase in the form of a bill of sale or receipted invoice which is evidence that the product is within the
warranty period, must be presented to obtain warranty service.” For rental firms, proof of first rental is also required.
Also print your name and address and a description of the defect. Send via standard UPS or its equivalent to:
ATLINKS USA, Inc.
c/o Thomson multimedia Inc.
11721 B Alameda Ave.
Socorro, Texas 79927
•
Pay any charges billed to you by the Exchange Center for service not covered by the warranty.
•
Insure your shipment for loss or damage. ATLINKS accepts no liability in case of damage or loss.
•
A new or refurbished unit will be shipped to you freight prepaid.
What your warranty does not cover:
•
Customer instruction. (Your Owner’s Manual provides information regarding operating instructions and user controls.
Any additional information, should be obtained from your dealer.)
•
Installation and setup service adjustments.
•
Batteries.
•
Damage from misuse or neglect.
•
Products which have been modified or incorporated into other products.
•
Products purchased or serviced outside the USA.
•
Acts of nature, such as but not limited to lightning damage.
Product Registration:
•
Please complete and mail the Product Registration Card packed with your unit. It will make it easier to contact you
should it ever be necessary. The return of the card is not required for warranty coverage.
Limitation of Warranty:
•
THE WARRANTY STATED ABOVE IS THE ONLY WARRANTY APPLICABLE TO THIS PRODUCT. ALL OTHER WARRANTIES,
EXPRESS OR IMPLIED (INCLUDING ALL IMPLIED WARRANTIES OF MERCHANTABILITY OR FITNESS FOR A PARTICULAR
PURPOSE) ARE HEREBY DISCLAIMED. NO VERBAL OR WRITTEN INFORMATION GIVEN BY ATLINKS USA, INC., ITS
AGENTS, OR EMPLOYEES SHALL CREATE A GUARANTY OR IN ANY WAY INCREASE THE SCOPE OF THIS WARRANTY.
•
REPAIR OR REPLACEMENT AS PROVIDED UNDER THIS WARRANTY IS THE EXCLUSIVE REMEDY OF THE CONSUMER.
ATLINKS USA, INC. SHALL NOT BE LIABLE FOR INCIDENTAL OR CONSEQUENTIAL DAMAGES RESULTING FROM THE
USE OF THIS PRODUCT OR ARISING OUT OF ANY BREACH OF ANY EXPRESS OR IMPLIED WARRANTY ON THIS
PRODUCT. THIS DISCLAIMER OF WARRANTIES AND LIMITED WARRANTY ARE GOVERNED BY THE LAWS OF THE
STATE OF INDIANA. EXCEPT TO THE EXTENT PROHIBITED BY APPLICABLE LAW, ANY IMPLIED WARRANTY OF
MERCHANTABILITY OR FITNESS FOR A PARTICULAR PURPOSE ON THIS PRODUCT IS LIMITED TO THE APPLICABLE
WARRANTY PERIOD SET FORTH ABOVE.
How state law relates to this warranty:
•
Some states do not allow the exclusion nor limitation of incidental or consequential damages, or limitations on how
long an implied warranty lasts so the above limitations or exclusions may not apply to you.
•
This warranty gives you specific legal rights, and you also may have other rights that vary from state to state.
If you purchased your product outside the USA:
•
This warranty does not apply. Contact your dealer for warranty information.
47
Model 29451
15339430 (Rev. 3 E/S)
01-43
Printed in China
ATLINKS USA, Inc.
10330 North Meridian Street
Indianapolis, IN 46290
© 2001 ATLINKS USA, Inc.
Trademark(s) ® Registered
Marca(s) Registrada(s)
TABLE DE CONTENIDO
INTRODUCCIÓN ........................................................................................................ 4
ANTES DE COMENZAR .............................................................................................. 5
LISTA DE PARTES ................................................................................................. 5
REQUERIMIENTOS PARA ENCHUFE MODULAR .............................................................. 6
AL COMENZAR .................................................................................................... 6
INSTALACIÓN ........................................................................................................... 7
INSTALACIÓN SOBRE SUPERFICIE PLANA ................................................................. 7
INSTALACIÓN SOBRE PARED ................................................................................ 9
PARA PROGRAMAR LA DIRECCIÓN DE SU ESTACIÓN .................................................... 11
PARA CAMBIAR EL TELÉFONO A UN MODELO 2-9450 ............................................ 13
VERIFICACIÓN DEL SISTEMA ................................................................................. 14
OTRAS ESTACIONES ........................................................................................ 14
SU ESTACIÓN ................................................................................................. 14
PROGRAMACIÓN DEL RELOJ .................................................................................. 15
PARA PROGRAMAR EL FORMATO DE HORAS .......................................................... 15
PARA PONER LA HORA ..................................................................................... 15
COMPATIBILIDAD E INSTALACIÓN DE AUDÍFONOS ...................................................... 15
OPERACIÓN BÁSICA ............................................................................................... 16
PARA HACER LLAMADAS HACIA AFUERA .................................................................. 16
USO DEL AURICULAR ....................................................................................... 16
USO DEL ALTAVOZ ........................................................................................... 16
USO DE LOS AUDÍFONOS .................................................................................. 17
PARA RECIBIR LLAMADAS ..................................................................................... 17
USO DEL AURICULAR ....................................................................................... 17
USO DEL ALTAVOZ ........................................................................................... 17
USO DE LOS AUDÍFONOS .................................................................................. 18
USO ALTERNO DE ALTAVOZ, AURICULAR Y AUDÍFONOS ............................................ 18
TEMPORIZADOR .................................................................................................. 18
ENMUDECEDOR .................................................................................................. 19
NO MOLESTAR .................................................................................................. 19
EN ESPERA ........................................................................................................ 19
PARA PONER UNA LLAMADA EN ESPERA .............................................................. 19
PARA LEVANTAR UNA LLAMADA EN ESPERA .......................................................... 20
CENTELLEO/SERVICIOS ESPECIALES ....................................................................... 20
TONO TEMPORARIO ............................................................................................. 20
REDISCADO ....................................................................................................... 21
PARA REVISAR EL AMORTIGUADOR DE REDISCADO ................................................. 21
REDISCADO AUTOMÁTICO DE NÚMERO OCUPADO .................................................... 21
CUANDO USTED RECIBE UNA SEÑAL DE OCUPADO .................................................. 21
1
LA CANCELACIÓN DE REDISCADO DE NÚMERO OCUPADO SE LLEVA A CABO CUANDO ..... 22
TRANSFERENCIA ................................................................................................. 22
TRANSFERENCIA DE UNA LLAMADA A OTRA ESTACIÓN ............................................ 22
PARA RECIBIR UNA LLAMADA DESDE OTRA ESTACIÓN ............................................. 23
PRIVACÍA .......................................................................................................... 23
PARA OFRECER PRIVACÍA A UNA LLAMADA ............................................................ 24
VOLUMEN ......................................................................................................... 24
VOLUMEN DEL TIMBRE ..................................................................................... 24
VOLUMEN DEL ALTAVOZ, AURICULAR Y AUDÍFONOS ................................................ 25
CONFERENCIA .................................................................................................... 25
INTERFONO ....................................................................................................... 26
INTERFONO DE UN TOQUE ................................................................................. 26
USO DEL INTERFONO EN UNA ESTACIÓN .............................................................. 26
PARA ANULAR UNA ESTACIÓN USANDO LA FUNCIÓN DE NO MOLESTAR .................... 27
PARA RECIBIR UNA LLAMADA POR INTERFONO ....................................................... 27
PARA USAR EL LOCALIZADOR (VOCEADOR) EN TODAS LAS ESTACIONES ...................... 27
PARA USAR EL LOCALIZADOR (VOCEADOR) EN UN GRUPO ....................................... 27
PARA ACTIVAR O DESACTIVAR EL LOCALIZADOR (VOCEAR) ........................................ 28
MEMORIA ......................................................................................................... 28
PARA ALMACENAR UN NÚMERO ......................................................................... 29
PARA CAMBIAR UN NÚMERO ALMACENADO .......................................................... 29
PARA ALMACENAR UNA CADENA DE NÚMEROS ..................................................... 30
PARA ALMACENAR EL ÚLTIMO NÚMERO DISCADO ................................................... 31
PARA ALMACENAR UNA PAUSA .......................................................................... 31
PARA ALMACENAR UN SERVICIO ESPECIAL (FLASH) ................................................ 31
INFORMACIÓN ESPECIAL DEL ALMACENAMIENTO DE MEMORIA .................................. 31
PARA DISCAR UN NÚMERO ALMACENADO ............................................................ 32
DISCADO EN CADENA ....................................................................................... 32
PARA REVISAR UN NÚMERO ALMACENADO EN UNA LOCALIZACIÓN DE MEMORIA .......... 33
PARA ALMACENAR UN RECADO .......................................................................... 33
PARA REVISAR UN RECADO ............................................................................... 33
PARA ALMACENAR UN RECADO EN UNA POSICIÓN PERMANENTE DE LA MEMORIA ......... 33
PUERTO DE INFORMACIÓN(DATA PORT) ............................................................. 34
FUNCIONES ESPECIALES .......................................................................................... 35
AJUSTE DE LOS TIMBRES ..................................................................................... 35
AJUSTE DEL CONTRASTE DEL VISOR ....................................................................... 35
INSTALACIÓN DE LA LÍNEA PRIORITARIA .................................................................... 35
PROGRAMACIÓN DE LA DURACIÓN DE LA PAUSA ....................................................... 36
PROGRAMACIÓN DE LA DURACIÓN DE LA FUNCIÓN ESPECIAL EN “FLASH” .................. 36
PROGRAMACIÓN DE LOS NÚMEROS DE EXTENSIÓN .................................................... 36
2
PROGRAMACIÓN PARA LOCALIZAR UN GRUPO ........................................................... 37
PROGRAMACIÓN DE LA MODALIDAD DE DISCADO (PULSO/ TONO) ................................ 37
AJUSTE DE LA FUNCIÓN DE NO MOLESTAR ............................................................. 37
AJUSTE DEL TIEMPO DE INTERVALO PARA REDISCAR UN NÚMERO OCUPADO .................... 38
AJUSTE DEL TIEMPO DE ESPERA PARA DETECTAR TONO DE OCUPADO ............................ 38
PROGRAMACIÓN DEL INTERFONO AUTOMÁTICO ......................................................... 39
PARA CAMBIAR LA DIRECCIÓN DE UNA ESTACIÓN ...................................................... 39
GUÍA PARA SOLUCIÓN DE PROBLEMAS ....................................................................... 40
PARA REEMPLAZAR LA BATERÍA ................................................................................. 42
CUIDADO GENERAL DEL PRODUCTO ............................................................................ 43
CÓMO OBTENER SERVICIOS DE MANTENIMIENTO ........................................................... 44
INDEX .................................................................................................................. 45
GARANTÍA LIMITADA ............................................................................................... 47
ATTENTION:
RIESGO DE SACUDIDA
ELÉCTRICA NO ABRA
ADVERTENCIA: PARA
PREVENIR EL RIESGO DE UNFUEGO O DE
UNA SACUDIDA ELECTRICA, NO EXPONGA
ESTE APARATO A LA LLUVIA O A LA HUMEDAD.
EL RELÁMPAGO Y LA
PUNTA DE FLECHA
DENTRO DEL TRIÁNGULO ES UNA SEÑAL
DE ADVERTENCIA,
ALERTÁNDOLE
A
UD. DE QUE HAY
"VOLTAJE
PELIGROSO"
DENTRO
DEL PRODUCTO.
CUIDADO: PARA REDUCIR
EL RIESGO DE UNA SACUDIDA
ELÉCTRICA,
NO
QUITE
LA
CUBIERTA
(O PARTE POSTERIOR) NO
USE PARTES DE REPUESTO DENTRO. CONSULTE A
ALGUNA PERSONA CALIFICADA DEL SERVICIO DE
REPARACIONES.
EL SIGNO DE EXCLAMACIÓN DENTRO
DEL TRIÁNGULO ES
UNA
SEÑAL
DE
ADVERTENCIA,
ALTERTÁNDOLE A
UD.
DE QUE EL
PRODUCTO, TRAE
INCLUCIDO,
IN
STRUCTIONES MUY
IMPORTANTES.
VEA ADVERTENCIA EN LA PARTE POSTERIOR/BASE DEL PRODUCTO.
3
INTRODUCCIÓN
Su Teléfono de Negocios de 4 líneas con Interfono es un aparato con todas
las funciones,ideal para uso en su hogar u oficina. Está diseñado para
recibir hasta 4 líneas entrantes y para servir hasta 16 usuarios de
estaciones. En un sistema instalado, su teléfono es capaz de ofrecerle
funciones como: 32 localizaciones de memoria, rediscado de número
ocupado, espera, llamada de conferencia, interfono, transferencia de
llamadas, visor y capacidad para funciones de altavoz.
Por favor lea con cuidado esta guía del usuario para familiarizarse con
todas las funciones de su nuevo teléfono. También asegúrese de
conservar esta guía para futura referencia.
4
ANTES DE COMENZAR
LISTA DE PARTES
Asegúrese de que su paquete contiene los siguientes artículos:
STORE IN
TIMER
TIME SET
MEMO
REVIEW
1
2
3
4
5
6
7
8
LOWER
PAGE
9
10
11
13
14
BUSY REDIAL
FLASH
12
15
PAUSE
PRIVACY
GHI
16
TRANSFER
CONF CALL
1
ABC
2
DEF
3
4
JKL
5
MNO
6
LINE 3
8
WXYZ
9
LINE 2
7
TUV
*
OPER
PQRS
LINE 4
VOLUME
TONE
HEADSET
MUTE
0
SPEAKERPHONE
#
HOLD
LINE 1
INTERCOM
Base del
aparato
Cables de línea
Auricular
Cable del
auricular
Cable de corriente AC
PRECAUCIÓN: Utilice únicamente la fuente de energía de ATLINKS USA,
Inc. 5-2418 que sea compatible con esta unidad. Usar otros adaptadores podría
dañar la unidad.
5
REQUERIMIENTOS PARA ENCHUFE MODULAR
Usted necesita un enchufe modular tipo RJ14, que es el tipo de
enchufe telefónico más común y es como se muestra en la
ilustración a continuación. Si usted no tiene un enchufe
modular, llame a su compañía telefónica local para informarse
cómo puede obtener que se le instale uno.
AL COMENZAR
MUY IMPORTANTE: Para tener el sistema completo de operación de su
teléfono (interfono, transferencia, localizador, etc., las líneas 1 y 2 deben estar
conectadas y ser comunes para todos los aparatos conectados al sistema.
Unicamente los modelos 2-9450 y 2-9451 son compatibles para la operación
del sistema completo. También, las líneas telefónicas deben ser conectadas
antes de que se conecte el cable de corriente AC. De otra manera, la
instalación puede no llevarse a cabo adecuadamente.
Su Teléfono de Negocios de 4 líneas con Interfono está diseñado para fácil
instalación en su hogar u oficina. Sin embargo, es importante seguir las
siguientes indicaciones:
• Tome unos minutos para leer este material para que usted
entienda perfectamente la secuencia en los pasos a seguir para la
instalación adecuada de su teléfono de negocios.
• Cuando lea las instrucciones, usted puede requerir cables de
línea adicionales o algún otro componente no incluido con este
producto. Estos artículos estarán señalados con las palabras “not
provided” (no incluído).
NOTA : Asegúrese de conservar estas instrucciones para referencia futura. Usted
puede querer agregar estaciones o hacer cambios al sistema en el futuro.
6
INSTALACIÓN
IMPORTANTE: Es imperativo que usted siga los siguientes pasos en secuencia
para asegurar la instalación adecuada del teléfono. Los cables de las líneas
telefónicas deben ser conectados antes de que se conecte el cable de corriente
AC. De otra manera, la instalación puede no llevarse a cabo adecuadamente.
También, sin el cable de corriente o la batería instalada, el discado en
modalidad de pulso y las funciones especiales de centelleo no podrán operar.
1. Cuidadosamente voltee el teléfono. En la
parte de abajo está la puerta del
compartimento de la batería. Quite el
tornillo de la puerta con un destornillador y
abra la puerta.
2. Instale una batería de 9V, poniendo
atención a la polaridad de la batería. Cierre
la puerta del compartimento de la batería y
apriete el tornillo nuevamente en su lugar.
Cuidadosamente voltee el teléfono
nuevamente.
Puerta del
compartimento
de la batería
NOTA : El respaldo de la batería es importante porque si usted experimentase
un corte de corriente, usted podrá seguir utilizando el teléfono.
INSTALACIÓN SOBRE SUPERFICIE PLANA
1. Conecte uno de los extremos de un
cable de línea telefónica al enchufe en la
parte posterior del teléfono marcado
“LINE 1,2.” Conecte el otro extremo al
contacto de pared marcado 1&2. Hay
dos posibilidades para esta conección.
1
• Un contacto para 2 líneas RJ14.
Conecte el otro extremo del cable al
contacto de pared.
o
7
• Dos contactos de pared
sencillos RJ11. Conecte el otro
extremo del cable al adaptador de 2
líneas (no incluído). Después conecte
el adaptador a los contactos de pared
con dos cables cortos de línea
telefónica (tampoco incluidos).
Si usted quiere conectar la línea 3 y 4,
use el mismo procedimiento que en el
paso 1.
STORE IN
2
TIMER
TIME SET
3. Conecte el cable de corriente AC en el
contacto marcado “AC 9V” en la parte
posterior del aparato. Enhebre el
cable detrás del soporte para el cable
de corriente para estabilizar el cable
y evitar que se desconecte facilmente.
Después conecte el cable de corriente
AC en un contacto eléctrico.
REVIEW
2
3
4
5
6
7
8
9
10
11
13
14
BUSY REDIAL
FLASH
LOWER
12
15
16
PAUSE
TRANSFER
1
ABC
4
JKL
5
MNO
7
TUV
8
WXYZ
PRIVACY
GHI
2. Para el auricular, conecte un extremo
del cable espiral en el contacto al
costado de la base del aparato. Tome
el otro extremo del cable y conéctelo
en el enchufe en la parte de abajo del
auricular. Después coloque el auricular en su sitio.
MEMO
1
PAGE
PQRS
2
DEF
3
6
9
CONF CALL
LINE 4
LINE 3
LINE 2
VOLUME
*
TONE
HEADSET
MUTE
0
#
OPER
SPEAKERPHONE
HOLD
LINE 1
INTERCOM
3
4. Siga los pasos en la sección de “Para
programar la dirección de su estación”
para continuar instalando su teléfono.
PRECAUCIÓN: Utilice únicamente la fuente de energía de ATLINKS USA,
Inc. 5-2418 que sea compatible con esta unidad. Usar otros adaptadores podría
dañar la unidad.
8
INSTALACIÓN SOBRE PARED
1. Gire el gancho del auricular 180º
hasta que entre un su sitio con un
chasquido.
STORE IN
1
1
2. Conecte un extremo del cable
telefónico al enchufe marcado “LINE
1,2” en la parte posterior del
teléfono. Para el uso de todas las 4
líneas, conecte el cable
telefónico en el enchufe marcado
“LINE 3,4.” Enhebre el cable
marcado “LINE 1,2” a través del
agujero en la placa para montaje de
pared. Introduzca la placa para
montaje de pared en la parte de
abajo de la base del aparato,
alineando las lengüetas y
asegurándose de guiar el cable de
corriente y el cable telefónico
marcado “LINE 3,4” a través de la
ranura en la parte de abajo de la
placa para montaje. Asegúrese de
que entra en su lugar al oír un
chasquido. Conecte los cables
telefónicos LINE 1,2 y LINE 3,4 en
sus respectivos contactos de pared.
5
PAGE
9
13
2
3
3. Sostenga el teléfono contra la placa
de montaje (no incluída) para que
los postecitos de la placa de pared
se deslicen dentro de las ranuras de
la placa para montaje de
pared. Deslice el teléfono hacia
abajo firmemente hasta que quede
asegurado en su sitio.
9
4. Para el auricular, conecte un extremo del
cable espiral del auricular en el contacto
al costado de la base del aparato. Tome
el otro extremo del cable y conéctelo en
el contacto en la parte de abajo del
auricular. Después coloque el auricular
en su sitio.
5. Conecte el cable de corriente AC en el
contacto marcado "AC 9V" en la parte
posterior de la base. Enhebre el cable
detrás del soporte para el cable de
corriente para estabilizar el cable y evitar
que se desconecte facilmente. Después
conecte el cable de corriente AC en un
contacto eléctrico.
6. Siga los pasos en la sección de “Para
programar la dirección de su estación”
para continuar instalando su teléfono.
STORE IN
TIMER
TIME SET
MEMO
REVIEW
1
2
3
4
5
6
7
8
LOWER
PAGE
9
10
13
11
14
BUSY REDIAL
12
15
FLASH
PAUSE
2
16
TRANSFER
1
ABC
4
JKL
5
MNO
7
TUV
8
WXYZ
PRIVACY
GHI
PQRS
DEF
3
6
9
CONF CALL
LINE 4
LINE 3
LINE 2
VOLUME
*
TONE
HEADSET
MUTE
0
OPER
SPEAKERPHONE
#
HOLD
LINE 1
INTERCOM
4
5
PRECAUCIÓN: Utilice únicamente la fuente de energía de ATLINKS USA,
Inc. 5-2418 que sea compatible con esta unidad. Usar otros adaptadores podría
dañar la unidad.
10
PARA PROGRAMAR LA DIRECCIÓN DE SU ESTACIÓN
Su teléfono tiene la capacidad para ser instalado, ya sea como modelo 29451 (el pre-programado), o como el 2-9450. Si usted tiene actualmente el
sistema 2-9450 instalado, este teléfono puede ser programado para ser
completamente compatible con su sistema. Vea la sección “Para cambiar
el teléfono a un modelo 2-9450.”
MUY IMPORTANTE: Para tener el sistema completo de operación de su
teléfono (interfono, transferencia, localizador, etc., las líneas 1 y 2 deben estar
conectadas y ser comunes para todos los aparatos conectados al sistema.
Unicamente los modelos 2-9450 y 2-9451 son compatibles para la operación
del sistema completo. También, las líneas telefónicas deben ser conectadas
antes de que se conecte el cable de corriente AC. Si las líneas no están
conectadas adecuadamente, el indicador del interfono (“INTERCOM”)
parpadeará en verde y rojo. De otra manera, la instalación puede no llevarse a
cabo adecuadamente.
El visor muestra Addr-.
1. Inscriba la dirección de la estación que
usted quiera asignar (01-16) u oprima el
botón correspondiente de la memoria. El
visor indica qué estación es la que usted
ha inscrito.
2. Oprima la tecla # para confirmar. El
indicador del interfono (“INTERCOM”)
parpadeará en verde y rojo mientras
verifica las conecciones de los cables de
líneas y la dirección de la estación. Si los
cables de línea están conectados
adecuadamente y la dirección de la
estación es válida, usted escuchará un tono
de confirmación. Esto indica que la
dirección de la estación ha sido
adecuadamente asignada.
TONE
STORE IN
1
DATA PORT
TIMER
REDIAL
LINE
TIME SET
3
EXT.
NUMBER
MEMO
2
1234
REVIEW
3
5
6
7
8
9
10
11
12
13
14
BUSY REDIAL
FLASH
15
PAUSE
LOWER
4
16
TRANSFER
CONF CALL
1
ABC
2
DEF
3
4
JKL
5
MNO
6
LINE 3
7
TUV
8
WXYZ
9
LINE 2
*
OPER
PRIVACY
GHI
PQRS
LINE 4
VOLUME
TONE
HEADSET
MUTE
0
SPEAKERPHONE
#
HOLD
LINE 1
INTERCOM
Indicador del Interfono
(“INTERCOM”)
11
3. Oprima el seguro de la cubierta del
índice hacia la izquierda y levante la
cubierta de acrílico del índice de la
memoria. Quite la tarjeta del índice de
memoria. Con lápiz, escriba todos los
nombres de los usuarios junto a las
respectivas estaciones en la tarjeta del
índice de la memoria.
4. Vuelva a colocar la tarjeta del índice de
memoria, baje la cubierta del índice
nuevamente a su lugar, y empuje el
seguro de la cubierta del índice hacia
la derecha para asegurar la cubierta.
NOTA : Si usted escucha un tono de
error, la dirección de la estación que usted
ha oprimido ha sido previamente asignada
a otro teléfono, o los cables de la línea
telefónica no están conectados
adecuadamente. Cheque las conecciones
de los cables telefónicos, o cambie la
dirección de la estación si fuera necesario.
NOTA : Si usted tiene las líneas 3 y 4 en su
teléfono, usted tiene que programar los
números de extensión para la operación
correcta de la función de transferencia. Vea
la sección de “Programación de los
números de extensión.”
Las líneas 3 y 4 NO TIENEN que ser
comunes para todos los aparatos
conectados al sistema; de esa manera el
sistema puede tener hasta un total de 34
líneas conectadas.
12
Tarjeta del
índice de
memoria
Cubierta
del índice
de memoria
Seguro de la
cubierta
del índice
STORE IN
BUSY REDIAL
1
2
3
5
6
7
8
9
10
11
12
13
14
15
16
TIMER
TIME SET
FLASH
MEMO
PAUSE
REVIEW
TRANSFER
1
ABC
2
4
JKL
5
MNO
7
TUV
8
WXYZ
*
OPER
PRIVACY
GHI
PQRS
DEF
3
4
LOWER
CONF CALL
LINE 4
6
LINE 3
9
LINE 2
VOLUME
TONE
HEADSET
MUTE
0
SPEAKERPHONE
#
HOLD
LINE 1
INTERCOM
PARA CAMBIAR EL TELÉFONO A UN
MODELO 2-9450
Este teléfono puede también ser
programado para ser compatible
con el sistema actual 2-9450.
STORE IN
1. Oprima “PROGRAM,” que está
abajo de la cubierta de acrílico y de
la tarjeta del índice de memoria.
3. Oprima la tecla # para confirmar.
El visor mostrará Addr-.
4. Inscriba el número de dirección
de la estación que usted quiera
asignar (01-16) u oprima el
número de memoria
correspondiente. El visor le indica
a qué estación ha entrado.
5. Oprima la tecla # para confirmar.
El indicador del interfono
(“INTERCOM”) parpadeará en
rojo y verde mientras checa el
sistema de conecciones de las
líneas telefónicas y las
direcciones de las estaciones. Si
los cables de las líneas telefónicas
están conectados adecuadamente
y la dirección de la estación es
válida, usted escuchará un tono
de confirmación. Esto significa
que la dirección de la estación ha
sido adecuadamente asignada.
2
3
5
6
7
8
9
10
11
12
13
14
15
16
TIMER
TIME SET
MEMO
REVIEW
4
LOWER
PAGE
BUSY REDIAL
2. Oprima 0.
1
FLASH
PAUSE
TRANSFER
ABC
2
4
JKL
5
MNO
6
LINE 3
7
TUV
8
WXYZ
9
LINE 2
GHI
PQRS
DEF
3
CONF CALL
1
PRIVACY
LINE 4
VOLUME
*
TONE
HEADSET
MUTE
0
OPER
SPEAKERPHONE
#
HOLD
LINE 1
Botón
para
programar
INTERCOM
Botón
del
interfono
NOTA : Si usted programa el 2-9451
como 2-9450, la función de
Localizador de Grupo no estará
disponible. La línea 3 y la línea 4
tienen que ser comunes para todos
los teléfonos en el sistema.
13
VERIFICACIÓN DEL SISTEMA
Los siguientes procedimientos deben ser usados para probar la
configuración del sistema e identificar posibles errores de conección de
líneas. El teléfono debe ser conectado a un contacto de corriente AC, las
líneas 1 y 2 deben ser conectadas al contacto marcado “LINE 1,2,” y el
teléfono debe estar programado con un número de dirección de estación.
OTRAS ESTACIONES
1. Oprima “LINE 1.”
2. Vea todas las otras estaciones. Si todas indican que la línea 1 está
siendo usada, la conección es correcta.
U
1. Oprima el botón de interfono (“INTERCOM”). El visor muestra “INT”- y
el indicador de interfono se enciende.
2. Inscriba una dirección de estación para verificar, usando el teclado. El
visor indicará a cuál estación usted ha entrado. Si la estación a la que
usted ha entrado está conectada al sistema, un sonido localizador será
escuchado en la estación a la que usted está llamando y el indicador del
interfono (“INTERCOM”) parpadeará en rojo. Si la estación no está
conectada al sistema, usted escuchará un tono de error, y el interfono
será cancelado.
SU ESTACIÓN
1. Oprima “REVIEW.”
2. Oprima el botón de interfono (“INTERCOM”). El visor leerá “Addr-.” Con
la dirección de la estación de dos dígitos (01-16).
NOTA : Para cambiar la dirección de la estación, vea la sección “Para cambiar
la dirección de una estación.”
14
PROGRAMACIÓN DEL RELOJ
PARA PROGRAMAR EL FORMATO DE HORAS
El reloj tiene la capacidad de ser programado en un formato de 12 o de 24
horas. El formato pre-programado es el de 12 horas.
1. Oprima “PROGRAM.”
2. Oprima “TIME SET.”
3. Oprima 0 para el formato de 12 horas, o 1 para el formato de 24 horas.
4. Oprima # para confirmar.
PARA PONER LA HORA
1. Oprima “TIME SET.”
2. Inscriba los 4 dígitos de la hora. Por ejemplo, en el formato de 12 horas,
las 9:00 a.m. serían 0900.
COMPATIBILIDAD E INSTALACIÓN DE AUDÍFONOS
Un par de audífonos opcionales se pueden usar como
alternativa al auricular, y es especialmente útil para
llamadas largas. Cheque con “Hello-Direct,” “Plantronics,”
o un representante de productos telefónicos para ver si
tienen un par de audífonos compatibles.
Conecte el cable espiral del auricular al enchufe del
auricular en la parte de abajo de la base de la unidad.
Cuando los audífonos no están siendo usados,
simplemente oprima el botón para los audífonos
(“HEADSET”) para desactivar la función de los
audífonos y regresar a la función normal de auricular o
altavoz.
Enchufe
para los
audífonos
PRECAUCIÓN: Use unicamente un juego de audífonos que sea registrado
"UL." El uso de audífonos no registrados puede resultar en daño al aparato.
15
OPERACIÓN BÁSICA
Su teléfono le brinda la conveniencia de poder tener acceso a 4 líneas
telefónicas separadas, cada una obtenida a partir de su compañía
telefónica, y cada una con su propio número telefónico. Esto
generalmente se aplica a compañías pequeñas. Esta función le ofrece 16
teléfonos (o estaciones) para compartir múltiples líneas. Cada estación
está interconectada a todas las demás por un interfono.
PARA HACER LLAMADAS HACIA AFUERA
USO DEL AURICULAR
1. Levante el auricular y el teléfono seleccionará una línea abierta.
2. Espere al tono de marcar.
3. Marque el número telefónico.
4. Cuelgue el auricular una vez que ha terminado.
USO DEL ALTAVOZ
1. Oprima el botón del altavoz (“SPEAKERPHONE”) y el teléfono
seleccionará una línea abierta.
2. Espere al tono de marcar.
3. Marque el número telefónico.
4. Oprima el botón del altavoz (“SPEAKERPHONE”) una vez que ha terminado.
NOTA : Unicamente una conversación entre dos líneas es posible en la
función de altavoz. Cuando usted está hablando, está transmitiendo. Cuando
usted está escuchando, está recibiendo. Usted no puede hacer las dos cosas al
mismo tiempo. El teléfono automaticamente cambiará entre transmitir y
recibir dependiendo del nivel de volumen de voz o del ruido en el cuarto que
el micrófono del altavoz detecta.
16
USO DE LOS AUDÍFONOS
1. Oprima el botón del audífonos (“HEADSET”). El indicador de
audífonos parpadeará.
2. Escoja la línea que usted quiere usar.
3. Espere al tono de marcar.
4. Marque el número telefónico.
5. Oprima el botón de audífonos (“HEADSET”) para apagar esta función.
NOTA : Si los audífonos no están conectados, un tono de error se escuchará
cuando usted oprime el botón de audífonos.
PARA RECIBIR LLAMADAS
USO DEL AURICULAR
Cuando el teléfono timbra, el indicador de la línea correspondiente
parpadea rapidamente.
1. Levante el auricular. La línea es seleccionada automaticamente.
2. Una vez que usted haya terminado, cuelgue el auricular.
USO DEL ALTAVOZ
Cuando el teléfono timbra, el indicador de la línea correspondiente
parpadea rapidamente.
1. Oprima el botón para el altavoz (“SPEAKERPHONE”). Al activarse el
altavoz, la línea es seleccionada automaticamente.
2. Una vez que usted haya terminado, oprima el botón para el altavoz
(“SPEAKERPHONE”).
17
USO DE LOS AUDÍFONOS
1. Cuando el teléfono timbra, el indicador de la línea correspondiente
parpadea rapidamente.
2. Oprima el botón para seleccionar la línea. Si la función de los audífonos
no está encendida, usted debe primero oprimir el botón de audífonos
(“HEADSET”). El indicador de los audífonos (“HEADSET”) parpadeará.
3. Una vez que usted haya terminado, oprima el botón (“HEADSET”).
NOTA : Tanto si usted está haciendo, como recibiendo una llamada, la
persona que llama será desconectada si usted oprime el botón de otra línea sin
primero poner en espera la llamada original.
USO ALTERNO DE ALTAVOZ, AURICULAR Y AUDÍFONOS
Para usar el altavoz, oprima el botón “SPEAKERPHONE.” El indicador del
altavoz se encenderá.
Para cambiar a auricular, levante el auricular. La función del altavoz o de
los audífonos se apagará.
Para usar los audífonos, oprima el botón “HEADSET.” El indicador de
audífonos se encenderá.
TEMPORIZADOR
Durante una conversación telefónica, la duración de la llamada será
calculada. La hora de la llamada y el símbolo del temporizador se
mostrarán en el visor. Una vez que usted ha terminado su llamada, la
duración de ésta permanece en el visor durante 15 segundos. Para revisar
el temporizador una vez que ha desaparecido del visor, oprima el botón
“TIMER.” Para revisar el temporizador de las 4 líneas, continúe oprimiendo
el botón “TIMER.”
18
ENMUDECEDOR
El botón enmudecedor le permite interrumpir una llamada telefónica y hablar
en privado con otra persona en el cuarto. Una conversación puede ser
enmudecida mientras se usa la función de altavoz, auricular o audífonos.
1. Oprima el botón “MUTE” para activar la función enmudecedora. El
indicador del enmudecedor se iluminará.
2. Oprima nuevamente el botón “MUTE” para desactivar esta función.
NOTA : Al cambiar a la función de altavoz, auricular o audífonos, la función
del enmudecedor se cancelará.
NO MOLESTAR
Esta función puede ser programada en teléfonos individuales para
desactivar (silenciar) la señal entrante del timbre, interfono o localizador.
Para programar la duración de la función de No Molestar, vea la sección
“Ajuste de la función de No Molestar.”
1. Mientras el teléfono no está en uso, oprima el botón “PRIVACY.” El
indicador parpadeará y el visor mostrará, en horas, el tiempo que
durará el timbre desactivado. Cuando hay una llamada entrante o una
llamada por el interfono, los indicadores mostrarán las funciones
normalmente, pero no se escuchará el timbre ni se escuchará la voz
comunicando anuncios.
2. Para cancelar, oprima nuevamente “PRIVACY.”
NOTA :Para anular la función de No Molestar, vea “Intercom”. La función de “No
Molestar” se cancela automaticamente cuando usted hace o recibe una llamada.
EN ESPERA
PARA PONER UNA LLAMADA EN ESPERA
1. Oprima el botón “HOLD.” El indicador de la línea que está en espera
parpadea en verde.
2. Cuelgue u oprima el botón de otra línea.
19
El teléfono emite un tono cada 30 segundos como recordatorio. En las
otras estaciones, el indicador parpadeará en rojo, pero no se escuchará el
tono recordatorio.
NOTA : Si usted pone una llamada en espera, mientras está en modalidad de
privacía (“PRIVACY”), nadie excepto usted puede tener acceso a la línea en
espera. Cualquier otra persona tratando de tener acceso a esa línea recibirá un
tono de error.
PARA LEVANTAR UNA LLAMADA EN ESPERA
1. Levante el auricular, u oprima “SPEAKERPHONE” o “HEADSET.”
2. Ponga la línea en espera.
NOTA : La llamada en espera puede ser levantada desde cualquier otra
estación mientras se use este procedimiento.
CENTELLEO/SERVICIOS ESPECIALES
Use el botón de centelleo (“FLASH”) para activar los servicios especiales
al cliente, como llamada en espera, o transferencia de llamadas, las cuales
son disponibles a través de su compañía de larga distancia.
TONO TEMPORARIO
Si usted tiene modalidad de discado de pulso (servicio rotatorio) y quiere
tener acceso a servicios al cliente que requieren modalidad de discado de
tono (touch-tone), como obtener información de un banco local, usted
puede usar esta función.
• Oprima el botón de tono (*) después de que se ha conectado al número
de servicio al cliente para activar la modalidad de discado por tono.
Cuando usted cuelga, el teléfono automaticamente vuelve a la modalidad
de discado rotatorio.
SUGERENCIA: La función de Tono Temporario también puede ser usada
mientras almacena números en la memoria, simplemente oprimiendo el
botón de Tono (*) en el punto necesario en la secuencia de almacenamiento.
20
REDISCADO
1. Levante el auricular, u oprima “SPEAKERPHONE” o “HEADSET.”
2. La línea es seleccionada automaticamente (Si va a usar los audífonos,
oprima la línea que quiera).
3. Espera al tono de marcar.
4. Oprima “REDIAL.”
NOTA : La función de rediscado no operará si el número que debe ser
rediscado contiene más de 30 dígitos. Si el número es más largo que eso, usted
escuchará un tono de error.
PARA REVISAR EL AMORTIGUADOR DE REDISCADO
1. Oprima “REVIEW.”
2. Oprima “REDIAL.” El último número almacenado en el amortiguador de
rediscado se muestra en el visor.
REDISCADO AUTOMÁTICO DE NÚMERO OCUPADO
Si el número telefónico discado está ocupado, su teléfono puede
automaticamente rediscar el número hasta 10 veces. Se usará la línea
seleccionada para hacer dichas llamadas.
CUANDO USTED RECIBE UNA SEÑAL DE OCUPADO
1. Cuelgue el teléfono.
2. Oprima “BUSY REDIAL” (para rediscar un número ocupado). El
indicador de “busy redial” parpadeará entre intentos y la bocina
emitirá un tono cuando se logra la conección. Si usted no levanta el
auricular o el altavoz durante los siguientes 60 segundos, el teléfono
desconectará la llamada.
21
LA CANCELACIÓN DE REDISCADO DE NÚMERO OCUPADO SE LLEVA A
CABO CUANDO
• Usted oprime “BUSY REDIAL” nuevamente
o
• Una llamada entra en la misma línea entre intentos de rediscado
o
• Usted levanta el auricular u oprime “SPEAKERPHONE”
o
• Se han hecho diez intentos y la línea continúa ocupada.
NOTA : La función de rediscado automático de número ocupado está
programada de fábrica a un intervalo de 30 segundos entre intentos. Usted
puede re-programar el intervalo si así lo desea. Vea la sección de “Ajuste del
tiempo de intervalo para rediscar un número ocupado.”
TRANSFERENCIA
TRANSFERENCIA DE UNA LLAMADA A OTRA ESTACIÓN
1. Con la persona que llama en la línea, oprima “TRANSFER.”
2. Dentro de 5 segundos después de oprimir “TRANSFER,” oprima el
número de la localización de la estación (01-16) o el botón de memoria
a donde usted desea transferir la llamada. El indicador de la línea
parpadea en amarillo hasta que la persona a la que usted le está
transmitiendo, levanta la llamada. Una vez que la llamada es levantada,
el indicador cambia a rojo constante. El indicador en el teléfono de la
persona recibiendo la llamada parpadeará rapidamente en amarillo y
timbrará a una frecuencia diferente hasta que el/ella levante la llamada.
• Si la llamada transferida no ha sido levantada en la otra estación
después de 30 segundos, usted escuchará un tono en su estación.
La transferencia se cancela, la llamada se pone en espera, y el
indicador de la línea parpadea en verde.
22
• Si la persona en la otra estación no levanta la llamada transferida, y
usted intenta transferir la llamada a otra estación, oprima el botón
de la línea que desea y repita el proceso de transferencia.
• Si el número de estación que usted oprimió no es válido, usted
escuchará un tono de error y la transferencia se cancelará.
• Si el teléfono de la persona a la que usted quiere transferir está en la
modalidad de No Molestar, las iniciales DND (Do Not Disturb)
aparecerán en el visor. La transferencia se cancela y la llamada se
pone en espera.
• Si la estación de la persona a la que usted quiere transferir está
ocupada, la palabra BUSY (ocupado) aparecerá en el visor.
PARA RECIBIR UNA LLAMADA DESDE OTRA ESTACIÓN
Si una llamada es transferida a su estación, usted escuchará un sonido de
tono diferente. El indicador de la línea que se le está transfiriendo parpadeará
en amarillo. Para contestar esa llamada, oprima el botón de esa línea.
Si usted está en otra línea cuando esta llamada le es transferida, usted
escuchará 3 tonos para ponerle en alerta de que hay una llamada entrante,
y la luz parpadeará en amarillo. Usted puede poner su llamada actual en
espera, simplemente oprimiendo el botón “HOLD,” y puede ahora recoger
la llamada transferida oprimiendo el botón de esa línea.
NOTA : Durante la transferencia, las únicas dos estaciones que pueden tener
acceso a la llamada que se está transfiriendo son: a) la estación que transfiere,
o; b) la estación que recibe la transferencia.
PRIVACÍA
Mientras está en uso, la línea puede ser asegurada para que nadie más
pueda escuchar la conversación. Esta función, sin embargo, se encuentra
unicamente en los modelos de teléfonos 2-9450/ 2-9451. Otros teléfonos
que no son compatibles con estos modelos pueden tener acceso a la línea.
23
PARA OFRECER PRIVACÍA A UNA LLAMADA
En cualquier momento durante la conversación, usted puede utilizar la
función de privacía para asegurar la línea.
1. Mientras está en la línea, oprima el botón “PRIVACY.” El indicador
se iluminará.
2. Para cancelar, oprima el botón “PRIVACY” nuevamente o cuelgue.
NOTA : Si usted pone una llamada en espera mientras está en la función de
privacía, nadie excepto usted puede tener acceso a la línea en espera.
VOLUMEN
El volumen del timbre, la bocina y el auricular/ audífonos se puede
programar independiente con los botones para aumentar o disminuir el
volumen (VOLUME up/ down). Su teléfono viene con las programaciones
pre-establecidas, las cuales pueden ser ajustadas a su gusto. Para volver al
programa pre-establecido, oprima ambos botones para aumentar o
disminuir el volumen, simultaneamente. Hay 15 diferentes programaciones
posibles para cada modalidad. Un tono le indicará cuando se ha alcanzado el
nivel máximo o mínimo.
VOLUMEN DEL TIMBRE
1. Mientras el teléfono está colgado, oprima los botones para aumentar o
disminuir “VOLUME.” El teléfono timbrará de acuerdo a la
programación actual.
2. Mientras sostiene los botones para aumentar o disminuir el volumen, el
volumen del timbre sonará de acuerdo a la programación actual. Suelte
el botón cuando haya alcanzado el nivel de volumen deseado. El dar
pequeños toques a los botones, mientras el teléfono está timbrando, le
permitirá ajustar el volumen paso a paso. El teléfono almacenará ese
programa una vez que el botón sea liberado.
NOTA : Para apagar, encender, o cambiar el patrón del timbre, vea “Ajuste de
los timbres.”
24
VOLUMEN DEL ALTAVOZ, AURICULAR Y AUDÍFONOS
• Mientras se está ocupando el teléfono, oprima “VOLUME” y los
botones para aumentar o disminuir al nivel deseado. El teléfono
almacenará ese programa una vez que el botón sea liberado.
NOTA : El volumen del auricular y audífonos regresará al nivel programado
de fábrica una vez que usted cuelgue el teléfono.
CONFERENCIA
Esta función le permite tener una conversación con 3 líneas, usando una
combinación de 2 líneas.
Para conectar
1. Para hacer la llamada, oprima la línea que usted quiera. Si usted ya
tiene a alguien en la línea, siga al paso 2.
2. Oprima “HOLD.”
3. Haga una llamada desde otra línea.
4. Oprima “CONFERENCE.”
5. Hable con las dos personas.
NOTA : Si usted tiene a más de una línea en espera y está intentando hacer
una llamada en conferencia, usted debe seleccionar la línea que quiere usar
para la conferencia.
Para desconectar a una de las personas
Simplemente oprima la línea de la persona con la que usted desea seguir
hablando, y la otra persona será automaticamente desconectada.
Para desconectar a ambas personas
Simplemente cuelgue el auricular, u oprima “SPEAKERPHONE” o “HEADSET.”
NOTA: Si oprime “HOLD” primero, usted puede desconectarse de cada
persona individualmente.
25
INTERFONO
INTERFONO DE UN TOQUE
Usted puede comunicarse a otra estación a través del interfono simplemente
oprimiendo el número de la estación (teclas de memoria 1-16). El auricular
debe estar colgado y ni la función de altavoz ni la función de audífonos deben
estar operando para que esta modalidad opere adecuadamente.
USO DEL INTERFONO EN UNA ESTACIÓN
1. Si el indicador del interfono (“INTERCOM”) está en rojo, el interfono
está siendo utilizado. Espere a que se apague la luz del indicador.
2. Oprima “INTERCOM.” El indicador se encenderá en verde. (Levante el
auricular si prefiere usarlo).
3. Oprima los 2 dígitos del número de estación (01-16) o el botón de
memoria que usted quiera. La estación que usted ha escogido timbrará
y su indicador del interfono parpadeará en rojo. Si la estación que usted
ha llamado no contesta en 90 segundos, la función del interfono será
cancelada. Cuando la persona que usted quería llamar contesta, el
altavoz se activará automaticamente. Si usted quiere usar el auricular,
levántelo. Para seleccionar audífonos, oprima “HEADSET.”
4. Para terminar la conversación, cuelgue u oprima “INTERCOM.”
NOTA: Usted escuchará un tono de error si la dirección de la estación no es
válida o no está conectada al sistema. Si el número de la estación que usted
quiere llamar está ocupado, el visor indicará BUSY y la persona escuchará un
tono de pendiente, poniéndole en alerta del interfono. Si la estación de la
persona que usted quiere llamar está en modalidad de No Molestar (DND), el
indicador de privacía (“PRIVACY”) en su estación comenzará a parpadear.
Para anular la modalidad de No Molestar, vea “Para anular una estación
usando la función de No Molestar.”
26
PARA ANULAR UNA ESTACIÓN USANDO LA FUNCIÓN DE NO MOLESTAR
1. Oprima “INTERCOM.”
2. Oprima la localización de la memoria de la estación que usted quiere
alcanzar. Si la estación está en modalidad de No Molestar (DND), el
visor indicará DND y el indicador de “PRIVACY” parpadeará.
3. Para anular la función de No Molestar (DND), oprima “LOWER,” y
después “PRIVACY.” El interfono entonces timbrará en esa estación.
NOTA: Esto solamente anula la función de No Molestar en la estación
particular que usted quería alcanzar. Las demás estaciones que estén usando la
función DND no serán afectadas.
PARA RECIBIR UNA LLAMADA POR INTERFONO
El indicador del interfono (“INTERCOM”) parpadeará en rojo para hacerle
saber que alguien está tratando de comunicarse por interfono con usted.
El visor también indicará Int- seguido de la dirección de la estación que
está intentando comunicarse con usted. Oprima “INTERCOM.” (Levante el
auricular u oprima “HEADSET” si usted quiere usar esta modalidad).
PARA USAR EL LOCALIZADOR (VOCEADOR) EN TODAS LAS ESTACIONES
1. Levante el auricular.
2. Oprima el botón localizador (“PAGE”) y espere a escuchar el tono. Las
otras estaciones activarán sus altavoces automaticamente y recibirán
su mensaje.
3. Hable en el auricular. Usted tendrá 30 segundos para usar esta función.
Después de 30 segundos la función del localizador se cancelará. After 30
seconds, the page will be cancelled.
4. Cuelgue cuando haya terminado.
NOTA: Si no hay un número asignado como localizador de grupo, todas las
estaciones recibirán el mensaje del localizador.
PARA USAR EL LOCALIZADOR (VOCEADOR) EN UN GRUPO
1. Levante el auricular.
27
2. Oprima “LOWER.”
3. Oprima el botón localizador (“PAGE”).
4. Oprima el número de 1 dígito (1-9) para el grupo que usted quiera vocear.
5. Espere a escuchar el tono. Las otras estaciones activarán sus altavoces
automaticamente y recibirán su mensaje.
6. Hable en el auricular. Usted tendrá 30 segundos para usar esta función.
Después de 30 segundos la función del localizador se cancelará.
7. Cuelgue cuando haya terminado.
NOTA: Para programar su propio número de localizador de grupo, vea
“Programación de número para localizar un grupo.”
También, teléfonos que tienen la función del localizador desactivada o
aquellos que están en modalidad de No Molestar no pueden ser voceados. La
función del localizador (“PAGE”) unicamente puede llevarse a cabo desde el
auricular o audífonos.
PARA ACTIVAR O DESACTIVAR EL LOCALIZADOR (VOCEAR)
El localizador de la estación puede ser activado o desactivado en cada
estación individual. En el programa pre-establecido, la función está
activada.
1. Con el auricular colgado, oprima “STORE IN.”
2. Oprima “PAGE.”
3. Oprima 0 para desactivar o 1 para activar.
4. Oprima # para confirmar.
MEMORIA
Cada uno del 16 botones de la memoria tiene la capacidad de almacenar 2
números telefónicos separados (de hasta 30 dígitos cada uno). Cada botón
de memoria tiene acceso a una localización de memoria más arriba o más
abajo. El botón “LOWER” tiene acceso a los números almacenados en
localizaciones más bajas.
28
PARA ALMACENAR UN NÚMERO
1. Oprima el botón para almacenar (“STORE IN”). El indicador “STORE”
se encenderá.
2. Inscriba el número telefónico que usted quiera almacenar, usando las
teclas de dígitos. Los números que usted inscriba aparecerán en el visor.
3. Oprima el botón para almacenar (“STORE IN”) nuevamente. El
indicador “STORE” parpadeará en rojo.
4. Oprima el botón de la localización de memoria en donde usted quiere
almacenar este número. Si usted lo quiere almacenar en una
localización de memoria más alta, simplemente oprima el botón de
localización de memoria . Si usted lo quiere almacenar en una
localización de memoria más baja, oprima el botón “LOWER.” El
indicador rojo se encenderá. Oprima el botón de la localización de
memoria en donde usted quiere almacenar ese número.
5. Para futura referencia, usted puede escribir el nombre un número de la
persona que usted ha almacenado en esta localización, en el espacio
correspondiente en la tarjeta del índice de la memoria.
6. Repita los pasos 1-5 para cada número adicional que usted quiera
almacenar, hasta un total de 32.
7. Para cancelar el procedimiento de almacenaje en cualquier momento,
oprima “STORE IN.” Si el indicador está parpadeando, oprímalo una vez.
Si está en encendido continuo, oprímalo dos veces.
NOTA: El procedimiento de almacenaje será automaticamente cancelado
después de 15 segundos si no se oprime ninguna tecla.
También, cuando la modalidad de discado de pulso es utilizada, el oprimir la
tecla de tono (TONE) “*” antes de programar hará que se almacenen estos
dígitos en la modalidad de tono.
PARA CAMBIAR UN NÚMERO ALMACENADO
Si usted quiere cambiar un número que ha sido almacenado, simplemente
inscriba el número nuevo sobre el viejo, usando el procedimiento previo de
almacenaje. Para borrar un número almacenado, oprima “STORE IN” dos
veces, y después la localización de la memoria que usted quiere borrar.
29
PARA ALMACENAR UNA CADENA DE NÚMEROS
Usted puede asociar una secuencia de discado de números telefónicos en
diferentes localizaciones de la memoria, simplemente combinándolos en
una misma localización de la memoria, o tener otra localización de la
memoria almacenada en una de las localizaciones que será asociada.
Por ejemplo
Localización de Memoria
Número telefónico de compañía de
larga distancia
6
Código de autorización (ID)
7
Donde toda la secuencia será almacenada
incluyendo el número de larga distancia
8
Para almacenar
1. Oprima “STORE IN.”
2. Oprima la localización de la memoria 6.
3. Oprima “PAUSE.”
4. Oprima la localización de la memoria 7.
5. Oprima “PAUSE.”
6. Inscriba el número de larga distancia.
7. Oprima “STORE IN.”
8. Oprima la localización 8, en donde toda la localización será almacenada.
9. Escriba el nombre de la persona en esta localización en la tarjeta del
índice de memoria.
NOTA: Cuando una cadena de números es almacenada en una localización
de la memoria, no puede ser almacenada como otra cadena de secuencia
numérica en una localización de la memoria diferente.
PARA ALMACENAR EL ÚLTIMO NÚMERO DISCADO
Usted puede almacenar en la memoria rápida y facilmente el último
30
número discado, oprimiendo el botón de rediscado. Siga los pasos #1-7 de
“Para almacenar un número”, pero oprima “REDIAL” en lugar de inscribir el
número con los dígitos del teclado.
PARA ALMACENAR UNA PAUSA
Use el botón de pausa (“PAUSE”) para introducir una pausa cuando un
retraso es necesario en la secuencia de discado (por ejemplo, cuando
usted debe marcar 9 para obtener línea al exterior o cuando usted debe
inscribir códigos de acceso a su línea de información bancaria).
PARA ALMACENAR UN SERVICIO ESPECIAL (FLASH)
Use el botón “FLASH” para introducir un servicio especial que le ofrece su
compañía telefónica en sus números almacenados .
INFORMACIÓN ESPECIAL DEL ALMACENAMIENTO DE MEMORIA
Si se intenta almacenar un número de más de 30 dígitos, se escuchará un
tono de error y la secuencia se suspenderá.
Como 30 es el número máximo de dígitos que usted puede almacenar en
una sola localización de memoria, es importante hacer notar el número de
dígitos consumido cuando usted almacena teclas de funciones. Los dígitos
de memoria se usan como sigue:
Botón oprimido
Dígitos usados
Número telefónico del teclado
1
Botón de pausa
1
Botón de centelleo
1
Selector de tono/ pulso
2
Localización de la memoria
3
Botón de rediscado
cantidad de números rediscados
PARA DISCAR UN NÚMERO ALMACENADO
1. Levante el auricular, oprima “SPEAKERPHONE,” u oprima “HEADSET.”
31
2. Oprima la línea que desee.
3. Espere al tono de marcar.
4. Oprima el botón de memoria de la persona que usted quiere llamar. Si
el número está almacenado en la localización de memoria baja, oprima
el botón “LOWER” primero. El número es discado automaticamente.
DISCADO EN CADENA
Este proceso le permite marcar una sucesión de números almacenados en
diferentes localizaciones de la memoria. Esto es útil cuando usted tiene
que marcar varias secuencias de números, como llamadas frecuentes a su
compañía de llamadas de larga distancia.
Por ejemplo
Localización de Memoria
Número local de acceso a su compañía de
Larga distancia
6
Código de autorización (ID)
7
Número telefónico de larga distancia
8
Para usarse
1. Oprima la línea que quiera.
2. Oprima la localización de memoria 6. (Oprima pausa si es necesario).
3. Oprima la localización de memoria 7. (Oprima pausa si es necesario).
4. Oprima la localización de memoria 8.
32
PARA REVISAR UN NÚMERO ALMACENADO EN UNA LOCALIZACIÓN DE
MEMORIA
1. Oprima “REVIEW.”
2. Oprima la localización de memoria que usted quiera revisar. El visor
muestra el número almacenado en esa localización.
NOTA: Si la localización de memoria contiene una secuencia en cadena, el
visor muestar unicamente el número de la localización en la memoria.
PARA ALMACENAR UN RECADO
Con esta función, usted puede temporalmente almacenar un número en la
memoria (hasta de 30 dígitos), incluso cuando usted está en el teléfono.
1. Oprima “MEMO.”
2. Inscriba el número telefónico que usted quiere instalar usando los
dígitos del teclado.
3. Oprima “MEMO” para salir.
PARA REVISAR UN RECADO
1. Oprima “REVIEW.”
2. Oprima “MEMO.” El número aparecerá en el visor.
PARA ALMACENAR UN RECADO EN UNA POSICIÓN PERMANENTE DE LA
MEMORIA
1. Oprima “STORE IN.”
2. Oprima “MEMO.”
3. Oprima “STORE IN.”
4. Oprima el botón de la localización de la memoria en donde usted quiere
almacenar este recado.
33
PUERTO DE INFORMACIÓN(DATA PORT)
Este teléfono está equipado con un contacto de Puerto de Información
para que usted pueda conectar un aditamento auxiliar para el teléfono,
como máquina de fax, modem para computadora, contestador, o incluso
un teléfono inalámbrico.
El selector de Puerto de Información en la parte posterior del teléfono
controla la función del Puerto de Información permitiéndole que usted
escoja la línea que el Puerto de Información use, ya sea la línea 1, línea 2,
línea 3, o línea 4.
Usted puede usar el Puerto de Información para conectar su máquina de
fax, por ejemplo, y después programar su selector del Puerto de
Información que cambie a la línea 4 para recibir faxes que se reciben por
la línea 4.
En el caso de que usted está en una conversación con alguien en la línea 4
y quiere que esa persona le mande un fax, cambie el selector del Puerto
de Información a la línea 2 o línea 3, y de a la persona el número
telefónico de la línea 2 o 3. Su máquina de fax puede ahora recibir faxes
por la línea 2 o la línea 3.
IMPORTANTE: Asegúrese de regresar su máquina de fax a su línea normal
para recepción de faxes cuando usted haya terminado porque otras personas
que no saben del cambio no podrán enviarle faxes si marcan a la línea 4.
34
FUNCIONES ESPECIALES
AJUSTE DE LOS TIMBRES
Los timbres en las 4 líneas pueden ser programados independientemente
de los otros.
1. Oprima “STORE IN.”
2. Oprima el botón de la línea deseada.
3. Oprima 0-4 para sonidos diferentes del timbre (0 desactivados).
4. Oprima # para confirmar.
NOTA : El indicador de la línea continuará parpadeando con las llamadas
entrantes, incluso con el timbre desactivado.
AJUSTE DEL CONTRASTE DEL VISOR
1. Oprima “STORE IN.”
2. Oprima el botón para aumentar el volumen (“VOLUME” up) para
aumentar el contraste, y el botón para disminuir el volumen (“VOLUME” down) para disminuirlo.
3. Oprima # para confirmar.
NOTA : Para cambiar el visor a la programación pre-establecida de contraste
del visor, oprima + y – juntos, y después # para confirmar.
INSTALACIÓN DE LA LÍNEA PRIORITARIA
Una línea prioritaria le permite seleccionar una de las 4 líneas para tener
precedencia sobre las otras 3 líneas.
1. Oprima “STORE IN.”
2. Oprima “LOWER.”
3. Oprima el botón de cualquier línea para entrar en la modalidad de Línea
Prioritaria (Priority Line).
35
4. Oprima el botón de la línea que usted quiere que tenga prioridad.
5. Oprima # para confirmar.
NOTA : Para cambiar la línea prioritaria, repita el mismo procedimiento pero
escoja una línea diferente en el paso 4.
PROGRAMACIÓN DE LA DURACIÓN DE LA PAUSA
1. Oprima “PROGRAM.”
2. Oprima “PAUSE.”
3. Oprima la duración (0-9) que desee; 1= 100 ms, 9= 900ms. La duración
pre-programada es de o para detectar el tono de marcar autómático.
4. Oprima # para confirmar.
PROGRAMACIÓN DE LA DURACIÓN DE LA FUNCIÓN
ESPECIAL EN “FLASH”
1. Oprima “PROGRAM.”
2. Oprima “FLASH.”
3. Oprima la duración (0-9) que desee; 1= 100 ms, 9= 900ms. La duración
pre-programada es de 6.
4. Oprima # para confirmar.
PROGRAMACIÓN DE LOS NÚMEROS DE EXTENSIÓN
Las líneas de números de extensión 3 y 4 se usan para algunas de las
funciones avanzadas que este sistema utiliza.
1. Oprima “PROGRAM.”
2. Oprima el botón de la línea que usted quiera programar.
3. Inscriba el número de extensión de 4 dígitos (0-9 para cada dígito).
4. Oprima # para confirmar.
36
PROGRAMACIÓN PARA LOCALIZAR UN GRUPO
A su estación se le puede asignar una función de un grupo total de 9
funciones para vocear. Cada estación en un grupo para ser voceado, debe
ser programada como sigue:
1. Oprima “PROGRAM.”
2. Oprima “PAGE”. La palabra PAGE aparecerá en el visor.
3. Inscriba el número para vocear al grupo (0-9) que usted quiera asignar a
su estación.
4. Oprima # para confirmar.
NOTA: El número pre-programado como localizador de grupo es el 0 si otro
dígito no ha sido asignado.
PROGRAMACIÓN DE LA MODALIDAD DE DISCADO
(PULSO/ TONO)
1. Oprima “PROGRAM.”
2. Oprima La tecla del asterisco “*.”
3. Oprima 0 para tono, 1 para pulso.
4. Oprima # para confirmar.
AJUSTE DE LA FUNCIÓN DE NO MOLESTAR
La duración del tiempo antes de que la función de No Molestar (Do Not
Disturb) sea cancelada, puede ser ajustada de 1 a 9 horas, o ser ilimitada.
1. Oprima “STORE IN.”
2. Oprima “PRIVACY.”
3. Oprima el dígito en el teclado (1-9) para el tiempo deseado, o 0 para
tiempo ilimitado.
4. Oprima # para confirmar.
37
AJUSTE DEL TIEMPO DE INTERVALO PARA REDISCAR UN
NÚMERO OCUPADO
La programación de fábrica para el tiempo de intervalo entre intentos de
llamadas es de 30 segundos, pero puede ser ajustado en incrementos de
10 segundos desde 0 a 90 segundos.
1. Oprima “PROGRAM.”
2. Oprima “BUSY REDIAL.”
3. Oprima el dígito en el teclado de 0-9 para programar el intervalo
deseado correspondiente a 0-90 segundos.
4. Oprima # para confirmar.
AJUSTE DEL TIEMPO DE ESPERA PARA DETECTAR TONO
DE OCUPADO
The time the phone waits until it receives a busy tone can also be
adjusted.
1. Oprima “PROGRAM.”
2. Oprima “LOWER.”
3. Oprima “BUSY REDIAL.”
4. Oprima el dígito en el teclado de 0-5 para programar el intervalo de
tiempo deseado correspondiente a 0.5-5.5 segundos.
5. Oprima # para confirmar.
38
PROGRAMACIÓN DEL INTERFONO AUTOMÁTICO
La función del interfono requiere que usted levante el auricular u oprima
“INTERCOM” cuando usted recibe una llamada por el interfono. Para
operar con las manos libres, el teléfono puede ser programado a
contestar automaticamente en la modalidad de altavoz cuando recibe
una señal del interfono.
SUGERENCIA : Usted puede utilizar esta función para monitorear el cuarto.
1. Oprima “PROGRAM.”
2. Oprima “LOWER.”
3. Oprima “INTERCOM.”
4. Oprima el dígito para la modalidad deseada. Oprima 1 para la operación
automática de interfono durante función de interfono, o 0 para
operación manual de interfono.
5. Oprima # para confirmar.
PARA CAMBIAR LA DIRECCIÓN DE UNA ESTACIÓN
1. Oprima “PROGRAM.”
2. Oprima “INTERCOM.”
3. Oprima el nuevo número de 2 dígitos para la dirección de estación (0116) o localización de memoria que usted desee.
4. Oprima # para confirmar. El indicador parpadeará en rojo mientras el
teléfono checa la nueva localización de la estación. Si ya estaba
previamente asignada, usted escuchará un tono de error. Tiene usted
entonces que seleccionar una nueva dirección. El indicador del
interfono “INTERCOM” se apagará.
39
GUÍA PARA SOLUCIÓN DE PROBLEMAS
En caso de dificultad por favor verifique esta Guía para Solución de
Problemas antes de hacer arreglos para la reparación.
Problema
Solución
No hay tono de marcar
• Cheque la instalación:
–– Están los cables de las líneas telefónicas conectados al
teléfono y en el contacto de pared? ¿Están dañados?
• El gancho de colgar el auricular se levanta cuando usted
descuelga?
• Cheque el botón de "SPEAKERPHONE". ¿El indicador está
apagado?
• Está la modalidad de Tono/ Pulso programada
correctamente? La modalidad de pulso o tono puede ser no
compatibles con su servicio de discado local.
• Desconecte al aparato de la pared y conecte otro aparato
al mismo contacto. Si no hay tono de marcar en el
segundo aparato, el problema puede ser en su servicio
local de cableado.
El tono de marcar está bien,
pero la llamada no sale.
• Asegúrese de que la modalidad de Tono/ Pulso esté
programada correctamente.
La otra persona no
le escucha.
• Está el auricular o los audífonos conectados
adecuadamente?
• Está la función enmudecedora activada?
El teléfono no timbra.
• Está el timbre desactivado?
• Está la función de No Molestar activada?
• Usted puede tener demasiadas extensiones en su línea. Haga
la prueba desconectando algunos aparatos.
• Vea las soluciones para "No hay Tono de Marcar."
40
Problem
La voz de la otra persona
se escucha muy bajo
o no se escucha.
Solution
• Cheque el nivel del volumen
El indicador y tono mariposean • Esto es normal porque la corriente de poder fluctúa
cuando disca en modalidad
de disco rotatorio
Discado desde la memoria
no funciona
• Programó usted las localizaciones de memoria correctamente?
• Asegúrese de que la modalidad de Tono/ Pulso esté
programada correctamente.
El indicador de baja batería
(LOW) parpadea o
permanece encendido
• La batería de 9V necesita ser reemplazada o no hay
batería instalada.
El interfono no funciona
correctamente
• Asegúrese de que las líneas 1 y 2 está conectadas
adecuadamente y son comunes de todos los aparatos del
sistema.
• Asegúrese de que todas las direcciones de las estaciones
involucradas han sido asignadas.
La función de transferencia
no funciona correctamente
• Asegúrese de que las líneas 1 y 2 está conectadas
adecuadamente y son comunes de todos los aparatos del
sistema.
• Cheque las conecciones de las líneas 3 y 4.
• Asegúrese de que los números de extensiones hansido
programados para las líneas 3 y 4.
El visor indica Addr-
• La dirección de esa estación debe ser re-asignada debido a
direcciones duplicadas en el sistema. Vea la sección “Para
cambiar la dirección de una estación.”
41
PARA REEMPLAZAR LA BATERÍA
Su Teléfono de 4 Líneas con Interfono ha
sido diseñado para aceptar una batería
de 9V como respaldo de poder. En el
caso de que usted experimentase un
corte de corriente, usted podrá seguir
utilizando su teléfono.
1. Cuidadosamente voltee el teléfono. En
la parte de abajo está la puerta del
compartimento de la batería. Quite el
tornillo de la puerta con un
destornillador.
2. Abra la puerta y saque la batería vieja.
3. Instale una batería nueva de 9V, cierre la
puerta del compartimento de la batería
y apriete eltornillo en su sitio.
PRECAUCIÓN : Reemplace unicamente
con una batería alcalina de 9 voltios.
42
Puerta del
compartimento
de la batería
CUIDADO GENERAL DEL PRODUCTO
Para mantener su teléfono funcionando bien y con buena apariencia,
observe las siguientes pautas:
• Evite poner el teléfono cerca de calentadores (calefactores) de ambiente
y dispositivos que generen interferencia eléctrica ejemplo, motores o
lámparas fluorescentes).
• No lo exponga a la luz solar directa o a la humedad.
• No deje caer la extensión móvil y no maltrate el teléfono.
• Limpie el teléfono con un trapo suave
• Nunca use un agente de limpieza fuerte ni un polvo abrasivo, ya que
esto dañará el acabado.
• Retenga el empaque original en caso de que necesite embarcar el
teléfono en el futuro.
43
CÓMO OBTENER SERVICIOS DE MANTENIMIENTO
La FCC requiere que este producto sea sometido a servicios de
mantenimiento solamente por el fabricante o por sus agentes de servicio
autorizados. De acuerdo con los requerimientos de la FCC, los cambios o
las modificaciones que no hayan sido expresamente aprobadas por
ATLINKS USA, Inc. podrían anular la autoridad que tiene el usuario de
operar este producto. Para recibir instrucciones sobre cómo obtener
servicios de mantenimiento, por favor consulte la garantía incluida en esta
Guía, o llame a Información para el Usuario,
1-800-448-0329.
O envíe sus preguntas a:
ATLINKS USA, Inc.
Gerente, Servicio al Consumidor
P.O. Box 1976
Indianápolis, IN 46206
Adjunte su recibo al folleto, para futura referencia, o anote la fecha en la
que se compró o recibió este producto como regalo. Esta información será
valiosa si se llegase a requerir durante el período de garantía.
Fecha de compra __________
44
Nombre de la tienda __________________
INDEX
A
I
Ajuste de la función de no molestar 37
Ajuste de los timbres 35
Ajuste del contraste del visor 35
Ajuste del tiempo de espera para
detectar tono de 38
Ajuste del tiempo de intervalo para
rediscar un nú 38
Al Comenzar 6
Antes de comenzar 5
Información especial del
almacenamiento de memoria 31
Instalación 7
Instalación de la línea prioritaria 35
Instalación sobre Pared 9
Instalación sobre superficie plana 7
Interfono 26
Interfono de un toque 26
Introducción 4
C
L
Cómo obtener servicios de
mantenimiento 44
Compatibilidad e Instalación de
Audífonos 15
Conferencia 25
Cuando usted recibe una señal de
ocupado 21
Cuidado general del producto 43
La cancelación de rediscado de número
ocupado se l 22
Lista de partes 5
D
Discado en cadena 32
E
En espera 19
Enmudecedor 19
F
Funciones Especiales 35
G
Garantía limitada 47
Guía para solución de problemas 40
M
Memory 28
N
No molestar 19
O
Operación básica 16
Otras estaciones 14
P
Para activar o desactivar el localizador
(vocear) 28
Para almacenar el último número
discado 31
Para almacenar un número 29
Para almacenar un recado 33
Para almacenar un recado en una
posición permanent 33
Para almacenar un servicio especial
(Flash) 31
45
Para almacenar una cadena de
números 30
Para almacenar una pausa 31
Para anular una estación usando la
función de no molestar 27
Para cambiar el teléfono a un modelo
2-9450 13
Para cambiar la dirección de una
estación 39
Para cambiar un número
almacenado 29
Para conectar 25
Para discar un número almacenado 32
Para hacer llamadas hacia afuera 16
Para levantar una llamada en espera 20
Para ofrecer privacía a una llamada 24
Para poner la hora 15
Para poner una llamada en espera 19
Para programar la dirección de su
estación 11
Para recibir llamadas 17
Para recibir una llamada desde otra
estación 23
Para recibir una llamada por
interfono 27
Para reemplazar la batería 42
Para revisar el amortiguador de
rediscado 21
Para revisar un número almacenado en
una localizac 33
Para revisar un recado 33
Para usar el localizador (voceador) en
todas las e 27
Para usar el localizador (voceador) en
un grupo 27
Privacía 23
Programación de la duración de la
función especial 36
Programación de la duración de la
pausa 36
Programación del interfono
automático 39
Programación del reloj 15
Programación para localizar un
grupo 37
Programming the extension number 36
Programming the pulse/tone mode 37
Puerto de información(Data Port) 34
R
Rediscado 21
Rediscado automático de número
ocupado 21
Requerimientos para enchufe
modular 6
S
Su estación 14
T
Temporizador 18
Tono temporario 20
Transferencia 22
Transferencia de una llamada a otra
estación 22
U
Uso alterno de altavoz, auricular y
audífonos 18
Uso de los audífonos 17, 18
Uso del altavoz 16, 17
Uso del auricular 16, 17
Uso del interfono en una estación 26
V
Verificación del sistema 14
Volumen 24
Volumen del altavoz, auricular y
audífonos 25
Volumen del timbre 24
GARANTÍA LIMITADA
Lo que cubre su garantía:
•
Defectos de materiales o de trabajo.
Por cuánto tiempo después de la compra:
•
Un año, a partir de la fecha de compra.
(El periodo de garantía para unidades arrendadas se inicia con la primera renta o 45 días de la fecha del embarque a la
firma de arrendamiento, lo que ocurra primero).
Lo que haremos:
•
Proporcionarle una unidad nueva o, a nuestra opción, una reacondicionada. La unidad de intercambio quedará bajo
garantía por el resto del periodo de garantía del producto original.
Cómo obtener servicio:
•
Empaque bien la unidad, incluyendo todos los cables, etc., que originalmente venían con el producto. Se recomienda
usar el cartón y materiales de empaque originales.
•
“Prueba de compra como factura o recibo de compra, que ofrezca evidencia de que el producto está dentro del
periodo de garantía, debe ser presentado para obtener servicio bajo garantía.” Para compañías de arrendamiento, se
requiere como evidencia el primer contrato de renta. También escriba claramente su nombre, dirección y la
descripción del defecto. Mande vía UPS o un servicio de paquetería equivalente a:
ATLINKS USA, Inc.
c/o Thomson multimedia Inc.
11721 B Alameda Ave.
Socorro, Texas 79927
•
Pague cualquier cargo que le facture el Centro de Intercambio por servicio que no esté cubierto por garantía.
•
Asegure su empaque para prevenir pérdida o daño. ATLINKS no acepta responsabilidad en caso de pérdida o daño.
•
Un aparato nuevo o uno remozado se le enviará con los cargos pagados.
Lo que no cubre la garantía:
•
Instrucciones al cliente. (Su manual de propietario le proporciona la información con respecto a las instrucciones de
operación y los controles del usuario. Cualquier información adicional debe obtenerse con su agente de ventas.
•
Ajustes de instalación y de preparación del servicio.
•
Baterías.
•
Daño por mal uso o negligencia.
•
Productos que han sido modificados o incorporados a otros productos.
•
Productos comprados o que han recibido servicio fuera de los Estados Unidos.
•
Desastres naturales, por ejemplo y sin limitarse a ellos, daños por relámpagos.
Registro del Producto:
•
Por favor llene y envíe por correo la Tarjeta de Registro del Producto que se embarcó con su producto. Hará más fácil
que hagamos contacto con usted si fuera necesario. No se requiere la devolución de la tarjeta para tener la cobertura
de la garantía.
Limitaciones sobre la Garantía:
•
LA GARANTÍA ESPECIFICADA ANTERIORMENTE ES LA ÚNICA GARANTÍA APLICABLE A ESTE PRODUCTO.
CUALQUIER OTRA GARANTÍA, EXPRESA O IMPLÍCITA (INCLUYENDO TODAS LAS GARANTÍAS IMPLÍCITAS DE
MERCADO O DE SALUD PARA CUALQUIER PROPÓSITO) SON CONSIDERADAS NO VÁLIDAS. NINGUNA
INFORMACIÓN VERBAL O ESCRITA OTORGADA POR ATLINKS USA,INC., SUS AGENTES, O EMPLEADOS SERÁ
CONSIDERADA PARA CREAR UNA GARANTÍA NI PARA AUMENTAR BAJO NINGUNA CIRCUNSTANCIA LA
COBERTURA DE ESTA GARANTÍA.
•
LA REPARACIÓN O REEMPLAZO DE UN PRODUCTO COMO SE ESPECIFICA BAJO ESTA GARANTÍA ES EL REMEDIO
EXCLUSIVO DEL CONSUMIDOR. ATLINKS USA, INC. NO SE HACE RESPONSIBLE POR DAÑOS INCIDENTALES, DAÑOS
DERIVADOS COMO CONSECUENCIA DEL USO DE ESTE PRODUCTO, O COMO RESULTADO DEL INCUMPLIMIENTO DE
CUALQUIER GARANTÍA IMPLÍCITA O EXPRESA DE ESTE PRODUCTO. LA INVALIDEZ DE LAS GARANTÍAS O LAS GARANTÍAS
LIMITADAS ESTÁN REGLAMENTADAS POR LAS LEYES DEL ESTADO DE INDIANA. EXCEPTO POR EL ALCANCE
ESTABLECIDO POR LAS LEYES APLICABLES, CUALQUIER GARANTÍA IMPLÍCITA DE MERCADO O DE SALUD PARA
CUALQUIER PROPÓSITO, EN ESTE PRODUCTO ES LIMITADA AL PERÍODO DE GARANTÍA ESPECIFICADO ANTERIORMENTE.
Cómo se Relaciona la Ley Estatal a esta Garantía:
•
Algunos estados no permiten la exclusión ni limitación de daño incidental o derivado de alguna consecuencia, o la
limitación con respecto al período de tiempo que debe aplicarse para garantías implícitas, por lo tanto las limitaciones
y exclusiones mencionadas anteriormente pueden no ser aplicables para usted.
•
Esta garantía le ofrece derechos legales específicos, y usted puede tener otros derechos legales que varían de estado a estado.
Si compró su producto fuera de los Estados Unidos:
•
Esta garantía no se aplica. Vea a su distribuidor para información sobre la garantía.
Modelo 29451
15339430 (Rev. 3 E/S)
01-43
Impreso en China
ATLINKS USA, Inc.
10330 North Meridian Street
Indianapolis, IN 46290
© 2001 ATLINKS USA, Inc.
Trademark(s) ® Registered
Marca(s) Registrada(s)