1
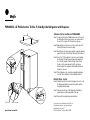
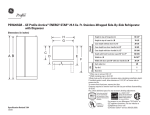
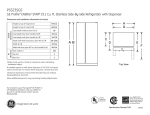
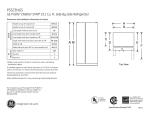
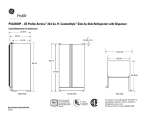
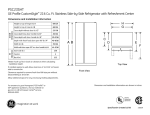
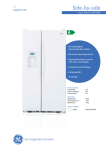
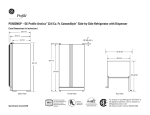
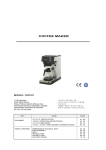
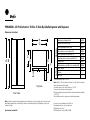
TM
PSW26SGN – GE Profile Arctica™ 25.5 Cu. Ft. Side-By-Side Refrigerator with Dispenser
Dimensions (in inches)
Overall
Dimensions
H
G
C
AB
D
E
Air
Clearances
F
Height to top of hinge (in.) A
69-1/4
Height to top of case (in.) B
70-1/2
Case depth without doors (in.) C
28-1/2
Case depth less door handle (in.) D
32-3/4
Case depth with door handle (in.) E
35-3/16
Depth with fresh food door open 90° (in.) F
50-9/16
Width (in.) G
35-7/8*
Width with doors open 90° less door handle (in.) H
36-3/16
Each side (in.)
1/8
Top (in.)
1
Back (in.)
1
*Width including top caps is 36-3/16.
Top View
Front View
Note: If the doors cannot be fully opened because of an obstruction or a wall on either side, a door stop should
be provided to prevent door or wall damage. If the doors cannot be opened at least 90 degrees, access to the
drawers is limited.
Specification Created 4/02
Note: Add 9/16” for water hook-up. Hook-up fits in 5/8” back air clearance
when calculating installation depth.
If installed against a wall, allow clearance of 14-3/16”.
To remove fresh food pans, remove door bins.
Clearance required to remove fresh food full-size pan without disassembling
is 18-15/16".
Allow additional space for any necessary leveling adjustments.
For answers to your Monogram,® GE Profile™ or
GE appliance questions, visit our website at
GEAppliances.com or call
GE Answer Center® service, 800.626.2000.
TM
PSW26SGN – GE Profile Arctica™ 25.5 Cu. Ft. Side-By-Side Refrigerator with Dispenser
To Remove Top Cap and Doors on PSW26SGNBS
1.
Step 1: Locate and remove two Phillips head screws on the top of
the refrigerator. Remove two screws, one on each side at
the rear of the top cap. Lift off and remove top cap.
Step 2: Open both doors. Remove one screw on each side of the
toekick. Pull forward to remove toekick.
Step 3: On the freezer door, disconnect water line coupler by pushing
against the collar on the left side. Disconnect wire harness.
Step 4: Use a Torx T-20 screwdriver to remove 2 screws holding
the top hinge. Carefully remove hinge while supporting
door. Lift door up and off bottom hinge. Remove fresh
food door in the same manner. Note: Do not remove
bottom hinges! Door alignment will be difficult if bottom
hinges are removed.
Hinge Screws
4.
Step 5: Place refrigerator onto a hand truck, upright and against
one side. Move refrigerator to the installation location.
Reinstall Doors, Top Cap
Step 6: Carefully lower doors onto bottom hinges. Be sure to route
the tubing and electrical connector through the bottom
hinge. Reinstall top hinges.
3.
2.
Step 7: Place cap over the top of the refrigerator. Reinstall the
original screws in the top and back of the cap.
Step 8: Reconnect the wiring harness and waterline.
Toekick Screw
Wire Harness
Water Line Coupler
Specification Created 4/02
For answers to your Monogram,® GE Profile™ or
GE appliance questions, visit our website at
GEAppliances.com or call
GE Answer Center® service, 800.626.2000.
TM
PSW26SGN – GE Profile Arctica™ 25.5 Cu. Ft. Side-By-Side Refrigerator with Dispenser
Features and Benefits
• 25.5 cu. ft. Capacity (Fresh Food 16.02 cu. ft./Freezer 9.48 cu. ft.)
• Upfront Electronic Digital Display Shows the Actual Temperature
Inside of the Refrigerator
• Upfront Electronic Touch Temperature Controls are Precise and Easy to Set
WATER
LOCK CONTROL
CRUSHED
DOOR ALARM
CUBED
LIGHT
QUICK ICE
• CustomCool™ Technology Chills Food and Beverages in Minutes
and Thaws Food Safely and Quickly
RESET WATER FILTER
HOLD 3 SECS
HOLD 3 SECS
• ClimateKeeper™ Temperature Management System – An Electronic System
that Helps Keep Food Fresh
• Tall LightTouch! Dispenser Easily Accommodates Pitchers, Blenders, Coffeepots
and all Sizes of Glassware (with Door Alarm and Child Lock)
• Integrated Shelf Support System with QuickSpace™ Shelf Allows for
Maximum Flexibility and Easily Accommodates Taller Items
• Model PSW26SGNBS – Stainless steel
Specification Created 4/02