1
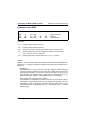
T5023/5023+
Programming Guide
"All rights, including rights of translation by printing, copying or similar methods,
even of parts, are reserved.
All rights, including rights created by patent grants or registration of a utility model or design, are reserved. Delivery subject to availability; right of technical modifications reserved."
TRADEMARKS
All names of hardware and software products mentioned in this manual are trade names and/
or trademarks of their respective manufactores.
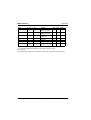
Contents
Preface ..................................................................................................... 1
Conventions .............................................................................................. 1
Abbreviations ............................................................................................ 2
Use of the manual ..................................................................................... 2
Contents of the manual ............................................................................. 3
Short description of the document printer ........................................... 7
Document printing point ............................................................................ 7
Options...................................................................................................... 8
Magnetic stripe reader (MSR)............................................................. 8
MICR................................................................................................... 8
Feeder................................................................................................. 8
Memory extension............................................................................... 8
System interface ....................................................................................... 9
Physical interface................................................................................ 9
Logical protocol................................................................................... 9
Application areas .................................................................................... 11
Programming interface (General) ....................................................... 13
Encryptions/Codes .................................................................................. 13
ASCII code........................................................................................ 14
Activating the document printer functions ......................................... 16
Print effects ............................................................................................. 17
Print quality ....................................................................................... 17
Fonts ................................................................................................. 18
Font size / character density ............................................................. 19
Highlighting text ................................................................................ 21
Page layout ....................................................................................... 23
Character tables...................................................................................... 25
National character sets ..................................................................... 26
Characters defined by the user in character tables .......................... 26
Graphics............................................................................................ 27
Document printer specifications .............................................................. 28
Document printing............................................................................. 29
Magnetic stripe processing ............................................................... 30
Special features of the document processing ................................... 31
T5023/5023+ - Programming Guide
Contents
Standard commands............................................................................. 33
Notes about command description.......................................................... 33
Description components.................................................................... 33
Coding of decimal command parameters ......................................... 34
Controlling the configuration of the printer .............................................. 41
Initializing the printer ......................................................................... 42
Selecting unidirectional printing for one line...................................... 44
Switching the unidirectional printing mode on/ off ............................ 44
Setting the MSB to 1 ......................................................................... 46
Setting the MSB to 0. ........................................................................ 47
Deleting the MSB specification ........................................................ 48
Printer offline ..................................................................................... 49
Printer online ..................................................................................... 49
Automatic single sheet feeder on/off................................................. 50
Special character codes .......................................................................... 51
Carriage return .................................................................................. 51
Backspace of one character.............................................................. 53
Deleting a character .......................................................................... 54
Cancelling a line................................................................................ 54
Line feed commands ............................................................................... 55
Line feed ........................................................................................... 56
Carrying out an n/ 180 inch line feed ................................................ 57
Determining 1/8 inch line spacing ..................................................... 58
Determining 1/6 inch line spacing ..................................................... 59
Determining n/180 inch line spacing ................................................. 60
Determining n/60 inch line spacing ................................................... 61
Determining n/360 inch line spacing ................................................. 63
Sheet ejection commands ....................................................................... 64
Sheet ejection ................................................................................... 65
Determining the document length at n lines...................................... 66
Determining the document length at n inches................................... 67
Vertical print control................................................................................. 68
Setting the bottom margin ................................................................. 69
Function: ........................................................................................... 69
Deleting the bottom margin .............................................................. 70
Determining / deleting vertical tabs (channel 0) ............................... 71
Determining / deleting vertical tabs for any channel ....................... 72
Selecting a vertical tab channel ....................................................... 73
Vertical tabulation ............................................................................. 73
T5023/5023+ - Programming Guide
Contents
Paper control .................................................................................... 74
Horizontal print control ........................................................................... 75
Setting the left margin ...................................................................... 77
Setting the right margin ................................................................... 80
Setting the text alignment ............................................................... 82
Setting / deleting horizontal tabs ...................................................... 84
Horizontal tabulation ........................................................................ 85
Horizontal positioning (absolute) ...................................................... 86
Horizontal positioning (relative) ....................................................... 88
Determining the character spacing .................................................. 90
Print quality and character size ............................................................... 92
Switching print quality (Draft/ LQ) ................................................... 94
Selecting the LQ type font ................................................................ 96
Switching proportional spacing on/off ............................................. 97
Selecting the character size 10 cpi (Pica) ........................................ 98
Selecting the character size 12 cpi (Elite) ........................................ 99
Selecting the character size 15 cpi ................................................ 100
Print modes ........................................................................................... 101
Switching on condensed print ........................................................ 102
Switching on condensed print ........................................................ 103
Switching off condensed print ....................................................... 104
Switching on elongated print for one line ...................................... 105
Switching on elongated print for one line ....................................... 106
Switching off elongated print .......................................................... 107
Switching elongated print on/off .................................................... 108
Enable/Disable Double Character Height ....................................... 109
Switching on bold print ................................................................... 110
Switching off bold print ................................................................... 111
Switching on double impact print .................................................. 112
Switching off double impact print ................................................... 113
Switching underlining on/off ........................................................... 114
Switching on superscript/subscript ................................................ 115
Switching off superscript/subscript ................................................ 116
Selection of combined print mode ................................................. 117
Non- executable commands ............................................................... 120
Signal tone ...................................................................................... 120
Switching half- rate printing on/off .................................................. 121
Selecting the print colour ............................................................... 121
T5023/5023+ - Programming Guide
Contents
Character set commands .................................................................. 123
Character set selection ......................................................................... 124
Definition of characters.......................................................................... 133
Notes on the use of user defined characters......................................... 145
Syntax of the character set commands ................................................. 147
Switching on italic print ........................................................................ 147
Switching off italic print ................................................................... 148
Selecting the character set.............................................................. 149
Selecting a national character set ................................................... 150
Switching on/off the character set defined by the user .................. 151
Switching on extended character set ............................................ 152
Switching off extended character set ............................................ 153
Copying the character set into the RAM ......................................... 154
Transferring the character definition ............................................... 155
Graphics commands........................................................................... 157
Graphics modes .................................................................................... 159
Mode of operation of the graphics commands ...................................... 160
Syntax of the graphics commands ........................................................ 163
Selecting the graphics mode .......................................................... 163
Switching on the ’single density’ graphics mode ........................... 168
Switching on the ’double density’ graphics mode ......................... 169
Switching on the ’double density and double rate’ graphics mode . 170
Switching on the ’quadruple density’ graphics mode ...................... 171
Reassigning graphics commands .................................................. 172
Additional commands (Printer).......................................................... 173
Structure of the additional commands................................................... 174
General ........................................................................................... 174
Transfer of user data....................................................................... 176
Reaction to incorrect parameters .................................................... 176
Responses ..................................................................................... 176
Notes on the command description................................................. 178
Important notes on document processing ............................................ 179
Character box ................................................................................. 180
Horizontal positioning...................................................................... 182
Vertical positioning .......................................................................... 185
Basic commands for document processing .......................................... 189
Paper feed of the document............................................................ 190
Selection of type fonts/ character sets ............................................ 191
T5023/5023+ - Programming Guide
Contents
Absolute vertical positioning ........................................................... 194
Relative vertical positioning backwards .......................................... 196
Requesting the document width...................................................... 197
Document edge detection ............................................................... 198
Activating passbook processing...................................................... 199
Specification of the horizontal leading edge ................................... 200
Mode switch- over for handling end of paper.................................. 202
Dual station control ......................................................................... 205
Switching on/off Multi Part .............................................................. 206
Controlling the MSR / MICR functions .................................................. 207
Position and measurements for MSR magnetic stripes .................. 208
Parameter block MSR..................................................................... 210
Reading a MSR track...................................................................... 212
Writing a MSR track ........................................................................ 215
Deleting a MSR track ...................................................................... 217
The MICR Read Process ................................................................ 218
Activate parameter command MICR............................................... 221
Reading command MICR................................................................ 222
Status and error messages ................................................................... 223
Notes on the printer status.............................................................. 224
Setting control points/ initiating the control cycle ............................ 226
Setting control point II ..................................................................... 228
Global printer status........................................................................ 230
Special printer messages................................................................ 231
Printing unit parameters.................................................................. 233
Electronic Journal Functions ................................................................. 235
Change between Document and Journal Printing .......................... 235
Application examples ......................................................................... 237
Processing of a blank form ................................................................... 238
Type area........................................................................................ 239
Print effects ..................................................................................... 241
Program steps (annotated) ............................................................. 243
Program (pseudo code) .................................................................. 250
Document processing ........................................................................... 254
Document structure ........................................................................ 255
Print positions ................................................................................. 256
Program steps (annotated) ............................................................. 258
Program (pseudo code) .................................................................. 262
T5023/5023+ - Programming Guide
Contents
Passbook processing with MSR............................................................ 265
Passbook data ................................................................................ 266
Program steps (annotated) ............................................................. 267
Program (pseudo code) .................................................................. 270
Loadable Firmware/Character Generators........................................ 273
Activating the Load Function ................................................................. 274
Load Functions: General ....................................................................... 275
Sequence of a Load Process .......................................................... 276
Module Identification ....................................................................... 277
ESCAPE Sequences (Bootstrap Loader).............................................. 279
Switch-over to the Load Function.................................................... 279
Exiting the Load Function................................................................ 280
Request Module ID/Data ID ............................................................ 281
Loading character generators ............................................................... 284
Indicate "Ready to load character generator" ................................. 284
Loading the Character Generator ................................................... 285
Loading the Firmware............................................................................ 286
Indicate ’Ready to load’................................................................... 286
Loading the Firmware ..................................................................... 286
Length of the Transfer ........................................................................... 287
Reading E-Journal Data.................................................................. 289
Control of Asian Character Sets ........................................................ 291
Pre-setting of the Character Set ESC [ n $ q .............................. 294
Specific Operating System Dependencies ....................................... 295
Windows NT Drivers.............................................................................. 295
Appendix .............................................................................................. 297
Command table ..................................................................................... 297
Command table for Epson ANSI emulation .................................... 297
Definition of barcode printing for T5023 .......................................... 302
Loader commands .......................................................................... 304
E-Journal commands ...................................................................... 304
Character Sets ...................................................................................... 305
Code Page 437 ............................................................................... 307
ISO 8859-2 Latin No. 2 ................................................................... 308
ISO 8859-5 Cyrillic .......................................................................... 309
ISO 8859-7 Greek ........................................................................... 310
ISO 8859-8 Hebrew ........................................................................ 311
T5023/5023+ - Programming Guide
Contents
ISO 8859-9 Latin No. 5 ................................................................... 312
ISO 8859-15.................................................................................... 313
OCR-A ............................................................................................ 314
OCR-B ............................................................................................ 315
Code Page ISO 2............................................................................ 316
Code Page 775 Latin / Baltic .......................................................... 317
Code Page 850 Latin 1 ................................................................... 318
Code Page 852 Latin 2 ................................................................... 319
Code Page 855 ............................................................................... 320
Code Page 857 Latin 5 ................................................................... 321
PC Code Page 858 ......................................................................... 322
Code Page 860 (Portugal) .............................................................. 323
Code Page 866 Latin/Cyrillic........................................................... 324
Code Page 869 Latin/Greek ........................................................... 325
Thailand Character Set (customer specific).................................... 326
1250 Windows Latin 2..................................................................... 327
1251 Windows Cyrillic..................................................................... 328
1252 Windows Latin 1..................................................................... 329
1253 Windows Greek...................................................................... 330
1254 Windows Latin 5..................................................................... 331
1255 Windows Hebrew ................................................................... 332
1256 Windows Arabic ..................................................................... 333
1257 Windows Baltic Rim ............................................................... 334
Chinese Characters in the Passbook/Document Printer....................... 335
Printer: One-byte mode................................................................... 335
Printer: Two-byte mode................................................................... 336
GB 2312-80 / GB 5007 / GB 5199 .................................................. 342
Font number.................................................................................... 342
Available Character Generators for the document printer .............. 343
IBM Emulations ..................................................................................... 345
IBM 4722 Emulation........................................................................ 345
IBM Proprinter XL24 Emulation ...................................................... 348
Range of Commands for the ProprinterXL24 and 4722.................. 349
Olivetti PR50 Emulation ........................................................................ 353
General ........................................................................................... 353
Emulation ........................................................................................ 353
Initialization parameter.................................................................... 353
Range of Commands for the OLIVETTI PR50................................ 353
Character Sets for the Olivetti Emulation........................................ 355
T5023/5023+ - Programming Guide
Contents
Paper Specifications.............................................................................. 356
Reference Lines .............................................................................. 356
Error messages ..................................................................................... 359
Status messages............................................................................. 359
Status messages (Bootstrap loader activated) .............................. 360
Malfunctions ................................................................................... 361
Description of the physical interface...................................................... 367
General ........................................................................................... 367
Handshaking protocols.................................................................... 367
Interface data serial interface.......................................................... 369
Interface data external Centronics interface ................................... 375
Glossary ............................................................................................... 385
Index ..................................................................................................... 387
T5023/5023+ - Programming Guide
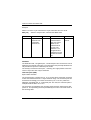
Preface
This programming manual describes in the main the instruction set of the multifunctional flat bed printer. The document printer is a workstation printer with one
printing point and is used to process documents and passbooks. The printer can
be fitted with a magnetic stripe reader (MSR) as an option.
This manual is intended for all users, who wish to create their own programs, for
example, for document or passbook processing . Detailed technical data, operating information (for example, connecting the printer, inserting the paper, etc.),
and maintenance instructions are in a separate operating instruction.
Fault elimination information is in the appendix of this manual.
Conventions
Following conventions are made in this manual:
Courier
Courier Bold
–
l
„“
J
i
System outputs, such as error messages, information, notes, file extracts
Example of user inputs
Indicates a list.
Indicates a specific sequence must be followed.
Refers to other chapters or sections.
Marks functions which have to be preferred. All
functions without this sign are only mentioned for
compatibility reasons, they should only be used by
exception.
General informations, notes and tips.
Warning notes, which have absolutely to be followed.
T5023/5023+ - Programming Guide
1
Abbreviations
Preface
Abbreviations
APA graphics
APR
CS
DQ
IF
LQ
MSR
MICR
CSI
LSB
MSB
OCR
All Points Addressable graphics
Automatic Passbook Reader
Character Set
Draft Qualitiy
Interface
Letter Quality
Magnetic Stripe Reader
Magnetic Ink Character Recognition
Control Sequence Introducer
Least Significant Bit
Most Significant Bit
Optical Character Recognition printer fonts
Use of the manual
This manual describes printer programming for various document processing
applications.
All program examples in this manual are independent of programming languages (pseudo code). Particulars for the conversion of pseudo code instructions
into a programming language (special BASIC dialects, COBOL, C, etc.) will not
be dealt with here. Likewise, particulars of the communication protocol between
the document printer and the connected computer are not taken into account.
2
T5023/5023+ - Programming Guide
Preface
Contents of the manual
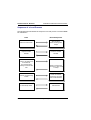
Contents of the manual
Chapter “Short description of the document printer“
This chapter briefly lists the hardware components of the document printer and
outlines the application areas of the printer.
Chapter “Programming interface (General)”
This chapter outlines the basic principle of logical communication between an
application and the printer via ESC sequences. The functions of the multifunctional document printer are described using examples.
Chapter “Standard commands”
All the Epson- compatible control commands of the document printer are described here. Exceptions are the character set and graphics commands, which will
be explained in subsequent chapters.
In particular, the commands for the following application areas are described:
–
Controlling the configuration of the printer
–
Setting the page and line constants
–
Vertical and horizontal tabulation
–
Setting the print quality and the character size
–
Highlighting parts of the text by setting a suitable print mode (e. g. bold print, un-
derlining, superscript, subscript, etc.).
Chapter “Character set commands”
The emphasis of this chapter is on the setting of characters defined by the user with
the description of the relevant commands. In addition, the commands for switching
over between character sets are described (for example, standard character set, graphics character set, national character sets).
Chapter “Graphics commands”
This chapter describes commands used to print drawings, diagrams or pictures
as dot graphics. The basic principle is to encrypt the individual picture dots as a
series of numbers and to transfer them to the printer.
T5023/5023+ - Programming Guide
3
Contents of the manual
Preface
Chapter “Additional commands”
This chapter explains special control commands for document processing or for
processing ZeKoSa data. An important application area for the commands described here is the processing of passbooks. This also contains important information on processing documents using horizontal and vertical print positioning.
Chapter “Application examples”
A small program example of command functions normally belongs to the command descriptions in the chapters “Standard commands”, “Character set commands”, etc.
The chapter “Application examples” uses more complex operations to explain
the use of specific commands in connection with:
–
Text processing with the document printer
–
Passbook processing with MSR.
Individual program steps are annotated in detail and the program structure is
presented in the form of a pseudo code.
Chapter “Loadable Firmware/Character Generators”
Firmware and character generators of the document printer are stored in a programmable memory with FLASH technology. The chapter "Loadable Firmware/
Character Generators" describes the sequence of load processes and the
bootstrap loader ESC sequences.
Chapter “Controlling Asian Character Sets”
Asian character sets must be made available for the specified printers to prepare
the document printer for its usage in the Asian area. This chapter provides a description of the control of the Asian character sets.
Chapter “Specific Operating System Dependencies”
This chapter describes specific operating system dependecies.
Chapter “Glossary“
Special terms are explained in this chapter.
4
T5023/5023+ - Programming Guide
Preface
Contents of the manual
Appendix
The appendix of this product manual contains the following information:
–
List of all document printer commands
–
Character set tables
–
Printable document and paper versions/ paper specification
–
Table of error messages
–
Description of the physical interface
Chapter “Index“
Facilitates searching for selected terms.
T5023/5023+ - Programming Guide
5
Contents of the manual
6
T5023/5023+ - Programming Guide
Preface
Short description of the document
printer
The document printer has a document printing point with which single documents,
multiple documents (sets of forms) and passbooks can be processed. The printer
can also be equipped with a magnetic stripe reader (MSR), a magnetic ink card rea-
der (MICR) or a single sheet feeder as an option.
Document printing point
The term ’document’ includes all single documents, for example, cheques, unprinted DIN A4 papers (blank documents), forms of various sizes or passbooks.
All documents are fed by the document printer over a flat bed according to the
principle of single- sheet processing, are processed and ejected again. The processing of a document is begun when each single document is put forward.
The form feed of the documents can be freely selected. The feeding of the documents is supported by an automatic alignment. The print characters can be positioned relative to all the document edges.
The following provides a comprehensive list of the characteristics of the document printing point:
–
90 printing points with 10 characters/ inch
–
Automatic document alignment
–
Automatic print head adjustment
–
Automatic document edge detection
–
Print head with 24 needles
–
2 print modes (LQ, Draft)
–
’24- bit’ and ’8- bit’ graphics
–
The print rate is dependent on the horizontal density of the character font
selected in each case. There are two different print rates for the print modes
LQ (Letter Quality) and Draft. The document printer can also process type
fonts, print qualities or multi- phase characters, which vary from the pixel
data structure of the standard character sets. More than two print rates are
possible due to the respective character font.
T5023/5023+ - Programming Guide
7
Options
Short description of the document printer
Options
Magnetic stripe reader (MSR)
As an option, the document printer can be delivered with a magnetic stripe reader (MSR device) for passbooks. This enables reading and updating from the
magnetic stripe on passbooks depending on certain recording modes (DIN /
IBM). It is possible to change between various recording modes via the program.
MICR
Magnetic ink character reader for the fonts CMC7 and E13B.
Feeder
Single sheet feeder for 500 sheets A4.
Memory extension
The memory extension is necessary e.g. for journal data or asiatic fonts.
8
T5023/5023+ - Programming Guide
Short description of the document printer
System interface
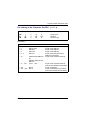
System interface
Data, which activates the functions of the printer is transferred through the system interface. The interfaces has the following characteristics:
–
the physical connection
–
the logic protocol (command sequences)
The characteristics are selected via the operating panel.
Physical interface
Two interfaces are available:
–
internal interface (RS232)
–
optional (external) interface (Centronics, LAN, etc. in combination with a correspondent additonal logic).
Logical protocol
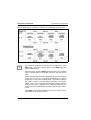
Several protocols (emulations) are available. Dependent on the loaded firmware
configuration the following selection is possible:
Firmware configuration ’5023_STD’
l
l
l
Epson ANSI
IBM 4722
Proprinter XL24
Firmware configuration ’5023_OLI’
l
l
l
Epson ANSI
Olivetti
Proprinter XL24
T5023/5023+ - Programming Guide
9
System interface
Short description of the document printer
Epson ANSI
The manual describes detailed this emulation. As all functions of the printer are
supported optimal, this emulation should be used for the relisation of new applications. Also this emulation can be used for the removal of the following printers:
–
EPSON ESC P
–
ND 90
–
HPR 4904
–
HPR 4905
IBM 4722, Proprinter XL 24, Olivetti
This emulations copy printers of other producers (partially with restrictions). In
this manual only the command table, specialities, parameter settings and possible incompabilities are described.
10
T5023/5023+ - Programming Guide
Short description of the document printer
Application areas
Application areas
The processing of single/multiple documents and passbooks allows the use of
the document printer in the following areas:
Industry and commerce:
–
Delivery notes
–
Freight and customs papers
–
Invoices
–
Envelopes
Public authorities:
–
Application forms
–
Filing cards
–
Tax car ds
–
Motor vehicle papers
–
Driving licences
Banks, Insurances and Services:
–
Passbooks
–
Cheques
–
Transfers
–
Medical certificates
–
Application forms
Magnetic stripe writing and reading equipment is available for use in banks as an
option.
T5023/5023+ - Programming Guide
11
Application areas
12
Short description of the document printer
T5023/5023+ - Programming Guide
Programming interface (General)
This chapter contains general information on how the functions of the document
printer can be activated by a user program, i. e., how the document printer can
be programmed. This chapter also explains the functions which can be activated
by means of the program in a short, comprehensive summary.
Encryptions/Codes
The print functions of the document printer are initiated from a program in which
unique numeric encryptions (codes) representing characters and commands are
transmitted from the computer to the printer. The individual codes stand for printable characters (letters, numbers, punctuation marks, mathematical symbols)
or control codes, which cause certain actions (for example, document ejection,
deletion of characters, carriage return).
T5023/5023+ - Programming Guide
13
Encryptions/Codes
Programming interface (General)
ASCII code
A code table specifies how the printable characters and control commands, for
example, for document ejection and carriage return are encrypted binarily in the
computer or printer. The encryption is expressed by a corresponding hexadecimal or decimal number. A certain character then lies in hexadecimal notation or
in the decimal representation, for example, in the range hex 00 to hex FF or decimal 0 to decimal 255 (8- bit encryption).
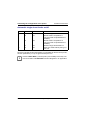
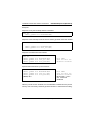
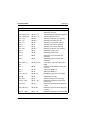
Examples:
Character
Meaning
Decimal
Hex
A
a
4
LF
ESC
Letter big A
Letter small a
Number 4
Line Feed
Escape
65
97
52
10
27
41
61
34
0A
1B
With the document printer and with most computers the basis for the encryptions is
the code system ASCII ( A merican S tandard C ode for I nformation I nterchange),
which only differs in certain characters for special foreign languages (national ASCII
table). The ASCII code is encrypted via 7 bits, whereby 128 different meanings are
possible.
Escape sequences / CSI sequences
As the ASCII table provides fewer control codes than print functions, the commands
for the printer normally consist of a sequence of two or more ASCII characters. Such
a code sequence is always preceded by the encryption of the control code ESC (Escape) (ASCII code 27 (decimal) or 1B (hexadecimal). This signals to the printer that
the encryptions following ESC are to be interpreted as commands for the printer.
There are two kinds of code sequences for the document printer:
–
ESC ...
Code sequences, which begin with ESC or the appropriate encryption, are
called ESC sequences.
–
CSI ... = ESC [ ...
Code sequences introduced with CSI (Control Sequence Introducer) are
called CSI sequences. CSI sequences are introduced with encryptions of
the character sequence “ESC [” and concluded with the encryption of two
14
T5023/5023+ - Programming Guide
Programming interface (General)
Encryptions/Codes
characters depending on the command I (= Intermediate Character) and F
(= Final Character). The CSI sequences are used to control special document printer functions for document and MSR processing (see “document
printer specifications” in this chapter and the chapter “Additional commands”).
Examples (ESC sequences):
ESC
sequence
Meaning
ASCII encryption
ESC 4
Italic print on
ESC 5
Italic print off
ESC 0
Deleting bottom margin
ESC C 60
Setting the document length
to 60 lines
decimal
hexadecimal
decimal
hexadecimal
decimal
hexadecimal
decimal
hexadecimal
: 27 52
: 1B 34
: 27 53
: 1B 35
: 27 79
: 1B 4F
: 27 67 60
: 1B 43 3C
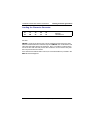
Examples (CSI sequences, here without encryptions):
CSI
Parameter
ESC [
ESC [
n
I
F
Meaning
%
r
Deleting of MSR track
$
t
(no parameters)
Activating passbook processing
T5023/5023+ - Programming Guide
15
Encryptions/Codes
Programming interface (General)
Activating the document printer functions
The control codes or ESC or CSI sequences must be addressed to the printer directly
and uniquely via corresponding program commands. Depending on the respective
programming language, this is, e. g., via PRINT or WRITE instructions.
Example:
Three lines are to be printed. Lines 1 and 3 are printed in normal print, line 2 in
italic print.
Pseudo code:
BEGIN
PRINTLF("
PRINT(ESC
PRINTLF("
PRINT(ESC
PRINTLF("
END
first line")
4)
second line")
5)
third line")
Conversion into BASIC:
10
20
30
40
50
LPRINT
LPRINT
LPRINT
LPRINT
LPRINT
"first line"
CHR$(27);" 4";
"second line"
CHR$(27);" 5";
"third line"
Result:
i
16
In this manual the program examples are depicted exclusively in the
form of a pseudo code and the control codes or code series are given
in decimal ASCII encryption or directly as characters. The corresponding information must then be converted into the appropriate programming language.
T5023/5023+ - Programming Guide
Programming interface (General)
Print effects
Print effects
The design of a print product is dependent on the print quality, type font, type
size or character width and highlighting text, e. g., by underlining or bold print.
Print quality
The print quality is characterized by the density of the print characters and by the
print rate. The document printer provides two print qualities:
–
LQ mode (Letter Quality)
The LQ mode has the higher print quality and lower print rate.
–
DQ mode (Draft Quality)
The DQ mode has a lower print quality, but a higher print rate.
Example:
The print quality can be selected by means of the corresponding ESC sequences via a program or the menu.
T5023/5023+ - Programming Guide
17
Print effects
Programming interface (General)
Fonts
In addition to the DQ font for drafts, the default fonts Roman, Sans Serif, OCR A
(OCR A1 Eurobanking) and OCR B (OCR B1 Eurobanking), as well as the character set ISO 8859 with the following versions are available for Letter Quality
(LQ mode):
–
East Europe
–
Cyrillic
–
Greece
–
Hebrew
–
Tur key
The DQ, Roman and Sans Serif fonts are selected via corresponding ESC sequences in the program.
The OCR- A, OCR- B and ISO 8859 fonts, as well as all special, non- Epsoncompatible fonts, can only be selected via CSI sequences. The character fonts
thus selected are treated like normal LQ type fonts, this means that all standard
commands (print quality, character size, print type) are also effective for these
fonts.
Example (fonts in Letter Quality):
18
T5023/5023+ - Programming Guide
Programming interface (General)
Print effects
Font size / character density
The width of a printed character is expressed in ’characters per inch’ (cpi) and is
often called ’character density’, for example
10 characters per inch = 10 cpi
The document printer can print in the character widths 10, 12 and 15 pitch. Each
individual character is then the same width.
Example:
The font size can also be influenced by proportional type, as well as by elongated or condensed print.
Proportional type
With proportional type each character takes up a different amount of space according to its size (for example, ’I’ takes up less space than ’B’ or ’t’ less than ’g’).
Texts in proportional type are normally shorter than in normal print.
Example:
Elongated print
With elongated print, each character is represented in double width. It is possible, for example, to highlight page headings in a text.
Example:
T5023/5023+ - Programming Guide
19
Print effects
Programming interface (General)
Condensed print
If printing takes place in 10 or 12 pitch in condensed print, each character can
be reduced to 60% of its width in normal print.
Example:
20
T5023/5023+ - Programming Guide
Programming interface (General)
Print effects
Highlighting text
The following print functions of the document printer can be influenced by corresponding ESC sequences:
–
Double impact print/ bold print
–
Underlining
–
Superscript/ subscript
–
Double Superscript
Double impact print / bold print
With double impact print (= vertical bold print) the print head goes over each line
twice. The paper is transported 1/180 inch after the first print and the same characters are printed again vertically and slightly displaced.
With bold print (also called horizontal bold print) each dot of a character is printed
twice, whereby the second dot is displaced slightly to the right of the first dot printed.
In double impact print, the space between the dots is filled up, in (horizontal) bold
print, the lines of a character are intensified. Bold and double impact print can be
combined so that particularly bold characters result.
Example:
Underlining
Certain parts of a text can be highlighted by switching the underlining mode on
and off.
Example:
T5023/5023+ - Programming Guide
21
Print effects
Programming interface (General)
Superscript / subscript
Footnotes, equation or special text designs are possible by switching superscript
and subscript on and off.
Example::
22
T5023/5023+ - Programming Guide
Programming interface (General)
Print effects
Page layout
By means of appropriate ESC sequences the page design can be influenced or
the text output controlled on the basis of pre- printed forms. This includes, for example:
–
Setting and deleting horizontal and vertical tabs
–
Setting the width of a printed page
–
Setting the line spacing
–
Presenting a text flush left, flush right, centered or with margin justification.
Example (setting page constants):
T5023/5023+ - Programming Guide
23
Print effects
Programming interface (General)
Example (Text adjustment):
Example (line spacing):
24
T5023/5023+ - Programming Guide
Programming interface (General)
Character tables
Character tables
Two areas are differentiated with the printable characters in a code table:
–
Area with the basic character set of each type font (Draft standard type, Roman, Sans Serif). This area is also called the ’basic character table’.
The characters of the basic character table are encrypted in ASCII by the codes hex 20 to hex 7F (decimal 32 to 127).
–
Area with italic characters, special characters, graphics characters or characters defined by the user. This area is also called the ’upper character table’.
The characters in the upper character table are encrypted in ASCII with the
codes hex 80 to hex FF (decimal 128 to 255).
The italic character set contains a basic character table (hex 20 to hex 7F) and
an italic character table (hex A0 to hex FF). The area hex 80 to hex 9F is not
utilized. In the graphics character set the upper character table contains special
graphics characters in the area hex A0 to hex FF. In the extended graphics set
the upper character table additionally contains characters in the area hex 80 to
hex 9F.
It is possible to switch over the various character sets at any time via a program
by means of appropriate ESC or CSI sequences.
i
The program can be switched to different fontpages by ESC sequences. You can find the available codepages in the appendix.
T5023/5023+ - Programming Guide
25
Character tables
Programming interface (General)
National character sets
By selecting a national character set, characters used in other languages are additionally available to the user. The selection of national character sets results
via an ESC sequence or via the operating panel of the printer. These characters
replace in each case the corresponding encrypted characters in the basic character table.
Examples:
Code
Basic
character
Italy
Japan
Norway
5B
60
7C
Ä
,
:
.
ù
ò
[
`
|
Æ
é
o
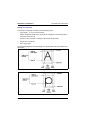
Characters defined by the user in character tables
Symbols stored in character tables are printed on the basis of the respective
character code and the assigned dot pattern.
Example:
By means of certain ESC sequences any dot patterns can be defined anew and
assigned to a code of the basic character table. For example, a new alphabet,
symbols specific to a subject or individual graphics characters can thus be produced and printed instead of the standard character in each case.
The definition of such characters specific to the user will be dealt with in a separate section. In principle the production of a new character or symbol is the production of a graphics pattern, for which the printer needs exact details as to
26
T5023/5023+ - Programming Guide
Programming interface (General)
Character tables
where each dot is to be printed.
Characters defined by the user are copied by means of ESC sequences into the memory of the document printer. It is possible to switch over at will between the normal
character set and that defined by the user.
Graphics
Via the document printer simple pictures and/ or diagrams can first be presented
on the basis of standard or graphics characters or symbols defined by the user
on the one hand and the formatting possibilities (for example, line spacing, tabs,
highlighting) on the other hand. The structure of such semi- graphics can be controlled by programs with corresponding ESC sequences. The production of semi- graphics on the basis of character sets is, in principle, the connecting of
individual characters over several lines.
Example:
By switching over to a graphics mode special graphics commands become
available through which drawings, diagrams or pictures can be printed as dot
graphics. Each picture dot is encrypted as a number sequence and transferred
to the printer. The appearance of dot graphics can be influenced by setting the
dot density, whereby a maximum density of 180 x 360 dots per inch is possible.
The document printer works in various graphics modes. A graphics mode is
identified by the number of needles addressed during printing (8 or 24) and the
horizontal dot spacing (60 to 360 dots per inch).
The production of dot graphics is in principle the connecting of dot data over several lines. The line spacing can be set in such a way that no spaces arise between the lines in a picture.
T5023/5023+ - Programming Guide
27
Document printer specifications
Programming interface (General)
Document printer specifications
Business procedures or transactions in a financial institution involve a series of
manual and program activities, e. g., the insertion and removal of documents
and passbooks or the entry of deposits and withdrawals, bank code and account
number. These processes are supported by special banking periphery and the
appropriate programs. The printer processing includes, for example, voucher
prints on documents and passbooks.
Standardly or optionally the document printer has features with which
–
documents or passbooks can be processed
–
magnetic stripes can be read and written on.
Additional special commands are available for programming:
–
positioning commands
–
control signals
–
control of the MSR functions
–
special functions.
The analysis of the document printer responses, which provide information
about the present status of the printer or contain data on the program, is also relevant here:
–
status of the printer after the appearance of exceptional conditions like errors,
operating interruptions or operating panel entries (status signals of the printer,
which can appropriately be acted upon in the program)
–
receiving requested data.
28
T5023/5023+ - Programming Guide
Programming interface (General)
Document printer specifications
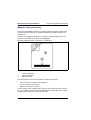
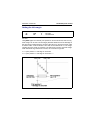
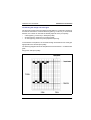
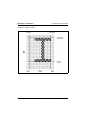
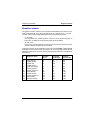
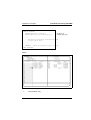
Document printing
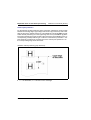
For documents (DIN A4 sheets, standard forms) or passbooks the logical structure of a document must be considered.
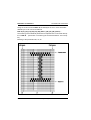
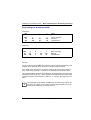
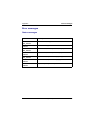
Example (passbook constants):
1
Page heading area
(is not printed during a passbook transaction)
2
3
4
Area with lines for logging deposits and withdrawals
Last printable line
Footer area
(is not printed during a passbook transaction).
T5023/5023+ - Programming Guide
29
Document printer specifications
Programming interface (General)
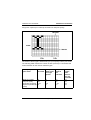
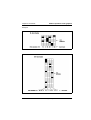
Magnetic stripe processing
The device called MSR is used for processing magnetic stripes on passbooks.
The MSR equipment allows an automatic reading and updating of data in encrypted form.
In what form the appropriate data is encrypted on a MSR magnetic stripe depends on the respective recording mode (DIN/IBM).
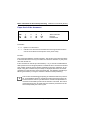
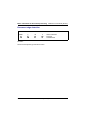
Example (magnetic stripe on the back of a passbook):
1
2
3
Inside of passbook
Back of passbook
Mangetic stripe
Here the magnetic stripe could contain the following information:
–
Next or last line to be printed in the passbook
–
Account number of the customer
–
Balance (credit) of the customer.
Via the reading of the magnetic stripe, the entry of this data becomes unnecessary. The values for the line number and the balance are updated on the magnetic stripe before the printing of the passbook line.
30
T5023/5023+ - Programming Guide
Programming interface (General)
Document printer specifications
Special features of the document processing
When processing documents, in contrast to the normal processing of single
sheets or continuous forms, the varying sizes of the documents and the document feeding mode must be considered.
Insertion and ejection of documents
In principle there are two possibilities for controlling the insertion and ejection of
documents.
One possibility is that the printer initiates an insertion automatically at a holding
position (set if necessary by appropriate commands), when a document is fed in
by the user. When the first print or positioning command for this document is recognized, it will be drawn in and transported to the correct processing position.
If the document printer receives print instructions and no document is available,
the user will be requested to insert a document by a flashing LED indicator and
the LCD display on the operating panel.
The ejection of a document can be initiated by a form feed command.
Using a special CSI command, documents can also be drawn in explicitly to the
base of the first print line and processed; or documents only fed in can be ejected. Thus insertion and ejection procedures can be secured by means of separate control cycles in the program.
T5023/5023+ - Programming Guide
31
Document printer specifications
32
Programming interface (General)
T5023/5023+ - Programming Guide
Standard commands
This chapter describes all Epson- compatible commands (ESC sequences).
Commands for changing character sets (see “Character set commands”) and
commands with which graphics can be created (see “Graphics commands”) are
not included here. Special commands (CSI sequences) for document processing or for processing MSR data are described in the chapter “Additional commands”.
Notes about command description
The following first explains how the respective ESC sequence for a command is
described and of which components this description consists. An explanation regarding the interpretation of the pseudo code instructions in the program examples then follows. A note is then given on how the commands normally
behave when incorrect command parameters are transmitted.
All notes given in this section also apply for the “Character set commands“ chapter and “Graphics commands” chapter and with variations also for the “Additional
commands“ chapter.
Description components
The description of the standard commands is divided into the following components:
–
Command name with ASCII coding in hexadecimal and decimal encryption
–
Description of function and usage
–
Additional notes on requirements, options and connections with other commands
–
Normally each command description is concluded with a short example
through which the usage and effect of the command is demonstrated.
T5023/5023+ - Programming Guide
33
Notes about command description
Standard commands
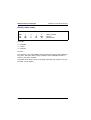
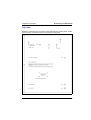
Example of a formal command description (command syntax):
ESC
27
1B
Q
R
A
65
41
(n)
n
n
ASCII character
Decimal
Hexadecimal
Q
R
Command name/ESC sequence
Decimal encryption according to ASCII table
Hexadecimal encryption according to ASCII table
Coding of decimal command parameters
All command parameters n or n1, n2, etc. in the ESC sequences of the Epsoncompatible commands must be transferred to the document printer in binary coded form and not as ASCII characters. Several parameters are simply transferred consecutively without separation characters (e. g. space or comma). The
binary coding of a paramater must be implemented in the user programm by means of a corresponding ASCII coding in hexadecimal or decimal encryption. In
the command syntax parameter values to be coded binarily are bracketed in the
first line (for example, (n) or (n1), (n2) (n3)...). In the subsequent lines with the
hexadecimal or decimal encryption of the command, the parameter descriptions
n, n1, etc. are repeated without brackets as variables for concrete values. Which
values a parameter can have are specified in the subsequent function description.
34
T5023/5023+ - Programming Guide
Standard commands
Notes about command description
Example:
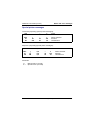
Determining the document length at n inches
ESC
27
1B
A
65
41
Q
(n)
n
n
ASCII character
Decimal
Hexadecimal
Function:
ESC C NUL( n) sets the document length at n inches (absolute document
length independent of the line spacing). The value n must be between 1 (inch)
and 22 (inches).
R
Q
R
i
Parameter value of n must be encrypted binarily
Note on which values the parameter n can have
In contrast to the ESC sequences of the standard, character set and
graphics commands for the document printer- specific additional commands (CSI sequences), the command parameters n, n1, etc. are coded as ASCII values. For example, three bytes are transferred for a
three- figure parameter value n = 123 (see “Additional commands”
chapter).
Program examples
All instructions in the program examples to demonstrate the standard control
commands are represented independently of a certain programming language.
This is done by formulating the program lines in a colloquial pseudo code. In
practice, this pseudo code, depending on the programming language used, must
be converted into the appropriate program instructions.
T5023/5023+ - Programming Guide
35
Notes about command description
Standard commands
Example:
BEGIN
PRINTLF("Print page with bottom margin")
CALL LINE PRINT
PRINT(char(27),"O")
PRINTLF("Print page without bottom margin")
CALL LINE PRINT
END
BEGIN LINE PRINT
SET N = 0
REPEAT
SET N = N + 1
PRINTLF("Line", N,"after title")
UNTIL N = 6
END LINE PRINT
Explanation of the pseudo code instructions:
1
2
3
4
5
6
7
7
7
8
Function
Coding
Instruction block
Loop
Alternative
Initializing
Changing variable value
Subprogram call
Printing without line feed
Printing with line feed
Control characters
Evaluation of printer response
(read data)
BEGIN/END
REPEAT/UNTIL abort criterion
IF...THEN...ELSE ...
SET variable = value
SET variable = variable +/- value
CALL subprogram name
PRINT (arguments)
PRINTLF (arguments)
char(x) or char(a,...,n)
GET (arguments)
(Further explanations on 1, 2, ... , 8 see next pages)
36
T5023/5023+ - Programming Guide
Standard commands
Notes about command description
1
When defining subprograms, after BEGIN and END the subprogram
name is specified (for example, BEGIN LINE PRINT ... END LINE
PRINT).
2
The instruction within REPEAT ... UNTIL (loop body) are executed until the
abort criterion specified after UNTIL is fulfilled (for example, REPEAT ...
UNTIL N = 6). This pseudo code instruction is defined here in such a way
that the loop body is not executed if the abort criterion is already fulfilled
before the first loop run.
3
(for example, IF N = 50 THEN BEGIN ... END or IF n = 50 THEN CALL
NEW PAGE ELSE N = N+ 1)
(for example, SET N=0)
(for example, SET N=N+1)
4
5
6
7
(for example, CALL LINE PRINT)
The data transmission from the program to the document printer is to
be symbolized by means of the procedures PRINT and PRINTLF.
Depending on the arguments, these are control commands
(character(...)) or alphanumeric or numeric user data.
No carriage return (CR) is executed via the procedure PRINT. A line feed
(LF) and also a carriage return (CR) are defined via the procedure
PRINTLF. Depending on whether the printer parameter ’AUTO- CR + LF’
(= CR- HANDLING in the document printer menu) is activated or not, the
real conversion of the PRINTLF procedure must be programmed
accordingly.
T5023/5023+ - Programming Guide
37
Notes about command description
Standard commands
The following values occur as arguments of PRINT and PRINTLF:
Argument
Meaning
"x"
Code of a printable character x from the sequence ESC
character (x)
... x ...
x := decimal encryption of an ASCII value
character (a, b,..., n)
"text"
A, B, C,..., N
or counter, page,
pass, etc.
or x := value of a parameter n, m, etc., which is to be
coded binarily
char( a), char( b), ..., char( n)
string of text/character chain
numeric or alphanumeric variables in the form of
capital letters or speaking names such as “counter”,
“page”, etc.
On ’x’:
For example, C as printable character can be specified directly by means of ’C’
in the sequence ESC C NUL (n) or by means of char (67), whereby 67 is the
decimal ASCII encryption of C.
Examples on char( x):
–
char( 27) with 27 = decimal encryption of ESC
–
char( 4) with 4 = value of n
for example, from the sequence ESC C NUL (n)
8
The procedure GET (arguments) should symbolize the data transmission from the document printer to the program. This procedure is only
relevant for the description of certain CSI sequences in the “Additional
commands” chapter, with which responses from the printer can be evaluated.
Examples:
The command for line feed is LF and is encrypted decimally according to the ASCII
coding by ’10’. Equivalent to this are the pseudo code instructions:
PRINT("This is a line", char(10))
PRINTLF("This is a line")
38
T5023/5023+ - Programming Guide
Standard commands
Notes about command description
Setting the document length (for example, 6 inches = ESC C NULL 6):
PRINT( char(27,67,0,6))
or
PRINT( char(27),"C", char(0), char(6))
Initializing the printer after printing with line feed:
PRINT("text", char(10), char(27),"@")
or
PRINT("text")
PRINT(char( 10))
PRINT(char( 27),"@")
or
PRINTLF("text")
PRINT(char(27),"@")
Printing variable values:
SET counter = 0
REPEAT
SET counter = counter + 1
PRINTLF("This is the line",counter)
UNTIL counter = 10
Enlarging the line spacing successively (n/ 180 inch by means of ESC 3 (n)):
SET N = 0
REPEAT
SET N = N + 1
PRINT(char(27),"3",char(N))
PRINT(" Line spacing", N,"/180 inch")
UNTIL N = 20
Printing a blank line:
PRINTLF()
T5023/5023+ - Programming Guide
39
Notes about command description
Standard commands
Reaction to incorrect parameters or incorrect syntax
Normally incorrect parameters n, n1, etc. are automatically replaced by the respective default value (for example, if the specified value range is exceeded).
Commands with parameters which are within the specified value range, but infringe on the set conditions, are ignored (for example, if horizontal absolute positioning is attempted outside the possible print area).
Exceptions to these rules are specified separately with the corresponding command description, if necessary.
i
40
An exact description of the printable areas and the definition of horizontal and vertical positions is contained in the section “Notes for document
processing” in the chapter “Additional commands”.
T5023/5023+ - Programming Guide
Standard commands
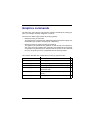
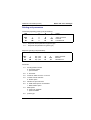
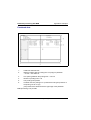
Controlling the configuration of the printer
Controlling the configuration of the printer
The status of the printer can be controlled from a program irrespective of the data to
be printed via the following control commands:
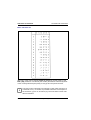
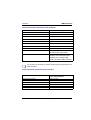
Command
Function
ESC @
ESC <
ESC U (n)
ESC >
ESC =
ESC #
Initializing the printer
Selecting unidirectional printing for one line
Unidirectional printing mode on/ off one line
Setting the 8th bit of incoming data (MSB = 1)
Deleting the 8th bit of incoming data (MSB = 0)
Terminating control of the 8th bit (= delete MSB
specification)
Switching printer off logically (Offline)
Switching printer on logically (Online)
Setting the automatic single sheet feeder mode on/off
DC3
DC1
ESC EM (n)
i
J
J
On some computers the MSB value (Most Significant Bit) is always constant
1. In practice that would mean that in the character table only characters
from the range of 80h to FFh could be addressed and then only italic or graphics characters or characters defined by the user could be printed.
The 8th bit can be deleted using the command ESC =. Therefore, characters from the basic character table (range from 20h to 7Fh) can also
be printed.
On the other hand, for computers which can only transfer 7- bit data
(MSB value always constant 0), the 8th bit can be set to 1 by ESC >.
Then it is also possible to address italic or graphics characters, or characters defined by the user.
T5023/5023+ - Programming Guide
41
Controlling the configuration of the printer
Standard commands
Initializing the printer
ESC
27
1B
@
64
40
ASCII character
Decimal
Hexadecimal
Function:
Via ESC @ the printer can be reset by the program to certain operating conditions (initializing of software). ESC @ resets the printer to the default values and
deletes all the print data of the current line out of the print buffer, which were
transmitted prior to the command.
The following actions will be executed:
–
set line spacing to 6 lines per inch
–
set the document format and the right and bottom margins to the default values (the current vertical position is defined as the new line 1)
–
set the left margin to the value which has been set in the emulation menu
(adjustable via the operating panel)
–
set the character spacingto the value which has been set in the emulation
menu (adjustable via the operating panel)
–
set the print quality and type font to the value which has been set in the emulation menu (adjustable via the operating panel)
–
delete vertical tabs and select channel 0
–
switch off elongated, bold, double impact and italic print
–
delete MSB specification
–
set additional character spacing to 0
–
delete superscript or subscript
–
switch off underlining
–
adjust printing flush left.
42
T5023/5023+ - Programming Guide
Standard commands
i
Controlling the configuration of the printer
When initializing or defining printer parameters for certain applications,
the following cases are to be differentiated:
–
Parameters, which are specified by means of their default value
–
Parameters, which are set by corresponding ESC sequences (document length, type font, character width, etc.)
–
Parameters, which are reset to their default value by means of the
command ESC @.
All default values of the document printer are listed in the appendix of this manual. If the printer is initialized via ESC @ at any vertical position on a document,
undesired results can occur during subsequent actions (current vertical position
is new line 1). For this reason ESC @ is not recommended for initializing parameters within a document.
T5023/5023+ - Programming Guide
43
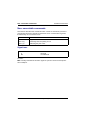
Controlling the configuration of the printer
Standard commands
Selecting unidirectional printing for one line
ESC
27
1B
ASCII character
Decimal
Hexadecimal
<
60
3C
Function:
Via ESC < the next printing line is printed from right to left. This command will be
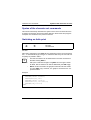
cancelled automatically by a carriage return (CR).
Switching the unidirectional printing mode on/ off
ESC
27
1B
U
85
55
(n)
n
n
ASCII character
Decimal
Hexadecimal
Function:
Normally printing is bidirectional (optimal printing path). Unidirectional printing
(printing in only one direction) is sensible, for example, in order to ensure a precise positioning of the characters when printing a text or graphics, thus to produce a neat print format.
ESC U (n) activates or deactivates unidirectional printing, by which n serves as
an on/ off switch:
n = 1 activates the mode (unidirectional on),
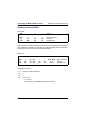
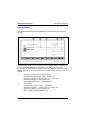
n = 0 deactivates the mode (unidirectional off).
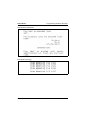
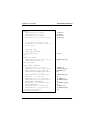
Example:
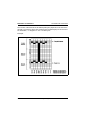
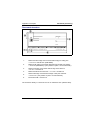
After printing three lines, a change is to take place between bidirectional and unidirectional printing. Bidirectional printing begins.
44
T5023/5023+ - Programming Guide
Standard commands
Controlling the configuration of the printer
BEGIN
PRINT(char(27),"U",char(0))
<-- bidirectional on
PRINTLF("bidirectional printing")
PRINTLF("bidirectional printing")
PRINTLF("bidirectional printing")
PRINT(char(27),"U",char(1))
PRINTLF()
<-- bidirectional off
PRINTLF("unidirectional printing")
PRINTLF("unidirectional printing")
PRINTLF("unidirectional printing")
END
Result:
T5023/5023+ - Programming Guide
45
Controlling the configuration of the printer
Standard commands
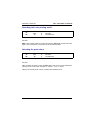
Setting the MSB to 1
ESC
27
1B
>
62
3E
ASCII character
Decimal
Hexadecimal
Function:
ESC > sets the most significant bit (MSB) of all incoming data to 1. Thus it is possible to print italic or graphics characters or characters defined by the user for
programs on computers, which only transfer 7- bit data (access to character table range from hex 80 to hex FF).
i
46
The MSB setting via ESC > is deleted by the following ESC seuences:
–
ESC @ (Initializing the printer)
–
ESC = (Deleting the most significant bit)
–
ESC # (Deleting the MSB specification).
T5023/5023+ - Programming Guide
Standard commands
Controlling the configuration of the printer
Setting the MSB to 0.
ESC
27
1B
=
61
3D
ASCII character
Decimal
Hexadecimal
Function:
ESC = sets the most significant bit (MSB) of all incoming data to 0 (zero). Thus it is
possible to print characters of the standard code table even for programs on computers which only transfer 7- bit data.
i
The MSB setting via ESC = is deleted by the following ESC seuences:
–
ESC @ (Initializing the printer)
–
ESC > (Setting the most significant bit)
–
ESC # (Deleting the MSB specification).
T5023/5023+ - Programming Guide
47
Controlling the configuration of the printer
Standard commands
Deleting the MSB specification
ESC
27
1B
#
35
23
ASCII character
Decimal
Hexadecimal
Function:
ESC # cancels the MSB specification (deleting or setting the most significant bit)
resulting from ESC = or ESC >.
i
48
An MSB specification resulting from ESC = or ESC > is also cancelled,
when the printer is initialized with software (see ESC @).
T5023/5023+ - Programming Guide
Standard commands
Controlling the configuration of the printer
Printer offline
DC3
19
13
ASCII character
Decimal
Hexadecimal
Function:
DC3 (device control 3) switches the printer offline (printer inactive) until a DC1
code (printer online) is received.
In no way can the printer be reactivated via the STOP key.
Printer online
DC1
17
11
ASCII character
Decimal
Hexadecimal
Function:
DC1 (device control 1) switches the printer back online after it has previously
been switched offline by a DC3 code.
If the printer was switched off via the STOP key, it cannot be switched online
again using this command.
T5023/5023+ - Programming Guide
49
Controlling the configuration of the printer
Standard commands
Automatic single sheet feeder on/off
ASC II
Decimal
Hexadecimal
Function
0
1
48
49
30
31
2
50
32
4
R
52
82
34
52
Switches single sheet feeder off
Selects feeder compartment 1
(only if 2 feeder compartments are
available)
Selects feeder compartment 2
(only if 2 feeder compartments are
available)
Switches single sheet feeder on
Ejects one sheet without pulling in a
new one.
Since the automatic single sheet feeder is not available for the document printer,
all other parameters (n = R) are ignored except for one.
i
50
Instead of ESC EM R (= sheet ejection) use the FF (Form Feed) command to do without the ESC EM command altogether in an application.
T5023/5023+ - Programming Guide
Standard commands
Special character codes
Special character codes
In this chapter the following commands are described:
Command
Function
CR
BS
DEL
CAN
Carriage Return
Backspace of one character
Deleting a character
Canceling a line
J
J
Carriage return
CR
13
0D
ASCII character
Decimal
Hexadecimal
Function:
After CR (carriage return) the data contained in the buffer is printed and the print
head is returned logically to the left edge.
If CR, according to the setting, for example, on the operating panel, is only interpreted as CR, the print head is returned on the same line. If necessary, an additional line feed must be achieved by subsequently pressing LF (line feed, see
section “Line feed commands” in this chapter).
If CR, according to presetting, is interpreted as CR + LF, a line feed is added
after execution of the carriage return.
Example:
A demonstration of the effect of CR commands depending on preset printer parameters.
BEGIN
PRINT("Test line", char(13))
PRINT("Test line", char(13))
PRINT("Test line", char(13))
END
T5023/5023+ - Programming Guide
51
Special character codes
Result:
–
CR without line feed
–
CR with line feed
52
T5023/5023+ - Programming Guide
Standard commands
Standard commands
Special character codes
Backspace of one character
BS
8
08
ASCII character
Decimal
Hexadecimal
Function:
After each BS character (backspace) the print head is moved logically one character to the left. Thus characters can be printed one upon the other.
If this command is received immediately following graphics printing, the print
head will return to the position in which it was before the start of graphics printing.
In the following cases the BS command is ignored:
–
the print head is at the left edge
–
the previous character is an HT character (horizontal tab as column limit)
–
a command for an absolute or relative point positioning of the print head was
received beforehand (ESC $ (n1) (n2) or ESC \ (n1) (n2))
–
with ESC a (n) a text adjustment other than flush left was selected (i. e. centered, flush right or margin justification).
Example:
With BS the mathematical signs for ’corresponds to’ and ’unequal’ are to be produced.
BEGIN
PRINTLF("corresponds to: ","=", char(8)," ^")
PRINTLF("unequal: ","=",char(8),"/")
END
Result:
T5023/5023+ - Programming Guide
53
Special character codes
Standard commands
Deleting a character
DEL
127
7F
ASCII character
Decimal
Hexadecimal
Function:
DEL (Delete) deletes the previous text character in the buffer as long as it has
not yet been printed. The control codes remain unchanged.
Cancelling a line
CAN
24
18
ASCII character
Decimal
Hexadecimal
Function:
CAN (Cancel) cancels in the printing buffer the whole text of one print line prior
to this code, but not the control codes.
54
T5023/5023+ - Programming Guide
Standard commands
Line feed commands
Line feed commands
The standard line spacing amounts to six lines per inch, i. e. the line spacing is
1/ 6 inch.
The line spacing can be changed using the following commands, whereby the smallest unit for the line spacing is 1/ 180 inch. The corresponding line feed is carried out
depending on the set line spacing:
Command
Function
LF
ESC J (n)
ESC 0
ESC 2
ESC 3 (n)
ESC A (n)
ESC + (n)
Line feed
Carrying out an n/180 inch line feed
Determining 1/8 inch line spacing
Determining 1/6 inch line spacing
Determining 1/180 inch line spacing
Determining 1/60 inch line spacing
Determining 1/360 inch line spacing
T5023/5023+ - Programming Guide
J
J
J
J
J
J
55
Line feed commands
Standard commands
Line feed
LF
10
0A
ASCII character
Decimal
Hexadecimal
Function:
On receipt of the command LF (line feed) the data contained in the buffer is printed
and the paper transported one line further according to the current line spacing.
i
56
–
If after LF the logical bottom edge of the sheet is exceeded (depending on the set document format), the document is ejected.
–
If a bottom margin set using ESC N (n) is exceeded, the document
is also ejected.
–
The horizontal position is set back to the left margin (CR).
T5023/5023+ - Programming Guide
Standard commands
Line feed commands
Carrying out an n/ 180 inch line feed
ESC
27
1B
J
74
4A
(n)
n
n
ASCII character
Decimal
Hexadecimal
Function:
ESC J (n) transports the paper n/ 180 inch on. A value between 0 and 255 must
be given for n. This command produces an immediate line feed, but does not effect a carriage return (no CR with positioning of the print head at the beginning
of the line).
ESC J (n) has no influence on the current line spacing, which results, for example, by means of LF (line feed).
Example:
A demonstration of the difference between a normal line feed and an n/ 180 inch”
feed.
BEGIN
PRINTLF("This is the first line")
PRINT("Second line")
← 5/180 inch
PRINT( char(27),"J", char(5))¨
PRINTLF("with the rest displaced by 5/180 inch")
PRINTLF("Now it continues normally")
END
Result:
T5023/5023+ - Programming Guide
57
Line feed commands
Standard commands
Determining 1/8 inch line spacing
ESC
27
1B
0
48
30
ASCII character
Decimal
Hexadecimal
Function:
ESC 0 sets the line spacing to 1/8 inch for the subsequent line feed commands.
The 0 is the ASCII character for the figure zero and not the ASCII code 0..
i
The line spacing set by ESC 0 is cancelled, if
–
the printer is initialized a new (ESC @)
–
a different line spacing is set by means of ESC 2, ESC 3 (n) or ESC
A (n).
Example:
A demonstration of the difference between the standard line feed (1/ 6 inch) and the
1/8 inch line spacing. The printer begins with the standard line feed.
BEGIN
PRINTLF("This is the
PRINTLF("This is the
PRINTLF()
PRINT(char(27),"0")
PRINTLF("This is the
PRINTLF("This is the
END
first print line")
second print line")
<-- 1/8 inch
first print line")
second print line")
Result:
58
T5023/5023+ - Programming Guide
Standard commands
Line feed commands
Determining 1/6 inch line spacing
ESC
27
1B
2
50
32
ASCII character
Decimal
Hexadecimal
Function:
ESC 2 sets the line spacing to 1/ 6 inch for the subsequent line feed commands.
This value is the effective default value when the printer is switched on.
The 2 is the ASCII character for the figure two and not the ASCII code 2.
Example:
see ESC 0.
T5023/5023+ - Programming Guide
59
Line feed commands
Standard commands
Determining n/180 inch line spacing
ESC
27
1B
3
51
33
(n)
n
n
ASCII character
Decimal
Hexadecimal
Function:
ESC 3 (n) sets the line spacing to n/ 180 inch for the subsequent line feed commands. A value between 0 and 255 inclusive must be given for n.
The 3 is the ASCII character for the figure three and not the ASCII code 3.
Example:
A demonstration of the printout for n = 1 to 20 with a measuring unit of n/ 180 inch
line spacing.
BEGIN
SET N = 0
REPEAT
SET N = N + 1
PRINT( char(27),"3", char(N))
PRINTLF( N,"/180 inch line spacing")
UNTIL N = 20
END
Result:
60
T5023/5023+ - Programming Guide
Standard commands
Line feed commands
Determining n/60 inch line spacing
ESC
27
1B
A
65
41
(n)
n
n
ASCII character
Decimal
Hexadecimal
Function:
ESC A (n) sets the line spacing to n/ 60 inch for the subsequent line feed commands.
A value between 0 and 127 inclusive must be given for n (0 = no feed).
Example:
A demonstration of the printout using four n- values (0, 3, 5, 18) with a measuring unit
of n/ 60 inch line spacing. 6 lines are printed for each n.
BEGIN
SET loop = 0
REPEAT
SET loop = loop + 1
SET N = 0
N = 3
N = 5
N = 18
CASE OF loop
PRINT( char(27),"A", char(N)) <-- N = spacing
SET line = 0
REPEAT
SET line = line + 1
PRINTLF( N,"/60 inch line spacing")
UNTIL line = 6
UNTIL loop = 4
PRINT( char(27),"@")
<-Initializing the printer
PRINTLF()
END
T5023/5023+ - Programming Guide
61
Line feed commands
Standard commands
Result:
62
T5023/5023+ - Programming Guide
Standard commands
Line feed commands
Determining n/360 inch line spacing
ESC
27
1B
+
43
2B
(n)
n
n
ASCII character
Decimal
Hexadecimal
Function:
ESC + (n) sets the line spacing to n/ 360 inch for the subsequent line feed commands (LF). A value between 0 and 255 inclusive must be given for n.
i
As the document printer can only execute line feeds in a matrix of min.
1/180 inch, an uneven value for n (1, 3, 5, ...) leads to a rounding-off
error of 1/360 inch.
T5023/5023+ - Programming Guide
63
Sheet ejection commands
Standard commands
Sheet ejection commands
The length of a document can be set directly or indirectly and the document ejected using the following commands:
Command
Function
FF
ESC C (n)
ESC C NUL (n)
Sheet ejection
Determining the document length in lines
Determining the document length in inches
i
Using ESC C (n) or ESC C NUL (n) the document length depending on
the size of the document to be processed is set for the document.
On the basis of the document length thus set, the bottom margin (see
ESC N (n)) can be set and the actual area to be printed on a document
can be determined.
64
T5023/5023+ - Programming Guide
Standard commands
Sheet ejection commands
Sheet ejection
FF
12
0C
ASCII character
Decimal
Hexadecimal
Function:
After FF all the data still contained in the printing buffer is printed and subsequently the current document ejected.
After the ejection the current logical position of the print line (distance between
the upper edge of the document and the base line of the print line) is identical to
the insertion position set via the operating panel (value between 10/ 60 and 80/
60 inch) if print data is transmitted without a previous insertion command. However, a document will not be requested until print jobs are available!
The insertion position can be set in the document printer menu by selecting the
menu item TOF- POS (see the Operating Manual). The default value is 3/ 6
inch.Manual
i
If a further FF or a series of FFs immediately follow an FF, these will not
be executed.
T5023/5023+ - Programming Guide
65
Sheet ejection commands
Standard commands
Determining the document length at n lines
ESC
27
1B
C
67
43
(n)
n
n
ASCII character
Decimal
Hexadecimal
Function:
ESC C (n) sets the document length at n lines in the selected line spacing. A value between 1 and 127 must be given for n. The actual physical document length
is then determined by the respective current line spacing.
It should be noted that the respective document length (n lines ∗ line spacing)
must not exceed the length of the document.
The current line, in which the print head is located on receipt of the command, is
fixed as the starting position of the document. A bottom margin set by means of
ESC N (n) is cancelled (see the corresponding command description in the “Vertical print control” section).
i
66
If the print head is positioned beyond the edge of the paper (for example, for a document length of 12 inches), the printer issues an error message (PAPER LENGTH). If a bottom margin is set logically on the paper
via ESC N (n) (for example, at 9 inches) and this margin is exceeded,
a form feed (FF) is executed.
T5023/5023+ - Programming Guide
Standard commands
Sheet ejection commands
Determining the document length at n inches
ESC
27
1B
C
67
43
NUL
0
00
(n)
n
n
ASCII character
Decimal
Hexadecimal
Function:
ESC C NUL (n) sets the document length at n inches (absolute document length
independent of the line spacing). The value of n must lie between 1 (inch) and
50 (inches) inclusive.
The value n (inches) must be selected so that the length of the paper format is
not exceeded. If the format is exceeded by a corresponding n, the printer automatically sets the maximum permitted format height as the current document
length.
The current line, in which the print head is located on receipt of the command, is
fixed as the starting position of the document. The bottom margin, possibly determined by ESC N (n), is cancelled by ESC C NUL (n).
i
If the print head is positioned beyond the edge of the paper (for example, for a document length of 12 inches), the printer issues an error message (PAPER LENGTH). If a bottom margin is set logically on the paper
via ESC N (n) (for example, at 9 inches) and this margin is exceeded,
a form feed (FF) is executed.
T5023/5023+ - Programming Guide
67
Vertical print control
Standard commands
Vertical print control
This section describes the commands for setting vertically arranged document
positions (end of document and vertical tabs). An automatic end of document
and feeding on certain lines are thus possible without the corresponding printing
of blank lines.
The data of vertical tabs is allocated to channels, which are numbered from 0 to 7.
Command
Function
ESC N (n)
ESC O
ESC B ... NUL
ESC b (c) ... NUL
ESC / (c)
VT
ESC EM n
Setting the bottom margin
Deleting the bottom margin
Determining/ deleting vertical tabs
Determining/ deleting vertical tabs in channels
i
Selecting a vertical tab channels
Vertical tabulation
Paper control
A difference must be made between the vertical leading edges ’upper
leading edge’ and ’lower leading edge’. The vertical leading edges are
defined in the chapter “Additional commands”.
Setting vertical tabs is possible in two ways:
–
up to 16 fixed tabs (ESC B)
–
up to 8 tab groups (channels 0 to 7) with up to 16 tabs respectively (ESC b).
In this case it is possible to switch over to a certain tab group depending on the
application before the printing of a document (ESC /) and thereby the structure
of different types of document can be controlled flexibly.
If tabs already set are to be reset, the old tab values for the corresponding channel must be deleted beforehand.
When setting vertical tabs, the appropriate absolute line position is calculated on
the basis of the currently set line spacing. Even if the line spacing is altered at
intervals, the line position of a tab remains unchanged. If necessary, when changing the line spacing, the old tab values must be deleted and set anew.
If no vertical tabs are defined, a tabulation command in a vertical direction is carried
out as a line feed.
68
T5023/5023+ - Programming Guide
Standard commands
Vertical print control
Setting the bottom margin
ESC
27
1B
N
78
4E
(n)
n
n
ASCII character
Decimal
Hexadecimal
Function:
ESC N (n) sets a bottom margin of n lines in the currently valid line spacing. The
standard document length (presetting of the printer) or the document length set
by ESC C (document length in lines) or by ESC C NUL (document length in
inches) serves as the basis.
A value between 0 and 127 can be selected for n. The margin resulting from this must
be smaller than the document length.
When the bottom margin is reached, a document ejection is automatically started.
T5023/5023+ - Programming Guide
69
Vertical print control
i
Standard commands
–
Subsequent alterations to the line spacing have no influence on the
set margin area. If necessary, after a change in the line spacing the
bottom margin setting must be deleted (ESC O) and then reset
using ESC N.
–
A set bottom margin is automatically cancelled, when the document
length is altered using ESC C or ESC C NUL.
Deleting the bottom margin
ESC
27
1B
O
79
4F
ASCII character
Decimal
Hexadecimal
Function:
A bottom margin determined by ESC N or by the setting of the printer is deleted
using ESC O .
70
T5023/5023+ - Programming Guide
Standard commands
Vertical print control
Determining / deleting vertical tabs (channel 0)
ESC
27
1B
B
66
42
(n1)
n1
n1
(n2)
n2
n2
...
...
...
NUL
0
00
ASCII character
Decimal
Hexadecimal
Function:
–
Setting tabs
Using ESC B ... NUL up to 16 vertical tabs can be determined in the relevant
line spacing. Subsequent alterations in the line spacing do not affect this.
The tab values are entered as n1, n2 (number of lines), etc. from 1 up to and
including 255 in ascending order. The sign NUL marks the end of the command.
–
Deleting tabs
Via ESC B NUL the set tabs are deleted (NUL characters directly after
ESC B).
i
–
Using ESC B ... NUL the tabs are set in channel 0.
–
If more than one set of tabs is to be defined, this must occur via
ESC b (small b).
–
A vertical tab jump occurs via the command VT (for ASCII decimal
11, hex 0B).
T5023/5023+ - Programming Guide
71
Vertical print control
Standard commands
Determining / deleting vertical tabs for any channel
ESC
27
1B
b
98
62
(c)
c
c
(n1)
n1
n1
...
...
...
NUL
0
00
ASCII character
Decimal
Hexadecimal
Function:
–
Setting tabs
ESC b (c) ... NUL has (in principle) the same function as ESC B ... NUL. By
means of the variable c (a number between 0 and 7) a certain channel for
vertical tabs can be selected additionally. Thus it is possible to define eight
different tab groups, each with up to 16 vertical tabs.
The change between the tab channels occurs via the command ESC / (c),
whereby c identifies the corresponding channel number.
–
Deleting the tabs for one channel
Via ESC b (c) NUL the tabs set in channel c (0 to 7) are deleted (NUL characters directly after ESC b (c)).
i
72
–
If vertical tabs were set using ESC B ... NUL , channel 0 is occupied.
–
Before tab values for a channel can be altered, these values must
be previously deleted in the appropriate channel (for example, ’Deleting tabs in channel 0’ using ESC b 0 NUL or ESC B NUL).
T5023/5023+ - Programming Guide
Standard commands
Vertical print control
Selecting a vertical tab channel
ESC
27
1B
/
47
2F
(c)
c
c
ASCII character
Decimal
Hexadecimal
Function:
Via ESC / (c) a vertical tab channel c can be selected. The values 0 to 7 (= channel 0 to channel 7) are permitted for c.
For all subsequently entered VT commands (Vertical tabulation) the paper feed
will then be controlled by the valid tabs in the current channel.
Vertical tabulation
VT
11
0B
ASCII character
Decimal
Hexadecimal
Function:
After VT all the data contained in the buffer is printed and the paper transported to
the next tab in the current channel.
i
–
A channel can be selected via ESC / (channel number).
–
If no channel has been selected, the vertical tabs are accepted in
channel 0.
–
If no vertical tabs are set in the standard channel 0 nor in a selected
channel 1 to 7, the paper is only transported one line on after VT
(Line feed).
T5023/5023+ - Programming Guide
73
Vertical print control
Standard commands
Paper control
ESC
27
1B
EM
25
19
n
n
n
ASCII character
Decimal
Hexadecimal
Parameter:
n=0 Deactivates the mode
n=1 Selects the feeder compartment 1
n=2 Selects the feeder compartment 1
n=4 Selects the feeder compartment 1
n=R Ejection
i
74
This command is only to be used if a single sheet feeder is installed. If
the feeder is activated and no document has be fed by the operator, a
document will be fed from the paper supply automatically when a print
or line feed command is received.
T5023/5023+ - Programming Guide
Standard commands
Horizontal print control
Horizontal print control
This section describes the commands for setting horizontally arranged document positions (left or right margin and horizontal tabs). The following functions
are possible:
–
automatic end of line, i. e. automatic carriage return with line feed when a
certain column position is reached
–
feeding at certain column positions without the corresponding printing of
blank spaces
–
feeding to any (dot) positions of a line.
Command
Function
ESC l (n)
ESC Q (n)
ESC a (n)
ESC D (n1) (n2) ... NUL
HT
ESC $ (n1) (n2)
ESC \ (n1) (n2)
ESC SP (n)
Determining the left margin
Determining the right margin
Determining the text adjustment
Determining/ deleting horizontal tabs
Horizontal tabulation
Horizontal positioning (absolute)
Horizontal positioning (relative)
Determining the character spacing
J
J
J
J
J
When positioning the print head horizontally, a distinction must be made between the horizontal leading edge on the left and on the right. For example, with
horizontal leading edge on the left, print position 0 can be the same as the left
edge of the document or, after ESC l (n), displaced to the right by the value n.
Dependences during horizontal print positioning are described in more detail in
the “Additional commands” chapter.
When setting the left and right margins or the horizontal tabs the appropriate absolute column position is calculated on the basis of the currently set character
size (10, 12, 15 cpi, elongated or condensed print). Even if the character size is
altered at intervals, the absolute column position remains unchanged. If necessary, when changing the character size the old margin or tab values must be deleted and reset.
The length of the lines depends on the distance between the left (ESC l) and the
right (ESC Q) margins. The adjustment of the text can be selected flush left, flush
T5023/5023+ - Programming Guide
75
Horizontal print control
Standard commands
right, centered or with margin justification (ESC a).
Feeding to a certain position on a line is specified in dots and calculated either
starting from the left margin (ESC $, 1 dot = 1/60 inch) or starting from the current
print position (ESC \ , 1 dot = 1/180 inch or 1/120 inch).
76
T5023/5023+ - Programming Guide
Standard commands
Horizontal print control
Setting the left margin
ESC
27
1B
I
108
6C
(n)
n
n
ASCII character
Decimal
Hexadecimal
Function:
Using ESC l (n) the horizontal ’print position 0’ can be influenced, that is to say,
a left margin can be set. The left margin (absolute distance from the left edge of
the document) is determined by means of the value of n and the currently valid
character width. A value between 0 and 160 can be selected for n. The margin
resulting from this must not, however, be wider than 8 inches. If the left margin
width is defined as greater than 8 inches, the command is ignored.
n = 0: print position 0 = left edge of document
n > 0: print position 0 = left edge of document + n
T5023/5023+ - Programming Guide
77
Horizontal print control
i
Standard commands
–
The absolute margin position is dependent on the set character
size (10, 12 or 15 cpi) and the print mode (condensed, elongated,
normal). With proportional spacing the left margin is determined according to the character size 10 cpi. Subsequent alterations to the
character size have no influence on the set margin.
–
The distance between the left and right margins must be at least 10
cpi.
–
ESC l (n) should be entered at the beginning of a print line as
ESC l (n) deletes all the previously entered characters and tabs in
the same print line.
Example:
First of all, the left document margin will be set using ESC l (n) for several values of
n. Subsequently, the effect of the current character size on the left margin will be demonstrated.
BEGIN
SET N = 6
REPEAT
SET N = N + 1
PRINT(char(27),"1",char(N))
<-- Setting left margin
PRINTLF("Left margin",N - 1,"columns")
UNTIL N = 10
PRINTLF()
12 cpi character
PRINT(char(27),"M")
<-- (ESC M)
PRINT(char(27),"l",char(10))
<-- Setting left margin
PRINTLF("Left margin 9 columns (12 cpi)")
PRINT(char(27),"W",char(1) <-- Switching on elongated
PRINTLF("Left margin unchanged")
print(ESC SO)
PRINT(char(27),"l",char(10))
<-- Setting left margin
PRINTLF("margin 9 columns (elongated)")
PRINT(char(27),"l",char(160))
PRINTLF("margin ignored")
<-- Left margin
> 8 inch
PRINTLF("not printed",char(27),"1",char(10),"printed")
END
78
T5023/5023+ - Programming Guide
Standard commands
Horizontal print control
Result (reduced in size):
Result (original size):
T5023/5023+ - Programming Guide
79
Horizontal print control
Standard commands
Setting the right margin
ESC
27
1B
Q
81
51
(n)
n
n
ASCII character
Decimal
Hexadecimal
Function:
ESC Q (n) influences the last horizontal print position, that is to say, a right margin can be set. The right margin is determined by means of the value of n and
the current valid character width. A value between 0 and 255 can be selected for
n.
The n th column will then not be printed.
If a text line exceeds the right margin, a carriage return with a line feed is automatically executed (even within a word). So many characters are printed in one line until
the space between the left and right margins is used up. Printing is then continued
on a new print line.
80
T5023/5023+ - Programming Guide
Standard commands
i
Horizontal print control
–
The absolute margin position is dependent on the set character
size (10, 12 or 15 cpi) and the print mode (condensed, elongated,
normal). With proportional spacing, the right margin is determined
according to the character size 10 cpi. Subsequent alterations to
the character size have no influence on the set margin.
–
The distance between the left and right margins must be at least
two 2/10“(two characters with 10 cpi).
–
ESC Q (n) should be entered at the beginning of a print line, as
ESC Q (n) deletes all the previously entered characters and tabs in
the same print line.
Example:
A demonstration of what effect a right margin has on the carriage return and line feed.
(For the influence of the current character size on the right margin compare with control command for “Setting the left margin”).
BEGIN
SET N = 30
REPEAT
SET N = N + 4
PRINT(char(27),"Q",char(N))
<-- Setting the right
PRINT("Line length equal to the distance") margin
PRINTLF(" between left and right margins")
UNTIL N = 42
END
Result:
T5023/5023+ - Programming Guide
81
Horizontal print control
Standard commands
Setting the text alignment
ESC
27
1B
a
97
61
(n)
n
n
ASCII character
Decimal
Hexadecimal
Function:
ESC a (n) sets the following text alignments depending on n (0 ... 3):
–
flush left : n = 0 (default value)
–
centered : n = 1
–
flush right : n = 2
–
margin justification : n = 3
The adjustment takes place after the output of the following control commands:
–
CR (Carriage return, is output implicitly, for example, by the print command
PRINTLF)
–
LF (Line feed, is output implicitly, for example, by the print command PRINT
LF)
–
VT (Vertical tabulation)
–
FF (Form feed)
–
After an additional command (ESC [ ...)
With margin justification the text is aligned flush left and flush right. Thereby the
word spacing and the character spacing are increased, if necessary. The division of a text into print lines takes place automatically. Therefore LF or CR commands, for example, via the print command PRINTLF, should only be used
within a margin justification text in order to set a paragraph in the text.
82
T5023/5023+ - Programming Guide
Standard commands
i
Horizontal print control
–
After switching on or initializing the printer (ESC @) the text alignment is flush left (n = 0).
–
In most programming languages there are print commands, which,
after the output of the printed text, automatically carry out the CR
or LF command (for example, PRINTLF).
–
The control commands HT (Horizontal tabulation) and BS
(Backspace) are without effect with centered and flush right text alignment or with margin justification.
–
ESC a (n) should be entered at the beginning of a print line, as
ESC a (n) deletes all the previously entered characters in the same
print line.
T5023/5023+ - Programming Guide
83
Horizontal print control
Standard commands
Setting / deleting horizontal tabs
ESC
27
1B
D
68
44
(n1)
n1
n1
(n2)
n2
n2
...
...
...
NUL
0
00
ASCII character
Decimal
Hexadecimal
Function:
– Setting tabs
Using ESC D ... NUL up to 32 column positions in the current character width
can be set as horizontal tabs.
The tab values are specified as n1, n2, etc. between 1 and 137 inclusive in
ascending order. Tab positions, which exceed the right margin, are ignored.
The sign NUL marks the end of the command.
–
Using ESC D NUL the set tabs are deleted (NUL sign directly after ESC D).
i
84
–
A horizontal tab jump takes place via the command HT (for ASCII
decimal 9 and hex 09).
–
The absolute tab position is dependent on the set character size
(10, 12 or 15 cpi) and the print mode (condensed, elongated, normal). With proportional spacing the tab positions are set according
to the character size 10 cpi. Subsequent alterations to the character size do not affect the absolute tab positions.
–
With condensed print the spacing of the tabs amounts to 60 % of
the character width, with elongated print double the normal character spacing.
–
After switching on the printer or after initializing (ESC @) the tabs
are set at a spacing of eight 10-cpi characters.
T5023/5023+ - Programming Guide
Standard commands
Horizontal print control
Horizontal tabulation
HT
9
09
ASCII character
Decimal
Hexadecimal
Function:
Using HT the print head is set to the next tab position.
After positioning on the last (right) tab position the HT command has no effect. This
also applies if all the tab positions were deleted using ESC D NUL.
i
–
After switching on the printer or after initializing (ESC @) the tabs
are set at a spacing of eight 10-cpi characters.
–
The tab positions are set using the command ESC D and deleted
using ESC D NUL.
–
With centered and flush right text adjustment or with margin justification (ESC a (n)) the HT command is ignored.
–
Various programs and computers convert the HT command into
corresponding blank spaces instead of passing the command directly to the document printer.
T5023/5023+ - Programming Guide
85
Horizontal print control
Standard commands
Horizontal positioning (absolute)
ESC
27
1B
$
36
24
(n)
n
n
(m)
m
m
ASCII character
Decimal
Hexadecimal
Function:
By means of ESC $ (n) (m) the print head is moved horizontally to a position
which is calculated independently of the current character size from the values
n and m relative to the previously set “logical left” margin (left margin of sheet set
using ESC l (n)). The distance of the print head from the left sheet margin results
from the following formula:
(m ∗ 256 + n) / 60 inch
A value between 0 and 255 for n and a value between 0 and 3 for m can be selected. (m ∗ 256 + n) may not be more than 816.
i
ESC $ (n) (m) is ignored if the specified position exceeds the logical
right margin set using ESC Q (n).
Example:
The distance of the text from the left sheet edge is increased step- by- step.
BEGIN
SET N = 60
REPEAT
SET N = N + 30
PRINT(char(27),"$",char(N,0))
PRINT("Distance from left sheet edge")
PRINTLF(N/60,"inch")
UNTIL N = 180
END
86
T5023/5023+ - Programming Guide
Standard commands
Horizontal print control
Result (reduced in size):
Result (Original size):
T5023/5023+ - Programming Guide
87
Horizontal print control
Standard commands
Horizontal positioning (relative)
ESC
27
1B
\
92
5C
(n)
n
n
(m)
m
m
ASCII character
Decimal
Hexadecimal
Function:
Via ESC \ (n) (m) the print head is displaced horizontally to a position relative to
the current print position. The position is calculated depending on the selected
print quality (Draft or LQ) from the values n and m using the following formula:
(m ∗ 256 + n) / 120 inch (Draft)
(m ∗ 256 + n) / 180 inch (LQ)
i
88
ESC \ (n) (m) is ignored if the specified position exceeds the right margin set using ESC Q (n).
T5023/5023+ - Programming Guide
Standard commands
Horizontal print control
Example:
At the beginning the Draft print quality is set.
BEGIN
PRINT("Displacement")
PRINT(char(27),"\",char(180,0))
PRINTLF("by 1.5 inches")
PRINT(char(27),"x",char(1))
PRINT("Displacement")
PRINT(char(27),"\",char(180,0))
PRINTLF("by 1 inch")
END
<-- LQ-mode
Result:
T5023/5023+ - Programming Guide
89
Horizontal print control
Standard commands
Determining the character spacing
ESC
27
1B
SP
32
20
(n)
n
n
ASCII character
Decimal
Hexadecimal
Function:
Using ESC SP (n) the normal distance between two print characters can be
increased. The additional character spacing is calculated depending on the selected print quality (Draft or LQ) from the value of n using the following formula:
n /120 inch (Draft)
n /180 inch (LQ)
n can accept values between 0 and 127.
i
90
After switching on or initializing the printer (ESC @) n has the value 0.
T5023/5023+ - Programming Guide
Standard commands
Horizontal print control
Example:
The character spacing is increased step- by- step.
BEGIN
SET N = 1
REPEAT
SET N = N + 2
PRINT(char(27)," ",char(N))
PRINTLF("Spacing for n equal to ",N)
UNTIL N = 9
END
Result:
T5023/5023+ - Programming Guide
91
Print quality and character size
Standard commands
Print quality and character size
This section describes the commands for setting the print quality and the character
size.
Command
Function
ESC x (n)
ESC k (n)
ESC p (n)
ESC P
ESC M
ESC g
Switching over the print quality (Draft/ LQ)
Selecting the LQ type font
Switching proportional spacing on/ off
Selecting the character size10 cpi
Selecting the character size12 cpi
Selecting the character size15 cpi (mikro print)
i
J
J
J
J
J
J
Notes on the print quality:
According to the application one of the two following print quality settings can be selected:
–
Draft print quality
This print quality is especially suited for quick draft printing. The
characters are printed with a (horizontal) density of 60 print dots per
inch.
–
i
LQ print quality (Letter Quality)
The LQ print quality is suited for printing the (corrected) final version of a document. The characters are printed with a (horizontal)
density of 180 print dots per inch.
In comparison to the draft print quality the characters contain more
print dots. From this on the one hand a neater print face results, on
the other hand a lower print rate compared with draft printing. In LQ
print quality the type fonts “Roman” and “Sans Serif” are available
standardly for the optical arrangement of a document. Further type
fonts can be used if the appropriate font is loaded.
Notes on the character size:
–
After switching on or initializing the printer the characters are printed with the data set in the emulation menu.
In normal print all the characters of one character size have the
same spacing (for example 1/10 inch with 10 cpi).
92
T5023/5023+ - Programming Guide
Standard commands
Print quality and character size
Width and height of character (example 'H' character):
font
LQ-Sans Serif
LQ-Roman
DQ
10 cpi
width/
height
2.0/2.6 mm
2.3/2.5 mm
1.8/2.5 mm
12 cpi
width/
height
1.7/2.6 mm
2.0/2.5 mm
1.6/2.5 mm
15 cpi
width/
height
1.4/1.9 mm
1.5/1.8 mm
1.4/1.9 mm
proportional
width/
height
1.9/2.6 mm
2.1/2.5 mm
With proportional spacing the different widths of the individual characters are taken into consideration, for example, the character ’i’ is narrower than the character ’w’, i. e. the print width of the character ’i’ in proportional spacing is smaller
than that of the character ’w’. Irregular spaces between the individual characters
of a word are thus removed. The character width in proportional spacing varies
between 1.0 and 2.6 mm. The size of the characters is 10 cpi. The print quality
is switched to LQ.
T5023/5023+ - Programming Guide
93
Print quality and character size
Standard commands
Switching print quality (Draft/ LQ)
ESC
27
1B
x
120
78
(n)
n
n
ASCII character
Decimal
Hexadecimal
Function:
–
Switching to draft print quality
ESC x (0) switches from LQ to draft print quality. This results in a higher print
rate and a lower print density (60 print dots per inch in a horizontal direction).
–
Switching to LQ print quality
ESC x (1) switches from draft to LQ print quality. This results in a lower print
rate and a higher print density (180 print dots per inch in a horizontal direction).
i
94
–
Switching from draft to LQ is also possible within a print line.
–
After switching to LQ print quality, printing takes place in the last
print type selected using ESC k (n).
–
After switching on or initializing (ESC @) the printer prints in the
print quality which has been set in the emulation menu.
–
When switching on the proportional spacing, the print quality is automatically set to LQ.
T5023/5023+ - Programming Guide
Standard commands
Print quality and character size
Example:
The character spacing is increased step- by- step.
BEGIN
PRINT(char(27),"x",char(0))
PRINTLF("print quality Draft")
PRINT(char(27),"x",char(1))
PRINTLF("print quality LQ")
END
Result:
T5023/5023+ - Programming Guide
95
Print quality and character size
Standard commands
Selecting the LQ type font
ESC
27
1B
k
107
6B
(n)
n
n
ASCII character
Decimal
Hexadecimal
Using ESC k (n) the following type fonts in LQ print quality can be selected:
n=0
LQ type font Roman
n=1
LQ type font Sans Serif
The selection of the type font can take place in draft or in LQ mode. The selected
type font is only actually printed in LQ print quality mode (switch with ESC x (1)).
The selection of further fonts not corresponding to the allocation of the IBM- 2 character set is via a separate command (see “Selection of type fonts/ character sets” in
the “Additional commands” chapter)..
i
The characters of the different type fonts are available in the character sizes 10 cpi, 12 cpi, 15 cpi and proportional.
Example:
BEGIN
PRINTLF(char(27),"x",char(1) <-- LQ-mode on
PRINTLF(char(27),"k",char(0),
"type font Roman")
PRINTLF(char(27),"k",char(1),
"type font Sans Serif")
END
Result:
96
T5023/5023+ - Programming Guide
Standard commands
Print quality and character size
Switching proportional spacing on/off
ESC
27
1B
p
112
70
(n)
n
n
ASCII character
Decimal
Hexadecimal
Function:
–
Switching on proportional spacing
ESC p (1) switches proportional spacing on. With proportional spacing the
character layout is based on the character size 10 cpi. The character width
of the individual characters is however different, for example, the width of the
character ’i’ is smaller than that of the character ’w’. In normal print all the
characters have the same width, whereby irregular spaces arise between
the individual characters of a word.
–
Switching off proportional spacing
ESC p (0) switches proportional spacing off.
i
–
After switching on or initializing (ESC @) the printer, proportional
spacing is possible, if it has been set in the emulation menu.
–
ESC p (1) switches automatically to LQ print quality.
Example:
BEGIN
PRINT("This line is not printed with proportional ")
PRINTLF("spacing")
PRINT(char(27),"p",char(1))
PRINTLF("This line is printed with proportional ")
PRINTLF("spacing")
END
Result (reduced in size):
T5023/5023+ - Programming Guide
97
Print quality and character size
Standard commands
Selecting the character size 10 cpi (Pica)
ESC
27
1B
P
80
50
ASCII character
Decimal
Hexadecimal
Function:
ESC P sets the character size to 10 cpi (10 characters per inch). This character
size is also set after switching on or initializing the printer if it has been selected
in the emulation menu.
i
–
The character size 10 cpi can be combined with condensed and
elongated print.
–
The command ESC P is normally used to deactivate the 12 cpi or
15 cpi character size.
Example:
BEGIN
PRINT(char(27),"P")
PRINTLF("character size 10 cpi")
PRINT(char(27),"M")
PRINTLF("character size 12 cpi")
PRINT(char(27),"g")
PRINTLF("character size 15 cpi"))
END
Result:
98
T5023/5023+ - Programming Guide
Standard commands
Print quality and character size
Selecting the character size 12 cpi (Elite)
ESC
27
1B
M
77
4D
ASCII character
Decimal
Hexadecimal
Function:
ESC M sets the character size to 12 cpi (12 characters per inch). Set character
sizes in 10 cpi or 15 cpi are cancelled.
i
–
After switching on or initializing the printer, the character size is set
to the value, which has been set in the emulation menu.
–
The character size 12 cpi can be combined with condensed and
elongated print.
–
With proportional spacing the character size is set to 10 cpi.
Example:
BEGIN
PRINT(char(27),"P")
PRINTLF("character size 10 cpi")
PRINT(char(27),"M")
PRINTLF("character size 12 cpi"
PRINT(char(27),"g")
PRINTLF("character size 15 cpi"
END
Result:
T5023/5023+ - Programming Guide
99
Print quality and character size
Standard commands
Selecting the character size 15 cpi
ESC
27
1B
g
103
67
ASCII character
Decimal
Hexadecimal
Function:
ESC g sets the character size to 15 cpi (15 characters per inch). Set character
sizes in 10 cpi or 12 cpi are cancelled.
i
–
After switching on or initializing the printer, the character size is set
to the value, which has been set in the emulation menu.
–
The character size 15 cpi can be combined with elongated print,
however, not with condensed print.
–
With proportional spacing the character size is set to 10 cpi.
Example:
BEGIN
PRINT(char(27),"P")
PRINTLF("character size 10 cpi")
PRINT(char(27),"M")
PRINTLF("character size 12 cpi")
PRINT(char(27),"g")
PRINTLF("character size 15 cpi")
END
Result:
100
T5023/5023+ - Programming Guide
Standard commands
Print modes
Print modes
The use of different print modes (e. g., bold print, elongated print, underlining) enables a document to be structured for optical effect. This section describes the commands for the selection of the print modes..
Command
Function
SI
ESC SI
DC2
SO
ESC SO
DC4
ESC W (n)
ESC w (n)
ESC E
ESC F
ESC G
ESC H
ESC - (n)
ESC S (n)
ESC T
ESC ! (n)
Switch on condensed print
Switch on condensed print
Switch off condensed print
Switch on elongated print for one line
Switch on elongated print for one line
Switch off elongated print for one line
Switch elongated print on/ off
Activate / deactivate double character height
Switch on bold print
Switch off bold print
Switch on double impact print
Switch off double impact print
Switch underlining on/off
Switch on superscript/subscript
Switch off superscript/subscript
Select combined print mode
i
J
J
J
J
J
J
J
J
J
J
J
J
J
–
By selecting condensed or elongated print the width of the characters is changed (condensed = 60% of the normal character width,
elongated = 200% of the normal character width).
–
Not all print modes and character sizes can be combined. Invalid
combinations are pointed out in the description of the individual
commands.
–
Using ESC ! (n) it is possible to switch on or off all print modes (with
the exception of superscript and subscript), the character sizes 10
cpi and 12 cpi, proportional spacing and italic print on or off with a
single command.
T5023/5023+ - Programming Guide
101
Print modes
Standard commands
Switching on condensed print
SI
15
0F
ASCII character
Decimal
Hexadecimal
Function:
SI switches condensed print on. The character size in condensed print is approximately 40% smaller than in normal print.
i
–
The command SI has the same effect as the command ESC SI.
–
Condensed print is switched off again using DC2.
–
Condensed and elongated print can be combined.
–
10 cpi and 12 cpi characters can be printed condensed. 15 cpi characters cannot be printed condensed.
–
Condensed print can be set in the emulation menu.
Example:
BEGIN
PRINTLF("standard print")
PRINT(char(15))
PRINTLF("condensed print")
PRINT(char(18))
PRINTLF("standard print")
END
<-- Condensed print on
<-- Condensed print off
Result:
102
T5023/5023+ - Programming Guide
Standard commands
Print modes
Switching on condensed print
ESC
27
1B
SI
15
0F
ASCII character
Decimal
Hexadecimal
Function:
ESC SI has the same effect as the command SI.
T5023/5023+ - Programming Guide
103
Print modes
Standard commands
Switching off condensed print
DC2
18
12
ASCII character
Decimal
Hexadecimal
Function:
DC2 switches the condensed print off, which was set using SI, ESC SI or
ESC ! (n) or in the emulation menu.
Example:
BEGIN
PRINT("normal",char(15),"condensed")
PRINTLF(char(18),"normal")
END
Result:
104
T5023/5023+ - Programming Guide
Standard commands
Print modes
Switching on elongated print for one line
SO
14
0E
ASCII character
Decimal
Hexadecimal
Function:
SO switches on elongated print for the current print line. Before beginning the
next print line elongated print is switched off again. In elongated print the width
of the characters is doubled.
i
–
The command SO has the same effect as the command ESC SO.
–
Elongated print is switched off again using DC4.
–
Elongated print can be combined with condensed print and all the
character sizes (10, 12, 15 cpi).
T5023/5023+ - Programming Guide
105
Print modes
Standard commands
Switching on elongated print for one line
ESC
27
1B
SO
14
0E
ASCII character
Decimal
Hexadecimal
Function:
ESC SO has the same effect as the command SO.
106
T5023/5023+ - Programming Guide
Standard commands
Print modes
Switching off elongated print
DC4
20
14
ASCII character
Decimal
Hexadecimal
Function:
DC4 switches off the elongated print set using SO or ESC SO (within the current
print line).
i
Elongated print switched on using ESC W (n) or ESC ! (n) is not switched off by DC4.
T5023/5023+ - Programming Guide
107
Print modes
Standard commands
Switching elongated print on/off
ESC
27
1B
W
87
57
(n)
n
n
ASCII character
Decimal
Hexadecimal
Function:
–
Switching on elongated print
ESC W (1) switches elongated print on. In elongated print the width of the
characters is doubled.
–
Switching off elongated print
ESC W (0) switches elongated print off.
i
Elongated print can be combined with condensed print and all the character sizes (10, 12, 15 cpi).
Example:
BEGIN
PRINTLF("standard print")
PRINT(char(27),"W",char(1))
PRINTLF("elongated print")
PRINT(char(27),"W",char(0))
PRINTLF("standard print")
END
←
Elongated print on
← Elongated
Result:
108
T5023/5023+ - Programming Guide
print off
Standard commands
Print modes
Enable/Disable Double Character Height
ESC
27
1B
w
119
77
(n)
n
n
ASCII character
Decimal
Hexadecimal
Function:
All characters following this command are printed with double the normal height.
Parameters:
n = 0 deactivates the mode
n = 1 activates the mode
T5023/5023+ - Programming Guide
109
Print modes
Standard commands
Switching on bold print
ESC
27
1B
E
69
45
ASCII character
Decimal
Hexadecimal
Function:
ESC E switches bold print on. With bold print each dot of a print character is printed twice. The second dot is printed slightly displaced to the right.
i
–
Bold print is switched off again using ESC F or ESC ! (n).
–
Bold print and double impact print can be combined.
–
Bold print can be used with draft and LQ print quality.
–
The print rate is slower with bold print than with normal print.
Example:
BEGIN
PRINTLF("standard print")
PRINT(char(27),"E")
<-- Bold print on
PRINTLF("bold print")
LQ print quality
PRINT(char(27),"x",char(1))
<-- (ESC x (n))
PRINTLF("bold print in LQ print quality")
PRINT(char(27),"G")
<-- Double impact print on
PRINT("bold print and double impact print")
(ESC G)
PRINTLF(" in LQ print quality")
END
Result (reduced in size):
110
T5023/5023+ - Programming Guide
Standard commands
Print modes
Switching off bold print
ESC
27
1B
F
70
46
ASCII character
Decimal
Hexadecimal
Function:
ESC F switches off the bold print set using ESC E or ESC ! (n).
Example:
BEGIN
PRINT("normal",char(27),"E"," bold")
PRINTLF(char(27),"F"," normal")
END
Result:
T5023/5023+ - Programming Guide
111
Print modes
Standard commands
Switching on double impact print
ESC
27
1B
G
71
47
ASCII character
Decimal
Hexadecimal
Function:
ESC G switches double impact print on. With double impact print each line is
printed twice, the second time slightly displaced horizontally.
i
–
Double impact print is switched off again using ESC H or ESC ! (n).
–
Double impact print and bold print can be combined.
–
Double impact print can be used with draft and LQ print quality.
Example:
BEGIN
PRINTLF("standard print")
PRINT(char(27),"G")
<-- Double impact print on
PRINTLF("double impact print on")
LQ print quality
PRINT(char(27),"x",char(1))
<-- (ESC x (n))
PRINTLF("double impact print in LQ print quality")
PRINT(char(27),"E")
<-- Bold print on
PRINT("bold print and double impact print")
(ESC E)
PRINTLF(" in LQ print quality")
END
Result (reduced in size):
112
T5023/5023+ - Programming Guide
Standard commands
Print modes
Switching off double impact print
ESC
27
1B
H
72
48
ASCII character
Decimal
Hexadecimal
Function:
ESC H switches off the double impact print set using ESC G or ESC ! (n).
Example:
BEGIN
PRINT("normal",char(27),"G"," double impact")
PRINTLF(char(27),"H"," normal")
END
Result:
T5023/5023+ - Programming Guide
113
Print modes
Standard commands
Switching underlining on/off
ESC
27
1B
45
2D
(n)
n
n
ASCII character
Decimal
Hexadecimal
Function:
–
Switching on underlining
After setting ESC - (1) all subsequent print characters (even the spaces) are
underlined continuously.
–
Switching off underlining
ESC - (0) switches off the underlining of the print characters.
Example:
BEGIN
PRINT("Highlighting",char(27),"-",char(1))
PRINT(" with underlining")
PRINT(char(27),"-",char(0))
PRINTLF(" is possible.")
END
Result:
114
T5023/5023+ - Programming Guide
Standard commands
Print modes
Switching on superscript/subscript
ESC
27
1B
S
83
53
(n)
n
n
ASCII character
Decimal
Hexadecimal
Function:
–
Switching on superscript
After setting ESC S (0) all subsequent print characters are printed reduced
to half the size and displaced upwards (for example, in mathematical or chemical formulas).
–
Switching on subscript
After setting ESC S (1) all subsequent print characters are printed reduced
to half the size and displaced downwards (for example, in mathematical or
chemical formulas).
i
–
Superscript or subscript is switched off again using ESC T.
–
If superscript or subscript characters are underlined, the underlining appears in the normal position. The underlining must be switched off beforehand, if necessary (ESC - (n)).
Example:
BEGIN
PRINT("Water: H")
*** Subscript on (S)/off (T) ***
PRINT(char(27),"S",char(1),"2")
PRINTLF(char(27),"T","O")
PRINT("Einstein: E = mc")
*** Superscript on (S)/off (T) ***
PRINT(char(27),"S",char(0),"2")
PRINTLF(char(27),"T")
END
Result:
T5023/5023+ - Programming Guide
115
Print modes
Standard commands
Switching off superscript/subscript
ESC
27
1B
T
84
54
ASCII character
Decimal
Hexadecimal
Function:
ESC T switches off superscript or subscript of the print characters.
116
T5023/5023+ - Programming Guide
Standard commands
Print modes
Selection of combined print mode
ESC
27
1B
!
33
21
(n)
n
n
ASCII character
Decimal
Hexadecimal
Function:
Using ESC ! (n) the following character sizes and print modes in any (valid) combination can be switched on or off (by specifying a value n between 0 and 255):
–
10 cpi character size (Pica)
–
12 cpi character size (Elite)
–
Proportional spacing
–
Condensed and elongated print
–
Bold and double impact print
–
Italic print
–
Underlining
–
Switching on several print modes or character sizes
The following list shows which values must be specified for n in order to
switch on certain character sizes or print modes:
Print mode/character size
Value of n
10 cpi (standard)
12 cpi
Proportional spacing (10 cpi)
Condensed print
Bold print
Double impact print
Elongated print
Italic print
Underlining
0
1
2
4
8
16
32
64
128
T5023/5023+ - Programming Guide
117
Print modes
–
Standard commands
Combination of several print modes or character sizes
In order to combine several print modes or character sizes the values
given in the list (above) must be added together.
Calculation examples:
Proportional spacing, bold print, underlining:
n = 2 + 8 + 128 = 138
12 cpi, condensed print, double impact print:
n = 1 + 4 + 16 = 21
i
118
–
ESC ! (0) switches off all print mode combinations and sets the character size to 10 cpi.
–
ESC ! (n) can be used in combination with the commands for switching the individual print modes or character sizes on and off.
–
When switching on proportional spacing the character size is set to
10 cpi (Pica) and LQ print quality is switched on.
T5023/5023+ - Programming Guide
Standard commands
Print modes
Example:
BEGIN
PRINT(char(27),"!",char(0)
PRINTLF("10 pitch normal")
PRINT(char(27),"!",char(1)
PRINTLF("12 pitch normal")
PRINT(char(27),"!",char(2),"proportional")
PRINT(char(27),"!",char(130)
PRINTLF(" and underlined")
PRINT(char(27),"!",char(0),"normal")
PRINT(char(27),"!",char(64)," italic")
PRINT(char(27),"!",char(72)," italic bold")
PRINT(char(27),"!",char(192)
PRINTLF(" italic underlined")
END
Result (reduced in size):
T5023/5023+ - Programming Guide
119
Non- executable commands
Standard commands
Non- executable commands
This section describes the commands which cannot be executed by the document printer because of specific requirements. Such commands are ignored,
therefore they do not cause an error.
Command
Function
BEL
ESC s (n)
ESC r (n)
Signal tone
Switching half- rate printing on/ off
Selecting the print colour
Signal tone
BEL
7
07
ASCII character
Decimal
Hexadecimal
Function:
BEL normally activates the acoustic signal of a printer. The document printer
has no bleeper.
120
T5023/5023+ - Programming Guide
Standard commands
Non- executable commands
Switching half- rate printing on/off
ESC
27
1B
s
115
73
(n)
n
n
ASCII character
Decimal
Hexadecimal
Function:
ESC s (1) normally switches to half- rate printing. ESC s (0) cancels this mode
again. This command is not relevant for the document printer.
Selecting the print colour
ESC
27
1B
r
114
72
(n)
n
n
ASCII character
Decimal
Hexadecimal
Function:
With a suitable printer by means of ESC r (n) a print colour can be selected depending on the n value (for example, 0 = black, 1 = red, 2 = blue).
With the document printer “black” is always the standard colour.
T5023/5023+ - Programming Guide
121
Non- executable commands
122
T5023/5023+ - Programming Guide
Standard commands
Character set commands
With the help of the following control commands, it is possible to change between the different character sets of the printer. Furthermore, your own characters can be defined as dot patterns and stored in the memory of the printer.
Command
Function
ESC % (n)
Switching on/ off the character set defined by
the user
Transferring the character definition
Switching on italic print
Switching off italic print
Switching on extended character set
Switching off extended character set
Copying the character set into the RAM
Selecting the national character set
Selecting the character set
ESC & (n) (n) (m)
ESC 4
ESC 5
ESC 6
ESC 7
ESC : NUL (n) NUL
ESC R (n)
ESC t (n)
i
J
J
J
By means of CSI sequences, further character sets with specially defined font qualities can be selected (see the additional command
CSI n # q in the “Additional commands” chapter). Character fonts selected in this way are treated as normal LQ type fonts, that is to say, all
standard commands (print quality, character size, types of print) also
work on these character sets in the way described in the “Standard
commands” chapter.
General notes on the command description can be found in the “Standard commands” chapter in the sections “Description components”,
“Coding of decimal command parameters” and “Program examples”.
T5023/5023+ - Programming Guide
123
Character set selection
Character set commands
Character set selection
The document printer prints characters as dot patterns. The data for the dot patterns of the characters is stored in the ROM (Read Only Memory) of the printer.
If the printer receives a character code from the computer, it prints the corresponding character according to the stored pattern.
Two areas are differentiated with the printable character codes:
–
area with the basic characters or italic characters
–
area with the italic characters or graphics and special characters.
To differentiate the character code areas the following labels are used in this
chapter:
–
’lower control code table’ for the code range from hex 00 to hex 1F (decimal
0 to 31)
–
’lower character table’ for the code range from hex 20 to hex 7F (decimal 32
to 127)
–
’upper control code table’ for the code range from hex 80 to hex 9F (decimal
128 to 159)
–
’upper character table’ for the code range from hex A0 to hex FF (decimal
160 to 255)
–
’complete upper character table’ for the code range from hex 80 to hex FF
(decimal 128 to 255).
The following character set definitions result from this:
–
The ’italic character set’ contains basic characters in the lower character table and italic characters in the upper character table
–
The ’graphics character set’ contains basic characters in the lower character
table and graphics characters in the upper character table
–
The ’extended graphics set’ contains a basic character set in the lower character table and graphics characters in the complete upper character table.
i
124
After switching on the document printer, the following character sets are
set:
–
Extended graphics character set. This correspond to the settings
using the maximum number of characters.
–
Country version (set in the emulation menu).
T5023/5023+ - Programming Guide
Character set commands
Character set selection
Area with basic characters or italic characters
This area lies in the lower character table (hex 20 to hex 7F or decimal 32 to
127). It contains large and small letters, figures, punctuation marks and special
characters in the print quality selected in each case (draft or LQ) or the LQ type
font (Roman, Sans Serif). The characters in the lower character table can be
printed by specifying the character code according to the following table.
T5023/5023+ - Programming Guide
125
Character set selection
Character set commands
Basic character set:
After entry of the control commands ESC 4 (’Switching on italic printing’) and
ESC ! (64) (’Selection of combined print modes’) all the basic character symbols
of the currently selected print quality or LQ type font are printed in italics.
i
126
The lower control code table is occupied by control codes (hex 00 to 1F
or decimal 0 to 31). It contains no printable characters. An exception is
the character ’§’ (hex 15, decimal 21) by which the lower control code
table is extended.
T5023/5023+ - Programming Guide
Character set commands
Character set selection
Country versions (national character sets)
A total of twelve character codes of the basic character set (hex 23-24, 40, 5B60 and 7B- 7E) can be occupied with national special characters using the command ESC R (n). Thirteen country versions are available:
i
The country versions also apply for italic characters in the upper character table.
T5023/5023+ - Programming Guide
127
Character set selection
Character set commands
Area with italic characters or graphics and special characters
The italic character area for the italic character set lies in the upper character table. It contains all the basic characters in the currently selected print quality or
LQ type font in italics.
For the graphics character set there are graphics characters in the upper character table. For the extended graphics character set there are special characters and graphics characters in the complete upper character table (special
characters in the area of the upper control code table; hex 80 to 9F).
All the characters in the upper or complete upper character table can be printed
by specifying the character code according to the following tables.
i
128
This function should´nt be used. Today it is good style to use the
charater set commands ESC 4 (italics on) and ESC 5 (italics off) to select italic printing.
T5023/5023+ - Programming Guide
Character set commands
Character set selection
Graphics character table
Here the upper control code table (hex 80 to 9F) is not occupied by printable
characters.
T5023/5023+ - Programming Guide
129
Character set selection
Character set commands
Extended graphics character table:
The upper control code table is occupied by printable special characters. After
the control command ESC t (1) has been entered, the extended graphics character set can be addressed in the complete upper character table.
130
T5023/5023+ - Programming Guide
Character set commands
Character set selection
Characters defined by the user
The pattern of the ground character in the used print qualities and fonts and the
graphic signs are in the resident menory of the printer. After turn off the printer
this memory is not lost.
In addition, the user can define his own characters. For this, an appropriate dot
pattern must be developed, encrypted via a sequence of numbers and transferred to the memory of the printer by means of the control code ESC &. A character code between hex 00 and hex 7F (decimal 0 to 127) is assigned to a
character defined by the user.
After changing with ESC % from the graphic signs in the resident memory to the
user defined graphic signs, this signs can be used with the defined code.
Example:
A character defined by the user is assigned to the ASCII code 65 (capital letter
A of the basic character set). The character sequence “AAA” is printed before
and after switching to the user-defined character set.
BEGIN
PRINTLF("AAA")
PRINT(char(27),"%",char(1));
PRINTLF("AAA")
END
Result:
T5023/5023+ - Programming Guide
131
Character set selection
Character set commands
The following diagram explains the selection of the different character sets:
i
132
–
The character set defined by the user can be switched on using
ESC % (1) in the lower character table or using ESC t (2) in the
upper character table.
–
After the control command ESC 6 has been entered, the complete
upper character table for characters defined by the user can be
used.
–
During definition, the characters defined by the user are assigned
codes from 0 to 127. If the character set defined by the user is
switched on in the upper character table, 128 must be added to
the codes in order to print the desired character. For example,
PRINT (char (128 + 60)) prints the character defined under the
code 60. Thus, basic characters and characters defined by the
user can be printed simultaneously without switching the character set.
–
Using ESC 4, the characters defined by the user in the lower character table can be printed in italics.
T5023/5023+ - Programming Guide
Character set commands
Definition of characters
Definition of characters
For the definition of a new character the following steps are necessary:
1.
2.
3.
4.
Design of a character
Transferring the design to a dot grid
Encryption of the dot pattern into a number sequence
Transferring the number sequence to the printer using the control com
mand ESC &.
T5023/5023+ - Programming Guide
133
Definition of characters
Character set commands
Design of a character
A character is depicted according to the following points:
–
type image, i. e. ’form of the character’
–
relative height and width of the character in comparison to the other characters of the character set
–
position of the character in relation to the base line (print line)
–
descender or ascender
–
left or right space.
The following diagrams show the design of a capital letter and a small letter with
descender:
134
T5023/5023+ - Programming Guide
Character set commands
Definition of characters
Transferring the design onto a dot grid
The document printer prints characters as dot patterns. A character consists of
a maximum of 24 dots in a vertical direction (spacing 1/ 180 inch). In a horizontal
direction, the number of dots and the densitiy depend on the print quality:
–
–
–
9 dots (spacing 1/120 inch) in draft print quality
29 dots (spacing 1/360 inch) in LQ print quality
37 dots (spacing 1/360 inch) with proportional spacing.
To ascertain the dot pattern, the character design is transferred onto a dot grid
appropriate to the desired print quality.
The following diagrams show the dot patterns for the character ’I’ on different dot
grids.
Dot grid for draft print quality:
T5023/5023+ - Programming Guide
135
Definition of characters
Character set commands
Dot grid for LQ print quality:
136
T5023/5023+ - Programming Guide
Character set commands
Definition of characters
Dot grid for superscript or subscript characters in draft print quality:
The extent of the dot grid is determined by the print quality and the print mode.
The following table contains the number of dots (columns) in a horizontal and
vertical direction for the various character types:
Print quality/
print mode
Character width
Complete
width of left
and right
spaces
Complete
width of
the
character
Character
height
with
descender and
ascender
Draft print quality
LQ print quality
Proportional spacing
Superscript/subscript
(draft)
9
29
1-37
9
3
7
0-5
3
12
36
1-42
12
24
24
24
16
T5023/5023+ - Programming Guide
137
Definition of characters
i
138
Character set commands
–
On a dot grid, dots may not be set directly beside each other horizontally. A dot position must remain free to the right and to the left
of each dot to be printed.
–
In normal print, the complete width of a character (including the left
and the right space) is fixed. Each character occupies 12 (draft) or
36 (LQ) horizontal dot positions. With proportional spacing, only the
number of horizontal dots is printed specified by the character definition (see the next section “Encryption of the dot pattern”). The
maximum complete width of a proportional character is 42 dots.
–
The complete width of the space, i. e. the distance to the next or
previous character, can be divided up at will between the left and/
or right space, for example, left space = 0, right space = 3 or left
space = 2, right space = 1 with the complete width of the space as
3 dots (draft).
–
For superscript and subscript characters, the same dot grids can be
used depending on the print quality and print mode. They are 16
dots high and 12 dots (draft), 36 dots (LQ) or maximally 42 dots
(proportional) wide. With superscript characters the upper 16 needles of the print head are used, with subscript characters the lower
16 needles.
T5023/5023+ - Programming Guide
Character set commands
Definition of characters
Encryption of the dot pattern into a number sequence
Before being transferred to the printer, the dot pattern of a newly defined character must be encrypted into a sequence of data bytes, i. e. into numbers between 0 and 255.
For this, the grid is divided into columns each of eight dot positions lying one beneath the other (squares). The encryption of such a dot column takes place according to the following system:
Each square of the dot column from the top to the bottom in descending order is
assigned a value of a power of two:
The encryption of the dot column is the total of the powers of two of all squares
which contain a dot, for example:
The total of a column, which contains no dots, is 0; the total of a column, in which
all the dots are set, is 255.
T5023/5023+ - Programming Guide
139
Definition of characters
Character set commands
The number of the totals to be calculated (data bytes) depends on the size of the
dot grid. For example, with a 24 by 29 dot grid, three data bytes per column must
be calculated, i. e. altogether 3 * 29 = 87 data bytes.
Example:
140
T5023/5023+ - Programming Guide
Character set commands
Definition of characters
Transferring the number sequence to the printer
When the complete dot pattern of a character is encrypted as a number sequence, this number sequence is transferred to the printer (RAM) using the control command ESC &. Subsequently the character can be printed as a character
defined by the user.
If several characters are to be defined, normally each character definition must
be transferred separately using ESC &. Only characters of a continuous alphabet range - for example, A – E or J – U, but not C, J and N - can be defined using
one ESC & command.
i
Before the encryption (number sequence) of a character defined by the
user can be transferred with ESC &, the print quality (LQ or draft) appropriate for the character definition and the appropriate print mode
(proportional spacing or superscript/ subscript) must be set on the printer. If, for example, an LQ character is defined, the print quality must first
be set to LQ using ESC x (1). If another mode is activated during the
transfer, the characters cannot be used.
If more than one character is defined, all the number sequences (sequences of
data bytes) are added successively. The number of data bytes depends on the
width (parameter d1) and the height (24 or 16 dots) of the dot grid used:
Number of data bytes per character to be transferred:
–
with normal character height (24 dots = 3 bytes)
Number of bytes = d1* 3
–
with superscript/subscript characters (16 dots = 2 bytes)
Number of bytes = d1 * 2
The number of data bytes to be transferred according to the formula above must
be kept to exactly. If too little data is transferred using ESC &, subsequent control commands or character codes may be interpreted as character data. Also,
too much data is interpreted as control commands or character codes.
T5023/5023+ - Programming Guide
141
Definition of characters
Character set commands
Using the control command ESC &, the data bytes of one or more characters
defined by the user can be transferred:
ESC & (n1) (n2) (n3) (d0) (d1) (d2) (data 1) (d0) (d1) (d2) (data 2) ...
The meaning of the individual parameters is explained in the command description of ESC & ... (see section “Transferring the character definition” in this chapter).
Meaning of the parameters d0, d1, d2:
142
T5023/5023+ - Programming Guide
Character set commands
Definition of characters
Example of the definition of a draft character
The example shows the following steps:
–
Definition of a draft character under the character code of the letter A (left
space two dot columns, character width nine dot columns, right space one
dot column).
–
Printing of the newly defined character in normal, elongated and italic print.
BEGIN
PRINT(char(27),"&",char(0),"AA")
PRINT(char(2,9,1))
PRINT(table )
PRINTLF("AAAABCDEFG")
PRINT(char(27),"%",char(1))
PRINTLF("AAAABCDEFG")
PRINT(char(14))
PRINTLF("AAAABCDEFG")
PRINT(char(27),"4")
PRINTLF("AAAABCDEFG")
END
New definition of
<- character A
<- Character width
9 dot columns
<- B to G not newly
defined
BEGIN table
char(8,0,0,16,0,0,32,0,0)
char(64,0,0,255,255,255,64,0,0) <- Charcter width 9,
char(32,0,0,16,0,0,8,0,0)
i.e. 27 data bytes
END table
Result:
T5023/5023+ - Programming Guide
143
Definition of characters
Character set commands
Example of the definition of LQ characters:
The example shows the following steps:
–
Definition of two proportional LQ characters under the character codes of the
letters A and B; the character width of the first character amounts to ten dot
columns, that of the second character eighteen dot columns.
–
Printing of the newly defined characters in normal and elongated print.
BEGIN
PRINT(char(27),"p",char(1))
PRINT(char(27),"&",char(1),"AB")
PRINT(char(3,10,1))
PRINT(table 1)
PRINT(char(3,18,1))
PRINT(table 2)
PRINTLF("ABABABCDEFG")
PRINT(char(27),"%",char(1))
PRINTLF("ABABABCDEFG")
PRINT(char(14))
PRINTLF("ABABABCDEFG")
END
New definition A
<-- and B (proport.)
<-- Different
character
<-- widths
<-- C to G not newly
defined
BEGIN table 1
char(0,8,0,0,4,0,0,8,0,0,4,0)
char(0,132,64,0,72,128,0,165,64)
char(0,90,128,0,37,0,0,26,0)
END Table 1
BEGIN table 2
char(0,8,0,0,4,0,0,8,0,0,4,0)
char(0,8,0,0,4,0,0,8,0,0,4,0)
char(0,8,0,0,4,0,0,8,0,0,4,0)
char(0,132,64,0,72,128,0,165,64)
char(0,90,128,0,37,0,0,26,0)
END table 2
Result:
144
T5023/5023+ - Programming Guide
Character set commands
Notes on the use of user defined cha-
Notes on the use of user defined characters
This section contains some general notes on the use of characters defined by
the user.
Storage of characters defined by the user
The characters defined by the user are stored in the RAM of the printer. Only one
character set can be loaded. When switching off the printer, the set of characters
defined by the user is deleted. Therefore, it must be possible at any time to reload the characters.
The control command ESC @ does not delete the character set defined by the
user.
Characters defined by the user in various print qualities
By means of the control command ESC %, the character set defined by the user
is selected. To print the characters, the print quality (draft or LQ) appropriate to
the character definition and the appropriate print mode (proportional spacing or
superscript/ subscript) must also be activated.
For example, if draft characters were defined (i. e. the draft print quality was activated before the character definition using ESC &), the draft print quality must
be switched on.
If you change to a different print quality or print mode the user defined graphics
can not be used.
T5023/5023+ - Programming Guide
145
Notes on the use of user defined characters
Character set commands
Print effects of characters defined by the user
For characters defined by the user, the same print effects are available as for
normal characters:
–
bold print, double impact print
–
condensed print, elongated print
–
italic print
–
underlining
–
character sizes 10, 12, 15 cpi
Transfer of the resident character set (Download)
If only a few characters within a resident character set (for example, LQ type font
or the standard type in draft quality) are to be newly defined, the desired resident
character set can be copied into the RAM using the command ESC : before defining the characters. The character set is then considered to be defined by the
user and can subsequently be modified character by character via ESC & (see
description of the control command ESC : in the following section, “Syntax of the
character set commands”).
146
T5023/5023+ - Programming Guide
Character set commands
Syntax of the character set com-
Syntax of the character set commands
This section extensively describes the syntax of the control commands for the
character set selection and the character definition. Exact notes and program
examples are contained in the previous sections.
Switching on italic print
ESC
27
1B
4
52
34
ASCII character
Decimal
Hexadecimal
Function:
Italic print is switched on using ESC 4. The characters of each current character
set, i. e. draft standard type, LQ type or characters defined by the user will subsequently be printed in italics..
i
–
The italic characters can be addressed in the lower character table after entering ESC 4.
–
Italic print is switched off again using ESC 5. In the upper character table, italic characters can still be addressed (see ESC t (n)).
–
ESC 4 can also be used if the graphics character set was activated using ESC t (1). However, the graphics characters are not
printed in italics.
Example:
BEGIN
PRINTLF("Draft normal")
PRINT(char(27),"4")
PRINTLF("Draft italic")
PRINT(char(27),"x",char(1))
PRINTLF("LQ italic")
END
T5023/5023+ - Programming Guide
147
Switching on italic print
Character set commands
Result:
Switching off italic print
ESC
27
1B
5
53
35
ASCII character
Decimal
Hexadecimal
Function:
Italic print activated using ESC 4 is switched off again using ESC 5.
i
148
In the upper character table, italic characters can be addressed even
after entering ESC 5 (see ESC t (n)).
T5023/5023+ - Programming Guide
Character set commands
Switching on italic print
Selecting the character set
ESC
27
1B
t
116
74
(n)
n
n
ASCII character
Decimal
Hexadecimal
Function:
Using ESC t (n), one of the following character sets of the complete upper character table is selected:
–
Italic character set (n= 0)
The upper character table contains the italic characters of the current character set (draft, LQ or defined by the user). The upper control code table
contains control codes (identical to those of the lower control code table).
–
Graphics character set (n= 1)
The complete upper character table contains graphics characters and international special characters.
–
Character set defined by the user (n= 2)
The upper character table contains the characters defined by the user. These characters can be used simultaneously with the standard characters
(ROM) without switching character set. For this, 128 must be added to each
code assigned with ESC & when defining the characters.
i
–
The introductory section “Selection of the character set” in this
chapter contains the character tables of the individual character
sets.
–
If ESC t (2) is used without previously defining characters, the upper and lower character tables are identical.
T5023/5023+ - Programming Guide
149
Switching on italic print
Character set commands
Selecting a national character set
ESC
27
1B
R
82
52
(n)
n
n
ASCII character
Decimal
Hexadecimal
Function:
Altogether twelve character codes of the basic character set (hex 23, 24, 40, 5B60 and 7B- 7E) can be occupied with national special characters using the command ESC R (n). By means of a value between 0 and 12 for n, one of thirteen
possible country versions is selected according to the following list:
n= 0
n= 1
n= 2
n= 3
n= 4
n= 5
n= 6
n= 7
n= 8
n= 9
n = 10
n = 11
n = 12
i
150
: USA
: France
: Germany
: Great Britain
: Denmark
: Sweden
: Italy
: Spain 1
: Japan
: Norway
: Denmark
: Spain 2
: Latin America
–
A summary of all the country- specific characters and their encryption (hexadecimal, decimal) is contained in the introductory section
“Character set selection” in this chapter.
–
The country versions of the ISO 8859 character set also are selected via the command ESC R (n) (see “Selection of type fonts/ character sets” in the chapter “Additional commands”).
T5023/5023+ - Programming Guide
Character set commands
Switching on italic print
Switching on/off the character set defined by the user
ESC
27
1B
%
37
25
(n)
n
n
ASCII character
Decimal
Hexadecimal
Function:
Using ESC % (n) the character set defined by the user is switched on. Characters defined by the user will only be printed if the currently selected print quality
(draft or LQ) and the current print mode (proportional or superscript/ subscript)
correspond to the character definition.
n = 0: user-defined character set off
n = 1: user-defined character set on
i
The sections “Character set selection” and “Character definition” contain further notes and program examples for the command ESC % (n).
T5023/5023+ - Programming Guide
151
Switching on italic print
Character set commands
Switching on extended character set
ESC
27
1B
6
54
36
ASCII character
Decimal
Hexadecimal
Function:
The command ESC 6 influences the complete upper character table. The effect
of the command depends on the character set activated using ESC t (n):
–
The upper character table contains characters defined by the user. In this
case, after entry of the command ESC 6, the upper control code table for
characters defined by the user can also be used. When defining the characters, the codes from hex 00 to hex 1F must be assigned to these characters.
–
The upper character table contains graphics characters. The upper control
code table is then occupied by further special characters.
–
The upper character table contains italic characters. In this case, the command ESC 6 is ignored.
i
152
The introductory section “Character set selection” in this chapter contains further notes on the command ESC 6. This section also contains
the characters of the upper control code table for the extended graphics character set.
T5023/5023+ - Programming Guide
Character set commands
Switching on italic print
Switching off extended character set
ESC
27
1B
7
55
37
ASCII character
Decimal
Hexadecimal
Function:
The command ESC 7 influences the complete upper character table. The effect
of the command depends on the character set activated using ESC t (n):
–
The upper character table contains characters defined by the user. ESC 7
cancels the effect of the command ESC 6. The upper and lower control code
tables are identical.
–
The upper character table contains graphics characters. After ESC 7 is entered, the upper and lower control code tables are identical.
–
The upper character table contains italic characters. In this case, the command ESC 7 is ignored.
i
The introductory section “Character set selection” in this chapter contains further notes on the command ESC 7.
T5023/5023+ - Programming Guide
153
Switching on italic print
Character set commands
Copying the character set into the RAM
ESC
27
1B
:
58
3A
NUL
NUL
NUL
(n)
n
n
NUL
NUL
NUL
ASCII character
Decimal
Hexadecimal
Function:
It is advisable to use this command when only a few characters of a resident character set are to be modified.
Before the definition of a new character (using ESC &), any resident character
set can be copied into the RAM of the printer using ESC :
The desired resident character set, for example the draft standard character set
or an LQ type font, is activated for this using the appropriate control command,
for example, using ESC x (1) (LQ character set) or ESC S (n) (superscript/ subscript). Subsequently, the current character set is copied into the RAM using
ESC : NUL (n) NUL. n is the number of the LQ type font specified in the standard
command ESC k (n), for example (see “Standard commands” chapter, section
“Selecting the LQ type font (ESC k (n))”).
154
T5023/5023+ - Programming Guide
Character set commands
Switching on italic print
Transferring the character definition
&
38
26
ESC
27
1B
(s)
s
s
(n)
n
n
(m)
m
m
Data
Data
Data
ASCII character
Decimal
Hexadecimal
Function:
Using the control command ESC &, the encryption (number sequence) of one or
more characters defined by the user can be transferred:
ESC & (s) (n) (m) (d0) (d1) (d2) (data 1) (d0) (d1) (d2) (data 2) ...
The parameters have the following meaning:
–
s is the number of the desired LQ type font (see control command
ESC k (n)). If a character is to be defined in draft print quality, 0 must be entered.
–
n is the character code of the first character to be defined.
–
m is the character code of the last character to be defined. If only one character is defined, n and m are identical.
–
d0 indicates the number of vertical dot columns for the left space of a character.
–
d1 indicates the number of vertical dot columns for the width of a character
(draft: 9 columns, LQ: 29 columns, proportional: 1- 37 columns, see previous
sections).
–
d2 indicates the number of vertical dot columns for the right space of a character.
–
Following the parameters d0 to d2 the data bytes of the character definition
(number sequence) are specified.
When defining several characters, the parameters d0 to d2 and the data bytes
of the character definition are specified for each character in alphabetical order.
i
The section “Character definition” in this chapter contains further notes
and application examples for the command ESC &.
T5023/5023+ - Programming Guide
155
Switching on italic print
156
Character set commands
T5023/5023+ - Programming Guide
Graphics commands
The instruction set of the document printer contains commands for printing graphics, for example, drawings, diagrams or pictures.
There are two different approaches to printing graphics:
–
Graphics printing in text mode
The graphics are composed from individual graphics characters (upper character table) (see chapter “Character set commands”).
–
Graphics printing in graphics mode (dot graphics)
The graphics are printed as dot graphics. In other words, the individual pixels, from which the graphics are composed, are transferred to the printer
encrypted as number sequences. With a maximum density of 180 x 360 dots
per inch, the printing of more complicated pictures is also possible.
This chapter describes the commands for printing in graphics mode:
Command
Function
ESC * (s) (n) (m) data
Selecting graphics mode
ESC K (n) (m) data
Switching on graphics mode ’single density’
ESC L (n) (m) data
Switching on graphics mode ’double density’
ESC Y (n) (m) data
Switching on graphics mode ’double density
and double rate’
ESC Z (n) (m) data
Switching on graphics mode ’quadruple
density’
ESC ? (m) (s)
Reassign graphics commands
T5023/5023+ - Programming Guide
J
157
Graphics commands
i
158
–
General notes on the command description can be found in the
chapter “Standard commands” in the sections “Description components”, “Coding of decimal command parameters” and “Program
examples”.
–
The document printer works in different graphics modes. A graphics mode is labelled by the number of print head needles addressed when printing, (8 needles or 24 needles) and by the horizontal
dot spacing (60 – 360 characters per inch).
–
The graphics commands switch on one of the graphics modes (exception: ESC ?). A defined set of the subsequently transferred data
is interpreted as a dot pattern, similar to the definition of a character. The exact quantity depends on the selected graphics mode and
the parameters specified in the command.
–
In many cases, graphics can also be displayed with a commercially
available program on the screen of the computer and then printed
as a so-called “Screen Dump”. As long as the program uses the appropriate graphics commands, the screen image and the printout
will match.
–
All the graphics modes of the document printer can be switched on
using the command ESC * .
T5023/5023+ - Programming Guide
Graphics commands
Graphics modes
Graphics modes
The graphics modes of the document printer are identified by the number of vertically arranged dots, which the print head prints in a graphics line, i. e. by the
number of print head needles addressed during the printing operation:
–
8- dot mode
In one graphics line, 8 dots spaced at 1/60 inch can be printed vertically. In
this mode, six different horizontal dot spacings are available.
–
24- dot mode
In this mode, 24 dots spaced at 1/180 inch can be printed vertically. Five different horizontal dot spacings are available.
All graphics modes can be switched on using the command ESC * (m) (n1) (n2)
by means of the selection of the parameter s. The following table shows the dot
densities (in dots per inch) of the various graphics modes and the corresponding
parameter s:
s
Graphics mode
needles
used
horizontal
dot density
vertical
dot density
0
1
2
single density
double density
double rate
double density
quadruple density
screen graphics
screen graphics 2
single density
double density
screen graphics 2
triple density
sextuple density
8
8
8
60
120
120
60
60
60
8
8
8
24
24
24
24
24
240
80
90
60
120
90
180
360
60
60
60
180
180
180
180
180
3
4
6
32
33
38
39
40
T5023/5023+ - Programming Guide
159
Mode of operation of the graphics commands
Graphics commands
Mode of operation of the graphics commands
This section describes the mode of operation of the graphics commands.
The graphics commands are structured as follows:
ESC command identifier (n) (m) data ...
Command identifiers are the letters K, L, Y, Z or * (s). Via entry of the identifier,
with ESC * by means of entry of the parameter s, one of the graphics modes of
the document printer is switched on. The number of dots printed vertically in a
dot column is now fixed (8-dot or 24-dot mode).
The parameters n and m determine the number of dot columns to be printed:
number of dot columns = m * 256 + n.
The subsequent data contains the information encrypted in numbers between 0
and 255 (bytes) about the dots from which the graphics are to be composed. The
encryption takes place as described in the section “Character definition” of the
“Character set commands” chapter.
The total number of data bytes is calculated from the parameters n and m:
Number of data bytes = m * 256 + n (8-dot mode)
Number of data bytes = 3 * (m * 256 + n) (24-dot mode)
160
T5023/5023+ - Programming Guide
Graphics commands
Mode of operation of the graphics
Example:
T5023/5023+ - Programming Guide
161
Mode of operation of the graphics commands
Graphics commands
The total number of data bytes must be adhered to exactly. If too many data bytes are entered, some may be interpreted as character codes. If too few data are
entered, subsequent control or character codes may be interpreted as graphics
data.
i
162
–
With 8-dot graphics modes ’double rate, double density’ and “quadruple density”, horizontally adjacent dots cannot be printed. This
is also the case for the 24-dot graphics mode ’sextuple density’.
–
For extensive graphics, the dot data of several lines must normally
be connected. With the normal line spacing of 1/6 inch, the picture
is interrupted by blank lines. To print graphics without line spaces
the line spacing must be set to 24/180 inch (corresponds to the
height of a graphics line) using ESC 3.
–
The horizontal and the vertical dot density are equal only with the
8-dot graphics mode ’single density’ and the 24-dot mode ’triple
density’. The various dot densities of the other graphics modes
must be considered when designing graphics. Otherwise, they may
lead to a distortion of the printed pictures.
T5023/5023+ - Programming Guide
Graphics commands
Syntax of the graphics commands
Syntax of the graphics commands
Selecting the graphics mode
*
42
2A
ESC
27
1B
(s)
s
s
(n)
n
n
(m)
m
m
Data...
Data...
Data...
ASCII character
Decimal
Hexadecimal
Function:
Using ESC * (s) (n) (m) according to the value (s) one of the graphics modes is
activated according to the following table:
s
graphics mode
needles
used
horiz.
density
vert.
density
horizontal
adjacent
dots
0
single density
8
60
60
possible
1
double density
8
120
60
possible
2
double density,
double rate
8
120
60
not possible
3
quadruple density
8
240
60
not possible
4
screen graphics
8
80
60
possible
6
screen graphics 2
8
90
60
possible
32
single density
24
60
180
possible
33
double density
24
120
180
possible
38
screen graphics 2
24
90
180
possible
39
triple density
24
180
180
possible
40
sextuple density
24
360
180
not possible
T5023/5023+ - Programming Guide
163
Syntax of the graphics commands
Graphics commands
The parameters n and m determine the number of dot columns to be printed:
Number of dot columns = m * 256 + n
In 8-dot graphics mode, one data byte per dot column must be specified, in 24dot graphics mode three data bytes per dot column.
i
164
The section “Mode of operation of the graphics commands” contains
further notes on the command ESC * (s) (n) (m).
T5023/5023+ - Programming Guide
Graphics commands
Syntax of the graphics commands
Example:
Using shading, the various dot densities of the graphics modes are illustrated. In
the main program, the parameter s is set for the command ESC *. In the subroutines EIGHT DOT and TWENTY- FOUR the command ESC *, the number of dot
columns (100 each time) and the data bytes (encryption) of the shading (decimal
170 followed by decimal 85) are given.
BEGIN
PRINTLF(" 8- dot graphics modes")
SET m=0
CALL EIGHT DOT
SET m=1
CALL EIGHT DOT
SET m=2
CALL EIGHT DOT
SET m=3
CALL EIGHT DOT
SET m=4
CALL EIGHT DOT
SET m=6
CALL EIGHT DOT
PRINTLF
PRINTLF("24-dot graphics modes")
SET m=32
CALL TWENTY-FOUR
SET m=33
CALL TWENTY-FOUR
SET m=38
CALL TWENTY-FOUR
SET m=39
CALL TWENTY-FOUR
SET m=40
CALL TWENTY-FOUR
END
T5023/5023+ - Programming Guide
165
Syntax of the graphics commands
BEGIN EIGHT DOT
PRINTLF("Parameter S =",S)
PRINT(char(27),"*",char(S))
PRINT(char(100,0))
SET N=0
REPEAT
SET N=N+1
PRINT(char(170),char(85))
UNTIL N=50
PRINTLF( )
END EIGHT DOT
BEGIN TWENTY-FOUR
PRINTLF("Parameter S =",S)
PRINT(char(27),"*",char(S))
PRINT(char(100,0))
SET N=0
REPEAT
SET N=N+1
PRINT(char(170),char(85))
UNTIL N=150
PRINTLF( )
END TWENTY-FOUR
166
T5023/5023+ - Programming Guide
Graphics commands
Graphics commands
Syntax of the graphics commands
Result:
T5023/5023+ - Programming Guide
167
Syntax of the graphics commands
Graphics commands
Switching on the ’single density’ graphics mode
ESC
27
1B
K
75
4B
(n)
n
n
(m)
m
m
Data...
Data...
Data...
ASCII character
Decimal
Hexadecimal
Function:
The 8-dot graphics mode ’single density’ is switched on with ESC K (n) (m).
The parameters n and m determine the number of dot columns to be printed:
Number of dot columns = m * 256 + n
One data byte must be specified per dot column.
i
168
–
The section “Mode of operation of the graphics commands” contains further notes on the command ESC K (n) (m).
–
Using ESC ?, any graphics mode of the document printer can be
assigned to the command ESC K.
T5023/5023+ - Programming Guide
Graphics commands
Syntax of the graphics commands
Switching on the ’double density’ graphics mode
ESC
27
1B
L
76
4C
(n)
n
n
(m)
m
m
Data...
Data...
Data...
ASCII character
Decimal
Hexadecimal
Function:
The 8-dot graphics mode ’double density’ is switched on with ESC L (n) (m).
The parameters n and m determine the number of dot columns to be printed:
Number of dot columns = m * 256 + n
One data byte must be specified per dot column.
i
–
The section “Mode of operation of the graphics commands” contains further notes on the command ESC L (n) (m).
–
Using ESC ?, any graphics mode of the document printer can be
assigned to the command ESC L.
T5023/5023+ - Programming Guide
169
Syntax of the graphics commands
Graphics commands
Switching on the ’double density and double rate’ graphics
mode
ESC
Y
89
59
27
1B
(n)
n
n
(m)
m
m
Data...
Data...
Data...
ASCII character
Decimal
Hexadecimal
Function:
The 8- dot graphics mode “double density and double rate” is switched on with
ESC Y (n) (m).
The parameters n and m determine the number of dot columns to be printed:
Number of dot columns = m * 256 + n
One data byte must be specified per dot column.
i
170
–
The section “Mode of operation of the graphics commands” contains further notes on the command ESC Y (n) (m).
–
Using ESC ?, any graphics mode of the document printer can be
assigned to the command ESC Y.
T5023/5023+ - Programming Guide
Graphics commands
Syntax of the graphics commands
Switching on the ’quadruple density’ graphics mode
Z
90
5A
ESC
27
1B
(n)
n
n
(m)
m
m
Data...
Data...
Data...
ASCII character
Decimal
Hexadecimal
Function:
The 8- dot graphics mode ’quadruple density’ is switched on with ESC Z (n) (m).
The parameters n and m determine the number of dot columns to be printed:
Number of dot columns = m * 256 + n
One data byte must be specified per dot column.
i
–
The section “Mode of operation of the graphics commands” contains further notes on the command ESC Z (n) (m).
–
Using ESC ?, any graphics mode of the document printer can be
assigned to the command ESC Z.
T5023/5023+ - Programming Guide
171
Syntax of the graphics commands
Graphics commands
Reassigning graphics commands
ESC
27
1B
?
63
3F
m
m
m
(s)
s
s
ASCII character
Decimal
Hexadecimal
Function:
One of the graphics modes of the document printer can be assigned to the graphics commands ESC K, ESC L, ESC Y and ESC Z with ESC ? m (s).
For m, the identifier of the graphics command must be given as a character code
(K, L, Y or Z). The parameter s identifies the graphics mode, as in the command
ESC * .
Example:
The example demonstrates the assigning of the 24-dot graphics mode ’double
density’ (identifier = 33) to the command ESC K.
BEGIN
PRINT(char(27),“?K“,char (33))
END
172
T5023/5023+ - Programming Guide
Additional commands (Printer)
The document printer can process single documents, multiple documents (form
sets) and passbooks.
This chapter explains special control commands (= additional commands) for
processing documents and for processing MSR/MICR data, which are not a
component of the Epson range of commands.
The description is divided into the following main sections:
–
Notes on the syntax of the additional commands
–
General notes on document processing
–
Basic commands for document processing
–
Specific commands for MSR/MICR
Certain additional commands allow the exchange of internal status information,
error messages or user data between the printing units and the computer. Data
transfer from the document printer to the computer is in the form of responses
which have the same structure as the additional commands (CSI sequences).
i
Examples for the programming of the additional commands for different
tasks can be found in the chapter “Application examples”.
Certain restrictions apply when printing documents (for example, nonprintable areas in passbooks because of the central fold or because of
the safety distance from the horizontal or vertical leading edges of a document). Ignoring this restriction can lead to poor print quality or to the
destruction of documents. The restrictions when printing documents
must be observed by the user. The appendix “Paper specification” contains all specifications as to which areas can or may not be printed depending on the type of document. The corresponding millimetre
specifications must be taken into consideration when setting the parameters of the respective additional commands.
T5023/5023+ - Programming Guide
173
Structure of the additional commands
Additional commands (Printer)
Structure of the additional commands
We begin with an explanation of the component parts used in the additional commands and responses.
General
Additional commands for controlling document and passbook processing and
responses have, in general, the following syntactic structure:
CSI
P1 ; ...; Pn I F
Description:
Meaning
Value/Value range
Remarks
CSI
(ESC [)
Control sequence
introducer
1B 5B
(ASCII)
Start value
Pi
Parameter
30-39
(ASCII)
Optional
;
Parameter separator
3B
(ASCII)
if number of
parameters > 1,
then compulsory
I
Intermediate
character
20-2F
(ASCII)
F
Final character
70-7E
(ASCII)
174
T5023/5023+ - Programming Guide
End value
Additional commands (Printer)
Structure of the additional commands
–
CSI starts the control sequence of an additional command and the sequence
of responses and stands for the sequence ESC [.
–
The parameters Pi, regarding number and use, depend on the respective
control command. Numeric parameter values are specified as ASCII characters (in contrast to the ESC sequences of the standard, character set and
graphics commands for which numeric values are transmitted to the document printer in binary form). Leading zeros need not be sent.
–
Parameters are separated from each other by ; (semicolon). The assignment of a value to a parameter results only from its position within the parameter sequence (parameter position).
–
If parameter positions are not occupied, the appropriate default values or the
value 0 will be set implicitly.
–
Even if parameter positions in a CSI command are not to be occupied, the
separator ; must be set at the respective parameter position.
Example:
–
CSI P1;P2;P3 I F
= complete command
CSI ;P2; I F
= P1, P3 are default values
CSI P1;;P3 I F
= P2 ist a default value
Intermediate (I) and final (F) characters end the control sequence or a response.
T5023/5023+ - Programming Guide
175
Structure of the additional commands
Additional commands (Printer)
Transfer of user data
The transfer of MSR data is archived by adding an STX... ETX sequence to the
respective CSI command:
CSI ... I F STX...ETX
Meaning
Value
Remarks
STX
Start of text
02 (ASCII)
ETX
End of text
03 (ASCII)
for example, start data
from OCR reader
for example, end of a
message from the printer
Reaction to incorrect parameters
Normally an additional command is ignored if non- decimal parameters or parameters exceeding the specified value range are transferred. This also applies if
the set format height is infringed by the vertical positioning. Exceptions to these
rules are given with the description of the appropriate command, as appropriate.
Responses
Responses of the document printer can be grouped as follows:
–
Requested data response
–
Global printer status (GPS)
–
Special printer message (SPM).
176
T5023/5023+ - Programming Guide
Additional commands (Printer)
Structure of the additional commands
Requested data responses
The basic characteristics of requested data responses are that for each response a requesting control command from the printer control was recognized (for
example, request = read the MSR track, response = MSR data or error identification). These control commands are processed in series with the other print
control commands.
The timing of the response cannot therefore be exactly specified. It depends on
internal runtimes and the mechanical execution times of the printer.
Global printer status/ special printer messages
The data of the ’global printer status’ (GPS) describes a status change within the
printer control, which has been caused by an exceptional circumstance. These
exceptional circumstances can be errors, operating interruptions or operating
panel entries.
With the help of ’special printer messages’ (SPM) these status changes will be
specified in more detail.
After a ’break’ on the printer interface, a ’printing unit parameters’ response is
created in addition to the global print status which contains information on the
configuration of the printer (for example, ’maximum form width’ or ’MSR function
available/ not available’).
Data for the global printer status, special printer messages or specifications for
the printing unit parameters occur spontaneously and are stored in a stack in the
printer interface until they are fetched by the system.
T5023/5023+ - Programming Guide
177
Structure of the additional commands
Additional commands (Printer)
Notes on the command description
In the individual descriptions of the CSI commands the Pi parameters are represented as follows:
n
: one parameter
n1; n2;n3
n1; ... ; n5
: parameters (in this case 3)
(0 - 9)
: Value range of a parameter from 0– 9 or 0– 99 or 0– 999, etc.
178
T5023/5023+ - Programming Guide
Additional commands (Printer)
Important notes on document processing
Important notes on document processing
The document printer can process single documents, multiple documents and
passbooks. Optionally the document printing point can also be equipped with a
magnetic stripe reader (MSR).
The manual document feed is supported by an automatic document adjustment
on the right- hand side.
The positioning of the print characters can be programmed for any horizontal or
vertical position (reasured from document edge). For document positioning the
smallest basic step is 1/180 inch. The maximum paper rate is approx. 70 lines
per second for documents and passbooks.
If a document is present, the printer automatically initiates an insert. When the
first print or positioning command for a document is recognized, this will be transported on to the correct processing position. If the printer receives data and no
sheet is available at the document printing point, the user will be requested to
insert a sheet by means of the flashing green ’PAPER LED’ on the operating panel.
For application programming the selection of the horizontal leading edge is optional. The difference is that leading blanks must be ignored for horizontal positioning on a document or passbook with the horizontal leading edge on the left,
while leading blanks corresponding to the physical width of the printing unit and
document must be taken into account in the case of the horizontal leading edge
on the right. As an alternative to the use of leading spaces, the left margin can
be set as required (ESC l (n)).
Where precise accuracy of positioning is required, the desired print position
should be reached using the least number of commands possible.
T5023/5023+ - Programming Guide
179
Important notes on document processing
Additional commands (Printer)
Character box
The printable areas on documents refer on the one hand to the outer edges of
the documents and passbooks as well as to staggered edges and folds, on the
other hand to the character box of the print character (also see appendix “Paper
specification”).
’Character box’ definition
The character box represents a rectangle, the width of which is specified by means of the selected character spacing:
10 characters/inch : width = 1/10 inch = 2.54 mm
12 characters/inch : width = 1/12 inch = 2.12 mm
15 characters/inch : width = 1/15 inch = 1.69 mm
Width of the character box for proportional spacing from 1. 27 mm to 2.96 mm.
The height of the character box is defined by means of the vertical distance between the highest and lowest needles (for the document printer 3.5 mm). Within
this character box each dot can be printed (blacked) via a needle.
180
T5023/5023+ - Programming Guide
Additional commands (Printer)
i
Important notes on document processing
When printable areas are defined in this section, reference is always to
the character box defined here. The capital letter ’H’, used in the relevant illustrations of printable areas, only serves as an example for all
print characters.
On the document printer the position of the print character within the character
box is not generally determined horizontally and vertically (Epson compatibility).
It is therefore wise to refer to the vertical edges of the character box (left or right
character box limit) for horizontal safety distances. For vertical safety distances,
selection of the base line of the print character as a reference line is recommended. The base line is the line drawn for capital letters by printing the lowest needle used. On the document printer this is normally needle 20 for standard
character fonts with 10 and 12 characters/inch line spacing (needle 1 appears at
the top, needle 24 at the bottom on the typeface).
Reference lines of the character box
Definition 1:
The reference line for horizontal positioning on the document printer is the left
character box limit. The distances to reference lines to the left of the print character specified in the following also refer to the left character box limit. Distances
to reference lines to the right of the print character specified in the following refer
to the right character box limit.
T5023/5023+ - Programming Guide
181
Important notes on document processing
Additional commands (Printer)
Definition 2:
The reference line for vertical positioning on the document printer is the base line
(needle 20). The distances between print characters and reference lines above
and below the print characters specified in this manual always refer to this base
line.
For measurements of the left and right character box limits, print characters are
recommended which extend from the left to the right edge of the character box
(for example, continuous horizontal bar (hex 2D) or block graphics characters).
Capital letters are recommended for measuring the base line.
Horizontal positioning
When positioning the print head horizontally, a logical distinction must be made
between the horizontal leading edges on the left and on the right.
For application programming, the difference is that for the horizontal positioning
on the document or passbook with the horizontal leading edge on the right, the
print positions of the document in question must be converted to the print positions of the printing unit, therefore the physical width of the printing unit and of the
document must be taken into consideration. If leading spaces are necessary in
a print line, the left margin can be set as required (ESC l (n)).
182
T5023/5023+ - Programming Guide
Additional commands (Printer)
Important notes on document processing
Horizontal print position 0
With the horizontal leading edge on the left, the left edge of the document is identical to print position 0 for all character spacings unless a left margin was set
using the standard command ESC l (n) (see the next subsection “Position 0 after
ESC l (n)”). If no left margin was set, the left character box limit of the first possible print character lies on the left edge of the document:
T5023/5023+ - Programming Guide
183
Important notes on document processing
Additional commands (Printer)
With the horizontal leading edge on the right, the right character box limit of the
90th character (with character spacing of 10 characters/inch) lies on the right
edge of the document. This means that print position 89 of the 90th character
lies 1/10 inch to the left of the right edge of the document (method of counting:
print position 0 for the 1st character, print position 1 for the 2nd character, etc.).
With character spacing of 12 characters/inch, print position 107 for the 108th
character lies 1/12 inch to the left of the right edge of the document accordingly:
Proceeding from these specifications, print position 0 can be calculated by counting backwards. The printing unit width of 90/10 inch must always be considered.
184
T5023/5023+ - Programming Guide
Additional commands (Printer)
Important notes on document processing
Position 0 after ESC l (n)
The horizontal print position 0 changes if a left margin was set by means of the
standard command ESC l (n). In this case, the left edge (= horizontal print position 0) is displaced to the right by the value n. This must be taken into consideration when calculating the actual print position 0 according to the following table
(printing unit width 90/10 inch):
Logical
leading
edge
Left margin
set
Position 0
On left
On left
On right
On right
n=0
n>0
n=0
n>0
Left edge of document
Left edge of document + n
Right edge of document -printing unit width
Right edge of document -printing unit width + n
Vertical positioning
The vertical print position is the distance from the top or bottom edge of the document to the base line of the character.
Positioning of the first printing line
The vertical first print position can be set in an area from 10/60 inch (line 1) to
80/60 inch (line 8) via the operating panel. The default setting is 30/60 inch (line
3) with a line reference of 10/60 inch. This position is valid after a document ejection (FF) but can be overwritten by means of positioning commands at any time.
T5023/5023+ - Programming Guide
185
Important notes on document processing
Additional commands (Printer)
Vertical print position 0
For the absolute vertical positioning of the print head, a distinction must be made
between the leading edges ’upper edge of document’ (top reference) and “lower
edge of document” (bottom reference). Two additional commands CSI n ! p (absolute vertical positioning from the upper edge of the form) and CSI n " p (absolute vertical positioning from the lower edge of the form) are available for this. A
corresponding vertical positioning of n/180 inch is set with the parameter n. For
both methods of positioning, the base line for the vertical print position 0 is on
the corresponding edge of the document.
Absolute vertical positioning (top reference):
j n ≥ 1 is admissible; n = 0 causes an error message.
186
T5023/5023+ - Programming Guide
Additional commands (Printer)
Important notes on document processing
Absolute vertical positioning (bottom reference):
j n ≥ 1 is admissible; n = 0 causes an error message.
Selection of the vertical leading edge
For performance reasons, care should be taken that the text lines are processed
from top to bottom when processing documents on which the lines relate to the
top of the document (top reference). With top reference, the preferred direction
of the printer is the forwards movement (insertion direction). With forms designed with bottom reference, the preferred direction is the backwards movement
(eject direction), so that here processing should be from the bottom to the top.
The user is free to change from bottom reference to top reference within a form.
T5023/5023+ - Programming Guide
187
Important notes on document processing
Additional commands (Printer)
Mixed use of character fonts
If different character fonts are to be used in one text line, care must be taken that
the respective fonts have the same matrix density in order to avoid loss of performance.
Printable document areas
When printing documents, it is important not to print on the document edges or
other uneven parts of the document (for example, folds or staggering) in order
to avoid damaging the document or the print head. With passbook processing,
the physical position of the scanning roller on the print head must also be taken
into consideration. Also waves in the paper and bent up corners of documents
can lead to malfunctions.
The restrictions of the printable document areas for single documents and for
passbooks or multiple documents are described in the appendix “Paper specification”.
All restrictions must be observed by the user when printing documents.
If the specified safety distances to the horizontal and vertical leading edges are
kept to, possible tolerances (document edge detection, lop-sided pull) can be intercepted.
188
T5023/5023+ - Programming Guide
Additional commands (Printer) Basic commands for document processing
Basic commands for document processing
By means of the following control commands, the document processing can be
controlled:
Command
Function
ESC [ n $ p
Paper feed of the document
ESC [ n # q
Selection of type fonts/ character sets
ESC [ n ! p
Absolute vertical positioning in relation to the top form edge
ESC [ n “ p
Absolute vertical positioning in relation to the bottom form
edge
ESC [ n # p
Relative vertical positioning backwards
ESC [ “ t
Requesting the document width
ESC [ # t
Document edge detection
ESC [ n $ t
Activating passbook processing
ESC [ n % t
Specification of the horizontal leading edge
ESC [ n ( t
Mode switch-over for handling end of paper
ESC [ n * t
Dual station control
ESC [ n , t
Multi Part
T5023/5023+ - Programming Guide
189
Basic commands for document processing
Additional commands (Printer)
Paper feed of the document
CSI
ESC
[
91
5B
27
1B
n
$
p
n
n
n
$
36
24
p
112
70
Name
ASCII character
Decimal
Hexadecimal
Parameter:
n = 0 : Ejection of a document
n = 1 : Insertion of a document to the base line of the logical first linewhich
can be set via the document printer menu (TOF- POS)
Function:
This command initiates a mechanical action. The ejection procedure also refers
to documents which were only form fed and on which no insertion or print procedure was carried out.
If this command is used to eject documents (n = 0), it must be considered that
after ejection the current logical position is outside the form. Therefore a new first
print position must be set here before transferring new print characters, for example, using the command FF (form feed) or via paper feed of the document
(positioning on the base line of the logical first line, see definition of default positioning for insertion) or using the command “Absolute vertical positioning”.
i
190
This control command triggers printing of characters still in the print buffer. It immediately causes a mechanical vertical movement which can
be secured via a control cycle. Because a mechanical optimization of
movement is avoided by means of the insertion command, this control
command should only be used when the insertion procedure must be
secured separately via control cycles.
T5023/5023+ - Programming Guide
Additional commands (Printer) Basic commands for document processing
Selection of type fonts/ character sets
CSI
ESC
[
91
5B
27
1B
n
#
q
n
n
n
#
35
23
q
113
71
Name
ASCII character
Decimal
Hexadecimal
Parameter:
n = type font or character set or font number (0 to 9999)
The font number is fixed when developing a specific character set.
Function:
Using this command by means of a type font or character set number n, special
character sets (fonts) can be selected which do not belong to the standard character sets of the Epson protocol.
Extensions can thus be implemented without coming into conflict with the current
and future definitions of the standard Epson protocol.
i
–
If a character set under the specified number is not a component of
the character sets range in the printing unit, the standard character
sets are switched over to automatically. This also applies if the character set under the specified number does not contain the previously set character spacing.
–
The character sets selected via CSI n # q do not offer the possibility
of producing characters defined by the user.
–
After initializing the printer, there is also a switch-over to the standard Epson character sets.
T5023/5023+ - Programming Guide
191
Basic commands for document processing
–
–
Additional commands (Printer)
The character fonts for the document printer have the following standard options:
DQ area =
DQ
LQ area =
1. Roman
2. Sans- Serif
3. OCR-A (OCR-A1 Eurobanking)
4. OCR-B (OCR-B1 Eurobanking)
The fonts DQ, Roman and Sans Serif can be selected using the standard
commands ’Switch over print quality’ (ESC x (n)) and ’Select LQ type font’
(ESC k (n)). In contrast, the fonts OCR A, OCR B and ISO 8859 can only be
selected by means of the additional command ’Selection of type fonts/character sets’ (CSI n # q). The following table contains the necessary character
set and font numbers:
Font
Font number
OCR-A
n = 900
OCR-B
n = 901
Roman ISO 8859
n = 600 (only with font CP15_437)
Sans-Serif ISO 8859
n = 601 (only with font CP15_437)
DQ ISO 8859
n = 602 (only with font CP15_437)
Country versions for the ISO 8859 character set are selected using the command ’Select national character set’ (ESC R (n)):
Font
Country-specific character sets
ISO 8859-2 East Europa
n=0
ISO 8859-5 Cyrillic
n=1
ISO 8859-7 Greece
n=2
ISO 8859-8 Hebrew
n=3
ISO 8859-9 Turkey
n=4
ISO 8859-15 Euro
n=5
The character tables for OCR- A, OCR- B and ISO 8859 are listed in the appendix “Character set tables”.
192
T5023/5023+ - Programming Guide
Additional commands (Printer) Basic commands for document processing
–
Before using the command CSI n # q the printer must be switched to ’LQ
print quality’ (ESC x (n)). Otherwise the character fonts selected via this
command are treated as normal LQ type fonts, this means that all standard
commands (print quality and character size, types of print) also work on these fonts in the manner described in the chapter “Standard commands”. No
special handling takes place.
T5023/5023+ - Programming Guide
193
Basic commands for document processing
Additional commands (Printer)
Absolute vertical positioning
Leading edge = upper edge of form
CSI
ESC
27
1B
[
91
5B
n
!
p
n
n
n
!
33
21
p
112
70
Name
ASCII character
Decimal
Hexadecimal
Leading edge = lower edge of form
CSI
ESC
27
1B
[
91
5B
n
"
p
n
n
n
"
34
22
p
112
70
Name
ASCII character
Decimal
Hexadecimal
Parameter:
n = positioning in a vertical direction by n/180 inch (n = 1 to 9999)
The permitted upper limit of the parameter value is specified by the set document height.
194
T5023/5023+ - Programming Guide
Additional commands (Printer) Basic commands for document processing
Function:
For document processing, two commands are available for the absolute vertical
positioning (y co-ordinates) of the write head on a form. Generally, both commands, after transfer to the printer, are valid for effecting the output of the characters still situated in the print buffer. The requested vertical movement is then
carried out mechanically when new write operations are executed at the document printing point.
The following differences are to be noted for the two commands for absolute vertical positioning:
–
With the absolute vertical positioning in relation to the upper edge of the form
(CSI n ! p), the spacing is specified in n/180 inch from the upper edge of the
form to the base line of a line.
–
With the absolute vertical positioning in relation to the lower edge of the form
(CSI n " p), the spacing is specified in n/180 inch from the lower edge of the
form to the base line of a line.
For these commands the printing unit of the document printer is fitted with equipment for the detection of the edges of the form.
i
The ’base line of a line’ is defined in the section “Important notes on document processing”.
T5023/5023+ - Programming Guide
195
Basic commands for document processing
Additional commands (Printer)
Relative vertical positioning backwards
CSI
ESC
27
1B
[
91
5B
n
#
p
n
n
n
#
35
23
p
112
70
Name
ASCII character
Decimal
Hexadecimal
Parameter:
n = backwards positioning in a vertical direction of n/ 180 inch (n = 0 to 9999).
The permitted upper limit of the parameter value is specified by the set document height and the current line position.
Function:
Via the command CSI n # p, a positioning of n/ 180 inch backwards relative to
the base line of the current line is executed.
After transferring this command, all characters are printed which are still in the
print buffer.
196
T5023/5023+ - Programming Guide
Additional commands (Printer) Basic commands for document processing
Requesting the document width
Command:
CSI
ESC
[
91
5B
27
1B
"
t
"
34
22
t
116
74
Name
ASCII character
Decimal
Hexadecimal
Response:
CSI
ESC
[
91
5B
27
1B
n
"
t
n
n
n
"
34
22
t
116
74
Name
ASCII character
Decimal
Hexadecimal
n = document width of the current form in n/ 180 inch.
Function:
Via the control command CSI " t, the printer control transmits information to the
program about the width of the document currently being processed.
If the width of the document is not known to the printer control at this point of
time, a measuring operation is carried out to determine the document width.
The response CSI n " t has the same structure as the requesting command supplemented by the parameter n, which identifies the determined document width
of the form with the measurement ’n/ 180 inch’. ’n’ can lie in the range from 0 to
9999.
i
The parameter n transmitted via CSI " t can be used in the program, for
example, as a switch to call up the corresponding formatting and printout routines depending on the type of form.
T5023/5023+ - Programming Guide
197
Basic commands for document processing
Additional commands (Printer)
Document edge detection
CSI
ESC
27
1B
[
91
5B
#
t
#
35
23
t
116
74
Name
ASCII character
Decimal
Hexadecimal
Function:
The document printer ignores this function.
198
T5023/5023+ - Programming Guide
Additional commands (Printer) Basic commands for document processing
Activating passbook processing
CSI
ESC
27
1B
[
91
5B
n
$
t
n
n
n
$
36
24
t
116
74
Name
ASCII character
Decimal
Hexadecimal
Function:
The document printer ignores this function.
T5023/5023+ - Programming Guide
199
Basic commands for document processing
Additional commands (Printer)
Specification of the horizontal leading edge
CSI
ESC
[
91
5B
27
1B
n
%
t
n
n
n
%
37
25
t
116
74
Name
ASCII character
Decimal
Hexadecimal
Parameter:
n = switch for the horizontal leading edge
n = 0 : (flush left, default value)
n = 1 : (flush right)l
Function:
Via CSI n % t, the printer control is informed to which horizontal edge the subsequent print and read operations are to refer (also see section “Important notes
on document processing”, subsection “Horizontal positioning” in this chapter).
i
200
–
After receiving the command CSI n % t, all the characters are
printed which are still in the print buffer.
–
If the horizontal leading edge on the right is selected (n = 1), the
left edge must be fixed logically depending on the physical document width and the printing unit width (90 characters @ 1/ 10 inch)
(for example, via ESC l (n)) or an appropriate number of leading
spaces must be taken into consideration (for example, by means
of appropriate editing of the print data or by means of appropriate
dot positioning).
T5023/5023+ - Programming Guide
Additional commands (Printer) Basic commands for document processing
T5023/5023+ - Programming Guide
201
Basic commands for document processing
Additional commands (Printer)
Mode switch- over for handling end of paper
CSI
ESC
27
1B
[
91
5B
n
(
t
n
n
n
(
40
28
t
116
74
Name
ASCII character
Decimal
Hexadecimal
n = switch for type of mode switch-over
n = 0 : manual; default value
n = 1 : automatic
Function:
By means of CSI n ( t depending on the parameter n the behaviour of the printing
unit on the document printing point can be influenced in the case of the following
errors (fatal errors):
PAPER LENGTH
End of paper within a form:
upper or lower edge of document was passed over
because of wrong document format or incorrect
programming.
PAPER WIDENESS
The print job exceeds the right document edge.
202
T5023/5023+ - Programming Guide
Additional commands (Printer) Basic commands for document processing
n = 0 : manual error handling
After an error the operator must clear the error via the operating panel
of the printer and put the printer into ONLINE status (also see the
operating manual)
n = 1 : automatic error handling
After an error the following actions are executed by the printing unit:
–
Locking the printer interface for further data;
–
Response ’Global printer status’ in the coding CSI n ! z with n=2
(ERROR);
–
Response ’Special printer message’ in the coding CSI n; m " z
with n=2 (NO PAPER);
–
Paper ejection, deletion of all print buffers, setting of default parameters;
–
Response ’Global printer status’ in the coding CSI n ! z with n=0
(ONLINE);
–
Release of the interface for the transfer of new data.
The operator no longer needs to clear the error status on the printing
unit. However, after a short pause (ejection of the document) the
printing unit is in the ONLINE status again for the system driver and
can thus be addressed.
i
The default value n=0 (manual error handling) is valid after switching
on the printer. Other control commands, initializations or error
statuses do not change this parameter.
T5023/5023+ - Programming Guide
203
Basic commands for document processing
Additional commands (Printer)
Use:
Control when printing lists on documents where the document length is
unknown.
For each print line the program generates a control point with a uniquely marked
parameter (for example, line number). In the case of an error the lines not yet
printed are deleted in the printer and in the system driver. Using the control
points reported back the program can now determine the rerun point after the
end of the paper. Thus the data for the next document can be formatted and
transferred to the printer.
As the printing unit automatically returns to the ONLINE status, the operator can
continue work by inserting a new document.
The error message via the operating panel of the printer and the use of the
STOP key by the operator are unnecessary.
204
T5023/5023+ - Programming Guide
Additional commands (Printer) Basic commands for document processing
Dual station control
CSI
ESC
[
91
5B
27
1B
n
*
t
n
n
n
*
42
2A
t
116
74
Name
ASCII character
Decimal
Hexadecimal
Parameter:
Dual station control
USER1 LED
USER2 LED
n = 1 : activated
off
off
n = 2 : activated
on
off
n = 3 : activated
off
on
n = 4 : activated
on
on
n = 0 : de-activated; default value
Function:
The ’Dual station control’ for the document printer can be activated using this
command. In this way the control of workstations using a common printer can be
synchronized.
Using the command CSI n * t USER1 and USER2 LEDs can be switched over
in the application program in order to indicate, for example, which job is being
processed or which operator is to insert a form. In order to receive a response
from the respective operator, the use of the USER 1 or USER 2 key can be requested via the ’Special printer messages’ (request via CSI " z, see section “Status and error messages” in this chapter).
i
–
In order to receive a ’Special printer message’ on the status of the
USER 1 or USER 2 keys, the “Dual station control” must be activated using CSI n * t (n ≥ 1).
–
After initializing the printer the ’Dual station control’ is de-activated.
T5023/5023+ - Programming Guide
205
Basic commands for document processing
Additional commands (Printer)
Switching on/off Multi Part
Encreasing the copying power
CSI
ESC
27
1B
[
91
5B
n
,
t
n
n
n
,
44
2C
t
116
74
Name
ASCII character
Decimal
Hexadecimal
Parameter:
n = 0 : Switching off Multi Part
n = 1 : Switching on Multi Part for curent page
Function:
If the printout of copies is too weak, the copying power can be increased with the
help of this parameter. 3 to 4 copies can be printed afterwards.
Normally this function should be switched off, as the noise level and the print
head attrition will increase.
206
T5023/5023+ - Programming Guide
Additional commands (Printer)
Controlling the MSR / MICR functions
Controlling the MSR / MICR functions
The magnetic stripe reader (MSR) is a device which can optionally be integrated
into the document printing point of the document printer. MSR processing is
used for passbook processing, whereby relevant data is encrypted on the magnetic stripe.
The MICR (Magnetic Ink Character Recognition) reader is a device that can be
installed as an option at the journal print station of the document printer. MICR
processing will be used for printing cheque forms.
The control of the MICR reader is implemented as an MSR component. This means that the same control sequences are used for reading the magnetic ink and
the magnetic stripe.
Command
Function
ESC [ n1;...; n5 ! r
Activating parameter command MSR/MICR
ESC [ " r
Reading command MSR/MICR
ESC [ # r STX... ETX Writing a MSR track
ESC [ % r
Deleting a track
The execution of MSR functions does not influence the current logical print position. The necessary vertical movements for the correct positioning of the
passbook for MSR are controlled internally by the document printer.
After the output of a MSR command, any data still in the print buffer is printed.
i
The MSR device supports the recording modes of DIN and IBM.
If you are interested in further recording modes, please contact your
Tally branch office.
T5023/5023+ - Programming Guide
207
Controlling the MSR / MICR functions
Additional commands (Printer)
Position and measurements for MSR magnetic stripes
The print areas for passbooks with MSR processing correspond to the specifications in the appendix “Paper specification”.
The position of a magnetic stripe on a passbook and the measurements of the
magnetic stripe are fixed according to DIN 32744.
The following specifications are in mm.
Upright fold book (magnetic stripe for DIN/IBM format):
208
T5023/5023+ - Programming Guide
Additional commands (Printer)
Controlling the MSR / MICR functions
Horizontal fold book:
T5023/5023+ - Programming Guide
209
Controlling the MSR / MICR functions
Additional commands (Printer)
Parameter block MSR
CSI
ESC
[
91
5B
27
1B
n1;...;n5
!
r
n1;...;n5
n1;...;n5
n1;...;n5
!
33
21
r
114
72
Name
ASCII character
Decimal
Hexadecimal
Parameter:
n1 =
number of write repetitions (0 to 2)
n2 =
number of read repetitions (0 to 2)
n3 =
identifier for the write/ read format (number of the recording format)
n4 =
vertical distance from the form edge (0 to 9999 in the measuring
unit 1/ 180 inch, thus n4/ 180 inch)
n5 =
leading edge for the vertical distance (0 = top, 1 = bottom).
Function:
CSI n1;...; n5 ! r is used to define under what conditions subsequent MSR transactions (e. g., reading or writing the magnetic stripe) are to be controlled by the
MSR unit.
–
Repetitions
The parameters n1 and n2 are set in case the writing or reading attempts
cannot be carried out without error the first time. These actions will then be
automatically repeated n1 or n2 times. If they do not deliver a correct result
after repetition, the operation will be interrupted. If no data is found on the
magnetic stripe the reading or writing attempt will not be repeated.
–
Write/ read format; magnetic stripe position
The parameter n3 specifies the format of the data on the magnetic stripe.
The position of the magnetic stripe on the passbook is defined by the two
parameters n4 and n5, whereby n4 fixes the distance of the stripe in 1/180
inch steps from the edge defined by n5 (0 = top leading edge, 1 = bottom
leading edge).
210
T5023/5023+ - Programming Guide
Additional commands (Printer)
–
–
Controlling the MSR / MICR functions
Table for recording formats
Depending on the recording formats, the user must transfer the following values via CSI ... ! r, in order to be able to process the following recording modes:
Format
n3
n4
n5
DIN
0
14 mm (99/180")
1
IBM 1
1
11 mm (78/180")
1
IBM 2
2
11 mm (78/180")
1
105 characters
5
14 mm (99/180")
1
ISO 7811
6
14 mm (99/180")
1
Default values:
If no parameters are set, the respective MSR transactions are carried out on
the basis of the following default values:
n1 = 0
(unsuccessful writing attempts are not repeated)
n2 = 0
(unsuccessful reading attempts are not repeated)
n3 = 0
(writing of the magnetic stripe in the DIN format, reading
of the magnetic stripe in the DIN/ IBM format)
n4 = 99/180 inch vertical distance from the leading edge
n5 = 1
–
(bottom leading edge).
Incorrect parameters:
If incorrect parameters are used, these are reset to their default values with
the exception of n3. The use of an incorrect n3 parameter (format) leads to
an error message of the printer.
T5023/5023+ - Programming Guide
211
Controlling the MSR / MICR functions
Additional commands (Printer)
Reading a MSR track
Command:
"
r
"
34
22
r
114
72
CSI
ESC
[
91
5B
27
1B
Name
ASCII character
Decimal
Hexadecimal
Response:
CSI
ESC
27
1B
[
91
5B
n1;...;n4
"
r
STX...ETX
Name
n1;...;n4
n1;...;n4
n1;...;n4
"
34
22
r
114
72
STX...ETX
2...3
02..03
ASCII character
Decimal
Hexadecimal
n1 =
number of required reading attempts
n2 =
reading threshold (always = 2)
n3 =
horizontal reading block number
n4 =
reading error (0 = without error; > 0 = error)
STX (02h) =
start of the read data area
Read data =
in the range of 30h-3Fh (ASCII)
ETX (03h) =
end of the read data area
Meaning of parameter n4 = reading error:
0 = no error
1 = LRC error
2 = parity error
3 = no data found
4 = no start character found
5 = incorrect flux change distance
6 = no end character found
7 = magnetic track interruption
212
T5023/5023+ - Programming Guide
Additional commands (Printer)
Controlling the MSR / MICR functions
Function:
The MSR track is read using the command CSI " r. The desired options are preset, if necessary, via the command ’MSR parameter block’ (CSI ... ! r) (number
of reading attempts, recording mode, position of the magnetic stripe, etc.). Irrespective of whether the reading attempt could be completed successfully, data
for the program is transferred. In addition to the actual user data (contents of the
magnetic stripe), this can also contain statistic specifications (for example, number of reading attempts) and error messages..
i
–
The command CSI " r triggers the output of characters still in the
print buffer to the document printing point.
–
The read data block contains all the information characters, including
the start and end characters for the respective recording format.
The LRC character (error detection character for block protection)
is internally produced and checked and is therefore not a component of the read data block.
–
–
With an incorrect reading attempt, the correctly recognized data up to
the first incorrect character is transferred.
Depending on the recording format, the start and end characters are hexadecimal encrypted as follows:
Format
n3
Start character
End character
DIN
0
3D
3F
IBM 1
1
3B
3C
IBM 2
2
3B
3F
105 characters
5
3D
3F
ISO 7811
6
3B
3F
T5023/5023+ - Programming Guide
213
Controlling the MSR / MICR functions
–
214
Additional commands (Printer)
Depending on the recording format, the following user data can be read:
Format
n3
Max. number
information
characters
Information
character
range (hex)
DIN
0
45
30 to 39
+ 3E
IBM 1
1
36
30to 39
+ 3A 3 D 3E
IBM 2
2
36
30 to 39
+ 3A 3 D 3E
105 characters
5
105
30 to 39,
+ 3E
ISO 7811
6
35
30 to 39
+ 3A 3E
T5023/5023+ - Programming Guide
Additional commands (Printer)
Controlling the MSR / MICR functions
Writing a MSR track
CSI
ESC
[
91
5B
27
1B
#
r
STX...ETX
Name
#
35
23
r
114
72
STX...ETX
2...3
02...03
ASCII character
Decimal
Hexadecimal
Response (acknowledgement of the write command):
CSI
[
91
5B
ESC
27
1B
n1;n2
#
r
n1;n2
n1;n2
n1;n2
#
35
23
r
114
72
Name
ASCII character
Decimal
Hexadecimal
n1 =
number of required writing attempts
n2 =
error in the read after write check (0 = no error, 1 = error)
Function:
The block of characters specified via CSI # r between STX and ETX is recorded
on the magnetic stripe under the conditions set using the command ’MSR parameter block’ (CSI ... ! r). The character string must contain the start and end characters appropriate to the selected recording format:
Format
n3
Start character
End character
DIN
0
3D
3F
IBM 1
1
3B
3C
IBM 2
2
3B
3F
105 characters
5
3D
3F
ISO 7811
6
3B
3F
T5023/5023+ - Programming Guide
215
Controlling the MSR / MICR functions
Additional commands (Printer)
After the execution of the command a acknowledgement CSI n1; n2 # r is produced,
which can be evaluated in the program. The acknowledgement contains the num-
ber of writing attempts and a message if an error has occured during control reading.
i
216
–
In the MSR unit of the document printer, the characters are limited
to the range from 30h-3Fh. Characters outside this range lead to an
error in the printer control.
–
The command triggers the output of characters still in the print buffer to the document printing point.
T5023/5023+ - Programming Guide
Additional commands (Printer)
Controlling the MSR / MICR functions
Deleting a MSR track
CSI
ESC
[
91
5B
27
1B
%
r
%
37
25
r
114
72
Name
ASCII character
Decimal
Hexadecimal
Function:
The vertical position on the magnetic stripe fixed at the transfer of the MSR parameters (CSI ... ! r) is overwritten with ’ZERO’ characters (the MSR track is deleted).
i
The command triggers the output of characters still in the print buffer to
the document printing point.
T5023/5023+ - Programming Guide
217
Controlling the MSR / MICR functions
Additional commands (Printer)
The MICR Read Process
Two jobs must be issued to the printer for every magnetic stripe read process:
–
a parameter job specifying the number of repetitions required for read errors,
and the font type (CMC7/E13B),
–
the actual read command.
The parameter n3 in the parameter job (CMC7 / E13B) informs the firmware that
the next MSR read job is a magnetic ink character recognition process. When
the MICR process is completed, the previously deactivated MSR parameter is
re-enabled.
Behavior when reading magnetic ink characters and passbooks
A mechanism is required to ensure that a passbook is not inserted too far for the
magnetic ink character recognition, because the reader's permanent magnet
may destroy the MSR recording on the passbook.
Therefore a journal has been defined with a max. settable width (see parameter
job MSR / MICR reader) for the MICR read function. The default value is 102mm.
i
For the MICR read process the parameter n4 has a different meaning
than for the other MSR functions:
MSR: n4 = vertical distance from the form edge (in 1/180 inches).
MICR: n4 = max. admissible journal width for magnetic ink character
reading
The parameter n4 is used by the application to transfer the max. admissible journal width (cheque width in normal view). If the parameter n4 contains a value below "496" (496/180 inches = 70mm) or a value above "1490" (1490/180 inches
= DIN A4 width), then the max. admissible width is automatically set to the default value "725" (725/180 inches = 102mm, specification according to: ISO
1004, ABA Specification, Credit Document and Code Line Dimen-sions).
If the document inserted for reading the magnetic ink characters is wider than
specified, the read process is not started, and the document is not moved. The
printer remains in the ’ONLINE PAPER’ status, and the normal MSR acknowledgement is sent to the application, together with the error code 8 (max. admissible
paper width exceeded). The application controls the subsequent processing of
the document.
218
T5023/5023+ - Programming Guide
Additional commands (Printer)
Controlling the MSR / MICR functions
Example sequence for an MICR reader
Status: NO_PAPER.
1 Switch MSR to magnetic ink character recognition (see MSR parameter)
without repeating the read process and with 90mm = 638/180 inches (smaller than default value) max. admissible cheque width (Parameter =
0;0;10;638;0):
1B 5B 3B 3b 31 30 3B 36 33 38 3B 21 72
2. Start magnetic ink character recognition:
1B 5B 22 72
– Green light is flashing, LCD display: LOAD PAPER.
–
Insert document (cheque with magnetic ink).
–
The document is drawn in; the width is measured.
–
The document width is checked before the read process is started.
3. Response from the printer
– OK with data. (The document is 90 mm wide, or less.):
The document is drawn in further for reading the magnetic ink characters, and guided across the magnetizing and read head.
The read data (d1 ... dn) is packed as for the MSR acknowledgement,
and sent to the application:
1B 5B 31 3B 3B 3B 22 72 02 d1 d2 d3 ... dn 03
–
OK without data:
If no characters are recognized, e.g. when the cheque is incorrectly inserted, the read logic issues a blank character between the start and the
end character:
1B 5B 31 3B 3B 3B 22 72 02 20 03
–
Ok with data:
All characters read are placed between the start character and the end
character, and are sent to the application.
Characters which were not recognized (rejects) are transferred as "?" (=
3F hex.):
T5023/5023+ - Programming Guide
219
Controlling the MSR / MICR functions
Additional commands (Printer)
1B 5B 31 3B 3B 3B 22 72 02 30 31 32 3F 34 35 ... 39 03
–
Not OK (The document is wider than 90mm.):
The document remains in its position (it is not moved).
An MSR acknowledgement is generated (without read data between
start and end character), and contains the error code 8 (= ASCII "38") in
the parameter byte n4:
1B 5B 3B 3B 3B 38 22 72 02 03
The document can be processed (printed, ejected) without any limitations.
220
T5023/5023+ - Programming Guide
Additional commands (Printer)
Controlling the MSR / MICR functions
Activate parameter command MICR
CSI
ESC
27
1B
[
91
5B
n1;...;n5
!
r
n1;...;n5
n1;...;n5
n1;...;n5
!
33
21
r
114
72
Name
ASCII character
Decimal
Hexadecimal
Parameter for MICR:
n1 =
0 (no function, parameter is ignored)
n2 =
Number of reading repetitions (parameter is ignored)
n3 =
Identifier for reading format with:
10 = CMC7
11 = E13B
n4 =
maximum document width (in 1/180) inch
adjustable: 496 to 1490 (70mm to 210mm)
all other values activate the default value 725 (102mm)
Accuracy of measurement: approx +/- 1mm
n5 =
0 (no function, parameter is ignored)
T5023/5023+ - Programming Guide
221
Controlling the MSR / MICR functions
Additional commands (Printer)
Reading command MICR
Command:
CSI
ESC
[
91
5B
27
1B
"
r
"
34
22
r
114
72
Name
ASCII character
Decimal
Hexadecimal
By this command reading is started corresponding to the parameters which have
been handed over before. For magnetic ink character reading the corresponding
parameter has to be handed over immediately before.
Response:
CSI
ESC
[
91
5B
27
1B
n1;...;n4
"
r
STX...ETX
Name
n1;...;n4
n1;...;n4
n1;...;n4
"
34
22
r
114
72
STX...ETX
2...3
02..03
ASCII character
Decimal
Hexadecimal
Parameter for MICR:
n1 =
Number of reading attempts
n2 =
0
n3 =
0
n4 =
Error code:
0 = no error
8 = maximum permissible paper width exceeded
222
T5023/5023+ - Programming Guide
Additional commands (Printer)
Status and error messages
Status and error messages
The CSI sequences described in the following section are either issued by the
program and acknowledged with appropriate responses or, depending on the
processing situation, are automatically generated by the document printer and
transmitted to the processor:
Command
Function
Initiator
ESC [ n ! t
Initiating the control cycle
Program
ESC [ n ) t
Setting control point II
Program
ESC [ n ! z
Global printer status
Document printer
ESC [ “ z
Requesting special printer
messages
Program
ESC [ n;m “ z
Special printer messages
Document printer
ESC [ n # z
Requesting printing unit
parameters
Program
ESC [ n1;...;n8 # z
Printing unit parameters
Document printer
i
The internal message buffer of the document printer is limited to approx. 30 status messages. When this buffer is full, messages subsequently generated are ignored (cleared). For this reason, care must be
taken in the application program that the messages are loaded and
evaluated at appropriate intervals.
T5023/5023+ - Programming Guide
223
Status and error messages
Additional commands (Printer)
Notes on the printer status
ONLINE
This status exists after an error- free initializing operation. In this status the receiving channel is open. The printer is ready to receive and execute jobs. There
is a response only with requested data or special printer messages which have
no influence on the current processing of print data.
STOP
This status signals an operation interruption. The following causes lead to this
operation interruption:
–
Pressing the STOP key in the ONLINE status
–
Opening the printing unit in the ONLINE status
–
Document request, i. e. a job which requires the insertion of a new form,
whereby at this time no sheet is inserted (inserting a new sheet restores the
ONLINE status)
In the first two cases, the computer is only informed of the status change via a
global printer status (GPS). For document request, the reason for the status
change is identified more exactly via a special printer message (SPM).
In each case, the STOP status can only be cleared by means of manual intervention on the printer. No data is lost as a result of these operation interruptions.
224
T5023/5023+ - Programming Guide
Additional commands (Printer)
Status and error messages
ERROR
This status signals an operating termination. It can only be cleared by means of
manual intervention on the printer. All jobs not carried out up to the termination
are cancelled. There are two groups of errors:
–
Hardware errors
The most common cause of the error status is a hardware error. If this error
is only restricted to a subfunction of the printer (for example, MSR), it can be
ignored by pressing the STOP key. The printing unit is then able to work until
an attempt is made to use this defective subfunction again.
–
Application errors
Errors of the documents must here be seen as special cases, as such errors
are caused by the user himself and can also be eliminated by him. Such a
case occurs, for example, if there is an attempt to print or read a document
outside its physical limits.
The cause of all errors is shown on the LCD of the document printer (see the
“List of error messages” in the appendix of this manual).
’Break’ function
The document printer reacts to a ’break’ in the printer interface with the transfer
of a global printer status and the response ’Printing unit parameters’ on the basis
of which the key information on the printer configuration can be recognized (see
description CSI n;...; n8 # z). If the global printer status is ONLINE, the receive
buffer is also cleared and the default parameters of the emulation are set.
The ’break’ function can be used to check whether the printer connected to the
printer interface is switched on and in which status it is at the time.
i
The ’break’ should not be used to query the status during running operation. Status changes are automatically indicated by the document
printer.
T5023/5023+ - Programming Guide
225
Status and error messages
Additional commands (Printer)
Setting control points/ initiating the control cycle
Command:
CSI
ESC
[
91
5B
27
1B
n
!
t
n
n
n
!
33
21
t
116
74
n
!
t
n
n
n
!
33
21
t
116
74
Name
ASCII character
Decimal
Hexadecimal
Response (control point):
CSI
ESC
[
91
5B
27
1B
Name
ASCII character
Decimal
Hexadecimal
Parameter:
n=
226
value freely definable by the application in the range 0 to 9999.
T5023/5023+ - Programming Guide
Additional commands (Printer)
Status and error messages
Function:
The command CSI n ! t triggers the initiation of an acknowledgement signal to
the computer interface if all the jobs transferred up to this command have been
processed.
For a definite assigning of the acknowledgement signals (also CSI n ! t) to the
transferred requests, the acknowledgement message contains the same parameter value n that the application transferred in the request.
i
–
If possible, the command CSI n ! t should be avoided in a transaction as the use of this command can negatively influence the performance of applications. When using CSI n ! t, the following notes
are important.
–
The request for acknowledgements via CSI n ! t should only occur
at the end of a line or during a function switch-over (for example,
from printing to reading MSR). This corresponds to the printer sequencing and does not interfere unnecessarily with the performance of the document printer.
–
The optimal printing path (bidirectional printing) is interrupted by
means of this command.
–
The order of the acknowledgement messages from the document
printer is the same as the order of the acknowledgement requests.
–
If an application is working with these acknowledgement cycles, it
should not wait for the respective acknowledgement signal, but immediately transmit further print data. Subsequently, the response
can be evaluated..
T5023/5023+ - Programming Guide
227
Status and error messages
Additional commands (Printer)
Setting control point II
Command:
CSI
ESC
[
91
5B
27
1B
n
)
t
n
n
n
)
41
29
t
116
74
n
)
t
n
n
n
)
41
29
t
116
74
Name
ASCII character
Decimal
Hexadecimal
Response (control point):
CSI
ESC
[
91
5B
27
1B
Name
ASCII character
Decimal
Hexadecimal
Parameter:
n=
value freely definable by the application in the range 0 to 9999.
Function:
The command CSI n ) t triggers the release of an acknowledgement signal to
the processor interface if the last mechanical procedure was started in the printing unit and no error has occurred at this point in time.
For a definite assigning of the acknowledgement signals (also CSI n ) t) to the
transferred requests, the acknowledgement message contains the same parameter value n that the application transferred in the request.
228
T5023/5023+ - Programming Guide
Additional commands (Printer)
i
Status and error messages
The command CSI n ) t should always be used when only one print line
can be made available to the printer and for this reason performance
problems arise.
The control point is acknowledged when the last mechanical task is
started.
For example, a print task is acknowledged when all the conditions for
correct execution of the print line are fulfilled, this means:
–
Data is transferred;
–
Document edges are measured;
–
Feeds are executed;
–
Paper is present;
–
Lid is closed;
–
Print procedure is started.
By means of an earlier release of the acknowledgement signal it is possible for the workstation to request a new task from the system earlier
and to transfer it to the printer during the time in which the last mechanical procedure has not yet terminated.
T5023/5023+ - Programming Guide
229
Status and error messages
Additional commands (Printer)
Global printer status
CSI
ESC
27
1B
[
91
5B
n
!
z
n
n
n
!
33
21
z
122
7A
Name
ASCII character
Decimal
Hexadecimal
Parameter:
n = 0 ONLINE
n = 1 STOP
n = 2 ERROR
Function:
This response in the coding CSI n ! z is produced spontaneously after initializing
the printer, after each status change (ONLINE, STOP, ERROR) and after a
’break’ on the printer interface.
The global printer status cannot be explicitly requested (see “Notes on the printer status” in this chapter).
230
T5023/5023+ - Programming Guide
Additional commands (Printer)
Status and error messages
Special printer messages
Command (requesting special printer messages):
CSI
ESC
[
91
5B
27
1B
"
z
"
34
22
z
122
7A
Name
ASCII character
Decimal
Hexadecimal
Response (requesting special printer messages):
CSI
ESC
[
91
5B
27
1B
n;m
"
z
n;m
n;m
n;m
"
34
22
z
122
7A
Name
ASCII character
Decimal
Hexadecimal
Parameter:
n=
m=
’Global Code’ (0 to 999)
’Special Code’ (0 to 999)
T5023/5023+ - Programming Guide
231
Status and error messages
Additional commands (Printer)
Function:
Special printer messages are produced in the following cases and transferred to
the system:
–
when changing the appropriate statuses
–
when using the keys USER 2 or USER 1 via the operator (only if the function
’Dual station control’ was activated using the command CSI n * t)
Further, the current status can be requested using the command CSI " z.
The following n/m combinations for the encryption of a special printer message
are possible:
PAPER
n=1/m=4
The paper sensor on the document printing point is covered
with paper again.
NO PAPER
n=2/m=4
The paper sensor on the document printing point is no
longer covered with paper.
USER 1 key
n = 20 / m 1
The USER 1 key on the operating panel was pressed.
This printer message can only occur if the function ’Dual
station control’ was activated using the command CSI n * t.
USER 2 key
n = 20 / m = 2
The USER 2 key on the operating panel was pressed.
This printer message can only occur of the function ’Dual
station control’ was activated using the command CSI n * t.
232
T5023/5023+ - Programming Guide
Additional commands (Printer)
Status and error messages
Printing unit parameters
Command (requesting printing unit parameters):
CSI
ESC
[
91
5B
27
1B
n
#
z
n
n
n
#
35
23
z
122
7A
Name
ASCII character
Decimal
Hexadecimal
n=0
Response without parameter n8 (printer type)
n=1
Response with parameter n8 (printer type)
Response (printing unit parameters):
CSI
ESC
[
91
5B
27
1B
n1;...;n9
#
z
n1;...;n9
n1;...;n9
n1;...;n9
#
35
23
z
122
7A
Name
ASCII character
Decimal
Hexadecimal
Parameter:
n1 =
Printing station number
0: document station
1: journal station
n2 =
4: document
n3 =
maximum width of form in 1/10 inch
n4 =
number of feed channels
2: feeder option
n5 =
Number of eject channels
n6 =
0: OCR reader option not available
1: MICR reader option
n7 =
MSR option
0: option not available
1: option available
n8 =
printer type
T5023/5023+ - Programming Guide
233
Status and error messages
n= 9
Additional commands (Printer)
Memory Extension
0: No Memory Extension
1: El. Journal
2: 2. CG
3: Asien GB 2312
4: Asien GB 5007
5: Asien GB 5199
6: Asien GB BIG 5
Parameter message with el. journal:
n1 =
Printer station number
0: document station
1: journal station
n2 =
3: journal
n3 =
maximum width of form 1/10 inch
n4 =
Number of feed channels
n5 =
Number of eject channels
n6 =
OCR reader option not available
n7 =
MSR option
n8 =
printer type
n9 =
Memory Extension
1: El. Journal
Function:
In the following cases the response of the printing unit parameters will be transferred from the printing unit to the system:
–
after switching on the printing unit;
–
as response to a ’Break’ at the printer interface;
–
as response to the command ’Requesting printing unit parameters’.
234
T5023/5023+ - Programming Guide
Additional commands (Printer)
Electronic Journal Functions
Electronic Journal Functions
Change between Document and Journal Printing
CSI
ESC
[
91
5B
27
1B
n
!
q
n
n
n
!
33
21
q
113
98
Name
ASCII character
Decimal
Hexadecimal
Parameter:
n=0
Document print (Default)
n=1
Electronic journal memory
The parameter ’Journal memory’ is used to redirect all following print characters
to a resident memory. All control sequences are ignored, except for line feeds.
This command initializes the printout of all characters still located in the internal
print buffer.
Command sequences which are written into the journal memory have no influence to the printout off the document station:
This function is available only in the device variant with ’memory extension’. The
selection Memory Extension -> EL-Journal must be enabled from the Service
menu. If the selection is not enabled, the command will be ignored
.
i
When the electronic journal memory is enabled, only the net data (printable characters) is stored. Any attributes, tabs, character set commands are filtered from the data stream. Graphic data is not supported.
In this mode, the responses are extended.
T5023/5023+ - Programming Guide
235
Electronic Journal Functions
Additional commands (Printer)
Journal printing
The data in the journal memory can be printed on the print station using the
JOURNAL menu (single sheet or feeder).
–
The DIN-A4 format is always used for the printout.
–
Font attribute DQ 15 cpi, 8 lpi.
–
Font attributes are always ignored.
An unprintable margin of 2 cm is provided on each side of the journal for filing
holes. An identifier for the page numbers and a hint on the following pages (e.g.
Page 5 of 17) are printed on the bottom of each page.
Error situation exception handling
When the printer is switched off while printing the journal data, or a print error
occurs, the data is not lost, but the complete print process must be repeated.
When the memory is filled by approx. 95%, the status message ’End-of-paper
journal’ is generated.
When the journal memory is filled completely, the error message ’End-of-paper
journal’ is generated. Any subsequent attempt to print data on the journal will be
rejected with the same error message. Print jobs can still be carried out on the
document station.
Capacity
Because the print data is stored in compressed form, it is not possible to provide
an exact specification of the memory behavior. In typical applications, a capacity
of 3,000 to 6,000 print lines can be achieved.
Technical data - memory:
–
128 KB usable memory volume.
–
10 years guaranteed data retention without power supply.
–
100,000 guaranteed delete/programming cycles.
–
Partial deletion of data not possible.
236
T5023/5023+ - Programming Guide
Application examples
This chapter demonstrates using detailed examples how the document printer is
programmed for common application cases.
In particular, the following application cases will be explained in separate sections:
–
Text processing (printing on a blank form using different print attributes)
–
Document processing (printing a specimen cheque)
–
Passbook processing with MSR (reading and modifying a MSR stripe and
passbook printing)
Normally each example consists of the following components:
–
Task description/target
–
Document description (document size, text area)
–
Assumed pre-conditions (for example, preset parameters)
–
Verbal description of the program steps
–
Conversion of the program steps into pseudo code
–
Program result.
T5023/5023+ - Programming Guide
237
Processing of a blank form
Application examples
Processing of a blank form
In the following example, a DIN A4 document will be printed with defined text. To
structure the layout and to highlight important parts of the text, standard commands for print attributes, horizontal and vertical tabulation will be used. All the
print data relates logically to the left leading edge so that a conversion of the print
positions of the document to print positions of the printing unit need not be taken
into account.
For this example the following pre-conditions are assumed:
–
All the parameters are set at their default values
–
Via the default setting the type font “Roman” is set.
238
T5023/5023+ - Programming Guide
Application examples
Processing of a blank form
Type area
Selection of standard print functions is demonstrated in the letter below. All the
print functions can also be used on the journal printing point.
T5023/5023+ - Programming Guide
239
Processing of a blank form
1:
2:
3:
4:
= 72 lines with 1/ 6 inch line spacing
= left margin (logical) = position 12 (10 cpi)
Last print position
= right margin (logical) = position 72 (10 cpi)
Position of processor ab- = 35 (horizontal tab)
breviation
5 : Position of date
= 40 (horizontal tab)
6 : First print line
= 8 (vertical tab)
7 : Reference line
= 16 (vertical tab)
8 : Start of text
= 20 (vertical tab)
9 : Greetings line
= 42 (vertical tab)
10: Name of sender
= 46 (vertical tab)
240
Document length
First print position
Application examples
T5023/5023+ - Programming Guide
Application examples
Processing of a blank form
Print effects
T5023/5023+ - Programming Guide
241
Processing of a blank form
Application examples
General
–
Character size = 10 cpi
–
Type font = Roman
Specialities
1 : Reference line in italics and additional line spacing of 12/180 inch
2 : Part of text ’connector for the RS-232 interface’ highlighted with bold print
3 : Type font for sketch = Sans Serif, text centred
4 : For the illustration of the pins (small ’o’) the following conditions apply:
–
–
–
242
no proportional spacing
character size 15 cpi
additional character spacing between small ’o’ = 24/180 inch
T5023/5023+ - Programming Guide
Application examples
Processing of a blank form
Program steps (annotated)
1.
Switching on LQ mode
Command:
Parameter:
ESC x (n)
n = 1 (LQ mode)
2.
Switching on proportional spacing
Command:
ESC p (n)
Parameter:
n = 1 (proportional spacing on)
Remarks:
With proportional spacing setting the character width is unnecessary.
3.
Setting line spacing
Command:
Remarks:
4.
ESC 2 (1/6 inch)
This command is not actually necessary for
the example as 1/6 inch line spacing is the default value.
Determining the document length
Command:
ESC C (n)
Parameter:
n = 72 (number of lines)
Remarks:
With line spacing of 1/6 inch and 72 lines, a
document length of 12 inches results. This
corresponds to the default value of the document printer. Therefore this program step could
also be omitted.
5.
Determining the left margin
Command:
Parameter:
ESC l (n)
n = 12 (position 12 with 10 cpi, default = 0)
T5023/5023+ - Programming Guide
243
Processing of a blank form
Application examples
6.
Determining the right margin
Command:
ESC Q (n)
Parameter:
n = 72 (position 72 with 10 cpi)
Remarks:
The default value is 90. With a setting ’right
margin = position 72’ printing is possible up to
position 71.
7.
Determining the vertical tabs
Command:
ESC B (n1,n2,n3,n4, n5) NUL
Parameters:
n1 = 8 (first print line)
n2 = 16 (reference line)
n3 = 20 (start of text)
n4 = 42 (greetings line)
n5 = 46 (name of sender)
Remarks:
Here the vertical tabs in a line spacing of 1/6
inch are automatically determined in channel
0. For channel 1 to channel 7 the command
ESC c (n1,...) NUL must be used (c = channel
number).
8.
Deleting the default values for horizontal tabs
Command:
ESC D NUL
Remarks:
After switching on or initializing the printer
(ESC @) tabs are set at a spacing of eight (8)
characters.
9.
244
Setting the horizontal tabs
Command:
ESC D (n1,n2) NUL
Parameters:
n1 = 35 (position of processor abbreviation)
n2 = 40 (position of date)
Remarks:
In proportional printing the characters are set
in pica spacing (10 cpi).
T5023/5023+ - Programming Guide
Application examples
Processing of a blank form
10. Vertical tabulation to the first address line
Command:
VT
11. Printing address
Remarks:
Last address line (place) without line feed
12. Horizontal tabulation to the processor abbreviation
Command:
HT
13. Printing processor abbreviation
Printing without line feed
Remarks:
14. Horizontal tabulation to the date
Command:
HT
15. Printing date
16. Vertical tabulation to the reference line
Command:
VT
17. Setting italic print
Command:
ESC 4
T5023/5023+ - Programming Guide
245
Processing of a blank form
Application examples
18. Determining additional spacing between characters
Command:
ESC SP (n)
Parameter:
n = 12
Remarks:
SP = space stands for the blank space (ASCII
= hex 20 or decimal 32 and EBCDIC = hex 40
or decimal 64). Via n = 12 in LQ mode, an additional character spacing of 12/180 inch is
determined. In draft mode this would be
12/120 inch.
19.
Printing reference line
20. Deleting additional spacing between the characters
Command:
ESC SP (n)
Parameter:
n = 0 (Default value)
21. Switching off italic print
Command:
ESC 5
22. Vertical tabulation to start of text
Command:
VT
23.
Printing text from ’Dear Mr ...’ to ’... query about the type of’
24. Switching on bold print
Command:
25.
246
ESC E
Printing text ’connector for the RS- 232 interface’
T5023/5023+ - Programming Guide
Application examples
Processing of a blank form
26. Switching off bold print
Command:
27.
ESC F
Printing text to ’... 9- pin Cannon plug’ plus blank lines to sketch
28. Selecting other LQ type
Command:
Parameter:
ESC k (n)
n = 1 (Sans Serif)
29. Setting centred print format adjustmentext
Command:
ESC a (n)
Parameter:
n=1
30. Printing ’05 ... 01’
31. Switching off proportional spacing
Command:
ESC p (n)
Parameter:
n = 0 (Default value)
32. Setting character size to 15 cpi
Command:
ESC g
33. Determining additional spacing between characters
Command:
ESC SP (n)
Parameter:
n = 24
Remarks:
Additional spacing = 24/180 inch, see also
step 18.
T5023/5023+ - Programming Guide
247
Processing of a blank form
Application examples
34. Printing lines with ’oo ... oo’ (5 times) and ’oo ... oo’ (4 times)
35. Deleting additional spacing between characters
Command:
ESC SP (n)
Parameter:
n=0
36. Setting character size to 10 cpi again
Command:
ESC P
37. Switching proportional spacing on again
Command:
ESC p (n)
Parameter:
n=1
38. Printing from ’09 ... 06’ to ’Pin numbering (plan view)’
39. Setting print format adjustment to flush left again)”
Command:
ESC a (n)
Parameter:
n = 0 (default value)
40. Changing type font
Command:
Parameter:
ESC k (n)
n = 0 (Roman)
41. Vertical tabulation to the greetings line
Command:
VT
42. Printing greetings line
248
T5023/5023+ - Programming Guide
Application examples
Processing of a blank form
43. Vertical tabulation to the name of sender
Command:
VT
44. Printing name of sender
45. Document ejection
Command:
FF
T5023/5023+ - Programming Guide
249
Processing of a blank form
Application examples
Program (pseudo code)
The corresponding numbering refers to the annotated program steps in the previous section.
BEGIN
CALL PROGRAM START ROUTINE
CALL LETTER HEAD
CALL REFERENCE
CALL INTRODUCTION
CALL SKETCH
CALL SENDER
PRINT(char(12))
END
BEGIN PROGRAM START ROUTINE
PRINT(char(27),"x",char(1))
PRINT(char(27),"p",char(1))
PRINT(char(27),"2")
PRINT(char(27),"C",char(72))
PRINT(char(27),"l",char(12))
PRINT(char(27),"Q",char(72))
PRINT(char(27),"B")
PRINT(char(8,16,20,42,46),
char(0))
PRINT(char(27),"D",char(0))
PRINT(char(27),"D")
PRINT(char(35,40),char(0))
END PROGRAM START ROUTINE
250
45: FF
1: ESC x (n)
2: ESC p (n)
3: ESC 2
4: ESC C (n)
5: ESC I (n)
6: ESC Q (n)
7: ESC B (n1...) NUL
8: ESC D NUL
9: ESC D (n1...) NUL
T5023/5023+ - Programming Guide
Application examples
Processing of a blank form
BEGIN LETTER HEAD
PRINT(char(11))
PRINTLF(Mr. Specimen"))
PRINTLF("7,Princes Road,"))
PRINTLF( )
PRINT("London. W. 5.")
PRINT(char(9))
PRINT("js")
PRINT(char(9))
PRINTLF("14.06.99")
END LETTER HEAD
BEGIN REFERENCE
PRINT(char(11))
PRINT(char(27),"4")
PRINT(char(27)," ",char(12))
PRINT("RS-232-interface")
PRINT(char(27)," ",char(0))
PRINT(char(27),"5")
END REFERENCE
10: VT (line 8)
11:
12: HT (position 35)
13:
14: HT (position 40)
15:
16: VT (line 16)
17: ESC 4
18: ESC SP (n)
19:
20: ESC SP (n)
21: ESC 5
T5023/5023+ - Programming Guide
251
Processing of a blank form
BEGIN INTRODUCTION
PRINT(char(11))
PRINT("Dear Mr. Specimen,")
PRINTLF( )
PRINT(" herewith we should like to
answer your query about
the type of")
PRINT(char(27),"E")
PRINT("connector for the
RS-232 interface")
PRINT(char(27),"F")
PRINTLF("of the printer.")
PRINTLF( )
PRINTLF("For the RS-232 interface
the printer has
a 9-pin Cannon plug:")
PRINTLF( )
END INTRODUCTION
252
Application examples
22: VT (line 20)
23:
24: ESC E
25:
26: ESC F
27:
T5023/5023+ - Programming Guide
Application examples
Processing of a blank form
BEGIN SKETCH
PRINT(char(27),"k",char(1))
PRINT(char(27),"a",char(1))
PRINTLF("05 ... 01")
PRINT(char(27),"p",char(0))
PRINT(char(27),"g")
PRINT(char(27)," ",char(24))
PRINTLF(" ooooo")
PRINTLF(" oooo")
PRINT(char(27)," ",char(0))
PRINT(char(27),"P")
PRINT(char(27),"p",char(1))
PRINTLF("09 ... 06")
PRINTLF( )
PRINTLF("Pin numbering (plan
view)")
PRINT(char(27),"a",char(0))
PRINT(char(27),"k",char(0))
END SKETCH
BEGIN SENDER
PRINT(char(11))
PRINTLF("Yours sincerely")
PRINTLF(char(11))
PRINTLF("(John Smith)")
END SENDER
28: ESC k (n)
29: ESC a (n)
30:
31: ESC p (n)
32: ESC g
33: ESC SP (n)
34:
35: ESC SP (n)
36: ESC P
37: ESC p (n)
38:
39: ESC a (n)
40: ESC k (n)
41: VT (line 42)
42:
43: (line 46)
44:
T5023/5023+ - Programming Guide
253
Document processing
Application examples
Document processing
This example is to illustrate document processing with the following features:
–
Coding the coding line
–
Printing a text on the document.
This example is based on producing a specimen cheque. The coding line on the
cheque is to be processed with bottom reference, the text on the cheque with top
reference.
The following pre-conditions are assumed:
–
–
–
–
The document printing point is activated
Passbook processing is deactivated
Character set OCR-A is set
Specification of the horizontal leading edge on the left (default)
i
254
–
In this example, document width detection is requested explicitly.
The restrictions for document width detection with regard to the current vertical position must be taken into account for this.
–
In this example, no horizontal tabs are set, but the respective print
position is determined in a horizontal direction by means of an absolute dot position (ESC $ (n) (m)).
T5023/5023+ - Programming Guide
Application examples
Document processing
Document structure
1:
Distance bottom edge of document/ bottom edge of coding line
= 8. 47 mm = 60/180 inch (DIN 66008)
2:
Distance left edge of document/ left edge of first OCR A character
= 3/10 inch (DIN 66008) ≡ print position 3 (with 1/10 inch/character)
3:
Distance top edge of document/ bottom edge of first text line
= 24 mm = 170/180 inch
4:
Distance between the text lines = 7. 5 mm = 53/180 inch
5:
Distance left edge of document/ left edge of first print character
= 10/10 inch ≡ print position 10 (with 1/10 inch/character)
6:
Document width = 59/10 inch
The character density in a text line is to be 10 characters/ inch (default value).
T5023/5023+ - Programming Guide
255
Document processing
Application examples
Print positions
The following illustration shows the different print positions for text and OCR
printing:
An absolute dot position on the respective current vertical position is reached via
the command ESC $ (n) (m). The position is calculated with the formula
x = m * 256 + n and thereby the position x/60 inch (= distance from left leading
edge) is determined. The print position 0 is identical with the left edge of the document.
1:
OCR print in coding line for cheque amount
Vertical position from bottom edge = 60/180 inch
Absolute dot position = x/60 inch with x = 0 * 256 + 180
(First print character on print position 30)
OCR character sequence = "00000045000 "
2:
Amount text
Vertical position from top edge = 170/180 inch
Absolute dot position = x/60 inch with x = 0 * 256 + 60
(First print character on print position 10)
Text= "FOUR HUNDRED AND FIFTY---------"
256
T5023/5023+ - Programming Guide
Application examples
Document processing
3:
Currency abbreviation and amount
Vertical position from top edge = 170/180 inch
Absolute dot position = x/60 inch with x = 1 * 256 + 2
(First print character on print position 43)
4:
Name
Vertical position from top edge via line feed of 53/180 inch
Absolute dot position as 2
Text "MR. SPECIMEN"
5:
Place/ date
Vertical position from top edge as 4 or another line feed
Absolute dot position as 3
Text "LONDON" and "05- 11- 1999"
T5023/5023+ - Programming Guide
257
Document processing
Application examples
Program steps (annotated)
1.
2a.
2b.
258
Setting absolute vertical position referring to the bottom document edge
Command:
CSI n " p
Parameter:
n = 90
Remarks:
The distance bottom edge of document/
bottom edge of OCR line = 90/180 inch
= 12.7 mm was selected in order to have a
sufficient distance to a possibly present
black bar. If such black bars are not there,
you can begin directly with step 2b (see also
the command description CSI " t,
’Requesting the document width’, in the
“Additional commands” chapter).
Requesting document width (optional)
Command:
CSI " t
Remarks:
The document width can be used as a
differentiation feature to branch to different
document-dependent application programs.
CSI " t initiates a document request if a
document is not yet present or inserted. The
document request is indicated by the
flashing ’DOCUMENT’ LED on the operating
panel.
Positioning on the coding line if document width measurement was
used (optional).
Command:
CSI n " p
Parameter:
n = 60
Remarks:
Distance bottom edge of document/bottom
edge of OCR line = 60/180 inch = 8.47 mm
T5023/5023+ - Programming Guide
Application examples
3.
4.
5.
Evaluating response to document width
Command:
CSI (n) " t
Parameter:
n = 1062
Remarks:
Document width = 1062/180 inch = 150 mm
(compare description of the document
structure)
Reaching horizontal print position for OCR printing
Command:
ESC $ (n) (m) = absolute dot position
Parameters:
n = 180, m = 0
Remarks:
First print character on position 30 = 180/60
inch
OCR print in amount field
Print data:
6.
7.
Document processing
e. g. "00000045000
Setting absolute vertical position referring to the top document edge
Command:
CSI n ! p
Parameter:
n = 170
Remarks:
Distance top edge of document/bottom edge
of line = 170/180 inch = 24 mm
Reaching horizontal print position for amount text
Command:
ESC $ (n) (m) = absolute dot position
Parameters:
n = 60, m = 0
Remarks:
First print character on position 10 = 60/60 inch
T5023/5023+ - Programming Guide
259
Document processing
8a.
8b.
Selecting LQ type font
Command:
ESC k (n)
Parameter:
n = 0 (Roman type font)
Printing amount text
Print data:
9.
10.
Application examples
"FOUR HUNDRED AND FIFTY---------"
Reaching horizontal print position for currency abbreviation/amount
= 24 mm
Command:
ESC $ (n) (m)
Parameters:
n = 2, m = 1
Remarks:
First print character on position 43 = 258/60
inch
Printing currency abbreviation/ amount
Print data:
"£ ---- 450,00"
11. Line feed
12.
260
Command:
ESC J (n)
Parameter:
n = 53
Remarks:
ESC J (n) executes a line feed of n/180 inch,
here 53/180 inch = 7.5 mm.
Reaching horizontal print position for name of receiver
Command:
ESC $ (n) (m)
Parameters:
n = 60, m = 0 (see also step 9)
T5023/5023+ - Programming Guide
Application examples
13.
Document processing
Printing name of receiver
Print data:
14.
15.
for example, "MR. SPECIMEN"
Reaching horizontal print position for place name
Command:
ESC $ (n) (m)
Parameters:
n = 2, m = 1 (see also step 11)
Printing place name
Print data:
16.
17.
18.
for example, "LONDON"
Line feed
Command:
ESC J (n)
Parameter:
n = 53 (see also step 13)
Reaching horizontal print position for date
Command:
ESC $ (n) (m)
Parameters:
n = 2, m = 1 (see also step 16)
Printing date
Print data:
19.
for example, "05- 11- 1999"
Document ejection
Command:
FF (Form Feed)
T5023/5023+ - Programming Guide
261
Document processing
Application examples
Program (pseudo code)
The corresponding numbering refers to the annotated program steps in the previous section.
262
T5023/5023+ - Programming Guide
Application examples
Document processing
BEGIN
PRINT(char(27),"[90"p")
PRINT(char(27),"["t")
PRINT(char(27),"[60"p")
GET(char(27),"[",char(n),""t")
.
.
If necessary, evaluate the
parameter n (document width in
n/180 inch)
.
.
CALL OCR LINE
CALL TEXT PRINTING
PRINT(char(12))
END
BEGIN OCR LINE
PRINT(char(27),"$",char(180,0))
PRINT("00000045000 ")
END OCR LINE
BEGIN TEXT PRINTING
PRINT(char(27),"[170!p")
PRINT(char(27),"$",char(60,0))
PRINT(char(27),"k",char(0))
PRINT("FOUR HUNDRED AND FIFTY
------------")
PRINT(char(27),"$",char(2,1))
PRINT("£ ---- 450,00")
PRINT(char(27),"J",char(53))
PRINT(char(27),"$",char(60,0))
PRINT("MR. SPECIMEN")
PRINT(char(27),"$",char(2,1))
PRINT("LONDON")
PRINT(char(27),"J",char(53))
PRINT(char(27),"$",char(2,1))
PRINT("05-11-1999")
END TEXT PRINTING
1: CSI n"p
2a: CSI"t
2b: CSI n"p
3: CSI (n)"t
19: FF
4: ESC $ (n) (m)
7:
6: CSI n ! p
7: ESC $ (n) (m)
8a: ESC k (n)
8b:
9: ESC $ (n) (m)
10:
11: ESC J (n)
12: ESC $ (n) (m)
13:
14: ESC $ (n) (m)
15:
16: ESC J (n)
17: ESC $ (n) (m)
18:
T5023/5023+ - Programming Guide
263
Document processing
Application examples
Result:
1:
Result from OCR LINE
2:
Result from TEXT PRINTING
264
T5023/5023+ - Programming Guide
Application examples
Passbook processing with MSR
Passbook processing with MSR
This example illustrates programming for passbook processing with MSR. The
passbook is to be positioned on the magnetic stripe with bottom reference. Then
the magnetic stripe is read via the MSR device and the data (here line, account,
balance) is transferred to the computer. After evaluation of the read data, the
magnetic stripe is to be written with new MSR data and the passbook positioned
on the next free posting line. After evaluation of the result ’writing MSR’, the
posting line is edited and printed.
The following pre-conditions are assumed:
–
Character font with LQ quality is set
–
Specification of the horizontal leading edge on the right.
T5023/5023+ - Programming Guide
265
Passbook processing with MSR
Application examples
Passbook data
1:
Passbook width 209 mm
2:
Distance bottom edge of posting line 1/ top edge of passbook
= 34 mm = 241/180 inch
3:
Line spacing between the posting lines = 1/5 inch
4:
Number of posting lines = 20
5:
Five posting lines present
6:
Printable area in a posting line = positions 25 to 86 (print positions of
the printing unit for 10 cpi)
print position 90 is identical with the right edge of the passbook.
MSR processing is as per DIN.
266
T5023/5023+ - Programming Guide
Application examples
Passbook processing with MSR
Program steps (annotated)
1.
Setting MSR parameters
Command:
CSI n1; n2; n3; n4; n5 ! r
Parameters:
n1 = 0 (no write repetitions = default value)
n2 = 0 (no read repetitions = default value)
n3 = 0 (write/read format = DIN)
n4 = 99 (vertical distance from leading edge =
99/ 180 inch = 14 mm)
n5 = 1 (bottom leading edge)
Remarks:
2.
3.
This parameter combination corresponds to
the default setting of the document printer
for MSR processing. Therefore, this program
step could be omitted, if previously another
parameter setting was not selected.
Specifying the horizontal leading edge (logical)
Command:
CSI n % t
Parameter:
n = 1 (form guidance on right)
Remarks:
This program step is only relevant if ’left
leading edge’ mode is set as default.
Reading the magnetic stripe (MSR data)
Command:
CSI " r
Remarks:
If the passbook is not inserted and drawn in,
this command initiates a document request
(READY LED on the operating panel flashes).
T5023/5023+ - Programming Guide
267
Passbook processing with MSR
4.
5.
268
Application examples
Waiting for response ’read MSR’ and evaluation of the MSR data
Response:
CSI n1; n2; n3; n4 " r
STX read data ETX
Parameters:
n1 = number of reading attempts
n2 = reading threshold
n3 = reading block number
n4 = reading error (0 = without error)
Remarks:
When the execution of the command CSI " r
is without error, the read data contains the
value for the next free posting line (= 6, see
step 7).
Note:
The boundary characters STX (hex 02) and
ETX (hex 03) are also transferred.
Updating the magnetic stripe (MSR data)
Command:
CSI # r STX write data ETX
Parameter:
New free posting line = 7, account number
(unchanged) and new passbook contents
(balance) depending on deposit or
withdrawal amount. The write data is
enclosed between STX (hex 02) and ETX
(hex 03).
Remarks:
This MSR write command produces an
acknowledgement in the form of
CSI n1; n2 # r, which is not evaluated in this
program example (n1 = number of writing
attempts needed; n2 = error identification for
read after write check).
T5023/5023+ - Programming Guide
Application examples
6.
7.
8.
Setting absolute vertical position with reference to the top passbook
edge (depending on the next free posting line)
Command:
CSI n ! p
Parameter:
n = 421 (see remarks)
Remarks:
– Next free posting line = 6
– Line spacing = 1/5 inch = 36/180 inch
– Distance bottom edge of posting line 1/ top
edge of passbook = 241/180 inch
→ n = 241 + 36 ∗ (6 - 1) = 241 + 180 = 421
→ Absolute vertical position = 421/180
inch from top passbook edge
Reaching horizontal print position for beginning of posting line
Command:
ESC $ (n) (m)
Parameter:
n = 150, m = 0
Remarks:
The position of the right passbook edge
corresponds to position 90 of the printing
unit (with 10 characters/inch).
→ Position 25 = 25 positions à 6/60 inch
→ n = 25 ∗ 6 = 150
–
–
9.
Passbook processing with MSR
Execution of transaction- relevant program steps (for example, modifying passbook file)
Editing the print data
Printing posting line
Print data:
for example "07- 12- 99 Cash 026 "
" ∗ 200. 00 ∗∗∗ 1, 550.00"
10. Document feed = passbook ejection
Command:
FF (Form Feed)
T5023/5023+ - Programming Guide
269
Passbook processing with MSR
Application examples
Program (pseudo code)
The corresponding numbering refers to the annotated program steps in the previous section. .
BEGIN
CALL PROGRAM START ROUTINE
CALL MSR
CALL POSTING
PRINT (char(12))
END
BEGIN PROGRAM START ROUTINE
PRINT(char(27),"[")
PRINT("0;0;0;99;1!r")
PRINT(char(27),"[1%t")
END PROGRAM START ROUTINE
BEGIN MSR
PRINT(char(27),"["r")
GET(char(27),"[")
GET(char(n1,59,n2,59,n3,59,n4)
GET(""r")
GET(char(2)"... MSR data...",
char(3))
.
.
Updating/ processing MSR data
.
.
PRINT(char(27),"[#r")
PRINT(char(2),"...new MSR
data...", char(3))
END MSR
270
11: FF
1: CSI n1;...; n5 ! r
1:
2: CSI n % t
3: CSI " r
4: CSI(...)"r
STX...ETX
4:
4:
4:
5: CSI # r STX... ETX
5:
T5023/5023+ - Programming Guide
Application examples
Passbook processing with MSR
BEGIN POSTING
PRINT(char(27),"[421!p")
PRINT(char(27),"$",char(150,0))
.
.
Internal processing and editing
of the print data
.
.
PRINT("...Data in posting line...")
END POSTING
6: CSI n ! p
7: ESC $ (n) (m)
8:
9:
Result:
1:
New passbook entry
T5023/5023+ - Programming Guide
271
Passbook processing with MSR
272
T5023/5023+ - Programming Guide
Application examples
Loadable Firmware/Character
Generators
The firmware and character generators of the passbook and document printer
are stored in a programmable memory with FLASH technology. The function for
loading this memory is implemented by a resident program (bootstrap loader).
The load function is activated either by control sequences in one of the printer
emulations or by simultaneously pressing the key combination USER 2 and
STOP when the printer is switched on.
The printer cannot be operated when the load mode is running.
–
The menu settings are not available.
–
The interface functionality is limited to the control functions for the bootstrap
loader.
The loader program can be exited by
–
Switching off the printer.
–
Entering a control sequence after the firmware and the character generator
have been loaded successfully.
The functionality is available on the physical interface RS 232, Centronics
interface card, and on the ’LAN interface’.
T5023/5023+ - Programming Guide
273
Activating the Load Function
Loadable Firmware/Character Genera-
Activating the Load Function
The activation of the load function is done via the printer emulation. The printer
is switched to the load mode by entering a specific control sequence.
This control sequence is identical for all emulations.
ESC
BEL
L
27
1B
7
07
76
4C
n
48-55
30-37
ASCII chars
Decimal
Hexadecimal
Function:
This command is used to exit the current emulation software. All data is deleted
from the input buffers. The mechanical functions are stopped immediately.
The load software is started, and generates the acknowledgment ESC BEL L
after 500ms min. for synchronization.
Special features of the RS 232 interface:
The data transfer rate on the RS 232 interface is normally set to 9,600 baud. In
the print mode, the maximum rate is 19,200 baud. A temporary increase in the
transfer rate is possible in the load mode to reduce the load times.
Parameters
n=0
n=1
n=2
n=3
n=4
n=5
n=6
n=7
274
Transfer rate unchanged
Baud rate 2,400
Baud rate 4,800
Baud rate 9,600
Baud rate 19,200
Baud rate 38,400
Baud rate 57,600
Baud rate 115,200
T5023/5023+ - Programming Guide
Loadable Firmware/Character Generators
Load Functions: General
Load Functions: General
The firmware and character generators can be transferred to the passbook and
document printer using the interface.
Reasons for a transfer can be:
–
Initial operation (production).
–
Installation of new electronics (i.g. for service).
–
Loading a firmware update.
–
Loading a national character generator.
The following functions are available in load mode:
–
Request module IDs.
–
Load character generator I.
–
Load character generator II.
–
Load firmware.
–
Enable printer.
T5023/5023+ - Programming Guide
275
Load Functions: General
Loadable Firmware/Character Genera-
Sequence of a Load Process
The following figure illustrates the sequence of a load process. The order must
be maintained.
Host
Document printer
Switch to load function
Stop mechanic,
delete remaining data,
receipt
Request module
identifier
Hand over module
identifier
Check if new data has to
be transferred,
give corresponding
loading commands and
wait
276
delete corresponding
flash memory area, send
a receipt
Transfer corresponding
module
Check correctness,
receipt the command
with module identifier
End bootstrap loader
Start firmware
T5023/5023+ - Programming Guide
Loadable Firmware/Character Generators
Load Functions: General
The load process is identical for all data to be loaded. A process begins with the
request for the data ID using the escape sequence ESC I D. This indicates
whether modules are loaded and which version is available.
If the relevant module has not been loaded or if the versions do not match, the
appropriate pre-command will be transferred in the second step.
Then the appropriate module can be transferred.
After the completion of the load process the complete file ID is transferred as an
acknowledgment. This indicates whether the new module has been transferred
correctly.
Module Identification
Every loadable data file can be identified by an ID. The file ID has the following
structure:
Length Contents Meaning
5
1
6
$xxx$
blank
yymmdd
1
4
1
8
1
3
1
blank
xxxx
blank
a..a
.
a.a
: or ;
Identifier $MOD$
Separator
Release date in the format YYMMDD (941101 for
1.11.94)
Separator
Version ID of the release (0105 for V01.05)
Separator
Module name (e.g. "5023_STD", "CP15_437")
Separator (point)
Extension (MOD, FRM, FNT)
Separator ":" or end character ";"
T5023/5023+ - Programming Guide
277
Load Functions: General
Loadable Firmware/Character Genera-
Version ID:
xxxx
Update
Update
Update Release
Basis Release
Error handling
Compatible modifications or updates
First release
First release
Extension
The passbook and document printer contains various data modules. The type of
the relevant data module is identified by the file extension. The following table
provided a description of the extensions and their meanings:
Extension
Meaning
*.FNT
*.MOD
*.FRM
*.TBF
Font
Firmware
Bootstrap loader (resident, not loadable)
Two-byte font (China)
278
T5023/5023+ - Programming Guide
Loadable Firmware/Character Generators
ESCAPE Sequences (Bootstrap
ESCAPE Sequences (Bootstrap Loader)
Switch-over to the Load Function
ESC
BEL
L
27
1B
7
07
76
4C
n
48-55
30-37
ASCII characters
Decimal
Hexadecimal
Function:
This command is used to exit the currently running emulation software. All data
is deleted from the input buffer. The mechanical functions are stopped
immediately.
The load software is started and generates the acknowledgment ESC BEL L
after 500ms min. for synchronization.
Parameters
n=0
n=1
n=2
n=3
n=4
n=5
n=6
n=7
Transfer rate not changed
Baud rate 2,400
Baud rate 4,800
Baud rate 9,600
Baud rate 19,200
Baud rate 38,400
Baud rate 57,600
Baud rate 115,200
T5023/5023+ - Programming Guide
279
ESCAPE Sequences (Bootstrap Loader) Loadable Firmware/Character Ge-
Exiting the Load Function
ESC
BEL
E
27
1B
7
07
69
45
ASCII characters
Decimal
Hexadecimal
Function:
This command is used to exit the bootstrap loader, to test the electronics, and to
start the loaded firmware.
Note:
The bootstrap loader is not exited unless a valid firmware and one of the
character generators has been loaded.
The firmware returns to the operation with the interface parameters which can
be set via the operating panel.
280
T5023/5023+ - Programming Guide
Loadable Firmware/Character Generators
ESCAPE Sequences (Bootstrap
Request Module ID/Data ID
ESC
I
D
27
1B
73
49
68
44
ASCII characters
Decimal
Hexadecimal
Function:
This command is used to request the data ID. All data modules loaded are
reported.
T5023/5023+ - Programming Guide
281
ESCAPE Sequences (Bootstrap Loader) Loadable Firmware/Character GeStructure of the Data ID
The response always begins with ESC I D:
Length Contents Meaning
1
1
1
ESC
I
D
ESCAPE
Information
Data ID
Depending on the number of modules loaded, the ID then contains 1 to 4 entries.
Each entry has a fixed length and ends with a colon, except for the last entry
which ends with a semicolon. The following table shows the structure of an entry:
Length Contents Meaning
282
5
1
6
$xxx$
blank
yymmdd
1
4
1
8
1
3
1
blank
xxxx
blank
a..a
.
a.a
: or ;
Identifier $MOD$
Separator
Release date with the format YYMMDD (941101 for
1.11.94)
Separator
Version ID of the release (0105 for V01.05)
Separator
Module name (e.g. "5023_STD", "CP15_437")
Separator (point)
Extension (MOD, FRM, FNT)
Separator ":" or end character ";"
T5023/5023+ - Programming Guide
Loadable Firmware/Character Generators
ESCAPE Sequences (Bootstrap
Examples
Response if only the bootstrap loader is available
ESC ID
$MOD$ yymmdd rrvv BOOTPROM.FRM;
Response if the bootstrap loader and the character generator have been loaded
ESC ID
$MOD$ yymmdd rrvv BOOTPROM.FRM:
$MOD$ yymmdd rrvv CP15_437.FNT;
Response if all data have been loaded
ESC ID
$MOD$ yymmdd rrvv BOOTPROM.FRM:
$MOD$ yymmdd rrvv CP15_437.FNT:
$MOD$ yymmdd rrvv 5023_STD.MOD;
Boot PROM
Font PC table 437
Firmware standard
Special feature “Electronic journal function“
ESC ID
$MOD$ yymmdd rrvv BOOTPROM.FRM:
$MOD$ yymmdd rrvv CP15_437.FNT:
$MOD$ yymmdd rrvv 5023_STD.MOD;
$MOD$ ELJ
Boot PROM
Font PC table 437
Firmware standard
Electronic journal function
enabled
With the journal function enabled, the recorded data is deleted from the journal
memory if the ’secondary character generator location’ is selected when loading.
T5023/5023+ - Programming Guide
283
Loading character generators
Loadable Firmware/Character Genera-
Loading character generators
Indicate "Ready to load character generator"
ESC
F
N
T
(n1)
27
1B
70
46
78
4E
84
54
n1
n1
(n2)
n2
n2
(n3)
n3
n3
(d)
(00/01)
(00/01)
ASCII chars
Decimal
Hexadecimal
Function:
Description:
This command is used to inform the printer that a new character generator
should be loaded. All activities in the printer will be stopped, and all data will be
deleted. Then the host is informed that the printer is ready to load. The number
of bytes to be loaded is also indicated. The following formula is used to calculate
the number of bytes to be loaded:
Number = n1 +256*n2 +65536*n3.
Parameter ’d’ target
The passbook and document printer with the model variants ’Medium’ or
’Comfort’ accommodate additional character generators in the extension
memory. Thus it is possible to load a second PC table or fonts for the Asian
regions up to a maximum size of 2 MB.
d = 00 Primary character generator location (256 KB max.)
d = 01 Secondary (optional) character generator location (2 or 4 MB max.)
’Ready to load’ is indicated by sending the sequence ESC F N T to the host.
284
T5023/5023+ - Programming Guide
Loadable Firmware/Character Generators
Loading character generators
Loading the Character Generator
$
36
24
M
77
4D
O
79
4F
D
68
44
$
36
24
ASCII chars
Decimal
Hexadecimal
Function:
$MOD$ is a part of the file and may not be transferred again before the data.
Data is transferred after the character sequence $MOD$. It is not allowed to load
other data than data with the file extension .FNT. A checksum is placed at the
end of the file. After the load process this checksum can be used to verify that
the load process was successful.
If the data was transferred without errors, the relevant data ID is provided in the
ESC I D acknowledgment.
T5023/5023+ - Programming Guide
285
Loading the Firmware
Loadable Firmware/Character Genera-
Loading the Firmware
Indicate ’Ready to load’
ESC
M
77
27
1B
4D
O
79
4F
D
68
44
(n1)
n1
n1
(n2)
n2
n2
(n3)
n3
n3
ASCII chars
Decimal
Hexadecimal
Function:
This command is used to inform the bootstrap loader that a new firmware should
be loaded. All activities in the printer will be stopped, and old data will be deleted.
Then the printer’s readiness to load is indicated to the host. The number of bytes
to be loaded is also transferred. The following formula is used to calculate the
number of bytes to be transferred:
Number = n1 +256*n2 +65536*n3.
’Ready to load’ is indicated by sending the sequence ESC M O D to the host.
Loading the Firmware
$
36
24
M
77
4D
O
79
4F
D
68
44
$
36
24
ASCII chars
Decimal
Hexadecimal
Function:
$MOD$ is a part of the file and may not be transferred again before the data.
Data is transferred after the character sequence $MOD$. It is not allowed to load
other data than data with the file extension *.MOD. A checksum is placed at the
end of the file. After the load process this checksum can be used to verify that
the load process was successful.
If the data was transferred without errors, the relevant data ID is provided in the
ESC I D acknowledgment.
286
T5023/5023+ - Programming Guide
Loadable Firmware/Character Generators
Length of the Transfer
Length of the Transfer
Because the bootstrap loader receives binary data, an end character cannot be
used to inform it when the transfer process is ended. For this reason, the length
of the transferred is included in the call of the bootstrap loader. The length
specification is used to determine how much memory must be deleted from the
FLASH EPROM.
The length of the data to be transferred is stored in the file after the file header.
A 48-byte header is stored at the beginning of the file. This ID record has the
following structure:
Offset
Length Contents Meaning
0
5
6
5
1
6
$MOD$
blank
yymmdd
12
13
17
18
26
27
30
31
32
33
1
4
1
8
1
3
1
1
1
1
blank
rrvv
blank
a..a
.
a.a
00
n1
n2
n3
34
48
14
00..00
Identifier
Separator
Release date with the format YYMMDD (941101
for 1.11.94)
Separator
Release and release version (1005 for V01.05)
Separator
Module name (e.g. "5023_STD", "CP15_437")
Separator (point)
Extension (MOD, FRM, FNT, PAR)
String terminator
Length byte 1
Length byte 2
Length byte 3 length= n1 + (256*n2) +
(65536*n3)
reserved
END
T5023/5023+ - Programming Guide
287
Length of the Transfer
Loadable Firmware/Character Genera-
The header can be used to determine the overall number of bytes to be loaded,
including the header itself.
The file header and the checksum can be used to determine that a file is valid:
Check sum calculation:
Sum of all 16-bit words = 0
Acknowledgment of a successful load process:
If the load process was completed successfully, the data ID is returned after 60s
max. (typically after 15s):
ESC ID
$MOD$ yymmdd rrvv BOOTPROM.FRM:
$MOD$ yymmdd rrvv CP15__437.FNT:
$MOD$ yymmdd rrvv 5023_STD.PAR;
The passbook and document printer will be booted again after this
acknowledgment if the firmware is available. During the reboot phase the
interface cannot be addressed for 10s max.
Problems during the load process:
If the loaded data is determined as not valid, the appropriate file header is
missing in the acknowledgment.
If the data transfer is interrupted for 60 seconds min. during the load process,
the file header is returned. The bootstrap loader resets to the home position. Any
data transferred is invalid, and the load process must be re-started.
Before any load command can be transferred, the system must switch the
Centronics interface card to the ECP mode (bi-directional). No data will be
processed in the compatible mode
288
T5023/5023+ - Programming Guide
Loadable Firmware/Character Generators
Length of the Transfer
Reading E-Journal Data
ESC
E
L
J
27
1B
69
45
77
4C
75
4A
ASCII chars
Decimal
Hexadecimal
Function:
This command is used to inform the bootstrap loader that the data of the
electronic journal function should be copied from the memory module to the
electronics. This function is reserved for service calls when it is no longer
possible to print data.
The response has the following structure:
Offset
Length
Contents Meaning
0
4
3
max.
128 KB
1
ELJ
ASCII
END
EOF
Identifier
Journal contents, code range 20..FE + CR, LF
0 ... 128 KB
EOF (1A hex)
T5023/5023+ - Programming Guide
289
Length of the Transfer
290
Loadable Firmware/Character Genera-
T5023/5023+ - Programming Guide
Control of Asian Character Sets
For passbook and document printers, the Asian character set is loaded via the
system interface. This function is available only in device variants with a memory
extension.
In addition, the optional memory extension should be selected in the Service
menu on the printer’s operating panel. The Asian character sets will not be
available if these requirements are not fulfilled.
Settings on the printer operating panel
Memory
extension
Memory extension
off
Memory extension
E.Journal
Memory extension
2.CG
Memory extension
GB2312
Memory extension
GB5007
Memory extension
GB5199
Memory extension
BIG5
Specification of the memory
extension
Asian encoding
The control of the Asian characters is based on the number of characters using
the 2-byte encoding.
T5023/5023+ - Programming Guide
291
Control of Asian Character Sets
The following intending formats are currently implemented:
GB 2312-80
VR China
GB 5007
VR China
GB 5199
VR China
BIG5
Traditional
Chinese
(Hongkong and
Taiwan)
For character assignment see Appendix,
section „Chinese Characters in the Passbook / Document Printer“.
For character assignment see Appendix,
section „Chinese Characters in the Passbook / Document Printer“.
For character assignment see Appendix,
section „Chinese Characters in the Passbook / Document Printer“.
For character assignment see Appendix,
section „Chinese Characters in the Passbook / Document Printer“.
When a 2-byte character generator is available, this character generator is
automatically enabled after power-on.
After a default font number has been specified, the relevant character is set.
If a default font number is not specified in the character generator, the character
set selected from the operating panel menu will be set.
Control sequences under 20h and/or ESC sequences will be executed where
possible.
When character codes from the 1-byte range of characters are transferred, the
LQ font currently set and the corresponding character set will be printed.
292
T5023/5023+ - Programming Guide
Control of Asian Character Sets
Example:
Switch-over from 1-byte characters to 2-byte characters and vice versa:
ESC [1$q
/h B1 A2
Switch to 2-byte mode, character set GB2312-80
31 32 33
B1 B2
Character 1 1-byte
character from
the EPSON
character set
B2 31
Character 2 Because the
character B2/31
does not exist in
GB2312, the
character B2 is
ignored. The
character 31 is
recognized as a
character from the
EPSON character
set.
0D
Initialize
printout
Attributes
The attributes ’bold’, ’elongated print’, ’condensed print’ and ’underscore’ can be
applied to the Chinese characters. The subscript and superscript attributes are
not possible and produce undefined print results.
The text layout functions ’block print’, ’centering’ and ’right-justified’ cannot be
used in conjunction with 2-byte characters.
Character pitch (HMI)
Epson ANSI emulation
The character pitch currently set (10, 12 or 15 CPI) will be used when character
codes are transferred from the 1-byte character range. The character pitch will
be doubled accordingly for Chinese characters (6, 6 or 7.5 CPI). When the
attributes ’elongated print’ or ’condensed print’ are used, the character pitch is
multiplied with the factor of 0.5 or 2.
The character set enabled by the operating panel selection will be active after
power-on. This presetting can be superseded by the control command shown in
the following table.
T5023/5023+ - Programming Guide
293
Control of Asian Character Sets
Pre-setting of the Character Set ESC [ n $ q
CSI
ESC
27
1B
[
91
5B
n
$
q
n
n
n
$
36
24
q
113
71
Name
ASCII chars
Decimal
Hexadecimal
Parameter n:
Value
Font
n=0
n=1
n=2
n=3
n = 4 .. 9
Epson fonts
GB 2312-80
GB 5007
GB 5199
GB xxxx
n = 10
n = 11 .. 100
n = 101
n = 102 .. 200
294
Encoding
1-byte mode EPSON ESC P
2-byte mode GB2312
2-byte mode GB5007
2-byte mode GB5199
2-byte mode GB (reserved for
additional font tables)
FANG SONG GB2312- 2-byte mode simplified Chinese
80,
GB5007, GB5199 and
GB xxxx
Fonts GB.........
2-byte mode simplified Chinese
(reserved for additional font tables)
BIG 5
2-byte mode BIG5
BIG 5
2-byte mode BIG5 font (currently
reserved for additional font tables)
T5023/5023+ - Programming Guide
Specific Operating System
Dependencies
Windows NT Drivers
The document printer is delivered with drivers for the operating systems
Windows 95/98/NT/2000/XP.
If the document printer is to be connected to a computer with the operating
system Windows NT/2000/XP using a serial interface, the following special
feature must be observed:
i
If one of these printer drivers has been installed, other applications can
no longer directly address the serial interface assigned.
In this case the Windows print spooler blocks the interface.
T5023/5023+ - Programming Guide
295
Windows NT Drivers
296
Specific Operating System Dependencies
T5023/5023+ - Programming Guide
Appendix
Command table
Appendix
Command table
Command table for Epson ANSI emulation
Command
ASCII hex
Function
* BEL
07
Signal tone
BS
08
Backspace of one character
HT
09
Horizontal tabulation
LF
0A
Line feed
VT
0B
Vertical tabulation
FF
0C
Sheet ejection
CR
0D
Carriage return
SO
0E
Switching on elongated print for one
line
SI
0F
Switching on condensed print
DC 1
11
Printer online
DC 2
12
Switching off condensed print
DC 3
13
Printer offline
DC 4
14
Switching off elongated print
CAN
18
Deleting a character
DEL
7F
Deleting a line
ESC SO
1B 0E
Switching on elongated print for one
line
ESC SI
1B 0F
Switching on condensed print
ESC EM (n)
1B 19 n
Paper control
ESC SP (n)
1B 20 n
Determining the character spacing
ESC ! (n)
1B 21 n
Selection of combined print mode
ESC #
1B 23
Deleting the MSB specification
ESC $ (n) (m)
1B 24 n m
Horizontal positioning (absolute)
T5023/5023+ - Programming Guide
297
Command table
Appendix
Command
ASCII hex
Function
ESC % (n)
1B 25 n
Switching on/ off the character set
defined by the user
ESC & (s) (n) (m)
1B 26 s n m
Transferring the character definitions
ESC * (s) (n) (m)
1B 2A s n m
Selecting graphics mode
ESC + (n)
1B 2B n
Selecting n/360 inch line spacing
ESC - (n)
1B 2D n
Switching underlining on/ off
ESC / (c)
1B 2F c
Selecting a vertical tab channel
ESC 0
1B 30
Selecting 1/8 inch line spacing
ESC 2
1B 32
Selecting 1/6 inch line spacing
ESC 3 (n)
1B 33 n
Selecting 1/180 inch line spacing
ESC 4
1B 34
Switching on italic print
ESC 5
1B 35
Switching off italic print
ESC 6
1B 36
Switching on the character set
extension
ESC 7
1B 37
Switching off the character set
extension
ESC : NUL (n)
NUL
1B 3A 00 n 00
Copying the character set into the
RAM
ESC <
1B 3C
Selecting unidirectional printing for
one line
ESC =
1B 3D
Setting the MSB to 0
ESC >
1B 3E
Setting the MSB to 1
ESC ? (m) (s)
1B 3F m s
Reassigning graphics commands
ESC @
1B 40
Initializing the printer
ESC A (n)
1B 41 n
Selecting n/60 inch line spacing
ESC B ... NUL
1B 42 ... 00
Determining/deleting vertical tabs
(channel 0)
ESC C (n)
1B 43 n
Determining the document length at
n lines
ESC C NUL (n)
1B 43 00 n
Determining the document length at
n inches
ESC D ... NUL
1B 44 ...00
Determining/ deleting horizontal tabs
298
T5023/5023+ - Programming Guide
Appendix
Command table
Command
ASCII hex
Function
ESC E
1B 45
Switching on bold print
ESC F
1B 46
Switching off bold print
ESC G
1B 47
Switching on double impact print
ESC H
1B 48
Switching off double impact print
ESC J (n)
1B 4A n
Carrying out an n/180 inch line feed
ESC K (n) (m)
1B 4B n m
Switching on the graphics mode
’single density’
ESC L (n) (m)
1B 4C n m
Switching on the graphics mode
’double density’
ESC M
1B 4D
Selecting the character size 12 cpi
(Elite)
ESC N (n)
1B 4E n
Setting the bottom margin
ESC O
1B 4F
Deleting the bottom margin
ESC P
1B 50
Selecting the character size 10 cpi
(Pica)
ESC Q (n)
1B 51 n
Determining the right margin
ESC R (n)
1B 52 n
Selecting a national character set
ESC S (n)
1B 53 n
Switching on superscript/subscript
ESC T
1B 54
Switching off superscript/subscript
ESC U (n)
1B 55 n
Unidirectional print mode on/off
ESC W (n)
1B 57 n
Switching elongated print on/off
ESC Y (n) (m)
1B 59 n m
Switching on the graphics mode
’double density and double rate’
ESC Z (n) (m)
1B 5A n m
Switching on the graphics mode
’quadruple density’
ESC [ n ! p
1B 5B n 21 70
Absolute vertical positioning (from
the top)
ESC [ n ! q
1B 5B n 21 71
Change between document and
journal printing
ESC [ n # p
1B 5B n 23 70
Relative vertical positioning
backwards
ESC [ n " p
1B 5B n 22 70
Absolute vertical positioning (from
the bottom)
T5023/5023+ - Programming Guide
299
Command table
Appendix
Command
ASCII hex
Function
ESC [ n # q
1B 5B n 23 71
Selection of type fonts/ character
sets
ESC [ n $ p
1B 5B n 24 70
Paper feed of the document
ESC [ n1 .. n5 ! r
1B 5B n1 .. n5 21
72
Parameter block MSR
ESC [ " r
1B 5B 22 72
Reading a MSR track
ESC [ # r STX ..
ETX
1B 5B 23 72 02
...03
Writing a MSR track
ESC [ % r
1B 5B 25 72
Deleting a MSR track
ESC [ n ! t
1B 5B n 21 74
Setting control points/initializing the
control cycle
ESC [ " t
1B 5B 22 74
Requesting the document width
ESC [ # t
1B 5B 23 74
Document edge detection
ESC [ n $ t
1B 5B n 24 74
Activating passbook processing
ESC [ n % t
1B 5B n 25 74
Specification of the horizontal
leading edge
ESC [ n ( t
1B 5B n 28 74
Mode switch-over for handling end of
paper
ESC [ n ) t
1B 5B n 29 74
Setting control point II
ESC [ n * t
1B 5B n 2A 74
Dual station control
ESC [ n , t
1B 5B n 2C 74
Increasing the copying power
ESC [ n ! z
1B 5B n 21 7A
Global printer status
ESC [ " z
1B 5B 22 7A
Requesting special printer messages
ESC [ n ; m " z
1B 5B n m 22 7A
Special printer messages
ESC [ n # z
1B 5B n 23 7A
Requesting printing unit parameters
ESC [ n1 ; ... ; n8
#z
1B 5B n1 .. n8 23
7A
Printing unit parameters
ESC \ (n) (m)
1B 5C n m
Horizontal positioning (relative)
ESC a (n)
1B 61 n
Determining the text adjustment
ESC b (c) .. NUL
1B 62 c .. 00
Setting/deleting vertical tabs for any
channel
ESC g
1B 67
Selecting the character size 15 cpi
300
T5023/5023+ - Programming Guide
Appendix
Command table
Command
ASCII hex
Function
ESC k (n)
1B 6B n
Selecting the LQ type font
ESC l (n)
1B 6C n
Determining the left margin
ESC p (n)
1B 70 n
Switching proportional spacing on/off
* ESC r (n)
1B 72 n
Selecting the print colour
* ESC s (n)
1B 73 n
Switching half-rate printing on/off
ESC t (n)
1B 74 n
Selecting the character set
ESC x (n)
1B 78 n
Switching over the print quality
(Draft/LQ)
* = Non-executable commands
If a command is non-executable (dependent on the configuration), hardware
specific commands will be ignored.
T5023/5023+ - Programming Guide
301
Command table
Appendix
Definition of barcode printing for T5023
Escape sequence
The definition for barcode printing is:
ESC [
1B
m
;
h
;
z
;
n
*
r
STX
5B 3X 3B 3X 3X 3B 3X 3X 3B 3X 2A 72 02
(data) ETX
(data) 03
Prints barcode according to the characteristics defined by the following parameters. The ’;’ separates the parameters. The final code (’*’ ’r’) closes the parameter part. The barcode data is enclosed with STX (start of text) and ETX (end of
text).
The values in the parameter part are listed below. Only the listed values are
valid! The range of every parameter is 1 to 4 digit. For example 5 can be send
as 5, 05, 005 or 0005 and has allways the same value.
Barcode type
The parameter ’m’ defines the following barcode types:
m
5
7
Barcode type
CODE39 (lower case bar code data ’a’..’z’ is automatic set to
upper case ’A’..’Z’).
2/5 INTERLEAVED (a odd number of bar code data is automatic filled with a leading zero).
If one wrong data found in barcode data, nothing will be printed and the printer
shows ’wrong order’.
Barcode height
The parameter ’h’ defines the barcode height:
h
00
01 - 10
302
Barcode height
DEFAULT (at least 5 mm or 15 % of Barcode length [**]).
Height as number h of passes [*]
T5023/5023+ - Programming Guide
Appendix
Command table
Barcode zoom coeffizient
The parameter ’z’ expresses the horizontal zoom coefficient in decimals. The following values are allowed:
z
00-09
10-34
Values
Ignored values
Acceptable values (10 = basic width. 15 is 1.5 * basic width, 20
is double width, etc.)
Human readable line
The parameter ’n’ comprising one byte, enables or disables plain language printing of the barcode (’Human Readable Line’ - H.R.L.) in the lower part:
n
0
1
Human Readable Line
Disabled
Enabled
’Human readable’ characters are printed with the OCR-A font, where no zoom
factor is applied.
Printposition
horizontal:
the horizontal position ist the beginning of white area.
This area is at least 10 times of small barcode line [**] and depends
of the zoom-factor.
vertical:
the vertical position ist the baseline of text (needle 20).
[*]
One pass = 8/60" at 24 pin
[**]
Specification EN 800 (code 39) / 801 (Interleaved 2 of 5)
T5023/5023+ - Programming Guide
303
Command table
Appendix
Loader commands
Command
ASCII hex
Function
ESC BEL L n
ESC BEL E
ESC I D
1B 07 4C n
1B 07 45
1B 49 44
Switching over to load function
Leaving the load function
Requesting data characteristic
Ready to load character generator
ESC F N T (n1)
1B 46 4E 54 n1
(n2) (n3) (d)
n2 n3 d
$ M O D $ (Daten) 24 4D 4F 44 24
ESC M O D (n1)
(n2) (n3)
1B 4D 4F 44 n1
n2 n3
Character generator/firmware data
transmitted
Ready to load firmware
E-Journal commands
Command
ASCII hex
Function
ESC E L J
1B 45 4C 4A
Reading E. Journal data
304
T5023/5023+ - Programming Guide
Appendix
Character Sets
Character Sets
Font
Code Table
Font Type
Font
Sizes
National
Variants
CP15_437.FNT
Code Page 437
DQ, LQ Roman,
LQ Sans Serif
10, 12, 15 CPI
proportional
X
Includes additional fonts
ISO 8859 - 2/-5/-7/-8/-9
(compatible with HPR4905)
DQ, LQ Roman,
LQ Sans Serif
10, 12, 15 CPI
Eurobanking (limited)
Code Page C437
OCR-A / -B
DQ, LQ Roman,
LQ Sans Serif
10 CPI
10, 12, 15 CPI
proportional
Includes additional fonts
ISO 8859 - 2/-5/-7/-8/-9
(compatible with HPR4905)
DQ, LQ Roman,
LQ Sans Serif
10, 12, 15 CPI
Eurobanking (limited)
Code Page 775
Includes PC Code Page 775
with baltic characters
OCR-A / -B
DQ, LQ Roman,
LQ Sans Serif
10 CPI
10, 12, 15 cpi
-----
Eurobanking (limited)
Code Page 850 Latin 1
Includes PC Code Page 850
Latin 1 Western/Northern
Europe
Eurobanking (limited)
Code Page 852 Latin 2
Includes PC Code Page 852
Latin 2 Eastern Europe
Eurobanking (limited)
Code Page 855
Includes PC Code Page 855
Macedonia
Eurobanking (limited)
Code Page 857 Latin 5
Includes PC Code Page 857
Latin 5 Turkey
Eurobanking (limited)
PC Code Page 858
Code Page 858 (CP 850 with
Euro characters on D5)
Eurobanking (limited)
Code Page 860 Portugal
OCR-A / -B
DQ, LQ Roman,
LQ Sans Serif
10 cpi
10, 12, 15 cpi
-----
OCR-A / -B
DQ, LQ Roman,
LQ Sans Serif
10 cpi
10, 12, 15 cpi
-----
OCR-A / -B
DQ, LQ Roman,
LQ Sans Serif
10 cpi
10, 12, 15 cpi
-----
OCR-A / -B
DQ, LQ Roman,
LQ Sans Serif
10 cpi
10, 12, 15 cpi
-----
OCR-A / -B
DQ, LQ Roman,
LQ Sans Serif
10 cpi
10, 12, 15 cpi
-----
OCR-A / -B
DQ, LQ Roman,
LQ Sans Serif
10 cpi
10, 12, 15 cpi
-----
Eurobanking (limited)
OCR-A / -B
10 cpi
CP15C437.FNT
X
for the Asian market (the dollar
character was replaced by the
Chinese character of currency)
CP15_775.FNT
CP15_850.FNT
CP15_852.FNT
CP15_855.FNT
CP15_857.FNT
CP15_858.FNT
CP15_860.FNT
T5023/5023+ - Programming Guide
305
Character Sets
Appendix
Font
Code Table
Font Type
Font
Sizes
National
Variants
CP15_866.FNT
Code Page 866 Latin / Cyrillic
DQ, LQ Roman,
LQ Sans Serif
10, 12, 15 cpi
-----
CP15_869.FNT
Eurobanking (limited)
Code Page 869 Latin / Greek
OCR-A / -B
DQ, LQ Roman,
LQ Sans Serif
10 cpi
10, 12, 15 cpi
-----
CP15THAI.FNT
Eurobanking (limited)
Thailand character set with
customer-specific/national
assignment
OCR-A / -B
DQ, LQ Roman,
LQ Sans Serif,
Script
10 cpi
10, 12, 15 cpi
-----
CP151250.FNT
Eurobanking (limited)
Windows Code Page 1250
Latin 2
DQ, LQ Roman,
LQ Sans Serif
10, 12 cpi
10, 12, 15 cpi
-----
CP151251.FNT
Eurobanking (limited)
Windows Code Page 1251
Cyrillic
OCR-A / -B
DQ, LQ Roman,
LQ Sans Serif
10 cpi
10, 12, 15 cpi
-----
CP151252.FNT
Eurobanking (limited)
Windows Code Page 1252
Latin 1
OCR-A / -B
DQ, LQ Roman,
LQ Sans Serif
10 cpi
10, 12, 15 cpi
-----
CP151253.FNT
Eurobanking (limited)
Windows Code Page 1253
Greek
OCR-A / -B
DQ, LQ Roman,
LQ Sans Serif
10 cpi
10, 12, 15 cpi
-----
CP151254.FNT
Eurobanking (limited)
Windows Code Page 1254
Latin 5
OCR-A / -B
DQ, LQ Roman,
LQ Sans Serif
10 cpi
10, 12, 15 cpi
-----
CP151255.FNT
Eurobanking (limited)
Windows Code Page 1255
Hebrew
OCR-A / -B
DQ, LQ Roman,
LQ Sans Serif
10 cpi
10, 12, 15 cpi
-----
CP151256.FNT
Eurobanking (limited)
Windows Code Page 1256
Arabic
OCR-A / -B
DQ, LQ Roman,
LQ Sans Serif
10 cpi
10, 12, 15 cpi
-----
CP151257.FNT
Eurobanking (limited)
Windows Code Page 1257
Baltic Rim
OCR-A / -B
DQ, LQ Roman,
LQ Sans Serif
10 cpi
10, 12, 15 cpi
-----
Eurobanking (limited)
ISO 8859-2 East Europe
OCR-A / -B
DQ, LQ-Roman,
LQ-Sans Serif
10 cpi
10, 12, 15 cpi
-----
Eurobanking (limited)
OCR-A / -B
10 cpi
CP15ISO2.FNT
306
T5023/5023+ - Programming Guide
Appendix
Character Sets
Code Page 437
T5023/5023+ - Programming Guide
307
Character Sets
Appendix
ISO 8859-2 Latin No. 2
308
T5023/5023+ - Programming Guide
Appendix
Character Sets
ISO 8859-5 Cyrillic
T5023/5023+ - Programming Guide
309
Character Sets
Appendix
ISO 8859-7 Greek
310
T5023/5023+ - Programming Guide
Appendix
Character Sets
ISO 8859-8 Hebrew
T5023/5023+ - Programming Guide
311
Character Sets
Appendix
ISO 8859-9 Latin No. 5
312
T5023/5023+ - Programming Guide
Appendix
Character Sets
ISO 8859-15
T5023/5023+ - Programming Guide
313
Character Sets
Appendix
OCR-A
314
T5023/5023+ - Programming Guide
Appendix
Character Sets
OCR-B
T5023/5023+ - Programming Guide
315
Character Sets
Appendix
Code Page ISO 2
316
T5023/5023+ - Programming Guide
Appendix
Character Sets
Code Page 775 Latin / Baltic
T5023/5023+ - Programming Guide
317
Character Sets
Appendix
Code Page 850 Latin 1
318
T5023/5023+ - Programming Guide
Appendix
Character Sets
Code Page 852 Latin 2
T5023/5023+ - Programming Guide
319
Character Sets
Appendix
Code Page 855
320
T5023/5023+ - Programming Guide
Appendix
Character Sets
Code Page 857 Latin 5
T5023/5023+ - Programming Guide
321
Character Sets
Appendix
PC Code Page 858
322
T5023/5023+ - Programming Guide
Appendix
Character Sets
Code Page 860 (Portugal)
For addresses 00h to 7Fh, see Code Page 437.
T5023/5023+ - Programming Guide
323
Character Sets
Appendix
Code Page 866 Latin/Cyrillic
324
T5023/5023+ - Programming Guide
Appendix
Character Sets
Code Page 869 Latin/Greek
T5023/5023+ - Programming Guide
325
Character Sets
Appendix
Thailand Character Set (customer specific)
# 550 ThaiRoman
# 553 ThaiDQ
# 560 ThaiScript
The customer specific character set can only be controled with the font number
and the respective ESC sequence (see the section “Selection of type fonts/ character sets” in the chapter “Additional commands”).
326
T5023/5023+ - Programming Guide
Appendix
Character Sets
1250 Windows Latin 2
T5023/5023+ - Programming Guide
327
Character Sets
Appendix
1251 Windows Cyrillic
328
T5023/5023+ - Programming Guide
Appendix
Character Sets
1252 Windows Latin 1
T5023/5023+ - Programming Guide
329
Character Sets
Appendix
1253 Windows Greek
330
T5023/5023+ - Programming Guide
Appendix
Character Sets
1254 Windows Latin 5
T5023/5023+ - Programming Guide
331
Character Sets
Appendix
1255 Windows Hebrew
332
T5023/5023+ - Programming Guide
Appendix
Character Sets
1256 Windows Arabic
T5023/5023+ - Programming Guide
333
Character Sets
Appendix
1257 Windows Baltic Rim
334
T5023/5023+ - Programming Guide
Appendix
Chinese Characters in the Passbook/
Chinese Characters in the Passbook/Document
Printer
Printer: One-byte mode
ESC [ 0 $ q
T5023/5023+ - Programming Guide
335
Chinese Characters in the Passbook/Document Printer
Printer: Two-byte mode
GB xxxx encoding
ESC [ n $ q n = 1 ... 100
336
T5023/5023+ - Programming Guide
Appendix
Appendix
Chinese Characters in the Passbook/
BIG 5 encoding
ESC [ n $ q n = 101 .....200
A140-A24E
A24F-A258
A259-A261
A262-A2AE
A2AF-A2B8
A2B9-A2C2
A2C3-A2CE
A2CF-A2E8
Symbols
Various special characters
Chinese characters
Graphic characters
Arabian digits
Roman digits
Hangzhou digits
Latin capital letter
T5023/5023+ - Programming Guide
337
Chinese Characters in the Passbook/Document Printer
A2E9-A343
A344-A35B
A35C-A373
A374-A3BA
A3BB-A3BF
A440-C67E
C6A1-C8D4
C940-F9D5
Latin small letters
Greek capital letters
Greek small letters
Zhuyin characters
Zhuyin diacritic characters
Hanzi (5401 characters - frequently used)
Characters in circles and brackets, Hiragana, Katakana,
Cyrillic characters, symbols, special characters
Hanzi (7652 characters - less frequently used)
Structure of the character generator
The Asian font file has the following structure:
File header
Font header 1
...
Font header n
Character pool
338
Appendix
T5023/5023+ - Programming Guide
Appendix
Chinese Characters in the Passbook/
File header
Bytes
Contents
Name
0000 - 0004
0005
0006 - 000B
000C
000D - 0010
0011
0012 - 0019
001A
001B - 001D
001E
001f - 0021
$MOD$
blank
yymmdd
blank
rrvv
blank
a....a
.
TBF
blank
a.a
Identifier
Separator
Date
Separator
Release & version
Separator
File name
Separator
Extension
Separator
Length
0022 - 0023
xxxx
Default font
number
0024 - 002F
blank
Free
T5023/5023+ - Programming Guide
e.g. 960229
e.g. 1000
e.g. ND97CHIN
dot
TBF -> two-byte font
001 = 64KB
002 = 128KB
003 = 192KB
004 = 256 KB
....
064 = 4 MB
Font number 0 is used
if a setting is required
at the operating panel
339
Chinese Characters in the Passbook/Document Printer
Appendix
Font header
Bytes
Data type
Name
0000 - 000F
0010 - 0011
0012 - 0015
ASCII
int
long
z. B. FANG SONG
z. B. FANG SONG = 0
0016 - 0019
001a - 001d
001e - 001f
long
long
Font name
Font number1
Pointer to
start address
First code
Last code
Empty
No. of vertical
pixels/char. width
No. of horizontal
pixel/char. width
Administration/
emulation
parameter
Printer
control
parameter
0020 - 0021
int
boxh
0022 - 0023
int
boxw
0024 - 0025
0026 - 0027
0028 - 0029
002a - 002b
int
int
int
int
vert_res
hor_res
baseline
printmode
002c - 003f
in dots/inch
in dots/inch
Reserved
1. see section “Font number”
340
T5023/5023+ - Programming Guide
Appendix
Chinese Characters in the Passbook/
Structure of the character generator
The font file contains information about the individual characters in sequential
order.
72 bytes are available to represent one character.
x
x
x x x x x
x
x
x
x
x
x
x
x
x
x
x
x
x
x
x
x
x
x
x
x
x x x x
x
x
x
x
x
x
x
x
x
x
x
x
x
x
x
x
x
x
x
x
x
x
x
x
x
x
x
x
x
x
x
x
x
x
x
x
x
x
x
x
x
x
x
x
x
x
x
x
x
x
x x
x
x x x x x x x
x
x
x
x
x
x
x
x x x x x
x
x
x
x
x
x
x
x
x
x
x
x
x
x
x
x
x
x
x
x
x x x x
x
x x
x
x
x
x x x
x
x
x
x
x
x
x x x x x
x x x
x
x x
x
x
x
x
x
x
x
x
x
x x
x x
x
x
x
x
x
x
x
x
x
x
x
x
x
x
x
x
x
Example: GBxxxx FANGSONG character B0/A1hex
Column information:
00 00 00, 00 00 00, 3f ff e0, 10 02 00, 10 02 00, 3f ff 80, 10 00 00, 00 00 00, 7f
ff ff, 3f ff fe, 20 c0 80, 3f 31 c0, 78 1f 80, 20 00 00, 11 ff 80, 10 82 00, 10 82 08,
11 ff 08, 10 80 0c, 10 00 0e, 1f ff fc, 3f ff f8, 00 00 00, 00 00 00
T5023/5023+ - Programming Guide
341
Chinese Characters in the Passbook/Document Printer
Appendix
GB 2312-80 / GB 5007 / GB 5199
The character set Guo Biao (GB) 2312-80 is a static 2-byte code for the People’s
Republic of China. it contains a total of 6763 characters and forms the basis set
for the simplified Chinese. In addition to the Chinese Characters the character
set Guo Biao includes the Latin, Greek and Russian alphabet, Japanese and
Korean characters, and symbols and line elements.
The character sets GB 5007 and GB 5199 use partially different characters in
the address area A1/A1hex to A9/FEhex than the character set GB2312-80. The
character pool and the addressing of the Chinese characters are, however,
identical.
A1A1
-
A9FE
AAA1
B0A1
F8A1
-
AFFE
F7FE
FEFE
Latin, Greek, Russian, Japanese and Korean
characters, symbols, graphics
Empty
Chinese characters
Empty
Font type
The font type FANG SONG is used to represent the Chinese characters on the
address area B0/A1hex to FE/ FE hex.
Font number
The font numbers ranging from 0 to 100 are provided for the fonts with the
character addresses A1A1 hex to FEFE hex (GB-XXXX).
The font numbers 101 to 200 should be used for character sets with an extensive
addressing which may not be sequential (BIG5).
Font
Font No.
GB2312 symbols
GB5007 symbols
GB5199 symbols
GB.... Simplified Chinese FANGSONG
BIG5 Traditional Chinese
1
2
3
10
101
342
T5023/5023+ - Programming Guide
Appendix
Chinese Characters in the Passbook/
Available Character Generators for the document printer
Description
CP15ASIA.TBF
Rev. date
1001/28.06.00
Default font
can be set on the
operating panel
Contents
.
Font
Font No.
GB2312 symbols
GB5007 symbols
GB5199 symbols
GB.... Simplified Chinese
FANGSONG
BIG5 Traditional Chinese
1
2
3
10
101
T5023/5023+ - Programming Guide
343
Chinese Characters in the Passbook/Document Printer
344
T5023/5023+ - Programming Guide
Appendix
Appendix
IBM Emulations
IBM Emulations
IBM 4722 Emulation
The passbook and document printer emulates the IBM 4722 printers model 1, 2,
and 3. The functions of the printer model 3 are accessible only if a special
protocol is used on the RS232 interface. The other modules can be operated
without protocol and/or via the external interface.
The control sequences for the IBM printer 4712 are ignored.
General
The selection of the model 3 emulation is done by setting the emulation type
’IBM 4722’.
This setting automatically enables the RS232 interface with the 4722 protocol.
Interface 4722 protocol
A CRC check and a check of the transmit and status sequence bits are not
carried out (message type byte).
The interface parameters are set to fixed values (except for the baud rate):
8 bits, no parity, 2 stop bits.
The setting SW 7 with/without acknowledgment handshake is made in the menu
Interface Handshake DTR / XON-OFF.
Emulation
The acknowledgment of the print jobs is supplied ’n’ lines before their execution
to achieve a higher system performance. The data stream associated with the
common error messages EJECTED and/or NO_PAPER is, however,
acknowledged correctly.
The command MSG parameter ’load patches’ is ignored.
Only the indicators "Programmable Indicator 1u2" are supported.
The function of loadable characters is not supported, due to different print head
resolutions.
The print attributes ’overscore’ and ’double height’ are not supported.
T5023/5023+ - Programming Guide
345
IBM Emulations
Appendix
The last possible print line when printing lists (unformatted) varies according to
the various printing units.
Printer type
Last print line before bottom paper edge
T5023 / 4722
approx. 1 mm
IBM 4722
approx. 6.5 mm
IBM 9068 / 4722
approx. 5 mm
Olivetti / 4722
Operation
When the 4722 emulation is enabled, the STOP and EJECT keys have the same
function as the STOP key of the 4722 printer. Exception: If an error occurs, the
printer need not be switched of (see IBM4722). The STOP key can be used to
initiate a reset, which automatically activates the ONLINE status.
When the USER 2 key is pressed at power-on, the 4722 emulation will be
replaced by the emulation set with the menu item EMULATION Type2.
The ’LOAD_PAPER’ status does not occur.
346
T5023/5023+ - Programming Guide
Appendix
IBM Emulations
Variable initialisation parameters 4722 emulation:
IBM4722 Switch - Electronic Board
T5023/5023+ Setting
IBM4722 Switch 1 Audible Alarm
Not supported
IBM4722 Switch 2 Zero Slash
Not supported
IBM4722 Switch 3 Automatic Line Feed Emulation menu LF (LF = LF)
IBM4722 Switch 4 Reserved
IBM4722 Switch 5 Character Set
Character set 2
IBM4722 Switch 6 Automatic CR
Emulation menu CR (CR = CR)
IBM4722 Switch 7 Reserved
Character set 2
IBM4722 Switch interface card
SW 1..3 Baud rate
Interface menu
9600,4800,2400,1200 (9600)
SW 7 Reserved
Interface menu Protocol (DTR)
Emulation menu Multi Part (OFF)
Emulation menu Typeface DQ,
Roman, Sans Serif (DQ-Sans Serif)
i
It is normally not necessary to set the operating panel parameters in the
4722 emulation.
Fixed initialisation parameters 4722 emulation:
Parameters
T5023/5023+ parameter
in the 4722 emulation
Top of form position
Char. density
Char. width
Country
Left edge
Ref. edge
Line 2 (6 LPI)
10 CPI
Normal
USA
Column 1 (10 CPI)
Left
T5023/5023+ - Programming Guide
347
IBM Emulations
Appendix
IBM Proprinter XL24 Emulation
General
The selection of the emulation is done using menu item Type ’Prop.XL24’.
This emulation can be used with all interfaces.
Emulation
The function of loadable characters is not supported, due to different print head
resolutions.
The print attributes ’overscore’ and ’double height’ are not supported.
Operation
The operation and the emulation parameters are identical with the Epson ANSI
emulation.
Initialisation parameters
All parameters that can be set in the relevant emulation menu are taken into
consideration during the initialisation.
348
T5023/5023+ - Programming Guide
Appendix
IBM Emulations
Range of Commands for the ProprinterXL24 and 4722
Summary of the command sequences T5023 Interpreter for 4722 (IBM)
ASCII
Decimal
Hex
Function
4722
XL24
Default
NULL
BEL
BS
HAT
LF
0
7
8
9
10
0
7
8
9
0A
ignor
Signal tone
Backspace
Horizontal tabulation
Line feed
X
X
X
X
X
X
X
X
X
X
VT
FF
11
12
0B
0C
Vertical tabulation
Sheet ejection/page feed
X
X
X
X
CR
13
0D
Carriage Return
X
X
SO
14
0E
X
X
SI
15
0F
X
X
Switched off
DC1
17
11
DC2
18
12
DC3
19
13
DC4
20
14
CAN
DEL
24
127
18
7F
Switching on elongated
printing for one line
Switching on condensed
printing
Switching on printer
logically (Online)
Switching off condensed
printing
Switching off printer
logically (Offline)
Switching off elongated
printing
Delete line (Cancel)
ignor (like NULL)
2/6" from
upper sheet
margin
adjustable with
XL24
CR
(adjustable
with LF)
Switched off
Remark
is ignored
at 1/6"
(adjustable
with CR)
X
is
ignored
X
X
X
X
X
X
X
X
X
T5023/5023+ - Programming Guide
is
ignored
Switched off
349
IBM Emulations
Appendix
ASCII
Decimal
Hex
Function
4722
XL24
ESC 0
27 48
1B 30
Select 1/8 line distance X
X
ESC 1
27 49
1B 31
Select 7/72 line
distance
X
X
ESC 2
27 50
1B 32
Select 1/6 variable line
distance ESC A
X
X
ESC 3 (n)
27 51 n
1B 33 n
Select n/216 (n/180)
line distance
X
X
ESC 4
27 52
1B 34
Set Top of Form
(EJECT
X
X
ESC 5 (n)
27 53
1B 35
Set Auto LF Mode on
CR - ON/OFF
X
X
Operating
panel
ESC 6
27 54
1B 36
Character set 2
(Extended)
X
X
On
ESC 7
27 55
1B 37
Character set 1
(Standard)
X
X
Off
ESC :
27 58
1B 3A
Set 12 CPI
X
X
ESC A (n)
27 65 n
1B 41 n
Select n/72 text line
spacing
X
X
ESC B ... NUL
27 66 ... 0
1B 42 ... 00
Define/delete vertical
tabulators
X
X
None
ESC C NUL (n)
27 67 0 n
1B 43 00 n
Define page length in
X
inch (document/journal)
X
11;3"/12" (*1)
ESC C (n)
27 67 n
1B 43 n
Define page length in
lines (document/
journal)
X
X
11;3"/12" (*1)
ESC D ... NUL
27 68 ... 0
1B 44 ... 00
Define/delete
horizontal tabulators
X
X
All 8
characters
ESC E
27 69
1B 45
Switching on bold
printing
X
X
Off
ESC F
27 70
1B 46
Switching off bold
printing
X
X
ESC G
27 71
1B 47
Print quality NLQ ON
X
X
ESC H
27 72
1B 48
Print quality NLQ OFF
X
X
ESC I (n)
27 73 n
1B 49 n
Font selection:text,
near letter, download
X
X
ESC J (n)
27 74 n
1B 4A n
n/216 line feed
X
X
ESC K (n) (m)
27 75 n m
1B 4B n m
Switching on graphics
mode single density
X
X
ESC L (n) (m)
27 76 n m
1B 4C n m
Switching on graphics
mode double density
X
X
350
T5023/5023+ - Programming Guide
Default
Off
Appendix
IBM Emulations
ASCII
Decimal
Hex
Function
4722
ESC N (n)
27 78 n
1B 4E n
Ignore setting lower
margin
X
ESC O
27 79
1B 4F
Ignore deleting lower
margin
X
ESC P n
27 80
1B 50
Proportional On Off
X
ESC Q (n)
27 81 n
1B 51 n
Deselect Printer
X
ESC R
27 82 n
1B 52 n
Reset all Tabstops
(vert. and hor.)
X
X
ESC S (n)
27 83 n
1B 53 n
Switching on
superscript/subscript
X
X
ESC T
27 84
1B 54
Switching off
superscript/subscript
X
X
ESC U (n)
27 85
1B 55
Switching on/off
unidirectional print
mode
X
X
Bidirectional
ESC W (n)
27 87 n
1B 57 n
Switching on/
offelongated printing
X
X
Off
Setting left and right
margin
X
X
ESC X (n)(m)
XL24
Default
No
margin
X
Off
(*2)
Off
(*1)
ESC Y (n) (m)
27 89 n m
1B 59 n m
Switching On graphics X
mode double density
and double speed 1/72
vert.
X
ESC Z (n) (m)
27 90 n m
1B 5A n m
Switching On graphics
mode quadruple
density 1/72 vert.
X
X
ESC ]
2793
1B 5D
Reverse Line Feed
(should not be used)
X
X
ESC ∧ n
27 94
1B 5E
Print all single
character
X
X
(*1)
ESC _ n
27 95
1B 5F
Overscore ON OFFt
X
X
(*2)
ESC [ F
27 91 70
1b 5b 46
Sheet feeder
X
(*2)
ESC [ F c1 c2
nn..nn
27 91 70
1b 5b 46
Page Presentation
Media
ESC [ J c1 c2 n ... 27 91 74
n
1b 5b 4A
Set single Line Density X
(SSLD)
ESC [ c c1 c2
27 91
1b 5b 63
Message
ESC [ \ n1 n2
27 91 92
1b 5b 5C
Set graphical line
distance
X
X
X
ESC [ @ n1 n2
27 91 64
1b 5b 40
Double height/width
X
ESC [ g n1 n2 m
27 91 95
1b 5b 67
Graphics
X
ESC d (n) (m)
27 100 n m
1B 64 n m
Horizontal positioning
(relative)
X
T5023/5023+ - Programming Guide
(*2)
351
IBM Emulations
Appendix
ASCII
Decimal
Hex
Function
XL24
Default
ESC SO
27 14
1B 0E
Switching on elongated
printing for one line
X
Switched
off
ESC SI
27 15
1B 0F
Switching on
condensed printing
X
Switched
off
ESC - (n)
27 45 n
1B 2D n
Switching on/off
underlining
X
Switched
off
ESC * (s)(n)(m)
27 42 s n m 1B 2A s n m
ESC =
4722
Select graphic mode
X
Download
X
X
(*2)
X
X
(*2)
ESC \ c1 c2 n..n
27 92 n n
1B 5C n n
Print all continous
ESC BEL L
27 07 76
1b 07 4c
Switch over to load
function
(*1) Printers with IBM 4722 emulation do not support this control code.
(*2) Is ignored
(*3) Original printing units do not support the control code for special function extensions.
352
T5023/5023+ - Programming Guide
(*3)
(*3)
Appendix
Olivetti PR50 Emulation
Olivetti PR50 Emulation
General
The selection of the emulation is done using the menu type ’Olivetti’.
This emulation can be used with all interfaces.
Emulation
The function of loadable characters is not supported, due to different print head
resolutions.
The print attribute ’overscore’ is not supported.
Initialization parameter
All parameters that can be set in the relevant emulation menu are taken into consideration during the initialisation.
Range of Commands for the OLIVETTI PR50
ASC II
LF
FF
CR
ESC # n
ESC & nn
ESC ´ n
ESC (
ESC )
ESC * n
ESC +
ESC ESC .
ESC / ..
ESC 0
ESC 1 p ..
ESC 2
ESC 3
ESC 4
ESC 7
Hex
0A
0C
0D
1B 23 ..
1B 26 ..
1B 27 ..
1B 28
1B 29
1B 1A
1B 2B
1B 2D
1B 2E
1B 2F ..
1B 30
1B 31 70 ..
1B 32
1B 33
1B 34
1B 37
Function
Remark
Line feed forward
Form Feed
Carriage return
Assign reference for ESC L nnn
Elementary vertical spacing
Set document type
Bold Face
Cancel Bold Bace
Underline
Cancel underline
Measure document length
Select automatic operator booking mode
Set absolute vertikcal position in elementary steps
General reset
Set B.I.M.
Reset B.I.M.
Double width
Cancel double width
Line feed backward
T5023/5023+ - Programming Guide
353
Olivetti PR50 Emulation
ASC II
ESC <
ESC =
ESC >
ESC ?
ESC H ..
ESC I ..
ESC J ..
ESC L ..
ESC M ..
ESC O
ESC Q ..
ESC R ..
ESC S 5
ESC S ..
ESC T ..
ESC U ..
ESC W 0
ESC W 1
ESC X ..
ESC Y D ..
ESC Y E ..
ESC Z
ESC [ ..
ESC \
ESC ]
ESC ^ 0
ESC _
ESC ` ..
ESC d
ESC e
ESC i
ESC j
ESC l
ESC m ..
ESC n
ESC p ..
ESC r x
ESC r x
ESC t ..
ESC {
ESC | A ..
ESC | B ..
DEL
FS
FS &
FS .
FS g
FS k
GS
354
Hex
1B 3C
1B 3D
1B 3E
1B 3F
1B 48 ..
1B 49 ..
1B 4A ..
1B 4C ..
1B 4D ..
1B 4F
1B 51 ..
1B 52 ..
1B 53 35
1B 53 ..
1B 54 ..
1B 55 ..
1B 57 30
1B 57 31
1B 58 ..
1B 59 44 ..
1B 59 45 ..
1B 5A
1B 5B ..
1B 5C
1B 5D
1B 5E 30
1B 5F
1B 60 ..
1B 64
1B 65
1B 69
1B 6A
1B 6C
1B 6D ..
1B 6E
1B 70 ..
1B 72 ..
1B 72 ..
1B 74 ..
1B 7B
1B 7C 41 ..
1B 7C 42 ..
7F
1C
1C 26
1C 2E
1C 67
1C 6B
1D
Function
Print pitch 10 cpi
Print pitch 12 cpi
Print pitch 16.6 cpi
Proportional spacing
Set absolute horizontal position
Set relative vertical position
Set left margin
Set absolute vertical position
Set bottom of form "BOF"
Eject document
Define document length
Select graphic font
Select printer device
Measure document length: answer
Define top of form "TOF"
Book operator
Cancel double height
Double height
Set relative horizontal position
Set vertical magnetic device
Set horizontal magnetic device
Request for primary ID
Select character set
Record and check magnetic stripe
Magnetic read
Change emulation
Select manual operator booking mode
Superscript - Subscript
Double height and double width
Cancel double height and double width
Request for basic machine configuration
Status request
Reset error
Select character generator
Olivetti controlled selection
Printer configuration
Answer to book operator command
Synchronous basic machine status
data to be recordet on magnetic stripe
Cancel superscript/subscript
Define offset in elementary steps
Define document width in elementary steps
Clear print memory
Read returned magnetic bar data ending marker
Set chiniese mode
Cancel chiniese mode
Cancel full angle ascii code
Set full angle ascii code
Magnetic bar data write ending marker
T5023/5023+ - Programming Guide
Appendix
Remark
Appendix
Olivetti PR50 Emulation
Character Sets for the Olivetti Emulation
i
The character set required from the Olivetti emulation are marked with
a ’OL’ ending (e. g. ’CP1250OL.FNT’ or ’CP_437OL.FNT’).
The character set required from the Olivetti emulation contains both character
sets for the Epson-ANSI emulation and the following character sets required for
the Olivetti emulation. Using the ’normal’ character sets the operating panel settings and the command sequences to select the character sets will be ingnored.
Character Sets Olivetti (IBM*) Emulation (operating panel parameter and
command sequences ESC [nnn])
*IBM Proprinter emulation can only be set at the operating panel.
nnn
000
010
020
030
040
050
060
070
080
090
100
110
140
150
National Variants
International
International
Germany
Portugal
Spain 1
Denmark/Norway
France
Italy
Sweden/Finland
Switzerland
Great Britain
USA ASCII
Greece
Israel
nnn
410
500
510
520
711
712
771
701
700
740
720
781
680
600
170
200
Spain 2
Yugoslavia
*
National Variants
STD31 – Olivetti TCV370
Canada
SDC
Turkey
PC Denmark/Norway
PC Denmark OPE
PC – 210 Greece
PC – 220 Spain 2
PC – 437 International
PC – 850 Latin 1
PC – 860 Portugal
PC – 862 Israel
OLIVETTI – UNIX
Code Page 1252
(ISO 8859/1 Latin 1)
PC – 852 Latin 2
* only be set at the operating panel
T5023/5023+ - Programming Guide
355
Paper Specifications
Appendix
Paper Specifications
The document printer has a document print station which can process single
documents, multi-copy documents (document sets) and passbooks. A magnetic
stripe reader (MSR) can be installed as an option at the document print station.
The document printer is operated with an automatic print head guidance system
for printing passbooks and documents.
For the right-angle orientation of the documents and passbooks towards the
print mechanism the documents/passbooks are aligned a the right-hand side of
the document chute assembly and at the front of the document stop. Transmitted
light barriers are located at these positions. Another transmitted light barrier
located inside the document feeder allows printing with footer detection.
Reference Lines
The safety distances described in this document use the outer document and
passbook edges as well as the staggered edges and folds as reference lines.
The reference lines for the print characters are defined by the represented
character box.
The character box is a rectangle where the width is predefined by the character
pitch selected (e.g. 1/10 inches for 10 characters/inch). The height of the
character box is defined by the vertical distance between the top and bottom
needle (3.5mm for the document printer). Any dot within this character box can
be printed (blackened).
356
T5023/5023+ - Programming Guide
Appendix
Paper Specifications
b = width of the character pitch (e.g. 1/10" for 10 CPI)
All dimensions shown in the illustration are in millimeter.
For detailed information see the “Paper specifications” on the CD-ROM.
T5023/5023+ - Programming Guide
357
Paper Specifications
358
Appendix
T5023/5023+ - Programming Guide
Appendix
Error messages
Error messages
Status messages
Status
Description / Removal
ONLINE
NO_PAPER
Online status, no paper inserted
ONLINE
PAPER
Online status, paper drawn in
DATA
NO_PAPER
STOP status, data in input buffer, no paper inserted
DATA
PAPER
STOP status, data in input buffer, paper inserted
STOP
NO_PAPER
STOP status, input buffer empty, no paper inserted
STOP
PAPER
STOP status, input buffer empty, paper inserted
LOAD
PAPER
Paper request by data in print buffer
T5023/5023+ - Programming Guide
359
Error messages
Appendix
Status messages (Bootstrap loader activated)
Status
LOAD
NO PROGRAM
NO_CHARCTER_
GENERATOR
PROGRAMMING
PROGRAMMING
TIMEOUT
TRANSM_ERROR
PROG_ERR
360
Description
Bootstrap loader activated
Bootstrap loader activated, firmware missing
Bootstrap loader activated, character generator misssing
Memory area is programmed
Timeout when loading data segments
Data transmission error when loading data segments
Programming error when loading memory chip
T5023/5023+ - Programming Guide
Appendix
Error messages
Malfunctions
i
Some error messages contain numerical codes with additional
information to the cause of error. This additional information is only for the
service personnel and can be called up by pressing the VALID key . The
service information will disappear after some time.
Error
Cause / Possible action
PAPER
LENGTH
Document too short
Service information:
No./Meaning
PAPER
JAM
Use a longer document
Paper jam, paper blocked, paper can 00...10
not be ejected
PAPER
WIDENESS
Check paper transport paths, remove
remainder of paper
Print job extends over right-hand paper edge
PARITY
ERROR
OVERRUN
ERROR
FRAMING
ERROR
BREAK
Feed in larger paper
Serial interface Parity Error
Check settings of printer or system
Serial interface Parity Error
Check settings of printer or system
Serial interface, serial interface Overrun Error
Check handshake protocol printer or
system, check cable
Serial interface, Switching system
ON/OFF, push/pull interface cable,
produced by the system driver
T5023/5023+ - Programming Guide
361
Error messages
Error
Appendix
Cause / Possible action
WRONG
IF_TYPE
Service information:
No. / Meaning
The Interface type set in the
parameter menu cannot be activated
Set another interface type:
check whether the correct optional interface board is installed; check whether the optional
interface board is correctly inserted.
WRONG
Incorrect control sequence or The printer has loaded
ORDER
character which cannot be
an emulation A, howeprinted
ver the received data is
for an emulation B
Check the system driver, load
different emulation firmware
into the printer
JOURNAL BUFFER Electronic Journal full
FULL
Start a journal printout and delete journal memory
COVER OPEN
Printer cover open
Close Printer cover
362
T5023/5023+ - Programming Guide
Appendix
Error
FIRMWARE
ERROR
ELECTR ERROR
(ELECTRONIC ERROR)
Error messages
Cause / Possible action
Service information:
No. / Meaning
Internal firmware error
16
IMT syntax error
Check firmware release, if ne32
cessary install new
Internal ET syntax error
33
ET AEQ MSG syntax
error
34
ET Timeout mechanic
35
ET Timeout interface
36
ET Timeout CPPT
64
CPPT syntax error
80
ECT syntax error
96
HMPT syntax error
112 VMT syntax error
Hardware error in the electro- 00
nic
EE-PROM
T5023/5023+ - Programming Guide
363
Error messages
Error
CARRIER
ERROR
DETECT
ERROR
HEAD HOT
Appendix
Cause / Possible action
Service information:
No. / Meaning
Print head drive Hardware er- 01
ror
Wrong needle frequency
Check area around the platen
02
for foreign bodies,
Print command without
print blocks
Light rail dirty (clean),
03
Carrier drive, drive belt, motor, Overflow of the proceed
plug, carrier motor, print head profile table
not plugged,
04
Print outside print area
Sensor in print head defect
(change print head), print head 05
Error at scanning basic
cable not plugged or defect,
setting
Electronic defect
06
Error at 'Go to target'
basic setting
07
Expected photo sensor
interrupt not received
08
Motor error at measuring drive over light rail
09
Measuring error light
rail over 5 mm
10
Motor error at 'Search
left paper edge'
Carrier Error at paper edge
measuring
The print head is too hot
Rests between printing of the
lines
When the print head is cold,
print head or cable defect
364
T5023/5023+ - Programming Guide
Appendix
Error messages
Error
Cause / Possible action
POWERSUPPLY
HOT
The power supply is too hot
TRANSP
ERROR
(TRANSPORT ERROR)
FEEDER
ERROR
MICR
ERROR
MSR WRONG
ORDER
Rests between printing of the
lines
Document feed error
Service information:
No. / Meaning
00
Control motor blocked (platen, Motor control
guidance hook, MSR pressure,
01
MICR pressure)
Motor transport
Control motor not plugged,
electronic defect
Feeder hardware error
Magnetic ink character reader
Magnetic stripe reader
T5023/5023+ - Programming Guide
01
Wrong sequence
02
Wrong parameter
03
Wrong character
04
Wrong character length
365
Error messages
Appendix
Error
Cause / Possible action
MSR
ERROR
Magnetic stripe reader hardware error
Change unit
366
T5023/5023+ - Programming Guide
Service information:
No. / Meaning
01
General hardware error
02
Head position MSR cleaning function
10
Too many writing repetitions
11
Control reading error
12
Too many reading repetitions
13 Read block 1
14 LRC error
15 Parity error
16
No data found
17
No start character
found
18
Wrong flux change distance
19
No end character found
20
Magnetic track interrupted
Appendix
Description of the physical interface
Description of the physical interface
The physical interface of the document printer makes serial asynchronous data
transmission possible. Optional the document printer can be retrofit with an Centronics interface.
The following sections lists the performance characteristics of the interfaces.
General
The document printer comes standard with a serial asynchronous interface.
You can control data transmission with the XON / XOFF protocol and the hardware handshaking DTR.
Optionally, a secondary serial interface, a Centronics card, a Ethernet card or a
B-Loop card can be installed in the document printer.
Parameters for the active interface are defined in more detail in a menu.
Handshaking protocols
Data transmission between the host and the printer is controlled by the handshaking protocol.
Hardware Handshake via the DTR Signal
In the DTR/Busy protocol the printer signals by the activated signals DTR and
RTS its readiness to receive data to the connected device.
DTR and RTS are activated:
1.
When the printer has been switched on (power on).
2.
When the status changes from STOP to ONLINE.
3.
When the available input buffer area of the printer accept new data (at
least 1 kByte free input buffer) after having been disabled (less than 512
Byte free input buffer).
T5023/5023+ - Programming Guide
367
Description of the physical interface
Appendix
DTR and RTS are deactivated:
1.
When the status changes from ONLINE to STOP (stop key pressed or
printer error appears).
2.
When the available input buffer area is less than 512 bytes.
By the activated signal CTS the connected device signals to the printer to send
data.
Software handshake with XON/XOFF protocol
In the XON/ XOFF protocol the printer signals to the connected device the readiness to receive data by sending an X-ON. X-OFF signals that the printer is not
ready to receive data.
X-ON is transmitted
1.
When the printer has been switched on (power on).
2.
When the status changes from STOP to ONLINE.
3.
When the available input buffer area of the printer accept new data (at
least 1 kByte free input buffer) after having been disabled (less than 512
byte free input buffer).
X-OFF is transmitted
1.
When the status changes from ONLINE to STOP (stop key or printer
error).
2.
When the available input buffer area is less than 512 bytes.
By the activated signal CTS the connected device signals to the printer to send
data.
Software handshake with X-ON/X-OFF 2 protocol
The difference between the X-On/X-OFF 2 protocol and the X-On/X-OFF protocol is that the printer transmitt data to the connected device without CTS-check.
368
T5023/5023+ - Programming Guide
Appendix
Description of the physical interface
Interface data serial interface
Signal level
RS-232
Data format
Baud Rate
Data word length
Stop bits
Parity
2400, 4800, 9600, 19200
7/ 8 Bit
1/ 2
even/ odd/ none
Parameter selection is performed via the operating panel.
Type of connector
The interface of the document printer is equipped with a 9-pin Cannon plug:
T5023/5023+ - Programming Guide
369
Description of the physical interface
Appendix
Buffer control RS- 232
The document printer has a 8192 byte print buffer, whose size cannot be changed. If there are less than 512 bytes of buffer free no more data is accepted and
the interface is disabled. Only when there are more than 1024 bytes available in
memory, the printer is ready to receive data again. Depending on the interface,
the line is controlled by the DTR/CTS hardware handshaking or by the XON/
XOFF software protocol.
Error handling
Errors when receiving data:
Error / status message
Reaction
BREAK
Warning
FRAMING ERROR
Warning
PARITY ERROR
Warning
OVERRUN ERROR
Error
370
T5023/5023+ - Programming Guide
Appendix
Description of the physical interface
Signal description and connector assignment RS- 232 interface
Pin 05
SG – Signal Ground
Data lines
Pin 03
TD Transmitted Data
Serial data output printer --> Host
Pin 02
RD Received Data
Serial data input printer <-- Host
Control lines
Pin 08
CTS – Clear To Send
Entry
In the DTR/Busy and XON/ XOFF protocol the ’ON’ status signals
to the connected device (signal receiver=printer) that it is ready to
receive data. Not used in the XON/ XOFF 2 protocol.
Pin 04
DTR – Data Terminal Ready
Exit
In the DTR/Busy protocol the ’ON’ status signals to the connected
device (signal receiver=host) readiness to receive data.
In the XON/ XOFF protocol DTR and RTS reflects back the
operating readiness of the printer:
– DTR/RTS active: Online
– DTR/RTS inactive: STOP (STOP key and operating interruption)
or ERROR
T5023/5023+ - Programming Guide
371
Description of the physical interface
Pin 07
Appendix
RTS – Request to Send
Exit
In the DTR/Busy protocol the ’ON’ status signals to the connected
device (signal receiver=host) readiness to receive data.
In the XON/ XOFF protocol DTR and RTS reflects back the
operating readiness of the printer:
– DTR/ RTS active: Online
– DTR/RTS inactive: STOP (STOP key and operating interruption)
or ERROR
Pin 01
Printer switched on
Exit
The ’ON’ status informs the host system that the printer has been
switched on. The electrical features of this signal do not comply
with the standard. The signal position can depend on the receiver
physics of the host. This signal has been implemented to maintain
the compatibility with the predecessor, and it may no longer be
used with new applications.
ON status 5.6 kOhm at +12 V
OFF status 5.6 kOhm at SG
372
T5023/5023+ - Programming Guide
Appendix
Description of the physical interface
Cable connection document printer - PC
PinNo.
Document printer
9-pin plug
Cable
Pin-No.
PC
9-pin plug
1
Printer switched on
(+12V)
==>
1
DCD Data Carrier
Detect
2
RD Received Data
Serial data entry printer
‹==
3
TD Transmitted
Data
3
TD Transmitted Data
Serial data exit printer
==>
2
RD Received Data
4
DTR Data Terminal
Ready exit
In the DTR/Busy
protocol the ’ON’ status
signals the connected
device (signal receiver)
the readiness to receive
data
==>
6
DSR Data Set
Ready
5
SG-Signal Ground
<==>
5
SG-Signal Ground
6
DSR Data Set Ready
<==
4
DTR Data Terminal
Ready
7
RTS Request to Send
In the DTR/Busy
protocol the ’ON’ status
signals the connected
device (signal receiver)
the readiness to receive
data
==>
8
CTS Clear to Send
T5023/5023+ - Programming Guide
373
Description of the physical interface
PinNo.
Document printer
9-pin plug
8
CTS Clear to Send Entry <==
The ’ON’ status signals
the connected device
(signal receiver) the
readiness to receive
data to (Not interpreted
by the printer if the XON/
XOFF 2 protocol is
selected.)
9
374
Cable
Appendix
Pin-No.
PC
9-pin plug
7
RTS Request to
Send
9
T5023/5023+ - Programming Guide
Appendix
Description of the physical interface
Interface data external Centronics interface
With the parameter ’centronics’ of the interface menu the Centronics interface
can be set to the ECP mode (centronics=ECP) or not (centronics=printer).
If the parameter ’centronics’ is set to ’printer’ the Centronics interface can only
be work in the compatibility mode.
The parameter ’centronics’ also controls how to set the signal ’PError’ from the
printer (see section “Cable connection“ and “Signal description printer side in the
compatibility mode and ECP-mode“ of the Centronics interface).
Centronics modes
Compatibility mode and ECP mode correspond to the norm IEEE P1284 D2.
Type of connector
The interface of the document printer have a 25-pin D-SUB plug at the host side and
a 36-pin Centronics plug at the printer side.
Receive buffer
The size of the receive buffer is 8 kByte.
T5023/5023+ - Programming Guide
375
Description of the physical interface
Appendix
Cable connection
Pin-No. Host
(1284-A)
25-pin
D-SUB plug
Pin-No. Printer
(1284-B)
36-pin
Centronics plug
Signal description
1
1
nStrobe
2
2
Data 1
3
3
Data 2
4
4
Data 3
5
5
Data 4
6
6
Data 5
7
7
Data 6
8
8
Data 7
9
9
Data 8
10
10
nAck
11
11
Busy
12
12
PError
13
13
Select
14
14
nAutoFd
15
32
nFault
16
31
nInit
17
36
nSelectIn
18
19
Signal Ground (nStrobe)
19
20, 21
Signal Ground (Data 1, Data 2)
20
22, 23
Signal Ground (Data 3, Data 4)
21
24, 25
Signal Ground (Data 5, Data 6)
22
26, 27
Signal Ground (Data 7, Data 8)
23
29
Signal Ground (Busy, nFault)
24
28
Signal Ground (PError, Select,
nAck)
376
T5023/5023+ - Programming Guide
Appendix
Description of the physical interface
Pin-No. Host
(1284-A)
25-pin
D-SUB plug
Pin-No. Printer
(1284-B)
36-pin
Centronics plug
Signal description
25
30
Signal Ground (nAutoFd,
nSelectIn, nInit)
16
Logic Ground
17
Chassis Ground
18
Peripherial Logic High (+5V)
15, 33-35
Not defined
T5023/5023+ - Programming Guide
377
Description of the physical interface
Appendix
Signal description printer side (Centronics plug) in the compatibility
mode and ECP-mode
Pin-No.
Source
ECP-Mode
Compatible Mode
1
Host
HostClk
nStrobe
2
Bidirectional
Data 1 (LSB)
Data 1 (LSB)
3
Bidirectional
Data 2
Data 2
4
Bidirectional
Data 3
Data 3
5
Bidirectional
Data 4
Data 4
6
Bidirectional
Data 5
Data 5
7
Bidirectional
Data 6
Data 6
8
Bidirectional
Data 7
Data 7
9
Bidirectional
Data 8 (MSB
Data 8 (MSB
10
Printer
PeriphClk
nAck
11
Printer
PeriphAck
Busy
12
Printer
nAckReverse
PError
13
Printer
Xflag
Select
14
Host
HostAck
nAutoFd
Not defined
Not defined
16
Logic Grd
Logic Grd
17
Chassis Grd
Chassis Grd
Peripheral Logic High
Peripheral Logic High
19
Signal Ground
(nStobe)
Signal Ground
(nStobe)
20
Signal Ground
(Data 1)
Signal Ground
(Data 1)
21
Signal Ground
(Data 2)
Signal Ground
(Data 2)
22
Signal Ground
(Data 3)
Signal Ground
(Data 3)
23
Signal Ground
(Data 4)
Signal Ground
(Data 4)
15
18
378
Printer
T5023/5023+ - Programming Guide
Appendix
Pin-No.
Description of the physical interface
Source
ECP-Mode
Compatible Mode
24
Signal Ground
(Data 5)
Signal Ground
(Data 5)
25
Signal Ground
(Data 6)
Signal Ground
(Data 6)
26
Signal Ground
(Data 7)
Signal Ground
(Data 7)
27
Signal Ground
(Data 8)
Signal Ground
(Data 8)
28
Signal Ground (PError,
Select, nAck)
Signal Ground (PError,
Select, nAck)
29
Signal Ground (Busy,
nFault)
Signal Ground (Busy,
nFault)
30
Signal Ground
(nAutoFd, nSelectIn,
nInit)
Signal Ground
(nAutoFd, nSelectIn,
nInit)
31
Host
nReverseRequest
nInit
32
Printer
nPeriphRequest
nFault
33
Not defined
Not defined
34
Not defined
Not defined
35
Not defined
Not defined
1284 Active
nSelectIn
36
Host
T5023/5023+ - Programming Guide
379
Description of the physical interface
Appendix
Description of the signals
HostClk/nStrobe
(Host driven)
Compatibility Mode:
Set active ’low’ to transfer data into printer´s input
latch. Data is valid while nStrobe is low.
ECP Mode:
Used in a closed-loop handshake with
PeriphAck to transfer data or address
information from the host to the printer.
Data 1 ... Data 8
Compatibility Mode:
Forward channel data.
ECP Mode:
Host to the printer or printer to host address or
data.
PeriphClk/nAck
(Printer driven)
Compatibility Mode:
Pulsed ’low’ by the printer to acknowledge
transfer of a data byte from the host.
ECP Mode:
Used in a closed-loop handshake with HostAck
to transfer data from the printer to the host.
Epson ANSI:
The signal nAck is used to acknowledge the
data byte from the host. Additional nAck is set to
zero for a short time if the the online status is
restored.
380
T5023/5023+ - Programming Guide
Appendix
Description of the physical interface
PeriphAck/Busy
(Printer driven)
Compatibility Mode:
Driven ’high’ to indicate that the printer is not
ready to receive data.
ECP Mode:
The printer uses this signal for flow control in
the forward direction. PeriphAck also provides a
ninth data bit used to determine whether
command or data information is present on the
data signals in the reverse direction.
Epson ANSI:
Busy = 0: STOP status and printer ready
Busy = 1: STOPstatus , Error or printer not
ready
nAckReverse/PError
(Printer driven)
Compatibility Mode:
Driven ’high’ to indicate that the printer has
encountered an error in its paper path.
ECP Mode:
The printer drives this signal ’low’ to
acknowledge nReverseRequest. The host relies
upon nAckReverse to determine when it is
permitted to drive the data signals.
Epson ANSI:
The signal nFault is not activ at PError but in the
global printer status ’ERROR’ it is activ.
Centronics = ECP PError is set to status that means PError is activ
if the special printer message NO_PAPER is
send to the system.
Centronics = printer PError is set to error that means PError only set
activ if data is send to the printer without paper
inside.
T5023/5023+ - Programming Guide
381
Description of the physical interface
Appendix
XFlag/Select
(Printer driven)
Compatibility Mode:
Set ’high’ to indicate that the printer is on-line.
ECP Mode:
Used by the printer to reply to the requested
extensibility byte sent by the host during the
negotiation phase.
HostAck/nAutoFd
(Host driven)
Compatibility Mode:
The interpretation of this signal varies from
printer to printer. Set ’low’ by host to put some
printers into auto-line feed mode.
ECP Mode:
The host drives this signal for flow control in the
reverse direction. It is used in an interlocked
handshake with PeriphClk.
HostAck also provides a ninth data bit used to
determine whether command or data
information is present on the data signals in the
forward direction.
Peripherial Logic High
(Printer driven)
Set ’high’ to indicate that all other signals
sourced by the printer are in a valid state.
nReverseRequest / nInit
Compatibility Mode:
Pulsed ’low’ to reset the interface and force a
return to Compatibility Mode idle phase.
ECP Mode:
This signal is driven ’low’ to place the channel in
the reverse direction.
382
T5023/5023+ - Programming Guide
Appendix
Description of the physical interface
nPeriphRequest / nFault
(Printer driven)
Compatibility Mode:
Set ’low’ by the printer to indicate that an error
has occoured.
ECP Mode:
The printer may drive this pin ’low’ to request
communications with the host. The request is
merely a ’hint’ to the host; the host has ultimate
control over the transfer direction.
Epson ANSI:
nFault = 0: ERROR status
nFault = 1: ONLINE and STOP status
1284 Active / nSelectIn
(Host driven)
Compatibility Mode:
Set ’low’ by host to select the printer.
ECP Mode:
Driven ’high’ by the host while in ECP Mode.
Set ’low’ by the host to terminate ECP Mode
and return the link to the Compatibility Mode.
T5023/5023+ - Programming Guide
383
Description of the physical interface
384
T5023/5023+ - Programming Guide
Appendix
Glossary
ANSI
( American National Standards Institute)
Standards institute in the USA, similar to the DIN institute in Germany.
Antiqua fonts
Type fonts with serifs, for example, Bookman, Garamond, Times. These fonts
are especially suitable if large amounts of text are to remain easily legible.
ASCII
(American Standard Code for Information Interchange)
This code is internationally standardized and also known in Germany as ISO 7bit code. It defines a character set code used to exchange data between data
processing devices. Using the 7 bits of the ASCII code 128 characters can be
written (alphabet in upper and lower case letters, figures, special and control
characters).
Baud
Measuring unit for the specification of the transfer rate of data expressed in bits
per second (for example, 300 baud = 300 bits per second).
Control characters
A non-representable ASCII character to control printer functions (control code).
Characters transferred from the central unit to a peripheral device to initiate certain functions there are also described as control characters or control bytes.
Document
Form on which data is first recorded in manual or mechanical form. Data carriers
used for mechanical data processing (mechanical document) such as plain language documents, marking documents, labels, etc. are also called documents.
Document processing
Name of the processing of single documents.
T5023/5023+ - Programming Guide
385
Glossary
Font
The complete character set of a type font in one size.
Serial interface
During serial data transfer each bit is transferred individually and consecutively.
The serial interface is also known under the names V. 24 or RS-232-C.
Advantages:
possibility of checking correct transfer by means of a parity check of the received
data word; also a considerably longer data cable than for the parallel interface
can be used.
Serifs
In antiqua type fonts small horizontal lines on the top and bottom of some letters.
When classifying fonts a distinction is made between fonts with and without serifs.
Examples of fonts with serifs: Bookman, Palatino, Times.
Examples of fonts without serifs: Helvetica, Avant Garde, Universe.
Syntax
General: the teaching on sentence structure (in the language). The syntax of a
(programming) language describes the structure of the language determined by
means of the rules of ’grammar’ without considering the meaning (semantics) or
sense.
Typography
Description of the arrangement of a printed paper including the selection of the
type font, type size and distribution of space.
386
T5023/5023+ - Programming Guide
Index
B
Definition of a draft character 143
Definition of characters 133
Backspace 53
Definition of LQ characters 144
Basic character set 25, 126
DEL 54
Basic character table 25
Delete 54
BEL 120
Deleting a character 54
Bold print off 111
Deleting the bottom margin 70
Bold print ON 110
Deleting the MSB specification 48
BS 53
Design of a character 134
Determining 1/6 inch line spacing 59
Determining 1/8 inch line spacing 58
C
Determining n/180 inch line spacing 60
Determining n/360 inch line spacing 63
CAN 54
Determining n/60 inch line spacing 61
Cancel 54
Determining the character spacing 90
Cancelling a line 54
Determining/ deleting vertical tabs for
Carriage return 51
Carrying out an n/ 180 inch line feed 57 any channel 72
Document processing 179, 189
Character box 180
Double impact print OFF 113
Character set commands 123
Double impact print ON 112
Character set selection 124
Character size 92
Characters defined by the user 26,
E
131, 145
Charcter density 19
Elongated print for one line ON 105,
Combine print modes 117
106
Condensed print OFF 104
Elongated print off 107
Condensed print ON 103
Elongated print on/ off 108
Country versions 127
ESC 44
CPI 19
ESC - (n) 114
CR 51
ESC ! (n) 117, 121
CSI sequences 35, 173
ESC (n1) (n2) 88
D
DC2 104
DC4 107
ESC # 48
ESC $ (n1) (n2) 86
ESC % (n) 151
ESC * (m) (n1) (n2) 163
ESC + (n) 63
T5023/5023+ - Programming Guide
387
Index
ESC / (n) 73
ESC = 47
ESC > 46
ESC ? (n1) (m) 172
ESC 0 58
ESC 2 59
ESC 3 (n) 60
ESC 4 147
ESC 5 148
ESC A (n) 61
ESC a (n) 82
ESC b (n) (n1) (n2) .. NUL 72
ESC B ... NUL 70, 71
ESC D (n1) (n2) ... NUL 84
ESC E 110
ESC F 111
ESC G 112
ESC g 100
ESC H 113
ESC J (n) 57
ESC k (n) 96
ESC L (n) (m) Data 169
ESC M 99
ESC P 98
ESC p (n) 97
ESC Q (n) 80
ESC r (n) 120
ESC S (n) 115
ESC s (n) 120, 121
ESC SI 103
ESC SO 106
ESC SP (n) 90
ESC T 116
ESC U (n) 44
ESC W (n) 108, 109
ESC x (n) 94
ESC Y (n) (m) Data 170
ESC Z (n) (m) Data 171
ESC_K_(n)_(m)_Data 168
Extended character set 152
Extended character set off 153
388
T5023/5023+ - Programming Guide
Index
Extended graphics character table 130
F
FF 65
G
Graphics 27
Graphics characters 25
Graphics mode/double density 169
Graphics mode/quadruple density 171
Graphics mode/single density 168
Graphics modes 159
H
Horizontal positioning (absolute) 86
Horizontal positioning (relative) 88
Horizontal print control 75
Horizontal tabulation 85
HT 85
I
Initializing the printer 42
Italic character 25
Italic characters 128
Italic print 147
Italic print OFF 148
L
LF 56
Line feed 56
Line feed commands 55
T5023/5023+ - Programming Guide
389
Index
M
Mikrodruck 100
N
National character set 127
National character sets 26
Non- executable commands 120
P
Print modes 101
Print quality 92
Printable areas 181
Proportional spacing on/ off 97
R
Reassigning graphics commands 172
Responses 176
S
Select print quality 94
Selecting a vertical tab channel 73
Selecting the character size 10 cpi 98
Selecting the character size 12 cpi 99
Selecting the character size 15 cpi 100
Selecting the graphics mode 163
Selecting the LQ type font 96
Selecting the print colour 121
Setting the left margin 77
Setting the MSB to 0 47
Setting the MSB to 1 46
Setting the right margin 80
Setting the text alignment 82
Setting/ deleting horizontal tabs 84
Sheet ejection commands 64
SI 102
390
T5023/5023+ - Programming Guide
Index
SO 105
Special character codes 51
Status and error messages 223
Superscript 22
Superscript/subscript OFF 116
Superscript/subscript ON 115
Switching on condensed print 102
Syntax of the character set commands 147
U
Underlining 21
Underlining ON/OFF 114
Unidirectional printing 44
User defined characters 151
V
Vertical print control 68
T5023/5023+ - Programming Guide
391
Index
392
T5023/5023+ - Programming Guide