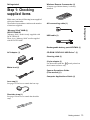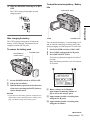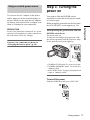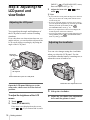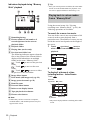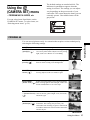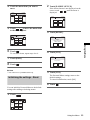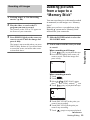
1
3-087-923-12(1)
Camera Operations Guide [GB]
Camera
Operations Guide
Read this first
Digital Video Camera Recorder
DCR-TRV460E/TRV461E
TM
SERIES
© 2004 Sony Corporation
Read this first
Before operating the unit, please read this
manual thoroughly, and retain it for future
reference.
WARNING
To prevent fire or shock hazard, do not
expose the unit to rain or moisture.
To avoid electrical shock, do not open
the cabinet. Refer servicing to qualified
personnel only.
FOR CUSTOMERS IN EUROPE
ATTENTION
The electromagnetic fields at the specific frequencies
may influence the picture and sound of this camcorder.
This product has been tested and found compliant with
the limits set out in the EMC Directive for using
connection cables shorter than 3 meters (9.8 feet).
b Notice
If static electricity or electromagnetic interference
causes data transfer to discontinue midway (fail),
restart the application or disconnect and connect the
USB cable again.
Notes on use
FOR CUSTOMERS IN THE UNITED
KINGDOM
NOTICE ON THE SUPPLIED AC
ADAPTOR
A moulded plug complying with BS1363 is fitted to
this equipment for your safety and convenience.
Should the fuse in the plug supplied need to be
replaced, a fuse of the same rating as the supplied one
and approved by ASTA or BSI to BS1362 (i.e.,
marked with
or
mark) must be used.
If the plug supplied with this equipment has a
detachable fuse cover, be sure to attach the fuse cover
after you change the fuse. Never use the plug without
the fuse cover. If you should lose the fuse cover, please
contact your nearest Sony service station.
Note on a cassette tape
You can record on standard 8 mm
and Hi8
,
Digital8
video cassettes in Digital8
system only
on your camcorder. See page 114 for details.
Notes on recording
• Before starting to record, test the recording function
to make sure the picture and sound are recorded
without any problems.
• Compensation for the contents of recordings cannot
be provided, even if recording or playback is not
possible due to a malfunction of the camcorder,
storage media, etc.
• TV color systems differ depending on the country/
regions. To view your recordings on a TV, you need
a PAL system-based TV.
• Television programs, films, video tapes, and other
materials may be copyrighted. Unauthorized
recording of such materials may be contrary to the
copyright laws.
Notes on the LCD panel, viewfinder, and
lens
• The LCD screen and the viewfinder are
manufactured using extremely high-precision
technology, so over 99.99% of the pixels are
operational for effective use.
However, there may be some tiny black points and/
or bright points (white, red, blue, or green in color)
that appear constantly on the LCD screen and the
viewfinder.
These points are normal results of the manufacturing
process and do not affect the recording in any way.
• Exposing the LCD screen, the viewfinder, or the lens
to direct sunlight for long periods of time may cause
malfunctions. Be careful when placing the camera
near a window or outdoors.
2
• Do not aim at the sun. Doing so might cause your
camcorder to malfunction. Take pictures of the sun
only in low light conditions, such as at dusk.
Note on connecting other device
Before connecting your camcorder to other device
such as a VCR or a computer with a USB or i.LINK
cable, be sure to insert the connector plug in the proper
direction. If you insert the connector plug forcibly in
the wrong direction, the terminal may be damaged, or
this may cause a malfunction of your camcorder.
Notes on using this manual
• The images of the LCD screen and the viewfinder
used on this manual are captured using a digital still
camera, and thus may appear different from what
you see.
• Instructions with no specific model names are for all
models.
Instructions with specific model names are for the
indicated models only.
Before you start reading this manual, check the
model name of your camcorder.
Touch the button on the LCD screen.
• You can change the language to be used for screen
display on your camcorder (p. 22)
• Do not hold the camcorder by the following parts.
Viewfinder
LCD panel
Notes on using the camcorder
• Hold your camcorder correctly.
Battery pack
• To ensure a good grip, fasten the grip belt as shown
in the following illustration.
• When you are using the touch panel, place your hand
on the back side of the LCD panel to support it.
Then, touch the buttons displayed on the screen.
3
Table of Contents
: Features available for tape only.
: Features available for “Memory Stick”
only.
Read this first ............................................................................................. 2
Quick Start Guide
Recording movies ...................................................................................... 8
Recording still images .............................................................................. 10
Recording/Playing back with ease ........................................................... 12
Getting started
Step 1: Checking supplied items.............................................................. 13
Step 2: Charging the battery pack............................................................ 14
Using an outside power source ................................................................................. 17
Step 3: Turning the power on................................................................... 17
Step 4: Adjusting the LCD panel and viewfinder...................................... 18
Adjusting the LCD panel ............................................................................................ 18
Adjusting the viewfinder ............................................................................................. 18
Step 5: Setting the date and time............................................................. 19
Step 6: Inserting the recording media ...................................................... 20
Inserting a cassette tape ........................................................................................... 20
Inserting a “Memory Stick” ......................................................................................... 21
Step 7: Setting the screen language ........................................................ 22
Recording
Recording movies .................................................................................... 24
Recording for a longer time ....................................................................................... 26
Using zoom ................................................................................................................ 26
Using the built-in light ................................................................................................ 27
Recording in mirror mode .......................................................................................... 28
Using the self-timer .................................................................................................... 28
Recording still images
– Memory photo recording............................. 29
Selecting image quality .............................................................................................. 31
Using the self-timer .................................................................................................... 31
Recording a still image on a “Memory Stick” while recording movies on a tape ....... 32
Recording with ease – Easy Handycam .................................................. 33
Recording a movie
............................................................................................... 33
Recording a still image
......................................................................................... 34
Making full use of Easy Handycam operation ........................................................... 34
4
Adjusting the exposure............................................................................. 35
Adjusting the exposure for backlit subjects ............................................................... 35
Fixing the exposure for the selected subject – Flexible spot meter .......................... 35
Adjusting the exposure manually .............................................................................. 36
Recording in dark places – NightShot plus, etc. ...................................... 37
Adjusting the focus................................................................................... 38
Adjusting the focus for an off-center subject – SPOT FOCUS .................................. 38
Adjusting the focus manually .................................................................................... 39
Recording a picture using various effects ................................................ 40
Fading in and out of a scene
– FADER .............................................................. 40
Using special effects
– Digital effect .................................................................. 41
Overlaying still images on movies on a tape – MEMORY MIX ................................. 43
Searching for the starting point
.......................................................... 44
Searching for the last scene of the most recent recording – END SEARCH ............ 44
Searching manually – EDIT SEARCH ...................................................................... 45
Reviewing the most recently recorded scenes – Rec review .................................... 45
Playback
Viewing movies recorded on a tape
................................................... 46
Playing back in various modes ................................................................................. 47
Viewing recordings with added effects – Digital effect .............................................. 48
Viewing recordings on a “Memory Stick”
........................................... 49
Playing back in various modes from a “Memory Stick” ............................................. 50
Playing back with ease – Easy Handycam .............................................. 51
Making full use of Easy Handycam operation ........................................................... 52
Various playback functions ...................................................................... 53
Magnifying pictures – Tape playback zoom/Memory playback zoom ....................... 53
Displaying the screen indicators ............................................................................... 54
Displaying the date/time and camera settings data – Data code .............................. 54
Playing the picture on a TV ...................................................................... 56
Locating a scene on a tape for playback
........................................... 57
Searching quickly for a desired scene – Zero set memory ....................................... 57
Searching for a scene by date of recording – Date search ....................................... 57
,continued
5
Advanced operations
Using the Menu
Connecting to a VCR or TV ...............86
Dubbing to another tape
...............87
Selecting menu items ........................ 59
Recording pictures from a VCR or TV 88
Using the
(CAMERA SET) menu
– PROGRAM AE/16:9 WIDE,
etc ................................................ 61
Dubbing pictures from a tape to a
“Memory Stick” .............................89
Using the
(MEMORY SET) menu
– QUALITY/IMAGE SIZE/ALL
ERASE/NEW FOLDER, etc ......... 65
Using the
(PICT. APPLI.) menu
– PICT. EFFECT/SLIDE SHOW/
FRAME REC/INTERVAL REC,
etc ................................................ 68
Using the
(EDIT/PLAY) menu
– END SEARCH/TITLE, etc ......... 73
Using the
(STANDARD SET) menu
– REC MODE/MULTI-SOUND/
AUDIO MIX/USB-CAMERA,
etc ................................................ 76
Using the
(TIME/LANGU.) menu
– CLOCK SET/WORLD TIME,
etc ................................................ 82
Customizing Personal Menu .............. 83
6
Dubbing/Editing
Dubbing still images from a “Memory
Stick” to a tape .............................90
Dubbing selected scenes from a tape
– Digital program editing ..............91
Deleting recorded pictures
............98
Marking recorded images with specific
information
– Image protection/
Print mark .....................................99
Printing recorded images (PictBridge
compliant printer)
..................101
Troubleshooting
Troubleshooting ...............................103
Warning indicators and messages....110
Additional Information
Using your camcorder abroad ..........114
Usable cassette tapes .....................114
About the “Memory Stick” ................115
About the “InfoLITHIUM”
battery pack ................................117
About i.LINK .....................................119
Maintenance and precautions ..........120
Specification ....................................123
Quick Reference
Identifying parts and controls ...........125
Index ................................................131
Refer also to other operating instructions
supplied with your camcorder:
• Editing images with your computer
cComputer Applications Guide
7
Quick Start Guide
Recording movies
1
Attach the charged battery pack to the camcorder.
To charge the battery, see page 14.
a Lift up the viewfinder.
b Slide the battery pack in the direction
of the arrow until it clicks.
2
Insert a cassette into the camcorder.
a Slide the
OPEN/ b Insert the cassette with c Press
.
Close the cassette lid after
EJECT lever in the
its window-side facing
the cassette compartment
direction of the arrow
up, then push the center
slides back in by itself.
to open the lid.
of the back of the
The cassette compartment
cassette.
comes out automatically.
Window-side
OPEN/EJECT lever
8
Quick Start Guide
3
Start recording while checking the subject on the LCD screen.
The date and time is not set up in the default setting. To set the date and time, see page 19.
a Remove the lens cap.
Quick Start Guide
Lens cap is not attached
when you purchase your
camcorder (p. 125).
b Press OPEN and
open the LCD panel.
c While pressing the
green button, slide
the POWER switch
down to light up the
CAMERA-TAPE lamp.
The power turns on.
d Press REC START/
STOP.
Recording starts. To
change to standby mode,
press REC START/STOP
again.
4
View the recorded picture on the LCD screen.
a Slide the POWER
switch repeatedly
until the PLAY/EDIT
lamp lights up.
b Touch
(rewind).
c Touch
(play) to
start the playback.
To stop, press
.
To turn off the power, slide the
POWER switch up to (CHG)
OFF.
Quick Start Guide
9
Recording still images
1
Attach the charged battery pack to the camcorder.
To charge the battery, see page 14.
a Lift up the viewfinder.
b Slide the battery pack in the direction
of the arrow until it clicks.
2
Insert a “Memory Stick” into the camcorder.
Insert it so that the b mark
is at the bottom left corner.
Push in until it clicks.
b mark
10
Quick Start Guide
3
Start recording while checking the subject on the LCD screen.
The date and time is not set up in the default setting. To set the date and time, see page 19.
a Remove the lens cap.
Quick Start Guide
Lens cap is not attached
when you purchase your
camcorder (p. 125).
b Press OPEN and
open the LCD panel.
c While pressing the
green button, slide
the POWER switch
repeatedly until the
CAMERA-MEMORY
lamp lights up.
The power turns on.
d Press PHOTO lightly.
A short beep sound is heard
when the focus is adjusted.
e Press PHOTO fully.
A shutter sound is heard and
the still image is recorded.
4
View the recorded picture on the LCD screen.
a Slide the POWER
switch repeatedly
until the PLAY/EDIT
lamp lights up.
b Touch
.
The most recently recorded
image is displayed.
c Touch
(next) or
(previous) to
view images in
sequence.
To turn off the power, slide the
POWER switch up to (CHG)
OFF.
Quick Start Guide
11
Recording/Playing back with ease
By switching to Easy Handycam operation, recording/playback operation
becomes even easier.
Easy Handycam operation allows easy recording/playback for even first
time users by providing only the basic functions for recording/playback.
Press EASY when recording/
playing back.
EASY lights up in blue (1) and
screen font size increases (2) during
Easy Handycam operation.
Easy Handycam
operation
ON
For details, see instructions for each operation.
See page 33 for recording, page 51 for playback.
12
Quick Start Guide
Getting started
Step 1: Checking
supplied items
Wireless Remote Commander (1)
A button-type lithium battery is already
installed.
Make sure you have following items supplied
with your camcorder.
The number in parentheses indicates the number
of that item supplied.
Getting started
“Memory Stick” 8MB (1)
(DCR-TRV461E)
“Memory Stick” media is only supplied with
DCR-TRV461E.
There is no “Memory Stick” media supplied
with DCR-TRV460E.
A/V connecting cable (1)
USB cable (1)
Rechargeable battery pack NP-FM30 (1)
AC Adaptor (1)
CD-ROM “SPVD-012 USB Driver” (1)
Cleaning cloth (1)
21-pin adaptor (1)
For the models with the
their bottom surfaces only.
mark printed on
Mains lead (1)
Camera Operations Guide
(This manual) (1)
Computer Applications Guide (1)
Lens cap (1)
See page 125 on how to attach the lens cap.
Shoulder strap (1)
See page 126 on how to attach the shoulder
strap.
Getting started
13
Step 2: Charging the
battery pack
1
Lift up the viewfinder.
2
Attach the battery pack by sliding it in
the direction of the arrow until it
clicks.
3
With the v mark on the DC plug
facing up, connect the AC Adaptor to
the DC IN jack on your camcorder.
You can charge the battery by attaching the
“InfoLITHIUM” battery pack (M series)
to your camcorder.
b Notes
• You cannot use batteries other than the
“InfoLITHIUM” battery pack (M series) (p. 117).
• Do not short-circuit the DC plug of the AC Adaptor
or battery terminals with any metallic objects. This
may cause a malfunction.
• Use a nearby wall socket when using the AC
Adaptor. Disconnect the AC Adaptor from the wall
socket immediately if any malfunction occurs.
Battery pack
DC IN jack
DC plug
Mains lead
AC Adaptor
To the wall socket
v mark
14
Getting started
4
Connect the mains lead to the AC
Adaptor.
5
Connect the mains lead to the wall
socket.
6
Slide the POWER switch up to (CHG)
OFF.
To check the remaining battery – Battery
Info
DSPL/BATT INFO
The CHG (charge) lamp lights up and
charging starts.
The CHG (charge) lamp turns off when the
battery is fully charged. Disconnect the AC
Adaptor from the DC IN jack.
To remove the battery pack
BATT(battery)
release button
POWER switch
Getting started
After charging the battery
POWER switch
OPEN
You can check the battery’s current charge level
and its current remaining recording time both
during charging or when the power is turned off.
1 Set the POWER switch to (CHG) OFF.
2 Press OPEN and open the LCD panel.
3 Press DSPL/BATT INFO.
The battery information appears for about 7
seconds.
Keep the button pressed to view it for about
20 seconds.
BATTERY INFO
BATTERY CHARGE
CHARGE LEVEL
LEVEL
BATTERY
0%
0%
1 Set the POWER switch to (CHG) OFF.
2 Lift up the viewfinder.
3 Slide the battery pack out in the direction
of the arrow pressing the BATT (battery)
release button down.
b Note
• If you do not use the battery pack for a long time, use
up the battery pack completely before storing it. See
page 118 about storage of the battery pack.
50%
50%
100%
100%
REC TIME
TIME AVAILABLE
AVAILABLE
REC
LCD SCREEN
SCREEN::
72 min
min
LCD
72
VIEWFINDER::
95 min
min
VIEWFINDER
95
A Battery charge level: Displays
approximate remaining amount of
power left in the battery pack.
B Approximate possible recording time
using the LCD panel.
C Approximate possible recording time
using the viewfinder.
,continued
Getting started
15
Charging time
Approximate number of minutes required when
you fully charge a fully discharged battery pack
at 25°C (77°F). (10 – 30°C (50 – 86°F)
recommended.)
Battery pack
NP-FM30 (supplied)
145
NP-FM50
150
NP-QM71/QM71D
260
NP-QM91/QM91D
360
Recording time when recording with the
LCD screen on
Approximate number of minutes available
when you use a fully charged battery pack at
25°C (77°F).
Battery pack Continuous
recording
time
Typical*
recording
time
NP-FM30
(supplied)
40
80
NP-FM50
130
60
NP-QM71/
QM71D
315
150
NP-QM91/
QM91D
475
230
Recording time when recording with the
viewfinder
Approximate number of minutes available
when you use a fully charged battery pack at
25°C (77°F).
16
Battery pack Continuous
recording
time
Typical*
recording
time
NP-FM30
(supplied)
50
105
NP-FM50
170
85
NP-QM71/
QM71D
415
205
NP-QM91/
QM91D
625
310
Getting started
* Approximate number of minutes when recording
while you repeatedly record, start/stop, slide the
POWER switch to change the power mode, and
zoom. The actual battery life may be shorter.
Playing time
Approximate number of minutes available
when you use a fully charged battery pack at
25°C (77°F).
This table shows the playing time for tapes
recorded in the Digital8 system.
The playing time of tapes recorded on other
devices in the Hi8
/standard 8 mm
system is reduced by about 20%.
Battery pack LCD panel
opened
LCD panel
closed
NP-FM30
(supplied)
80
120
NP-FM50
135
195
NP-QM71/
QM71D
335
465
NP-QM91/
QM91D
505
695
b Notes
• The power will not be supplied from the battery pack
when the AC Adaptor is connected to the DC IN jack
of your camcorder, even if its mains lead is
disconnected from the wall socket.
• The recording and playback time will be shorter
when you use your camcorder in low temperature.
• The CHG (charge) lamp flashes during charging, or
the battery information will not be correctly
displayed in following conditions.
– The battery pack is not attached correctly.
– The battery pack is damaged.
– The battery pack is fully discharged. (For Battery
information only.)
Using an outside power source
Step 3: Turning the
power on
You need to slide the POWER switch
repeatedly to select the desired power mode
to record or play.
When using this camcorder for the first time,
the [CLOCK SET] screen appears (p. 19).
PRECAUTION
Even if your camcorder is turned off, AC power
(mains) is still supplied to it while connected to
the wall socket via the AC Adaptor.
While pressing the green button, slide the
POWER switch down.
Connect your camcorder as shown in
“Charging the battery pack” (p. 14).
Getting started
You can use the AC Adaptor as the power
source when you do not want the battery to
run out. While you are using the AC Adaptor,
the battery pack will not lose its charge even
when it is attached to your camcorder.
The power turns on.
To enter the recording or playing mode, slide
the switch repeatedly until the respective lamp
for the desired power mode lights up.
• CAMERA-TAPE mode: To record on a tape.
• CAMERA-MEMORY mode: To record on a
“Memory Stick.”
• PLAY/EDIT mode: To play or edit pictures on
a tape or “Memory Stick.”
To turn off the power
Slide the POWER switch up to (CHG) OFF.
Getting started
17
Step 4: Adjusting the
LCD panel and
viewfinder
Adjusting the LCD panel
You can adjust the angle and brightness of
the LCD panel to meet various recording
situations.
Even when there are obstructions between you
and the subject, you can check the subject on the
LCD screen during recording by adjusting the
angle of the LCD panel.
Maximum
180 degrees
[MENU],
(STANDARD SET) menu,
then touch [LCD SET] (p. 78).
3 Adjust the item with
touch
/
, then
.
z Tips
• If you rotate the LCD panel 180 degrees to the lens
side, you can close the LCD panel with the LCD
screen facing out.
• If you are using the battery pack for power source,
you can adjust the brightness by selecting [LCD BL
LEVEL] from the [LCD SET] on the
(STANDARD SET) menu (p. 78).
• Even if you adjust the LCD screen backlight, the
recorded picture will not be affected.
• You can turn off the operation confirmation beep by
setting [BEEP] in the
(STANDARD SET)
menu to [OFF] (p. 80).
Adjusting the viewfinder
You can view images using the viewfinder
when you close the LCD panel. Use the
viewfinder when the battery is running out, or
when the screen is hard to see.
Maximum
90 degrees
Press OPEN and open the LCD panel.
Viewfinder lens adjustment lever
Open the LCD panel 90 degrees to the
camcorder, then rotate it to the desired
position.
To adjust the brightness of the LCD
screen
1 Touch
.
2 Touch [LCD BRIGHT].
If the item is not displayed on the screen,
touch
/
. If you cannot find it, touch
18
Getting started
1
Lift up the viewfinder.
2
Adjust the viewfinder lens adjustment
lever until the picture is clear.
To use the viewfinder during operation
When you are recording on a tape or a “Memory
Stick”, you can adjust the exposure (p. 35) and
fader (p. 40) while checking the image on the
viewfinder. Have the LCD panel rotated 180
degrees and closed with the screen facing out.
1 Set the power mode to CAMERA-TAPE
or CAMERA-MEMORY (p. 17).
2 Close the LCD panel with the screen
3 Touch
.
[Set LCD off?] appears on the screen.
4 Touch [YES].
The LCD screen is turned off.
5 Touch the LCD screen while checking
Set the date and time when using this
camcorder for the first time. If you do not set
the date and time, the [CLOCK SET] screen
appears every time you turn on your
camcorder.
Getting started
facing out.
appears on the screen.
Step 5: Setting the
date and time
b Note
• If you do not use your camcorder for about 3
months, the built-in rechargeable button-type
battery gets discharged and the date and time
settings may be cleared from the memory. In that
case, charge the rechargeable button-type battery
(p. 122) and then set the date and time again.
the display in the viewfinder.
[EXPOSURE], etc. are displayed.
6 Touch the button you want to set.
• [EXPOSURE]: Adjust with
/
and touch
.
• [FADER]: Touch it repeatedly to select a
desired effect (only in the CAMERATAPE mode).
•
: The LCD screen lights up.
To hide the buttons on the LCD screen,
touch
.
To use the large-capacity battery pack
When you use the large-capacity battery pack
(NP-QM71/QM71D/QM91/QM91D) on your
camcorder, extend the viewfinder and pull it up
to the optimal angle for viewing.
OPEN
POWER switch
1
Turn on your camcorder (p. 17).
2
Press OPEN and open the LCD panel.
Proceed to step 7 when you set the clock for
the first time.
3
Touch
.
– :– – :– –
60min
1/3
MENU
EXPO–
SURE
FADER
SPOT
FOCUS
SPOT
METER
PRGRAM
AE
,continued
Getting started
19
4
Step 6: Inserting the
recording media
Touch [MENU].
–:––:––
60min
CAMERA SET
PROGRAM AE
SPOT METER
EXPOSURE
5
Inserting a cassette tape
OK
Select
(TIME/LANGU.) with
/
, then touch
.
You can record on standard 8 mm ,
Hi8
and Digital8 cassettes in Digital8
system only. For details on these cassettes
(such as write-protection), see page 114.
–:––:––
60min
DISPLAY
MENU ROTATE
A. SHUT OFF
CLOCK SET
WORLD TIME
LANGUAGE
PROGRAM AE
6
OK
Select [CLOCK SET] with
then touch
.
,
–:––:––
CLOCK SET
DATE
2004 Y
/
b Notes
• Do not force the cassette into the compartment. This
may cause a malfunction of your camcorder.
• The recording time when you use your camcorder is
2/3 of the indicated time on Hi8
tape. If you
select the LP mode in the menu settings, the
recording time is the indicated time on Hi8
tape.
1
1M
1D
0: 00
Slide the
OPEN/EJECT lever in
the direction of the arrow and open the
lid.
OK
OPEN/EJECT lever
7
Set [Y] (year) with
.
, then touch
–:––:––
CLOCK SET
DATE
2004 Y
/
Lid
1M
1D
0: 00
OK
You can set any year up to the year 2079.
8
20
Set [M] (month), [D] (day), hour and
minute in the same way as was done in
step 7, then touch
.
Getting started
The cassette compartment automatically
comes out and opens up.
2
Insert a cassette with its window-side
facing up.
Inserting a “Memory Stick”
Window-side
For details on the “Memory Stick” (such as
write-protection), see page 115.
Push the center of the
back of the cassette
lightly.
3
Press
Getting started
b Note
• When using the half-sized “Memory Stick,” the
“Memory Stick Duo,” make sure you attach the
Memory Stick Duo adaptor. Your camcorder may
malfunction when it is inserted without an adaptor
(p. 116).
Access
lamp
.
The cassette compartment automatically
slides back in.
b mark
4
Insert the “Memory Stick” with the b
mark at the bottom left corner until it
clicks.
Close the lid.
To eject the cassette
1 Slide the
OPEN/EJECT lever in the
To eject a “Memory Stick”
Lightly push the “Memory Stick” in once.
direction of the arrow and open the lid.
The cassette compartment automatically
comes out.
2 Take out the cassette, then press
The cassette compartment automatically
slides back in.
.
Lightly push in
once.
3 Close the lid.
,continued
Getting started
21
b Notes
• If you force the “Memory Stick” into the “Memory
Stick” slot in the wrong direction, the “Memory
Stick” slot may be damaged.
• Do not insert anything other than a “Memory Stick”
into the “Memory Stick” slot. Doing so may cause a
malfunction of your camcorder.
• When the access lamp is lit or flashing, your
camcorder is reading/writing data from/to the
“Memory Stick.” Do not shake or knock your
camcorder, turn the power off, eject the “Memory
Stick,” or remove the battery pack. Otherwise,
image data may be damaged.
Step 7: Setting the
screen language
You can select the language to be used on the
LCD screen.
POWER switch
OPEN
1
Turn on your camcorder.
2
Press OPEN to open the LCD panel.
3
Touch
60min
1/3
4
.
STBY
MENU
EXPO–
SURE
FADER
SPOT
FOCUS
SPOT
METER
PRGRAM
AE
0:00:00
Touch [LANGUAGE].
If the item is not displayed on the screen,
touch
/
. If you cannot find it, touch
[MENU], and select it from the
(TIME/LANGU.) menu. (p. 82)
60min
LANGUAGE:
0:00:00
STBY
ENGLISH
DEU
TSCH
ΕΛΛΗ
ΝΙΚΑ
ENG
LISH
ENG
[SIMP]
1/4
22
Getting started
5
Select the desired language with
, then touch
.
/
z Tip
• Your camcorder offers [ENG[SIMP]](simplified
English) for when you cannot find your native
tongue among the options.
Getting started
Getting started
23
Recording
3
Recording movies
To record on a tape
Slide the POWER switch until the
CAMERA-TAPE lamp lights up, and your
camcorder is set to the standby mode.
You can record movies on a tape or a
“Memory Stick.”
Before recording, follow steps 1 to 7 in
“Getting started” (p. 13 - p. 22).
When you are recording on a tape, movies
will be recorded along with stereo sound.
When you are recording on a “Memory
Stick,” the movie will be recorded with
monaural sound.
Slide the POWER
switch while
pressing the green
button.
To record on a “Memory Stick” –
MPEG MOVIE EX
Slide the POWER switch repeatedly until
the CAMERA-MEMORY lamp lights up,
and the currently selected recording folder
appears on the screen.
Camera recording lamp
OPEN
REC START/STOP
1
Slide the POWER
switch while
pressing the green
button.
POWER switch
z Tip
• Performing Easy Handycam operation, even first
time users can record easily. For details,see page 33.
Remove the lens cap. Pull the lens cap
string down and attach it to the grip
belt.
Select the recording mode.
4
Press REC START/STOP.
Recording starts. [REC] appears on the
LCD screen and the Camera recording lamp
lights up.
Press REC START/STOP again to stop
recording.
To check the most recently recorded
MPEG movie
– Review
Touch
. Playback starts automatically.
Touch
again to return to standby.
To delete the movie, touch
after playback
is finished, then [YES].
To cancel deleting, touch [NO].
2
24
Press OPEN and open the LCD panel.
Recording
To turn the power off
Slide the POWER switch up to (CHG) OFF.
b Note
• While recording movies on a “Memory Stick,” the
only menu items available will be those with short
cuts on the Personal Menu. In order to use other
menu items, add them to the Personal Menu.
z Tip
• If you do not use your camcorder for a long time,
remove the cassette and store it.
Indicators displayed during recording
on a tape
Indicators displayed during recording
on a “Memory Stick”
The indicators will not be recorded on the
“Memory Stick.”
Date/time (p. 54) will not be displayed during
recording.
60min
REC
101
0:00:00
320 2min
The indicators will not be recorded on the tape.
Date/time and the camera settings data (p. 54)
will not be displayed during recording.
Recording
P-MENU
60min
REC
0:00:00
A Recording folder
P-MENU
B Remaining battery
The indicated time may not be correct
depending on the environment of use.
When you opened or closed the LCD panel,
it takes about 1 minute to display the correct
remaining battery time.
A Remaining battery
The indicated time may not be correct
depending on the environment of use.
When you opened or closed the LCD panel,
it takes about 1 minute to display the correct
remaining battery time.
C Recording status ([REC] (recording))
B Recording mode (SP or LP)
G “Memory Stick” recording start
indicator (appears for about 5 seconds)
C Format indicator
D Recording status ([STBY] (standby) or
[REC] (recording))
E Time code or tape counter
(hour: minute: second)
F Recording capacity of the tape
Displayed after you run the tape for a while.
G Personal Menu button (p. 59)
H END SEARCH/EDIT SEARCH/Rec
review display switch button (p. 44)
D Movie size
E Recorded time (hour: minute: second)
F Recording capacity of the “Memory
Stick”
H Personal Menu button (p. 59)
I Review button (p. 24)
b Notes
• Before changing the battery pack, slide the POWER
switch up to (CHG) OFF.
• In the default setting, when you do not operate the
camcorder for more than about 5 minutes, the power
will automatically turn off to prevent battery loss
([A.SHUT OFF], p. 81). To restart recording, slide
the POWER switch down to select CAMERATAPE or CAMERA-MEMORY, and then press
REC START/STOP.
,continued
Recording
25
z Tips
• To ensure smooth transition on a tape from the last
recorded scene to the next, note the following.
– Do not remove the cassette. (The picture will be
recorded continuously without a break even when
you turn the power off).
– Do not record pictures in SP mode and LP mode on
the same tape.
– Avoid stopping then recording a movie in the LP
mode.
• See “To record for a longer time on a “Memory
Stick”” (p. 26) for the approximate length of time it
is possible to record on a “Memory Stick” of
different capacities.
• The recording time, date, and the camera settings data
(for tape only) are recorded automatically on the
recording media without being displayed on the screen.
You can view this information during playback by
selecting [DATA CODE] in the menu setting (p. 54).
Image size and time (hour: minute: second)
[320 × 240]
[160 × 112]
8MB*
00:01:20
00:05:20
16MB
00:02:40
00:10:40
32MB
00:05:20
00:21:20
64MB
00:10:40
00:42:40
128MB
00:21:20
01:25:20
256MB
(MSX-256)
00:42:40
02:50:40
512MB
(MSX-512)
01:25:20
05:41:20
1GB
(MSX-1G)
02:50:40
11:22:40
* Supplied with DCR-TRV461E only.
Recording for a longer time
Using zoom
To record for a longer time on a tape
In the
(STANDARD SET) menu, select
[
REC MODE], then [LP] (p. 76).
In the LP mode, you can record 1.5 times longer
than you can when recording in the SP mode.
A tape recorded in the LP mode should be
played back only on this camcorder.
To record for a longer time on a
“Memory Stick”
When the CAMERA-TAPE mode is
selected, you can choose zoom to
magnification levels greater than 20 times,
and from that point activate the digital zoom
([DIGITAL ZOOM], p. 63).
Occasional use of the zoom is effective, but
use it sparingly for best results.
In the
(MEMORY SET) menu, select
[MOVIE SET], [ IMAGE SIZE], then [160 ×
112] (p. 65).
The length of time you can record on a
“Memory Stick” varies depending on the image
size and the recording environment.
Refer to the following list for approximate
length of time you can record movies on a
“Memory Stick” formatted on your camcorder.
1 cm (approx.
1/2 inch)*
80 cm (approx.
2 5/8 feet)*
* The minimum distance required between your
camcorder and the subject to get a sharp focus in
that position of the lever.
26
Recording
Move the power zoom lever slightly for a
slower zoom. Move it further for a faster
zoom.
To record wider range of view
Move the power zoom lever towards W.
The subject appears farther away (Wide
angle).
To record closer view
Move the power zoom lever towards T.
The subject appears closer (Telephoto).
You can use the built-in light to suit your
shooting situation. The recommended
distance between the subject and camcorder
is about 1.5 m (5 feet).
Built-in light
LIGHT
Press LIGHT repeatedly to select a setting.
The settings are displayed cyclically in the
following order.
No indicator displayed: Always records
without using the built-in light.
m
: Automatically turns on and off
according to the ambient brightness.
m
: Always turns on.
To turn off the built-in light
Press LIGHT repeatedly until no indicator
appears on the screen.
,continued
Recording
27
Recording
Using the built-in light
b Notes
• The built-in video light emits very bright light,
which is perfectly safe in normal use. However,
avoid directly aiming the light at a subject’s eyes
from very close range.
• The battery pack discharges quickly while the builtin light is turned on.
• When you do not use your camcorder, turn the builtin light off and remove the battery pack to avoid
turning on the built-in light accidentally.
• When flickering occurs while shooting in the
mode, press LIGHT until
appears.
• The built-in light may turn on/off when you use the
[PROGRAM AE] or backlight function while
shooting in the
mode.
• The built-in light is turned off in the following cases:
– While the END SEARCH function is working.
– Interval time of Interval recording.
– When you leave it on for more than 5 minutes with
the POWER switch set to CAMERA-MEMORY.
– When it stays on in the
mode for more
than 5 minutes.
– When you leave it on for more than 5 minutes with
no cassette inserted or after the tape has run out.
• When you use the conversion lens (optional), light
from the built-in light is blocked and may not
illuminate the subject properly.
Recording in mirror mode
You can turn the LCD panel towards the
subject so that you and your subject can share
the image being recorded. You can also
utilize this function when recording yourself,
to keep the attention of small children
attracted to the camcorder while you record
them.
Using the self-timer
With the self-timer, you can start recording
after a delay of about 10 seconds.
REC START/STOP
REC START/STOP
Open the LCD panel 90 degrees to the
camcorder, then rotate it 180 degrees
towards the subject.
1
Touch
2
Touch [SELF-TIMER].
.
If the item is not displayed on the screen,
touch
/
. If you cannot find it, touch
[MENU], and select it from the
(CAMERA SET) menu.
A mirror-image of the subject appears on the
LCD screen, but the picture will be normal
when recorded.
60min
SELF–TIMER:
STBY
OFF
OFF
3
0:00:00
ON
Touch [ON], then
appears.
60min
STBY
0:00:00
P-MENU
28
Recording
.
4
Press REC START/STOP.
You will hear a beep sound counting down
for about 10 seconds (The count down
indication begins from 8).
The recording starts.
To stop recording, press REC START/
STOP.
To cancel the count down
Recording still
images
– Memory photo
recording
You can record still images on a “Memory
Stick.” Before recording, follow steps 1 to 7
in “Getting started” (p. 13 - p. 22).
Touch [RESET] or press REC START/STOP.
OPEN
PHOTO
To cancel the self-timer
Recording
Follow steps 1 and 2, then select [OFF] in step
3.
POWER switch
z Tip
• Performing Easy Handycam operation, even first
time users can record easily. For details, see page 33.
1
Remove the lens cap. Pull the lens cap
string down and attach it to the grip
belt.
2
Press OPEN and open the LCD panel.
,continued
Recording
29
3
Slide the POWER switch repeatedly
until the CAMERA-MEMORY lamp
lights up.
The selected recording folder is displayed.
Slide the POWER
switch while pressing
the green button.
To record moving subjects correcting
jitter - FIELD/FRAME
Select the
(MEMORY SET) menu,
[STILL SET], then [ FLD/FRAME].
Your camcorder compensates for camera-shake
when recording moving subjects in the [FIELD]
mode. Your camcorder records in high quality
in the [FRAME] mode (p. 65).
Indicators displayed during recording
60min
4
FINE
101
Press and hold PHOTO lightly.
You will hear a light beeping sound when
the focus and brightness settings are
adjusted. Recording does not start at this
point.
P-MENU
The indicator
stops flashing.
The number of images
that can be recorded.*
60min
20
FINE
101
A Recording folder
B Quality
([FINE]) or
([STANDARD])
C Personal Menu button (p. 59)
D Review button (p. 30)
P-MENU
* The number of images that can be recorded
varies depending on the image quality setting
and the recording environment.
5
Press PHOTO fully.
A shutter sound is heard. When bars of
disappears, the image is recorded
on the “Memory Stick.”
To check the most recently recorded
image – Review
Touch
.
Touch
to return to standby.
To delete the image, touch
, then [YES].
To cancel deleting, touch [NO].
To turn the power off
Slide the POWER switch up to (CHG) OFF.
30
Recording
b Notes
• When recording fast-moving subjects in the
[FRAME] mode, the recorded image appears blurry.
• When recording in the [FRAME] mode, your
camcorder may not correct camera-shake. We
recommend that you shoot objects with a tripod.
z Tips
• When you press PHOTO on your Remote
Commander, the image displayed on the screen at
that timing is recorded.
• The recording time, date, and the camera settings
data are recorded automatically on the recording
media without being displayed on the screen. You
can view this information during playback by
selecting [DATA CODE] in the menu setting
(p. 54).
Selecting image quality
Select the
(MEMORY SET) menu,
[STILL SET], then [ QUALITY] (p. 65).
The number of pictures you can record on a
“Memory Stick” varies depending on the
quality of the image and the recording
environment.
Using the self-timer
With the self-timer, you can record a still
image after a delay of about 10 seconds.
PHOTO
PHOTO
Recording
Refer to the following list for the approximate
number of pictures that can be recorded on a
“Memory Stick” formatted on your camcorder.
Image quality and number of images
The image size of [FINE] is about 150 kB, that
of [STANDARD] is about 60 kB.
[FINE]
[STANDARD]
8MB*
50
120
16MB
96
240
32MB
190
485
64MB
390
980
128MB
780
1970
256MB
(MSX-256)
1400
3550
512MB
(MSX-512)
2850
7200
1GB (MSX-1G)
5900
14500
1
Touch
2
Touch [SELF-TIMER].
.
If the item is not displayed on the screen,
touch
/
. If you cannot find it, touch
[MENU] and select it from the
(CAMERA SET) menu.
60min
SELF–TIMER:
* Supplied with DCR-TRV461E only.
20
FINE
OFF
OFF
ON
z Tip
• The still image size is 640 × 480 dots only.
3
Touch [ON], then
.
appears.
60min
FINE
20
101
P-MENU
,continued
Recording
31
4
Press PHOTO.
You will hear a beep sound counting down
for about 10 seconds (The count down
indication begins from 8).
The image is recorded. When bars of
disappears, the image is recorded
on the “Memory Stick.”
Recording a still image on a
“Memory Stick” while recording
movies on a tape
You can record still images on a “Memory
Stick.” Before recording, follow steps 1 to 7
in “Getting started” (p. 13 - p. 22).
To cancel the count down
Touch [RESET].
To cancel the self-timer
Follow steps 1 and 2, then select [OFF] in step
3.
PHOTO
Press PHOTO fully during tape recording.
Recording is
complete when the
scrolling stops.
To record still images in standby mode
Press and hold PHOTO lightly. Check the
image and press it fully.
b Notes
• You cannot record a still image on a “Memory
Stick” during the following operations:
– [16:9 WIDE] mode
– Memory overlap
– MEMORY MIX function
• Titles are not recorded on a “Memory Stick.”
32
Recording
Recording with ease
3
Slide the POWER switch until the
CAMERA-TAPE lamp lights up.
– Easy Handycam
With this Easy Handycam operation, most of
the camera settings are set to automatic
mode, only basic functions become available,
and screen font size increases for easy
viewing. Even first time users can enjoy easy
recording. Before recording, follow steps 1 to
7 in “Getting started” (p. 13 - p. 22)
POWER switch
4
Press EASY.
Recording
Camera recording lamp
Slide the POWER
switch while
pressing the green
button.
The EASY lights up in blue.
Lens cap
EASY
PHOTO
Easy Handycam
operation
ON
5
OPEN
REC START/STOP
Recording a movie
Press REC START/STOP.
Recording starts. [REC] appears on the
LCD screen and the Camera recording lamp
lights up. Press REC START/STOP again
to stop recording.
To turn the power off
Slide the POWER switch up to the (CHG) OFF
position.
During Easy Handycam operation, you can
record movies on a tape only. To record movies
on a “Memory Stick,” see page 24 (MPEG
MOVIE EX).
1
Remove the lens cap. Pull the lens cap
string down and attach it to the grip
belt.
2
Press OPEN and open the LCD panel.
To cancel Easy Handycam operation
Press EASY again.
b Notes
• You cannot turn Easy Handycam operation on or off
during:
– Recording
– USB Streaming
• During Easy Handycam operation, BACK LIGHT
(p. 35) is not available.
• During Easy Handycam operation, the settings of the
functions that are not displayed on the screen return
to their defaults. Previously made settings are
restored when you cancel Easy Handycam
operation.
,continued
Recording
33
Recording a still image
1
Remove the lens cap. Pull the lens cap
string down and attach it to the grip
belt.
2
Press OPEN and open the LCD panel.
3
Slide the POWER switch repeatedly
until the CAMERA-MEMORY lamp
lights up.
• During Easy Handycam operation, the settings of the
functions that are not displayed on the screen return
to their defaults. Previously made settings are
restored when you cancel the Easy Handycam
operation.
Making full use of Easy Handycam
operation
1
Touch [MENU].
The available menu items are displayed on
the screen.
Example: In the CAMERA-MEMORY mode
60min
20
SELFTIMER
BEEP
Slide the POWER
switch while
pressing the green
button.
4
Press EASY.
The EASY lights up in blue.
5
Press and hold PHOTO lightly to
adjust focus, then press fully.
A shutter sound is heard. When bars of
disappear, the image is recorded on
the “Memory Stick.”
To turn the power off
Slide the POWER switch up to the (CHG) OFF
position.
To cancel Easy Handycam operation
Press EASY again.
b Note
• You cannot turn Easy Handycam operation on or off
during recording.
• During Easy Handycam operation, BACK LIGHT
(p. 35) is not available.
34
Recording
CLOCK
SET
LANGUAGE
2
Touch the desired item.
3
Select the desired setting.
For [CLOCK SET]
1 Set [Y] (year) with
/
, then touch
.
2 Set [M] (month), [D] (day), hour and
minutes in the same way as [Y] (year),
then touch
.
For [LANGUAGE]
Select the desired language with
then touch
.
/
,
For [BEEP]
See page 80.
For [SELF-TIMER] (In the CAMERAMEMORY mode only)
Touch [ON], then
. Press PHOTO fully.
You will hear a beep sound counting down
for about 10 seconds. When the bars of
disappear, the image is recorded on
the “Memory Stick.”
Adjusting the
exposure
The exposure is adjusted automatically in the
default setting.
Adjusting the exposure for backlit
subjects
You can adjust and fix the exposure to the
subject, so that it is recorded in suitable
brightness even when there is strong contrast
between the subject and the background
(such as subjects in the limelight on stage).
1
Touch
during recording or in
the standby mode.
2
Touch [SPOT METER].
If the item is not displayed on the screen,
touch
/
. If you cannot find it, touch
[MENU], and select it from the
(CAMERA SET) menu.
SPOT METER
STBY
AUTO
BACK LIGHT
Recording
When your subject has its back to the sun or
other light, you can adjust the exposure to
prevent the subject from becoming
shadowed.
Fixing the exposure for the
selected subject – Flexible spot
meter
3
0:00:00
END
Touch the point you want to adjust and
fix the exposure on the screen.
[SPOT METER] flashes while the camera
is adjusted the exposure for the selected
point.
Press BACK LIGHT during recording or
in the standby mode.
. appears.
SPOT METER
STBY
0:00:00
To cancel the back light function, press BACK
LIGHT again.
b Note
• The back light function is canceled when you set
[EXPOSURE] to [MANUAL] (p. 36) or select
[SPOT METER] (p. 35).
AUTO
4
END
Touch [END].
To return the setting to automatic
exposure
Follow steps 1 and 2, then select [AUTO] in
step 3. Or set [EXPOSURE] to [AUTO] (p. 36).
,continued
Recording
35
b Notes
• You cannot use the Flexible spot meter together
with:
– Color Slow Shutter function
– NightShot plus function
• If you set [PROGRAM AE], [SPOT METER] is
automatically set to [AUTO].
z Tip
• If you set [SPOT METER], [EXPOSURE] is
automatically set to [MANUAL].
Adjusting the exposure manually
4
Adjust the exposure by touching
(dim)/
(bright), then touch
60min
STBY
.
0:00:00
P-MENU
To return the setting to automatic exposure
Follow steps 1 and 2, then select [AUTO] in step 3.
You can fix the brightness of a picture at the
best exposure. When recording indoors on a
clear day, for instance, you can avoid
backlight shadows on people next to the
window by manually fixing the exposure to
that of the wall side of the room.
1
Touch
during recording or in
the standby mode.
2
Touch [EXPOSURE].
If the item is not displayed on the screen,
touch
/
. If you cannot find it, touch
[MENU], and select it from the
(CAMERA SET) menu.
60min
EXPOSURE:
AUTO
3
STBY
AUTO
0:00:00
MANUAL
Touch [MANUAL].
60min
EXPOSURE:
AUTO
STBY
0:00:00
MANUAL
MANUAL
OK
36
Recording
Recording in dark
places – NightShot plus, etc.
NIGHTSHOT PLUS
OFF
ON
ON.
and [“NIGHTSHOT PLUS”] appear.
3 Touch
.
4 Touch [SUPER NSPLUS].
If the item is not displayed on the screen,
touch
/
. If you cannot find it, touch
[MENU], and select it from the
(CAMERA SET) menu.
5 Touch [ON], then
.
appears.
To cancel Super NightShot plus, follow
steps 3 and 4, then select [OFF] in step 5.
Or, set the NIGHTSHOT PLUS switch to
OFF.
Recording
You can record subjects in dark places (such
as when capturing the face of your baby
sleeping) with the NightShot plus, Super
NightShot plus or Color Slow Shutter
function.
The NightShot plus and Super NightShot
plus function enable you to record an image
brighter and smoother.
The Color Slow Shutter function enables you
to record an image more faithful to the
original colors.
2 Set the NIGHTSHOT PLUS switch to
To record a clearer picture in color on
the tape
– Color Slow Shutter
1 Slide the POWER switch to select the
CAMERA-TAPE mode.
2 Make sure the NIGHTSHOT PLUS
switch is set to OFF.
3 Touch
.
4 Touch [COLOR SLOW S].
If the item is not displayed on the screen,
touch
/
. If you cannot find it, touch
[MENU], and select it from the
(CAMERA SET) menu.
5 Touch [ON], then
Set the NIGHTSHOT PLUS switch to ON.
and [“NIGHTSHOT PLUS”] appear.
To cancel NightShot plus, set the NIGHTSHOT
PLUS switch to OFF.
To record higher sensitivity pictures on
the tape
– Super NightShot plus
The Super NightShot plus function enables you
to use the NightShot plus function more
effectively.
The picture will be recorded at a maximum of
16 times the sensitivity of NightShot plus
recording.
1 Slide the POWER switch to select the
.
appears.
To cancel Color Slow Shutter, follow steps
3 and 4, then select [OFF] in step 5.
b Notes
• Do not use the NightShot plus/Super NightShot plus
function in bright places. This may cause a
malfunction.
• The Color Slow Shutter function may not operate
correctly in total darkness. When you are recording
in a place with no light at all, use the NightShot plus
or Super NightShot plus functions.
• You cannot use the Super NightShot plus/Color
Slow Shutter function together with:
– FADER function
– Digital effect
– [PROGRAM AE]
• You cannot use the Color Slow Shutter function
together with:
– Manual exposure
– Flexible spot meter
CAMERA-TAPE mode.
,continued
Recording
37
• When using the Super NightShot plus or Color Slow
Shutter function, the shutter speed of your
camcorder changes depending on the brightness.
The motion of the picture may slow down at this
time.
• Adjust the focus manually when it is hard to focus
automatically.
• Do not cover the infrared port with your fingers or
other objects. Remove the conversion lens (optional)
if it is attached.
• Depending on the shooting conditions or
circumstances, colors may not be reproduced
properly.
z Tip
• If you record subjects in complete darkness, setting
[NS LIGHT] to [ON] on the menu is recommended.
The maximum shooting distance using the
NightShot Light is about 3 m (10 feet).
(The default setting is [ON])
If you record subjects in dark places (such as night
scene or in moonlight), set [NS LIGHT] to [OFF] on
the menu. You can make image color deeper (p. 62).
Adjusting the focus
The focus is adjusted automatically in the
default setting.
Adjusting the focus for an offcenter subject – SPOT FOCUS
You can select and adjust the focal point to
aim it at a subject not located in the center of
the screen.
1
Touch
during recording or in
the standby mode.
2
Touch [SPOT FOCUS].
If the item is not displayed on the screen,
touch
/
. If you cannot find it, touch
[MENU], and select it from the
(CAMERA SET) menu.
SPOT FOCUS
STBY
0:00:00
AUTO
3
END
Touch the subject for which you want
to adjust the focus on the screen.
[SPOT FOCUS] flashes while the camera is
adjusting the focus. 9 appears.
SPOT FOCUS
STBY
0:00:00
AUTO
4
38
Recording
Touch [END].
END
To adjust the focus automatically
If the item is not displayed on the screen,
touch
/
. If you cannot find it, touch
[MENU], and select it from the
(CAMERA SET) menu.
Follow steps 1 and 2, then touch [AUTO] in step
3. Or set [FOCUS] to [AUTO] (p. 39).
b Note
• You cannot use the SPOT FOCUS function together
with [PROGRAM AE].
60min
FOCUS:
z Tip
• If you set [SPOT FOCUS], [FOCUS] is
automatically set to [MANUAL].
Adjusting the focus manually
STBY
AUTO
AUTO
3
0:00:00
MANUAL
Touch [MANUAL].
You can adjust the focus manually according
to the recording conditions.
Use this function in the following cases.
4
Touch
or
Recording
appears.
to sharpen focus.
: To focus on close subjects.
: To focus on distant subjects.
9 changes to
when the focus cannot be
adjusted any further. 9 changes to
when the focus cannot be adjusted any
closer.
– To record a subject behind a window covered
with raindrops.
– To record horizontal stripes.
– To record a subject with little contrast
between the subject and its background.
– When you want to focus on a subject in the
background.
60min
FOCUS:
STBY
0:00:00
MANUAL
AUTO
MANUAL
OK
Tips for focusing manually
• It is easier to focus on the subject when
you use the zoom function. Move the
power zoom lever towards T (telephoto)
to adjust the focus, and then, towards W
(wide angle) to adjust the zoom for
recording.
• When you want to record a close-up
image of a subject, move the power zoom
lever towards W (wide angle) to fully
magnify the image, then adjust the focus.
– To record a stationary subject using a tripod.
1
Touch
during recording or in
the standby mode.
2
Touch [FOCUS].
5
Touch
.
To adjust the focus automatically
Follow steps 1 and 2, then touch [AUTO] in
step 3.
Recording
39
Recording a picture
using various effects
[OVERLAP] (fade in only)
[WIPE] (fade in only)
[DOT FADER] (fade in only)
POWER switch
Fading in and out of a scene
– FADER
You can add the following effects to
currently recording pictures.
1
Slide the POWER switch to select the
CAMERA-TAPE mode.
2
Touch
in the standby mode (to
fade in) or during recording (to fade
out).
3
Touch [FADER].
[BLACK FADER]
If the item is not displayed on the screen,
touch
/
. If you cannot find it, touch
[MENU], and select it from the
(PICT.
APPLI.) menu.
60min
FADER:
STBY
OFF
[WHITE FADER]
OFF
BLACK
FADER
WHITE
FADER
MOSAIC
FADER
0:00:00
1/2
[MOSAIC FADER]
4
Touch the desired effect, then touch
.
When you touch [OVERLAP], [WIPE] and
[DOT FADER], the image on the tape in
your camcorder is stored as a still image.
[MONOTONE]
When fading in, the picture gradually changes
from black-and-white to color.
When fading out, the picture gradually changes
from color to black-and-white.
40
Recording
(While storing the image, the screen turns to
blue.)
60min
STBY
0:00:00
BLACK
FADER
5 Select
(PICT. APPLI.), then
[
OVERLAP] by touching
/
and touch
.
The recorded image appears on the
thumbnail screen.
6 Touch
(previous) /
(next) to
select the still image to be superimposed.
P-MENU
5
Press REC START/STOP.
The fader indicator stops flashing and
disappears when the fade is complete.
7 Touch [ON], then
.
8 Touch
.
9 Press REC START/STOP to start
recording.
[M. OVRLAP] stops flashing, and
disappears when fading is finished.
Recording
To cancel the operation
Follow steps 2 and 3, then touch [OFF] in step 4.
b Notes
• The OVERLAP, WIPE and DOT FADER functions
do not work with tapes recorded on other devices in
the Hi8
/standard 8 mm
system.
• The title does not fade in or fade out. Erase it before
operating the FADER function if it is not needed.
• You cannot use the FADER function together with:
– Super NightShot plus function
– Color Slow Shutter function
– Digital effect
– [INTERVAL REC] (Interval recording)
– [FRAME REC] (Frame recording)
– Self-timer
Fading in from still image on the
“Memory Stick” – Memory overlap
You can fade in from the still image on the
“Memory Stick” to the movie currently being
recorded on the tape.
Still image
Movie
Using special effects
effect
– Digital
You can add digital effects to the recordings.
[STILL]
You can record a movie while superimposing it
on a previously recorded still image.
[FLASH] (flash motion)
You can record a movie with a serial-still-image
effect (strobe effect).
[LUMI. KEY] (luminance key)
You can replace a brighter area in a previously
recorded still image, such as the background of
a person or a title written on white paper, with a
movie.
1 Check that you have a “Memory Stick”
with the still image to be superimposed
and a tape in your camcorder.
2 Slide the POWER switch to select the
CAMERA-TAPE mode.
3 Touch
.
4 Touch [MENU].
[TRAIL]
You can record a picture so that an incidental
image like a trail is left.
,continued
Recording
41
[SLOW SHUTTR] (slow shutter)
You can slow down the shutter speed. This
mode is suitable for shooting a subject more
clearly in a dark place.
[OLD MOVIE]
You can add an old movie-type atmosphere to
pictures. Your camcorder automatically records
pictures in the letterbox mode for all screen size,
sepia in color, and at a slower shutter speed.
1
Slide the POWER switch to select the
CAMERA-TAPE mode.
2
Touch
3
.
Touch [D.EFFECT].
STBY
OFF
OFF
STILL
FLASH
LUMI.
KEY
0:00:00
Items to adjust
[STILL]
The degree of transparency
of the still image you want
to superimpose on a
movie.
[FLASH]
The interval of frame-byframe playback.
[LUMI. KEY]
The color scheme of the
area in the still image
which is to be swapped
with a movie.
[TRAIL]
The fade time of the
incidental image.
[SLOW
SHUTTR]*
Shutter speed (1 is 1/25, 2
is 1/12, 3 is 1/6, 4 is 1/3).
[OLD MOVIE]
No adjustment necessary.
* It is hard to adjust the focus automatically when
you choose this effect. Adjust the focus
manually using a tripod to steady the
camcorder.
If the item is not displayed on the screen,
touch
/
. If you cannot find it, touch
[MENU], and select it from the
(PICT.
APPLI.) menu.
60min
D. EFFECT:
Effect
5
Touch
.
appears.
1/2
To cancel Digital effect
Follow steps 2 and 3, then select [OFF] in step
4.
4
Touch the desired effect, then adjust
the effect by touching
(decrease) /
(increase) and touch
.
Adjustment screen example:
60min
D. EFFECT:
STBY
STILL
0:00:00
OK
When you touch [STILL] or [LUMI. KEY],
the image displayed on the screen at that
time is saved as a still image.
42
Recording
b Notes
• You cannot use Digital effect together with:
– Super NightShot plus function
– Color Slow Shutter function
– FADER function
– Memory overlap
– MEMORY MIX function
• You cannot use [SLOW SHUTTR]/[OLD MOVIE]
together with [PROGRAM AE] (except [AUTO]).
• You cannot use [OLD MOVIE] together with:
– [16:9 WIDE] mode
– Picture effect ([PICT. EFFECT])
z Tip
• You can create a picture with color and brightness
reversed or a picture that looks like a pastel drawing
while recording on a tape. For details, refer to the
Picture effect ([PICT. EFFECT], p. 68).
Overlaying still images on movies
on a tape – MEMORY MIX
You can superimpose a still image you have
recorded on a “Memory Stick” over the
movie you are currently recording on a tape.
You can then record the superimposed
pictures on a tape or a “Memory Stick.” (You
cannot superimpose a still image on a tape
which you have already finished recording.)
Still image
Check that you have a “Memory
Stick” with the still image to be
superimposed and a tape (only if you
are recording on tape) in your
camcorder.
2
Slide the POWER switch repeatedly to
select the CAMERA-TAPE mode
(when you are recording on a tape) or
the CAMERA-MEMORY mode
(when you are recording on a
“Memory Stick”).
3
Touch
4
Touch [MEMORY MIX].
Recording
[MTCAM LUMI.] (Memory Luminance
key)
You can swap the brighter (white) area of a still
image into a movie. To use this function, have a
still image of an illustration or title handwritten
on white paper recorded on a “Memory Stick”
beforehand.
1
.
If the item is not displayed on the screen,
touch
/
. If you cannot find it, touch
[MENU], and select it from the
(PICT.
APPLI.) menu.
The still image stored in the “Memory
Stick” will be displayed on the thumbnail
screen.
Movie
[CAMTM CHROMA] (Camera Chroma
key)
You can superimpose a movie on top of a still
image, such as an image which can be used as
background. Shoot the movie with the subject
against a blue background. Only the blue area of
the movie will be swapped with the still image.
Thumbnail screen
60min
MEMORY MIX:
STBY
OFF
OFF
CAM M
101
101–0001 CHROMA
0:00:00
M CAM
LUMI.
M CAM
CHROMA
OK
Still image
Movie
5
Touch
/
to select the still
image to overlap.
6
Touch the desired effect.
Blue
[MTCAM CHROMA] (Memory Chroma
key)
You can have the movie swap into the blue area
of a still image such as an illustration or into a
frame with a blue area enclosed by the frame.
Still image
Movie
The still image is superimposed on the
movie which is currently displayed on the
LCD screen.
60min
MEMORY MIX:
0:00:00
STBY
CAM M CHROMA
101
101–0001
OK
Blue
,continued
Recording
43
7
Touch
(decrease)/
to adjust the following.
(increase)
For [MTCAM LUMI.]
The color scheme of the bright area in the
still image which is to be swapped into a
movie. When you want to record only the
still image stored on the “Memory Stick” to
a tape, touch
on the screen in
[MTCAM LUMI.] until the bar indicator
is extended fully to the right side.
Searching for the
starting point
For [CAMTM CHROMA]
The color scheme of the blue area in the
movie.
For [MTCAM CHROMA]
The color scheme of the blue area in the still
image which is to be swapped into a movie.
8
Touch
twice.
appears.
9
Start recording.
When you are recording on a tape
Press REC START/STOP.
When you are recording on a
“Memory Stick”
Press PHOTO fully.
POWER switch
Searching for the last scene of the
most recent recording
– END SEARCH
This function is handy when you have played
back the tape, for example, but want to start
recording right after the most recently
recorded scene. The END SEARCH function
will not work once you eject the cassette after
you have recorded on the tape.
1
Slide the POWER switch repeatedly to
select the CAMERA-TAPE mode.
2
Touch
To cancel MEMORY MIX
Follow steps 1 to 4, then touch [OFF] in step 5.
b Notes
• When the overlapping still image has a large amount
of white, the image in the thumbnail screen may not
be clear.
• When you use the MEMORY MIX function in the
mirror mode (p. 28), the picture on the LCD screen
appears normally, without being mirror-reversed.
• You may not be able to play back pictures modified
on your computer or recorded with other camcorders
on your camcorder.
z Tip
• The supplied SPVD-012 USB Driver CD-ROM
contains sample images for use in MEMORY MIX
operations. Refer to the supplied “Computer
Applications Guide” for details.
44
Recording
60min
.
STBY
0:00:00
EDIT
3
Touch
.
The last scene of the most recent recording
is played back for about 5 seconds, and the
camcorder enters the standby mode at the
point where the last recording has finished.
To cancel the operation
Touch [CANCEL].
b Notes
• The END SEARCH function will not work correctly
when there is a blank section between recorded
sections on the tape.
• The END SEARCH function does not work for the
tapes recorded on other devices in the Hi8
/
standard 8 mm
system.
You can view a few seconds of the scene
recorded just before you stopped the tape.
1
Slide the POWER switch repeatedly to
select the CAMERA-TAPE mode.
2
Touch
60min
.
STBY
Recording
z Tip
• You can do this operation also by selecting [END
SEARCH] in the menu setting. When PLAY/EDIT
mode is selected, you can do this operation by
selecting [END SEARCH] short-cut on
.
(p. 59)
Reviewing the most recently
recorded scenes – Rec review
0:00:00
Searching manually – EDIT
SEARCH
EDIT
You can search for the start point while
viewing the pictures on the screen. The sound
is not played back during the search.
1
2
Slide the POWER switch to select the
CAMERA-TAPE mode.
Touch
60min
Touch
once.
The last few seconds of the most recently
recorded scene are played back. Then, your
camcorder is set to the standby mode.
b Note
• The Rec review function does not work for the tapes
recorded on other devices in the Hi8
/standard
8 mm
system.
.
STBY
3
0:00:00
EDIT
3
Keep touching
(to go
backward)/
(to go forward) and
release it at the point where you want
the recording to start.
b Note
• The EDIT SEARCH function does not work for the
tapes recorded on other devices in the Hi8
/
standard 8 mm
system.
Recording
45
Playback
3
Viewing movies
recorded on a tape
Make sure you have a recorded cassette
inserted into your camcorder.
Some of the operations are possible using the
Remote Commander or using the touch
panel.
When you want to play back recordings on
your TV, see page 56.
Touch
(rewind) to go to the point
you want to view.
60min
0:00:00:00
P-MENU
4
Touch
(play) to start playback.
To adjust the volume
1 Touch
.
2 Touch [VOLUME].
If the item is not displayed on the screen,
touch
/
. If you cannot find it, touch
[MENU], and select it from the
(STANDARD SET) menu.
3 Adjust the volume by touching
OPEN
POWER switch
(decrease) /
.
(increase), then touch
To stop playback
z Tip
• Performing Easy Handycam operation, even first
time users can play back easily. For details, see
page 51.
1
Press OPEN and open the LCD panel.
2
Slide the POWER switch repeatedly to
select the PLAY/EDIT mode.
Slide the POWER
switch while
pressing the green
button.
46
Playback
Touch
(stop).
To pause
Touch
(pause) during playback. Touch it
again to restart the playback.
Playback stops automatically when the pause
mode continues for more than certain period.
To fast forward or rewind
Touch
(fast forward) or
stop mode.
(rewind) in
To review movies on the viewfinder
Close the LCD panel.
Indicators displayed during tape
playback
60min
0:00:00:15
To play back in various modes
You will not hear the recorded sound. Also, you
may see mosaic-like images of the previously
played picture remaining on the screen when
playing back in the Digital8
system.
Noise may appear when your camcorder plays
back tapes recorded on other devices in the Hi8
/standard 8 mm
system.
1 During playback or playback pause,
touch
P-MENU
A Remaining battery
B Recording mode (SP or LP)
D Time code (hour: minute: second: frame)
or tape counter (hour: minute: second)
2 Touch [
VAR. SPD PB].
If the item is not displayed on the screen,
touch
/
. If you cannot find it, touch
[MENU], and select it from the
(EDIT/PLAY) menu.
3 Select a playback mode.
To return to the normal playback mode,
touch
(play/pause) twice (once from
frame playback).
E Personal Menu button (p. 59)
To
Touch
F Video operation buttons
When a “Memory Stick” has been inserted,
(stop) changes to
(“Memory
Stick” playback) when you stop playback.
change the
playback
direction*
(frame) during
playback.
play back
slowly**
(slow) during
playback.
To reverse direction
1 Touch
(frame).
2
(slow).
play back 2 times
faster (double
speed)
(double speed)
during playback.
To reverse direction
1 Touch
(frame).
2
(double speed).
play back frame
by frame
(frame) during
playback pause.
To reverse direction, touch
(frame) again during
frame playback.
z Tip
• When you play back tapes recorded on other devices
in the Hi8
/standard 8 mm
system, the tape
counter appears on the screen.
Playing back in various modes
To fast forward or rewind during
playback – Picture search
Keep on touching
(fast forward) or
(rewind) during playback.
To resume normal playback, release the button.
To view the picture while fast
forwarding or rewinding – Skip scan
Keep on touching
(fast forward) or
(rewind) while fast forwarding or rewinding the
tape.
To resume fast forwarding or rewinding, release
the button.
Playback
C Tape transport indicator
.
* Horizontal lines may appear at the top, bottom,
or in the center of the screen. This is not a
malfunction.
** Pictures output from the DV Interface
cannot be played back smoothly in slow mode.
4 Touch
, then
.
,continued
Playback
47
Viewing recordings with added
effects – Digital effect
You can apply [STILL], [FLASH], [LUMI.
KEY], and [TRAIL] effects when viewing
recorded pictures. For details on each effect,
see page 41.
To cancel Digital effect
Follow steps 2 to 4, then select [OFF] in step 5.
b Notes
• You cannot add effects to externally input pictures.
Also, you cannot output pictures edited with digital
effects via the DV Interface.
• The Digital effect function does not work with tapes
recorded on other devices in the Hi8
/standard 8
mm
system.
z Tip
• You cannot record the pictures edited using special
effects on the tape in your camcorder, but you can
copy them to a “Memory Stick” (p. 89) or another
tape (p. 87).
POWER switch
1
Slide the POWER switch repeatedly to
select the PLAY/EDIT mode.
2
Touch
while the picture you
want to add the effect to is displayed.
3
Touch [MENU].
4
Select
(PICT. APPLI.), then [D.
EFFECT] by touching
/
and
.
5
Select an effect, then adjust the effect
by touching
(decrease)/
(increase).
6
Touch
twice, then
appears.
48
Playback
.
Viewing recordings
on a “Memory Stick”
3
Touch
.
The most recently recorded picture appears
on the screen.
60min
101–0001
You can view pictures one at a time on the
screen. When you have a lot of pictures, you
can list them to search through them easily.
Make sure you have a recorded “Memory
Stick” inserted into your camcorder.
When you want to play back a recorded
picture on your TV, see page 56.
1 / 10 101
MEMORY PLAY
P-MENU
4
Touch
(previous)/
select a picture.
(next) to
Screen example (movies):
320
2 / 10 101
MEMORY PLAY
Playback
60min
MOV00002
MPEG
P-MENU
When you view a movie, touch
when the selected movie appears on the
screen.
OPEN
POWER switch
z Tip
• Performing Easy Handycam operation, even first
time users can play back easily. For details, see
page 51.
1
Press OPEN and open the LCD panel.
2
Slide the POWER switch repeatedly to
select the PLAY/EDIT mode.
To adjust the volume of movies
.
1 Touch
2 Touch [VOLUME].
If the item is not displayed on the screen,
touch
/
. If you cannot find it, touch
[MENU], and select it from the
(STANDARD SET) menu.
3 Adjust the volume by touching
(decrease) /
.
(increase), then touch
To stop or pause movies
Touch
playback.
Slide the POWER
switch while
pressing the
green button.
. Touch it again to restart the
To delete pictures
See “Deleting recorded pictures” (p. 98).
b Note
• While playing back movies on a “Memory Stick,”
the only menu items available will be those with
short cuts on the Personal Menu. In order to use
other menu items, add them to the Personal Menu.
,continued
Playback
49
Indicators displayed during “Memory
Stick” playback
60min
101–0010
1 0 / 10 101
0:00:00
P-MENU
z Tip
• Once you record a picture in a folder, the same folder
will be set as the default folder for playback. You
can select a playback folder in the menu (p. 67).
Playing back in various modes
from a “Memory Stick”
Using the screen in step 4 in “Viewing
recordings on a “Memory Stick”” (p. 49), the
following operations are available.
To search for a scene in a movie
B Picture number/Total number of
recorded pictures in the current
playback folder
You can divide a movie into a maximum of 60
scenes in order to start playback from a
particular scene. The number of scenes you can
divide the movie into depends on the length of
the movie.
C Playback folder
1 Touch
A Remaining battery
D Playing time (movies only)
E Previous/next folder icon
The following indicators appear when the
first or last picture of the current folder is
displayed and when there are multiple
folders on the same “Memory Stick.”
: Touch
to move to the previous
folder.
: Touch
to move to the next
folder.
: Touch
/
to move to either
the previous or the next folder.
F Image delete button
G Print mark (still images only) (p. 99)
H Image protection mark (p. 99)
(previous)/
(next) to
select a scene from which to start the
playback.
60min
MOV00002
320
2 / 10 101
MEMORY PLAY
MPEG
P-MENU
2 Touch
.
To display 6 pictures at a time,
including movies – Index Screen
Touch
.
Previous
6 pictures
N mark*
I Data file name
END
J Personal Menu button
K Index screen display button
L Tape playback select button
M Picture select button
b Note
• Folders that you have created on a computer,
renamed folders, and modified pictures may not
appear on the screen.
50
Playback
101–0002
2 / 10
Next
6 pictures
101
SET
Movie icon
* The picture displayed before switching to the index
screen.
To return to the single display mode, touch the
picture that you want to display.
To view pictures in other folders in the
index screen
1 Touch
.
2 Touch
.
3 Touch [PB FOLDER].
4 Select a folder with
/
, then touch
.
Playing back with
ease – Easy Handycam
Easy Handycam operation allows easy
playback for even first time users by
providing only the basic functions for
playback. Also screen font size increases for
easy viewing. Make sure you have a recorded
cassette or a recorded “Memory Stick”
inserted into your camcorder.
EASY
Playback
OPEN
POWER switch
1
Press OPEN and open the LCD panel.
2
Slide the POWER switch repeatedly
until the PLAY/EDIT lamp lights up.
Slide the POWER
switch while
pressing the green
button.
,continued
Playback
51
3
1 Set [Y] (year) with
Press EASY.
The EASY lights up in blue.
4
Play back a picture.
When playing back on a tape
The following buttons can be operated.
(play/pause)/
(fast forward)/
(stop)/
(rewind)
You can operate these operations and
SLOW
on the Remote Commander.
When playing back on a “Memory
Stick”
Touch
.
The following buttons can be operated.
/
/
/
You can control playback with the Remote
Commander.
To cancel Easy Handycam operation
Press EASY again.
b Note
• You cannot turn Easy Handycam operation on or off
during communication with another device via USB
cable.
Making full use of Easy Handycam
operation
1
Touch MENU.
The available menu items are displayed on
the screen.
60min
BEEP
VOLUME
0:00:00:00
CLOCK
SET
DATA
CODE
LANGUAGE
ALL
ERASE
2
Touch the desired item.
3
Select the desired setting.
For [CLOCK SET]
52
Playback
/
, then touch
.
2 Set [M] (month), [D] (day), hour and
minutes in the same way as [Y] (year),
then touch
.
For [LANGUAGE]
Select the desired language with
then touch
.
/
,
For [BEEP]
See page 80.
For [VOLUME]
Adjust the volume by touching
(decrease)/
(increase), then touch
For [DATA CODE]
You can display the date/time during
playback.
Touch [DATE/TIME], then touch
.
For [
ALL ERASE]
You can delete all the images on the
“Memory Stick.”
Touch [YES].
z Tip
• During Easy Handycam operation, you can also do
the following:
– “Playing the picture on a TV” (p. 56)
– “Dubbing to another tape” (p. 87)
.
4
Various playback
functions
Select
(PICT. APPLI.), then [PB
ZOOM] by touching
/
and
.
Tape playback zoom screen
PB ZOOM
You can magnify a small subject in a
recording and display it on the screen. You
can also display the recorded date and the
name of the folder in which the picture is
recorded.
0:00:00:00
Play back
the image.
PB
“Memory Stick”
playback select
button
END
Memory playback zoom screen
PB ZOOM
1 / 10
101
MEMORY PLAY
5
DSPL/BATT
INFO
POWER
switch
1
Slide the POWER switch repeatedly to
select the PLAY/EDIT mode.
2
Touch
3
Touch [MENU].
END
Play back the still picture or movie,
and touch the screen at the point you
want to magnify within the displayed
frame.
The picture is magnified approximately
twice the original size and centered at the
point you touched on the screen. When you
touch another place, the point you touched
becomes the center.
Magnifying pictures – Tape
playback zoom/Memory playback
zoom
You can magnify movies recorded on a tape
or still images stored on a “Memory Stick.”
Playback
Tape playback
select button
101–0001
VIDEO
6
Adjust the zoom ratio using the power
zoom lever.
You can select the zoom ratio from
approximately 1.1 to 5 times the original
size. Touch W to decrease, or T to increase
the ratio.
.
To cancel the operation
Touch [END].
b Note
• You cannot magnify externally input pictures. Also,
you cannot output the magnified pictures recorded
on a tape in the Digital8 system or on a “Memory
Stick” via the DV Interface.
z Tip
• If you press DSPL/BATT INFO during the playback
zoom operation, the frame will disappear.
,continued
Playback
53
Displaying the screen indicators
3
Touch [DATA CODE].
If the item is not displayed on the screen,
touch
/
. If you cannot find it, touch
[MENU], and select it from the
(STANDARD SET) menu.
You can choose to display the time code, tape
counter, and other information on the screen.
60min
DATA CODE:
0:00:00:00
OFF
OFF
Press DSPL/BATT INFO.
CAMERA
DATA
The indicators appear/disappear as you press the
button.
z Tip
• You can display the screen indicators during
playback on a TV. Select the
(STANDARD
SET) menu, [DISPLAY], then [V-OUT/PANEL]
(p. 81).
4
Select [CAMERA DATA] or [DATE/
TIME] then touch
.
60min
0:00:00:00
Displaying the date/time and
camera settings data – Data code
During playback, you can view the date/time
data and the camera settings data
([CAMERA DATA]) that are automatically
recorded while recording pictures on a tape or
a “Memory Stick.”
1
Slide the POWER switch repeatedly to
select the PLAY/EDIT mode.
2
Touch
during playback or
playback pause.
DATE/
TIME
AUTO
100 AWB
F3. 4
0dB
P-MENU
To hide the date/time or the camera
settings data
Follow steps 2 and 3, and select [OFF] in step 4.
Camera settings data display
In the date/time data display, the date and time
is displayed in the same area.
If you record the picture without setting the
clock, [-- -- ----] and [--:--:--] will appear.
60min
0:00:00:00
AUTO
100 AWB
F1.6
9dB
A SteadyShot off*
B Exposure*
C White balance*
54
Playback
D Gain*
E Shutter speed
F Aperture value
* Appears only during tape playback
b Notes
• Camera setting data do not appear when movies on a
“Memory Stick” are played back.
• The data code function does not work with tapes
recorded on other devices in the Hi8
/standard
8 mm
system.
z Tip
• Exposure adjustment value (0EV) appears when a
“Memory Stick” is played back.
Playback
Playback
55
Playing the picture on
a TV
Connect your camcorder to a TV using the
supplied A/V connecting cable as shown in
the following illustration.
Connect the supplied AC Adaptor to the wall
socket for the power supply (p. 14).
Refer also to the instruction manuals supplied
with the devices to be connected.
To copy to another tape, see page 87.
A/V jack
Yellow
White
Red
S VIDEO jack
Signal flow
A/V connecting cable (supplied)
VCRs or TVs
* Pictures can be reproduced more faithfully by using
an S video cable (optional). When there is an S video
jack on the device to be connected, connect the S
video plug to that jack instead of using the yellow
video plug. The audio will not be output when you
connect with the S video plug alone.
If your TV/VCR has a 21-pin connector
(EUROCONNECTOR)
Use the 21-pin adaptor supplied with your
camcorder (For models with the
mark
printed on their bottom surfaces only). This
adaptor is designed for output use only.
When your TV is connected to a VCR
Connect your camcorder to the LINE IN input
on the VCR using the A/V connecting cable. Set
the input selector on the VCR to LINE.
When your TV is monaural (When your
TV has only one audio input jack)
Connect the yellow plug of the A/V connecting
cable to the video input jack and connect the
white (left channel) or the red (right channel)
plug to the audio input jack of your TV or VCR.
When you want to play the sound in monaural
mode, use a connecting cable (optional) for that
purpose.
56
Playback
TV/VCR
Locating a scene on a
tape for playback
Searching quickly for a desired
scene – Zero set memory
m REW
PLAY
DISPLAY
ZERO SET MEMORY
1
During playback, press ZERO SET
MEMORY on the Remote
Commander at the point you want to
locate later on.
To cancel the operation
Press ZERO SET MEMORY on the Remote
Commander again.
b Notes
• There may be a discrepancy of several seconds
between the time code and the tape counter.
• Zero set memory will not function correctly if there
is a blank section between recorded sections on the
tape.
• The zero set memory function does not work with
tapes recorded on other devices in the Hi8
/
standard 8 mm
system.
Searching for a scene by date of
recording – Date search
You can locate the point where the recording
date changes.
SEARCH M.
The tape counter is reset to “0:00:00” and
appears on the screen.
60min
./>
STOP
0:00:00
20
P-MENU
1
Slide the POWER switch repeatedly to
select the PLAY/EDIT mode.
2
Press SEARCH M. on the Remote
Commander repeatedly to select
[DATE SEARCH].
If the tape counter is not displayed, press
DISPLAY on the Remote Commander.
2
Press
(stop) when you want to
stop playback.
3
Press m REW.
Playback
STOP
The playback starts from the point
designated “0:00:00” on the tape counter.
The tape stops automatically when the tape
counter reaches “0:00:00.”
4
Press PLAY.
,continued
Playback
57
3
Press . (previous)/> (next) on
the Remote Commander to select a
recording date.
Playback starts automatically from the
point where the date changes.
Each time you press the button, the previous
or the next date will be searched for and
displayed.
To cancel the operation
Press STOP on the Remote Commander.
b Notes
• If one day’s recording is less than 2 minutes, your
camcorder may not accurately find the point where
the recording date changes.
• The Date search will not function correctly when
there is a blank section between recorded sections on
the tape.
• The date search function does not work with tapes
recorded on other devices in the Hi8
/standard
8 mm
system.
58
Playback
BAdvanced operations
4
Using the Menu
Select the icon of the desired menu
with
/
, then touch
.
CAMERA SET (p. 61)
MEMORY SET (p. 65)
PICT. APPLI. (p. 68)
EDIT/PLAY (p. 73)
STANDARD SET (p. 76)
TIME/LANGU. (p. 82)
Selecting menu items
You can change various settings or make
detailed adjustments using the menu items
displayed on the screen.
60min
0:00:00:00
BURNU VCD
END SEARCH
TITLE
REC MODE
AUDIO MODE
VOLUME
MULTI SOUND
POWER switch
1
Turn on the power (p. 17).
2
Touch
,
60min
REMOTE CTRL: ON
ON
0:00:00:00
OFF
0:00:00:00
60min
MENU
END
SERCH
VOLUME
VAR.
SPD PB
REC
CTRL
DATA
CODE
6
Touch [MENU] to display the menu
index screen.
Select the desired setting.
changes to
. If you decide not to
change the setting, touch
to return to
the previous screen.
60min
REMOTE CTRL: OFF
60min
/
.
Example: PLAY/EDIT mode’s Personal Menu
3
Select the desired item with
then touch
.
You can also touch the item directly to
select it.
You can scroll and see all items. The
available items vary depending on the
power mode of your camcorder.
Unavailable items will be grayed out.
The Personal Menu appears. Item that are
used often are displayed as short-cuts.
1/3
OK
Using the Menu
5
SP
0:00:00:00
0:00:00:00
ON
MEMORY SET
STILL SET
MOVIE SET
ALL ERASE
OFF
OK
OK
,continued
Using the Menu
59
7
Touch
screen.
, then
to hide the menu
You can also touch
(return) to go back
a screen each time you touch the button.
To use the short-cuts of the Personal
Menu
The available items vary depending on the
power mode of your camcorder. Unavailable
items will be grayed out. You can customize the
short-cuts (p. 83).
1 Touch
.
2 Touch the desired item.
3 Select the desired setting, then touch
.
z Tips
• When the PLAY/EDIT mode is selected, touch
on the screen displayed after step 2 (p. 59) to display
the video operation screen. Touch
to return to
the previous screen.
• It is convenient if the items you often use appear as
short-cuts on the Personal Menu. To customize the
Personal Menu, see page 83.
60
Using the Menu
Using the
(CAMERA SET) menu
– PROGRAM AE/16:9 WIDE, etc
You can select items listed below on the
CAMERA SET menu. To select items, see
“Selecting menu items” (p. 59).
The default settings are marked with G. The
indicators in parentheses appear when the
setting is selected. The settings you can adjust
vary depending on the power mode of your
camcorder. The screen shows the items you can
currently operate. Unavailable items will be
grayed out.
60min
STBY
0:00:00
CAMERA SET
PROGRAM AE
SPOT METER
EXPOSURE
OK
PROGRAM AE
You can record pictures easily in a situation that requires various techniques by
selecting the following settings.
Select this when not using PROGRAM AE.
SPOTLIGHT*
(spotlight) ( )
Select to prevent people’s faces from appearing
excessively white when subjects are lit by strong
light, such as in a theater or at a wedding.
PORTRAIT (soft
portrait) (
)
Select to bring out the subject such as people or
flowers while creating a soft background.
Using the Menu
G AUTO
SPORTS* (sports Select to minimize shake when shooting fastlesson) ( )
moving subjects such as in tennis or golf.
BEACH&SKI*
(beach & ski) (
Select to prevent people’s faces from appearing
) dark in strong light or reflected light, such as at a
beach in midsummer or on a ski slope.
SUNSET&MOON Select to maintain the atmosphere of situations
** (sunset & moon) such as sunsets, general night views, fireworks,
(
)
and neon signs.
LANDSCAPE**
Select when shooting distant subjects such as
(landscape) (
) mountains. This setting also prevents your
camcorder from focusing on glass or metal mesh
in windows that comes in between the camcorder
and the subject.
,continued
Using the Menu
61
* Your camcorder is adjusted to focus only on subjects in the middle to far distance.
**Your camcorder is adjusted to focus only on distant subjects.
SPOT METER
See page 35 for details.
EXPOSURE
See page 36 for details.
AUTO SHUTTER
GON
Select to automatically activate the electronic shutter to adjust the
shutter speed when recording in bright conditions.
OFF
Select when recording without using the electronic shutter.
SPOT FOCUS
See page 38 for details.
FOCUS
See page 39 for details.
SUPER NSPLUS
See page 37 for details.
NS LIGHT
When using the NightShot plus function to record, you can record clearer pictures
by using the NightShot Light to emit infrared rays (invisible).
62
Using the Menu
GON
Select to use the NightShot Light (p. 37).
OFF
Select to disable the NightShot Light (p. 37).
COLOR SLOW S
See page 37 for details.
SELF-TIMER
See page 28, 31 for details.
DIGITAL ZOOM
You can select the maximum zoom level in case you want to zoom to a level
greater than 20 times while recording on a tape. Note that the image quality
decreases when you are using the digital zoom. This function is useful when
recording enlarged pictures of a distant subject, such as a bird.
GOFF
Select to deactivate the digital zoom. Up to 20 times zoom is
performed optically.
40 ×
Select to activate the digital zoom. 20 times through 40 times zoom is
performed digitally.
990 ×
Select to activate the digital zoom. 20 times through 990 times zoom
is performed digitally.
Using the Menu
The right side of the bar shows the digital
zooming zone.
The zooming zone appears when you select
the zooming level.
,continued
Using the Menu
63
16:9 WIDE
You can record a 16:9 wide picture on the tape to watch on a 16:9 wide-screen TV
([16:9 WIDE] mode).
With this function [ON], your camcorder offers even wider angles when you
move the power zoom lever to the “W” side than recording in [OFF].
Refer also to the manuals supplied with your TV.
When viewed on the LCD screen
When viewed on a 16:9 wide screen TV*
When viewed on a standard TV**
* Picture appears in full screen when the wide-screen TV switches to full mode.
**Played in 4:3 mode. When you play a picture in the wide mode, it appears as you have seen
on the LCD screen.
GOFF
ON (
Standard setting (to record pictures to play back on a 4:3 TV). The
recorded picture will not be wide.
)
Select to record a picture to be played back on a 16:9 wide TV.
z Tip
• The SteadyShot does not work. If you set [16:9 WIDE] to [ON] in the menu settings when
the SteadyShot is working,
flashes and the SteadyShot does not function.
STEADYSHOT
You can select this function to compensate for camera-shake.
GON
OFF (
64
Using the Menu
Standard setting (enable the SteadyShot function).
)
Select to deactivate the SteadyShot function.
Select to shoot a stationary subject with a tripod, or when using a
conversion lens (optional). Natural pictures are produced.
Using the
(MEMORY SET) menu
– QUALITY/IMAGE SIZE/ALL ERASE/NEW
FOLDER, etc
You can select items listed below on the
MEMORY SET menu. To select items, see
“Selecting menu items” (p. 59).
The default settings are marked with G. The
indicators in parentheses appear when the
setting is selected. The settings you can adjust
vary depending on the power mode of your
camcorder. The screen shows the items you can
currently operate. Unavailable items will be
grayed out.
60min
FINE
20
MEMORY SET
STILL SET
MOVIE SET
FORMAT
OK
STILL SET
QUALITY
)
STANDARD (
Using the Menu
GFINE (
Select to record still images with the fine image quality (compressed
to about 1/4).
) Select to record still images with the standard image quality
(compressed to about 1/10).
FLD/FRAME
GFIELD
FRAME (
To record moving subjects correcting jitter (p. 30).
)
To record stationary subjects in high quality.
MOVIE SET
IMAGE SIZE
G320 × 240
(
)
160 × 112 (
Select to record movies for playing on a large screen, or to record
clearer pictures.
) Select to record for longer time.
REMAINING
GAUTO
Select to display the remaining capacity of the “Memory Stick” in the
following cases:
• After inserting a “Memory Stick” with the POWER switch in the
CAMERA-MEMORY mode (for about 5 seconds).
• When the remaining capacity of the “Memory Stick” is less than 2
minutes after the CAMERA-MEMORY mode is selected.
• At the starting or ending point of the movie (for approximately 5
seconds).
,continued
Using the Menu
65
ON
Select to always display the remaining capacity of the “Memory
Stick.”
ALL ERASE
You can delete all the pictures on a “Memory Stick” that are not write-protected.
To delete pictures one by one, see page 98.
1 Select [ALL FILES] or [CURRNT FOLDER].
ALL FILES
Select to delete all the images on the “Memory Stick.”
CURRNT FOLDER Select to delete all the images in the selected playback folder.
2 Touch [YES] twice.
To cancel deletion of all pictures, select [NO].
3 Touch
.
b Notes
• The folder will not be deleted even when you delete all the pictures in the folder.
• Do not move the POWER switch or press any buttons while [
Erasing all data...] is
displayed on the screen.
FORMAT
The supplied* or newly purchased “Memory Stick” has been formatted at the
factory, and does not require formatting.
For details on the “Memory Stick,” see page 115.
* Memory Stick media is only supplied with DCR-TRV461E.
1 Touch [YES] twice.
To cancel formatting, select [NO].
2 Touch
.
b Notes
• Do not do any of the following while [
Formatting...] is displayed:
– Move the POWER switch to select other power modes.
– Operate any buttons.
– Eject the “Memory Stick.”
• Formatting erases everything on the “Memory Stick” including protected image data and
newly created folders.
FILE NO.
66
Using the Menu
GSERIES
Select to assign file numbers in sequence even if the “Memory Stick”
is replaced with another one. The file number is reset when a new
folder is created or the recording folder is replaced with another.
RESET
Select to reset the file number to 0001 each time the “Memory Stick”
is changed.
NEW FOLDER
You can create a new folder (102MSDCF to 999MSDCF) on a “Memory Stick.”
When a folder is full (a maximum of 9999 images are stored) a new folder is
automatically created.
1 Touch [YES].
A newly created folder will be numbered in sequence after the last folder
number.
To cancel creation, select [NO].
2 Touch
.
b Notes
• You cannot delete the created folders using your camcorder. You will have to format the
“Memory Stick” (p. 66), or delete them using your computer.
• The number of pictures that can be recorded on a “Memory Stick” decreases as the number
of folders increases on the “Memory Stick.”
REC FOLDER
Using the Menu
As the default setting, pictures are saved in the 101MSDCF folder. You can select
a folder to save your pictures. Create new folders from the [NEW FOLDER]
menu, then select the folder to be used for recording with
/
and touch
.
When you have a lot of pictures, you can search for the desired picture easily when
you sort them in folders.
PB FOLDER
Select the playback folder with
/
, then touch
.
Using the Menu
67
Using the
(PICT.
APPLI.) menu – PICT.
EFFECT/SLIDE SHOW/FRAME REC/
INTERVAL REC, etc
You can select items listed below on the PICT.
APPLI. menu. To select items, see “Selecting
menu items” (p. 59).
The default settings are marked with G. The
indicators in parentheses appear when the
setting is selected. The settings you can adjust
vary depending on the power mode of your
camcorder. The screen shows the items you can
currently operate. Unavailable items will be
grayed out.
60min
STBY
0:00:00
PICT. APPLI.
FADER
OVRLAP
D. EFFECT
OK
FADER
See page 40 for details.
OVERLAP
See page 41 for details.
D. EFFECT
See page 41, 48 for details.
PICT. EFFECT
You can add special effects (such as films) to a picture before or after recording
on a tape.
appears when the effect is selected.
68
Using the Menu
GOFF
Select when not using the Picture effect setting.
NEG.ART
Select to record/play the picture with the color
and brightness of the picture reversed.
SEPIA
Select to record/play the picture appearing in sepia.
B&W
Select to record/play the picture appearing in monochrome (blackand-white).
SOLARIZE
Select to record/play the picture looking like an
illustration with strong contrast.
PASTEL
Select to record the picture looking like a pale
pastel drawing. (This effect is not available
during playback.)
MOSAIC
Select to record picture appearing mosaicpatterned. (This effect is not available during
playback.)
b Notes
• You cannot add effects to externally input pictures. Also, you cannot output pictures edited
with Picture effects via the
DV Interface.
• Picture effects do not work with tapes recorded on other devices in the Hi8
/standard
8 mm
system.
z Tip
• You can copy pictures edited using picture effects to a “Memory Stick” (p. 89) or to
another tape (p. 87).
Using the Menu
MEMORY MIX
See page 43 for details.
PB ZOOM
See page 53 for details.
SLIDE SHOW
You can play back the images stored in a “Memory Stick” (or a selected playback
folder) in sequence (slide show).
1 Touch
.
2 Touch [PB FOLDER].
3 Select [ALL FILES] or [CURRNT FOLDER], then touch
GALL FILES (
CURRNT
FOLDER (
) Select to execute a slide show by playing back all the images on
the “Memory Stick.”
)
Select to execute a slide show by playing back all the images in
the current playback folder.
4 Touch [REPEAT].
5 Touch [ON] or [OFF], then
GON (
.
)
OFF
.
Select to repeat the slide show.
Select to execute the slide show only once.
6 Touch [END].
,continued
Using the Menu
69
7 Touch [START].
Your camcorder plays back the images recorded on the “Memory Stick” in
sequence.
To cancel the slide show, touch [END]. To pause, touch [PAUSE].
z Tips
• You can select the first picture for the slide show by touching
/
before touching
[START].
• If movies are played in the slide show, you can adjust the volume by touching
(decrease)/
(increase).
FRAME REC
You can record pictures with a stop-motion animated effect by alternately frame
recording and then moving the subject a little. Operate your camcorder using the
Remote Commander to prevent camera shake.
GOFF
ON (
Select to record in the standard recording mode.
)
Select to record pictures using the FRAME REC function.
1 Select [ON], then touch
.
2 Touch
.
3 Press REC START/STOP.
A picture (approximately 5 frames) is recorded, and your
camcorder enters the standby mode.
4 Move the subject and repeat step 3.
b Notes
• When you use frame recording continuously, the remaining tape time will not be indicated
correctly.
• The last scene will be longer than other scenes.
INTERVAL REC
You can achieve excellent recordings of flowers blooming, etc., with this
function. Connect your camcorder to the wall socket using the supplied AC
Adaptor during the operation.
[a]
[a]
[b]
[b]
a: [REC TIME]
b: [INTERVAL]
1 Touch
.
2 Touch [INTERVAL].
3 Select a desired interval time, then touch
.
You can select from 30 seconds, 1, 5 or 10 minutes for the interval.
4 Touch [REC TIME].
70
Using the Menu
5 Select a desired recording time, then touch
.
You can select from 0.5, 1, 1.5 or 2 seconds for the recording time.
6 Touch [END].
7 Touch [ON], then
GOFF
.
To deactivate interval recording.
ON (
)
To record moving pictures on a tape in the selected interval.
8 Touch
.
flashes on the screen.
9 Press REC START/STOP.
stops flashing and the interval recording starts.
To cancel interval recording, select [OFF] in step 7.
b Notes
• You cannot use the Interval recording with Memory overlap.
• There may be a discrepancy in recording time of up to ±5 frames from the selected time.
Using the Menu
z Tips
• If you adjust the focus manually, you may be able to record clear pictures even if the light
changes (p. 39).
• You can silence the beeps during recording (p. 80).
INT. REC-STL
This function is useful to observe the movement of clouds or the changes of
daylight. Your camcorder will shoot a still image at a selected interval and record
it on a “Memory Stick.”
[a]
[a]
[b]
[a]
[b]
a: Shooting time
b: Interval
1 Touch
.
2 Select a desired interval time (1, 5 or 10 minutes), then touch
3 Touch [ON], then touch
.
GOFF
.
To deactivate interval recording.
ON (
)
To record still images on a “Memory Stick” in the selected interval.
4 Touch
.
flashes.
5 Press PHOTO fully.
stops flashing and the Interval photo recording starts.
To cancel interval photo recording, select [OFF] in step 3.
,continued
Using the Menu
71
DEMO MODE
When you remove a cassette and “Memory Stick” from your camcorder, and
select the CAMERA-TAPE mode, you can view the demonstration in about 10
minutes.
GON
Select to see an overview of the functions available such as when you
are using this camcorder for the first time.
OFF
Select when you do not intend to use the DEMO MODE.
b Note
• You cannot view the demonstration only when the NIGHTSHOT PLUS switch is set to
ON.
z Tips
• The demonstration will be suspended in situations such as those described below.
– When you touch the screen during the demonstration. (The demonstration starts again in
about 10 minutes.)
– When a cassette or “Memory Stick” is inserted.
– When a mode other than CAMERA-TAPE is selected.
• If [A.SHUT OFF] is set to [5 min] when the camcorder is used on the battery pack, the
power will be turned off after approximately 5 minutes (p. 81).
PRINT
See page 101 for details.
72
Using the Menu
Using the
(EDIT/
PLAY) menu – END SEARCH/
The settings you can adjust vary depending on
the power mode of your camcorder. The screen
shows the items you can currently operate.
Unavailable items will be grayed out.
TITLE, etc
60min
You can select items listed below on the EDIT/
PLAY menu. To select items, see “Selecting
menu items” (p. 59).
0:00:00:00
EDIT/PLAY
VAR. SPD PB
REC CTRL
PROG. EDIT
OK
VAR. SPD PB
See page 47 for details.
REC CTRL
Using the Menu
For recording on a tape.
See page 88, 90 for details.
PROG. EDIT
OTHER DEVICE Select to make programs and dubbing the selected scenes to a tape on
a VCR (p. 91).
MEMORY STICK Select to make programs and dubbing the selected scenes to a
“Memory Stick” (p. 95).
REC CTRL
For recording on a “Memory Stick.”
See page 88, 89 for details.
BURN DVD
When your camcorder is connected to a Sony VAIO series personal computer,
you can easily burn the picture recorded on the tape on a DVD (Direct Access to
“Click to DVD”) using this command. See the supplied “Computer Applications
Guide” for details.
BURN VCD
When your camcorder is connected to a personal computer, you can easily burn
the picture recorded on the tape on a CD-R (Direct Access to Video CD Burn)
using this command. See the supplied “Computer Applications Guide” for details.
,continued
Using the Menu
73
END SEARCH
EXEC
Select to activate the END SEARCH function. The most recently
recorded picture is played back for about 5 seconds and then stops
automatically.
CANCEL
Select to stop the END SEARCH function.
TITLE
You can insert a title when recording. You can select one of the 8 preset titles and
the 2 custom titles. You can also select the color, size and position of titles.
1 Select a desired title from the displayed titles (2 original titles that you
have created before and the preset titles that have been stored in your
camcorder). You can create original titles (up to 2 types of title of within
20 characters each) in the following procedure.
1 Select [CUSTOM 1 ” ”] or [CUSTOM 2 ” ”], then touch
.
2 Select a desired character. Touch the button repeatedly to select the
desired character on the button.
TITLE
P1
STBY
P2
0:00:00
END
P3
E___________________
&?!
ABC
DEF
GHI
JKL
MNO
123
45
PQR
S
TUV
WXY
Z
' .,
/–
678
90
OK
To erase a character: Touch
.
To insert a space: Touch
.
To select the type of letter to enter the title: Select
P3 .
P1
,
P2
or
3 Touch
to move s to select the next character, and enter the
character in the same manner.
4 When you have finished entering characters, touch
2 Touch
3 Touch
.
.
(color),
/
(position), [SIZE] as necessary to select a
desired color, position, or size.
Color
white t yellow t violet t red t cyan t green t blue
Position
You can select from 8 to 9 choices.
Size
small y large
(You can only select small size when you are entering more than 13
characters.)
4 Touch
.
The title is displayed on the screen and the title is set.
74
Using the Menu
To record the title
Press REC START/STOP during recording standby.
To erase the title display
Touch
.
b Notes
• When you are using your camcorder on the battery pack and do not operate it for 5 minutes,
the power automatically goes off as the default setting. If you may take 5 minutes or longer
to enter characters, set [A.SHUT OFF] on the
(STANDARD SET) menu to
[NEVER] (p. 81). The power will not be turned off. Even though the power goes off, the
characters you have entered remain stored in memory. Turn the power back on, then start
again from step 1 to continue superimposing the title.
• When you superimpose a title while you are recording, the beep does not sound.
z Tip
• To change a created title, select the title in step 1, then touch
characters again.
. Then, reselect the
Using the Menu
Using the Menu
75
Using the
(STANDARD SET)
menu – REC MODE/MULTISOUND/AUDIO MIX/USB-CAMERA, etc
The default settings are marked with G. The
indicators in parentheses appear when the
setting is selected. The settings you can adjust
vary depending on the power mode of your
camcorder. The screen shows the items you can
currently operate. Unavailable items will be
grayed out.
60min
You can select the items listed below on the
STANDARD SET menu. To select these
items, see “Selecting menu items” (p. 59).
STBY
0:00:00
STANDARD SET
REC MODE
AUD IO MODE
LCD SET
OK
REC MODE
GSP ( SP )
Select to record in the SP (Standard Play) mode on a cassette.
LP ( LP )
Select to increase the recording time to 1.5 times the SP mode (Long
Play). The use of Sony cassette is recommended to get the most out of
your camcorder.
b Notes
• If you record in the LP mode, a mosaic-like noise may appear or sound may be interrupted
when you play back the tape on other camcorders or VCRs.
• When you mix recordings in the SP mode and in the LP mode on one tape, the playback
picture may be distorted or the time code may not be written properly between the scenes.
AUDIO MODE
G12BIT
16BIT (
Select to record in the 12-bit mode (2 stereo sounds).
)
Select to record in the 16-bit mode (1 stereo sound with high quality).
b Note
• You cannot select AUDIO MODE when you dub tapes recorded in the Digital8
system
to another VCR. However, you can select AUDIO MODE when you dub tapes recorded on
other devices in the Hi8
/standard 8 mm
system to another VCR, via the DV
Interface.
VOLUME
See page 46, 49 for details.
MULTI-SOUND
You can select how to play back audio recorded on a tape in stereo mode. Select
the desired mode when you play back a Digital8
system tape which is dubbed
from a dual sound track tape recorded in the DV system, or when you play back a
76
Using the Menu
Hi8
/standard 8 mm system tape recorded on other devices in a dual sound
track of the AFM HiFi stereo system.
GSTEREO
Select to play back a stereo tape with stereo sound or dual sound track
tape with main and sub sound.
1
Digital8
system: Select to play back a stereo tape with the left
channel sound or a dual sound track tape with main sound.
Hi8
/standard 8 mm
system: Select to play back a stereo tape
with monaural sound or a dual sound track tape with main sound.
2
Digital8
system: Select to play back a stereo tape with the right
channel sound or a dual sound track tape with sub sound.
Hi8
/standard 8 mm
system: Select to play back a stereo tape
with unnatural sound or a dual sound track tape with sub sound.
b Notes
• You can playback a dual sound track cassette on your camcorder. However, you cannot
record a dual sound track on your camcorder.
• The setting returns to [STEREO] when you disconnect the power source from your
camcorder for more than 5 minutes.
GON
Select to correct jitter (horizontal picture shake during playback).
OFF
Select to not compensate picture distortion when playing back a tape
on which you have dubbed repeatedly or recorded TV game signals.
b Note
• The TBC function works only with tapes recorded on other devices in the Hi8
standard 8 mm
system.
Using the Menu
TBC
/
DNR
GON
Select to eliminate color noise in the picture.
OFF
Select to minimize picture artifacts in a picture containing lots of
movement.
b Note
• The DNR function works only with tapes recorded on other devices in the Hi8
standard 8 mm
system.
/
AUDIO MIX
You can adjust the audio balance between the main sound (ST1) and the sub sound
(ST2) on the tape.
,continued
Using the Menu
77
b Notes
• You cannot adjust sound recorded in 16 bit audio mode.
• Only the originally recorded sound will be heard when you disconnect the power source
from your camcorder for more than 5 minutes.
• You cannot adjust the balance for tapes recorded on other devices in the Hi8
/standard
8 mm system.
LCD SET
The recorded picture will not be affected by this setting.
LCD BRIGHT
See page 18 for details.
LCD BL LEVEL
You can adjust the brightness of the LCD screen’s backlight.
GNORMAL
Standard brightness.
BRIGHT
Select to brighten the LCD screen.
b Notes
• When you connect your camcorder to outside power sources, [BRIGHT] is automatically
selected for the setting.
• When you select [BRIGHT], battery life is reduced by about 10 percent during recording.
LCD COLOR
Touch
/
to adjust the color on the LCD screen.
Low intensity
High intensity
A/V c DV OUT
You can connect a digital device and an analog device to your camcorder and
convert the signal transmitted from the connected devices to the appropriate signal
on your camcorder.
GOFF
ON (
78
Using the Menu
Select when not using the Digital convert function.
)
To output analog images and sound in digital format using your
camcorder.
The analog signal input to the A/V jack of your camcorder will be
converted and output from the DV Interface of your camcorder.
For details, refer to the “Computer Applications Guide.”
PB MODE
GAUTO
/
Select to automatically detect the system (Hi8
/standard 8 mm
or Digital8 ) that was used to recorded on the tape, and play
back the tape. During switching of systems, the screen turns blue, and
the following displays appear on the screen. A hissing noise also
sometimes can be heard.
t
/ : During switching from Digital8
to Hi8
/
standard 8 mm
.
/
t : During switching from Hi8
/standard 8 mm
to Digital8 .
Select to play back a tape that was recorded on other devices in the Hi8
/standard 8 mm
system when your camcorder does not
automatically detect the recording system.
b Note
• The setting returns to [AUTO] when you disconnect the power source from your camcorder
or slide the power switch.
Using the Menu
USB-CAMERA
You can connect a USB cable (supplied) to your camcorder, and view the picture
displayed on the screen of your camcorder on your computer (USB Streaming).
For details, refer to the “Computer Applications Guide.”
GOFF
Select to deactivate the USB Streaming function.
USB STREAM
Select to activate the USB Streaming function.
USB-PLY/EDT
You can connect a USB cable (supplied) to your camcorder, and view the picture
on the tape or “Memory Stick” in your camcorder on your computer. For details,
refer to the “Computer Applications Guide.”
GSTD-USB
Select to view the picture on the “Memory Stick.”
PictBridge
Select to connect the PictBridge compliant printer (p. 101).
USB STREAM
Select to view the picture on the tape.
GOFF
Select not to display date, time and the camera settings data during
playback.
DATE/TIME
Select to display the date and time during playback (p. 54).
CAMERA DATA
Select to display the camera settings data during playback (p. 54).
DATA CODE
,continued
Using the Menu
79
REMAINING
GAUTO
Select to display the remaining tape indicator for about 8 seconds:
• After you select the CAMERA-TAPE mode with the cassette
inserted, and your camcorder calculates the remaining amount of
tape.
• When you touch
(play/pause).
ON
Select to always display the remaining tape indicator.
GON
Select when using the Remote Commander supplied with your
camcorder.
OFF
Select to deactivate the Remote Commander to prevent your
camcorder from responding to a command sent by another VCR
remote control unit.
REMOTE CTRL
b Note
• The setting returns to [ON] when you have the power source disconnected from your
camcorder for more than 5 minutes.
REC LED
GON
Select to turn on the camera recording lamp on the front of your
camcorder during recording.
OFF
Select this setting in the following recording situations. The camera
recording lamp will not light up during recording.
• When you do not want the subject to be nervous about being
recorded.
• When you are recording close to the subject.
• When the subject reflects the recording lamp.
GMELODY
Select to sound a melody when you start/stop recording, operate the
touch panel, or when an unusual condition occurs on your camcorder.
NORMAL
Select to sound a beep instead of the melody.
OFF
Select to cancel the melody, the beep sound, the shutter sound or touch
panel operation confirmation beep.
BEEP
80
Using the Menu
DISPLAY
GLCD PANEL
Select to show the displays such as the time code on the LCD screen
and in the viewfinder.
V-OUT/PANEL
Select to show the displays such as the time code on the TV screen,
LCD screen, and in the viewfinder.
b Note
• You cannot input a signal to your camcorder if you press DSPL/BATT INFO while [VOUT/PANEL] is selected.
MENU ROTATE
You can select the scrolling direction (up or down) of the menu items on the LCD
screen when you touch
or
.
GNORMAL
Select to scroll the menu items downwards by touching
OPPOSITE
Select to scroll the menu items upwards by touching
G5 min
Select to activate the Auto shut off. When approximately 5 minutes
have elapsed while you do not operate your camcorder, the camcorder
is automatically turned off to prevent the battery from becoming
consumed.
NEVER
Select to deactivate the Auto shut off.
.
.
Using the Menu
A.SHUT OFF
b Note
• When you connect your camcorder to the wall socket, [A.SHUT OFF] is automatically set
to [NEVER].
Using the Menu
81
Using the
(TIME/
LANGU.) menu – CLOCK SET/
The settings you can adjust vary depending
on the power mode of your camcorder. The
screen shows the items you can currently
operate. Unavailable items will be grayed out.
WORLD TIME, etc
You can select items listed below on the TIME/
LANGU. menu. To select items, see “Selecting
menu items” (p. 59).
60min
STBY
0:00:00
TIME/LANGU.
CLOCK SET
WORLD TIME
LANGUAGE
OK
CLOCK SET
You can set the date and time (p. 19).
WORLD TIME
You can adjust the time difference when using your camcorder abroad. Set the
time difference by touching
/
, the clock will be adjusted in accordance
with the time difference. If you set the time difference to 0, the clock returns to
the originally set time.
LANGUAGE
You can select or change the language used for the on-screen display (p. 22). You
can select from English, Simplified English, Traditional-Chinese, SimplifiedChinese, French, Spanish, Portuguese, German, Dutch, Italian, Greek, Russian,
Arabic or Persian.
82
Using the Menu
Customizing Personal
Menu
You can add frequently used menu items to
Personal Menu, or sort them in the order you
like (customizing). You can customize the
Personal Menu for each power mode of your
camcorder.
3
60min
Select the category.
END
OK
4
60min
Select the item.
END
PROGRAM AE
SPOT METER
EXPOSURE
AUTO SHUTTER
SPOT FOCUS
OK
5
Touch
/
then touch
to select a menu item,
.
.
60min
ADD
1/3
MENU
EXPO–
SURE
FADER
SPOT
FOCUS
SPOT
METER
PRGRAM
AE
YES
6
If the desired menu is not displayed on the
screen, touch
/
until the menu is
displayed.
NO
Touch [YES].
The menu is added to the end of the list.
Touch [P-MENU SET UP].
60min
P–MENU SET UP
0:00:00
Add this item to
CAMERA-TAPE mode's
P-MENU?
0:00:00
60min
2
0:00:00
Using the Menu
Touch
Touch
/
to select a menu
category, then touch
.
The available items vary depending on the
power mode of the camcorder.
Only the available items are displayed.
You can add frequently used menu items to
Personal Menu for easier and faster access.
1
0:00:00
CAMERA SET
PICT. APPLI.
EDIT/PLAY
STANDARD SET
TIME/LANGU.
Adding a menu – Add
b Note
• You can add up to 28 menu items each for the
CAMERA-TAPE, CAMERA-MEMORY, and
PLAY/EDIT modes. If you want to add more, you
must delete a less important menu item before
adding a new menu item (p. 84).
Touch [ADD].
7
Touch
.
0:00:00
END
ADD
DELETE
SORT
RESET
,continued
Using the Menu
83
The selected menu is deleted from Personal
Menu.
Deleting menu – Delete
6
1
Touch
.
0:00:00
60min
1/3
2
MENU
EXPO–
SURE
FADER
SPOT
FOCUS
SPOT
METER
PRGRAM
AE
If the desired menu is not displayed on the
screen, touch
/
until the menu is
displayed.
b Note
• You cannot delete [MENU] and [P-MENU SET
UP].
You can sort the menus added to Personal Menu
in the desired order.
1
Touch
ADD
DELETE
SORT
RESET
Touch [DELETE].
2
MENU
EXPO–
SURE
FADER
SPOT
FOCUS
SPOT
METER
PRGRAM
AE
END
FADER
SPOT
FOCUS
SPOT
METER
PRGRAM
AE
Touch [P-MENU SET UP].
60min
P–MENU SET UP
0:00:00
END
0:00:00
Delete this from
CAMERA-TAPE mode's
P-MENU?
YES
3
ADD
DELETE
SORT
RESET
Touch [SORT].
60min
Select button to move.
NO
1/3
84
EXPO–
SURE
Touch the menu that you want to
delete.
60min
DELETE
5
MENU
If the menu is not displayed on the screen,
touch
/
until the desired menu is
displayed.
0:00:00
60min
Select button to delete.
4
0:00:00
60min
1/3
1/3
.
0:00:00
END
3
.
Arranging the order of menus
displayed on Personal Menu
– Sort
Touch [P-MENU SET UP].
60min
P–MENU SET UP
Touch
Touch [YES].
Using the Menu
MENU
EXPO–
SURE
FADER
SPOT
FOCUS
SPOT
METER
PRGRAM
AE
0:00:00
END
4
Touch the menu item you want to
move.
60min
Select new location.
1
EXPO–
SURE
3
4
SPOT
FOCUS
6
PRGRAM
AE
FADER
1/3
5
5
SPOT
METER
1
60min
P–MENU SET UP
3
1/3
5
FADER
SPOT
FOCUS
4
SPOT
METER
EXPO–
SURE
6
PRGRAM
AE
END
DELETE
SORT
RESET
OK
3
Touch [RESET].
60min
RESET
END
0:00:00
Initialize
CAMERA-TAPE mode's
P-MENU setting?
YES
OK
.
To sort more items, repeat steps 4 to 6.
7
ADD
4
NO
Touch [YES].
60min
RESET
Touch [END].
Using the Menu
Touch
0:00:00
0:00:00
2
MENU
6
END
Touch
/
to move the menu item
to the desired place.
60min
Select new location.
Touch [P-MENU SET UP].
If the desired menu is not displayed on the
screen, touch
/
until the menu is
displayed.
0:00:00
2
MENU
2
0:00:00
Are you sure ?
8
Touch
.
NO
b Note
• You cannot move [P-MENU SET UP].
5
YES
Touch [YES].
The Personal Menu settings return to the
default settings.
To cancel initialization, touch [NO].
Initializing the settings – Reset
6
Touch
.
You can initialize Personal Menu to the default
settings after adding or deleting menus.
1
Touch
.
0:00:00
60min
1/3
MENU
FADER
SPOT
FOCUS
SPOT
METER
EXPO–
SURE
PRGRAM
AE
Using the Menu
85
Dubbing/Editing
You can record the picture from a VCR or TV
to a tape or a “Memory Stick” inserted into
your camcorder (p. 88). You can also create a
copy of the picture recorded on your
camcorder on other recording device (p. 87).
Connect your camcorder to a TV or VCR as
shown in the following illustration.
Connecting to a VCR
or TV
A/V jack
Connecting with an i.LINK cable
i.LINK cable (optional)
i.LINK jack
DV Interface
S VIDEO jack
Yellow
A/V connecting cable
(supplied)
White
VCRs or TVs
Red
Signal flow
* Pictures can be reproduced more faithfully by using
an S video cable (optional). When there is an S video
jack on the device to be connected, connect the S
video plug to that jack instead of using the yellow
video plug. The audio will not be output when you
connect with the S video plug alone.
b Notes
• Use the A/V connecting cable to connect your
camcorder to other devices. Before connecting,
make sure the [DISPLAY] setting in the
(STANDARD SET) menu is set to [LCD PANEL]
(the default setting) (p. 81).
• When you are connecting your camcorder to
monaural device, connect the yellow plug of the A/
V connecting cable to the video jack, and the red
(right channel) or the white (left channel) plug to the
audio jack on the VCR or the TV.
86
Dubbing/Editing
To use an i.LINK cable for connection
Use an i.LINK cable (optional) to connect your
camcorder to other device via the
DV
Interface. The video and sound signals are
transmitted digitally, producing high quality
pictures. Note that you cannot record the picture
and sound separately. For details, see page 119.
Dubbing to another
tape
You can copy and edit the picture played
back on your camcorder to other recording
devices (such as VCRs).
1
Connect your VCR to your camcorder
as a recording device (p. 86).
2
Prepare your VCR for recording.
• When connected using the i.LINK cable, the
recorded picture becomes rough when a picture is
paused on your camcorder while recording to a
VCR.
• When you dub the tape recorded on other devices in
the Hi8
/standard 8 mm
system via the
DV Interface, the picture may fluctuate. This is not a
malfunction. Digital signals are output as image
signals from the DV Interface during playback.
• Insert a cassette for recording.
• If your VCR has an input selector, set it to
the input mode.
3
Prepare your camcorder for playback.
4
Dubbing/Editing
• Insert the recorded cassette.
• Slide the POWER switch to select the
PLAY/EDIT mode.
Start the playback on your camcorder,
and record it on the VCR.
Refer to the operating instructions supplied
with your VCR for details.
5
When the dubbing is finished, stop
your camcorder and the VCR.
b Notes
• When your camcorder is connected to the VCR via
the DV Interface, you cannot record the title,
indicators and words entered on the index screen of
the “Memory Stick.”
• When dubbing using the A/V connecting cable,
press DSPL/BATT INFO to hide indicators such as
time code (p. 54). Otherwise, they will be recorded
on the tape.
• To record the date/time and camera settings data,
have them displayed on screen (p. 54).
• Pictures edited with Picture effect ([PICT. EFFECT]
p. 68), Digital effect (p. 41, 48), or Playback zoom
(p. 53) cannot be output via the DV Interface.
Dubbing/Editing
87
When recording on a “Memory
Stick”
1 Touch
.
2 Touch [MENU].
3 Select the
(EDIT/PLAY) menu,
then [
REC CTRL] with an
icon.
Recording pictures
from a VCR or TV
You can record and edit pictures or TV
programs from a VCR or TV on a tape or a
“Memory Stick” inserted in your camcorder.
You can also record a scene as a still image
on a “Memory Stick.”
Insert a cassette or a “Memory Stick” for
recording in your camcorder.
b Notes
• Your camcorder can only record from a PAL source.
For example, French video or TV programs
(SECAM) cannot be recorded correctly. See
page 114 for details on TV color systems.
• If you use a 21-pin adaptor to input PAL source, you
need a dual direction 21-pin adaptor (optional).
5
The picture played on the connected device
appears on the LCD screen of your
camcorder.
6
Touch [REC START] at the point you
want to start recording.
7
Stop recording.
When recording on a tape
Touch
(stop) or [REC PAUSE].
Recording movies
1
Connect your TV or VCR to your
camcorder (p. 86).
2
If you are recording from a VCR,
insert a cassette.
3
Slide the POWER switch to select the
PLAY/EDIT mode.
4
Operate your camcorder to record
movies.
When recording on a tape
1 Touch
.
2 Touch [
REC CTRL] with an
icon.
If the item is not displayed on the screen,
touch
/
. If you cannot find it,
touch [MENU], and select it from the
(EDIT/PLAY) menu (p. 73).
3 Touch [REC PAUSE].
88
Dubbing/Editing
Start playing the cassette on your
VCR, or select a TV program.
When recording on a “Memory
Stick”
Touch [REC STOP].
8
Touch
, then
.
z Tips
• The
indicator appears when you connect your
camcorder and other devices via an i.LINK cable.
(This indicator may also appear on your TV.)
• When recording movies on a “Memory Stick,” you
can skip step 4 and press REC START/STOP in
step 6.
• To enable smooth transition, we recommend that
you do not mix pictures recorded in the Hi8
/
standard 8 mm
system on other devices with the
Digital8
system on a tape.
Recording still images
1
2
Perform steps 1 to 3 in “Recording
movies” (p. 88).
Play the video, or receive the TV
program you want to record.
The pictures on the VCR or TV appear on
the screen of your camcorder.
3
Press PHOTO lightly at the scene you
want to record. Check the image and
press it fully.
You can record movies (with sound recorded
in monaural) or still images on a “Memory
Stick.”
Make sure you have a recorded tape in the
Digital8 system and a “Memory Stick”
inserted into your camcorder.
1
Slide the POWER switch to select the
PLAY/EDIT mode.
2
Search and record the scene you want
to record.
When recording a still image
1 Touch
(play) to playback the tape.
2 Press PHOTO lightly at the scene you
want to record. Check the image and
press it fully.
60min
101
FINE
Dubbing/Editing
The image is not recorded unless you press
PHOTO fully. Release it if you do not want
to record the scene, and select other scene
as described above.
Dubbing pictures
from a tape to a
“Memory Stick”
20
CAPTURE
P-MENU
When recording a movie
1 Touch
.
2 Touch [MENU].
3 Select the
(EDIT/PLAY) menu,
then [
REC CTRL] with an
icon.
4 Touch
(play) to playback the tape.
REC CTRL
0:00:00:00
REC
START
2min
5 Touch [REC START] at the point you
want to start recording.
6 Touch [REC STOP] at the point you
want to stop recording.
(stop) to stop tape playback.
7 Touch
,continued
Dubbing/Editing
89
8 Touch
, then
.
b Notes
• The Data code and titles recorded on the tape cannot
be recorded on the “Memory Stick.” The time and
date the picture is recorded on the “Memory Stick”
will be recorded.
• The sound is recorded in 32kHz monaural.
• While recording images from a tape as still images,
they are recorded in the [FRAME] mode
automatically, even if you select [FIELD] in the
menu settings (p. 65).
• If you record pictures recorded in different recording
systems (Digital8 , and Hi8
/standard 8 mm
on other devices), transitional scenes between
recording systems may be incorrectly recorded on
the “Memory Stick.”
z Tips
• You can also record a movie by pressing REC
START/STOP during tape playback.
• For the recording time of movies, see page 26.
Dubbing still images
from a “Memory
Stick” to a tape
You can record still images on a tape.
Make sure you have the “Memory Stick”
with the images and a tape inserted into your
camcorder.
1
Slide the POWER switch to select the
PLAY/EDIT mode.
2
Search for the point where you want to
start dubbing by touching
(rewind) or
(fast forward), then
touch
(stop).
3
Touch
4
Touch
/
to select the image
you want to dub.
5
Touch
6
Touch [
icon.
.
.
REC CTRL] with an
If the item is not displayed on the screen,
touch
/
. If you cannot find it, touch
[MENU], and select it from the
(EDIT/PLAY) menu.
7
Touch [REC PAUSE].
8
Touch [REC START].
The selected image is dubbed to the tape.
9
Touch
(stop) or [REC PAUSE]
when you want to stop recording.
To dub other still images, select images by
touching
/
, then repeat steps 7 to
9.
90
Dubbing/Editing
10Touch
, then
.
b Notes
• You cannot dub the index screen.
• You may not be able to dub images modified on your
computer or recorded with other camcorders on your
camcorder.
• You cannot dub MPEG movies on the tape.
Dubbing selected
scenes from a tape
– Digital program editing
You can select up to 20 scenes (programs)
and record them in the desired order to other
recording device such as VCRs or to a
“Memory Stick” inserted in your camcorder.
When you are recording on a “Memory
Stick,” skip steps 1 and 2 and start from
“Recording the selected scenes as programs”
(p. 95).
b Note
• The Digital program editing does not work with
tapes recorded on other devices in the Hi8
/
standard 8 mm
system.
Delete unwanted scene
Dubbing/Editing
Change the order
Results of editing
Step 1 : Preparing your
camcorder and VCR for operation
Follow the steps below when you are
performing a digital program edit for the first
time to a tape in a VCR. You can skip this
setting if you have set up the VCR by the
following procedure before.
b Note
• You cannot perform the Digital program editing on
a VCR that does not support [IR SETUP] codes.
,continued
Dubbing/Editing
91
1
Connect your VCR to the camcorder
as a recording device (p. 86).
8
You can use either the A/V connecting
cable or the i.LINK cable to make the
connection. The dubbing procedure is
easier with the i.LINK connection.
Touch [OTHER DEVICE].
PROG. EDIT
MARK START
IN
0:00:00:00
EDIT
UNDO
SET
TOTAL 0:00:00:00
SCENE 0
END
2
Prepare your VCR.
• Insert a cassette for recording.
• Set the input selector to input mode if your
VCR has one.
9
Touch [EDIT SET].
PROG. EDIT
EDIT SET
3
END
Prepare your camcorder (playing
device).
• Insert a cassette for editing.
• Slide the POWER switch to select the
PLAY/EDIT mode.
4
CON–
TROL
ADJ
TEST
CUT–
IN
CUT–
OUT
1/2
10Touch [CONTROL].
Touch
.
PROG. EDIT
CONTROL
5
0:00:00:00
0:00:00:00
IR
Touch [MENU].
IR
60min
i. LINK
0:00:00:00
MEMORY SET
STILL SET
MOVIE SET
ALL ERASE
6
Touch
/
to select
PLAY), then touch
.
60min
11Select [IR] or [i.LINK].
OK
(EDIT/
0:00:00:00
When connecting with an A/V
connecting cable
Touch [IR], then
. Follow the procedure
described in “To set the [IR SETUP] code”
(p. 93).
D. EFFECT
PICT. EFFECT
PRINT
VAR. SPD PB
REC CTRL
PROG. EDIT
OK
REC CTRL
7
Touch
/
to select [PROG.
EDIT], then touch
.
PROG. EDIT
0:00:00:00
END
Select the media.
OTHER
DEVICE
92
MEMORY
STICK
Dubbing/Editing
When connecting with an i.LINK
cable
Touch [i.LINK], then
. Go on to “Step
2 : Adjusting the synchronization of the
VCR” (p. 94).
To set the [IR SETUP] code
[IR SETUP] code list
When you connect with an A/V connecting
cable, you need to check the [IR SETUP] code
signal to see if your VCR can be operated by
your camcorder (infrared ray emitter).
The following [IR SETUP] codes are recorded
on your camcorder by default. (It is set at “3” as
the default setting.)
Infrared ray emitter
Remote sensor
VCR
A/V connecting
cable (supplied)
1 Touch
, then [IR SETUP].
2 Select the [IR SETUP] code of your VCR
3 Touch [PAUSEMODE].
4 Select the mode to cancel recording
pause on your VCR, then touch
.
Refer to the operating instructions supplied
with your VCR for details on operation.
5 Point the infrared ray emitter of your
camcorder towards the remote sensor on
your VCR, from about 30 cm (12 in.)
away, with no obstructions.
6 Insert a cassette into your VCR, and set
the VCR to recording pause.
7 Touch [IR TEST].
8 Touch [EXEC].
The recording starts on your VCR when the
setting is correct. [Completed.] appears
when the [IR SETUP] code test is finished.
Go on to “Step 2 : Adjusting the
synchronization of the VCR” (p. 94).
When recording fails to start, select another
[IR SETUP] code and try again.
[IR SETUP] code
Sony
1, 2, 3, 4, 5, 6
Aiwa
47, 53, 54
Akai
50, 62, 74
Alba
73
Amstrad
73
Baird
30, 36
Blaupunkt
11, 83
Bush
74
CGM
36, 47, 83
Clatronic
73
Daewoo
26
Ferguson
76, 83
Fisher
73
Funai
80
Goldstar
47
Goodmans
26, 84
Dubbing/Editing
/
, then touch
.
with
For the [IR SETUP] code of your VCR,
refer to “[IR SETUP] code list” (p. 93).
When there is more than one code listed for
the manufacturer of your VCR, try each
code and find the most appropriate one.
Manufacturing
company
Grundig
9, 83
Hitachi
42, 56
ITT/Nokia Instant
36
JVC
11, 12, 15, 21
Kendo
47
Loewe
16, 47, 84
Luxor
89
Mark
26*
Matsui
47, 58*, 60
Mitsubishi
28, 29
Nokia
36, 89
Nokia Oceanic
89
Nordmende
76
Okano
60, 62, 63
Orion
58*, 70
Panasonic
16, 78
Philips
83, 84, 86
Phonola
83, 84
,continued
Dubbing/Editing
93
Manufacturing
company
[IR SETUP] code
Roadstar
47
SABA
21, 76, 91
Salora
89
Samsung
22, 32, 52, 93, 94
Sanyo
36
Schneider
10, 83, 84
SEG
73
Seleco
47, 74
Sharp
89
Siemens
10, 36
Tandberg
26
Telefunken
91, 92
Step 2
: Adjusting the
synchronization of the VCR
Follow the steps below when you are
performing digital program edit for the first
time to a tape in a VCR. You can skip this
setting if you have set up your VCR before
using the following procedure.
You can adjust the synchronization of your
camcorder and the VCR to avoid not
recording the starting scene.
1
Remove the cassette from your
camcorder. Prepare a pen and paper
to take notes.
2
Set the VCR to recording pause mode.
Thomson
76, 100
Thorn
36, 47
Toshiba
40, 93
Universum
47, 70, 84, 92
Skip this step if you have selected [i.LINK]
in step 11 on p. 92.
W.W. House
47
bNote
Watoson
58, 83
• Run the tape for about 10 seconds before
pausing. The starting scenes may not get
recorded when you start recording from
the beginning of the tape.
* TV/VCR component
3
Touch
PROG. EDIT
ADJ TEST
, then [ADJ TEST].
0:00:00:00
Set the recording
device in
rec. pause mode.
EXEC
4
CANCEL
Touch [EXEC].
A picture (about 50 seconds long) with 5
[IN] and [OUT] indicators each for
adjusting synchronization is recorded.
94
Dubbing/Editing
[Completed.] appears when the recording is
finished.
10Touch
/
to select the average
number value for [CUT-OUT], then
touch
.
0:00:00:00
PROG. EDIT
ADJ TEST
The calculated stop position for recording is
set.
Completed.
11Touch [END] twice.
5
Rewind the tape on your VCR, then
play back in slow mode.
5 opening numbers for each [IN] and
closing numbers for each [OUT] appear.
6
Touch [CUT-IN].
0:00:00:00
PROG. EDIT
CUT–IN
When you are performing a digital program
edit for the first time to a tape in a VCR, go
through the procedures described in Steps 1
and 2 (p. 91 to p. 94) beforehand.
b Note
• You cannot dub the title or display indicators.
However, you can dub the title which has already
been recorded on a tape.
1
-60~+240
Touch
/
to select the average
number value for [CUT-IN], then
touch
.
The calculated start position for recording
is set.
9
Touch [CUT-OUT].
Prepare a cassette or a “Memory
Stick.”
Insert a tape to be played back into the
camcorder.
When you are recording on a tape, insert a
cassette for recording into your VCR.
When you are recording on a “Memory
Stick,” insert a “Memory Stick” into your
camcorder.
0
8
Dubbing/Editing
7
Take a note of the opening number
value of each [CUT-IN] and the closing
number value of each [CUT-OUT],
then calculate the average number
value for each [CUT-IN] and [CUTOUT].
Recording the selected scenes as
programs
2
Touch
3
Touch [MENU].
60min
.
0:00:00:00
0:00:00:00
PROG. EDIT
CUT–OUT
MEMORY SET
0
STILL SET
MOVIE SET
ALL ERASE
OK
-60~+240
,continued
Dubbing/Editing
95
4
Touch
/
to select
PLAY), then touch
.
60min
(EDIT/
7
Search for the beginning of the first
scene that you want to dub on your
camcorder, then pause playback.
You can adjust the position with
(frame).
0:00:00:00
D. EFFECT
PICT. EFFECT
PRINT
/
VAR. SPD PB
REC CTRL
PROG. EDIT
OK
REC CTRL
5
8
Touch [MARK IN].
The starting point of the first program is set,
and the upper part of the program mark
changes to light blue.
Touch
/
to select [PROG.
EDIT], then touch
.
[IMAGE SIZE] appears when recording
on a “Memory Stick.”
PROG. EDIT
MARK START
OUT
0:00:00:00
PROG. EDIT
END
0:00:00:00
EDIT
UNDO
SET
Select the media.
OTHER
DEVICE
MEMORY
STICK
TOTAL 0:00:00:00
SCENE 0
END
6
Touch the desired item.
When you are recording on a tape in
the VCR
Touch [OTHER DEVICE].
PROG. EDIT
MARK START
IN
0:00:00:00
EDIT
UNDO
SET
TOTAL 0:00:00:00
SCENE 0
END
When you are recording on a
“Memory Stick”
1 Touch [MEMORY STICK].
PROG. EDIT
MARK START
IN
Search for the end of the first scene
that you want to record on your
camcorder, then pause playback.
You can adjust the position with
(frame).
The ending point of the first program is set,
and the lower part of the program mark
changes to light blue.
PROG. EDIT
MARK START
IN
0:00:00:00
EDIT
UNDO
SET
TOTAL 0:00:00:12
SCENE 1
END
11Repeat steps 7 to 10 and create
END
2 Touch [IMAGE SIZE] repeatedly to
select the desired image size.
Dubbing/Editing
/
10Touch [MARK OUT].
0:00:00:00
IMAGE UNDO
SIZE
2min
TOTAL 0:00:00
SCENE 0
96
9
programs.
12Set your VCR to recording pause.
Skip this step if your camcorder is
connected via an i.LINK cable or recording
on a “Memory Stick.”
13Touch [START].
START
CANCEL
0:00:00:00
ENGAGE
REC PAUSE
EXEC
TOTAL 0:00:00:25
SCENE 3
b Notes
• You cannot set the starting point or ending point on
a blank section of the tape. If there is a blank section
in the picture set as a program, the total time may not
appear correctly.
• When you cannot operate the device correctly using
an i.LINK cable connection, select [IR] in step 11 on
p. 92, and set the [IR SETUP] code.
14Touch [EXEC].
A search for the beginning of the first
program starts, then the recording starts.
[SEARCH] appears during the search and
[EDITING] appears during editing.
SEARCH
–x1
0:00:00:00
SCENE 1/3
CANCEL
END
Dubbing/Editing
When a program is recorded, the program
mark changes from orange to light blue.
When all programs have been recorded, the
program editing operation stops
automatically.
To cancel recording, touch [CANCEL].
To end Digital program editing
Touch [END].
To save a program without using it to
record
Touch [CANCEL] in step 13.
The program is stored in memory until the
cassette is ejected.
To erase programs
1 Follow steps 1 to 6 in “Recording the
selected scenes as programs” (p. 95),
then touch [UNDO].
2 Touch [DEL 1MARK] to delete the last
set program. Or, touch [ALL ERASE] to
delete all the programs.
3 Touch [EXEC].
The programs are deleted.
To cancel this operation, touch [CANCEL].
Dubbing/Editing
97
Deleting recorded
pictures
To delete pictures on the index screen
You can easily search for the picture to be
deleted by displaying 6 pictures at once.
1 Slide the POWER switch to select the
PLAY/EDIT mode.
You can delete all or selected pictures stored
on a “Memory Stick.”
1
2
Slide the POWER switch repeatedly to
select the PLAY/EDIT mode.
Touch
60min
101–0001
.
2 / 10 101
MEMORY PLAY
2
3
4
5
6
Touch
.
Touch
.
Touch
.
Touch [
DELETE].
Touch the picture you want to delete.
appears on the image to be deleted.
To display the next or the previous 6
pictures, touch
/
.
7 Touch
.
8 Touch [YES].
The selected pictures are deleted.
To cancel deletion, touch [NO].
P-MENU
3
Touch
/
to select a picture
you want to delete.
4
Touch
DELETE
101–0001
.
2 / 10
101
Delete this image?
YES
5
NO
Touch [YES].
The selected picture is deleted.
To cancel deletion, touch [NO].
To delete all pictures at once
Select the
(MEMORY SET) menu, then
touch [
ALL ERASE] (p. 66).
98
Dubbing/Editing
b Notes
• Pictures cannot be deleted when the write-protect tab
of the “Memory Stick” is set to the write-protect
position (p. 116), or when the selected picture is
protected (p. 99).
• The pictures cannot be restored once they are
deleted. Make sure you check the pictures before
deleting them.
Marking recorded
images with specific
information
– Image
5
PROTECT
protection/Print mark
Make sure the write-protect tab on the
“Memory Stick” is not set to the write-protect
position.
Touch [PROTECT].
101–0002
2/ 10
6
101
Touch the image that you want to
protect.
- appears on the
PROTECT
selected image.
Preventing accidental erasure –
Image protection
101–0002
2/ 10
You can select and mark images to prevent
accidental erasure.
101
7
Touch
Touch [END].
OK
.
Slide the POWER switch to select the
PLAY/EDIT mode.
8
2
Touch
To cancel image protection
3
.
Touch
Dubbing/Editing
1
Follow steps 1 to 5, then touch the image to
cancel image protection.
- disappears from the image.
.
END
Selecting still images for printing
– Print mark
101–0002
2/ 10
4
Touch
101
SET
.
SET
END
PRO–
TECT
PR I NT
MARK
DELETE
PB
FOLDER
You can mark images that you want to print
out while viewing them on your camcorder.
(You cannot specify the number of
printouts.)
The DPOF (Digital Print Order Format)
standard is used to select images for printing
on your camcorder.
1
Slide the POWER switch to select the
PLAY/EDIT mode.
2
Touch
.
,continued
Dubbing/Editing
99
3
Touch
b Note
• Do not mark images on your camcorder if the
“Memory Stick” already has some images with the
Print mark put on other devices. This may change
the information of the images with the Print mark put
on the other device.
.
END
101–0002
2/ 10
4
Touch
101
SET
.
SET
END
5
PRO–
TECT
PR I NT
MARK
DELETE
PB
FOLDER
Touch [PRINT MARK].
PRINT MARK
101–0002
2/ 10
6
101
Touch the image that you want to print
out later.
appears on the
selected image.
PRINT MARK
101–0002
2/ 10
101
7
Touch
8
Touch [END].
OK
.
To cancel the Print mark
Follow steps 1 to 5, then touch the image to
cancel the Print mark.
disappears from the image.
100
Dubbing/Editing
Printing recorded
images (PictBridge
compliant printer)
4
Select
(STANDARD SET), then
[USB-PLY/EDT] by touching
/
and
.
5
Select [PictBridge], then touch
You can easily print still images recorded on
your camcorder by using a PictBridge
compliant printer, even if you do not have a
computer. Just set the connection in the menu
setting screen of your camcorder, then
connect your camcorder and printer using the
USB cable.
6
Touch
7
Connect the USB jack (p. 127) of your
camcorder to a printer using the
supplied USB cable.
Insert the “Memory Stick” on which still
images are stored into your camcorder, set
the paper in the printer, and turn on the
power.
.
The location of the USB jack of the printer
differs depending on the model. Refer to the
operating instructions supplied with your
printer for details on operation.
8
Select
(PICT. APPLI), then
[PRINT] by touching
/
and
1 / 10
PRINT
101–0001
b Note
• Connect the supplied AC Adaptor to the wall outlet
for the power supply.
1
Slide the POWER switch repeatedly to
select the PLAY/EDIT mode.
2
Select
3
Touch [MENU].
101
END
PictBridge indication
SET
Connecting your camcorder to the
printer
.
When connection between your camcorder
and printer is complete,
appears on the
screen.
Dubbing/Editing
z Tip
• PictBridge is an industry standard established by the
Camera & Imaging Products Association (CIPA).
You can print still images without using a computer
by connecting a printer directly to a digital video
camera or digital still camera, regardless of model
manufacturer.
.
EXEC
One of the images stored on the “Memory
Stick” will be displayed.
b Notes
• We cannot guarantee the operation of models that
are not PictBridge compatible.
• You cannot connect your camcorder to the printer if
[USB-PLY/EDT] in the menu settings is not set to
[PictBridge]. Follow the instructions shown on the
screen.
.
,continued
Dubbing/Editing
101
To print another image
Printing
Repeat steps 1 to 6.
To stop printing
Touch [CANCEL] while printing.
1
Select the image to be printed by
touching
(previous image)/
(next image).
2
Touch
3
Select the number of copies to be
printed by touching
/
, then
touch
.
, then [COPIES].
You can set a maximum of 20 copies of one
image to be printed.
4
Touch [END].
To print the date on the image
1 Touch
, then [DATE/TIME].
2 Select [DATE] or [DAY&TIME] and
.
The default setting is [OFF].
5
Touch [EXEC].
A confirmation screen appears.
1 / 10
101
PRINT
101-0001
Print this?
COPIES 1
DATE/TIME OFF
NO
YES
6
Touch [YES].
When printing is finished, [Printing...]
disappears and the image selection screen
appears again.
1 / 10
101
PRINT
101-0001
Printing...
Keep USB cable connected.
CANCEL
102
Dubbing/Editing
To finish printing
Touch [END] and disconnect the USB cable
from your camcorder and printer.
b Notes
• Do not attempt the following operations when
is
on the screen. The operations may not be performed
properly.
– Slide the POWER switch to select other power
modes.
– Disconnecting the USB cable from your
camcorder or printer.
– Removing the “Memory Stick” from your
camcorder.
• If the printer stops working, disconnect the USB
cable and restart the operation from the beginning.
• Some printer models may not support the date
printing function. Refer to the operating instructions
of your printer for details.
• We cannot guarantee the printing of images recorded
with a device other than your camcorder.
Troubleshooting
Troubleshooting
If you run into any problem using your
camcorder, use the following table to
troubleshoot the problem. If the problem
persists, remove the power source and
contact your Sony dealer.
If “C:ss:ss” is displayed on the LCD
screen or the viewfinder, the self-diagnosis
display function is activated. See page 110
for details.
Overall operations
Cause and/or Corrective Actions
The power does not turn on.
• The battery pack is discharged, running low, or not attached to the
camcorder.
cAttach a charged battery pack to the camcorder. (p. 14)
cUse the AC Adaptor to connect to the wall socket. (p. 17)
The camcorder does not operate even
when the power is set to on.
cDisconnect the AC Adaptor from a wall socket or remove the battery
pack, then reconnect it after about 1 minute. If the functions still do not
work, press the RESET button using a sharp-pointed object. (If you press
the RESET button, all settings including the clock setting (except the
Personal Menu items) are reset.)
The supplied Remote Commander
does not function.
cSet [REMOTE CTRL] on the
(STANDARD SET) menu to [ON].
(p. 80)
cInsert a battery into the battery holder with the + – polarities correctly
matching the + – marks. If this still does not solve the problem, insert a
new battery since the battery is dead. (p. 128)
cRemove any obstructions between the Remote Commander and the
remote sensor.
Troubleshooting
Symptom
,continued
Troubleshooting
103
Batteries/Power sources
Symptom
Cause and/or Corrective Actions
The CHG (charge) lamp does not
light while the battery pack is being
charged.
cAttach the battery pack to the camcorder correctly. If the lamp still does
not light up, then it indicates that no power is supplied from the wall
socket.
• The battery charge is completed. (p. 14)
The CHG (charge) lamp flashes while cAttach the battery pack to the camcorder correctly. If the problem
the battery pack is being charged.
persists, disconnect the AC Adaptor from the wall socket and contact
your Sony dealer. The battery pack may be damaged. (p. 14)
The battery pack is quickly
discharged.
• The temperature of the environment is too low, or the battery pack has
not been charged enough. This is not a malfunction.
cFully charge the battery again. If the problem persists, replace the
battery pack with a new one. It may be damaged. (p. 14, 117)
The remaining battery time indicator
does not indicate the correct time.
• The temperature of the environment is too high or too low, or the battery
pack has not been charged enough. This is not a malfunction.
cFully charge the battery again. If the problem persists, replace the
battery pack with a new one. It may be damaged. (p. 14, 117)
The power turns off frequently
although the remaining battery
indicator indicates that the battery
pack has enough power to operate.
• A problem has occurred in the remaining battery time indicator, or the
battery pack has not been charged enough.
cFully charge the battery again to correct the indication. (p. 14)
The power abruptly turns off.
• [A.SHUT OFF] in the
(STANDARD SET) menu is set to [5 min].
(p. 81)
cWhen approximately 5 minutes have elapsed while you do not operate
your camcorder, the camcorder is automatically turned off.
Slide the POWER switch down to turn the power on again. (p. 17) Or
use the AC Adaptor.
A problem occurs when the
camcorder is connected to the AC
Adaptor.
cTurn off the power, and disconnect the AC Adaptor from the wall socket.
Then, connect it again.
Cassette tapes
104
Symptom
Cause and/or Corrective Actions
Cassette cannot be ejected from the
compartment.
cMake sure the power source (battery pack or AC Adaptor) is connected
correctly. (p. 14)
cRemove the battery pack from the camcorder, then attach it again. (p. 14)
cAttach a charged battery pack to the camcorder. (p. 14)
Cassette is not ejected even when the
cassette lid is open.
• Moisture condensation is starting in your camcorder. (p. 120)
Troubleshooting
Symptom
Cause and/or Corrective Actions
The remaining tape indicator is not
displayed.
cSet [
REMAINING] to [ON] on the
(STANDARD SET) menu
to always display the remaining tape indicator. (p. 80)
LCD screen/viewfinder
Cause and/or Corrective Actions
An unknown language appears on the
screen.
cSee page 22.
An unknown picture appears on the
screen.
• The camcorder is in [DEMO MODE]. (The [DEMO MODE] is
automatically displayed when you leave the camcorder for 10 minutes
after selecting CAMERA-TAPE without inserting a cassette and
“Memory Stick.”) Touch on the LCD screen or insert a cassette or
“Memory Stick” to cancel [DEMO MODE]. You can also set [DEMO
MODE] to [OFF] on the menu. (p. 72)
An unknown indicator appears on the
screen.
cRefer to the indicator list. (p. 130)
The letters on the screen are larger
than usual, or the menu settings (
(CAMERA SET) etc.) are not
displayed.
cPress the EASY button to cancel Easy Handycam operation (p. 33, 51).
The buttons do not appear on the
touch panel.
cTouch the LCD panel lightly.
cPress DSPL/BATT INFO (or DISPLAY on the Remote Commander).
(p. 54)
The buttons on the touch panel do not
work correctly or do not work at all.
cAdjust the screen ([CALIBRATION]). (p. 121)
The picture in the viewfinder is not
clear.
cUse the viewfinder lens adjustment lever to adjust the lens. (p. 18)
The picture in the viewfinder has
disappeared.
cClose the LCD panel. The picture is not displayed in the viewfinder
when the LCD panel is open. (p. 18)
Troubleshooting
Symptom
,continued
Troubleshooting
105
Recording
If you are using a “Memory Stick” for recording, refer also to the “Memory Stick” section. (p. 108)
Symptom
Cause and/or Corrective Actions
The tape does not start when you
press REC START/STOP.
cSlide the POWER switch to turn on the CAMERA-TAPE lamp. (p. 17)
cThe tape has reached the end. Rewind it, or insert a new cassette.
cSet the write-protect tab to REC or insert a new cassette. (p. 115)
cThe tape is stuck to the drum due to moisture condensation. Remove the
cassette and leave your camcorder for at least 1 hour, then re-insert the
cassette. (p. 120)
The power abruptly turns off.
• [A.SHUT OFF] in the
(STANDARD SET) menu is set to [5 min].
(p. 81)
cWhen approximately 5 minutes have elapsed while you do not operate
your camcorder, the camcorder is automatically turned off.
Slide the POWER switch down to turn the power on again. (p. 17) Or
use the AC Adaptor.
cCharge the battery pack. (p. 14)
The SteadyShot does not function.
cSet [STEADYSHOT] to [ON] in the
(CAMERA SET) menu. (p. 64)
cSet [16:9 WIDE] to [OFF] in the
(CAMERA SET) menu. (p. 64)
The auto focus does not function.
cSet [FOCUS] to [AUTO] in the
(CAMERA SET) menu to enable
auto focus. (p. 39)
cThe recording conditions are not suitable for auto focus. Adjust the focus
manually. (p. 39)
A vertical band appears when
recording candlelight or electric light
in the dark.
• This occurs when the contrast between the subject and the background is
too high. This is not a malfunction.
A vertical band appears when
recording a bright subject.
• This phenomenon is called the smear effect. This is not a malfunction.
Tiny spots in white, red, blue, or
green appear on the screen.
• The spots appear when you are recording in [SLOW SHUTTR], Super
NightShot plus, or Color Slow Shutter. This is not a malfunction.
(p. 37, 41)
The color of the picture is not
correctly displayed.
cDeactivate the NightShot plus function. (p. 37)
Picture appears too bright on the
screen, and the subject does not
appear on the screen.
cDeactivate the NightShot plus function in bright places. (p. 37)
cCancel the back light function. (p. 35)
The shutter sound is not heard.
cSet [BEEP] to [MELODY] or [NORMAL] on the
SET) menu. (p. 80)
Black bands appear when you record
a TV screen or computer screen.
cSet [STEADYSHOT] to [OFF] on the
(p. 64)
(STANDARD
(CAMERA SET) menu.
Flickering or changes in color occurs. cThis occurs when recording pictures under a fluorescent lamp, sodium
lamp, or mercury lamp in the soft portrait or sports lesson mode. Cancel
[PROGRAM AE] in this case. (p. 61)
END SEARCH does not work.
106
Troubleshooting
• The cassette was ejected after recording.
• The cassette is new and has nothing recorded.
Symptom
Cause and/or Corrective Actions
END SEARCH does not work
correctly.
• There is a blank section in the beginning or middle of the tape. This is
not a malfunction.
The built-in light does not function.
cPress LIGHT repeatedly to select
.
cIf the problem persists, contact your Sony dealer or local authorized
Sony service facility.
Playback
If you are playing back the pictures stored on a “Memory Stick,” refer also to the “Memory Stick”
section. (p. 108)
Cause and/or Corrective Actions
Cannot play back.
cIf the tape has reached the end, rewind the tape. (p. 46)
Horizontal lines appear on the
picture. The displayed pictures are
not clear or do not appear.
cClean the head using the cleaning cassette (optional). (p. 121)
No sound or only a low sound is
heard.
cSet [MULTI-SOUND] to [STEREO] in the
(STANDARD SET)
menu. (p. 76)
cTurn up the volume. (p. 46)
cOn the
(STANDARD SET) menu, adjust [AUDIO MIX] from the
[ST2] (sub sound) side until the sound is heard appropriately. (p. 77)
cWhen you are using an S VIDEO plug, make sure the red and white plugs
of the A/V connecting cable are connected as well. (p. 56)
The sound breaks off.
cClean the head using the cleaning cassette (optional). (p. 121)
Cannot perform the Date search with
the recording date displayed on the
screen.
• There is a blank section in the beginning or middle of the tape. This is
not a malfunction.
The picture is not played back
correctly.
cSet [PB MODE] to [
/ ] in the
(STANDARD SET) menu
for the tape recorded on other devices in Hi8
/standard 8 mm
system. (p. 79)
cSet [PB MODE] to [AUTO] in the
(STANDARD SET) menu for
the tape recorded in Digital8
system. (p. 79)
“---” is displayed on the screen.
• The tape you are playing was recorded without setting the date and time.
• A blank section on the tape is being played.
• The data code on a tape with a scratch or noise cannot be read.
END SEARCH does not work.
• The cassette was ejected after recording.
• The cassette is new and has nothing recorded.
END SEARCH does not work
correctly.
• There is a blank section in the beginning or middle of the tape. This is
not a malfunction.
Troubleshooting
Symptom
,continued
Troubleshooting
107
“Memory Stick”
108
Symptom
Cause and/or Corrective Actions
Cannot operate functions using the
“Memory Stick.”
cSet the POWER switch to the CAMERA-MEMORY or PLAY/EDIT
mode. (p. 17)
c Insert a “Memory Stick” into your camcorder. (p. 21)
• The “Memory Stick” was formatted on a personal computer.
cFormat it on your camcorder (Note that all recorded data will be
deleted). (p. 66)
Cannot record on the “Memory
Stick.”
cRelease the lock on the write-protect tab of the “Memory Stick.” (p. 116)
cThe capacity is full. Delete unnecessary pictures recorded on the
“Memory Stick.” (p. 98)
cFormat the “Memory Stick” on your camcorder or insert another
“Memory Stick.” (p. 66)
• The “100MSDCF” folder is selected. You cannot record pictures to the
“100MSDCF” folder. This folder is used for playback only.
The pictures are not played back in
the actual size.
• Pictures recorded on other devices may not appear in the actual size. This
is not a malfunction.
Image data cannot be played back.
• Image data cannot be played back when you modify files or folders, or
edit the data on a computer. (The file name flashes in that case.) This is
not a malfunction. (p. 117)
• Pictures recorded on other devices may not be played back. This is not a
malfunction.
Pictures cannot be deleted.
cRelease the lock on the write-protect tab of the “Memory Stick.” (p. 116)
cCancel image protection on the picture. (p. 99)
• The maximum number of pictures that you can delete at one time is 100.
Delete them in groups of less than 100 pictures each.
Cannot format the “Memory Stick.”
cRelease the lock on the write-protect tab of the “Memory Stick.” (p. 116)
Cannot delete all pictures at once.
cRelease the lock on the write-protect tab of the “Memory Stick.” (p. 116)
cCancel image protection on the picture. (p. 99)
Image protection cannot be applied.
cRelease the lock on the write-protect tab of the “Memory Stick.” (p. 116)
cPerform the operation again on the index screen. (p. 99)
Cannot mark pictures for print.
cRelease the lock on the write-protect tab of the “Memory Stick.” (p. 116)
cPerform the operation again on the index screen. (p. 99)
• The maximum number of pictures you can mark for print is 999.
• Movies cannot be marked for print.
The data file name is not indicated
correctly.
• Only the file name is displayed if the directory structure does not
conform to the universal standard.
• The file is damaged.
• The file format is not supported on your camcorder. (p. 115)
The data file name flashes.
• The file is damaged.
• The file format is not supported on your camcorder. (p. 115)
Troubleshooting
Dubbing/Editing
Symptom
Cause and/or Corrective Actions
Pictures from connected devices are
not displayed on the LCD screen or
the viewfinder.
cSet [DISPLAY] to [LCD PANEL] in the
menu. (p. 81)
(STANDARD SET)
Still pictures cannot be dubbed from a • You cannot record or a distorted picture may be recorded if the tape has
tape to a “Memory Stick.”
been used repeatedly for recording.
• You cannot record or a distorted picture may be recorded in the
following:
– The tape has a blank section.
– The tape has been used repeatedly for recording.
– Input signal has been interrupted or cut.
Digital program editing on the tape
does not function.
cSet the input selector on the VCR correctly, then check the connection
between your camcorder and the VCR. (p. 86)
cWhen your camcorder is connected to a DV device that is not a Sony
product via an i.LINK cable, select [IR] in step11 of “Step 1: Preparing
your camcorder and VCR for operation” (p. 91).
cAdjust the synchronization of the VCR. (p. 94)
cEnter a correct [IR SETUP] code. (p. 93)
cSelect the mode used to cancel recording pause again. (p. 93)
cSet your camcorder and the VCR more than 30 cm (12 in.) apart. (p. 93)
cSet [PB MODE] to [AUTO] in the
(STANDARD SET) menu.
(p. 79)
• The program may not be set to a blank section on the tape.
The VCR is not responding properly
during Digital program editing when
it is connected via an i.LINK cable.
• While connecting via an i.LINK cable, select [IR] in step 11 of “Step 1:
Preparing your camcorder and VCR for operation” (p. 91).
Digital program editing on the
“Memory Stick” does not function
correctly.
• The program may not be set to a blank section on the tape.
• You cannot record or a distorted picture may be recorded if the tape has
been used repeatedly for recording.
Troubleshooting
Troubleshooting
Movies cannot be dubbed from a tape
to a “Memory Stick.”
109
Warning indicators
and messages
Self-diagnosis display/Warning indicators
If indicators appear on the screen or in the viewfinder, check the following. See the page in parentheses
for details.
Indication
Cause and/or Corrective Actions
C:ss:ss/E:ss:ss (Selfdiagnosis display)
Some symptoms can be fixed by yourself. If the problem persists even after
you tried a couple of times, contact your Sony dealer or local authorized
Sony service facility.
C:04:ss
cA battery pack that is not an “InfoLITHIUM” battery pack is being used.
Use an “InfoLITHIUM” battery pack. (p. 117)
C:21:ss
cMoisture condensation has occurred. Remove the cassette and leave your
camcorder for at least 1 hour, then re-insert the cassette. (p. 120)
C:22:ss
cClean the head using a cleaning cassette (optional). (p. 121)
C:31:ss / C:32:ss
cSymptoms that are not described above have occurred. Remove and
insert the cassette, then operate your camcorder again. Do not perform
this procedure if moisture starts to condense. (p. 120)
cRemove the power source. Reconnect it again and operate your
camcorder again.
cChange the tape.
cPress the RESET button and operate your camcorder again (p. 125).
E:61:ss / E:62:ss
cContact your Sony dealer or local authorized Sony service facility.
Inform them of the 5-digit code, which starts from “E.”
101-0001 (Warning indicator
pertaining to files)
• The file is damaged.
• The file is unreadable.
• You are trying to carry out the MEMORY MIX function on a movie
(p. 43).
E (Battery level warning)
• The battery pack is nearly used up.
• Depending on the operating, environmental, or battery conditions, the
E indicator may flash, even if there are approximately 5 to 10 minutes
remaining.
% (Moisture condensation warning)* cEject the cassette, set the POWER switch to (CHG) OFF, and leave it for
about 1 hour with the cassette lid open (p. 120).
(Warning indicator pertaining to
the “Memory Stick”)
110
Troubleshooting
• No “Memory Stick” is inserted.
Indication
Cause and/or Corrective Actions
(Warning indicator pertaining to
“Memory Stick” formatting)*
• The “Memory Stick” data is damaged.
• The “Memory Stick” is not formatted correctly (p. 66).
(Warning indicator pertaining to
incompatible “Memory Stick”)*
• An incompatible “Memory Stick” is inserted.
Q (Warning indicator pertaining to
the tape)
Slow flashing:
• There is less than 5 minutes remaining on the tape.
• No cassette is inserted.*
• The write-protect tab on the cassette is set to lock (p. 115).*
Fast flashing:
• The tape has run out.*
Z (Eject cassette warning)*
Slow flashing:
• The write-protect tab on the cassette is set to lock (p. 115).
Fast flashing:
• Moisture condensation has occurred (p. 120).
• The self-diagnosis display code is displayed (p. 110).
- (Warning indicator pertaining to
image deletion)*
• The image is protected (p. 99).
- (Warning indicator
pertaining to the write-protect of the
“Memory Stick”)
• The write-protect tab on the “Memory Stick” is set to lock. (p. 116)
* You hear a melody or beep sound when the warning indicators appear on the screen.
Troubleshooting
,continued
Troubleshooting
111
Warning messages
If messages appear on the screen, check the following. See the page in parentheses for details.
Subjects
Indications
Corrective Actions/References
Battery
Use the “InfoLITHIUM” battery pack.
cSee page 117.
Battery level is low.
cCharge the battery (p. 14).
Old battery. Use a new one.
cSee page 117.
Moisture
condensation
Cassette/tape
Z Re-attach the power source.
–
% Z Moisture condensation. Eject the cassette.
cSee page 120.
% Moisture condensation. Turn off for 1H.
cSee page 120.
Q Insert a cassette.
cSee page 20.
Z Reinsert the cassette.
cThe cassette might be damaged, etc.
Q Z The tape is locked - check the tab.
cSee page 115.
Q The tape has reached the end.
–
“Memory Stick”
Insert a Memory Stick.
cSee page 21.
Reinsert the Memory Stick.
cReinsert the “Memory Stick” a few
times.
cFormat the "Memory Stick." (p. 66)
• The “Memory Stick” might be
damaged. Try with another “Memory
Stick.”
Do not eject the Memory Stick during writing.
–
This is a read-only Memory Stick.
–
Incompatible type of Memory Stick.
cSee page 115.
This Memory Stick is not formatted correctly. cCheck the format, then format the
“Memory Stick” as necessary (p. 66).
Cannot record. The Memory Stick is full.
- The Memory Stick is locked - check the
cDelete unnecessary images (p. 98).
cSee page 116.
tab.
Cannot playback. Reinsert the Memory Stick.
112
Troubleshooting
–
Cannot record. Reinsert the Memory Stick.
–
No file.
• No file is recorded or there is no
readable file on the “Memory Stick.”
NO FILE AVAILABLE.
• There is no file in the selected folder.
USB streaming... This function is not available.
• You tried to play back or record on a
“Memory Stick” during USB
Streaming.
Subjects
Indications
Corrective Actions/References
“Memory Stick”
Memory Stick folders are full.
• You cannot create folders exceeding
999MSDCF.
• You cannot delete the created folders
using your camcorder. You will have
to format the “Memory Stick” (p. 66),
or delete them using your computer.
Cannot record still images on Memory Stick.
–
Cannot record Memory Stick movie on a tape.
–
Check the connected device.
cSwitch off the printer and switch it on
again, then disconnect the USB cable
and reconnect it.
PictBridge
compliant printer
Connect the camcorder to a PictBridge compatible cSwitch off the printer and switch it on
printer.
again, then disconnect the USB cable
and reconnect it.
Others
Check the printer.
cCheck the printer.
Error-Cancel the task.
cCheck the printer.
Cannot print. Check the printer.
cSwitch off the printer and switch it on
again, then disconnect the USB cable
and reconnect it.
Cannot record due to copyright protection.
–
Cannot record 44.1 kHz audio on a Memory Stick. –
–
Already added to CAMERA-MEMORY mode’s
P-MENU.
–
Troubleshooting
Already added to CAMERA-TAPE mode’s
P-MENU.
Already added to PLAY/EDIT mode’s P-MENU. –
x
Dirty video head. Use a cleaning cassette.
cSee page 121.
Cannot start Easy Handycam
–
Cannot cancel Easy Handycam
–
Cannot start Easy Handycam with USB connected
–
Cannot cancel Easy Handycam with USB
connected
–
Invalid button with Easy Handycam operation
–
USB is invalid in this mode during Easy
Handycam
• You can select [STD-USB] in PLAY/
EDIT mode during Easy Handycam
operation, but you cannot select
[PictBridge] or [USB STREAM].
(The message disappears when you
touch
.)
Troubleshooting
113
Additional Information
Using your camcorder
abroad
Power supply
You can use your camcorder in any country/
regions using the AC Adaptor supplied with
your camcorder within AC 100 V to 240 V,
50/60 Hz.
On TV color systems
Your camcorder is a PAL system-based
camcorder. If you want to view the playback
picture on a TV, it must be a PAL system-based
TV (see following list) with the AUDIO/
VIDEO input jack.
System
Used in
PAL
Australia, Austria, Belgium,
China, Czech Republic, Denmark,
Finland, Germany, Holland, Hong
Kong, Hungary, Italy, Kuwait,
Malaysia, New Zealand, Norway,
Poland, Portugal, Singapore,
Slovak Republic, Spain, Sweden,
Switzerland, Thailand, United
Kingdom, etc.
PAL - M
Brazil
PAL - N
Argentina, Paraguay, Uruguay
SECAM
Bulgaria, France, Guiana, Iran,
Iraq, Monaco, Russia, Ukraine, etc.
NTSC
Bahama Islands, Bolivia, Canada,
Central America, Chile, Colombia,
Ecuador, Guyana, Jamaica, Japan,
Korea, Mexico, Peru, Surinam,
Taiwan, the Philippines, the
U.S.A., Venezuela, etc.
Simple setting of clock by time
difference
You can easily set the clock to the local time by
setting a time difference when using your
camcorder abroad. Select [WORLD TIME] in
the
(TIME/LANGU.) menu, then set the
time difference (p. 82).
114
Additional Information
Usable cassette
tapes
You can use standard 8 mm
and Hi8
,
Digital8
video cassettes on your camcorder.
Digital8
system
This video system has been developed to enable
digital recording to Hi8
/Digital8 video
cassette.
The recording time when you use your
Digital8
system camcorder on Hi8
/
standard 8 mm
tape is 2/3 of the recording
time when using the conventional Hi8
/
standard 8 mm
system camcorder.
(90 minutes of recording time becomes 60
minutes in the SP mode.)
Hi8
system
This Hi8
system is an extension of the
standard 8 mm system, and was developed to
produce higher quality pictures.
You cannot play back a tape recorded in the
Hi8
system correctly on video recorders/
players other than a Hi8 video recorder/player.
To prevent a blank section from being
made on the tape
Touch
to go to the end of the recorded
section before you begin the next recording in
the following cases:
– You have ejected the cassette during
recording.
– You have played back the tape.
– You have used EDIT SEARCH.
If there is a blank section or discontinuous
signals on your tape, re-record from the
beginning to the end of the tape as described
above.
Copyright signal
When you play back
If the cassette you play back on your camcorder
contains copyright signals, you cannot copy it to
a tape in another video camera connected to
your camcorder.
When you record
You cannot record software on your
camcorder that contains copyright
control signals for copyright protection
of software.
[Cannot record due to copyright protection.]
appears on the LCD screen, or on the TV screen
if you try to record such software.
Your camcorder does not record copyright
control signals on the tape when it records.
Notes on use
To prevent accidental erasure
Slide the write-protect tab on the cassette to set
to SAVE.
About the “Memory
Stick”
The “Memory Stick” is a new light and small
recording media which, despite its size, can
store more data than a floppy disk.
You can use following types of “Memory
Stick” on your camcorder. However,
appearance on the list does not guarantee the
operation of all types of “Memory Stick” on
your camcorder.
Types of “Memory Stick”
Recording/
Playback
“Memory Stick”
a
“Memory Stick
Duo”*1
a*2
“MagicGate Memory Stick
Duo”*1
a*2
“Memory Stick PRO”
a*2
“Memory Stick PRO
When labeling the cassette
Be sure to place the label only on the locations
as shown in the following illustration so as not
to cause malfunction of your camcorder.
Do not put a label
along the border.
Labeling position
After using the cassette
Rewind the tape to the beginning to avoid
distortion of the picture or the sound. The
cassette should then be put in its case, and stored
in an upright position.
•
,
and
are trademarks.
Duo”*1
a*2
*1 Attach the Memory Stick Duo adaptor before
inserting it into the camcorder.
*2 “MagicGate” is a copyright protection technology
that records and transfers the contents in an
encrypted format. Note that data that uses
“MagicGate” technology cannot be recorded or
played on your camcorder.
Additional Information
REC: The cassette can be recorded.
SAVE: The cassette cannot be recorded (writeprotected).
a
“MagicGate Memory Stick”
• Still image format: Your camcorder
compresses and records image data in the
JPEG (Joint Photographic Experts Group)
format. The file extension is “.JPG.”
• Movie format: Your camcorder compresses
and records picture data in the MPEG
(Moving Picture Experts Group) format. The
file extension is “.MPG.”
• File names of still images:
– 101-0001: This file name appears on the
screen of your camcorder.
– DSC00001.JPG: This file name appears on
the display of a computer.
• File names of movies:
– MOV00001: This file name appears on the
screen of your camcorder.
– MOV00001.MPG: This file name appears
on the display of a computer.
,continued
Additional Information
115
• On a “Memory Stick” formatted on a
computer: A “Memory Stick” formatted by
the Windows OS or using Macintosh
computers does not have guaranteed
compatibility with your camcorder.
• Data read/write speed may vary depending on
the combination of the “Memory Stick” and
“Memory Stick” compliant product you use.
To prevent accidental erasure of images
Slide the write-protect tab on the “Memory
Stick” to the write-protect position.
The position and shape of the write-protect tab
may be different depending on the model.
Back of the “Memory Stick”
Write-protect tab
Terminal
Notes on use
Image data may be damaged in the following
cases. Compensation for damaged image data
will not be made.
– If you eject the “Memory Stick,” turn the
power off on your camcorder, or remove the
battery pack for replacement while your
camcorder is reading or writing image files
on the “Memory Stick” (while the access
lamp is lit or flashing).
– If you use the “Memory Stick” near magnets
or magnetic fields.
It is recommended you take a back-up of
important data on the hard disk of a computer.
On handling
• Do not bend, drop or apply strong force to the
“Memory Stick.”
• Do not disassemble or modify the “Memory
Stick.”
• Do not let the “Memory Stick” get wet.
• Do not insert any objects other than a
compliant “Memory Stick” into the “Memory
Stick” slot. It may cause a malfunction.
On location for use
Do not use or keep the “Memory Stick” in the
following locations.
– Places subject to extremely high temperature,
such as a car parked outside in the summer.
– Places under direct sunlight.
– Places with extremely high humidity or
subject to corrosive gases.
Note on using the “Memory Stick Duo”
You can use a “Memory Stick Duo” in your
camcorder after inserting it into the Memory
Stick Duo adaptor.
You may damage the “Memory Stick Duo” or
the “Memory Stick” slot on your camcorder in
the following situations.
– When you insert a “Memory Stick Duo” that
is not inserted into a Memory Stick Duo
adaptor into the “Memory Stick” slot on your
camcorder.
– When you insert the “Memory Stick Duo” in
the wrong direction.
If you insert a “Memory Stick Duo” without a
Memory Stick Duo adaptor by mistake, hold the
camcorder so the “Memory Stick” slot is facing
down, then hold the lid aside using a toothpick
or similar object to let the “Memory Stick Duo”
slide out.
Labeling area
Attach the label within
the designated labeling
area.
Keep the following notes in mind when
handling a “Memory Stick.”
• When you carry or store a “Memory Stick,”
put it in its case.
• Do not touch, or allow metallic objects to
come into contact with the terminal.
116
Additional Information
Notes on using the “Memory Stick PRO”
• The maximum memory capacity of a
“Memory Stick” that can be used on your
camcorder is 1 GB (512 MB for a “Memory
Stick PRO Duo”).
• This unit does not support high speed data
transfer.
Notes on image data compatibility
• Image data files recorded on a “Memory
Stick” by your camcorder conform to the
Design Rule for Camera File Systems
universal standard established by the JEITA
(Japan Electronics and Information
Technology Industries Association).
• On your camcorder, you cannot play back still
images recorded on other device (DCRTRV890E/TRV900/TRV900E or DSC-D700/
D770) that does not conform to the universal
standard. (These models are not sold in some
regions.)
• If you cannot use a “Memory Stick” that has
been used with other device, format it with
your camcorder (p. 66). Note that formatting
erases all information on the “Memory Stick.”
• You may not be able to play back images with
your camcorder:
– When playing back image data modified on
your computer.
– When playing back image data recorded
with other device.
This unit is compatible with the
“InfoLITHIUM” battery pack (M series). Your
camcorder operates only with the
“InfoLITHIUM” battery pack.
“InfoLITHIUM” M series battery packs have
the
mark.
TM
SERIES
What is the “InfoLITHIUM” battery
pack?
The “InfoLITHIUM” battery pack is a lithiumion battery pack that has functions for
communicating information related to operating
conditions between your camcorder and an
optional AC Adaptor/charger.
The “InfoLITHIUM” battery pack calculates
the power consumption according to the
operating conditions of your camcorder, and
displays the remaining battery time in minutes.
With an AC Adaptor/charger (optional), the
remaining battery time and charging time
appear.
Additional Information
• “Memory Stick,”
and “MagicGate
Memory Stick” are trademarks of Sony
Corporation.
• “Memory Stick Duo” and “
”
are trademarks of Sony Corporation.
• “Memory Stick PRO” and “
”
are trademarks of Sony Corporation.
• “MagicGate” and “
” are
trademarks of Sony Corporation.
• All other product names mentioned herein
may be the trademarks or registered
trademarks of their respective companies.
Furthermore, “™” and “®” are not mentioned
in each case in this manual.
About the
“InfoLITHIUM”
battery pack
To charge the battery pack
• Be sure to charge the battery pack before you
start using your camcorder.
• We recommend charging the battery pack in
an ambient temperature of between 10°C to
30°C (50°F to 86°F) until the CHG (charge)
lamp turns off. If you charge the battery pack
outside of this temperature range, you may not
be able to charge it efficiently.
• After charging is complete, either disconnect
the cable from the DC IN jack on your
camcorder or remove the battery pack.
To use the battery pack effectively
• Battery pack performance decreases when the
surrounding temperature is 10°C (50°F) or
below, and the length of time you can use the
battery pack becomes shorter. In that case, do
one of the following to use the battery pack for
a longer time.
,continued
Additional Information
117
•
•
•
•
– Put the battery pack in a pocket to warm it
up, and insert it in your camcorder right
before you start taking shots.
– Use a large capacity battery pack: NPFM50/QM71/QM71D/QM91/QM91D
(optional).
Frequent use of the LCD screen or a frequent
playback, fast forward or rewind operation
wears out the battery pack faster. We
recommend using a large capacity battery
pack: NP-FM50/QM71/QM71D/QM91/
QM91D (optional).
Be sure to set the POWER switch to (CHG)
OFF when not recording or playing back on
your camcorder. The battery pack is also
consumed when your camcorder is in
recording standby or playback pause.
Have spare battery packs ready for two or
three times the expected recording time, and
make trial recordings before making the actual
recording.
Do not expose the battery pack to water. The
battery pack is not water resistant.
About remaining battery time indicator
• When the power goes off even though the
remaining battery time indicator indicates that
the battery pack has enough power to operate,
charge the battery pack fully again. The
indication on the remaining battery time will
be indicated correctly. Note, however, that the
battery indication will not be restored if it is
used in high temperatures for a long time, or if
left in a fully charged state, or when the
battery pack is frequently used.
Use the remaining battery time indication as a
guide to the approximate shooting time.
• The E mark that indicates low battery flashes
even if there are still 5 to 10 minutes of battery
time remaining, depending on the operating
conditions or ambient temperature and
environment.
118
Additional Information
About storage of the battery pack
• If the battery pack is not used for a long time,
fully charge the battery pack and use it on your
camcorder once a year to maintain the proper
function.
To store the battery pack, remove it from your
camcorder and put it in a dry, cool place.
• To discharge the battery pack on your
camcorder completely, set [A. SHUT OFF] to
(STANDARD SET)
[NEVER] on the
menu and leave your camcorder in tape
recording standby until the power goes off
(p. 81).
About battery life
• The battery life is limited. Battery capacity
drops little by little as you use it more and
more, and as time passes. When the available
battery time is shortened considerably, a
probable cause is that the battery pack has
reached the end of its life. Please buy a new
battery pack.
• The battery life varies depending on how it is
stored and the operating conditions and
environment for each battery pack.
“InfoLITHIUM” is a trademark of Sony
Corporation.
About i.LINK
The DV Interface on this unit is an i.LINKcompliant DV Interface. This section describes
the i.LINK standard and its features.
What is i.LINK?
b Note
• Normally, only one device can be connected to this
unit with the i.LINK cable. When connecting this
unit to i.LINK-compatible device having two or
more DV Interfaces, refer to the operating
instructions of the device to be connected.
z Tips
• i.LINK is a more familiar term for the IEEE 1394
data transport bus proposed by Sony, and is a
trademark approved by many corporations.
• IEEE 1394 is an international standard standardized
by the Institute of Electrical and Electronics
Engineers.
i.LINK’s maximum baud rate varies according
to the device. There are three types.
S100 (approx. 100Mbps*)
S200 (approx. 200Mbps)
S400 (approx. 400Mbps)
The baud rate is listed under “Specifications” in
the operating instructions of each piece of
device. It is also indicated near the i.LINK
interface on some device.
The maximum baud rate for device that does not
have any indication (such as this unit) is
“S100.”
The baud rate may differ from the indicated
value when the unit is connected to device with
a different maximum baud rate.
* What is Mbps?
Mbps stands for “megabits per second,” or the
amount of data that can be sent or received in one
second. For example, a baud rate of 100 Mbps means
that 100 megabits of data can be sent in one second.
To use i.LINK functions on this unit
For details on how to dub when this unit is
connected to other video device having a DV
Interface, see page 86, 87.
This unit can also be connected to other i.LINK
(DV Interface) compatible device made by
Sony (e.g. a VAIO series personal computer) as
well as to video device.
Before connecting this unit to your computer,
make sure that application software supported
by this unit is already installed on your
computer.
Some i.LINK compatible video device such as
Digital Televisions, DVD recorders/players,
and MICROMV recorders/players are not
compatible with DV device. Before connecting
to other device, be sure to confirm whether the
device is compatible with DV device or not.
For details on precautions and compatible
application software, refer also to the operating
instructions for the device to be connected.
Additional Information
i.LINK is a digital serial interface for
transferring digital video, digital audio, and
other data to other i.LINK-compatible device.
You can also control other device using the
i.LINK.
i.LINK-compatible device can be connected
using an i.LINK cable. Possible applications are
operations and data transactions with various
digital AV devices.
When two or more i.LINK-compatible device
are connected to this unit in a daisy chain,
operations and data transactions are possible
with not only the device that this unit is
connected to but also with other devices via the
directly connected device.
Note, however, that the method of operation
sometimes varies according to the
characteristics and specifications of the device
to be connected. Also, operations and data
transactions may not be possible on some
connected device.
About i.LINK Baud rate
About the required i.LINK cable
Use the Sony i.LINK 4-pin-to-4-pin cable
(during DV dubbing).
i.LINK and
Corporation.
are trademarks of Sony
Additional Information
119
Maintenance and
precautions
On use and care
• Do not use or store the camcorder and
accessories in the following locations.
– Anywhere extremely hot or cold. Never
leave them exposed to temperatures above
60°C (140°F), such as under direct sunlight,
near heaters or in a car parked in the sun.
They may malfunction or become
deformed.
– Near strong magnetic fields or mechanical
vibration. The camcorder may malfunction.
– Near strong radio waves or radiation. The
camcorder may not be able to record
properly.
– Near AM receivers and video equipment.
Noise may occur.
– Sandy beach or anywhere dusty. If sand or
dust gets in your camcorder, it may
malfunction. Sometimes this malfunction
cannot be repaired.
– Near windows or outdoors, where the LCD
screen, the viewfinder, or the lens may be
exposed to direct sunlight. This damages
the inside of the viewfinder or the LCD
screen.
– Anywhere very humid.
• Operate your camcorder on DC 7.2 V (battery
pack) or DC 8.4 V (AC Adaptor).
• For DC or AC operation, use the accessories
recommended in these operating instructions.
• Do not let your camcorder get wet, for
example, from rain or sea water. If your
camcorder gets wet, it may malfunction.
Sometimes this malfunction cannot be
repaired.
• If any solid object or liquid get inside the
casing, unplug your camcorder and have it
checked by a Sony dealer before operating it
any further.
• Avoid rough handling disassembling,
modifying or mechanical shock. Be
particularly careful of the lens.
• Keep the POWER switch setting to (CHG)
OFF when you are not using your camcorder.
120
Additional Information
• Do not wrap your camcorder with a towel, for
example, and operate it. Doing so might cause
heat to build up inside.
• When disconnecting the power cord, pull by
the plug and not the cord.
• Do not damage the power cord such as by
placing anything heavy on it.
• Keep metal contacts clean.
• Keep the Remote Commander and buttontype battery out of children's reach. If the
battery is accidentally swallowed, consult a
doctor immediately.
• If the battery electrolytic liquid has leaked
– consult your local authorized Sony service
facility.
– wash off any liquid that may have contacted
your skin.
– if any liquid gets in your eyes, wash with
plenty of water and consult a doctor.
When not using your camcorder for a
long time
Occasionally turn it on and let it run such as by
playing back tapes for about 3 minutes.
Otherwise, unplug it from the wall socket.
Moisture condensation
If your camcorder is brought directly from a
cold place to a warm place, moisture may
condense inside your camcorder, on the surface
of the tape, or on the lens. In this state, the tape
may stick to the head drum and be damaged or
your camcorder may not operate correctly. If
there is moisture inside your camcorder,
[% Z Moisture condensation. Eject the
cassette] or [% Moisture condensation. Turn off
for 1H.] appears. The indicator will not appear
when the moisture condenses on the lens.
If moisture condensation has occurred
None of the functions except cassette ejection
will work. Eject the cassette, turn off your
camcorder, and leave it for about one hour with
the cassette lid open. Your camcorder can be
used again if the % or Z does not appear when
the power is turned on again.
If moisture starts to condense, your camcorder
sometimes cannot detect condensation. If this
happens, the cassette is sometimes not ejected
for 10 seconds after the cassette lid is opened.
This is not a malfunction. Do not close the
cassette lid until the cassette is ejected.
Note on moisture condensation
Moisture may condense when you bring your
camcorder from a cold place into a warm place
(or vice versa) or when you use your camcorder
in a humid place as shown below.
• When you bring your camcorder from a ski
slope into a place warmed up by a heating
device.
• When you bring your camcorder from an airconditioned car or room into a hot place
outside.
• When you use your camcorder after a squall or
a shower.
• When you use your camcorder in a hot and
humid place.
How to prevent moisture condensation
When you bring your camcorder from a cold
place into a warm place, put your camcorder in
a plastic bag and seal it tightly. Remove the bag
when the air temperature inside the plastic bag
has reached the surrounding temperature (after
about one hour).
Video head
LCD screen
• Do not add excessive pressure on the LCD
screen, as it may cause damage.
• If your camcorder is used in a cold place, a
residual image may appear on the LCD screen.
This is not a malfunction.
• While using your camcorder, the back of the
LCD screen may heat up. This is not a
malfunction.
To clean the LCD screen
• If fingerprints or dust make the LCD screen
dirty, it is recommended you use the cleaning
cloth (supplied) to clean it. When you use the
LCD Cleaning Kit (optional), do not apply the
cleaning liquid directly to the LCD screen.
Use cleaning paper moistened with the liquid.
On adjustment of the LCD screen
(CALIBRATION)
The buttons on the touch panel may not work
correctly. If this happens, follow the procedure
below. It is recommended you connect your
camcorder to the wall socket using the supplied
AC Adaptor during the operation.
Additional Information
• When the video head becomes dirty, you
cannot record pictures normally, or distorted
picture or sound is played back.
• The video head suffers from wear after long
use. If you cannot obtain a clear image even
after using a cleaning cassette, it might be
because the video head is worn. Please contact
your Sony dealer or local authorized Sony
service facility to have the video head
replaced.
• If the following problem occurs, clean the
video heads for 10 seconds with the Sony
V8-25CLD cleaning cassette (optional).
When you play back in the Digital8
system
– Mosaic-pattern noise appears on the
playback picture or the screen is displayed
in blue.
– Playback pictures do not appear or the
sound breaks off.
Dirty video head. Use a cleaning
– [x
cassette.] appears on the screen during
recording.
When you play back in the Hi8
/standard
8 mm
system
– [x
Dirty video head. Use a cleaning
cassette.] appears on the screen during
recording.
– Playback pictures contain noise.
– Playback pictures are hardly visible.
– Playback pictures do not appear.
1 Slide the POWER switch up to (CHG)
OFF.
2 Eject the cassette and “Memory Stick”
from your camcorder, then disconnect
any connecting cables except the AC
Adaptor from your camcorder.
– Playback pictures do not move.
,continued
Additional Information
121
3 Slide the POWER switch repeatedly to
select the PLAY/EDIT mode while
pressing DSPL/BATT INFO on your
camcorder, then press and hold DSPL/
BATT INFO for about 5 seconds.
4 Touch the “×” displayed on the screen
with an object such as the corner of a
“Memory Stick.”
The position of the “×” changes.
CALIBRATION
If you did not press the right spot, start from
step 4 again.
b Note
• You cannot calibrate the LCD screen if you have
rotated the LCD panel and set it with the LCD screen
facing out.
On handling the casing
• If the casing is soiled, clean the camcorder
body with a soft cloth lightly moistened with
water, and then wipe the casing with a dry soft
cloth.
• Avoid the following to avoid damage to the
finish.
– Using chemicals such as thinner, benzine,
alcohol, chemical cloths, repellent and
insecticide.
– Handling with above substances on your
hands.
– Leaving the casing in contact with rubber or
vinyl objects for a long period of time.
About care and storage of the lens
• Wipe the surface of the lens clean with a soft
cloth in the following instances:
– When there are fingerprints on the lens
surface.
– In hot or humid locations
– When the lens is exposed to salty air such as
at the seaside.
• Store in a well-ventilated location subject to
little dirt or dust.
122
Additional Information
• To prevent molds periodically clean the lens
as described above.
It is recommended you operate your camcorder
about once a month to keep it in an optimum
state for a long time.
To charge the pre-installed button-type
battery
Your camcorder has a pre-installed button-type
battery to retain the date, time, and other
settings even when the POWER switch is set to
(CHG) OFF. The pre-installed button-type
battery is always charged while you are using
your camcorder but it will get discharged
gradually if you do not use your camcorder. The
button-type battery will be fully discharged in
about 3 months if you do not use your
camcorder at all. However, even if the preinstalled button-type battery is not charged, the
camcorder operation will not be affected as long
as you are not recording the date.
Procedures
Connect your camcorder to a wall socket using
the supplied AC Adaptor, and leave it with the
POWER switch set to (CHG) OFF for more
than 24 hours.
Specification
Video camera recorder
System
*2 Objects unable to be seen due to the dark can
be shot with infrared lighting.
Input/Output connectors
S video input/output
Luminance signal: 1 Vp-p, 75 Ω (ohms),
unbalanced
Chrominance signal: 0.3 Vp-p, 75 Ω (ohms),
unbalanced
4-pin mini DIN
Audio/Video input/output
AV MINIJACK
Video signal: 1 Vp-p, 75 Ω (ohms),
unbalanced, sync negative
Audio signal: 327 mV (at output impedance
more than 47 kΩ (kilohms)), Input impedance
more than 47 kΩ (kilohms), Output impedance
with less than 2.2 kΩ (kilohms)
Stereo minijack (φ 3.5 mm)
DV input/output
4-pin connector
USB jack
mini-B
Additional Information
Video recording system
2 rotary heads, Helical scanning system
Still image recording system
Exif Ver. 2.2*1
*1 “Exif” is a file format for still images,
established by the JEITA (Japan
Electronics and Information Technology
Industries Association). Files in this format
can have additional information such as
your camcorder’s setting information at the
time of recording.
Audio recording system
Rotary heads, PCM system
Quantization: 12 bits (Fs 32 kHz, stereo 1,
stereo 2), 16 bits (Fs 48 kHz, stereo)
Video signal
PAL color, CCIR standards
Usable cassette
8 mm video format cassette
Tape speed
SP: Approx. 28.70 mm/s
LP: Approx. 19.13 mm/s
Recording/playback time (using 90 min. Hi8/
Digital8 video cassette)
SP: 60 min
LP: 90 min
Fast forward/rewind time (using 90 min. Hi8/
Digital8 video cassette)
Approx. 5 min
Viewfinder
Electric viewfinder (monochrome)
Image device
3.0 mm (1/6 type) CCD (Charge Coupled
Device)
Gross: Approx. 540 000 pixels
Effective (still): Approx. 350 000 pixels
Effective (movie): Approx. 350 000 pixels
Lens
Combined power zoom lens
Filter diameter: 37 mm (1 7/16 in.)
20 × (Optical), 990 × (Digital)
F = 1.6 ~ 2.4
Focal length
2.5 - 50 mm (1/8 - 2 in.)
When converted to a 35 mm still camera
In CAMERA-TAPE:
42 - 840 mm (1 11/16 - 33 1/8 in.)
In CAMERA-MEMORY:
42 - 840 mm (1 11/16 - 33 1/8 in.)
Color temperature
Auto
Minimum illumination
4 lx (lux) (F 1.6)
0 lx (lux) (during the NightShot plus
function)*2
LCD screen
Picture
6.2 cm (2.5 type)
Total dot number
123 200 (560 × 220)
,continued
Additional Information
123
General
Rechargeable battery pack (NP-FM30)
Power requirements
DC 7.2 V (battery pack)
DC 8.4 V (AC Adaptor)
Average power consumption (when using the
battery pack)
During camera recording using the viewfinder
2.9 W
During camera recording using the LCD
3.8 W
Operating temperature
0° C to 40° C (32° F to 104° F)
Storage temperature
-20° C to + 60° C (-4° F to + 140° F)
Dimensions (approx.)
85 × 98 × 151 mm (3 3/8 × 3 7/8 × 6 in.) (w/h/
d)
Mass (Approx.)
800 g (1 lb 12 oz) main unit only
940 g (2 lb 1 oz) including the NP-FM30
rechargeable battery pack, Hi8/Digital8
cassette, lens cap, and shoulder strap.
Supplied accessories
See page 13.
Maximum output voltage
DC 8.4 V
Output voltage
DC 7.2 V
Capacity
5.0 Wh (700 mAh)
Dimensions (approx.)
38.2 × 20.5 × 55.6 mm
(1 9/16 × 13/16 × 2 1/4 in.) (w/h/d)
Mass (approx.)
65 g (2.3 oz)
Operating temperature
0° C to 40° C (32° F to 104° F)
Type
Lithium ion
AC Adaptor AC-L15A/L15B
Power requirements
AC 100 - 240 V, 50/60 Hz
Current consumption
0.35 - 0.18 A
Power consumption
18 W
Output voltage
DC 8.4 V, 1.5 A
Operating temperature
0° C to 40° C (32° F to 104° F)
Storage temperature
-20° C to + 60° C (-4° F to + 140° F)
Dimensions (approx.)
56 × 31 × 100 mm (2 1/4 × 1 1/4 × 4 in.) (w/h/
d) excluding the projecting parts
Mass (approx.)
190 g (6.7 oz) excluding the mains lead
124
Additional Information
Design and specifications are subject to change
without notice.
Quick Reference
Identifying parts and
controls
Camcorder
A EASY button (p. 12, 33, 51)
C Lens cap (p. 24, 29)
D LCD/Touch panel screen (p. 2, 18)
E OPEN button (p. 18)
F Speaker
G RESET button
If you press RESET, all the settings
including the date and time, except the
Personal Menu items, return to the default.
Quick Reference
B DSPL/BATT INFO button (p. 15)
K CAMERA-TAPE, CAMERAMEMORY, PLAY/EDIT mode lamps
(p. 17)
L LIGHT button (p. 27)
M Access lamp (p. 21, 116)
N Battery pack (p. 14)
O “Memory Stick” slot (p. 21)
To attach the lens cap
H BACK LIGHT button (p. 35)
The BACK LIGHT button is not available
during Easy Handycam operation.
(z mark)
I Viewfinder (p. 2, 18)
J CHG (charge) lamp (p. 14)
,continued
Quick Reference
125
A Power zoom lever (p. 26)
E POWER switch (p. 17)
B BATT (battery) release button (p. 15)
F Grip belt (p. 3)
C Hooks for shoulder strap
G REC START/STOP button (p. 24)
D PHOTO button (p. 29)
H DC IN jack (p. 14)
To attach the shoulder strap
Attach the shoulder strap supplied with your
camcorder to the hooks for the shoulder strap.
126
Quick Reference
A A/V (audio/video) jack (p. 56, 86)
G Built-in light (p. 27)
B
H Remote sensor/Infrared ray emitter
(p. 93)
C
DV Interface (p. 86, 119)
(USB) jack
D Jack cover
I Camera recording lamp (p. 24)
E NIGHTSHOT PLUS switch (p. 37)
J Microphone
F Lens
K S VIDEO jack (p. 56, 86)
Quick Reference
A Viewfinder lens adjustment lever (p. 18)
B Eyecup
C Cassette compartment (p. 20)
D
OPEN/ EJECT lever (p. 20)
E Tripod receptacle
Make sure that the length of the tripod
screw is less than 5.5 mm (7/32 inch).
Otherwise, you cannot attach the tripod
securely, and the screw may damage your
camcorder.
,continued
Quick Reference
127
Remote Commander
Remove the insulation sheet before using the
Remote Commander.
To remove the insulation sheet
Insulation sheet
To change the button-type battery
1 While pressing on the tab, inset your
fingernail into the slit to pull out the
battery case.
Tab
A PHOTO button (p. 29)
B Memory control buttons (Index*, –/+,
Memory playback) (p. 49)
C SEARCH M. button* (p. 57)
2 Remove the button-type lithium battery.
D ./> buttons* (p. 57)
E Video control buttons (Rewind,
Playback, Fast-forward, Pause, Stop,
Slow) (p. 47)
F ZERO SET MEMORY button* (p. 57)
G Transmitter
After turning on your camcorder, point
towards the remote sensor to control your
camcorder.
3 Place a new button-type lithium battery
with the + side facing up.
H REC START/STOP button (p. 28)
I Power zoom button (p. 26)
J DISPLAY button (p. 57)
* These buttons are not available during Easy
Handycam operation.
4 Insert the battery case back into the
Remote Commander until it clicks.
128
Quick Reference
CAUTION
Danger of explosion if battery is incorrectly
replaced.
Replace only with the same or equivalent type
recommended by the manufacturer.
Discard used batteries according to the
manufacturer’s instructions.
b Notes on the Remote Commander
• A button-type lithium battery (CR2025) is used in
the Remote Commander. Do not use batteries other
than CR2025.
• Point the remote sensor away from strong light
sources such as direct sunlight or overhead lighting.
Otherwise, the Remote Commander may not
function properly.
• The Remote Commander may not function properly
when the remote sensor is obstructed with a
conversion lens (optional).
• When you are operating with the Remote
Commander supplied with your camcorder, your
VCR may also operate. In that case, select a
commander mode other than VTR 2 for your VCR,
or cover the sensor of your VCR with black paper.
Quick Reference
,continued
Quick Reference
129
Indicators for the LCD screen and viewfinder
Following indicators will appear on the LCD
screen and viewfinder to indicate the state of
your camcorder. Indicators vary depending on
your camcorder model.
Indicators
Outputting analog images
and sound in digital format
(p. 78)
Example: Indicators in the CAMERA-TAPE
mode
DV input (p. 88)
Zero set memory (p. 57)
Time code (p. 25)/Tape counter (p. 25)/
Self-diagnosis (p. 110)/Picture number (p. 50)
60min
STBY
Meanings
NightShot plus (p. 37)
Super NightShot plus
(p. 37)
0:00:00
Color Slow Shutter (p. 37)
QZ
Warning (p. 110)
Picture effect (p. 68)
P-MENU
Digital effect (p. 41, 48)
Exposure adjustment scale
MEMORY MIX (p. 43)
9
Indicators
Meanings
y60min
Remaining battery (p. 25)
SP LP
Recording mode (p. 26)
STBY REC
Recording standby/
recording mode
Image quality (p. 31)
.
Back light (p. 35)
16:9 WIDE (p. 64)
SteadyShot off (p. 64)
-
Protect (p. 99)
Print mark (p. 99)
Recording folder/playback
folder (p. 67)
Slide show (p. 69)
Format indicator (p. 25)
PictBridge connecting
(p. 101)
Audio mode (p. 76)
Self-timer recording (p. 28,
31)
Interval recording (p. 70)
Interval still image
recording (p. 71)
Built-in light (p. 27)
Frame recording (p. 70)
Quick Reference
PROGRAM AE (p. 61)
Image size (p. 26)
Remaining tape (p. 25)
130
Manual focus (p. 39)
Image delete (p. 98)
Index
Numeric
16:9 WIDE mode ...............64
21-pin adaptor ..............56, 88
A
A/V connecting
cable ......................56, 86
AC Adaptor........................14
Adjusting the
viewfinder ...................18
AUDIO MIX......................77
AUDIO MODE ..................76
Auto shut off function
(A.SHUT OFF) ...........81
AUTO SHUTTER .............62
B
C
CALIBRATION ..............121
Camera Chroma key
(CAMTM CHROMA)
.....................................43
Camera settings data
display .........................54
Cassette ......................20, 114
Charging the battery
pack .............................14
Clock set
(CLOCK SET) ......19, 82
D
Data code
(DATA CODE)..... 54, 79
Date search ........................ 57
Date/time ........................... 54
Delete
Deleting pictures......... 98
DEMO MODE .................. 72
Digital convert function
(A/V cDV OUT) ........ 78
Digital effect
(D.EFFECT) ......... 41, 48
Digital program editing
(PROG.EDIT)............. 91
DIGITAL ZOOM .............. 63
Digital8 system................ 114
Direct Access to
“Click to DVD”
See BURN DVD
Direct Access to
Video CD Burn
See BURN VCD
Display
DISPLAY ................... 81
Display indicators ..... 130
DNR................................... 77
DOT FADER..................... 40
Dual sound track tape ........ 76
Dubbing (REC CTRL) ...... 88
E
Easy Handycam ........... 33, 51
EDIT SEARCH ................. 45
END SEARCH ............ 44, 74
Erase
ALL ERASE
(still image) .......... 66
Exposure ............................ 35
F
FADER .............................. 40
FILE NO............................ 66
Fine (FINE)
See Image quality
(QUALITY)
Flash motion (FLASH) ..... 41
Flexible spot meter
(SPOT METER)......... 35
Focus ................................. 62
Folder
See NEW FOLDER
See PB FOLDER
See REC FOLDER
FORMAT .................. 66, 115
Frame playback ................. 47
Frame recording
(FRAME REC)........... 70
Full charge ........................ 14
G
Grip belt .............................. 3
H
Hi8/standard 8 mm
system....................... 114
I
i.LINK ............................. 119
i.LINK cable ............... 86, 92
Image protection ............... 99
Image quality
(QUALITY) ......... 31, 65
Index screen ...................... 50
"InfoLITHIUM"
battery pack .............. 117
Infrared ray emitter ........... 93
Interval photo recording
(INT. REC-STL) ........ 71
Interval recording
(INTERVAL REC) .... 70
Quick Reference
BACK LIGHT (camera) ....35
Battery
Battery Info .................15
Battery pack ................14
Remaining battery
time ...............25, 118
BEEP............................18, 80
BLACK FADER................40
Built-in light.......................27
BURN DVD.......................73
BURN VCD .......................73
Button-type battery
Camcorder .................122
Remote
Commander ........128
Color Slow Shutter
(COLOR SLW S) ....... 37
Customizing Personal
Menu ........................... 83
J
JPEG ............................... 115
L
Language
(LANGUAGE) ..... 22, 82
LCD back light
(LCD BL LEVEL) ..... 78
LCD brightness
(LCD BRIGHT) ......... 18
LCD COLOR .................... 78
LCD screen ......................... 3
LCD SET .......................... 78
,continued
Quick Reference
131
LP (Long Play)
See Recording mode
(REC MODE)
Luminance key
(LUMI. KEY) ............. 41
O
S
OLD MOVIE .....................42
Operation confirmation beep
See BEEP
OVERLAP .........................40
M
P
Main sound
See MULTI-SOUND
Manual focus ..................... 39
Memory Chroma key
(MTCAM CHROMA)
.................................... 43
Memory Luminance key
(MTCAM LUMI.).... 43
MEMORY MIX ................ 43
Memory Overlap
(OVERLAP) ............... 41
Memory photo............. 29, 49
“Memory Stick”
General information.. 115
Inserting ...................... 21
Number of pictures ..... 31
Menu
CAMERA SET ........... 61
EDIT/PLAY ............... 73
MEMORY SET .......... 65
MENU ROTATE........ 81
PICT. APPLI. ............. 68
Selecting items............ 59
STANDARD SET ...... 76
TIME/LANGU. .......... 82
Mirror mode ...................... 28
Moisture condensation .... 120
MONOTONE .................... 40
MOSAIC FADER ............. 40
MOVIE SET...................... 65
MPEG.............................. 115
MULTI-SOUND ............... 76
PAL..................................114
PB FOLDER ......................67
Personal Menu
(P-MENU)...................59
PictBridge ........................101
Picture effect
(PICT. EFFECT) .........68
Picture search.....................47
Playback (VAR. SPD PB)
Double speed...............47
Frame ..........................47
Reverse........................47
Slow ............................47
Playback zoom
(PB ZOOM) ................53
Playing time .......................16
Power mode .......................17
PRINT
See PictBridge
Print mark ..........................99
PROGRAM AE .................61
Program edit
(PROG. EDIT) ............73
S video......................... 56, 86
Self-diagnosis display ..... 110
Self-timer recording
(SELF-TIMER) .... 28, 31
Shoulder strap.................. 126
Skip scan ........................... 47
SLIDE SHOW................... 69
Slow shutter (SLOW
SHUTTR) ................... 42
Smooth transition
See END SEARCH
SP (Standard Play)
See Recording mode
(REC MODE)
SPOT FOCUS ................... 38
Standard (STANDARD)
See Image quality
(QUALITY)
STEADYSHOT................. 64
Stereo/monaural ................ 76
STILL ................................ 41
Still image format............ 115
STILL SET ........................ 65
Sub sound
See MULTI-SOUND
Super NightShot plus ........ 37
N
NEW FOLDER ................. 67
NightShot Light
(NS LIGHT) ......... 38, 62
NightShot plus................... 37
NTSC............................... 114
132
Quick Reference
R
REC FOLDER ...................67
Rec review .........................45
Recording capacity
Display ........................25
REMAINING........65, 80
Recording lamp
(REC LED) .................80
Recording mode
(REC MODE) .......25, 76
Recording time.............16, 26
Remote Commander ........128
REMOTE CTRL .........80
Remote sensor..................127
RESET .............................125
Review .........................24, 30
T
Tape counter...................... 25
TBC ................................... 77
Telephoto
See Zoom
Time code.......................... 25
TITLE................................ 74
TRAIL ............................... 41
TV color systems............. 114
U
USB jack ......................... 127
USB Streaming.................. 79
USB-CAMERA .......... 79
USB-PLY/EDT........... 79
Using abroad ................... 114
V
Video head....................... 121
Viewfinder......................... 18
Volume (VOLUME) ... 46, 49
W
Warning indicators...........110
Warning messages ...........110
WHITE FADER ................40
Wide angle
See Zoom
WIPE..................................40
WORLD TIME ..................82
Write-protect tab ......115, 116
Z
Zero set memory ................57
Zoom ..................................26
Quick Reference
Quick Reference
133
Printed in Japan