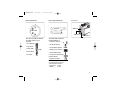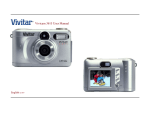
1
PIONEERmanREV
11/19/01
6:00 PM
Page 1
PIONEERmanREV
11/19/01
6:00 PM
Page ii
MUST DO
1. Read warnings in manual (pages iv - vii).
2. If you have any questions after reading this manual or
problems regarding the SeaLife digital camera, housing or
accessories follow these instructions:
• Do not contact dealer; do this:
• Check trouble shooting guide in this manual or on the SeaLife
website www.sealife-cameras.com
• If this does not solve the problem contact SeaLife Customer
Service: USA (856) 866-9192. For other countries, contact the
Sealife national distributor. For a complete list, see the above
website.
3. Use only the following AA batteries:
• SeaLife Nickel Metal Hydride (Ni-MH) 1600mAh or higher
rechargeable batteries. Carefully follow charging instructions.
• Lithium non-rechargeable batteries. Lithium batteries last the
longest of all batteries but they are expensive and they are
not rechargeable.
• We do not recommend using Alkaline batteries due to their
short battery life, however new high-energy alkaline batteries,
like Duracell Ultra, have a longer battery life and can be used
with the SeaLife digital camera. Even high-energy alkaline
batteries do not last as long as SeaLife Ni-MH batteries. Do
not use standard alkaline batteries.
• Replace batteries when battery power status indicator on
camera is down one bar.
• Turn camera power or LCD monitor OFF when not using
camera to preserve battery power.
• Always use freshly charged batteries. Batteries can discharge
at room temperature up to 10% per day. Store batteries in
plastic bag or container in refrigerator or cool, dry place.
4. Follow the correct computer connect sequence to download
pictures: (Only for Windows 98 you need to install the driver
using the enclosed CD. You need to install the Photo Suite
ii
Imaging Software only if you do not want to use your existing
picture editing software).
• First power up computer and connect USB cable to
computer.
• Turn camera power ON.
• Turn Operating mode dial to PC.
• ONLY THEN connect USB cable to camera.
• Locate pictures in “Removable disk (:)” under “My Computer.”
• Some operating systems may require a few minutes before
the camera connection is established.
5. Use only the following brands of Compact Flash memory
cards:
• SeaLife, SanDisk, Kingston, Lexar, Ritek and Pretec
(registered trademarks of respective companies).
6. Keep main O-Rings and housing perfectly clean.
• Clean housing and main O-rings with fresh water after
every use.
• Do not remove O-rings. Do not grease.
• Store camera and housing only after careful cleaning and
when totally dry.
7. Never let any moisture or dirt get inside housing when
opening.
• Only open and load the housing in dry cool air, such as inside
an air-conditioned room.
8. For good underwater pictures you need:
• Clear water conditions.
• Control your buoyancy before taking picture.
• Get as close as possible to subject (ideal distance is 2’ to 6’).
• Make it a habit to use the SeaLife Macro Lens/Filter for
superb details and vibrant colors.
• For best underwater pictures, use External Flashes and
snap-on Macro or wide-angle lenses.
PIONEERmanREV
11/19/01
6:00 PM
Page iii
Limited Warranty
This product will be replaced or repaired free of charge within 1 year from the purchase date in the case of a manufacturing
defect, if the complete defective product is sent freight prepaid at the sender’s risk with prepayment for handling and shipping
of US$10.00 to: Pioneer Research, Attn: SeaLife Service Center, 97 Foster Road, Suite 5, Moorestown, NJ 08057, or to the
SeaLife distributor in a different country. The shipment must include an original purchase receipt or proof of purchase with the
purchase date. Excluded are any consequential damages, cosmetic damages, damages to products which show abuse,
non-conformance with the instructions, particularly water damage due to damaged O-ring or removed O-ring or any particles
wedged between the housing and the O-ring, or tampering and attempted repair of the product. Excluded are scratches on
lenses or damaged lens coatings. Cameras used in rental operations are excluded from this warranty and have a special
service support program (Contact SeaLife/Pioneer Research).
FCC Notice
This equipment has been tested and found to comply with the limits for a Class B digital device, pursuant to part 15 of the FCC
Rules. These limits are designed to provide reasonable protection against harmful interference in commercial installation. This
equipment generates, uses and can radiate radio frequency energy and if not installed and used in accordance with the
instructions, may cause harmful interference to radio communications. However, there is no guarantee that interference will not
occur in a particular installation. If this equipment does cause harmful interference to radio or television reception, detectable
by turning the equipment in question off and on, the user is encouraged to try to correct the interference by one or more of the
following measures: Reorient or relocate the receiving antenna; Increase the distance between the equipment and the
receiver; Connect the equipment to an outlet on a different circuit than that which the receiver is connected to; Or consult the
dealer or an experienced radio/TV technician for help.
NOTE
A shielded-type DC power cable incorporated with a ferrite core is required in order to meet the FCC emission limits and also
to prevent interference to nearby radio and television reception. Use only shielded I/O cable incorporated with a ferrite core to
connect this equipment to host computer or TV set. Shielded AC power cable and shielded I/O cables are required in order to
meet the FCC emission limits. It is essential that only the supplied power cord and I/O cable(s) be used.
SERVICE: Do not contact your dealer for product questions or service.
After going through the Trouble Shooting Guide in this manual, if you cannot find a solution for a problem: Contact the SeaLife
Service Center or send the camera with the housing to an authorized SeaLife service facility or directly to SeaLife Headquarters
in Moorestown, NJ USA or the SeaLife distributor in your country. (A list of SeaLife distributors can be found on the
website www.sealife-cameras.com). Include: US$10.00 for handling and domestic shipping; your day time phone number, proof
of purchase and return address (No P.O. BOX); a clear written description of problem. Ship prepaid to:
Pioneer Research, Attn: SeaLife Service Center, 97 Foster Road, Suite 5, Moorestown, NJ 08057 USA
Phone: (856) 866-9192 • Fax (856) 866-8615 • www.sealife-cameras.com
iii
PIONEERmanREV
11/19/01
6:00 PM
Page iv
WARNING
This camera is not waterproof or water resistant. Use the inner camera only inside the SeaLife waterproof
housing when in or around water. Follow waterproof housing instructions carefully to prevent water
damage to camera. Water damage to camera is not covered by warranty unless it has been determined
that the waterproof housing leaked water as a result of a manufacturing defect.
Do not use this camera if it is emitting smoke, emitting any unusual odor or noise, or if it is in any other
abnormal state. Operating the camera in any of these situations may cause a fire or an electrical shock.
Stop using the camera immediately, turn the camera off, and then disconnect the power source (batteries
or AC power adapter). (If you are using the AC power adapter, unplug the adapter from the AC power
outlet after you have disconnected the camera.) After checking that smoke is no longer being emitted,
contact your local authorized SeaLife service facility and request repairs. Never attempt to repair this
camera yourself as this is dangerous.
Do not use the camera if any water has entered the camera, even after camera has dried. Turn the camera
off, and then disconnect the power source (batteries or AC power adapter). (If you are using the AC power
adapter, unplug the adapter from the AC power outlet after you have disconnected the camera.) Then
contact your local SeaLife authorized service facility. Do not continue to use the camera as this may cause
a fire or an electrical shock. Be careful when handling wet camera. Camera and batteries may become very
hot.
Do not use the camera if any foreign objects have entered the camera. Turn the camera off, and then
disconnect the power source (batteries or AC power adapter). (If you are using the AC power adapter,
unplug the adapter from the AC power outlet after you have disconnected the camera.) Then contact your
local SeaLife authorized service facility. Do not continue to use the camera as this may cause a fire or an
electrical shock.
If the camera has been dropped or if the camera case has been damaged, turn the camera off, and then
disconnect the power source (batteries or AC power adapter). (If you are using the AC power adapter,
unplug the adapter from the AC power outlet after you have disconnected the camera.) Then contact your
local SeaLife authorized service facility. Do not continue to use the camera as this may cause a fire or an
electrical shock.
iv
PIONEERmanREV
11/19/01
6:00 PM
Page v
WARNING
Do not expose the camera to moisture and make sure that there is no water getting into the camera. Take
particular care when using the camera under extreme weather conditions such as rain or snow, or when
operating the camera at the beach on near water. Water in the camera may cause a fire or an electrical
shock.
Do not insert or drop metallic or flammable foreign objects into the camera through access points such as
the Compact Flash card slot. This may cause a fire or an electrical shock.
Do not attempt to modify this camera. This may cause a fire or an electrical shock.
Do not remove the camera casing. This may cause an electrical shock. Internal inspection, maintenance
and repairs should only be carried out by your local authorized SeaLife service facility.
Do not touch camera, charger or AC adapter during a thunderstorm if you are using the AC power adapter.
This may cause an electrical shock.
Never operate this camera in any way while driving a vehicle. This may cause a traffic accident.
Do not place the camera in any unstable locations such as on a wobbly table or sloping surface where the
camera may fall or tip over and cause injury.
v
PIONEERmanREV
11/19/01
6:00 PM
Page vi
WARNING
Do not place camera, charger or batteries in damp or dusty locations. This may cause a fire or an
electrical shock.
Do not place this camera in a location affected by oil fumes, steam, seaspray, rain, boat deck, damp clothes,
cooking stove or humidifier. This may cause a fire or an electrical shock.
Do not leave this camera in a location subject to extremely high temperatures, such as in a sealed vehicle
or in direct sunlight. Exposure to high temperatures may adversely affect the camera case and internal
components and may cause a fire.
Do not cover or wrap the camera, battery charger or the AC power adapter with a cloth or quilt. This may
cause heat to build up and distort the case and cause a fire. Always use the camera and its accessories in
well-ventilated locations
Handle the camera carefully and do not bump the camera into any hard object. Handling the camera
roughly may cause a malfunction.
Do not move the camera while it is attached to AC adapter, USB or video cable. (If you are using the AC
power adapter, unplug the adapter from the AC power outlet after you have switched off the camera.)
Ensure that any connector cords or cables to other devices are disconnected before moving the camera.
Failure to do so may damage the cords or cables and cause a fire or an electrical shock.
When handing the camera ,always unplug it from the power source (AC power adapter) for safety. (If you
are using the AC power adapter, unplug the adapter from the AC power outlet after you have
disconnected the camera.) Failure to do may result in an electrical shock.
vi
PIONEERmanREV
11/19/01
6:00 PM
Page vii
WARNING
When leaving the camera unused for long periods, such as during a vacation, always remove the batteries
or unplug the camera from the AC power adapter for safety. (If you are using the AC power adapter, unplug
the adapter from the AC power outlet after you have disconnected the camera.) Failure to do so could
result in a fire.
Do not use batteries other than those specified for use with your camera. The use of unsuitable batteries
may result in the batteries splitting or leaking and causing a fire, injury, or damaging the battery compartment.
When inserting batteries into the camera, check the polarity markings on the battery ( - and + )to ensure
that you insert the battery correctly. Incorrect battery polarity may result in the batteries splitting or leaking
and causing a fire, injury, or damaging of the battery compartment.
Remove the batteries if the camera will not be used for an extended period of time. The batteries may leak
and cause a fire, injury or damage the battery compartment. If the batteries leak, clean and wipe the battery compartment carefully and install new batteries. Wash your hands carefully if you touch the battery
fluid.
Do not leave battery charger plugged into AC outlet after charging is complete. Remove batteries from
charger when charging is complete.
vii
PIONEERmanREV
11/19/01
6:00 PM
Page viii
Table of Contents
Must Do . . . . . . . . . . . . . . . . . . . . . . . . . . . . . . . . . . . . . . . . . . . . . . . . . . . . . . . . . . . . . . . . . . . . . . . . .ii
Warranty/Service . . . . . . . . . . . . . . . . . . . . . . . . . . . . . . . . . . . . . . . . . . . . . . . . . . . . . . . . . . . . . . . . . .iii
Warnings . . . . . . . . . . . . . . . . . . . . . . . . . . . . . . . . . . . . . . . . . . . . . . . . . . . . . . . . . . . . . . . . . . . . . . . .iv
How it Works . . . . . . . . . . . . . . . . . . . . . . . . . . . . . . . . . . . . . . . . . . . . . . . . . . . . . . . . . . . . . . . . . . . . .1
Getting Started . . . . . . . . . . . . . . . . . . . . . . . . . . . . . . . . . . . . . . . . . . . . . . . . . . . . . . . . . . . . . . . . . . .3
Checking Accessories . . . . . . . . . . . . . . . . . . . . . . . . . . . . . . . . . . . . . . . . . . . . . . . . . . . . . . . . . . . . . . . . . . . . . . . . . .3
System Requirements . . . . . . . . . . . . . . . . . . . . . . . . . . . . . . . . . . . . . . . . . . . . . . . . . . . . . . . . . . . . . . . . . . . . . . . . . .4
Identifying the Parts . . . . . . . . . . . . . . . . . . . . . . . . . . . . . . . . . . . . . . . . . . . . . . . . . . . . . . . . . . . . . . .5
Top View . . . . . . . . . . . . . . . . . . . . . . . . . . . . . . . . . . . . . . . . . . . . . . . . . . . . . . . . . . . . . . . . . . . . . . . . . . . . . . . . . . . .5
Front View . . . . . . . . . . . . . . . . . . . . . . . . . . . . . . . . . . . . . . . . . . . . . . . . . . . . . . . . . . . . . . . . . . . . . . . . . . . . . . . . . . .5
Rear View . . . . . . . . . . . . . . . . . . . . . . . . . . . . . . . . . . . . . . . . . . . . . . . . . . . . . . . . . . . . . . . . . . . . . . . . . . . . . . . . . . .6
Bottom View . . . . . . . . . . . . . . . . . . . . . . . . . . . . . . . . . . . . . . . . . . . . . . . . . . . . . . . . . . . . . . . . . . . . . . . . . . . . . . . . .6
Operating Mode Knob . . . . . . . . . . . . . . . . . . . . . . . . . . . . . . . . . . . . . . . . . . . . . . . . . . . . . . . . . . . . . . . . . . . . . . . . .7
Status LCD . . . . . . . . . . . . . . . . . . . . . . . . . . . . . . . . . . . . . . . . . . . . . . . . . . . . . . . . . . . . . . . . . . . . . . . . . . . . . . . . . .7
Connectors . . . . . . . . . . . . . . . . . . . . . . . . . . . . . . . . . . . . . . . . . . . . . . . . . . . . . . . . . . . . . . . . . . . . . . . . . . . . . . . . . .7
Preparing the Power Supply . . . . . . . . . . . . . . . . . . . . . . . . . . . . . . . . . . . . . . . . . . . . . . . . . . . . . . . . . . . . . . . . . . . . .8
Loading the CompactFlash™ Card . . . . . . . . . . . . . . . . . . . . . . . . . . . . . . . . . . . . . . . . . . . . . . . . . . . . . . . . . . . . . . . .9
Setting the Date and Time . . . . . . . . . . . . . . . . . . . . . . . . . . . . . . . . . . . . . . . . . . . . . . . . . . . . . . . . . . . . . . . . . . . . . .9
Digital Camera Instructions/Basic Operations . . . . . . . . . . . . . . . . . . . . . . . . . . . . . . . . . . . . . .10
How to record an image . . . . . . . . . . . . . . . . . . . . . . . . . . . . . . . . . . . . . . . . . . . . . . . . . . . . . . . . . . . . . . . . . . . . . . . .10
Digital zoom . . . . . . . . . . . . . . . . . . . . . . . . . . . . . . . . . . . . . . . . . . . . . . . . . . . . . . . . . . . . . . . . . . . . . . . . . . . . . . . . .10
Tips for picture taking . . . . . . . . . . . . . . . . . . . . . . . . . . . . . . . . . . . . . . . . . . . . . . . . . . . . . . . . . . . . . . . . . . . . . . . . . .11
How to playback images . . . . . . . . . . . . . . . . . . . . . . . . . . . . . . . . . . . . . . . . . . . . . . . . . . . . . . . . . . . . . . . . . . . . . . . .12
How to view image information and thumbnails . . . . . . . . . . . . . . . . . . . . . . . . . . . . . . . . . . . . . . . . . . . . . . . . . . . . . .13
How to examine image details . . . . . . . . . . . . . . . . . . . . . . . . . . . . . . . . . . . . . . . . . . . . . . . . . . . . . . . . . . . . . . . . . . .13
How to delete images . . . . . . . . . . . . . . . . . . . . . . . . . . . . . . . . . . . . . . . . . . . . . . . . . . . . . . . . . . . . . . . . . . . . . . . . . .14
How to set the focus . . . . . . . . . . . . . . . . . . . . . . . . . . . . . . . . . . . . . . . . . . . . . . . . . . . . . . . . . . . . . . . . . . . . . . . . . . .15
How to set the image resolution and quality . . . . . . . . . . . . . . . . . . . . . . . . . . . . . . . . . . . . . . . . . . . . . . . . . . . . . . . . .15
Resolution and Image Quality Indicator . . . . . . . . . . . . . . . . . . . . . . . . . . . . . . . . . . . . . . . . . . . . . . . . . . . . . . . . . . . . .16
viii
PIONEERmanREV
11/19/01
6:00 PM
Page ix
How to set the flash . . . . . . . . . . . . . . . . . . . . . . . . . . . . . . . . . . . . . . . . . . . . . . . . . . . . . . . . . . . . . . . . . . . . . . . . . . .17
Advanced Operations . . . . . . . . . . . . . . . . . . . . . . . . . . . . . . . . . . . . . . . . . . . . . . . . . . . . . . . . . . . . . . . . . . . . . . . . .17
How to adjust the EV compensation . . . . . . . . . . . . . . . . . . . . . . . . . . . . . . . . . . . . . . . . . . . . . . . . . . . . . . . . . . . . . . .17
How to adjust the White Balance . . . . . . . . . . . . . . . . . . . . . . . . . . . . . . . . . . . . . . . . . . . . . . . . . . . . . . . . . . . . . . . . .18
How to set the OSD (On-Screen Display) language . . . . . . . . . . . . . . . . . . . . . . . . . . . . . . . . . . . . . . . . . . . . . . . . . . .18
How to set the Self-Timer . . . . . . . . . . . . . . . . . . . . . . . . . . . . . . . . . . . . . . . . . . . . . . . . . . . . . . . . . . . . . . . . . . . . . . .19
How to format the CF (CompactFlash™) card . . . . . . . . . . . . . . . . . . . . . . . . . . . . . . . . . . . . . . . . . . . . . . . . . . . . . . .19
Operating Modes and Menus . . . . . . . . . . . . . . . . . . . . . . . . . . . . . . . . . . . . . . . . . . . . . . . . . . . . . . . . . . . . . . . . . . .20
RECORD mode . . . . . . . . . . . . . . . . . . . . . . . . . . . . . . . . . . . . . . . . . . . . . . . . . . . . . . . . . . . . . . . . . . . . . . . . . . . . . . .20
PLAY mode . . . . . . . . . . . . . . . . . . . . . . . . . . . . . . . . . . . . . . . . . . . . . . . . . . . . . . . . . . . . . . . . . . . . . . . . . . . . . . . . . .22
LAND and SEA mode . . . . . . . . . . . . . . . . . . . . . . . . . . . . . . . . . . . . . . . . . . . . . . . . . . . . . . . . . . . . . . . . . . . . . . . . . .25
DELETE mode . . . . . . . . . . . . . . . . . . . . . . . . . . . . . . . . . . . . . . . . . . . . . . . . . . . . . . . . . . . . . . . . . . . . . . . . . . . . . . . .28
PC mode . . . . . . . . . . . . . . . . . . . . . . . . . . . . . . . . . . . . . . . . . . . . . . . . . . . . . . . . . . . . . . . . . . . . . . . . . . . . . . . . . . . .29
Transferring your Images to the Computer . . . . . . . . . . . . . . . . . . . . . . . . . . . . . . . . . . . . . . . . . . . . . . . . . . . . . . . . .29
Driver Installation . . . . . . . . . . . . . . . . . . . . . . . . . . . . . . . . . . . . . . . . . . . . . . . . . . . . . . . . . . . . . . . . . . . . . . . . . . . . . .29
Downloading Images . . . . . . . . . . . . . . . . . . . . . . . . . . . . . . . . . . . . . . . . . . . . . . . . . . . . . . . . . . . . . . . . . . . . . . . . . .29
Editing and Processing images . . . . . . . . . . . . . . . . . . . . . . . . . . . . . . . . . . . . . . . . . . . . . . . . . . . . . . . . . . . . . . . . . . .30
Using MGI PhotoVista . . . . . . . . . . . . . . . . . . . . . . . . . . . . . . . . . . . . . . . . . . . . . . . . . . . . . . . . . . . . . . . . . . . . . . . . . .31
Additional Information . . . . . . . . . . . . . . . . . . . . . . . . . . . . . . . . . . . . . . . . . . . . . . . . . . . . . . . . . . . . . . . . . . . . . . . . .34
Names and Functions . . . . . . . . . . . . . . . . . . . . . . . . . . . . . . . . . . . . . . . . . . . . . . . . . . . . . . . . . . . . . . . . . . . . . . . . . .34
LED Messages . . . . . . . . . . . . . . . . . . . . . . . . . . . . . . . . . . . . . . . . . . . . . . . . . . . . . . . . . . . . . . . . . . . . . . . . . . . . . . .37
Specification . . . . . . . . . . . . . . . . . . . . . . . . . . . . . . . . . . . . . . . . . . . . . . . . . . . . . . . . . . . . . . . . . . . . . . . . . . . . . . . . .38
Underwater Housing Instruction . . . . . . . . . . . . . . . . . . . . . . . . . . . . . . . . . . . . . . . . . . . . . . . . . . . . . . . . . . . . . . . . .39
Using and cleaning underwater housing . . . . . . . . . . . . . . . . . . . . . . . . . . . . . . . . . . . . . . . . . . . . . . . . . . . . . . . . . . . .47
Great Pictures Made Easy . . . . . . . . . . . . . . . . . . . . . . . . . . . . . . . . . . . . . . . . . . . . . . . . . . . . . . . . . . . . . . . . . . . . . .48
How to use charger . . . . . . . . . . . . . . . . . . . . . . . . . . . . . . . . . . . . . . . . . . . . . . . . . . . . . . . . . . . . . . . . . . . . . . . . . . . .51
Battery selection guide . . . . . . . . . . . . . . . . . . . . . . . . . . . . . . . . . . . . . . . . . . . . . . . . . . . . . . . . . . . . . . . . . . . . . . . . .53
Trouble Shooting . . . . . . . . . . . . . . . . . . . . . . . . . . . . . . . . . . . . . . . . . . . . . . . . . . . . . . . . . . . . . . . . . . . . . . . . . . . . .55
Cautions - Obey cautions in this manual to prevent damaging this product or causing injury.
Tips - The “Tips” icon will provide helpful tips for using the camera.
ix
PIONEERmanREV
11/19/01
6:00 PM
Page 1
How It Works
A Very Unique Camera
Land & Sea®
Introduction:
The SeaLife Reefmaster Digital Land & Sea camera allows you to choose between Land Mode for taking land pictures and Sea Mode
for taking underwater pictures. This is essential for taking great pictures and achieving the perfect picture exposure.
Sea Mode: If the camera is set to Sea Mode and used inside the Underwater Camera Housing, the camera is programmed to
automatically find the best exposure control combination in an underwater environment. The internal sensor reads the light
conditions through the lens (TTL). It evaluates the whole picture in 64 segments with higher priority in the center. Then it
automatically sets the correct exposure time, lens opening, and sensitivity. You may hear a slight clicking noise when you move
the camera to different light conditions. SeaLife Research has tested several thousand combinations to achieve the optimal
exposure controls. In the Sea mode, the slowest exposure time underwater is 1/30 seconds. If the surrounding light is too dark,
the flash will fire automatically. While in the Sea mode, the camera flash will actually fire two times; one weak flash, called a
pre-flash, is used to determine the brightness and reflection of whatever you’re taking a picture of. The primary flash will fire 0.2
seconds after the pre-flash (hardly noticeable). Only the primary flash is used by the camera for properly exposing the final
picture. The combination of the pre-flash and main flash ensures the optimal exposure setting for the camera.
In order to avoid underwater “backscatter” (spots that show up in pictures caused by tiny particles in the water) and get more vivid
colors, we recommend that you use the SeaLife External Flash, which is sold separately. You can even use two external flashes,
like the pros do, in order to eliminate shadows in your pictures. When using the SeaLife External Flash, you must set the
camera to the External Flash Mode. The External Flash Mode does not use a Pre Flash, since this would cause the external flash
to fire during the pre-flash and not during the primary flash.
If you are taking close-up pictures in very low light or even total darkness with the SeaLife Macro lenses and you experience over
flashing from a reflective fish or object, you have the choice of immediately deleting the image by pressing the shutter button again
within 3 seconds (the monitor will show you the picture and display “DELETE?”). You can then redirect the flash by moving the
flexible flash arm or turning the flash diffuser dial to a different setting. The Flash Diffuser is an accessory that can be clipped on
to the external slash head in order to modify the brightness by dialing a degree of diffusion. The system gives you many options
to create great photos under many different conditions and using the various flashes or lens accessories.
Land Mode: If you are taking land pictures, set the camera to Land Mode. Now the camera is automatically programmed to take
great land pictures. The camera evaluates light conditions through the lens. If it’s too dark, the camera uses the built-in flash to
fire a pre-flash (to test the picture quality) and a primary flash for taking a properly exposed picture. If you like, you can override
the camera’s fully automatic functions. In many cases you might actually take a better picture without flash, such as in longer
shooting distances in low light or indoor, and you can select “no flash.” In other cases, even in bright light, you might select “fillflash” to brighten up shadows and avoid dark areas. Sometimes pictures can be “grainy” if you do not have enough light and do
not use the flash. No matter how dark it is, even if it becomes impossible for any camera to take a sharp picture, the camera will
continued on following page
1
PIONEERmanREV
11/19/01
6:00 PM
Page 2
still try to take a picture. If that happens, get closer to the subject and use a flash or another good light source. In general, the
closer you are to your subject and the brighter the light conditions are, the better the picture results will be. With a little
experimenting you will quickly be on your way towards great digital pictures to share with your friends and family.
Your computer
It’s important to follow the correct procedures to establish a connection between the camera and your computer. Once you got the
hang of it, you will connect the camera to your computer and download, edit, print or e-mail pictures.
Download – The USB connection will quickly transfer pictures from your camera to your computer. Please refer to the detailed
instructions on page 29 on how to connect your camera to the computer.
Editing – You will enjoy picture editing with MGI Photo Suite®, but you can also use your own picture-publishing program that you
are familiar with. First take pictures in the highest quality setting. Then you can make adjustments to the image on your
computer, like cropping, adjusting the picture size or some really creative special effects.
Printing – For photo-like 5”X7” prints, set the printer on the highest resolution and use high-quality glossy photo paper. You will
discover that creating a vacation trip report on Word® with your best pictures is an impressive way to save and share your
memories.
There are many great books and websites dedicated to the world of digital photography. Please visit our website
www.sealife-cameras.com for links to the best website and other suggestions on how to learn more about digital photography.
2
PIONEERmanREV
11/19/01
6:00 PM
Page 3
Getting Started
Thanks for purchasing the Sealife Reefmaster digital camera. You will experience a whole new way of seeing and
sharing your greatest impressions. First, we will guide you through the whole picture taking process. Please keep this
booklet on hand for future reference.
SeaLife Reefmaster
SeaLife Reefmaster
Digital UW Camera (item#SL120) Digital UW Camera (item#SL121)
Checking Accessories
■ Underwater Housing
■ 4 x “AA” batteries
■ Battery charger for
SeaLife Ni-MH batteries
■ Video Cable
■ AC Power supply cable
■ USB Cable
■ MGI Photosuite Software with camera driver
■ Instruction Manual
■ Quick Start Guide
■ Camera Pouch
■ Strap (for camera and housing)
■ Care Kit (cleaning cloth, swabs, desiccant)
Optional Accessories:
■
■
■
■
Compact Flash™ Memory Card - 32MB, or 128MB
Water resistant sports case
External Flash (one or two) with mounting bracket
Snap-on macro lenses - 16X macro, 8X macro, 3X
macro with Macro Wand distance measuring tool
■ 20mm wide angle lens
■ Anti-fog desiccant (drying agent)
Included
Reefmaster Digital
depth rated to 133’
Optional
Included
Reefmaster Digital DX
depth rated to 200’
SeaLife Ni-MH batteries
with charger included
Optional
Included
Optional
Included
Included
Included
Included
Included
Included
Included
Included
Included
Included
Included
Included
Included
Included
Included
Included
Included
■ Sunshade for LCD monitor
■ Diffuser for external flash
■ Shockproof hard carry cases for camera and
accessories
■ Soft padded carry case for camera and accessories
3
PIONEERmanREV
11/19/01
6:00 PM
Page 4
System Requirements
■ Pentium 166MHz processor or higher
■ Windows® 98SE/2000/Me/XP – Macintosh® version 8.5 or higher
■ Available USB port
■ At least 32MB RAM
■ 80MB available hard disk space
■ CD-ROM drive
■ Color monitor (800x600 24-bit or higher recommended)
■ Microsoft Internet Explorer 4.0 or higher
4
PIONEERmanREV
11/19/01
6:00 PM
Page 5
Identifying the Parts
6. Menu
7. Flash Mode
Button
Button
3. Status
5. Operating
1. Shutter
LCD
Mode Dial
Button
LAND & SEA
Fig.1
4. Resolution/Quality
Button
2. Power
Button
1. Viewfinder
Optical
2. Flash
3. Jack
Cover
5. Lens
4. Focus
Knob
Standard
focus
Fig.2
Macro
focus
5
PIONEERmanREV
11/19/01
6:00 PM
Page 6
1. Strap Holder
7. LED 1
8. LED 2
2. Optical Viewfinder
3. Up / Backward /
Self-timer Button
4. Down / Forward
Button
5. OK Button
6. Monitor ON/OFF
Button
Fig.3
3. CF Cover
Fig.4
6
2. Tripod
Socket
1. Battery
Cover
PIONEERmanREV
11/19/01
6:00 PM
Operating Mode Dial
Page 7
Connectors
Status LCD / LCD Monitor
USB Port
LAND & SEA
Video Port
DC IN Port
The camera provides 5 different
operating modes for your
selection:
1. Record Mode
2. Play Mode
3. Setup Mode
The status LCD contains the
following indicators:
1. Resolution Indicator
2. PC Mode Indicator
3. Image Quality Indicator
LAND & SEA
★★★
4. Battery Power Indicator
4. Delete Mode
5. Flash Mode Indicator
5. PC Mode
6. Images Remaining/Image
Number Indicator
7. Self-timer Indicator
LCD Monitor (not shown)
The LCD Monitor shows the
current image information:
1. Resolution 3. Time
2. Quality
4. Date
7
PIONEERmanREV
11/19/01
6:00 PM
Page 8
On Battery Usage (also see Battery Selection Guide on page 53)
■ Only use 4 “AA” type batteries designed for high drain electronic devices
(SeaLife Ni-MH rechargeable, high energy alkalines, see battery selection guide
on page 53).
■ Do not mix battery types or it may cause a fire or explosion. Use only one
battery type at one time.
■ Batteries should be inserted in the battery compartment with the “+” and “-”
sides facing correctly.
■ Batteries should be replaced when the battery indicator icon appears as empty.
■ To improve battery performance, replace all installed batteries at the same time.
■ Keep battery away from heat.
■ Do not drop, puncture or disassemble batteries.
■ Remove batteries if they won’t be used for a long period of time.
■ Use only freshly charged Ni-MH batteries. 1600 mAh or higher. (At room
temperature batteries can discharge up to 10% per day).
■ Store batteries in a plastic container in refrigerator or cool, dry place.
■ Batteries may last about 2 hours with LCD on but actual time depends on how
many pictures are taken if LCD is on or other factors.
Any of the following actions may cause the battery to split or leak, resulting in fire or injury.
Do not attempt to charge alkaline batteries.
Do not carry or store a battery with objects such as metal pens, necklaces, coins or hairpins. This could short circuit
the positive + and negative - poles of the battery.
Do not insert or remove batteries with wet hands or in moist conditions.
Do not heat or attempt to disassemble a battery, and do not place a battery in water or in a fire.
Do not subject batteries to strong impacts, such as hitting them with a hammer, stepping on them or dropping them.
Do not use batteries that have signs of splitting or leaking.
8
PIONEERmanREV
11/19/01
6:00 PM
Page 9
Using the Optional Power Adapter
1. Open the connector cover and connect one end of the power adapter to the
DC 6V IN port as illustrated.
2. Connect the other end of the power adapter to a power outlet.
Use only the specified batteries or AC power adapter specified for use with
this camera. The use of other power sources may cause a fire.
Loading the CompactFlash™ Card (optional accessory)
The camera has 8MB of internal memory used to store pictures in
memory. You can also use CompactFlash memory cards to store more
pictures.
To load the CF card, perform the following:
1. Make sure to turn off the camera.
2. Open the CF card slot cover and then insert a CF card as indicated by the arrow.
3. Close the CF card slot cover. The lower LED on back of camera will light up green
indicating that the CF card is inserted correctly.
Inserting CF card with power on may permanently damage the memory card and result in lost images.
Insert CF card slowly and straight, but not with force.
Setting the Date and Time (not shown)
With camera power turned ON switch to LAND & SEA and the Setup menu appears. Use the (▲/▼) button
to select DATE/TIME. Press the OK button to change DATE/TIME. The cursor skips to the data field. Use
the arrow buttons (▲/▼) to adjust DATE/TIME. Press OK button to move to next DATE/TIME field. For more
details, please refer to page 26.
9
PIONEERmanREV
11/19/01
6:00 PM
Page 10
Digital Camera Instructions
Basic Operations
How to take a picture
To take a picture, perform the following:
1. Power on the camera.
2. Set the operating mode to RECORD.
3. Use the viewfinder window or LCD Monitor to frame
the image.
• Press the Monitor ON/OFF button to turn on the
LCD Monitor for usage.
4. Press the Shutter button.
• LED1 is blinking while capturing images.
Digital Zoom
To record a zoom image, perform the following:
1. Set the camera to Record mode.
2. Press the Monitor ON/OFF button to turn on the LCD monitor.
3. Press the OK button to activate 2X digital zoom function.
4. Press the Shutter button.
• Digital Zoom is only available at the high resolution (of 1280x960 pixels.)
10
PIONEERmanREV
11/19/01
6:00 PM
Page 11
Tips for Taking Pictures
■ Holding the camera
• Hold the camera firmly with both hand and brace your elbows lightly against your body.
• Keep your fingers, hair and the camera strap away from the camera lens and flash.
• Use the viewfinder or LCD monitor to frame your shot.
• Be sure to rest the camera against your forehead while using the optical viewfinder to focus your
shot.
■ Press and releasing Shutter Button
• Press the shutter button slowly and gently, until you feel a “click.”
• Keep your camera still while pressing the shutter button.
• Continue holding camera steady until you hear the click sound of the camera taking a picture.
This can take up to 2 seconds depending on lighting conditions.
• Practice not moving camera when you push the shutter button.
11
PIONEERmanREV
11/19/01
6:00 PM
Page 12
How to playback images
You can review the recorded images either on the LCD Monitor or on a TV. To playback images,
perform the following:
■ Playback images on LCD Monitor
1. Power on the camera.
2. Set the operating mode to PLAY mode.
The last image recorded appears.
3. Use the arrow buttons (▲/▼) to scroll forward/backward through the recorded images.
■ Playback images on TV
1. Connect one end of the video cable to the VIDEO port of your camera.
2. Connect the other end of the cable to the VIDEO IN port of your television.
3. Turn on the camera and the TV.
• Set the video output format before connecting to a TV (See page 26).
4. Set the camera to PLAY mode.
5. Use the arrow buttons (▲/▼) to forward/backward through the recorded images.
To playback the image recorded in the CF card, make sure the card is inserted.
To playback the images recorded in the camera internal memory, make sure the CF card is ejected.
LCD Monitor may be difficult to see in bright sunlight. View images in shaded area or use optional
sunshade (item# SL194).
12
PIONEERmanREV
11/19/01
6:00 PM
Page 13
How to view image information and thumbnails
The TIME/DATE, image size and image number is also recorded at the same time the image is captured.
While in PLAY mode.
The Monitor ON/OFF button acts as a switch to cycle through image
information ON, thumbnail display and image information OFF.
1. Set the camera to PLAY mode.
2. Press the Monitor ON/OFF button to bring up the DATE/TIME, size and number of the image displayed.
3. Press the Monitor ON/OFF button again to show thumbnail images.
4. Use the arrow buttons (▲/▼) to quickly locate the image you are searching, and
then press the OK or Display button to preview it at full screen.
How to examine image details
Sometimes you may want the images to be enlarged on the LCD monitor to be carefully examined. While
in PLAY mode
,the OK button acts as a switch to cycle through 2X, 4X and 1X magnification.
1. Set the camera to PLAY mode.
2. Press the OK button once to magnify the image at 2X.
3. Press the OK button again to magnify the image at 4X.
4. Use the arrow buttons to navigate through the image magnified in a "Z" type sequence.
13
PIONEERmanREV
11/19/01
6:00 PM
Page 14
How to delete images
1. Set the operating mode to DELETE.
Delete menu appears.
2. Use the arrow buttons (▲/▼) to select DELETE CURRENT or DELETE ALL. Press OK.
3. If you selected “Delete all” a message window appears with “ARE YOU SURE?” Use arrow button
(▲/▼)to select YES or NO option and press OK.
4. If you selected “Delete current,” the most recent picture taken will appear on the LCD monitor.
This picture will be deleted if you press OK. If you press the arrow button (▲/▼), the next picture
will appear..
5. Switch the operating mode dial to exit delete mode..
To delete the images recorded in the CF card, make sure to insert the card before deletion.
To delete the images recorded in the camera (internal memory), remove the CF card. The camera will
not be able to read the internal data with an external memory card inserted.
You can browse through the recorded images on the LCD Monitor or on a TV while in delete mode.
If there is no image stored in the memory a “NO IMAGES” message pops up.
To exit this message, switch to any other operating mode.
14
PIONEERmanREV
11/19/01
6:00 PM
Page 15
How to set the focus
Before taking a picture, make sure camera has correct focus setting. The camera provides 2 different
focus settings:
Mode
Effective Range
2ft. ~ infinity
(60cm ~ )
Icon
Close-up
8
Icon
Portrait/Telephoto
1ft. ~ 2ft.
(30cm ~ 60cm)
Description
For a normal/long distance shot
For a macro shot
Rotate the lens ring to select focus setting.
Set focusing to portrait/telephoto focus when used inside waterproof housing.
How to set the image resolution & quality
This camera provides 6 different image resolution & quality combination settings:
• 1280x960 pixels resolution
• 640x480 pixels resolution
with Super Fine (★★★), Fine (★★), Normal (★) quality.
with Super Fine (★★★), Fine (★★), Normal (★) quality.
To change the resolution & quality setting, perform the following:
1. Power on the camera.
2. Set the operating mode to RECORD.
3. Press the Resolution & Quality button.
Until you select the desired image resolution
and quality setting.
The setting is conserved even if the camera power is off.
Always check focus setting before taking pictures to make sure you have the correct setting.
15
PIONEERmanREV
11/19/01
6:00 PM
Page 16
Resolution Indicator
■ RECORD mode: Shows the currently set image resolution setting on the status LCD.
■ PLAY mode: Shows the captured image resolution setting on the LCD monitor.
Image Quality Indicator
■ RECORD mode: Shows the currently set image quality setting on the status LCD.
■ PLAY mode: Shows the captured image quality setting on the LCD monitor.
Resolution
Quality
Compression
Number of
Ratio
pictures with 8MB
1280x960
1280x960
1280x960
640x480
★★★
★★
★
★★★
8:1
12:1
20:1
4:1
17
25
50
34
640x480
640x480
★★
★★
8:1
16:1
69
138
The setting is conserved even if the camera power is off.
16
Tips
Ideal for printing larger pictures (8x10)
recommended for most pictures
Ideal for printing medium pictures (5x7)
Ideal for printing small pictures (3x4)
Ideal for emailing larger pictures (8x10)
recommended for most e-mail
Ideal for emailing medium pictures (5x7)
Ideal for emailing small pictures (3x4)
PIONEERmanREV
11/19/01
6:00 PM
Page 17
How to adjust the flash setting
The Flash settings can only be adjusted under RECORD mode. There are 4 settings
available: Auto, Red-Eye, Fill-In and Off. The default setting is AUTO for Land Mode and Sea Mode.
Flash is on while in External Flash Mode. To change the setting, press the Flash Mode button until the
desired one is selected.
Icon
Mode
Auto
Red-Eye
Fill-In
Flash Off
Description
Flash is enabled automatically in low light conditions
Auto Mode with Pre-Flash to reduce red eye effect
Flash is always enabled
Flash is always disabled
The setting is conserved even if the camera power is off
Advanced Camera Operations
How to adjust the EV compensation
To adjust the EV compensation, perform the following:
1. Set the operating mode to RECORD.
2. Press the Menu button. The Record menu appears.
3. Select the EV COMPENSATION item using the arrow button (▲/▼), then press OK button.
4. Select the desired exposure value using the arrow button (▲/▼), then press OK button.
• The effective range is from -1.8 to +1.8 in steps of 0.3 EV.
• For more information on EV COMPENSATION, see page 22.
This setting is reset to 0.0 when the camera power is off.
17
PIONEERmanREV
11/19/01
6:00 PM
Page 18
How to adjust the White Balance
To adjust the White Balance, perform the following:
1. Set the operating mode to RECORD.
2. Press the Menu button. The Record menu appears.
3. Select the WHITE BALANCE item using the arrow button (▲/▼), then press OK button.
4. Select the desired white balance setting. Using the arrow button (▲/▼), then press OK button.
• For information on white balance, see page 21.
This setting is reset to AUTO when the camera power is off.
How to set the OSD (On-Screen Display) language
To set the OSD language, perform the following:
1. Set the operating mode dial to LAND & SEA.
2. The Setup menu appears.
3. Select the LANGUAGE item. Using the arrow button (▲/▼), then press OK button.
4. Select the desired language setting.
• For information on OSD language, see page 26.
The setting is conserved even if the camera power is off.
18
PIONEERmanREV
11/19/01
6:00 PM
Page 19
How to set the Self-Timer
The self-timer can only be set under RECORD
mode.
To use the Self-Timer function, perform the following:
1. Press the Self-Timer button (▲) to activate the Self-timer. Red light on front of camera will be on.
2. Press the Shutter button.
3. After 10 seconds, an image is captured and the timer will turn itself off.
Self-Timer is designed to count down for 10 seconds. In the first 7 seconds, the RED indicator light in
the front of the camera blinks at a rate relatively slow and then blinks rapidly for the last 3 seconds.
How to format the CF (CompactFlash™) card
This will delete all pictures stored on the flash card.
To format the CF card, perform the following:
1. Set the operating mode to LAND & SEA. The SET-UP menu appears.
2. Select the FORMAT MEDIA item using the arrow button (▲/▼), then press OK button..
3. Select YES (default = NO) using the arrow button (▲/▼), then press OK button..
4. A message window appears - “Are you sure?”. Select yes using the arrow button (▲/▼), then
press OK button. A message window appears - “Format Complete.” CF Card is now formatted.
19
PIONEERmanREV
11/19/01
6:00 PM
Page 20
Operating Modes and Menus
RECORD Mode
Set the operating mode to RECORD
for taking pictures.
RECORD MENU
Press the Menu button
in RECORD
mode, the RECORD menu appears.
The menu contains the following items:
LCD BRIGHTNESS: This feature allows you to increase the brightness
of the LCD.
Changes the brightness setting (-5 ~ +5, Interval =1) of the LCD display.
Press the OK button to select this item. The cursor skips to the data
field as the OK button being pressed. Use the arrow buttons (▲/▼) to
increase/decrease the LCD brightness. Press the OK button again
to confirm time setting. The cursor returns to the Record menu
automatically when the change is made.
The setting is conserved even if the camera power is off.
QUICKVIEW :
If the LCD Monitor is on and QuickView mode is enabled, a preview of the captured image is shown on
the LCD Monitor as soon as the image is taken. When the 3 seconds are over, the LCD Monitor will
return to viewfinder mode. If the LCD Monitor is off but QuickView mode is enabled, a preview of the
captured image is temporarily shown on the LCD Monitor for 3 seconds as soon as the image is taken.
After the 3 seconds is over, the LCD Monitor will automatically turn off. During this 3 seconds of
preview in either case, the user will have the option, by means of an on-screen prompt, of deleting the
image just captured by pressing the OK button once processing is completed. (Available in SEA and
EXT. FLASH mode only)
20
PIONEERmanREV
11/19/01
6:00 PM
Page 21
Using the LCD Monitor while taking pictures shortens the life span of your batteries. To save battery
power you can take pictures without the LCD Monitor. Simply turn off the LCD Monitor and use the
Optical Viewfinder to frame the image as you would with a traditional camera.
Select the item by the arrow buttons (▲/▼) and then press the OK button to confirm. The cursor skips
to the data field as the OK button being pressed. Use the arrow buttons (▲/▼) to select the desired
setting. The cursor returns to the Record menu automatically when the change is made.
Note: Quickview setting is always enabled for Land, Sea, or External Flash Mode.
The setting is conserved even if the camera power is off.
WHITE BALANCE: This feature will compensate the color balance of a picture under certain lighting
conditions.
Select either one of the 5 (Auto, Sun, Shade, Fluorescent, Tungsten) manual white balance settings.
The auto white balance is recommended for most cases. For certain critical circumstances, if the result
did not come out as expected, you may manually change to another white balance type according to
the ambient lighting condition.
Use the arrow buttons (▲/▼) to move the cursor next to WHITE BALANCE and then press the OK
button to confirm. Press OK button and the cursor moves to the data field. Use the arrow buttons
(▲/▼) to select the desired white balance type. Press the OK button again to make the change. The
cursor returns to the Record menu automatically when the change is made.
The setting is reset to AUTO when the camera power is off.
Reference:
The approximate color temperature of the 4 white balance settings (except Auto White Balance) is
Sun = 5500K, Shade = 6000K, Fluorescent = 4000K and Tungsten = 2850K.
21
PIONEERmanREV
11/19/01
6:00 PM
Page 22
EV COMPENSATION: This feature will allows you to adjust the exposure compensation over a range of
-1.8 to +1.8 EV in steps of 0.3 EV. This is similar to “pushing” a film picture.
Select the item by the arrow buttons (▲/▼) and then press the OK button to confirm. A higher EV value
will overexpose image. Press OK button and the cursor skips to the data field. Use the arrow buttons
(▲/▼) to increase/decrease the EV compensate value (-1.8 ~ +1.8). Press the OK button again to make
the change. The cursor returns to the Record menu automatically when the change is made.
The setting is reset to AUTO when the camera power is off.
PLAY Mode
In Play mode, users can review the recorded images on the LCD Monitor or on a TV. Set the operating
mode to PLAY for image review.
PLAY MENU:
Press the Menu button in PLAY mode, the Play menu appears.
The menu contains the following items:
LCD BRIGHTNESS: See page 20 for how to adjust LCD
brightness.
The setting is conserved even if the camera power is off.
22
PIONEERmanREV
11/19/01
6:00 PM
Page 23
SLIDE SHOW:
Displays the recorded images sequentially, with a user-defined delay between images. Use the arrow
buttons (▲/▼) to move cursor next to SLIDE SHOW. Press OK button and cursor skips next to the
data field. Use the arrow buttons (▲/▼) to increase/decrease the delay between 2 to10 seconds in
increments of 2 . Press the OK button again to make the change. The slide show starts.
Press the Display/Menu/OK/ arrow buttons (▲/▼) buttons or switch the Operating Mode knob while a
slide show is playing to stop the slide show.
COPY TO CF CARD: Copies images stored in the camera’s internal memory to the CF Card.
Use the arrow buttons (▲/▼) to move cursor next to COPY TO CF CARD. Press OK button and
cursor skips to data field. Use the arrow buttons (▲/▼) to toggle the YES or NO option. Then press
OK button to confirm.
DPOF (Digital Print Order Format) If you select the DPOF item, all your image settings will be saved
on the CF card. Now, a DPOF compatible printer will print images as specified in your setting, after
you insert the CF card into a printer.
DPOF User Interface You can use Shutter or Menu button to setup DPOF as follows:
A. Use Shutter button in PLAY Mode:
1. Set the Operating Mode Dial to the PLAY,
then the last image appears.
2. Press the Shutter button to toggle the DPOF print tag setting of the selected image. A printer
icon appears in bottom right corner of LCD monitor as you toggle between DPOF tag setting.
The default setting is size=Standard and quantity=1, when using the Shutter button to enable the
DPOF print tag.
23
PIONEERmanREV
11/19/01
6:00 PM
Page 24
B. Use Menu button in Play Menu:
1. Set the Operating Mode Dial to the PLAY,
then the last image appears.
2. Use the arrow buttons (▲/▼) to select the image you want for DPOF setting.
3. Press the Menu button, the Play menu appears.
4. Use the arrow buttons (▲/▼) to select DPOF item, then press OK button to confirm.
5. DPOF submenu will appear, and there are 4 items in this submenu, including Print Quantity, Print
Size, Print Index, and Print Enable. Use arrow buttons (▲/▼) to select one of 4 items, then press
OK button to confirm.
• If you select PRINT QUANTITY, use the arrow buttons (▲/▼) to make change, and then press OK
to confirm and return to the DPOF submenu. You can set the print quantity from 1 to 9.
• If you select PRINT SIZE, use the arrow buttons (▲/▼) to make change, and then press OK to
confirm and return to the DPOF submenu. You can set the print size from PRINT STD, 3X5, 4X6,
5X7, 8x10.(inch)
• If you select PRINT INDEX, use the arrow buttons (▲/▼) to toggle ON or OFF, and then press OK
to confirm and return to the DPOF submenu. You can select to print photo index or not.
• If you select PRINT ENABLE, use arrow buttons (▲/▼) to toggle ENABLE or DISABLE. If you
select “ENABLE” and press OK button to confirm, the camera will save the setting and returns to
Play menu. If you select “DISABLE” and press OK button to confirm, the camera will erase this
images DPOF setting and returns to Play menu.
If your printer only supports DPOF version 1.0, you must set PRINT STD for the
“PRINT SIZE” option.
DPOF function can only be operated with CF card inserted.
24
PIONEERmanREV
11/19/01
6:00 PM
Page 25
LAND & SEA Mode
In LAND & SEA mode, users can customize the camera setting based
on your personal or picture taking requirements.
LAND & SEA Menu
Switch the Operating Mode dial to LAND & SEA, the Setup menu
appears.
The menu contains the following items: LAND, SEA / EXT. FLASH
This unique camera offers the option to set the exposure program for Land or Sea (underwater)
mode.
LAND If using the camera above water, select the Land mode.
SEA If using the camera underwater, inside the underwater housing, select the Sea mode.
EXT. FLASH - If using the camera underwater, inside the underwater housing with one or two external
flash(es). Select the External Flash mode.
1. Turn camera Power ON.
2. Set the operating mode dial to LAND & SEA. The set-up menu will appear.
3. Use the arrow (▲/▼) button to move cursor next to “LAND/SEA/EXT FLASH”.
4. Press the OK button and the cursor will move to the data field at bottom of menu.
5. Use the arrow (▲/▼) button to select between LAND, SEA or EXT FLASH mode and press OK
button.
6. Rotate operating mode dial to record to exit Set-up menu. You will see a fish icon
appear
on the bottom of the LCD monitor when the camera is set to the Sea mode. A fish/flash
will
appear when the camera is set to External Flash mode.
Sea mode should only be used for underwater pictures without the external flash. The Ext. Flash
mode should only be used for underwater pictures with one or two external flash(es).
25
PIONEERmanREV
11/19/01
6:00 PM
Page 26
DATE/TIME: Sets the date and time information.
When the camera is used for the 1st time or the batteries are replaced, you may need to set the
correct date/time.
Press the OK button to select DATE/TIME. The cursor skips to the data field and the first item (Month)
is selected. Use the arrow buttons (▲/▼) to change the number or press the OK button to proceed to
the next item. When the last item is selected/changed, press OK button to return to the Setup menu.
LANGUAGE: Sets the On-Screen Display menu language.
There are 8 languages available for your selection. They are English, French, German, Spanish,
Japanese, Portuguese, Traditional Chinese and Simplified Chinese.
Use the arrow buttons (▲/▼) to move cursor next to language. Press OK button and the cursor skips
to the data field. Use the arrow buttons (▲/▼) to select the desired language setting (default=English).
Press the OK button again to make the change. The cursor returns to the Setup menu automatically
when the change is made.
SOUND: This feature allows you to enable or disable the beeping sound when camera buttons are
pressed.
Use the arrow buttons (▲/▼) to move cursor next to Sound. Press OK button and cursor skips to data
field. Use the arrow buttons (▲/▼) select On or Off. Press the OK button again to make the change.
The cursor returns to the Setup menu automatically when the change is made.
The above settings are conserved even if the camera power is off.
26
PIONEERmanREV
11/19/01
6:00 PM
Page 27
FORMAT MEDIA: Formats the CompactFlash™ card.
Use the arrow buttons (▲/▼) to move the cursor next to Format Media. The cursor skips to the data
field. Use the arrow buttons (▲/▼) to select Yes or No. Select YES and a message appears - “Are you
sure?”. Press the OK button to re-format the CF card and return to the Setup menu. Select NO and
press the OK button to cancel and return to the Setup menu without any change.
• This feature can also be used to reformat the 8MB of internal memory, if necessary.
Note: Any images or data stored on the CF Card, or internal memory will be lost when
formatting media.
VIDEO MODE: This feature allows you to set video output type.
The camera provides 2 different video output types for your selection: NTSC and PAL. Select the
correct video type for your region (e.g. NTSC TV or PAL TV). The default setting is NTSC.
RESET TO DEFAULT:
Returns all the camera settings to the factory default settings. (Same as setting to LAND mode)
Use the arrow buttons (▲/▼) to move cursor next to “Reset to Default”. Press the OK button and
cursor skips to the data field. Use the arrow buttons (▲/▼) to select Yes or No. Select YES and press
the OK button to make the change and return to the SETUP menu. Select NO, then press the OK
button to cancel and return to the SETUP menu without any change.
Default Setting (same as LAND mode)
Image Resolution = 1280 x 960
Image Quality = Super fine
White Balance = Auto
Flash = Auto
QuickView = On
LCD Brightness = 0
EV Compensation = 0.0
Slide Show Delay = 4 seconds
Sound = ON
27
PIONEERmanREV
11/19/01
6:00 PM
Page 28
DELETE Mode
In DELETE mode, you can delete all recorded images at one time or each
image one at a time.
DELETE MENU
Switch the operating mode dial to DELETE,
and the DELETE menu will
appear.
To delete the images recorded in the CF card, make sure to insert the card
before deletion.
To delete the images recorded in the camera (internal memory), do not insert any CF card.
DELETE CURRENT
1. Use arrow button (▲/▼) to move cursor next to “Delete current?”, then press OK button.
2. The last image taken or the image currently being viewed in Play mode will be displayed.
3. Use the arrow buttons (▲/▼) to select the captured images you want to delete.
4. Press the OK button to delete the displayed picture.
5. Repeat the step 3-4 to continue the delete other images, or switch the Operating Mode dial to exit.
• Each image shown, on LCD will also display file name and image number information at bottom of
screen.
While in the delete mode, you can browse the recorded images on the LCD Monitor or on a TV.
DELETE ALL
1. Use the arrow buttons (▲/▼) to move cursor next to “Delete all?”, then press the OK button.
2. A MESSAGE window appears - “Are you sure?”. Use the arrow button (▲/▼) to select YES or NO
then press OK button to confirm selection. Selecting YES will delete all images. Selecting NO will
return you to the delete menu.
28
PIONEERmanREV
11/19/01
6:00 PM
Page 29
PC Mode
Images can only be transferred to a PC via USB in this mode. In this mode, there are no menus and
no buttons are activated.
Transferring your Images to the Computer
Before image transfer, please read the following guideline carefully.
Driver Installation (Windows98 only)
If you are planing to transfer your images into a computer, make sure to complete the camera driver
installation before making camera connection. Install the driver as follows:
1. Insert the software CD-ROM disc into your CD-ROM drive
2. The setup program starts. Follow the on screen instructions to complete the software installation.
3. Restart the computer (recommended)
Windows 2000/ME and MAC version 8.5 or higher will automatically recognize camera so
installing the driver is not necessary. However, installing driver will change name of “mass
storage device” to “Sealife camera.”
Downloading Images to computer
Follow the steps below to transfer your images to the computer:
1. First, connect USB cable to the USB port on your computer.
2. Power on the camera.
3. Set the Operating mode dial to “PC.”
4. Only then connect USB cable to camera.
5. Click on “My Computer” to find drive called “removable disk (:)” to locate images.
29
PIONEERmanREV
11/19/01
6:00 PM
Page 30
Editing and Processing images
Using MGI PhotoSuite (must be installed from CD before using)
MGI PhotoSuite is a very user-friendly image editing program. With PhotoSuite, you can quickly open,
view, retouch, compose and organize your images. It contains a variety of templates, such as photo
frames, birthday cards, calendars and other fun stuff. Get your images ready and explore this
amazing program.
To use the program, follow the steps below:
1. Launch MGI PhotoSuite.
Get button
Navigation bar
Welcome screen
Large Get button
2. Click the large Get button on the Welcome screen, or the Get button
on the Navigation bar.
3. In the GET PHOTO menu click the “computer” button.
4. Look in drive called “removable disk.” All images are located in files
under this drive. Double click image to open and view.
5. Now you are able to process your images with all the tools provided
by PhotoSuite. PhotoSuite offers a help menu that provides detailed
instructions on how to use PhotoSuite.
30
PIONEERmanREV
11/19/01
6:00 PM
Page 31
Using MGI PhotoVista (must be installed from CD before using)
MGI PhotoVista is an easy-to-use program that lets you create spectacular 360º panoramic images in a
snap. When you view these panoramas, you get the experience of being totally immersed in a realistic
environment. Photovista’s powerful engine quickly and automatically stitches images together, and its
intuitive interface will let even a novice get great results in minutes.
To use the program, follow the steps below:
Step 1: Open Source Images in MGI PhotoVista
MGI PhotoVista requires some overlap of source images
to properly align them before a stitch. For best results,
use a 20% to 50% overlap. The number of photos you
need to shoot to achieve this overlap depends on the lens
type you’re using.
Step 2: Select the Lens
Click the Select Lens icon. The Select Lens dialog box
appears. Select the “50mm” lens type.
31
PIONEERmanREV
11/19/01
6:00 PM
Page 32
Step 3: Preview the Stitch
Click the Stitch Panorama icon. The Stitch Options dialog box
appears. Click Preview Stitch button.
Step 4: View the Panorama In Action
Choose Show Viewer from the Panorama menu. The Stitch Preview window changes to viewer mode.
Press and drag the pointer over the panorama vertically and horizontally. Press SHIFT to zoom in or
press CTRL to zoom out. Close the viewer window when you’re done to return to the preview stitch.
32
PIONEERmanREV
11/19/01
6:00 PM
Page 33
Step 5: Create a Full Stitch
Click the Stitch Panorama icon. The Stitch Options dialog box appears. Click Full Stitch button. The
Stitch Progress dialog box displays the progress of the stitch. Follow the procedure in Step 4 to view
the panorama in action.
Step 6: Save a Panorama
After Step5, you can save the panorama from the Stitched Result window as a BMP, Flashpix (FPX), or
JPEG file. MGI PhotoVista also automatically creates an IVR file for you, which you use to play the
panorama.
33
PIONEERmanREV
11/19/01
6:00 PM
Page 34
Additional Information
Names and Functions
Optical Viewfinder - To extend the battery life, turn off LCD monitor and use optical viewfinder.
The optical viewfinder is the real-image type with 85±5% alignment tolerance.
LCD Monitor - When you are about to take a picture, you may use the LCD monitor to frame the image.
Press the
monitor button to turn the LCD Monitor ON/OFF.
LCD Monitor Button
The LCD button is only active in RECORD and PLAY modes. While in RECORD mode, press the
Display button will toggle the LCD monitor On and Off. In PLAY mode, press the Display button to
review the images in the following 3 modes:
1. Single image display
2. Single image display with image information overlay
3. Multi-image (3x3 thumbnail) display
Menu Button
The Menu button is active in RECORD/PLAY/DELETE modes. Press the Menu button to turn on the
Record/Play/Delete menus. To access the Record/Play/Delete menu, simply rotate the operating mode
dial to RECORD/PLAY/DELETE mode and press the Menu button. To turn off the menu, press the
Menu button again.
34
PIONEERmanREV
11/19/01
6:00 PM
Page 35
OK Button
The OK button is active any time a menu or dialog is displayed. Use the button to select/confirm the
currently highlighted item.
Power Button
Press the power button to turn the camera on or off. While the camera is powered on and there is no
button activity or host communication for about 3 minutes, the camera will automatically switch to the
POWER SAVE mode (standby) to conserve power. Press any button or rotate the Mode dial will bring
the camera back from POWER SAVE mode. If there is no activity for 5 minutes, the system power will
turn off and you will have to press the power button to turn the camera back on. When the camera is
set to SEA or EXT. FLASH mode, the system will turn off in 15 minutes.
Shutter Button (Big red button)
The Shutter button is only active in RECORD and PLAY mode. You may press the button in RECORD
mode for image capturing, processing and storing. Before taking pictures, please make sure that your
camera has available free space for image storage and there is appropriate light for a successful image
capturing. In PLAY mode, the shutter toggles between the DPOF printer setting.
Self-Timer Button
The Self-Timer button is active only in RECORD mode. When the Self-Timer button is pressed, the 10second self-timer is enabled. A red light on front of camera will illuminate. To disable the self-timer
function, do any of the following:
• Press the Self-Timer button again.
• Press the Shutter button to capture the image.
• Power off the camera.
• Change to another mode other than RECORD mode.
• Let the camera automatically disable the Self-Timer function after an image is captured.
35
PIONEERmanREV
11/19/01
6:00 PM
Page 36
Operating Mode Dial
Switch the Operating Mode Dial to select the desired operating mode. There are five operating modes
available as follows:
RECORD: Capture/stores images
PLAY: Review images in memory
LAND & SEA
Change camera settings and select between LAND & SEA exposure programs
DELETE: Delete images in memory
PC: Transfer images to PC
Battery Power Indicator
You may check the battery status by the battery power indicator on the LCD display.
Battery icon with 3 bars on: The battery is fully charged.
Battery icon with 2 bars on: The battery is partially charged (should be recharged before diving.)
Battery icon with 1 bar on: Insert new or freshly recharged batteries.
Battery icon with no bars on: The battery needs to be replaced, there is no battery power
remaining. The camera will be forced to power off at once.
• If “low battery” message will appears on LCD monitor, stop using camera and recharge
batteries.
36
PIONEERmanREV
11/19/01
6:00 PM
Page 37
Images Remaining/Image Number Indicator
The image number on the Status LCD may have different meanings in each mode:
RECORD Mode: Shows the number of the minimum images that can be recorded in your camera with
current settings.
LAND & SEA Mode: Shows the total amount of the recorded images in your camera.
PLAY/DELETE Mode: Shows the current image number displayed on the LCD monitor.
LED Messages
Type
Color
Status
Description
Sound
LED1
Red
Blinking
While detecting a system error
Yes
LED1
Green
On
Camera is powered on
No
LED1
LED2
Red
Green
Blinking
On
Image processing
CF card is inserted
No
No
SELF - Timer
Indicator
Red
Blinking
Camera is capturing an image
No
SELF - Timer
Red
On
Self-Timer IS ACTIVATED
(press shutter)
Yes
37
PIONEERmanREV
11/19/01
6:00 PM
Page 38
Camera Specification
Image Sensor
Image Resolution
Image Quality
Image Modes
Color
Lens
Zoom
File Format
Internal Memory
External Memory
Processing Time
Software Driver
AP
LCD Display
LCD Indicator
Built-in Flash
Self-timer
Exposure
White Balance
Language
Connectors
Power
Certification
Dimensions
Weight
38
CCD sensor with 1.3 mega pixels
1280x960 / 640x480
Normal, Fine, Super Fine
Land, Sea or Ext. Flash
24-bit Color (RGB)
Fixed Lens with Macro (0.3m~0.6m), Aperture-2 step (Auto)F:2.8/8
2 X Digital Zoom
JPEG , EXIF 2.1
8MB Flash Memory
Compact Flash Card Type 1 Slot (CF Cards not included)
Interval during taking pictures < 4 sec ; picture playback time < 4 sec (LAND mode)
PC(Windows 98/2000/Me) MAC version 8.5 or higher
MGI PhotoSuite III SE, MGI PhotoVista
1.8" color LCD for real time display with 280x220 image
Flash/Quality/Battery Status/Number of Image
Auto, Red-eye reduction, Fill-in, Off
10 sec delay
Auto; Manual: 0.3 EV step, -1.8 ~ +1.8EV
Auto, Sun, Shade, Fluorescent,Tungsten
English, Japanese, German, French, Spanish,Portuguese, Traditional Chinese,
Simplified Chinese
AC power port/ USB port / Video Output (NTSC or PAL)
4X AA (High-Energy Alkaline Battery, Ni-MH, Lithium); AC-DC Adapter
CE, FCC, VCCI,TSMI
105x66.5x48 mm
about 190g(without battery and CF card)
PIONEERmanREV
11/19/01
6:00 PM
Page 39
Underwater Housing Instructions
SeaLife manufacturers two underwater housings for the Reefmaster Digital camera – The SL111 and SL111DX. The primary
difference between these two housings is the depth rating. The SL111 is depth tested and rated to 133 feet (40m) and the
SL111DX is depth rated and tested to 200’ (60m). The depth rating is printed on the front lens port to help you distinguish
between the two housings.
SeaLife Reefmaster Digital Deluxe Housing (SL111DX)
•
•
•
•
•
•
•
Depth rated and tested to 200ft. (60M)
Includes Sportsfinder.
Rubber grips - yellow for high visibility, slip proof, adds shock resistance.
Optical glass lens port.
Stainless steel hardware - corrosion proof.
Simple 2-button operation (power and shutter/delete button).
This housing is included with the Reefmaster Digital DC200. (item#SL121)
SeaLife Reefmaster Digital Housing (SL111)
•
•
•
•
•
•
Depth rated and tested to 133ft. (40M)
Rubber grips - gray/blue slip proof, adds shock resistance.
Optical glass lens port.
Stainless steel hardware - corrosion proof.
Simple 2-button operation (power and shutter/delete button).
This housing is included with the Reefmaster Digital DC100. (item#SL120)
These housing instructions apply to both housing models (SL111 and SL111DX).
39
PIONEERmanREV
11/19/01
6:00 PM
Page 40
MUST DO for underwater housing:
1. Read these instructions before using the underwater housing.
2. Do not exceed the depth rating printed on the lens port of the housing.
3. Keep main O-Rings perfectly clean.
• Clean main O-rings with cleaning brush provided before every use. Do not remove O-rings. Do not
grease.
• Store camera and housing only after careful cleaning and when totally dry.
• Housing uses two large O-rings at housing sealing lid. Never use housing without both O-rings in place.
• If O-ring is damaged, contact the SeaLife Service Center. (See page 42)
• O-ring must be perfectly clean (no sand, dirt or debris) before sealing housing.
• Soak or rinse sealed housing with fresh water after drying.
4. Carefully close lid to seal housing.
• Make sure O-rings do not slip out of the groove when sealing.
• Press lid firmly and tightly down into housing to ensure a waterproof seal.
5. Never let any moisture or dirt get inside housing when opening.
• Only open and load the housing in dry cool air, such as inside an air-conditioned room.
6. For great underwater pictures you need:
• Clear water conditions, control your buoyancy before taking picture, get as close as possible to subject
(ideal distance is 2’ to 6’). Use the SeaLife Macro Lens/Filter for close-up pictures with super details
and vibrant colors.
7. Store housing at room temperature in a clean and dry place
• Do not expose housing to direct sunlight for prolonged periods of time.
• Do not store housing in hot locations, like the trunk of your car.
40
PIONEERmanREV
11/19/01
6:00 PM
Page 41
Important:
The lid O-ring is Teflon® coated (permanent). Do not wipe off Teflon® coating. Only use cleaning brush to
clean. Replace Teflon® O-ring after every 50 dives. We suggest you record camera usage and
maintenance in your log book.
41
PIONEERmanREV
11/19/01
6:00 PM
Page 42
Main O-rings and keeping a waterproof seal
The SeaLife housing uses two O-rings to form a waterproof seal. Every housing is tested for quality and a waterproof seal. It is your responsibility to maintain the housing and ensure it remains waterproof. Our research and
testing shows that 99% of leaks are the result of not cleaning or caring for the O-ring.
Warranty does not cover a water-damaged camera unless it is clearly determined that a manufacturing defect
caused the leak.
• The O-rings must always be kept clean and checked for damage before every use.
• Carefully clean the housing surface that makes contact with the O-ring and inspect for scrapes and cuts. If
the housing sealing area is damaged, contact the SeaLife Service Center.
• Never use the housing without all the O-rings in place.
• If O-rings need replacement contact the SeaLife Service Center.
• Do not remove or lubricate O-rings.
• The O-ring located in the housing body groove is glued in place. Never remove this O-ring. If the O-ring
becomes loose or unglued, contact the SeaLife Service Center.
• The O-ring located in the housing lid groove is not glued in place. O-ring should not be removed unless sand,
hair or other objects become trapped under O-ring. If O-ring must be removed use the other end of the
cleaning brush to lift up O-ring and remove. Carefully inspect O-ring for cuts and damage. If this O-ring is
removed, make sure it is carefully replaced. Do not twist or stretch O-ring. Lid O-ring must be pushed into
it’s groove. Be careful not to pinch O-ring when closing housing.
The underwater housing uses only two buttons – Power ON/OFF button and Shutter button. Each button
assembly has an O-ring to keep a waterproof seal. It is normal to feel some resistance when pressing these
buttons. If the button does not return to it’s original position or if the button does not have a smooth action,
contact the SeaLife Service Center. Do not attempt to disassemble or service the shutter or power buttons.
Quick waterproof test
Wrap a small dive weight in a blue paper towel, place inside housing and close the lid to seal the housing. The blue paper
towel makes it easier to see a leak. Make sure not to pinch the paper towel in the O-ring. Place the sealed housing in a
tub of cold water for about one hour. No leaks should be present. If the housing shows sign of leaking, do not use the
housing and contact the SeaLife Service Center for repairs.
SeaLife Service Center, 97 Foster Road, Moorestown, NJ 08057
(856) 866-9192 - www.sealife-cameras.com/service.
42
PIONEERmanREV
11/19/01
6:00 PM
Page 43
Opening tab
43
PIONEERmanREV
44
11/19/01
6:00 PM
Page 44
PIONEERmanREV
11/19/01
6:00 PM
Page 45
How to set-up the Underwater Housing
Set up camera
1. Insert 4 fully charged Ni-MH batteries (size AA, capacity at least 1600 mAh). See page 53 for more battery
information. Make sure you insert the batteries with the correct + and – polarity.
2. Clean camera lens with dry, clean cotton cloth.
3. Make sure camera focus knob (lens) is set to standard distance. DO NOT SET TO MACRO.
4. Remove camera strap since this may prevent the camera from correctly seating itself inside the housing.
5. Set camera to Sea mode. If you are using an External Flash, set camera to External Flash mode. See page 25
for detailed instructions on how to set camera to Land, Sea or External Flash modes.
Set up housing
Opening and loading of the housing should be done only in dry cool air, such as in an air-conditioned room to
prevent fogging.
1. Open the housing by pulling up latch on side of housing. Do not extend housing lid beyond its stop point or
damage may occur to the hinge area.
2. Carefully inspect O-rings for damage and make sure O-ring is firmly seated in its
groove. If O-ring is damaged and requires replacement, contact SeaLife Service
Center (For service details, see page iii).
3. Clean the housing glass lens port using clean, dry cotton cloth. It is recommended
to apply anti-fog solution to the inside surface of the housing lens.
4. Carefully insert camera into housing. Make sure camera is clean and dry.
5. Insert two Anti-Fog desiccant capsules into special slots inside housing. Note: New
desiccant capsules will be blue in color. As the desiccant absorbs moist air, it turns
from blue to light pink. Replace desiccant capsules when color changes to light pick.
6. Carefully clean O-rings and inside of housing area where O-ring makes contact. Use
cleaning brush provided in Care Kit. O-ring must not be wet when sealing housing,
allow these areas to dry.
O-Ring must be absolutely clean of all lint, sand or other small particles.
Do not grease O-rings.
45
PIONEERmanREV
11/19/01
6:00 PM
Page 46
12. Do not allow any water droplets to get inside housing. This will
cause the inside of the housing to fog.
13. Close housing lid tightly. Make sure there are no obstructions that
prevent the housing from closing. Make sure lid is tightly pressed
into housing, ( see picture).
14. Close housing latch. Make sure the lid is pressed flat and evenly
against the housing body. The housing may leak if the lid is not flat
against the housing when closed.
Close housing lid tightly.
Test camera and housing
1. Press the external power button on the top of the housing to turn camera power on.
2. Press the shutter button on the outside of the housing to take a test picture.
3. The power or shutter button should have a smooth action and return to its original resting position
after pressing. It is normal to feel some resistance when pressing the power and shutter button.
4. Press and hold power button to turn camera power off. It is recommended to leave camera power
off until you’re ready to use camera to preserve battery power.
5. After 3 minutes the LCD and monitor will turn off, and the camera will in power save mode. To
re-activate power, push the SHUTTER BUTTON.
6. After 6 minutes the camera power will shut down. (15 minutes in SEA or EXT. FLASH mode). To
operate the camera, push the POWER BUTTON to turn on the camera.
46
PIONEERmanREV
11/19/01
6:00 PM
Page 47
Using and cleaning the underwater housing and camera
Entering the water with housing
1. Do not enter water with camera in your hand. Have someone hand you the camera after you have entered the
water.
2. See “Great Pictures Made Easy” on page 48.
After using housing underwater
1. Before entering dive boat, hand housing to someone on the boat.
2. Make sure the sealed housing is placed in a fresh water tank available on most dive boats. This will clean the
salt water from the camera housing and prevents the salt water from drying on the camera housing and O-ring.
Never let water dry on the camera housing. Salt crystals can damage the O-rings, lens and attract moisture. Dry
housing with clean soft towel after removing from fresh water tank.
3. Do not expose camera and housing to direct sunlight – keep in a shaded area or under a dry towel.
4. It is not recommended to remove camera from housing while on the dive boat. Allowing humid air to enter the
housing may cause fogging.
5. If you must open the housing while on the dive boat, make sure you and the housing are perfectly dry before
opening the housing. Do not allow the inside of the housing or the camera to get wet.
Cleaning housing after use
1. The sealed housing must be thoroughly cleaned with fresh water before opening. Never let salt water dry on
housing. Salt crystals may damage the O-rings, lens and attract moisture.
2. Never let water drops dry on lens. Wipe lens dry with clean cotton cloth.
3. Before opening housing, everything, including your hands, head and surrounding area must be totally dry. Have
a dry towel handy.
4. After opening the housing, clean the camera, O-ring area and all inside and outside parts with a clean, dry
cotton cloth.
5. Before storing the housing and camera, remove batteries, Compact Flash card and keep in a clean dry area.
Make sure the housing and any accessories are clean and dry before storage.
6. Never store camera or housing in direct sunlight or in a dark damp area. The airtight, unbreakable SeaLife
ReefMaster Dry Case (Item # SL930) is highly recommended along with 1-oz bags of SeaLife Moisture Muncher
Desiccant (Item # M101) for travel and storage.
47
PIONEERmanREV
11/19/01
6:00 PM
Page 48
Great Pictures Made Easy
Taking underwater pictures is much different that taking land pictures. Here are the most important tips to taking
great pictures underwater:
1. Crystal Clear water.
Crystal Clear water is essential for good underwater pictures. Remember the human eye can see more detail than
a camera. In other words, your eyes see the water as being clearer than it actually is. Floating particles like algae,
and silt cause low visibility. Avoid stirring up the sandy bottom with your fins. These floating particles cause small
spots to appear in your picture, known as “backscatter.”
Always remember to limit your shooting distance to 1/10 of the water visibility. For example, if the visibility is 60
feet (18 m), you should keep your shooting distance to within 6 feet (1.8m); in 30 feet (10 m) visibility you should be
no further than 3 feet (90 cm) away from your subject.
2. Stay within the ideal shooting distance of 2 to 6 feet.
The ideal shooting distance is between 2 to 6 feet (0.6 to 1.8 meters). This distance will result in detailed, colorful
pictures. The closer, the better. Use your stretched out arm as a measuring tool to keep your minimum shooting
distance of 2 feet (0.6 meters). Remember that light does not travel very far underwater. For best pictures, use a
3X Macro Lens at distances from 12 to 36 inches (30 to 90 cm).
3. Move calmly and control your buoyancy before taking a picture.
It is very hard to take good pictures when you are moving. Look around for great picture opportunities. First position
yourself at the best angle, and neutralize your buoyancy. Second, use the LCD monitor to perfectly frame your subject,
check your shooting distance and keep the camera steady. Third, be calm and patient: Sometimes you have to wait a
little bit so the fish that were frightened away, come back. Don’t chase the fish, let the fish come to you.
Always be in control of your buoyancy before taking pictures and observe all safe-diving rules.
4. Shoot and review - If you don’t like it, delete it.
One of the key advantages of the SeaLife digital camera is that the monitor displays the picture you’ve just taken. The
monitor will display a message “DELETE?” for 3 seconds. If you don’t like it, delete it by pushing the shutter button again.
One of the best ways to learn underwater photography is from your good pictures and mistakes.
48
PIONEERmanREV
11/19/01
6:00 PM
Page 49
5. Take several pictures of the same subject.
Use different distances and angles. (Allow about 8 seconds between shots for the flash to re-charge). Study and compare
the good and bad pictures and you will soon be a master.
Never touch any sea creatures. Consult your dive master about approaching dangerous creatures or structures.
6. Use SeaLife Macro and Wide Angle Lenses for dramatic close-ups.
The SeaLife Macro and Wide Angle lenses allow you to get super close to your subject for images full of colors and
razor-sharp details. Each SeaLife macro lens has optical coatings for color correction (reduces the underwater bluish effect)
and a neutral density coating to prevent over flashing.
With the 20-mm wide-angle lens you fit a close group of 4 dive buddies or a 6-foot (180 cm) shark at a shooting distance
of 6 feet (180 cm). Normally you would have to be 10 feet away, too far for a sharp picture. The following lenses are
available at your local scuba dive dealer:
Lens description
Item #
effective range
No Lens
N/A
2’ (60 cm) to infinity
Macro 3X lens/filter
SL951
12" to 36" (30 to 90 cm)
Macro 8X lens/filter
SL959 (set)
10" to 13" (25 to 33 cm)
Macro 16X lens/filter
SL959 (set)
7" to 10" (18 to 25 cm)
20 mm Wide angle lens
SL970
1’ (30 cm) to infinity. Field of view about 50 % larger.
The above distance only apply to digital camera. SeaLife film cameras will have different shooting distances.
The 8X and 16X Macro lenses are sold in a set that also includes the extendable and collapsible distance-measuring device
“Macro Wand” (Set item # SL959)
7. Use the SeaLife External Flash to enhance color and brightness.
Water filters out light and red/yellow colors resulting in darker, bluer images. The only way to prevent this from occurring is
by taking pictures at shallow depths (within 5’ depth on a sunny day) or by using artificial light, like the SeaLife External
Flash. The External Flash easily mounts to the bottom of the housing. The flexible arm allows you to direct the flash at the
subject. Even two flashes can be mounted onto the housing for an evenly illuminated and shadow-free image.
This system blocks the built-in flash and prevents backscatter. The flexible flash arms allow quick adjustments of the flash.
An optional Flash Diffuser can be snapped onto the flash head. This lets you dial 3 different flash intensities, which is
highly recommended for close-up shots and reflective subjects.
49
PIONEERmanREV
11/19/01
6:00 PM
Page 50
8. Take the SeaLife “Great Pictures Made Easy” Photo Course Program.
SeaLife offers photography course for film and digital cameras though participating dealers worldwide. The following
courses are available:
Step One: Safe Diving While handling a camera – This course covers how to safely handle a camera, how to find
exciting sea creatures, the basics about how to take pictures and how to make lasting impressions. Available as
booklet “Great Pictures made easy. Step I” and as introductory course at your dive store.
Step two: Basic Underwater Photography skills – You will learn to take great pictures with a basic underwater camera.
Learn about underwater varying light conditions, how to use an external flash to “wake-up” intense colors and the habitats of our strange and colorful sea creatures
Step Three: Advanced Underwater Photography Skills – Here we explore in detail, the magic of composing your image,
working with macro and wide angle lenses, using dual external flashes, Editing skills and tips from the pros.
Please check with your local SeaLife scuba dive dealer for more details.
50
PIONEERmanREV
11/19/01
6:00 PM
Page 51
Ni-MH battery charger (item # SL190) (Optional accessory)
The SeaLife Nickel Metal Hydride (Ni-MH) battery charger is designed to fully
charge SeaLife Ni-MH batteries in about 2 hours. The charger can be used
worldwide with one of the 3 international plug adapter types. The charging indicator light is orange in color during the charge and turns green when charging is
complete.
Only charge 4 batteries at a time. Do not charge less than 4 batteries in
charger.
Only use SeaLife Ni-MH rechargeable batteries in charger.
Never charge alkaline, lithium or any other non-rechargeable battery in
charger.
Never insert batteries into charger with polarity (+ and -) reversed.
Remove charge from outlet after charging is complete. Do not leave
charger plugged into outlet when not in use.
To prevent fire and risk of electric shock, do not remove the cover
or back of charger.
Do not use charger if charger comes in contact with water, even
after it dries.
Do not charge battery that is damaged or leaking.
Always use freshly charged batteries. Batteries can discharge at
room temperature up to 10% per day. Store batteries in plastic
bag or container in refrigerator or cool, dry place.
51
PIONEERmanREV
11/19/01
6:00 PM
Page 52
How to use charger
1. Slide down battery cover plate to access battery compartment. Insert 4 SeaLife Ni-MH batteries into charger,
making sure batteries are correctly inserted with + and – polarity as indicated on charger. Close battery cover
plate before charging.
2. Fold down 2-prong plug from charger and plug charger into wall outlet. For international outlets, select
appropriate plug adapter.
3. The charging indicator light will turn orange while batteries are charging. When charging is complete, indicator
light turns green.
4. Once charging is complete, remove charger from wall outlet and remove batteries from charger.
5. Always use freshly charged batteries. Batteries can discharge at room temperature up to 10 % per day. Store
batteries in plastic bag or container in refrigerator or cool, dry place.
52
PIONEERmanREV
11/19/01
6:00 PM
Page 53
Battery Selection Guide:
It is important to use only AA batteries designed for high drain electronic devices.
Nickel Metal Hydride (Ni-MH)
We suggest using SeaLife 1600 mAh Ni-MH rechargeable batteries or higher mAh rated Ni-MH battery. With
Ni-MH batteries, you can expect about 2 hours of normal operating usage. Ni-MH batteries can be recharged about
1000 times without the “memory” problems that you get with Ni-CAD batteries
With proper power management you can get through a dive day and recharge your batteries at night.
Do not expose Ni-MH batteries to water or moisture. Properly dispose of any Ni-MH battery exposed to water or
moisture.
See specific warning on battery.
Lithium
Lithium AA batteries are suitable for the SeaLife digital camera. AA Lithium batteries typically will last the longest,
cost the most and are not rechargeable.
Standard and High Energy Alkaline
Do not use alkaline batteries, like Duracell Coppertop, since they may only last about 10 minutes in the SeaLife
Digital Camera.
If you cannot use Ni-MH rechargeable batteries, you may use new “high energy” alkaline batteries that last a longer
than standard alkaline batteries, but not as long as SeaLife Ni-MH rechargeable batteries. The following are
examples of “high energy” alkaline batteries:
1. Duracell Ultra
2. Panasonic (high energy)
3. Energizer Titanium or E3 (High Energy)
Do not attempt to recharge alkaline batteries.
53
PIONEERmanREV
11/19/01
6:00 PM
Page 54
Battery Life
We have tested the following batteries under normal and extreme operating conditions. The following operating
times are averages and can vary depending on age of battery, temperature and other factors.
Normal conditions (designed to simulate operating conditions when scuba diving):
1. Turn camera on, take a test picture. Set to Sea Mode. Put in housing, close housing.
2. 90 minutes later: Turn power on. Take three pictures on land. 10 Minutes later: Take pictures underwater for 45
Minutes, not continuously, but every 2 Minutes, =23 pictures.
3. Wait for 1 hour, then take 20 underwater pictures in 40 Minutes.
4. Wait for 2 hours, then repeat step 2 and step 3.
5. Then repeat 3.
Extreme conditions (designed to test the power consumption in the most extreme operating conditions.)
1. Turn camera on, Set to External FLASH mode. Put in housing, close housing.
2. Take picture intervals as quickly as possible (display always ON, FLASH always fires)
Battery
Type
Life during
NORMAL dive use
Life during
EXTREME usage
SeaLife Ni-MH rechargeable (1600 mAh)
243 minutes
100 minutes
Energizer Lithium 1 (non-rechargeable)
400 minutes
130 minutes
Duracell Ultra (high-energy alkaline)
205 minutes
26 minutes
Duracell Coppertop (Standard alkaline)
20 minutes
10 minutes
Note: The above times may vary depending on other factors like temperature, humidity, age of batteries and other factors.
54
PIONEERmanREV
11/19/01
6:00 PM
Page 55
Trouble shooting guide
Problem
Possible cause . . . . . . . . . . . . . . . . . . . . .Corrective Action
No Power
Battery power low. . . . . . . . . . . . . . . . . . . . . . . .Replace or recharge batteries.
Wrong type of batteries . . . . . . . . . . . . . . . . . . .Use only AA designed for high drainage
. . . . . . . . . . . . . . . . . . . . . . . . . . . . . . . . . . . . . .electronics (see battery selection guide).
Battery + and - not inserted correctly. . . . . . . . .Check that batteries are inserted correctly
Power save function activated. . . . . . . . . . . . . . .Turn camera back on.
Camera damaged . . . . . . . . . . . . . . . . . . . . . . . .Contact service center.
Camera gets hot
Constant use of camera. . . . . . . . . . . . . . . . . . .This is normal.
Using incorrect battery type. . . . . . . . . . . . . . . .Use only AA designed for high drainage
. . . . . . . . . . . . . . . . . . . . . . . . . . . . . . . . . . . . . .electronics.
. . . . . . . . . . . . . . . . . . . . . . . . . . . . . . . . . . . . . .(see battery selection guide)
No PC connection
Improper connection procedure. . . . . . . . . . . . .Must follow correct procedure (page 29).
USB cable not connected to USB port. . . . . . . .Inspect connection ports.
Slow PC connection time. . . . . . . . . . . . . . . . . .Give at least 5 minutes for some PC’s to
. . . . . . . . . . . . . . . . . . . . . . . . . . . . . . . . . . . . . .establish connection.
Camera driver not installed. . . . . . . . . . . . . . . . .Install camera driver CD (page 29).
No Video Connection
Improper connection to TV. . . . . . . . . . . . . . . . .Connect video cable to video IN
. . . . . . . . . . . . . . . . . . . . . . . . . . . . . . . . . . . . . .jack of TV or VCR and change TV/VCR to
. . . . . . . . . . . . . . . . . . . . . . . . . . . . . . . . . . . . . .video in channel.
Poor Video connection
Video cable not fully inserted . . . . . . . . . . . . . . .
into camera or TV. . . . . . . . . . . . . . . . . . . . . . . .Make sure video cable is completely
. . . . . . . . . . . . . . . . . . . . . . . . . . . . . . . . . . . . . .inserted into video jack of camera until it
. . . . . . . . . . . . . . . . . . . . . . . . . . . . . . . . . . . . . .clicks. Also check that connection to
. . . . . . . . . . . . . . . . . . . . . . . . . . . . . . . . . . . . . .TV/VCR is correct.
“Memory full” message
Memory storage is full. . . . . . . . . . . . . . . . . . . . .Delete images or download to PC.
. . . . . . . . . . . . . . . . . . . . . . . . . . . . . . . . . . . . . .Insert empty CF card.
Pictures out of focus
Dirty lens. . . . . . . . . . . . . . . . . . . . . . . . . . . . . . .Clean lens with clean cotton cloth.
Incorrect focus setting. . . . . . . . . . . . . . . . . . . . .Check lens for correct focus (macro or
. . . . . . . . . . . . . . . . . . . . . . . . . . . . . . . . . . . . . .standard).
Fogged housing lens. . . . . . . . . . . . . . . . . . . . . .Insert camera in dry, air-conditioned room.
. . . . . . . . . . . . . . . . . . . . . . . . . . . . . . . . . . . . . .Use anti-fog desiccant inside housing. Do
. . . . . . . . . . . . . . . . . . . . . . . . . . . . . . . . . . . . . .not let water drops get inside housing.
55
PIONEERmanREV
11/19/01
Problem
6:00 PM
Page 56
Possible cause
Corrective Action
Pictures out of focus
Too close to subject. . . . . . . . . . . . . . . . . . . . . .Shooting distance must be 2’+ (macro = 1’
. . . . . . . . . . . . . . . . . . . . . . . . . . . . . . . . . . . . . .to 2’).
Low water visibility. . . . . . . . . . . . . . . . . . . . . . . .Shooting distance not to exceed 1/10 of
. . . . . . . . . . . . . . . . . . . . . . . . . . . . . . . . . . . . . .visibility.
Grainy picture
Dark light conditions. . . . . . . . . . . . . . . . . . . . . .Move closer to subject (4’ to 6’).
. . . . . . . . . . . . . . . . . . . . . . . . . . . . . . . . . . . . . .Turn flash setting to off.
. . . . . . . . . . . . . . . . . . . . . . . . . . . . . . . . . . . . . .Use artificial light source to illuminate
. . . . . . . . . . . . . . . . . . . . . . . . . . . . . . . . . . . . . .subject.
Overexposed image
To close to reflective object. . . . . . . . . . . . . . . . .Move farther away from subject (4’ to6’).
. . . . . . . . . . . . . . . . . . . . . . . . . . . . . . . . . . . . . .Turn flash off.
Flash not firing
Flash on Auto and is not needed. . . . . . . . . . . . .Turn fill-flash ON (see page 17)
Finger over flash window. . . . . . . . . . . . . . . . . . .Grip camera correctly, not blocking flash.
Improper operating mode . . . . . . . . . . . . . . . . . .Check for proper operating mode
. . . . . . . . . . . . . . . . . . . . . . . . . . . . . . . . . . . . . .(Land or Sea).
Lost images
Defective CF card. . . . . . . . . . . . . . . . . . . . . . . .Use only approved quality CF cards
. . . . . . . . . . . . . . . . . . . . . . . . . . . . . . . . . . . . . .Reformat CF card (will delete pictures).
Defective internal memory. . . . . . . . . . . . . . . . . .Reformat memory (this will delete pictures
. . . . . . . . . . . . . . . . . . . . . . . . . . . . . . . . . . . . . .in memory).
Using camera with low battery power. . . . . . . . .Replace with freshly charged batteries.
Image number indicator
does not count down
This may occur depending on . . . . . . . . . . . . . .
actual memory available. . . . . . . . . . . . . . . . . . .N/A
Housing leaks water
O-ring not clean. . . . . . . . . . . . . . . . . . . . . . . . . .Perfectly clean main O-rings.
. . . . . . . . . . . . . . . . . . . . . . . . . . . . . . . . . . . . . .Inspect for damage or dents to housing
. . . . . . . . . . . . . . . . . . . . . . . . . . . . . . . . . . . . . .and O-ring.
Camera not seated in housing. . . . . . . . . . . . . . .Remove strap or any accessory from
. . . . . . . . . . . . . . . . . . . . . . . . . . . . . . . . . . . . . .camera. Check that camera is completely
. . . . . . . . . . . . . . . . . . . . . . . . . . . . . . . . . . . . . .seated in housing.
No image on TV set
Improper connection. . . . . . . . . . . . . . . . . . . . . .Check cable connections.
Wrong video mode. . . . . . . . . . . . . . . . . . . . . . .Change video mode in camera set-up
. . . . . . . . . . . . . . . . . . . . . . . . . . . . . . . . . . . . . .menu (page 27).
56
For updated trouble shooting guide refer to website: www.sealife-cameras.com
PIONEERmanREV
11/19/01
6:00 PM
Page 57
Pioneer Research
Manufacturers of SeaLife Cameras
97 Foster Road
Moorestown, NJ 08057
(856) 866-9191
www.pioneer-research.com
www.sealife-cameras.com