1
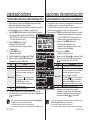
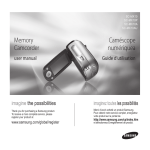
SC-MX10
SC-MX10P
SC-MX10A
SC-MX10AU
Memory
Camcorder
User manual
imagine the possibilities
Thank you for purchasing a Samsung product.
To receive a more complete service, please
register your product at
www.samsung.com/global/register
Videocámara
con memoria
Manual del usuario
imagine las posibilidades
Gracias por adquirir un producto Samsung.
Para recibir un servicio más completo,
registre su producto en
www.samsung.com/global/register
Spanish_
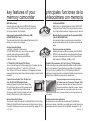
key features of your
memory camcorder
principales funciones de la
videocámara con memoria
MPEG4 Encoding
Records enhanced quality video in MPEG4 ASP(Advanced
Simple Profile) format (720 x 480) onto memory cards at 30
fps for high resolution, life-like images.
Codificación MPEG4
Graba video con calidad ampliada en formato MPEG4 ASP
(Advanced Simple Profile) (720 x 480) en tarjetas de memoria a 30 fps para alta resolución, imágenes como la vida real.
High-capacity embedded Flash Memory (4GB)
(SC-MX10A/MX10AU only)
The camcorder has built-in high capacity flash memory that
allows you to record movie images.
Memoria Flash incorporada de alta capacidad (4GB)
(sólo SC-MX10A/MX10AU)
La videocámara tiene incorporada una memoria flash
de gran capacidad que le permite grabar secuencias de
video.
Various Recording Media
In addition to the built-in flash memory
(SC-MX10A/MX10AU only), this memory camcorder
supports various storage media like SDHC
(Secure Digital High Capacity) and MMCplus.
(128 MB ~ 8 GB)
Diversos soportes de grabación
Además de la memoria flash incorporada (sólo SC-MX10A/
MX10AU), esta videocámara con memoria admite diversos
soportes de almacenamiento como SDHC (Secure Digital
High Capacity) y MMCplus.(128 MB ~ 8 GB)
.7" Wide(16:9) LCD Display(11K Pixels)
You can see the bigger picture by enlarging the 4:3 aspect ratio into
16:9 wide screen with the 2.7" wide (16:9) LCD screen.
The 112K pixel LCD monitor rotates up to 270 degrees for flexible
viewing angles and provides sharp, detailed image for monitoring and
playback.
Pantalla LCD panorámica (16:9) de ,7 pulg. (11.000 píxeles)
Puede ver la imagen más grande ampliando la relación de altura/anchura
de 4:3 en una pantalla 16:9 panorámica con la pantalla LCD panorámica
(16:9) de 2,7 pulg. La pantalla LCD de 112.000 píxeles gira hasta 270
grados para conseguir ángulos de visualización flexibles y proporciona una
imagen nítida y detallada para supervisión y reproducción.
Capture Visions Farther Than The Eye Can
See (34x Optical/100x Digital Zoom)
Samsung's powerful optical zoom lenses bring
the world closer without sacrificing image quality.
In addition, Digital Zoom interpolation means
that extreme digital zooming is clearer, with less
distortion than previous types of digital zooms.
Captura de imágenes mucho más lejos de lo que el
ojo humano puede ver (Zoom óptico 34x/digital 100x)
Los potentes objetivos ópticos de Samsung le acercan
el mundo sin sacrificar la calidad de la imagen. Además,
la interpolación del zoom digital significa que el zoom
digital extremo es más claro, con menos distorsión que los tipos anteriores de
zoom digital.
Various Recording Features
The memory camcorder supports Anti-Shake(EIS) (Electronic Image
Stabilizer), Digital Effect and a wide range of other functions that you
can select according to the scene you are recording. ➥page 48 ~ 56
ii_English
Funciones diversas de grabación
La videocámara con memoria admite anti-temblores (EIS) (Estabilizador
electrónico de imagen), efecto digital y una amplia gama de otras funciones que
puede seleccionar según la escena que esté grabando. ➥página 48 ~ 56
Spanish_ii
Enjoying Various Playback Features
Unlike tape operation, playback is simple and easy in this memory
camcorder since no time is needed for rewinding or fast forward
operations. Various functions are available for enjoying many different
types of playback. ➥page 58 ~ 61
Play back on your PC
USB 2.0 enables the smooth transfer of movies to
a computer. With the bundled software, you can
easily transfer and play back your own movies on
your PC. ➥page 75
PC Cam for multi-entertaining
Connect the memory camcorder to a PC via a USB 2.0 cable and
instantly communicate via live video with business associates, friends
and family wherever you are.
Versatile 16:9 Wide &
4:3 Display option
You can easily select the display
option when recording or playback
(16:9 Wide/4:3). Samsung’s 16:9 Wide
display option lets you monitor more
widely on the 2.7" wide LCD screen
when recording or playback with your
memory camcorder. Ensure your entire
movies are recorded in 4:3 aspect ratio
regardless of the display option
(16:9 Wide/4:3 aspect ratio).
iii_English
Disfrute con las diversas funciones de grabación
A diferencia del funcionamiento de las cintas, la reproducción es
sencilla y simple en esta videocámara con memoria ya que no se
necesita nada de tiempo para realizar las operaciones de rebobinado
y avance rápido. Existen diversas funciones para disfrutar de los
diferentes tipos de reproducción. ➥página 58 ~ 61
Reproducción en PC
USB 2.0 permite realizar una transferencia sin
problemas de secuencias de video a una PC. Con el
software que se incluye, puede fácilmente transferir y
reproducir sus propias películas en la PC. ➥página 75
PC Cam para multientretenimiento
Conecte la videocámara con memoria a una PC a través de un cable
USB 2.0 y comunique instantáneamente a través de video en directo
con sus socios empresariales, amigos y familia independientemente
del lugar en el que se encuentre.
< 4:3 aspect ratio >
< 16:9 Wide aspect ratio >
Opción de visualización versátil: 16:9
panorámica y 4:3
Puede fácilmente seleccionar la opción de
visualización al grabar o al reproducir (16:9 panorámica/4:3). La opción de visualización 16:9
panorámica de Samsung permite controlar de
forma más amplia en la pantalla LCD panorámica de 2,7 pulg. al grabar o al reproducir con la
videocámara con memoria. Asegúrese de que
todos los videos se graben con una relación de
altura/anchura de 4:3 independientemente de la
opción de visualización (relación altura/anchura
de 16:9 panorámica/4:3).
Spanish_iii
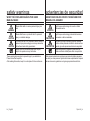
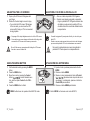
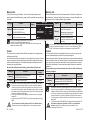
safety warnings
advertencias de seguridad
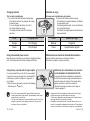
WHAT THE ICONS AND SIGNS IN THIS USER
MANUAL MEAN :
SIGNIFICADO DE LOS ICONOS Y SIGNOS EN ESTE
MANUAL DEL USUARIO
WARNING
CAUTION
CAUTION
Means that death or serious personal injury is a
risk.
Means that there is a potential risk for personal
injury or material damage.
To reduce the risk of fire, explosion, electric shock, or
personal injury when using your memory camcorder,
follow these basic safety precautions:
Means hints or referential pages that may be
helpful to operate memory camcorder.
These warning signs are here to prevent injury to you and others.
Please follow them explicitly.
After reading this section, keep it in a safe place for future reference.
iv_English
ATENCIÓN
PRECAUCIÓN
Significa que existe riesgo de muerte o daños
personales serios.
Significa que existe riesgo potencial de lesiones
personales o daños materiales.
Para reducir el riesgo de incendio, explosión, descarga
eléctrica o daños personales al utilizar la videocámara con
PRECAUCIÓN memoria, siga estas precauciones básicas de seguridad:
Significa sugerencias o páginas de referencia que
pueden resultar de utilidad para utilizar el reproductor.
Estos signos de advertencia se incluyen aquí para evitar daños personales
en usted y en otras personas. Siga las instrucciones explícitamente. Después
de leer esta sección, guárdela en un lugar seguro para referencia futura.
Spanish_iv
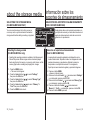
important information on use Información importante sobre su uso
BEFORE USING THIS CAMCORDER
ANTES DE UTILIZAR ESTA VIDEOCÁMARA
• This memory camcorder is designed exclusively for high-capacity
• Esta videocámara con memoria se ha diseñado exclusivamente
built-in flash memory and external memory card.
• This memory camcorder records video in MPEG4 format compliant
with SD-VIDEO format.
• Please be noted that this memory camcorder is not compatible
with other digital video formats.
• Before recording important video, make a trial recording.
- Play back your trial recording to make sure the video and audio
have been recorded properly.
• The recorded contents cannot be compensated for:
- Samsung cannot compensate for any damages caused when
recording is not made normally or recorded contents cannot be played
back because of a defect in the memory camcorder, card. Also,
Samsung cannot be responsible for your recorded video and audio.
- Recorded contents may be lost due to a mistake when handling
this memory camcorder or memory card, etc.Samsung shall not
be responsible for the compensation for damages due to the loss
of recorded contents.
• Make a backup of important recorded data.
- Protect your important recorded data by copying the files to a
PC. It is recommended to copy it from your PC to other recording
media for storage. Refer to the software installation and USB
connection guide.
• Copyright: Please be noted that this memory camcorder is
intended for an individual consumer’s use only.
- Data recorded on the card in this memory camcorder using other
digital/analog media or devices is protected by the copyright act
and cannot be used without permission of the owner of copyright,
except for personal enjoyment. Even if you record an event such
as a show, performance or exhibition for personal enjoyment,
it is strongly recommended that you obtain the permission
beforehand.
v_English
para memoria flash incorporada de gran capacidad y para tarjeta de
memoria externa.
• Esta videocámara con memoria graba video en formato MPEG4
compatible con el formato SD-VIDEO.
• Recuerde que esta videocámara con memoria no es compatible con
otros formatos de video digital.
• Antes de grabar video importante, realice una prueba de grabación.
- Reproduzca la prueba de grabación para asegurarse de haber grabado
correctamente el video y el audio.
• El contenido grabado no podrá compensarse por las siguientes causas:
- Samsung no puede compensar por ningún daño causado cuando la
grabación no se realice normalmente o el contenido grabado no pueda
reproducirse debido a un defecto en la tarjeta o en la videocámara con
memoria. Samsung tampoco puede hacerse responsable del video y
audio grabado.
- El contenido grabado podría perderse debido a un error al manejar esta videocámara
con memoria o la tarjeta con memoria, etc. Samsung no será responsable de
compensar por daños debidos a la pérdida de contenido grabado.
• Realice una copia de seguridad de datos importantes grabados
- Proteja los datos importantes grabados copiando los archivos a una PC.
Se recomienda copiar desde la PC a otro soporte de grabación para guardarlo.
Consulte la instalación del software y la guía de conexión USB.
• Copyright: recuerde que esta videocámara con memoria está destinada
únicamente para uso de consumidores individuales.
- Los datos grabados en la tarjeta de esta videocámara con memoria utilizando
otros soportes o dispositivos digitales o analógicos están protegidos por la ley
de copyright y no pueden utilizarse sin el permiso del propietario del copyright,
excepto para disfrute personal. Incluso aunque grabe un evento, como un
espectáculo, una actuación o una exposición para disfrute personal, se
recomienda encarecidamente obtener de antemano un permiso para tal fin.
Spanish_v
precautions on use
precauciones de uso
• Handle the liquid crystal display (LCD) with care:
• Maneje la pantalla de cristal líquido (LCD) con cuidado:
- La pantalla LCD es un dispositivo de visualización muy delicado: no presione su
superficie con excesiva fuerza, no la golpee ni la pinche con un objeto punzante.
- Si presiona la superficie de la pantalla LCD, es posible que se produzcan irregularidades en la pantalla. Si no desaparecen las irregularidades, apague la videocámara,
espere unos instantes y enciéndala de nuevo.
- No coloque la videocámara con la pantalla LCD abierta hacia abajo.
- Cierre la pantalla LCD cuando no utilice la videocámara
IMPORTANT NOTE
- The LCD is a very delicate display device: Do not press its surface with
excessive force, hit it or prick it with a sharp object.
- If you push the LCD surface, unevenness in display may occur. If
unevenness does not disappear, turn the camcorder off, wait for a few
moments, and then turn it on again.
- Do not place the camcorder with the open LCD screen down.
- Close the LCD monitor when not using the camcorder
•
Liquid crystal display:
- The LCD screen is a product of high precision technology. Out of the
total pixels (approx. 112,000 pixels of an LCD monitor ), 0.01% or less
pixels may be out (black dots) or may remain lit as colored dots (red,
blue, and green). This shows the limitations of the current technology,
and does not indicate a fault that will interfere with recording.
- The LCD screen will be slightly dimmer than usual when the camcorder
is at low temperature, as in cold areas, or right after the power is turned
on. Normal brightness will be restored when the temperature inside the
camcorder rises. Note that the foregoing phenomena have no effect on
the image in a storage media, so there is no cause for concern.
• Hold the memory camcorder correctly:
- Do not hold the memory camcorder by the LCD monitor when lifting it:
the LCD monitor could detach and the memory camcorder may fall.
• Do not subject the memory camcorder to impact:
- This memory camcorder is a precision machine. Take great care that
you do not strike it against a hard object or let it fall.
- Do not use the memory camcorder on a tripod in a place where it is
subject to severe vibrations or impact.
• No sand or dust!
- Fine sand or dust entering the memory camcorder or AC power adaptor
could cause malfunctions or defects.
• No water or oil!
- Water or oil entering the memory camcorder or AC power adaptor could
cause electric shock, malfunctions or defects.
• Heat on surface of product:
- The surface of the memory camcorder will be slightly warm when
using, but this does not indicate a fault.
vi_English
NOTA IMPORTANTE
• Pantalla de cristal líquido:
- La pantalla LCD es un producto de tecnología de alta precisión. Del número total
de píxeles (aprox. 112.000 píxeles de una pantalla LCD), el 0,01% o menos de
los píxeles pueden estar apagados (puntos negros) o permanecer encendidos
como puntos de colores (rojo, azul y verde). Esto muestra las limitaciones de la
tecnología actual y no indica ningún fallo que interfiera en la grabación.
- La pantalla LCD estará algo más atenuada de lo habitual cuando la videocámara
se encuentre a una temperatura baja, como en áreas frías o justo después de
encenderla. El brillo normal se recuperará cuando suba la temperatura interior de la
videocámara. Recuerde que los
fenómenos anteriormente mencionados no tienen ningún efecto sobre la imagen en
un soporte de almacenamiento, con lo cual no hay
ninguna causa para preocuparse.
• Sujete correctamente la videocámara con memoria:
- Não segure a câmara de vídeo com memória interna pelo monitor LCD quando a levantar:
o monitor do LCD pode separar-se e a câmara de vídeo com memória interna pode cair.
• No someta la videocámara con memoria a impactos:
- Esta videocámara con memoria es una máquina de precisión. Ponga gran cuidado
para evitar golpearla contra objetos duros y no la deje caer.
- No utilice la videocámara con memoria con trípode en lugares expuestos a fuertes
vibraciones o impactos.
• Evite la arena o el polvo
- La entrada de arena fina o polvo en la videocámara con memoria o en el adaptador de
alimentación de CA podría causar averías o fallos.
• Evite el agua o el aceite
- La entrada de agua o aceite en la videocámara con memoria o en el adaptador de
alimentación de CA podría causar descargas eléctricas o fallos.
• Calor sobre la superficie del producto:
- La superficie de la videocámara con memoria estará ligeramente caliente al utilizarse,
pero no significa que tenga ningún fallo.
Spanish_vi
• Be careful of unusual ambient temperature:
•
•
•
•
•
•
•
•
•
- Using the memory camcorder in a place where the temperature is over
140°F (40°C) or lower than 32°F (0°C) may result in abnormal recording/
playback.
- Do not leave the memory camcorder on a beach or in a closed vehicle
where the temperature is very high for a long time: This could cause
malfunctions.
Do not point directly at the sun:
- If direct sunlight strikes the lens, the memory camcorder could
malfunction or a fire could occur.
- Do not leave the memory camcorder with the LCD screen exposed to
direct sunlight: This could cause malfunction.
Do not use the memory camcorder near TV or radio:
- This could cause noise to appear on the TV screen or in radio broadcasts.
Do not use the memory camcorder near strong radio waves or
magnetism:
- If the memory camcorder is used near strong radio waves or magnetism,
such as near a radio wave tower or electric appliances, noise could enter
video and audio that are being recorded. During playback of normally
recorded video and audio, noise may also be present in picture and sound.
At worst the memory camcorder could malfunction.
Do not expose the memory camcorder to soot or steam:
- Thick soot or steam could damage the memory camcorder case or cause
malfunctions.
Do not use the memory camcorder near corrosive gas:
- If the memory camcorder is used in a place where there is dense exhaust
gas generated by gasoline or diesel engines, or corrosive gas such as
hydrogen sulfide, the external or internal terminals could corrode, disabling
normal operation, or the battery connection terminals could corrode, so that
power will not turn on.
Do not use the memory camcorder near ultrasonic humidifier:
- Calcium and other chemicals dissolved in water could scatter in the air, and
white particles could adhere to the optical head of the memory camcorder,
which could cause it to operate abnormally.
Do not clean the memory camcorder body with benzene or thinner:
- The coating of exterior could peel off or the case surface could
deteriorate.
- When using a chemical cleaning cloth, follow the instructions.
Keep the memory card out of reach of children to prevent swallowing.
To disconnect the apparatus from the mains, the plug must be pulled
out from the mains socket, therefore the mains plug shall be readily
operable.
vii_English
• Tenga cuidado con temperaturas ambientales inusuales:
- Si se utiliza la videocámara con memoria en un lugar en el que la temperatura
se encuentre por encima de 40°C (140°F) o por debajo de 0°C (32°F), es
posible que la reproducción /grabación no se realice de forma normal.
- No deje durante mucho tiempo la videocámara con memora en la playa o en un
vehículo cerrado donde la temperatura sea muy alta, esto podría causar averías.
• No apunte directamente al sol:
- Si la luz del sol incide directamente sobre el objetivo, podría producirse un
incendio o una avería en la videocámara con memoria.
- No deje la videocámara con memoria con la pantalla LCD expuesta a la luz
directa del sol, esto podría causar una avería.
• No utilice la videocámara con memoria cerca del televisor o la radio:
- Esto podría causar la aparición de ruido en la pantalla del televisor o en las
emisiones de radio.
• No utilice la videocámara con memoria cerca de ondas de radio o
magnetismo:
- Si se utiliza la videocámara con memoria cerca de ondas de radio
o magnetismo potentes, como torres de ondas de radio o aparatos
eléctricos, es posible que se produzca ruido en el video y el audio que se
esté grabando. Durante la reproducción de video y audio normalmente
grabados, es posible que también exista ruido en la imagen y el sonido.
En el peor de los casos, es posible que la videocámara con memoria no
funcionara con normalidad.
• No exponga la videocámara con memoria a hollín o vapor:
- El hollín y el vapor podrían dañar la carcasa de la videocámara con
memoria o causar averías.
• No utilice la videocámara con memoria cerca de gas corrosivo:
- Si la videocámara con memoria se utiliza en un lugar en el que se haya
generado gas de escape denso por motores de gasolina o diesel, o bien gas
corrosivo como sulfuro de hidrógeno, podrían dañarse los terminales internos
y externos, impidiendo el funcionamiento normal, o bien los terminales de
conexión de la batería podrían dañarse impidiendo que se encendiera la unidad.
• No utilice la videocámara con memoria cerca de un humidificador
ultrasónico:
- El calcio y otros productos químicos disueltos en el agua podrían dispersarse
en el aire y las partículas blancas podría adherirse al cabezal óptico de la
videocámara con memoria, lo que podría impedir su funcionamiento normal.
• No limpie con benceno o disolvente la carcasa de la videocámara con memoria:
- El revestimiento del exterior podría desprenderse o podría deteriorarse la superficie
de la carcasa.
- Al utilizar un paño de limpieza con productos químicos, siga las instrucciones.
• Mantenga la tarjeta de memoria fuera del alcance de los niños para impedir su
ingesta accidental.
• Para desconectar el aparato de la toma de alimentación, saque el enchufe de
la toma de corriente; el enchufe de la toma de corriente debe estar operativo.
Spanish_vii
precautions on use
precauciones de uso
ABOUT THIS USER MANUAL
INFORMACIÓN SOBRE ESTE MANUAL DEL USUARIO
• This User Manual covers the complete range of SC-MX10,
• Este Manual del usuario cubre la gama completa de los modelos
NOTES REGARDING A TRADEMARK
NOTAS RELACIONADAS CON MARCAS COMERCIALES
• All the trade names and registered trademarks mentioned in this
• Todos los nombres de marcas y marcas comerciales registradas
•
•
SC-MX10P, SC-MX10A and SC-MX10AU.
Please note that models with an ‘A’ letter has built-in flash
memory. SC-MX10 and SC-MX10P does not support built-in flash
memory, and SC-MX10A and SC-MX10AU. support built-in flash
memory(4GB). Although some features of SC-MX10, SC-MX10P,
SC-MX10A and SC-MX10AU are different, they are both operated
in the same way.
• Illustrations of SC-MX10A model are used in this user manual.
• The displays in this user manual may not be exactly the same as
those you see on the LCD screen.
• Designs and specifications of storage media and other accessories
are subject to change without any notice.
•
•
•
manual or other documentation provided with
your Samsung product are trademarks or registered trademarks of
their respective holders.
Windows® is registered trademark or trademark of Microsoft
Corporation, registered in the United States and other countries.
Macintosh is trademark of Apple Computer, Inc.
All the other product names mentioned here in may be the trademark
or registered trademarks of their respective companies.
Furthermore, “TM” and “R” are not mentioned in each case in this manual.
viii_English
SC-MX10, SC-MX10P, SC-MX10A y SC-MX10AU.
Recuerde que los modelos con la letra ‘A’ tienen una memoria flash
incorporada. El modelo SC-MX10 y SC-MX10P no admite memoria flash
incorporada y los modelos SC-MX10A y SC-MX10AU admiten memoria
flash incorporada (4GB). Aunque algunas funciones de los modelos
SC-MX10, SC-MX10P, SC-MX10A y SC-MX10AU son diferentes,
funcionan de la misma forma.
• En este manual del usuario se utilizan las ilustraciones del modelo SC-MX10A.
• Es posible que las pantallas del manual del usuario no sean
exactamente las mismas que las que aparecen en la pantalla LCD.
• Los diseños y especificaciones de los soportes de almacenamiento y
otros accesorios están sujetos a cambio sin aviso previo.
•
•
•
mencionados en este manual o en el resto de documentación facilitada
con el producto Samsung son marcas comerciales o marcas registradas
de sus respectivos propietarios.
Windows® es una marca comercial registrada de Microsoft Corporation,
registrada en Estados Unidos y otros países.
Macintosh es una marca comercial de Apple Computer, Inc.
El resto de nombres de productos aquí mencionados puede ser marca
comercial o marca registrada de sus respectivas empresas.
Además, las indicaciones “TM” y “R” no aparecen en todos los casos en
este manual.
Spanish_viii
contents
Índice
GETTING TO KNOW 06 Quick Start Guide
YOUR MEMORY 07 What's included with your memory
camcorder
CAMCORDER
06
08 Front & left view
09 Side & bottom view
PREPARATION 10 Using the accessories
10
12 Connecting a power source
20 Button type battery installation
21 Basic operation of your memory
camcorder
22 LCD screen indicators
25 Turning the screen indicators on/off
(
)
26 Using the LCD enhancer
27 Adjusting the LCD screen
27 Using the MENU button
28 Using the Control buttons
29 Shortcut menu (Ok Guide)
30 Initial setting : OSD Language & date and time
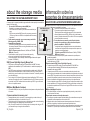
ABOUT THE 3 Selecting the storage media
(SC-MX10A/MX10AU only)
STORAGE MEDIA
32
33 Inserting / ejecting the memory card
34 Selecting the suitable memory card
36 Recordable time and capacity
INTRODUCCIÓN 06 Guía de inicio rápido
SOBRE LA 07 Componentes de la videocámara
con memoria
VIDEOCÁMARA
CON MEMORIA 08 Vistas frontal y lateral izquierda
06
09 Vistas lateral e inferior
PREPARACIÓN 10 Utilización de los accesorios
10
12 Conexión a una fuente de alimentación
20 Instalación de la pila de botón
21 Funcionamiento básico de la videocámara con memoria
22 Indicadores de la pantalla LCD
25 Encendido y apagado de los indicadores de pantalla (
)
26 Uso de LCD ENHANCER
27 Ajuste del color de la pantalla LCD
27 Utilización del botón MENU
28 Utilización de los botones de control
29 Menú de acceso directo (Ok Guía)
30 Ajuste inicial: idioma de OSD y fecha y hora
INFORMACIÓN 3 Selección del soporte de almacenamiento
(sólo SC-MX10A/MX10AU)
SOBRE LOS
SOPORTES DE 33 Inserción / expulsión de una tarjeta
de memoria
ALMACENAMIENTO
32
34 Selección de la tarjeta de memoria adecuada
36 Tiempo y capacidad de grabación
RECORDING 38 Recording movie images
GRABACIÓN 38 Grabación de imágenes de vídeo
PLAYBACK 4 Movie images playback
REPRODUCCIÓN 4 Reproducción de imágenes de vídeo
38
03_English
40 Recording with ease for beginners
(EASY. Q mode)
41 Zooming
38
40 Grabación sencilla para principiantes
(Modo EASY. Q)
41 Zoom
Spanish_03
contents
Índice
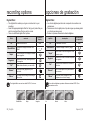
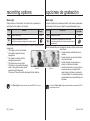
RECORDING 45 Changing the menu settings
OPTIONS 47 Menu items
45
48 Recording menu items
48 Scene Mode (AE)
49 White Balance
50 Exposure
51 Anti-Shake(EIS)
(Electronic Image Stabilizer)
52 Digital Effects
53 Focus
54 Back Light
55 16:9 Wide
55 Quality
56 Resolution
56 Digital Zoom
PLAY BACK 57 Setting the play option
OPTIONS 58 Deleting movie images
57
59 Protecting movie images
60 Copying movie images
(SC-MX10A/MX10AU only)
61 16:9 Wide
61 File Information
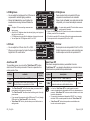
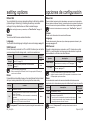
SETTING OPTIONS 6 Changing the menu settings in "Settings"
62
04_English
63
64
64
64
64
65
65
65
66
Setting menu items
Date/Time set
Date format
Time format
Date/Time
LCD Brightness
LCD color
Auto Power Off
Beep Sound
OPCIONES DE 45 Cambio de los ajuste del menú
GRABACIÓN 47 Opciones de menú
45
48 Opciones de menú para grabación
48 Scene Mode (AE)
49 White Balance
50 Exposure
51 Anti-Shake(EIS)
(Estabilizador electrónico de la imagen)
52 Digital Effect
53 Focus
54 Back Light
55 16:9 Wide
55 Quality
56 Resolution
56 Digital Zoom
OPCIONES DE 57 Ajuste de la opción de reproducción
REPRODUCCIÓN 58 Eliminación de imágenes de vídeo
57
59 Protección de imágenes de vídeo
60 Copia de imágenes de vídeo
(sólo SC-MX10A/MX10AU)
61 16:9 Wide
61 Información de archivos
OPCIONES DE 6 Cambio de los ajustes del menú en "Settings"
CONFIGURACIÓN 63 Opciones del menú de ajustes
62
64
64
64
64
65
65
65
66
Date/Time Set
Date format
Time format
Date/Time
LCD Brightness
LCD colour
Auto Power Off
Beep Sound
Spanish_04
66
66
67
67
68
68
68
68
68
File no.
Memory type
(SC-MX10A/MX10AU only)
Memory info
Format
Default set
Version
Language
USB connect
Demo
USB INTERFACE 69 System requirements
69
71
73
74
75
Installing the software
Connecting the USB cable
Viewing the contents of storage media
Transferring files from the memory
camcorder to your PC
76 Using the PC cam function
CONNECTION 77 Viewing on TV Screen
78 Recording (Dubbing) Images on Other
Video Devices
MAINTENANCE & 79 Maintenance
ADDITIONAL 80 Additional information
INFORMATION
TROUBLESHOOTING 81 Troubleshooting
SPECIFICATIONS 93
05_English
66
66
67
67
68
68
68
68
68
File no.
Memory type
(sólo SC-MX10A/MX10AU)
Memory info
Format
Default set
Version
Language
USB Connect
Demo
INTERFAZ USB 69 Requisitos del sistema
69
71 Instalación del software
73 Conexión del cable USB
74 Visualización del contenido del soporte
de almacenamiento
75 Transferencia de archivos desde la
videocámara con memoria la PC
76 Utilización de la función PC Cam
CONEXIÓN 77 Visualización en una pantalla de televisión
78 Grabación (duplicación) de imágenes
en otros dispositivos de video
MANTENIMIENTO E 79 Mantenimiento
INFORMACIÓN 80 Información Adicional
ADICIONAL
SOLUCIÓN DE 81 Solución de problemas
PROBLEMAS
ESPECIFICACIONES 93
Spanish_05
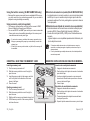
quick start guide
•
•
guía de inicio rápido
This chapter introduces you to the basic
features of your memory camcorder.
See the reference pages for more information.
•
•
Step1
Paso1
Preparation
• Connecting a power source
En este capítulo se presentan las funciones
básicas de la videocámara con memoria.
Consulte las páginas de referencia para
obtener información adicional.
Preparación
➥page 12
• Check out the storage media ➥page 32
• Setting the Date/Time and OSD Language
➥page 30
Step
1
• Conexión de una fuerte de alimentación
➥página 12
• Comprobación de los soportes de almace-
namiento ➥página 32
• Ajuste de la fecha y hora y del idioma de la
OSD ➥página 30
Paso
Recording
Grabación
• Recording the movie ➥page 38
• Grabación de video ➥página 38
Step3
Paso3
Playing back
Reproducción
• Selecting an image to play back from the
• Selección de una imagen para reproducirla a
thumbnail index views ➥page 42
• Viewing on the your PC or TV connected to
your memory camcorder ➥page 73, 77
06_English
6_English
partir de un índice de vistas en miniatura
➥página 42
• Visualización de la PC o TV conectadas a la
videocámara con memoria ➥página 73, 77
Spanish_06
getting to know your
memory camcorder
introducción sobre la
videocámara con memoria
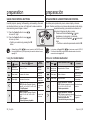
Your new memory camcorder comes with the following accessories. If
any of these items is missing from your box, call Samsung’s Customer
Care Center.
✪ The exact shape of each item may vary by model.
La nueva videocámara con memoria incluye los siguientes accesorios.
Si falta alguno de ellos en la caja, llame al centro de atención al cliente
de Samsung.
✪ La forma exacta de cada elemento puede variar entre modelos.
WHAT'S INCLUDED WITH YOUR MEMORY CAMCORDER
1 Battery pack(IA-BP85ST)
1
COMPONENTES DE LA VIDEOCÁMARA CON MEMORIA
3
1 Batería (IA-BP85ST)
AC power adapter(AA-E9 type)
Adaptador de CA (TIPO AA-E9)
3 Multi-AV cable
3 Cable Multi-AV
4 USB cable
5 Software CD
4
5
6
6 User manual
7 Button type battery (type: CR2025)
8 Lens cover
4 Cable USB
5 CD de software
6 Manual del usuario
7
8
9
7 Pila de botón (tipo: CR2025)
8 Tapa del objetivo
9 Lens cover strap
9 Correa de la tapa del objetivo
10 quick start guide
10 guía de inicio rápido
11 Pouch
10
11
1
11 Bolsa
1 Cradle*
1 Soporte*
13 Carrying Case*
13 Runda de transporte*
• The contents can vary depending on the sales region.
• Parts and accessories are available at your local
Samsung dealer and service center.
• The memory card is not included. See page 34 for
compatible memory card for your memory camcorder.
• * : Not supplied with your camcorder. To buy the optional
accessory, contact your nearest Samsung dealer or
Samsung service center.
07_English
13
• El contenido puede variar dependiendo de la región de ventas.
• Los componentes y accesorios se encuentran disponibles en
el distribuidor local y en el Servicio técnico de Samsung.
• No se incluye la tarjeta de memoria. Consulte la página 34 para la
tarjeta de memoria compatible de la videocámara con memoria.
• * : no se suministra con la videocámara. Para comprar el
accesorio opcional, póngase en contacto con el distribuidor
de Samsung más cercano o con el centro de servicio de
Samsung.
Spanish_07
getting to know your
memory camcorder
introducción a la
videocámara con memoria
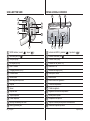
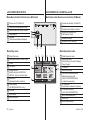
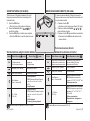
FRONT & LEFT VIEW
VISTAS FRONTAL Y LATERAL IZQUIERDA
11
1
3
4
5
6
7
8
9 10
1 Lens
1 Objetivo
Internal microphone
Micrófono interno
3 MENU button
3 Botón MENU
4 OK button
4 Botón OK
5 Control button (
)
5 Botones de control (
6 Recording start/stop button
6 Botón Inicio/Parar grabación
7 LCD screen
7 Pantalla LCD
8 Built-in speaker
9
11 Zoom lever (W/T)
08_English
8 Parlante incorporado
button
10 LCD ENHANCER (
)
9 botón
) button
10 Botón LCD ENHANCER (
)
11 Palanca de zoom (W/T)
Spanish_08
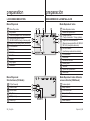
SIDE & BOTTOM VIEW
VISTAS LATERAL E INFERIOR
10
1
11
1
9
8
3
4
7
6
5
16
15
14 13
1
MODE indicator ( record (
1
Indicador de MODO ( grabador (
Multi cable jack (AV/ S )
Conector multicable (AV/ S )
3
USB jack (USB)
3
Conector USB (USB).
4
DC IN jack (DC IN)
4
Conector DC IN (ENTR. CC)
5
EASY. Q button
5
Botón EASY. Q
6
Charging indicator (CHG)
6
Indicador de carga (CHG)
7
POWER switch
7
Interruptor POWER
8
MODE button
8
Botón MODE
9
Recording start/stop button
9
Botón Iniciar/Parar grabación
) / player (
10 Grip belt
))
) / reproductor (
10 Correa de empuñadura
11 Swivel
11 Plataforma giratoria
1 Grip belt hook
1 Enganche de correa de empuñadura
13 Tripod receptacle
13 Orificio para el trípode
14 Cradle receptacle
14 Receptáculo del soporte
15 Memory card /Battery slot cover
15 Tapa de la ranura para tarjeta de memoria/batería
16 Button type battery slot
16 Ranura de la pila de tipo botón
09_English
))
Spanish_09
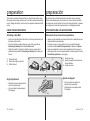
preparation
preparación
This section provides information that you should know before using
this memory camcorder such as how to use the provided accessories,
how to charge the battery, how to setup the operation mode and initial
setup.
En esta sección se facilita información que debe conocer antes de
utilizar esta videocámara con memoria, así como el modo de utilizar
los accesorios que se facilitan, la forma de cargar la batería, la manera
de configurar el modo de funcionamiento y la configuración inicial.
USING THE ACCESSORIES
UTILIZACIÓN DE LOS ACCESORIOS
Attaching a Grip Belt
Colocación de la correa de la empuñadura
• Insert your right hand from the bottom of memory camcorder up to
• Inserte la mano derecha por la parte inferior de la videocámara con
the base of your thumb.
• Put your hand in a position where you can easily operate the
Recording start/stop button and the Zoom lever.
• Adjust the length of grip belt so that the memory camcorder is
stable when you press the Recording start/stop button with your
thumb.
1. Detach the belt.
. Adjust the length of grip belt.
3. Attach the belt.
1
tarjeta hasta la base del pulgar.
• Coloque la mano en una posición en la que pueda fácilmente
accionar el botón Iniciar/Parar grabacióny la palanca de Zoom.
• Ajuste la longitud de la correa de la empuñadura de forma que la
videocámara con memoria quede estable cuando presione el botón
Iniciar/Parar grabación con el pulgar.
3
Ajuste del ángulo
Angle Ajdustment
• Incline la pieza del objetivo al
• Rotate the swivel hand-grip at the
most convenient angle.
• You can rotate it downward upto
150 degrees.
10_English
1. Suelte la correa.
2. Ajuste la longitud de la correa de
la empuñadura.
3. Acople la correa.
ángulo más conveniente.
• Puede girarlo hacia abajo hasta
150 grados.
0˚~150˚
Spanish_10
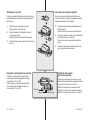
Attaching a Lens Cap
Colocación de la tapa del objetivo
Pass the provided string through the hole in the grip
belt attachment part and pass it through the hole in
the lens cap.
Pase el cordón que se facilita a través del orificio de la
pieza de conexión de la correa de la empuñadura y páselo
a través del orificio de la tapa del objetivo.
1.
Attach the lens cap string to lens cap.
Shorter side is for the lens cap.
1.
.
Attach the string to the attachment hole of
memory camcorder.
Detaching the grip belt makes things easier.
Coloque el cordón de la tapa del objetivo en la
tapa del objetivo.
El lado más corto es para la tapa del objetivo.
2.
3.
Push both sides of cap inward and attach it over
the lens.
Coloque el cordón en el orificio de acoplamiento
de la videocámara con memoria.
Soltar la correa de la empuñadura facilita las
cosas.
3.
Presione ambos lados de la tapa hacia el interior y colóquela sobre el objetivo.
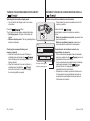
Using the cradle (optional accessory)
Cradle is a connection plate, which can be
used to make it easy charging the battery,or
connecting to a TV or a PC.
Use the memory camcorder with the cradle
more stably when charging the battery, or
connecting to a TV or a PC.
Utilización del soporte
(accesorio opcional)
Cradle
receptacle
DC IN jack
USB jack
11_English
Multi cable jack
El soporte es una placa de conexión, que se
puede utilizar para facilitar la carga de la batería
o conectar a un televisor o a una PC.
Utilice la videocámara con memoria con el
soporte de una forma más estable al cargar la
batería o al conectar a un televisor o a una PC.
Spanish_11
preparation
preparación
CONNECTING A POWER SOURCE
CONEXIÓN A UNA FUENTE DE ALIMENTACIÓN
• There are two types of power source that can be connected to your
• Hay dos tipos de fuentes de alimentación a las que se puede
memory camcorder.
• Do not use provided power supply units with other
equipment.
- The battery pack: used for outdoor recording.
- The AC power adapter : used for indoor recording.
➥page 19
Insert
Para cargar la batería
To Charge the Battery Pack
• Asegúrese de cargar la batería antes de empezar a
• Be sure to charge the battery pack before you start
utilizar la videocámara con memoria.
using your memory camcorder.
Battery Pack installation / ejection
It is recommended you purchase one or more
additional battery packs to allow continuous use of
your memory camcorder.
Instalación y extracción de la batería
Se recomienda adquirir una o más baterías para poder
utilizar la videocámara con memoria de forma continua.
Eject
Inserting the battery pack
1. Slide and open the battery slot cover as shown
in the figure.
. Insert the battery pack into the battery slot until it
softly clicks.
• Make sure that the SAMSUNG logo is facing up
while the set is placed as shown in the figure.
3. Slide and close the battery slot cover.
Ejecting the battery pack
1. Slide and open the battery slot cover and push the battery lock.
• Gently push the battery lock in the direction as shown in the
figure to eject the battery out.
. Pull the ejected battery out in the direction as shown in the figure.
3. Slide and close the battery slot cover.
1_English
conectar la videocámara con memoria.
• No utilice las fuentes de alimentación que se facilitan
con otros equipos.
- La batería: se emplea para grabaciones en exteriores.
- El adaptador de alimentación de CA: se emplea para
grabaciones en interiores.➥página 19
Inserción de la batería
1. Deslice y abra la tapa de la ranura de la batería
como se muestra en la figura.
2. Inserte la batería en su ranura hasta que emita un
chasquido suave.
• Asegúrese de que el logotipo de SAMSUNG esté
hacia abajo con el aparato colocado como se
muestra en la figura.
3. Deslice y cierre la tapa de la ranura de la batería.
Extracción de la batería
1. Deslice y abra la tapa de la ranura de la batería y
presione el cierre de la batería.
• Presione suavemente el cierre de la batería en
la dirección que se muestra en la figura para
extraer la batería.
2. Saque la batería en la dirección que se muestra en
la figura.
3. Deslice y cierre la tapa de la ranura de la batería.
Spanish_1
About battery packs
Información sobre las baterías
• The benefits of battery pack: Battery pack is small but has a large
• Ventajas de la batería: la batería es pequeña pero tiene una gran
power capacity. It should be recharged in any environment that is
between 32°F (0°C) and 104°F (40°C). However, when it is exposed
to cold temperatures (below 32°F (0°C)), its usage time becomes
reduced and it may cease to function. If this happens, place the
battery pack in your pocket or other warm, protected place for a
short time, then reattach it to the memory camcorder.
• The recording time shortens dramatically in a cold environment.
The continuous recording times in the operating instructions are
measured using a fully charged battery pack at 77 °F (25 °C). As
the environmental temperature and conditions vary, the remaining
battery time may differ from the approximate continuous recording
times given in the instructions.
On handling a battery pack
• To preserve battery power, keep your memory camcorder turned
off when you are not operating it.
• For power saving purposes, the memory camcorder will
automatically turns off in 5 minutes in standby mode.
(Only if you set "Auto Power Off" from the menu with 5 min.)
• Do not touch, or metallic objects to come into contact with the
terminals.
• Make sure that the battery pack fits firmly into place. Do not drop
the battery pack.
Dropping the battery pack may damage itself.
• Be careful to keep the battery pack out of the reach of children.
There is danger that a child might swallow it.
• Frequently use of the LCD screen or a frequent playback, fast
forward or rewind operation wears out the battery pack faster.
13_English
capacidad de energía. La batería debe recargarse a una
temperatura ambiente de entre 0°C (32°F) y 40°C (104° F). No
obstante, cuando se expone a temperaturas frías (por debajo de
0°C (32°F)), su tiempo de uso se reduce y es posible que deje de
funcionar. Si esto sucede, coloque la batería en el bolsillo o en otro
sitio caliente protegido durante un tiempo y vuelva a colocarla en la
videocámara con memoria.
• El tiempo de grabación se acorta enormemente en un ambiente
frío. Los tiempos de grabación continua en las instrucciones de
funcionamiento se miden utilizando una batería totalmente cargada
a 25 °C (77 °F). Conforme la temperatura y las condiciones ambientales varíen, el tiempo restante de la batería puede diferir de los
tiempos de grabación continuos facilitados en las instrucciones.
Manipulación de la batería
• Para ahorrar energía de la batería mantenga la videocámara con
memoria apagada cuando no la esté usando.
• Para ahorrar energía, la videocámara con memoria se apagará
automáticamente después de estar 5 minutos en modo de espera.
(Sólo si se define “Auto Power Off” en el menú con min.)
• No toque ni permita que objetos metálicos entren en contacto con
los terminales.
• Asegúrese de que la batería esté colocada correctamente en su
sitio. No deje caer la batería.
Si se llegara a caer podría estropearse.
• Tenga cuidado de mantener la batería fuera del alcance de los
niños. Existe peligro de que un niño se la trague.
• El uso frecuente de la pantalla LCD o una reproducción frecuente,
un avance o retroceso rápido agotan la batería más rápidamente.
Spanish_13
preparation
preparación
Maintaining the battery pack
• The recording time is affected by temperature and environmental conditions.
• The recording time shortens dramatically in a cold environment. The continuous
recording times in the operating instructions are measured using a fully charged
battery pack at 77 °F (25 °C).As the environmental temperature and conditions
vary, the remaining battery time may differ from the approximate continuous
recording times given in the instructions.
• We recommend only using the original battery pack that is available from your
Samsung retailer. When the battery reaches the end of its life, please contact your
local dealer. The batteries have to be dealt with as chemical waste.
• Clean the terminals to remove any foreign substances before inserting the battery.
• Do not put the battery pack near any heat source (i.e. fire or a heater).
• Do not disassemble, apply pressure to, or heat the battery pack.
• Do not allow the + and - terminals of the battery pack to be short-circuited.
It may cause leakage, heat generation, induce overheating or fire.
- Do not expose the battery pack to water. The battery pack is not water resistant.
• When fully discharged, a battery pack damages the internal cells.
The battery pack may be prone to leakage when fully discharged.
• Remove from charger or powered unit when not in use. Even when the power is
switched off, the battery pack will still discharge if it is left attached to the memory
camcorder.
• When not using the memory camcorder for an extended period:
It is recommended that you fully charge the battery pack once a year, attach it to
memory camcorder and use it up
: then remove the battery pack and store it in a cool place again.
Mantenimiento de la batería
• El tiempo de grabación se ve afectado por las condiciones ambientales y la temperatura.
• El tiempo de grabación se acorta enormemente en un ambiente frío. Los
tiempos de grabación continua en las instrucciones de funcionamiento
se miden utilizando una batería totalmente cargada a 25 °C (77 °F).
Conforme la temperatura y las condiciones ambientales varíen, el
tiempo restante de la batería puede diferir de los tiempos de grabación
continuos facilitados en las instrucciones.
• Recomendamos únicamente el uso de la batería original que está disponible en
los distribuidores autorizados de SAMSUNG. Cuando se termine la vida útil de
la batería, póngase en contacto con su proveedor habitual. Para desechar las
baterías gastadas, éstas deben tratarse como residuos químicos.
• Limpie el terminal para eliminar sustancias extrañas antes de insertar la batería.
• No ponga la batería cerca de una fuente de calor (fuego o llamas, por ejemplo).
• No desmonte la batería ni la someta a manipulaciones, presiones ni al calor.
• No permita que se produzca un cortocircuito entre los polos + y – de la batería.
Podrían producirse pérdidas o recalentamiento, lo cual podría ocasionar un incendio.
- No exponga la batería al agua. La batería no es resistente al agua.
• Cuando se descargue completamente, la batería daña las células internas.
La batería puede ser más propensa a fugas cuando se deja totalmente descargada.
• Retire la unidad del cargador o de la alimentación eléctrica cuando no
la utilice. Incluso con la unidad apagada, la batería se descargará si se
deja conectada a la videocámara con memoria.
• Cuando no se utilice la videocámara con memoria durante un tiempo prolongado:
Se recomienda que una vez al año cargue completamente la batería, la
acople a la videocámara con memoria y la utilice. Luego, retire la batería
y guárdela de nuevo en un lugar fresco.
About the battery life
• Battery capacity decreases over time and through repeated use.
If decreased usage time between charges becomes significant, it is probably time
to replace it with a new one.
• Each battery's life is governed by storage, operating and environmental conditions.
Use only approved battery packs.
Otherwise, there is a danger of overheating, fire or explosion.
Samsung is not responsible for problems occurring due to using
unapproved batteries.
14_English
Información sobre la duración de la batería
• La capacidad de la batería disminuye con el tiempo y tras el uso reiterado.
Si el tiempo de uso reducido entre cargas es cada vez más significativo,
probablemente es hora de sustituirla por una nueva.
• La duración de cada batería depende de las condiciones de almacenamiento,
funcionamiento y ambientales.
Utilice únicamente baterías aprobadas.
De lo contrario, existe peligro de sobrecalentamiento, incendio o explosión.
Samsung no se hace responsable de problemas que se produzcan
debido al uso de baterías no aprobadas.
Spanish_14
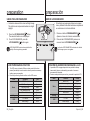
Charging, recording and playback times with fully
charged battery pack (with no zoom operation, etc.)
Tiempos de carga, grabación y reproducción con la
batería totalmente cargada (sin utilizar el zoom, etc.)
• For your reference, the approximate time with fully charged
• Para su referencia, el tiempo aproximado con la batería
battery pack:
Battery type
Charging time
Media
Mode
Continuous
Built-in recording
memory Playback
time
Continuous
recording
SDHC/
MMCplus Playback
time
Super Fine
IA-BP85ST
approx. 2 hr.
Fine
Tipo de batería
Tiempo de carga
Normal
approx. 115min.
approx. 120min.
approx. 125min.
approx. 230min.
approx. 230min.
approx. 230min.
approx. 120min.
approx. 125min.
approx. 130min.
approx. 230min.
approx. 230min.
approx. 230min.
- The time is only for reference. Figures show above are measured
under Samsung's test environment, and may differ from users and
conditions.
Continuous Recording (without zoom)
The continuous recording time of memory camcorder in the table
shows the available recording time when the memory camcorder is in
the recording mode without using any other function after recording
started. In actual recording, the battery pack may discharge 2-3
times faster than this reference since the record start/stop and zoom
are being operated, and playback is performed. Assume that the
recordable time with a fully charged battery pack is between 1/2 and
1/3 of the time in the table, and prepare type and number of battery
packs to allow for the time you are planning to record on the memory
camcorder. Note that the battery pack discharges faster in cold
environment.
The charging time will vary depending on the remaining battery
level.
15_English
totalmente cargada:
Soportes
Memoria
incorporada
SDHC/
MMCplus
Modo
Grabación
continua
Super Fine
(Superfino)
IA-BP85ST
aprox. 2 h.
Fine
(Fino)
Normal
aprox. 115 min. aprox. 120 min. aprox. 125 min.
Tiempo de
aprox. 230 min. aprox. 230 min. aprox. 230 min.
reproducción
Grabación
aprox. 130 min. aprox. 125 min.. aprox. 130 min.
continua
Tiempo de
aprox. 230 min. aprox. 230 min. aprox. 230 min.
reproducción
- El tiempo es sólo para referencia. Las cifras indicadas anteriormente
han sido medidas en un entorno de prueba de Samsung y pueden
diferir de las de otros usuarios y condiciones.
Grabación continua (sin zoom)
El tiempo de grabación continua de la videocámara con memoria en la
tabla muestra el tiempo de grabación disponible cuando la videocámara
con memoria se encuentra en el modo de grabación sin utilizar ninguna
otra función después de iniciar la grabación. En una grabación, la batería
puede descargarse 2-3 veces más rápido que esta referencia debido a que
se está utilizando Iniciar/parar grabación y el zoom y se está realizando
la reproducción. Calcule que el tiempo grabable con una batería totalmente cargada es entre 1/2 y 1/3 del tiempo de la tabla, y prepare el tipo
y el número de baterías que le permita grabar con la videocámara con
memoria el tiempo planeado. Observe que la batería se descarga más
rápidamente en un ambiente frío.
El tiempo de carga variará dependiendo del nivel de batería
restante.
Spanish_15
preparation
preparación
To check the remaining battery charge
Para comprobar la carga restante de la batería
• When the camcorder is turned off (battery is installed) press and
release the
button to display the remaining capacity
of the battery capacity.
• When the camcorder is turned on (battery is
installed) press and hold the
button for more than 2-3 seconds to display
the remaining battery capacity.
Press the
button again or any
other button to return to the initial OSD while
the battery information is displayed.
•
•
When the battery is installed and the AC
adapter is connected, if you press
button, the remaining
battery capacity is displayed.
When the AC adapter alone is connected,
pressing the
button will
display "No Battery" message.
• Con la videocámara apagada (batería instalada), presione y suelte
el botón
mantenga presionado el botón
durante más de 2-3 segundos para ver la capacidad
restante de la batería.
Presione de nuevo el botón
o
cualquier otro botón para volver a la OSD inicial
mientras aparece la información de la batería.
Battery
0%
50%
154 Min
Memory (Super Fine)
120 Min
para ver la capacidad restante de la batería.
• Con la videocámara encendida (batería instalada),
100%
• Con la batería instalada y el adaptador de CA
conectado, si presiona el botón
,
aparece la capacidad restante de la batería.
• Cuando se conecta el cable solo, si se presiona
el botón
Battery Info aparecerá
el mensaje “No Battery”.
60 Min
Recording capacity (approx.)
Remaining battery(approx.)
16_English
Spanish_16
Battery Level Display
STBY 00:00:00/00:58:00
The Battery Level Display shows the amount of
battery power remaining in the battery pack.
Battery
Level
Indicator
Indicador de carga de la batería
El indicador de carga de la batería muestra la
cantidad de energía restante en la batería.
State
Message
Indicador
de nivel de
la batería
Estado
Mensaje
Fully charged
-
Completamente cargada
-
20~40% used
-
20~40% usada
-
40~60% used
-
40 - 80% usada
-
60~80% used
-
40 - 60% usada
-
80~95% used
-
80 - 95% usada
-
-
Agotada (parpadea): El dispositivo se
apagará enseguida. Cambie la batería
a la máxima brevedad posible.
-
Exhausted(flickers): The device will
soon turn off. Change the Battery
Pack as soon as possible.
(flickers): The device will be forced to
turn off after 5 seconds.
17_English
120
MIN
"Low battery"
(parpadea): El dispositivo se apagará
de forma forzada transcurridos 5
“Low battery”
segundos.
Spanish_17
preparation
preparación
Charging the Battery Pack
Carga de la batería
The IA-BP85ST battery pack provided with this memory camcorder
may be charged a little at purchase time: Charge it before using the
memory camcorder.
• Use IA-BP85ST battery pack only.
• The battery pack may be charged a little at the
time of purchase.
1. Slide the POWER switch downward to turn off
the power.
. Insert the battery pack.
3. Open the LCD screen and jack cover.
4. Connect the AC power adapter to the DC IN
jack of your memory camcorder.
5. Connect the AC power adapter to a wall socket.
• The charging indicator will start to blink,
showing that the battery pack is charging.
6. When the battery pack is fully charged,
disconnect the battery pack and the AC power
adapter from the memory camcorder.
La batería IA-BP85ST suministrada con esta videocámara con memoria puede tener cierta carga al adquirirla: Cárguela antes de utilizar la
videocámara con memoria.
• Utilice sólo la batería IA-BP85ST.
1
• Es posible que la batería esté un poco cargada en
el momento de la compra.
1. Deslice el interruptor POWER hacia abajo para
apagar la unidad.
. Inserte la batería.
3. Abra la pantalla LCD y la tapa de los conectores.
4. Conecte el adaptador de alimentación de CA al
terminal DC IN de la videocámara con memoria.
5. Conecte el adaptador de alimentación de CA a
una toma de corriente.
• El indicador de carga comenzará a parpadear,
lo cual indica que se está cargando la batería.
6. Cuando la batería esté completamente cargada,
desconecte la batería y el adaptador de alimentación de CA de la videocámara con memoria.
3
Even if your camcorder is turned off, AC power
(house current) is still supplied to it while
connected to the wall outlet via the AC power
adaptor.
5
4
• Do not use the AC adaptor placed in a narrow space, such as
between a wall and furniture.
Before detaching the power source, make
sure that the camcorder’s power is turned off.
Failure to do so can result in camcorder malfunction.
• Use the nearby wall outlet when using the AC power adaptor.
Disconnect the AC power adaptor from the wall outlet immediately
if any malfunction occurs while using your camcorder.
CAUTION •
18_English
PRECAUCIÓN
Incluso aunque su videocámara esté apagada,
está recibiendo CA (corriente de la casa)
desde la toma mural a través del adaptador de
alimentación de CA.
• No utilice el adaptador de CA colocado en un espacio estrecho,
como entre una pared y un mueble.
• Antes de desconectar la fuente de alimentación, asegúrese de
que la videocámara esté apagada. No hacerlo podría provocar
una avería en la videocámara.
• Utilice la toma mural cercana cuando utilice el adaptador de
alimentación de CA. Desconecte el adaptador de alimentación de
CA de la toma mural inmediatamente si se produce alguna avería
mientras utiliza la videocámara.
Spanish_18
Charging indicator
Indicador de carga
Tips for battery identification
• The colour of the LED indicates charging status.
- If the battery has been fully charged, the charge
indicator is green.
If you are charging the battery, the color of
the charge indicator is orange.
The charge indicator flickers if the battery is
abnormal.
Consejos para la identificación de la batería
• El color del LED indica el estado de carga.
- Si la batería se ha cargado totalmente, el indicador
de carga estará verde.
Si está cargando la batería, el color del indicador
de carga estará naranja.
El indicador de carga parpadea si la batería tiene
alguna anomalía.
Color
Charging state
Color
Orange
On Charging
Naranja
Cargando
Green
Fully Charged
Verde
Completamente cargada
Using a household power source
Make the same connections as you do when charging the battery
pack. The battery pack will not lose its charge in this case.
Using memory camcorder with AC power adaptor
It is recommended that you use the AC power adaptor
to power the memory camcorder from a household AC
outlet when you perform settings on it, play back, or
use it indoors.
- Make the same connections as you do when charging
the battery pack. ➥page 18
• Be sure to use the specified AC power adaptor to power the
memory camcorder. Using other AC power adaptors could cause
electric shock or result in fire.
• The AC power adaptor can be used around the world. An AC plug
adaptor is required in some foreign countries. If you need one,
purchase it from your distributor.
19_English
Estado de carga
Utilización de una fuente de alimentación doméstica
Haga las mismas conexiones que al cargar la batería.
La batería no perderá su carga en este caso.
Utilización de la videocámara con memoria
con el adaptador de alimentación de CA
Se recomienda utilizar el adaptador de alimentación
de CA para suministrar energía a la videocámara con
memoria a través de la toma de CA cuando realice
ajustes, reproduzca o la utilice en interiores.
- Realice las mismas conexiones que al cargar la
batería. ➥página 18
• Asegúrese de utilizar el adaptador de alimentación de CA para
suministrar energía a la videocámara con memoria.
Si utiliza otros adaptadores de alimentación de CA podría causar
descargas eléctricas o provocar un incendio.
• El adaptador de alimentación de CA puede utilizarse en todo el
mundo. Se necesitará un adaptador de enchufe de CA en algunas
zonas en el extranjero. Si lo necesita, cómprelo en un distribuidor.
Spanish_19
preparation
preparación
BUTTON TYPE BATTERY INSTALLATION
INSTALACIÓN DE LA PILA DE BOTÓN
1. Insert the button type battery in the battery slot on
the bottom of the memory camcorder.
1. Inserte la pila de botón en la ranura de la pila situada
en la parte inferior de la videocámara con memoria.
. Position the button type battery with the positive
( ) terminal face down in the button type battery
slot.
2. Coloque la pila de botón con el terminal positivo
( ) hacia abajo en la ranura de la pila de botón.
+
+
Precauciones relacionadas con la pila de
botón
Precautions regarding the button type
battery
•
•
There is a danger of explosion if button type battery
is incorrectly replaced. Replace only with the same or
equivalent type.
Instalación de la pila para el reloj interno
Battery installation for the internal clock
La pila de botón mantiene la función de reloj y el
contenido predefinido de la memoria: incluso aunque se
quite la batería o el adaptador de alimentación de CA.
La pila de botón de la videocámara con memoria dura
aproximadamente seis meses en condiciones normales
de funcionamiento.
Cuando la pila de botón se debilite o se agote,
el indicador de fecha y hora
mostrará "007/01/01 1:00AM" cuando active la
visualización de fecha y hora.
The button type battery maintains the clock function
and preset contents of the memory : even if the battery
pack or AC power adapter is removed. The button type
battery for the memory camcorder lasts about 6 months
under normal operation from the time of installation.
When the button type battery becomes weak or dead,
the date/time indicator willdisplay "007/01/01 1:00AM "
when you turn the date and time display on.
WARNING
Keep the button type battery out of reach of children.
Should a battery be swallowed, consult a doctor
immediately.
0_English
Existe peligro de explosión si la pila de botón se
coloca de forma incorrecta. Cambie la pila sólo por
una igual o de especificaciones equivalentes.
WARNING
Mantenga la pila de botón fuera del alcance de los niños.
En caso de que alguien se tragara una por accidente, avise
inmediatamente a un médico.
Spanish_0
BASIC OPERATION OF YOUR MEMORY CAMCORDER
FUNCIONAMIENTO BÁSICO DE LA VIDEOCÁMARA CON MEMORIA
This section explains the basic techniques of recording movies, and
also basic settings on your memory camcorder.
Set the appropriate operation mode according to
your preference using POWER switch and
MODE button.
En esta sección se explican las técnicas básicas para grabación de video
y también los ajustes básicos de la videocámara con
memoria.Ajuste el modo de funcionamiento apropiado a
sus preferencias utilizando el interruptor POWER y MODE.
Turning memory camcorder on or off
You can turn the power on or off by sliding the
POWER switch down.
• Slide the POWER switch repeatedly to toggle
the power on or off.
• Power saving function
- In the setting at the time of purchase, the power turns off
automatically if you leave your camcorder without any operation
attempted off for approximately 5 minutes, to save the battery
power. ➥page 65
• If warning messages appear on the screen, follow the instructions.
➥page 81
Setting the operating modes
• You can switch the operating mode in the
following order each time you press the MODE
button.
• Movie Record mode (
) ➔ Movie Play mode
( ) ➔ Movie Record mode ( )
• Each time the operational mode changes, the
respective mode indicator lights up.
- Movie Record mode ( ): To record movie
images.
- Movie Play mode ( ): To play movie image.
1_English
Encendido o apagado de la videocámara con memoria
Puede encender o apagar deslizando hacia abajo el
interruptor POWER.
• Deslice el interruptor POWER de forma repetida
para encender y apagar.
• Función de ahorro de energía
- En el ajuste en el momento de la compra, la unidad se apaga
automáticamente si deja de utilizar la videocámara durante 5
minutos, para ahorrar la energía de la batería. ➥página 65
• Si aparecen en pantalla mensajes de advertencia, siga las
instrucciones. ➥ página 81
Ajuste de los modos de funcionamiento
• Puede cambiar el modo de funcionamiento en el
siguiente orden cada vez que presione el botón
MODE.
• Modo Grabar video ( ) ➔ Modo Reproducir
video ( ) ➔ Modo Grabar video ( )
• Cada vez que cambia el modo de funcionamiento,
se ilumina el indicador de modo respectivo.
- Modo Grabar video ( ): para grabar imágenes de video.
- Modo Reproducir video ( ): para reproducir imágenes de video.
Spanish_1
preparation
5
6
preparación
LCD SCREEN INDICATORS
INDICADORES DE LA PANTALLA LCD
Movie Record mode
Modo Grabar video
1
Modo Grabar video
Estado de funcionamiento ([STBY](espera) o [
Time counter (movie recording time: remaining recordable time)
3
Contador (tiempo de grabación de video: tiempo grabable restante)
4
Storage media (Built-in memory(SC-MX10A/MX10AU only)
or memory card)
4
1
Movie Record mode
Operating status ([STBY](standby) or [
3
](recording))
5
Battery info.(Remaining battery level/time)
5
Soporte de almacenamiento (Memoria incorporada
(Sólo SC-MX10A/MX10AU) o tarjeta de memoria)
Inf. de la batería (nivel/tiempo restante de la batería)
6
LCD Enhancer *
6
LCD Enhancer *
7
Anti-Shake(EIS) (Electronic Image Stabilizer)
7
Anti-temblores (EIS) (Estabilizador electrónico de la imagen)
8
Focus *
8
Enfoque *
9
Back Light *
9
Luz de fondo *
10
Digital Effect
10
Efecto digital
11
EASY.Q *
11
EASY.Q *
1
Zoom (Optical zoom / Digital zoom)
1
Zoom (Zoom óptico / Zoom digital)
13
Date/Time
13
Fecha y hora
14
White balance
14
Balance de blanco
15
Scene Mode (AE) /Exposure (Manual) *
15
Modo escena (EA) /Exposición (Manual) *
16
Video quality
16
Calidad de video
17
Resolution
17
Resolución
• The above screen is an example for
explanation: It is different form the actual
display.
• The OSD indicators are based on memory
capacity of 2GB(MMC plus).
• Functions marked with * won’t be kept
when the memory camcorder restarts.
• For enhanced performance, the display
indications and the order are subject to
change without prior notice.
1
11
_English
3
4
120
MIN
5
17
6
16
7
8
15
9
14
10
Manual Focus
EASY.Q
2007/01/01 12:00AM
13
8
10
STBY 00:00:00/00:58:00
7
9
](grabación))
15
11
• La pantalla anterior es un ejemplo
explicativo: difiere de la pantalla real.
• Los indicadores de OSD están basados en
la capacidad de memoria de 2 GB (MMC).
• Las funciones marcadas con * no se
conservarán cuando se reinicie la
videocámara con memoria.
• Para un mayor rendimiento, las indicaciones
de pantalla y el orden están sujetos a cambio
sin aviso previo.
1
1
Spanish_
LCD SCREEN INDICATORS
INDICADORES DE LA PANTALLA LCD
Movie Record mode: Shortcut menu (OK Guide)
Modo Grabar video: Menú de accesos directos (OK Manual)
1
Screen size (16:9 Wide/4:3)
Focus (Auto Focus/Manual Focus) *
3
Shortcut menu (OK Guide) / Return
5
4
White balance *
4
5
Exposure
(Auto Exposure/Manual Exposure)
1
120
MIN
STBY 00:00:00/00:58:00
3
3
4
5
1
Modo Reproducir video
Movie Play mode
1
Movie Play mode
Menu name (Delete, Protect, Copy)
3
Protect
4
File Name
5
Storage media
(Built-in memory (SC-MX10A/
MX10AU only) or memory card)
6
Battery info.
(Remaining battery level/time)
7
Copy Selected
(SC-MX10A/MX10AU only)
8
Scroll bar
9
Button Guide
10
Delete Selected
3_English
Tamaño de pantalla (16:9 Pan/4:3)
Enfoque
(Enfoque autom./Enfoque manual) *
Menú de accesos directos
(OK Manual) / Volver
Balance de blanco *
Exposición (Auto / Manual)
1
3
4
5
9
Modo Reproducir video
Nombre de menú
(Delete (Blorrar), Protect (Proteger),
Copy (Copiar))
Protección
Nombre de archivo
Soporte de almacenamiento
(Memoria incorporada
(Sólo SC-MX10A/MX10AU)
o tarjeta de memoria)
Inf. de batería
(nivel/tiempo restante de la batería)
Copia seleccionada
(sólo SC-MX10A/MX10AU)
Barra de desplazamiento
Botón Guía
10
Borrar seleccionados
1
6
Delete
10
MIN
100-0001
7
10
8
3
4
5
9
Move
OK
Play
MENU
Exit
6
7
8
Spanish_3
preparation
preparación
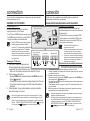
LCD SCREEN INDICATORS
INDICADORES DE LA PANTALLA LCD
Movie Play mode
1
3
4
5
6
7
8
9
10
11
1
Movie Play mode
Play Status
Time code (Elapsed time / Recorded time)
Storage media (Built-in memory
(SC-MX10A/MX10AU only) or memory card)
Battery info.(Remaining battery level/time)
LCD Enhancer *
Protect
File Name
Date/Time
Volume
Play Option
Resolution
Modo Reproducir video
1
3
1
4
00:00:00/00:23:00
120
MIN
1
5
6
11
7
10
9
3
4
5
2007/01/01 12:00AM
100-0001
8
6
7
8
9
10
11
1
Movie Play mode:
Shortcut menu (OK Guide)
1
3
4
5
6
FF(fast forward)
Volume Down
Button Guide
Play/Pause
REW(rewind)
Volume Up
4_English
00:00:00/00:23:00
120
MIN
Modo Reproducir video: Menú de
accesos directos (OK Manual)
6
1
5
4
3
ZOOM
100-0001
List
3
1
Modo Reproducir video
Estado de reproducción
Código de tiempo
(Tiempo transcurrido / Tiempo grabado)
Soporte de almacenamiento
(Memoria incorporada (Sólo SC-MX10A/
MX10AU) o tarjeta de memoria)
Inf. de la batería
(nivel/tiempo restante de la batería)
LCD Enhancer *
Protección
Nombre de archivo
Fecha y hora
Volumen
Opción de reproducción
Resolución
4
5
6
Avance rápido
Bajar volumen
Guía de botones
Reproducir / Pausa
Rebobinar
Subir volumen
Spanish_4
TURNING THE SCREEN INDICATORS ON/OFF
(
)
ENCENDIDO Y APAGADO DE LOS INDICADORES DE PANTALLA
(
)
Switching the information display mode
Cambio del modo de visualización de información
• Puede cambiar el modo de visualización de la información en pantalla:
• You can switch the display mode of on-screen
information:
Presione el botón
.
Se alternarán los modos de visualización completo y
mínimo.
• Modo de visualización completo: aparecerá todo
tipo de información.
• Modo de visualización mínima: aparecerá el
único indicador de estado de funcionamiento.
Press the
button.
The full and minimum display modes will alternate.
• Full display mode: All types of information will
appear.
• Minimum display mode: The only operating status
indicator will appear.
Battery
Checking the remained battery and
memory capacity
• When the camcorder is turned off (battery is
installed) press and release the
button to display the remaining capacity of the
battery capacity.
• When the camcorder is turned on (battery is
installed) press and hold the
button for more than 2-3 seconds to display
the remaining battery capacity.
5_English
0%
50%
154 Min
Memory (Super Fine)
120 Min
Recording capacity (approx.)
Remaining battery(approx.)
60 Min
100%
Comprobación de la batería restante y la
capacidad de la memoria
• Con la videocámara apagada (batería instalada),
presione y suelte el botón
para ver la
capacidad restante de la batería.
• Con la videocámara encendida (batería instalada),
mantenga presionado el botón
durante más de 2-3 segundos para ver la
capacidad restante de la batería.
• Después de un instante, aparecerá durante unos
10 segundos el tiempo grabable aproximado en
el soporte de almacenamiento seleccionado y la
información de la batería.
Spanish_5
preparation
preparación
USING THE LCD ENHANCER
USO DE LCD ENHANCER
• Contrast is enhanced for a clear and bright image.
• El contraste se mejora para obtener una imagen
1. Press the LCD ENHANCER (
) button.
The selected function icon is displayed.
. To exit LCD ENHANCER, press the
LCD ENHANCER (
) button again.
1. Presione el botón LCD ENHANCER (
).
Aparece el icono de la función seleccionada.
. Para salir de LCD ENHANCER, presione de
nuevo el botón LCD ENHANCER(
).
clara y brillante. Este efecto también se implemente
en exteriores con luz diurna brillante.
This effect is also implemented outdoors in bright
daylight.
STBY 00:00:00/00:58:00
120
MIN
LCD ENHANCER function does not affect the
quality of the image being recorded.
La función LCD ENHANCER no afecta a la calidad
de la imagen que se va a grabar.
LCD POWER SAVING FUNCTION
FUNCIÓN DE AHORRO DE ENERGÍA DE LA LCD
• The LCD screen is turned off after a certain period of time has
passed (see below) in each mode in order to prevent unnecessary
bettery power consumption.
• Press any button to go back and turn on the LCD screen.
Mode
Movie
Settings
USB
6_English
Sub-mode
STBY Mode
While Recording
Play (single view)
Play (thumbnail view)
Demo Mode
PC Camera
Mass Storage
Time
10min
None
None
10min
None
60sec
60sec
60sec
• La pantalla LCD se apaga después de un período de tiempo
transcurrido (véase a continuación) para evitar el consumo
innecesario de la batería.
• Presione cualquier botón para volver y encender la pantalla LCD.
Modo
Movie
Settings
USB
Submodo
Tiempo
Modo STBY
10min
Mientras se graba
Ninguna
Reproducir (vista única)
Ninguna
Reproducir (vista en miniatura)
10min
Modo Demo
Ninguna
-
60 seg.
PC Cam
60 seg.
Mass Storage
60 seg.
Spanish_6
ADJUSTING THE LCD SCREEN
AJUSTE DEL COLOR DE LA PANTALLA LCD
1. Open up the LCD screen 90 degrees with
your finger.
. Rotate it to the best angle to record or play.
• If you rotate the LCD screen 180 degrees
to the lens side, you can close the LCD
screen with it facing out. This is convenient
during playback.
•
•
See pages 65 to adjust brightness and color of the LCD screen.
Over-rotation may cause damage to the inside of the hinge that
connects the LCD screen to the memory camcorder.
1. Abra con el dedo la pantalla LCD 90 grados.
2. Gírela al mejor ángulo para grabar o reproducir.
• Si gira la pantalla LCD 180 grados hacia el lado
del objetivo, puede cerrar la pantalla LCD con
ella hacia fuera. Esto resulta de utilidad durante
la reproducción.
•
•
Do not lift the memory camcorder with holding the LCD screen.
It can be a cause of sudden fall.
WARNING
USING THE MENU BUTTON
1. Set the desired mode by pressing the MODE
button.
. Press the MENU button.
3. Move the cursor by pressing the Control
button (
) to select desired menu
item, and then press Control button OK to
confirm.
4. Press the MENU button to finish.
MENU button dose not operate in the EASY.Q mode.
7_English
ADVERTENCIA
Consulte las páginas 65 para ajustar el brillo y el color de la pantalla LCD.
Girarla en exceso puede causar daños en el interior de la bisagra
que conecta la pantalla LCD con la videocámara con memoria.
No levante la videocámara con memoria sujetando la
pantalla LCD. Puede provocar su desprendimiento.
UTILIZACIÓN DEL BOTÓN MENU
1. Ajuste el modo que desee presionando el botón
MODE.
2. Presione el botón MENU.
3. Mueva el cursor presionando el botón de Control
( / / / ) para seleccionar la opción de menú
que desee y, a continuación, presione el botón de
Control OK para confirmar.
4. Presione el botón MENU para finalizar.
El botón MENU no funciona en el modo EASY.Q.
Spanish_7
preparation
preparación
USING THE CONTROL BUTTONS
UTILIZACIÓN DE LOS BOTONES DE CONTROL
Used for playback, pausing, fastforwarding, and rewinding. Also used
as directional buttons (up, down, left, right) and to make a selection
when selecting movie images or menus.
Se utilizan para reproducción, pausa, avance rápido y retroceso
rápido. También se utilizan como botones direccionales (arriba, abajo,
izquierda, derecha) y para realizar una selección al
seleccionar imágenes de video o menús.
1. Presione el botón de Control ( / ) para
desplazarse a la izquierda / a la derecha.
. Presione el botón de Control ( / ) para subir /
bajar.
• Confirme su selección presionando el botón OK.
1. Press the Control button to move (
)
to move left / right.
. Press the Control button to move (
)
to move up / down.
• Confirm your selection by pressing the OK
button.
• Control button (OK / ( / )) does not operate in the EASY.Q mode.
• Using the OK button, you may directly access the shortcut menu.
➥page 29
Utilización del Botón de Control
Using the Control button
Movie Record
Button
(
) mode
OK
Movie Play(
Access the
Shortcut menu
Playback /Pause
Zoom (wide)
Increases the volume
Zoom (tele)
Decreases the volume
-
-
8_English
• Los botones de Control (OK / ( / )) no funcionan en modo EASY.Q.
• Si utiliza el botón OK, puede acceder directamente al menú de
acceso directo. ➥página 29
) mode
- Search playback
RPS (Reverse Playback Search)
rate:x2→x4→x8→x16→x32→x64
- Skip Playback
- Search playback
FPS (Forward Playback Search)
rate: x2→x4→x8→x16→x32→
x64
- Skip Playback
- Frame-by-frame playback
Menu
selection
Confirms
selection
Moves the
cursor up
Moves the
cursor down
Botón
Modo Grabar
video (
)
OK
Acceso al
menú de acceso directo
Reproducción / Pausa
Confirma la
selección
Zoom (pan)
Sube el volumen
Zoom (tele)
Baja el volumen
Mueve el cursor
hacia arriba
Mueve el cursor
hacia abajo
Modo Reproducir video (
)
Selección
de menú
Moves to
the previous
menu
-
- Buscar reproducción Velocidad
RPS (Búsqueda de reproducción inversa): Vuelve al menú
x2→x4→x8→x16→x32→x64
anterior
- Saltar reproducción
Moves to the
next menu
-
- Buscar reproducción Velocidad
FPS (Búsqueda de reproducción adelante): Pasa al menú
x2→x4→x8→x16→x32→x64
siguiente
- Saltar reproducción
- Reproducción fotograma a fotograma
Spanish_8
SHORTCUT MENU (OK GUIDE)
MENÚ DE ACCESO DIRECTO (OK GUÍA)
Shortcut menu (OK guide) represents the most
frequently accessed functions according to the
selected mode.
El menú de acceso directo (OK guía) incluye las
funciones de acceso más frecuente de acuerdo con
el modo seleccionado.
1. Press the OK button.
• Shortcut menu (OK guide) is displayed.
. Press the Control button (
) to
control the setting.
3. Press the OK button to confirm your selection.
• Press the OK button to exit the shortcut menu.
1. Presione el botón OK.
• Aparece el menú de acceso directo (OK guía).
. Presione el botón de Control ( / / / )
para controlar el ajuste.
3. Presione el botón OK para confirmar la selección.
• Presione el botón OK para salir del menú de
acceso directo.
OK
120
MIN
STBY 00:00:00/00:58:00
WB
Funciones de acceso directo
utilizando los botones de Control
Shortcut function using the Control buttons
Button
OK
Movie Record(
)mode
Movie Play(
) mode
- Access the shortcut menu
- Confirm selection
- Exit the shortcut menu
- Shortcut menu (OK guide) is
displayed
- Playback/ause
Exposure (Auto / Manual)
lncreases the volume
Focus (Auto / Manual)
Decreases the volume
White Balance
(Auto ~ Custom WB)
- Search playback
RPS (Reverse Playback Search)
rate: x2→x4→x8→x16→x32→
x64)
- Skip Playback
16 : 9 Wide
(Off / On)
- Search playback
FPS (Forward Playback Search)
rate: x2→x4→x8→x16→x32→
x64)
- Skip Playback
- Frame-by-frame playback
OK button dose not operate in the EASY. Q mode.
9_English
Botón
OK
Modo Grabar video (
)
Modo Reproducir video (
)
- Acceso al menú de acceso directo - Aparece la guía El menú de
- Confirmación de selección
acceso directo (OK guía)
- Salida del menú de acceso directo - Reproducción/Pausa
Exposure (Auto / Manual)
Sube el volumen
Focus (Auto / Manual)
Baja el volumen
White Balance
(Auto ~ Custom WB)
- Buscar reproducción Velocidad
RPS (Búsqueda de reproducción
inversa): x2→x4→x8→x16→x32→x64)
- Saltar reproducción
16 : 9 Wide
(Off / On)
- Buscar reproducción Velocidad
RPS (Búsqueda de reproducción
adelante): x2→x4→x8→x16→
x32→x64)
- Saltar reproducción
- Reproducción fotograma a
fotograma
El botón OK no funciona en modo EASY. Q.
Spanish_9
preparation
preparación
INITIAL SETTING : OSD LANGUAGE & DATE AND TIME
AJUSTE INICIAL: IDIOMA DE OSD Y FECHA Y HORA
• Initial setting is available in all operating modes.
• To read the menus or messages in your desired language, set the
• El ajuste inicial está disponible en todos los modos de funcionamiento.
• Para leer los menús o mensajes en el idioma que desee, defina el
OSD language. To store the date and time during record, set the
date/time.
idioma de la OSD. Para grabar la fecha y hora durante la grabación,
ajuste la fecha y la hora.
How to set the settings mode
1. Slide the POWER switch downward to turn on the
memory camcorder.
. Press the MENU button.
3. Press the Control button (
) to select
"Settings".
4. Press the OK button.
• The settings menu screen appears.
Selecting the OSD language
Cómo fijar el modo de ajustes
OK
MENU
Control
Video
1. Deslice el interruptor POWER hacia abajo para
apagar la videocámara con memoria.
. Presione el botón MENU.
3. Presione el botón de Control ( / ) para
seleccionar “Settings”.
4. Presione el botón OK .
• Aparece la pantalla del menú de ajustes.
POWER
120
MIN
Selección del idioma de la OSD
You can select the desired language to display
Puede seleccionar el idioma en el que desea que
Settings
the menu screen and the messages.
aparezca la pantalla del menú y los mensajes.
OK
1. Set the "Settings" mode.
1. Defina el modo “Settings”.
• The settings menu screen appears.
• Aparece la pantalla del menú de ajustes.
• See "How to set the Settings mode".
OK Select
MENU Exit
• Consulte “Cómo fijar el modo de ajustes”.
Move
. Press the Control button (
) to select
. Presione el botón de Control ( / ) para
"Language".
Settings
seleccionar “Language”.
3. Press the Control button (
) to select the
3. Presione el botón de Control (
) para
Language
desired OSD language, and then press the
seleccionar el idioma de la OSD y, a continuación
OK button.
English
presione el botón OK.
• English /
/ Français / Deutsch / Italiano /
• English /
/ Français / Deutsch / Italiano
Français
Español / Português / Nederlands / Svenska /
/ Español / Português / Nederlands / Svenska
Suomi / Norsk / Dansk / Polski / Magyar /
OK Select
MENU Exit
Move
/ Suomi / Norsk / Dansk / Polski / Magyar /
Українська / Русский /
/
/ Türkçe /
Українська / Русский /
/
/ Türkçe /
Iranian / Arabic
Iranian / Arabic
4. Press the MENU button to exit the menu.
4. Presione el botón MENU para salir del menú.
• The OSD language is refreshed in the selected language.
• El idioma de la OSD se actualiza en el idioma seleccionado.
120
MIN
• Even if the battery pack or AC power are removed, the language
setting will be preserved.
• "Language" options may be changed without prior notice.
30_English
• Incluso aunque extraiga la batería o la fuente de alimentación de CA,
se conservará el ajuste de idioma.
• Las opciones de “Language” pueden cambiarse sin aviso previo.
Spanish_30
Setting date and time
Ajuste de la fecha y hora
Set the current date and time so that the date and time at which you
make a recording can be recorded correctly. The following procedure
can also be used to correct the date and time you have already set.
Fije la fecha y hora actuales de forma que al realizar la grabación la
fecha y hora aparezcan correctamente. El siguiente procedimiento
también puede utilizarse para corregir la fecha y hora ya definidos.
1. Set the "Settings" mode.
• The settings menu screen appears.
• See "How to set the Settings mode". ➥page 30
Video
Settings
. Press the Control button (
) to select
"Date/Time Set" and then press the OK button.
OK
3. Set the desired value by moving the Control
button (
).
Move
4. Move to the next item by moving the Control
button (
) , and then set values by moving
the Control button (
).
• Items are displayed in the order of the date
format.
• By default, it appears in the order of year,
month, date, hour, minute and AM/PM.
5. After setting the last item, press the OK button to
finish the setting.
• Press the MENU button to exit the menu.
120
MIN
Select
OK
120
MIN
Date/Time Set
2007
01
01
12 : 00
Move
2. Presione el botón de Control ( / ) para
seleccionar “Date/Time Set” y, a continuación,
presione el botón OK.
Exit
Settings
AM
OK
Set
• You can set the year up to 2037.
• After setting, the date and time are automatically recorded on a
special data area of the storage media.
• The button type battery maintains the clock function and preset
contents of the memory : even if the battery pack or AC power
adapter is removed. The button type battery for the memory
camcorder lasts about 6 months under normal operation from the
time of installation.
When the button type battery becomes weak or dead, the date/time
indicator will display "007/01/01 1:00AM " when you turn the
date and time display on. ➥page 20
Turning the date and time display on/off
• To switch the date and time display on or off, access the menu and
change the date/time mode. ➥page 64
31_English
MENU
MENU
Exit
1. Defina el modo “Settings”.
• Aparece la pantalla del menú de ajustes.
• Consulte “Cómo fijar el modo de ajustes”.
➥página 30.
3. Establezca el valor que desee moviendo el botón
de Control (
).
4. Desplácese a la opción siguiente moviendo el botón
de Control ( / ) y, a continuación, ajuste los
valores moviendo el botón de Control (
).
• Los elementos aparecen en el orden del formato
de fecha.
• Por defecto, aparece en el orden de año, mes,
día, hora, minuto y AM/PM
5. Después de ajustar la última opción, presione el botón OK para finalizar el ajuste.
• Presione el botón MENU para salir del menú.
• Puede fijar el año hasta 2037.
• La fecha y la hora se graban automáticamente en una zona especial del soporte de almacenamiento.
• La pila de botón mantiene la función de reloj y el contenido
predefinido de la memoria: incluso aunque se quite la batería
o el adaptador de alimentación de CA. La pila de botón de la
videocámara con memoria dura aproximadamente seis meses en
condiciones normales de funcionamiento.
Cuando se debilite o se agote la pila de botón, el indicador de
fecha y hora mostrará “007/01/01 1:00AM “ cuando tenga
activada la visualización de fecha y hora. ➥página 20.
Activación y desactivación de la visualización de la fecha y hora
• Para mostrar o no la fecha y hora, acceda al menú y cambie el
modo de fecha y hora. ➥página 64
Spanish_31
about the storage media
información sobre los
soportes de almacenamiento
SELECTING THE STORAGE MEDIA
(SC-MX10A/MX10AU ONLY)
SELECCIÓN DEL SOPORTE DE ALMACENAMIENTO
(SÓLO SC-MX10A/MX10AU)
You can record moving on the built-in memory or
a memory card, so you should select the desired
storage media before starting recording or playback.
Settings
120
MIN
Memory Type
Memory
Card
Move
OK
Select
MENU
Puede grabar video en la memoria incorporada o en
una tarjeta de memoria; por tanto debe seleccionar el
soporte de almacenamiento antes de comenzar la
grabación o la reproducción.
Exit
Selecting the storage media
(SC-MX10A/MX10AU only)
Selección del soporte de almacenamiento
(Sólo SC-MX10A/MX10AU)
• Selecting the recording medium is available in the Movie record
• La selección del soporte de grabación está disponible en los
/Movie Play modes. Movie images can be stored and played
back using the built-in memory or a memory card. Hence, set the
memory type before recording and playing back images.
1. Press the MENU button.
• The menu list will appear.
. Press the Control button (
) to select "Settings",
then press the OK button.
3. Press the Control button (
) to select "Memory Type",
then press the OK button.
4. Press the Control button (
) to select "Memory" or
"Card" then press the OK button.
5. Press the MENU button to exit.
3_English
modos Grabar video / Reproducir video. Las imágenes de video
pueden almacenarse y reproducirse utilizando la memoria
incorporada o una tarjeta de memoria. Por consiguiente,
fije el tipo de memoria antes de grabar y reproducir imágenes.
1. Presione el botón MENU.
• Aparece la lista del menú.
. Presione el botón de Control ( / ) para seleccionar “Settings”
y, a continuación, presione el botón OK.
3. Presione el botón de Control ( / ) para seleccionar “Memory Type”
y, a continuación, presione el botón OK.
4. Presione el botón de Control (
) para seleccionar
“Memory” o “Card” y, a continuación, presione el botón OK.
5. Presione el botón MENU para salir.
Spanish_3
Using the built-in memory (SC-MX10A/MX10AU only)
• Because this memory camcorder has an embedded 4GB memory,
you don’t need to buy any extra storage media. So you can take or
playback moving/recording conveniently.
Using a memory card (not supplied)
• This memory camcorder has multi card slot for access to SDHC
(Secure Digital High Capacity) and MMCplus.
• You can use SDHC and MMC plus card on your memor camcorder.
- Some cards are not compatible depending on the memory card
manufacturer and memory card type.
• If you insert a memory card when the memory camcorder is on,
the pop-up message will prompt you automatically to select the
storage type.
• If there is no memory card inserted, only the built-in memory will
be available.
INSERTING / EJECTING THE MEMORY CARD
Utilización de la memoria incorporada (Sólo SC-MX10A/MX10AU)
• La videocámara con memoria cuenta con una memoria incorporada
de 4GB, por lo que no necesita comprar ningún soporte de alma
cenamiento adicional. Por tanto, podrá grabar o reproducir video de
forma apropiada.
Utilización de una tarjeta de memoria (no se suministra)
• Esta videocámara con memoria tiene una ranura multitarjeta para
acceder a SDHC (Secure Digital High Capacity) y MMCplus.
• Puede utilizar la tarjeta SDHC y MMC plus en la videocámara con
memoria.
- Algunas tarjetas no son compatibles dependiendo del fabricante y del
tipo de tarjeta de memoria.
• Si inserta una tarjeta de memoria con la videocámara con memoria
encendida, un mensaje emergente le pedirá que seleccione el tipo de
almacenamiento.
• Si no hay insertada ninguna tarjeta de memoria, sólo estará disponible la
memoria incorporada.
INSERCIÓN / EXPULSIÓN DE UNA TARJETA DE MEMORIA
Inserting a memory card
Inserción de una tarjeta de memoria
1. Turn the memory camcorder off.
. Slide the memory card slot cover to the right to
open the cover.
3. Insert the memory card into the memory card slot
until it softly clicks in the direction of the arrow
shown in the figure.
4. Close the cover.
1. Apague la videocámara con memoria.
. Deslice la tapa de la tarjeta de memoria a la derecha
para abrir la tapa.
3. Inserte una tarjeta de memoria en su ranura en la
dirección de la flecha hasta que emita un clic suave
como se indica en la figura.
4. Cierre la tapa.
Expulsión de una tarjeta de memoria
Ejecting a memory card
1. Turn the memory camcorder off.
. Slide the memory card slot cover to the right to
open the cover.
3. Slightly push the memory card inwards to pop it out.
4. Pull the memory card out of the memory card slot
and close the cover.
33_English
label pasting portion
1. Apague la videocámara con memoria.
. Deslice la tapa de la tarjeta de memoria a la derecha
para abrir la tapa.
3. Presione ligeramente la tarjeta de memoria hacia
dentro para que salte.
4. Saque la tarjeta de memoria de su ranura y cierre la tapa.
Spanish_33
about the storage media
SELECTING THE SUITABLE MEMORY CARD
información sobre los
soportes de almacenamiento
SELECCIÓN DE LA TARJETA DE MEMORIA ADECUADA
A memory card is a compact portable storage media with a data capacity that exceeds the
capacity of a floppy disk.
Una tarjeta de memoria es un soporte de almacenamiento portátil con una capacidad de datos que
• You can use a SDHC memory card and MMC plus.
supera la capacidad de un disquete.
(If needed, buy a memory card separately.).
Usable Memory Cards
• Puede utilizar una tarjeta de memoria SDHC y MMC plus.
- You can also use a SD memory card, but recommended that you
(128MB~8GB)
(Si lo necesita, compre una tarjeta de memoria aparte.)
use a
- También puede utilizar una tarjeta de memoria SD, pero se recomienda
SDHC memory card and MMC plus with your memory camcorder.
utilizar una tarjeta de memoria SDHC y MMC plus con la videocámara con
( SD memory cards over 4GB are not compatible with this memory
memoria. (Las tarjetas de memoria SD con más de 4 GB no son compatibles
camcorder.)
con esta videocámara con memoria.)
• On this memory camcorder, you can use memory cards of the
<MMCplus>
• En esta videocámara con memoria, puede utilizar las tarjetas de
Terminals
following capacity: 18MB ~ 8GB
memoria con la capacidad que se indica más adelante:soporte de
• Compatible recording media
grabación compatible de 18 MB ~ 8 GB
- The following recording media have been guaranteed to work with
- Los siguientes soportes de grabación funcionan con esta videocámara
this memory camcorder. Others are not guaranteed to work, so buy
con memoria con total garantía. Debe tener precaución al comprar otros
such products with caution.
Protection
soportes que no estén garantizados.
<SDHC memory card>
SDHC or SD memory cards: Panasonic, SanDisk, and TOSHIBA,
tab
Tarjetas de memoria SDHC o SD:de Panasonic, SanDisk y TOSHIBA,
MMC plus: Transcend
MMC plus:de Transcend
• If other media are used, they may fail to record data correctly,
• Si se utilizan otros soportes, es posible que no graben correctamente o es posible que se
or they may lose data that has already been recorded.
pierdan datos grabados.
• For movie recording, use a memory card that support faster wirte speed
(at least 1.25 MB/sec).
• Para grabación de video, utilice una tarjeta de memoria que admita una velocidad de escritura
más alta (de al menos 1,25 MB)
SDHC (Secure Digital High Capacity) Memory Card
Tarjeta de memoria SDHC (Secure Digital High Capacity)
• SDHC memory card complies with new SD specification Ver..00. This latest
La tarjeta de memoria SDHC cumple con la nueva especificación SD Ver..00. Esta
•
specification was established by SD Card Association to realize data capacity over
reciente especificación la estableció SD Card Association para poder adoptar una
GB.
capacidad de datos superior a GB.
• The SDHC memory card supports a mechanical write protection switch. Setting the
• La tarjeta de memoria SDHC cuenta con un conmutador mecánico de protección contra
switch prevents accidental erasure of files recorded on the SDHC memory card. To
escritura. Ajustar el conmutador evita el borrado accidental de archivos grabados en la tarjeta de
enable writing, move the switch up to the direction of terminals. To set write protection,
memoria SDHC. Para permitir la escritura, mueva el interruptor hacia arriba en la dirección de los
move the switch down.
terminales. Para establecer la protección contra escritura, mueva el interruptor hacia abajo.
• Due to change In File Allocation System and physical specifications, SDHC memory
card can not be used with current SD enabled host devices. SDHC memory card can
• Debido a la modificación del sistema de asignación de archivos y de las especificaciones
be used with only SDHC enables host devices which carry SDHC logo on devices its
técnicas, la tarjeta de memoria SDHC no se puede utilizar con los dispositivos actuales de alojamiento compatibles con SD. La tarjeta de memoria SDHC sólo puede utilizarse con dispositivos
self or on its operation manual.
de alojamiento compatibles con SDHC que lleven el logotipo SDHC sobre ellos o en su manual
MMCplus (Multi Media Card plus)
de instrucciones.
MMCplus (Multi Media Card plus)
• In the case of MMCplus, they have no protection tab so please use the protect function
• En el caso de MMCplus, no cuentan con ninguna lengüeta de protección; por tanto, utilice la
in the menu.
función de protección del menú.
Common cautions for memory card
Precauciones comunes con la tarjeta de memoria
• Es posible que no puedan recuperarse los datos dañados. Se recomienda hacer una copia de
• Damaged data may not be recovered. It is recommended you make a back-up of
seguridad de los datos importantes en el disco duro de la PC.
important data separately on the hard disk of your PC.
• Turning the power off or removing a memory card during operation such as formatting,
• Apagar la unidad o retirar la tarjeta de memoria durante operaciones como el formateo, la
deleting, recording, and playback may cause the data loss.
eliminación, la grabación y la reproducción puede causar la pérdida de datos.
• After you modify the name of a file or folder stored in the memory card using your PC,
• Después de modificar el nombre de un archivo o carpeta almacenados en la tarjeta de memoria
your camcorder may not recognize the modified file.
utilizando la PC, es posible que la videocámara no pueda reconocer el archivo modificado.
34_English
Spanish_34
Handling a memory card
Manipulación de una tarjeta de memoria
It is recommended that you power off before inserting or removing the memory card
to avoid data loss. It is not guaranteed that you can use a memory card formatted by
other devices.
Be sure to format your memory card using this camcorder.
• You have to format newly-purchased memory cards, memory cards with data
that your camcorder cannot recognize or are saved by other devices. Note that
formatting erases all data on the memory card.
• If you cannot use a memory card that has been used with another device, format
it with your memory camcorder. Note that formatting erases all information on the
memory card.
• A memory card has a certain life span. If you cannot record new data, you have
to purchase a new memory card.
• A memory card is a precision electronic media. Do not bend it, drop it, or cause a
strong Do not use or store in a place that has high temperature and humidity or
dusty environment.
• Do not place foreign substances on the memory card terminals. Use a soft dry
cloth to clean the terminals if required.
• Do not paste anything other than exclusive label on label pasting portion.
• Be careful to keep memory card out of the reach of children, who might swallow it.
Se recomienda apagar antes de insertar o extraer la tarjeta de memoria para evitar
la pérdida de datos. No se garantiza que pueda utilizar una tarjeta de memoria
formateada en otros dispositivos.
Asegúrese de formatear la tarjeta de memoria utilizando la videocámara con memoria.
• Tiene que formatear las tarjetas de memoria recién adquiridas; las tarjetas de
memoria con datos que la videocámara con memoria no pueda reconocer o las
tarjetas guardadas mediante otros dispositivos. Recuerde que el formateo borra
todos los datos de la tarjeta de memoria.
• Si no puede utilizar una tarjeta de memoria que se haya utiizado con otro dispositivo, formatéela con su videocámara con memoria. Recuerde que el formateo borra
toda la información de la tarjeta de memoria.
• Una tarjeta de memoria tiene una vida de uso concreta. Si no puede grabar nuevos
datos, tendrá que adquirir una nueva tarjeta de memoria.
• Una tarjeta de memoria es un soporte electrónico de precisión. No la doble, no la
deje caer ni la someta a impactos fuertes.
• No la utilice ni la guarde en un lugar sometido a altas temperaturas, humedad o polvo.
• No permita el contacto de sustancias extrañas en los terminales de la tarjeta de
memoria. Utilice un paño seco suave para limpiar la superficie.
• No pegue nada que no sea su etiqueta específica en la parte de pegado de la etiqueta.
• Mantenga la tarjeta de memoria fuera del alcance de los niños, ya que existe
riesgo de que pudieran ingerirla.
The memory camcorder supports SDHC and MMCplus
memory cards for data storage.
• The data storage speed may differ, according to the manufacturer and
•
•
production system.
- SLC(single level cell) system: faster write speed enabled.
- MLC(multi level cell) system: only lower write speed supported.
The user using a lower write speed memory card for recording a movie may
have difficulties storing the movie on the memory card. You can even lose
your movie data during the recording.
In an attempt to preserve any bit of the recorded movie, the memory
camcorder forcibly stores the movie on the memory card and displays a
warning: "Low speed card. Please record at lower quality."
To facilitate movie recording, you are recommended to
use a memory card that supports faster write speed.
• If you are unavoidably using a low speed memory card, it is desirable to
lower the recording quality by one level "Fine" → "Normal" or decrease the
movie size to 352P to reduce the data size.
• You can have three quality options to record a movie with the memory
•
•
camcorder : "Super Fine", "Fine", "Normal"
You can record the same scene in three quality levels of "Super Fine",
"Fine", "Normal".
However, the better the quality is, the bigger the data size is.
For optimal performance of the memory camcorder, ensure that you
purchase a fast speed memory card.
35_English
La videocámara con memoria admite tarjetas de memoria SDHC
y MMCplus para almacenamiento de datos.
• La velocidad de almacenamiento de datos puede diferir según el fabricante y el sistema de
producción.
• - Sistema SLC (célula de un solo nivel): permite una mayor velocidad de escritura.
• - Sistema MLC (célula multinivel): sólo permite una velocidad de escritura más baja.
• El usuario que utiliza una tarjeta de memoria con una velocidad de escritura menor para
grabar una película puede que tenga dificultades al almacenar la película en la tarjeta de
memoria. Puede incluso perder los datos de la película durante la grabación.
• En un intento por conservar parte de la película grabada, la videocámara con memoria
almacena forzosamente la película en la tarjeta de memoria y muestra un aviso: “Low speed
card. Please record in low quality” (Tarjeta de velocidad baja. Grabe con calidad más baja.)
Para facilitar la grabación de la película, se recomienda utilizar una
tarjeta de memoria que admita una mayor velocidad de escritura.
• Si inevitablemente tiene que utilizar una tarjeta de memoria de baja velocidad, sería dese-
able reducir la calidad de la grabación en un nivel “Fine” → “Normal” o disminuir el tamaño
de la película a 352P para reducir el tamaño de los datos.
• Tiene tres opciones de calidad para grabar una película con la videocámara con memoria:
“Super Fine”, “Fine”, “Normal”
• Puede grabar la misma escena en tres niveles de calidad: “Super Fine”, “Fine”, “Normal”.
Sin embargo, cuanto mejor sea la calidad, mayor será el tamaño de los datos.
• Para un rendimiento óptimo de la videocámara con memoria, asegúrese de que adquiere
una tarjeta de memoria de velocidad rápida.
Spanish_35
about the storage media
RECORDABLE TIME AND CAPACITY
TIEMPO Y CAPACIDAD DE GRABACIÓN
Recordable time for movie images
Media
built-in
memory
Capacity
35x40p
(40p)
Super Fine
720x480i(480i)
/720x480p(480p)
35x40p
(40p)
Fine
720x480i(480i)
/720x480p(480p)
35x40p
(40p)
Normal
720x480i(480i)
/720x480p(480p)
4GB
approx.
170min.
approx.
112min.
approx.
256min.
approx.
170min.
approx.
512min.
approx.
256min.
Tiempo grabable para imágenes de video
SDHC/
MMCplus
1GB
approx.
43min.
approx.
28min.
approx.
64min.
approx.
43min.
approx.
128min.
approx.
64min.
2GB
approx.
85min.
approx.
56min.
approx.
128min.
approx.
85min.
approx.
256min.
approx.
128min.
4GB
approx.
170min.
approx.
112min.
approx.
256min.
approx.
170min.
approx.
512min.
approx.
256min.
1GB=1,000,000,000bytes : actual formatted capacity may be less as
the internal firmware uses a portion of the memory.
• 240p, 480i/480p refer to resolutions the camcorder will record at.
• The above figures are measured under Samsung’s standard
recording test conditions and may differ depending on the test or
use condition.
• The memory camcorder provides three quality options for movie
recordings:
- "Super Fine", "Fine", "Normal". For a same scene, higher
quality setting will retain the better image with bigger data size in
the order of "Super Fine", "Fine", "Normal".
• The compression rate increases while lowering the quality
(in the order of "Fine", "Normal").
The higher the compression rate is, the picture quality is more
deteriorated but the recording time will be increased.
• The compression rate automatically adjusts to the recording
image, and the recording time may vary accordingly.
36_English
información sobre los soportes
de almacenamiento
Soporte
Memoria
incorporada
Capacidad
35x40p
(40p)
Super Fine
720x480i(480i)
/720x480p(480p)
35x40p
(40p)
Fine
720x480i(480i)
/720x480p(480p)
35x40p
(40p)
Normal
720x480i(480i)
/720x480p(480p)
4 GB
aprox.
170 min.
aprox.
112 min.
aprox.
256 min.
aprox.
170 min.
aprox.
512 min.
aprox.
256 min.
SDHC/
MMCplus
1 GB
aprox.
43 min.
aprox.
28 min.
aprox.
64 min.
aprox.
43 min.
aprox.
128 min.
aprox.
64 min.
2 GB
aprox.
85 min.
aprox.
56 min.
aprox.
128 min.
aprox.
85 min.
aprox.
256 min.
aprox.
128 min.
4 GB
aprox.
170 min.
aprox.
112 min.
aprox.
256 min.
aprox.
170 min.
aprox.
512 min.
aprox.
256 min.
1 GB = 1.000.000.000 de bytes: la capacidad real formateada puede ser inferior ya que
el firmware interno utiliza una parte de la memoria.
• 240p, 480i/480p se refiere a las resoluciones en la que puede grabar la videocámara.
• Las cifras anteriores se han medido en condiciones de prueba de grabación
estándar de Samsung y pueden diferir dependiendo de la prueba o de las
condiciones de uso.
• La videocámara de memoria proporciona tres opciones de calidad para
grabaciones de video:
- "Super Fine", "Fine", "Normal". Para una escena idéntica, el ajuste de una
calidad más alta logrará una imagen de mayor calidad con un tamaño de
datos también mayor en el orden "Super Fine", "Fine", "Normal".
• El índice de compresión aumenta al mismo tiempo que desciende la calidad
(en el orden “Fine”, “Normal”). Cuanto más alta sea el índice de compresión,
más deteriorada será la calidad de la imagen, pero el tiempo de grabación se
verá aumentado.
• El índice de compresión se ajusta automáticamente para la imagen de la
grabación, y el tiempo de grabación podría variar en consecuencia.
Spanish_36
• You can use a SDHC or MMC plus memory card on your
memory camcorder.
Some cards may not compatible depending on the memory
card manufacturer and memory card type.
• Proper operation is not guaranteed for those memory cards
that are not formatted by this memory camcorder.
Perform the formatting directly on the memory camcorder for
formatting.
• To facilitate the movie recording, it is recommended to use a
memory card that supports faster write speed.
(Write speed: 1.25 MB / sec or higher) If you use a low writespeed memory card, recording may stop with a message of
"Low speed card. Please record at lower quality".
If you inevitably use a low speed card, select a lower quality
("Fine" → "Normal") or set the movie size to 35p.
• It supports proper operation with up to 8GB of memory card for
movie recording / playback.
Memory cards of bigger than 8GB in capacity may not work
properly.
• The memory card that is used to store a movie can cause
unwritable area, which may result in reduced recording time
and free memory space.
• The maximum size of a movie (MPEG4) file that can be
recorded at one time is 2GB.
• You can store up to 5000 movie images on a memory card.
• The movie image files recorded by other equipment are not
playable on this memory camcorder.
• Built-in memory used in the SC-MX10A/MX10AU only.
To check capacity that remains memory
• Press the
37_English
button. ➥page 16
• En la videocámara con memoria puede utilizar una tarjeta
de memoria SDHC o MMC plus.
Es posible que algunas tarjetas no sean compatibles dependiendo del fabricante y del tipo de tarjeta de memoria .
• No se garantiza el funcionamiento correcto de las tarjetas de
memoria que no se hayan formateado con esta videocámara
con memoria.
Formatee directamente en la videocámara con memoria.
• Para facilitar la grabación de video, se recomienda utilizar
una tarjeta de memoria que admita una mayor velocidad de
escritura. (Velocidad de escritura: 1,25 MB / seg. o superior) Si
utiliza una tarjeta de memoria de velocidad de escritura baja,
es posible que se detenga la grabación y aparezca el mensaje
"Low speed card. Please record at lower quality".
Si no tiene más remedio que utilizar una tarjeta de baja velocidad, seleccione una calidad inferior ("Fine" → "Normal") o
ajuste el tamaño de video en 35p.
• Permite un funcionamiento correcto con tarjetas de memoria
de hasta 8GB para grabación / reproducción de video.
Es posible que no funcionen correctamente las tarjetas de
memoria con una capacidad superior a 8GB.
• La tarjeta de memoria que se utiliza para almacenar una
película puede crear un área de no escritura, que puede
reducir el tiempo de grabación y el espacio de memoria disponible.
• El tamaño máximo de un archivo de video (MPEG4) que se
puede grabar de una vez es de 2GB.
• En una tarjeta de memoria puede almacenar hasta 5000 imágenes de video.
• Los archivos de imágenes de video grabados en otro equipo
no se puden reproducir en esta videocámara con memoria.
• Memoria incorporada utilizada sólo en los modelos SC-MX10A/
MX10AU.
Para comprobar la capacidad restante de la memoria
• Presione el botón
. ➥página 16
Spanish_37
recording
grabación
A continuación se describen los procedimientos básicos para grabar
imágenes de video.
Basic procedures to record movie images described below.
RECORDING MOVIE IMAGES
GRABACIÓN DE IMÁGENES DE VIDEO
• Memory camcorder provides two Recording start/stop buttons.
One is on the rear side of the camcorder and the other one is on the
LCD panel. Select the Recording start/ stop button according to
the use.
1. Turn the memory camcorder on.
• Connect a power source to the memory
camcorder.➥page 12,18
(A battery pack or an AC power adapter)
• Slide the POWER switch downward to turn on
the power ➥page 21
• Set the appropriate storage media.
(SC-MX10A/MX10AU only) (If you
want to record on a memory card, insert the
memory card.)
. Check the subject on the LCD screen.
3. Press the Recording start/stop button.
• The recording indicator ( ) will display and
recording will start.
• Pressing the Recording start/stop button
again during recording will set the memory
camcorder to recording pause mode.
4. When recording is finished, turn the memory
camcorder off.
Parar grabación. Uno se encuentra en la parte trasera de la
videocámara y el otro en el panel LCD. Seleccione el botón Iniciar/
Parar grabación según el uso que haga.
00:00:00/00:58:00
120
MIN
Recording...
STBY 00:00:30/00:57:30
• Setting the display option of "16:9 Wide" does
not imply wide angle (wide aspect ratio) recording. Camera
output, recording and playback signal is formatted to 4:3 aspect
ratio.
• Please note that all movies recorded with this memory camcorder
have 4:3 aspect ratio regardless of the display option (16:9 Wide/4:3).
When it is set to "16:9 Wide", the displayed picture may appear
wider or rougher than that of 4:3 screen aspect ratio. ➥pages 55,61
38_English
• La videocámara con memoria proporciona dos botones Iniciar/
120
MIN
1. Encienda la videocámara con memoria.
• Conecte la fuente de alimentación a la
videocámara con memoria.➥página 12,18 (una
batería o un adaptador de alimentación de CA)
• Deslice hacia abajo el interruptor POWER para
encender. ➥página 21
• Establezca el soporte de almacenamiento
apropiado. (Sólo SC-MX10A/MX10AU)
(Si desea grabar en una tarjeta de memoria,
inserte la tarjeta de memoria.)
2. Encuadre el sujeto en la pantalla LCD.
3. Presione el botón Iniciar/Parar grabación.
• Aparecerá el indicador de grabación ( ) y se
iniciará la grabación.
• Si se presiona de nuevo el botón Iniciar/Parar
grabación durante la grabación, se fijará la
videocámara con memoria en el modo de pausa
de grabación.
4. Una vez finalizada la grabación, apague la
videocámara con memoria.
• Ajustar la opción de visualización de "16:9 Wide" no
implica una grabación con un ángulo amplio (relación
de altura/anchura panorámica). La señal de salida de
cámara, grabación y reproducción tiene el formato de
una relación de altura/anchura de 4:3.
• Tenga en cuenta que todos los videos grabados con la videocámara con
memoria tienen una relación de altura/anchura de 4:3 independientemente
de la opción de visualización (16:9 panorámica/4:3). Cuando se define en
“16:9 Wide”, la imagen visualizada puede aparecer más ancha o menos
fina que la de la relación de altura/anchura de 4:3. ➥páginas 55,61
Spanish_38
• Eject the battery pack when you have finished recording to prevent
unnecessary battery power consumption.
• For on-screen information display. ➥page 22
• For approximate recording time. ➥page 36
• For various functions available when you record movie images.
➥page 45~56
• If focusing is difficult, use the manual focus function.➥page 53
• During recording, some button operations are unavailable.
(MENU button, etc.)
• Sound is recorded from the internal stereo microphone on the front
of the memory camcorder.
Take care that this microphone is not blocked.
• Before recording an important movie, make sure to test on the
recording function to check if there is any problem with the audio
and video recording.
• While recording, don't insert or eject the memory card as it may
record noise. (SC-MX10A/MX10AU only)
• Do not operate the power switch or remove the memory card while
accessing the storage media.
Doing so may damage the storage media or the data on storage
media.
• You can not use a locked memory card for recording. You will see a
message saying recording is disabled due to the lock.
• If you press the Recording start/stop button while a menu operation
is in process, the product returns to recording pause mode.
39_English
• Expulse la batería al terminar de grabar para evitar un consumo
innecesario de la batería.
• Para obtener información en pantalla. ➥página 22
• Para ver el tiempo de grabación aproximado. ➥página 36
• Para las diferentes funciones disponibles cuando graba imágenes
de video. ➥página 45~56
• Si resulta difícil enfocar, utilice la función de enfoque manual.
➥página 53
• Durante la grabación, algunas de las operaciones de los botones
no están disponibles. (botón MENU, etc.)
• El sonido se graba con el micrófono estéreo interno situado en la
parte frontal de la videocámara con memoria.
Tenga cuidado de no bloquear este micrófono.
• Antes de grabar un video importante, asegúrese de probar si existe
algún problema con el sonido o con la grabación de video.
• Mientras graba, no inserte ni expulse la tarjeta de memoria ya que
podría producir ruido en la grabación. (Sólo SC-MX10A/MX10AU)
• No accione el interruptor de encendido ni retire la tarjeta de memoria
mientras accede al soporte de almacenamiento.
Si lo hace, podrían producirse daños en el soporte de almacenaminto
o en sus datos.
• No puede utilizar una tarjeta de memoria bloqueada para grabar.
Verá un mensaje que indica que la grabación está desactivada
debido a que está bloqueada.
• Si presiona el botón Iniciar/parar grabación mientras se encuentra
en curso la operación de un menú, la unidad vuelve al modo de
pausa de grabación.
Spanish_39
recording
grabación
RECORDING WITH EASE FOR BEGINNERS
(EASY. Q MODE)
GRABACIÓN SENCILLA PARA PRINCIPIANTES (MODO EASY. Q)
• With the EASY. Q function, most of the memory camcorder settings are
automatically adjusted, which frees you from detailed
adjustments.
1.
.
3.
4.
Slide the POWER switch downward to turn on the
memory camcorder.
Press the MODE button to set Movie Record mode
(
). ➥page 21
Press the EASY. Q button.
• When you press the EASY. Q button, all functions
on the memory camcorder will be set to off and the
recording settings will be set to the following basic
modes. (Scene Mode(AE), White Balance, Auto
Exposure, Anti-Shake(EIS), Digital Effect, Auto
Focus and Back Light)
• The EASY. Q and Anti-Shake(EIS) (
)
indicator appear on the screen at the same time.
To record movie images, press the Recording start/
stop button.
• Recording will begin using the basic automatic
settings.
STBY
• Con la función EASY. Q, la mayoría de los ajustes de la videocámara con
memoria se ajustan automáticamente, lo que le libera de tener que realizar
ajustes detallados.
1. Deslice hacia abajo el interruptor POWER para encender la
videocámara con memoria.
. Presione el botón MODE para establecer el modo Grabar
video ( ). ➥página 21
3. Presione el botón EASY. Q.
• Cuando presione el botón EASY. Q, todas las funciones
de la videocámara con memoria se desactivarán y los
ajustes de grabación se ajustarán en los siguientes
modos básicos.
00:00:00/00:58:00
(Scene Mode(AE), White Balance, Auto Exposure,
Anti-Shake(EIS), Digital Effect, Auto Focus y Back Light)
• Los indicadores de EASY. Q y Anti-temblores (EIS)
(
) aparecen en pantalla al mismo tiempo.
4. Para grabar imágenes de video, presione el botón Iniciar/
Parar
grabación.
EASY. Q
• La grabación empieza con los ajustes automáticos
básicos.
Para cancelar el modo EASY. Q
Pulse de nuevo el botón EASY. Q.
• Los indicadores de EASY. Q y Anti-temblores (EIS) (
To cancel EASY. Q mode
Press the EASY. Q button again.
• The indicator EASY. Q and Anti-Shake(EIS) (
the screen.
120
MIN
) indicator disappear from
Unavailable buttons during operation
• The following button and menu operations are unavailable because the
•
•
•
items are automatically set.
And the corresponding message( " Release the EASY.Q ") may appear
if unavailable operations are attempted.
- MENU button
- OK button
- etc.
Cancel EASY. Q function if you want to add any effect or settings to the images.
The EASY. Q mode settings are released when the memory camcorder is turned off.
EASY. Q mode automatically sets the "Anti-Shake(EIS)" to "On" while
using EASY. Q.
40_English
) desaparecen de la pantalla.
Botones no disponibles durante la operación
• El siguiente botón y opciones de menú no están disponibles porque
•
•
•
se definen automáticamente.
Y es posible que aparezca el mensaje correspondiente ("Release the
EASY.Q") si se intentan operaciones que no están disponibles.
- Botón MENU
- Botón OK
- etc.
Cancele la función EASY. Q si desea añadir algún efecto o ajuste a las
imágenes.
Los ajustes del modo EASY. Q se liberan una vez que se apaga la
videocámara con memoria.
El modo EASY. Q ajusta automáticamente “Anti-Shake(EIS)” en “On”
mientras se utiliza EASY. Q.
Spanish_40
ZOOMING
ZOOM
Use the zoom function for close-up or wide-angle recording.
This memory camcorder allows you to record using optical 34x power
zoom and 1200x digital zoom.
Utilice la función de zoom para cerrar o abrir el ángulo de grabación.
Esta videocámara con memoria permite grabar utilizando un potente
zoom óptico 34x y un zoom digital 1200x.
• You can zoom with the Zoom lever or the zoom
• Puede utilizar el zoom con la palanca de zoom o el
(W/T) button on the LCD panel.
• The further you slide the Zoom lever, the quicker
the zoom action.
botón de zoom(W/T) del panel LCD.
• Cuanto más deslice la palanca de Zoom, más
rápida se realizará la acción del zoom.
To zoom in
Para acercar el zoom
• Slide the Zoom lever towards T (telephoto).
To zoom out
• Slide the Zoom lever towards W (wide-angle).
• Deslice la palanca de zoom hacia adelante T (telefoto).
Para alejar el zoom
W:Recording wide area
(wide-angle)
T: Recording enlarged
image (telephoto)
• Deslice la palanca de zoom hacia W
(ángulo panorámico).
• Zoom magnification over 34x is done through
digital image processing, and is therefore called
digital zoom. Digital zooming is possible up to
1200x. Set "Digital Zoom" to "On". ➥page 56
• Be sure to keep your finger on the Zoom lever.
If you move your finger off the zoom lever, the
operation sound of the Zoom lever may be also
recorded.
• You can also zoom with the Zoom (W/T) button on
the LCD panel.
• The minimum possible distance between
camcorder and subject while maintaining sharp
focus is about 1 cm (about 0.39 inch) for wide
angle and 50 cm (about 19.68 inch) for telephoto.
• Focusing may become unstable during zooming.
In this case, set the zoom before recording and
lock the focus by using the manual focus, t hen
zoom in or out during recording. ➥page 53
• Optical zoom preserves the movie quality, but
during digital zoom the quality of image may suffer.
41_English
W: Wide angle
STBY 00:00:00/00:58:00
T: Telephoto
120
MIN
• La ampliación del zoom por encima de 34x se
realiza a través de un procesamiento de imágenes
digital y por ello se denomina zoom digital. El zoom
digital puede llegar hasta 1200x.
Defina “Digital Zoom” en “On”. ➥página 56
• Asegúrese de mantener el dedo en la palanca del zoom.
Si aleja el dedo de la palanca del zoom, es posible que
también se grabe el sonido de la palanca del zoom.
• También puede utilizar el zoom con el botón de zoom (W/T)
del panel LCD.
• La distancia mínima posible entre la videocámara y el objeto con un enfoque nítido es de aproximadamente 1 cm
para el ángulo panorámico y de 50 cm para el teleobjetivo.
• Es posible que el enfoque sea inestable mientras se utiliza
el zoom. En este caso, defina el zoom antes de grabar
y bloquee el enfoque utilizando el enfoque manual y, a
continuación utilice el zoom en la grabación. ➥página 53
• El zoom óptico mantiene la calidad del video, pero con el
zoom digital es posible que la calidad de la imagen sufra.
Spanish_41
playback
reproducción
MOVIE IMAGES PLAYBACK
REPRODUCCIÓN DE IMÁGENES DE VIDEO
You can find a desired movie image quickly using thumbnail index
views.
Puede buscar rápidamente la imagen de video que desee utilizando la
vista del índice de imágenes en miniatura.
1. Turn the memory camcorder on.
• Slide the POWER switch downward to turn on
the power. ➥page 21
• Set the appropriate storage media. ➥page 32
(SC-MX10A/MX10AU only)
(If you want to record on a memory card, insert
the memory card.)
. Open the LCD screen.
• Adjust brightness or contrast of the LCD
screen. ➥page 65
3. Press the MODE button.
• Switches to Movie Play mode.
• The recorded movie images are displayed in
thumbnail index view.
4. Use the Control button ( / / / ) to select the
desired movie images, and the press the OK button.
- Shortcut menu for playback will be displayed
for a while.
• Each time you press the OK button, play or
pause is toggled.
• If you move the zoom lever during playback,
the camcorder switches to thumbnail index view.
100-0001
Move
OK
4_English
3. Presione el botón MODE.
• Cambia al modo Reproducir video.
• Las imágenes de video grabadas aparecen en
la vista del índice de imágenes en miniatura.
Play
00:00:00/00:23:00
• Please note that all movies recorded with this memory camcorder
have 4:3 aspect ratio regardless of the display option (16:9 Wide/4:3).
When it is set to "16:9 Wide", the displayed picture may appear
wider or rougher than that of 4:3 screen aspect ratio. ➥pages 55,61
10
MIN
1. Encienda la videocámara con memoria.
• Deslice hacia abajo el interruptor POWER para
encender.➥página 21
• Establezca el medio de almacenamiento
apropiado.➥página 32
(Sólo SC-MX10A/MX10AU)
(Para grabar en una tarjeta de memoria,
inserte la tarjeta de memoria.)
. Abra la pantalla LCD.
• Ajuste el brillo o el contraste de la pantalla LCD.
➥página 65
120
MIN
100-0001
4. Utilice el botón de Control ( / / / ) para
seleccionar las imágenes de video que desee y,
a continuación, presione el botón OK.
- Aparecerá durante unos instantes el menú de
acceso directo de reproducción.
• Cada vez que presione el botón OK, se reproduce
o se hace una pausa alternativamente.
• Si mueve la palanca de zoom durante la
reproducción, la videocámara cambia a la vista
del índice de imágenes en miniatura.
• Tenga en cuenta que todos los videos grabados con la
videocámara con memoria tienen una relación de altura/anchura
de 4:3 independientemente de la opción de visualización (16:9
panorámica/4:3). Cuando se define en “16:9 Wide”, la imagen
visualizada puede aparecer más ancha o menos fina que la de la
relación de altura/anchura de 4:3. ➥páginas 55,61
Spanish_4
• During playback, pressing the Recording start/stop button will
move to Movie Record mode.
• If there is no file stored to view, the message "Empty" appears.
• When the multi-AV cable is connected to the memory camcorder,
the built-in speaker will automatically turn off.
• Depending on the amount of data to be played back, it may take
some time for the playback images to appear.
• Image data edited on PC or certain types of image data may not
be displayed on this memory camcorder.
• Image data recorded on another camcorder may not be playable
on this memory camcorder.
• You can also play movie images on a TV screen by connecting the
memory camcorder to a TV. ➥page 77
• A video codec is required to play the recorded movie images on
a PC. Install the software in the provided software CD to have the
CODEC automatically installed in the system.
If you do not have the software CD, search the product model
name in the download center on the Samsung Electronics home
page (www.samsung.com) to get the CODEC installation file.
➥page 71
• For various functions available during playback, see “playback
options”. ➥pages 57~61
Adjusting the volume
00:00:20/00:10:30
• Durante la reproducción, si presiona el botón Iniciar/Parar
grabación irá al modo Grabar video.
• Si no hay ningún archivo guardado que ver, aparece el mensaje
“Empty”.
• Cuando se conecta el cable multi-AV a la videocámara con
memoria, se apaga automáticamente el parlante incorporado.
• Dependiendo de la cantidad de datos que se vaya a reproducir,
es posible que las imágene que se van a reproducir tarden
tiempo en aparecer.
• Es posible que no aparezcan en la videocámara con memoria
datos de imágenes editados en la PC o algunos tipos de datos
de imágenes.
• Es posible que los datos de imágenes grabados en otra
videocámara no puedan reproducirse en esta videocámara
con memoria.
• También puede reproducir las imágenes de video en una pantalla
de TV conectando la videocámara con memoria a un televisor.
➥página 77
• Se necesita un códed de video para reproducir imágenes de video
en una PC. Instale el software que se facilita en el CD de software
para que el CÓDEC se instale automáticamente en el sistema. Si no
tiene el CD, busque el nombre del modelo del producto en el Centro
de descargas de la página de inicio de Samsung Electronics para
obtener el archivo de instalación del códec. ➥página 71
• Para las diversas funciones disponibles durante la reproducción,
consulte “opciones de reproducción”. ➥ páginas 57~61
120
MIN
Ajuste del volumen
• You can hear the recorded sound from the built-in
• Puede oír el sonido grabado con el parlante
• You can control the volume by using the Control
• Puede controlar el volumen utilizando el botón de
speaker.
button (
incorporado.
Control (
).
• The level can be adjusted anywhere between 0
and 10. (If you close the LCD screen while playing,
you will not hear the sound from the speaker.)
ZOOM
100-0001
List
00:00:00/00:23:00
120
MIN
Press the Control button (
) to increase or
decrease the volume.
- The volume bar disappears after 1~2 seconds.
100-0001
43_English
/ ).
• El nivel puede ajustarse entre 0 y 10.
(Si cierra la pantalla LCD mientras reproduce, no
escuchará ningún sonido en el parlante.)
Presione el botón de Control ( / ) para subir o
bajar el volumen.
- La barra de volumen desaparece después de 1 ó 2
segundos.
Spanish_43
playback
reproducción
Various Playback Operations
Diversas operaciones de reproducción
Still playback (pause)
• Press the OK button during playback.
- To resume normal playback, press the OK button
again.
Reproducción interrumpida (pausa)
• Presione el botón OK durante la reproducción.
- Para reanudar la reproducción normal, presione
de nuevo el botón OK.
Search playback or movie
Búsqueda de reproducción o video
• During normal playback, press and hold the Control
• Durante la reproducción normal, mantenga
button ( ) for forward search, or to left reverse search.
pulsado el botón de Control ( ) para buscar
OK
• Moving the Control button to (
) repeatedly
adelante o a la izquierda para buscar hacia atrás.
increases the search speed for each direction.
• Si mueve repetidamente el botón de Control a (
)
- RPS(Reverse Playback Search) rate:
aumenta la velocidad de búsqueda en cada dirección.
00:00:20/00:10:30
x2→x4→x8→x16→x32→x64
- Velocidad RPS (Búsqueda de reproducción
- FPS(Forward Playback Search) rate:
inversa): x2→x4→x8→x16→x32→x64
x2→x4→x8→x16→x32→x64
- Velocidad FPS (Búsqueda de reproducción
• To resume normal playback, press the OK button.
adelante): x2→x4→x8→x16→x32→x64
• Para reanudar la reproducción normal, presione el
Skip playback of movie
100-0001
List
botón de OK.
• During playback, press the Control button ( )
Saltar reproducción de video
to locate the start point of next file. Pressing the
00:00:00/00:23:00
• Durante la reproducción, presione el botón de Control
Control button ( ) repeatedly skips files in forward
( ) para localizar el punto inicial del siguiente archivo.
direction.
Si presiona el botón de Control ( ) de forma repetida
• During playback, press the Control button ( ) to
saltará archivos hacia adelante.
locate the start point of the current file, pressing the
•
Durante la reproducción, presione el botón de Control
Control button ( ) repeatedly skips files in reverse
( ) para localizar el punto inicial del archivo actual; si
direction.
100-0001
se presiona el botón de Control ( ) repetidamente,
• Press the Control button ( ) within 3 seconds from
se saltan los archivos en la dirección inversa.
the start point,
• Presione el botón de Control ( ) durante 3 segundos desde el
it skips to the first image of the previous file.
punto inicial para saltar a la primera imagen del archivo anterior.
Frame-by-frame playback
Reproducción fotograma a fotograma
• While playback is paused, press the Control button ( ).
• Con la reproducción en pausa, presione el botón de Control ( ).
- Pressing the Control button ( ) repeatedly advances the still
- Si presiona el botón de Control ( ) de forma repetida hará
picture frame by frame.
avanzar la imagen fotograma a fotograma.
- While playback is paused, press and hold the Control button to
- Con la reproducción en pausa, mantenga presionado el botón de
( ), it plays back frame by frame just like slow motion playback.
Control en ( ) y se reproducirá fotograma a fotograma como si
- To resume normal playback, press the OK button.
fuera una reproducción a cámara lenta.
- Para reanudar la reproducción normal, presione el botón de OK.
120
MIN
ZOOM
120
MIN
44_English
Spanish_44
recording options
opciones de grabación
CHANGING THE MENU SETTINGS
CAMBIO DE LOS AJUSTES DEL MENÚ
You can change the menu settings to customize your memory
camcorder. Access the desired menu screen by following the steps
below, then change the various settings.
Puede cambiar los ajustes del menú para personalizar la videocámara
con memoria.
Acceda a la pantalla del menú que desee siguiendo los pasosque se
incluyen a continuación y cambie los diversos ajustes.
1. Slide POWER switch downward to turn the
memory camcorder on.
. Select the operation mode.
• For Movie Record Menus: Press MODE button
to set Record (
).
• For Movie Play Menus: Press MODE button to
set Play (
).
3. Press MENU button.
• The menu screen appears.
OK MENU
Control
4. Select the desired sub menu and menu item
with the Control buttons and the OK button.
• To return to the normal screen, press MENU
button.
• Even if the menu item is displayed, some item
cannot be set depending on the selected mode
(movie recording/playback, settings).
In this case, sub menu cannot be accessed or setting cannot be
changed. ➥page 85
• You can also access the shortcut menu using the OK button.
➥page29
• While the menu screen is displayed, pressing the Recording
start/stop button will move to Movie Record mode.
Button Tips
a. MENU button : Use it to enter or exit the menu.
b. Control button (
) : Use it to move up/down/left/right
c. OK button : Use it to select or confirm the menu.
45_English
POWER
MODE
1. Deslice el interruptor POWER hacia abajo para
encender la videocámara con memoria.
2. Seleccione el modo de funcionamiento.
• Para los menús de Grabar video: Presione el
botón MODE para establecer Grabar (
).
• Para los menús de Reproducir video: Presione el
botón MODE para establecer Reproducir(
).
3. Presione el botón MENU.
• Aparece la pantalla de menús.
4. Seleccione el submenú que desee y la opción de
menú con los botones de Control y el botón OK.
• Para volver a la pantalla normal, presione el botón MENU.
• Incluso aunque aparezca la opción de menú, algunas
opciones no pueden ajustarse dependiendo del modo
seleccionado (grabar/reproducir video, ajustes). En
este caso, no es posible acceder al submenú o no es
posible modificar el ajuste. ➥página 85
• También puede acceder al menú de acceso directo utilizando el
botón OK. ➥página 29
• Con el menú en pantalla, si presiona el botón Iniciar/Parar
grabación irá al modo Grabar video.
Sugerencias de botones
a. Botón MENU: Se utiliza para entrar en el menú o salir de él.
b. Botón de Control (
) : Se utiliza para desplazarse
arriba/abajo/izquierda/derecha
c. Botón OK: Se utiliza para seleccionar o confirmar el menú.
Spanish_45
recording options
opciones de grabación
✪ Follow the instruction below to use each of the menu items
listed after this page.
For example: setting the White Balance in Movie Record mode.
✪ Siga las instrucciones que se encuentran a continuación para
utilizar cada una de las opciones de menú que se enumeran
en las siguentes páginas.
Por ejemplo: ajustar el balance de blanco en el modo Grabar video.
1. Slide the POWER switch to downward to turn the memory
camcorder on.
. Select the operation mode.
• For Movie Record Menus:
Press MODE button to set Record (
1. Deslice el interruptor POWER hacia abajo para
apagar la videocámara con memoria.
. Seleccione el modo de funcionamiento.
• En los menús de Grabar video:
Presione el botón MODE para establecer Grabar
(
).
).
3. Press MENU button.
• The menu screen appears.
4. Press the Control button (
"White Balance".
) to select
5. Select the desired sub menu item with the
Control button (
), and then press the
OK button.
6. Press MENU button to exit the menu.
• The selected is applied and the indicator is
displayed. But in case of some item just like
"Auto", the item indicator may not displayed
on the screen.
• While the menu screen is displayed, pressing
the Recording start/stop button will move to
Movie Record mode.
• You can also change the menu setting,
using the shortcut menu represents the most
frequently accessed functions. ➥ page 29
46_English
Video
120
MIN
4. Presione el botón de Control ( / ) para
seleccionar “White Balance”.
White Balance
Auto
Daylight
Cloudy
Move
OK
3. Presione el botón MENU.
• Aparece la pantalla del menú.
Select
STBY 00:00:00/00:58:00
MENU
5. Seleccione la opción del submenú que desea con
el botón de Control (
)
y, a continuación, presione el botón OK.
Exit
120
MIN
6. Presione el botón MENU para salir del menú.
• La selección se aplica y aparece el indicador.
Pero en el caso de una opción como “Auto”,
el indicador de la opción
puede que no aparezca en pantalla.
• Con el menú en pantalla, si presiona el botón
Iniciar/Parar grabación irá al modo Grabar video.
• También puede cambiar el ajuste del menú
utilizando el menú de acceso directo que
representa las funciones de acceso más
frecuente. ➥ página 29
Spanish_46
MENU ITEMS
OPCIONES DE MENÚ
• Accessible items in menu can vary depending on the operation
• Las opciones accesibles en el menú pueden variar dependiendo
mode.
• For operation details, see the corresponding page.
➥ pages 45~46, 57~61
Menu items in Movie Record(
Items
Scene Mode (AE)
White Balance
Exposure
Anti-Shake (EIS)
Digital Effect
Focus
Back Light
16:9 Wide
Quality
Resolution
Digital Zoom
Menu items in Movie Play(
Items
Play Option
Delete
Protect
Copy
(SC-MX10A/MX10AU only)
16:9 Wide
File Info
47_English
correspondiente. ➥páginas 45~46, 57~61
)
Default value
Auto
Auto
Auto
Off
Off
Auto
Off
On
Super Fine
720x480i
Off
del modo de funcionamiento.
• Para obtener detalles de las operaciones, consulte la página
Opciones de menú en Grabar video (
Page
48
49
50
51
52
53
54
55
55
56
56
Opción
Scene Mode (AE)
White Balance
Exposure
Anti-Shake (EIS)
Digital Effect
Focus
Back Light
16:9 Wide
Quality
Resolution
Digital Zoom
)
Valor predeterminado Página
Auto
48
Auto
49
Auto
50
Off
51
Off
52
Auto
53
Off
54
On
55
Super Fine
55
720x480i
56
Off
56
Opciones de menú en Reproducir video (
)
Default value
Play All
OK
On
Page
57
58
59
-
60
On
OK
61
61
)
Opción
Valor predeterminado Página
Play Option
Play All
57
Delete
OK
58
Protect
On
59
Copy
60
(Sólo SC-MX10A/MX10AU)
16:9 Wide
On
61
File Info
OK
61
Spanish_47
recording options
opciones de grabación
RECORDING MENU ITEMS
OPCIONES DE MENÚ PARA GRABACIÓN
You can setup the menu items for movie images recording.
Puede configurar las opciones de menú para la grabación de imágenes de video.
Scene Mode (AE)
Scene Mode (AE)
This memory camcorder automatically sets the shutter speed and aperture
according to the subject brightness for optimum recording: You can also specify
one of five modes depending on subject conditions, recording environment or
purpose of filming.
on-screen
display
Esta videocámara con memoria ajusta automáticamente la velocidad y apertura
del obturador de acuerdo con el brillo del objeto para obtener una grabación
óptima: También puede especificar uno de los cinco modos dependiendo de las
condiciones del objeto, el entorno de grabación o la finalidad de la filmación.
visualización
en pantalla
item
contents
"Auto"
- Auto balance between the subject and the background.
- To be used in normal conditions.
- The shutter speed is automatically adjusted from 1/60
to 1/250 per second, depending on the scene.
"Sports"
- Reduces blurring when recording rapidly moving
subjects such as in golf or tennis.
If the Sports mode is used under a fluorescent light,
the image may flicker.
In this case, use the Auto mode for recording.
“Sports”
"Portrait"
- Creates a shallow depth of field so that the person or
subject appears against a softened background.
- The portrait mode is most effective when used outdoors.
- The shutter speed is automatically adjusted from
1/60 to 1/1000 per second.
“Portrait”
"Spotlight"
- Prevents overexposure of subject portrait face, etc. when
strong light strikes the subject, as in a wedding or on stage.
“Spotlight”
"Beach/
Snow"
- Prevents under exposure of subject portrait face, etc.
in a place where reflection of light is intense, such as
at the seaside in midsummer or on a ski slope.
"High
Speed"
- For recording fast-moving subjects such as players
in golf or tennis games.
“Beach/
Snow”
- Evita la sobreexposición del objeto del retrato, etc. en un
lugar en el que el reflejo de la luz sea intenso, como al
lado del mar en verano o en una pista de esquí.
“High
Speed”
- Este modo se emplea para grabar escenas en que el
movimiento sea de gran velocidad, por ejemplo, jugadores
de tenis o de golf.
None
• If you set the Exposure to manual, "Scene Mode (AE)" will be
disabled. ➥page 50
• This function will not operate in the EASY. Q mode.
• You can check the selected "Scene Mode (AE)" on the on-screen
information display.
However, nothing will appear in "Auto" mode.
48_English
opción
“Auto”
descripción
- Balance automático entre el objeto y el fondo.
- Se utiliza en condiciones normales.
- La velocidad del obturador se ajusta automáticamente desde
1/60 a 1/250 por segundo, dependiendo de la escena.
- Reduce el efecto borroso al grabar rápidamente objetos
en movimiento como en el golf o en el tenis.
Si el modo Sports se utiliza con luz fluorescente, es
posible que la imagen tiemble.
En este caso, utilice el modo Auto para grabar.
- Crea una profundidad de campo superficial para que la
persona o el objeto aparezcan contra un fondo suavizado.
- Este modo de retrato es más eficaz cuando se emplea en exteriores.
- La velocidad del obturador se ajusta automáticamente
desde 1/60 a 1/1000 por segundo.
Nada
- Evita la sobreexposición del objeto del retrato, etc. cuando
se enfrenta a una luz potente, como en una operación de
soldadura o en un escenario.
• Si ha definido la exposición en manual, “Scene Mode (AE)” se
desactivará. ➥página 50
• Esta función no estará operativa en el modo EASY. Q.
• Puede comprobar el “Scene Mode (AE)” seleccionado en la
visualización de la información en pantalla.
No obstante, nada aparecerá en el modo “Auto”.
Spanish_48
White Balance
This memory camcorder automatically adjusts the color of subject.
Change the white balance setting depending on the recording
conditions.
item
contents
on-screen
display
"Auto"
This option is generally used to control the
white balance automatically.
None
White Balance
Esta videocámara con memoria ajusta automáticamente el color del
objeto. Cambie el ajuste del balance de blanco dependiendo de las
condiciones de grabación.
opción
descripción
visualización
en pantalla
Nada
“Auto”
"Daylight"
This controls the white balance according to
the outdoor ambience, especially for close
up and where the subject is of one dominant
color.
Esta es la opción que se utiliza por lo
general para controlar de manera automática
el balance de blanco.
“Daylight”
"Cloudy"
This option is used when you make a
recording in a cloudy weather.
Controla el equilibrio del blanco según el ambiente
exterior, especialmente en planos cortos y
cuando el objeto tiene un color dominante.
“Cloudy”
"Fluorescent "
This option is used when you make a
recording under white fluorescent lights.
Esta opción se utiliza cuando se graba con
un tiempo nublado.
Esta opción se utiliza para grabar con luces
fluorescentes blancas.
"Tungsten"
This option is used when the surroundings
are in less than 3200K of tungsten lights
such as fluorescent lights.
“Fluorescent ”
“Tungsten”
"Custom
WB"
You can manually adjust white balance to
match the light source or situation.
Esta opción se utiliza cuando en el entorno
haya menos de 3200K de luces de
tungsteno como luces fluorescentes.
“Custom
WB”
Puede ajustar manualmente el balance de
blanco para que coincida con la fuente de
luz o con la situación.
Setting the white balance manually:
1. Select "Custom WB".
• The indicator ( ) and the message
"Set White Balance" are displayed.
. Frame a white object such as a piece of paper
so that it fills the screen. Use an object that is not
transparent.
• If the object that fills the screen is not focused,
correct the focus using "Manual Focus"
➥page 53
3. Press the OK button.
• The white balance setting will be applied and
indicator ( )is displayed.
49_English
STBY 00:00:00/00:58:00
Set White Balance
OK Set
MENU Cancel
White thick paper
120
MIN
Ajuste del balance de blanco manual:
1. Seleccione “Custom WB”.
• Aparece el indicador ( ) y el mensaje
“Set White Balance”.
2. Encuadre un objeto blanco, como una hoja de
papel, de forma que llene la pantalla.
Utilice un objeto que no sea transparente.
• Si no se enfoca el objeto que aparece en
pantalla, corrija el enfoque utilizando
“Manual Focus” ➥página 53
3. Presione el botón OK .
• El ajuste de balance de blanco se aplicará y
aparecerá el indicador ( ).
Spanish_49
recording options
opciones de grabación
• Un objeto se puede grabar bajo diferentes tipos de condiciones de luz en
interiores (natural, fluorescente, vela, etc.). Debido a que la temperatura
del color es diferente dependiendo de la fuente de luz, el matiz del objeto
diferirá dependiendo del ajuste del balance de blanco. Utilice esta función
para obtener un resultado más natural.
• El balance de blanco también puede definirse en el menú de acceso
directo.➥página 29
• El balance de blanco tampoco puede utilizarse mientras EASY. Q se
encuentre en uso.
• Se recomienda definir “Digital Zoom” en “Off” antes de ajustar el
balance de blanco.➥página 56
• Reinicie el balance de blanco si las condiciones de iluminación cambian.
• Durante la grabación normal en el exterior, definirlo en automático puede
producir mejores resultados.
• No utilice un objeto con color al ajustar el balance de blanco: No podrá
ajustarse el matiz apropiado.
• A subject can be recorded under various types of lighting conditions
indoors (natural, fluorescent, candlelight, etc.). Because the color
temperature is different depending on the light source, the subject
tint will differ depending on the white balance settings.
Use this function for a more natural result.
• The white balance also can be set in the shortcut menu. ➥page 29
• The white balance can not use while EASY. Q is in use.
• It is recommended that you specify "Digital Zoom" to "Off" before
setting white balance.➥page 56
• Reset the white balance if lighting conditions change.
• During normal outdoor recording, setting to auto may provide better
results.
• Do not use a colored object when setting white balance:
The appropriate tint cannot be set.
Exposure
The memory camcorder usually adjusts the exposure automatically.
You can also manually adjust the exposure depending on the recording conditions.
item
contents
on-screen
display
"Auto"
This option automatically adjusts image brightness
according to the environmental light conditions.
None
"Manual"
- You can adjust the brightness of an image manually.
- Adjust the brightness when the subject is too bright
or too dark.
Setting the exposure manually:
When manually setting the exposure, the default setting
appears as the value is automatically adjusted according to
the environmental light conditions.
• Press the Control button (
) to adjust the exposure
while viewing the image on the LCD screen.
- Confirm your selection by pressing the OK button.
- Exposure value can be set between "0" and "9".
- If you set exposure to manual, the higher the exposure,
the brighter the recorded picture will be.
50_English
Exposure
La videocámara con memoria normalmente ajusta la exposición automáticamente.
También puede ajustar manualmente la exposición dependiendo de las
condiciones de grabación.
opción
“Auto”
“Manual”
STBY 00:00:00/00:58:00
Manual Exposure
22
descripción
Esta opción ajusta automáticamente el brillo de la
imagen según las condiciones de luz ambiental.
- Puede ajustar manualmente el brillo de una imagen.
- Ajuste el brillo cuando el objeto esté demasiado
brillante o demasiado oscuro.
120
MIN
visualización
en pantalla
Nada
Ajuste manual de la exposición:
Al ajustar manualmente la exposición, aparece el ajuste predeterminado conforme se ajuste el valor automáticamente según
las condiciones de luz ambiental.
• Presione el botón de Control (
) para ajustar la exposición
al mismo tiempo que ve la imagen en la pantalla LCD.
- Confirme su selección presionando el botón OK.
- El valor de exposición se puede definir entre “0” y “9”.
- Si define la exposición en manual, cuanto más alta sea la
exposición, mayor brillo tendrá la imagen grabada.
Spanish_50
Manual exposure is recommended in situations listed below :
• When shooting using reverse lighting or when the background is too bright.
• When shooting on a reflective natural background such as at the beach or
when skiing.
• When the background is overly dark or the subject is bright.
Se recomienda la exposición manual en las situaciones que se enumeran a continuación:
• Al disparar utilizando una iluminación inversa o cuando el fondo sea
demasiado brillante.
• Al disparar en un fondo natural reflectante como una playa o una pista de esquí.
• Cuando el fondo sea demasiado oscuro o el objeto demasiado brillante.
• The exposure also can be set in the shortcut menu. ➥page 29
• EASY. Q mode automatically sets the "Exposure" to "Auto".
• If you manually change the exposure value when "Scene
Mode(AE)" function is selected, manual changes are applied first.
Anti-Shake(EIS) (Electronic Image Stabilizer)
When you use zoom to record a magnified subject image, it will correct
fuzziness in the recorded image.
item
contents
"Off"
Disables the function.
"On"
Compensates for unstable images caused by camerashake, particularly at high magnification.
Anti-Shake(EIS) (Estabilizador electrónico de la imagen)
Cuando se utiliza el zoom para grabar una imagen de un objeto
ampliado, corregirá la falta de nitidez en la imagen grabada.
on-screen
display
opción
None
“Off”
Deshabilita la función.
“On”
Compensa las imágenes inestables causadas por
temblores de la cámara , en particular al aplicar el zoom.
Anti-Shake(EIS) provides a more stable image when:
• Recording while zooming
• Recording small objects
• Recording while walking or moving
• Recording through the window of a moving vehicle
• EASY. Q mode automatically sets the "Anti-Shake(EIS)" to "On"
while using EASY. Q.
• When "Anti-Shake(EIS) : On" is specified, there will be a slight
difference between the actual movement and the movement on
screen.
• Gross camcorder shake may not be entirely corrected even if
"Anti-Shake(EIS) : On" is specified.
Firmly hold the memory camcorder with both hands.
• It is recommended that you specify "Anti-Shake(EIS): Off " when
using the memory camcorder on a desk or tripod.
• When you record pictures with 34x or more magnification and the
"Anti-Shake(EIS)" is "On" in dim places, after-images may stand
out. In this case, we recommend using a tripod and turning the
"Anti-Shake(EIS)" to "Off".
51_English
• La exposición también puede definirse en el menú de acceso directo.
➥página 29
• El modo EASY. Q define automáticamente “Exposure” en “Auto”.
• Si cambia manualmente el valor de exposición con la función “Scene
Mode(AE)” seleccionada, primero se aplican los cambios manuales.
descripción
visualización
en pantalla
Nada
Anti-Shake(EIS) proporciona una imagen más estable:
• Al grabar con zoom;
• Al grabar objetos pequeños;
• Al grabar mientras se camina o se está en movimiento;
• Al grabar a través de la ventanilla de un vehículo.
• El modo EASY. Q ajusta automáticamente “Anti-Shake(EIS)” en
“On” mientras se utiliza EASY. Q.
• Cuando “Anti-Shake(EIS): On” se especifica, existirá una ligera
diferencia entre el movimiento real y el movimiento en pantalla.
• Unos temblores fuertes de la cámara podrían no corregirse
completamente si se especifica “Anti-Shake(EIS): On”.
Sujete con firmeza la videocámara con memoria con ambas
manos.
• Se recomienda especificar “Anti-Shake(EIS): Off” cuando se
utilice la videocámara con memoria sobre una mesa o sobre un
trípode.
• Cuando grabe imágenes con un aumento de 34x o superior y “AntiShake(EIS)” se encuentre en “On” en lugares poco iluminados, es
posible que se produzcan postimágenes. En este caso, recomendamos utilizar un trípode y definir “Anti-Shake(EIS)” en “Off”.
Spanish_51
recording options
opciones de grabación
Digital Effect
Digital Effect
• The digital effect enables you to give a creative look to your
• Los efectos digitales permiten dar un aspecto más creativo a las
recording.
• Select the appropriate digital effect for the type of picture that you
wish to record and the effect you wish to create.
• There are 6 different digital effect options.
item
“Off”
“Black&White”
“Sepia”
contents
Disables the function.
grabaciones.
• Seleccione el efecto digital para el tipo de imagen que desea grabar
y el efecto que desea crear.
• Existen 6 opciones diferentes de efectos digitales.
on-screen
display
opción
None
“Off”
Changes the images into Black and
White.
“Black&White”
This mode gives the images a reddish
brown pigment.
descripción
Deshabilita la función.
“Sepia”
Este modo le da a la imagen un color
marrón rojizo.
Invierte los colores, creando el aspecto
en negativo.
Reverses the colors, creating the look
of a negative.
“Negative”
“Art”
Adds artistic effects to your movie file.
“Art”
Añade efectos artísticos en el archivo
de video.
“Mosaic”
A mosaic overlay appears on your
movie file.
“Mosaic”
En el video aparece una presentación
en mosaico.
“Mirror”
This mode cuts the image in half using a
Mirror effect.
“Mirror”
Este modo divide la imagen en dos,
empleando un efecto de espejo.
Los efectos digitales no pueden utilizarse mientras EASY. Q se
encuentre en uso.
The digital effects can not use while EASY. Q is in use.
5_English
Sepia
Negative
Nada
Cambia la imagen a blanco y negro
“Negative”
Black&White
visualización
en pantalla
Art
Mosaic
Mirror
Spanish_5
Focus
• The memory camcorder usually focuses on a subject automatically (auto-focus).
• You can also manually focus a subject depending on the recording conditions.
item
"Auto"
"Manual"
contents
This memory camcorder automatically focuses a subject
at the center of screen (auto-focus). When the memory
camcorder is turned on, auto-focus will always be set.
Manual focusing may be necessary under certain
conditions that make automatic focusing difficult
or unreliable.
Focus
• La videocámara con memoria normalmente enfoca un objeto automáticamente (auto-focus).
• También puede enfocar manualmente un objeto dependiendo de las condiciones de grabación.
on-screen
display
opción
None
“Auto”
descripción
“Manual”
Esta videocámara enfoca automáticamente un objeto que se
encuentre en el centro de la pantalla (auto-focus). Al encender la
videocámara con memoria, siempre aparece activado auto-focus.
El enfoque manual puede ser necesario bajo ciertas
condiciones que hacen que el enfoque automático resulte
difícil o poco fiable.
visualización
en pantalla
Nada
Focusing manually during recording
This memory camcorder automatically focuses a subject from close-up to infinity.
However, the correct focus may not be obtained depending on the recording
condition. In this case, use the manual focus mode.
1. Select "Focus" to "Manual".
.
3.
• The manual focus adjustment indicator appears.
Use the zoom lever to zoom in on subject.
Press the Control button (
) to adjust the focus,
while viewing the subject on the LCD screen.
Focusing on a further subject
To focus on a further subject, press the Control
button ( ).
Focusing in a nearer subject
To focus on a nearer subject, press the Control
button ( ).
Enfoque manual durante la grabación
Esta videocámara con memoria enfoca automáticamente un objeto desde cerca
hasta el infinito. No obstante, es posible que no se consiga un enfoque correcto
dependiendo de las condiciones de grabación. En este caso, utilice el modo de
enfoque manual.
STBY 00:00:00/00:58:00
1. Seleccione “Focus” en “Manual”.
• Aparece el indicador de enfoque de ajuste manual.
. Utilice la palanca de zoom para acercar el zoom sobre
un objeto.
3. Presione el botón de Control (
) para ajustar el
enfoque, mientras ve el objeto en la pantalla LCD.
Manual Focus
Enfoque de un objeto más alejado
Para enfocar un objeto más lejano, presione el botón de
Control ( ).
Enfoque de un objeto más cercano
Para enfocar un objeto más cercano, presione el botón de
Control ( ).
Manual focus is recommended in the following
<Nearer subject >
situations :
a. A picture containing several objects, some close to the
memory camcorder, others further away.
b. A person enveloped in fog or surrounded by snow.
c. Very shiny or glossy surfaces like a car.
d. People or objects moving constantly or quickly like an athlete or a crowd.
• The focus also can be set in the shortcut menu. ➥page 29
• EASY. Q mode automatically sets the "Focus" to "Auto".
• Be sure to zoom in on your subject before manually focusing on
it. If you bring the subject into focus at the "W" control side, focus
will be faulty when you turn the zoom lever to the "T" control side
to zoom in on the subject.
53_English
120
MIN
El enfoque manual está recomendado en las siguientes
situaciones:
Cuando una imagen contiene varios objetos, algunos situados cerca de la
videocámara con memoria y otros lejos de ella.
Cuando hay una persona entre la niebla o rodeada de nieve.
Cuando se graban superficies muy brillantes, como un coche.
Cuando hay gente u objetos que se mueven constantemente o con rapidez,
como una multitud o un atleta.
• El enfoque también puede definirse en el menú de acceso directo.
<Further subject >
a.
b.
c.
d.
➥página 29
• El modo EASY. Q define automáticamente “Focus” en “Auto”.
• Asegúrese de acercar el zoom a un objeto antes de enfocarlo manualmente.
Si enfoca un objeto en el lado del control “W”, el enfoque será defectuoso cuando gire la palanca del zoom al lado del control “T” para acercar
el zoom sobre el objeto.
Spanish_53
recording options
opciones de grabación
Back Light
Back Light
When subject is lit from behind , this function will compensate for
lighting so that the subject is not too dark.
Cuando el objeto esté iluminado por detrás, esta función compensará
la iluminación de forma que el objeto no quede demasiado oscuro.
item
contents
"Off
Disables the function.
"On"
- Backlight compensation is excuted.
- Backlight compensation brightens the subject quickly.
on-screen
display
opción
None
“Off
Deshabilita la función.
“On”
- Se ejecuta la compenzación de luz de fondo.
- La compensación de luz de fondo da brillo al objeto
rápidamente.
Back lighting influences recording when the subject is darker than the
background:
• The subject is in front of a window.
• The subject is against a snowy
background.
• The subject is outdoors and the
background is overcast.
• The light sources are too bright.
• The person to be recorded is wearing
white or shiny clothes and is placed
<BLC off>
against a bright background:
The person’s face is too dark to distinguish his/her features.
The "Back Light" function can not use while EASY. Q is in use.
54_English
descripción
visualización
en pantalla
Nada
La luz de fondo influye en la grabación cuando el objeto es más oscuro
que elfondo:
• Cuando el objeto está delante de una
ventana.
• Cuando el objeto se encuentra delante
de un fondo nevado.
• Cuando el objeto se encuentra en el
exterior y el fondo está nublado.
• Cuando la fuente de luz es muy intensa.
<BLC on>
• La persona que se va a grabar lleva
ropas blancas o brillantes y está contra
un fondo brillante: La cara de la persona
es demasiado oscura para distinguir sus
facciones.
La función “Back Light” tampoco puede utilizarse mientras EASY. Q
se encuentre en uso.
Spanish_54
El zoom digital no está disponible en el modo 16:9 Wide
16:9 Wide
16:9 Wide
You can select the desired LCD display aspect ratio for recording or
playback (16:9 Wide/4:3 aspect ratio).
item
contents
on-screen
display
"Off"
Disables the function. Displays the image in 4:3
aspect ratio. Select to use the standard display
aspect ratio of 4:3 on the screen.
None
"On"
Select to view movies of 4:3 aspect ratio by
enlarging and fitting into 16:9 aspect ratio.
None
• 16:9 wide setting also can be set in the shortcut menu. ➥page 29.
• Please note that all movies recorded with this memory camcorder
have 4:3 aspect ratio regardless of the display option (16:9 Wide/4:3).
When it is set to "16:9 Wide", the displayed picture may appear
wider or rougher than that of 4:3 screen aspect ratio.
Quality
You can select the quality of a movie to be recorded. This memory
camcorder can record in the SF (super fine), F (fine) and N (normal)
modes.
item
"Super Fine"
"Fine"
"Normal"
contents
on-screen
display
Displays in the supreme quality.
Displays in high quality.
Displays in normal quality.
• You can record the same scene in three quality levels of
"Super Fine, Fine, Normal".
However, the better the quality is, the bigger the data size is.
• The recording times depend on the quality of a movie to be
recorded. ➥page 36
55_English
Puede seleccionar la relación de altura/anchura de la pantalla LCD
que desee para la grabación o la reproducción (relación de altura/
anchura 16:9 panorámica/4:3).
opción
descripción
visualización
en pantalla
“Off”
Deshabilita la función. deshabilita la función. Muestra
la imagen con una relación de altura/anchura de 4:3.
Se selecciona para utilizar en pantalla la relación de
altura/anchura de visualización estándar de 4:3.
Nada
“On”
se selecciona para ver videos con una relación de
altura/anchura de 4:3 ampliándola y adaptándola a una
relación de 16:9.
Nada
• El ajuste de 16:9 panorámica también puede definirse en el menú
de acceso directo. ➥página 29.
• Tenga en cuenta que todos los videos grabados con la
videocámara con memoria tienen una relación de altura/anchura
de 4:3 independientemente de la opción de visualización (16:9
panorámica/4:3). Cuando se define en “16:9 Wide”, la imagen
visualizada puede aparecer más ancha o menos fina que la de la
relación de altura/anchura de 4:3.
Quality
Se puede seleccionar la calidad del video que se va a grabar. Esta
videocámara con memoria puede grabar en los modos SF (superfino),
F (fino) y N (normal).
opción
descripción
“Super Fine”
Muestra la imagen con una calidad suprema.
“Fine”
“Normal”
visualización
en pantalla
Muestra la imagen con una gran calidad.
Muestra la imagen con una calidad normal.
• Puede grabar la misma escena en tres niveles de calidad:
“Super Fine”, “Fine”, “Normal”. Sin embargo, cuanto mejor sea
la calidad, mayor será el tamaño de los datos.
• Los tiempos de grabación dependen de la calidad del video que se
va a grabar. ➥página 36
Spanish_55
recording options
opciones de grabación
Resolution
Resolution
• You can select the resolution of a movie to be recorded.
item
contents
"70x480i"
Resolution of the movie played on a TV screen.
"70x480p"
"35x40p"
• Se puede seleccionar la resolución del video que se va a grabar.
on-screen
display
opción
“70x480i”
Higher resolution of the movie played on a PC
screen.
Resolución del video reproducido en una
pantalla del televisor.
“70x480p”
Lower resolution of the movie played on a PC
screen.
Resolución más alta del video reproducido en
una pantalla de la PC.
“35x40p”
Resolución más baja del video reproducido
en una pantalla de la PC.
• High resolution images use more memory than lower resolution
images. Therefore the higher the resolution selected, the fewer will
be the available time available.
• The recording times depend on the resolution. ➥page 36
• When the screen size is set to 352(352x240p), it is played back in
smaller size than 720(720x480) on PC.
Digital Zoom
• You can select the maximum zoom level in case you want to zoom to a level
greater than 34x (the default setting) during recording. Up to 34x zoom is
performed optically, and after that, up to 1200x zoom is performed digitally.
Note that the image quality decrease when you use the digital zoom.
item
contents
on-screen
display
"Off"
Only optical zoom is available up to 34x.
-
"On"
Digital zoom is available up to 1200x.
Moving the zoom lever will display the digital zoom bar.
-
• You can also zoom with the zoom (W/T)
button on the LCD panel.
• The image quality may deteriorate
depending on how much you zoom in
on the subject.
• Maximum zooming may result in lower
image quality.
56_English
descripción
visualización
en pantalla
• Las imágenes de alta resolución utilizan más memoria que las imágenes
con una resolución más baja. Por tanto, cuanto más alta sea la resolución
seleccionada, menor será el número de imágenes disponible.
• Los tiempos de grabación dependen de la resolución. ➥página 36
• Cuando se fija el tamaño de pantalla en 352(352x240p), se reproduce
en la PC en un tamaño inferior a 720(720x480) en la PC.
Digital Zoom
• Puede seleccionar el nivel de zoom máximo en caso de que desee
aplicar el zoom por encima de 34x (el ajuste predeterminado) durante
la grabación. Hasta 34x, el zoom se realiza ópticamente y hasta 1200x
se realiza digitalmente. Recuerde que la calidad de imagen disminuye
cuando utilice el zoom digital.
opción
descripción
Visualización
en pantalla
“Off”
El zoom óptico está disponible hasta 34x.
-
“On”
El zoom digital está disponible hasta 1200x.Si mueve
la palanca del zoom se verá la barra de zoom digital.
-
00:00:00/00:58:00
120
MIN
• También puede utilizar el zoom con el botón de
zoom (W/T) del panel LCD.
• La calidad de la imagen puede deteriorarse
dependiendo del nivel de acercamiento sobre el
objeto.
• El zoom máximo puede dar como resultado una
calidad de imagen más pobre.
Spanish_56
playback options
opciones de reproducción
• You can manage recorded movie images in various ways.
• Each thumbnail image shown in the display represents the first frame
• Puede gestionar las imágenes de video grabadas de diversas formas.
• Cada imagen en miniatura que se muestra en pantalla representa el
of a separately recorded movie.
primer fotograma de un video grabado por separado.
SETTING THE PLAY OPTION
AJUSTE DE LA OPCIONES DE REPRODUCCIÓN
• You can play all images continuously or play the
1. Slide the POWER switch downward to turn on
the memory camcorder.
• Set the appropriate storage media.
(SC-MX10A/MX10AU only) (If you want to record
on a memory card, insert the memory card.)
. Press the MODE button.➥page 21
• Switches to Movie Play mode.
• The recorded movie images are displayed in
thumbnail index view.
3. Press the MENU button.
• Press the Control button( / ) to select
"Play Option".
4. Press the Control button ( / ) to select an
option, and then press the OK button.
item
"Play One"
contents
Plays back from the selected image to the
last image.
The selected movie images will be played.
"Repeat All"
All movie images will be played repeatedly.
"Play All"
• Puede reproducir de forma continua todas las imágenes
o reproducir únicamente la imagen seleccionada.
• También puede establecer la opción de repetición en
Move
OK
Play
100-0002
120
MIN
Play Option
Play All
Play One
Repeat All
Move
OK
Select
MENU
Exit
100-0002
120
MIN
Play Option
Play All
Play One
Repeat All
Move
todas las imágenes.
1. Deslice hacia abajo el interruptor POWER para
encender la videocámara con memoria.
• Establezca el soporte de almacenamiento
apropiado. (Sólo SC-MX10A/MX10AU)
(Si desea grabar en una tarjeta de memoria,
inserte la tarjeta de memoria.)
. Presione el botón MODE.➥página 21
• Cambia al modo Reproducir video.
• Las imágenes de video grabadas aparecen en la
vista del índice de imágenes en miniatura.
3. Presione el botón MENU.
• Presione el botón de Control ( / ) para
seleccionar “Play Option”.
4. Presione el botón de Control ( / ) para
seleccionar una opción y, a continuación,
presione el botón OK .
opción
OK
Select
"Repeat One" The selected movie images will be played repeat.
5. Press the MENU button to exit the menu.
• During playback, the selected item is applied
• While the menu screen is displayed, pressing the Recording start/
stop button will move to Movie Record mode.
• It operates identically in the single image display.
57_English
10
MIN
100-0002
selected image only.
• You can also set the repeat option for all images.
MENU
Exit
“Play All”
“Play One”
“Repeat All”
“Repeat One”
descripción
Reproduce desde la imagen seleccionada
hasta la última imagen.
Se reproducirán las imágenes de video
seleccionadas.
Se reproducirán de forma repetida todas las
imágenes de video.
Se reproducirán de forma repetida las
imágenes de video seleccionadas.
5. Presione el botón MENU para salir del menú.
• Durante la reproducción, se aplica la opción seleccionada.
• Con el menú o la imagen en miniatura en pantalla, si presiona el
botón Iniciar/Parar grabación irá al modo Grabar video.
• Funciona de igual forma que la pantalla de imagen única.
Spanish_57
playback options
opciones de reproducción
• You can delete saved movie images.
• Puede borrar las imágenes de video guardadas.
DELETING MOVIE IMAGES
ELIMINACIÓN DE IMÁGENES DE VIDEO
1. Slide the POWER switch downward to turn on the
memory camcorder.
• Set the appropriate storage media. (SC-MX10A/MX10AU only)
(If you want to record on a memory card, insert the memory card.)
. Press the MODE button. ➥page 21
• Switches to Movie Play mode.
• Select the desired movie images, using the
Control button.
3. Press the MENU button.
4. Press the Control button ( / ) to select "Delete".
Move
5. Select an option by pressing the Control button
( / ) and then press the OK button.
item
"OK"
"Multi Select"
"All"
contents
Deletes the selected movie image.
Deletes individual selected movie
images.
-To delete individual movie images,
select desired movie images to delete
by pressing the OK button. And then
press the MENU button to delete.
-The indicator (
) is displayed on the
selected movie images. Pressing the OK
button toggles the selection and release.
Deletes all movie images.
6. The pop-up selection menu will appear depending on
the selected menu item. In this case, select the desired
item with the Control buttons ( / ) and the OK button.
1. Deslice el interruptor POWER hacia abajo para apagar la videocámara
con memoria.
• Establezca el soporte de almacenamiento apropiado. (Sólo SC-MX10A/MX10AU)
(Si desea grabar en una tarjeta de memoria, inserte la tarjeta de memoria.)
. Presione el botón MODE. ➥página 21
100-0006
• Cambia al modo Reproducir video.
• Seleccione las imágenes de video que desee,
utilizando el botón de Control .
3. Presione el botón MENU.
4. Presione el botón de Control ( / ) para seleccionar “Delete”.
5. Seleccione una opción presionando el botón Control
OK Play
( / ) y, a continuación, presione el botón OK.
10
MIN
100-0006
Delete
OK
Multi Select
All
Move
OK
Select
MENU
100-0005
Move
OK
• Accordingly the deleted images also disappear in thumbnail images.
• While the menu screen is displayed, pressing the Recording
start/stop button will move to Movie Record mode.
• It operates identically in the single image display.
• Once deleted, a image can not be restored.
• Protected files will not be deleted.
58_English
120
MIN
Play
Exit
10
MIN
opción
“OK”
descripción
Borra el archivo de video seleccionado.
Borra las imágenes de video individuales
seleccionadas.
-Para borrar imágenes de video
individuales, seleccione las imágenes
de video que desea pulsando el botón
“Multi Select”
OK. Y, a continuación, presione el botón
MENU para borrar.
-Aparece el indicador (
) en las
imágenes de video seleccionadas. Si se
pulsa el botón OK se cambia la selección.
Borra todas las imágenes de video.
“All”
6. Aparecerá el menú de selección emergente dependiendo de la opción de menú seleccionada. En este caso, seleccione la
opción que desee con los botones de Control ( / ) y el botón OK.
• Consecuentemente, las imágenes borradas también desaparecen de
las imágenes en miniatura.
• Con el menú o la imagen en miniatura en pantalla, si presiona el botón
Iniciar/Parar grabación irá al modo Grabar video.
• Funciona de igual forma que la pantalla de imagen única.
• Una vez borrada, la imagen no podrá recuperarse.
• No se borrarán los archivos protegidos.
Spanish_58
PROTECTING MOVIE IMAGES
PROTECCIÓN DE IMÁGENES DE VIDEO
• You can protect saved important movie images from accidental deletion.
• Protected images will not be deleted unless you release the protection or
• Las imágenes de video guardadas más importantes se pueden proteger
contra el borrado accidental.
format the memory.
o formatee la memoria.
1. Slide the POWER switch downward to turn on the memory camcorder.
• Set the appropriate storage media. (SC-MX10A/MX10AU only)
(If you want to record on a memory card, insert the memory card.)
. Press the MODE button. ➥page 21
• Switches to Movie Play mode.
• Select the desired movie images, using the Control button.
3. Press the MENU button.
• Menu screen appears.
4. Press the Control button ( / ) to select "Protect".
5. Select an option by pressing the Control button
( / ) and then press the OK button.
item
"On"
"Multi Select"
"All On"
"All Off"
• Las imágenes protegidas no se borrarán a menos que quite la protección
1.
Deslice el interruptor POWER hacia abajo para apagar la videocámara con memoria.
• Establezca el soporte de almacenamiento apropiado. (Sólo SC-MX10A/MX10AU)
(Si desea grabar en una tarjeta de memoria, inserte la tarjeta de memoria.)
.
Presione el botón MODE. ➥página 21
• Cambia al modo Reproducir video.
• Seleccione las imágenes de video que desee, utilizando el botón de Control .
3. Presione el botón MENU.
100-0006
• Aparece la pantalla del menú.
4. Presione el botón de Control ( / ) para seleccionar “Protect”.
5. Seleccione una opción presionando el botón de Control
( / ) y, a continuación, presione el botón OK .
10
MIN
opción
contents
Protects the selected movie image from
delection.
Move
Protects selected movie images from
delection
- To protect individual movie images,
select desired movie images by
pressing the OK button. And then
press the MENU button to confirm.
- The indicator (
) is displayed on
the selected movie images.
- Pressing the OK button toggles the
selection and release.
Protects all movie images.
Cancels the protection for all movie images.
OK
Play
100-0006
120
MIN
Protect
On
Multi Select
All On
Move
OK
Select
MENU
100-0006
Exit
10
MIN
6.
6. The pop-up selection menu will appear depending on the
selected menu item. In this case, select the desired item
with the Control buttons ( / ) and the OK button.
descripción
Protege la imagen de video seleccionada
contra el borrado.
Protege las imágenes de video seleccionadas
contra el borrado.
- Para proteger las imágenes de video
individuales, seleccione las imágenes de video
que desee presionando el botón OK.
“Multi Select”
Y, a continuación, presione el botón MENU
para confirmar.
- El indicador (
) aparece en las imágenes
de video seleccionadas.
- Si se pulsa el botón OK cambia la selección.
Protege todas las imágenes de video.
“All On”
“All Off”
Cancela la protección de todas las imágenes de video.
“On”
Move
OK
Play
Aparecerá el menú de selección emergente dependiendo de la
opción de menú seleccionada. En este caso, seleccione la opción
que desee con los botones de Control ( / ) y el botón OK.
• While the menu screen is displayed, pressing the Recording start/stop
• Con el menú en pantalla, si pulsa el botón Iniciar/Parar grabación
• It operates identically in the single image display.
• Protected movie images will show the indicator (
• Funciona de igual forma que la pantalla de imagen única.
) cuando aparezcan.
• Las imágenes protegidas mostrarán el indicador (
• Si la pestaña de protección contra escritura en la tarjeta de memoria
button will move to Movie Record mode.
displayed.
irá al modo Grabar video.
) when they are
• If the write protection tab on the memory card is set to lock, you cannot
set image protection.
59_English
está colocada en LOCK, no puede definir la protección de imagen.
Spanish_59
playback options
opciones de reproducción
COPYING MOVIE IMAGES (SC-MX10A/MX10AU ONLY)
COPIA DE IMÁGENES DE VIDEO (SÓLO SC-MX10A/MX10AU)
• Movie images are copied to the destination storage with leaving
•
1.
• Las imágenes de video se copian en el almacenamiento de destino dejando
las imágenes originales en el almacenamiento de origen.
original movie images in the source storage.
• Copia desde la memoria actualmente utilizada a otra. Por ejemplo, si se ha
It copies from the currently-used memory to another. For example, if
utilizado una memoria incorporada, copia a una tarjeta de memoria.
the built-in memory was used, it copies to a memory card.
1. Deslice el interruptor POWER hacia abajo para apagar la videocámara con memoria.
Slide the POWER switch downward to turn on the memory camcorder.
• Establezca el soporte de almacenamiento apropiado.
• Set the appropriate storage media. (SC-MX10A/
100-0003
(Sólo SC-MX10A/MX10AU) (Si desea grabar en una
MX10AU only) (If you want to record on a memory
tarjeta de memoria, inserte la tarjeta de memoria.)
card, insert the memory card.)
. Presione el botón MODE. ➥página 21
Press the MODE button. ➥page 21
• Cambia al modo Reproducir video.
• Switches to Movie Play mode.
• Seleccione las imágenes de video que desee,
• Select the desired movie images, using the
OK
utilizando el botón de Control.
Move
Play
Control button.
3. Presione el botón MENU.
Press the MENU button.
• Aparece la pantalla del menú.
100-0003
• Menu screen appears.
4. Presione el botón de Control ( / ) para seleccionar “Copy”.
Press the Control button ( / ) to select "Copy".
Copy
5. Seleccione una opción presionando el botón de Control
Select an option by pressing the Control button
( / ) y, a continuación, presione el botón OK .
OK
( / ) and then press the OK button.
10
MIN
.
3.
120
MIN
4.
5.
item
"OK"
contents
Copies the selected movie images.
Copies the individual movie images.
- To copy individual movie images, select
desired movie images by pressing the
OK button.
"Multi Select" - The indicator (
) is displayed on the
selected movie images. And then press
the MENU button to confirm.
- Pressing the OK button toggles the
selection and release.
Copies all the movie images.
"All"
Multi Select
All
Move
OK
Select
120
MIN
Copy
OK
Multi Select
All
Move
OK
Select
menu item. In this case, select the desired item with the Control buttons
( / ) and the OK button.
• While the menu screen is displayed, pressing the Recording start/
stop button will move to Movie Record mode.
• It operates identically in the single image display.
• If a memory card is not inserted, you can not perform the "Copy" function.
opción
“OK”
Exit
100-0003
6. The pop-up selection menu will appear depending on the selected
60_English
MENU
MENU
Exit
descripción
Copia las imágenes de video seleccionadas.
Copia las imágenes de video individuales.
- Para copiar imágenes de video individuales,
seleccione las imágenes de video que
desee presionando el botón OK.
“Multi Select”
- El indicador (
) aparece en las imágenes
de video seleccionadas. Y, a continuación,
presione el botón MENU para confirmar.
- Si se pulsa el botón OK cambia la selección.
“All”
Copia todas las imágenes de video.
6.
Aparecerá el menú de selección emergente
dependiendo de la opción de menú seleccionada.
En este caso, seleccione la opción que desee con
los botones de Control ( / ) y el botón OK.
• Con el menú o la imagen en miniatura en pantalla, si presiona el botón
Iniciar/Parar grabación irá al modo Grabar video.
• Funciona de igual forma que la pantalla de imagen única.
• Si no se inserta una tarjeta de memoria, no es posible ejecutar la función “Copy”.
Spanish_60
El zoom digital no está disponible en el modo 16:9 Wide
16:9 Wide
You can select the desired LCD display aspect ratio for
recording or playback (16:9 Wide/4:3 aspect ratio).
item
"Off"
"On"
contents
Disables the function. Displays the image in
4:3 aspect ratio. Select to use the standard
display aspect ratio of 4:3 on the screen.
Select to view movies of 4:3 aspect ratio by
enlarging and fitting into 16:9 aspect ratio.
10
MIN
100-0004
on-screen
display
None
Puede seleccionar la relación de altura/anchura de la pantalla
LCD que desee para la grabación o la reproducción (relación
de altura/anchura 16:9 panorámica/4:3).
opción
Move
OK
None
Please note that all movies recorded with this
memory camcorder have 4:3 aspect ratio regardless
of the display option (16:9 Wide/4:3). When it is set to
"16:9 Wide", the displayed picture may appear wider
or rougher than that of 4:3 screen aspect ratio.
16:9 Wide
Play
100-0004
120
MIN
16:9 Wide
“On”
Off
On
Move
OK
“Off”
Select
MENU
descripción
Deshabilita la función. deshabilita la función.
Muestra la imagen con una relación de
altura/anchura de 4:3. Se selecciona para
utilizar en pantalla la relación de altura/anchura de visualización estándar de 4:3.
se selecciona para ver videos con una relación de altura/anchura de 4:3 ampliándola
y adaptándola a una relación de 16:9.
visualización
en pantalla
Nada
Nada
Tenga en cuenta que todos los videos grabados con
la videocámara con memoria tienen una relación de
altura/anchura de 4:3 independientemente de la opción
de visualización (16:9 panorámica/4:3). Cuando se
define en “16:9 Wide”, la imagen visualizada puede
aparecer más ancha o menos fina que la de la relación
de altura/anchura de 4:3.
Exit
FILE INFORMATION
You can see the image information for all images.
1. Slide the POWER switch downward to turn on the memory
INFORMACIÓN DE ARCHIVOS
camcorder.
• Set the appropriate storage media.
Puede ver la información de todas las imágenes.
(SC-MX10A/MX10AU only)
1. Deslice el interruptor POWER hacia abajo para
apagar la videocámara con memoria.
(If you want to record on a memory card,
• Establezca el soporte de almacenamiento apropiado.
insert the memory card.)
100-0004
(Sólo SC-MX10A/MX10AU)
. Press the MODE button. ➥page 21
(Si desea grabar en una tarjeta de memoria,
File Info
• Switches to Movie Play mode.
inserte la tarjeta de memoria.)
3. Select the desired movie images, using the
OK
2. Presione el botón MODE. ➥página 21
Control button.
• Cambia al modo Reproducir video.
4. Press the MENU button.
3. Seleccione las imágenes de video que desee, utiliOK Select
MENU Exit
Move
zando el botón de Control.
5. Press the Control button ( / ) to select
4. Presione el botón MENU.
"File Info".
100-0004
5.
Presione
el botón Control ( / ) para
6. Press the OK button.
seleccionar “File Info”.
100VIDEO
• Press the OK button again after confirming.
6. Presione el botón OK .
SDV_0004.AVI
• The information of the selected file is displayed
• Presione de nuevo el botón OK tras confirmar.
■ Date
2007/01/01
as shown below.
• Aparece la información del archivo seleccionado
■ Duration 00:00:01
■ Size
- Date
3,876 KB
como se muestra a continuación.
- Fecha
- Duration
OK Back
- Duración
- Size
- Tamaño
61_English
Spanish_61
120
MIN
120
MIN
setting options
opciones de configuración
CHANGING THE MENU SETTINGS IN "SETTINGS"
CAMBIO DE LOS AJUSTES DEL MENÚ EN “SETTINGS”
You can change the menu settings to customize your memory
camcorder. Access the desired menu screen by
Video
following the steps below and change the various
settings.
Settings
Puede cambiar los ajustes del menú para personalizar la videocámara
con memoria. Acceda a la pantalla de menú que
desee siguiendo los pasos que se indican a
continuación y cambie los diversos ajustes.
1. Slide POWER switch downward to turn the
memory camcorder on.
. Press MENU button.
• The menu screen appears.
3. Select "Settings" with the Control button ( / ),
and then press the OK button.
• The menus in "Settings" mode will appear.
4. Select the desired sub menu and menu item with
the Control buttons ( / / / ) and the
OK button.
• To return to the normal screen, press MENU button.
• Even if the menu item is displayed, some item
cannot be set depending on the selected mode
(movie recording/playback, settings).
In this case, sub menu cannot be accessed or
setting cannot be changed.
(If there is no storage media inserted, it can not
be selected and will be dimmed on the menu:
"Memory Info", "Format", etc.) ➥page 92
120
MIN
1. Deslice el interruptor POWER hacia abajo para
encender la videocámara con memoria.
OK
Move
OK
Select
MENU
. Presione el botón MENU.
• Aparece la pantalla de menús.
Exit
Settings
120
MIN
Default Set
OK
Move
OK
Select
MENU
Settings
120
MIN
Default Set ?
All settings return to default.
Yes
Move
Exit
No
OK
Select
3. Seleccione “Settings” con el botón de Control
( / ) y, a continuación, presione el botón OK.
• Aparecerán los menús del modo “Settings”.
4. Seleccione el submenú y la opción de menú que
desee con los botones de Control ( / / / )
y el botón OK.
• Para volver a la pantalla normal, presione el botón MENU.
• Incluso aunque aparezca la opción de menú, algunas
opciones no pueden ajustarse dependiendo del modo
seleccionado (grabar/reproducir video, ajustes).
En este caso, no es posible acceder al submenú
o cambiar el ajuste. (Si no se ha insertado ningún
soporte de almacenamiento, no podrá seleccionarse
y aparecerá atenuado en el menú: " Memory Info",
"Format", etc.) ➥ página 92
Button Tips
Sugerencias de botones
a. MENU button : Use it to enter or exit the menu.
b. Control button ( / / / ) : Use it to move up/down/left/
right
c. OK button : Use it to select or confirm the menu.
a. Botón MENU: Se utiliza para entrar en el menú o salir de él.
b. Botón de Control ( / / / ) : Se utiliza para desplazarse
arriba/abajo/izquierda/derecha
c. Botón OK: Se utiliza para seleccionar o confirmar el menú.
The pop-up selection menu will appear depending on the selected
menu item. In this case, select the desired item with the Control
buttons ( / ) and the OK button.
6_English
Aparecerá el menú de selección emergente dependiendo de la opción
de menú seleccionada. En este caso, seleccione la opción que desee
con los botones de Control ( / ) y el botón OK.
Spanish_6
You can setup the date/time, OSD language and display settings of the
memory camcorder.
Puede configurar la fecha y hora, el idioma de la OSD y los ajustes de
visualización de la videocámara con memoria.
SETTING MENU ITEMS
OPCIONES DEL MENÚ DE AJUSTES
Items
Default value
Page
opción
Valor predeterminado
Página
Date/Time Set
2007/01/01 12:00 AM
64
Date/Time Set
2007/01/01 12:00 AM
64
Date Format
YY/MM/DD
64
Date Format
YY/MM/DD
64
Time Format
12 Hr
64
Time Format
12 Hr
64
Date/Time
Off
64
Date/Time
Off
64
LCD Brightness
40%
65
LCD Brightness
40%
65
LCD Color
50%
65
LCD Color
50%
65
Auto Power Off
Off
65
Auto Power Off
Off
65
Beep Sound
On
66
Beep Sound
On
66
File No.
Series
66
File No.
Series
66
-
66
Memory Type
(SC-MX10A/MX10AU
only)
-
66
Memory Type
(Sólo SC-MX10A/
MX10AU)
Memory Info
OK
67
Memory Info
OK
67
Format
OK
67
Format
OK
67
Default Set
OK
68
Default Set
OK
68
Version
-
68
Version
-
68
Language
English
68
Language
English
68
USB Connect
Mass Storage
68
USB Connect
Mass Storage
68
Demo
Off
68
Demo
Off
68
These Items and Default value may be changed without notice.
63_English
Estoas opciones y valores predeterminados pueden cambiar sin
previo aviso.
Spanish_63
setting options
opciones de configuración
Date/Time Set
Date/Time Set
Date Format
Date Format
Set the current date and time so that the date and time at which you make a
recording can be recorded correctly. ➥page 31
You can select the date format to display.
Fije la fecha y hora actuales de forma que al realizar la grabación la fecha y
hora aparezcan correctamente. ➥página 31
Puede seleccionar el formato de fecha que va a aparecer.
settings
contents
on-screen
display
"YY/MM/DD"
The date is displayed in the order of year / month / date.
-
“YY/MM/DD”
La fecha aparece en el orden año/ mes / día.
-
"DD/MM/YY"
The date is displayed in the order of date / month / year.
-
“DD/MM/YY”
La fecha aparece en el orden día / mes/ año.
-
"MM/DD/YY"
The date is displayed in the order of month / date / year.
-
“MM/DD/YY”
La fecha aparece en el orden mes / día / año.
-
Time Format
contents
descripción
visualización
en pantalla
Time Format
You can select the time format to display.
settings
ajustes
Puede seleccionar el formato de hora que va a aparecer.
on-screen
display
ajustes
descripción
visualización
en pantalla
"1 Hr"
The time is displayed as the unit of 12 hours.
-
“12 Hr”
La hora aparece con el formato de 12 horas.
-
"4 Hr"
The time is displayed as the unit of 24 hours.
-
“24 Hr”
La hora aparece con el formato de 24 horas.
-
Date/Time
You can set to display date and time on the LCD monitor.
• Before you use the "Date/Time" function, you must set the date/time. ➥page 31
settings
"Off"
contents
The date and time are not displayed.
"Date"
The date is displayed.
"Time"
The time is displayed.
"Date & Time"
The date and time are displayed.
on-screen
display
Puede establecer mostrar la fecha y hora en la pantalla LCD.
• Antes de utilizar la función “Date/Time”, debe ajustar la fecha y hora. ➥página 31
ajustes
descripción
None
“Off”
007/01/01
“Date”
Aparece la fecha.
1:00AM
“Time”
Aparece la hora.
007/01/01
1:00AM
“Date & Time”
The date/time will read "007/01/01 1:00 AM" in the following
conditions.
- When the button type battery becomes weak or dead.
64_English
Date/Time
No aparece la fecha y hora.
Aparece la fecha y hora.
visualización
en pantalla
Nada
007/01/01
1:00AM
007/01/01
1:00AM
La fecha y hora mostrará “007/01/01 1:00 AM” en las siguientes
situaciones.
- Cuando la pila de botón esté débil o descargada.
Spanish_64
LCD Brightness
Settings
• You can adjust the brightness of the LCD screen to
compensate for ambient lighting conditions.
Move
LCD Color
Settings
• You can adjust the LCD color from 0% to 100%.
• When you set color range, the higher the figures the
LCD Color
Auto Power Off
To save battery power, you can set the "Auto Power Off" function
which turns off the memory camcorder if there is no operation for a
certain period of time.
"Off"
"5 Min"
Cancels the "Auto Power Off" function.
The memory camcorder automatically turns
off when there is no operation for 5 min.
Exit
• Un ajuste de la pantalla LCD más brillante consume
más energía de la batería.
• Ajuste el brillo de la pantalla LCD cuando la luz del entorno sea demasiado
brillante y resulte difícil ver la pantalla.
• El brillo de la pantalla LCD no afecta al brillo de las imágenes almacenadas.
• Puede ajustar el brillo de la pantalla LCD de 0% a 100%.
LCD Color
• Puede ajustar el color de la pantalla LCD de 0% a 100%.
• Al definir la gama de colores, cuanto más altas sean
las cifras mayor será el brillo de la pantalla LCD.
Adjust
MENU
Exit
Auto Power Off
Para ahorrar energía de la batería, puede definir la función
“Auto Power Off” que apaga la videocámara con memoria si no se
utiliza durante un período de tiempo determinado.
on-screen
display
None
ajustes
None
“5 Min”
• The "Auto Power Off" will not function when you connect the AC
power adapter to the memory camcorder.
The "Auto Power Off" functions when the battery pack is the only
power source.
• If you connect the camcorder to the USB device (PC, etc.) through
USB cable, the "Auto Power Off" will not function.
• "Auto Power Off" will only function when you set this function in
settings mode.
65_English
Adjust
120
MIN
Move
contents
a la pantalla, y si lo mueve hacia abajo la oscurecerá.
MENU
50%
brighter the LCD monitor will be.
settings
compensar las condiciones de luz ambiental.
• Mover el botón de Control hacia arriba dará más brillo
40%
• A brighter LCD screen setting consumes more
battery power.
• Adjust the LCD brightness when the ambient lighting is too bright and
the monitor is hard to see.
• LCD Brightness does not affect the brightness of images to be stored.
• You can adjust the LCD Brightness from 0% to 100%.
LCD Brightness
• Puede ajustar el brillo de la pantalla LCD para
LCD Brightness
• Moving the Control button up will brighten the
screen whereas moving it down will darken the
screen.
120
MIN
“Off”
descripción
Cancela la función “Auto Power Off”.
La videocámara con memoria se apaga automáticamente cuando no se utiliza durante 5 min.
visualización
en pantalla
Nada
Nada
• La función “Auto Power Off” no estará operativa cuando
conecte el adaptador de alimentación de CA a la videocámara con
memoria. “Auto Power Off” funciona cuando la batería es la única
fuente de alimentación.
• Si conecta la videocámara al dispositivo USB (PC, etc.) a través
del cable USB, no estará operativa la función "Auto Power Off".
• “Auto Power Off” sólo estará operativa cuando defina esta
función en el modo de ajustes.
Spanish_65
setting options
opciones de configuración
Beep Sound
You can set the beep sound to on/off. When on a beep will sound every time a
button is pressed.
settings
contents
"Off"
Disables the function
The beep sounds when operate the menu
settings, the power is turned on.
"On"
on-screen
display
None
None
File No.
File numbers are assigned to movie images in the order they were recorded.
settings
"Series"
"Reset"
contents
Assigns file numbers in sequence even if the memory card is
replaced with another one or after formatting, or after deleting
all files. The files number is reset when a new folder is created.
Resets the file number to 0001 even after formatting,
deleting all or inserting a new memory card.
on-screen
display
None
None
When you set "File No." to "Series", each file is assigned with a different
number so as to avoid duplicating file names. It is convenient when you
want to manage your files on a PC.
Memory Type (SC-MX10A/MX10AU only)
You can record movie images on the built-in memory or a memory card, so
you should select the desired storage media before starting recording or
playback. ➥page 32
settings
contents
Select the built-in memory for storage medium. So you
"Memory" can record or play back movie image on the built-in
memory.
"Card"
Select a memory card for storage medium. So you can
record or play back movie image on memory card.
66_English
on-screen
display
Beep Sound
Puede activar o desactivar el sonido del pitito. Cuando está activado, sonará un
pitido siempre que se pulse un botón.
ajustes
visualización
en pantalla
descripción
“Off”
Deshabilita la función.
Nada
“On”
El pitido suena al utilizar los ajustes el menú
con la unidad encendida.
Nada
File No.
Los números de archivo se asignan a las imágenes de video en el orden en que se grabaron.
ajustes
descripción
visualización
en pantalla
“Series”
Asigna números de archivo en secuencia incluso aunque se
sustituya la tarjeta de memoria por otra, después de formatear
o después de borrar todos los archivos. El número de archivo
se reinicia al crear una nueva carpeta.
Nada
“Reset”
Reinicia el número de archivo a 0001 incluso tras formatear,
borrando todo o insertando una nueva tarjeta de memoria.
Nada
Cuando defina “File No.” en “Series”, a cada archivo se le asigna un
número diferente para evitar la duplicación de nombres de archivos. Es
conveniente cuando se desea administrar los archivos en una PC.
Memory Type (Sólo SC-MX10A/MX10AU)
Puede grabar imágenes de video en la memoria incorporada o en una tarjeta de
memoria; por tanto, debe seleccionar el soporte de almacenamiento antes de
comenzar la grabación o la reproducción. ➥página 32
ajustes
visualización
en pantalla
descripción
Selecciona la memoria incorporada como soporte de
“Memory” almacenamiento. Por tanto, puede grabar o reproducir
imágenes de video en la memoria incorporada.
Selecciona una tarjeta de memoria como soporte de
almacenamiento. Por tanto, puede grabar o reproducir
“Card”
imágenes de video en la tarjeta de memoria.
Spanish_66
Memory Info
Memory Info
It shows you the storage information. You can view the storage media, used
memory space and available memory space, and the recordable time according to
the quality.
settings
on-screen
display
contents
It shows you the memory information
"Memory" of built-in storage media.
(SC-MX10A/MX10AU only )
It shows you the memory information
"Card"
of the inserted memory card.
Memory Info
●
Used:
4MB
Card
-
OK
Format
The format function completely delete all files and options on the storage media,
including protected files.
You can format (initialize) recording data in the storage media. You have to format
the pre-used storage media or newly purchased memory cards with this memory
camcorder before using them. This enables stable speeds and operation when
accessing the recording medium.
Be aware that all files and data including protected files will be erased.
"Memory"
"Card"
contents
Formats the built-in storage media.
(SC-MX10A/MX10AU only)
Formats the memory card.
on-screen
display
None
None
• Make sure to format the recording medium on the memory camcorder.
• Do not remove the recording medium or perform any other operation
•
•
(such as turning off the power) during format. Also, be sure to use the
provided AC power adapter, as the recording medium may be corrupted
if the battery becomes exhausted during format. If the recording medium
becomes corrupted, format it again.
A memory card with the protection tab set to lock will not be formatted.
➥page 59
In case of model SC-MX10/MX10P, the format is executed by selecting
"OK".
Do not format the recording medium on the PC or a different device.
WARNING Make sure to format the recording medium on the memory camcorder.
67_English
●
Free:
117MB
SF :
026Min
F :
N :
005Min
059Min
Back
If there is no storage media inserted, it could not be
selected. Then it will be dimmed on the menu.
In case of model SC-MX10/MX10P, the information of the memory card
appears by selecting "OK".
settings
Muestra la información del soporte de almacenamiento. Puede ver el soporte de
almacenamiento, el espacio utilizado de la memoria y el espacio disponible en la
memoria, así como el tiempo grabable según la calidad.
ajustes
“Memory”
“Card”
descripción
Muestra la información de la
memoria del soporte de
almacenamiento incorporado.
(Sólo SC-MX10A/MX10AU)
Muestra la información de la
memoria de la tarjeta de memoria
insertada.
visualización
en pantalla
-
-
Si no hay ningún soporte de almacenamiento insertado, no será posible seleccionarlo.
En este caso, aparecerá difuminado en el menú. En el caso del modelo SC-MX10/
MX10P, la información de la tarjeta de memoria aparece seleccionando "OK".
Format
La función de formateo borra completamente todos los archivos y opciones del
soporte de almacenamiento, inclusive los archivos protegidos.
Puede formatear (inicializar) los datos grabados en el soporte de almacenamiento.
Antes de utilizarlas, tiene que formatear el soporte de almacenamiento preutilizado
o las tarjetas de memoria recién adquiridas con esta videocámara con memoria.
Esto permite velocidades y un funcionamiento estables al acceder al soporte de
grabación.
Tenga cuidado ya que se borrarán todos los archivos y datos, incluidos los
archivos protegidos.
ajustes
“Memory”
“Card”
descripción
visualización
en pantalla
Formatea el soporte de almacenamiento
incorporado. (Sólo SC-MX10A/MX10AU)
Nada
Formatea la tarjeta de memoria.
Nada
• Asegúrese de formatear el soporte de grabación en la videocámara con memoria.
• No retire el soporte de grabación ni realice ninguna operación (como apagar la
•
•
ADVERTENCIA
unidad) al formatear. Asimismo, asegúrese de utilizar el adaptador de alimentación
de CA, ya que es posible que se haya dañado el soporte de grabación si la batería
se agota al formatear. Si el soporte de grabación se daña, formateelo de nuevo.
No se formateará una tarjeta de memoria con la pestaña de protección en Lock.
➥página 59
En el caso del modelo SC-MX10/MX10P, el formateo se ejecuta seleccionando "OK".
No formatee el soporte de grabación en la PC o en un dispositivo
diferente. Asegúrese de formatear el soporte de grabación en la
videocámara con memoria.
Spanish_67
setting options
opciones de configuración
Default Set
Default Set
You can initialize the memory camcorder settings to the factory defaults
(initial settings at the factory). Initializing the memory camcorder
settings to factory defaults does not affect recorded images.
After resetting the memory camcorder, set "Date/Time Set". ➥page 31
Tras reiniciar la videocámara con memoria, ajuste “Date/Time Set”. ➥página 31
Version
Version
Puede ver la información de la versión del firmware.
You can see the firmware version information.
Language
Language
You can select a desired language to display the menu and messages. ➥page 30
USB Connect
Connect the memory camcorder to a PC via a USB 2.0 cable and you can transfer
your movie images from the storage media, or use this as a web camera.
settings
contents
on-screen
display
"Mass
Storage"
Transfers the data files with your memory camcorder
and a PC. ➥page 75
None
"PC Cam"
Uses your memory camcorder as a web camera.
➥page 76
None
• The default setting is mass storage.
• Before connecting the USB cable, check if the appropriate USB mode you
Demo
Puede inicializar los ajustes de la videocámara con memoria con los ajustes de
fábrica (ajustes iniciales en fábrica). La inicialización de los ajustes de la videocámara con memoria a los ajustes de fábrica no afecta a las imágenes grabadas.
want to use is selected.
Demonstration automatically shows you the major features that are included
with your memory camcorder so that you may use them more easily.
settings
contents
on-screen
display
"Off"
Disables the function
None
"On"
Activates demonstration mode and shows various features
on the LCD screen.
- After it exit to the menu, the demonstration is automatically
operated.
- Demonstration mode will resume if you operate any other
function in STBY mode for about 6minute.
None
"Auto power off " function does not operate during the demonstration mode.
68_English
Puede seleccionar el idioma en el que desea que aparezca el menú y los
mensajes. ➥página 30
USB Connect
Conecte la videocámara con memoria a una PC a través de un cable
USB 2.0 y podrá transferir las imágenes de video desde el soporte de
almacenamiento o utilícela como una Webcam.
ajustes
“Mass Storage”
“PC Cam”
descripción
visualización
en pantalla
Transfiere los archivos de datos con la
videocámara con memoria y una PC. ➥página 75
Utiliza la videocámara con memoria como una
Webcam. ➥página 76
Nada
Nada
• El ajuste preedeterminado es almacenamiento en masa.
• Antes de conectar el cable USB, compruebe si se selecciona el modo
Demo
USB apropiado que desea utilizar.
La demostración muestra de manera automática las funciones más
importantes de la videocámara para poder utilizarlas de forma más sencilla.
ajustes
descripción
“Off”
Deshabilita la función.
“On”
Activa el modo de demostración y muestra las diversas
funciones en la pantalla LCD.
- Tras salir al menú, la demotración se ejecutará automáticamente.
- O modo de demonstração vai ser retomado se não utilizar
outra função durante cerca de 6 minutos.
visualización
en pantalla
Nada
Nada
La función "Auto power off" no está operativa durante el modo de
demostración.
Spanish_68
USB interface
Interfaz USB
SYSTEM REQUIREMENTS
REQUISITOS DEL SISTEMA
Transferencia de imágenes digitales mediante una conexión USB
This chapter explains how to connect a PC using the USB cable for various
actions.
- To connect an USB cable to a PC, refer to the software installation instructions
and available PC specification.
En este capítulo se explica la forma de conectar una PC utilizando el cable USB
para realizar diversas acciones.
- Para conectar un cable USB a una PC, consulte las instrucciones de instalación
del software y las especificaciones disponibles de la PC.
• The memory camcorder supports USB 2.0 High speed.
(Depends on the PC specification)
• You can transfer a recorded file in storage media to a PC via a USB connection.
• If you transfer data to a PC, you need to install the software
(DV Driver, Video Codec, DirectX 9.0) supplied with the memory camcorder.
• La videocámara con memoria admite USB 2.0 de alta velocidad.
(Depende de la especificación de la PC.)
• Puede transferir un archivo grabado en un soporte de almacenamiento a una
PC a través de una conexión USB.
• Para transferir datos al ordenador es necesario instalar el software
(DV Driver, Video Codec , DirectX 9.0) que se proporciona junto con la
videocámara con memoria.
USB Connection Speed (depending on the System)
Velocidad de la conexión USB (según el sistema)
System Requirements
Windows operating systems
Requisitos del sistema
Sistemas operativos Windows
Transferring a Digital Image through a USB Connection
• High speed USB connection is supported by Microsoft
(Windows) device drivers only.
• Windows 2000 - High speed USB on a system with Service
Pack 4 or later installed.
• Windows XP - High speed USB on a system with Service
Pack 1 or later installed.
• Windows Vista - High speed USB on a system with Service
Pack 1 or later installed.
• CPU: Intel® Pentium 4™, 2GHz or higher, or the equivalent
• Operating systems: Windows® 2000/XP/Vista
Standard installation is required. If you have upgraded your current operating
system, we can not guarantee
the proper operation of the product.
• Memory: 512MB RAM or higher
• Hard Disk: 2GB or higher
• Resolution: 1024x768 dots, 24bit color
• USB port: USB2.0 High Speed
- System requirements mentioned above are recommendations.
Even on a system that satisfies the requirements may not ensure the operation
depending on the system.
- This memory camcorder is recognized just as a removable storage device on the
Macintosh computer.
(Mac OS 10.3 or above supporting the High Speed USB standards)
69_English
• La conexión USB de alta velocidad sólo la admiten los
controladores de dispositivos de Microsoft (Windows).
• Windows 2000: USB de alta velocidad en un sistema con
Service Pack 4 o posterior instalado.
• Windows XP: USB de alta velocidad en un sistema con
Service Pack 1 o posterior instalado.
• Windows Vista: USB de alta velocidad en un sistema con
Service Pack 1 o posterior instalado.
• Procesador: Intel® Pentium 4™, 2 GHz o superior, o el equivalente
• Sistemas operativos: Windows® 2000/XP/Vista
Se requiere la instalación estándar. Si ha actualizado su sistema operativo
actual, no podemos garantizar el funcionamiento correcto del producto.
• Memoria: 512 MB de RAM o superior
• Disco duro: 2 GB o más
• Resolución: 1024x768 puntos, color de 24 bits
• Puerto USB: USB 2.0 de alta velocidad
- La interfaz USB no se admite en los sistemas operativos Windows® Vista
(64 bits) Macintosh.
- Los requisitos del sistema mencionados anteriormente son recomendaciones.
Incluso en sistemas que cumplan los requisitos es posible garantizar el
funcionamiento correcto dependiendo del sistema.
- La videocámara con memoria se reconoce como un dispositivo de
almacenamiento extraíble en el Macintosh. (Mac OS 10.3 o superior es
compatible con los estándares USB de alta velocidad)
Spanish_69
USB interface
Interfaz USB
• On a slower PC than recommended, movie playback may not
• En una PC más lenta de lo recomendado, es posible que la
•
•
•
•
•
•
•
•
•
be smooth or video editing may take a long time.
may skip frames or operate unexpectedly.
If your OS is Windows 2000/XP/Vista, log in as the Administr
ator(administrator of the PC)
(or a user with the equivalent privileges) to install the OS.
Check out the storage media of the memory camcorder
before connecting USB cable. If no memory card or an
unformatted memory card is inserted, the PC will not
recognize your memory camcorder as a removable disk.
If you disconnect the USB cable from the PC or the memory
camcorder during the data transfer, the data transfer will stop
and the data may be damaged.
If you connect the USB cable to a PC using a USB HUB or
with other devices at the same time, it may cause conflict and
may not work properly. If this occurs, remove all other USB
devices and try the connection again.
Intel® Pentium III™ or Pentium 4™ is a trademark of the Intel
Corporation.
Windows® is a registered trademark of the Microsoft®
Corporation.
All other brands and names are property of their respective
owners.
•
•
•
•
•
•
•
70_English
reproducción de películas no sea tan continua o puede que
la edición de video tarde algo más.
En una PC más lenta de lo recomendado, es posible que la
reproducción salte fotogramas o funcione de forma inesperada.
Si el sistema operativo es Windows 2000/XP/Vista, inicie la
sesión como Administrador (administrador de la PC)
(o un usuario con los privilegios equivalentes) para instalar el
sistema operativo.
Compruebe el soporte de almacenamiento de la videocámara
con memoria antes de conectar el cable USB. Si no tiene
ninguna tarjeta de memoria o tiene una sin formatear,
la PC no reconocerá la videocámara con memoria como
disco extraíble.
Si desconecta el cable USB de la PC o de la videocámara
con memoria durante la transferencia de datos, la
transferencia de datos se detendrá y puede que los datos
resulten dañados.
Si conecta el cable USB a una PC utilizando el HUB USB
o con otros dispositivos al mismo tiempo, puede causar
conflictos y puede que no funcione correctamente. Si esto
ocurre, retire el resto de dispositivos USB e intente la
conexión de nuevo.
Intel® Pentium III™ o Pentium 4™ es una marca comercial
de Intel Corporation.
Windows® es una marca registrada de Microsoft® Corporation.
El resto de marcas y nombres pertenecen a sus respectivos
propietarios.
Spanish_70
INSTALLING THE SOFTWARE
Installing DV Media Pro Program
INSTALACIÓN DEL SOFTWARE
Instalación del programa DV Media Pro
You need to install DV Media Pro to play back recorded
movie files or the transferred data from memory camcorder
with the USB cable on your PC. When you install the DV
Media Pro software on your Windows computer, you can
enjoy the following operations by connecting your memory
camcorder to your computer via a USB cable.
Tiene que instalar DV Media Pro para reproducir los archivos
de video grabados o los datos transferidos desde esta
videocámara con memoria con el cable USB. Cuando instale
el software de DV Media Pro en la PC con Windows, podrá
disfrutar de las siguientes funciones conectando la videocámara
con memoria a la PC a través de un cable USB.
- View movie recordings on PC:
DV Driver - DirectX9.0 - Video Codec
- PC camera/USB streaming function:
DV Driver - DirectX9.0 - Video Codec
- Visualización de grabaciones de video en la PC:
DV Driver - DirectX9.0 - Video Codec
- Función Webcam / USB Streaming:
DV Driver - DirectX9.0 - Video Codec
Before you start!
Pasos preliminares
Installing Driver - DV Driver and DirectX 9.0
Instalación del controlador - DV Driver y DirectX 9.0
• Turn on your PC. Exit all other applications running.
• Insert the provided CD into the CD-ROM drive.
- The setup screen appears automatically soon after the CD was inserted.
If the setup screen does not appear, click on "Start" on the bottom left corner
and select "Run" to display a dialog. Type "D:\autorun.exe" and then press
ENTER, if your CD-ROM drive is mapped to "D:Drive".
• DV Driver is a software driver that is required to support establishing
connection to a PC.
(If it is not installed, some functions will not be supported.)
1.
.
3.
Click on "DV Driver" on the setup screen.
• Driver software required is installed automatically.
Following drivers will be installed:
- USB PC-CAMERA driver
- USB streaming driver (USB video transfer)
Click on "Confirm" to finish driver installation.
If the "DirectX 9.0" is not installed, it is installed automatically
after setting "DV Driver".
• After installing DirectX 9.0, PC needs to be restarted.
• If DirectX 9.0 is installed already, there is no need to restart the PC.
• Encienda la PC. Salga de todas las aplicaciones en ejecución.
• Inseete el CD que se facilita en la unidad de CD-ROM.
- La pantalla de configuración aparece automáticamente justo tras insertar el CD. Si
no aparece la pantalla de configuración, haga clic en “Inicio” en la esquina inferior
izquierda y seleccione “Ejecutar” para que aparezca el diálogo. Escriba “D:\autorun.
exe” y pulse INTRO, si la unidad de CD-ROM tiene asignada la letra “D:”.
• DV Driver es un controlador de software necesario para poder establecer la
conexión con una PC.
(Si no se instala, es posible que no se admitan algunas funciones.)
1.
Haga clic en el “DV Driver” en la pantalla de configuración.
• Se instala automáticamente el software del controlador
necesario. Se instalarán los siguientes controladores:
- Controlador de Webcam USB
- Controlador de USB Streaming (transferencia de video USB)
. Haga clic en “Confirm” para finalizar la instalación del
controlador.
3. Si no está instalado “DirectX 9.0”, se instala automáticamente
tras definir “DV Driver”.
• Tras instalar DirectX 9.0, tiene que reiniciar la PC.
• Si ya está instalado DirectX 9.0, no hay necesidad de reiniciar la PC.
Application Installation - Video Codec
Instalación de la aplicación - Video Codec
• Click on "Video Codec" on the setup screen. Video Codec is required to play
movie files recorded by this memory camcorder on a PC.
• Haga clic en “Video Codec” en la pantalla de configuración. Video Codec es
necesario para reproducir en la PC archivos de video grabados en la
videocámara con memoria.
71_English
Spanish_71
USB interface
Interfaz USB
Application Installation – Quick Time
1. Click "Quick Time" on the setup screen.
• QuickTime is Apple's technology for handling movie,
sound, animation, graphics, text, music, and even
360-degree virtual reality (VR) scenes
Instalación de la aplicación – Quick Time
1. Haga clic en “Quick Time” en la pantalla de configuración.
• QuickTime es una tecnología de Apple para la utilización
de video, sonido, animación, gráficos, texto, música e
incluso escenas de realidad virtual (VR) en 360 grados.
CyberLink Power Director
CyberLink Power Director
• CyberLink Power Director is software for easily editing MPEG, AVI,
• CyberLink Power Director es el software para editar fácilmente MPEG,
Setting up CyberLink Power Director
• After inserting the CD, the setup screen displays automatically.
Follow the instruction to start installation.
It is a video editing tool that allows users to edit movie files.
Configuración de CyberLink Power Director
• Tras insertar el CD, aparece automáticamente la pantalla de configuración.
Siga las instrucciones para iniciar la instalación. Es una herramienta de
edición de vídeo que permite a los usuarios editar archivos de video.
and other video files, still images, and other contents for creating a
movie. This software has an interface that allows editing in either time
line or storyboard mode, maintains superior image quality, uses SVRT
for high-speed rendering, and has a host of other advanced video
editing features.
• Please install by using the Software CD that
came with this memory camcorder. We do not
guarantee compatibility with other CDs.
• For movie playback on a PC, install software in
this order : DV Driver - DirectX 9.0 - Video Codec
• For movie editing, use the CyberLink Power Director.
• For PC Cam use, install software in this order:
DV Driver - DirectX 9.0 - Video Codec
• You have to install "DV Driver", "Video Codec" and
"DirectX 9.0" to run DV Media Pro properly.
• During installation, if the Microsoft LOGO test
warning is shown, just click ‘Continue(C).’
• If a message saying "Digital Signature not found" or something similar
appears, ignore the message and continue with the installation.
7_English
AVI, y otros archivos de video, imágenes fijas, así como otro contenido
para crear un video. Este software tiene una interfaz que permite editar
en modo de línea de tiempo o guión gráfico, mantiene una calidad de
imagen superior, utiliza SVRT para representación de alta velocidad y
cuenta con una serie de funciones avanzadas de edición de video.
• Instálelo utilizando el CD de software que se
incluye con esta videocámara con memoria.
No garantizamos la compatibilidad con otros CD.
• Para la reproducción de vídeo en una PC, instale
el software en este orden:
DV Driver - DirectX 9.0 - Video Codec
• Para edición de video, utilice CyberLink Power Director.
• Para utilizar PC Cam, instale el software en este
orden:DV Driver - DirectX 9.0 - Video Codec
• Tiene que instalar “DV Driver”, “Video Codec” y “DirectX 9.0”
para ejecutar correctamente DV Media Pro.
• Durante la instalación, si aparece el aviso de prueba de Microsoft
LOGO, haga clic en ‘Continue(C).’
• Si aparece un mensaje del tipo “Firma digital no encontrada” o
algo similar, ignore el mensaje y continúe con la instalación.
Spanish_7
CONNECTING THE USB CABLE
CONEXIÓN DEL CABLE USB
Connect the USB cable to copy movie images in a recording medium
to the PC and vice versa.
Conecte el cable USB para copiar imágenes de video en un soporte
de grabación en la PC y viceversa.
You can also other various application with
USB connection.
(PC-camera, storing the data, etc.)
1. Set the "USB Connect" to
"Mass Storage". ➥page 68
. Connect the memory camcorder to
the PC with a USB cable.
PC
• Don’t apply excessive force when inserting or extracting a USB jack.
• Insert a USB jack after checking the direction of its insertion is correct.
• It is recommended to use the AC adapter as the power supply
instead of the battery pack.
• When the USB cable is connected, turning on or off the camcorder
causes malfunctions of the PC.
Disconnecting the USB cable
Before loading or unloading recording mediums or turning off the PC,
first disconnect the USB cable and turn off the memory camcorder.
After completing the data transmission, you must disconnect the cable
in the following way:
1. Click the "Unplug or eject hardware" icon on the
task tray.
. Select "USB Mass Storage Device" or "USB Disk," and
then click "Stop."
3. Click "OK."
4. Disconnect the USB cable from the memory camcorder and PC.
• If you disconnect the USB cable from the PC or the memory
camcorder while transferring, the data transmission will stop and
the data may be damaged.
• If you connect the USB cable to a PC via a USB HUB or
simultaneously connect the USB cable along with other USB
devices, the memory camcorder may not work properly. If this
occurs, remove all USB devices from the PC and reconnect the
memory camcorder.
73_English
Memory camcorder
USB cable
También puede acceder a otras aplicaciones con la conexión USB.
(Webcam, almacenamiento de datos, etc.)
1. Defina “USB Connect” en
“Mass Storage”. ➥página 68
. Conecte la videocámara con
memoria a la PC con el cable USB.
• No aplique una fuerza excesiva al insertar o extraer un conector USB.
• Inserte un conector USB tras comprobar que la dirección de su
inserción sea correcta.
• Se recomienda utilizar el adaptador de CA como fuente de
alimentación en vez de la batería.
• Al conectarse el cable USB, encender o apagar la videocámara
causa averías en la PC.
Desconexión del cable USB
Antes de cargar o descargar los soportes de grabación o apagar la PC,
desconecte primero el cable USB y apague la videocámara con memoria.
Tras completar la transmisión de datos, debe desconectar el cable de la
forma siguiente:
1. Haga clic en el icono “Unplug or eject hardware”
en la bandeja de tareas.
. Seleccione “USB Mass Storage Device” o
“USB Disk,” y, a continuación, haga clic en “Stop.”
3. Haga clic en “OK.”
4. Desconecte el cable USB de la videocámara con memoria y la PC.
• Si desconecta el cable USB de la PC o de la videocámara con
memoria mientras se están transfiriendo datos, la transmisión se
detendrá y puede que los datos resulten dañados.
• Si conecta el cable USB a la PC a través de un concentrador
(hub) USB, o si lo conecta de manera simultánea con otros
aparatos USB, es posible que la videocámara con memoria no
funcione correctamente. En este caso, desconecte de la PC
los otros aparatos USB y vuelva a conectar la videocámara con
memoria.
Spanish_73
USB interface
Interfaz USB
VIEWING THE CONTENTS OF STORAGE MEDIA
VISUALIZACIÓN DEL CONTENIDO DEL SOPORTE DE ALMACENAMIENTO
1.
Slide the POWER switch downward to turn on the memory
camcorder.
- Select the desired recording medium. ➥page 32
(SC-MX10A/MX10AU only)
- Make sure that there is a memory card in the memory camcorder.
. Connect the memory camcorder to the PC with a USB cable.
➥page 73
- Check out the USB connection on the LCD monitor.
3. When using Windows® XP,Vista version :
- The "Removable Disk" window appears on the PC’s
screen after a moment.
- Select "Open folders to view files using Windows
Explorer" and click "OK."
When using Windows® 000:
a. Doubleclick the "My Computer" icon on the desktop.
The "Removable Disk" icon which represents the
storage media in the memory camcorder appears in
the "My Computer" window.
b. Doubleclick the "Removable Disk" icon.
4. The folders in the storage media appear.
- Different file types are stored in different folders.
1. Deslice hacia abajo el interruptor POWER para encender la
videocámara con memoria.
- Seleccione el soporte de grabación que desee. ➥página 32
(Sólo SC-MX10A/MX10AU)
- Asegúrese de que la videocámara con memoria tiene una
tarjeta de memoria.
. Conecte la videocámara con memoria a la PC con un cable
USB. ➥página 73
- Compruebe la conexión USB de la pantalla LCD.
3. Al utilizar Windows® XP,Vista versión:
- Aparece la ventana “Disco extraíble” en la pantalla de la PC
tras un momento.
- Seleccione “Abrir carpets para ver archivos con Windows
Explorer” y haga clic en “Aceptar.”
Al utilizar Windows® 000:
a. Haga doble clic en el icono de “Mi PC” en el escritorio.
El icono “Disco extraíble” que representa el soporte
de almacenamiento en la videocámara con memoria
aparece en la ventana “Mi PC”.
b. Haga doble clic en el icono “Disco extraíble”.
4. Aparecen las carpetas del soporte de almacenamiento.
- Los diferentes tipos de archivos se almacenan en diferentes carpetas.
If the "Removable Disk" window does not appear,
confirm the connection or perform the steps 1 and 2.
Structure of folders and files on the storage media
• The folder and file structure for built-in memory or memory
card is as follows.
• Don’t arbitrarily change or remove the folder or file name.
It may not be playable.
Movie image file (1)
The SD-quality movie images have SDV_####.AVI format.
The file number automatically increases when a new movie
image file is created. When the number exceeds 9,999, a new
folder is created and it is stored in SDV_0001.AVI.
General data file (2)
It is the place where the user can save general document files
as a storage device.
74_English
Si no aparece la ventana “Disco extraíble”, confirme la
conexión o realice los pasos 1 y 2.
VIDEO
Estructura de carpetas y archivos del soporte
de almacenamiento
Movie image
Setting data
• La carpeta y la estructura de archivos de la memoria incorporada
o la tarjeta de memoria se muestran a continuación.
• No cambie arbitrariamente ni elimine la carpeta o el nombre del
archivo. Es posible que no se pueda reproducir.
VIDEO
100VIDEO
SDV_0001.AVI
SDV_0002.AVI
MISC
1
2
Archivo de imagen de video (1)
Las imágenes de video con calidad SD tienen el formato SDV_
####.AVI. El número de archivo aumenta automáticamente
cuando se crea un nuevo archivo de imagen de video. Cuando
el número sobrepasa los 9.999, se crea una nueva carpeta y
se guarda como SDV_0001.AVI.
Archivo de datos general ()
Es el lugar en el que el usuario puede guardar los archivos de
documentos generales como dispositivo de almacenamiento.
Spanish_74
• When the folder number is 999 and the file number is 9,999, you cannot
•
record any file. In this case, format your storage media.
(memory card, etc.)
You may modify the name of a file/folder stored in the memory card using
a PC. This memory camcorder may not recognize modified files.
TRANSFERRING FILES FROM THE MEMORY
CAMCORDER TO YOUR PC
You can copy the movie image to your PC and play back those.
1. Execute the procedure in "Viewing the contents of storage media."
➥page 74
The folders in the storage media appear.
. Create a new folder, enter the folder name, and
then doubleclick it.
3. Select the folder to copy, and then drag and drop it
into the destination folder.
• The folder is copied from the storage media to
the PC.
• Saving the wrong kinds of files in a recording
medium or deleting files or folders from a
recording medium can cause problems with
the operation of the memory camcorder.
When it is necessary to delete a file from a
recording medium, delete it through the memory
camcorder. Also, do not move or rename folders
and files within the medium on PC.
Never disconnect the USB cable while the
ACCESS lamp on the memory camcorder lights
or blinks.
• Cuando el número de carpeta llegue a 999 y el número de archivo
a 9.999, no podrá grabar ningún archivo más. En este caso,
formatee el soporte de almacenamiento. (tarjeta de memoria, etc.)
• Puede modificar el nombre de un archivo / carpeta almacenados
en la tarjeta de memoria utilizando una PC. Es posible que la
videocámara con memoria no reconozca los archivos modificados.
TRANSFERENCIA DE ARCHIVOS DESDE LA
VIDEOCÁMARA CON MEMORIA A LA PC
Puede copiar la imagen de video a la PC y reproducirla.
1. Ejecute el procedimiento de “Visualización del contenido del soporte de almacenamiento.” ➥página 74
Aparecen las carpetas del soporte de almacenamiento.
. Cree una nueva carpeta, introduzca el nombre de la
carpeta y, a continuación, haga doble clic en ella.
3. Seleccione la carpeta que va a copiar y, a continuación,
arrástrela y suéltela en la carpeta de destino.
• La carpeta se copia desde el soporte de
almacenamiento a la PC.
• Guardar tipos de archivos erróneos en un soporte de
grabación o borrar archivos o carpetas del mismo puede
causar problemas de funcionamiento en la videocámara
con memoria. Cuando sea necesario borrar un archivo del
soporte de grabación, bórrelo a través de la videocámara
con memoria. Asimismo, en la PC no mueva ni modifique
el nombre de carpetas y archivos existentes en el soporte.
Nunca desconecte el cable USB mientras el indicador de
ACCESO de la videocámara con memoria esté iluminada
o parpadee.
Playing Back Files on the PC
Reproducción De Archivos En La PC
Use the "DV Media Pro".
- You can install this software from the provided CD.
For more details of "Video Codec". ➥page 71
Utilice “DV Media Pro”.
- Puede instalar este software desde el CD que se facilita.
Para más detalles de “Video Codec”. ➥página 71
Movie Images
When playing back a file in the recording medium on your PC, copy
the file to your PC, and then play it back. If video file is played back
directly from recording medium (i.e. the memory camcorder is connected through USB to your PC), it may be not played back properly
due to the inadequate processing speeds or other problems.
75_English
Imágenes de video
Al reproducir un archivo en el soporte de grabación de la PC, copie el
archivo a la PC y reprodúzcalo. Si el archivo de video se reproduce
directamente desde el soporte de grabación (es decir, la videocámara
con memoria está conecada a través de USB a la PC), es posible
que no reproduzca correctamente debido a velocidades de
procesamiento no adecuadas o a otros problemas.
Spanish_75
USB interface
Interfaz USB
USING THE PC CAM FUNCTION
UTILIZACIÓN DE LA FUNCIÓN PC CAM
You can use your memory camcorder as a PC camera for video chatting,
video conference and other PC camera applications.
Puede utilizar esta videocámara con memoria como una Webcam para chat
con vídeo, videoconferencia y otras aplicaciones de Webcam.
Before you start!
Pasos preliminares
For PC Cam use, it is required to install the DV Driver. ➥page 71
1. Slide the Power switch downward to turn on the
Settings
memory camcorder.
.
3.
4.
5.
6.
7.
Para utilizar la Webcam, tiene que instalar DV Driver. ➥página 71
1. Deslice el interruptor POWER hacia abajo para
apagar la videocámara con memoria.
• The Movie Record mode screen appears.
• Aparece la pantalla del modo Grabar video.
USB Connect
Press the MENU button and select the " Settings".
2. Presione el botón MENU y seleccione “Settings”.
Mass Storage
➥page 62
➥página 62
PC Cam
• The Settings screen appears.
• Aparece la pantalla de ajustes.
Press the Control button (
) to select
3. Presione el botón de Control (
) para seleccionar
"USB Connect".
OK Select
MENU Exit
Move
“USB Connect”.
Press the Control button (
) to select
"PC Cam" and then press the OK button.
4. Presione el botón de Control (
) para seleccionar
PC
Memory camcorder
Turn on your PC.
“PC Cam” y, a continuación, presione el botón OK.
Connect the memory camcorder to your PC with the
5. Encienda la PC.
USB cable.
6. Conecte la videocámara con memoria a una PC
The memory camcorder can be used as a PC Cam
utilizando el cable USB.
for programs such as Windows Messenger.
USB cable
7. La videocámara con memoria se puede utilizar como una
- Various applications take advantage of the
Webcam para programas como Windows Messenger.
"PC Cam" function.
- Muchas aplicaciones se benefician de la función “PC Cam”.
Refer to respective product documentation for further details.
Consulte
la
documentación
correspondiente del producto para
- When finished, disconnect the USB cable.
• It is recommended to use an AC Power Adapter during data transfer
to avoid unintended power outages.
• When the USB port connection changed, it may require DV Driver
re-installation. ➥page 71
• If you connect more than two USB devices to a single PC or use
a hub for USB connection, the PC camera function may not work
properly.
• You may see a popup message for confirmation of the compatibility,
depending on the PC specification. Press "Continue" and follow the
on-screen instructions to complete the installation.
• If the DV Media Pro is not properly installed on your PC, during
connection, you may see the Found New Hardware Wizard on
the screen. Follow the on-screen instructions to complete the
installation.
76_English
120
MIN
obtener más detalles.
- Al finalizar, desconecte el cable USB.
• Se recomienda utilizar el adaptador de CA durante la transferencia
de datos para evitar cortes de alimentación no intencionados.
• Cuando se cambie la conexión del puerto USB, es posible que
haya que reinstalar DV Driver. ➥página 71
• Si conecta más de dos dispositivos USB a una sola PC o utiliza
un concentrador para la conexión USB, es posible que la Webcam
no funcione correctamente.
• Es posible que aparezca un mensaje emergente de confirmación
sobre la compatibilidad, dependiendo de las especificaciones de
la PC. Pulse “Continue” y siga las instrucciones en pantalla para
completar la instalación.
• Si no se ha instalado debidamente en la PC DV Media Pro,
durante la conexión, es posible que aparezca la pantalla de
nuevo hardware encontrado. Siga las instrucciones en pantalla
para completar la instalación.
Spanish_76
connection
conexión
You can view the recorded movie on a large screen by connecting the
memory camcorder to a TV.
Puede ver el video grabado en una pantalla grande conectando la
videocámara con memoria a un televisor.
VIEWING ON TV SCREEN
VISUALIZACIÓN EN UNA PANTALLA DE TELEVISIÓN
Connecting to a TV
Use the provided multi-AV cable to connect the
memory camcorder to a TV as follows:
Conexión a un televisor
Memory Camcorder
Normal TV
* If your TV has an S-VIDEO input jack, you can connect
the S-VIDEO plug into it. Even if you use an S-VIDEO
input jack, you need to connect an audio cable.
• Using S-VIDEO will deliver clearer playback.
• Before connecting, make sure that the
volume on TV is turned down: forgetting this
may cause howling from the TV speakers.
• Carefully connect the input and output
cables to the corresponding connections
on the device the memory camcorder is
being used with.
INPUT
S-VIDEO
Signal flow
L-AUDIO-R
Multi-AV cable
Stereo Type with
S-VIDEO Jack
S-VIDE O
AUDIO
R
Stereo Type
AUDIO
VIDEO
R
W
Monaural Type
VIDEO
R
L
AUDIO
VIDEO
L
Viewing on TV Screen
Red
1. Turn on the TV and set the input selector to
White
White
Red
the Input connection the memory camcorder is
connected to. This is often referred to as “line”.
- Refer to the TV instruction manual for how to switch the TV input.
. Turn the memory camcorder on.
.
- Slide the POWER switch downward and press the MODE button to set
Player (
). page 21
- The image that the memory camcorder is viewing will appear on the TV screen.
- You can also monitor the image on the LCD screen of the memory
camcorder.
3.
3. Perform playback. You can perform playback, recording or setting the
menu while viewing on TV screen.
R
W
• When the copy-guarded movie is played back, no image will appear on TV screen.
• Information that the memory camcorder is recording will appear on the TV
screen: You can also display only part of information or switch off the display.
Refer to “ TURNING THE SCREEN INDICATORS ON/OFF (
) ” on page
25, and press the
button to switch the display status.
R
W
B
Yellow
White
Y
Yellow
Y
Y
77_English
VIDEO
G
R
W
Y
Utilice el cable multi-AV que se suministra para
conectar la videocámara con memoria a un televisor de
la siguiente forma:
* Si el televisor tiene un conector de entrada S-VIDEO,
puede conectar en él el enchufe de S-VIDEO. Incluso
aunque utilice un conector de entrada S-VIDEO, tiene
que conectar un cable de audio.
• Si utiliza S-VIDEO conseguirá una
reproducción más clara.
• Antes de conectar, asegúrese de que el volumen
del televisor esté bajo: si no lo hace, podrían
producirse pitidos en los altavoces del televisor.
• Conecte con cuidado los cables de entrada y
salida a las conexiones correspondientes del
dispositivo con el que se esté utilizando la
videocámara con memoria.
Visualización en una pantalla de televisión
1. Encienda el televisor y coloque el selector de entrada
en la conexión de entrada a la que está conectada la
videocámara con memoria. Esto normalmente se conoce como “línea”.
- Consulte el manual de instrucciones del televisor para saber cómo cambiar
la entrada del televisor.
Encienda la videocámara con memoria.
- Deslice hacia abajo el interruptor POWER y presione el botón MODE para
fijar el reproductor (
). página 21
- La imagen que esté mostrando la videocámara con memoria aparecerá en
la pantalla del televisor.
- Pode também controlar a imagem no ecrã LCD da câmara de vídeo com
memória interna.
Realice la reproducción. Puede realizar la reproducción, grabación o ajuste del
menú mientras se ve en la pantalla del televisor.
• Cuando se reproduzca el video de la copia guardada, no aparecerá ninguna
imagen en la pantalla del televisor.
• La información que esté grabando la videocámara con memoria aparecerá
en la pantalla del televisor. También puede ver solo parte de la información
o apagar la visualización. Consulte “ENCENDIDO Y APAGADO DE LOS
INDICADORES DE PANTALLA (
)” en la página 25 y presione el botón
para cambiar el estado de visualización.
Spanish_77
connection
conexión
RECORDING (DUBBING) IMAGES ON OTHER VIDEO DEVICES
GRABACIÓN (DUPLICACIÓN) DE IMÁGENES EN OTROS
DISPOSITIVOS DE VIDEO
You can record (dub) images played
back on this memory camcorder, onto
other video devices.
Use the multi-AV cable(provided) to
connect the memory camcorder to
another video device as shown in the
following figure:
VCRs or DVD/HDD
recorders
Memory Camcorder
INPUT
Signal flow
1. Press the MODE button to set
Multi-AV cable
Player(
). ➥page 21
. Choose the recorded (dubbed)
movie on the thumbnail view and then press the OK button.
3. Press the record button on the connected device.
- The memory camcorder will start playback and the recording
device will record (dub) it.
• Using S-VIDEO will deliver clearer images.
• Be sure to use the AC adaptor to power the memory camcorder
from household AC outlet to prevent battery power from shutting
off during recording on another video device.
• You can perform playback in the same manner as when playing
back movies on this memory camcorder.
78_English
S-VIDEO
VIDEO
L-AUDIO-R
Puede grabar (duplicar) imágenes
reproducidas en esta videocámara con
memoria, en otros dispositivos de video.
Utilice un cable Multi-AV (suministrado)
para conectar la videocámara con
memoria a otro dispositivo de video
como se muestra en la siguiente figura:
1. Presione el botón MODE para fijar
el reproductor(
). ➥ página 21
. Elija el video grabado (duplicado) en la vista en miniatura y, a
continuación, presione el botón OK.
3. Presione el botón de grabación en el dispositivo conectado.
- La videocámara con memoria comenzará la reproducción y el
dispositivo de grabación lo grabará.
• Si utiliza S-VIDEO conseguirá unas imágenes más claras.
• Asegúrese de utilizar el adaptador de alimentación de CA como fuente
de alimentación de la videocámara con memoria para evitar que se
apague la unidad durante la grabación en otro dispositivo de video.
• Puede realizar la reproducción de la misma forma que al reproducir
videos en esta videocámara con memoria.
Spanish_78
maintenance &
additional information
mantenimiento e
información adicional
MAINTENANCE
MANTENIMIENTO
Your memory camcorder is a product of superior design and craftsmanship
and should be treated with care. The suggestions below will help you fulfill any
warranty obligations and allow you to enjoy this product for many years.
✪ For safekeeping of the memory camcorder, turn off the memory camcorder.
- Remove the battery pack and AC power adaptor. ➥page 13
- Remove the memory card. ➥page 32
La videocámara con memoria es un producto de diseño y trabajo superior y
debe tratarse con cuidado. Las sugerencias que se incluyen a continuación le
ayudarán a cumplir con las obligaciones de la garantía y le permitirán disfrutar
de este producto durante muchos años.
✪ Para la conservación de la videocámara con memoria, apague la videocámara con memoria.
- Retire la batería y el adaptador de alimentación de CA. ➥página 13
- Retire la tarjeta de memoria. ➥página 32
Cautions on Storing
• Do not leave the memory camcorder in a place where the temperature is
very high for a long period of time:
The temperature inside a closed vehicle or trunk can become very high in
a hot season. If you leave the memory camcorder in such a place, it could
malfunction or the case could be damaged. Do not expose the memory
camcorder to direct sunlight or place it near a heater.
• Do not store the memory camcorder in a place where the humidity is high
or in a dusty place:
Dust entering the memory camcorder could cause malfunctions. If humidity is
high, the lens could become moldy, and the memory camcorder could become
inoperative. It is recommended that you put the memory camcorder in a box
together with a desiccant when storing it in a closet, etc.
• Do not store the memory camcorder in a place subject to strong
magnetism or intense vibrations:
This could cause malfunctions.
• Detach the battery pack from the memory camcorder and store it in a
cool place:
Leaving the battery pack attached or storing it at high temperature could
shorten its life.
Cleaning the memory camcorder
✪ Before cleaning, turn off the memory camcorder and remove the battery pack
and AC power adapter.
• To clean the exterior
Wipe gently with a soft dry cloth. Do not apply excessive force when
cleaning, gently rub the surface.
- Do not use benzene or thinner to clean the camcorder. The coating of
exterior could peel off or the case could deteriorate.
79_English
Precauciones sobre almacenamiento
• No deje la videocámara con memoria durante un tiempo prolongado en
un lugar en el que la temperatura sea muy alta:
La temperatura dentro de un vehículo cerrado puede ser muy alta en verano. Si
deja la videocámara con memoria en un lugar de estas características, podría
sufrir una avería o podría dañarse la carcasa. No exponga la videocámara con
memoria a la luz directa del sol ni la coloque cerca de un calentador.
• No almacene guarde la videocámara con memoria en un lugar en el que
la humedad sea alta o en un lugar polvoriento:
La entrada de polvo en la videocámara con memoria podría causar averías.
Si la humedad es alta, el objetivo podría enmohecerse y la videocámara con
memoria podría quedar inoperativa. Se recomienda colocar la videocámara con
memoria en una caja junto con un desecador al guardarla en un armario, etc.
• No guarde la Videocámara con memoria en lugares sometidos a fuerte
magnetismo o a intensas vibraciones.
Esto podría causar averías.
• Retire la batería de la videocámara con memoria y guárdela en lugar fresco:
Si deja la batería conectada o la guarda con una temperatura alta, podría
reducirse su tiempo de utilidad.
Limpieza de la videocámara con memoria
✪ Antes de limpiarla, apague la videocámara con memoria y retire la batería y el
adaptador de alimentación de CA.
• Para limpiar el exterior
Límpiela con un paño suave seco. No aplique fuerza excesiva al limpiar,
frote con suavidad la superficie.
- No utilice benceno o disolvente para limpiar la videocámara. El
revestimiento del exterior podría desprenderse o podría deteriorarse la
carcasa.
Spanish_79
maintenance &
additional information
• To clean the LCD monitor
Wipe gently with a soft dry cloth. Be careful not to damage the monitor.
• To clean the lens
Use an optional air blower to blow out dirt and other small object. Do
not wipe the lens with cloth or your fingers. If necessary, wipe gently
with lens cleaning paper.
- Mold may form if the lens is left dirty.
- If the lens looks dimmer, turn off the memory camcorder and leave it
for about 1 hour.
ADDITIONAL INFORMATION
Using your memory camcorder abroad
mantenimiento e
información adicional
• Para limpiar la pantalla LCD
Límpiela con un paño suave seco. Tenga cuidado de no dañar el monitor.
• Para limpiar el objetivo
Utilice un ventilador opcional para eliminar la suciedad y otras pequeñas
partículas. No limpie el objetivo con un paño ni con los dedos.
Si es necesario, limpie suavemente con papel para limpieza de objetivos.
- Es posible que se forme moho si se deja el objetivo sucio.
- Si el objetivo parece más oscuro, apague la videocámara con memoria y
déjela descansar durante una hora aproximadamente.
INFORMACIÓN ADICIONAL
• Each country or region has its own electric and color systems.
• Before using your memory camcorder abroad, check the following items.
• Power sources
The provided AC adapter features automatic voltage selection in the
AC range from 100 V to 240 V.
You can use your camcorder in any countries/regions using the AC
power adaptor supplied with your camcorder within the AC 100 V to
240 V, 50/60 Hz range. Use a commercially available AC plug adaptor,
if necessary, depending on the design of the wall outlet.
• About TV color systems
Your camcorder is an NTSC-system-based camcorder. If you want
to view your recordings on a TV or to copy it to an external device,
it must be an NTSC-system-based TV or an external device having
the appropriate Audio/Video jacks. Otherwise, you may need to use
a separate video format transcoder (NTSC-PAL format converter).
Utilización de la videocámara con memoria en el extranjero
• Los sistemas de electricidad y de color pueden variar de un país a otro.
• Antes de usar la videocámara con memoria en el extranjero,
compruebe lo siguiente.
• Fuentes de alimentación
El adaptador de CA que se suministra incluye la selección automática de
voltaje en el rango de CA de 100 V a 240 V.
Puede utilizar la videocámara en cualquier país o región utilizando el
adaptador de alimentación de CA que se suministra con la videocámara
dentro del rango de 100 V a 240 V de CA, y el rango de 50/60 Hz.
• Si es necesario, utilice una clavija adaptadora de CA, dependiendo
del diseño de la toma de corriente.
Información sobre los sistemas de color para el televisor La videocámara está
basada en el sistema NTSC. Para ver las grabaciones en un televisor o para
copiar en un dispositivo externo, debe ser un televisor basado en un sistema
NTSC o en un dispositivo externo que tenga los terminales de audio/video
apropiados. De lo contrario, puede que tenga que utilizar un transcodificador de
video separado (conversor de formato NTSC-PAL).
PAL-Compatible Countries / Regions
Australia, Austria, Belgium, Bulgaria, China, CIS, Czech Republic, Denmark,
Egypt, Finland, France, Germany, Greece, Great Britain, Holland, Hong
Kong, Hungary, India, Iran, Iraq, Kuwait, Libya, Malaysia, Mauritius, Norway,
Romania, Saudi Arabia, Singapore, Slovak Republic, Spain, Sweden,
Switzerland, Syria, Thailand, Tunisia, etc.
NTSC-Compatible Countries / Regions
Bahamas, Canada, Central America, Japan, Mexico, Philippines, Korea,
Taiwan, United States of America, etc.
Países / regiones con sistemas de color compatibles con PAL:
Alemania, Arabia Saudita, Australia, Austria, Bélgica, Bulgaria, CEI, China,
Dinamarca, Egipto, España, Finlandia, Francia, Gran Bretaña, Grecia, Holanda,
Hong Kong, Hungría, India, Irak, Irán, Kuwait, Libia, Malasia, Mauricio, Noruega,
República Checa, República de Eslovaquia, Rumania, Singapur, Siria, Suecia,
Suiza, Tailandia, Túnez, etc.
Países / regiones con sistemas de color compatibles con NTSC:
América Central, Bahamas, Canadá, Corea, Estados Unidos, Filipinas, Japón,
México, Taiwán, etc.
80_English
Spanish_80
troubleshooting
solución de problemas
TROUBLESHOOTING
SOLUCIÓN DE PROBLEMAS
✪ Before contacting a Samsung authorized service center,
perform the following simple checks. They may save you the
time and expense of an unnecessary call.
✪ Antes de ponerse en contacto con un centro de servicio
autorizado de Samsung, realice las siguientes comprobaciones.
Es posible que le ahorren el tiempo y el coste de una llamada
innecesaria.
Warning indicators and messages
Indicadores y mensajes de advertencia
Fuente de alimentación
Power source
Message
Low Battery
Informs that...
The battery pack is
almost discharged.
Action
Mensaje
Change to a charged one or
use AC adaptor.
Charge the battery pack.
Low Battery
If no button is pressed
• To disable this option,
for about 5 minutes,
change the setting of
Auto Power the memory camcorder
"Auto Power Off" to
Off
is automatically turned
off .
"Off" ➥page 65
("Auto Power Off").
81_English
Indica que...
La batería está casi
descargada.
Posible solución
Cámbiela por una cargada o
utilice un adaptador de CA.
Si no se presiona
ningún botón durante
• Para desactivar esta
unos 5 minutos, la
Auto Power
opción, cambie el ajuste de
videocámara con
Off
"Auto Power Off" a "Off"
memoria se apaga
➥ página 65
automáticamente
("Auto Power Off").
Spanish_81
troubleshooting
solución de problemas
Storage media
Message
Memory
Full
Insert Card
Soporte de almacenamiento
Informs that...
There is not enough
space to record
on built-in memory.
Action
Delete unnecessary files on
the built-in memory.
(SC-MX10A/MX10AU)
Use a memory card.
There is no memory
Insert a memory card.
card inserted in the card Use the built-in memory.
slot.
(SC-MX10A/MX10AU)
Mensaje
Indica que...
Posible solución
Memory
Full
No hay suficiente
memoria para grabar.
Borre los archivos innecesarios en la memoria incorporada.
(SC-MX10A/MX10AU)
Utilice la tarjeta de memoria.
Insertar
tarjeta
No hay ninguna tarjeta
Inserte una tarjeta de memoria.
de memoria insertada en Utilice la memoria incorporada.
la ranura de la tarjeta.
(SC-MX10A/MX10AU)
Card Full
There is not enough
space to record
on memory card.
Delete unnecessary files on
the memory card.
Use the built-in memory
(SC-MX10A/MX10AU)
Card Full
No hay suficiente
memoria para grabar.
Borre archivos innecesarios en
la tarjeta de memoria.
Utilice la memoria incorporada.
(SC-MX10A/MX10AU)
Card Error
The memory card is
corrupted.
Format the memory card or
replace it with a new one.
Card Error
La tarjeta de memoria
está dañada.
Dé formato a la tarjeta de memoria
o cámbiela por una nueva.
Editing files
Message
Not
Formatted
Edición de archivos
Informs that...
The memory card is not
formatted.
Action
Format the memory card.
Not
Supported
Format
8_English
Indica que...
Posible solución
Not
Formatted
La tarjeta de memoria
necesita formato.
Formatee la tarjeta de memoria.
Grabación
Recording
Message
Mensaje
Informs that...
The format is not
supported.
Action
The file format is not
supported.
Check the supported file.
Mensaje
Not
Supported
Format
Indica que...
Posible solución
Formato no admitido.
El formato de archivo no se
admite. Compruebe el archivo
admitido.
Spanish_8
CAUTION
When there is dew condensation, put aside for a while
before using
• What is dew condensation?
Dew condensation happens when a memory camcorder is
moved to a place where there is a significant temperature
difference from the previous place. In other words, the
water vapor in the air turns into dew
because of the temperature difference, and it condensates
like dew on the external or internal lenses of the memory
camcorder and on the reflection lens.
When this happens, you temporarily may not use the
record or play functions of the memory camcorder.
Also, it may cause a malfunction or damage to the
memory camcorder when using the device with the
power on while there is dew condensation.
• What can I do?
Turn the power off and detach the battery pack, and
leave it in a dry area for 1~2 hours before using it.
• When does the dew condensation occur?
When the device is relocated to a place with a higher
temperature than the previous location, or when using it
in a hot area suddenly, it will cause condensation.
- When recording outside in cold weather during the
winter and then using it in indoors.
- When recording outside in hot weather after being
indoors or inside a car where the AC was running.
Note before sending your camcorder for repair.
• If these instructions do not solve your problem, contact
your nearest Samsung authorized service center.
• Depending on the problem, current hard disk may need
to be initialized or replaced and the data will be deleted.
Be sure to back up the data on the hard disk on the other
storage media before sending your camcorder to repair.
Samsung cannot guarantee any loss of your data.
83_English
PRECAUCIÓN
Si existe condensación, no lo utilice durante unos
minutos
• Qué es la condensación?
La condensación se produce al trasladar la videocámara
con memoria a un lugar en el que existe una diferencia
de temperatura considerable con respecto al lugar de
origen. En otras palabras, el vapor de agua en el aire se
convierte en agua debido a la diferencia de temperatura
y se condensa en las lentes tanto interna como externa
de la videocámara con memoria y en la lente de
reflexión, así como en la superficie del disco impidiendo
su correcta reproducción.
Cuando esto sucede, es posible que no pueda utilizar
temporalmente las funciones de grabación o reproducción
de la videocámara con memoria.
Asimismo, es posible que cause una vería o dañe la
videocámara al utilizar el dispositivo con condensación.
• Qué puedo hacer?
Apague la unidad, retire la batería y déjela secar en un
área seca durante 1~2 horas antes de utilizarla.
• Cuándo se produce la condensación?
Cuando se traslada el dispositivo a un lugar con una
temperatura superior a la temperatura del lugar de origen
o al utilizarla de repente en un área caliente.
- Al grabar en exteriores con una temperatura baja en
invierno y después utilizarla en interiores.
- Al grabar en exteriores con temperaturas altas después
de estar en interiores o dentro de un coche utilizando CA.
Antes de enviar la videocámara a reparar.
• Si las siguientes instrucciones no le permiten solucionar el
problema, póngase en contacto con el centro de servicio
autorizado de Samsung más cercano.
• Dependiendo del problema, es posible que haya que
inicializar el disco duro o sustituirlo y los datos se perderán.
Asegúrese de hacer una copia de seguridad en el disco
duro del soporte de almacenamiento antes de enviar la
videocámara a reparar. Samsung no se hace responsable
de la pérdida de datos.
Spanish_83
troubleshooting
solución de problemas
✪ If you encounter any problem using your camcorder, check
the followings before asking for service repair. If these
instructions do not solve your problem, contact the nearest
Samsung authorized service center.
✪ Si tiene algún problema con la videocámara, compruebe lo siguiente
Symptoms and solutions
Síntomas y soluciones
Alimentación
Power
Symptom
antes de solicitar la reparación. Si las siguientes instrucciones no le
permiten solucionar el problema, póngase en contacto con el centro
de servicio autorizado de Samsung más cercano.
Explanation/Solution
Síntoma
• The battery pack may not be installed on your
The power does
not turn on.
The power
automatically
turns off.
Power cannot be
turned off .
The battery
pack is quickly
discharged.
84_English
memory camcorder. Insert a battery pack to the
memory camcorder.
Explicación/Solución
• Es posible que no se haya instalado la batería en la
videocámara con memoria. Inserte la batería en la
videocámara con memoria.
• Es posible que la batería insertada esté descargada.
Cargue la batería o sustitúyala por una cargada.
• Si utiliza un adaptador de alimentación de CA,
asegúrese de que esté correctamente conectado a
una toma de corriente.
• The inserted battery pack may be discharged.
No se enciende.
• Your memory camcorder has been left for more
• La videocámara con memoria se ha dejado durante
más de 5 minutos sin presionar ningún botón.Para
encender la videocámara con memoria, presione el
botón Iniciar/Parar grabación.
• Está "Auto Power Off" definido en "On"?
Si no se presiona ningún botón durante unos 5
Se apaga
minutos, la videocámara con memoria se apaga
automáticamente.
automáticamente ("Auto Power Off").Para
desactivar esta opción, cambie el ajuste de "Auto
Power Off" a "Off" ➥ página 65
• La batería está casi descargada.Cargue la batería o
sustitúyala por una cargada.
• Remove the battery pack or unplug the AC power
No es posible
apagar la
unidad.
Charge the battery pack or replace it with a
charged one.
• If you use an AC power adaptor, make sure it is
properly connected to the wall outlet.
than 5 minutes without any button operation.
To turn on your memory camcorder, press the
Record start/stop button.
• Is "Auto Power Off" set to "On"?
If no button is pressed for about 5 minutes, the
memory camcorder is automatically turned off
( "Auto Power Off"). To disable this option,
change the setting of "Auto Power Off" to "Off"
➥page 65
• The battery pack is almost discharged. Charge
the battery pack or replace it with a charged one.
adaptor, and connect the power supply to the
camcorder again before turning it on.
• The temperature in the use condition is too low.
• The battery pack is not fully charged. Charge the
battery pack again.
• The battery pack reached its lifespan and cannot
be recharged. Use another battery pack.
La batería se
descarga con
mucha rapidez.
• Quite la batería o desenchufe el adaptador de alimentación
de CA y vuelva a conectar una fuente de alimentación a la
videocámara antes de encenderla de nuevo.
•
•
•
La temperatura de uso es demasiado baja.
La batería no está completamente cargada.
Cargue de nuevo la batería.
La batería ha llegado al final de su vida útil y no
puede recargarse. Utilice otra batería.
Spanish_84
Displays
Pantalla
Symptom
Explanation/Solution
The screen of TV or
LCD screen displays
distorted images.
• All movies recorded with this memory
camcorder have 4:3 aspect ratio.
- It can occur when recording or viewing a 16:9-ratio
image on the LCD screen. For more details, see
the display specifications. ➥page 55, 61
- If you want to display properly on your TV,
check out your TV type and set the proper
screen mode (4:3 aspect ratio).
Unknown image appears
on the LCD screen.
• The memory camcorder is in "Demo" mode.
Change the setting "Demo" to "Off". ➥page 68
• A warning indicator or message appears on the
screen. ➥page 81
The afterimage remains on
the LCD screen.
• This occurs if you disconnect the AC power
adaptor or remove the battery pack before
turning the power off.
The image on the LCD
screen looks dark.
• Ambient is too bright. Adjust the brightness
and angle of LCD.
Menu
Síntoma
Explicación/Solución
• Todos los videos grabados con esta
videocámara con memoria tienen una relación
de altura/anchura de 4:3.
Puede suceder al grabar o al ver una imagen
La pantalla de televisión
con una relación 16:9 en la pantalla LCD. Para
o la pantalla LCD
más detalles, consulte las especificaciones de la
muestran imágenes
pantalla. àpágina 55, 61
distorsionadas.
- Para una visualización correcta en el televisor,
compruebe el tipo de televisor y defina el ajuste
del modo de pantalla de televisión apropiado
(relación de altura/anchura de 4:3).
• La videocámara con memoria se encuentra en el
Una imagen
modo "Demo". Cambie el ajuste de “Demo” a
“Off”. ➥página 68
desconocida aparece en
• Aparece en pantalla un indicador o mensaje de
la pantalla LCD.
advertencia. ➥ página 81
Una postimagen
permanece en la
pantalla LCD.
• Esto sucede si desconecta el adaptador de
alimentación de CA o retira la batería sin apagar
la unidad antes.
La imagen de la pantalla • La luz ambiente es demasiado brillante. Ajuste el brillo
y el ángulo de la pantalla LCD.
LCD aparece oscura.
Menú
Symptom
Explanation/Solution
•
•
Menu items are
grayed out.
<Cannot Use> <Because of the following setting>
Scene Mode(AE) Exposure ( Manual)
•
•
85_English
You cannot select grayed items in the
current recording/playback mode.
There are some functions you cannot activate
simultaneously. The following list shows examples
of unworkable combinations of functions and
menu items. If you want to set the desired
functions, do not set the following items first.
Most of menu items cannot be selected when
you set the EASY.Q function.
If there is no storage media inserted, it can not
be selected and will be dimmed on the menu :
" Memory Info", "Format", etc.
Síntoma
Las opciones de menú
aparecen atenuadas.
Explicación/Solución
• No puede seleccionar las opciones atenuadas en
el modo de grabación/reproducción actual.
• Existen algunas funciones que no puede activar
simultáneamente. En la siguiente lista se muestran
algunos ejemplos de combinaciones de funciones
y opciones de menú imposibles. Para definir las
funciones que desea, no ajuste primero las siguientes
opciones.
<No es posible utilizar> <Debido al siguiente ajuste>
Modo escena (EA)
Exposición (Manual)
• La mayoría de opciones de menú no pueden
seleccionarse al ajustar la function EASY.Q.
• Si no se ha insertado ningún soporte de
almacenamiento, no puede seleccionarse y
aparecerá atenuado en el menú: " Memory
Info", "Format", etc.
Spanish_85
troubleshooting
solución de problemas
Recording Media (Memory card, etc)
Soporte de grabación (tarjeta de memoria, etc)
Symptom
Explanation/Solution
• Insert a memory card into your camcorder
properly. ➥page 33
Memory card functions
• If you use a memory card formatted on a
are not operable.
computer, format it again directly on your
camcorder. ➥page 67
• The recorded images are protected. Remove
Image cannot be
deleted.
protection from the files and delete them.
➥page 59
• You cannot delete the images protected by
other device. Release the protection of the
image on the device.
• Release the lock on the write-protect tab
of the memory card (SDHC, standard SD
memory card etc), if any. ➥page 34
Síntoma
Las funciones de la
tarjeta de memoria no
están disponibles.
You cannot format the
memory card.
The data file name is
not indicated correctly.
86_English
• The file may be corrupted.
• The file format is not supported by your
camcorder.
• Only the file name is displayed, if the
directory structure does not comply with the
international standard.
• Inserte correctamente una tarjeta de memoria
en la videocámara ➥página 33
• Si utiliza una tarjeta de memoria formateada
en una PC, formatéela de nuevo directamente
en la videocámara. ➥página 67
• Las imágenes grabadas están protegidas.
Quite la protección de los archivos y bórrelos.
➥ página 59
• No puede borrar las imágenes protegidas
No es posible borrar la
con otro dispositivo.Libere la protección de la
imagen.
imagen del dispositivo.
• Desbloquee la lengüeta de protección contra
escritura de la tarjeta de memoria (tarjeta de
memoria SDHC, SD estándar, etc.) si la tiene.
➥ página 34
• Desbloquee la lengüeta de protección contra
• Release the lock on the write-protect tab
of the memory card (SDHC, standard SD
memory card, etc), if any. ➥page 34
• Copy any important recorded files to your
PC before formatting. Samsung shall not be
responsible for any loss of data.
(It is recommended that you copy the data to
your PC or other storage media.)
Explicación/Solución
No es posible
formatear la tarjeta de
memoria.
El nombre del archivo
de datos no se indica
correctamente.
escritura de la tarjeta de memoria (tarjeta de
memoria SDHC/SD estándar, etc.) si la tiene.
➥ página 34
• Copie los archivos importantes grabados a la
PC antes de formatear. Samsung no se hace
responsable de la pérdida de datos.
(Se recomienda copiar los datos a la PC o a
otro soporte de almacenamiento.)
• Es posible que el archivo esté dañado.
• La videocámara no admite el formato de
archivo.
• Sólo aparece el nombre de archivo, si la
estructura de directorios no cumple con el
estándar internacional.
Spanish_86
Recording
Symptom
Grabación
Explanation/Solution
Síntoma
• Press the MODE button to set Movie
Record mode (
el modo Grabar video (
).
on the built-in memory or memory card.
• Check if the memory card is write-
The actual recording
time is less than the
estimated time.
• The estimated recording time is calculated
by some references.
• When you record an object that moves
fast, the actual recording time may be
shorten.
Si se pulsa el
botón Iniciar/parar
grabación no se
inicia la grabación.
When recording a
subject illuminated
by bright light,
vertical line appear.
87_English
deletion of files, the performance of the
built-in flash memory will be deteriorated.
In this case, format the built-in memory
again.
• This is not malfunctioning.
la memoria incorporada o en la tarjeta de
memoria.
• Compruebe si la tarjeta de memoria
tiene protección contra escritura o si ha
insertado la tarjeta de memoria SDHC.
• La temperatura interna de la videocámara
es inusualmente alta. Apague la videocámara y déjela en un lugar fresco durante
un tiempo.
• La videocámara tiene humedad en el
interior (condensación). Apague la
videocámara y déjela en un lugar fresco
durante una hora. ➥página 79
• El tiempo de grabación estimado se
El tiempo de
calcula mediante ciertas referencias.
grabación normal es
• Cuando grabe un objeto que se mueva
menor que el tiempo
rápidamente, es posible que se acorte el
estimado.
tiempo de grabación real.
• If you make a frequent recording or
The recording stops
automatically.
).
• No hay espacio suficiente para grabar en
• There is not enough free space to record
protected or if SDHC memory card is
Pressing the
inserted.
Recording start/
• The internal temperature of your
stop button does not
camcorder is unusually high. Turn off your
start recording.
camcorder and leave it for a while in a
cool place.
• Your camcorder is damp and moist inside
(condensation). Turn off your camcorder
and leave it for about 1 hour in a cool
place. ➥page 79
Explicación/Solución
• Presione el botón MODE para establecer
La grabación
se detiene
automáticamente.
Al grabar un objeto
iluminado con luz
brillante, aparece
una línea vertical.
• Si graba o borra archivos con frecuencia,
se reducirá el rendimiento de la memoria
flash incorporada. En este caso, formatee
de nuevo la memoria incorporada.
• Esto no es ninguna avería.
Spanish_87
troubleshooting
Symptom
Explanation/Solution
solución de problemas
Síntoma
Explicación/Solución
When the screen
is exposed to the
direct sunlight during
• This is not malfunctioning.
recording, the screen
becomes red or black
for an instant.
Cuando al grabar la
pantalla esté expu• Este hecho es normal y no se trata de
esta a la luz directa
del sol, la pantalla se
ninguna avería.
pone roja o negra por
un instante.
During recording, the
• "Date/Time" is set to "Off". Set the
date/time does not
"Date/Time" to "On". ➥page 64
display.
Durante la grabación,
• “Date/Time” se define en “Off”. Fije
no aparece ni la
“Date/Time” en “On”. ➥página 64
fecha ni la hora.
There is a time
difference between
the point where you
press Recording
start/stop button
and the point where
the recorded movie
starts/stops.
Existe una diferencia
• En la videocámara, es posible que exista
de tiempo entre el
punto en el que se
una ligera demora entre el punto en
presiona el botón Iniel que presione el botón Iniciar/parar
ciar/parar grabación
grabación y el punto real en el que se
y el punto en el que
inicie/detenga la grabación de video. No
se inicia/detiene la
se trata de ningún error.
imagen grabada.
• On your camcorder, there may be a slight
time delay between the point when you
press Recording start/stop button and
the actual point where the recorded movie
starts/stops. This is not an error.
• The internal temperature of your
The recording stops.
88_English
camcorder is unusually high. Turn off your
camcorder and leave it for a while in a
cool place.
• Your camcorder is damp and moist inside
(condensation). Turn off your camcorder
and leave it for about 1 hour in a cool
place. ➥page 79
• La temperatura interna de la videocámara
La grabación se
detiene.
es inusualmente alta.Apague la
videocámara y déjela en un lugar fresco
durante un tiempo.
• La videocámara tiene humedad en el
interior (condensación).Apague la
videocámara y déjela en un lugar fresco
durante una hora. ➥página 79
Spanish_88
Adjusting the image during recording
Symptom
Explanation/Solution
Ajuste de la imagen durante la grabación
Síntoma
• Defina “Focus” en “Auto”. ➥página 53
• Las condiciones de grabación no son ido-
• Set "Focus" to "Auto". ➥page 53
• The recording conditions are not suitable
Focus does not
adjust automatically.
The image appears
too bright or
flickering, or changes
in color.
Color balance of
image is not natural.
Unknown indicator
appears on the
screen.
The backlight
function does not
function.
89_English
for auto focus. Adjust the focus manually.
➥page 53
• The lens is dusty on the surface. Clear the
lens and check the focus.
• Recording is being made in a dark place.
Light up to brighten the place.
• This occurs when recording images under
a fluorescent lamp, sodium lamp, or
mercury lamp. Cancel "Scene Mode
(AE)" to minimize this phenomena.
➥page 48
• White balance adjustment is required. Set
proper "White Balance". ➥page 49
Explicación/Solución
El enfoque
no se ajusta
automáticamente.
neas para el enfoque automático. Ajuste el
enfoque manualmente. ➥página 53
• El objetivo tiene polvo en la superficie.
Limpie el objetivo y compruebe el enfoque.
• La grabación se ha realizado en un lugar
oscuro. Ilumine el lugar para darle más
claridad.
La imagen aparece
demasiado brillante
o con alteraciones,
o bien cambia de
color.
• Esto sucede al grabar imágenes con luz
El balance de color
de la imagen no es
natural.
•
fluorescente, luz de lámpara de sodio
o luz de lámpara de mercurio. Cancele
“Scene Mode (AE)” para minimizar este
fenómeno. ➥ página 48
Hay que realizar el ajuste de balance
de blanco. Fije el balance de blanco
apropiado. ➥página 49
• A warning indicator or message appears
on the screen.
• While recording in EASY.Q mode, the
backlight function does not work.
En la pantalla
• Aparece en pantalla un indicador o
aparece un indicador
mensaje de advertencia.
desconocido.
La función de luz de
fondo no funciona.
• Mientras se graba, la función de luz de
fondo no está operativa.
Spanish_89
troubleshooting
solución de problemas
Playback on your camcorder
Reproducción en la videocámara
Symptom
Pressing the
playback (Play/
Pause) button
would not start
playing.
The Skip or Search
function does not
work properly.
Explanation/Solution
• Press the MODE button to set Movie Play mode(
).
• Image files recorded using other device may not
be played on your memory camcorder.
• Select a proper recording medium.
• If the temperature inside the camcorder is
too high, it can not function properly. Turn the
camcorder off, wait for a few moments, and turn it
on again.
Playback is interrupted • Check the AC adaptor or battery pack is properly
connected and stable.
unexpectedly.
Playback on other devices (TV, etc.)
Symptom
Explanation/Solution
• Connect the audio line of the multi-AV cable to
You cannot view
the image or hear
the sound on the
connected device.
your camcorder or to the connected device
(TV, DVD recorder, etc). (Red color- right, White
color- left)
• The multi-AV cable is not connected properly.
Make sure that the multi-AV cable is connected to
the proper jack.➥page 77
• When you are using the S-VIDEO cable, make
sure to connect red and white plugs of your multiAV cable separately since S-VIDEO cable does
not support audio. ➥page 77
• All movies recorded with this memory camcorder
have 4:3 aspect ratio. So this happens when
The image appears
viewing recorded movies on a 16:9 wide screen TV.
distorted on the
• If you want to display properly on your TV, check
16:9 wide TV.
out your TV type and set the proper screen mode
(4:3 aspect ratio).
90_English
Síntoma
Explicación/Solución
• Presione el botón MODE para establecer el
).
modo Reproducir video (
Si se presiona el
botón de reproducción • Es posible que los archivos de imágenes
(Reproducir/Pausa) no
se inicia la grabación.
La función de salto
o búsqueda no funciona correctamente.
grabados con otro dispositivo no se reproduzcan
en la videocámara con memoria.
• Seleccione un soporte de grabación correcto.
• Si la temperatura del interior de la videocámara
es demasiado alta, es posible que no funcione
correctamente. Apague la videocámara, espere unos
instantes y, a continuación, enciéndala de nuevo.
La reproducción se
• Compruebe que el adaptador de CA o la batería
interrumpe de forma
estén correctamente conectados y estables.
inesperada.
Reproducción en otros dispositivos (TV, etc.)
Síntoma
Explicación/Solución
• Conecte la línea de audio del cable de AV a la
videocámara o al dispositivo conectado
(TV, grabadora de DVD, etc).
(Color rojo - derecha, color blanco - izquierda)
No puede ver la
• El cable de AV no se ha conectado correctamente.
imagen ni oír sonido
Asegúrese de que el cable de AV esté conectado al
en el dispositivo
terminal correcto.➥página 77
conectado.
• Cuando esté utilizando el cable S-VIDEO, asegúrese
de conectar los terminales rojo y blanco del cable AV
por separado ya que el cable S-VIDEO no admite
audio. ➥página 77
• Todos los videos grabados con esta videocámara con
memoria tienen una relación de altura/anchura de 4:3.
La imagen aparece
Por tanto, esto sucede al ver videos grabados en un
televisor con pantalla 16:9 panorámica.
distorsionada en
• Para una visualización correcta en el televisor,
el televisor 16:9
compruebe el tipo de televisor y defina el ajuste del
panorámico.
modo de pantalla de televisión apropiado (relación de
altura/anchura de 4:3).
Spanish_90
Connecting/Dubbing with other devices (TV, DVD player, etc)
Symptom
You cannot dub
correctly using the
multi-AV cable.
Explanation/Solution
• The multi-AV cable is not connected properly.
Make sure that the multi-AV cable is connected
to the proper jack, i.e. to the input jack of the
device used for dubbing an image from your
camcorder. ➥page 78
Conexión/duplicación con otros dispositivos
(TV, reproductor de DVD, etc)
Síntoma
No se puede duplicar
correctamente
utilizando el cable de
AV.
Explicación/Solución
• El cable de AV no se ha conectado
correctamenteAsegúrese de que el cable de
conexión de AV esté conectado al terminal
apropiado, es decir, al terminal de entrada del
dispositivo utilizado para duplicar una imagen de
otra videocámara. ➥página 78
Connecting to a computer
Symptom
Explanation/Solution
• Install the provided software program.
➥page 71
• Disconnect the USB device other than the
When using the
movies, a computer
keyboard, the mouse and the camcorder from
does not recognize
the computer.
• Disconnect the cable from the computer and
your camcorder.
camcorder, restart the computer, then connect
them again correctly.
• A video codec is needed to play the file recorded
Cannot play a
movie file properly
on a PC.
Cannot use the
provided software,
"DV Media Pro",
on the Macintosh
computer.
91_English
Conexión a una PC.
Síntoma
Explicación/Solución
• Instale el programa de software que se facilita.
➥página 71
Al utilizar los videos, • Desconecte de la PC cualquier dispositivo USB
una PC no reconoce
que no sea el teclado, el ratón y la videocámara.
• Desconecte el cable del PC y de la videocámara,
la videocámara.
reinicie la PC y, a continuación, conéctelas de
nuevo correctamente.
• Se necesita un códec de video para reproducir
on your memory camcorder. Install the software
provided with your camcorder. ➥page 71
Please install by using the software CD that
came with this camcorder.
We do not guarantee compatibility for different
CD versions.
• Make sure you insert the connector in the
correct direction, and connect the USB cable to
the USB jack on your camcorder firmly.
• Disconnect the cable from the computer and
camcorder, restart the computer. And connect it
again properly.
el archivo grabado en la videocámara con
memoria. Instale el software que se facilita con la
videocámara ➥página 71
Instale utilizando el CD de software que se incluye
No se pueden reprocon esta videocámara. No garantizamos la
ducir correctamente
compatibilidad para versiones de CD diferentes.
un archivo de video
• Asegúrese de insertar el conector en la dirección
en una PC.
correcta y conecte correctamente el cable USB
al terminal USB de la videocámara.
• Desconecte el cable de la PC y de la
videocámara, reinicie la PC. Y conéctela de
nuevo correctamente.
• You cannot use "DV Media Pro" for a Macintosh
• No puede utilizar "DV Media Pro" para una
No se puede utilizar
computadora Macintosh.
el software que se
• Esta videocámara se reconoce como un dispositivo
facilita, “DV Media
de almacenamiento extraíble en Macintosh.
Pro”, en Macintosh.
• (Mac OS 10.3 o superior admitidos.)
computer.
• This camcorder is recognized just as a
removable storage device on the Macintosh
computer. (Mac OS 10.3 or above supported.)
Spanish_91
troubleshooting
Symptom
Explanation/Solution
"DV Media Pro" does • Exit the "DV Media Pro" program, and restart
not function properly.
the Windows computer.
solución de problemas
Síntoma
“DV Media Pro”
no funciona
correctamente.
• Movie playback or sound may stop temporarily
The image or sound
on your camcorder
is not played on your
computer properly.
The playback
screen is paused or
distorted.
depending on your computer. The movie or
sound copied to your computer is not affected.
• If your camcorder is connected to a computer
that does not support Hi-speed USB(USB2.0),
the images or sound may not be played back
correctly. The images and sound is copied to
your computer is not affected.
• Check the system requirements to play a
movie. ➥page 69
• Exit other all applications running on the
current computer.
Overall operations
Symptom
The date and time
are incorrect.
9_English
Explanation/Solution
• Has the camcorder been left unused for a long
period of time? The backup memory battery
(button-type battery) may be discharged:
replace it with a new one. ➥ page 20
Explicación/Solución
• Salga del programa “DV Media Pro” y reinicie la
PC de Windows.
• Es posible que la reproducción de videos o
sonido se detenga temporalmente dependiendo
de la PC. El video o el sonido coppiados a la PC
La imagen o el sonido
no se ven afectados.
de la videocámara
• Si la videocámara está conectada a una PC
no se reproducen
que no admita USB de alta velocidad (USB2.0),
correctamente en la
es posible que las imágenes y el sonido no se
PC.
reproduzcan correctamente.
Las imágenes y el sonido copiados a la PC no
se ven afectados.
La pantalla de repro- • Compruebe los requisitos del sistema para
ducción se paraliza
reproducir un video. ➥página 69
o aparece distorsion- • Salga del resto de aplicaciones que se estén
ada.
ejecutando en la PC actual.
Operaciones generales
Síntoma
Explicación/Solución
• Ha dejado la videocámara sin utilizar durante
La fecha y hora son
incorrectas.
un tiempo prolongado? Es posible que la pila
de la memoria auxiliar (pila de botón) se haya
descargado: sustitúyala por una nueva.
➥página 20
Spanish_9
specifications
Model Name: SC-MX10/SC-MX10P/SC-MX10A/SC-MX10AU
especificaciones
Nombre Del Modelo: SC-MX10/SC-MX10P/SC-MX10A/SC-MX10AU
System
Video signal
Picture compression format
Audio compression format
Recording quality
Image device
Lens
Focal Length
Minimum Illumination
Filter diameter
Size/dot number
LCD screen method
NTSC
MPEG4 ASP Format
ADPCM
Super Fine (about 12Mbps), Fine (about 10Mbps),
Normal (about 8Mbps)
CCD (Charge Coupled Device)
(Max/Effective : 680K/350K pixels)
F1.6 to 4.3, 34x (Optical), 1200x (Digital) Electronic zoom lens
2.3~78.2mm
3.0 Lux
Ø30
LCD screen
Composite video out
Audio output
2.7 inches wide, 112k
1.6" interlaced scan, LCD panel/TFT active matrix system
Connectors
Y:1V (p_p), 75Ω, analog
C:0.286Vp_p, 75Ω, analog
1.0V (p_p), 75Ω, analog
(-7.5dBm 47KΩ, analog, stereo)
USB output
mini USB-B type (USB2.0 High Speed)
S-Video output
Power source
Power source type
Power consumption
(LCD on/LCD off)
Operating temperature
Operating humidity
Storage temperature
Dimensions (W x H x D)
Weight
Internal MIC
General
8.4V (Using AC adapter),
7.4V (Using Lithium Ion battery pack)
Power supply (100V~240V) 50/60Hz,
Lithium Ion battery pack
2.96W, 0.4A / 2.4W ( 0.3A)
0˚~40˚C (32˚F~104˚F)
30% ~80%
-20˚C ~ 60˚C (-4˚F ~ 140˚F)
Approx. 2.36" x 2.46" x 4.76" (60mm x 62.5mm x 121mm)
Approx. 0.61Ibs (280g)
(expect for battery pack or memory card)
Omni-directional stereo microphone
These technical specifications and design may be changed without notice.
93_English
Sistema
Señal de video
Formato de compresión de
imágenes
Formato de compresión de
audio
Calidad de grabación
Dispositivo de imagen
Objetivo
Longitud focal
Iluminación mínima
Diámetro del filtro
Tamaño/número de puntos
NTSC
Formato MPEG4 ASP
ADPCM
Superfina (unos 12 Mbps), Fina (unos 10 Mbps),
Normal (unos 8 Mbps)
CCD (dispositivo acoplado por carga)
(Máx./Efectiva: 680K/350K píxeles)
objetivo de zoom electrónico F1.6 a 34x (óptico), 1200x (digital)
2,3~78,2 mm
3.0 Lux
Ø30
Pantalla LCD
Salida de S-Video
Salida de video compuesto
Salida de audio
panorámica de 2,7 pulgadas 112k
Sistema de matriz activa TFT/Panel LCD con barrido
entrelazado de 1,6 pulg.
Conectores
Y:1V (p_p), 75Ω, analógica / C:0.286Vp_p, 75Ω, analógica
1,0 V (p_p), 75Ω, analógica
(-7,5 dBm 47K Ω, analógica, estéreo)
Salida USB
Tipo mini USB-B (USB 2.0 Alta velocidad)
Método de pantalla LCD
Fuente de alimentación
Tipo de fuente de
alimentación
Consumo de energía (LCD
encendida / LCD apagada)
Temperatura de
funcionamiento
Humedad de funcionamiento
Temperatura de almacenaje
Dimensiones (An x Al x Pr)
Peso
Micrófono incorporado
Generales
8,4 V (con adaptador de CA), 7,4 V (con batería de iones de litio)
Fuente de alimentación (100 V ~ 240 V) 50/60 Hz,
batería de iones de litio
2,96 W, 0,4 A / 2,4 W ( 0,3A)
0˚~40˚C (32˚F~104˚F)
30% ~80%
-20˚C ~ 60˚C (-4˚F ~ 140˚F)
Aprox. 2.36" x 2.46" x 4.76" (60mm x 62.5mm x 121mm)
Aprox. 0.61Ibs (280g) (excepto batería o tarjeta de memoria)
Micrófono estéreo omnidireccional
Estas especificaciones técnicas y el diseño están sujetos a cambios sin previo aviso.
Spanish_93
contact SAMSUNG world wide
If you have any questions or comments relating to Samsung products, please contact the
SAMSUNG customer care center.
Region
North America
Latin America
Country
CANADA
MEXICO
U.S.A
ARGENTINE
BRAZIL
CHILE
COSTA RICA
ECUADOR
EL SALVADOR
GUATEMALA
JAMAICA
PANAMA
PUERTO RICO
REP. DOMINICA
TRINIDAD & TOBAGO
VENEZUELA
COLOMBIA
BELGIUM
CZECH REPUBLIC
Europe
CIS
Asia Pacific
Middle East & Africa
DENMARK
FINLAND
FRANCE
GERMANY
HUNGARY
ITALIA
LUXEMBURG
NETHERLANDS
NORWAY
POLAND
PORTUGAL
SLOVAKIA
SPAIN
SWEDEN
U.K
Republic of Ireland
AUSTRIA
Switzerland
RUSSIA
KAZAHSTAN
UZBEKISTAN
KYRGYZSTAN
UKRAINE
LITHUANIA
LATVIA
ESTONIA
AUSTRALIA
New zealand
CHINA
HONG KONG
INDIA
INDONESIA
JAPAN
MALAYSIA
PHILIPPINES
SINGAPORE
THAILAND
TAIWAN
VIETNAM
Turkey
SOUTH AFRICA
U.A.E
Póngase en contacto con SAMSUNG world wide
Si tiene algún comentario o pregunta en relación con los productos de Samsung, póngase en
contacto con el Centro de atención al cliente de SAMSUNG.
Customer Care Center
1-800-SAMSUNG (726-7864)
01-800-SAMSUNG (726-7864)
1-800-SAMSUNG (726-7864)
0800-333-3733
0800-124-421, 4004-0000
800-SAMSUNG (726-7864)
0-800-507-7267
1-800-10-7267
800-6225
1-800-299-0013
1-800-234-7267
800-7267
1-800-682-3180
1-800-751-2676
1-800-SAMSUNG(726-7864)
0-800-100-5303
01-8000112112
0032 (0)2 201 24 18
844 000 844
Distributor pro Českou republiku :Samsung Zrt., česka organizační složka Vyskočilova 4, 14000 Praha 4
70 70 19 70
030-6227 515
3260 SAMSUNG(726-7864) or 08 25 08 65 65 (€ 0,15/Min)
01805 - 121213 (€ 0,14/Min)
06-80-SAMSUNG (726-7864)
800-SAMSUNG (726-7864)
0035 (0)2 261 03 710
0900 20 200 88 (€ 0,10/Min)
815-56 480
0 801 801 881,022-607-93-33
80 8 200 128
0800-SAMSUNG (726-7864)
902 10 11 30
0771-400 200
0870 SAMSUNG (726-7864)
0818 717 100
0800-SAMSUNG(726-7864)
0800-SAMSUNG(726-7864)
8-800-555-55-55
8-10-800-500-55-500
8-800-120-0-400
00-800-500-55-500
8-800-502-0000
8-800-77777
800-7267
800-7267
1300 362 603
0800SAMSUNG (726-7864)
800-810-5858, 010-6475 1880
3698 - 4698
3030 8282, 1800 110011
0800-112-8888
0120-327-527
1800-88-9999
1800-10-SAMSUNG (726-7864)
1800-SAMSUNG (726-7864)
1800-29-3232, 02-689-3232
0800-329-999
1 800 588 889
444 77 11
0860-SAMSUNG (726-7864)
800-SAMSUNG (726-7864), 8000-4726
Web Site
www.samsung.com/ca
www.samsung.com/mx
www.samsung.com/us
www.samsung.com/ar
www.samsung.com/br
www.samsung.com/cl
www.samsung.com/latin
www.samsung.com/latin
www.samsung.com/latin
www.samsung.com/latin
www.samsung.com/latin
www.samsung.com/latin
www.samsung.com/latin
www.samsung.com/latin
www.samsung.com/latin
www.samsung.com/latin
www.samsung.com.co
www.samsung.com/be
www.samsung.com/cz
www.samsung.com/dk
www.samsung.com/fi
www.samsung.com/fr
www.samsung.de
www.samsung.com/hu
www.samsung.com/it
www.samsung.be
www.samsung.com/nl
www.samsung.com/no
www.samsung.com/pl
www.samsung.com/pt
www.samsung.com/sk
www.samsung.com/es
www.samsung.com/se
www.samsung.com/uk
www.samsung.com/ie
www.samsung.com/at
www.samsung.com/ch
www.samsung.ru
www.samsung.kz
www.samsung.uz
www.samsung.ua
www.samsung.lt
www.samsung.com/lv
www.samsung.ee
www.samsung.com/au
www.samsung.com/nz
www.samsung.com.cn
www.samsung.com/hk
www.samsung.com/in
www.samsung.com/id
www.samsung.com/jp
www.samsung.com/my
www.samsung.com/ph
www.samsung.com/sg
www.samsung.com/th
www.samsung.com/tw
www.samsung.com/vn
www.samsung.com.tr
www.samsung.com/za
www.samsung.com/mea
SAMSUNG ELECTRONICS MÉXICO, S.A de C.V
Vía López Portillo No. 6
Col. San Francisco Chilpan Tultitlán, Estado
de México, C.P. 54940
Tel:01(55) 5747.5100/01.800.76.7864
Fax:01(55) 5747.50/01.800.849.1743
RoHS compliant
Our product complies with “The Restriction Of the use of certain
Hazardous Substances in electrical and electronic equipment”,
and we do not use the 6 hazardous materials- Cadmium (Cd),
Lead (Pb), Mercury (Hg), Hexavalent Chromium (Cr+6), Poly Brominated
Biphenyls (PBBs), Poly Brominated Diphenyl Ethers (PBDEs)- in our products.
Compatibilidad RoHS
Nuestro producto cumple con “La restricción de uso de ciertas
sustancias peligrosas en equipo eléctrico y electrónico”, y no
utilizamos los seis materiales peligrosos: Cadmio Cd), Plomo
(Pb), Mercurio (Hg), Cromo hexavalente (Cr+6), bifenilos polibrominados
(PBBs), difenilos éteres polibrominados (PBDEs)- en nuestros productos.
Code No. AD68-01307C - 00