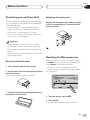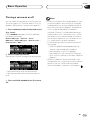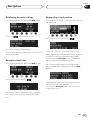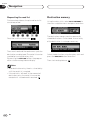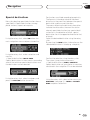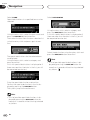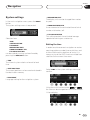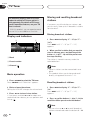
1
English NAVIGATION/CD TUNER ENGLISH Español Deutsch Operation Manual ANH-P9R-BK The screen shown in the example may differ from the actual screen. The actual screen may be changed without notice for performance and function improvements. 2 En Section Contents 00 Thank you for buying this Pioneer product. Please read through these operating instructions so you will know how to operate your model properly. After you have finished reading the instructions, put them away in a safe place for future reference. Italiano Nederlands En Français Navigation What is navigation? 19 Safety instructions 19 Digitised area 19 Deutsch Basic Operation Turning a source on or off 15 Using navigation and SOURCES simultaneously 16 SOFT KEY operation 16 • Switching the function of the multi-function buttons 16 • Example of multi-function button operation 17 • The difference between the BAND/ESC button and the BACK button 17 • Display example (e.g., built-in CD player) 18 Key guidance indicator 18 General notes 19 Before using navigation 20 Selecting navigation 20 Main navigation menu 21 Entering destination 21 • Selecting the country 21 • Entering the destination 22 • Entering the destination road 23 • Entering the destination centre 24 • Entering the POST CODE for the destination road 25 Route menu 25 • Entering the house number for the destination road 26 • Select the intersection for the destination road 27 • Selecting the route settings 27 Storing a specified destination in the destination memory 28 • Deleting stored destinations 29 • Destination memory full 29 Route guidance calculation 29 • Recalculating the route 29 Stopover 30 • Entering a stopover 30 • Starting route calculation to a stopover 30 • Deleting a stopover 30 • Stopover reached 31 Traffic jam function 31 • Entering the length of the bypass 31 • Delete block 31 Cancelling route guidance 32 Notes on route guidance 32 Dynamic navigation with TMC 34 • What is dynamic route guidance? 34 • Dynamic route guidance 34 • Displaying traffic information 35 Information during route guidance 36 Español Before You Start Introduction 7 License Agreement 7 • PIONEER ANH-P9R-BK 7 Important Safety Information 9 About this unit 10 About this manual 10 Precautions 10 In case of trouble 10 Protecting your unit from theft 11 • Removing the front panel 11 • Attaching the front panel 11 Resetting the Microprocessor 11 About the demo mode 12 • Reverse mode 12 • Feature demo 12 What’s what 13 • Optional remote control 14 3 Section 00 Contents • Requesting journey duration and kilometres travelled 36 • Displaying the route settings 37 • Request current time 37 • Requesting current position 37 • Requesting the road list 38 Destination memory 38 Special destinations 39 System settings 41 • Setting the time 41 • Saving the position 42 • Requesting the position 42 • Setting the language 43 • Switching announcement of the estimated time of arrival on/off 43 • Average Speed 44 • Selecting the measuring unit 44 4 Receiving traffic announcements 50 • Turning the TA function on or off 50 • Canceling traffic announcements 51 • Adjusting the TA volume 51 • TP alarm 51 Using the PTY function 52 • Searching the PTY 52 • Setting the news program interruption 52 • PTY alarm 52 PTY list 53 Using radio text 54 • Displaying the radio text 54 • Storing radio text 54 • Recalling preset radio text 54 Tuner Display and indicators 45 Basic operation 45 Storing and recalling broadcast stations 46 • Storing broadcast stations 46 • Recalling broadcast stations 46 Tuner function menu 46 Storing the strongest broadcast stations 47 Tuning in strong signals 47 Built-in CD Player Display and indicators 55 Basic operation 55 Switching and scrolling the title 56 Built-in CD player function menu 57 Repeating play 57 Playing tracks in random order 57 Scanning tracks of a CD 57 Selecting tracks from the track title list 58 Pausing CD playback 58 Entering disc titles 58 RDS Display and indicators 48 What is RDS? 48 Displaying the frequency of an RDS station 48 Using alternative frequency (AF) 49 Using the PI seek function 49 • PI seek 49 • Auto PI seek (for preset station) 49 Limiting stations to regional programming 50 Multi-CD Player Display and indicators 59 50-disc multi-CD player 59 Basic operation 59 Selecting a disc directly 60 Switching and scrolling the title 60 Multi-CD player function menu 61 Repeating play 61 Playing tracks in random order 62 Scanning CDs and tracks 62 Selecting tracks from the track title list 63 En Section Contents 00 Audio Adjustments Recalling equalizer curves 76 Audio menu 76 Using balance adjustment 77 Adjusting equalizer curve 77 Using bass adjustment 78 Using treble adjustment 78 Using loudness 78 Using subwoofer output 79 • Adjusting subwoofer settings 79 Adjusting source levels 79 Setting the sound focus equalizer 80 Français DAB Tuner Display and indicators 68 • Indications that light when function is switched on 68 • DAB status indications 68 Basic operation 69 Storing and recalling services 69 • Storing services 69 • Recalling services 69 Changing a band 69 Switching the display 70 Switching the road traffic flash and transport flash on or off 70 • Canceling road traffic flash and transport flash interruptions part way through 70 Dynamic label function 70 • Displaying dynamic labels 70 • Storing a dynamic label 71 • Recalling a dynamic label 71 DAB tuner function menu 71 Setting the announcement support interruption 72 Selecting services from the preset service list 72 Selecting services from the available service list 72 Searching the available PTY 73 Deutsch TV Tuner Display and indicators 74 Basic operation 74 Storing and recalling broadcast stations 74 • Storing broadcast stations 74 • Recalling broadcast stations 74 Changing a band 75 TV tuner function menu 75 Selecting channels from the preset channel list 75 Español Selecting discs from the disc title list 63 Pausing CD playback 64 Entering disc titles 64 Using compression and dynamic bass emphasis 65 Using ITS memory 66 • Programming tracks in ITS memory 66 • Playback from ITS memory 66 • Erasing a track from ITS memory 67 • Erasing a CD from ITS memory 67 Nederlands En Italiano Initial Settings Initial settings menu 81 • Initial settings menu operation 81 Using reverse mode 81 Using the feature demo 81 Switching the auxiliary setting 82 Switching the guide animation setting 82 Switching the muting/attenuation setting 82 Setting the Guide Select 82 Setting the FM tuning step 82 Setting the warning tone 83 Switching the rear output setting 83 Setting the DAB priority function 84 Switching the auto PI seek 84 5 Section 00 Contents Other Functions Attenuating audio volume 85 Displaying the clock 85 • Setting the time display on or off 85 • Off clock display 85 Adjusting the brightness 86 Switching the dimmer setting 86 Selecting the wall paper pattern 87 Using the AUX source 87 • Selecting AUX as the source 87 • Entering the AUX title 87 Additional Information CD player and care 88 CD-R/CD-RW discs 88 Understanding built-in CD player error messages 89 About traffic information 89 Copyright 90 Specifications 90 6 En Section Before You Start PIONEER ANH-P9R-BK 2. DISCLAIMER OF WARRANTY Nederlands En Italiano The Software and related documentation are provided to you “AS IS”. PIONEER AND ITS LICENSOR(S) (for the purpose of provisions 2 and 3, Pioneer and its licensor(s) shall be collectively referred to as “Pioneer”) MAKES AND YOU RECEIVE NO WARRANTY WHETHER EXPRESS OR IMPLIED, AND ALL WARRANTIES OF MERCHANTABILITY AND FITNESS FOR ANY PARTICULAR PURPOSE ARE EXPRESSLY EXCLUDED. SOME STATES DO NOT ALLOW EXCLUSION OF IMPLIED WARRANTIES, SO THE ABOVE EXCLUSION MAY NOT APPLY TO YOU. The Software is complex and may contain some non-conformities, defects or errors. Pioneer does not warrant that the Software will meet your needs or expectations, that operation of the Software will be error free or uninterrupted, or that all non-conformities can or will be corrected. Furthermore, Pioneer does not make any representations or warranties regarding the use or results of the use of the Software in terms of its accuracy, reliability or otherwise. Français Pioneer grants to you a non-transferable, nonexclusive license to use the software installed on the Pioneer products (the “Software”) and the related documentation solely for your own personal use or for internal use by your business, only on such Pioneer products. You shall not copy, reverse engineer, translate, port, modify or make derivative works of the Software. You shall not loan, rent, disclose, publish, sell, assign, lease, sublicense, market or otherwise transfer the Software or use it in any manner not expressly authorized by this agreement. You shall not derive or attempt to Deutsch 1. GRANT OF LICENSE Español THIS IS A LEGAL AGREEMENT BETWEEN YOU, AS THE END USER, AND PIONEER CORP.(JAPAN) (“PIONEER”). PLEASE CAREFULLY READ THE TERMS AND CONDITIONS OF THIS AGREEMENT BEFORE USING THE SOFTWARE INSTALLED ON THE PIONEER PRODUCTS. BY USING THE SOFTWARE INSTALLED ON THE PIONEER PRODUCTS, YOU ARE AGREEING TO BE BOUND BY THE TERMS OF THIS AGREEMENT. THE SOFTWARE INSTALLED ON THE PIONEER PRODUCTS INCLUDES DATABASE OF NAVTECH Data OF Navigation Technologies Corporation (“NAVTECH”) AND SEPARATE TERMS ATTACHED SHALL BE APPLIED TO THE DATABASE BY THE NAVTECH Data BY NAVTECH RESPECTIVELY. IF YOU DO NOT AGREE WITH THESE TERMS, PLEASE RETURN THE PIONEER PRODUCTS (INCLUDING THE SOFTWARE AND ANY WRITTEN MATERIALS) WITHIN FIVE (5) DAYS OF RECEIPT OF THE PRODUCTS, TO THE PLACE FROM WHICH YOU PURCHASED THEM, FOR A FULL REFUND OF THE PURCHASE PRICE OF THE PIONEER PRODUCTS. derive the source code or structure of all or any portion of the Software by reverse engineering, disassembly, decompilation, or any other means. You shall not use the Software to operate a service bureau or for any other use involving the processing of data for other persons or entities. Pioneer and its licensor(s) shall retain all copyright, trade secret, patent and other proprietary ownership rights in the Software. The Software is copyrighted and may not be copied, even if modified or merged with other products. You shall not alter or remove any copyright notice or proprietary legend contained in or on the Software. You may transfer all of your license rights in the Software, the related documentation and a copy of this License Agreement to another party, provided that the party reads and agrees to accept the terms and conditions of this License Agreement. English Introduction License Agreement 01 7 Section 01 Before You Start 3. LIMITATION OF LIABILITY IN NO EVENT SHALL PIONEER BE LIABLE FOR ANY DAMAGES, CLAIM OR LOSS INCURRED BY YOU (INCLUDING, WITHOUT LIMITATION, COMPENSATORY, INCIDENTAL, INDIRECT, SPECIAL, CONSEQUENTIAL, OR EXEMPLARY DAM-AGES, LOST PROFITS, LOST SALES OR BUSINESS, EXPENDITURES, INVEST-MENTS, OR COMMITMENTS IN CONNECTION WITH ANY BUSINESS, LOSS OF ANY GOODWILL, OR DAMAGES) RESULTING FROM THE USE OF OR INABILITY TO USE THE SOFTWARE, EVEN IF PIONEER HAS BEEN INFORMED OF, KNEW OF, OR SHOULD HAVE KNOWN OF THE LIKELIHOOD OF SUCH DAMAGES. THIS LIMITATION APPLIES TO ALL CAUSES OF ACTION IN THE AGGREGATE, INCLUDING WITHOUT LIMITATION BREACH OF CONTRACT, BREACH OF WARRANTY, NEGLIGENCE, STRICT LIABILITY, MISREPRESENTATION, AND OTHER TORTS. IF PIONEER’S WARRANTY DISCLAIMER OR LIMITATION OF LIABILITY SET FORTH IN THIS AGREEMENT SHALL OR FOR ANY REASON WHATSOEVER BE HELD UNENFORCEABLE OR INAPPLICABLE, YOU AGREE THAT PIONEER’S LIABILITY SHALL NOT EXCEED FIFTY PERCENT (50%) OF THE PRICE PAID BY YOU FOR THE ENCLOSED PIONEER PRODUCT. Some states do not allow the exclusion or limitation of incidental or consequential damages, so the above limitation or exclusion may not apply to you. This warranty disclaimer and limitation of liability shall not be applicable to the extent that any provision of this warranty is prohibited by any federal, state or local law which cannot be preempted. 4. EXPORT LAW ASSURANCES You agree and certify that neither the Software nor any other technical data received from Pioneer, nor the direct product thereof, will be exported outside the country or district (the “Country”) governed by the government having jurisdiction over you (the “Government”) except as authorized and as permitted by the laws and regulations of the Government. If the Software 8 En has been rightfully obtained by you outside of the Country, you agree that you will not reexport the Software nor any other technical data received from Pioneer, nor the direct product thereof, except as permitted by the laws and regulations of the Government and the laws and regulations of the jurisdiction in which you obtained the Software. 5. TERMINATION This Agreement is effective until terminated. You may terminate it at any time by destroying the Software. The Agreement also will terminate if you do not comply with any terms or conditions of this Agreement. Upon such termination, you agree to destroy the Software. 6. MISCELLANEOUS This is the entire Agreement between Pioneer and you regarding its subject matter. No change in this Agreement shall be effective unless agreed to in writing by Pioneer. If any provision of this Agreement is declared invalid or unenforceable, the remaining provisions of this Agreement shall remain in full force and effect. Section Before You Start Important Safety Information • As with any accessory in your vehicle’s interior, you should not allow this Navigation System to divert your attention from the safe operation of your vehicle. If you experience difficulty in operating the system or reading the display, please make adjustments while safely parked. English Español Deutsch Français Italiano Nederlands Before using your Navigation System, be sure to read and fully understand the following safety information: • Read the manual before operating this Navigation System. • This Navigation System is intended solely as an aid to you in the operation of your vehicle. It is not a substitute for your attentiveness, judgement, and care when driving. • Do not operate this Navigation System if doing so in any way will divert your attention from the safe operation of your vehicle. Always observe safe driving rules and follow all existing traffic regulations. • Never allow others to use the system unless they have read and understood the operating instructions. • Never use this Navigation System to route to hospitals, police stations, or similar facilities in an emergency. The map data may not include a comprehensive list of emergency service facilities. • Route and guidance information displayed by this equipment is for reference purposes only. It may not accurately reflect the latest permissible routes, road conditions, or traffic restrictions. • Traffic restrictions and advisories currently in force should always take precedence over guidance given by this product. Always obey current traffic restrictions, even if this product provides contrary advice. • Failure to input correct information about the local time may result in the product providing improper routing and guidance instructions. • Never set the volume of your Navigation System so high that you cannot hear outside traffic and emergency vehicles. • The data encoded in the disc provided with this product is the intellectual property of the provider, and the provider is responsible for such content. 01 En 9 Section 01 Before You Start About this unit This product complies with the EMC Directives (89/336/EEC, 92/31/EEC) and CE Marking Directive (93/68/EEC). • This navigation does not work correctly in the areas other than Europe. • The radio tuner frequencies on this unit are allocated for use in Western Europe, Asia, the Middle East, Africa and Oceania. Use in other areas may result in improper reception. The RDS function operates only in areas with FM stations broadcasting RDS signals. About this manual This unit features a number of sophisticated functions ensuring superior reception and operation. All the functions have been designed for the easiest possible use, but many are not selfexplanatory. This operation manual will help you benefit fully from this product’s potential and to maximize your listening enjoyment. We recommend that you familiarize yourself with the functions and their operation by reading through the manual before you begin using this unit. It is especially important that you read and observe precautions on this page and in other sections. 10 En Precautions • A CLASS 1 LASER PRODUCT label is affixed to the bottom of this unit. CLASS 1 LASER PRODUCT • The Pioneer CarStereo-Pass is for use only in Germany. • Keep this manual handy as a reference for operating procedures and precautions. • Always keep the volume low enough so you can hear sounds outside of the car. • Protect this product from moisture. • If the battery is disconnected or discharged, the preset memory will be erased and must be reprogrammed. In the case an auto antenna is installed, either turn off the ignition switch or detach the front panel to put away the antenna. In case of trouble Should this product fail to operate properly, contact your dealer or nearest authorized Pioneer Service Station. Section Before You Start Protecting your unit from theft Attaching the front panel Replace the front panel by holding it upright to this unit and clipping it securely into the mounting hooks. Español Important Removing the front panel 2 Grip the left side of the front panel and pull it gently outward. Take care not to grip it tightly or drop it. Resetting the Microprocessor When the ignition switch is turned OFF, pressing RESET lets you reset the microprocessor. Press RESET in the following cases. • When this unit fails to operate correctly. • When strange (incorrect) messages appear on the display. Français 1 Press OPEN to open the front panel. Deutsch • Never use force or grip the display and the buttons tightly when removing or attaching. • Avoid subjecting the front panel to excessive shocks. • Keep the front panel out of direct sunlight and high temperatures. English The front panel can be detached from the head unit and stored in the protective case provided to discourage theft. • If the front panel is not detached from the head unit within five seconds of turning off the ignition, a warning tone will sound. • You can turn off the warning tone. See Setting the warning tone on page 83. 01 Italiano 3 Put the front panel into the protective case provided for safe keeping. Nederlands 1 Turn the ignition switch OFF. 2 Press RESET. Use a pen tip or other pointed instrument. En 11 Section 01 Before You Start Notes • When using with a Pioneer Navigation System, if you press RESET, be sure the ACC OFF is selected. If ACC ON is selected, correct operation may not be possible even if you press RESET. • After completing connections or when you want to erase all memorized settings or return the unit to its initial (factory) settings, switch your engine ON or set the ignition switch to ACC ON before pressing RESET. Feature demo The feature demo automatically starts when power to this product is switched off while the ignition switch is set to ACC or ON. Pressing 6 numbered button during feature demo operation cancels the feature demo mode. Pressing 6 numbered button again to start the feature mode. Remember that if the feature demo continues operating when the car engine is switched off, it may drain battery power. Notes About the demo mode This product features two demonstration modes. one is the reverse mode, the other is the feature demo mode. Reverse mode If you do not perform an operation within about 30 seconds, screen indications start to reverse, and then continue reversing every 10 seconds. Pressing 5 numbered button when power to this product is switched off while the ignition switch is set to ACC or ON cancels the reverse mode. Pressing 5 numbered button again to start the reverse mode. 12 En • You cannot cancel a demo mode when the front panel is open. • The red lead (ACC) of this product should be connected to a terminal coupled with ignition switch on/off operations. If this is not done, the vehicle battery may be drained. • When the source is off, you can check the location of “5” and “6” by turnig on the feature demo. Section Before You Start 01 English Español 6 Multi-function buttons Press to select functions. 7 BACK button Pressing BACK cancels the current menu or mode and returns to the previously selected menu or mode. Nederlands 8 SOURCE button With the NAVIGATION function Switches to the main audio display. With the AUDIO function This unit is switched on by selecting a source. Press to cycle through all of the available sources. Italiano 2 Rotary stick, NAVI/OK button With the NAVIGATION function Rotary: Lets you select an item. 2/3/∞/5 : Let you select an item. Push: Lets you enter a selected item and switch functions ON/OFF. With the AUDIO function Rotary: Lets you manually adjust. 2/3/∞/5 : Let you manually adjust. Push: Switches to the main navigation display. 5 NEXT button Press NEXT to switch through the functions of the multi-function buttons. Français 1 Rotary volume, INFO button With the NAVIGATION function Rotary: Lets you adjust guidance volume level. Push: Displays information indications. With the AUDIO function Rotary: Lets you adjust the volume level of each source. Push: Lets you cancel each function during operation. 4 BAND/ESC button Press to select among three FM or MW/LW bands and cancel the control mode of functions. Deutsch What’s what 3 OPEN button Press to open the front panel. En 13 Section 01 Before You Start 9 0 ~ @ = ! Optional remote control The steering remote control CD-SR100 is sold separately. Operation is the same as when using the button on the head unit. See the explanation of the head unit about the operation of each button with the exception of ATT, which is explained below. 9 ATT button Press to quickly lower the volume level, by about 90%. Press once more to return to the original volume level. 0 BAND button - 5/∞/2/3 buttons = FUNCTION button ~ SOURCE button ! AUDIO button @ VOLUME button 14 En Note • Navigation operations of the ANH-P9R-BK cannot be performed even if the CD-SR100 is switched to the navigation mode. Section Basic Operation Turning a source on or off Italiano 3 Press and hold SOURCE to turn the source off. Français • Roll clockwise to raise the volume level. • Roll counterclockwise to lower the volume level. Deutsch 2 Raise or lower the volume. Rolling the VOLUME changes the volume level. Español 1 Press SOURCE to select the desired source (e.g., tuner). Press SOURCE repeatedly to switch between the following sources: Built-in CD player—TV tuner—Tuner— DAB tuner—Multi-CD player—External unit 1— External unit 2—AUX Notes • External unit refers to a Pioneer product (such as one available in the future) that, although incompatible as a source, enables control of basic functions by this product. Two external units can be controlled by this product, although “External” is displayed whether you select external unit 1 or external unit 2. When two external units are connected, the allocation of them to external unit 1 or external unit 2 is automatically set by this product. • In the following cases, the sound source will not change: * When no product corresponding to the source is connected to this product. * No audio disc is set in this product. * No magazine is set in the multi-CD player. * AUX (auxiliary setting) is set to off. (Refer to page 82.) • When this product’s blue/white lead is connected to the car’s auto-antenna relay control terminal, the car’s auto-antenna extends when this product’s source is switched on. English You can select the source you want to listen to. To switch to built-in CD player, load a CD in this product. (Refer to Basic operation on page 55.) 02 Nederlands En 15 Section 02 Basic Operation Using navigation and SOURCES simultaneously Switching the function of the multi-function buttons If SOURCE is pressed after having set the destination during navigation, the SOURCE display and navigation information are displayed simultaneously. The “3” indicator shows that the multi-function buttons have functions other than those currently displayed. When this indicator is visible, press NEXT to switch through the functions of the multi-function buttons. • Press NEXT to display the desired functions (e.g., built-in CD player). Press NEXT repeatedly to switch between the following functions: An announcement is made by the guide audio as necessary. In the case the name of the course changes, although the display will switch to the navigation display, it will automatically return to the SOURCE display. « Notes SOFT KEY operation SOFT KEY operation means that the function of a button changes as indicated on the display. The multi-function buttons provide SOFT KEY operation; the functions performed by the buttons change according to the function or setting that has been selected. Function names “3” Multi-function buttons Important • In this manual, for operations using the multifunction buttons the function displayed is used as the name of the function button. 16 En • The number of functions or displays switched through will differ according to the source or menu selected. • When no function is indicated for a button, that button is not currently active. Section Basic Operation Here the “random play” function of the built-in CD player is used as an example to illustrate operation of the multi-function buttons. 1 Press NEXT to display FUNC. Press NEXT repeatedly until FUNC appears. Notes • You can also turn random play on or off by pressing 5 or ∞ in the random mode. • If you do not operate the function within about 30 seconds, the display is automatically returned. 2 Press FUNC to enter the function menu. With the switch to the function menu, the functions of the multi-function buttons also change simultaneously. BAND/ESC button Pressing BAND/ESC immediately cancels the current menu or mode, and returns to the basic displays. Note 4 Press RDM to turn random play on. BACK button Pressing BACK cancels the current menu or mode and returns to the previously selected menu or mode. Français • When the source is the Tuner, TV tuner or DAB tuner and no menu or mode is selected, pressing BAND/ESC has the effect of switching bands. Deutsch 3 Press RDM to select the random mode. Español The difference between the BAND/ ESC button and the BACK button English Example of multi-function button operation 02 Italiano The light illuminates. • Press RDM again to turn random play off. The light goes off. Nederlands 5 Press BACK to exit the function menu. When the function menu is exited, the functions of the multi-function buttons also change simultaneously. En 17 Section 02 Basic Operation Display example (e.g., built-in CD player) Key guidance indicator This product’s display features key guidance indicators. These light to indicate which of the 5/∞/2/3 buttons you can use. When you’re in the function menu, audio menu or the other menus, they also make it easy to see which 5/∞/2/3 buttons you can use to switch functions on/off, switch repeat selections and perform other operations. Key guidance indicators Note • In this manual, operation for each mode is given mainly in terms of the multi-function buttons. However, in each mode, when the key guidance indicators are lit it is also possible to use5/∞/2/3 to operate the mode. 18 En Section Navigation 03 The navigation CD provided contains a digitised street map. Motorways, federal and regional roads, as well as district roads are detailed in this street map. Larger cities and boroughs are completely covered. The regional and unclassified roads or access roads and the town centre for smaller towns and boroughs are included. One way streets, pedestrian zones, turn bans and other traffic regulations are taken into account as far as possible. There may be discrepancies between the data on the navigation CD and the actual local situation, due to permanent changes to road systems and their traffic regulations. Deutsch The term “navigation” (lat. navigare = to travel by sea) is generally understood to mean the location of a vehicle, the determination of the direction and distance from the desired destination and the required route. Stars, prominent landmarks, compasses and satellites etc. are used as navigation tools. With the Pioneer ANH-P9R-BK, the location is determined via the GPS receiver (GPS = Global Positioning System). The direction and distance from the destination is determined using a digital street map, a navigation computer and sensors. A speedometer and reverse signal are additionally used to calculate the route. For safety reasons, route guidance follows predominantly in spoken form supported by a direction indicator on the display. Español Digitised area English What is navigation? General notes Safety instructions Nederlands En Italiano • Radio or CD operation continues during navigation operation. The distance to be covered before the next announcement and the estimated time of arrival are always displayed at the right of the display. • The unit can be switched to AUDIO by pressing the SOURCE button. The navigation menu is automatically displayed when navigation announcements are given. • When entering the address, only those letters, digits and symbols which are relevant for the address are displayed. The entries are automatically completed. Spaces (e.g. in Bad Abbach) must be entered using the underline symbol. Letters, numbers and symbols can be selected via the rotary stick and multifunction buttons 1 to 2. The scroll marks 5 and ∞ indicate a selection list which can be scrolled through using the rotary stick. Selection can also be made pressing the NAVI/OK button, as described later in this Operation Manual. Français • The requirements of the Road Traffic Regulations (RTR) apply. • Observation of traffic signs and local traffic regulations always takes priority. • Traffic guidance is restricted to passenger vehicles. Special driving recommendations and regulations for other vehicles (e.g. commercial vehicles) are not taken into account. • The destination must only be entered when the vehicle is stationary. 19 Section 03 Navigation • BACK button quits the current menu and displays the previous menu. • The route is recalculated by the system if deviation from the route is made. • Press the INFO button to hear the current navigation announcement. • During the navigation announcement, adjustment can be made to the volume using the rotary volume (see page 13). • By briefly pressing the INFO button, additional information can be requested during route guidance or the current position when route guidance is not active See Information during route guidance on page 36. • The current navigation announcement is interrupted by pressing the INFO button. • If the INFO button is pressed for longer than 2 seconds during a navigation announcement, the navigation announcement switches off and route guidance continues via display only. By briefly pressing the INFO button, the navigation announcements are switched on again. • The scroll marks 5 and ∞ indicate a selection list which can be scrolled through using the rotary stick. Each entry in the list shown in capital letters can be selected by pressing the NAVI/OK button. Before using navigation Before using the navigation, perform calibration and language definition referring to the Installation Manual. 20 En Selecting navigation These are the basic steps necessary to operate the navigation. More advanced navigation operation is explained starting on next page. Press the NAVI/OK button. • The navigation CD must be loaded when starting navigation operation for the first time. If the navigation system has not yet been calibrated, a calibration journey is prompted (see Installation manual). The main navigation menu appears after this display. Notes • Map data is on the navigation CD. • A navigation CD with the data for the destination country is required for navigation operation. • The navigation CD must be inserted to start the route calculation. During the calculation, the prompt flashes on the display. Once the calculation has been completed, the prompt extinguishes, the navigation CD can be removed and an audio CD can be inserted. • When entering destinations, driving off should be delayed until the prompt disappears. Section Navigation Main navigation menu 03 English • LAST DESTINATIONS A list of the last 50 destinations is displayed. The desired destination can be selected using the rotary stick. Before confirming with the rotary stick, details of the destination can be requested by pressing the INFO button. Stopovers are not stored as last destinations. Selection from can be made by turning the rotary stick, and confirmed by pressing the NAVI/OK button. Entering destination Select DESTINATION in the main navigation menu using the rotary stick and press to confirm. Deutsch • DEST. MEMORY contains destinations which have been stored previously. See Destination memory on page 38. Español DEST. MEMORY, DESTINATION, P.O.I., LAST DESTINATIONS, Selecting the country • DESTINATION accesses the entry menu for the destination. See Entering destination on this page. If your destination lies in another country, select the country (ex. GERMANY) using the rotary stick and press to confirm. Italiano Select the country using the rotary stick and press the NAVI/OK button to confirm. Français • P.O.I. Menu for the selection of special local and interregional destinations and special destinations nearby. Special destinations are e.g. petrol stations, airports or hospitals. See Special destinations on page 39. Note En Nederlands • We recommend the selection of a stopover (page 30) at the half- way point to the destination. 21 Section 03 Navigation Entering the destination The last location entered is displayed. If you want to enter a destination in the displayed location, you can select ROAD (refer to page 23) or CENTRE (refer to page 24) immediately. If your destination lies in another location, select the location using the rotary stick and press to confirm. Select the letters one after the other by turning the rotary stick and press the NAVI/OK button to confirm. The enlarged selected letter appears at the right of the display. Using the multifunction button the last confirmed letter is deleted. The complete entry is deleted if the multifunction button is pressed for more than 2 seconds. 22 En Letters which are already entered are displayed inversely. For the purpose of support, the existing entry is displayed at the next place-name to be reached. The unit offers only the possible remaining letters for selection. If no other entries are available, the unit completes the place-name automatically. To accept the entry, press and hold the NAVI/OK button for more than 2 seconds or select the small check ✓ and briefly press the NAVI/OK button. If the complete place-name was previously entered or was automatically completed, the program switches to either place-distinguishing list or to road or centre entry. If no roads and only the centre can be selected in the location entered, the program switches directly to route menu. If an incomplete location entry was confirmed, the place selection list is displayed. The place nearest to the entry appears in capital letters in the place selection list. The scroll marks indicate that more places are available for selection in alphabetical order. Select by turning the rotary stick and confirm by pressing the NAVI/OK button. (See General notes on page 19.) If the entry is unequivocal, the program switches to road or centre entry. If no roads and only the centre can be selected in the location entered, the program switches directly to route menu. Section Navigation If no other entries are available, the unit completes the road-name. Italiano Select the letters one after the other by turning the rotary stick and press the NAVI/OK button to confirm. The enlarged selected letter appears at the right of the display. Français Using the rotary stick, select ROAD and press the NAVI/OK button to confirm. To accept the entry, press and hold the rotary stick for more than 2 seconds or select the small check ✓ and briefly press the NAVI/OK button. If the complete road-name was previously entered or was automatically completed, the program switches to either road-distinguishing list or to route menu. If an incomplete location entry was confirmed, the road selection list is displayed. Deutsch Entering the destination road Letters which are already entered are displayed inversely. For the purpose of support, the existing entry is displayed at the next road to be reached. The unit offers only the possible remaining letters for selection. Español Select the required place using the rotary stick and press the NAVI/OK button to confirm. The program switches to road or centre entry. If no roads and only the centre can be selected in the location entered, the program switches directly to route menu. Using the multifunction button the last confirmed letter is deleted. The complete entry is deleted if the multifunction button is pressed for more than 2 seconds. English The place-distinguishing list is displayed if the selection is ambiguous. 03 Nederlands En 23 Section 03 Navigation The road nearest to the entry appears in capital letters in the road selection list. The scroll marks indicate that more roads are available for selection in alphabetical order. Select the road by turning the rotary stick and press the NAVI/OK button to confirm. If the entry is unequivocal, the program switches to route menu. The road-distinguishing list is displayed if the selection is ambiguous. Select the required place using the rotary stick and press the NAVI/OK button to confirm. The program switches to route menu. Select the centre by turning the rotary stick and press the NAVI/OK button to confirm. If the number of centres is greater than 9, the program switches to centre entry. Select the letters one after the other by turning the rotary stick and press the NAVI/OK button to confirm. The enlarged selected letter appears at the right of the display. Using the multifunction button the last confirmed letter is deleted. The complete entry is deleted if the multifunction button is pressed for more than 2 seconds. Entering the destination centre Using the rotary stick, select CENTRE and press the NAVI/OK button to confirm. If the place selected only has one centre, the program switches immediately to route menu. If the number of centres is less than 10, the centre list is displayed. 24 En Letters which are already entered are displayed inversely. For the purpose of support, the existing entry is displayed at the next centre to be reached. The unit offers only the possible remaining letters for selection. If no other entries are available, the unit completes the centre-name. Section Navigation Français Note The POST CODE to the entry appears in capital letters in the centre list. The scroll mark indicates that more centres are available for selection in alphabetical order. Select the POST CODE by turning the rotary stick and press the NAVI/OK button to confirm. The program switches to the route menu. Route menu • A list of possible centres is displayed immediately by pressing the NAVI/OK button for more than 2 seconds without having selected any letters. Using the rotary stick, select POST CODE in the route menu and press to confirm. Selection from can be made by turning, and confirmed by pressing the NAVI/OK button. Using the rotary stick, enter the POST CODE for the destination road and press for more than 2 seconds to confirm the entry. To confirm, the small check ✓ can also be selected and the rotary stick briefly pressed. • SAVE DESTINATION accesses the entry menu for the Destination memory (page 28). En Nederlands SAVE DESTINATION START–FAST R., (START–SHORT R. or START–DYN. R.) HOUSE NUMBER, CROSSING ROUTE SETTINGS Italiano Entering the POST CODE for the destination road Deutsch The centre nearest to the entry appears in capital letters in the centre list. The scroll mark indicates that more centres are available for selection in alphabetical order. Select the centre by turning the rotary stick and press the NAVI/OK button to confirm. The program switches to the route menu. If the complete centre-name was previously entered or was automatically completed, the program switches to route menu. The program switches to the centre list if the selection is ambiguous. Español If the complete centre-name was previously entered or was automatically completed, the program switches to route menu. The program switches to the centre list if the selection is ambiguous. Due to the system characteristics, route guidance continues only in the area of the POST CODE specified. English To accept the entry, press and hold the rotary stick for more than 2 seconds or select the small check ✓ and briefly press the NAVI/OK button. 03 25 Section 03 Navigation • START–FAST R., START–SHORT R. or START–DYN. R. Starts route calculation. Simultaneously, a prompt appears indicating the currently selected route option (–SHORT R. for a short route, -FAST R. for a fast route and -DYN. R. for a dynamic route). • HOUSE NUMBER The house number in the specified destination road can be entered here. This function is only available if this information is stored on the navigation CD. • CROSSING An intersecting road can be defined as the destination here. This function is only available if this information is stored on the navigation CD. • ROUTE SETTINGS Specifications such as quick route, short route, dynamic route, motorway, ferries and toll roads can be selected here. 26 En Entering the house number for the destination road Using the rotary stick, select HOUSE NUMBER in the route menu and press to confirm. Using the rotary stick, enter the house number for the destination road and press for more than 2 seconds to confirm the entry. To confirm, the small check ✓ can also be selected and the rotary stick briefly pressed. Due to the system characteristics, route guidance continues only in the area of the house number specified. Select START– to start route guidance. Select SAVE DESTINATION to jump to the destination memory menu. Select ROUTE SETTINGS to access the possible route settings. Select by turning the rotary stick and press to confirm the selection. Section Navigation Using the rotary stick, select CROSSING in the route menu and press to confirm. Using the rotary stick, select ROUTE SETTINGS in the route menu and press to confirm. • FAST ROUTE If selected, the program calculates the shortest possible journey time. Notes • The setting “SHORT ROUTE” is often recommended for larger cities or metropolis. • DYNAMIC ROUTE Dynamic route guidance is used to calculate the route, taking current traffic announcements into account. Français Select START– to start route guidance. Select SAVE DESTINATION to jump to the destination memory menu. Select ROUTE SETTINGS to access the possible route settings. Select by turning the rotary stick and press to confirm the selection. Deutsch • SHORT ROUTE If selected, the program calculates the shortest possible distance. Español Select the intersection for the destination road by turning the rotary stick and press to confirm. Selecting the route settings English Select the intersection for the destination road 03 Note Italiano • If Dynamic route guidance has been activated, the routes are calculated using the “FAST ROUTE” setting. Nederlands En 27 Section 03 Navigation Further information under Dynamic navigation with TMC on page 34. Storing a specified destination in the destination memory • RESTRICTIONS Provides options for avoiding motorways, ferries or toll roads. It is not absolutely necessary to store a destination in the destination memory for route guidance. It saves repeated manual entry, if the destination is required at a later date. Select SAVE DESTINATION in the route menu and press the NAVI/OK button to confirm. Selection can be made by turning the right rotary control, and settings can be changed by pressing the NAVI/OK button. Press the control for more than 2 seconds to accept all settings and quit the menu. Note • Routes without motorways can only be calculated for short distances (up to 200 km). Caution When a route is calculated, the route and voice guidance for the route is automatically set. Also, for day or time traffic regulations, only information about traffic regulations at the time when the route was calculated is shown. For example, if a street is open during the morning only, but you arrive later, it would be against the traffic regulations so you cannot drive along the set route. When driving, please follow the actual traffic signs. Also, the system may not know some traffic regulations. Any name of your choice consisting of up to 14 characters can be entered for the specified destination and then automatically stored in the destination memory after pressing the NAVI/OK button for more than 2 seconds. See Destination memory on page 38. To store, the small check ✓ can also be selected and the rotary stick briefly pressed. If you do not wish to enter a name of your choice, press and hold the NAVI/OK button for more than 2 seconds to store the address as previously entered in the destination memory. The last destination entered can be filled at any position by turning the rotary stick. The memory position is confirmed by briefly pressing the NAVI/OK button. A total of 50 destinations can be stored. For final storage in the destination memory, either route guidance must be started or the program must be switched to new destination entry by selection of NEW DESTINATION. 28 En Section Navigation Deleting stored destinations 03 Route guidance calculation English Select destination memory (see page 38). Destination memory full Deutsch Recalculating the route If the current route is not followed due to road blocks, diversions, unintentional driving in the wrong direction or failing to observe the recommendations, the system immediately calculates a new route. During this recalculation, NEW ROUTE is displayed. Français Occurs when the destination memory is full. Select either DELETE (to jump to the destination memory in order to delete a destination) or BACK (to cancel saving). Español Select the destination to be deleted using the rotary stick and press the multifunction button. The message “Calculating route” indicates that the distance is being calculated, which may take several seconds. After the first route guidance announcement, the prompt flashes on the display until the route has been completely calculated. When entering a destination, driving off should be delayed until no longer flashes. Italiano Nederlands En 29 Section 03 Navigation Starting route calculation to a stopover Stopover This function enables a stopover to be entered when route guidance is active. Entering a stopover To start route calculation to the stopover, press the NAVI/OK button. The route is calculated and route guidance begins. Press the multifunction button . Note • The .symbol is displayed inversely during route guidance to a stopover. Deleting a stopover Using the rotary stick, make a selection and press to confirm. • DEST. MEMORY (see page 38) Select the stopover from the destination memory. • DESTINATION (see page 21) allows entry of a stopover with the precise specification of the address. • P.O.I. (see page 39) enables the selection of special destinations as stopovers via LOCAL AREA, NEAR DESTINATION and TOWN/COUNTRY, e.g. petrol stations or airports. 30 En Press the multifunction button . To delete the stopover, press the NAVI/OK button within 8 seconds. Section Navigation 03 is displayed inversely and the route is recalculated. Delete block Traffic jam function Entering the length of the bypass Deutsch This function allows you to block the approaching route sections as from the next junction and calculate a bypass route when a traffic jam or road block is directly ahead. Press the multifunction button . Français To delete a block, press the NAVI/OK button within 8 seconds. Press the multifunction button Español Route guidance to the final destination automatically starts following the message YOU HAVE REACHED YOUR STOPOVER. English Using the rotary stick, select the length of the traffic jam and press the NAVI/OK button to confirm. Stopover reached . Italiano Nederlands En 31 Section 03 Navigation Cancelling route guidance WARNING Press BACK button. If a driving recommendation contradicts the applicable Road Traffic Regulations (RTR), the RTR is always valid! Route guidance is cancelled by pressing the NAVI/OK button within 8 seconds. For clarification, there follows a selection of examples of possible driving recommendations: • “Please perform a U-turn if possible”. When you press the BACK button, route guidance continues. Notes on route guidance After entering the destination (address), the system calculates the route and announces: “Ready to drive off”. The driving recommendations are given by voice messages and displays on the screen. By pressing the INFO button the current driving recommendation can be repeated. If the route to be travelled is not clear, e.g. at an intersection where a change in direction is not specified, the direction of travel can be displayed by pressing the NAVI/OK button. Please follow the direction indicated by the arrow. The display appears for 8 seconds after pressing the NAVI/OK button. 32 En You are driving in the wrong direction and should turn back at the earliest opportunity. • “Please turn right after 300 meters”. The arrow indicator > points to the next street into which you should turn. The progress bar on the right illustrates the distance and the black part decreases as you approach the intersection. • “Please follow the road”. Section Navigation This display tells you that you are in a non-digitised street (e.g. car park, garage), which is not included in the digital street map. The arrow indicates the direction of the destination as the crow flies. • “Keep right after 2 kilometers”. Español This recommendation prepares you for the next turning to be taken. However, “move into the left- hand lane” does not mean that you should do so immediately! At this point, you must drive straight ahead. • “Please follow the direction arrows”. English This display tells you that you should follow the course of the road. • “Prepare to turn left” or “Please move into the left- hand lane”. 03 Notes The destination specified is reached and route guidance is terminated. Français This display shows you which exit (marked with the arrow) you must take at the intersection. • “Now drive straight ahead”. Keeping to the right means that the road forks and you should follow the relevant direction. • “You have reached your destination”. Deutsch • At junctions and intersections, only the end of the road which is to be passed is displayed. • “Please leave the intersection at the third exit on the right”. Italiano Nederlands En 33 Section 03 Navigation Dynamic navigation with TMC Notes • Dynamic route guidance is not possible in all countries. • When any route recalculations are made with active dynamic route guidance, the navigation system may request the navigation CD (if the navigation CD is not already inserted). What is dynamic route guidance? Dynamic route guidance is used to calculate the route, taking current traffic announcements into account. The traffic announcements are transmitted by a TMC radio station in addition to the radio programme and are received and analysed by the navigation system. There is no charge for receiving traffic announcements. Note • Traffic announcements are transmitted by radio stations, therefore we cannot accept any responsibility for the completeness and correctness of the announcements. Dynamic route guidance Dynamic route guidance can be started by selecting START–DYN. R. in the route menu. If dynamic route guidance has been activated, a continuous check is made for the presence of relevant announcements for the selected route. The route is then calculated using the “FAST ROUTE” option, while taking into account current traffic announcements. If the check determines that a traffic announcement is relevant for the route guidance, then a new route to the destination is calculated automatically by the unit. NEW ROUTE appears on the display. In addition, there is a voice announcement “The route is being recalculated due to current traffic announcements”. is displayed inversely. Notes • If no TMC radio station was found, then CURRENTLY TMC RECEPTION IS NOT POSSIBLE is displayed. After a short time, the unit switches back to the route guidance display. • If a TMC station still cannot be found after 10 minutes, FOR THE TIME BEING TMC RECEPTION IS NOT POSSIBLE is displayed, accompanied by a brief signal tone. Your navigation system can receive TMC information, whether a TMC station is selected or not. However, in order to guarantee optimal reception of TMC information, we recommend the selection of a TMC station. 34 En Section Navigation Displaying traffic information Press the multifunction button . A list of currently available traffic information is displayed. A list of all currently available traffic information is displayed by pressing the multifunction button . Note After the desired traffic information has been confirmed, the information is displayed in full. A typical traffic announcement consists of: En Nederlands • a motorway or road number • approximate direction information • detailed location and direction information • the incident • the cause, if known Italiano • If no traffic information is currently available, NO TRAFFIC MESSAGES RECEIVED is displayed. The scroll marks at the left edge of the display indicate that additional traffic information is available. A selection can be made by turning the rotary stick and pressing the NAVI/OK button to confirm. Français A list of all current traffic information which is relevant for the calculated route is displayed by pressing the multifunction button . Deutsch More detailed information on the individual announcements can be requested in the list of current traffic information. Español Route guidance display: Information menu: For inactive route guidance, the information menu can be requested by pressing the INFO button. English Current traffic announcements can be displayed in plain text. There are several options for requesting current traffic information. Traffic information can be requested via the multifunction buttons and in the route guidance display and, in the case of inactive route guidance, via the multifunction button . in the information menu. 03 35 Section 03 Navigation If scroll marks are visible at the left edge of the display, then more than 3 lines are used to display the traffic information. Pressing the BACK button, switches back to the list of current traffic information. Information during route guidance Press the INFO button. The destination, the distance and the estimated time of arrival are displayed. Requesting journey duration and kilometres travelled During route guidance, press the INFO button. Press the multifunction button . The journey duration, kilometres travelled and the average speed are displayed. Pressing the NAVI/OK button, returns to the route guidance display. The information for journey duration, kilometres travelled and the average speed can also be requested as previously described, provided that the destination flag waves after the destination has been reached. If a stopover has been specified, the stopover is displayed. The main destination can be displayed via the multifunction button . To return to route guidance, press the INFO button again or wait for 8 seconds. 36 En Section Navigation 03 Requesting current position During route guidance, press the INFO button. During route guidance, the current position can be requested. Español Press the multifunction button. Press the multifunction button Request current time During route guidance, press the INFO button. The current position with road name (if available), degrees of longitude and latitude and the number of satellites received are displayed. By pressing the NAVI/OK button, the program returns to the route guidance display. For inactive route guidance, the information menu can be requested by pressing the INFO button. Français Press multifunction button . Deutsch The route settings are displayed. After 8 seconds, the system returns to the route guidance display. English Displaying the route settings . Nederlands The current time is displayed. After 8 seconds, the system returns to the route guidance display. Italiano The geographic position and number of satellites being used are displayed. Pressing the NAVI/OK button, returns to the information menu. En 37 Section 03 Navigation Requesting the road list Destination memory During route guidance, the planned route list can be requested. Press the multifunction button . The current road and the road names up to the destination are displayed. The route list can be scrolled by turning the rotary stick. By pressing the NAVI/OK button, the program returns to the route guidance display. Notes • After destination entry, there is a short delay until the route list is created. • If the vehicle is “off road” at the moment of destination entry, the route list cannot be created until a stored road is reached. 38 En Using the rotary stick, select DEST. MEMORY in the main navigation menu and press to confirm. The destination memory contains personally stored destinations. Once stored, manual entry of the destination is no longer necessary. Select the destination using the rotary stick and press the NAVI/OK button to confirm. Then start route guidance. Section Navigation Special destinations Italiano Using the rotary stick, select either country (ex. GERMANY) (see page 21), TOWN or NATIONWIDE and press to confirm. Français Using the rotary stick, select a category and press the NAVI/OK button to confirm. Confirm the selection using the rotary stick. The system jumps to the route menu. • Special destinations TOWN / COUNTRY Special destinations of your choice in countries contained in the navigation CD can be selected. Deutsch Using the rotary stick, make a selection and confirm. • Special destinations LOCAL AREA Special destinations in the current surrounding area of the vehicle or special destinations near the destination can be selected. Español Using the rotary stick, select P.O.I. from the main navigation menu and press to confirm. Destinations are listed according to proximity. The figures in kilometres relate to the direct distance (as the crow flies) between the special destination and the current location. The arrows following the distance information indicate the distance as the crow flies to the relevant special destination (e.g. special destination lies in the direction of travel, special destination lies in the opposite direction to that of travel). Select the desired destination using the rotary stick. By pressing the INFO button, information on the selected destination is listed (e.g. a hospital). English Menu for selecting special destinations from a specified list. Special destinations are e.g. petrol stations, airports or hospitals. 03 Nederlands En 39 Section 03 Navigation Select TOWN Special destinations in a specified town can be selected. Using the rotary stick, select the town name and press the NAVI/OK button to confirm. Then select the town from the town selection list using the rotary stick and press again to confirm. Select NATIONWIDE Using the rotary stick, select a category and press the NAVI/OK button to confirm. A list with special destinations is displayed or if there are more than 9 entries in the list, you will be requested to enter text. Select the destination using the rotary stick and press the NAVI/OK button to confirm. The special destinations for the selected town are displayed. Using the rotary stick, select a category and press to confirm. A list with special destinations is displayed or if there are more than 9 entries in the list, you will be requested to enter text. Enter the special destination and confirm. Confirm the special destination in the list displayed by pressing the NAVI/OK button. The system jumps to the route menu. Note • A list of possible special destinations is displayed by pressing the NAVI/OK button for more than 2 seconds without having selected any letters. 40 En Note • A list of possible special destinations is displayed by pressing the NAVI/OK button for more than 2 seconds without having selected any letters. Section Navigation System settings can be made by turning, and confirmed by pressing the NAVI/OK button. • ETA CALCULATION This setting controls the estimated average speed when driving on a motorway. Setting the time In order to achieve correct navigation on routes requiring guidance under time restrictions and to calculate the estimated time of arrival, it is necessary to set the GMT time transmitted from satellites to the current time zone. Deutsch SAVE POSITION, LANGUAGE*, MEASURING UNIT, ANNOUNCEMENT ETA, ETA CALCULATION, • ANNOUNCEMENT ETA Announcement of the estimated time of arrival can be switched on / off. Español Selection from TIME, • MEASURING UNIT The display units can be changed from metres to yards. English In the main navigation menu, press the BACK button. The system settings menu is requested. 03 • TIME The internal system clock can be set to local time. Select TIME in the system settings menu and confirm. Français • SAVE POSITION The current position can be saved and stored in the destination memory. • LANGUAGE* Language setting for the navigation system. Italiano Using the multifunction button or the time can be changed from the 24 hour to the 12 hour display. Nederlands En 41 Section 03 Navigation Using the multifunction buttons or the time is changed every half an hour. By pressing the rotary stick or the multifunction button the time set is accepted. The program returns to the system settings menu. Select the desired position in the destination memory using the rotary stick and press the NAVI/OK button to confirm. Requesting the position Request the destination memory (see page 38) and select destination using the rotary stick. Saving the position Select SAVE POSITION in the system settings menu and confirm. The current position, in degrees of longitude and latitude, is displayed. Confirm again by pressing the NAVI/OK button. Enter the name of the position. Press the NAVI/OK button for more than 2 seconds to confirm the name entered. To confirm, the small check ✓ can also be marked and the rotary stick briefly pressed. The destination memory is automatically requested (see page 38). 42 En If the position is outside a digitised area, the driver is guided to the digitised route nearest to the destination. The announcement “Your destination is nearby” is given. The direction of the arrows must be followed in order to reach the destination. Section Navigation Setting the language Select ANNOUNCEMENT ETA in the system settings menu and confirm. ETA stands for Estimated Time of Arrival. Español It is possible to select between ANNOUNCEMENT ETA ON and OFF by briefly pressing the NAVI/OK button. Press and hold the NAVI/OK button to accept Deutsch Select the language using the rotary stick. The language selection is accepted by pressing the control and the language is installed. You can choose either a male or a female voice for certain languages. Switching announcement of the estimated time of arrival on/off English Select LANGUAGE* in the system settings menu and confirm. 03 the setting. The system returns to the system settings menu. Français Select the voice using the rotary stick. The voice is accepted and installed by pressing the control. The system returns to the system settings menu after installation. Italiano Note • In the case you have mistakenly switched to a language you cannot read, perform operation by following the asterisk (*). Nederlands En 43 Section 03 Navigation Average speed Selecting the measuring unit Select ETA CALCULATION in the system settings menu and confirm. Select MEASURING UNIT from the system settings menu and confirm. Select the estimated average speed using the rotary stick. The estimated average speed is accepted by pressing the NAVI/OK button. The system returns to the system settings menu. Select the measuring unit using the rotary stick. The measuring unit is accepted by pressing the NAVI/OK button. The system returns to the system settings menu. Notes • METRIC indicates calculation in metres. • IMPERIAL indicates calculation in yards. 44 En Section Tuner 04 Display and indicators 2 3 6 1 This product’s AF function can be switched on and off. AF should be switched off for normal tuning operations. (Refer to page 49.) English 4 Basic operation 1 Press SOURCE to select the tuner. Press SOURCE until “Tuner” appears. 1 Band 2 AF indicator 3 LOC indicator 2 Raise or lower the volume. Rolling the VOLUME changes the volume level. 3 Press BAND/ESC to select the desired band. Press BAND/ESC repeatedly to switch between the following bands: FM-1 — FM-2 — FM-3 — MW/LW 5 Frequency 6 Stereo indicator Français 4 Press 2 or 3 to tune in to a station. The frequencies move up or down step by step. • If you press and hold 2 or 3 for about one second and release, you can perform seek tuning. Seek tuning lets you skip broadcasting stations until a broadcast strong enough for good reception is found. • If you press and hold 2 or 3, you can skip broadcasting stations. Seek tuning starts as soon as you release the button. Deutsch 4 Preset number Español 5 Notes Italiano • The stereo indicator “” lights when a stereo station is selected. • After choosing your destination, press SOURCE and you can listen to the guide voice during navigation guidance. • When new traffic information arrives, appears. If desired, check the new information. Nederlands En 45 Section 04 Tuner Storing and recalling broadcast stations If you press any of the buttons 1 – 6, you can easily store up to six broadcast stations for later recall. Recalling broadcast stations 1 Press NEXT to display “1” – “6”. Press NEXT until “1” – “6” appears. 2 Press any of the buttons 1 – 6 to recall a station preset under that button. Storing broadcast stations Note 1 Press NEXT to display “1” – “6”. Press NEXT until “1” – “6” appears. 2 When you find a station that you want to store in memory, press and hold any of the buttons 1 – 6 until the preset number stops flashing. The station is stored in memory under the selected button. • You can also use 5 or ∞ to recall broadcast stations memorized in the buttons 1 – 6. Tuner function menu The tuner function menu has the following functions: FM Note • Up to 18 FM stations, six for each of the three FM bands, and six MW/LW stations can be stored in memory. MW/LW Notes • “AF”, “PTY” and “REG” are RDS functions for FM bands. Refer to “RDS”. • If you do not operate the function within about 30 seconds, the display is automatically returned. 46 En Section Tuner BSM (best stations memory) lets you automatically store the six strongest broadcast stations under the buttons 1 – 6. 1 Press FUNC to select the BSM mode. Local seek tuning lets you tune in only those broadcast stations with sufficiently strong signals for good reception. 1 Press FUNC and then press LOC to select the local mode. Deutsch 2 Press LOC to set the local seek sensitivity. Press LOC repeatedly to switch between the following settings: FM: Local OFF — Level 1 — Level 2 — Level 3 — Level 4 MW/LW: Local OFF — Level 1 — Level 2 • When the local mode is exited except for “Local OFF” is selected, “LOC” appears on the basic display. Español 2 Press BSM to turn the BSM on. “Searching” appears. The six strongest broadcast stations will be stored under the buttons 1 – 6 and in order of their signal strength. When finished, “Searching” disappears. • To cancel the storage process before it is completed, press BSM again while “Searching” appears. Tuning in strong signals English Storing the strongest broadcast stations 04 Note Français • The “Level 4” setting allows reception of only the strongest stations, while lower settings let you receive progressively weaker stations. Italiano Nederlands En 47 Section 05 RDS Display and indicators 5 7 23 4 Notes 1 86 1 Band • RDS service may not be provided by all stations. • RDS functions like AF (alternative frequencies search) and TA (traffic announcement standby) are only available when your radio is tuned in to an RDS station. • After choosing your destination, press SOURCE and you can listen to the guide voice during navigation guidance. 2 TRFC indicator 3 AF indicator 4 TXT indicator 5 Preset number 6 NEWS indicator 7 Program service name (or frequency) 8 PTY information What is RDS? RDS (Radio Data System) is a system for providing information along with FM broadcasts. This inaudible information provides such features as program service name, program type, traffic announcement standby, automatic tuning and program type tuning, intended to aid radio listeners in finding and tuning in to a desired station. 48 En Displaying the frequency of an RDS station When you tune in to an RDS station, its program service name is displayed. If you want to know the frequency, perform the following steps. • Press DISP to change the frequency (or PTY information) display. Press DISP repeatedly to switch between the following displays: Program service name — Frequency Notes • After switching displays, if you do not perform an operation within eight seconds, the display automatically returns to the program service name. • The PTY (program type ID code) information is correlated with the list in the section PTY list on page 53. • When new traffic information arrives, appears. If desired, check the new information. Section RDS 05 If you are listening to a broadcast and the reception becomes weak or there are other problems, this product will automatically search for a different station in the same network which is broadcasting a stronger signal. The tuner searches for another frequency broadcasting the same program. “PI Seek” appears on the display and the radio volume is muted during a PI seek. The muting is discontinued after completion of the PI seek, whether or not the PI seek has succeeded. If the PI seek is unsuccessful, the tuner returns to the previous frequency. 1 Press FUNC and then press AF to select the AF mode. 2 Press AF to turn the AF function on. The light illuminates. • Press AF again to turn the AF function off. • When the AF mode is exited while AF is on, “AF” appears on the basic display. Auto PI seek (for preset station) When preset stations cannot be recalled, as when traveling long distances, this product can be set to perform PI seek during preset recall. The default setting for auto PI seek is off. Français Note • Refer to Switching the auto PI seek on page 84. Italiano • AF tunes the receiver only to RDS stations when you use seek tuning or BSM auto memory with the AF function on. • When you recall a preset station, the tuner may update the preset station with a new frequency from the station’s AF list. (This is only available when using presets on the FM-1 and FM-2 bands.) No preset number appears on the display if the RDS data for the station received differs from the data for the originally stored station. • Sound may be temporarily interrupted by another program during an AF frequency search. • When the tuner is tuned to a non-RDS station, the “AF” indicator flashes. • The AF function can be turned on or off independently for each FM band. If you are listening to a broadcast and the reception becomes weak or if this product fails to find a suitable alternative frequency, this product will automatically search for a different station with the same program. Deutsch Notes PI seek Español Using the PI seek function English Using alternative frequency (AF) Nederlands En 49 Section 05 RDS Limiting stations to regional programming When AF is used to automatically retune frequencies, the regional function limits the selection to stations broadcasting regional programs. 1 Press FUNC and then press REG to select the regional mode. 2 Press REG to turn the regional function on. The light illuminates. • Press REG again to turn the regional function off. Notes • Regional programming and regional networks are organized differently depending on the country (i.e., they may change according to the hour, state or broadcast area). • The preset number may disappear from the display if the tuner tunes in to a regional station which differs from the originally set station. • The regional function can be turned on or off independently for each FM band. Receiving traffic announcements The TA (traffic announcement standby) function lets you receive traffic announcements automatically, no matter what source you are listening to. The TA function can be activated for both a TP station (a station that broadcasts traffic information) or an enhanced other network’s TP station (a station carrying information which cross-references TP stations). Turning the TA function on or off 1 Press 2 or 3 to tune in to a TP or enhanced other network’s TP station. The “TRFC” indicator lights when the tuner is tuned in to a TP station or an enhanced other network’s TP station. 2 Press TA to turn the TA function on. The “3TRFC” indicator lights, indicating that the tuner is waiting for traffic announcements. • Press TA again when no traffic announcement is being received to turn the TA function off. Notes • The system switches back to the original source following traffic announcement reception. • The TA function can be activated from sources other than the tuner if the tuner was last set to the FM band but not if it was last set to the MW/LW band. • If the tuner was last set to FM, turning on the TA function lets you operate other tuning functions while listening to sources other than the tuner. • If you switched the TA function on while tuned in to neither a TP nor an enhanced other network’s TP station, only “T” in the “3 TRFC” indicator lights. 50 En Section RDS • When listening to a RDS broadcast, press 2 or 3 to tune in to another TP station or enhanced other network’s TP station. In sources other than the tuner, the tuner automatically seeks out the TP station with the strongest signal in the current area 10 (or 30)* seconds after the “3TRFC” indicator turns to “T”. * Time taken before seek begins TA function ON 10 seconds TA, AF functions ON 30 seconds Deutsch • Press TA while a traffic announcement is being received to cancel the announcement and return to the original source. The announcement is canceled but the tuner remains in the TA mode until TA is pressed again. About 30 seconds after the “3TRFC” indicator turns to “T” due to a weak signal, a five second beep sounds to remind you to select another TP or enhanced other network’s TP station. Español Canceling traffic announcements TP alarm English • Only TP or enhanced other network’s TP stations are tuned in during seek tuning when the “3TRFC” or “T” indicator is on. • Only TP or enhanced other network’s TP stations are stored by BSM when the “3TRFC” or “T” indicator is on. 05 Adjusting the TA volume When a traffic announcement begins, the volume adjusts automatically to a preset level to enable you to hear the announcement clearly. Français • Turn VOLUME to adjust and set the volume during reception of a traffic announcement. The newly set volume is stored in memory and recalled for subsequent traffic announcements. Italiano Nederlands En 51 Section 05 RDS Using the PTY function A PTY search is performed by program type as indicated in the PTY list (the program types are: News&Inf, Popular, Classics, Others). It also provides automatic tuning to emergency broadcasts (PTY alarm). Searching the PTY 1 Press FUNC and then press PTY to select the PTY search mode. 2 Press any of the buttons 1 – 4 to search the desired PTY. The tuner searches for a station broadcasting the desired PTY. Notes • The program of some stations may differ from that indicated by the transmitted PTY. • If no station is broadcasting the type of program you searched for, “Not found” is displayed for about two seconds and then the tuner returns to the original station. • The PTY method is wide only. • You can also use 2, 3 and 5 to select and search the desired PTY. 52 En Setting the news program interruption When a news program is broadcast from a PTY code news station, this product can switch from any station to the news broadcast station. When the news program ends, reception of the previous program resumes. 1 Press NEXT to display “NEWS”. Press NEXT until “NEWS” appears. 2 Press NEWS to turn the news interruption on. The “3NEWS” or “N” indicator lights. • Press NEWS again to turn the news interruption off. • Press TA during news program reception to cancel the news program. PTY alarm PTY alarm is a special PTY code for announcements regarding emergencies such as natural disasters. When the tuner receives the radio alarm code, “ALARM” appears on the display and the volume adjusts to the TA volume. When the station stops broadcasting the emergency announcement, the system returns to the previous source. • Press TA during announcement reception to cancel the announcement. Section RDS 05 PTY list News&Inf Type of program News News. Affairs Current affairs. Info General information and advice. Sport Sports programs. Weather Weather reports/Meteorological information. Finance Stock market reports, commerce, trading, etc. Pop Mus Popular music. Rock Mus Contemporary modern music. Easy Mus Easy listening music. Other types of music, which can’t be categorized. Jazz Jazz music based programs. Country Country music based programs. Nat Mus National music based programs. Oldies Oldies music, ‘Golden age’ based programs. Deutsch Oth Mus Español Popular Specific English General Folk music based programs. L. Class Light classical music. Classic Serious classical music. Others Educate Educational programs. Drama All radio plays and serials. Culture Programs concerned with any aspect of national or regional culture. Science Programs about nature, science and technology. Light entertainment programs. Children Children’s programs. Social Social affairs programs. Religion Religion affairs programs or services. Phone in based programs. Touring Travel programs, not announcements about traffic problems. Leisure Programs about hobbies and recreational activities. Document Documentary programs. Nederlands Phone In Italiano Varied Français Folk Mus Classics En 53 Section 05 RDS Using radio text This tuner can display radio text data transmitted by RDS stations, such as station information, the name of the currently broadcast song and the name of the artist. Notes • When radio text is received, the “TXT” indicator lights. • The tuner automatically memorizes the three latest radio text broadcasts received, replacing text from the least recent reception with new text when it is received. • If you do not perform an operation within 30 seconds, the radio text mode is canceled. Displaying the radio text 1 Press NEXT to display “R.TEXT”. Press NEXT until “R.TEXT” appears. 2 Press R.TEXT to switch to the radio text mode. 3 Press 2 or 3 to recall the three latest radio text broadcasts from the tuner’s memory. Pressing 2 or 3 switches between the four radio text data displays. Notes • Press BAND/ESC to cancel the radio text mode. • When no radio text is currently being received, “No text” is displayed. • If there is no radio text data stored in the tuner, 2 or 3 does not operate. 54 En Storing radio text You can store data from up to six radio text transmissions under the buttons MEMO1 – MEMO6. 1 Select the radio text you want to store in memory. Refer to Displaying the radio text on this page. 2 Press and hold any of the buttons MEMO1 – MEMO6 until “RT memo” appears to store the desired radio text. The radio text is stored in memory under the selected button. Recalling preset radio text 1 Press NEXT to display “R.TEXT”. Press NEXT until “R.TEXT” appears. 2 Press R.TEXT to switch to the radio text mode. 3 Press any of the buttons MEMO1 – MEMO6 to recall the radio text preset under that button. Section Built-in CD Player 06 Display and indicators 4 1 The built-in CD player plays one standard 12 cm or 8 cm (single) CD at a time. Do not use an adapter when playing an 8 cm CD. 3 Disc title 2 Insert a CD into the CD loading slot. 3 5 1 Source name Deutsch CD loading slot Español 2 Track number 1 Press OPEN to open the front panel. • The navigation CD must be inserted to start the route calculation. During the calculation, the prompt CD flashes on the display. Once the calculation has been completed, the prompt CD extinguishes, the navigation CD can be removed and an audio CD can be inserted. English 2 Basic operation 4 Play time 5 Track title 0 button • To avoid a malfunction, make sure that no metal object comes into contact with the front panel is open. 5 Press 0 to eject the CD after opening the panel by pressing OPEN. • Be sure to close the front panel after removing the CD. En Nederlands 4 Press 2 or 3 to select a track. Pressing 3 skips to the start of the next track. Pressing 2 once skips to the start of the current track. Pressing again will skip to the previous track. • If you press and hold 2 or 3, you can perform fast forward or reverse. Italiano 3 Raise or lower the volume. Rolling the VOLUME changes the volume level. Français Note 55 Section 06 Built-in CD Player WARNING Do not use with the front panel left open. If the front panel is left open, it may result in injury in the event of an accident. Switching and scrolling the title When playing a CD TEXT disc, you can switch text display such as artist name and track title. With text longer than 24 letters, you can scroll to see the rest of the text. Notes 1 Press TITLE to switch the title mode. • You can select CD as the source by pressing SOURCE when a audio disc is loaded in this product. • When the front panel is open, multi-function buttons are not available. • Do not insert anything other than a CD into the CD loading slot. • A CD left partially inserted after ejection may incur damage or fall out. • If a CD cannot be inserted fully or playback fails, make sure the recorded side is down. Press 0 and check the disc for damage before reinserting it. • If the built-in CD player cannot operate properly, an error message (such as “ERROR-14”) appears on the display. Refer to Understanding built-in CD player error messages on page 89. • You can eject the CD by pressing and holding 0 with opening the front panel when the CD loading or ejecting cannot operate properly. • After choosing your destination, press SOURCE and you can listen to the guide voice during navigation guidance. • When new traffic information arrives, appears. If desired, check the new information. 56 En 2 Press the corresponding button to display the desired title. Button Operation TTL1 Displays disc title and track title. TTL2 Displays disc title and disc artist name. TTL3 Displays track title and track artist name. SCROLL Scrolls the displayed title. Notes • If you do not operate the function within about eight seconds, the display is automatically returned. • You cannot use 2 or 3 to select a track in title mode. • The titles are displayed up to 24 letters long. • A CD TEXT disc is a CD featuring recorded text information such as disc title, artist name and track title. • If certain text information is not recorded on a CD TEXT disc, “No ~” (e.g., “No title”) is displayed. • If you have not input disc titles, “No title” is displayed. Section Built-in CD Player 06 Playing tracks in random order The built-in CD player function menu has the following functions: Random play lets you play back tracks on the CD in random order. English Built-in CD player function menu 1 Press FUNC and then press RDM to select the random mode. Deutsch • If you do not operate the function within about 30 seconds, the display is automatically returned. (When you select the disc title input mode (TTLin), the display is not returned automatically.) • “T.LIST” is displayed only when playing a CD TEXT disc. 2 Press RDM to turn random play on. The light illuminates. Tracks will play in random order. • Press RDM again to turn random play off. • When the random mode is exited while random play is on, “RDM” appears on the basic display. Scanning tracks of a CD Repeating play 1 Press FUNC to select the repeat mode. Note 2 Press SCAN to turn scan play on. The light illuminates. The first 10 seconds of each track are played. • When the scan mode is exited while scan play is on, “SCAN” appears on the basic display. 3 When you find the desired track, press SCAN to turn scan play off. The light goes off. The track will continue to play. • If the scan mode is automatically canceled, select the scan mode again. Note • After scanning of a CD is finished, normal playback of the tracks will begin again. En Nederlands • If you perform track search or fast forward/reverse, repeat play is automatically canceled. 1 Press FUNC and then press SCAN to select the scan mode. Italiano 2 Press RPT to turn the repeat play on. The light illuminates. The track currently playing will play and then repeat. • Press RPT again to turn repeat play off. • When the repeat mode is exited while repeat play is on, “RPT” appears on the basic display. Scan play lets you hear the first 10 seconds of each track on the CD. Français Repeat play lets you hear the same track over again. Español Notes 57 Section 06 Built-in CD Player Selecting tracks from the track title list The track title list lets you see the list of track titles on a CD TEXT disc and select one of them for playback. 1 Press FUNC and then press T.LIST to select the track title list mode. 2 Press NEXT to display the desired track title. Press NEXT until the desired track title appears. Pausing CD playback Pause lets you temporarily stop playback of the CD. 1 Press FUNC and then press PAUSE to select the pause mode. 2 Press PAUSE to turn the pause on. The light illuminates. Play of the current track pauses. • Press PAUSE again to turn the pause off. • When the pause mode is exited while pause is on, “PAUSE” is displayed in the basic display. Note 3 Press the corresponding number button to select the desired track title. That selection will begin to play. • You can also turn pause on or off by pressing PAUSE in the following display. Notes • You can also use 2, 3 and 5 to select and play the desired track title. • Only when playing a CD TEXT disc, you can switch to this mode. Entering disc titles Disc title input lets you input up to 48 CD titles up to 10 letters long into the built-in CD player. If you input a CD title, the entered title is displayed. For details of operation, refer to Entering disc titles on page 64 under “Multi-CD Player”. Notes • When playing a CD TEXT disc, if you switch to this mode, “No title input” is displayed and you cannot input the title. • After the titles for 48 discs have been entered, the data for a new disc will overwrite the oldest one. • If you connect a multi-CD player, you can input disc titles for up to 100 discs. 58 En Section Multi-CD Player 07 Display and indicators 3 5 1 English 2 Basic operation This product can control a multi-CD player, which is sold separately. 1 Press SOURCE to select the multi-CD player. Press SOURCE until “Multi-CD” appears. 6 1 Source name 2 Disc number 3 Track number 5 Play time 6 Track title Only those functions described in this manual are supported for 50-disc multi-CD players. 4 Press 2 or 3 to select a track. Pressing 3 skips to the start of the next track. Pressing 2 once skips to the start of the current track. Pressing again will skip to the previous track. • If you press and hold 2 or 3, you can perform fast forward or reverse. Notes Nederlands En Italiano • When the multi-CD player is performing the preparatory operations, “Ready” is displayed. • If the multi-CD player cannot operate properly, an error message such as “ERROR-14” is displayed. Refer to the multi-CD player owner’s manual. • If there are no discs in the multi-CD player magazine, “No disc” is displayed. • After choosing your destination, press SOURCE and you can listen to the guide voice during navigation guidance. Français 50-disc multi-CD player 3 Press 5 or ∞ to select a disc. A disc number for which there is no disc will be skipped. • You can use the buttons 1 – 6 (or 7 – 12) to select a disc directly. Deutsch 4 Disc title 2 Raise or lower the volume. Rolling the VOLUME changes the volume level. Español 4 59 Section 07 Multi-CD Player Selecting a disc directly Switching and scrolling the title You can use the buttons 1 – 6 (or 7 – 12) to select a disc directly. When playing a CD TEXT disc on a CD TEXT compatible multi-CD player, you can switch text display such as artist name and track title. With text longer than 24 letters, you can scroll to see the rest of the text. 1 Press NEXT to display “1” – “6” (or “7” – “12”). Press NEXT until “1” – “6” (or “7” – “12”) appears. 2 Press any of the buttons 1 – 6 (or 7 – 12) to select a disc located at 1 to 6 (or 7 to 12). Note • You cannot display “7” – “12” when a 6-disc multi-CD player is connected. 1 Press TITLE to switch the title mode. 2 Press the corresponding button to display the desired title. Button Operation TTL1 Displays disc title and track title. TTL2 Displays disc title and disc artist name. TTL3 Displays track title and track artist name. SCROLL Scrolls the displayed title. Notes • If you do not operate the function within about eight seconds, the display is automatically returned. • You cannot use 5/∞/2/3 to select a disc or track in title mode. • The titles are displayed up to 24 letters long. • A CD TEXT disc is a CD featuring recorded text information such as disc title, artist name and track title. • If certain text information is not recorded on a CD TEXT disc, “No ~” (e.g., “No title”) is displayed. • If you have not input disc titles, “No title” is displayed. 60 En Section Multi-CD Player 07 Repeating play The multi-CD player function menu has the following functions: There are three repeat play ranges for the multiCD player: one-track repeat, disc repeat and multi-CD player repeat. English Multi-CD player function menu 1 Press FUNC to select the repeat mode. • If you select other discs during repeat play, the repeat range changes to multi-CD player repeat. • If you perform track search or fast forward/reverse during one-track repeat, the repeat range changes to disc repeat. Français Notes Deutsch • If you do not operate the function within about 30 seconds, the display is automatically returned. (When you select the disc title input mode (TTLin) or ITS memory mode (ITS.M), the display is not returned automatically.) • “T.LIST” is displayed only when playing a CD TEXT disc on a CD TEXT compatible multi-CD player. 2 Press RPT to select the repeat range. Press RPT repeatedly to switch between the following repeat ranges: Magazine repeat (multi-CD player repeat) — Track repeat (one-track repeat) — Disc repeat (disc repeat) • When the repeat mode is exited, either “T.RPT” or “D.RPT” may appear on the basic display. – “T.RPT” appears while the one-track repeat is selected. – “D.RPT” appears while the disc repeat is selected. Español Notes Italiano Nederlands En 61 Section 07 Multi-CD Player Playing tracks in random order Scanning CDs and tracks Random play lets you play back tracks in random order within the repeat range: multi-CD player repeat and disc repeat. When you select disc repeat, scan play lets you hear the first 10 seconds of each track on the selected CD. When you select multi-CD player repeat, scan play lets you hear the first 10 seconds of the first track on each CD. 1 Select the repeat range. Refer to Repeating play on page 61. 2 Press FUNC and then press RDM to select the random mode. 3 Press RDM to turn random play on. The light illuminates. Tracks will play in random order within the selected repeat range. • Press RDM again to turn random play off. • When the random mode is exited while random play is on, “RDM” appears on the basic display. Note • If you turn random play on during one-track repeat, the repeat range changes to disc repeat. 1 Select the repeat range. Refer to Repeating play on page 61. 2 Press FUNC and then press SCAN to select the scan mode. 3 Press SCAN to turn scan play on. The light illuminates. The first 10 seconds of each track of the current disc (or the first track of each disc) are played. • When the scan mode is exited while scan play is on, “SCAN” appears on the basic display. 4 When you find the desired track (or disc), press SCAN to turn scan play off. The light goes off. The track (or disc) will continue to play. • If the scan mode is automatically canceled, select the scan mode again. Notes • After track or disc scanning is finished, normal playback of the tracks will begin again. • If you turn scan play on during one-track repeat, the repeat range changes to disc repeat. 62 En Section Multi-CD Player 07 Selecting discs from the disc title list The track title list lets you see the list of track titles on a CD TEXT disc and select one of them for playback. The disc title list lets you see the list of disc titles and select one of them for playback. Displayed disc titles are those which have been entered into the multi-CD player or recorded on a CD TEXT disc. 2 Press NEXT to display the desired track title. Press NEXT until the desired track title appears. 2 Press NEXT to switch between “1” – “6” and “7” – “12”. 3 Press any of the buttons 1 – 6 (or 7 – 12) to select the desired disc title. That selection will begin to play. • You can also use 2, 3 and 5 to select and play the desired track title. • Only when playing a CD TEXT disc on a CD TEXT compatible multi-CD player, you can switch to this mode. Notes Italiano • You can also use 2, 3 and 5 to select and play the desired disc title. • “No D.Title” is displayed for a disc whose title has not been input. • “No disc” is displayed next to the disc number when no disc is set in the magazine. • You cannot display “7” – “12” when a 6-disc multi-CD player is connected. Français Notes Deutsch 3 Press the corresponding number button to select the desired track title. That selection will begin to play. 1 Press FUNC and then press D.LIST to select the disc title list mode. Español 1 Press FUNC and then press T.LIST to select the track title list mode. English Selecting tracks from the track title list Nederlands En 63 Section 07 Multi-CD Player Pausing CD playback Entering disc titles Pause lets you temporarily stop playback of the CD. Disc title input lets you input up to 100 CD titles up to 10 letters long (with ITS memory) into the multi-CD player. If you input a CD title, the entered title is displayed. 1 Press FUNC and then press PAUSE to select the pause mode. 2 Press PAUSE to turn pause on. The light illuminates. Play of the current track pauses. • Press PAUSE again to turn pause off. • When the pause mode is exited while pause is on, “PAUSE” is displayed in the basic display. Note • You can also turn pause on or off by pressing PAUSE in the following display. 1 Press 5 or ∞ to play a disc you want to enter the title. 2 Press FUNC and NEXT and then press TTLin to select the disc title input mode. 3 Press ABC to switch the character mode. Press ABC repeatedly to switch between the following modes: Alphabet (upper case), numbers and symbols — Alphabet (lower case) — European letters, such as those with accents (e.g. á, à, ä, ç) • Press 012 to switch to the numbers and symbols mode. 4 Press 5 or ∞ to select letters, numbers and symbols. • To insert a space, select the flashing cursor “_”. 5 Press 3 to move the cursor to the next character position. • Press 2 to move backwards in the display. 64 En Section Multi-CD Player 7 Press BAND/ESC to cancel the disc title input mode. Notes Using the COMP (compression) and DBE (dynamic bass emphasis) functions enables multi-CD player sound quality adjustment. Each of the functions enables two-step adjustment. The COMP function adjusts imbalances between loud and subdued sounds at higher volumes. DBE boosts bass levels to give a fuller sound. Español 1 Press FUNC and NEXT and then press COMP to select the compression and dynamic bass emphasis mode. Note Français 2 Press COMP to select the desired setting. Press COMP repeatedly to switch between the following settings: COMP OFF — COMP 1 — COMP 2 — COMP OFF — DBE 1 — DBE 2 • When this mode is exited except for “COMP OFF” is selected, “COMP” appears on the basic display. Deutsch • When playing a CD TEXT disc on a CD TEXT compatible multi-CD player, if you switch to this mode, “Can’t input” is displayed and you cannot input the title. • Titles remain in memory even after the disc has been removed from the magazine, and are recalled when the disc is reinserted. • After the titles for 100 discs have been entered, the data for a new disc will overwrite the oldest one. Using compression and dynamic bass emphasis English 6 Press 3 to move the cursor to the last position and then press 3 one more time after entering the title. 07 • If the multi-CD player does not support these functions, “No COMP” is displayed when you attempt to select it. Italiano Nederlands En 65 Section 07 Multi-CD Player Using ITS memory The ITS (instant track selection) lets you make a program of favorite tracks from those in the multi-CD player magazine. After you have added your favorite tracks to the ITS memory, you can turn on ITS play and play just those selections. Programming tracks in ITS memory You can use ITS to enter and playback up to 99 tracks per disc, up to 100 discs (with the disc title). (With multi-CD players sold before the CDX-P1250 and CDX-P650, up to 24 tracks can be stored in the playlist.) 1 Press 5 or ∞ to play the CD you want to program. 2 Press FUNC and NEXT and then press ITS.M to select the ITS memory mode. 3 Press 2 or 3 to select the desired track. 4 Press MEMO to store the currently playing track in the ITS memory. “Memory complete” is displayed briefly and the currently playing track is added to ITS memory. 5 Press BAND/ESC to cancel the ITS memory mode. Notes • In this mode, you can also use 5 to store the currently playing track in the ITS memory. • After 100 discs have been programmed, the data for a new disc will overwrite the oldest one. 66 En Playback from ITS memory ITS play lets you listen to the tracks that you have entered into ITS memory. When you turn on ITS play, tracks from ITS memory in the multi-CD player will begin to play. 1 Select the repeat range. Refer to Repeating play on page 61. 2 Press FUNC and NEXT and then press ITS.P to select the ITS play mode. 3 Press ITS.P to turn ITS play on. The light illuminates. Playback begins of those tracks from ITS memory within the selected repeat range: multi-CD player repeat or disc repeat. • Press ITS.P again to turn ITS play off. • When the ITS play mode is exited while ITS play is on, “ITS” appears on the basic display. Note • If no track in the current play range is programmed for ITS play, “ITS empty” is displayed. Section Multi-CD Player 07 When you want to erase all tracks of a CD from ITS memory, you can do so when ITS play is off. 1 Turn ITS play on while playing a CD from which you want to erase a track program from ITS memory. Refer to Playback from ITS memory on page 66. 1 Press 5 or ∞ to select the CD you want to erase from ITS memory. If ITS play is on, turn ITS play off. Refer to Playback from ITS memory on page 66. 2 Press FUNC and NEXT and then press ITS.M to select the ITS memory mode. 2 Press FUNC and NEXT and then press ITS.M to select the ITS memory mode. 3 Press 2 or 3 to select the desired track. 3 Press CLEAR to erase all tracks on the currently playing CD from ITS memory. “Memory deleted” is displayed briefly and all tracks on the currently playing CD are erased from ITS memory. 4 Press CLEAR to erase the currently playing track from ITS memory. The currently playing track is erased from ITS memory and playback of the next track from ITS memory begins. If there are no tracks from ITS memory in the current play range, “ITS empty” is displayed and normal play resumes. Note Note • In this mode, you can also use ∞ to erase all tracks on the currently playing CD from ITS memory. Français 5 Press BAND/ESC to cancel the ITS memory mode. 4 Press BAND/ESC to cancel the ITS memory mode. Deutsch When you want to erase a track from ITS memory, you can do so when ITS play is on. Español Erasing a CD from ITS memory English Erasing a track from ITS memory • In this mode, you can also use ∞ to erase the currently playing track from ITS memory. Italiano Nederlands En 67 Section 08 DAB Tuner The following explains how to use this product to control a DAB tuner, which is sold separately. For details of DAB tunerspecific operation/features, see your DAB tuner’s manual. • This product does not have the language filter function. • With this product, you can operate three additional functions: available service list, available PTY search, storing and recalling dynamic label. Display and indicators 6 7 24 5 0- 1 Indications that light when function is switched on Indicator Function NET Service follow (service follow) W (THR)* Area weather flash (weather) A (NNC)* Announce (announce) N (EWS)* News flash (news) T (RFC)* Road traffic flash or transport flash * If the set announcement support is received, the letters in parentheses light. DAB status indications 9 = 8 3 1 Band Indicator Status EXTRA The currently received service has a secondary service component. TXT The currently received service has a dynamic label. DAB When DAB reception is possible. 2 TRFC indicator 3 NEWS indicator 4 NET indicator 5 TXT indicator 6 Preset number 7 ANNC indicator 8 WTHR indicator 9 Service label 0 EXTRA indicator - DAB indicator = Service component label 68 En Section DAB Tuner Basic operation 2 Raise or lower the volume. Rolling the VOLUME changes the volume level. 4 Press and hold 2 or 3 for one second and release to select an ensemble. Storing services 2 Press any of the buttons 1 – 6 to recall the service preset under that button. Note • You can also use 5 or ∞ to recall services memorized under the buttons 1 – 6. Changing a band • Press BAND/ESC to select the desired band. Press BAND/ESC repeatedly to switch between the following bands: DAB 1 — DAB 2 — DAB 3 Français 1 Press NEXT to display “1” – “6”. Press NEXT until “1” – “6” appears. Deutsch Storing and recalling services 1 Press NEXT to display “1” – “6”. Press NEXT until “1” – “6” appears. Español 3 Press 2 or 3 to select a service. Recalling services English 1 Press SOURCE to select the DAB tuner. Press SOURCE until “DAB Tuner” appears. 08 Italiano 2 When you find a service that you want to store in memory, press and hold any of the buttons 1 – 6 until the preset number stops flashing. The service is stored in memory under the selected button. Nederlands En 69 Section 08 DAB Tuner Switching the display • Press DISP to select the desired display. Press DISP repeatedly to switch between the following displays: SERVICE (service label) and COMPONENT (service component label) — D.TEXT (dynamic label segment head line) — SERVICE (service label) and ENSEMBLE (ensemble label) — SERVICE (service label) and PTY (PTY label) Note • With a service component that has no service component label or dynamic label, the display is blank when you switch to service component label and dynamic label. Dynamic label function Displaying dynamic labels 1 Press NEXT to display “D.TEXT”. Press NEXT until “D.TEXT” appears. 2 Press D.TEXT to switch to the dynamic label mode. 3 Press 2 or 3 to recall the three latest dynamic label broadcasts from the tuner’s memory. Pressing 2 or 3 switches between the four dynamic label data displays. Notes Switching the road traffic flash and transport flash on or off • Press TA to turn the road traffic flash and transport flash on. The “3TRFC” or “T” indicator lights. • Press TA again to turn the road traffic flash and transport flash off. Canceling road traffic flash and transport flash interruptions part way through • To cancel a road traffic flash or transport flash interruption and return to the original source, press the TA during an announcement interruption. 70 En • Press BAND/ESC to cancel the dynamic label mode. • When no dynamic label is currently being received, “No text” is displayed. • If there is no dynamic label data stored in the tuner, 2/3 do not operate. • If you do not operate the function within about 60 seconds, the display is automatically returned. Section DAB Tuner 08 DAB tuner function menu You can store data from up to six dynamic label transmissions under the buttons MEMO1 – MEMO6. The DAB tuner function menu has the following functions: 1 Select the dynamic label you want to store in memory. Refer to Displaying dynamic labels on page 70. 1 Press NEXT to display “D.TEXT”. Press NEXT until “D.TEXT” appears. 3 Press any of the buttons MEMO1 – MEMO6 to recall the dynamic label preset under that button. r t y 1 AS (announcement support) For operation of the announcement support, refer to Setting the announcement support interruption on page 72. 2 chLIST (preset service list) For operation of the preset service list, refer to Selecting services from the preset service list on page 72. 3 S.LIST (available service list) For operation of the available service list, refer to Selecting services from the available service list on page 72. 4 PTY (available PTY search) For operation of the available PTY search, refer to Searching the available PTY on page 73. Français 2 Press D.TEXT to switch to the dynamic label mode. e Deutsch Recalling a dynamic label w Español 2 Press and hold any of the buttons MEMO1 – MEMO6 until “DAB memo” appears to store the desired dynamic label. The dynamic label is stored in memory under the selected button. q English Storing a dynamic label 5 P/2ND (primary/secondary) Press P/2ND repeatedly to switch to the next service component. Italiano 6 SF (service follow) Press SF repeatedly to turn SF on or off. Note En Nederlands • If you do not operate the function within about 30 seconds, the display is automatically returned. 71 Section 08 DAB Tuner Setting the announcement support interruption Selecting services from the preset service list 1 Press FUNC and then press AS to select the announcement support mode. 1 Press FUNC and then press chLIST to select the preset service list mode. 2 Press the corresponding button to turn the desired announcement support on. 2 Press any of the buttons 1 – 6 to recall the desired service. Button Announcement NEWS News flash WTHR Area weather flash ANNC Announcement Note • You can also use 2, 3 and 5 to select and recall the desired service. Note • You can also use 2, 3 and 5 to select and turn on the desired announcement. Selecting services from the available service list The available service list lets you see the list of available services and select one of them to receive, if the currently received ensemble has multiple services. 1 Press FUNC and then press S.LIST to select the available service list mode. 2 Press 2 or 3 to select the desired service. 3 Press 5 to receive the selected service. 72 En Section DAB Tuner 08 Searching the available PTY English Available PTY search lets you see the list of available PTYs that is in the current ensemble and select one of them to receive. • Available PTY search function is different from PTY search function. With this product, you can operate only the available PTY search. Español 1 Press FUNC and then press PTY to select the available PTY search mode. 2 Press 2 or 3 to select the desired PTY. Deutsch 3 Press 5 to start the PTY search. DAB receives the desired PTY service. Notes Français • The PTY method displayed is narrow. The wide method cannot be selected when using DAB as the source. (Refer to page 53.) • If there is no available PTY in the current ensemble, you cannot switch to the available PTY search mode. • If no service broadcasting the selected programming type is found, “Not found” is displayed briefly, and the DAB tuner returns to the previous service. Italiano Nederlands En 73 Section 09 TV Tuner The following explains how to use this product to control a TV tuner, which is sold separately. For details of TV tunerspecific operation/features, see your TV tuner’s manual. • With this product, you can operate preset channel list as one additional function. If you press any of the buttons 1 – 6 (or 7 – 12), you can easily store up to 12 broadcast stations for later recall. Storing broadcast stations Display and indicators 2 Storing and recalling broadcast stations 1 3 1 Band 2 Preset number 3 Channel Basic operation 1 Press SOURCE to select the TV tuner. Press SOURCE until “Television” appears. 2 Raise or lower the volume. Rolling the VOLUME changes the volume level. 3 Press 2 or 3 to tune in to a station. • If you press and hold 2 or 3 for about one second and then release, you can perform seek tuning. 1 Press NEXT to display “1” – “6” (or “7” – “12”). Press NEXT until “1” – “6” (or “7” – “12”) appears. 2 When you find a station that you want to store in memory, press and hold any of the buttons 1 – 6 (or 7 – 12) until the preset number stops flashing. The station is stored in memory under the selected button. Notes • Up to 12 stations can be memorized in one band. • This product allows you to store and recall directly using preset channels 7 –12. Recalling broadcast stations 1 Press NEXT to display “1” – “6” (or “7” – “12”. Press NEXT until “1” – “6” (or “7” – “12”) appears. 2 Press any of the buttons 1 – 6 (or 7 – 12) to recall the station preset under that button. Note • You can also use 5 or ∞ to recall broadcast stations memorized under the buttons 1 – 12. 74 En Section TV Tuner 09 Selecting channels from the preset channel list • Press BAND/ESC to select the desired band. Press BAND/ESC repeatedly to switch between the following bands: TV 1 — TV 2 The preset channel list lets you see the list of preset channels and select one of them to receive. TV tuner function menu 2 Press NEXT to switch between “1” – “6” and “7” – “12”. The TV tuner function menu has the following functions: w 1 BSSM (best stations sequential memory) Press BSSM repeatedly to turn BSSM on or off. When finished, the display switches to the preset channel list mode. 3 Press any of the buttons 1 – 6 (7 – 12) to recall the desired channel. Deutsch q Español 1 Press FUNC and then press chLIST to select the preset channel list mode. English Changing a band Note 2 chLIST (preset channel list) For operation of the preset channel list, refer to Selecting channels from the preset channel list on this page. Italiano Note Français • You can also use 2, 3 and 5 to select and recall the desired channel. • If you do not operate the function within about 30 seconds, the display is automatically returned. Nederlands En 75 Section 10 Audio Adjustments Recalling equalizer curves There are seven stored equalizer curves which you can easily recall at any time. Here is a list of the equalizer curves: 1 Press EEQ to switch to the easy equalizer mode. 2 Press NEXT to switch between “CSTM2” and the other selections (curves). 3 Press the corresponding button to select the desired equalizer curve. Button Equalizer curve FLAT Flat S.BASS Super bass PWRFL Powerful NATRL Natural VOCAL Vocal CSTM1 Custom1 CSTM2 Custom2 • CSTM1 and CSTM2 are adjusted equalizer curves. • A separate CSTM1 curve can be created for each source. (The Built-in CD player and MultiCD player are set to the same Equalizer Curve Adjustment setting automatically when using the AVH-P6400CD.) • If you make adjustments when a curve other than CSTM2 is selected, the equalizer curve settings are memorized in CSTM1. • A CSTM2 curve can be created common to all sources. • If you make adjustments when the CSTM2 curve is selected, the CSTM2 curve is updated. 76 En • When FLAT is selected no supplement or correction is made to the sound. This is useful to check the effect of the equalizer curves by switching alternatively between FLAT and a set equalizer curve. Notes • You can also use 2 and 3 to select the desired equalizer curve. • If you do not operate the function within about eight seconds, the display is automatically returned. Audio menu The audio menu has the following functions: Notes • If you do not operate the function within about 30 seconds, the display is automatically returned. • “SW2” is displayed only when the subwoofer output is on in the subwoofer output mode (SW1). • “SLA” is not displayed when you select FM tuner as the source. Section Audio Adjustments 10 Adjusting equalizer curve You can select a fader/balance setting that provides an ideal listening environment in all occupied seats. You can adjust the level, the frequency and the Q factor. English Using balance adjustment 1 Press AUDIO to select F/B (fader/balance). Level (dB) Center frequency Q=2W Frequency (Hz) 1 Press AUDIO and then press EQ. 2 Press 2 or 3 to select the desired band for adjustment. 4 Press LEVEL to select the level. Each press of 5 or ∞ increases or decreases the level.+6 – –6 is displayed as the level is increased or decreased. Italiano 5 Press Q to select the desired Q factor. Press 5 or ∞ until the desired Q factor appears in the display. 2 N—1 N—1 W—2 W Français 3 Press FREQ to select the desired frequency. Press 5 or ∞ until the desired frequency appears in the display. 40—80—100—160 (Hz) 200—500—1 k—2 k (Hz) 3.15 k—8 k—10 k—12.5 k (Hz) Deutsch 3 Press 2 or 3 to adjust left/right speaker balance. Each press of 2 or 3 moves the left/right speaker balance towards the left or the right. • “BALANCE L09” – “BALANCE R09” is displayed as the left/right speaker balance moves from left to right. Q=2N Español 2 Press 5 or ∞ to adjust front/rear speaker balance. Each press of 5 or ∞ moves the front/rear speaker balance towards the front or the rear. • “FADER F15” – “FADER R15” is displayed as the front/rear speaker balance moves from front to rear. • “FADER FR00” is the proper setting when only two speakers are used. • When the PREOUT setting is SW, you cannot adjust front/rear speaker balance. Refer to Switching the rear output setting on page 83. Note En Nederlands • If you make adjustments when a curve other than CSTM2 is selected, CSTM1 curve is updated. 77 Section 10 Audio Adjustments Using bass adjustment Using loudness You can adjust the cut-off frequency and the bass level. • In FRT1 mode, bass adjustment affects only the rear output: front output cannot be adjusted. Loudness compensates for deficiencies in the low- and high-sound ranges at low volume. 1 Press AUDIO and then press BASS. 2 Select the desired frequency with 2/3. Press 2 or 3 until the desired frequency appears in the display. 40—63—100—160 (Hz) 3 Press 5 or ∞ to adjust the bass level. Each press of 5 or ∞ increases or decreases the bass level.+6 – –6 is displayed as the level is increased or decreased. Using treble adjustment You can adjust the cut-off frequency and the Treble level. • In FRT1 and FRT2 modes, treble adjustment affects only the front output: rear output cannot be adjusted. 1 Press AUDIO and then press TREBLE. 2 Select the desired frequency with 2/3. Press 2 or 3 until the desired frequency appears in the display. 2.5k—4k—6.3k—10k (Hz) 3 Press 5 or ∞ to adjust the treble level. Each press of 5 or ∞ increases or decreases the treble level.+6 – –6 is displayed as the level is increased or decreased. 78 En 1 Press AUDIO and then press LOUD to select the loudness mode. Loudness level (e.g., MID) appears in the display. 2 Press LOUD to turn the loudness on. LOUDNESS ON appears in the display. • Press LOUD again to turn loudness off. 3 Select the desired level with 2/3. Press 2 or 3 until the desired level appears in the display. LOW—MID—HIGH Section Audio Adjustments Using subwoofer output 10 Note 1 Press AUDIO and NEXT and then press SW1 to select the subwoofer output mode. SLA (source level adjustment) lets you adjust the volume level of each source to prevent radical changes in volume when switching between sources. • Settings are based on the FM tuner volume level, which remains unchanged. 2 Press SW1 to turn the subwoofer output on. “SUB. W ON” appears in the display. • Press SW1 again to turn subwoofer output off. When the subwoofer output is on, you can adjust the cut-off frequency and the output level of the subwoofer. 4 Press 5 or ∞ to adjust the source volume. Each press of 5 or ∞ increases or decreases the source volume. +4 – –4 is displayed as the source volume is increased or decreased. Notes • Since the FM tuner volume is the control, it is not possible to apply source level adjustments to the FM tuner. • The MW/LW tuner volume level can also be adjusted using source level adjustment. • The built-in CD and the multi-CD players are both set to the same source level adjustment volume automatically. • External unit 1 and External unit 2 are set to the same volume adjustment setting automatically. En Nederlands 3 Press 5 or ∞ to adjust the output level of the subwoofer. Each press of 5 or ∞ increases or decreases the level of the subwoofer. • “+6” – “–6” is displayed as the level is increased or decreased. 3 Press SLA to select the SLA mode. Italiano 2 Press 2 or 3 to select the cut-off frequency. Each press of 2 or 3 selects cut-off frequencies in the following order: 50 — 80 — 125 (Hz) 2 Press AUDIO and then press NEXT. Français 1 Press AUDIO and NEXT and then press SW2 to select the subwoofer setting mode. When the subwoofer output is on, you can select the SW2. 1 Compare the FM tuner volume level with the level of the source you want to adjust (e.g., built-in CD player). Deutsch Adjusting subwoofer settings Adjusting source levels Español • “SW2” is not displayed when the subwoofer output is off in the subwoofer output mode (SW1). In this case, this mode is inactive. English This unit is equipped with a subwoofer output which can be switched on or off. When a subwoofer is connected to the rear output, first, switch the rear output setting to subwoofer, then turn the subwoofer output on. For more details, see Switching the rear output setting on page 83. 79 Section 10 Audio Adjustments Setting the sound focus equalizer Clarifying the sound image of vocals and instruments allows the simple staging of a natural, pleasant sound environment. Even greater listening enjoyment will be obtained if seating positions are chosen carefully. • FRT1 boosts the treble on the front output and the bass on the rear output. FRT2 boosts the treble and the bass on the front output and the bass on the rear output. (The bass boost is the same for both front and rear.) For both FRT1 and FRT2 the H setting provides a more pronounced effect than the L setting. 1 Press AUDIO and NEXT and then press POSI. FRT1-H (front1-high) —FRT1-L (front1-low) — FRT2-H (front2-high) —FRT2-L (front2-low) — CUSTM (custom) —OFF (off) 2 Press 2 or 3 to select the desired position. Press 2 or 3 until the desired position appears in the display. LEFT (left) —CENTER (center) —RIGHT (right) Note • If you adjust the bass or treble, CUSTM memorizes an POSI mode in which the bass and treble are adjusted for personal preference. 80 En Section Initial Settings 11 Using reverse mode The initial settings menu has the following functions: If you do not carry out an operation within about 30 seconds, screen indications will start to reverse, and then continue reversing every 10 seconds. You can turn the reverse mode on or off. • DAB P. is displayed only when a separately sold hide-away DAB tuner (e.g., GEXP700DAB) is connected. 1 With the source turned off, press and hold 1 to select the reverse mode. 2 Press REV to turn the reverse mode on. ON appears in the display. • Press REV again to turn the reverse mode off. You can operate the initial settings menu only when the source is off. 1 Press and hold SOURCE to turn the source off. Using the feature demo The feature demo automatically starts when power to this product is switched off while the ignition switch is set to ACC or ON. You can turn the feature demo on or off. 1 With the source turned off, press and hold 1. Français 2 Press and hold 1 to enter the initial settings menu. • When the source is off, you can check the location of “1” by turning on the feature demo. Deutsch Initial settings menu operation Español Note English Initial settings menu 2 Press F.DEMO to select the feature demo mode. Note • Press BAND/ESC to cancel the initial settings menu. Italiano 3 Press F.DEMO to turn the feature demo on. ON appears in the display. • Press F.DEMO again to turn the feature demo off. Note En Nederlands • The red lead (ACC) of this product should be connected to a terminal coupled with ignition switch ON/OFF operations. If this is not done, the vehicle battery may be drained. 81 Section 11 Initial Settings Switching the auxiliary setting 1 With the source turned off, press and hold 1. It is possible to use auxiliary equipment with this product. Turn the auxiliary setting on when using external equipment connected to this product. 2 Press MUTE.S to select the muting/attenuation mode. 2 Press AUX to select the AUX mode. 3 Press MUTE.S to select the desired setting. Press MUTE.S repeatedly to switch between the following settings: MUTE (muting)—ATT (attenuation)—NORMAL (no attenuation) 3 Press AUX to turn AUX on. ON appears in the display. • Press AUX again to turn AUX off. Setting the Guide Select 1 With the source turned off, press and hold 1. Car navigation audio (guidance) can be output from the front speakers. Switching the guide animation setting 1 With the source turned OFF, press and hold 1. Navigation guide animation can be switched on and off. 2 Press G.MIX to select the Guide Select mode. 1 With the source turned off, press and hold 1. 2 Press G.ANI to turn the guide animation on. ON appears in the display. • Press G.ANI again to turn the guide animation off. Switching the muting/attenuation setting • This setting controls whether the volume of the Head Unit is automatically muted during voice guidance. • Either muting or attenuation is selectable for the guide voice of the head unit when a mute signal has been received from a cell phone connected to the head unit. 82 En 3 Push the rotary stick 2 or 3, or press the multi-function button to select the desired output setting. LEFT + RIGHT — LEFT — RIGHT Setting the FM tuning step Normally, the FM tuning step is set at 50 kHz during seek tuning, however, it changes to 100 kHz when the AF or TA function is on. You can set the FM tuning step to 50 kHz even when the AF or TA function is on. 1 With the source turned off, press and hold 1. 2 Press NEXT and then press FMstep to select the FM tuning step mode. 3 Press the corresponding button to select the desired tuning step. Section Initial Settings 11 50K 50 kHz 100K 100 kHz This unit’s PREOUT (rear speaker leads output and RCA rear output) can be used for full-range speaker or subwoofer connection. If you switch the PREOUT setting to the subwoofer, you can connect a rear speaker lead directly to a subwoofer without using an auxiliary amp. • If you connect a subwoofer to the rear output, set the output setting to SW. • Even if you change this setting, there is no output unless you switch the subwoofer output on (refer to Using subwoofer output on page 79). • Both rear speaker leads output and RCA rear output are switched simultaneously in this setting. Notes • The FM tuning step remains set at 50 kHz during manual tuning. • The tuning step returns to 100 kHz if the battery is temporarily disconnected. Setting the warning tone The warning tone sounds to remind you to detach the front panel. (Refer to page 11.) You can turn the warning tone function on or off. 2 Press NEXT and then press DT-WRN to select the warning tone mode. 2 Press NEXT and then press PREOUT to select the preout setting mode. Français 1 With the source turned off, press and hold 1. 1 With the source turned off, press and hold 1. Deutsch Switching the rear output setting Español Tuning step English Button 3 Press SW or REAR to select the desired output setting. 3 Press DT-WRN to turn the warning tone on. ON appears in the display. • Press DT-WRN again to turn the warning tone Italiano off. Nederlands En 83 Section 11 Initial Settings Setting the DAB priority function Switching the auto PI seek When a hide-away DAB tuner (e.g., GEXP700DAB) is connected, you can set the product in this mode so that a traffic information interruption from the hide-away DAB tuner takes precedence over this product’s RDS traffic announcement (TA) function. During the preset station PI seek operation, you can switch the auto PI seek function on or off. (Refer to Using the PI seek function on page 49.) 1. With the source turned off, press and hold 1. 2 Press NEXT and then press A.PI to select the auto PI seek mode. 2. Press NEXT and then press DAB P. to select the DAB priority setting mode. 3 Press A.PI to turn the auto PI seek on. ON appears in the display. • Press A.PI again to turn the auto PI seek off. 3. Press DAB P. to turn the DAB priority setting on. ON appears in the display. • Press DAB P. again to turn the DAB priority setting off. Note • You can select to the DAB priority setting mode only when a separately sold hide-away DAB tuner (e.g., GEX-P700DAB) is connected. With DAB priority ON When the selected service component supports road traffic flashes and transport flashes, DAB reception is not interrupted by this product’s RDS traffic announcement (TA). With DAB priority OFF Interruption is by the first received news flash, either this product’s RDS or the hide-away DAB traffic information broadcast. 84 En 1 With the source turned off, press and hold 1. Section Other Functions 12 Attenuating audio volume Note • If you do not operate the function within about 60 seconds, the display is automatically returned. English The attenuator lets you lower the volume level quickly (by about 90%). 1 Press NEXT to display ATT. Press NEXT until ATT appears. Off clock display When the time display is turned on, the calendar display appears with the time display when sources and the feature demo are off. Deutsch Displaying the clock Español 2 Press ATT to turn the attenuator on. ATT appears in the display. • Press ATT again to turn the attenuator off and return to the original volume level. You can turn the time display on or off. Setting the time display on or off Français 1 Press NEXT to display CLK. Press NEXT until CLK appears. Italiano 2 Press CLK and then press ON/OFF to turn the time display on. The light illuminates. • Press ON/OFF again to turn the time display off. • If you press BAND/ESC and exit the time mode, the time display will appear instead of the source name. Nederlands Time Display En 85 Section 12 Other Functions Adjusting the brightness Switching the dimmer setting Display brightness adjustment lets you adjust the display for easier viewing when lighting conditions change. To prevent the display from being too bright at night, the display is automatically dimmed when the car’s headlights are turned on. You can switch the dimmer on or off. 1 Press NEXT to display C.MENU. Press NEXT until C.MENU appears. 2 Press C.MENU and then press BRGHT to select the brightness mode. 3 Press 2 or 3 to adjust the brightness. Each press of 2 or 3 increases or decreases the brightness. • 00 – 31 is displayed as the brightness is increased or decreased. 86 En 1 Press NEXT to display C.MENU. Press NEXT until C.MENU appears. 2 Press C.MENU and then press DMMER to select the dimmer mode. 3 Press DMMER to turn the dimmer on. ON appears on the display. • Press DMMER again to turn the dimmer off. Section Other Functions Selecting the wall paper pattern 1 Press NEXT to display C.MENU. Press NEXT until C.MENU appears. 3 Press any of the buttons A – C to select the desired pattern. An IP-BUS-RCA interconnector such as the CDRB20 or CD-RB10 (sold separately) lets you connect this product to auxiliary equipment featuring RCA output. For more details, refer to the IP-BUS-RCA interconnector’s owner’s manual. Entering the AUX title The title displayed for the AUX source can be changed. 1 Press SOURCE to select AUX as the source. Press SOURCE until AUX appears. 2 Press FUNC and then press TTLin to select the AUX title input mode. Refer to Entering disc titles on page 64, and perform procedures 3 to 7 in the same way. • Even if you do not press TTLin you can enter the title, but you will not be able to change the character types. Français Note Deutsch Using the AUX source 1 Press SOURCE to select AUX as the source. Press SOURCE until AUX appears. • If the auxiliary setting is not switched on, AUX cannot be selected. For more details, see Switching the auxiliary setting on page 82. Español 2 Press C.MENU and then press PTRN to select the wall paper pattern mode. Selecting AUX as the source English There are three patterns to choose from. 12 Italiano Nederlands En 87 Section 13 Additional Information CD player and care CD-R/CD-RW discs • Use only CDs that have either of the two Compact Disc Digital Audio marks as show below. • It may not be possible to play back CD-R/CDRW discs recorded on a music CD recorder or a personal computer because of disc characteristics, scratches or dirt on the disc, or dirt, condensation, etc. on the lens of this unit. • Playback of discs recorded on a personal computer may not be possible depending on the application settings and the environment. Please record with the correct format. (For details, contact the manufacturer of the application.) • Playback of CD-R/CD-RW discs may become impossible in case of direct exposure to sunlight, high temperatures, or the storage conditions in the car. • Titles and other text information recorded on a CD-R/CD-RW disc may not be displayed by this product (in the case of audio data (CDDA)). • This product conforms to the track skip function of the CD-R/CD-RW disc. The tracks containing the track skip information are skipped over automatically (in the case of audio data (CD-DA)). • If you insert a CD-RW disc into this product, time to playback will be longer than when you insert a conventional CD or CD-R disc. • Read the precautions with the CD-R/CD-RW discs before using. • Use only normal, round CDs. If you insert irregular, non-round, shaped CDs they may jam in the CD player or not play properly. • Check all CDs for cracks, scratches or warped discs before playing. CDs that have cracks, scratches or are warped may not play properly. Do not use such discs. • Avoid touching the recorded (non-printed side) surface when handling the disc. • Store discs in their cases when not in use. • Keep discs out of direct sunlight and do not expose the discs to high temperatures. • Do not attach labels, write on or apply chemicals to the surface of the discs. • To clean dirt from a CD, wipe the disc with a soft cloth outward from the center of the disc. • If the heater is used in cold weather, moisture may form on components inside the CD player. Condensation may cause the CD player to not operate properly. If you think that condensation is a problem turn off the CD player for an hour or so to allow the CD player to dry out and wipe any damp discs with a soft cloth to remove the moisture. • Road shocks may interrupt CD playback. 88 En Section Additional Information Dirty disc. Clean disc. ERROR-11, 12, 17, 30 Scratched disc. Replace disc. ERROR-14 Unrecorded disc. Check the disc. ERROR-22, 23 The CD format cannot be played back. Replace disc. ERROR-10, 11, 12, 14, 17, 30, A0 Electrical or mechanical problem. Turn the ignition ON and OFF, or switch to a different source, then back to the CD player. ERROR-44 All tracks are skip tracks. Replace disc. HEAT CD player overheated. Turn off the CD player and wait until the CD player cools down. • Pioneer does not bear responsibility for the accuracy of the information transmitted. • Pioneer does not bear responsibility for changes to information services provided by broadcasting stations or by related companies, such as cancellation of the services or changing to pay-services. Also, we do not accept return of the product for this reason. Nederlands ERROR-11, 12, 17, 30 Italiano Action Français Cause Deutsch Message • Because the information is updated only periodically, it may take time to collect all the information. • Not all RDS stations provide traffic information. • Traffic information is not taken into account in calculating estimated time of arrival time or travel time for your destination. • This product may not be able to receive traffic information in some areas. Español When problems occur during CD play an error message may appear on the display. If an error message appears on the display refer to the table below to see what the problem is and the suggested method of correcting the problem. If the error cannot be corrected, contact your dealer or your nearest Pioneer Service Center. About traffic information English Understanding built-in CD player error messages 13 En 89 Section 13 Additional Information Copyright Specifications ©1993-2002 Navigation Technologies B. V. All rights reserved General France: Sourcé: Géoroùte ® IGN France & BD Carto ® IGN France Germany: Die Grundlagendaten wurden mit Genehmigung der zuständigen Behörden entnommen. Great Britain: Based upon Ordnance Survey electronic data and used with the permission of the Controller of Her Majesty’s Stationary Office © Crown Copyright, 1995 Italy: La Banca Dati Italiana é stata prodotta usando quale riferimento anche cartographia numerica ed al tratto prodotta e fornita dalla Regione Toscana. Portugal: “Source: IgeoE-Portugal” Spain: Información geográfica propiedad del CNIG. Sweden: Based upon electronic data © National Land Survey Sweden. Switzerland: Topografische Grundlage: © Bundesamt für Landestopographie. 90 En Power source ...................... 14.4 V DC (10.8 – 15.1 V allowable) Grounding system .............. Negative type Max. current consumption ............................................. 10.0 A Dimensions (W × H × D): Chassis (DIN) .............. 178 × 50 × 157 mm Nose ............................ 188 × 58 × 18.0 mm Weight ................................. 2.0 kg Navigation (GPS receiver) System ................................. L1, C/Acode GPS SPS (Standard Positioning Service) Reception system ............... 12ch Reception frequency .......... 1,575.42 MHz Sensitivity ............................ –130 dbm Position update frequency ... Approx. once per second (Common) Maximum current consumption ............................................. 10 A Power source .............................. DC 14.4 V (10.8–15.1 V allowed) Ground type ................................. Negative type (GPS antenna) Aerial ................................... Micro strip flat antena/right-handed helical polarizaton Aerial cable ......................... 5.0 m (Dimensions) Main unit ................................... 178 (W) × 50 (H) × 157 (D) mm GPS antenna ........................ 46 (W) × 46 (H) × 13 (D) mm (Weight) Main unit .............................. 1.5 kg GPS aerial ............................. 115 g Audio Maximum power output ..... 50 W × 4 50 W × 2 ch/4 Ω + 70 W × 1 ch/2 Ω (for subwoofer) Continuous power output .. 27 W × 4 (DIN 45324, +B=14.4 V) Load impedance ................. 4 Ω (4 – 8 Ω [2 Ω for 1 ch] allowable) Preout max output level/output impedance ............................................. 2.2 V/1 kΩ Section Additional Information FM tuner MW tuner Frequency range ................. 531 – 1,602 kHz (9 kHz) Usable sensitivity ............... 18 µV (S/N: 20 dB) Selectivity ............................ 50 dB (±9 kHz) LW tuner Deutsch Frequency range ................. 153 – 281 kHz Usable sensitivity ............... 30 µV (S/N: 20 dB) Selectivity ............................ 50 dB (±9 kHz) Français Italiano CD player Nederlands System ................................ Compact disc audio system Usable discs ....................... Compact disc Signal format: Sampling frequency ... 44.1 kHz Number of quantization bits ..................................... 16; linear Frequency characteristics ............................................. 5 – 20,000 Hz (±1 dB) Signal-to-noise ratio ........... 94 dB (1 kHz) (IEC-A network) Dynamic range ................... 92 dB (1 kHz) Number of channels .......... 2 (stereo) Español Frequency range ................. 87.5 – 108.0 MHz Usable sensitivity ............... 9 dBf (0.8 µV/75 Ω, mono, S/N: 30 dB) 50 dB quieting sensitivity ... 15 dBf (1.5 µV/75 Ω, mono) Signal-to-noise ratio ........... 70 dB (IEC-A network) Distortion ............................ 0.3% (at 65 dBf, 1 kHz, stereo) Frequency response ........... 30 – 15,000 Hz (±3 dB) Stereo separation ............... 40 dB (at 65 dBf, 1 kHz) English Equalizer (3-Band Parametric Equalizer): (Low) Frequency ............ 40/80/100/160 Hz Q Factor ............... 0.35/0.59/0.95/1.15 (+6 dB when boosted) Gain ..................... ±12 dB (Mid) Frequency ............ 200/500/1 k/2 k Hz Q Factor ............... 0.35/0.59/0.95/1.15 (+6 dB when boosted) Gain ..................... ±12 dB (High) Frequency ............ 3.15 k/8 k/10 k/12.5 k Hz Q Factor ............... 0.35/0.59/0.95/1.15 (+6 dB when boosted) Gain ..................... ±12 dB Loudness contour: (Low) ............................ +3.5 dB (100 Hz) +3 dB (10 kHz) (Mid) ............................ +10 dB (100 Hz) +6.5 dB (10 kHz) (High) .......................... +11 dB (100 Hz) +11 dB (10 kHz) (Volume: –30 dB) Tone controls: (Bass) Frequency ............ 40/63/100/160 Hz Gain ..................... ±12 dB (Treble) Frequency ............ 2.5 k/4 k/6.3 k/10 k Hz Gain ..................... ±12 dB Subwoofer: Frequency ............ 50/80/125 Hz Slope .................... –12 dB/oct Gain ..................... ±12 dB 13 Note • Specifications and the design are subject to possible modifications without notice due to improvements. En 91 PIONEER CORPORATION 4-1, MEGURO 1-CHOME, MEGURO-KU, TOKYO 153-8654, JAPAN PIONEER ELECTRONICS (USA) INC. P.O. Box 1540, Long Beach, California 90801-1540, U.S.A. TEL: (800) 421-1404 PIONEER EUROPE NV Haven 1087, Keetberglaan 1, B-9120 Melsele, Belgium TEL: (0) 3/570.05.11 PIONEER ELECTRONICS ASIACENTRE PTE. LTD. 253 Alexandra Road, #04-01, Singapore 159936 TEL: 65-6472-1111 PIONEER ELECTRONICS AUSTRALIA PTY. LTD. 178-184 Boundary Road, Braeside, Victoria 3195, Australia TEL: (03) 9586-6300 PIONEER ELECTRONICS OF CANADA, INC. 300 Allstate Parkway, Markham, Ontario L3R OP2, Canada TEL: (905) 479-4411 PIONEER ELECTRONICS DE MEXICO, S.A. de C.V. San Lorenzo 1009 3er. Piso Desp. 302 Col. Del Valle Mexico, D.F. C.P. 03100 TEL: 55-5688-52-90 Published by Pioneer Corporation. Copyright © 2002 by Pioneer Corporation. All rights reserved. Publication de Pioneer Corporation. Copyright © 2002 Pioneer Corporation. Tous droits de reproduction et de traduction réservés. Printed in Belgium Imprimé en Belgique <KFJFF/02F00000> <CRB1807-A> EW