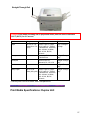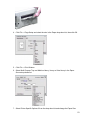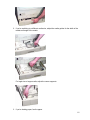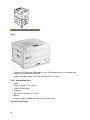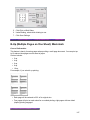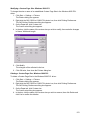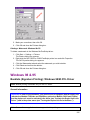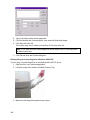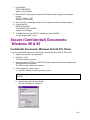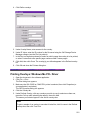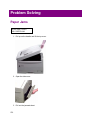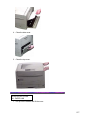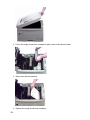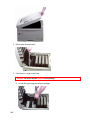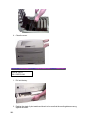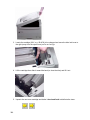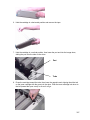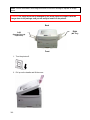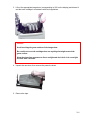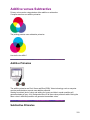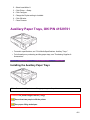
1
Table of Contents
Print Media..................................................................................................................... 25
Printer Driver Media Weight Settings .......................................................................... 25
Print Media Sizes ........................................................................................................ 25
English Media...................................................................................................... 25
Metric Media............................................................................................................ 25
Envelopes ............................................................................................................... 26
Print Media Specifications........................................................................................... 26
Print Media Specifications: Tray 1.......................................................................... 26
Paper................................................................................................................... 26
Transparencies ................................................................................................... 26
Print Media Specifications: Multi-Purpose Tray ..................................................... 26
Print Media Specifications: Duplex Unit .................................................................. 27
Print Media Specifications: Auxiliary Trays ............................................................. 28
Print Media Specifications: High Capacity Feeder .................................................. 29
Long Edge versus Short Edge .................................................................................... 29
Paper .......................................................................................................................... 30
Standard Paper ....................................................................................................... 30
Recommended Standard Paper.......................................................................... 30
Letter Size ....................................................................................................... 30
Legal Size........................................................................................................ 31
Tabloid Size..................................................................................................... 31
Standard Paper Specifications............................................................................ 31
Weight ............................................................................................................. 31
Sizes................................................................................................................ 31
Standard Paper Print Path .................................................................................. 31
Feed Paths ...................................................................................................... 31
Exit Paths ........................................................................................................ 31
Matte Photo Paper .................................................................................................. 31
Matte Photo Paper Specifications ....................................................................... 32
Weight ............................................................................................................. 32
Sizes................................................................................................................ 32
Matte Photo Paper Print Path ............................................................................. 32
Feed Paths ...................................................................................................... 32
Exit Paths ........................................................................................................ 32
Recycled Paper....................................................................................................... 32
Recommended (Letter Size) ............................................................................... 32
Recycled Paper Specifications............................................................................ 32
Weight ............................................................................................................. 33
Sizes................................................................................................................ 33
Recycled Paper Print Path .................................................................................. 33
Feed Paths ...................................................................................................... 33
Exit Paths ........................................................................................................ 33
Storing Paper .......................................................................................................... 33
1
Transparencies ........................................................................................................... 34
Recommended Transparencies .............................................................................. 34
Transparency Print Path ......................................................................................... 34
Driver Settings: Individual Print Jobs ...................................................................... 34
Menu Settings: Transparencies as the Default ....................................................... 34
To set transparencies as the default for Tray 1:.................................................. 34
To set transparencies as the default for the Multi-Purpose Tray: ....................... 35
Printing Transparencies .......................................................................................... 35
Printing Transparencies Using the Windows PCL Driver .................................... 35
Printing Transparencies Using the Windows PostScript Driver........................... 37
Printing Transparencies Using the Macintosh..................................................... 39
Labels ......................................................................................................................... 41
Label Recommendations ........................................................................................ 41
Label Print Path....................................................................................................... 41
Label Specifications ................................................................................................ 41
Driver Settings: Individual Print Jobs ..................................................................... 42
Menu Settings: Labels as the Default for the Multi-Purpose Tray........................... 42
Printing Labels ........................................................................................................ 42
Printing Labels Using the Windows PCL Driver .................................................. 42
Printing Labels Using the Windows Postscript Driver ......................................... 44
Printing Labels Using the Macintosh ................................................................... 45
Thick Paper (Index, Cards) ......................................................................................... 47
Recommended Thick Papers.................................................................................. 47
Letter Size ........................................................................................................... 47
Tabloid Size ........................................................................................................ 48
Thick Paper Specifications...................................................................................... 48
Weight ................................................................................................................. 48
Sizes ................................................................................................................... 48
Thick Paper Print Path ............................................................................................ 48
Thick Paper Driver Settings: Individual Print Jobs .................................................. 48
Menu Settings: Thick Paper as the Default............................................................ 49
Printing Thick Paper................................................................................................ 49
Printing Thick Paper Using the Windows PCL Driver ......................................... 49
Printing Thick Paper Using the Windows Postscript Driver................................. 51
Printing Thick Paper Using the Macintosh .......................................................... 52
Envelopes ................................................................................................................... 54
Envelope Recommendations .................................................................................. 54
Envelope Print Path ................................................................................................ 55
Envelope Driver Settings: Individual Print Jobs ...................................................... 55
Menu Settings: Envelopes as the Default .............................................................. 55
Printing Envelopes .................................................................................................. 56
Printing Envelopes Using the Windows PCL Driver ............................................ 56
Printing Envelopes Using the Windows PostScript Driver................................... 57
Printing Envelopes Using the Macintosh............................................................. 58
Loading Print Media .................................................................................................... 60
Loading Print Media in Tray 1, Auxiliary Trays & High Capacity Feeder ................ 60
2
Loading Print Media in the Multi-Purpose Tray ....................................................... 63
Print Paths .................................................................................................................. 66
Feed Paths.............................................................................................................. 66
Tray 1 .................................................................................................................. 68
Tray 1 Usable Media Sizes ............................................................................. 68
The Paper Tray Gauge.................................................................................... 68
The Paper Tray Media Indicator...................................................................... 69
Multi-Purpose Tray.............................................................................................. 70
Multi-Purpose Tray Usable Media Sizes ......................................................... 70
Auxiliary Trays (Optional).................................................................................... 71
Auxiliary Tray Usable Media Sizes.................................................................. 71
The Auxiliary Tray Gauge................................................................................ 71
Paper Tray Media Indicator ............................................................................. 71
High Capacity Feeder (HCF)............................................................................... 72
HCF Usable Media Sizes ................................................................................ 73
The Paper Tray Gauge.................................................................................... 73
The Paper Tray Media Indicator...................................................................... 73
Automatic Tray Switching........................................................................................ 74
To turn automatic tray switching off: ................................................................... 75
Changing The Default Feed Path............................................................................ 75
Changing the Default Feed Path: Windows 2000 ............................................... 75
PCL Driver....................................................................................................... 75
PostScript Driver (factory default = Automatically Select)............................... 75
Changing the Default Feed Path: Windows Me .................................................. 76
PCL Driver....................................................................................................... 76
PostScript Driver (factory default = AutoSelect).............................................. 76
Changing the Default Feed Path: Windows 98 & 95 ........................................... 76
PCL Driver....................................................................................................... 76
PostScript Driver (factory default = AutoSelect).............................................. 76
Changing the Default Feed Path: Windows NT 4.0 ............................................ 77
PCL Driver....................................................................................................... 77
PostScript Driver ............................................................................................. 77
Changing the Default Feed Path: Macintosh ...................................................... 77
Changing the Default Feed Path in the Printer Menu ......................................... 78
Exit Paths ................................................................................................................ 78
Top Exit Path....................................................................................................... 78
Straight-Through Exit Path.................................................................................. 79
Opening the Straight-Through Exit Path ......................................................... 79
Selecting the Straight-Through Exit Path in the Driver.................................... 80
Changing the Default Exit Path ........................................................................... 81
Using the Printer Menu.................................................................................... 81
Using the Driver............................................................................................... 81
Changing Media Settings in the Menu ........................................................................ 83
Changing Media Settings in the Menu: Tray 1 ....................................................... 83
Transparencies ................................................................................................... 83
Other Print Media (Non-Transparencies) ............................................................ 84
3
Changing Media Settings in the Menu: Multi-Purpose (MP) Tray ........................... 84
Transparencies ................................................................................................... 84
First, set the Media Size:................................................................................. 84
Next, set the Media Type ................................................................................ 84
Exit the Menu .................................................................................................. 85
Other Print Media (Non-Transparencies) ............................................................ 85
First, set the Media Size:................................................................................. 85
Next, set the Media Weight ............................................................................. 85
Exit the Menu .................................................................................................. 85
Changing Media Weight in the Menu: Auxiliary Trays ............................................ 85
Changing Media Weight in the Menu: High Capacity Feeder ................................. 86
Printable Area ............................................................................................................. 86
Printable Area: PCL ................................................................................................ 86
Letter ................................................................................................................... 86
Legal 13" ............................................................................................................. 87
Legal 13.5" .......................................................................................................... 87
Legal 14" ............................................................................................................. 87
Tabloid ................................................................................................................ 88
Tabloid Extra ....................................................................................................... 88
Executive............................................................................................................. 88
A3........................................................................................................................ 89
A3 Nobi ............................................................................................................... 89
A3Wide................................................................................................................ 89
A4........................................................................................................................ 90
A5........................................................................................................................ 90
A6........................................................................................................................ 91
B4........................................................................................................................ 91
B5........................................................................................................................ 91
Monarch .............................................................................................................. 92
Com-9 ................................................................................................................. 92
Com-10 ............................................................................................................... 92
DL........................................................................................................................ 93
C4........................................................................................................................ 93
C5........................................................................................................................ 93
Printable Area: PostScript ....................................................................................... 94
Letter ................................................................................................................... 94
Legal 13" ............................................................................................................. 94
Legal 13.5" .......................................................................................................... 94
Legal 14" ............................................................................................................. 95
Tabloid ................................................................................................................ 95
Tabloid Extra ....................................................................................................... 96
Executive............................................................................................................. 96
A3........................................................................................................................ 96
A3 Nobi ............................................................................................................... 97
A3Wide................................................................................................................ 97
A4........................................................................................................................ 97
4
A5........................................................................................................................ 98
A6........................................................................................................................ 98
B4........................................................................................................................ 98
B5........................................................................................................................ 99
Monarch .............................................................................................................. 99
Com-9 ................................................................................................................. 99
Com-10 ............................................................................................................. 100
DL...................................................................................................................... 100
C4...................................................................................................................... 100
C5...................................................................................................................... 101
Control Panel Description & Walk-up Functions ..................................................... 102
Description ................................................................................................................ 102
Control Panel Buttons ........................................................................................... 102
Menu Button...................................................................................................... 102
ON LINE Button ................................................................................................ 102
ITEM + Button ................................................................................................... 103
ITEM - Button .................................................................................................... 103
VALUE + Button ................................................................................................ 104
VALUE - Button................................................................................................. 104
SELECT Button................................................................................................. 105
CANCEL Button ................................................................................................ 105
Control Panel Lights.............................................................................................. 105
READY Light ..................................................................................................... 106
ATTENTION Light ............................................................................................. 106
Walk-up Functions .................................................................................................... 106
Printing a Demo Page ........................................................................................... 106
Printing a PCL Font List ........................................................................................ 107
Printing a PostScript Typeface List ....................................................................... 107
Printing Out the MenuMap (List of Current Menu Settings) .................................. 108
Printing Confidential (Secure) Documents ............................................................ 108
Printing a Confidential Document...................................................................... 108
Deleting a Confidential Document before Printing It ......................................... 109
Printing the File List............................................................................................... 109
Setting the Color Balance ..................................................................................... 110
Setting Power Save Mode (Time to Print)............................................................. 111
Setting the Power Save Interval ........................................................................ 112
Disabling/Enabling Power Save ........................................................................ 112
Setting a Specific Emulation ................................................................................. 112
Turning the Duplex Unit On in the Menu............................................................... 113
Control Panel Display Language .............................................................................. 113
Printer Menus .............................................................................................................. 115
How to Use the Menu................................................................................................ 115
Resetting the Printer's Menu to the Factory Defaults................................................ 115
Printer Menu Entries (in alphabetical sequence) ..................................................... 116
Color Menu............................................................................................................ 116
Process Mode ................................................................................................... 117
5
Disk Maintenance Menu........................................................................................ 117
Information Menu .................................................................................................. 117
Print Menu Map................................................................................................. 118
Print File List ..................................................................................................... 118
Print PCL Font................................................................................................... 118
Print PS Font..................................................................................................... 118
Print Demo ........................................................................................................ 118
Print Error Log................................................................................................... 118
Maintenance Menu................................................................................................ 119
EEPROM Reset ................................................................................................ 119
Power Save....................................................................................................... 119
Paper Black Setting........................................................................................... 119
Paper Color Setting........................................................................................... 119
Transpr Black Setting........................................................................................ 120
Transpr Color Setting ........................................................................................ 120
Media Menu .......................................................................................................... 120
TRAY1 MEDIATYPE ......................................................................................... 121
TRAY1 MEDIAWEIGHT.................................................................................... 121
MP TRAY PAPERSIZE ..................................................................................... 122
MP TRAY MEDIATYPE .................................................................................... 122
MP TRAY MEDIAWEIGHT ............................................................................... 122
UNIT OF MEASURE ......................................................................................... 122
X DIMENSION .................................................................................................. 122
Y DIMENSION .................................................................................................. 122
Memory Menu ....................................................................................................... 122
RECEIVE BUFF SIZE ....................................................................................... 123
RESOURCE SAVE ........................................................................................... 123
FLASH INITIALIZE............................................................................................ 123
PS FLASH RESIZE ........................................................................................... 123
Network Menu ....................................................................................................... 124
TCP/IP............................................................................................................... 125
NETWARE ........................................................................................................ 125
ETHERTALK ..................................................................................................... 125
NETBEUI........................................................................................................... 125
FRAME TYPE ................................................................................................... 125
DHCP/BOOTP .................................................................................................. 125
RARP ................................................................................................................ 126
IP ADDRESS .................................................................................................... 126
SUBNET MASK ................................................................................................ 126
GATEWAY ADDRESS ...................................................................................... 126
INITIALIZE ........................................................................................................ 126
PRINT SETTINGS ............................................................................................ 126
Parallel Menu ........................................................................................................ 126
PARALLEL ........................................................................................................ 127
BI-DIRECTION.................................................................................................. 127
ECP................................................................................................................... 127
6
ACK WIDTH ...................................................................................................... 127
ACK/BUSY TIMING .......................................................................................... 127
I-PRIME............................................................................................................. 127
PCL Emulation Menu ............................................................................................ 127
FONT SOURCE ................................................................................................ 128
FONT No........................................................................................................... 128
FONT PITCH..................................................................................................... 128
FONT HEIGHT.................................................................................................. 129
SYMBOL SET ................................................................................................... 129
A4 PRINT WIDTH ............................................................................................. 129
WHITE PAGE SKIP .......................................................................................... 129
CR FUNCTION ................................................................................................. 129
LF FUNCTION .................................................................................................. 129
PRINT MARGIN ................................................................................................ 129
TRUE BLACK.................................................................................................... 129
Print Menu............................................................................................................. 130
COPIES............................................................................................................. 131
DUPLEX............................................................................................................ 131
BINDING ........................................................................................................... 131
JOB OFFSET .................................................................................................... 131
PAPER FEED ................................................................................................... 131
OUTPUT BIN .................................................................................................... 132
AUTO TRAY SWITCH ...................................................................................... 132
PAPER SIZE CHECK ....................................................................................... 132
PRIORITY TRAY............................................................................................... 132
RESOLUTION................................................................................................... 132
MONO-PRINT SPEED ...................................................................................... 132
ORIENTATION.................................................................................................. 132
LINE PER PAGE............................................................................................... 133
EDIT SIZE ......................................................................................................... 133
System Adjust Menu ............................................................................................. 133
X ADJUST......................................................................................................... 134
Y ADJUST......................................................................................................... 134
DUPLEX X ADJUST ......................................................................................... 134
DUPLEX Y ADJUST ......................................................................................... 135
TRAY1 NOBI PAPER........................................................................................ 135
TRAY1 LEGAL 14 PAPER................................................................................ 135
PCL TRAY2 ID# ................................................................................................ 135
PCL TRAY3 ID# ................................................................................................ 135
PCL TRAY4 ID# ................................................................................................ 136
PCL TRAY5 ID# ................................................................................................ 136
PCL MP TRAY ID#............................................................................................ 136
HEX DUMP ....................................................................................................... 136
System Configuration Menu.................................................................................. 136
POWER SAVE DELAY TIME............................................................................ 137
PERSONALITY ................................................................................................. 137
7
CONTROL-T ..................................................................................................... 137
CLEARABLE WARNING................................................................................... 137
AUTO CONTINUE ............................................................................................ 137
MANUAL TIMEOUT .......................................................................................... 137
WAIT TIMEOUT ................................................................................................ 138
PCL Mode ..................................................................................................... 138
PostScript Mode ............................................................................................ 138
LOW TONER .................................................................................................... 138
JAM RECOVERY .............................................................................................. 138
ERROR REPORT ............................................................................................. 138
LANGUAGE ...................................................................................................... 138
Usage Menu.......................................................................................................... 138
TOTAL PAGE COUNT ...................................................................................... 139
TRAY1 PAGE COUNT ...................................................................................... 139
MP TRAY PAGE COUNT ................................................................................. 140
BLACK DRUM USAGE ..................................................................................... 140
CYAN DRUM USAGE ....................................................................................... 140
MAGENTA DRUM USAGE ............................................................................... 140
YELLOW DRUM USAGE .................................................................................. 140
BELT USAGE.................................................................................................... 140
FUSER USAGE ................................................................................................ 140
BLACK TONER................................................................................................. 140
CYAN TONER................................................................................................... 141
MAGENTA TONER ........................................................................................... 141
YELLOW TONER.............................................................................................. 141
USB Menu............................................................................................................. 141
USB................................................................................................................... 141
SOFT RESET.................................................................................................... 141
Using Print Features................................................................................................... 142
(see also Proof & Print, Secure Documents and Overlays) ...................................... 142
Macintosh.................................................................................................................. 142
Collating: Macintosh.............................................................................................. 142
General Information .......................................................................................... 142
Using Collating: Macintosh................................................................................ 142
Custom Page Sizes: Macintosh ............................................................................ 143
General Information .......................................................................................... 143
Creating & Saving a Custom Page Size: Macintosh ......................................... 143
Printing Using a Custom Page Size: Macintosh................................................ 144
Modifying a Custom Page Size: Macintosh....................................................... 144
Deleting a Custom Page Size: Macintosh ......................................................... 145
Duplex Printing (Printing on Both Sides): Macintosh ............................................ 145
General Information .......................................................................................... 145
Duplex Printing from a Software Application: Macintosh................................... 146
Setting Duplex Printing as the Printer Default: Macintosh................................. 146
N-Up (Multiple Pages on One Sheet): Macintosh ................................................. 147
General Information............................................................................................. 147
8
N-Up Printing: Macintosh .................................................................................. 148
Print Resolution: Macintosh .................................................................................. 148
Models C9200, C9200n & C9200dxn............................................................ 148
Model C9400dxn ........................................................................................... 148
Setting the Print Resolution: Macintosh ............................................................ 149
Windows 2000 .......................................................................................................... 149
Collating: Windows 2000....................................................................................... 149
General Information .......................................................................................... 149
Collating: Windows 2000 PCL Driver ................................................................ 150
Printing using Collating: Windows 2000 PCL ................................................ 150
Setting Collate as the Default: Windows 2000 PCL ...................................... 150
Collating: Windows 2000 PostScript Driver....................................................... 150
Printing using Collating: Windows 2000 PS .................................................. 150
Setting Collate as the Default: Windows 2000 PS ........................................ 150
Custom Page Sizes: Windows 2000 ..................................................................... 151
General Information .......................................................................................... 151
Custom Page Sizes: Windows 2000 PCL Driver .............................................. 151
Creating and Storing a Custom Page Size: Windows 2000 PCL .................. 151
Printing Using a Custom Page Size: Windows 2000 PCL............................. 151
Setting a Custom Page Size as the Default: Windows 2000 PCL................. 152
Modifying a Custom Page Size: Windows 2000 PCL.................................... 153
Deleting a Custom Page Size: Windows 2000 PCL...................................... 153
Custom Page Sizes: Windows 2000 PostScript Driver ..................................... 154
Creating the Default Custom Page Size: Windows 2000 PS ........................ 154
Printing Using a Custom Page Size: Windows 2000 PS............................... 155
Modifying the Default Custom Page Size: Windows 2000 PS ...................... 156
Duplex Printing (Printing on Both Sides): Windows 2000 ..................................... 156
General Information .......................................................................................... 156
Duplex Printing from a Software Application: Windows 2000 ........................... 157
Duplex Printing: Windows 2000 PCL Driver.................................................. 157
Duplex Printing: Windows 2000 PostScript Driver ........................................ 157
Duplex Printing as the Printer Default: Windows 2000 ..................................... 158
Setting Duplex Printing as the Default: Windows 2000 PCL ......................... 158
Setting Duplex Printing as the Default: Windows 2000 PS ........................... 158
N-Up: Windows 2000 ............................................................................................ 159
General Information............................................................................................. 159
N-Up Printing: Windows 2000 PCL ................................................................... 159
N-Up Printing: Windows 2000 PS ..................................................................... 159
Print Resolution: Windows 2000 ........................................................................... 160
Models C9200, C9200n & C9200dxn: PCL & PostScript Modes .................. 160
Model C9400dxn: PCL Mode ........................................................................ 160
Model C9400dxn: PostScript Mode............................................................... 160
Setting the Default Print Resolution: Windows 2000 PCL Driver ...................... 160
Changing the Resolution for a Print Job: Windows 2000 PCL Driver ............... 161
Setting the Default Print Resolution: Windows 2000 PostScript Driver............. 162
Changing the Resolution for a Print Job: Windows 2000 PostScript Driver ...... 162
9
Watermarks: Windows 2000 ................................................................................. 163
General Information .......................................................................................... 163
Creating & Storing a Watermark: Windows 2000 PCL...................................... 163
Printing Using a Watermark: Windows 2000 PCL............................................. 164
Modifying a Watermark: Windows 2000 PCL.................................................... 165
Deleting a Watermark: Windows 2000 PCL ...................................................... 165
Fit to Page: Windows 2000, PCL Only.................................................................. 165
Using Fit to Page:.............................................................................................. 165
Windows Me ............................................................................................................. 166
Booklets (Signature Printing): Windows Me PCL Driver ....................................... 166
General Information .......................................................................................... 166
Booklets, Individual Print Jobs: Windows Me PCL............................................ 167
Setting Booklets as the Printer Default: Windows Me PCL ............................... 168
Collating: Windows Me.......................................................................................... 168
General Information .......................................................................................... 168
Collating: Windows Me PCL Driver ................................................................... 168
Printing using Collating: Windows Me PCL ................................................... 169
Setting Collate as the Default: Windows Me PCL ......................................... 169
Collating: Windows Me PostScript Driver.......................................................... 169
Printing using Collating: Windows Me PS ..................................................... 169
Setting Collate as the Default: Windows Me PS ........................................... 170
Custom Page Sizes: Windows Me ........................................................................ 170
General Information .......................................................................................... 170
Custom Page Sizes: Windows Me PCL Driver ................................................. 170
Setting Up a Custom Page Size: Windows Me PCL ..................................... 170
Printing Using a Custom Page Size: Winodws Me PCL................................ 171
Modifying a Custom Page Size: Windows Me PCL....................................... 172
Deleting a Custom Page Size: Windows Me PCL......................................... 173
Custom Page Sizes: Windows Me PostScript Driver ........................................ 173
Setting Up a Custom Page Size: Windows Me PS ....................................... 173
Printing Using a Custom Page Size: Windows Me PS.................................. 174
Modifying a Custom Page Size: Windows Me PS......................................... 175
Duplex Printing (Printing on Both Sides): Windows Me ........................................ 175
General Information .......................................................................................... 175
Duplex Printing from a Software Application: Windows Me .............................. 176
Duplex Printing: Windows Me PCL ............................................................... 176
Duplex Printing: Windows Me PS.................................................................. 176
Duplex Printing Set as Default: Windows Me.................................................... 177
Setting Duplex Printing as the Default: Windows Me PCL ............................ 177
Setting Duplex Printing as the Default: Windows Me PS .............................. 177
N-Up: Windows Me ............................................................................................... 177
General Information............................................................................................. 177
N-Up Printing: Windows Me PCL ...................................................................... 178
N-Up Printing: Windows Me PS ........................................................................ 178
Print Resolution: Windows Me .............................................................................. 179
General Information .......................................................................................... 179
10
Models C9200, C9200n & C9200dxn: PCL & PostScript Modes .................. 179
Model C9400dxn: PCL Mode ........................................................................ 179
Model C9400dxn: PostScript Mode............................................................... 179
Setting the Default Print Resolution: Windows Me PCL.................................... 179
Changing the Resolution for a Print Job: Windows Me PCL ............................. 180
Setting the Default Print Resolution: Windows Me PS ...................................... 181
Changing the Resolution for a Print Job: Windows Me PS ............................... 181
Watermarks: Windows Me .................................................................................... 182
General Information .......................................................................................... 182
Watermarks: Windows Me PCL ........................................................................ 182
Creating & Storing Watermarks: Windows Me PCL ...................................... 182
Printing Using a Watermark: Windows Me PCL............................................ 182
Modifying a Watermark: Windows Me PCL................................................... 183
Deleting a Watermark: Windows Me PCL ..................................................... 183
Watermarks: Windows Me PS .......................................................................... 183
Creating & Storing Watermarks: Windows Me PS ........................................ 183
Printing Using a Watermark; Windows Me PS .............................................. 184
Modifying a Watermark: Windows Me PS ..................................................... 184
Deleting a Watermark: Windows Me PS ....................................................... 185
Windows 98 & 95 ...................................................................................................... 185
Booklets (Signature Printing): Windows 98/95 PCL Driver ................................... 185
General Information .......................................................................................... 185
Booklets, Individual Print Jobs: Windows 98 & 95 PCL .................................... 186
Setting Booklets as the Printer Default: Windows 98 & 95 PCL........................ 187
Collating: Windows 98 & 95 .................................................................................. 187
General Information .......................................................................................... 187
Collating: Windows 98/95 PCL Driver ............................................................... 188
Printing using Collating: Windows 98/95 PCL ............................................... 188
Setting Collate as the Default: Windows 98/95 PCL ..................................... 188
Collating: Windows 98/95Post Script Driver...................................................... 188
Printing using Collating: Windows 98/95 PS ................................................. 188
Setting Collate as the Default: Windows 98/95 PS ....................................... 189
Custom Page Sizes: Windows 98 & 95................................................................. 189
General Information .......................................................................................... 189
Custom Page Sizes: Windows 98/95 PCL Driver ............................................. 189
Setting Up a Custom Page Size: Windows 98/95 PCL ................................. 189
Printing Using a Custom Page Size: Windows 98/95 PCL............................ 190
Modifying a Custom Page Size: Windows 98/95 PCL................................... 191
Deleting a Custom Page Size: Windows 98/95 PCL..................................... 192
Custom Page Sizes: Windows 98/95 PostScript Driver .................................... 192
Setting Up a Custom Page Size: Windows 98/95 PS ................................... 192
Printing Using a Custom Page Size: Windows 98/95 PS.............................. 193
Modifying a Custom Page Size: Windows 98/95 PS..................................... 194
Duplex Printing: Windows 98/95 ........................................................................... 194
General Information .......................................................................................... 194
Duplex Printing from a Software Application: Windows 98/95 .......................... 195
11
Duplex Printing: Windows 98/95 PCL ........................................................... 195
Duplex Printing: Windows 98/95 PS.............................................................. 195
Setting Duplex Printing as the Default: Windows 98/95 .................................... 196
Setting Duplex Printing as the Printer Default: Windows 98/95 PCL ............ 196
Setting Duplex Printing as the Printer Default: Windows 98/95 PS............... 196
Fit to Page: Windows 98/95, PCL Only................................................................. 196
Using Fit to Page:.............................................................................................. 196
N-Up: Windows 98 & 95........................................................................................ 197
General Information............................................................................................. 197
N-Up Printing: Windows 98/95 PCL Driver........................................................ 198
N-Up Printing: Windows 98/95 PostScript Driver .............................................. 198
Print Resolution: Windows 98 & 95....................................................................... 199
General Information .......................................................................................... 199
Models C9200, C9200n & C9200dxn: PCL & PostScript Modes .................. 199
Model C9400dxn: PCL Mode ........................................................................ 199
Model C9400dxn: PostScript Mode............................................................... 199
Setting the Default Print Resolution: Windows 98 & 95 PCL Driver.................. 199
Changing the Resolution for a Print Job: Windows 98 & 95 PCL Driver ........... 200
Setting the Default Print Resolution: Windows 98 & 95 PostScript Driver ........ 201
Changing the Resolution for a Print Job: Windows 98 & 95 PostScript Driver.. 201
Watermarks: Windows 98 & 95............................................................................. 202
General Information .......................................................................................... 202
Watermarks: Windows 98/95 PCL Driver.......................................................... 202
Creating & Storing Watermarks: Windows 98/95 PCL .................................. 202
Printing using Watermarks: Windows 98/95 PCL.......................................... 202
Modifying a Watermark: Windows 98/95 PCL............................................... 203
Deleting a Watermark: Windows 98/95 PCL ................................................. 203
Watermarks: Windows 98/95 PostScript Driver ................................................ 203
Creating & Storing Watermarks: Windows 98/95 PS .................................... 203
Printing Using a Watermark: Windows 98/95 PS .......................................... 204
Modifying a Watermark: Windows 98/95 PS ................................................. 204
Deleting a Watermark: Windows 98/95 PS ................................................... 205
Windows NT 4.0........................................................................................................ 205
Booklets (Signature Printing): Windows NT 4.0 PCL Driver ................................. 205
General Information .......................................................................................... 205
Booklets, Individual Print Jobs: Windows NT 4.0 PCL ...................................... 206
Setting Booklets as the Printer Default: Windows NT 4.0 PCL ......................... 206
Collating: Windows NT 4.0.................................................................................... 207
General Information .......................................................................................... 207
Collating: Windows NT 4.0 PCL Driver ............................................................. 207
Printing using Collating: Windows NT 4.0 PCL ............................................. 207
Setting Collate as the Default: Windows NT 4.0 PCL ................................... 208
Collating: Windows NT 4.0 PostScript Driver .................................................... 208
Printing using Collating: Windows NT 4.0 PS ............................................... 208
Setting Collate as the Default: Windows NT 4.0 PS...................................... 209
Custom Page Sizes: Windows NT 4.0 .................................................................. 209
12
General Information .......................................................................................... 209
Custom Page Sizes: Windows NT 4.0 PCL Driver............................................ 209
Creating and Storing a Custom Page Size: Windows NT 4.0 PCL ............... 209
Printing Using a Custom Page Size: Windows NT 4.0 PCL.......................... 210
Setting a Custom Page Size as the Default: Windows NT 4.0 PCL.............. 211
Modifying a Custom Page Size: Windows NT 4.0 PCL................................. 211
Deleting a Custom Page Size: Windows NT 4.0 PCL ................................... 212
Custom Page Sizes: Windows NT 4.0 PostScript Driver .................................. 213
Creating the Default Custom Page Size: Windows NT 4.0 PS ..................... 213
Printing Using a Custom Page Size: Windows NT 4.0 PS ............................ 214
Modifying the Default Custom Page Size: Windows NT 4.0 PS.................... 215
Duplex Printing: Windows NT 4.0 ......................................................................... 216
General Information .......................................................................................... 216
Duplex Printing from a Software Application: Windows NT 4.0......................... 216
Duplex Printing: Windows NT 4.0 PCL.......................................................... 216
Duplex Printing: Windows NT 4.0 PS............................................................ 217
Duplex Printing as the Default: Windows NT 4.0 .............................................. 217
Setting Duplex Printing as the Default: Windows NT 4.0 PCL ...................... 217
Setting Duplex Printing as the Default: Windows NT 4.0 PS ........................ 217
Fit to Page: Windows NT 4.0, PCL Only ............................................................... 218
Using Fit to Page:.............................................................................................. 218
N-Up: Windows NT 4.0 ......................................................................................... 219
General Information............................................................................................. 219
N-Up Printing: Windows NT 4.0 PCL Driver...................................................... 219
N-Up Printing: Windows NT 4.0 PS .................................................................. 219
Print Resolution: Windows NT 4.0 ........................................................................ 220
General Information .......................................................................................... 220
Models C9200, C9200n & C9200dxn: PCL & PostScript Modes .................. 220
Model C9400dxn: PCL Mode ........................................................................ 220
Model C9400dxn: PostScript Mode............................................................... 220
Setting the Default Print Resolution: Windows NT 4.0 PCL .............................. 221
Changing the Resolution for a Print Job: Windows NT 4.0 PCL ....................... 221
Setting the Default Print Resolution: Windows NT 4.0 PS ................................ 222
Changing the Resolution for a Print Job: Windows NT 4.0 PS ......................... 222
Watermarks: Windows NT 4.0 PCL ...................................................................... 223
General Information .......................................................................................... 223
Creating Watermarks: Windows NT 4.0 PCL .................................................... 223
Printing Using a Watermark: Windows NT 4.0 PCL .......................................... 223
Modifying a Watermark: Windows NT 4.0 PCL ................................................. 224
Deleting a Watermark: Windows NT 4.0 PCL ................................................... 224
Proof & Print................................................................................................................ 225
General Information .................................................................................................. 225
Proof & Print: Windows 2000 PCL Driver.................................................................. 225
Printing a Document Using Proof & Print .............................................................. 225
Print the Remaining Copies .................................................................................. 226
To Delete a Proof & Print Document before Printing the Remaining Copies ........ 227
13
Proof & Print: Windows Me ....................................................................................... 227
Proof & Print: Windows Me PCL Driver................................................................. 227
Proof & Print: Windows Me PostScript Driver ....................................................... 228
Printing the Remaining Copies.............................................................................. 229
Deleting the Job without Printing the Remaining Copies ...................................... 229
Proof & Print: Windows 98 & 95................................................................................ 230
Proof & Print: Windows 98 & 95 PCL Driver ......................................................... 230
Proof & Print: Windows 98 & 95 PostScript Driver................................................ 231
Printing the Remaining Copies.............................................................................. 232
Deleting the Job without Printing the Remaining Copies ...................................... 232
Proof & Print: Windows NT 4.0 ................................................................................. 233
Proof & Print: Windows NT 4.0 PCL Driver........................................................... 233
Proof & Print: Windows NT 4.0 PostScript Driver ................................................. 234
Printing the Remaining Copies.............................................................................. 234
Deleting the Job without Printing the Remaining Copies ...................................... 235
Secure Documents ..................................................................................................... 236
General Information .................................................................................................. 236
To use Secure Printing:......................................................................................... 236
Secure (Confidential) Documents: Windows 2000 PCL Driver ................................ 236
Send a Confidential Document to the Printer........................................................ 236
Print out a Confidential Document ........................................................................ 237
To Delete a Confidential Document before Printing It........................................... 237
Secure (Confidential) Documents: Windows Me....................................................... 238
Confidential Documents: Windows Me PCL Driver............................................... 238
Confidential Documents: Windows Me PostScript Driver ..................................... 239
Printing the Confidential Document....................................................................... 240
Deleting the Job without Printing It........................................................................ 240
Secure (Confidential) Documents: Windows 98 & 95 .............................................. 241
Confidential Documents: Windows 98 & 95 PCL Driver ....................................... 241
Confidential Documents: Windows 98 & 95 PostScript Driver .............................. 242
Printing the Confidential Document....................................................................... 242
Deleting the Job without Printing It........................................................................ 243
Secure (Confidential) Documents: Windows NT 4.0................................................ 244
Confidential Documents: Windows NT 4.0 PCL Driver ......................................... 244
Confidential Documents: Windows NT 4.0 PostScript Driver................................ 245
Printing the Confidential Document....................................................................... 245
Deleting the Job without Printing It........................................................................ 246
Overlays (Forms) ........................................................................................................ 248
General Information .................................................................................................. 248
Printing with Overlays: Windows 2000...................................................................... 248
Defining Overlays: Windows 2000 PCL Driver...................................................... 248
Printing Using Overlays: Windows 2000 PCL Driver ............................................ 249
Editing Defined Overlays: Windows 2000 PCL Driver .......................................... 250
Deleting Defined Overlays: Windows 2000 PCL Driver ........................................ 250
Printing with Overlays: Windows Me......................................................................... 250
Defining Overlays: Windows Me PCL Driver......................................................... 250
14
Printing Overlays: Windows Me PCL Driver.......................................................... 251
Editing Defined Overlays: Windows Me PCL Driver ............................................. 252
Deleting Defined Overlays: Windows Me PCL Driver .......................................... 252
Defining Overlays: Windows Me PostScript Driver ............................................... 253
Set up an Overlay Group: ................................................................................. 253
Finish................................................................................................................. 254
Printing Using Overlays: Windows Me PostScript Driver ...................................... 254
Editing Defined Overlays: Windows Me PostScript Driver .................................... 254
Deleting Defined Overlays: Windows Me PostScript Driver.................................. 254
Printing with Overlays: Windows 98 & 95 ................................................................. 255
Defining Overlays: Windows 98 & 95 PCL Driver ................................................ 255
Printing Overlays: Windows 98 & 95 PCL Driver .................................................. 256
Editing Defined Overlays: Windows 98 & 95 PCL Driver ...................................... 256
Deleting Defined Overlays: Windows 98 & 95 PCL Driver.................................... 257
Defining Overlays: Windows 98 & 95 PostScript Driver........................................ 257
Set up an Overlay Group: ................................................................................. 258
Finish................................................................................................................. 258
Printing Using Overlays: Windows 98 & 95 PostScript Driver............................... 258
Editing Defined Overlays: Windows 98 & 95 PostScript Driver............................. 259
Deleting Defined Overlays: Windows 98 & 95 PostScript Driver .......................... 259
Printing with Overlays: Windows NT 4.0 ................................................................... 259
Defining Overlays: Windows NT 4.0 PCL Driver................................................... 259
Printing Overlays: Windows NT 4.0 PCL Driver.................................................... 260
Editing Defined Overlays: Windows NT 4.0 PCL Driver........................................ 261
Deleting Defined Overlays: Windows NT 4.0 PCL Driver ..................................... 261
Defining Overlays: Windows NT 4.0 PostScript Driver ......................................... 261
Set up an Overlay Group:.............................................................................. 262
Save Your Settings........................................................................................ 262
Printing Using Overlays: Windows NT 4.0 PostScript Driver ................................ 263
Editing Defined Overlays: Windows NT 4.0 PostScript Driver .............................. 263
Deleting Defined Overlays: Windows NT 4.0 PostScript Driver ............................ 263
OKI Storage Device Manager (SDM) ......................................................................... 265
OKI SDM: General Information ................................................................................. 265
OKI SDM Functions .................................................................................................. 265
OKI SDM Administration ........................................................................................... 266
Passwords............................................................................................................. 266
The Spooler........................................................................................................... 266
Administrative Functions ....................................................................................... 266
Opening OKI Storage Device Manager..................................................................... 266
OKI SDM: Setting Up an Administrative Password................................................... 267
OKI SDM: PostScript Forms ..................................................................................... 268
Creating & Downloading a PostScript Project....................................................... 268
Create the Forms .............................................................................................. 268
Create a New Project ........................................................................................ 268
Add Files to the Project ..................................................................................... 269
Check the Location for Storing the Files in the Printer's Memory ..................... 269
15
Save the Project and Download it to the Printer ............................................... 270
Test Printing a PostScript Form ............................................................................ 270
PCL Macros (Forms)................................................................................................. 270
Creating & Downloading a PCL Project ................................................................ 270
1. Create the Forms .......................................................................................... 270
2. Create a New Project .................................................................................... 270
3. Convert the Files to Binary (.bin) Format ...................................................... 271
4. Add the .bin Files to the Project .................................................................... 272
5. Check the .bin File Settings and Save the Project ........................................ 272
6. Download the Project to the Printer .............................................................. 272
Downloading a Printer Job Language (.pjl) Command File to the Printer ............. 272
Test Printing a PCL Macro .................................................................................... 273
Using the Spooler ..................................................................................................... 273
To Open the Spooler:............................................................................................ 273
To Delete Files: ..................................................................................................... 274
Deleting a Form ........................................................................................................ 274
Problem Solving.......................................................................................................... 276
Paper Jams ............................................................................................................... 276
Hardware Problems .................................................................................................. 288
Paper Problems .................................................................................................... 288
Printing Problems.................................................................................................. 289
Print Quality Problems .............................................................................................. 290
Error Display Messages ............................................................................................ 293
Status Display Messages.......................................................................................... 299
Problem Solving: Macintosh Systems....................................................................... 301
Problem Solving: Windows Systems......................................................................... 302
Maintenance ................................................................................................................ 305
Toner Cartridges ....................................................................................................... 305
Replacing the Toner Cartridges ............................................................................ 305
Back .................................................................................................................. 305
Front.................................................................................................................. 305
Toner Cartridge Life .............................................................................................. 308
Image Drums ............................................................................................................ 309
Replacing Image Drums........................................................................................ 309
Back .................................................................................................................. 310
Image Drum Precautions ...................................................................................... 315
Image Drum Life.................................................................................................... 315
Cleaning the LED Arrays........................................................................................... 315
When to Clean the LED Arrays ............................................................................. 315
To clean the LED arrays: ...................................................................................... 316
Replacing the Fuser Unit........................................................................................... 317
Back .................................................................................................................. 317
Replacing the Transfer Belt ...................................................................................... 320
Back .................................................................................................................. 321
Setting the Color Registration ................................................................................... 324
Initiating the Auto Registration Manually............................................................... 324
16
To Set the Color Registration Manually: ............................................................... 325
Working with Color ..................................................................................................... 328
Glossary .................................................................................................................... 328
Additive versus Subtractive....................................................................................... 333
Additive Primaries ................................................................................................. 333
Subtractive Primaries ............................................................................................ 333
Color Adjustments..................................................................................................... 334
Color Adjustment Using the Software Application................................................. 334
Changing the Lightness & Saturation Settings in the OKI PCL Driver .................. 335
Color Perception ....................................................................................................... 335
Reflected Light ...................................................................................................... 335
Transmitted Light .................................................................................................. 336
Emitted Light ......................................................................................................... 336
Color Registration ..................................................................................................... 336
Color Wheel .............................................................................................................. 336
Dithering & Halftones ................................................................................................ 337
Dithering................................................................................................................ 337
Halftoning .............................................................................................................. 338
The Electromagnetic Spectrum................................................................................. 338
Visible Light........................................................................................................... 338
White Light ............................................................................................................ 339
Black Light............................................................................................................. 339
Perceived Light ..................................................................................................... 339
Neutral Colors ........................................................................................................... 339
Primary & Secondary Colors..................................................................................... 339
Primary Colors ...................................................................................................... 339
Secondary Colors.................................................................................................. 339
Problems Using Color ............................................................................................... 339
Specifying Color ........................................................................................................ 340
The HSL Model ..................................................................................................... 340
The RGB Model .................................................................................................... 341
Using the Color Swatch Utility................................................................................... 342
Accessing the Color Swatches in the Windows 95 PCL Driver............................. 343
Windows ICM (Image Color Matching) ..................................................................... 343
ICM: Windows 2000 .............................................................................................. 343
Activating the ICM Files in the Windows 2000 PCL Driver................................ 343
Activating the OKI ICM Files in the Windows 2000 PostScript Driver ............... 343
ICM: Windows Me/98/95 ....................................................................................... 344
Activating the OKI ICM Files in the Windows Me/98/95 PCL Driver ................. 344
Activating the OKI ICM Files in the Windows Me/98/95 PostScript Driver ........ 344
Color Management ................................................................................................... 345
Color Management Systems................................................................................. 345
Effects of Paper................................................................................................. 345
Potential Problems with Color: Plan, plan, plan! ............................................... 345
Experiment for Best Results.............................................................................. 345
Color Management: Macintosh® ........................................................................... 346
17
Color Management: Windows 2000 ...................................................................... 347
Windows 2000 PCL Driver ................................................................................ 347
Color Management for an Individual Print Job: Windows 2000 PCL............. 347
Changing the Color Management Defaults: Windows 2000 PCL.................. 348
Activating the OKI ICM Files: Windows 2000 PCL........................................ 349
ICM: Windows 2000 PostScript Driver .............................................................. 350
Color Management for an Individual Print Job: Windows 2000 PS............... 350
Changing the Color Management Defaults: Windows 2000 PS.................... 350
Activating the OKI ICM Files: Windows 2000 PS .......................................... 351
Color Management: Windows Me ......................................................................... 351
ICM: Windows Me PCL Driver .......................................................................... 351
Color Management for an Individual Print Job: Windows Me PCL................ 351
Changing the Color Management Defaults: Windows Me PCL..................... 352
Activating the OKI ICM Files: Windows Me PCL........................................... 353
Windows Me PostScript Driver.......................................................................... 353
Color Management for an Individual Print Job: Windows Me PS.................. 353
Changing the Color Management Defaults: Windows Me PS....................... 354
Activating the OKI ICM Files: Windows Me PS ............................................. 355
Color Management: Windows 98 & 95.................................................................. 355
Windows 98 & 95 PCL Driver............................................................................ 355
Color Management for an Individual Print Job: Windows 98/95 PCL............ 355
Changing the Color Management Defaults: Windows 98/95 PCL................. 356
Activating the OKI ICM Files: Windows 98/95 PCL....................................... 356
Windows 98 & 95 PostScript Driver .................................................................. 356
Color Management for an Individual Print Job: Windows 98/95 PS.............. 356
Changing the Color Management Defaults: Windows 98/95 PS................... 357
Activating the OKI ICM Files: Windows 98/95 PS ......................................... 358
Color Management: Windows NT 4.0 ................................................................... 358
Windows NT 4.0 PCL Driver ............................................................................. 359
Color Management for an Individual Print Job: Windows NT 4.0 PCL.......... 359
Changing the Color Management Defaults: Windows NT 4.0 PCL............... 359
Windows NT 4.0 PostScript Driver .................................................................... 360
Color Management for an Individual Print Job: Windows NT 4.0 PS ............ 360
Changing the Color Management Defaults: Windows NT 4.0 PS ................. 361
Specifications.............................................................................................................. 363
General Specifications .............................................................................................. 363
Print Method.......................................................................................................... 363
Print Speed ........................................................................................................... 363
Print Resolution..................................................................................................... 363
RAM ...................................................................................................................... 363
Flash Memory ....................................................................................................... 363
OKI C9000 Series Printer Configurations ................................................................. 363
Electrical Specifications ............................................................................................ 364
Voltage/Frequency ................................................................................................ 364
Power .................................................................................................................... 364
Physical Specifications ............................................................................................. 364
18
Dimensions ........................................................................................................... 364
Weight ................................................................................................................... 364
Interface Specifications ............................................................................................. 364
Parallel .................................................................................................................. 364
USB....................................................................................................................... 364
Network ................................................................................................................. 364
How Digital LED Technology Works ......................................................................... 364
Digital LED vs Laser Technology .......................................................................... 365
Advantages of digital LED technology .................................................................. 365
The Electrophotographic Process ......................................................................... 365
Step 1: Charging ............................................................................................... 365
Step 2: Exposure............................................................................................... 365
Step 3: Developing............................................................................................ 366
Step 4: Transfer ................................................................................................ 366
Step 5: Fusing ................................................................................................... 366
In Summary........................................................................................................... 366
Service & Support....................................................................................................... 367
For the Latest Information ......................................................................................... 367
Support: U.S. & Canada ........................................................................................... 367
Via the Internet...................................................................................................... 367
www.okidata.com .............................................................................................. 367
Your Gateway to OKI Products and Services ............................................... 367
my.okidata.com ................................................................................................. 368
Via Your Oki Data Dealer...................................................................................... 368
Via Oki Data Customer Service, U.S. & Canada Only, 24/7: ................................ 369
Call 1-800-OKI-DATA (1-800-654-3282)........................................................... 369
The Information System Automated Attendant ................................................. 369
The Oki Data Customer Support Team............................................................. 370
Service Information: U.S. & Canada ......................................................................... 370
To Locate a Service Dealer................................................................................... 370
Repair under Warranty.......................................................................................... 371
Repairs after Your Warranty Expires .................................................................... 371
OKI Regional Service Depots: 1-800-OKI-DATA (1-800-654-3282) ................. 371
Oki Data Service Depot Information: U.S. & Canada........................................ 371
Repacking the Printer for Shipment .......................................................................... 372
Prepare the Printer................................................................................................ 372
Pack the Printer for Shipment ............................................................................... 375
Supplies & Accessories............................................................................................. 377
Purchasing Supplies & Accessories...................................................................... 377
Consumable & Replacement Part Order Numbers ............................................... 378
Toner Cartridges ............................................................................................... 378
Image Drums ............................................................................................................ 378
Fusers ....................................................................................................................... 378
Transfer Belt ............................................................................................................. 379
Accessory Order Numbers.................................................................................... 379
General ............................................................................................................. 379
19
Memory: RAM Upgrades................................................................................... 380
Network Print Servers ....................................................................................... 381
Interface Cables ................................................................................................ 381
Accessories................................................................................................................. 382
Memory DIMMS ........................................................................................................ 382
Installing Memory DIMMs...................................................................................... 382
To install additional DIMMs: .............................................................................. 383
Step 1: Prepare The Printer .......................................................................... 383
Back .................................................................................................................. 383
Step 2: Install the DIMM(s)............................................................................ 384
Step 3: Complete the Installation .................................................................. 386
Step 4: Check for Proper Installation............................................................. 387
Step 5: Change the Memory Setting in the Drivers ....................................... 387
Print Servers ............................................................................................................. 388
Model 6200e, OKI P/N 70036701 ......................................................................... 388
Installing the OkiLAN® 6200e Print Server ........................................................ 388
Model 6020e, OKI P/N 70036001 ......................................................................... 390
Installing the OkiLAN® 6020e Print Server ........................................................ 391
Hard Disk Drive, OKI P/N 70037301......................................................................... 391
Installing the Internal Hard Disk Drive................................................................... 392
Step 1: Prepare The Printer .............................................................................. 392
Back .................................................................................................................. 392
Step 2: Install the Hard Disk Drive (HDD) ......................................................... 393
Step 3: Complete the Installation ...................................................................... 394
Step 4: Check for Proper Installation ................................................................ 395
Step 5: Activate the Hard Disk in the Printer Driver ......................................... 396
Windows PCL Driver ..................................................................................... 396
Windows PostScript Driver............................................................................ 396
Duplex Unit, OKI P/N 70037101 ............................................................................... 396
Installing the Duplex Unit ...................................................................................... 397
Back .................................................................................................................. 397
Step 1: Install the Duplex Unit ........................................................................... 398
Step 2: Activate the Duplex Unit in the Menu.................................................... 399
Step 3: Activate the Duplex Unit in the Driver ................................................... 400
Windows PCL Driver ..................................................................................... 400
Windows PostScript Driver............................................................................ 400
Macintosh Driver ........................................................................................... 400
Auxiliary Paper Trays, OKI P/N 41529701................................................................ 401
Installing the Auxiliary Paper Trays....................................................................... 401
Step 1: Install the Tray(s) .................................................................................. 402
Back .................................................................................................................. 402
Step 2: Load Print Media................................................................................... 403
Step 3: Activate the Auxiliary Tray(s) in the Printer Driver ................................ 405
Windows PCL Driver ..................................................................................... 405
Windows PostScript Driver............................................................................ 405
Macintosh PostScript Driver .......................................................................... 405
20
High Capacity Feeder, OKI P/N 41529801 ............................................................... 406
Installing the High Capacity Feeder ...................................................................... 406
Back .................................................................................................................. 406
Step 2: Load Paper ........................................................................................... 409
Fonts ............................................................................................................................ 411
Selecting Fonts ......................................................................................................... 411
PCL Fonts ................................................................................................................. 411
Resident Bitmap PCL Fonts.................................................................................. 411
Resident Fixed Scalable PCL Fonts ..................................................................... 411
Resident Proportional Scalable PCL Fonts........................................................... 413
PCL Font Symbol Sets.......................................................................................... 415
PostScript.................................................................................................................. 417
Resident Fixed PostScript Fonts........................................................................... 417
Fixed Type-14 Resident PostScript Fonts......................................................... 418
Resident Proportional PostScript Fonts ................................................................ 418
Type 2 Fonts ..................................................................................................... 418
Type 14 Fonts ................................................................................................... 419
Font Management for the Macintosh ........................................................................ 422
Adobe® Type Manager® (ATM®)............................................................................ 422
Fonts Downloader Program .................................................................................. 422
Installing the Downloader Program ................................................................... 422
Using the Downloader Program ........................................................................ 422
Warranties, Certifications, etc. .................................................................................. 424
Warranties................................................................................................................. 424
Limited Warranty ................................................................................................... 424
United States & Canada.................................................................................... 424
On-Site Repair............................................................................................... 424
Oki Data Service Center Information............................................................. 425
Options Limited Warranty: US & Canada.............................................................. 425
Oki Data Service Centers.............................................................................. 426
Consumables Limited Warranty ............................................................................ 426
Oki Data Service Centers.............................................................................. 427
Safety Information ..................................................................................................... 427
Federal Communications Commission (FCC) Statements ....................................... 428
Federal Communications Commission Declarations of Conformity
for 120 Volt Models ............................................................................................. 428
Federal Communications Commission Radio Frequency ..................................... 428
Interference Statement for 120-Volt Models ......................................................... 429
Federal Communications Commission Radio Frequency Interference Statement
for 230/240-Volt Models and 120-Volt Models Equipped with Auxiliary Tray(s)
and/or Network Print Server Option .................................................................... 429
Industry Canada Radio Interference Statements ...................................................... 429
For 120-Volt Models.............................................................................................. 429
For 230/240-Volt Models and 120-Volt Models with Auxiliary Paper Tray(s)
and/or Network Print Server Option .................................................................... 430
ENERGY STAR ............................................................................................................ 430
Year 2000 Compliance ............................................................................................. 430
21
European Union Council of the European Communities Statement
of Electromagnetic Conformance for 230/240-Volt Models..................................... 430
European Union Council of the European Communities Statement
of Safety Conformance, 230/240V Models ............................................................. 430
Drivers / Connections................................................................................................. 431
Uninstalling the Printer Software............................................................................... 431
Windows 2000, Me, 98, 95 & NT 4.0 .................................................................... 431
Macintosh.............................................................................................................. 431
Parallel Interface ....................................................................................................... 431
Connecting the Parallel Port ................................................................................. 431
Parallel Cable Requirements ................................................................................ 432
Standard Parallel Port Menu Settings ................................................................... 432
Changing Parallel Port Menu Settings .................................................................. 433
ECP Mode............................................................................................................. 433
Changing the ECP Menu Setting .......................................................................... 433
Pin Assignments ................................................................................................... 434
Parallel Interface Pin Assignments: Compatible Mode ..................................... 434
Parallel Interface Pin Assignments: ECP Mode ................................................ 435
Parallel Interface Pin Assignments: Nibble Mode ............................................. 436
USB Interface............................................................................................................ 436
Connecting the USB Port ...................................................................................... 437
Standard USB Port Menu Settings........................................................................ 437
Changing USB Port Menu Settings....................................................................... 437
USB Cable Requirements ..................................................................................... 438
Network Interface ...................................................................................................... 438
Network Interface .................................................................................................. 438
Network Cable Requirements ............................................................................... 439
Windows Systems............................................................................................. 439
Macintosh Systems ........................................................................................... 439
Connecting the Network Server ............................................................................ 439
Portrait versus Landscape......................................................................................... 440
Portrait ...................................................................................................................... 440
Landscape ................................................................................................................ 440
Index............................................................................................................................. 441
22
Every effort has been made to ensure that the information in this document is complete,
accurate, and up-to-date. Oki Data assumes no responsibility for the results of errors or
omissions beyond its control.
Copyright 2001 by Oki Data Americas, Inc. All Rights Reserved
Written and produced by the Oki Data Training and Publications Department. Please address
any comments on this publication to:
Oki Data
Training & Publications Department
2000 Bishops Gate Blvd.
Mount Laurel, NJ 08054-4620
email address: [email protected]
Please visit Oki Data’s multilingual web site at: http://www.okidata.com.
OKI, OkiLAN and OkiView are registered trademarks of Oki Electric Industry Company, Ltd.
3M is a trademark or registered trademark of 3M Company.
Adobe, ATM, Carta, Garamond, PostScript, Tekton and Type Manager are either registered trademarks
or trademarks of Adobe Systems Incorporated in the United States and/or other countries.
Albertus MT, Arial, Cooper Black, GillSans, Goudy, Joanna and Times New Roman are trademarks of
The Monotype Corporation registered in the US Patent and Trademark Office and may be registered in
certain other jurisdictions.
American Express is a registered trademark of American Express Company.
Antique Olive is a registered trademark of Marcel Olive.
Apple Chancery, Geneva, Macintosh, Mac and Monaco are trademarks of Apple Computer, Inc.,
registered in the U.S. and other countries.
CG Times and CG Omega are products of Agfa Corporation, Agfa Compugraphic Division.
Clarendon, Helvetica, Optima, Stempel Garamond and Univers are trademarks of Linotype-Hell AG
and/or its subsidiaries.
Copperplate Gothic and Letter Gothic are trademarks of Heidelberger Druckmaschinen AG, which may
be registered in certain jurisdictions.
Coronet is a trademark of Ludlow Type Foundry.
Energy Star is a registered trademark of the United States Environmental Protection Agency.
Eurostile is a trademark of Nebiolo.
Folex is a registered trademark of Folex Imaging.
Great White is a registered trademark of Great White Consumer.
HammerMill is a registered trademark of HammerMill.
HP and PCL are registered trademarks of Hewlett Packard Company.
Hoefler Text was designed by the Hoefler Type Foundary.
ITC Avant Garde Gothic, ITC Bookman, ITC Mona Lisa, ITC Symbol, ITC Zapf Chancery, ITC Zapf
Dingbats, LubalinGraph, New Century Schoolbook, Palatino, Times and Wingdings are trademarks of
International Typeface Corporation.
Marigold is a trademark of AlphaOmega Typography.
MasterCard is a registered trademark of MasterCard International, Inc.
Oxford is a trademark of AlphaOmega Typography.
Springhill is a registered trademark of International Paper.
Strobe is a trademark of Sappi Limited.
Velcro is a registered trademark of Velcro Industries B.V.
VISA is a registered trademark of Visa.
Wausau Exact is a registered trademark of Wausau-Mosinee Paper Corp.
Weyerhaeuser is a trademark or registered trademark of Weyerhaeuser Company.
Windows and Windows NT are either registered trademarks or trademarks of Microsoft Corporation in the
23
United States and other countries.
Xerox is a trademark of Xerox Corporation.
24
Print Media
Printer Driver Media Weight Settings
Media Weight
Setting
Light
Medium Light
Medium (default)
US Bond
16 lb.
Metric
62 g/m
17-19 lb.
20-24 lb.
Index
2
33 lb.
63-73 g/m
2
74-92 g/m
2
34-40 lb.
42-50 lb.
2
Medium Heavy
25-27 lb.
93-103 g/m
Heavy
28-32 lb.
104-122 g/m2
33-54 lb.
2
Ultra Heavy
51-56 lb.
123-200 g/m
58-67 lb.
67-110 lb.
Print Media Sizes
English Media
Designation
Dimensions
Letter
8.5 x 11 inches
Legal
8.5 x 14 inches
8.5 x 13.5 inches
8.5 x 13 inches
Executive
7.25 x 10.5 inches
Tabloid
11 x 17 inches
Tabloid Extra
12 x 18 inches
Metric Media
Designation
Dimensions
A3
297 x 420 mm
A3 Nobi
328 x 453 mm
A3 Wide
320 x 450 mm
A4
210 x 297 mm
A5
148 x 210 mm
A6
105 x 148 mm
25
B4
257 x 364 mm
B5
182 x 257 mm
Envelopes
Designation
Dimensions
DL
110 x 220 mm
C4
229 x 324 mm
C5
162 x 229 mm
COM-9
3.875 x 8.875 inches
COM-10
4.125 x 9.5 inches
Monarch
3.875 x 7.5 inches
Print Media Specifications
Print Media Specifications: Tray 1
Paper
Weight: 17 to 47 lb. (63 to 176 g/m2)
Sizes: Letter, Legal-13, Legal-13.5, Legal-14, Tabloid, Tabloid Extra, Executive, A3, A3
Nobi, A3 Wide, A4, A5, A6, B4, B5, Custom (must be set up in the printer driver)
Exit Path: Top or Straight-Through
Transparencies
(Use 3M® CG3720 or Folex® BG67 or BG78 transparencies)
Sizes: Letter, A4, Tabloid, Tabloid Extra
Exit Path: Straight-Through Only
Print Media Specifications: Multi-Purpose Tray
Note: Always use the straight-through (face-up) exit with the Multi-Purpose Tray.
26
Straight-Through Exit
Caution! Print media (including ink on preprinted forms) must be able to withstand
392°F (200°C) for 0.1 second.
Media
Weight
Size(s)
Paper
16 to 47 lb. US
Bond (62 to 176
g/m2)
Letter, Legal-13, LegalTop or Straight13.5, Legal-14, Tabloid,
Through
Tabloid Extra, Executive,
A3, A3 Nobi, A3 Wide,
A4, A5, A6, B4, B5,
Custom
Transparencies*
N.A.
Letter, A4, Tabloid,
Tabloid Extra
Straight-Through
Only
Com-9, Com-10,
Monarch, DL, C5 or C4
Straight-Through
Only
Letter, A4
Straight-Through
Only
Envelopes
Exit Path
Labels
N.A.
Heavy Paper
up to 110 lb.
Letter, Legal-13, LegalStraight-Through
Index (200 g/m2) 13.5, Legal-14, Tabloid,
Only
Tabloid Extra, Executive,
A3, A3 Nobi, A3 Wide,
A4, A5, A6, B4, B5,
Custom
* Use only 3M® CG3720 or Folex® BG67 transparencies
Print Media Specifications: Duplex Unit
27
Caution! Print media (including ink on preprinted forms) must be able to withstand
392°F (200°C) for 0.1 second.
Note: If you will be using the duplex unit to print complex documents, you also need to
purchase and install 64 MB of additional memory (OKI # 70037401).
Handles paper:
Weight: 20 to 28 lb. US Bond (75 to 105 g/m2)
Note: If you experience significant curling when printing in the duplex mode and you're
using 20 or 24-lb. paper, switch to 28-lb. paper.
Size: Letter, Legal-13, Legal-13.5, Legal-14, Tabloid, Tabloid Extra, Executive, A3, A3
Wide, A4, A5, B4, B5
Feed Path: Tray 1, Auxiliary Tray(s), High Capacity Feeder
Note: The duplex unit is not usable with the Multi-Purpose Tray.
Exit Path: Top or Straight-Through
Print Media Specifications: Auxiliary Trays
Caution! Print media (including ink on preprinted forms) must be able to withstand
392°F (200°C) for 0.1 second.
28
Paper Only:
Weight Range: 17 to 47-lb. US Bond (63 to 176 g/m2)
Sizes: Letter, Legal-13, Legal-13.5, Legal-14, Tabloid, Tabloid Extra, Executive, A3, A3
Nobi, A3 Wide, A4, A5, A6, B4, B5
Output Path: Top or Straight-Through
Print Media Specifications: High Capacity Feeder
Caution! Print media (including ink on preprinted forms) must be able to withstand
392°F (200°C) for 0.1 second.
Paper Only:
Weight Range: 17 to 46-lb. US Bond (63 to 176 g/m2)
Sizes: Letter, Legal-13, Legal-13.5, Legal-14, Tabloid, Tabloid Extra, Executive, A3, A3
Nobi, A3 Wide, A4, A5, A6, B4, B5
Output Path: Top or Straight-Through
Long Edge versus Short Edge
Because the printer takes media up to 12.9 inches wide (328 mm), letter, A4 and B5 size sheets
can be fed into the printer either long edge first or short edge first.
Long edge feed (LEF) is the printer default and provides faster throughput than short edge feed.
For example, for letter size media:
Long Edge feed: 11-inch edge of the media feeds into the printer:
29
Short Edge feed: 8.5-inch edge of the media feeds into the printer:
Note: Long versus short edge feed has no impact on whether the document is printed on the
sheet in portrait or landscape format. Portrait/landscape printing is determined by your
software application.
Paper
Standard Paper
Recommended Standard Paper
Letter Size
HammerMill®
Laser, 24 lb. US Bond
Xerox
4024, 20 lb. US Bond
4024DP, 20 lb. US Bond
Xpressions, 24 lb. / 28 lb. / 32 lb. US Bond
Color Xpressions, 24 lb. US Bond
30
Legal Size
Xerox
4024DP, 20 lb. US Bond
Tabloid Size
HammerMill
Laser, 24 lb. US Bond
Wausau Exact®
Color Copy, 28 lb. US Bond
Standard Paper Specifications
Weight
16 to 54 lb. US Bond (62 to 200 g/m2)
Sizes
Tabloid, Tabloid Extra
Letter, Executive
Legal-14, Legal-13.5, Legal-13
A3 Nobi, A3 Wide, A3, A4, A5, A6
B4, B5
Custom (must be defined and saved in the printer driver)
Standard Paper Print Path
Feed Paths
Tray 1, range to 47 lb. US Bond
Multi-Purpose Tray, range to 110 lb. Index (54 lb US Bond)
Auxiliary Tray(s) (optional), range to 47 lb. US Bond
High Capacity Feeder (optional), range to 47 lb. US Bond
Exit Paths
Top, range to 47 lb.
Straight-Through (required when using Multi-Purpose Tray)
Matte Photo Paper
31
Matte Photo Paper Specifications
Weight
20 to 54 lb. (75 to 200 g/m2)
Sizes
Tabloid, Tabloid Extra
Letter, Executive
Legal-14, Legal-13.5, Legal-13
A3 Nobi, A3 Wide, A3, A4, A5, A6
B4, B5
Custom (must be defined and saved in the printer driver)
Matte Photo Paper Print Path
Feed Paths
Tray 1, range to 47 lb. US Bond
Multi-Purpose Tray, range to 110 lb. Index (54 lb US Bond)
Auxiliary Tray(s) (optional), range to 47 lb. US Bond
High Capacity Feeder (optional), range to 47 lb. US Bond
Exit Paths
Top, range to 47 lb
Straight-Through (required when using Multi-Purpose Tray)
Recycled Paper
Recommended (Letter Size)
Great White®
Recycled Content 86100, 24 lb. US Bond
Weyerhaeuser®
Husky Zero Copy 3108, 20 lb. US Bond
Xerox®
Recycled, 3 Holes, 20 lb. US Bond
Recycled Paper Specifications
32
Weight
20 to 54 lb. (75 to 200 g/m2)
Note: Recycled paper is slightly thicker than non-recycled paper of the same paper weight
(ream weight). If the toner is not fusing properly, change the Media Weight to the next higher
setting.
Sizes
Tabloid, Tabloid Extra
Letter, Executive
Legal-14, Legal-13.5, Legal-13
A3 Nobi, A3 Wide, A3, A4, A5, A6
B4, B5
Custom (must be defined and saved in the printer driver)
Recycled Paper Print Path
Feed Paths
Tray 1, range to 47 lb. US Bond
Multi-Purpose Tray, range to 110 lb. Index (54 lb US Bond)
Auxiliary Tray(s) (optional), range to 47 lb. US Bond
High Capacity Feeder (optional), range to 47 lb. US Bond
Exit Paths
Top, range to 47 lb
Straight-Through (required when using Multi-Purpose Tray)
Storing Paper
If paper is stored improperly, print quality could be affected.
Store paper in a dark, dry place such as a closet or a cabinet.
Don't open the package until you are ready to use it.
Always store paper lying flat or it may curl.
Store your paper in a static-free environment.
Ideally, store paper at a constant temperature of 70°F (21.1°C) with less than 50%
humidity.
Note: Discard the top sheet from each ream of paper before loading it into the paper tray—it
may be contaminated with glue or dust.
33
Transparencies
Caution! Transparencies must be able to withstand 392°F (200°C) for 0.1-second.
Recommended Transparencies
3M®
CG3720 (letter)
Folex®
BG67 (A4)
BG78 (tabloid)
Transparency Print Path
Input: Tray 1 (up to 250 sheets) or Multi-Purpose Tray (up to 50 sheets)
Output: Straight-Through Exit Only
Note: Transparencies can only be fed from Tray 1 or the Multi-Purpose Tray. They can not be
fed from the auxiliary tray(s) or from the high capacity feeder.
Driver Settings: Individual Print Jobs
For individual print jobs, change the settings in the driver as you print the job:
Source: Tray 1 or Multi-Purpose Tray
Size: Letter, A4, Tabloid or Tabloid Extra
Type: Transparency
Windows PostScript Driver only: Deselect Paper Size Check (Windows 2000, Windows
Me/98/95, Windows NT 4.0)
Menu Settings: Transparencies as the Default
If you consistently use transparencies in Tray 1 or the Multi-Purpose Tray, enter the printer
menu and change the settings to make transparencies the default for the appropriate tray. This
eliminates the need to set up the transparency print parameters for each print job.
To set transparencies as the default for Tray 1:
34
1. Press MENU repeatedly until MEDIA MENU appears on the display.
2. Press ITEM + repeatedly until TRAY1 MEDIATYPE appears on the display.
3. Press VALUE (+ or -) repeatedly until TRANSPARENCY appears on the display.
4. Press SELECT to engage the setting. An asterisk appears next to TRANSPARENCY.
5. Press ON LINE to save the setting and exit the menu.
To set transparencies as the default for the Multi-Purpose Tray:
1. Press MENU repeatedly until MEDIA MENU appears on the display.
2. Press ITEM + repeatedly until MP TRAY PAPERSIZE appears on the display.
3. Press VALUE (+ or -) repeatedly until your choice of LETTER, A4, TABLOID or
TABLOID EXTRA appears on the display.
4. Press SELECT to engage the setting. An asterisk appears beside the new setting.
5. Press ITEM + repeatedly until MP TRAY MEDIATYPE appears on the display.
6. Press VALUE (+ or -) repeatedly until TRANSPARENCY appears on the display.
7. Press SELECT to engage the new setting. An asterisk appears beside
TRANSPARENCY.
8. Press ON LINE to save the settings and exit the menu.
Printing Transparencies
Printing Transparencies Using the Windows PCL Driver
1. Open the document in the application.
35
2. Load the transparencies print side down in Tray 1 or print side up in the Multi-Purpose
Tray.
3. Open the straight-through exit tray.
36
4. Click File → Print.
The Print dialog box appears.
5. Make sure the OKI C9200 or C9400 PCL printer is selected, then click Properties (or
Setup, or your application's equivalent).
6. In the Paper tab, select the Size and Source, then click Transparency in the Media Type
drop-down list.
7. Click Device options, then click Paper size check to deselect it.
8. Click OK and print the document.
Printing Transparencies Using the Windows PostScript Driver
1. Open the document in the application.
2. Load the transparencies print side down in Tray 1 or print side up in the Multi-Purpose
Tray.
37
3. Open the straight-through exit tray.
4. Click File → Print.
The Print dialog box appears.
5. Make the following selections in the PostScript driver (Windows 2000, Windows
Me/98/95, Windows NT 4.0):
• Paper size = Letter, A4, Tabloid or Tabloid Extra.
• Paper source = Multi-Purpose Tray
• Paper Type = Transparency
• Paper size check = OFF.
38
6. Click OK and print the document.
Printing Transparencies Using the Macintosh
1. Open the document in the application.
2. Load the transparencies print side down in Tray 1 or print side up in the Multi-Purpose
Tray.
3. Open the straight-through exit tray.
39
4. Click File → Page Setup and select Letter, A4, Tabloid or Tabloid Extra in the Paper
drop-down list, then click OK.
5. Click File → Print Window.
6. Select Multi-Purpose Tray and Transparency in the Paper Source drop-down list:
7. Select Printer Specific Options 2 from the drop down list and change the Paper Size
40
Check setting to Off.
8. Click Print.
Labels
Label Recommendations
Important! Use label sheets designed for laser printers.
Caution!
Labels must be able to withstand 392°F (200°C) for 0.1-second.
Labels must cover the entire carrier sheet.
Label adhesive must not be exposed; if it is, it will cause jamming in the printer.
Label Print Path
Input: Multi-Purpose (MP) Tray Only
Output: Straight-Through Exit Only
Label Specifications
Maximum depth of label sheet feed stack: about 3/8-inch (1 cm)
Sheet Size: Letter or A4
41
Driver Settings: Individual Print Jobs
For individual print jobs, change the settings in the driver as you print the job:
Source: MP TRAY
Size: LETTER or A4
Type: LABEL1 (Heavy) or LABEL2 (Ultra Heavy)
Windows Adobe PostScript Driver only: Deselect Paper Size Check (Windows 2000,
Windows Me/98/95, Windows NT 4.0)
Menu Settings: Labels as the Default for the Multi-Purpose
Tray
If you consistently use labels in the Multi-Purpose Tray, enter the printer menu and change the
settings to make labels the default for the MP Tray:
1. Press MENU repeatedly until MEDIA MENU appears on the display.
2. Press ITEM + repeatedly until MP TRAY PAPERSIZE appears on the display.
3. Press VALUE (+ or -) repeatedly until the desired label sheet size setting (LETTER or
A4) appears on the display.
4. Press SELECT to engage the setting.
An asterisk appears beside the new setting.
5. Press ITEM + repeatedly until MP TRAY MEDIAWEIGHT appears on the display.
6. Press VALUE (+ or -) repeatedly until HEAVY or ULTRA HEAVY appears on the display.
7. Press SELECT to engage the new setting.
An asterisk appears beside the setting.
8. Press ON LINE to save the settings and exit the menu.
Printing Labels
Printing Labels Using the Windows PCL Driver
1. Open the document in the application.
2. Load the label sheets print side up in the Multi-Purpose Tray (printer default is long edge
first).
42
3. Open the straight-through exit tray.
4. Click File → Print.
The Print dialog box appears.
5. Make sure the OKI C9200 or C9400 PCL printer is selected, then click Properties (or
Setup, or your application's equivalent).
6. In the Paper tab, make the following selections:
• Size = Letter or A4
• Source = Multi Purpose Tray
• Media Type = LABEL1 (Heavy) or LABEL2 (Ultra Heavy)
43
7. Click Device options, then click Paper size check to deselect it.
8. Click OK and print the document.
Printing Labels Using the Windows Postscript Driver
1. Open the document in the application.
2. Load the label sheets print side up in the Multi-Purpose Tray.
3. Open the straight-through exit tray.
44
4. Click File → Print.
The Print dialog box appears.
5. Make the following selections in the PostScript driver (Windows 2000, Windows
Me/98/95, Windows NT 4.0):
• Paper size = Letter or A4.
• Paper source = Multi-Purpose Tray
• Paper Type = Labels1 (Heavy) or Labels2 (Ultra Heavy)
• Paper size check = OFF.
6. Click OK and print the document.
Printing Labels Using the Macintosh
1. Open the document in the application.
2. Load the label sheets print side up in the Multi-Purpose Tray.
3. Open the straight-through exit tray.
45
4. Click File → Page Setup and select Letter or A4 in the Paper drop-down list, then click
OK.
5. Click File → Print Window.
6. Select Multi-Purpose Tray and Labels1 (Heavy) or Labels2 (Ultra Heavy) in the Paper
Source drop-down list:
46
7. Select Printer Specific Options 2 from the drop down list and change the Paper Size
Check setting to Off.
8. Click Print.
Thick Paper (Index, Cards)
Caution! You must change the printer's media settings before you print on thick paper.
If you do not, the printer will be damaged and require repair.
Recommended Thick Papers
Letter Size
HammerMill®
Cover Copy, 60 & 80 lb. Index
Color Cover Copy #12002-3, 80 lb. Index
Spring Hill®
Index, 110 lb. Index
47
Weyerhaeuser®
First Choice Premium Cover #8210, 80 lb. Index
Wausau Exact®
Index #49111, 90 lb. Index
Index #49511, 110 lb. Index
Xerox
Color Xpressions, 65 lb. Index
Cover Stock, 65 lb. Index
Index, 90 lb. Index
Tabloid Size
Strobe Gloss
100 lb. Index
Thick Paper Specifications
Weight
up to 110 lb. Index (200 g/m2)
Sizes
Tabloid, Tabloid Extra
Letter, Executive
Legal-14, Legal-13.5, Legal-13
A3 Nobi, A3 Wide, A3, A4, A5, A6
B4, B5
Custom (must be defined in the printer driver)
Thick Paper Print Path
Input: Tray 1 (up to 47 lb. US Bond) Multi-Purpose (MP) Tray (up to 110 lb. Index)
Output: Straight-Through Exit Only
Thick Paper Driver Settings: Individual Print Jobs
For individual print jobs, change the settings in the driver
48
as you print the job:
Source: Tray1 (up to 47 lb. US Bond) MP Tray (up to 110 lb. Index)
Size: Letter, Legal-13, Legal 13.5, Legal-14, Tabloid, Tabloid Extra, Executive, A4, A5, A6,
B4, B5 or Custom (must be defined and saved in the driver)
Type: Medium Heavy to Ultra Heavy
Menu Settings: Thick Paper as the Default
If you consistently use thick paper in the Multi-Purpose Tray, enter the printer menu and change
the settings to make thick paper the default for the MP Tray:
1. Press MENU repeatedly until MEDIA MENU appears on the display.
2. Press ITEM + repeatedly until MP TRAY PAPERSIZE appears on the display.
3. Press VALUE (+ or -) repeatedly until the desired size appears on the display.
4. Press SELECT to engage the size setting.
An asterisk appears beside the new setting.
5. Press ITEM + repeatedly until MP TRAY MEDIAWEIGHT appears on the display.
6. Press VALUE (+ or -) repeatedly until the appropriate choice of MEDIUM HEAVY,
HEAVY, or ULTRA HEAVY appears on the display.
7. Press SELECT to engage the new setting.
An asterisk appears beside the setting.
8. Press ON LINE to save the settings and exit the menu.
Printing Thick Paper
Printing Thick Paper Using the Windows PCL Driver
1. Open the document in the application.
2. Load the thick paper print side up in the Multi-Purpose Tray.
49
3. Open the straight-through exit tray.
4. Click File → Print.
The Print dialog box appears.
5. Make sure the OKI C9200 or C9400 PCL printer is selected, then click Properties (or
Setup, or your application's equivalent).
6. In the Paper tab, make the following selections:
• Size = your choice
• Source = Multi Purpose Tray
• Media Type = Medium Heavy to Ultra Heavy
7. Click Device options, then click Paper size check to deselect it.
8. Click OK and print the document.
50
Printing Thick Paper Using the Windows Postscript Driver
1. Open the document in the application.
2. Load the thick paper print side up in the Multi-Purpose Tray.
3. Open the straight-through exit tray.
4. Click File → Print.
The Print dialog box appears.
5. Make the following selections in the PostScript driver (Windows 2000, Windows
Me/98/95, Windows NT 4.0):
51
• Paper size = your choice
• Paper source = Multi-Purpose Tray
• Paper Type = Medium Heavy to Ultra Heavy
• Paper size check = OFF.
6. Click OK and print the document.
Printing Thick Paper Using the Macintosh
1. Open the document in the application.
2. Load the thick paper print side up in the Multi-Purpose Tray.
3. Open the straight-through exit tray.
52
4. Click File → Page Setup and select the size in the Paper drop-down list, then click OK.
5. Click File → Print Window.
6. Select Multi-Purpose Tray and Medium Heavy, Heavy or Ultra Heavy in the Paper
Source drop-down list:
7. Select Printer Specific Options 2 from the drop down list and change the Paper Size
53
Check setting to Off.
8. Click Print.
Envelopes
Caution! The ink in preprinted return addresses must be able to withstand 392°F
(200°C) for 0.1-second.
Envelope Recommendations
Important!
Use envelopes with a smooth, even surface that are designed for laser printers: no
metal clasps, snaps, windows, or self-adhesive flaps.
Folds should be well scored and sharply creased.
Envelopes containing air can wrinkle as they pass through the printer.
Be sure to test sample envelopes first before buying in quantity.
Yes!
No!
54
Envelope Print Path
Input: Multi-Purpose (MP) Tray Only
Output: Straight-Through Exit Only
Envelope Driver Settings: Individual Print Jobs
For individual print jobs, change the settings in the driver as you print the job:
Source: Multi-Purpose Tray
Size: Com-9, Com-10, Monarch, DL, B4, C5 or C4
Type: Medium Heavy
Menu Settings: Envelopes as the Default
If you consistently use envelopes in the Multi-Purpose Tray, enter the printer menu and change
the settings to make envelopes the default for the MP Tray:
1. Press MENU repetitively until MEDIA MENU appears on the display.
2. Press ITEM (+ or -) until MP TRAY PAPERSIZE appears on the display.
3. Press VALUE (+ or -) until the desired envelope size appears on the display.
4. Press SELECT to engage the envelope size setting.
An asterisk appears beside the new setting.
5. Press ITEM + until MP TRAY MEDIAWEIGHT appears on the display.
6. Press VALUE (+ or -) until MEDIUM HEAVY appears on the display.
7. Press SELECT to engage this new setting.
An asterisk appears beside the setting.
8. Press ON LINE to save the settings and exit the menu.
55
Printing Envelopes
Printing Envelopes Using the Windows PCL Driver
1. Open the document in the application.
2. Load the envelopes print side up, return address toward the printer and to the left, in the
Multi-Purpose Tray.
Return Address
3. Open the straight-through exit tray.
56
4. Click File → Print.
The Print dialog box appears.
5. Make sure the OKI C9200 or C9400 PCL printer is selected, then click Properties (or
Setup, or your application's equivalent).
6. In the Paper tab, make the following selections:
• Size = Com-9, Com-10, Monarch, DL, C5 or C4
• Source = Multi-Purpose Tray
• Media Type = Medium Heavy
7. Click OK and print the document.
Printing Envelopes Using the Windows PostScript Driver
1. Open the document in the application.
2. Load the envelopes print side up, return address toward you and to the left, in the MultiPurpose Tray.
Return Address
3. Open the straight-through exit tray.
57
4. Click File → Print.
The Print dialog box appears.
5. Make the following selections in the PostScript driver (Windows 2000, Windows
Me/98/95, Windows NT 4.0):
• Paper size = Com-9, Com-10, Monarch, DL, C5 or C4.
• Paper source = Multi-Purpose Tray
• Paper Type = Medium Heavy
6. Click OK and print the document.
Printing Envelopes Using the Macintosh
1. Open the document in the application.
2. Load the envelopes print side up, return address toward you and to the left, in the MultiPurpose Tray.
58
3. Open the straight-through exit tray.
4. Click File → Page Setup and select the envelope size (Com-9, Com-10, Monarch, DL,
C5 or C4) in the Paper drop-down list, then click OK.
59
5. Click File → Print Window.
6. Select Multi-Purpose Tray and Medium Heavy in the Paper Source drop-down list:
7. Click Print.
Loading Print Media
Loading Print Media in Tray 1, Auxiliary Trays & High
Capacity Feeder
1. Pull the tray out.
60
2. If you're switching to a different media size, adjust the media guides for the width of the
media and length of the media.
For legal size or larger media, adjust the corner supports:
3. If you're loading paper, fan the paper.
61
4. Place the print media in the tray, print side down, keeping the stack below the PAPER
FULL mark.
Note: The default feed for letter size paper is long edge.
Paper Full Mark
Note: Load letterhead stationery print side down:
For long edge feed, load letterhead stationery with the top aimed toward the back of
the printer:
For short edge feed, load letterhead stationery with the top to the right:
5. If you're switching to another size or type of media as the normal media in the tray,
switch the media indicator to the new media designation.
62
6. Gently push the tray back into the printer.
Loading Print Media in the Multi-Purpose Tray
1. Pull open the Multi-Purpose Tray.
2. Swing out the platform.
63
3. Pivot out the extender supports.
4. Adjust the guides for the media you are using.
5. Place the media on the tray.
64
Notes
Letterhead Stationery (Letter, A4 or B5 size):
For long edge feed, load letterhead stationery face up with the top aimed toward the
back of the printer:
For short edge feed, load letterhead stationery face up with the top nosed into the
printer:
Transparencies & Labels:
Place transparencies and labels print side up. (Remember that the printer default is
long edge feed.)
65
Envelopes:
Place envelopes with flap down and nosed into the printer:
Print Paths
Feed Paths
Print media can be fed into the printer in multiple ways:
From Tray 1, which takes up to 550 sheets of 20-lb. paper or 250 transparencies
66
From the Multi-Purpose Tray (MP Tray) which takes up to 100 sheets of 20-lb paper, 50
transparencies or 10 envelopes, as well as label sheets.
From the optional Auxiliary Tray which takes up to 550 sheets of 20-lb. paper.
From a second optional Auxiliary Tray which takes up to 550 sheets of 20-lb. paper.
From the optional High Capacity Feeder which takes up to 1650 sheets of 20-lb. paper
(550 sheets in each of its three trays).
67
Tray 1
Takes up to 550 sheets of 20-lb paper or up to 250 transparencies in an enclosed area,
away from environmental conditions.
Usable with paper, range 17 to 47 lb. US Bond (63 to 176 g/m2).
Tray 1 Usable Media Sizes
Letter
Legal-13, Legal-13.5, Legal-14
Tabloid, Tabloid Extra
Executive
A3, A3 Nobi, A3 Wide, A4, A5, A6
B4, B5
Custom (must be defined and saved in the printer driver)
The Paper Tray Gauge
68
The paper tray gauge on the right side indicates the amount of paper left in the tray. This
eliminates having to open the tray to check how much paper remains.
The Paper Tray Media Indicator
A media indicator insert is provided on the right end of the tray. The insert can be removed and
flipped/repositioned to indicate what media is installed in the tray.
Selections include:
Letter
8.5" x 11"
(long edge)
A3
Letter
8.5" x 11"
A3 Wide
(short edge)
Legal 14"
8.5" x 14"
A3 Nobi
Legal 13.5"
8.5" x 13.5"
A4
(Long Edge)
Legal 13"
8.5" x 13"
A4
(Short Edge)
11"x17"
(Tabloid)
A5
[long edge only]
12"x18"
(Tabloid Extra)
A6
Executive
7.25" x 10.5"
B4
69
Transparency OHP
B5
(Long Edge)
B5
(Short Edge)
Multi-Purpose Tray
Use the Multi-Purpose Tray to print on special media without having to change the paper you
have loaded in the tray(s). You can print multiple pieces of media or you can use the MultiPurpose Tray as a manual feed unit to print individual pieces "on-the-fly."
Important! Always use the straight-through exit when feeding media from the multipurpose feeder. This eliminates curling, and for labels, it eliminates peeling.
You can use the Multi-Purpose Tray to print on the following media:
Standard Paper (up to 100 sheets of 20-lb. paper), usually a paper that is different from
the paper loaded in the tray(s): e.g., letterhead, different size, different color, etc.
Labels
Transparencies (up to 50)
Thick Paper such as index or card stock (up to 53 lb. US Bond [110 lb. Index, 200 g/m2])
Envelopes (up to 10)
Multi-Purpose Tray Usable Media Sizes
Letter
Legal-13, Legal-13.5, Legal-14
Tabloid, Tabloid Extra
Executive
A3, A3 Nobi, A3 Wide, A4, A5, A6
B4, B5
Custom (must be defined and saved in the printer driver)
70
Auxiliary Trays (Optional)
Used for paper, range 17 to 47 lb. US Bond (63 to 176 g/m2)
Up to two Auxiliary Trays can be added to the printer.
Each tray holds up to 550 sheets of 20-lb. paper in an enclosed area, away from
environmental conditions.
Note: The Auxiliary Trays can not be used with transparencies.
Auxiliary Tray Usable Media Sizes
Letter
Legal-13, Legal-13.5, Legal-14
Tabloid, Tabloid Extra
Executive
A3, A3 Nobi, A3 Wide, A4, A5, A6
B4, B5
Custom (must be defined and saved in the printer driver)
The Auxiliary Tray Gauge
The paper tray gauge on the right end of the tray indicates the amount of paper left in the tray.
This eliminates having to open the tray to check how much paper remains.
Paper Tray Media Indicator
71
A media indicator insert is provided on the right end of the tray. The insert can be removed and
flipped/repositioned to indicate what media is installed in the tray.
Selections include:
Letter
8.5" x 11"
(long edge)
A3
Letter
8.5" x 11"
A3 Wide
(short edge)
Legal 14"
8.5" x 14"
A3 Nobi
Legal 13.5"
8.5" x 13.5"
A4
(Long Edge)
Legal 13"
8.5" x 13"
A4
(Short Edge)
11"x17"
(Tabloid)
A5
[long edge feed only]
12"x18"
(Tabloid Extra)
A6 Size A6 is not supported by
Auxiliary Trays!
Executive
7.25" x 10.5"
B4
[long edge feed only]
Transparency OHP
B5
(Long Edge)
B5
(Short Edge)
High Capacity Feeder (HCF)
72
Includes three paper trays.
Takes paper, range 17 to 47 lb. US Bond (63 to 176 g/m2).
Each tray holds up to 550 sheets of 20-lb. paper in an enclosed area, away from
environmental conditions.
Can be used with one Auxiliary Tray.
Note: The High Capacity Feeder trays can not be used with transparencies.
HCF Usable Media Sizes
Letter
Legal-13, Legal-13.5, Legal-14
Tabloid, Tabloid Extra
Executive
A3, A3 Nobi, A3 Wide, A4, A5, A6
B4, B5
Custom (must be defined and saved in the printer driver)
The Paper Tray Gauge
The paper tray gauge on the right side of each tray indicates the amount of paper left in the tray.
This eliminates having to open the tray to check how much paper remains.
The Paper Tray Media Indicator
73
A media indicator insert is provided on the right end of each tray. The insert can be removed
and flipped/repositioned to indicate what media is installed in the tray.
Selections include:
Letter
8.5" x 11"
(long edge)
A3
Letter
8.5" x 11"
A3 Wide
(short edge)
Legal 14"
8.5" x 14"
A3 Nobi
Legal 13.5"
8.5" x 13.5"
A4
(Long Edge)
Legal 13"
8.5" x 13"
A4
(Short Edge)
11"x17"
(Tabloid)
A5
[long edge feed only]
12"x18"
(Tabloid Extra)
A6 Size A6 is not supported by
High Capacity Feeder trays!
Executive
7.25" x 10.5"
B4
[long edge feed only]
Transparency OHP
B5
(Long Edge)
B5
(Short Edge)
Automatic Tray Switching
With Automatic Tray Switching turned on (the factory default), if the tray from which the printer is
74
currently feeding print media runs out, the printer will automatically switch to the nearest tray
with the same print media size and type.
To turn automatic tray switching off:
1. Press MENU repeatedly until PRINT MENU appears on the display.
2. Press ITEM (+ or -) repeatedly until AUTO TRAY SWITCH appears on the display.
3. Press VALUE +.
OFF appears on the second line of the display.
4. Press SELECT.
An asterisk appears next to OFF.
5. Press ON LINE to save the setting and exit the Menu Mode.
Changing The Default Feed Path
Changing the Default Feed Path: Windows 2000
PCL Driver
1. Click Start → Settings → Printers.
2. Right click the OKI C9200 or C9400 PCL printer icon, then click Printing Preferences.
The OKI PCL Printing Preferences dialog box appears.
3. Click your choice of Tray1 (or Tray2, Tray3, etc., if the Auxiliary Tray(s) and/or High
Capacity Feeder are installed) or Multi purpose tray for the default feed path from the
Source drop-down list.
4. Click OK and close the Printers dialog box.
PostScript Driver (factory default = Automatically Select)
1. Click Start → Settings → Printers.
The Printers dialog box appears.
2. Right click the OKI C9200 or C9400 PostScript printer icon, then click Printing
Preferences.
The OKI PS Printing Preferences dialog box appears.
3. Click the Paper/Quality tab
4. Click your choice of Tray 1 (or Tray 2, Tray 3, etc., if the Auxiliary Tray(s) and/or High
75
Capacity Feeder are installed) or Multi-Purpose Tray for the default feed path from the
Paper Source drop-down list.
5. Click OK and close the Printers dialog box.
Changing the Default Feed Path: Windows Me
PCL Driver
1. Click Start → Settings → Printers.
The Printers dialog box appears.
2. Right click the OKI C9200 or C9400 PCL printer icon, then click Properties.
The OKI PCL Properties dialog box appears.
3. Click the Paper tab.
4. Click your choice of Tray1 (or Tray2, Tray3, etc., if the Auxiliary Tray(s) and/or High
Capacity Feeder are installed)or Multi purpose tray for the default feed path from the
Source drop-down list.
5. Click OK and close the Printers dialog box.
PostScript Driver (factory default = AutoSelect)
1. Click Start → Settings → Printers.
The Printer dialog box appears.
2. Right click the OKI C9200 or C9400 PostScript printer icon, then click Properties.
The OKI PS Properties dialog box appears.
3. Click the Paper tab.
4. Click your choice of Tray 1 (or Tray 2, Tray 3, etc., if the Auxiliary Tray(s) and/or High
Capacity Feeder are installed) or Multi-Purpose Tray for the default feed path from the
Source drop-down list.
5. Click OK and close the Printers dialog box.
Changing the Default Feed Path: Windows 98 & 95
PCL Driver
1. Click Start → Settings → Printers.
The Printers dialog box appears.
2. Right click the OKI C9200 or C9400 PCL printer icon, then click Properties.
The OKI PCL Properties dialog box appears.
3. Click the Paper tab.
4. Click your choice of Tray1 (or Tray2, Tray3, etc., if the Auxiliary Tray(s) and/or High
Capacity Feeder are installed)or Multi purpose tray for the default feed path from the
Source drop-down list.
5. Click OK and close the Printers dialog box.
PostScript Driver (factory default = AutoSelect)
1. Click Start → Settings → Printers.
76
The Printers dialog box appears.
2. Right click the OKI C9200 or C9400 PostScript printer icon, then click Properties.
The OKI PS Properties dialog box appears.
3. Click the Paper tab.
4. Click your choice of Tray1 (or Tray2, Tray3, etc., if the Auxiliary Tray(s) and/or High
Capacity Feeder are installed)or Multi-Purpose Tray for the default feed path from the
Source drop-down list.
5. Click OK and close the Printers dialog box.
Changing the Default Feed Path: Windows NT 4.0
PCL Driver
1. Click Start → Settings → Printers.
The Printers dialog box appears.
2. Right click the OKI C9200 or C9400 PCL printer icon, then click Document Defaults.
The OKI PCL Default dialog box appears.
3. Click your choice of Tray1 (or Tray2, Tray3, etc., if the Auxiliary Tray(s) and/or High
Capacity Feeder are installed) or Multi purpose tray for the default feed path from the
Source drop-down list.
4. Click OK and close the Printers dialog box.
PostScript Driver
1. Click Start → Settings → Printers.
The Printers dialog box appears.
2. Right click the OKI C9200 or C9400 PostScript printer icon, then click Document
Defaults.
The OKI PS Default dialog box appears.
3. Under Paper/Output, click Paper Source.
4. Under Change 'Paper Source' Setting, click your choice of Automatically Select, Tray1
(or Tray2, Tray3, etc., if the Auxiliary Tray(s) and/or High Capacity Feeder are installed)
or Multi-Purpose Tray for the default feed path.
5. Click OK and close the Printers dialog box.
Changing the Default Feed Path: Macintosh
1. Double-click the printer icon to open the printer dialog.
2. Click File → Print Window.
3. Select General from the drop-down list.
4. Select the feed path you want under Paper Source.
5. Click Save Settings.
77
Changing the Default Feed Path in the Printer Menu
1. Press MENU repeatedly until PRINT MENU appears on the display.
2. Press ITEM + repeatedly until PAPER FEED appears on the display.
3. Press VALUE + repeatedly until the paper feed path you wish to be the default appears
on the display.
4. Press SELECT to engage the new setting. An asterisk appears next to the new setting.
5. Press ON LINE to save the setting and exit the menu.
Exit Paths
Top Exit Path
The top exit is the one normally used for routine printing.
For standard and letterhead paper, up to 32 lb (120 g/m2).
Printed pages feed face down into the bin.
Pages stack in the correct order.
Bin holds up to 500 sheets of 20-lb. paper.
When the bin is full
REMOVE THE PAPER
78
480: STACKER FULL
appears on the display and printing stops until the paper is removed.
Straight-Through Exit Path
Provides a straight-through path for special print media such as transparencies, labels,
envelopes and heavy stock (cards, etc.) to eliminate curl.
Important!
To use the straight-through exit path you must select it in the printer driver or set it as
the default in the driver or printer menu.
The straight-through exit path must be used when the print media is fed in from the
Multi-Purpose Tray.
For paper up to 53 lb. US Bond (200 g/m2) or card stock up to 110 lb. Index (200 g/m2)
Printed pages feed face up.
Pages stack in reverse order.
Holds a maximum of 100 sheets of 20 lb. letter-size paper.
When the bin is full
REMOVE THE PAPER
470: FINISHER STACKER FULL
appears on the display and printing stops until the paper is removed.
Opening the Straight-Through Exit Path
To open the straight-through exit:
Caution! Do not extend the straight-through exit tray while printing: a print media jam
may occur.
79
1. Pull the tray down.
2. Pivot out the extenders.
Selecting the Straight-Through Exit Path in the Driver
Windows Systems
To select the straight-through exit path when printing a job:
1. Open the document in your software application, then click File → Print. The Print dialog
box appears.
2. In the Print dialog box, click Properties (or your application's equivalent).
3. Click the exit path you want (Face-down = top exit; Face-up = straight-through exit)
under Output bin:
Windows PCL Driver:
• All Windows Systems: click the Layout tab
Windows PostScript Driver:
• Windows 2000: click Advanced, then go to Document Options → Printer Features →
Output Bin.
• Windows Me/98/95: click the Paper tab.
• Windows NT 4.0: go to Document Options → Paper/Output.
Macintosh
To select the straight-through exit path when printing a job:
80
1. Double-click the printer icon to open the printer dialog.
2. Click File → Print Window.
3. Select Printer Specific Options 1 from the drop-down list.
4. Select the exit path you want (Face-down = top exit; Face-up = straight-through exit) under
Output Bin.
5. Click Print.
Changing the Default Exit Path
Important! Normally, settings made in the driver override settings made in the printer
menu.
Using the Printer Menu
To select the exit path using the printer menu:
1. Press MENU repeatedly until PRINT MENU appears on the display.
2. Press ITEM + until OUTPUT BIN appears on the display.
3. Press VALUE + to toggle the setting between FACE DOWN (top exit) and FACE UP
(straight-through exit).
4. Press SELECT.
An asterisk appears beside the new setting.
5. Press ON LINE to save the setting and exit the menu.
Using the Driver
Windows 2000 PCL Driver
1. Click Start → Settings → Printers.
2. Right click the OKI C9200 or C9400 PCL printer icon, then click Printing Preferences.
The OKI PCL Printing Preferences dialog box appears.
3. Click the Layout tab.
4. Click your choice for the default exit path from the Output bin drop-down list (Face-down
= top exit; Face-up = straight-through exit).
5. Click OK and close the Printers dialog box.
Windows 2000 PostScript Driver
81
1. Click Start → Settings → Printers.
2. Right click the OKI C9200 or C9400 PostScript printer icon, then click Printing
Preferences.
The OKI PS Printing Preferences dialog box appears.
3. Click Advanced.
4. Under Document Options, Printer Features, click your choice for the default exit path
from the Output Bin drop-down list (Face-down = top exit; Face-up = straight-through
exit).
5. Click OK twice and close the Printers dialog box.
Windows Me PCL Driver
1. Click Start → Settings → Printers.
2. Right click the OKI C9200 or C9400 PCL printer icon, then click Properties.
The OKI PCL Properties dialog box appears.
3. Click the Layout tab.
4. Select your choice for the default exit path from the Output bin drop-down list (Facedown = top exit; Face-up = straight-through exit).
5. Click OK and close the Printers dialog box.
Windows Me PostScript Driver
1. Click Start → Settings → Printers.
2. Right click the OKI C9200 or C9400 PostScript printer icon, then click Properties.
The OKI PS Properties dialog box appears.
3. Click the Paper tab.
4. Click your choice for the default exit path from the Output bin drop-down list (Face-down
= top exit; Face-up = straight-through exit).
5. Click OK and close the Printers dialog box.
Windows 98/95 PCL Driver
1. Click Start → Settings → Printers.
2. Right click the OKI C9200 or C9400 PCL printer icon, then click Properties.
The OKI PCL Properties dialog box appears.
3. Click the Layout tab.
4. Select your choice for the default exit path from the Output bin drop-down list (Facedown = top exit; Face-up = straight-through exit).
5. Click OK and close the Printers dialog box.
Windows 98/95 PostScript Driver
1. Click Start → Settings → Printers.
2. Right click the OKI C9200 or C9400 PostScript printer icon, then click Properties.
The OKI PS Properties dialog box appears.
3. Click the Paper tab.
4. Click your choice for the default exit path from the Output bin drop-down list (Face-down
= top exit; Face-up = straight-through exit).
5. Click OK and close the Printers dialog box.
Windows NT 4.0 PCL Driver
82
1. Click Start → Settings → Printers.
2. Right click the OKI C9200 or C9400 PCL printer icon, then click Document Defaults.
The OKI PCL Default dialog box appears.
3. Click the Layout tab.
4. Under Finisher, Output bin, click Stacker (Face-down) to select the top exit path, or
Stacker (Face-up) to select the straight-through exit path.
5. Click OK and close the Printers dialog box.
Windows NT 4.0 PostScript Driver
1. Click Start → Settings → Printers.
2. Right click the OKI C9200 or C9400 PostScript printer icon, then click Document
Defaults.
The OKI PS Default dialog box appears.
3. Under Paper/Output, click Output Bin.
4. Under Change 'Output Bin' Setting, click Stacker [Face-down] to select the top exit path,
or Stacker [Face-up] to select the straight-through exit path.
5. Click OK and close the Printers dialog box.
Macintosh
1. Double-click the printer icon to open the printer dialog.
2. Click File → Print Window.
3. Select Printer Specific Options 1 from the drop-down list.
4. Select the exit path you want (Face-down = top exit; Face-up = straight-through exit)
under Output Bin.
5. Click Save Settings.
Changing Media Settings in the Menu
Changing Media Settings in the Menu: Tray 1
Transparencies
1. Press MENU repeatedly until MEDIA MENU appears on the display.
2. Press ITEM + repeatedly until TRAY1 MEDIATYPE appears on the display.
83
3. Press VALUE (+ or -) repeatedly until TRANSPARENCY appears on the second line of
the display.
4. Press SELECT to engage Transparency.
An asterisk appears next to TRANSPARENCY.
5. Press ON LINE to save the setting and exit the menu.
Other Print Media (Non-Transparencies)
1. Press MENU repeatedly until MEDIA MENU appears on the display.
2. Press ITEM + repeatedly until TRAY1 MEDIAWEIGHT appears on the display.
3. Press VALUE (+ or -) repeatedly until the desired setting appears on the second line of
the display.
4. Press SELECT to engage the new setting.
An asterisk appears next to the new setting.
5. Press ON LINE to save the setting and exit the menu.
Changing Media Settings in the Menu: Multi-Purpose (MP)
Tray
Transparencies
First, set the Media Size:
1. Press MENU repeatedly until MEDIA MENU appears on the display.
2. Press ITEM + repeatedly until MP TRAY PAPERSIZE appears on the display.
3. Press VALUE (+ or -) repeatedly until TABLOID, TABLOID EXTRA, LETTER or A4
appears on the second line of the display.
4. Press SELECT to engage the new setting.
An asterisk appears next to the new setting.
Next, set the Media Type
5. Press ITEM + repeatedly until MP TRAY MEDIATYPE appears on the display.
84
6. Press VALUE (+ or -) repeatedly until TRANSPARENCY appears on the second line of
the display.
7. Press SELECT to engage TRANSPARENCY.
An asterisk appears next to TRANSPARENCY.
Exit the Menu
8. Press ON LINE to save the settings and exit the menu.
Other Print Media (Non-Transparencies)
First, set the Media Size:
1. Press MENU repeatedly until MEDIA MENU appears on the display.
2. Press ITEM + repeatedly until MP TRAY PAPERSIZE appears on the display.
3. Press VALUE (+ or -) repeatedly until the size you wish to select appears on the second
line of the display.
4. Press SELECT to engage the new setting.
An asterisk appears next to the new setting.
Next, set the Media Weight
5. Press ITEM + repeatedly until MP TRAY MEDIAWEIGHT appears on the display.
6. Press VALUE (+ or -) repeatedly until the desired setting appears on the second line of
the display.
7. Press SELECT to engage the new setting.
An asterisk appears next to the new setting.
Exit the Menu
8. Press ON LINE to save the settings and exit the menu.
Changing Media Weight in the Menu: Auxiliary Trays
1. Press MENU repeatedly until MEDIA MENU appears on the display.
2. Press ITEM + repeatedly until TRAY2 MEDIAWEIGHT or TRAY3 MEDIAWEIGHT
appears on the display.
3. Press VALUE (+ or -) repeatedly until the desired setting appears on the second line of
85
the display.
4. Press SELECT to engage the new setting.
An asterisk appears next to the new setting.
5. Press ON LINE to save the setting and exit the menu.
Changing Media Weight in the Menu: High Capacity Feeder
1. Press MENU repeatedly until MEDIA MENU appears on the display.
2. Press ITEM + repeatedly until the appropriate tray number (e.g. TRAY5 MEDIAWEIGHT
or TRAY4 MEDIAWEIGHT) appears on the display.
Note: With just the High Capacity Feeder installed, the HCF tray numbers will be 2, 3
and 4. With both the High Capacity Feeder and one Auxiliary Tray installed, the HCF
tray numbers will be 3, 4 and 5 (Auxiliary Tray will be 2).
3. Press VALUE (+ or -) repeatedly until the desired setting appears on the second line of
the display.
4. Press SELECT to engage the new setting.
An asterisk appears next to the new setting.
5. Press ON LINE to save the setting and exit the menu.
Printable Area
Printable Area: PCL
Letter
Sheet
Printable
Unit
Width
Length
Width
Length
Inches
8.5
11
8.17
10.67
Millimeters
215.9
279.4
207.4
270.9
Margins
Unit
86
Left
Right
Top
Bottom
Inches
0.17
0.17
0.17
0.17
Millimeters
4.23
4.23
4.23
4.23
Legal 13"
Sheet
Printable
Unit
Width
Length
Width
Length
Inches
8.5
13
8.17
12.67
Millimeters
215.9
330.2
207.4
321.7
Margins
Unit
Left
Right
Top
Bottom
Inches
0.17
0.17
0.17
0.17
Millimeters
4.23
4.23
4.23
4.23
Legal 13.5"
Sheet
Printable
Unit
Width
Length
Width
Length
Inches
8.5
13.5
8.17
13.17
Millimeters
215.9
342.9
207.4
334.4
Margins
Unit
Left
Right
Top
Bottom
Inches
0.17
0.17
0.17
0.17
Millimeters
4.23
4.23
4.23
4.23
Legal 14"
Sheet
Printable
Unit
Width
Length
Width
Length
Inches
8.5
14
8.17
13.67
Millimeters
215.9
355.6
207.4
347.1
87
Margins
Unit
Left
Right
Top
Bottom
Inches
0.17
0.17
0.17
0.17
Millimeters
4.23
4.23
4.23
4.23
Tabloid
Sheet
Printable
Unit
Width
Length
Width
Length
Inches
11
17
10.67
16.67
Millimeters
279.4
431.8
270.9
423.3
Margins
Unit
Left
Right
Top
Bottom
Inches
0.17
0.17
0.17
0.17
Millimeters
4.23
4.23
4.23
4.23
Tabloid Extra
Sheet
Printable
Unit
Width
Length
Width
Length
Inches
12
18
11.67
17.67
Millimeters
304.8
457.2
296.3
448.7
Margins
Unit
Left
Right
Top
Bottom
Inches
0.17
0.17
0.17
0.17
Millimeters
4.23
4.23
4.23
4.23
Executive
Sheet
Printable
Unit
Width
Length
Width
Length
Inches
7.25
10.5
6.92
10.17
88
Millimeters
184.15
266.7
175.7
258.2
Margins
Unit
Left
Right
Top
Bottom
Inches
0.17
0.17
0.17
0.17
Millimeters
4.23
4.23
4.23
4.23
A3
Sheet
Printable
Unit
Width
Length
Width
Length
Inches
11.7
16.5
11.36
16.20
Millimeters
297
420
288.5
411.6
Margins
Unit
Left
Right
Top
Bottom
Inches
0.17
0.17
0.17
0.17
Millimeters
4.23
4.23
4.23
4.23
A3 Nobi
Sheet
Printable
Unit
Width
Length
Width
Length
Inches
12.91
17.83
12.58
117.50
Millimeters
328
453
319.5
444.5
Margins
Unit
Left
Right
Top
Bottom
Inches
0.17
0.17
0.17
0.17
Millimeters
4.23
4.23
4.23
4.23
A3Wide
Sheet
Printable
89
Unit
Width
Length
Width
Length
Inches
12.6
17.72
12.27
17.38
Millimeters
320
450
311.6
441.5
Margins
Unit
Left
Right
Top
Bottom
Inches
0.17
0.17
0.17
0.17
Millimeters
4.23
4.23
4.23
4.23
A4
Sheet
Printable
Unit
Width
Length
Width
Length
Inches
8.27
11.69
7.93
11.36
Millimeters
210
297
201.5
288.5
Margins
Unit
Left
Right
Top
Bottom
Inches
0.17
0.17
0.17
0.17
Millimeters
4.23
4.23
4.23
4.23
A5
Sheet
Printable
Unit
Width
Length
Width
Length
Inches
5.83
8.27
5.49
7.93
Millimeters
148
210
139.5
201.5
Margins
Unit
Left
Right
Top
Bottom
Inches
0.17
0.17
0.17
0.17
Millimeters
4.23
4.23
4.23
4.23
90
A6
Sheet
Printable
Unit
Width
Length
Width
Length
Inches
4.13
5.83
3.80
5.49
Millimeters
105
148
96.5
139.5
Margins
Unit
Left
Right
Top
Bottom
Inches
0.17
0.17
0.17
0.17
Millimeters
4.23
4.23
4.23
4.23
B4
Sheet
Printable
Unit
Width
Length
Width
Length
Inches
10.12
14.33
9.78
14.00
Millimeters
257
364
248.5
355.5
Margins
Unit
Left
Right
Top
Bottom
Inches
0.17
0.17
0.17
0.17
Millimeters
4.23
4.23
4.23
4.23
B5
Sheet
Printable
Unit
Width
Length
Width
Length
Inches
7.17
10.12
6.83
9.78
Millimeters
182
257
173.6
248.5
Margins
Unit
Left
Right
Top
Bottom
Inches
0.17
0.17
0.17
0.17
Millimeters
4.23
4.23
4.23
4.23
91
Monarch
Sheet
Printable
Unit
Width
Length
Width
Length
Inches
3.875
7.5
3.54
7.17
Millimeters
98.4
190.5
90.0
182.0
Margins
Unit
Left
Right
Top
Bottom
Inches
0.17
0.17
0.17
0.17
Millimeters
4.23
4.23
4.23
4.23
Com-9
Sheet
Printable
Unit
Width
Length
Width
Length
Inches
3.875
8.875
3.54
8.54
Millimeters
98.4
225.4
90.0
217.0
Margins
Unit
Left
Right
Top
Bottom
Inches
0.17
0.17
0.17
0.17
Millimeters
4.23
4.23
4.23
4.23
Com-10
Sheet
Printable
Unit
Width
Length
Width
Length
Inches
4.125
9.5
3.79
9.17
Millimeters
104.8
241.3
96.4
232.8
Margins
Unit
Left
Right
Top
Bottom
Inches
0.17
0.17
0.17
0.17
92
Millimeters
4.23
4.23
4.23
4.23
DL
Sheet
Printable
Unit
Width
Length
Width
Length
Inches
4.33
8.66
4.00
8.33
Millimeters
110
220
101.5
211.5
Margins
Unit
Left
Right
Top
Bottom
Inches
0.17
0.17
0.17
0.17
Millimeters
4.23
4.23
4.23
4.23
C4
Sheet
Printable
Unit
Width
Length
Width
Length
Inches
9
12.8
8.67
12.47
Millimeters
229
324
220.1
316.7
Margins
Unit
Left
Right
Top
Bottom
Inches
0.17
0.17
0.17
0.17
Millimeters
4.23
4.23
4.23
4.23
C5
Sheet
Printable
Unit
Width
Length
Width
Length
Inches
6.4
9
6.07
8.67
Millimeters
162
229
154.1
220.1
93
Margins
Unit
Left
Right
Top
Bottom
Inches
0.17
0.17
0.17
0.17
Millimeters
4.23
4.23
4.23
4.23
Printable Area: PostScript
Letter
Sheet
Printable
Unit
Width
Length
Width
Length
Inches
8.5
11
8.187
10.667
Millimeters
215.9
279.4
207.941
270.933
Margins
Unit
Left
Right
Top
Bottom
Inches
0.157
0.157
0.167
0.167
Millimeters
3.979
3.979
4.233
4.233
Legal 13"
Sheet
Printable
Unit
Width
Length
Width
Length
Inches
8.5
13
8.187
12.667
Millimeters
215.9
330.2
207.941
321.733
Margins
Unit
Left
Right
Inches
0.157
0.157 0.167
0.167
Millimeters
3.979
3.979 4.233
4.233
Legal 13.5"
94
Top
Bottom
Sheet
Printable
Unit
Width
Length
Width
Length
Inches
8.5
13.5
8.187
13.173
Millimeters
215.9
342.9
207.941
334.603
Margins
Unit
Left
Right
Top
Bottom
Inches
0.157
0.157
0.167
0.167
Millimeters
3.979
3.979
4.233
4.233
Legal 14"
Sheet
Printable
Unit
Width
Length
Width
Length
Inches
8.5
14
8.187
13.680
Millimeters
215.9
355.6
207.941
347.472
Margins
Unit
Left
Right
Top
Bottom
Inches
0.157
0.157
0.167
0.153
Millimeters
3.979
3.979
4.233
3.895
Tabloid
Sheet
Printable
Unit
Width
Length
Width
Length
Inches
11
17
10.667
16.667
Millimeters
279.4
431.8
270.933
423.333
Margins
Unit
Left
Right
Top
Bottom
Inches
0.167
0.167
0.167
0.167
Millimeters
4.233
4.233
4.233
4.233
95
Tabloid Extra
Sheet
Printable
Unit
Width
Length
Width
Length
Inches
12
18
11.68
17.68
Millimeters
304.8
457.2
296.672
449.072
Margins
Unit
Left
Right
Top
Bottom
Inches
0.16
0.16
0.167
0.153
Millimeters
4.064
4.064
4.233
3.895
Executive
Sheet
Printable
Unit
Width
Length
Width
Length
Inches
7.25
10.5
6.933
10.187
Millimeters
184.15
266.7
176.107
258.741
Margins
Unit
Left
Right
Top
Bottom
Inches
0.160
0.157
0.167
0.147
Millimeters
4.064
3.979
4.233
3.725
A3
Sheet
Printable
Unit
Width
Length
Width
Length
Inches
11.693
16.535
11.36
16.213
Millimeters
297
420
288.544
411.819
Margins
Unit
Left
Right
Top
Bottom
Inches
0.167
0.167
0.167
0.157
Millimeters
4.233
4.233
4.233
3.979
96
A3 Nobi
Sheet
Printable
Unit
Width
Length
Width
Length
Inches
12.913
17.835
12.587
17.520
Millimeters
328
453
319.701
445.008
Margins
Unit
Left
Right
Top
Bottom
Inches
0.167
0.163
0.167
0.150
Millimeters
4.233
4.149
4.233
3.810
A3Wide
Sheet
Printable
Unit
Width
Length
Width
Length
Inches
12.598
17.717
12.267
17.387
Millimeters
320
450
311.573
441.621
Margins
Unit
Left
Right
Top
Bottom
Inches
0.167
0.167
0.167
0.163
Millimeters
4.233
4.233
4.233
4.149
A4
Sheet
Printable
Unit
Width
Length
Width
Length
Inches
8.268
11.693
7.947
11.36
Millimeters
210
297
201.845
288.544
Margins
Unit
Left
Right
Top
Bottom
Inches
0.163
0.16
0.167
0.167
97
Millimeters
4.149
4.064
4.233
4.233
A5
Sheet
Printable
Unit
Width
Length
Width
Length
Inches
5.827
8.268
5.520
7.947
Millimeters
148
210
140.208
201.845
Margins
Unit
Left
Right
Top
Bottom
Inches
0.157
0.153
0.167
0.157
Millimeters
3.979
3.895
4.233
3.979
A6
Sheet
Printable
Unit
Width
Length
Width
Length
Inches
4.134
5.827
3.813
5.520
Millimeters
105
148
96.9
139.5
Margins
Unit
Left
Right
Top
Bottom
Inches
0.163
0.16
0.167
0.143
Millimeters
4.149
4.064
4.233
3.641
B4
Sheet
Printable
Unit
Width
Length
Width
Length
Inches
10.118
14.331
9.787
14.00
Millimeters
257
364
248.581
355.600
Margins
98
Unit
Left
Right
Top
Bottom
Inches
0.167
0.167
0.167
0.167
Millimeters
4.233
4.233
4.233
4.233
B5
Sheet
Printable
Unit
Width
Length
Width
Length
Inches
7.165
10.118
6.853
9.787
Millimeters
182
257
174.075
248.581
Margins
Unit
Left
Right
Top
Bottom
Inches
0.157
0.157
0.167
0.167
Millimeters
3.979
3.979
4.233
4.233
Monarch
Sheet
Printable
Unit
Width
Length
Width
Length
Inches
3.875
7.5
3.547
7.173
Millimeters
98.425
190.5
90.085
182.203
Margins
Unit
Left
Right
Top
Bottom
Inches
0.167
0.163
0.167
0.160
Millimeters
4.233
4.149
4.233
4.064
Com-9
Sheet
Printable
Unit
Width
Length
Width
Length
Inches
3.875
8.875
3.547
8.560
Millimeters
98.425
225.425
90.085
217.424
99
Margins
Unit
Left
Right
Top
Bottom
Inches
0.167
0.163
0.167
0.150
Millimeters
4.233
4.149
4.233
3.810
Com-10
Sheet
Printable
Unit
Width
Length
Width
Length
Inches
4.125
9.5
3.813
9.173
Millimeters
104.775
241.3
96.859
233.003
Margins
Unit
Left
Right
Top
Bottom
Inches
0.157
0.157
0.167
0.160
Millimeters
3.979
3.979
4.233
4.064
DL
Sheet
Printable
Unit
Width
Length
Width
Length
Inches
4.33
8.66
4.00
8.347
Millimeters
109.982
219.964
101.6
212.005
Margins
Unit
Left
Right
Top
Bottom
Inches
0.167
0.163
0.167
0.147
Millimeters
4.233
4.149
4.233
3.725
C4
Sheet
Unit
100
Width
Printable
Length
Width
Length
Inches
9.016
12.756
8.693
12.427
Millimeters
229
324
220.811
315.637
Margins
Unit
Left
Right
Top
Bottom
Inches
0.163
0.160
0.67
0.163
Millimeters
4.149
4.064
4.33
4.149
C5
Sheet
Printable
Unit
Width
Length
Width
Length
Inches
6.378
9.016
6.053
8.693
Millimeters
162
229
153.755
220.811
Margins
Unit
Left
Right
Top
Bottom
Inches
0.163
0.163
0.167
0.157
Millimeters
4.149
4.149
4.233
3.979
101
Control Panel Description & Walk-up
Functions
Description
Control Panel Buttons
Menu Button
Printer On line or Off line
Press to enter the Menu mode.
Menu mode
Press to advance to the next Category in the Menu.
Press and hold for 2 seconds or longer to go back to the previous Category.
Password (PIN) Mode
Press to enter a zero in the password.
ON LINE Button
102
Printer On line
Press to take the printer off line.
Printer Off line
Press to put the printer on line.
Menu Mode
Press to exit the Menu mode and go back on line.
Password (PIN) Mode
Press to enter the number 4 in the password.
Error Mode (Attention light blinking)
If the paper size requested by the print job is different from the paper specified as in the tray,
press the ON LINE button to force the job to print despite the paper size error.
If you have selected manual print in the driver, press the ON LINE button to print the job after
you load the print media in the MP Tray.
ITEM + Button
Menu Mode
Press to advance to the next Item in the Menu.
Press and hold to advance through the menu Items quickly.
Password (PIN) Mode
Press to enter the number 1 in the password.
ITEM - Button
103
Menu Mode
Press to go back to the previous Item in the Menu.
Press and hold to advance backward through the menu Items quickly.
Password (PIN) Mode
Press to enter the number 5 in the password.
VALUE + Button
Menu Mode
Press to advance to the next Value for an Item in the Menu.
Press and hold to advance through the Values quickly.
Password (PIN) Mode
Press to enter the number 2 in the password.
VALUE - Button
Menu Mode
Press to go back to the previous Value for an Item in the Menu.
Press and hold to advance backward through the Values quickly.
Password (PIN) Mode
Press to enter the number 6 in the password.
104
SELECT Button
Menu Mode
Press to engage a new value for an Item (an asterisk appears next to the new setting).
Press to initiate the action indicated on the display (e.g., print MenuMap).
Password (PIN) Mode
Press to enter the number 3 in the password.
CANCEL Button
Printer On line or Off Line
Press to delete a job being processed:
If the job is currently printing, it is cancelled and deleted.
If the job is still being received by the printer, it continues until all the data is received, then
is deleted.
Note: If the printer is off line, it will remain off line after the job is deleted.
Menu Mode
Press to exit the Menu mode and place the printer back on line.
Password (PIN) Mode
Press to enter the number 7 in the password.
During Error Condition
CANCEL button is disabled.
Control Panel Lights
105
READY Light
On
The printer is on line.
Off
The printer is off line.
Blinking
The printer is receiving data.
ATTENTION Light
On
Warning: the printer needs attention, but can continue to operate. The display message
indicates the nature of the problem: e.g. TONER LOW, CHANGE CYAN IMAGE DRUM,
PAPER NEAR END, etc.
Off
Normal.
Blinking
Alarm: the printer needs attention immediately. The display message indicates the nature of the
problem: e.g., PAPER JAM, CLOSE COVER, TONER EMPTY, INSTALL NEW IMAGE DRUM,
TRAY1 EMPTY, STACKER FULL, MEDIA MISMATCH, etc.
Walk-up Functions
Printing a Demo Page
Notes
You can print either the standard demo page supplied with the printer or a custom demo page
file you have created and stored on the printer's internal hard disk drive.
Models C9200n, C9200dxn and C9400dxn include the internal hard disk drive; model C9200
can be equipped with the hard drive option.
To print out a demo page:
106
1. Press MENU once or twice until INFORMATION MENU appears on the display.
2. Press ITEM (+ or -) repeatedly until DEMO1 (the default demo page) or the file name
you wish to print appears on the display.
3. Press SELECT.
The demo page prints and the printer returns to the on-line state.
Printing a PCL Font List
To print out a list of PCL Fonts, including Font ID information, Escape Sequences and print
samples:
1. Press MENU once or twice until INFORMATION MENU appears on the display
2. Press ITEM + repeatedly until PRINT PCL FONT appears on the display.
3. Press SELECT.
The PCL Font List prints.
Printing a PostScript Typeface List
To print out a list of PostScript® Fonts with print samples:
107
1. Press MENU once or twice until INFORMATION MENU appears on the display.
2. Press ITEM + repeatedly until PRINT PS FONT appears on the display.
3. Press SELECT.
The PostScript Typeface List prints.
Printing Out the MenuMap (List of Current Menu Settings)
1. Press MENU repeatedly until INFORMATION MENU appears on the display.
2. Press ITEM + repeatedly until PRINT MENU MAP appears on the display.
3. Press SELECT.
The MenuMap prints and the printer goes back on line.
Printing Confidential (Secure) Documents
Printing a Confidential Document
To print a confidential document which has been saved to the printer's internal hard disk drive
(the hard disk drive is standard on all but model C9200):
108
1. Press MENU. PRINT JOBS MENU appears on the display.
2. Press SELECT and enter your personal ID number (PIN) using the control panel
buttons. SELECT JOB ALL JOBS appears on the display.
3. Press VALUE + repeatedly until the name of the job you wish to print appears.
4. Press SELECT.
The document prints and is deleted from the printer’s hard drive. The printer goes back
on line.
Deleting a Confidential Document before Printing It
If you wish to deleted a confidential document from the printer's internal hard disk drive without
printing it:
1. Press MENU.
PRINT JOBS MENU appears on the display.
2. Press SELECT and enter your personal ID number (PIN) using the control panel
buttons.
SELECT JOB ALL JOBS appears on the display.
3. Press VALUE + repeatedly until the name of the job you wish to delete appears.
4. Press CANCEL
DELETE THE JOB YES=SELECT/NO=CANCEL appears on the display.
5. To delete the job, press SELECT. Otherwise, press CANCEL.
The printer goes back on line.
Printing the File List
To print out a list of files in the printer's memory:
109
1. Press MENU (repeatedly) until INFORMATION MENU appears on the display.
2. Press ITEM + (repeatedly) until PRINT FILE LIST appears on the display.
3. Press SELECT.
The listing of files prints.
Setting the Color Balance
Setting the color balance ensures that the three primary colors your printer uses are properly
balanced. If they are not balanced, one color may dominate, and printed pictures will not be as
lifelike as they could be.
The color balance should be set
when the printer is installed
any time the print quality seems to have deteriorated
when image drums are replaced
if you switch to a significantly different print media (e.g., from white to a color media)
if the printer is moved to a new location
To set the Color Balance:
1. Press MENU repeatedly until COLOR MENU displays.
2. Press ITEM + repeatedly until COLOR BALANCE ADJUST RESET TO DEFAULT
displays.
3. Press SELECT. This restores the factory color balance settings, which form a baseline
for the adjustment.
The Color Balance test pattern prints:
110
4. Check the color of the center circle in the printout against the surrounding circles:
• If the center circle matches the circles labeled 00, the color balance is okay and you're
done. Press ON LINE (the printer goes back on line).
• If the center circle does not match the circles labeled 00, determine which
surrounding circle most closely matches the center circle and note its number.
5. Press VALUE (+ or -) until COLOR BALANCE ADJUST SELECT PATTERN # displays,
where # represents the number of the circle determined in step 4.
6. Press SELECT.
The new value is engaged and a new test pattern prints.
7. Check the pattern again and repeat steps 4 through 6 until the color of the center circle
most closely matches the circles labeled 00.
Note: The color balance process is subjective. It is unlikely that you will get an exact
match of the center circle to the circles labeled 00. Repeat the color balance process
until you feel you have a match, but no more than three times before pressing ON LINE
to exit the color balance process.
8. Press ON LINE.
The printer goes back on line.
Setting Power Save Mode (Time to Print)
The Power Save Mode setting determines the amount of time the printer waits for another print
job before going to the standby state.
Once the printer is in the standby state, it must warm up first before it prints a job or before you
can access the printer's menu.
Note: The default setting for the Power Save interval is 60 minutes.
111
Setting the Power Save Interval
1. Press MENU repeatedly until SYSTEM CONFIG MENU appears on the display.
2. Press ITEM (+ or -) repeatedly until POWER SAVE DELAY TIME appears on the
display.
3. Press VALUE (+ or -) repeatedly until the time interval (5, 15, 30, 60, or 240 minutes)
you wish to select appears on the display.
4. Press SELECT to engage the new setting (an asterisk appears next to the new setting).
5. Press ON LINE to save the setting and exit the menu.
Disabling/Enabling Power Save
Note: The default setting for Power Save is ENABLED.
To disable the Power Save mode, or to re-enable it:
1. Press MENU repeatedly until MAINTENANCE MENU appears on the display.
2. Press ITEM (+ or -) repeatedly until POWER SAVE appears on the display.
3. Press VALUE + to toggle the setting between ENABLE and DISABLE.
4. Press SELECT to engage the new setting (an asterisk appears next to the new setting).
5. Press ON LINE to save the setting and exit the menu.
Setting a Specific Emulation
The printer is set at the factory to automatically detect the emulation of an incoming print job.
112
To change it to always be PCL® or Adobe® PostScript®:
1. Press MENU repeatedly until SYSTEM CONFIG MENU appears on the display.
2. Press ITEM + repeatedly until PERSONALITY appears on the display.
3. Press VALUE + repeatedly until the setting you wish to engage appears on the second
line of the display.
4. Press SELECT.
An Asterisk (*) appears next to the new setting.
5. Press ON LINE to save the setting and exit the menu.
Turning the Duplex Unit On in the Menu
To turn duplex printing on in the printer menu:
1. Press MENU several times until PRINT MENU appears on the display.
2. Press ITEM + several times until DUPLEX appears on the display.
3. Press VALUE + once to change the setting from OFF to ON.
4. Press SELECT to engage the new setting.
An asterisk will appear at the end of the second line.
5. Press ON LINE to save the setting and exit the menu.
Control Panel Display Language
113
To change the control panel display language:
1. Press MENU repeatedly until SYSTEM CONFIG MENU appears on the display.
2. Press ITEM (+ or -) repeatedly until LANGUAGE appears on the display.
3. Press VALUE (+ or -) repeatedly until the language you wish to engage appears on the
display.
4. Press SELECT to engage that value (an asterisk appears beside the language).
5. Press ON LINE to save the setting and exit the menu.
114
Printer Menus
How to Use the Menu
To make changes in the printer's menu:
1. Press MENU repeatedly until the group in which you wish to make a change appears on
the display.
2. Press ITEM + or ITEM - repeatedly until the specific item you wish to change appears on
the display.
3. Press VALUE + or VALUE - repeatedly until the setting you wish to engage for that item
appears on the display.
4. Press SELECT to engage the setting.
5. Press ON LINE to save the setting and exit the menu.
Resetting the Printer's Menu to the Factory
Defaults
To reset the printer menu to the factory defaults:
1. Press MENU repeatedly until MAINTENANCE MENU appears on the display.
2. Press ITEM (+ or -) repeatedly until EEPROM RESET EXECUTE appears on the
display.
3. Press SELECT to reset the menu to the factory defaults. The printer resets and returns
115
to the on-line state.
Printer Menu Entries (in alphabetical
sequence)
Color Menu
Used for
Setting the Color Balance
Optimizing quality when printing web pages
Manually initiating the automatic Color Registration
Setting the Color Registration manually.
Defaults are red bold print.
Item (see descriptions below)
Values/Meaning
COLOR BALANCE ADJUST
Prints Color Balance pattern, Type 1 or Type 2.
COLOR BALANCE ADJUST
SELECT PATTERN
RESET TO DEFAULT, SELECT PATTERN 1
to 36
ADJUST REGISTRATION
EXECUTE
Press to manually initiate automatic
registration.
AUTO REGISTRATION
ON, OFF
The following items are used for manual registration and appear only if AUTO
REGISTRATION is set to OFF:
AUTO REGISTRATION PATTERN
Prints registration pattern.
AUTO REGISTRATION #1
0, +1, +2, +3, +4, +5, +6, +7, -7, -6, -5, -4, -3, 2, -1
AUTO REGISTRATION #2
0, +1, +2, +3, +4, +5, +6, +7, -7, -6, -5, -4, -3, 2, -1
AUTO REGISTRATION #3
0, +1, +2, +3, +4, +5, +6, +7, -7, -6, -5, -4, -3, 2, -1
AUTO REGISTRATION #4
0, +1, +2, +3, +4, +5, +6, +7, -7, -6, -5, -4, -3, 2, -1
AUTO REGISTRATION #5
0, +1, +2, +3, +4, +5, +6, +7, -7, -6, -5, -4, -3, 2, -1
AUTO REGISTRATION #6
0, +1, +2, +3, +4, +5, +6, +7, -7, -6, -5, -4, -3, 2, -1
AUTO REGISTRATION #7
0, +1, +2, +3, +4, +5, +6, +7, -7, -6, -5, -4, -3, 2, -1
AUTO REGISTRATION #8
0, +1, +2, +3, +4, +5, +6, +7, -7, -6, -5, -4, -3, 2, -1
AUTO REGISTRATION #9
0, +1, +2, +3, +4, +5, +6, +7, -7, -6, -5, -4, -3, -
116
2, -1
PROCESS MODE
(see explanation below)
TYPE1, TYPE2
Process Mode
If you are printing web pages and the printing is too light, temporarily change this setting to
Type 1. For occasional use only.
Disk Maintenance Menu
The Disk Maintenance Menu can be used to initialize the printer's internal hard disk drive, to
reassign the partition contents, or to reformat the partitions.
Unless you know what you are doing, please avoid this section of the Menu.
It is recommended that disk maintenance be done through the OKI Storage Device Manager
software by the System Administrator, or by someone who is knowledgeable in this area.
Information Menu
The Information Menu provides printouts of information about the printer. It is also used to print
the demo page(s).
When the message EXECUTE appears, press SELECT to print the information provided.
Defaults are red bold print.
Item (see descriptions below)
Values
PRINT MENU MAP
EXECUTE
Not applicable.
PRINT FILE LIST
EXECUTE
Not applicable.
PRINT PCL FONT
EXECUTE
Not applicable.
PRINT PS FONT
EXECUTE
Not applicable.
PRINT DEMO
DEMO1 … DEMOn*
PRINT ERROR LOG
EXECUTE
Not applicable.
* DEMO1 is built into the printer. Other Demos can be generated and saved in the Flash
memory or on the printer's internal hard disk drive (standard on Models C9200n, C9200dxn and
C9400dxn; optional on Model C9200).
117
Print Menu Map
Prints a listing of all the menu entries by group, including the values currently selected for each
item in the group.
Print File List
Prints a listing of all the files stored
in the Flash memory
on each partition of the printer's internal hard disk drive (standard on Models C9200n,
C9200dxn and C9400dxn; optional on Model C9200)
Print PCL Font
Prints a list of the PCL® fonts, including
Resident Fonts
Fonts Stored in the Flash Memory
Fonts Stored on the Internal Hard Drive
The following information is supplied for each font:
Font ID #
Font Name
Pitch/Point
Escape Sequence
Print Sample
Print PS Font
Prints a list of the resident PostScript® typefaces, each one printed in the typeface it represents.
Print Demo
Prints the demo page. If you have stored additional demo pages in the Flash memory or on the
internal hard disk drive, you can choose which demo page you wish to print by pressing VALUE
+ to scan through the list.
Print Error Log
Prints a list of the printer's error messages, including
Counter No.
Error No.
Error Message
118
Maintenance Menu
For performing printer maintenance functions.
You'll use this menu primarily to Enable/Disable the Power Save Mode or to reset the printer
menu to the defaults.
Defaults are red bold print.
Item (see descriptions below)
Values/Meaning
EEPROM RESET
EXECUTE
POWER SAVE
ENABLE, DISABLE
PAPER BLACK SETTING
0, +1, +2, -2, -1
PAPER COLOR SETTING
0, +1, +2, -2, -1
TRANSPR BLACK SETTING
0, +1, +2, -2, -1
TRANSPR COLOR SETTING
0, +1, +2, -2, -1
EEPROM Reset
Use this to reset the printer's menu to the factory defaults.
Power Save
With Power Save engaged (the printer's default), the printer waits the preselected interval (60
minutes is the printer's default) before going into the standby state. This saves energy, but if the
printer is in the power save state when you send a print job or try to go into the printer menu,
you have to wait for the printer to warm up before you can proceed.
You can use the Power Save setting in the Maintenance Menu to disable the power save mode.
For information on changing the Power Save Interval, see "Setting the Power Save Interval."
Paper Black Setting
Used to compensate for deterioration in the black print quality resulting from temperature and
humidity differences:
Select -1 or -2 if light specks or streaks appear in the black printing.
Select +1 or +2 if the black printing appears faded.
Paper Color Setting
119
Used to compensate for deterioration in color print quality resulting from temperature and
humidity differences:
Select -1 or -2 if light specks or streaks appear in the color printing.
Select +1 or +2 if the color printing appears faded.
Transpr Black Setting
Used to compensate for deterioration in the black print quality on transparencies, resulting from
temperature and humidity differences:
Select -1 or -2 if light specks or streaks appear in the black printing.
Select +1 or +2 if the black printing appears faded.
Transpr Color Setting
Used to compensate for deterioration in the color print quality on transparencies, resulting from
temperature and humidity differences:
Select -1 or -2 if light specks or streaks appear in the color printing.
Select +1 or +2 if the color printing appears faded.
Media Menu
Sets media type/feed/size parameters.
Defaults are red bold print.
Note: Paper size for Trays 1, 2, 3, 4 and 5 is automatically detected.
Item (see descriptions below)
Values
TRAY1 MEDIATYPE
PLAIN, LETTERHEAD, TRANSPARENCY, BOND,
RECYCLED, CARD STOCK, ROUGH
TRAY1 MEDIAWEIGHT
LIGHT, MEDIUM LIGHT, MEDIUM, MEDIUM HEAVY,
HEAVY, ULTRA HEAVY
TRAY2 MEDIATYPE
PLAIN, LETTERHEAD, TRANSPARENCY, BOND,
RECYCLED, CARD STOCK, ROUGH
TRAY2 MEDIAWEIGHT
LIGHT, MEDIUM LIGHT, MEDIUM, MEDIUM HEAVY,
HEAVY, ULTRA HEAVY
TRAY3 MEDIATYPE
PLAIN, LETTERHEAD, TRANSPARENCY, BOND,
RECYCLED, CARD STOCK, ROUGH
TRAY3 MEDIAWEIGHT
LIGHT, MEDIUM LIGHT, MEDIUM, MEDIUM HEAVY,
HEAVY, ULTRA HEAVY
TRAY4 MEDIATYPE
PLAIN, LETTERHEAD, TRANSPARENCY, BOND,
RECYCLED, CARD STOCK, ROUGH
120
TRAY4 MEDIAWEIGHT
LIGHT, MEDIUM LIGHT, MEDIUM, MEDIUM HEAVY,
HEAVY, ULTRA HEAVY
TRAY5 MEDIATYPE
PLAIN, LETTERHEAD, TRANSPARENCY, BOND,
RECYCLED, CARD STOCK, ROUGH
TRAY5 MEDIAWEIGHT
LIGHT, MEDIUM LIGHT, MEDIUM, MEDIUM HEAVY,
HEAVY, ULTRA HEAVY
MP TRAY PAPERSIZE
A3 Nobi, A3 Wide, A3, A4 SHORT EDGE, A4 LONG EDGE,
A5, A6, B4, B5 SHORT EDGE, B5 LONG EDGE, LEGAL14,
LEGAL13.5, LEGAL13, TABLOID EXTRA, TABLOID,
LETTER SHORT EDGE, LETTER LONG EDGE,
EXECUTIVE, CUSTOM, COM-9 ENVELOPE LEF*, COM10 ENVELOPE LEF*, MONARCH ENVELOP LEF*, DL
ENVELOPE LEF*, C5 ENVELOPE LEF*, C4 ENVELOPE
LEF*
*LEF = Long Edge Feed
MP TRAY MEDIATYPE
PLAIN, LETTERHEAD, TRANSPARENCY, LABELS,
BOND, RECYCLED, CARD STOCK, ROUGH
MP TRAY MEDIAWEIGHT
LIGHT, MEDIUM LIGHT, MEDIUM, MEDIUM HEAVY,
HEAVY, ULTRA HEAVY
UNIT OF MEASURE
INCH, MILLIMETER
X DIMENSION
3.5 to 12.9 in increments of 0.1-INCH. Default = 8.5 INCH.
Y DIMENSION
5.8 to 35.5 INCH in increments of 0.1-INCH. Default = 11
INCH.
TRAY1 MEDIATYPE
(TRAY2 MEDIATYPE, TRAY3 MEDIATYPE, TRAY4 MEDIATYPE, TRAY5 MEDIATYPE)
Use only the TRAY1 Mediatype setting to change the default media to transparencies. Select
TRANSPARENCY.
Note: Trays 2 through 5 only appear if the optional Auxiliary Trays and/or the optional High
Capacity Feeder are installed on the printer. These trays can not be used with transparencies.
TRAY1 MEDIAWEIGHT
TRAY2 MEDIAWEIGHT
TRAY3 MEDIAWEIGHT
TRAY4 MEDIAWEIGHT
TRAY5 MEDIAWEIGHT
Use these settings to set the default to print media other than transparencies (e.g., labels, thick
paper, etc.).
Note: Trays 2 through 5 only appear if the optional Auxiliary Trays and/or the optional High
Capacity Feeder are installed on the printer.
121
MP TRAY PAPERSIZE
Use this to set the default paper size for the Multi-Purpose Tray.
MP TRAY MEDIATYPE
Use this to set the default media type for the Multi-Purpose Tray. It is very important to select
TRANSPARENCY when you are consistently using transparencies in this tray.
MP TRAY MEDIAWEIGHT
Use this to set the default for the Multi-Purpose Tray to a print media other than transparencies
(e.g., labels, thick paper, etc.).
UNIT OF MEASURE
Sets the default unit of measure for defining custom page sizes to inches or millimeters.
X DIMENSION
For setting the width of custom page sizes. For this dimension to work, the Multi-Purpose Tray
size must be set to Custom.
Y DIMENSION
For setting the length of custom page sizes. For this dimension to work, the Multi-Purpose Tray
size must be set to Custom.
Memory Menu
Sets parameters for the printer's memory.
Defaults are red bold print.
Item (see descriptions below)
Values
RECEIVE BUFF SIZE
AUTO, 0.5MB, 1MB, 2MB, 4MB, 8MB, 16MB, 32
MB
RESOURCE SAVE
AUTO, OFF, O.5MB, 1MB, 2MB, 4MB, 8MB,
16MB, 32MB
FLASH INITIALIZE
EXECUTE
122
PS FLASH RESIZE
1MB, 0.5MB, 1.5MB, 0MB
RECEIVE BUFF SIZE
Sets the size of the receive buffer. The Auto setting calculates the receive buffer size as a
percentage of the installed printer memory.
RESOURCE SAVE
Sets the size of the font cache area.
FLASH INITIALIZE
Caution! This will erase whatever is presently in the printer's Flash memory.
Initializes the printer's Flash memory. This function is normally set by the System
Administrator.
To perform a Flash Initialization:
1. Press MENU repeatedly until MEMORY MENU appears on the display.
2. Press ITEM + several times until FLASH INITIALIZE EXECUTE appears on the display.
3. Press SELECT.
ARE YOU SURE?
YES=SELECT/NO=CANCEL
appears on the display.
4. Press SELECT.
EXECUTE NOW?
YES=SELECT/NO=CANCEL
appears on the display.
5. Press SELECT.
PLEASE POWER OFF
SHUTDOWN COMPLETED
appears on the display.
6. Shut the printer off, then turn it back on again.
PS FLASH RESIZE
Caution! This will erase whatever is presently in the printer's PostScript Flash memory.
Changes the size of the printer's PostScript Flash memory area. This function is normally set
by the System Administrator.
123
To perform a PS Flash Resize:
1. Press MENU repeatedly until MEMORY MENU appears on the display.
2. Press ITEM + several times until
PS FLASH RESIZE
1.5MB
*
appears on the display.
3. Press VALUE + repeatedly until the new memory size you wish to use appears on the
second line of the display.
4. Press SELECT.
ARE YOU SURE?
YES=SELECT/NO=CANCEL
appears on the display.
5. Press SELECT.
EXECUTE NOW?
YES=SELECT/NO=CANCEL
appears on the display.
6. Press SELECT.
PLEASE POWER OFF
SHUTDOWN COMPLETED
appears on the display.
7. Shut the printer off, then turn it back on again.
Note:
During the initialization process,
FLASH MEMORY FORMAT
appears on the display while the Flash memory is being reconfigured to the new memory
value.
Network Menu
Note: These items are normally set by the System Administrator.
This menu appears only on printers equipped with a network print server.
Sets the network parameters. English only.
For more information on the OkiLAN® 6200e print server, see the on-line OkiLAN 6200e User's
Guide.
Defaults are red bold print.
Item (see descriptions below)
Values
TCP/IP
ENABLE, DISABLE
NETWARE
ENABLE, DISABLE
124
ETHERTALK
ENABLE, DISABLE
NETBEUI
ENABLE, DISABLE
FRAME TYPE
AUTO, 802.2, 802.3, ETHER-II, SNAP
DHCP/BOOTP
ENABLE, DISABLE
RARP
ENABLE, DISABLE
IP ADDRESS
xxx.xxx.xxx.xxx
SUBNET MASK
xxx.xxx.xxx.xxx
GATEWAY ADDRESS
xxx.xxx.xxx.xxx
INITIALIZE
ON, OFF
PRINT SETTINGS
ON,OFF
TCP/IP
Enables/Disables TCP/IP.
NETWARE
Enables/Disables NETWARE®.
ETHERTALK
Enables/Disables EtherTalk®.
NETBEUI
Enables/Disables NETBEUI.
FRAME TYPE
Sets the frame type.
DHCP/BOOTP
Specifies whether or not DHCP/BOOTP automatically resets.
125
RARP
Specifies whether or not RARP automatically resets.
IP ADDRESS
Sets IP address (see Changing the IP address).
SUBNET MASK
Sets subnet mask (see Changing the Subnet Mask).
GATEWAY ADDRESS
Sets gateway address (see Changing the Gateway Address).
INITIALIZE
Change the setting to ON if you wish the network to initialize whenever the menu is exited.
PRINT SETTINGS
Change the setting to ON if you wish to print a MenuMap including the results of a selfdiagnosis and a listing of the network settings. The MenuMap will print automatically when you
exit the menu mode.
Parallel Menu
Sets parameters for the parallel interface.
Defaults are red bold print.
Item (see descriptions below)
Values
PARALLEL
ENABLE, DISABLE
BI-DIRECTION
ENABLE, DISABLE
ECP
ENABLE, DISABLE
ACK WIDTH
NARROW, MEDIUM, WIDE
ACK/BUSY TIMING
ACK IN BUSY, ACK WHILE BUSY
I-PRIME
3 MICRO SEC, 50 MICRO SEC, DISABLE
126
PARALLEL
Enables/disables the printer's parallel port.
BI-DIRECTION
Enables/disables bi-directional communication between the printer and the computer through
the parallel port.
ECP
Enables/disables the ECP mode.
ACK WIDTH
Sets the ACK width for compatible reception:
Narrow = 0.5 microseconds
Medium = 1 microsecond
Wide = 3 microseconds
ACK/BUSY TIMING
Sets the output order for the ACK signal and the busy signal during compatible reception.
I-PRIME
Sets or disables the I-Prime signal.
PCL Emulation Menu
Sets parameters for the PCL® emulation.
Defaults are red bold print.
Item
(see descriptions below)
Values
FONT SOURCE
RESIDENT, DIMM0, DIMM1, DOWNLOADED
127
FONT No.
I000, C001, S001
FONT PITCH
0.44 to 99.99 CPI IN 0.01 CPI increments. Default = 10.00 CPI
FONT HEIGHT
4.00 to 999.75 point in 0.25-poin increments. Default = 12.00 points.
SYMBOL SET
WIN3.1J, PC-8, PC-8 Dan/Nor, PC-8 TK, PC-775, PC-850, PC-852,
PC-855, PC-857 TK, PC-858, PC-866, PC-869, PC-1004, Pi Font,
Plska Mazvia, PS Math, PS Text, Roman-8, Roman-9, Roman Ext,
Serbo Croat1, Serbo Croat2, Spanish, Ukrainian, VN Int'l, VN Math, VN
US, Win 3.0, Win 3.1 Blt, Win 3.1 Cyr, Win 3.1 Grk, Win 3.1 Heb, Win
3.1 L1, Win 3.1 L2, Win 3.1 L5, Wingdings, Dingbats MS, Symbol,
OCR-A, OCR-B, HP ZIP, USPSFIM, USPSSTP, ISO Swedish1, ISO
Swedish2, ISO Swedish3, ISO-2 IRV, ISO-4 UK, ISO-6 ASC, ISO-10
S/F, ISO-11 Swe, ISO-14 JASC, ISO-15 Ita, ISO-16 Por, ISO-17 Spa,
ISO-21 Ger, ISO-25 Fre, ISO-57 Chi, ISO-60 Nor, ISO-61 Nor, ISO-69
Fre, ISO-84 Por, ISO-85 Spa, Kamenicky, Legal, Math-8, MC Text, MS
Publish, PC Ext D/N, PC Ext US, PC Set1, PC Set2 D/N, PC Set2 US,
USPSZIP, Bulgarian, CWI Hung, DeskTop, German, Greek-437, Greek437 Cy, Greek-928, Hebrew NC, Hebrew OC, IBM-437, IBM-850, IBM860, IBM-863, IBM-865, ISO Dutch, ISO L1, ISO L2, ISO L5, ISO L6,
ISO L9
A4 PRINT WIDTH
78 COLUMN, 80 COLUMN
WHITE PAGE SKIP
OFF, ON
CR FUNCTION
CR, CR + LF
LF FUNCTION
LF, LF + CR
PRINT MARGIN
NORMAL, 1/5 INCH, 1/6 INCH
TRUE BLACK
OFF, ON
FONT SOURCE
Selects location of font used. Downloaded only appears if fonts have been downloaded to the
printer.
FONT No.
The prefix denotes the font source:
I = internal (resident font); I000 = Courier.
C = Card Font (font stored in printer's Flash memory).
S = downloaded soft font (font stored on the printer's internal hard disk drive).
FONT PITCH
Sets the font width in characters per inch (cpi). Applies only to fixed fonts (does not apply to
proportional fonts).
128
FONT HEIGHT
Sets the font height in points. Applies only to proportional, scalable fonts (does not apply to
fixed fonts).
SYMBOL SET
Selects the character symbol set to be used.
A4 PRINT WIDTH
If you are printing a letter size document on an A4 size sheet, select 80 column. This condenses
the print to fit on the slightly narrower A4 sheet, without changing the line breaks.
WHITE PAGE SKIP
Change this setting to ON if you do not wish to print blank pages.
CR FUNCTION
Determines what happens when the carriage return code is received in the PCL emulation:
CR = Carriage Return
CR + LF = Carriage Return and Line Feed
LF FUNCTION
Determines what happens when the line feed code is received in the PCL emulation:
LF = Line Feed
LF + CR = Line Feed and Carriage Return
PRINT MARGIN
Sets the width of the non-printed margins.
TRUE BLACK
Sets how black will be printed:
129
OFF = Composite Black (CMYK)
ON = Pure Black (Black toner only)
Composite black text should be used for the best results when printing photographs. Text in
such documents may appear slightly muddy.
Change the setting to ON to get the best results when printing a combination of text and
graphics.
Print Menu
Sets the print parameters.
Defaults are red bold print.
Item (see descriptions below) Values
COPIES
1 to 999
DUPLEX
ON, OFF
BINDING
LONG EDGE, SHORT EDGE (Appears only when DUPLEX item is
set to ON.)
JOB OFFSET
ON, OFF
PAPER FEED
TRAY1, TRAY2, TRAY3, TRAY4, TRAY%, MPTRAY (TRAY2
through TRAY5 appear only when the optional Auxiliary Trays
and/or the High Capacity Feeder are installed.)
OUTPUT BIN
FACE-DOWN, FACE-UP
AUTO TRAY SWITCH
ON, OFF
PAPER SIZE CHECK
ENABLE, DISABLE
PRIORITY TRAY
NONE, MPTRAY
RESOLUTION
Model C9200:
1200DPI, 600DPI
Model C9400:
1200DPI, FAST1200DPI, 600DPI
MONO-PRINT SPEED
AUTO, COLOR SPEED, NORMAL SPEED
ORIENTATION
PORTRAIT, LANDSCAPE
LINE PER PAGE
5 to 128 LINES in increments of 1 LINE. Default = 60 LINES
(based on letter size paper). PCL only.
EDIT SIZE
CASSETTE SIZE, LETTER SHORT EDGE, LETTER LONG
EDGE, EXECUTIVE, LEGAL14, LEGAL13.5, LEGAL13, TABLOID
EXTRA, TABLOID, A3 NOBI, A3 WIDE, A3, A4 SHORT EDGE, A4
LONG EDGE, A5, A6, B4, B5 SHORT EDGE, B5 LONG EDGE,
CUSTOM, COM-9 ENVELOPE, COM-10 ENVELOPE, MONARCH
ENVELOPE, DL ENVELOPE, C5 ENVELOPE, C4 ENVELOPE
130
COPIES
Sets the default number of copies to be printed.
DUPLEX
Change to ON if you will always be using two-sided (duplex) printing for multi-page print jobs.
BINDING
Sets the default binding edge for duplex printing.
Example
For an 8½ x 11-inch document:
Long Edge = document bound on the 11-inch edge
Short Edge = document bound on the 8½-inch edge.
Note: Duplex settings you make in the printer drivers will override this menu setting.
JOB OFFSET
Applies to the top (face-down) exit only. This causes each consecutive document to be offset
left-right by approximately ¾-inch to make it easier to separate multiple copies of a document.
All media sizes except Tabloid Extra and A3 Nobi will be offset.
Change to OFF if you do not want documents to be offset.
PAPER FEED
Selects the default feed source for print media.
Note: Paper feed settings you make in the printer drivers will override this menu setting.
131
OUTPUT BIN
Selects whether the print job will go to the top exit (FACE-DOWN) or the straight-through exit
(FACE-UP).
AUTO TRAY SWITCH
Change this to OFF if you do not want the printer to automatically switch to another feed tray
with the same size and type of media when the present tray runs out of media.
PAPER SIZE CHECK
Normally the printer will check to see that the media size being specified by the print job
matches what is in the feed tray and signals a mismatch with a warning message on the display.
If you do not wish the printer to provide such warning messages, change this setting to Disable.
PRIORITY TRAY
Change this setting to MP TRAY if you wish the printer to look for media in the Multi-Purpose
Tray first, before using Tray 1.
RESOLUTION
Sets the default print resolution.
Note: Resolution settings you make in the printer drivers will override this menu setting.
MONO-PRINT SPEED
Sets the print speed for printing monochrome documents:
AUTO (default) = Switches to mono print speed if more than three pages in a row are
detected as monochrome printing.
COLOR = Sets the printer to the color print speed. Use this setting if you will be printing
documents which have a few monochrome pages interspersed with color pages.
NORMAL = Sets the printer to the monochrome print speed . Use this setting to increase
the print speed if you are printing a multi-page monochrome document.
ORIENTATION
Sets the default print orientation.
132
LINE PER PAGE
PCL emulation only. Sets the number of lines printed per page. Change this setting if you find
your document pages running over to the next page by a few lines.
EDIT SIZE
Change the setting only if you are printing a document on print media which is a different size
from the original. For example, if you are printing an 8½ x 14-inch legal document on letter size
paper, change the EDIT SIZE setting to Legal14, then load letter size paper in the tray.
System Adjust Menu
Defaults are red bold print.
Item (see descriptions below)
Values
X ADJUST
0.00 MILLIMETER, +0.25 to +2.00 MILLIMETER and –0.25 to –
2.00 MILLIMETER, in 0.25 mm increments
Y ADJUST
0.00 MILLIMETER, +0.25 to +2.00 MILLIMETER and –0.25 to –
2.00 MILLIMETER, in 0.25 mm increments
DUPLEX X ADJUST
0.00 MILLIMETER, +0.25 to +2.00 MILLIMETER and –0.25 to –
2.00 MILLIMETER, in 0.25 mm increments (Appears only if
duplex unit is installed.)
DUPLEX Y ADJUST
0.00 MILLIMETER, +0.25 to +2.00 MILLIMETER and –0.25 to –
2.00 MILLIMETER, in 0.25 MM increments (Appears only if
duplex unit is installed.)
TRAY1 NOBI PAPER
A3 NOBI, A3 WIDE, TABLOID EXTRA
TRAY1 LEGAL 14 PAPER
LEGAL 14, LEGAL 13.5
TRAY2 NOBI PAPER
A3 NOBI, A3 WIDE, TABLOID EXTRA (Appears only if the
optional Auxiliary Tray or High Capacity Feeder is installed.)
TRAY2 LEGAL 14 PAPER
LEGAL 14, LEGAL 13.5 (Appears only if the optional Auxiliary
Tray or High Capacity Feeder is installed.)
TRAY3 NOBI PAPER
A3 NOBI, A3 WIDE, TABLOID EXTRA (Appears only if a
second optional Auxiliary Tray or the optional High Capacity
Feeder is installed.)
TRAY3 LEGAL 14 PAPER
LEGAL 14, LEGAL 13.5 (Appears only if a second optional
Auxiliary Tray or the optional High Capacity Feeder is installed.)
TRAY4 NOBI PAPER
A3 NOBI, A3 WIDE, TABLOID EXTRA (Appears only if the
optional High Capacity Feeder is installed.)
TRAY4 LEGAL 14 PAPER
LEGAL 14, LEGAL 13.5 (Appears only if the optional High
Capacity Feeder is installed.)
TRAY5 NOBI PAPER
A3 NOBI, A3 WIDE, TABLOID EXTRA (Appears only if one
133
optional Auxiliary Tray and the High Capacity Feeder are both
installed.)
TRAY5 LEGAL 14 PAPER
LEGAL 14, LEGAL 13.5 (Appears only if one optional Auxiliary
Tray and the High Capacity Feeder are both installed.)
PCL TRAY2 ID#
1 to 59. Default = 5. (Appears only if the optional Auxiliary Tray
is installed.)
PCL TRAY3 ID#
1 to 59. Default = 20. (Appears only if a second optional
Auxiliary Tray or the optional High Capacity Feeder is installed.)
PCL TRAY4 ID#
1 to 59. Default = 21. (Appears only if the optional High
Capacity Feeder is installed.)
PCL TRAY5 ID#
1 to 59. Default = 22. (Appears only if the optional High
Capacity Feeder is installed.)
PCL MP TRAY ID#
1 to 59. Default = 4.
HEX DUMP
EXECUTE
X ADJUST
Shifts the print position of the entire page's image to the right or left relative to the left-hand
margin. Settable in 0.25 millimeter increments.
Note: Any parts of the print image that go beyond the printable area as a result of this
adjustment are clipped.
Y ADJUST
Shifts the print position of the entire page's image up or down relative to the top margin.
Settable in 0.25 millimeter increments.
Notes
Any parts of the print image that go beyond the printable area as a result of this adjustment are
clipped.
Negative values are invalid in the PostScript mode.
DUPLEX X ADJUST
Applies when using duplex printing (printing on both sides).
Shifts the print position of the entire page's image to the right or left relative to the left-hand
margin. Settable in 0.25 millimeter increments.
134
Notes
Any parts of the print image that go beyond the printable area as a result of this adjustment are
clipped.
Negative values are invalid in the PostScript mode.
DUPLEX Y ADJUST
Applies when using duplex printing (printing on both sides).
Shifts the print position of the entire page's image up or down relative to the top margin.
Settable in 0.25 millimeter increments.
Note: Any parts of the print image that go beyond the printable area as a result of this
adjustment are clipped.
TRAY1 NOBI PAPER
TRAY2 NOBI PAPER
TRAY3 NOBI PAPER
TRAY4 NOBI PAPER
TRAY5 NOBI PAPER
If you are using A3 NOBI, A3 WIDE, or TABLOID EXTRA paper, use this setting to tell the
printer which of the three sizes is loaded in the designated tray.
TRAY1 LEGAL 14 PAPER
TRAY2 LEGAL 14 PAPER
TRAY3 LEGAL 14 PAPER
TRAY4 LEGAL 14 PAPER
TRAY5 LEGAL 14 PAPER
Sets the length of the legal paper in the designated tray. Change this to LEGAL 13.5 if that is
the standard legal size in your country.
PCL TRAY2 ID#
PCL emulation only.
For use by programmers. When setting the paper feed destination command (ESC&l#H), the
number set here represents Tray 2.
PCL TRAY3 ID#
135
PCL® emulation only.
For use by programmers. When setting the paper feed destination command (ESC&l#H), the
number set here represents Tray 3.
PCL TRAY4 ID#
PCL emulation only.
For use by programmers. When setting the paper feed destination command (ESC&l#H), the
number set here represents Tray 4.
PCL TRAY5 ID#
PCL emulation only.
For use by programmers. When setting the paper feed destination command (ESC&l#H), the
number set here represents Tray 5.
PCL MP TRAY ID#
PCL emulation only.
For use by programmers. When setting the paper feed destination command (ESC&l#H), the
number set here represents the multi-Purpose Tray.
HEX DUMP
Go to this item in the menu and press the SELECT button to print the data received by the
printer in hexadecimal code.
To return to normal printing, turn the printer off, then on again.
System Configuration Menu
Sets system parameters.
Defaults are red bold print.
Item (see descriptions below) Values
POWER SAVE DELAY TIME
5 MIN, 15 MIN, 30 MIN, 60 MIN, 240 MIN
PERSONALITY
AUTO EMULATION, PCL, Adobe PostScript
CONTROL-T
ENABLE, DISABLE (PostScript only)
CLEARABLE WARNING
ON, JOB (PCL only)
AUTO CONTINUE
ON, OFF
136
MANUAL TIMEOUT
60 SEC, 30 SEC, OFF
WAIT TIMEOUT
OFF, 5 to 300 SEC in increments of 1 SEC. Default = 40 SEC.
LOW TONER
CONTINUE, STOP
JAM RECOVERY
ON, OFF
ERROR REPORT
ON, OFF
LANGUAGE
ENGLISH, GERMAN, FRENCH, ITALIAN, SPANISH, SWEDISH,
NORWEGIAN, DANISH, DUTCH, TURKISH, PORTUGUESE
POWER SAVE DELAY TIME
Sets the interval before the printer automatically enters the power save mode. Power Save can
also be disabled.
PERSONALITY
Sets the printer emulation.
CONTROL-T
PostScript® mode only.
Normally the printer is set to send a reply to CONTROL-T from the parallel port immediately. To
prevent this, change the setting to DISABLE.
CLEARABLE WARNING
PCL® emulation only.
Change the setting to JOB if you wish error messages which appear on the display to remain
there until the next print job comes in.
AUTO CONTINUE
PCL emulation only.
Determines whether or not the printer will automatically recover after a memory overflow or print
overrun.
MANUAL TIMEOUT
PostScript mode only.
137
Sets the time the printer will wait for paper to be installed after it displays a request for paper,
before it cancels the print job.
WAIT TIMEOUT
Sets the length of time the printer waits for additional data to be received.
PCL Mode
If the amount of time selected passes before the printer receives additional data, the
printer will print any data it has in the buffer and reset.
PostScript Mode
If the amount of time selected passes before the printer receives additional data, the
printer will cancel the print job immediately and reset without any further printing.
LOW TONER
Normally when this message is displayed, the printer will remain on line and continue printing
until it runs out of toner.
Change the setting to STOP if you wish the printer to stop printing and go off line when this
message displays.
JAM RECOVERY
Determines what happens to the print job after a paper exit jam is cleared.
Normally, the printer will automatically resume the print job.
If you change the setting to OFF, the printer won't reprint the jammed pages.
ERROR REPORT
If you wish the printer to automatically generate and print an error report when an internal error
occurs, change the setting to ON.
LANGUAGE
Sets the printer's display language.
Usage Menu
Provides information on counts for various printer parameters.
138
Item (see descriptions below)
Values
TOTAL PAGE COUNT
Nnnnnn
TRAY1 PAGE COUNT
Nnnnnn
TRAY2 PAGE COUNT
Nnnnnn (Appears only if the optional Auxiliary Tray
or the High Capacity Feeder is installed.)
TRAY3 PAGE COUNT
Nnnnnn (Appears only if a second optional Auxiliary
Tray or the High Capacity Feeder is installed.)
TRAY4 PAGE COUNT
Nnnnnn (Appears only if the High Capacity Feeder is
installed.)
TRAY5 PAGE COUNT
Nnnnnn (Appears only if one optional Auxiliary Tray
and the High Capacity Feeder are installed.)
MP TRAY PAGE COUNT
Nnnnnn
BLACK DRUM USAGE
Nnnnnn IMAGES
CYAN DRUM USAGE
Nnnnnn IMAGES
MAGENTA DRUM USAGE
Nnnnnn IMAGES
YELLOW DRUM USAGE
Nnnnnn IMAGES
BELT USAGE
Nnnnnn PRINTS
FUSER USAGE
Nnnnnn PRINTS
BLACK TONER
15k = XXX% 7.5k = YYY%
CYAN TONER
15k = XXX% 7.5k = YYY%
MAGENTA TONER
15k = XXX% 7.5k = YYY%
YELLOW TONER
15k = XXX% 7.5k = YYY%
TOTAL PAGE COUNT
Displays the total number of pages printed, based on the number of pages that have passed the
fuser.
Note: Pages that have jammed after leaving the feed tray are not counted. In Duplex Printing,
one page is counted as two. The total page count does not necessarily match the number of
pages fed from each tray.
TRAY1 PAGE COUNT
TRAY2 PAGE COUNT
TRAY3 PAGE COUNT
TRAY4 PAGE COUNT
TRAY5 PAGE COUNT
Displays the total number of pages printed from the designated tray.
139
MP TRAY PAGE COUNT
Displays the total number of pages printed from the Multi-Purpose Tray.
BLACK DRUM USAGE
Displays the usage of the black drum, based on the number of drum rotations.
CYAN DRUM USAGE
Displays the usage of the cyan drum, based on the number of drum rotations.
MAGENTA DRUM USAGE
Displays the usage of the magenta drum, based on the number of drum rotations.
YELLOW DRUM USAGE
Displays the usage of the yellow drum, based on the number of drum rotations.
BELT USAGE
Displays the usage of the belt, based on the number of belt rotations.
FUSER USAGE
Displays the usage of the fuser, based on the number of pages that have passed through the
fuser.
BLACK TONER
Displays the approximate amount of toner left in the black toner cartridge.
Note: Both values appear no matter which toner is installed.
140
CYAN TONER
Displays the approximate amount of toner left in the cyan toner cartridge.
Note: Both values appear no matter which toner is installed.
MAGENTA TONER
Displays the approximate amount of toner left in the magenta toner cartridge.
Note: Both values appear no matter which toner is installed.
YELLOW TONER
Displays the approximate amount of toner left in the yellow toner cartridge.
Note: Both values appear no matter which toner is installed.
USB Menu
Sets parameters for the USB interface.
For instructions on changing USB Menu settings, see "Changing USB Port Menu Settings."
Defaults are red bold print.
Item (see descriptions below)
Values
USB
ENABLE, DISABLE
SOFT RESET
ENABLE, DISABLE
USB
Enables/Disables the printer's USB interface.
SOFT RESET
Enables/Disables the printer's soft reset command.
141
Using Print Features
(see also Proof & Print, Secure Documents and Overlays)
Macintosh
Collating: Macintosh
General Information
Collated printing allows you to print multiple copies of a document as a series of individual
documents, as opposed to printing multiple copies of each page of the document then manually
collating the pages into documents.
If your software application has a collated print option, use the software to select collated
printing rather than the printer driver. See your software application documentation for
information on how to do this.
If your software application does not have a collated printing option, you'll need to select it using
the printer driver.
Using Collating: Macintosh
To print a job using collating:
1. Double click the printer icon to open the printer dialog.
2. Click File → Print Window.
3. Enter the required number of Copies and click Collated to select it.
4. Click Print.
142
Custom Page Sizes: Macintosh
General Information
To print custom page sizes, you must:
Use the Multi-Purpose Tray
Use the Straight-Through Exit path
Use a Custom Page Size defined in the printer driver:
- Width range 3 to 12.9 inches (76 to 328 mm)
- Length range 5 to 18 inches (127 to 457 mm)
Creating & Saving a Custom Page Size: Macintosh
Note: You can create and store virtually as many Custom Page Sizes as you want.
1. Double click the printer icon.
2. Click File → Page Setup.
3. Select Custom Page Sizes from the drop-down list.
4. Click New.
5. Select the units of measure you wish to use in the Units drop-down list.
6. Enter the custom page measurements under Paper Size.
7. Enter the Margins you wish to use.
143
8. Enter a name for the custom page under Custom Page Name, then click OK.
9. Click OK.
Printing Using a Custom Page Size: Macintosh
1. Double click the printer icon to open the printer dialog.
2. Click File → Page Setup.
3. Select Page Attributes from the drop-down list.
4. Select the custom page name from the drop-down list under Paper and click OK.
5. Print the document.
Modifying a Custom Page Size: Macintosh
1. Double click the printer icon.
2. Click File → Page Setup.
3. Select the custom page name you wish to modify from the drop-down list, then click
Edit."
4. Make your changes, then click OK.
144
Deleting a Custom Page Size: Macintosh
1. Double click the printer icon.
2. Click File → Page Setup.
3. Select the custom page name you wish to remove.
4. Click Delete.
5. Click OK.
Duplex Printing (Printing on Both Sides): Macintosh
General Information
Models equipped with the duplex unit can be used to print on both sides of the paper.
Note: Models C9200dxn and C9400dxn include the duplex unit; Models C9200 and C9200n
must have the optional duplex unit installed before they can be used for duplex printing.
To use duplex printing:
The duplex unit must be activated in the driver.
Paper must be fed from Tray 1 (or one of the optional Auxiliary Trays or the optional High
Capacity Feeder trays)
Paper weight must be 20 to 28 lb (74 to 108 g/m2)
Paper sizes supported:
- Letter (long or short edge)
- Legal-14
- Legal-13.5
- Legal-13
- Tabloid
- Tabloid Extra
- Executive
- A3
- A3 Wide
- A4 (long or short edge)
- A5
- B4
- B5 (long or short edge).
145
Note: If you experience significant curling when printing in the duplex mode and you're using
20 or 24-lb. paper, switch to 28-lb. paper.
Duplex Printing from a Software Application: Macintosh
Note: If you haven't already done so, before attempting duplex printing you must activate the
duplex unit in the driver.
1. Open the document in your software application.
2. Double click the printer icon to open the printer dialog.
3. Click File → Print Window.
4. Open Layout from the drop down selections.
5. Click Print on Both Sides.
6. Under Binding, select which binding to use.
7. Click Print.
Setting Duplex Printing as the Printer Default: Macintosh
1. Change the Duplex setting in the printer menu to ON.
2. Double click the printer icon to open the printer dialog.
3. Click File → Print Window.
4. Click Layout from the drop-down list.
146
5. Click Print on Both Sides.
6. Under Binding, select which binding to use.
7. Click Save Settings.
N-Up (Multiple Pages on One Sheet): Macintosh
General Information
This feature is handy for saving paper when proofing a multi-page document. You can print up
to 16 reduced-size pages on one sheet of paper.
Choices include:
2-up
4-up
6-up
9-up
16-up
For example, if you select 4-up printing:
Each page will be reduced to 25% of its original size.
Four pages will print on each sheet for one-sided printing; eight pages with two-sided
(duplex) printing engaged.
147
N-Up Printing: Macintosh
To print multiple pages on one sheet of media:
1. Double click the printer icon to open the printer dialog.
2. Click File → Print Window.
3. Click Layout from the drop-down list.
4. Select the required number of pages from the Pages per sheet drop-down list.
5. Select the printing order under Layout direction.
6. Select the type of border from the Border drop-down list.
7. Click Save Settings to save the printer driver settings or click Print to print the document.
Print Resolution: Macintosh
General Information
The print resolution is set in units of dots per inch (dpi).
Generally, the higher the resolution, the higher the quality of the printed graphic images.
Higher resolutions use up more toner, require larger amounts of disk space for spooling and will
increase the time required to print a job. For example, a 1200 dpi x 1200 dpi print job is up to
four times the size of a 600 dpi x 600 dpi print job.
Models C9200, C9200n & C9200dxn
Default is in red bold print.
Resolution
Use for
Speed
600 x 600 dpi
Proofing
Fast
600 x 1200 dpi
Highest quality images
Slower
Model C9400dxn
Default is in red bold print.
Resolution
Use for
Speed
600 x 600 dpi
Proofing
Fastest
148
1200 x 1200 dpi
Highest quality images
Slowest
Setting the Print Resolution: Macintosh
1. Double-click the printer icon to open the printer dialog.
2. Click File → Print Window.
3. Select Printer Specific Options 1 from the drop-down list.
4. Select the resolution in the Resolution drop-down list.
5. Click Save Settings to save the setting or click Print to print the document.
Windows 2000
Collating: Windows 2000
General Information
Collated printing allows you to print multiple copies of a document as a series of individual
documents, as opposed to printing multiple copies of each page of the document then manually
collating the pages into documents.
Important! If you are using duplex printing with collating:
1. Select collated printing in your software application.
2. Select the number of copies in the driver (click Properties [or Setup or your
application's equivalent] in the Print dialog box and set the number of copies in the
driver for the Windows 2000 PCL driver, you must set the number of copies in the Paper
tab, not the General tab).
If your software application has a collated print option, use the software to select collated
printing rather than the printer driver. See your software application documentation for
information on how to do this.
149
If your software application does not have a collated printing option, you'll need to select it using
the printer driver.
Collating: Windows 2000 PCL Driver
Printing using Collating: Windows 2000 PCL
To print a job using collating in the Windows 2000 PCL driver:
1. In the software application, open the file you wish to print.
2. Click File → Print.
The Print dialog box appears.
3. On the General tab, select the OKI C9200 or C9400 PCL printer.
4. Enter the Number of copies and click Collate.
Important! If you are using duplex printing, set the number of copies in the Paper
tab, not the General tab.
5. Click Print.
Setting Collate as the Default: Windows 2000 PCL
To set collated printing as the printer default in the Windows 2000 PCL driver:
1. Click Start → Settings → Printers.
The Printers dialog box appears.
2. Right click the OKI C9200 or C9400 PCL printer icon, then click Printing Preferences.
The OKI Printing Preferences dialog box appears.
3. On the Paper tab, under Copies, enter the number of copies to be printed and click
Printer Collate.
4. Click OK and close the Printers dialog box.
Collating: Windows 2000 PostScript Driver
Printing using Collating: Windows 2000 PS
To print a job using collating in the Windows 2000 PostScript driver:
1. In the software application, open the file you wish to print.
2. Click File → Print.
The Print dialog box appears.
3. On the General tab, select the OKI C9200 or C9400 PostScript printer.
4. Enter the Number of copies and click Collate to select it.
5. Click Print.
Setting Collate as the Default: Windows 2000 PS
To set collated printing as the default in the Windows 2000 PostScript driver:
1. Click Start → Settings → Printers. The Printers dialog box appears.
150
2. Right click the OKI C9200 or C9400 PostScript printer icon, then click Printing
Preferences.
The OKI Printing Preferences dialog box appears.
3. On the Layout tab, click Advanced.
The Advanced Options dialog box appears.
4. Scroll down to Printer Features, click Collate, and select Yes in the Collate drop-down
box.
5. Click OK twice and close the Printers dialog box.
Custom Page Sizes: Windows 2000
General Information
To print custom page sizes, you must:
Use the Multi-Purpose Tray
Use the Straight-Through Exit path
Use a Custom Page Size defined in the printer driver:
Width range 3 to 12.9 inches (76 to 328 mm)
Length range 5 to 18 inches (127 to 457 mm)
Custom Page Sizes: Windows 2000 PCL Driver
Creating and Storing a Custom Page Size: Windows 2000 PCL
Note: You can save up to 32 Custom Page Sizes in the PCL driver.
To set up a Custom Page Size in the Windows 2000 PCL driver:
1. Click Start → Settings → Printers.
The Printers dialog box appears.
2. Right click the printer icon, then click Printing Preferences.
The OKI Printing Preferences dialog box appears.
3. On the Paper tab, click Custom size.
The Custom size dialog box appears.
4. Enter a Name (up to 12 characters) for the custom page size.
5. Select a Unit of measure, then enter the Width and Length you wish to use.
6. Click Add.
The name will appear in the box.
7. Click OK.
The name you entered appears at the end of the Media Size drop-down list.
8. Click OK and close the Printers dialog box.
Printing Using a Custom Page Size: Windows 2000 PCL
To print using a Custom Page Size in the Windows 2000 PCL driver:
151
1. Open the document in your software application.
2. Load the custom print media in the Multi-Purpose Tray.
3. Make sure the Straight-Through Exit tray is open.
4. From your software application, click File → Print.
The Print dialog box appears.
5. Make sure the OKI C9200 or C9400 PCL printer is selected, then click the Paper tab.
6. On the Paper tab, click the M in the illustration (or click Multi purpose tray in the Source
drop-down list).
7. Under Size, select the appropriate custom page size name.
8. Click Print.
Setting a Custom Page Size as the Default: Windows 2000 PCL
If you wish to set a Custom Page Size as the default in the Windows 2000 PCL driver:
1. Click Start → Settings → Printers.
The Printers dialog box appears.
2. Right click the C9200 or C9400 PCL printer icon, then click Printing Preferences.
The OKI Printing Preferences dialog box appears.
3. On the Paper tab, click the M in the illustration (or click Multi purpose tray in the Source
drop-down list).
4. Select the appropriate custom page size name in the Media Size drop-down list.
5. Click OK and close the Printers dialog box.
152
Modifying a Custom Page Size: Windows 2000 PCL
To change the size or name of an established Custom Page Size in the Windows 2000 PCL
driver:
1. Click Start → Settings → Printers.
The Printers dialog box appears.
2. Right click the OKI C9200 or C9400 PCL printer icon, then click Printing Preferences.
The OKI Printing Preferences dialog box appears.
3. On the Paper tab, click Custom size.
The Custom size dialog box appears.
4. In the box, click the name of the custom size you wish to modify, then make the changes
in Name, Width and Length.
5. Click Modify.
The changes will be reflected in the box.
6. Click OK twice, then close the Printers dialog box.
Deleting a Custom Page Size: Windows 2000 PCL
To delete a Custom Page Size in the Windows 2000 PCL driver:
1. Click Start → Settings → Printers.
The Printers dialog box appears.
2. Right click the OKI C9200 or C9400 PCL printer icon, then click Printing Preferences.
The OKI Printing Preferences dialog box appears.
3. On the Paper tab, click Custom size.
The Custom size dialog box appears.
4. In the box, click the name of the custom size you wish to remove, then click Delete and
click Yes to confirm the deletion.
153
5. Click OK twice, then close the Printers dialog box.
Custom Page Sizes: Windows 2000 PostScript Driver
Creating the Default Custom Page Size: Windows 2000 PS
Note: In the PostScript driver, you can set up one Custom Page Size in the driver to save for
future use.
To create a Custom Page Size in the Windows 2000 PostScript driver:
1. Click Start → Settings → Printers.
The Printers dialog box appears.
2. Right click the OKI C9200 or C9400 PCL printer icon, then click Printing Preferences.
The OKI Printing Preferences dialog box appears.
3. On the Layout tab, click Advanced.
The OKI Advanced Options dialog box appears.
4. Under Paper/Output, in the Paper Size drop-down list, click PostScript Custom Page
Size.
The PostScript Custom Page Size Definition dialog box appears:
154
5. Select a Unit of measure, then enter the Width and Height.
6. Select a Paper Feed Direction:
Notes
Maximum width for Long Edge First is 12.9 inches.
Paper length must be greater than the paper width.
• Long Edge First = media feeds in long edge first
• Short Edge First = media feeds in short edge first
• Long Edge First (flipped) = Reserved for future use.
• Short Edge First (flipped) = Reserved for future use.
7. Click OK.
8. Click OK twice, then close the Printers dialog box.
Printing Using a Custom Page Size: Windows 2000 PS
To print using a Custom Page Size in the Windows 2000 PostScript driver:
1. Open the document in your software application.
2. Load the custom print media in the Multi-Purpose Tray.
3. Make sure the Straight-Through Exit tray is open.
155
4. From your software application, select File → Print.
5. Make sure the OKI C9200 or C9400 PostScript printer is selected, then click the
Paper/Quality tab.
6. Click Advanced.
The OKI Advanced Options dialog box appears.
7. If you have set the custom page size as the default, skip to step 9. Otherwise, click
PostScript Custom Page Size in the Paper Size drop-down list.
The PostScript Custom Page Size Definition dialog box appears.
8. If you're using your preset default, click OK; otherwise, make your settings, then click
OK.
9. Click OK, then click Print.
Modifying the Default Custom Page Size: Windows 2000 PS
To modify the default Custom Page Size in the Windows 2000 PostScript driver:
1. Click Start → Settings → Printers.
The Printers dialog box appears.
2. Right click the OKI C9200 or C9400 PostScript printer icon, then click Printing
Preferences.
The OKI Printing Preferences dialog box appears.
3. On the Layout tab, click Advanced.
The OKI PS Default dialog box appears.
4. If you've set the custom page size as the default, click Edit Custom Page Size; otherwise
click PostScript Page Size in the Paper Size drop-down list.
The PostScript Custom Page Size Definition dialog box appears.
5. Make any changes you wish to make in the settings, then click OK.
6. Click OK twice, then close the Printers dialog box.
Duplex Printing (Printing on Both Sides): Windows 2000
General Information
Models equipped with the duplex unit can be used to print on both sides of the paper.
Note: Models C9200dxn and C9400dxn include the duplex unit; Models C9200 and C9200n
156
must have the optional duplex unit installed before they can be used for duplex printing.
To use duplex printing:
The duplex unit must be activated in the driver.
Paper must be fed from Tray 1 (or one of the optional Auxiliary Trays or the optional High
Capacity Feeder trays)
Paper weight must be 20 to 28 lb (74 to 108 g/m2)
Paper sizes supported:
- Letter (long or short edge)
- Legal-14
- Legal-13.5
- Legal-13
- Tabloid
- Tabloid Extra
- Executive
- A3
- A3 Wide
- A4 (long or short edge)
- A5
- B4
- B5 (long or short edge).
Note: If you experience significant curling when printing in the duplex mode and you're using
20 or 24-lb. paper, switch to 28-lb. paper.
Duplex Printing from a Software Application: Windows 2000
Note: If you haven't already done so, before attempting duplex printing you must activate the
duplex unit in the driver (PCL, PostScript).
Duplex Printing: Windows 2000 PCL Driver
1. Open the document in your software application,
2. Click File → Print.
The Print dialog box appears.
3. On the General tab, select the OKI C9200 or C9400 PCL printer, then click the Layout
tab.
4. Select Long edge (
) or Short edge (
) binding under 2-sided printing.
Note: If these selections are grayed out, you need to activate the duplex unit in the
driver.
5. Click Print.
Duplex Printing: Windows 2000 PostScript Driver
157
1. Open the document in your software application.
2. Click File → Print.
The Print dialog box appears.
3. On the General tab, select the OKI C9200 or C9400 PostScript printer, then click the
Layout tab.
4. Under Print on Both Sides (Duplex), click your selection of Flip on Long Edge (
) or Flip
on Short Edge ( ).
Note: If these selections do not appear on the Layout tab, you need to activate the
duplex unit in the driver.
5. Click Print.
Duplex Printing as the Printer Default: Windows 2000
Setting Duplex Printing as the Default: Windows 2000 PCL
1. Change the Duplex setting in the printer menu to ON.
2. Click Start → Settings → Printers.
The Printers dialog box appears.
3. Right click the OKI C9200 or C9400 PCL printer icon, then click Printing Preferences.
The OKI Printing Preferences dialog box appears.
4. Click the Layout tab.
5. Select Long edge (
) or Short edge ( )binding in the 2-sided printing drop-down list.
Note: If these selections do not appear on the Layout tab, you need to activate the
duplex unit in the driver.
6. Click OK, then close the Printers dialog box.
Setting Duplex Printing as the Default: Windows 2000 PS
1. Change the Duplex setting in the printer menu to ON.
2. Click Start → Settings → Printers.
The Printers dialog box appears.
3. Right click the OKI C9200 or C9400 PostScript printer icon, then click Printing
Preferences.
The OKI Printing Preferences dialog box appears.
4. On the Layout tab, under Print on Both Sides (Duplex), click your choice of Flip on Long
Edge (
) or Flip on Short Edge ( ).
Note: If these selections do not appear on the Layout tab, you need to activate the
duplex unit in the driver.
5. Click OK and close the Printers dialog box.
158
N-Up: Windows 2000
General Information
This feature is handy for saving paper when proofing a multi-page document. You can print up
to 16 reduced-size pages on one sheet of paper.
Choices include:
2-up
4-up
6-up
9-up
16-up
For example, if you select 4-up printing:
Each page will be reduced to 25% of its original size.
Four pages will print on each sheet for one-sided printing; eight pages with two-sided
(duplex) printing engaged.
N-Up Printing: Windows 2000 PCL
To print a job using N-Up printing in the Windows 2000 PCL driver:
1. Open the document in the software application.
2. Click File → Print.
The Print dialog box appears.
3. In the General tab, click the OKI C9200 or C9400 PCL printer icon.
4. Click the Layout tab. Under Finishing Mode, click the number of pages to be printed per
sheet from the Pages per sheet drop-down list.
5. Click your choice from the Page Borders drop-down list.
6. Click Print.
N-Up Printing: Windows 2000 PS
To print a job using N-Up printing in the Windows 2000 PostScript driver:
1. Open the document in the software application.
159
2. Click File → Print.
The Print dialog box appears.
3. In the General tab, select the OKI C9200 or C9400 PostScript printer icon.
4. Click the Layout tab. Under Pages per Sheet, click the number of pages to be printed
per sheet.
5. Click Print.
Print Resolution: Windows 2000
General Information
The print resolution is set in units of dots per inch (dpi).
Generally, the higher the resolution, the higher the quality of the printed graphic images.
Higher resolutions use up more toner, require larger amounts of disk space for spooling and will
increase the time required to print a job. For example, a 1200 dpi x 1200 dpi print job is up to
four times the size of a 600 dpi x 600 dpi print job.
Models C9200, C9200n & C9200dxn: PCL & PostScript Modes
Default is in red bold print.
Resolution
Use for
Speed
600 x 600 dpi
Proofing
Fast
600 x 1200 dpi
Highest quality images
Slower
Model C9400dxn: PCL Mode
Default is in red bold print.
Resolution
Use for
Speed
600 x 600 dpi
Proofing
Fastest
Fast 1200
(600 x 1200 dpi)
Higher quality images
Medium Fast
1200 x 1200 dpi
Highest quality images
Slowest
Model C9400dxn: PostScript Mode
Default is in red bold print.
Resolution
Use for
Speed
600 x 600 dpi
Proofing
Fastest
1200 x 1200 dpi
Highest quality images
Slowest
Setting the Default Print Resolution: Windows 2000 PCL Driver
160
1. Click Start → Settings → Printers.
The Printers dialog box appears.
2. Right click the OKI C9200 or C9400 PCL printer icon, then click Printing Preferences.
The OKI Printing Preferences dialog box appears.
3. Click the Quality tab, then click your resolution selection under Resolution.
4. Click OK and close the Printers dialog box.
Changing the Resolution for a Print Job: Windows 2000 PCL Driver
1. Open the document in the application.
2. Click File → Print.
The Print dialog box appears.
3. Make sure the OKI C9200 or C9400 PCL printer is selected, then click the Quality tab.
161
4. Click your resolution selection under Resolution.
5. Click Print.
Setting the Default Print Resolution: Windows 2000 PostScript Driver
1. Click Start → Settings → Printers.
The Printers dialog box appears.
2. Right click the OKI C9200 or C9400 PostScript printer icon, then click Printing
Preferences.
The OKI Preferences dialog box appears.
3. On the Layout tab, click Advanced.
The OKI Advanced Options dialog box appears.
4. Under Graphic, click Print Quality.
5. Click your resolution selection in the Print Quality drop-down list.
6. Click OK twice, then close the Printers dialog box.
Changing the Resolution for a Print Job: Windows 2000 PostScript Driver
1. Open the document in the application.
2. Click File → Print.
The Print dialog box appears.
3. Make sure the OKI C9200 or C9400 PostScript printer is selected, then click the
Paper/Quality tab.
4. Click Advanced.
The OKI Advanced Options dialog box appears.
5. Under Graphic, click Print Quality.
162
6. Click your resolution selection in the Print Quality drop-down list.
7. Click OK, then click Print.
Watermarks: Windows 2000
General Information
A watermark is an image superimposed on the pages of a printed document. Normally a
watermark is a faint background image, but it can be any color, any intensity.
For example, the word "DRAFT" could be watermarked on a page:
You set the text, size, angle, font color and position of the watermark in the printer driver.
You can insert a watermark on:
the first page of your document or
on all pages of your document.
Note: Watermarks can only be printed in Windows 2000 using the PCL driver.
Creating & Storing a Watermark: Windows 2000 PCL
To create a watermark:
1. Click Start → Settings → Printers.
The Printers dialog box appears.
2. Right click the OKI C9200 or C9400 PCL printer icon, then click Printing Preferences.
The OKI Printing Preferences dialog box appears.
3. Click the Watermark tab.
163
4. Type in the text, then select the Size, Angle, Font and Color.
5. Click Add.
The text appears in the Watermark list box:
6. Click OK and close the Printers dialog box.
Printing Using a Watermark: Windows 2000 PCL
To print a document with a watermark:
1. Open the document in the software application.
164
2. Click File → Print.
The Print dialog box appears.
3. On the General tab, click the OKI C9200 or C9400 PCL printer icon.
4. Click the Watermark tab and select the watermark you wish to use from the Watermark
list (or create a new one).
5. To print the watermark only on the first page of the document, click First page only.
Otherwise the watermark will print on every page.
6. Click Print.
Modifying a Watermark: Windows 2000 PCL
To edit an existing watermark:
1. Click Start → Settings → Printers.
The Printers dialog box appears.
2. Right click the OKI C9200 or C9400 PCL printer icon, then click Printing Preferences.
The OKI Printing Preferences dialog box appears.
3. Click the Watermark tab, then click the watermark you wish to change.
4. Make any changes.
5. When you're done making changes, click Apply.
6. Click OK and close the Printers dialog box.
Deleting a Watermark: Windows 2000 PCL
To delete a watermark:
1. Click Start → Settings → Printers.
The Printers dialog box appears.
2. Right click the OKI C9200 or C9400 PCL printer icon, then click Printing Preferences.
The PCL Printing Preferences dialog box appears.
3. Click the Watermark tab.
4. Click the watermark you wish to delete, then click Remove.
5. Click Yes to confirm the removal.
6. Click OK and close the Printers dialog box.
Fit to Page: Windows 2000, PCL Only
This feature allows you to print a document on a different size media by reducing or enlarging it
to fit on the page. For example, you can proof a custom-size document on standard size paper,
reserving the special custom-size paper for use only for the final printing.
Using Fit to Page:
Note: If the document size is significantly larger than the print media, portions of the edge of
the document will be cut off to fit it on the page.
165
1. With the document you wish to print open in your software application, click File → Print.
The Print dialog box appears.
2. Make sure the OKI C9200 or C9400 PCL driver is selected, then click Properties (or your
application's equivalent).
3. Click the Paper tab.
4. If necessary, select the Source.
5. Click the checkbox beside Fit to Page.
A drop-down list appears below Fit to Page.
6. Under Size, click the paper size representing the document you wish to print, then select the
size conversion you wish to use from the drop-down list.
Example
To print a tabloid size document on letter-size paper:
7. Click Print.
Windows Me
Booklets (Signature Printing): Windows Me PCL Driver
Note: Booklet printing is available only for the PCL driver.
General Information
Important! In order to print booklets, your printer must be equipped with the duplex unit
(standard on Models C9200dxn and C9400dxn, optional on Models C9200 and C9200n)
and the duplex unit must be activated in the driver (see "Activate the Duplex Unit in the
Driver ") and in the printer menu (see "Turning the Duplex Unit On in the Menu ").
Note: Some software applications do not support booklet printing.
Printing booklets allows you to print multiple pages on a single sheet—printing on both sides—
then fold the paper in half to form a booklet.
166
Example
If your document pages are 5.5" x 8.5" (portrait), you can set the printer up to print four
pages (landscape) per 8.5" x 11" sheet which would then be folded over to form a 5.5" x 8.5"
(portrait) booklet:
Booklets, Individual Print Jobs: Windows Me PCL
To print a file as a booklet:
1. Load paper, print side down, in Tray 1.
Note: The Multi-Purpose Tray, Auxiliary Trays and High Capacity Feeder can not be
used for printing booklets.
2. In your software application, open the file you wish to print.
3. Click File → Print and make sure the OKI C9200 or C9400 PCL printer is selected, then
click Properties (or your application's equivalent).
The OKI Properties dialog box appears.
4. Click the Layout tab.
5. Under Finishing Mode, select Booklet from the drop-down list.
Note: If Booklet does not appear in the drop-down list, the duplex unit has not been
activated in the driver. On the Paper tab, click Device options, then click Duplex option
unit to select it and click OK.
6. If necessary, select the appropriate Signature from the drop-down list (normally No limit
is used).
Note: The term signature refers to the number of pages in the document to be included
in the booklet, and does not refer to the traditional printer's signature (imposition).
Generally, the setting for this should be left at No limit so that all the pages in the
document will be printed.
7. Click OK and print the document.
167
Setting Booklets as the Printer Default: Windows Me PCL
To set booklet printing up as the printer default:
1. Click Start → Settings → Printers.
The Printers dialog box appears.
2. Right click the OKI C9200 or C9400 PCL printer icon, then click Properties.
The Properties dialog box appears.
3. Click the Layout tab.
4. Under Finishing Mode, select Booklet from the drop-down list.
5. If necessary, select the appropriate Signature from the drop-down list (normally No limit
is used).
Note: The term signature refers to the number of pages in the document to be included
in the booklet, and does not refer to the traditional printer's signature (imposition).
Generally, the setting for this should be left at No limit so that all the pages in the
document will be printed.
6. Click OK, then close the Printers dialog box.
Collating: Windows Me
General Information
Collated printing allows you to print multiple copies of a document as a series of individual
documents, as opposed to printing multiple copies of each page of the document then manually
collating the pages into documents.
Important! If you are using duplex printing with collating:
1. Select collated printing in your software application.
2. Select the number of copies in the driver (click Properties [or Setup or your
application's equivalent] in the Print dialog box and set the number of copies in the
driver for the Windows 2000 PCL driver, you must set the number of copies in the Paper
tab, not the General tab).
If your software application has a collated print option, use the software to select collated
printing rather than the printer driver. See your software application documentation for
information on how to do this.
If your software application does not have a collated printing option, you'll need to select it using
the printer driver.
Collating: Windows Me PCL Driver
168
Printing using Collating: Windows Me PCL
To print a job using collating in the Windows Me PCL driver:
1. In your software application, open the file to be printed.
2. Click File → Print.
The Print dialog box appears.
Important! If your application has a collate feature select it here. If you are using
duplex printing, select the number of copies in the driver (see step 4).
3. Make sure the OKI C9200 or C9400 PCL printer is selected, then click Properties (or
your application's equivalent).
The OKI Properties dialog box appears.
4. On the Paper tab, under Copies, enter the number of required copies. If your application
does not have the collate feature, click Printer Collate.
5. Click OK and print the job.
Setting Collate as the Default: Windows Me PCL
To set collating as the default in the Windows Me PCL driver:
1. Click Start → Settings → Printers.
The Printers dialog box appears.
2. Right click the OKI C9200 or C9400 PCL printer icon and click Properties.
The OKI Properties dialog box appears.
3. Click the Paper tab.
4. Under Copies, enter the number of required copies and click Printer collate.
5. Click OK and close the Printers dialog box.
Collating: Windows Me PostScript Driver
Printing using Collating: Windows Me PS
To print a job using collating in the Windows Me PostScript driver:
1. In your software application, open the file to be printed.
2. Click File → Print.
The Print dialog box appears.
Important! If your application has a collate feature select it here. If you are using
duplex printing, select the number of copies in the driver (see step 4).
3. Make sure the OKI C9200 or C9400 PostScript printer is selected, then click Properties
(or your application's equivalent).
The OKI PS Properties dialog box appears.
4. On the Paper tab, under Copies, enter the number of required copies. If your application
does not have the collate feature, click Collate.
5. Click OK and proceed to print the job.
169
Setting Collate as the Default: Windows Me PS
To set collate as the default in the Windows Me PostScript driver:
1. Click Start → Settings → Printers.
The Printers dialog box appears.
2. Right click the OKI C9200 or C9400 PostScript printer icon, then click Properties.
The OKI Properties dialog box appears.
3. Click the Paper tab.
4. Under Copies, enter the number of required copies and click Collate.
5. Click OK and close the Printers dialog box.
Custom Page Sizes: Windows Me
General Information
To print custom page sizes, you must:
Use the Multi-Purpose Tray
Use the Straight-Through Exit path
Use a Custom Page Size defined in the printer driver:
Width range 3 to 12.9 inches (76 to 328 mm)
Length range 5 to 18 inches (127 to 457 mm)
Custom Page Sizes: Windows Me PCL Driver
Note: Up to 32 custom paper sizes can be defined and stored.
Setting Up a Custom Page Size: Windows Me PCL
To set up a Custom Page Size in the Windows Me PCL driver:
1. Click Start → Settings → Printers.
The Printers dialog box appears.
2. Right click the OKI C9200 or C9400 PCL printer icon, then click Properties.
The OKI Properties dialog box appears.
3. Click the Paper tab, then click Custom Size.
The Custom size dialog box appears.
170
4. Type in the Name of the custom page size.
5. Click the desired Unit of measurement, then enter the Width and Length.
6. Click Add, then click OK.
The custom page size is added to the bottom of Size drop-down list.
Note: If you want to set the custom page size as the default, click it in the drop-down
list before continuing.
7. Click OK and close the Printers dialog box.
Printing Using a Custom Page Size: Winodws Me PCL
To print using a Custom Page Size in the Windows Me PCL driver:
1. Open the file in your software application.
2. Load the custom size media in the Multi-Purpose Tray.
3. Make sure the straight-through exit tray is open.
171
4. Click File → Print.
The Print dialog box appears.
5. Make sure the OKI C9200 or C9400 PCL printer is selected, then click Properties (or
your application's equivalent).
The OKI Properties dialog box appears.
6. On the Paper tab, click the M on the printer drawing (or click Multi purpose tray from the
Source drop-down list).
7. Click the desired custom page size from the Size drop-down list.
8. Click OK and print the document.
Modifying a Custom Page Size: Windows Me PCL
To modify a Custom Page Size in the Windows Me PCL driver:
1. Click Start → Settings → Printers.
The Printers dialog box appears.
2. Right click the OKI C9200 or C9400 PCL printer icon, then click Properties.
The OKI Properties dialog box appears.
3. Click the Paper tab, then click Custom Size.
The Custom size dialog box appears.
4. Click the Name of the custom page size you wish to change.
5. Enter any changes, then click Modify.
172
6. Click OK twice, then close the Printers dialog box.
Deleting a Custom Page Size: Windows Me PCL
To delete a Custom Page Size in the Windows Me PCL driver:
1. Click Start → Settings → Printers.
The Printers dialog box appears.
2. Right click the OKI C9200 or C9400 PCL printer icon, then click Properties.
The OKI Properties dialog box appears.
3. Click the Paper tab, then click Custom Size.
The Custom size dialog box appears.
4. Click the Name of the custom page size you wish to delete.
5. Click Delete, then click Yes to confirm the deletion.
6. Click OK twice, then close the Printers dialog box.
Custom Page Sizes: Windows Me PostScript Driver
Setting Up a Custom Page Size: Windows Me PS
Note: Three Custom Page Sizes can be defined in the PostScript driver.
To set up a Custom Page Size in the Windows Me PostScript driver:
1. Click Start → Settings → Printers.
The Printers dialog box appears.
2. Right click the OKI C9200 or C9400 PostScript printer icon, then click Properties.
The OKI Properties dialog box appears.
3. Click the Paper tab, then select Custom page 1, Custom page 2, or Custom page 3 in
the Size drop-down list.
4. Click Custom Size.
173
5. In the Paper name box, type in the name for the custom paper size.
6. Select a Unit of measure, then enter the Width and Length measurements.
7. Click OK.
The new custom size will appear near the bottom of the Size drop-down list.
8. Click OK and close the Printers dialog box.
Printing Using a Custom Page Size: Windows Me PS
To print using a Custom Page Size in the Windows Me PostScript driver:
1. Open the file in your software application.
2. Load the custom size media in the Multi-Purpose Tray.
3. Make sure the straight-through exit tray is open.
4. Click File → Print.
The Print dialog box appears.
174
5. Make sure the OKI C9200 or C9400 PostScript printer is selected, then click Properties
(or Setup, or your application's equivalent).
The OKI Properties dialog box appears.
6. On the Paper tab, click Multi-Purpose tray in the Source drop-down list.
7. Click the desired custom page size from the Size drop-down list.
8. Click OK and proceed to print the job.
Modifying a Custom Page Size: Windows Me PS
To modify a Custom Page Size in the Windows Me PostScript driver:
1. Click Start → Settings → Printers.
The Printers dialog box appears.
2. Right click the OKI C9200 or C9400 PostScript printer icon, then click Properties.
The OKI PS Properties dialog box appears.
3. Click the Paper tab.
4. In the Size drop-down list, click the custom page size to be modified.
5. Click Custom Size.
The Custom Paper Size dialog box appears.
6. Make any changes in Paper name, Width, and Length, then click OK.
7. Click OK and close the Printers dialog box.
Duplex Printing (Printing on Both Sides): Windows Me
General Information
Models equipped with the duplex unit can be used to print on both sides of the paper.
Note: Models C9200dxn and C9400dxn include the duplex unit; Models C9200 and C9200n
must have the optional duplex unit installed before they can be used for duplex printing.
To use duplex printing:
The duplex unit must be activated in the driver.
Paper must be fed from Tray 1 (or one of the optional Auxiliary Trays or the optional High
Capacity Feeder trays)
Paper weight must be 20 to 28 lb (74 to 108 g/m2)
Paper sizes supported:
175
- Letter (long or short edge)
- Legal-14
- Legal-13.5
- Legal-13
- Tabloid
- Tabloid Extra
- Executive
- A3
- A3 Wide
- A4 (long or short edge)
- A5
- B4
- B5 (long or short edge).
Note: If you experience significant curling when printing in the duplex mode and you're using
20 or 24-lb. paper, switch to 28-lb. paper.
Duplex Printing from a Software Application: Windows Me
Note: If you haven't already done so, before attempting duplex printing you must activate the
duplex unit in the driver (PCL, PostScript).
Duplex Printing: Windows Me PCL
1. Open the document in your software application.
2. Click File → Print.
The Print dialog box appears.
3. Make sure the OKI C9200 or C9400 PCL driver is selected, then click Properties (or your
application's equivalent).
The OKI Properties dialog box appears.
4. Click the Layout tab, then select Long edge (
printing.
) or Short edge ( ) binding under 2-sided
5. Click OK and print the document.
Duplex Printing: Windows Me PS
1. Open the document in your software application.
2. Click File → Print.
The Print dialog box appears.
3. Make sure the OKI C9200 or C9400 PostScript driver is selected, then click Properties
(or your application's equivalent).
The OKI PS Properties dialog box appears.
4. Click the Layout tab.
5. Under 2-sided printings, click your selection of Flip on long edge (
edge ( ) from the drop-down list.
6. Click OK and print the document.
176
) or Flip on short
Duplex Printing Set as Default: Windows Me
Setting Duplex Printing as the Default: Windows Me PCL
To set Duplex printing as the default in the Windows Me PCL Driver:
1. Click Start → Settings → Printers.
The Printers dialog box appears.
2. Right click the OKI C9200 or C9400 PCL printer icon, then click Properties.
The OKI Properties dialog box appears.
3. Click the Layout tab.
4. Under 2-Sided printing, click Long edge (
down list.
) or Short edge ( ) binding from the drop-
Note: If these items are grayed out, you need to turn the duplex unit on in the driver.
5. Click OK and close the Printers dialog box.
Setting Duplex Printing as the Default: Windows Me PS
To set Duplex printing as the default in the Windows Me PostScript Driver:
1. Click Start → Settings → Printers.
The Printers dialog box appears.
2. Right click the OKI C9200 or C9400 PostScript printer icon, then click Properties.
The OKI PS Properties dialog box appears.
3. Click the Layout tab.
4. Under 2-sided printings, click your selection of Flip on long edge (
) or Flip on short
edge ( ) from the drop-down list.
Note: If these items are grayed out, you need to turn the duplex unit on in the driver.
5. Click OK and close the Printers dialog box.
N-Up: Windows Me
General Information
This feature is handy for saving paper when proofing a multi-page document. You can print up
to 16 reduced-size pages on one sheet of paper.
Choices include:
2-up
4-up
6-up
9-up
16-up
177
For example, if you select 4-up printing:
Each page will be reduced to 25% of its original size.
Four pages will print on each sheet for one-sided printing; eight pages with two-sided
(duplex) printing engaged.
N-Up Printing: Windows Me PCL
To print a job using N-Up printing in the Windows Me PCL driver:
1. Open the document in the software application.
2. Click File → Print.
The Print dialog box appears.
3. Make sure the OKI C9200 or C9400 PCL printer is selected, then click Properties (or
your application's equivalent).
The OKI Properties dialog box appears.
4. Click the Layout tab. Under Finishing Mode, click the number of pages to be printed per
sheet.
5. Click your choice from the Page Borders drop-down list
6. Click OK and print the document.
N-Up Printing: Windows Me PS
To print a job using N-Up printing in the Windows Me PostScript driver:
1. Open the document in the software application.
2. Click File → Print.
The Print dialog box appears.
3. Make sure the OKI C9200 or C9400 PostScript printer is selected, then click Properties
(or your application's equivalent).
The OKI Properties dialog box appears.
4. Click the Layout tab. Under Pages on Sheet, click the number of pages to be printed per
sheet.
5. Click OK and print the document.
178
Print Resolution: Windows Me
General Information
The print resolution is set in units of dots per inch (dpi).
Generally, the higher the resolution, the higher the quality of the printed graphic images.
Higher resolutions use up more toner, require larger amounts of disk space for spooling and will
increase the time required to print a job. For example, a 1200 dpi x 1200 dpi print job is up to
four times the size of a 600 dpi x 600 dpi print job.
Models C9200, C9200n & C9200dxn: PCL & PostScript Modes
Default is in red bold print.
Resolution
Use for
Speed
600 x 600 dpi
Proofing
Fast
600 x 1200 dpi
Highest quality images
Slower
Model C9400dxn: PCL Mode
Default is in red bold print.
Resolution
Use for
Speed
600 x 600 dpi
Proofing
Fastest
Fast 1200
(600 x 1200 dpi)
Higher quality images
Medium Fast
1200 x 1200 dpi
Highest quality images
Slowest
Model C9400dxn: PostScript Mode
Default is in red bold print.
Resolution
Use for
Speed
600 x 600 dpi
Proofing
Fastest
1200 x 1200 dpi
Highest quality images
Slowest
Setting the Default Print Resolution: Windows Me PCL
1. Click Start → Settings → Printers.
The Printers dialog box appears.
2. Right click the OKI C9200 or C9400 PCL printer icon, then click Properties.
The OKI Properties dialog box appears.
3. Click the Quality tab, then click your resolution selection under Resolution.
179
4. Click OK and close the Printers dialog box.
Changing the Resolution for a Print Job: Windows Me PCL
1. Open the document in the application.
2. Click File → Print.
The Print dialog box appears.
3. Make sure the OKI C9200 or C9400 PCL printer is selected, then click Properties (or
your application's equivalent).
The OKI Properties dialog box appears.
4. Click the Quality tab, then click your resolution selection under Resolution.
180
5. Click OK and print the document.
Setting the Default Print Resolution: Windows Me PS
1. Click Start → Settings → Printers.
The Printers dialog box appears.
2. Right click the OKI C9200 or C9400 PostScript printer icon, then click Properties.
The OKI Properties dialog box appears.
3. Click the Print Quality tab, then click your resolution selection in the Resolution dropdown list.
4. Click OK and close the Printers dialog box.
Changing the Resolution for a Print Job: Windows Me PS
1. Open the document in the application.
2. Click File → Print.
The Print dialog box appears.
3. Make sure the OKI C9200 or C9400 PostScript printer is selected, then click Properties
(or your application's equivalent).
The OKI Properties dialog box appears.
4. Click the Print Quality tab, then click your resolution selection in the Resolution dropdown list.
5. Click OK and print the document.
181
Watermarks: Windows Me
General Information
A watermark is an image superimposed on the pages of a printed document. Normally a
watermark is a faint background image, but it can be any color, any intensity.
For example, the word "DRAFT" could be watermarked on a page:
You set the text, size, angle, font color and position of the watermark in the printer driver.
You can insert a watermark on:
the first page of your document or
on all pages of your document.
Watermarks: Windows Me PCL
Creating & Storing Watermarks: Windows Me PCL
To create and store a watermark in the Windows Me PCL driver:
1. Click Start → Settings → Printers.
The Printers dialog box appears.
2. Right click the OKI C9200 or C9400 PCL printer icon, then click Properties.
The OKI Properties dialog box appears.
3. Click the Watermark tab.
4. Type in the text, then select the Size, Angle, Font and Color.
5. Click Add.
The text appears in the Watermark list box.
6. Click OK and close the Printers dialog box.
Printing Using a Watermark: Windows Me PCL
To print a document with watermarks in the Windows Me PCL driver:
1. Open the document in the software application.
2. Click File → Print.
The Print dialog box appears.
3. Make sure the OKI C9200 or C9400 PCL printer is selected, then click Properties (or
your application's equivalent).
182
The OKI Properties dialog box appears.
4. Click the Watermark tab and select the watermark you wish to use from the Watermark
list (or create a new one).
5. To print the watermark only on the first page of the document, click First page only.
Otherwise the watermark will print on every page.
6. Click OK and print the document.
Modifying a Watermark: Windows Me PCL
To modify an existing watermark in the Windows Me PCL driver:
1. Click Start → Settings → Printers.
The Printers dialog box appears.
2. Right click the OKI C9200 or C9400 PCL printer icon and click Properties.
The OKI Properties dialog box appears.
3. Click the Watermarks tab, then click the watermark you wish to change:
4. Make your changes, then click Apply.
5. Click OK and close the Printers dialog box.
Deleting a Watermark: Windows Me PCL
To delete a watermark in the Windows Me PCL driver:
1. Click Start → Settings → Printers.
The Printers dialog box appears.
2. Right click the OKI C9200 or C9400 PCL printer icon, then click Properties.
The OKI Properties dialog box appears.
3. Click the Watermark tab, then click the watermark you wish to delete.
4. Click Remove then confirm the deletion by clicking Yes.
5. Click OK and close the Printers dialog box.
Watermarks: Windows Me PS
Creating & Storing Watermarks: Windows Me PS
To create and store a watermark in the Windows Me PostScript driver:
1. Click Start → Settings → Printers.
The Printers dialog box appears.
2. Right click the OKI C9200 or C9400 PostScript printer icon, then click Properties.
The OKI Properties dialog box appears.
3. Click the Watermarks tab.
4. Click New.
The New Watermark dialog box appears.
183
5. Type in the text, then select the Font, Size, Style, Angle, Position and Color.
6. Click OK twice and close the Printers dialog box.
Printing Using a Watermark; Windows Me PS
To print a document with watermarks in the Windows Me PostScript driver:
1. Open the document in the software application.
2. Click File → Print.
The Print dialog box appears.
3. Make sure the OKI C9200 or C9400 PostScript printer is selected, then click Properties
(or your application's equivalent.
The OKI Properties dialog box appears.
4. Click the Watermarks tab and select the watermark you wish to use from the Watermark
list (or create a new one).
5. Select where and how the watermark is to be printed under Print Watermark.
6. Click OK and close the Printers dialog box.
Modifying a Watermark: Windows Me PS
To modify an existing watermark in the Windows Me PostScript driver:
1. Click Start → Settings → Printers.
The Printers dialog box appears.
2. Right click the OKI C9200 or C9400 PostScript printer icon and click Properties.
The OKI Properties dialog box appears.
3. Click the Watermarks tab and select the watermark you wish to modify.
4. Click Edit.
The Edit Watermark dialog box appears.
184
5. Make your corrections, then click OK.
6. Click OK and close the Printers dialog box.
Deleting a Watermark: Windows Me PS
To delete a watermark in the Windows Me PostScript driver:
1. Click Start → Settings → Printers.
The Printers dialog box appears.
2. Right click the OKI C9200 or C9400 PostScript printer icon and click Properties.
The OKI Properties dialog box appears.
3. Click the Watermarks tab and select the watermark you wish to delete.
4. Click Delete and confirm the deletion.
5. Click OK and close the Printers dialog box.
Windows 98 & 95
Booklets (Signature Printing): Windows 98/95 PCL Driver
Note: Booklet printing is available only for the PCL driver.
General Information
Important! In order to print booklets, your printer must be equipped with the duplex unit
(standard on Models C9200dxn and C9400dxn, optional on Models C9200 and C9200n)
and the duplex unit must be activated in the driver (see "Activate the Duplex Unit in the
Driver ") and in the printer menu (see "Turning the Duplex Unit On in the Menu ").
Note: Some software applications do not support booklet printing.
185
Printing booklets allows you to print multiple pages on a single sheet—printing on both sides—
then fold the paper in half to form a booklet.
Example
If your document pages are 5.5" x 8.5" (portrait), you can set the printer up to print four
pages (landscape) per 8.5" x 11" sheet which would then be folded over to form a 5.5" x 8.5"
(portrait) booklet:
Booklets, Individual Print Jobs: Windows 98 & 95 PCL
To print a file as a booklet:
1. Load paper, print side down, in Tray 1.
Note: The Multi-Purpose Tray, Auxiliary Trays and High Capacity Feeder can not be
used for printing booklets.
2. In your software application, open the file you wish to print.
3. Click File → Print and make sure the OKI C9200 or C9400 PCL printer is selected, then
click Properties (or your application's equivalent).
The OKI Properties dialog box appears.
4. Click the Layout tab.
5. Under Finishing Mode, select Booklet from the drop-down list.
Note: If Booklet does not appear in the drop-down list, the duplex unit has not been
activated in the driver. On the Paper tab, click Device options, then click Duplex option
unit to select it and click OK.
6. If necessary, select the appropriate Signature from the drop-down list (normally No limit
is used).
Note: The term signature refers to the number of pages in the document to be included
in the booklet, and does not refer to the traditional printer's signature (imposition).
Generally, the setting for this should be left at No limit so that all the pages in the
document will be printed.
186
7. Click OK and print the document.
Setting Booklets as the Printer Default: Windows 98 & 95 PCL
To set booklet printing up as the printer default:
1. Click Start → Settings → Printers.
The Printers dialog box appears.
2. Right click the OKI C9200 or C9400 PCL printer icon, then click Properties.
The Properties dialog box appears.
3. Click the Layout tab.
4. Under Finishing Mode, select Booklet from the drop-down list.
5. If necessary, select the appropriate Signature from the drop-down list (normally No limit
is used).
Note: The term signature refers to the number of pages in the document to be included
in the booklet, and does not refer to the traditional printer's signature (imposition).
Generally, the setting for this should be left at No limit so that all the pages in the
document will be printed.
6. Click OK, then close the Printers dialog box.
Collating: Windows 98 & 95
General Information
Collated printing allows you to print multiple copies of a document as a series of individual
documents, as opposed to printing multiple copies of each page of the document then manually
collating the pages into documents.
Important! If you are using duplex printing with collating:
1. Select collated printing in your software application.
2. Select the number of copies in the driver (click Properties [or Setup or your
application's equivalent] in the Print dialog box and set the number of copies in the
driver for the Windows 2000 PCL driver, you must set the number of copies in the Paper
tab, not the General tab).
If your software application has a collated print option, use the software to select collated
printing rather than the printer driver. See your software application documentation for
information on how to do this.
If your software application does not have a collated printing option, you'll need to select it using
the printer driver.
187
Collating: Windows 98/95 PCL Driver
Printing using Collating: Windows 98/95 PCL
To print a job using collating in the Windows 98 & 95 PCL driver:
1. In your software application, open the file to be printed.
2. Click File → Print. The Print dialog box appears.
Important! If your application has a collate feature select it in the Print dialog
box. If you are using duplex printing, select the number of copies in the driver
(see step 4).
3. Make sure the OKI C9200 or C9400 PCL printer is selected, then click Properties (or
your application's equivalent).
The OKI Properties dialog box appears.
4. On the Paper tab, under Copies, enter the number of required copies.
If your application does not have the collate feature, click Printer Collate.
5. Click OK and proceed to print the job.
Setting Collate as the Default: Windows 98/95 PCL
To set collating as the default in the Windows 98 & 95 PCL driver:
1. Click Start → Settings → Printers.
The Printers dialog box appears.
2. Right click the OKI C9200 or C9400 PCL printer icon and click Properties.
The OKI Properties dialog box appears.
3. Click the Paper tab.
4. Under Copies, enter the number of required copies and click Printer Collate.
5. Click OK and close the Printers dialog box.
Collating: Windows 98/95Post Script Driver
Printing using Collating: Windows 98/95 PS
To print a job using collating in the Windows 98 & 95 PostScript driver:
1. In your software application, open the file to be printed.
2. Click File → Print.
The Print dialog box appears.
Important! If your application has a collate feature select it here. If you are using
duplex printing, select the number of copies in the driver (see step 4).
3. Make sure the OKI C9200 or C9400 PostScript printer is selected, then click Properties
(or your application's equivalent)
The OKI PS Properties dialog box appears.
4. On the Paper tab, under Copies, enter the number of required copies. If your application
does not have the collate feature, click Collate.
188
5. Click OK and proceed to print the job.
Setting Collate as the Default: Windows 98/95 PS
To set collate as the default in the Windows 98 & 95 PostScript driver:
1. Click Start → Settings → Printers.
The Printers dialog box appears.
2. Right click the OKI C9200 or C9400 PostScript printer icon, then click Properties.
The OKI Properties dialog box appears.
3. Click the Paper tab.
4. Under Copies, enter the number of required copies and click Collate.
5. Click OK and close the Printers dialog box.
Custom Page Sizes: Windows 98 & 95
General Information
To print custom page sizes, you must:
Use the Multi-Purpose Tray
Use the Straight-Through Exit path
Use a Custom Page Size defined in the printer driver:
Width range 3 to 12.9 inches (76 to 328 mm)
Length range 5 to 18 inches (127 to 457 mm)
Custom Page Sizes: Windows 98/95 PCL Driver
Note: Up to 32 custom paper sizes can be defined and stored.
Setting Up a Custom Page Size: Windows 98/95 PCL
To set up a Custom Page Size in the Windows 98 & 95 PCL driver:
1. Click Start → Settings → Printers.
The Printers dialog box appears.
2. Right click the OKI C9200 or C9400 PCL printer icon, then click Properties.
The OKI Properties dialog box appears.
3. Click the Paper tab, then click Custom Size.
The Custom size dialog box appears.
189
4. Type in the Name of the custom page size.
5. Click the desired Unit of measurement, then enter the Width and Length.
6. Click Add, then click OK.
The custom page size is added to the bottom of Size drop-down list.
Note: If you want to set the custom page size as the default, click it in the drop-down
list before continuing.
7. Click OK and close the Printers dialog box.
Printing Using a Custom Page Size: Windows 98/95 PCL
To print using a Custom Page Size in the Windows 98 & 95 PCL driver:
1. Open the file in your software application.
2. Load the custom size media in the Multi-Purpose Tray.
3. Make sure the straight-through exit tray is open.
190
4. Click File → Print.
The Print dialog box appears.
5. Make sure the OKI C9200 or C9400 PCL printer is selected, then click Properties (or
your application's equivalent).
The OKI Properties dialog box appears.
6. On the Paper tab, click the M on the printer drawing (or click Multi purpose tray from the
Source drop-down list).
7. Click the desired custom page size from the Size drop-down list.
8. Click OK and print the document.
Modifying a Custom Page Size: Windows 98/95 PCL
To modify a Custom Page Size in the Windows 98 & 95 PCL driver:
1. Click Start → Settings → Printers.
The Printers dialog box appears.
2. Right click the OKI C9200 or C9400 PCL printer icon, then click Properties.
The OKI Properties dialog box appears.
3. Click the Paper tab, then click Custom Size.
The Custom size dialog box appears.
4. Click the Name of the custom page size you wish to change.
5. Enter any changes, then click Modify.
191
6. Click OK twice, then close the Printers dialog box.
Deleting a Custom Page Size: Windows 98/95 PCL
To delete a Custom Page Size in the Windows 98 & 95 PCL driver:
1. Click Start → Settings → Printers.
The Printers dialog box appears.
2. Right click the OKI C9200 or C9400 PCL printer icon, then click Properties.
The OKI Properties dialog box appears.
3. Click the Paper tab, then click Custom Size.
The Custom size dialog box appears.
4. Click the Name of the custom page size you wish to delete.
5. Click Delete, then click Yes to confirm the deletion.
6. Click OK twice, then close the Printers dialog box.
Custom Page Sizes: Windows 98/95 PostScript Driver
Setting Up a Custom Page Size: Windows 98/95 PS
Note: Three Custom Page Sizes can be defined in the PostScript driver.
To set up a Custom Page Size in the Windows 98 & 95 PostScript driver:
1. Click Start → Settings → Printers.
The Printers dialog box appears.
2. Right click the OKI C9200 or C9400 PostScript printer icon, then click Properties.
The OKI Properties dialog box appears.
3. Click the Paper tab, then select Custom page 1, Custom page 2, or Custom page 3 in
the Size drop-down list.
4. Click Custom Size.
192
5. In the Paper name box, type in the name for the custom paper size.
6. Select a Unit of measure, then enter the Width and Length measurements.
7. Click OK.
The new custom size will appear near the bottom of the Size drop-down list.
8. Click OK and close the Printers dialog box.
Printing Using a Custom Page Size: Windows 98/95 PS
To print using a Custom Page Size in the Windows 98 & 95 PostScript driver:
1. Open the file in your software application.
2. Load the custom size media in the Multi-Purpose Tray.
3. Make sure the straight-through exit tray is open.
4. Click File → Print.
193
The Print dialog box appears.
5. Make sure the OKI C9200 or C9400 PostScript printer is selected, then click Properties
(or your application's equivalent).
The OKI Properties dialog box appears.
6. On the Paper tab, click Multi-Purpose tray in the Source drop-down list.
7. Click the desired custom page size from the Size drop-down list.
8. Click OK and proceed to print the job.
Modifying a Custom Page Size: Windows 98/95 PS
To modify a Custom Page Size in the Windows 98 & 95 PostScript driver:
1. Click Start → Settings → Printers.
The Printers dialog box appears.
2. Right click the OKI C9200 or C9400 PostScript printer icon, then click Properties(or your
application's equivalent).
The OKI PS Properties dialog box appears.
3. Click the Paper tab.
4. In the Size drop-down list, click the custom page size to be modified.
5. Click Custom Size.
The Custom Paper Size dialog box appears.
6. Make any changes in Paper name, Width, and Length, then click OK.
7. Click OK and close the Printers dialog box.
Duplex Printing: Windows 98/95
General Information
Models equipped with the duplex unit can be used to print on both sides of the paper.
Note: Models C9200dxn and C9400dxn include the duplex unit; Models C9200 and C9200n
must have the optional duplex unit installed before they can be used for duplex printing.
To use duplex printing:
The duplex unit must be activated in the driver.
Paper must be fed from Tray 1 (or one of the optional Auxiliary Trays or the optional High
Capacity Feeder trays)
194
Paper weight must be 20 to 28 lb (74 to 108 g/m2)
Paper sizes supported:
- Letter (long or short edge)
- Legal-14
- Legal-13.5
- Legal-13
- Tabloid
- Tabloid Extra
- Executive
- A3
- A3 Wide
- A4 (long or short edge)
- A5
- B4
- B5 (long or short edge).
Note: If you experience significant curling when printing in the duplex mode and you're using
20 or 24-lb. paper, switch to 28-lb. paper.
Duplex Printing from a Software Application: Windows 98/95
Note: If you haven't already done so, before attempting duplex printing you must activate the
duplex unit in the driver (PCL, PostScript).
Duplex Printing: Windows 98/95 PCL
1. Open the document in your software application.
2. Click File → Print.
The Print dialog box appears.
3. Make sure the OKI C9200 or C9400 PCL driver is selected, then click Properties (or your
application's equivalent).
The OKI Properties dialog box appears.
4. Click the Layout tab, then select Long edge (
sided printing.
) or Short edge ( ) binding under 2-
5. Click OK and print the document.
Duplex Printing: Windows 98/95 PS
1. Open the document in your software application.
2. Click File → Print.
The Print dialog box appears.
3. Make sure the OKI C9200 or C9400 PostScript driver is selected, then click Properties
(or your application's equivalent).
The OKI PS Properties dialog box appears.
4. Click the Layout tab.
5. Under 2-sided printings, click your selection of Flip on long edge (
) or Flip on short
195
edge ( ) from the drop-down list.
6. Click OK and print the document.
Setting Duplex Printing as the Default: Windows 98/95
Setting Duplex Printing as the Printer Default: Windows 98/95 PCL
To set Duplex printing as the default in the Windows 98 & 95 PCL Driver:
1. Change the Duplex setting in the printer menu to ON.
2. Click Start → Settings → Printers.
The Printers dialog box appears.
3. Right click the OKI C9200 or C9400 PCL printer icon, then click Properties.
The OKI Properties dialog box appears.
4. Click the Layout tab.
5. Under 2-Sided printing, click Long edge (
down list.
) or Short edge ( ) binding from the drop-
Note: If these items are grayed out, you need to turn the duplex unit on in the driver.
6. Click OK and close the Printers dialog box.
Setting Duplex Printing as the Printer Default: Windows 98/95 PS
To set Duplex printing as the default in the Windows 98 & 95 PostScript Driver:
1. Change the Duplex setting in the printer menu to ON.
2. Click Start → Settings → Printers. The Printers dialog box appears.
3. Right click the OKI C9200 or C9400 PostScript printer icon, then click Properties. The
OKI PS Properties dialog box appears.
4. Click the Layout tab.
5. Under 2-sided printings, click your selection of Flip on long edge (
) or Flip on short
edge ( ) from the drop-down list.
Note: If these items are grayed out, you need to turn the duplex unit on in the driver.
6. Click OK and close the Printers dialog box.
Fit to Page: Windows 98/95, PCL Only
This feature allows you to print a document on a different size media by reducing or enlarging it
to fit on the page. For example, you can proof a custom-size document on standard size paper,
reserving the special custom-size paper for use only for the final printing.
Using Fit to Page:
196
Note: If the document size is significantly larger than the print media, portions of the edge of
the document will be cut off to fit it on the page.
1. With the document you wish to print open in your software application, click File → Print.
The Print dialog box appears.
2. Make sure the OKI C9200 or C9400 PCL driver is selected, then click Properties (or your
application's equivalent).
3. On the Paper tab: if necessary, select the Source, then click the checkbox beside Fit to
Page.
A drop-down list appears below Fit to Page.
4. Under Size, click the paper size representing the document you wish to print, then select the
size conversion you wish to use from the drop-down list.
Example
To print a tabloid size document on letter-size paper:
5. Click OK then print the document.
N-Up: Windows 98 & 95
General Information
This feature is handy for saving paper when proofing a multi-page document. You can print up
to 16 reduced-size pages on one sheet of paper.
Choices include:
2-up
4-up
6-up
9-up
16-up
For example, if you select 4-up printing:
197
Each page will be reduced to 25% of its original size.
Four pages will print on each sheet for one-sided printing; eight pages with two-sided
(duplex) printing engaged.
N-Up Printing: Windows 98/95 PCL Driver
To print a job using N-Up printing in the Windows 98 & 95 PCL driver:
1. Open the document in the software application.
2. Click File → Print.
The Print dialog box appears.
3. Make sure the OKI C9200 or C9400 PCL printer is selected, then click Properties (or
your application's equivalent).
The OKI Properties dialog box appears.
4. Click the Layout tab. Under Finishing Mode, click the number of pages to be printed per
sheet.
5. Click your choice from the Page Borders drop-down list
6. Click OK and print the document.
N-Up Printing: Windows 98/95 PostScript Driver
To print a job using N-Up printing in the Windows 98 & 95 PostScript driver:
1. Open the document in the software application.
2. Click File → Print.
The Print dialog box appears.
3. Make sure the OKI C9200 or C9400 PostScript printer is selected, then click Properties
(or Setup. or your application's equivalent).
The OKI Properties dialog box appears.
4. Click the Layout tab. Under Pages on Sheet, click the number of pages to be printed per
sheet.
5. Click OK and print the document.
198
Print Resolution: Windows 98 & 95
General Information
The print resolution is set in units of dots per inch (dpi).
Generally, the higher the resolution, the higher the quality of the printed graphic images.
Higher resolutions use up more toner, require larger amounts of disk space for spooling and will
increase the time required to print a job. For example, a 1200 dpi x 1200 dpi print job is up to
four times the size of a 600 dpi x 600 dpi print job.
Models C9200, C9200n & C9200dxn: PCL & PostScript Modes
Default is in red bold print.
Resolution
Use for
Speed
600 x 600 dpi
Proofing
Fast
600 x 1200 dpi
Highest quality images
Slower
Model C9400dxn: PCL Mode
Default is in red bold print.
Resolution
Use for
Speed
600 x 600 dpi
Proofing
Fastest
Fast 1200
(600 x 1200 dpi)
Higher quality images
Medium Fast
1200 x 1200 dpi
Highest quality images
Slowest
Model C9400dxn: PostScript Mode
Default is in red bold print.
Resolution
Use for
Speed
600 x 600 dpi
Proofing
Fastest
1200 x 1200 dpi
Highest quality images
Slowest
Setting the Default Print Resolution: Windows 98 & 95 PCL Driver
1. Click Start → Settings → Printers.
The Printers dialog box appears.
2. Right click the OKI C9200 or C9400 PCL printer icon, then click Properties.
The OKI Properties dialog box appears.
3. Click the Quality tab, then click your resolution selection under Resolution.
199
4. Click OK and close the Printers dialog box.
Changing the Resolution for a Print Job: Windows 98 & 95 PCL Driver
1. Open the document in the application.
2. Click File → Print.
The Print dialog box appears.
3. Make sure the OKI C9200 or C9400 PCL printer is selected, then click Properties (or
your application's equivalent).
The OKI Properties dialog box appears.
4. Click the Quality tab, then click your resolution selection under Resolution.
200
5. Click OK and print the document.
Setting the Default Print Resolution: Windows 98 & 95 PostScript Driver
1. Click Start → Settings → Printers.
The Printers dialog box appears.
Right click the OKI C9200 or C9400 PostScript printer icon, then click Properties. The
OKI Properties dialog box appears.
2. Click the Print Quality tab, then click your resolution selection in the Resolution dropdown list.
3. Click OK and close the Printers dialog box.
Changing the Resolution for a Print Job: Windows 98 & 95 PostScript Driver
1. Open the document in the application.
2. Click File → Print.
The Print dialog box appears.
3. Make sure the OKI C9200 or C9400 PostScript printer is selected, then click Properties
(or your application's equivalent).
The OKI Properties dialog box appears.
4. Click the Print Quality tab, then click your resolution selection in the Resolution dropdown list.
5. Click OK and print the document.
201
Watermarks: Windows 98 & 95
General Information
A watermark is an image superimposed on the pages of a printed document. Normally a
watermark is a faint background image, but it can be any color, any intensity.
For example, the word "DRAFT" could be watermarked on a page:
You set the text, size, angle, font color and position of the watermark in the printer driver.
You can insert a watermark on:
the first page of your document or
on all pages of your document.
Watermarks: Windows 98/95 PCL Driver
Creating & Storing Watermarks: Windows 98/95 PCL
To create and store a watermark in the Windows 98 & 95 PCL driver:
1. Click Start → Settings → Printers.
The Printers dialog box appears.
2. Right click the OKI C9200 or C9400 PCL printer icon , then click Properties.
The OKI Properties dialog box appears.
3. Click the Watermarks tab.
4. Type in the text, then select the Size, Angle, Font and Color.
5. Click Add.
The text appears in the Watermark list box.
6. Click OK and close the Printers dialog box.
Printing using Watermarks: Windows 98/95 PCL
To print a document with watermarks in the Windows 98 & 95 PCL driver:
1. Open the document in the software application.
2. Click File → Print.
The Print dialog box appears.
202
3. Make sure the OKI C9200 or C9400 PCL printer is selected, then click Properties (or
your application's equivalent).
The OKI Properties dialog box appears.
4. Click the Watermarks tab and select the watermark you wish to use from the Watermark
list (or create a new one).
5. To print the watermark only on the first page of the document, click First page only.
Otherwise the watermark will print on every page.
6. Click OK and print the document.
Modifying a Watermark: Windows 98/95 PCL
To modify an existing watermark in the Windows 98 & 95 PCL driver:
1. Click Start → Settings → Printers.
The Printers dialog box appears.
2. Right click the OKI C9200 or C9400 PCL printer icon and click Properties.
The OKI Properties dialog box appears.
3. Click the Watermarks tab, then click the watermark you wish to change:
4. Make your changes, then click Apply.
5. Click OK and close the Printers dialog box.
Deleting a Watermark: Windows 98/95 PCL
To delete a watermark in the Windows 98 & 95 PCL driver:
1. Click Start → Settings → Printers.
The Printers dialog box appears.
2. Right click the OKI C9200 or C9400 PCL printer icon, then click Properties.
The OKI Properties dialog box appears.
3. Click the Watermarks tab, then click the watermark you wish to delete.
4. Click Remove then confirm the deletion by clicking Yes.
5. Click OK and close the Printers dialog box.
Watermarks: Windows 98/95 PostScript Driver
Creating & Storing Watermarks: Windows 98/95 PS
To create and store a watermark in the Windows 98 & 95 PostScript driver:
1. Click Start → Settings → Printers.
The Printers dialog box appears.
2. Right click the OKI C9200 or C9400 PostScript printer icon, then click Properties.
The OKI Properties dialog box appears.
3. Click the Watermarks tab.
4. Click New.
The New Watermark dialog box appears.
203
5. Type in the text, then select the Font, Size, Style, Angle, Position and Color.
6. Click OK twice and close the Printers dialog box.
Printing Using a Watermark: Windows 98/95 PS
To print a document with watermarks in the Windows 98 & 95 PostScript driver:
1. Open the document in the software application.
2. Click File → Print.
The Print dialog box appears.
3. Make sure the OKI C9200 or C9400 PostScript printer icon is selected, then click
Properties (or your application's equivalent.
The OKI Properties dialog box appears.
4. Click the Watermarks tab and select the watermark you wish to use from the Watermark
list (or create a new one).
5. Select where and how the watermark is to be printed under Print Watermark.
6. Click OK and close the Printers dialog box.
Modifying a Watermark: Windows 98/95 PS
To modify an existing watermark in the Windows 98 & 95 PostScript driver:
1. Click Start → Settings → Printers.
The Printers dialog box appears.
2. Right click the OKI C9200 or C9400 PostScript printer icon and click Properties.
The OKI Properties dialog box appears.
3. Click the Watermarks tab and select the watermark you wish to modify.
4. Click Edit.
The Edit Watermark dialog box appears.
204
5. Make your changes, then click OK.
6. Click OK and close the Printers dialog box.
Deleting a Watermark: Windows 98/95 PS
To delete a watermark in the Windows 98 & 95 PostScript driver:
1. Click Start → Settings → Printers.
The Printers dialog box appears.
2. Right click the OKI C9200 or C9400 PostScript printer icon and click Properties.
The OKI Properties dialog box appears.
3. Click the Watermarks tab and select the watermark you wish to delete.
4. Click Delete and confirm the deletion.
5. Click OK and close the Printers dialog box.
Windows NT 4.0
Booklets (Signature Printing): Windows NT 4.0 PCL Driver
Note: Booklet printing is available only for the PCL driver.
General Information
Important! In order to print booklets, your printer must be equipped with the duplex unit
(standard on Models C9200dxn and C9400dxn, optional on Models C9200 and C9200n)
and the duplex unit must be activated in the driver (see "Activate the Duplex Unit in the
Driver ") and in the printer menu (see "Turning the Duplex Unit On in the Menu ").
Note: Some software applications do not support booklet printing.
205
Printing booklets allows you to print multiple pages on a single sheet—printing on both sides—
then fold the paper in half to form a booklet.
Example
If your document pages are 5.5" x 8.5" (portrait), you can set the printer up to print four
pages (landscape) per 8.5" x 11" sheet which would then be folded over to form a 5.5" x 8.5"
(portrait) booklet:
Booklets, Individual Print Jobs: Windows NT 4.0 PCL
To print a file as a booklet using the Windows NT 4.0 PCL driver:
1. Load paper, print side down, in Tray 1.
Note: The Multi-Purpose Tray, Auxiliary Trays and High Capacity Feeder can not be
used for printing booklets.
2. In your software application, open the file you wish to print.
3. Click File → Print and make sure the OKI C9200 or C9400 PCL printer is selected, then
click Properties (or your application's equivalent).
The OKI Properties dialog box appears.
4. Click the Layout tab. Under Finishing mode, select Booklet from the drop-down list.
5. If necessary, select the appropriate Signature from the drop-down list (normally No limit
is used).
Note: The term signature refers to the number of pages in the document to be included
in the booklet, and does not refer to the traditional printer's signature (imposition).
Generally, the setting for this should be left at No limit so that all the pages in the
document will be printed.
6. Click OK and print the document.
Setting Booklets as the Printer Default: Windows NT 4.0 PCL
206
To set booklet printing up as the printer default in the Windows NT 4.0 PCL driver:
1. Click Start → Settings → Printers.
The Printers dialog box appears.
2. Right click the OKI C9200 or C9400 PCL printer icon, then click Document Defaults.
The OKI Default dialog box appears.
3. Click the Layout tab. Under Finishing mode, select Booklet from the drop-down list.
4. If necessary, select the appropriate Signature from the drop-down list (normally No limit
is used).
Note: The term signature refers to the number of pages in the document to be included
in the booklet, and does not refer to the traditional printer's signature (imposition).
Generally, the setting for this should be left at No limit so that all the pages in the
document will be printed.
5. Click OK and close the Printers dialog box.
Collating: Windows NT 4.0
General Information
Collated printing allows you to print multiple copies of a document as a series of individual
documents, as opposed to printing multiple copies of each page of the document then manually
collating the pages into documents.
Important! If you are using duplex printing with collating:
1. Select collated printing in your software application.
2. Select the number of copies in the driver (click Properties [or your application's
equivalent] in the Print dialog box and set the number of copies in the driver for the
Windows 2000 PCL driver, you must set the number of copies in the Paper tab, not the
General tab).
If your software application has a collated print option, use the software to select collated
printing rather than the printer driver. See your software application documentation for
information on how to do this.
If your software application does not have a collated printing option, you'll need to select it using
the printer driver.
Collating: Windows NT 4.0 PCL Driver
Printing using Collating: Windows NT 4.0 PCL
To print a job using collating in the Windows NT 4.0 PCL driver:
1. In the software application, open the file to be printed.
207
2. Click File → Print.
The Print dialog box appears.
Important!
If your application has a collate feature select it here.
If you are using duplex printing, select the number of copies in the driver (see
step 4).
3. Make sure the OKI C9200 or C9400 PCL printer is selected, then click Properties (or
your application's equivalent).
The OKI Properties dialog box appears:
4. On the Paper tab under Copies, enter the number of copies to be made. If your
application does not have a collate feature, click Printer collate.
5. Click OK and print the document.
Setting Collate as the Default: Windows NT 4.0 PCL
To set collate as the default in the Windows NT 4.0 PCL driver:
1. Click Start → Settings → Printers.
The Printers dialog box appears.
2. Right click the OKI C9200 or C9400 PCL printer icon, then click Document Defaults.
The OKI Default dialog box appears:
3. On the Paper tab under Copies, enter the number of copies to be made and click Printer
collate.
4. Click OK and close the Printers dialog box.
Collating: Windows NT 4.0 PostScript Driver
Printing using Collating: Windows NT 4.0 PS
To print a job using collating in the Windows NT 4.0 PostScript driver:
1. Open the document in the software application.
2. Click File → Print.
The Print dialog box appears.
Important! If your application has a collate feature select it here. If you are using
duplex printing, select the number of copies in the driver (see step 4)
3. Make sure the OKI C9200 or C9400 PostScript printer icon is selected, then click
Properties (or your application's equivalent).
The OKI Properties dialog box appears.
4. Under Paper/Output, click Copy Count and enter the number of copies to be printed
under Change 'Copy Count' Setting.
5. If your application does not have the collate feature, scroll down to Collate and click it,
208
then click Yes under Change 'Collate' Setting.
6. Click OK and print the document.
Setting Collate as the Default: Windows NT 4.0 PS
To set collate as the default in the Windows NT 4.0 PostScript driver:
1. Click Start → Settings → Printers.
The Printers dialog box appears.
2. Right click the OKI C9200 or C9400 PostScript printer icon and click Document Default.
The OKI Default dialog box appears.
3. Under Paper/Output, click Copy Count and enter the number of copies to be printed
under Change 'Copy Count' Setting:
4. Click Collate, then click Yes under Change 'Collate' Setting:
5. Click OK and close the Printers dialog box.
Custom Page Sizes: Windows NT 4.0
General Information
To print custom page sizes, you must:
Use the Multi-Purpose Tray
Use the Straight-Through Exit path
Use a Custom Page Size defined in the printer driver:
Width range 3 to 12.9 inches (76 to 328 mm)
Length range 5 to 18 inches (127 to 457 mm)
Custom Page Sizes: Windows NT 4.0 PCL Driver
Creating and Storing a Custom Page Size: Windows NT 4.0 PCL
Note: You can save up to 32 Custom Page Sizes.
To set up a Custom Page Size in the Windows NT 4.0 PCL driver:
1. Click Start → Settings → Printers.
The Printers dialog box appears.
2. Right click the OKI C9200 or C9400 PCL printer icon, then click Document Defaults.
The OKI Default dialog box appears.
3. Click Custom size.
The Custom size dialog box appears:
209
4. Select a Unit of measure, then enter the Width and Length you wish to use.
5. Enter a Name (up to 12 characters) for the custom page size, then click Add.
The name appears in the box.
6. Click OK.
The name you entered now appears at the end of the Media Size drop-down list.
7. Click OK and close the Printers dialog box.
Printing Using a Custom Page Size: Windows NT 4.0 PCL
To print using a Custom Page Size in the Windows NT 4.0 PCL driver:
1. Open the document in your software application.
2. Load the custom print media in the Multi-Purpose Tray.
3. Make sure the straight-through exit tray is open.
210
4. From your software application, select File → Print.
The Print dialog box appears.
5. Make sure the OKI C9200 or C9400 PCL printer icon is selected, then click Properties
(or your application's equivalent).
The OKI Properties dialog box appears.
6. On the Paper tab, click the M in the illustration (or click Multi purpose tray in the Source
drop-down list).
7. Under Size, click the appropriate custom page size name.
8. Click OK and print the document.
Setting a Custom Page Size as the Default: Windows NT 4.0 PCL
If you wish to set a Custom Page Size as the default in the NT 4.0 PCL driver:
1. Click Start → Settings → Printers.
The Printers dialog box appears.
2. Right click the OKI C9200 or C9400 PCL printer icon, then click Document Defaults.
The OKI Default dialog box appears.
3. Click the M in the illustration or click Multi purpose tray in the Source drop-down list.
4. Click the appropriate custom page size name from the Media Size drop-down list.
5. Click OK and close the Printers dialog box.
Modifying a Custom Page Size: Windows NT 4.0 PCL
To change the size or name of an established Custom Page Size in the NT 4.0 PCL driver:
1. Click Start → Settings → Printers.
The Printers dialog box appears.
2. Right click the printer icon, then click Document Defaults.
The OKI Default dialog box appears.
3. Click Custom size.
The Custom size dialog box appears.
4. In the box, click the name of the custom size you wish to modify, then make any
changes.
211
5. Click Modify.
The changes are reflected in the box.
6. Click OK twice, then close the Printers dialog box.
Deleting a Custom Page Size: Windows NT 4.0 PCL
To delete a Custom Page Size in the Windows NT 4.0 PCL driver:
1. Click Start → Settings → Printers.
The Printers dialog box appears.
2. Right click the OKI C9200 or C9400 PCL printer icon, then click Document Defaults.
The OKI Default dialog box appears.
3. Click Custom size.
The Custom size dialog box appears.
4. In the box, click the name of the custom size you wish to delete.
5. Click Delete, then click Yes to confirm the deletion.
6. Click OK twice, then close the Printers dialog box.
212
Custom Page Sizes: Windows NT 4.0 PostScript Driver
Creating the Default Custom Page Size: Windows NT 4.0 PS
Note: In the PostScript driver, you can set up one Custom Page Size in the driver to save for
future use.
To create a Custom Page Size in the Windows NT 4.0 PostScript driver:
1. Click Start → Settings → Printers.
The Printers dialog box appears.
2. Right click the OKI C9200 or C9400 PostScript printer icon, then click Document
Defaults.
The OKI Default dialog box appears.
3. Click Paper Size, and select PostScript Custom Page Size from the Change 'Paper Size'
Setting drop-down list.
4. Click Edit of Custom Paper.
The PostScript Custom Page Size Definition dialog box appears:
5. Select a Paper Feed Direction:
Notes
Maximum width for Long Edge First is 12.9 inches.
Paper length must be greater than the paper width.
• Long Edge First = media feeds in long edge first
• Short Edge First = media feeds in short edge first
• Long Edge First (flipped) = Reserved for future use.
• Short Edge First (flipped) = Reserved for future use.
6. Select a Unit of measure, then enter the Width and Height you wish to use.
7. Click OK.
8. Click OK and close the Printers dialog box.
213
Printing Using a Custom Page Size: Windows NT 4.0 PS
To print using a Custom Page Size in the Windows NT 4.0 PostScript driver:
1. Open the document in your software application.
2. Load the custom print media in the Multi-Purpose Tray.
3. Make sure the straight-through exit is open.
4. From your software application, select File → Print.
The Print dialog box appears.
5. Make sure the OKI C9200 or C9400 PostScript printer is selected, then click Properties
(or Setup, or your application's equivalent).
The OKI Properties dialog box appears.
6. Click Paper Size, then select PostScript Custom Page Size from the Change 'Paper
Size' Setting drop-down list.
7. To modify the custom page size or to view the current settings, click Edit of Custom
Paper.
The PostScript Custom Page Size Definition dialog box appears:
214
8. Make any changes, then click OK.
9. Click OK twice and print the document.
Modifying the Default Custom Page Size: Windows NT 4.0 PS
To modify the default Custom Page Size in the Windows NT 4.0 PostScript driver:
1. Click Start → Settings → Printers.
The Printers dialog box appears.
2. Right click the OKI C9200 or C9400 PostScript printer icon, then click Document
Defaults.
The OKI Default dialog box appears.
3. Click Paper Size, and select PostScript Custom Page Size from the Change 'Paper Size'
Setting list.
4. Click Edit of Custom Paper.
The PostScript Custom Page Size Definition dialog box appears:
5. Make any changes you wish to make in the settings, then click OK.
6. Click OK and close the Printers dialog box.
215
Duplex Printing: Windows NT 4.0
General Information
Models equipped with the duplex unit can be used to print on both sides of the paper.
Note: Models C9200dxn and C9400dxn include the duplex unit; Models C9200 and C9200n
must have the optional duplex unit installed before they can be used for duplex printing.
To use duplex printing:
The duplex unit must be activated in the driver.
Paper must be fed from Tray 1 (or one of the optional Auxiliary Trays or the optional High
Capacity Feeder trays)
Paper weight must be 20 to 28 lb (74 to 108 g/m2)
Paper sizes supported:
- Letter (long or short edge)
- Legal-14
- Legal-13.5
- Legal-13
- Tabloid
- Tabloid Extra
- Executive
- A3
- A3 Wide
- A4 (long or short edge)
- A5
- B4
- B5 (long or short edge).
Note: If you experience significant curling when printing in the duplex mode and you're using
20 or 24-lb. paper, switch to 28-lb. paper.
Duplex Printing from a Software Application: Windows NT 4.0
Note: If you haven't already done so, before attempting duplex printing you must activate the
duplex unit in the driver (PCL, PostScript).
Duplex Printing: Windows NT 4.0 PCL
1. Open the document in your software application.
2. Click File → Print.
The Print dialog box appears.
3. Make sure the C9200 or C9400 PCL driver is selected, then click Properties (or your
application's equivalent).
The OKI Properties dialog box appears:
4. Click the Layout tab.
216
5. Select Long edge (
) or Short edge (
) binding under 2-sided printing.
6. Click OK and print the document.
Duplex Printing: Windows NT 4.0 PS
1. Open the document in your software application.
2. Click File → Print.
The Print dialog box appears.
3. Make sure the C9200 or C9400 PostScript driver is selected, then click Properties (or
your application's equivalent).
The OKI Properties dialog box appears.
4. Scroll down to Layout and click 2-Sided Printing, then select either Long Side (
) or
Short Side ( ) binding under Change '2-Sided Printing' Setting.
Note: If 2-Sided Printing is grayed out, you need to activate the duplex unit in the
driver.
5. Click OK and print the document.
Duplex Printing as the Default: Windows NT 4.0
Setting Duplex Printing as the Default: Windows NT 4.0 PCL
To set Duplex printing as the default in the Windows NT 4.0 PCL driver:
1. Make sure duplex printing is turned on in the Printer menu.
2. Click Start → Settings → Printer.
The Printers dialog box appears.
3. Right click the OKI C9300 or C9400 PCL printer icon, then click Document Defaults.
The OKI Default dialog box appears.
4. Click the Layout tab.
5. Select Long edge (
) or Short edge ( ) binding in the 2-sided printing drop-down list.
Note: If these items are grayed out, you need to turn the duplex unit on in the driver.
6. Click OK and close the Printers dialog box.
Setting Duplex Printing as the Default: Windows NT 4.0 PS
To set Duplex printing as the default in the Windows NT 4.0 PostScript driver:
1. Make sure duplex printing is turned on in the printer menu.
2. Click Start → Settings → Printer.
The Printers dialog box appears.
3. Right click the OKI C9200 or C9400 PostScript printer icon, then click Document
Defaults.
The OKI Defaults dialog box appears.
217
4. Scroll down to Layout and click 2-Sided Printing, then select either Long Side (
) or
Short Side ( ) binding under Change '2-Sided Printing' Setting.
Note: If 2-Sided Printing is grayed out, you need to activate the duplex unit in the
driver.
5. Click OK and close the Printers dialog box.
Fit to Page: Windows NT 4.0, PCL Only
This feature allows you to print a document on a different size media by reducing or enlarging it
to fit on the page. For example, you can proof a custom-size document on standard size paper,
reserving the special custom-size paper for use only for the final printing.
Using Fit to Page:
Note: If the document size is significantly larger than the print media, portions of the edge of
the document will be cut off to fit it on the page.
1. With the document you wish to print open in your software application, click File → Print.
The Print dialog box appears.
2. Make sure the OKI C9200 or C9400 PCL driver is selected, then click Properties (or your
application's equivalent).
3. On the Paper tab: if necessary, select the Source, then click the checkbox beside Fit to
Page.
A drop-down list appears below Fit to Page.
4. Under Size, click the paper size representing the document you wish to print, then select the
size conversion you wish to use from the drop-down list.
Example
To print a tabloid size document on letter-size paper:
5. Click OK then print the document.
218
N-Up: Windows NT 4.0
General Information
This feature is handy for saving paper when proofing a multi-page document. You can print up
to 16 reduced-size pages on one sheet of paper.
Choices include:
2-up
4-up
6-up
9-up
16-up
For example, if you select 4-up printing:
Each page will be reduced to 25% of its original size.
Four pages will print on each sheet for one-sided printing; eight pages with two-sided
(duplex) printing engaged.
N-Up Printing: Windows NT 4.0 PCL Driver
To print a job using N-Up printing in the Windows NT 4.0 PCL driver:
1. Open the document in the software application.
2. Click File → Print.
The Print dialog box appears.
3. Make sure the OKI C9200 or C9400 PCL driver is selected, then click Properties (or your
application's equivalent).
The OKI Properties dialog box appears.
4. Click the Layout tab. Under Finishing Mode, select the number of pages you wish to print
on each sheet from the Pages per sheet drop-down list.
5. Click your choice from the Page Borders drop-down list.
6. Click OK and print the document.
N-Up Printing: Windows NT 4.0 PS
219
To print a job using N-Up printing in the Windows NT 4.0 PostScript driver:
1. Open the document in the software application.
2. Click File → Print. The Print dialog box appears.
3. Make sure the OKI C9200 or C9400 PostScript driver is selected, then click Properties
(or your application's equivalent). The OKI Document Properties dialog box appears:
4. Scroll down to Page Layout (N-up) Option, then click it. Click the number of pages you
wish to print on a page under Change 'Page Layout (N-Up) Option' Setting.
5. Click OK and print the document.
Print Resolution: Windows NT 4.0
General Information
The print resolution is set in units of dots per inch (dpi).
Generally, the higher the resolution, the higher the quality of the printed graphic images.
Higher resolutions use up more toner, require larger amounts of disk space for spooling and will
increase the time required to print a job. For example, a 1200 dpi x 1200 dpi print job is up to
four times the size of a 600 dpi x 600 dpi print job.
Models C9200, C9200n & C9200dxn: PCL & PostScript Modes
Default is in red bold print.
Resolution
Use for
Speed
600 x 600 dpi
Proofing
Fast
600 x 1200 dpi
Highest quality images
Slower
Model C9400dxn: PCL Mode
Default is in red bold print.
Resolution
Use for
Speed
600 x 600 dpi
Proofing
Fastest
Fast 1200
(600 x 1200 dpi)
Higher quality images
Medium Fast
1200 x 1200 dpi
Highest quality images
Slowest
Model C9400dxn: PostScript Mode
Default is in red bold print.
Resolution
Use for
Speed
600 x 600 dpi
Proofing
Fastest
1200 x 1200 dpi
Highest quality images
Slowest
220
Setting the Default Print Resolution: Windows NT 4.0 PCL
1. Click Start → Settings → Printers.
The Printers dialog box appears.
2. Right click the OKI C9200 or C9400 PCL printer icon, then click Document Defaults.
The OKI Default dialog box appears.
3. Click the Quality tab, then click your resolution selection under Resolution.
4. Click OK and close the Printers dialog box.
Changing the Resolution for a Print Job: Windows NT 4.0 PCL
1. Open the document in the application.
2. Click File → Print.
The Print dialog box appears.
3. Make sure the OKI C9200 or C9400 PCL printer is selected, then click Properties (or
your application's equivalent).
The OKI Properties dialog box appears.
4. Click the Quality tab, then click your resolution selection under Resolution.
221
5. Click OK and print the document.
Setting the Default Print Resolution: Windows NT 4.0 PS
1. Click Start → Settings → Printers.
The Printers dialog box appears.
2. Right click the OKI C9200 or C9400 PostScript printer icon, then click Document
Defaults.
The OKI Default dialog box appears.
3. Scroll down to Quality, then click Resolution.
4. Click your selection under Change 'Resolution' Setting.
5. Click OK and close the Printers dialog box.
Changing the Resolution for a Print Job: Windows NT 4.0 PS
1. Open the document in the application.
2. Click File → Print.
The Print dialog box appears.
3. Make sure the OKI C9200 or C9400 PostScript printer is selected, then click Properties
(or your application's equivalent).
The OKI Properties dialog box appears.
4. Scroll down to Quality, then click Resolution.
5. Click your selection under Change 'Resolution' Setting.
6. Click OK and print the document.
222
Watermarks: Windows NT 4.0 PCL
Note: Watermarks can only be printed in Windows NT 4.0 using the PCL driver.
General Information
A watermark is an image superimposed on the pages of a printed document. Normally a
watermark is a faint background image, but it can be any color, any intensity.
For example, the word "DRAFT" could be watermarked on a page:
You set the text, size, angle, font color and position of the watermark in the printer driver.
You can insert a watermark on:
the first page of your document or
on all pages of your document.
Creating Watermarks: Windows NT 4.0 PCL
To create a watermark
1. Click Start → Settings → Printers.
The Printers dialog box appears.
2. Right click the OKI C9200 or C9400 PCL printer icon, then click Document Defaults.
The OKI Default dialog box appears.
3. Click the Watermark tab.
4. Type in the text, then select the Size, Angle, Font and Color.
5. Click Add. The text appears in the Watermark list box:
6. Click OK and close the Printers dialog box.
Printing Using a Watermark: Windows NT 4.0 PCL
To print a document with a watermark:
1. Open the document in the software application.
223
2. Click File → Print.
The Print dialog box appears.
3. Make sure the OKI C9200 or C9400 PCL printer is selected, then click Properties (or
your application's equivalent).
The OKI Properties dialog box appears.
4. Click the Watermark tab and select the watermark you wish to use from the Watermark
list (or create a new one).
5. To print the watermark only on the first page of the document, click First page only.
Otherwise the watermark will print on every page.
6. Click OK and print the document.
Modifying a Watermark: Windows NT 4.0 PCL
To edit an existing watermark:
1. Click Start → Settings → Printers.
The Printers dialog box appears.
2. Right click the OKI C9200 or C9400 PCL printer icon, then click Document Defaults.
The OKI Default dialog box appears.
3. Click the Watermark tab, then click the watermark you wish to change:
4. Make your changes, then click Apply.
5. Click OK and close the Printers dialog box.
Deleting a Watermark: Windows NT 4.0 PCL
To delete a watermark:
1. Click Start → Settings → Printers.
The Printers dialog box appears.
2. Right click the OKI C9200 or C9400 PCL printer icon, then click Document Defaults.
The OKI Default dialog box appears.
3. Click the Watermark tab.
4. Click the watermark you wish to delete, then click Remove.
5. Click Yes to confirm the removal.
6. Click OK and close the Printers dialog box.
224
Proof & Print
General Information
Note: Proof & Print is not available for the Macintosh®.
Proof & Print allows printing a single copy of a document for checking before printing
multiple copies of the same document.
Proof & Print automatically collates the printed copies.
Proof & Print requires that the printer be equipped with the internal hard disk drive
(standard on Models C9200n, C9200dxn and C9400dxn; optional on Model C9200)
Important! If the software application being used has a collate option, it must be turned
off. If you do not turn off the collate option in the application, it will override the Proof &
Print feature and print out all the copies.
Proof & Print: Windows 2000 PCL Driver
Note: Proof & Print can only be done in the Windows 2000 PCL driver, not the Windows
PostScript driver.
Printing a Document Using Proof & Print
1. Open the document in the application.
2. Click File → Print.
The Print dialog box appears.
3. Make sure the OKI C9200 or C9400 PCL printer is selected and the application's collate
feature is turned off, then click the Paper tab.
4. Under Copies, select the number of copies you wish to print, then select Proof and Print
as the Job type.
The Job PIN dialog box appears:
225
Note: If Job Type is grayed out, click Device options and click Printer hard disk, then
click OK.
5. Under Job name setting, enter a Job name having up to 16 characters.
6. Enter the four-digit password (PIN) assigned to you by your network administrator, or
create one using any combination of numeric characters 0 through 7 (8 and 9 cannot be
used).
7. Click OK, then click Print.
A proof of the document prints.
Print the Remaining Copies
1. Press MENU.
PRINT JOBS MENU appears on the display.
2. Press SELECT and enter your personal ID (PIN) number using the control panel
buttons.
SELECT JOB ALL JOBS appears on the display.
3. Press VALUE + repeatedly until the name of the job you wish to print appears.
4. Press SELECT.
The document prints and is deleted from the printer’s hard drive.
5. The printer goes back on line.
226
To Delete a Proof & Print Document before Printing the
Remaining Copies
1. Press MENU.
PRINT JOBS MENU
appears on the display.
2. Press SELECT and enter your personal ID (PIN) number using the control panel
buttons.
SELECT JOB ALL JOBS
appears on the display.
3. Press VALUE + repeatedly until the name of the job you wish to delete appears.
4. Press CANCEL.
DELETE THE JOB
YES=SELECT/NO=CANCEL
appears on the display.
5. To delete the job, press SELECT. Otherwise, press CANCEL.
The printer goes back on line.
Proof & Print: Windows Me
Proof & Print: Windows Me PCL Driver
To print a proof using the Windows Me PCL driver:
1. Open the document in the application.
2. Click File → Print.
The Print dialog box appears.
3. Make sure the OKI C9200 or C9400 PCL printer is selected and the application's collate
feature is turned off, then click Properties (or your application's equivalent).
The OKI Properties dialog box appears.
4. On the Paper tab, under Copies. select the number of copies you wish to print, then
select Proof and Print as the Job Type.
The Job PIN dialog box appears.
227
Note: If Job Type is grayed out, click Device options and click Printer hard disk, then
click OK.
5. Under Job name setting, enter a Job name having up to 16 characters.
6. Enter the four-digit password (PIN) assigned to you by your network administrator, or
create one using any combination of numeric characters 0 through 7 (8 and 9 cannot be
used).
7. Click OK twice and print the document.
Proof & Print: Windows Me PostScript Driver
To print a proof using the Windows Me PostScript driver:
1. Open the document in the application.
2. Click File → Print.
The Print dialog box appears.
3. Make sure the OKI C9200 or C9400 PostScript printer is selected and the application's
collate feature is turned off, then click Properties (or your application's equivalent).
The OKI Properties dialog box appears.
4. On the Paper tab, under Copies:
a. Select the number of copies you wish to print.
b. If applicable, click Collate.
c. Select Proof and print as the Job type.
The JOB PIN dialog box appears.
228
5. Under Job Name Setting, enter a Job Name having up to 16 characters.
6. Enter the four-digit password (PIN) assigned to you by your network administrator, or
create one using any combination of numeric characters 0 through 7 (8 and 9 cannot be
used).
7. Click OK twice and print the document.
Printing the Remaining Copies
1. Press MENU.
PRINT JOBS MENU
appears on the display.
2. Press SELECT and enter your personal ID (PIN) number using the control panel
buttons.
SELECT JOB ALL JOBS
appears on the display.
3. Press VALUE + repeatedly until the name of the job you wish to print appears.
4. Press SELECT.
The document prints and is deleted from the printer’s hard drive. The printer goes back
on line.
Deleting the Job without Printing the Remaining Copies
229
1. Press MENU.
PRINT JOBS MENU
appears on the display.
2. Press SELECT and enter your personal ID (PIN) number using the control panel
buttons.
SELECT JOB ALL JOBS
appears on the display.
3. Press VALUE + repeatedly until the name of the job you wish to delete appears.
4. Press CANCEL.
DELETE THE JOB
YES=SELECT/NO=CANCEL
appears on the display.
5. To delete the job, press SELECT. Otherwise, press CANCEL.
The printer goes back on line.
Proof & Print: Windows 98 & 95
Proof & Print: Windows 98 & 95 PCL Driver
To print a proof using the Windows 98/95 PCL driver:
1. Open the document in the application.
2. Click File → Print.
The Print dialog box appears.
3. Make sure the OKI C9200 or C9400 PCL printer is selected and the application's collate
feature is turned off, then click Properties (or your application's equivalent).
The OKI Properties dialog box appears.
4. On the Paper tab, under Copies:
a. Select the number of copies you wish to print.
Note: If Job Type is grayed out, click Device options and click Printer hard disk, then
click OK.
b. Select Proof and Print as the Job Type. The Job PIN dialog box appears.
230
5. Under Job name setting, enter a Job name having up to 16 characters.
6. Enter the four-digit password (PIN) assigned to you by your network administrator, or
create one using any combination of numeric characters 0 through 7 (8 and 9 cannot be
used).
7. Click OK twice and print the document.
Proof & Print: Windows 98 & 95 PostScript Driver
To print a proof using the Windows 98/95 PostScript driver:
1. Open the document in the application.
2. Click File → Print.
The Print dialog box appears.
3. Make sure the OKI C9200 or C9400 PostScript printer is selected and the application's
collate feature is turned off, then click Properties (or your application's equivalent).
The OKI Properties dialog box appears.
4. On the Paper tab, under Copies:
a. Select the number of copies you wish to print.
b. If applicable, click Collate.
c. Select Proof and print as the Job type.
The JOB PIN dialog box appears.
5. Under Job Name Setting, enter a Job Name having up to 16 characters.
231
6. Enter the four-digit password (PIN) assigned to you by your network administrator, or
create one using any combination of numeric characters 0 through 7 (8 and 9 cannot be
used).
7. Click OK twice and print the document.
Printing the Remaining Copies
1. Press MENU.
PRINT JOBS MENU
appears on the display.
2. Press SELECT and enter your personal ID (PIN) number using the control panel
buttons.
SELECT JOB ALL JOBS
appears on the display.
3. Press VALUE + repeatedly until the name of the job you wish to print appears.
4. Press SELECT.
The document prints and is deleted from the printer’s hard drive. The printer goes back
on line.
Deleting the Job without Printing the Remaining Copies
1. Press MENU.
PRINT JOBS MENU
232
appears on the display.
2. Press SELECT and enter your personal ID (PIN) number using the control panel
buttons.
SELECT JOB ALL JOBS
appears on the display.
3. Press VALUE + repeatedly until the name of the job you wish to delete appears.
4. Press CANCEL.
DELETE THE JOB
YES=SELECT/NO=CANCE
appears on the display.
5. To delete the job, press SELECT. Otherwise, press CANCEL.
The printer goes back on line.
Proof & Print: Windows NT 4.0
Proof & Print: Windows NT 4.0 PCL Driver
To print a proof using the Windows NT 4.0 PCL driver:
1. Open the document in the application.
2. Click File → Print.
The Print dialog box appears.
3. Make sure the OKI C9200 or C9400 PCL printer is selected and the application's collate
feature is turned off, then click Properties (or your application's equivalent).
The OKI Properties dialog box appears.
4. On the Paper tab, under Copies:
a. Select the number of copies you wish to print.
Note: If Job Type is grayed out, click Device options and click Printer hard disk, then
click OK.
b. Select Proof and Print as the Job Type.
The Job PIN dialog box appears.
5. Under Job Name Setting, enter a job name having up to 16 characters.
6. Enter the four-digit password (PIN) assigned to you by your network administrator, or
create one using any combination of numeric characters 0 through 7 (8 and 9 cannot be
233
used).
7. Click OK twice and print the document.
Proof & Print: Windows NT 4.0 PostScript Driver
To print a proof using the Windows NT 4.0 PostScript driver:
1. Open the document in the application.
2. Click File → Print.
The Print dialog box appears.
3. Make sure the OKI C9200 or C9400 PostScript printer is selected and the application's
collate feature is turned off, then click Properties (or your application's equivalent).
The OKI Properties dialog box appears.
4. Under Paper/Output:
a. Click Copy Count and select the number of copies you wish to print.
Note: If Job Type is grayed out, click Start → Settings → Printers; right-click the printer
icon, then click Properties. Click the Device Settings tab, then scroll down to Installable
Options. Click Hard Disk and select Installed, then click OK and close the Printers
dialog box.
b. Click Job Type and select Proof and print under Change 'Job Type' Setting.
The JOB PIN dialog box appears.
5. Under Job Name Setting, enter a Job Name having up to 16 characters.
6. Enter the four-digit password (PIN) assigned to you by your network administrator, or
create one using any combination of numeric characters 0 through 7 (8 and 9 cannot be
used).
7. Click OK twice and print the document.
Printing the Remaining Copies
234
1. Press MENU.
PRINT JOBS MENU
appears on the display.
2. Press SELECT and enter your personal ID (PIN) number using the control panel
buttons.
SELECT JOB ALL JOBS
appears on the display.
3. Press VALUE + repeatedly until the name of the job you wish to print appears.
4. Press SELECT.
The document prints and is deleted from the printer’s hard drive.
5. The printer goes back on line.
Deleting the Job without Printing the Remaining Copies
1. Press MENU. PRINT JOBS MENU appears on the display.
2. Press SELECT and enter your personal ID (PIN) number using the control panel
buttons. SELECT JOB ALL JOBS appears on the display.
3. Press VALUE + repeatedly until the name of the job you wish to delete appears.
4. Press CANCEL. DELETE THE JOB YES=SELECT/NO=CANCEL appears on the
display.
5. To delete the job, press SELECT. Otherwise, press CANCEL. The printer goes back on
line.
235
Secure Documents
General Information
Secure printing enables you to store a confidential document on the printer's internal hard disk
drive, with password-only access.
When you are ready to print the document, simply go to the printer and enter your password.
Once it has been printed, the document will automatically be deleted from the printer's memory.
To use Secure Printing:
The printer must be equipped with the internal hard disk drive (standard on Models
C9200n, C9200dxn and C9400dxn, optional on Model C9200)
If the software application being used has a collate option, it must be turned off.
Note: Secure Printing is not available for the Macintosh.
Secure (Confidential) Documents:
Windows 2000 PCL Driver
Note: Secure Printing can only be done in the Windows 2000 PCL driver.
Send a Confidential Document to the Printer
1. Open the document in the application.
2. Click File → Print.
The Print dialog box appears.
3. Make sure the OKI C9200 or C9400 PCL printer is selected, then click the Paper tab.
4. Under Copies:
a. Select the number of copies you wish to print.
Note: If Job Type is grayed out, click Device options and click Printer hard disk, then
click OK.
b. Select Secure print as the Job type.
The Job PIN dialog box appears.
236
5. Under Job Name setting, enter a Job Name having up to 16 characters.
6. Enter the four-digit password (PIN) assigned to you by your network administrator, or
create one using any combination of numeric characters 0 through 7 (8 and 9 cannot be
used).
7. Click OK and print the document. The document processes and downloads to the
printer's hard drive.
Print out a Confidential Document
1. Press MENU.
PRINT JOBS MENU
appears on the display.
2. Press SELECT and enter your personal ID (PIN) number using the control panel
buttons.
SELECT JOB ALL JOBS
appears on the display.
3. Press VALUE + repeatedly until the name of the job you wish to print appears.
4. Press SELECT.
The document prints and is deleted from the printer’s hard drive.
5. The printer goes back on line.
To Delete a Confidential Document before Printing It
237
1. Press MENU.
PRINT JOBS MENU
appears on the display.
2. Press SELECT and enter your personal ID (PIN) number using the control panel
buttons.
SELECT JOB ALL JOBS
appears on the display.
3. Press VALUE + repeatedly until the name of the job you wish to delete appears.
4. Press CANCEL.
DELETE THE JOB
YES=SELECT/NO=CANCEL
appears on the display.
5. To delete the job, press SELECT. Otherwise, press CANCEL.
The printer goes back on line.
Secure (Confidential) Documents: Windows
Me
Confidential Documents: Windows Me PCL Driver
To send a confidential document to the printer using the Windows Me PCL driver:
1. Open the document in the application.
2. Click File → Print.
The Print dialog box appears.
3. Make sure the OKI C9200 or C9400 PCL printer is selected, then click Properties (or
your application's equivalent).
The OKI Properties dialog box appears.
4. On the Paper tab, under Copies:
a. Select the number of copies you wish to print.
Note: If Job Type is grayed out, click Device options and click Printer hard disk, then
click OK.
b. Select Secure print as the Job type.
The Job PIN dialog box appears.
238
5. Under Job name setting, enter a Job name having up to 16 characters.
6. Enter the four-digit password (PIN) assigned to you by your network administrator, or
create one using any combination of numeric characters 0 through 7 (8 and 9 cannot be
used).
7. Click OK twice and print the document.
The document processes and downloads to the printer's hard drive.
Confidential Documents: Windows Me PostScript Driver
To send a confidential document to the printer using the Windows Me PostScript driver:
1. Open the document in the application.
2. Click File → Print.
The Print dialog box appears.
3. Make sure the OKI C9200 or C9400 PostScript printer is selected, then click Properties
(or your application's equivalent).
The OKI Properties dialog box appears.
4. On the Paper tab, under Copies:
a. Select the number of copies you wish to print.
b. If applicable, click Collate.
c. Select Secure print as the Job type.
The JOB PIN dialog box appears.
239
5. Under Job Name Setting, enter a Job Name having up to 16 characters.
6. Enter the four-digit password (PIN) assigned to you by your network administrator, or
create one using any combination of numeric characters 0 through 7 (8 and 9 cannot be
used).
7. Click OK twice and print the document.
The document processes and downloads to the printer's hard drive.
Printing the Confidential Document
1. Press MENU.
PRINT JOBS MENU
appears on the display.
2. Press SELECT and enter your personal ID (PIN) number using the control panel
buttons.
SELECT JOB ALL JOBS
appears on the display.
3. Press VALUE + repeatedly until the name of the job you wish to print appears.
4. Press SELECT.
The document prints and is deleted from the printer’s hard drive.
5. The printer goes back on line.
Deleting the Job without Printing It
240
1. Press MENU.
PRINT JOBS MENU
appears on the display.
2. Press SELECT and enter your personal ID (PIN) number using the control panel
buttons.
SELECT JOB ALL JOB
appears on the display.
3. Press VALUE + repeatedly until the name of the job you wish to delete appears.
4. Press CANCEL.
DELETE THE JOB
YES=SELECT/NO=CANCEL
appears on the display.
5. To delete the job, press SELECT. Otherwise, press CANCEL.
The printer goes back on line.
Secure (Confidential) Documents:
Windows 98 & 95
Confidential Documents: Windows 98 & 95 PCL Driver
To send a confidential document to the printer using the Windows 98 & 95 PCL driver:
1. Open the document in the application.
2. Click File → Print.
The Print dialog box appears.
3. Make sure the OKI C9200 or C9400 PCL printer is selected, then click Properties (or
your application's equivalent).
The OKI Properties dialog box appears.
4. On the Paper tab, under Copies:
a. Select the number of copies you wish to print.
Note: If Job Type is grayed out, click Device options and click Printer hard disk, then
click OK.
b. Select Secure print as the Job type.
The Job PIN dialog box appears.
241
5. Under Job name setting, enter a Job name having up to 16 characters.
6. Enter the four-digit password (PIN) assigned to you by your network administrator, or
create one using any combination of numeric characters 0 through 7 (8 and 9 cannot be
used).
7. Click OK twice and print the document. The document processes and downloads to the
printer's hard drive.
Confidential Documents: Windows 98 & 95 PostScript Driver
To send a confidential document to the printer using the Windows 98 & 95 PostScript driver:
1. Open the document in the application.
2. Click File → Print.
The Print dialog box appears.
3. Make sure the OKI C9200 or C9400 PostScript printer is selected, then click Properties
(or your application's equivalent).
The OKI Properties dialog box appears.
4. On the Paper tab, under Copies:
a. Select the number of copies you wish to print.
b. If applicable, click Collate.
c. Select Secure print as the Job type.
The JOB PIN dialog box appears.
5. Under Job Name Setting, enter a Job Name having up to 16 characters.
6. Enter the four-digit password (PIN) assigned to you by your network administrator, or
create one using any combination of numeric characters 0 through 7 (8 and 9 cannot be
used).
7. Click OK twice and print the document
The document processes and downloads to the printer's hard drive.
Printing the Confidential Document
242
1. Press MENU.
PRINT JOBS MENU
appears on the display.
2. Press SELECT and enter your personal ID (PIN) number using the control panel
buttons.
SELECT JOB ALL JOBS
appears on the display.
3. Press VALUE + repeatedly until the name of the job you wish to print appears.
4. Press SELECT.
The document prints and is deleted from the printer’s hard drive.
5. The printer goes back on line.
Deleting the Job without Printing It
1. Press MENU.
PRINT JOBS MENU
appears on the display.
2. Press SELECT and enter your personal ID (PIN) number using the control panel
buttons.
SELECT JOB ALL JOBS
appears on the display.
3. Press VALUE + repeatedly until the name of the job you wish to delete appears.
4. Press CANCEL.
DELETE THE JOB
YES=SELECT/NO=CANCEL
appears on the display.
243
5. To delete the job, press SELECT. Otherwise, press CANCEL.
The printer goes back on line.
Secure (Confidential) Documents:
Windows NT 4.0
Confidential Documents: Windows NT 4.0 PCL Driver
To send a confidential document to the printer using the Windows NT 4.0 PCL driver:
1. Open the document in the application.
2. Click File → Print.
The Print dialog box appears.
3. Make sure the OKI C9200 or C9400 PCL printer is selected, then click Properties (or
your application's equivalent).
The OKI Properties dialog box appears.
4. On the Paper tab, under Copies:
a. Select the number of copies you wish to print.
b. If applicable, click Printer Collate.
Note: If Job Type is grayed out, click Device options and click Printer hard disk, then
click OK.
c. Select Secure print as the Job Type.
The Job PIN dialog box appears.
5. Under Job Name Setting, enter a job name having up to 16 characters.
6. Enter the four-digit password (PIN) assigned to you by your network administrator, or
create one using any combination of numeric characters 0 through 7 (8 and 9 cannot be
used).
7. Click OK twice and print the document.
The document processes and downloads to the printer.
244
Confidential Documents: Windows NT 4.0 PostScript Driver
To send a confidential document to the printer using the Windows NT 4.0 PostScript driver:
1. Open the document in the application.
2. Click File → Print.
The Print dialog box appears.
3. Make sure the OKI C9200 or C9400 PostScript printer is selected, then click Properties
(or your application's equivalent).
The OKI Properties dialog box appears.
4. Under Paper/Output:
a. Click Copy Count and select the number of copies you wish to print.
b. If applicable, click Collate. and select Yes under Change 'Collate' Setting.
Note: If Job Type is grayed out, click Start → Settings → Printers; right-click the printer
icon, then click Properties. Click the Device Settings tab, then scroll down to Installable
Options. Click Hard Disk and select Installed, then click OK and close the Printers
dialog box.
c. Click Job Type and select Secure print under Change 'Job Type' Setting.
The JOB PIN dialog box appears.
5. Under Job Name Setting, enter a Job Name having up to 16 characters.
6. Enter the four-digit password (PIN) assigned to you by your network administrator, or
create one using any combination of numeric characters 0 through 7 (8 and 9 cannot be
used).
7. Click OK twice and print the document.
The document processes and downloads to the printer.
Printing the Confidential Document
245
1. Press MENU.
PRINT JOBS MENU
appears on the display.
2. Press SELECT and enter your personal ID (PIN) number using the control panel
buttons.
SELECT JOB ALL JOBS
appears on the display.
3. Press VALUE + repeatedly until the name of the job you wish to print appears.
4. Press SELECT.
The document prints and is deleted from the printer’s hard drive.
5. The printer goes back on line.
Deleting the Job without Printing It
1. Press MENU.
PRINT JOBS MENU
appears on the display.
2. Press SELECT and enter your personal ID (PIN) number using the control panel
buttons.
SELECT JOB ALL JOBS
appears on the display.
3. Press VALUE + repeatedly until the name of the job you wish to delete appears.
4. Press CANCEL.
DELETE THE JOB
YES=SELECT/NO=CANCEL
appears on the display.
5. To delete the job, press SELECT. Otherwise, press CANCEL.
246
The printer goes back on line.
247
Overlays (Forms)
General Information
Important! File names used in printing overlays are case sensitive.
You can save logos, lettterheads, etc. as overlays
in the printer's flash SIMM or
on the printer's internal hard disk drive
then add one or any combination of them to a file as it is being printed.
You can use overlays in place of pre-printed stationery, to add your logo or company address to
a document, or to create forms from pre-stored modular pieces.
Note: Overlay printing cannot be done using the Windows 2000 PostScript driver or the
Macintosh driver.
The printer must be equipped with the hard disk drive (standard on all but Model C9200)
and the OKI Storage Device Manager software must be installed.
Overlay elements must be created in the software application of your choice, then stored
on the printer's hard drive using the OKI Storage Device Manager software before they can
be used.
If the hard disk memory is insufficient for the spooled data, the message DISK FULL
appears.
If your software application has a collate print option, it must be turned OFF before you
print overlays.
Printing with Overlays: Windows 2000
Note: In Windows 2000, overlays can only be printed using the PCL driver.
Defining Overlays: Windows 2000 PCL Driver
1. Click Start → Settings → Printers.
The Printers dialog box appears.
2. Right click the OKI C9200 or C9400 PCL printer icon, then click Printing Preferences.
The OKI Printing Preferences dialog box appears.
3. Click the Overlay tab.
4. Click Define Overlays.
248
5. Under Overlay Name, enter a name for the overlay.
6. Under ID Value, enter the ID number for the file saved using the Storage Device
Manager software (see the File List printout).
7. In the Print on Pages drop-down list, select on which pages the overlay is to be printed,
or select Custom and enter specific page numbers under Custom pages.
8. Click Add, then click Close.
The overlay you defined appears in the Defined overlays list.
9. Click OK and close the Printers dialog box.
Printing Using Overlays: Windows 2000 PCL Driver
1. Open the document in the software application.
2. Click File → Print.
The Print dialog box appears.
3. On the General tab, select the C9200 or C9400 PCL driver.
4. Click the Overlay tab.
5. Under Defined Overlays, click any overlays you wish to use (to select more than one,
press the Ctrl key while selecting the names), then click Add.
The name(s) appears in the Active overlays box.
Notes
To print a sample of an overlay to see what it looks like, click the name under Defined
Overlays, then click Test Print.
If you wish to add more overlays to the list, click Define overlays, then fill in the
appropriate information in the Define overlays dialog box and click Close.
249
6. Click Print using active overlays, then click Print.
Editing Defined Overlays: Windows 2000 PCL Driver
1. Click Start → Settings → Printers.
The Printers dialog box appears.
2. Right click the OKI C9200 or C9400 PCL printer icon, then click Printing Preferences.
The OKI Printing Preferences dialog box appears.
3. Click the Overlay tab.
4. Click Define overlays.
The Define overlays dialog box appears.
5. Under Defined overlays, click the overlay to be edited.
6. Make your changes, then click Apply.
7. Click Close.
8. Click OK and close the Printers dialog box.
Deleting Defined Overlays: Windows 2000 PCL Driver
1. Click Start → Settings → Printers.
The Printers dialog box appears.
2. Right click the OKI C9200 or C9400 PCL printer icon, then click Printing Preferences.
The OKI Printing Preferences dialog box appears.
3. Click the Overlay tab.
4. Click Define Overlays.
The Define overlays dialog box appears.
5. Under Defined overlays, click the overlay to be deleted.
6. Click Remove, then click Close.
7. Click OK and close the Printers dialog box.
Printing with Overlays: Windows Me
Note: Before overlays can be printed, they must be created in a software application and
saved as a print file, then downloaded to the printer's internal hard disk drive using the OKI
Storage Device Manager software.
Defining Overlays: Windows Me PCL Driver
1. Click Start → Settings → Printers.
The Printers dialog box appears.
2. Right click the OKI C9200 or C9400 PCL printer icon, then click Properties.
The OKI Properties dialog box appears.
3. Click the Overlay tab.
250
4. Click Define overlays.
5. Under Overlay Name, enter a name for the overlay.
6. Under ID Value, enter the ID number for the file saved using the OKI Storage Device
Manager software (see the File List printout).
7. In the Print on Pages drop-down list, select on which pages the overlay is to be printed,
or select Custom and enter specific page numbers under Custom pages.
8. Click Add, then click Close. The overlay(s) you defined appears in the Defined overlay
list.
9. Click OK and close the Printers dialog box.
Printing Overlays: Windows Me PCL Driver
1. Open the document in the software application.
2. Click File → Print.
The Print dialog box appears.
3. Make sure the OKI C9200 or C9400 PCL printer is selected, then click Properties (or
your application's equivalent).
The OKI Properties dialog box appears.
4. Click the Overlay tab.
5. Under Defined Overlay, click any overlays you wish to use (to select more than one,
press the Ctrl key while selecting the names), then click Add.
The names you selected appear in the Active overlays box.
Notes
To print a sample of an overlay to see what it looks like, click it's name in the Defined
overlays box, then click Test Print.
251
If you wish to add more overlays to the list, click Define overlays, then fill in the
appropriate information in the Define overlays dialog box and click Close.
6. Click Print using active overlays, then click OK and print the document.
Editing Defined Overlays: Windows Me PCL Driver
1. Click Start → Settings → Printers.
The Printers dialog box appears.
2. Right click the OKI C9200 or C9400 PCL printer icon, then click Properties.
The OKI Properties dialog box appears.
3. Click the Overlay tab.
4. Click Define overlays.
The Define overlays dialog box appears.
5. Under Defined overlays, click the overlay to be edited.
6. Make any changes, then click Apply.
7. Click Close.
8. Click OK and close the Printers dialog box.
Deleting Defined Overlays:
Windows Me PCL Driver
1. Click Start → Settings → Printers.
The Printers dialog box appears.
2. Right click the OKI C9200 or C9400 PCL printer icon, then click Properties.
252
The OKI Properties dialog box appears.
3. Click the Overlay tab.
4. Click Define overlays.
The Define overlays dialog box appears.
5. Under Defined overlays, click the overlay to be deleted.
6. Click Remove, then Close.
7. Click OK and close the Printers dialog box.
Defining Overlays: Windows Me PostScript Driver
1. Click Start → Settings → Printers.
The Printers dialog box appears.
2. Right click the OKI C9200 or C9400 PostScript printer icon, then click Properties.
The OKI Properties dialog box appears.
3. Click the Overlay tab.
Set up an Overlay Group:
4. Click New.
The Define Overlays dialog box appears.
5. Under Group Name, enter a name for the group of overlays you are creating.
6. In the Print on Pages drop-down list, select on which pages the overlay is to be printed,
or select Custom and enter specific page numbers under Custom pages.
7. Under Overlay Name, type in the name of the overlay file exactly as it it was stored using
the OKI Storage Device Manager software (see the File List printout).
Note: Overlay file names are case sensitive.
253
8. Click Add.
9. Repeat steps 7 and 8 to add additional overlays (maximum of three per group).
10. Click OK.
Note: To create additional overlay groups (up to 32 can be defined), repeat steps 4 to
10 above.
Finish
11. Click OK and close the Printers dialog box.
Printing Using Overlays: Windows Me PostScript Driver
1. Open the document in the software application.
2. Click File → Print.
The Print dialog box appears.
3. Make sure the OKI C9200 or C9400 PostScript printer is selected, then click Properties
(or Settings, or your application's equivalent).
The OKI Properties dialog box appears.
4. Click the Overlay tab.
5. Click Enable Overlay in the drop-down list.
6. Click up to four groups under Defined Overlay, then click Add.
7. Click OK and print the document.
Editing Defined Overlays: Windows Me PostScript Driver
1. Click Start → Settings → Printers.
The Printers dialog box appears.
2. Right click the OKI C9200 or C9400 PostScript printer icon, then click Properties.
The OKI Properties dialog box appears.
3. Click the Overlay tab.
4. Under Defined Overlay, click the name of the group you wish to modify, then click Edit.
The Define Overlays dialog box appears.
5. Make your changes, then click OK twice and close the Printers dialog box.
Deleting Defined Overlays: Windows Me PostScript Driver
1. Click Start → Settings → Printers.
The Printers dialog box appears.
2. Right click the OKI C9200 or C9400 PostScript printer icon, then click Properties.
The OKI Properties dialog box appears.
3. Click the Overlay tab.
254
4. Under Defined Overlay, click the name of the group you wish to remove, then click
Delete.
5. Click OK and close the Printers dialog box.
Printing with Overlays: Windows 98 & 95
Note: Before overlays can be printed, they must be created in a software application and
saved as a print file, then downloaded to the printer's internal hard disk drive using the OKI
Device Storage Manager software.
Defining Overlays:
Windows 98 & 95 PCL Driver
1. Click Start → Settings → Printers.
The Printers dialog box appears.
2. Right click the OKI C9200 or C9400 PCL printer icon, then click Properties.
The OKI Properties dialog box appears.
3. Click the Overlay tab.
4. Click Define overlays.
5. Under Overlay Name, enter a name for the overlay.
6. Under ID Value, enter the ID number for the file saved using the OKI Storage Device
Manager software (see the File List printout).
7. In the Print on Pages drop-down list, select on which pages the overlay is to be printed,
or select Custom and enter specific page numbers under Custom pages.
8. Click Add, then click Close. The overlay(s) you defined appears in the Defined overlay
list.
9. Click OK and close the Printers dialog box.
255
Printing Overlays: Windows 98 & 95 PCL Driver
1. Open the document in the software application.
2. Click File → Print.
The Print dialog box appears.
3. Make sure the OKI C9200 or C9400 PCL printer is selected, then click Properties (or
your application's equivalent).
The OKI Properties dialog box appears.
4. Click the Overlay tab.
5. Under Defined Overlay, click any overlays you wish to use (to select more than one,
press the Ctrl key while selecting the names), then click Add.
The names you selected appear in the Active overlays box.
Notes
To print a sample of an overlay to see what it looks like, click its name in the Defined
overlays box, then click Test Print.
If you wish to add more overlays to the list, click Define overlay, then fill in the
appropriate information in the Define overlays dialog box and click Close.
6. Click Print using active overlays, then click OK and print the document.
Editing Defined Overlays: Windows 98 & 95 PCL Driver
1. Click Start → Settings → Printers.
The Printers dialog box appears.
2. Right click the OKI C9200 or C9400 PCL printer icon, then click Properties.
The OKI Properties dialog box appears.
3. Click the Overlay tab.
4. Click Define overlays.
The Define overlays dialog box appears.
256
5. Under Defined overlays, click the overlay to be edited.
6. Make any changes, then click Apply.
7. Click Close.
8. Click OK and close the Printers dialog box.
Deleting Defined Overlays: Windows 98 & 95 PCL Driver
1. Click Start → Settings → Printers.
The Printers dialog box appears.
2. Right click the OKI C9200 or C9400 PCL printer icon, then click Properties.
The OKI Properties dialog box appears.
3. Click the Overlay tab.
4. Click Define overlays.
The Define overlays dialog box appears.
5. Under Defined overlays, click the overlay to be deleted.
6. Click Remove, then Close.
7. Click OK and close the Printers dialog box.
Defining Overlays: Windows 98 & 95 PostScript Driver
1. Click Start → Settings → Printers.
The Printers dialog box appears.
2. Right click the OKI C9200 or C9400 PostScript printer icon, then click Properties.
The OKI Properties dialog box appears.
3. Click the Overlay tab.
257
Set up an Overlay Group:
4. Click New.
The Define Overlays dialog box appears.
5. Under Group Name, enter a name for the group of overlays you are creating.
6. In the Print on Pages drop-down list, select on which pages the overlay is to be printed,
or select Custom and enter specific page numbers under Custom pages.
7. Under Overlay Name, type in the name of the overlay file exactly as it it was stored using
the OKI Storage Device Manager software (see the File List printout).
Note: Overlay file names are case sensitive.
8. Click Add.
9. Repeat steps 7 and 8 to add additional overlays (maximum of three per group).
10. Click OK.
Note: To create additional overlay groups (up to 32 can be defined), repeat steps 4 to
10 above.
Finish
11. Click OK and close the Printers dialog box.
Printing Using Overlays: Windows 98 & 95 PostScript Driver
1. Open the document in the software application.
2. Click File → Print.
258
The Print dialog box appears.
3. Make sure the OKI C9200 or C9400 PostScript printer is selected, then click Properties
(or Settings, or your application's equivalent).
The OKI Properties dialog box appears.
4. Click the Overlay tab.
5. Click Enable Overlay in the drop-down list.
6. Click up to four groups under Defined Overlay, then click Add.
7. Click OK and print the document.
Editing Defined Overlays: Windows 98 & 95 PostScript Driver
1. Click Start → Settings → Printers.
The Printers dialog box appears.
2. Right click the OKI C9200 or C9400 PostScript printer icon, then click Properties.
The OKI Properties dialog box appears.
3. Click the Overlay tab.
4. Under Defined Overlay, click the name of the group you wish to modify, then click Edit.
The Define Overlays dialog box appears.
5. Make your changes, then click OK twice and close the Printers dialog box.
Deleting Defined Overlays: Windows 98 & 95 PostScript
Driver
1. Click Start → Settings → Printers.
The Printers dialog box appears.
2. Right click the OKI C9200 or C9400 PostScript printer icon, then click Properties.
The OKI Properties dialog box appears.
3. Click the Overlay tab.
4. Under Defined Overlay, click the name of the group you wish to remove, then click
Delete.
5. Click OK and close the Printers dialog box.
Printing with Overlays: Windows NT 4.0
Defining Overlays: Windows NT 4.0 PCL Driver
1. Click Start → Settings → Printers.
The Printers dialog box appears.
2. Right click the OKI C9200 or C9400 PCL printer icon, then click Document Defaults.
259
The OKI Default dialog box appears.
3. Click the Overlay tab.
4. Click Define overlays.
The Define overlays dialog box appears
.
5. Under Overlay Name, enter a name for the overlay.
6. Under ID Value, enter the ID number for the file saved using the OKI Storage Device
Manager software (see the File List printout).
7. In the Print on Pages drop-down list, select on which pages the overlay is to be printed,
or select Custom and enter specific page numbers under Custom pages.
8. Click Add, then click Close.
The overlays you defined will appear in the Defined overlays window.
9. Click OK and close the Printers dialog box.
Printing Overlays: Windows NT 4.0 PCL Driver
1. Open the document in the software application.
2. Click File → Print.
The Print dialog box appears.
3. Make sure the OKI C9200 or C9400 PCL driver is selected, then click Properties (or
Settings, or your application's equivalent).
The OKI Properties dialog box appears.
4. Click the Overlay tab.
5. Under Defined Overlays, click any overlays you wish to use (to select more than one,
press the Ctrl key while selecting the names), then click Add.
The name(s) appears in the Active overlays box.
260
Notes
To print a sample of an overlay to see what it looks like, click its name in the Defined
Overlays box, then click Test Print.
If you wish to add more overlays to the list, click Define overlays, then fill in the
appropriate information in the Define overlays dialog box and click Close.
6. Click Print using active overlays, then click OK and print the document.
Editing Defined Overlays: Windows NT 4.0 PCL Driver
1. Click Start → Settings → Printers.
The Printers dialog box appears.
2. Right click the OKI C9200 or C9400 PCL printer icon, then click Document Defaults.
The OKI Defaults dialog box appears.
3. Click the Overlay tab.
4. Click Define Overlays.
The Define overlays dialog box appears.
5. Under Defined overlays, click the overlay to be edited.
6. Make your changes, then click Apply.
7. Click Close.
8. Click OK and close the Printers dialog box.
Deleting Defined Overlays: Windows NT 4.0 PCL Driver
1. Click Start → Settings → Printers.
The Printers dialog box appears.
2. Right click the OKI C9200 or C9400 PCL printer icon, then click Document Defaults.
The OKI Defaults dialog box appears.
3. Click the Overlay tab.
4. Click Define Overlays.
5. Under Defined overlays, click the overlay to be deleted.
6. Click Remove, then Close.
7. Click OK and close the Printers dialog box.
Defining Overlays: Windows NT 4.0 PostScript Driver
1. Click Start → Settings → Printers.
The Printers dialog box appears.
2. Right click the OKI C9200 or C9400 PostScript printer icon, then click Document
Defaults.
261
The OKI Default dialog box appears.
3. Scroll down to Layout, and click Overlay.
4. Under Change 'Overlay' Setting, click Use Overlay.
5. Click Setting of Overlay.
The Setting of Overlay dialog box appears.
Set up an Overlay Group:
6. Click New.
The Define Overlays dialog box appears.
7. Under Group Name, enter a name for the group of overlays you are creating.
8. In the Print on Pages drop-down list, select on which pages the overlay is to be printed,
or select Custom and enter specific page numbers under Custom pages.
9. Under Overlay Name, type in the name of the overlay file exactly as it it was stored using
the OKI Storage Device Manager software (see the File List printout).
Note: Overlay file names are case sensitive.
10. Click Add.
11. Repeat steps 9 and 10 to add additional overlays (maximum of three per group).
12. Click OK.
Note: To create additional overlay groups (up to 32 can be defined), repeat steps 6 to
11 above.
Save Your Settings
13. Click OK twice and close the Printers dialog box.
262
Printing Using Overlays: Windows NT 4.0 PostScript Driver
1. Open the document in the software application.
2. Click File → Print.
The Print dialog box appears.
3. Make sure the OKI C9200 or C9400 PostScript printer is selected, then click Properties
(or your application's equivalent).
The OKI Properties dialog box appears.
4. Scroll down to Layout, then click Use Overlay.
5. Click Setting of Overlay.
The Setting of Overlay dialog box appears.
6. Click the Overlay group(s) you wish to print, then click Add.
The group will appear in the Active Overlay Groups list.
7. Click OK twice and print the document.
Editing Defined Overlays: Windows NT 4.0 PostScript Driver
1. Click Start → Settings → Printers.
The Printers dialog box appears.
2. Right click the OKI C9200 or C9400 PostScript printer icon, then click Document
Defaults.
The OKI Defaults dialog box appears.
3. Scroll down to Layout, and click Overlay.
4. Click Setting of Overlay.
The Setting of Overlay dialog box appears.
5. Under Defined Overlay Groups, click the name of the group you wish to modify, then
click Edit.
The Define Overlays dialog box appears.
6. Make your changes, then click OK.
7. Click OK twice and close the Printers dialog box.
Deleting Defined Overlays: Windows NT 4.0 PostScript Driver
1. Click Start → Settings → Printers.
The Printers dialog box appears.
2. Right click the OKI C9200 or C9400 PostScript printer icon, then click Document
Defaults.
The OKI Default dialog box appears.
3. Scroll down to Layout, and click Overlay.
4. Click Setting of Overlay.
The Setting of Overlay dialog box appears.
5. Click the name of the Defined Overlay Group you wish to remove, then click Delete and
263
click Yes to confirm the deletion.
6. Click OK twice and close the Printers dialog box.
264
OKI Storage Device Manager (SDM)
Note: OKI Storage Device Manager is currently for operation only on Windows systems.
OKI SDM: General Information
OKI Storage Device Manager requires Microsoft Internet Explorer 4.0 or higher to run.
The OKI Storage Device Manager software provides a means of managing
the printer's Flash memory (2 MB)
the printer's internal hard disk drive (standard on Model C9400 dxn/HD, optional on other
models): 5 GB (partitioned with 1.6 GB each allocated as Common, PCL and PostScript)
Using the OKI Storage Device Manager software improves the internal performance of the
printer and provides a tool for downloading files from the computer to the printer's memory,
including
graphic files
forms such as letterheads, invoices, etc.
overlays such as logos, addresses, etc.
Important! The printer's internal hard drive does not communicate directly back to the
OKI Storage Device Manager software; it sends any error messages to the printer
display.
OKI SDM Functions
OKI Storage Device Manager functions:
Create or modify a project
Download files to a printer
Add or remove printers being administered
Manage the proof and secure spooler queues on the internal hard drive
View the status, configuration and variables for a printer
Print the demo page, PCL fonts list, or a PostScript font list from a printer
Print one or more PCL format macros or a PostScript forms (Overlays)
Caution! You can also use the OKI Storage Device Manager to format the partitions on
the printer's hard drive, but this will wipe out all the contents of the partition and can
cause serious problems. We recommend that you use the Spooler and the Delete Form
features to maintain the disk.
265
OKI SDM Administration
On network systems, the Administrator oversees the Storage Device Manager software and can
use it to manage and monitor the printer's Flash memory and internal hard disk.
Passwords
The first thing to do is to set up your Administrative Password.
Next, assign a 4-digit PIN number for each of your clients, using any four numbers from 0
through 7 (8 and 9 cannot be used). Alternately, each client can choose their own PIN number,
but the administrator will need to know these PINs in order to access client information in the
Spooler.
The Spooler
The Administrator can use the Spooler to view a listing of Proof & Print and Secure Print files
stored on either memory area and
delete files, or
print and the delete files
Administrative Functions
The Administrative Functions feature allows you to delete any PCL Macros or PostScript Forms
which are stored on the printer's internal hard disk or in the Flash memory.
Opening OKI Storage Device Manager
1. Click Start → Programs → Oki Data Corporation → OKI Storage Device Manager → OKI
Storage Device Manager.
The StoreMan - Printer Discovery dialog box opens.
2. Click the appropriate computer connection(s), then click Start.
266
The printer will search for connected printers and place icons in the Printers Window at
the bottom of the dialog box.
3. Click Close.
The Storage Device Manager dialog box opens.
OKI SDM: Setting Up an Administrative
Password
1. With the OKI Storage Device Manager program open, click Administrator Functions in
the Printer menu.
Note: Passwords consist of eight digits, letters or numbers, and are case sensitive.
2. Enter the default password (p1xs7d0m) under Old Password (see "Administrator
Functions" in the OKI Storage Device Manager Help file for more information).
3. Type the 8-digit, alpha-numeric password of your choice under New Password.
4. Type the password again under Confirm New Password.
New Password Accepted appears.
267
5. Click OK.
6. Click Close.
OKI SDM: PostScript Forms
Note: PostScript forms are the ones to use if you are not experienced with PCL Macro
commands.
Creating & Downloading a PostScript Project
Important! Remember that file names and paths are case sensitive.
Create the Forms
1. Create the document in your software application.
2. Click File → Print and make sure the OKI C9200 or C9400 PostScript driver is selected.
3. Engage the Encapsulated PostScript (EPS) output option: Windows Me/98/95: - Click
Properties (or your application's equivalent). - Click the PostScript tab, then, if it is not
already selected, click Encapsulated PostScript (EPS). Windows NT 4.0: - Click
Properties (or your application's equivalent). - Scroll down to PostScript Options and
click it, then click PostScript Output Option and select Encapsulated PostScript (EPS).
4. Click OK.
5. Print the document to a file using the extension .PRN.
Create a New Project
1. Open the OKI Storage Device Manager software.
268
2. Click File → New Project.
The Project dialog box opens.
3. Click File → Save Project., enter the path/name for storing the project on your hard drive
or your network, then click Save.
Add Files to the Project
1. Click File → Add File to Project.
The Open dialog box appears.
2. Make sure PRN files(*.prn) is selected in the File name drop-down list.
3. Browse to the folder where the files are saved and select the files you wish to add to the
project, then click OK.
The Information dialog box appears.
4. Click OK.
The files are saved as .HST.
5. Repeat steps 1 through 4 until you have added all the files you wish to add to the
Project.
Note: To delete a file from the project, click the file name, then click File → Remove File from
Project.
Check the Location for Storing the Files in the Printer's Memory
If your printer is equipped with an internal hard disk drive, the Storage Device Manager will
automatically save the forms to the PostScript partition on the hard drive.
If your printer does not have the internal hard disk drive, the Storage Device Manager will
automatically store the forms in the PostScript section of the Flash memory.
269
To store the forms in the Flash memory instead of on the hard disk drive:
1. Double-click the file name in the Project Window.
The Edit Component Name and ID dialog box appears.
2. Under Volume, type in %Flash0%, then click OK.
Save the Project and Download it to the Printer
1. Click File → Save Project.
2. Click File → Send Project Files to Printer.
"Command Issued" appears.
3. Click OK.
Test Printing a PostScript Form
1. With OKI Storage Device Manager open and the appropriate printer icon highlighted,
click Printers → Test Form.
The Test PostScript Form dialog box appears.
2. Enter the file name for the form you wish to print (you can get this from the File List
printout), then click OK.
"Command Issued" appears.
3. Click OK and wait for the form to print.
PCL Macros (Forms)
Important! Unless you are experienced with PCL Macro commands, it is best to stick
with PostScript Forms.
Creating & Downloading a PCL Project
Important! Remember that file names and paths are case sensitive.
1. Create the Forms
a. Create the document in your software application.
b. Click File → Print and make sure the OKI C9200 or C9400 PCL driver is selected.
c. Print the document to a file using the extension .PRN.
2. Create a New Project
a. Open the OKI Storage Device Manager software.
270
b. Click File → New Project.
The Project dialog box opens.
c. Click File → Save Project., enter the path/name for storing the project on your hard drive
or your network, then click Save.
3. Convert the Files to Binary (.bin) Format
a. Click File → Filter Macro File.
The Filter Printer Patterns dialog box appears.
b. Make any desired adjustments in the settings.
Example
271
If you create a black oval in MS Paint and leave all the color command filters checked, the
black oval will print as a black rectangle when the overlay is used. To maintain the oval
shape, turn off (deselect) the "Configure Image Data," "Palette Control ID,"and "Palette
Control" filters.
c. Click OK.
The Open dialog box appears.
d. Make sure Print spool files (*.prn) is selected in the File of type drop-down list.
e. Browse to the folder where the files are saved and double-click the file name.
f.
Click OK.
The file is saved as a .bin file.
g. Repeat steps 1 through 5 until you have converted all the files you wish to add to the
Project.
4. Add the .bin Files to the Project
a. Click File → Add File to Project.
b. Highlight the .bin files you wish to add, then click Open.
The file names appear in the Project dialog box.
Note: To delete a file from the project, click the file name, then click File → Remove
File from Project.
5. Check the .bin File Settings and Save the Project
a. To check the settings for the bin files, double-click the file name. The Edit Component
Name and ID dialog box appears.
b. Here you can edit the
• file name
• ID number (the number you need to enter in the printer driver when printing overlays)
• volume: 0: = printer's disk drive PCL partition 1: = printer's disk drive Common
partition %disk0%: = printer's disk drive PostScript partition 2: = Flash memory PCL
%Flash0% = Flash memory PostScript
• path.
c. Click OK.
d. When you're through reviewing the settings, click File → Save Project.
6. Download the Project to the Printer
a. Click File → Send Project Files to Printer. Command Issued appears.
b. Click OK.
Downloading a Printer Job Language (.pjl) Command File to
the Printer
272
Important! Remember that file names and paths are case sensitive.
1. Click File → Send Download File to Printer.
2. Browse to the directory with the .pjl file and click the file name.
3. Click Open.
"Command Issued" appears.
4. Click OK.
Test Printing a PCL Macro
1. With OKI Storage Device Manager open and the appropriate printer icon highlighted,
click Printers → Test Macro.
The Test Macro dialog box appears.
2. Enter the ID number for the macro file you wish to print (you can get this from the File
List printout), then click OK.
Command Issued appears.
3. Click OK and wait for the macro to print.
Using the Spooler
The Spooler feature of OKI Storage Device Manager allows you to view and manage the Proof
& Print and Secure Print files stored on the printer's hard disk drive.
To Open the Spooler:
1. Open the OKI Storage Device Manager software and click the icon for the printer whose
contents you wish to view.
2. Click Printers → Spooler Options.
The Spool Options dialog box appears.
273
3. Under Queue, click OKISECURE queue to view Secure Print jobs and/or OKIPROOF
queue to view Proof & Print jobs.
4. To view the jobs stored for a particular client, type in the client's 4-digit User PIN, then
press Enter.
5. To view all stored jobs, type in your Administrator's Password, then press Enter.
To Delete Files:
1. Click the file(s) to be deleted (press Shift to select a span of files; press Ctrl to select
additional files).
2. Delete the files:
Careful! You will not be prompted to confirm the deletion.
• Click Cancel Jobs to delete the files without printing them.
OR
• Click Print Job(s) to print the files out before they are automatically deleted.
3. Click Close.
Deleting a Form
To delete a project component from the printer's hard disk drive or from the Flash memory:
1. If you don't have a current printout of the File List, print one.
2. Open the OKI Storage Device Manager software and click the icon for the printer from
which you wish to delete files.
3. Click Printers → Administrator Functions.
274
The Storage Device Manager - Administrative Functions dialog box appears.
4. Type in your password under Old Password.
5. Click Delete File.
6. Referring to the File List, type in the complete path for the file to be deleted. (e.g.,
0:\pcl\macros\50::PCLMACRO.bin), then click OK.
"Command Issued" appears.
Important! You must be sure to type the path in exactly as it appears on the File
List (path entry is case sensitive).
7. Click OK, then click Close.
8. Double-click the printer icon and check to be sure the file was deleted.
275
Problem Solving
Paper Jams
OPEN SIDE COVER
380: PAPER JAM
1. Pull up on the handle and lift the top cover.
2. Open the side cover.
3. Pull out the jammed sheet.
276
4. Close the side cover.
5. Close the top cover.
OPEN UPPER COVER
381: PAPER JAM
1. Pull up on the handle and lift the cover.
277
2. Lift out the image drums/toner cartridges to gain access to the jammed sheet.
3. Remove the jammed sheet(s).
4. Replace the image drums/toner cartridges.
278
5. Close the cover.
OPEN UPPER COVER
382: PAPER JAM
1. Pull up on the handle and lift the cover.
279
2. Remove the jammed sheet.
3. If the sheet is caught in the fuser:
Caution! The fuser may be very hot from printing.
a. Lift out the cyan image drum/toner cartridge.
280
b. Move the fuser lock levers to the left (toward the open cover).
c. Lift out the fuser, then move the fuser roller release lever forward and remove the
jammed sheet.
d. Move the fuser roller release (blue lever) back and reinstall the fuser.
e. Replace the cyan drum/toner.
281
4. Close the cover.
CHECK TRAY 1
390: PAPER JAM
1. Pull out the tray.
2. Realign the stack of print media and check to be sure that the media guides are snug
against the stack.
282
3. Gently push the tray back in.
CHECK MP TRAY
391: PAPER JAM
1. Pull the jammed sheet.
CHECK DUPLEX
283
nnn: PAPER JAM
1. Pull up on the handle and lift the top cover.
2. Lift out one or two of the image drums/toner cartridges and check to see if any paper is
jammed underneath.
3. Remove any jammed sheets.
284
4. Replace the image drums/toner cartridges.
5. Lift out the separator (located to the left of the fuser, just under the open cover).
6. Remove any jammed sheets.
285
7. Put the separator back into the printer.
8. Open the cover on the duplex unit and pull the blue handle to access the duplex unit.
9. Open the duplex cover and remove any jammed sheets.
286
10. Close the duplex cover and gently push the duplex/tray back into the printer.
11. Open the side cover.
12. Remove any jammed sheets, then close the side cover.
287
13. Close the top cover.
Hardware Problems
Paper Problems
Paper jams are frequent.
The printer is not level.
► Place the printer on a stable, level surface.
Paper is too thin.
► Use correct type of paper.
The paper is moist or affected by static.
► Store paper within specified temperature and humidity levels.
The paper is creased or wrinkled.
► Remove the creased/wrinkled paper from the feed tray.
Paper is not aligned correctly.
► Adjust tray print guides and rear stopper or Multi-Purpose feed guides.
More than one sheet feeds at a time.
The printer is not level.
► Place the printer on a stable, level surface.
Paper is too thin.
► Use correct type of paper.
The paper is moist or affected by static.
► Store paper within specified temperature and humidity levels.
The paper is creased or wrinkled.
► Remove the creased/wrinkled paper from the feed tray.
Paper is not aligned correctly.
288
► Adjust tray print guides and rear stopper or Multi-Purpose feed guides.
Paper feeds at an angle.
The printer is not level.
► Place the printer on a stable, level surface.
Paper is too thin.
► Use correct type of paper.
The paper is moist or affected by static.
► Store paper within specified temperature and humidity levels.
The paper is creased or wrinkled.
► Remove the creased/wrinkled paper from the feed tray.
Paper is not aligned correctly.
► Adjust tray print guides and rear stopper or Multi-Purpose feed guides.
Paper does not feed.
Paper feed selection is incorrect in printer driver.
► Be sure to set the correct paper size and tray in the driver as you are printing the
document.
Paper curls.
The paper is moist.
► Store paper within specified temperature and humidity levels.
The paper is too thin.
► For individual print jobs, make sure you set the type to match the media weight being
used.
► If you will always be using this type of paper, enter the printer menu and change the
default media weight setting.
► Try using a heavier paper. (If you are printing using the duplex unit and are using 20 or
24-lb. paper, try switching to 28-lb. paper)
► If you're printing presentation slides, switch to a lighter background color.
Paper jam has been cleared, but printer does not print.
The cover must be opened and closed to complete the paper jam clearing process.
► Open and close the top cover.
Printing Problems
The power is on, but the printer does not go on line.
There is a problem with the power connection.
► Turn off the printer and disconnect the power cable. Reconnect power cable and turn the
printer on. If this does not clear the fault, call for service.
289
Print processing does not start.
An error has occurred.
► Check the control panel. If an error message is displayed, correct the problem.
Print processing cancels.
The printer interface cable is faulty.
► Replace the printer interface cable.
Time out setting is too short.
► Enter the printer menu, go to the SYSTEM CONFIG MENU group and change the setting
for the WAIT TIMEOUT to a higher value.
Printer makes a strange noise.
The printer is not level.
► Place the printer on a stable, level surface.
There are scraps of paper or other foreign matter inside the printer.
► Open the top cover, lift out the drums/toners and remove any such objects, then replace
the drums/toners and close the cover.
The top cover is not firmly shut.
► Press down on either side of the top cover:
It takes a long time to start printing.
The printer has to warm up returning from power save mode.
► In the printer menu settings, set power save to a higher value to increase the length of
time before entering power save mode.
The image drum is carrying out a cleaning process to ensure print quality, which takes time.
► Wait for the process to finish.
The fuser unit adjusts temperature, which takes time.
► Wait for the process to finish.
The printer is processing data from another interface.
► Wait for the process to finish.
Print Quality Problems
Toner is flaking off the printed page.
The Media Weight setting is too low.
► If this happens only for a specific print job, reprint the job, changing the Media Weight
setting in the driver (File → Print → Properties [or Setup, or your application's equivalent])
to the next highest value (e.g., change from Medium to Medium Heavy).
► If this happens frequently, enter the printer menu and change the media weight setting to
the next highest value (see "Changing Default Media Settings" under "Print Media").
Toner is blistering on the printed page.
290
The Media Weight setting is too high.
► If this happens only for a specific print job, reprint the job, changing the Media Weight
setting in the driver (File → Print → Properties [or Setup, or your application's equivalent])
to the next lowest value (e.g., change from Medium Heavy to Medium).
► If this happens frequently, enter the printer menu and change the media weight setting to
the next lowest value (see "Changing Media Weight Settings in the Menu" under "Print
Media").
In the PCL mode, the text is printing more of a dark brown than black.
The printer is set to print black using CMYK rather than black only.
► Enter the menu, go to PCL EMULATION and change the TRUE BLACK menu setting to
ON.
Vertical white stripes
LED head is dirty.
► Clean the LED heads with the lens cleaner pad (one is supplied with the printer, one is
supplied with each replacement toner cartridge) or a soft, lint-free cloth moistened with
rubbing alcohol.
Toner is low.
► Change the toner cartridge.
Image drum is damaged.
► Change the image drum.
Vertical fading.
The LED head is dirty.
► Clean the LED heads with the lens cleaner pad (one is supplied with the printer, one is
supplied with each replacement toner cartridge) or a soft, lint-free cloth moistened with
rubbing alcohol.
Toner is low.
► Change the toner cartridge.
Print media is unsuitable for printer.
► Use recommended media.
Faint printing.
The toner cartridge is incorrectly installed.
► Reinstall the toner cartridge.
Toner is low.
► Change toner cartridge.
The paper is moist.
► Replace the paper with dry paper. Be sure to store paper within specified temperature
and humidity levels.
The print media is unsuitable for printer.
► Use recommended media.
291
Fading in patches
The paper is moist.
► Replace the paper with dry paper. Be sure to store paper within specified temperature
and humidity levels.
Vertical black stripes.
The black image drum is damaged.
► Replace the black image drum.
The black toner is low.
► Replace the black toner cartridge.
Periodic horizontal lines or spots.
If the lines or spots occur at intervals of approximately 3¾ inches (95 mm), the image drum is
damaged or dirty.
► Remove the drum which corresponds to the color of the lines/spots and carefully wipe the
shiny green drum surface with a soft, lint-free tissue. If this doesn't work, replace the
image drum.
If the lines or spots occur at intervals of approximately 35 mm, there is foreign matter inside
the image drum cartridge.
► Replace the image drum which corresponds to the color of the lines/spots.
If the lines or spots occur at intervals of approximately 3½ inches (88 mm), the fuser roller is
damaged.
► Change the fuser unit.
The image drum has been exposed to light.
► Remove the image drum corresponding to the color of the lines/spots from the printer and
store it in a dark place for several hours. If this does not work, replace the image drum.
Faint shading on unprinted sections.
Paper has been affected by static electricity.
► Replace with fresh paper. Raise the humidity level in the area of the printer. Be sure to
store paper within specified temperature and humidity levels.
The paper is too thick.
► Use recommended paper.
Toner is low.
► Change toner cartridge.
Blurred letter edges.
LED is dirty.
► Clean the LED heads with the lens cleaner pad (one is supplied with the printer, one is
supplied with each replacement toner cartridge) or a soft, lint-free cloth moistened with
rubbing alcohol.
Cannot print desired color because toner is low.
► Replace the toner cartridge.
292
Black print method does not match the application.
► Go into the PCL driver (Start → Settings → Printers, right click the printer icon, then click
Printing Preferences [Windows 2000], Properties [Windows Me, 98, 95] or Document
Defaults [Windows NT 4.0], click the Quality tab, then select Gloss (CMYK) under Black
finishing in photo printing).
Error Display Messages
Note: The Error messages below are in alphabetical sequence.
CHANGE BELT UNIT
Appears on the second line of the display to indicate that you must change the transfer belt.
CHANGE FUSER UNIT
Appears on the second line of the display to indicate that you must change the fuser unit.
CHANGE ddd IMAGE DRUM
Change the image drum (ddd indicates the drum color; e.g., CHANGE CYAN IMAGE DRUM).
CHANGE PAPER TO mmm/ppp
nnn:ttt MEDIA MISMATCH
The media in tray ttt must be changed to match the media designated in the print job (mmm/ppp
indicates correct media type; nnn represents the message number).
CHANGE PAPER TO mmm/ppp
nnn:ttt SIZE MISMATCH
The size of the media in tray ttt does not match the size designated in the print job (mmm/ppp
indicates correct media size; nnn represents the message number).
Either replace the paper with the appropriate size or press ON LINE to clear the message and
allow the print job to continue.
293
CHECK BELT UNIT
330:BELT UNIT MISSING
The transfer belt is not correctly installed.
CHECK DUPLEX
nnn:PAPER JAM
Remove the jammed paper.
CHECK FUSER UNIT
320:FUSER UNIT MISSING
The fuser unit is not correctly installed. Open the top cover and push down on the fuser unit to
be sure it is locked in place. If the message still appears, remove and reinstall the fuser unit.
CHECK IMAGE DRUM
nnn:ddd DRUM MISSING
Image drum ddd (e.g., 340:YELLOW DRUM MISSING) is either incorrectly installed or missing.
Check for proper installation/reinstall.
CHECK ttt
nnn:PAPER JAM
Remove the paper jammed in tray ttt.
CLOSE COVER
nnn:ccc COVER OPEN
Close cover ccc (e.g., 310:UPPER COVER OPEN).
COLLATE FAIL: TOO MANY PAGES
Memory overflow. Break up the print job into two or more groups of pages. If you run into this
problem often, consider installing additional memory in the printer.
294
DISK IS WRITE PROTECTED
An attempt was made to overwrite a read-only file.
DISK FILE OPERATION FAILED
Error with hard disk operations. Try printing the job again.
DISK FILE SYSTEM IS FULL
Hard disk/flash memory is full. Check with your System Administrator or go into the printer menu
and clear out some of the Proof & Print or Secure Print jobs stored on the disk.
ttt EMPTY
Appears on the second line of the display to indicate that tray ttt is empty. Refill the tray with
print media.
ERROR POSTSCRIPT
A PostScript error has occurred. The rest of the data is ignored. When the job has completed, it
aborts and the message automatically clears.
Try printing the job again. This message can occur if virtual memory is used up. Reduce the
size of the print job (instead of printing the whole file at once, print several pages at a time;
reduce the number of graphics; print the document at a lower resolution; etc.). If you run into
this problem often, consider installing additional memory in the printer.
INSTALL ADDITIONAL
MEMORY
nnn:MEMORY OVERFLOW
The print job exceeded the printer's memory. Press ON LINE to clear the message and
continue.
Reduce the size of the print job (instead of printing the whole file at once, print several pages at
a time; reduce the number of graphics; print the document at a lower resolution; etc.). If you run
into this problem often, consider installing additional memory in the printer.
295
INSTALL DUPLEX UNIT
360: DUPLEX UNIT OPEN
Duplex printing is enabled but there is no duplex unit installed. Install the duplex unit.
INSTALL NEW IMAGE DRUM
nnn:ddd DRUM LIFE
Replace the image drum indicated by ddd (e.g., 350: YELLOW DRUM LIFE).
INSTALL NEW TONER
nnn: ttt TONER EMPTY
Replace ttt toner cartridge (e.g., 410: YELLOW TONER EMPTY).
INSTALL PAPER CASSETTE
nnn:ttt MISSING
Tray ttt is not installed in the printer. Install the tray if it's missing.
INSTALL PAPER CASSETTE
nnn:ttt OPEN
Tray tttt is not pushed all the way in. Push the tray all the way in.
INSTALL PAPER CASSETTE
nnn:ttt MISSING
Tray tttt is not installed. Install the missing tray.
JOB OFFSET HOME ERROR
An error has occurred in the left-right shifting of successive copies of multi-copy print jobs. The
offset function is disabled for the rest of the job. Stop the printing, empty the top exit, and resend
296
the balance of the copies.
LOAD mmm
nnn: ttt EMPTY
Tray ttt is empty. Load the requested paper (mmm) in the tray.
LOAD mmm
500: MANUAL PRINT
A manual print job has been sent and you need to load the requested paper (mmm) in the MultiPurpose Tray, then press the ON LINE button to begin printing the job.
Note: If you do not press the ON LINE button within the time set by the MANUAL TIMEOUT
item in the SYSTEM CONFIG MENU (default = 60 seconds), the job will be cancelled and the
next job in the print queue will begin processing. If you do not want the printer to cancel such
print jobs if the ON LINE button is not pressed soon enough, enter the menu and change the
MANUAL TIMEOUT setting to OFF.
ttt NEAR END
Appears on the second line of the display to warn that print media in tray ttt is running out.
OPEN UPPER COVER
nnn:PAPER JAM
Remove the jammed paper.
OPEN UPPER COVER
401: PAPER MULTI FEED
Paper that is too long has been fed in from the Multi-Purpose Tray. Remove the partially fed
paper, then load acceptable paper and resend the print job.
297
OPEN UPPER COVER
400:PAPER SIZE ERROR
An inappropriate media size was fed from a tray. Change the media to an appropriate size, then
open and close the top cover.
POWER OFF/ON
nnn:NETWORK ERROR
A network error has occurred. Turn the printer off, then on again. Check the network to be sure
it is not down.
PRESS ONLINE SW
INVALID DATA
Invalid data was received. Press ON LINE to return to normal operation.
REMOVE THE PAPER
nnn:ttt UNSUITABLE SIZE
The size media loaded in tray ttt is not usable in that tray. Switch to a usable media size, or if
the size is acceptable in the Multi-Purpose Tray, switch to the Multi-Purpose Tray.
REMOVE THE PAPER
470:FINISHER STACKER FULL
Straight-through (face-up) output stacker is full. Remove the print media.
REMOVE THE PAPER
480: STACKER FULL
Top (face-down) output stacker is full. Remove the print media.
SERVICE CALL
nnn:FATAL ERROR
298
Try turning the printer off then on again. If the message persists, note the identifying error
number (nnn) and call for service.
tttt TONER LOW
Appears on the second line of the display to warn that the specified toner is low (ttt indicates
toner color; e.g. YELLOW TONER LOW). Be sure you have a replacement toner cartridge on
hand.
ttt TONER SENSOR ERROR
Appears on the second line of the display to indicate that there is a problem with the toner
sensor (ttt indicates toner color; e.g., CYAN TONER SENSOR ERROR). Call for service.
Status Display Messages
Note: These messages are in alphabetical sequence.
CANCELLING JOB
The printer is cancelling the current print job.
COLLATE COPY
iii/jjj
The printer is printing multiple copies using collating.
• iii = number of copy being printed
• jjj = total number of copies requested
COPY
kkk/lll
The printer is printing multiple copies:
• kkk = number of copy being printed
• lll = total number of copies requested
299
DATA ARRIVE
Data has been received, but processing has not yet started.
DATA PRESENT
Unprinted data remains in the buffer. The printer is waiting for additional data.
OFFLINE
The printer is off line.
ONLINE
The printer is on line.
PLEASE POWER OFF
Your request for a hard disk or Flash memory initialization has been processed. Turn the printer
off, then on again to reinitialize the hard disk or Flash memory.
POWER SAVE
Appears on the second line of the display to indicate that the printer is in the power save mode.
PRINTING
Data is being printed.
PROCESSING
Data is being processed.
300
RAM CHECK
RAM is being checked as part of the printer's initialization process.
WARMING UP
The printer is warming up.
Problem Solving: Macintosh Systems
Print job is garbled or fails to print
The time set for the printer to wait for additional data is too short.
► Press MENU to enter the printer menu and go to SYSTEM CONFIG MENU, then change
the WAIT TIMEOUT setting to a minimum of 40 seconds.
Cannot configure after USB connection.
Interface is disabled.
► Check that USB interface is set to enable.
MacOS version incorrect.
► Use MacOS version 9.0 or higher that supports USB connection. For earlier versions,
connect printer via a network.
USB cable does not meet specifications.
► Switch to a specification Ver.1.1 USB cable.
Configuration procedure was not correctly followed or cancelled.
► Configure again from the beginning.
USB cable is disconnected or faulty.
► Reconnect or try another cable.
A USB hub is being used.
► Connect the printer and computer directly.
Cannot print.
Printer is switched off.
► Turn the printer on.
USB cable is disconnected or faulty.
► Reconnect or try another cable.
A USB hub is being used.
► Try connecting the printer and computer directly.
301
There is a Hand icon on the desktop printer.
► Select Start printer queue in the Printer menu.
Configuration procedure was not correctly followed or cancelled.
► Configure again from the beginning.
Memory error occurs.
Desktop print monitor or print monitor memory is insufficient.
► Increase memory size.
Printing is slow.
Print processing is carried out by the computer.
► Use a computer with faster print processing.
► Set lower print resolution in the printer driver.
Data is too complex.
► Simplify data.
Problem Solving: Windows Systems
Cannot configure for parallel connection.
The computer does not support bi-directional parallel interface.
► Use a computer that does.
Parallel cable does not meet specifications.
► Use IEEE-1284 compatible, bi-directional parallel cable.
Interface is disabled.
► Check that parallel interface is set to enable in the printer menu.
Configuration procedure was not correctly followed or was cancelled.
► Configure again from the beginning.
Parallel cable is disconnected or faulty.
► Check the connections; if okay, try another cable.
A converter, buffer or extension cable is being used.
► Connect the printer directly to the computer.
Cannot configure for USB connection.
Windows NT4.0 does not support USB.
► Use parallel connection instead.
Windows 95 or 3.1 systems which have been upgraded to Windows 98 are not guaranteed to
work with USB.
► Use parallel connection instead.
Computer does not support USB interface.
► Check if there is USB controller in device manager. If not, use parallel connection instead.
302
USB cable does not meet specifications.
► Use USB cable which meets specification Ver.1.1.
Interface is disabled.
► Check that USB interface is set to Enable.
Configuration procedure was not correctly followed or cancelled.
► Configure again from the beginning.
USB cable is disconnected or faulty.
► Check the connections; if okay, try another cable.
A USB hub is being used.
► Try connecting the printer directly to the computer.
Printout is garbled or incorrect with parallel connection.
Possible mismatch on parallel connection between computer and printer.
► Disable ECP.
Cannot print.
LPT write error.
PRNUSBx write error.
Interface is disabled.
► In the printer menu settings, enable Parallel or USB interface.
Printer is switched off.
► Turn the printer on.
Printer interface cable is disconnected.
► Reconnect the printer interface cable.
A converter, buffer, extension cable or USB hub is being used.
► Connect the printer directly to the computer.
Printer driver output port is incorrect.
► Set the correct output port for the printer (Click Start → Settings → Printers; right click the
printer icon, then click Sharing → Ports).
Printer is not selected.
► Be sure the OKI C9200 or C9400 driver is selected when printing a document, or set it as
the default printer (Click Start → Settings → Printers; right click the printer icon, then click
Set as Default).
Problem with the printer driver.
► Reinstall the printer driver.
Application error or general protection fault.
Application is not suitable for the Windows version being used.
► Upgrade the application.
Memory is insufficient for the number of applications running.
► Close all other applications.
303
Print file is corrupted.
► Correct or recreate the file.
Memory is insufficient for the application.
► Increase computer’s memory.
Insufficient free space on computer's hard disk.
► Delete unnecessary files (start with Temporary files).
Problem with the printer driver.
► Reinstall the printer driver.
Collated printing is selected, but all the pages are printing as one long duplexed job
instead of printing as individually collated duplexed jobs.
If you are using collating with duplex printing, you must select the number of copies in the
printer driver.
► In the Print dialog box, click Properties (or your application's equivalent) and set the
number of copies in the driver, then click OK and print the document. If you are printing
using the Windows 2000 PCL driver, be sure to set the number of copies in the Paper tab,
not the General tab.
Insufficient memory.
Memory is insufficient for number of applications running.
► Close all other applications.
Printing is slow.
Print processing is carried out by the computer.
► Use a computer with a faster processor.
► Set lower print resolution in the printer driver.
Data is too complex.
► Simplify data.
304
Maintenance
Toner Cartridges
Replacing the Toner Cartridges
XXX TONER LOW
or
INSTALL NEW TONER
NNN: XXX TONER EMPTY
Back
Right
Left
(MP Tray)
(Straight-Through
Paper Path)
Front
1. Turn the printer off.
2. Pull up on the handle and open the top cover.
305
3. Locate the cartridge (XXX, e.g., BLACK) to be changed and move the blue lock lever to
the right (away from the open cover) as far as it will go.
4. Lift the cartridge then slide it toward the back (to clear the tube) and lift it out.
5. Unpack the new toner cartridge and shake it back and forth to distribute the toner.
306
6. Hold the cartridge in a horizontal position and remove the tape.
7. Hold the cartridge in a vertical position, then lower the port end into the image drum,
sliding the port onto the tube on the drum.
Port
Tube
8. Press the cartridge toward the tube, then lower the opposite end, aligning the white tab
on the toner cartridge with the groove in the drum. Push the toner cartridge lock lever to
the left (toward the open cover) as far as it will go.
307
Caution! Be sure to push the lock lever all the way back. If it is not pushed back
and you close the cover, the lever could damage the LED printhead.
9. Remove the LED lens cleaner (supplied with the toner) from its packet and use it to wipe
the corresponding LED head clean.
10. Close the cover and turn the printer back on.
Important! After the new toner cartridge is installed, the TONER LOW or TONER EMPTY
message should disappear from the display. If it doesn't, try printing a page. If it still
doesn't disappear, reinstall the toner cartridge.
Toner Cartridge Life
Toner cartridge life depends on the page density, the percentage of each page that is printed
with toner. An average business letter prints at between 3% and 5% density; graphics density is
usually higher. The higher the print density, the more toner is used.
308
On the average, the toner cartridge will produce approximately 15,000 sheets at 5% print
density. This can vary greatly depending on the relative amount of a particular toner color used
in your print jobs.
Important! The first toner cartridges you place in your printer will only produce about
half as many sheets. This is normal, as the new image drum reservoirs and developing
roller system must saturate with toner.
Be sure you have a replacement toner cartridge on hand after the XXX TONER LOW message
(e.g., BLACK TONER LOW) appears on the second line of the display. At this point, the printer
will print about 100 more sheets.
You must replace the toner cartridge when the
INSTALL NEW TONER
nnn: XXXXX TONER EMPTY
message appears.
For example:
INSTALL NEW TONER
413: BLACK TONER EMPTY
At this point the printer will stop printing. Printing will not resume until the empty toner cartridge
is replaced.
Image Drums
Replacing Image Drums
CHANGE XXX IMAGE DRUM
309
Note: You will need both a new image drum and a new toner cartridge to replace an image
drum.
Caution! The image drum can be damaged by too much exposure to light. Leave the
image drum in the package until you are ready to install it in the printer.
Back
Right
Left
(MP Tray)
(Straight-Through
Paper Path)
Front
1. Turn the printer off.
2. Pull up on the handle and lift the cover.
310
3. Lift out the appropriate image drum (corresponding to XXX on the display) and discard it
and the toner cartridge in accordance with local regulations.
Caution!
Avoid touching the green surface of the image drum.
Be careful not to set the cartridge down on anything that might scratch the
green surface.
Keep the drum from exposure to direct sunlight and don't let it sit in room light
for more than 5 minutes.
4. Unpack the new drum, then remove the protective sheet.
5. Remove the tape.
311
6. Unlock the blanking plate by pushing in the direction of the molded-in arrow, then
remove the blanking plate from the drum.
7. Lower the new image drum into the printer, aligning the pins on the ends of the drum
with the slots (indicated by arrows) in the printer.
8. Unpack the new toner cartridge and shake it back and forth to distribute the toner.
312
9. Carefully remove the tape.
10. Hold the cartridge in a vertical position and lower the port end into the image drum,
sliding the port onto the tube on the drum.
Port
Tube
11. Press the cartridge toward the tube, then lower the opposite end, aligning the white tab
on the toner cartridge with the groove in the drum. Push the toner cartridge lock lever to
the left (toward the open cover) as far as it will go.
313
Caution! Be sure to push the lock lever all the way back. If it is not pushed back
and you close the cover, the lever could damage the LED printhead.
12. Remove the LED lens cleaner (supplied with the toner) from its packet and use it to wipe
the corresponding LED head clean.
13. Close the cover and turn the printer back on.
Important! After the drum/toner is installed, the CHANGE XXX IMAGE DRUM message
should disappear from the display. If it doesn't, try printing a page. If it still doesn't
disappear, reinstall the drum.
314
Image Drum Precautions
The image drums are fragile. To avoid damage to new drums, take these precautions while
handling the new image drum cartridges:
Avoid touching the green drum surface.
Be careful not to set the cartridge down on anything that might scratch the green drum
surface.
Keep the drum from exposure to direct sunlight and don't let it sit in room light for more
than 5 minutes.
Leave the image drum in the package until you are ready to install it in the printer.
Image Drum Life
The life of the image drums depends on a number of factors, including
operating temperature
humidity
type of paper you use
number of pages per job.
Each time you print or turn the printer on/off, the drums have to rotate to start up and to wind
down. Frequent one-page print jobs will age your drums more quickly than multiple-page print
jobs.
For simplex (one-sided) printing with 5% area coverage, the image drums should normally last:
about 26,000 pages at 3 pages per job, or
about 39,000 pages, continuous printing
Important! These numbers are approximate since you won't print the same number of
pages each time, the amount of color will vary from page to page, and environmental
conditions and print media used may vary.
When an image drum nears the end of its life, the CHANGE DRUM message appears on the
display. You should have a new image drum cartridge and a new toner cartridge on hand at this
point. Replace the image drum when the print becomes faint or begins to deteriorate.
Cleaning the LED Arrays
When to Clean the LED Arrays
Clean the corresponding LED array every time you install a new toner cartridge.
If faded vertical stripes appear on your printed pages between toner changes, clean the
LED arrays.
315
To clean the LED arrays:
1. Pull up on the handle and lift the cover.
2. Remove the LED Lens Cleaner Pad from the package and carefully run it along each
LED array, folding it over to a fresh surface before cleaning each additional array.
Note: If you do not have a lens cleaner pad, you can use a lint-free cloth with a little
rubbing alcohol on it to clean the LED arrays.
3. Close the printer cover.
316
Replacing the Fuser Unit
When the CHANGE FUSER UNIT message appears on the display, it's time to replace the
Fuser Unit.
Caution! The fuser unit may be HOT. Be sure to let it cool down before attempting to
replace it.
Back
Right
Left
(MP Tray)
(Straight-Through
Paper Path)
Front
317
1. Turn the printer off.
2. Pull up on the handle and lift the cover.
3. Push the blue lock levers at either end of the fuser unit to the left (toward the open
printer cover) to release the fuser.
4. Grab the handle and lift the fuser out."
318
5. Unpack the replacement fuser and lower it into the printer, pushing down until you feel it
snap into place.
Note: Make sure the blue lock levers at either end of the fuser have snapped back
locking the fuser unit in place. If not, push them to the right (away from the open cover).
6. If present, remove the orange fuser transport lock:
a. Move the fuser roller lock lever to the right (away from the open cover) and remove
the lock.
b. Move the fuser roller release lever to the left (toward the open cover) to re-lock the
319
roller.
7. Close the printer cover and turn the printer back on.
Replacing the Transfer Belt
When the message CHANGE BELT UNIT appears on the display, it's time to replace the
transfer belt unit.
320
Back
Right
Left
(MP Tray)
(Straight-Through
Paper Path)
Front
1. Turn the printer off.
2. Pull up on the handle and open the top cover.
3. Remove the four image drums/toner cartridges.
321
4. Press the blue transfer belt lock levers (circled) to the left (toward the open cover).
5. Lift the end of the transfer belt unit up by the blue handle.
6. Grasp both handles and lift the transfer belt unit out of the printer.
322
7. Unpack the new transfer belt unit.
Caution! Avoid touching the shiny black surface of the transfer belt.
8. Hold the transfer belt by the handles and lower it into the printer.
9. Move the blue lock levers to the right (away from the open cover) to lock the transfer
belt in place.
10. Put the image drums/toner cartridges back into the printer.
323
11. Close the cover and turn the printer back on.
Setting the Color Registration
Normally the printer is programmed to automatically set the Color Registration:
every time the printer is turned on
whenever the cover is closed
after every 200 printed pages
You can also initiate the automatic registration manually or you can disengage the automatic
registration feature and set the color registration manually.
Initiating the Auto Registration Manually
To ensure optimum printer performance, you should perform a Color Registration whenever you
remove and replace the drum/toner cradle
replace an image drum
lift out an image drum, then put it back
You can initiate automatic registration by shutting the printer off and turning it back on, but it's
quicker to enter the menu and execute the color registration from there. To do this:
324
1. Press MENU repeatedly until COLOR MENU appears on the display.
2. Press ITEM + repeatedly until AUTO REGISTRATION EXECUTE appears on the
display.
3. Press SELECT.
ON LINE COLOR ADJUSTING
flashes on the display.
4. When the automatic registration is complete, the printer goes back on line.
To Set the Color Registration Manually:
1. Press MENU repeatedly until COLOR MENU appears on the display.
2. Press ITEM + repeatedly until AUTO REGISTRATION ON * appears on the display.
3. Press VALUE + to change the setting to OFF.
4. Press SELECT to engage the setting.
An asterisk appears next to OFF.
5. Press ITEM +.
ADJUST REGISTRATION PRINT PATTERN
appears on the display.
6. Press SELECT and wait for the registration pattern to print:
325
7. Examine the page. The test pattern page has nine sections, each with a series of lined
boxes in it. Beginning with section #1, find the box which shows no color in the spaces
between the black lines, and make a note of its number.
Here's what you're looking for:
Not this:
8. Press ITEM +.
ADJUST REGISTRATION #1
0*
appears on the display.
9. Press VALUE + or VALUE - until the number corresponding to the box which shows no
color in the spaces appears on the second line of the display.
10. Press SELECT.
An asterisk appears next to the number.
11. Press ITEM +.
ADJUST REGISTRATION #2
0*
appears on the display.
12. Repeat steps 9 through 11 until you have entered the appropriate numbers for all nine
test pattern sections.
13. Press ITEM + several times until AUTO REGISTRATION PRINT PATTERN appears on
326
the display.
14. Press SELECT and wait for the pattern to print.
15. Re-examine the test page. The boxes with no color in the spaces should all now
correspond to 0. If not, repeat steps 9 through 11 for those that don't, then follow step 13
to reprint the test pattern.
16. Press ON LINE to save the settings and exit the menu.
327
Working with Color
Glossary
Additive Primaries
Red, Green and Blue (RGB) are the additive primaries and the basis for forming other colors in
displays such as computer monitors or televisions.
Brightness
The relative lightness or darkness of a color, is usually measured as a percentage from 0%
(black) to 100% (white).
CIE
In 1931, the Commission Internationale de l’Eclairage (CIE) devised a color system based on
the human visual system which is now an accepted standard. This system is not linear and is
therefore difficult to interpret. There have been modifications to the system that have given rise
to CIELab and CIELuv.
Cluster-dot Screening
This is a halftoning method that uses multiple pixels that vary from small to larger dots as the
color gets darker. It is characterized by a polka-dot look.
CMY(K)
Cyan, magenta, yellow and black are the toners used in the four color print process. Due to the
imperfections in toners, black is added rather than produced by mixing the other three inks.
Black is identified as ‘K’ to avoid confusion with other colors such as blue.
Color Gamut
328
The range of colors that a device can produce is known as its color gamut. Devices are unable
to produce all colors that occur in nature so their color gamut is a subset of this.
Color Management System (CMS)
A system used to communicate color fidelity across devices such as input, display and output to
ensure that the best color rendition possible is given at all times.
Color Mapping
The translation of color representation from one device (or system) to another. For example,
from computer screen colors to printed colors.
Color Models
A color model is a system that allows colors to be arranged or identified. There are various
models in existence, with some more suitable to specific applications than others.
Color Separations
Each of the process colors are printed separately and must therefore be specified individually,
as the color is needed. Image data is therefore split into the primary colors (plus spot colors)
before printing.
Color Space
This is a method of describing color. Some systems are device-dependent such as RGB and
CMYK. The CIE system is a device independent color space. Note that all color models are not
color spaces in their own right.
Colorants
These are the colors used by a device to reproduce color. A printing press uses the CMYK
(cyan, magenta, yellow, black) colorants.
Density
In this context, density bears no relation to the mass and volume of the object. Rather, it is the
ability of the object to absorb light. The more light absorbed, the higher the object density.
Dithering
329
A technique where pixels of different colors are placed in close proximity to give the illusion of
another color as perceived by the human visual system.
Dot Gain
During the printing process, toners may spread causing dots on a page to print larger than
intended. This results in darker tones and colors. The problem can be compensated for by
careful adjustment.
Error Diffusion
This is usually associated with halftoning, but can also be used with dither. The error between a
pixel and its intended value is propagated to adjacent pixels to produce a balanced overall
effect. Results may sometimes appear grainy.
Grayscale
Differing shades of gray ranging from black to white. Eight bits of data will produce 256 shades
of gray.
Halftoning
A printed image is composed of dots (or pixels). The spacing of these pixels can give the illusion
of shades or tone. Increasing the spacing of dots lightens the shade so that it tends towards
white (color of the page).
Highlight
This is the lightest part of an image. In the extreme, this would be white.
HSB Model
Colors are defined by hue, saturation and brightness. The dimensions are similar to the HSL
model but the HSB model is related to the RGB system.
HSL Model
Colors are defined by hue, saturation and lightness.
Hue
330
Hue is the color reflected from or transmitted through an object. It is measured as a location on
the standard color wheel, expressed as a degree between 0° to 360°. In common use, hue is
identified by the name of the color such as red, green, orange, etc.
Indexed Color
Color pixels are represented by 8-bits. This gives the possibility of 256 colors which are
contained in a lookup table.
Lightness
This describes the intensity of a color and determines whether a color is closer to black or white.
Moiré Pattern
This is an undesirable pattern that occurs due to pixel (or) dot placement. The eye is able to
pick up repetitive patterns that exist within an image.
Pixel
This is the smallest addressable dot or PICture ELement. This has been abbreviated as PIXEL
rather than PICEL.
Primary Color
All colors can be produced by mixing a limited set of colors. There are two different sets of
primary colors associated with the video and printing industries: Additive Primaries (RGB) and
Subtractive Primaries (CMYK).
Registration
This describes the alignment of the various colors when printing. As each of the process
primaries are specified separately and printed individually, it is important that the color is placed
in precise locations or the colors will not align to produce the desired result.
RGB
331
Computer monitors, for example, use red, green and blue phosphors to display images. These
colors are specified using the RGB model.
Saturation
Saturation, sometimes called chroma, is the strength or purity of the color. It represents the
amount of grey in proportion to the hue and is measured as a percentage from 0% (grey) to
100% (fully saturated). On the standard color wheel, saturation increases from the center to the
edge.
Secondary Color
Mixing two primary colors in equal amounts will produce a secondary color (e.g., Red + Green =
Yellow).
Spot Color
A term used in offset printing. These are additional colors used in printing that are not a part of
the process ink set and are specified individually. These colors are required when the end result
is of paramount importance (such as within a corporate logo) as there is a substantial increase
in cost. A separate plate is also required.
Subtractive Primaries
Cyan, Magenta and Yellow (CMY) are the subtractive primaries and are the basis for toners
used in color printing. Color is produced because the toners are designed to absorb certain
wavelengths of light and transmit others.
YCC
This system was developed by Kodak for encoding color images for display on video monitors.
RGB values are converted to a luminance component (Y) and chromatic components (C1) and
(C2).
332
Additive versus Subtractive
Primary colors can be categorized as either additive or subtractive.
Computer monitors use additive primaries.
The printing process uses subtractive primaries.
How do the two differ?
Additive Primaries
The additive primaries are Red, Green and Blue (RGB). Video technology such as computer
monitors and television screens uses additive primaries.
Starting from black (lack of color) and adding red, green and blue in equal quantities will
generate shades of gray. A full, balanced mixture of all three colors produces white. Mixing the
three colors in different quantities will generate intermediate colors.
Subtractive Primaries
333
The subtractive primaries are Cyan, Magenta, and Yellow (CMY). Printing processes use
subtractive primaries.
With subtractive primaries, we start with a white background (usually paper ) and add
translucent inks of cyan, magenta and yellow to subtract certain wavelengths of light.
For example, cyan ink on a page appears as cyan because the ink removes components of red
light and reflects green and blue, which we perceive as cyan.
In theory, a combination of the three subtractive primaries should produce black. In practice,
pigments used in toner are not perfect and the combination usually gives rise to a dark
green/brown instead of black. For this reason, in many color output devices, a separate black
toner is used to produce grays and black (in shadows and black text for example). This is the
CMYK (Cyan / Magenta / Yellow / Black) model and is the method most widely used in the color
printing and printer industry.
The OKI® C9000 Series Printers use separate cyan, magenta, yellow and black toner cartridges
to generate high definition color images.
Color Adjustments
Certain images such as bitmaps sometimes print with a strong hint of a particular color. Images
that look fine when viewed on a monitor may not necessarily print that way.
The color that appears to dominate the picture will vary depending on factors such as
The scanner or other input device having a bias towards a particular color.
The monitor's inability to represent certain colors on-screen.
Color Adjustment Using the Software Application
Many software packages provide a way to reduce the amount of any of the process colors put
on the page in relation to the others.
Example
You find that all of your graphics have a tendency to contain too much blue. To compensate
for this, reduce the amount of cyan or magenta, which combine to produce blue (if you do
this, bear in mind that other colors containing cyan or magenta will also be affected). An
alternative would be to increase the amount of yellow. This has the advantage of increasing
334
color saturation while balancing the image.
Changing the Lightness & Saturation Settings in the OKI PCL
Driver
Another method of decreasing strong colors is to increase the lightness setting. To compensate
for this, the saturation setting must be stepped down accordingly. As a rule, the saturation
should be stepped down an equal number of steps to the level that the lightness has been
stepped up.
This can be done in the OKI® C9000 Series PCL printer driver as you are printing the document:
1. Click Properties or Printer Setup or the equivalent button in your Print dialog box.
2. Click the Color tab.
3. Select Manual color.
4. Adjust the Lightness and Saturation settings at the bottom of the screen.
5. Click OK.
Color Perception
Color perception depends on the presence of
A light source
An object
An observer
Our perception of color involves light from a source interacting with an object and entering the
eye. The composition of the light and its interaction with the object will define the color we see.
Reflected Light
A reflective object absorbs some sections of the visible spectrum and reflects the rest. What we
see is the reflected portion. An object removing wavelengths at the ultra violet end of the
spectrum, for example, will appear red.
335
Transmitted Light
A transmissive object allows light to pass through it and may absorb a section of the spectrum.
The color of the object in this case will depend on the wavelengths of light that are allowed to
pass through.
Emitted Light
An emissive object emits light. The appearance of the light will depend on the wavelengths
emitted.
Color Registration
The CMYK printing process uses overlapping toner of cyan, magenta and yellow. To produce
the best possible output, the colors must print in specific positions so that overlaps and dithering
are accurate. If the colors are not aligned, the resulting print will have color shifts (colors
produced where incorrect colors overlay to produce an undesired color) or appear blurred.
Using black to print gray tints and black text eliminates the problem when printing gray and
black, but not when color is constructed from two or more of the process primaries.
The illustration shows how registration problems can cause undesired affects.
Color Wheel
The relationship between colors can be best shown on what is known as a color wheel. The hue
value of a particular color is expressed in degrees. For example, the additive primaries are
displaced by 120° from each other: red at 0°, green at 120° and blue at 240°. The subtractive
336
primaries, yellow, cyan and magenta, are located at mid points between these.
The color wheel shows the following relationships:
Each color is a secondary color of the two colors on either side of it. For example, mixing
equal quantities of yellow and magenta will produce red.
A color is directly opposite its complement.
We can add another set of neighboring colors on the color wheel to produce additional
intermediate colors. The numbers on the color wheel doubles to twelve:
Repeating the procedure a number of times produces a color wheel with subtle changes of hue
from neighbor to neighbor.
Dithering & Halftones
No matter how colors are specified, the printer is only able to use a combination of three colors
plus black to generate an image on paper. To achieve this the printer uses processes known as
dithering and halftoning.
Dithering
Each addressable picture element (pixel) on a monitor screen or printed output contributes to
what we see in the final image. The pixels are placed in close proximity so the eye is unable to
resolve individual dots. Colors of adjacent pixels appear to merge and produce a new color.
Using dot patterns of a given set of colors to generate new colors is known as dithering.
337
Halftoning
Shades of gray can be generated by using a similar method of black dot placement. This
technique is known as halftoning and gives rise to what we perceive as a continuous tone
image.
The entire printing area is split into sections known as cells (much like a grid). The patterns
within the cell are then altered to obtain the required amount of grayscale. An area of an image
containing 50% gray will contain cells that have half of the dots within the cell printed with black
and the other half left empty.
The Electromagnetic Spectrum
Visible Light
Visible light comprises a minute portion of the electromagnetic (EM) spectrum. Although we are
"blind" to the rest of the EM spectrum, the part we do see has a significant impact on our
338
perception of everything around us.
White Light
White light contains light from all visible wavelengths in balanced quantities.
Black Light
Black light is the absence of all wavelengths.
Perceived Light
Different individual wavelengths in the spectrum give rise to what we perceive as color. For
example, a wavelength around 700 nm (0.0007 mm wavelength) in interpreted by our eyes as
red, while the other end of the scale, 400 nm, is interpreted by our eyes as violet.
Neutral Colors
Although the term color is used, neutral colors do not have properties of hue or saturation. They
are described in terms of lightness only.
The neutral colors are black and white and all shades of gray in between. A balanced mix of the
subtractive primariescyan, magenta and yellowyields the neutral color or black (in theory). The
same effect can be achieved with the additive primaries by having an equal mix of red, green
and blue light.
Primary & Secondary Colors
In theory, all colors can be made up from a very small group of color elements.
Primary Colors
There are three primary colors: blue, red and yellow. All other colors can be obtained by mixing
the primary colors in varying proportions.
Secondary Colors
Mixing two primary colors in equal proportions produces what is known as a secondary color.
For example, mixing blue and yellow produces the secondary color green.
Problems Using Color
Computer monitors and printers use different methods to generate colors. Computer monitors
339
use RGB (additive primaries) while printers use CMYK (subtractive primaries, plus black).
In addition, there is a limit on how many colors a monitor or printer can generate. This is known
as a device's color gamut:
Some colors can be reproduced on both devices, while others can be displayed on a monitor
but cannot be printed, or vice versa. In practice this may lead to a printed page not matching the
original on-screen image. What has happened?
Images can be captured:
through scans
through digital photography
through direct input via application programs
But however the original image is obtained, it will be displayed and manipulated on-screen in
RGB color, then converted to CMYK for printing. Each of these processes requires data
conversion and manipulation.
An image seen on a computer monitor relies on the monitor's ability to reproduce the image and
represent colors within it. Adjustments such as brightness, color and contrast also tailor the
image to the preference of the viewer rather than a display of true color. The data sent to the
printer may not be adjusted to allow for imperfections in the toners used.
These differences in monitors and printers can to a large extent be reconciled through the use
of Color Management Systems.
Specifying Color
There are many ways to specify color and many models to use, including:
HSL
RGB
HSB
CMY[K]
CIE Yxy
CIELAB and CIELUV
YCC
Each of these models have their advantages and disadvantages and are useful in particular
situations. We will only discuss the first two here.
The HSL Model
340
The color wheel, described above, is a two-dimensional view of the HSL model. The HSL model
is based on Hue, Saturation and Lightness as components for specifying color. The third
dimension in this case is lightness, which describes the tendency towards black or white.
The RGB Model
Most applications support the RGB model which (along with CMYK) is perhaps the simplest to
use. This model is used to specify colors by varying the proportions and levels of the red, green
and blue components.
The amount of red, green and blue in a color is usually expressed as a number from 0 to 255.
Less commonly it may expressed as a number between 0 and 65535 or as a percentage.
Converting between systems is straightforward.
Example
To achieve a color that is described as 100% red, 50% green and 40% blue:
255 Color Scale
100/100 x 255 = 255 red
50/100 x 255 = 128 green
40/100 x 255 = 102 blue
65535 Color Scale
100/100 x 65535 = 65535 red
50/100 x 65535 = 32768 green
341
40/100 x 65535 = 26214 blue
The printout from this set of numbers should produce a color close to the original. However,
it may be necessary to make minor adjustments until the right combination is found.
Once a color match is obtained, the RGB component numbers should be entered regardless of
the colors displayed on-screen.
To maintain color consistency it is recommended that OKI® consumables be used since they are
manufactured specifically for the OKI C9000 Series Printer and will produce the best color
results.
Using the Color Swatch Utility
Note: The Color Swatch Utility is not available for the Windows 95 PostScript Driver. It can be
accessed in the Windows 95 PCL driver.
Differences in the way colors are represented on the computer screen (RGB) and the way they
appear on the printed document (CMYK) can result in undesired colors in the printed document.
Use the Color Swatch Utility to set your application's RGB values to produce the color you want
regardless of what you see on the screen.
The OKI® Color Swatch Utility prints a series of sample colors each with RGB values listed
below. To ensure that a particular color prints true, pick the appropriate color from the swatch
and use its RGB values to designate that color in your software application (ignore the color's
appearance on your screen).
1. Click Start → Programs OKI C Series → Color Swatch Utility.
The Swatch Utility dialog box appears.
2. To set custom values for Hue, Saturation and Lightness, click File → Custom Swatch,
then make your changes in the Customize Color dialog box and click OK.
3. Click File → Print.
4. Make sure that the OKI C9200 or C9400 printer is selected, then print the swatch.
5. Find the color on the swatch that most closely matches the color you want, then use the
RGB values listed for the color to designate that color in your software application.
342
Accessing the Color Swatches in the Windows 95 PCL Driver
1. Click Start → Settings → Printers.
2. Right click the OKI C9200 or C9400 PCL printer icon, then click Properties.
The OKI PCL Properties dialog box appears.
3. Click the Color tab.
4. Click Print color swatch, then make your selection of swatches to print and click OK.
Windows ICM (Image Color Matching)
Note: Windows ICM is not available for Windows NT 4.0.
If you prefer, you can use Windows Image Color Matching to provide consistency between the
color of images displayed on the screen and the color of images generated by the printer.
Note: For additional information on Windows color management, see
http://www.microsoft.com/hwdev/devdes/icmwp.htm.
ICM: Windows 2000
Activating the ICM Files in the Windows 2000 PCL Driver
To activate the OKI ICM files in the Windows 2000 PCL driver:
1. Click Start → Settings → Printers.
The Printers dialog box appears.
2. Right click the OKI C9200 or C9400 PCL printer icon then click Properties.
3. Click the Color Management tab.
4. Click Add, then go to the Windows\System32\Color directory.
5. Select the OKI C9200 or C9400 ICM files and click Add.
6. Click Apply, then click OK and close the Printers dialog box.
Activating the OKI ICM Files in the Windows 2000 PostScript Driver
To activate the OKI ICM files in the Windows 2000 PostScript driver:
1. Click Start → Settings → Printers.
The Printers dialog box appears.
2. Right click the OKI C9200 or C9400 PostScript printer icon then click Properties.
3. Click the Color Management tab.
343
4. Click Add, then go to the Windows\System32\Color directory.
5. Select the OKI C9200 or C9400 ICM files, then click Add.
6.
Click Apply.
7. Click OK.
8. Right click the OKI C9200 or C9400 PostScript printer icon then click Printing
Preferences.
9. On the Layout tab, click Advanced, then select your choice for ICM Method from the
Image Color management drop-down list.
10. Click OK twice, then close the Printers dialog box.
ICM: Windows Me/98/95
Activating the OKI ICM Files in the Windows Me/98/95 PCL Driver
To activate the OKI ICM files in the Windows Me/98/95 PCL driver:
1. Click Start → Settings → Printers.
The Printers dialog box appears.
2. Right click the OKI C9200 or C9400 PCL printer icon then click Properties.
3. Click the Color Management tab.
4. Click Add, then select the OKI C9200 or C9400 ICM files (e.g., Ok9400l1.icm and
Ok9400l2.icm).
5. Click Add.
6. Click Apply, then click OK.
Activating the OKI ICM Files in the Windows Me/98/95 PostScript Driver
To activate the OKI ICM files in the Windows Me/98/95 PostScript printer driver:
1. Click Start → Settings → Printers.
The Printers dialog box appears.
2. Right click the OKI C9200 or C9400 PostScript printer icon, then click Properties.
3. Click the Color Management tab.
4. Click Add, then select the OKI C9200 or C9400 ICM files (Ok9400l1.icm and
Ok9400l2.icm).
5. Click Add.
6. Click Apply, then click OK.
7. Right click the OKI C9200 or C9400 PostScript printer icon, then click Properties.
8. Click the Color tab.
9. Click Windows ICM to select it, then click Options.
The Image Color Matching dialog box appears.
10. Select you preferences for Image color matching method and Rendering intent, then
click OK.
11. Click OK, then close the Printers dialog box.
344
Color Management
Color Management Systems
Color Management Systems (CMS), such as those found in the OKI® C9000 Series printer
drivers, help correct mismatches that may occur during the RGB and CMYK conversion
process.
Color Management Systems ensure a better match between the input data and the printed
result, but cannot always allow for monitor adjustment or variations in paper stock.
Effects of Paper
Color. Paper can sometimes appear blue or cream in hue. This will have an effect on the light
reflected from the page which can change the appearance of some colors.
Texture. The texture of the paper used will affect the way that light is scattered and may also
result in patches of light or dense color.
You should experiment with a variety of papers to find and adopt a paper that provides the best
results for your print jobs.
Potential Problems with Color: Plan, plan, plan!
Watch the amount of color you use: too much color can have a negative affect on the
overall document
Be careful when using colors considered garish. These will definitely affect the way the
document is perceived and should be used only to create an intentional special affect.
Consider the result when colors are placed in close proximity: make sure they complement
one another and enhance the document rather than detracting from it.
Planning ahead with care should greatly minimize any of these problems.
Experiment for Best Results
If specific colors are of paramount importance, such as those in your company logo, use the
OKI Color Swatch Utility to determine the RGB values to use in your application software to give
the closest match to the required color.
345
®
Color Management: Macintosh
Software applications generally have their own color matching and management facilities for
display and printing. Please refer to the documentation for the software application on how to
carry out color matching and management from within the software.
Important! Please note that some software applications may overwrite the settings in
the printer driver.
1. Double click on the printer icon to open the printer dialog.
2. Click File → Print Window.
3. Select Color Matching from the drop down list.
4. Select the color printing required under Print Color.
5. Select the printer profile required under Printer Profile.
6. Select Printer Specific Options 1 from the drop down list, then select the settings from
the various options for color printing.
346
7. Click Save Settings to save the printer driver settings or click Print to print the document.
Color Management: Windows 2000
Software applications generally have their own color matching and management facilities for
display and printing. Please refer to the software application's documentation for information on
color matching and management from within the software.
Important! Please note that some software applications may overwrite the settings in
the printer driver.
Windows 2000 PCL Driver
Color Management for an Individual Print Job: Windows 2000 PCL
To set the color management options manually for a print job using the Windows 2000 PCL
driver:
1. Open the document in the software application.
2. Click File → Print.
The Print dialog box appears.
3. Make sure the OKI C9200 or C9400 PCL printer is selected, then click the Color tab.
347
Note: If you select Manual Color, you can adjust each item of the Color Setting.
We recommend Manual Color only for users who have a lot of experience with color
printing. When these adjustments are made, sometimes the printed colors differ greatly
from the colors on the screen. Continue to adjust settings, changing one setting at a
time, until the desired colors are achieved.
4. To make the color settings manually, click Manual color under Color mode.
Note: For additional information on the various manual color parameters, see the help
for the OKI C Series PCL printer driver (click
at the top of the dialog box).
a. Under Halftone type, select the dithering method.
b. Under Color setting, select how the color will be determined.
c. Under Manual adjustment, adjust the Lightness and Saturation.
5. For black only printing, click Monochrome, then set the Lightness and Contrast under
Manual adjustment. For more information, see the help for the OKI C Series PCL printer
driver.
6. Click Print.
Changing the Color Management Defaults: Windows 2000 PCL
To set the color management defaults in the Windows 2000 PCL driver:
1. Click Start → Settings → Printers.
The Printers dialog box appears.
2. Right click the OKI C9200 or C9400 PCL printer icon then click Printing Preferences.
The OKI Printing Preferences dialog box appears.
3. Click the Color tab.
348
Notes
If you select Manual Color, you can adjust each item of the Color Setting.
We recommend Manual Color only for users who have a lot of experience with color
printing. When these adjustments are made, sometimes the printed colors differ greatly
from the colors on the screen. Continue to adjust settings, changing one setting at a
time, until the desired colors are achieved.
4. To make the color settings manually, click Manual color under Color mode.
Note: For additional information on the various manual color parameters, see the help
for the OKI C Series PCL printer driver (click
at the top of the dialog box).
a. Under Halftone type, select the dithering method.
b. Under Color setting, select how the color will be determined.
c. Under Manual adjustment, adjust the Lightness and Saturation (vividness)
5. For black only printing, click Monochrome, then set the Lightness and Contrast under
Manual adjustment. For more information, see the help for the OKI C Series PCL printer
driver.
6. Click OK and close the Printers dialog box.
Activating the OKI ICM Files: Windows 2000 PCL
For information on activating the OKI ICM files see " Activating the ICM Files in the Windows
2000 PCL Driver."
349
ICM: Windows 2000 PostScript Driver
Color Management for an Individual Print Job: Windows 2000 PS
To set the color management options manually for a print job using the Windows 2000
PostScript driver:
1. Open the document in the software application.
2. Click File → Print.
The Print dialog box appears.
3. Make sure the OKI C9200 or C9400 PostScript printer is selected, then click the
Paper/Quality tab.
4. Click Advanced.
5. Scroll down to Printer Features, then click Color Control.
6. Make your selection in the drop-down list:
a. Printer Color Matching (color management performed by the printer driver using the
parameters you set)
b. No Color matching (color management performed by your software application)
c. Print in Grayscale (monochrome printing)
7. Click Image Color Matching and select the type of color matching to use from the dropdown list:
a. OKI Unique Color Matching (Performs color matching using ASIC built into the
printer to convert RGB data to CMYK)
b. PostScript CRD Color Matching (Performs color matching using the PostScript Color
Rendering Dictionary)
8. Click Black Finish and select the method for printing black from the drop-down list:
a.
Auto
b. Matte (100% black toner used)
c. Glossy (CMYK)
9. Click Image Color Rendering Style and select from the drop-down list:
a. Auto (automatically determines the best color settings for each print job)
b. Perceptual (emphasis on contrast)
c. Vivid (emphasis on brightness)
10. Click OK, then click Print.
Changing the Color Management Defaults: Windows 2000 PS
To set the color management defaults in the Windows 2000 PostScript driver:
1. Click Start → Settings → Printers.
The Printers dialog box appears.
2. Right click the OKI C9200 or C9400 PostScript printer icon then click Printing
Preferences.
The OKI Printing Preferences dialog box appears.
3. On the Layout tab, click Advanced.
4. Scroll down to Printer Features, then click Color Control.
5. Make your selection from the drop-down list:
a. Printer Color Matching (color management performed by the printer driver using the
350
parameters you set)
b. No Color matching (color management performed by your software application)
c. Print In Grayscale (monochrome printing)
6. Click Image Color Matching, select the type of color matching from the drop-down list:
a. OKI Unique Color Matching (Performs color matching using ASIC built into the
printer to convert RGB data to CMYK)
b. PostScript CDR Color Matching (Performs color matching using the PostScript Color
Rendering Dictionary)
7. Click Black Finish and select the method for printing black from the drop-down list:
a.
Auto
b. Matte (100% black toner used)
c. Glossy (CMYK)
8. Click Image Color Rendering Style and select from the drop-down list:
a. Auto (automatically determines the best color settings for each print job)
b. Perceptual (emphasis on contrast)
c. Vivid (emphasis on brightness)
9. Click OK twice and close the Printers dialog box.
Activating the OKI ICM Files: Windows 2000 PS
For information on activating the OKI ICM files see " Activating the ICM Files in the Windows
2000 PostScript Driver."
Color Management: Windows Me
Software applications generally have their own color matching and management facilities for
display and printing. Please refer to the software application's documentation for information on
color matching and management from within the software.
Important! Please note that some software applications may overwrite the settings in
the printer driver.
ICM: Windows Me PCL Driver
Color Management for an Individual Print Job: Windows Me PCL
To set the color management options manually for a print job using the Windows Me PCL driver:
1. Open the document in the software application.
2. Click File → Print.
The Print dialog box appears.
3. Make sure the OKI C9200 or C9400 PCL printer is selected, then click Properties (or
Setup, or your application's equivalent).
The OKI Properties dialog box appears.
4. Click the Color tab.
351
Notes
If you select Manual Color, you can adjust each item of the Color Setting.
We recommend Manual Color only for users who have a lot of experience with color
printing. When these adjustments are made, sometimes the printed colors differ greatly
from the colors on the screen. Continue to adjust settings, changing one setting at a
time, until the desired colors are achieved.
5. To make the color settings manually, click Manual color under Color mode.
Note: For additional information on the various manual color parameters, see the help
for the OKI C Series PCL printer driver (click the
top of the dialog box).
button or click
at the
a. Under Halftone type, select the dithering method.
b. Under Color setting, select how the color will be determined.
c. Under Manual adjustment, adjust the Lightness and Saturation.
6. For black only printing, click Monochrome under Color mode, then set the Lightness and
Contrast under Manual adjustment. For more information, see the help for the OKI C
Series PCL printer driver.
7. Click OK and print the document.
Changing the Color Management Defaults: Windows Me PCL
To set the color management defaults manually for the Windows Me PCL driver:
1. Click Start → Settings → Printers.
The Printers dialog box appears.
2. Right click the OKI C9200 or C9400 PCL printer icon then click Properties.
The OKI Properties dialog box appears.
3. Click the Color tab.
Notes
If you select Manual Color, you can adjust each item of the Color Setting.
We recommend Manual Color only for users who have a lot of experience with color
printing. When these adjustments are made, sometimes the printed colors differ greatly
from the colors on the screen. Continue to adjust settings, changing one setting at a
time, until the desired colors are achieved.
4. To make the color settings manually, click Manual under Color mode.
Note: For additional information on the various manual color parameters, see the help
for the OKI C Series PCL printer driver (click the
top of the dialog box).
a. Under Halftone type, select the dithering method.
352
button or click
at the
b. Under Color setting, select how the color will be determined.
c. Under Manual adjustment, adjust the Lightness and Saturation (vividness)
5. For black only printing, click Monochrome under Color mode, then set the Lightness and
Contrast under Manual adjustment. For more information, see the help for the OKI C
Series PCL printer driver.
6. Click OK and close the Printers dialog box.
Activating the OKI ICM Files: Windows Me PCL
For information on activating the OKI ICM files see " Activating the ICM Files in the Windows
Me/98/95 PCL Driver."
Windows Me PostScript Driver
Color Management for an Individual Print Job: Windows Me PS
To set the color management options manually for a print job using the Windows Me PostScript
driver:
1. Open the document in the software application.
2. Click File → Print.
The Print dialog box appears.
3. Make sure the OKI C9200 or C9400 PCL printer is selected, then click Properties (or
your application's equivalent).
The OKI Properties dialog box appears.
4. Click the Color tab.
5. Make your selection under Color Control:
a. Printer Color Matching (color management performed by the printer driver using the
parameters you set)
b. Windows ICM (color management performed by Windows Image Color Matching)
c. No Color matching (color management performed by your software application)
Note: You can also select Print in Grayscale (monochrome printing) or Print Color
separations (print each color separately).
6. To set the parameters for Printer Color Matching, click Options.
Note: For additional information on the various manual color parameters, see the help
for the OKI C Series PostScript driver (click
at the top of the dialog box).
7. Under Image Color Matching, select the type of color matching to use.
a. OKI Color Matching (Uses color matching built into the printer to convert RGB data to
CMYK)
b. PostScript Color Matching (Performs color matching using the PostScript Color
Rendering Dictionary [CRD])
8. Under Black Finish, select how black will be printed:
a.
Auto (selects the best method for the document)
353
b. Matte (100% black toner used—best for text and graphics)
c. Glossy (CMYK—best for photographs)
9. Under Image Color Rendering Style, select:
a. Auto (automatically determines the best color settings for each print job)
b. Perceptual (emphasis on contrast)
c. Vivid (emphasis on brightness)
10. Under Color Halftone, select:
a. Device Best Dither (emphasis on resolution)
b. Cluster Ordered Dither (emphasis on smooth gradation)
11. Click OK twice and print the document.
Changing the Color Management Defaults: Windows Me PS
To set the color management defaults manually for the Windows Me PostScript driver:
1. Click Start → Settings → Printers.
The Printers dialog box appears.
2. Right click the OKI C9200 or C9400 PostScript printer icon then click Properties.
The OKI PS Properties dialog box appears.
3. Click the Color tab.
4. Make your selection under Color Control:
a. Printer Color Matching (color management performed by the printer driver using the
parameters you set)
b. Windows ICM (color management performed by Windows Image Color Matching)
c. No Color matching (color management performed by your software application)
Note: You can also select Print in Grayscale (monochrome printing) or Print Color
separations (print each color separately).
5. To set the parameters for Printer Color Matching, click Options.
Note: For additional information on the various manual color parameters, see the help
for the OKI C Series PostScript driver (click
at the top of the dialog box).
6. Under Image Color Matching, select the type of color matching to use.
a. OKI Color Matching (Uses color matching built into the printer to convert RGB data to
CMYK)
b. PostScript Color Matching (Performs color matching using the PostScript Color
Rendering Dictionary)
7. Under Black Finish, select how black will be printed:
a.
Auto (selects the best method for the document)
b. Matte (100% black toner used—best for text and graphics)
c. Glossy (CMYK—best for photographs)
8. Under Image Color Rendering Style, select:
a. Auto (automatically determines the best color settings for each print job)
b. Perceptual (emphasis on contrast)
354
c. Vivid (emphasis on brightness)
9. Under Color Halftone, select:
a. Device Best Dither (emphasis on resolution)
b. Cluster Ordered Dither (emphasis on smooth gradation)
10. Click OK twice and close the Printers dialog box.
Activating the OKI ICM Files: Windows Me PS
For information on activating the OKI ICM files see " Activating the ICM Files in the Windows
Me/98/95 PostScript Driver."
Color Management: Windows 98 & 95
Software applications generally have their own color matching and management facilities for
display and printing. Please refer to the software application's documentation for information on
color matching and management from within the software.
Important! Please note that some software applications may overwrite the settings in
the printer driver.
Windows 98 & 95 PCL Driver
Color Management for an Individual Print Job: Windows 98/95 PCL
To set the color management options manually for a print job using the Windows 98/95 PCL
driver:
1. Open the document in the software application.
2. Click File → Print.
3. Make sure the OKI C9200 or C9400 PCL printer is selected, then click Properties (or
your application's equivalent).
The OKI Properties dialog box appears.
4. Click the Color tab.
Note: If you select Manual Color, you can adjust each item of the Color Setting.
We recommend Manual Color only for users who have a lot of experience with color
printing. When these adjustments are made, sometimes the printed colors differ greatly
from the colors on the screen. Continue to adjust settings, changing one setting at a
time, until the desired colors are achieved.
5. To make the color settings manually, click Manual color under Color mode.
Note: For additional information on the various manual color parameters, see the help
for the OKI C Series PCL printer driver (click the
button or click
at the top
of the dialog box).
a. Under Halftone type, select the dithering method.
355
b. Under Color setting, select how the color will be determined.
c. Under Manual adjustment, adjust the Lightness and Saturation.
6. For black only printing, click Monochrome under Color mode, then set the Lightness and
Contrast under Manual adjustment. For more information, see the help for the OKI C
Series PCL printer driver.
7. Click OK and print the document.
Changing the Color Management Defaults: Windows 98/95 PCL
To set the color management defaults manually for the Windows 98/95 PCL driver:
1. Click Start → Settings → Printers.
The Printers dialog box appears.
2. Right click the OKI C9200 or C9400 PCL printer icon then click Properties.
The OKI Properties dialog box appears.
3. Click the Color tab.
Note: If you select Manual Color, you can adjust each item of the Color Setting.
We recommend Manual Color only for users who have a lot of experience with color
printing. When these adjustments are made, sometimes the printed colors differ greatly
from the colors on the screen. Continue to adjust settings, changing one setting at a
time, until the desired colors are achieved.
4. To make the color settings manually, click Manual under Color mode.
Note: For additional information on the various manual color parameters, see the help
for the OKI C Series PCL printer driver (click the
button or click
at the top
of the dialog box).
a. Under Halftone type, select the dithering method.
b. Under Color setting, select how the color will be determined.
c. Under Manual adjustment, adjust the Lightness and Saturation (vividness)
5. For black only printing, click Monochrome under Color mode, then set the Lightness and
Contrast under Manual adjustment. For more information, see the help for the OKI C
Series PCL printer driver.
6. Click OK and close the Printers dialog box.
Activating the OKI ICM Files: Windows 98/95 PCL
For information on activating the OKI ICM files see " Activating the ICM Files in the Windows
Me/98/95 PCL Driver."
Windows 98 & 95 PostScript Driver
Color Management for an Individual Print Job: Windows 98/95 PS
To set the color management options manually for a print job using the Windows 98/95
PostScript driver:
356
1. Open the document in the software application.
2. Click File → Print.
The Print dialog box appears.
3. Make sure the OKI C9200 or C9400 PCL printer is selected, then click Properties (or
your application's equivalent).
The OKI Properties dialog box appears.
4. Click the Color tab.
5. Make your selection under Color Control:
a. Printer Color Matching (color management performed by the printer driver using the
parameters you set)
b. Windows ICM (color management performed by Windows Image Color Matching)
c. No Color matching (color management performed by your software application)
Note: You can also select Print in Grayscale (monochrome printing) or Print Color
separations (print each color separately).
6. To set the parameters for Printer Color Matching, click Options.
Note: For additional information on the various manual color parameters, see the help
for the OKI C Series PostScript driver (click
at the top of the dialog box).
7. Under Image Color Matching, select the type of color matching to use.
a. OKI Color Matching (Uses color matching built into the printer to convert RGB data to
CMYK)
b. PostScript Color Matching (Performs color matching using the PostScript Color
Rendering Dictionary [CRD])
8. Under Black Finish, select how black will be printed:
a.
Auto (selects the best method for the document)
b. Matte (100% black toner used—best for text and graphics)
c. Glossy (CMYK—best for photographs)
9. Under Image Color Rendering Style, select:
a. Auto (automatically determines the best color settings for each print job)
b. Perceptual (emphasis on contrast)
c. Vivid (emphasis on brightness)
10. Under Color Halftone, select:
a. Device Best Dither (emphasis on resolution)
b. Cluster Ordered Dither (emphasis on smooth gradation)
11. Click OK twice and print the document.
Changing the Color Management Defaults: Windows 98/95 PS
To set the color management defaults manually for the Windows 98/95 PostScript driver:
1. Click Start → Settings → Printers.
The Printers dialog box appears.
2. Right click the OKI C9200 or C9400 PostScript printer icon then click Properties.
The OKI PS Properties dialog box appears.
357
3. Click the Color tab.
4. Make your selection under Color Control:
a. Printer Color Matching (color management performed by the printer driver using the
parameters you set)
b. Windows ICM (color management performed by Windows Image Color Matching)
c. No Color matching (color management performed by your software application)
Note: You can also select Print in Grayscale (monochrome printing) or Print Color
separations (print each color separately).
5. To set the parameters for Printer Color Matching, click Options.
Note: For additional information on the various manual color parameters, see the help
for the OKI C Series PostScript driver (click
at the top of the dialog box).
6. Under Image Color Matching, select the type of color matching to use.
a. OKI Color Matching (Uses color matching built into the printer to convert RGB data to
CMYK)
b. PostScript Color Matching (Performs color matching using the PostScript Color
Rendering Dictionary)
7. Under Black Finish, select how black will be printed:
a.
Auto (selects the best method for the document)
b. Matte (100% black toner used—best for text and graphics)
c. Glossy (CMYK—best for photographs)
8. Under Image Color Rendering Style, select:
a. Auto (automatically determines the best color settings for each print job)
b. Perceptual (emphasis on contrast)
c. Vivid (emphasis on brightness)
9. Under Color Halftone, select:
a. Device Best Dither (emphasis on resolution)
b. Cluster Ordered Dither (emphasis on smooth gradation)
10. Click OK twice and close the Printers dialog box.
Activating the OKI ICM Files: Windows 98/95 PS
For information on activating the OKI ICM files see " Activating the ICM Files in the Windows
Me/98/95 PostScript Driver."
Color Management: Windows NT 4.0
Software applications generally have their own color matching and management facilities for
display and printing. Please refer to the software application's documentation for information on
color matching and management from within the software.
Important! Please note that some software applications may overwrite the settings in
358
the printer driver.
Windows NT 4.0 PCL Driver
Color Management for an Individual Print Job: Windows NT 4.0 PCL
To set the color management options for the Windows NT 4.0 PCL driver:
1. Open the document in the software application.
2. Click File → Print.
The Print dialog box appears.
3. Make sure the OKI C9200 or C9400 PCL printer is selected, then click Properties (or
your application's equivalent).
The OKI Properties dialog box appears.
4. Click the Color tab.
Notes
If you select Manual Color, you can adjust each item of the Color Setting.
We recommend Manual Color only for users who have a lot of experience with color
printing. When these adjustments are made, sometimes the printed colors differ greatly
from the colors on the screen. Continue to adjust settings, changing one setting at a
time, until the desired colors are achieved.
5. To make the color settings manually, click Manual color under Color mode.
Note: For additional information on the various manual color parameters, see the help
for the OKI C Series PCL printer driver (click the
button or click
at the top
of the dialog box).
a. Under Halftone type, select the dithering method.
b. Under Color setting, select how the color will be determined.
c. Under Manual adjustment, adjust the Lightness and Saturation.
6. For black only printing, click Monochrome under Color Mode, then set the Lightness and
Contrast under Manual adjustment. For more information, see the help for the OKI C
Series PCL printer driver.
7. Click OK and print the document.
Changing the Color Management Defaults: Windows NT 4.0 PCL
To set the color management defaults for the Windows NT 4.0 PCL driver:
1. Click Start → Settings → Printers.
The Printers dialog box appears.
2. Right click the OKI C9200 or C9400 PCL printer icon then click Document Defaults.
The OKI Default dialog box appears.
3. Click the Color tab.
Notes
359
If you select Manual Color, you can adjust each item of the Color Setting.
We recommend Manual Color only for users who have a lot of experience with color
printing. When these adjustments are made, sometimes the printed colors differ greatly
from the colors on the screen. Continue to adjust settings, changing one setting at a
time, until the desired colors are achieved.
4. To make the color settings manually, click Manual color under Color mode.
Note: For additional information on the various manual color parameters, see the help
for the OKI C Series PCL printer driver (click the
button or click
at the top
of the dialog box).
a. Under Halftone type, select the dithering method.
b. Under Color setting, select how the color will be determined.
c. Under Manual adjustment, adjust the Lightness and Saturation (vividness)
5. For black only printing, click Monochrome under Color mode, then set the Lightness and
Contrast under Manual adjustment. For more information, see the help for the OKI C
Series PCL printer driver.
6. Click OK and close the Printers dialog box.
Windows NT 4.0 PostScript Driver
Color Management for an Individual Print Job: Windows NT 4.0 PS
To set the color management options for the Windows NT 4.0 PostScript driver:
1. Open the document in the software application.
2. Click File → Print.
The Print dialog box appears.
3. Make sure the OKI C9200 or C9400 PostScript printer is selected, then click Properties
(or your application's equivalent).
The OKI Properties dialog box appears.
4. Scroll down to Color, then click Color Control.
5. Make your selection under Change 'Color Control' Setting:
a. Printer Color Matching (color management performed by the printer driver using the
parameters you set)
b. No Color matching (color management performed by your software application)
c. Print in Grayscale (monochrome printing)
6. To set the parameters for Printer Color Matching, click Options.
The Printer Color Matching dialog box appears.
7. Under Image Color Matching, select the type of color matching to use:
a. OKI Unique Color Matching (Performs color matching using ASIC built into the
printer to convert RGB data to CMYK)
b. PostScript CDR Color Matching (Performs color matching using the PostScript Color
360
Rendering Dictionary)
8. Under Black Finish, select how black will be printed:
a.
Auto (selects the best method for the document)
b. Matte (100% black toner used—best for text and graphics)
c. Glossy (CMYK—best for photographs)
9. Under Image Color Rendering Style, select:
a. Auto (automatically determines the best color settings for each print job)
b. Perceptual (Makes the printed colors close to those seen on the screen. Sometimes
the printed colors do not match those on the screen because monitor's color
characteristics [brightness, saturation and contrast] cannot be recognized.)
c. Vivid (color setting priorities based on vividness of colors)
10. Under Color Halftone, select:
a. Device Best Dither (emphasis on resolution)
b. Cluster Ordered Dither (emphasis on smooth gradation)
11. Click OK twice and print the document.
Changing the Color Management Defaults: Windows NT 4.0 PS
To set the color management defaults for the Windows NT 4.0 PostScript driver:
1. Click Start → Settings → Printers.
The Printers dialog box appears.
2. Right click the OKI C9200 or C9400 PostScript printer icon then click Document
Defaults.
The OKI Default dialog box appears.
3. Scroll down to Color, then click Color Control.
4. Make your selection under Change 'Color Control' Setting:
a. Printer Color Matching (color management performed by the printer driver using the
parameters you set)
b. No Color matching (color management performed by your software application)
c. Print in Grayscale (monochrome printing)
5. To set the parameters for Printer Color Matching, click Options.
6. Under Image Color Matching, select the type of color matching to use.
7. Under Black Finish, select how black will be printed:
a.
Auto (selects the best method for the document)
b. Matte (100% black toner used—best for text and graphics)
c. Glossy (CMYK—best for photographs)
8. Under Image Color Rendering Style, select:
a. Auto (automatically determines the best color settings for each print job)
b. Perceptual (Makes the printed colors close to those seen on the screen. Sometimes
the printed colors do not match those on the screen because monitor's color
characteristics [brightness, saturation and contrast] cannot be recognized.)
c. Vivid (color setting priorities based on vividness of colors)
9. Under Color Halftone, select:
a. Device Best Dither (emphasis on resolution)
361
b. Cluster Ordered Dither (emphasis on smooth gradation)
10. Click OK twice and close the Printers dialog box.
362
Specifications
General Specifications
Print Method
LED Array
Print Speed
Mono Printing: 26 ppm
Color Printing: 21 ppm
Mono Printing on Transparencies: 16 ppm
Color Printing on Transparencies: 6 ppm
Print Resolution
Model C9200 600 x 600 dpi 600 x 1200 dpi
Model C9400 600 x 600 dpi Fast 1200 dpi (600 x 1200 dpi) 1200 x 1200 dpi
RAM
Models C9200 & C9200n: 128 MB, expandable to 1GB with optional memory boards
Model C9200dxn: 192 MB, expandable to 1GB with optional memory boards
Model C9400dxn: 320 MB, expandable to 1GB with optional memory boards
Flash Memory
2 MB
OKI C9000 Series Printer Configurations
Model
C9200
Hard Disk Drive
Duplex Unit
6200e Print
Server
Memory
Supplied
128 MB
363
C9200n
yes
C9200dxn
yes
C9400dxn
yes
yes
128 MB
yes
yes
192 MB
yes
yes
320 MB
Electrical Specifications
Voltage/Frequency
120 (102 to 127) VAC; 60 Hz, ±2Hz
230 (198 to 264) VAC; 50 Hz, ±2Hz
Power
Standby: 1300W max.; average 200W
Operating: 1400W max.; average 600W
Power Save Mode: 60W max.
Physical Specifications
Dimensions
Depth: 24.6" (626 mm)
Width: 48" (1219 mm)
Height: 18.1" (460 mm)
Weight
Approx. 160 lb. (72 kg)
Interface Specifications
Parallel
IEEE 1284 compliant, bidirectional port
USB
Version 1.1
Network
Ethernet 10/100 Base-T, supporting TCP/IP, IPX/SPX, NetBEUI and EtherTalk protocols
How Digital LED Technology Works
364
Digital LED vs Laser Technology
Conventional Lasers
LED Technology
Conventional laser printers use
a laser beam, which is moved
across the image drum by a
series of lenses and spinning
mirrors.
Oki Data's digital LED technology
uses a fixed array of light emitting
diodes mounted on a flat strip that
doesn't move.
Advantages of digital LED technology
Advantage
Due to
Dramatic reduction in the size and
weight of the printer.
Elimination of moving parts of the
light source.
Less wear on the mechanism.
Fewer moving parts
Greater consistency in dot placement.
Fixed LED array
Crisp type resolution
Elimination of edge distortion
inherent in moving optics
Higher reliability
Significantly fewer parts
The Electrophotographic Process
The electrophotographic technology used in Oki Data digital LED printers is almost identical to
that employed in most toner-based copying machines. In the color printers, there are four image
drums: black, yellow, magenta and cyan, and four corresponding LED arrays.
Step 1: Charging
The first step is depositing a uniform electrical charge over each image drum.
Step 2: Exposure
Next, each drum is exposed to light to create a latent image on its surface. The light source is
365
the LED array, which uses light emitting diodes to produce its images. The latent image retains
much of the charge applied to the drum's surface during charging. The segments of the
photoreceptor drum that correspond to the non-image areas have a reduced electrical change.
Step 3: Developing
In the development cycle, charged toner is attracted to the latent image by static electricity,
making the image visible.
Step 4: Transfer
The paper is brought into contact with each of the four photoreceptor drums, one after the other,
transferring the toner images to the paper. The transfer process applies a charge through the
paper so the toner particles adhere to the paper rather than to the drum.
Step 5: Fusing
Heat and pressure fuses the toner to the paper to produce the final product.
In Summary
Oki Data's proprietary advanced digital LED technology, with fewer moving parts, assures builtin quality and reliability. Oki Data backs every digital LED technology unit with a 5-year
printhead limited warranty
366
Service & Support
For the Latest Information
In the U.S. and Canada, call 1-800-OKI-DATA (1-800-654-3282)
In Brazil, check the Portuguese (http://www.okidata.com/port/html/nf/Home.html) section of
the Oki Data web site.
In Latin America, check the Spanish (http://www.okidata.com/span/html/nf/Home.html)
section of the Oki Data web site.
Support: U.S. & Canada
Via the Internet
www.okidata.com
Your Gateway to OKI Products and Services
Visit the OKI DATA Web Site at http://www.okidata.com for general information about OKI®
products and services:
Get Web-based support for all OKI products: 24 hours a day, 7 days a week—no waiting!
Download printer drivers
Read about other customers and how they use OKI products
Use the Dealer Locator to find a dealer location close to you
Find out about Oki Data's special promotional offers and breaking news
. . . and more!
367
my.okidata.com
Your Personal Solutions Center
A powerful area of Oki Data's web site providing personalized, web-based support for the OKI
products you own: 24 hours a day, 7 days a weekno waiting!
Log on and check for
Product News
What's Changed?
You can
Register your OKI products.
Keep track of your warranty eligibility.
Download or view manuals online.
Control your contact, profile and preference information.
Get automatic e-mail notification of new drivers and key product updates.
Track your e-mail support history.
and more!
Just point your browser to my.okidata.com, or go to www.okidata.com and click on Support.
Via Your Oki Data Dealer
To Locate a Service Dealer
Check with your dealer.
368
Consult the store where you purchased your printer.
In the U.S. only, go to the Oki Data web site (http://www.okidata.com) and click Find a
Dealer or Dealer Locator, then fill in the information and click Locate My Dealer.
Call 1-800-OKI-DATA (1-800-654-3282) for the location of the nearest Authorized OKI
Service Dealer. Please have your zip code (U.S.) or area code (Canada) ready.
Via Oki Data Customer Service, U.S. & Canada Only, 24/7:
Call 1-800-OKI-DATA (1-800-654-3282)
Our customer service and technical assistance for current OKI products are available 7 days a
week, 24 hours a day, 365 days a year by calling 1-800-OKI-DATA (1-800-654-3282).
Follow the menu to obtain information from the Oki Data Information System Automated
Attendant or to speak to a member of the Oki Data Customer Support Team.
The Information System Automated Attendant
369
For immediate assistance with:
Sales and service referrals
Parts and supplies referrals
Product information
The Oki Data Customer Support Team
Our Customer Support Team can answer your questions regarding:
Locations of Sales & Service Dealers
Installation of your OKI printer
Usage/normal maintenance of your printer
Availability/installation of printer drivers
Error message interpretation/solutions
Parts and Supplies identification
Consumer relations
Note: Customer Support Professionals are not trained to provide assistance with the use of
commercial software packages. Please consult your software users manual for times and
availability of the software manufacturer's support.
Service Information: U.S. & Canada
To Locate a Service Dealer
370
Check with your dealer.
Consult the store where you purchased your printer.
In the U.S. only, go to the Oki Data web site (http://www.okidata.com) and click Find a
Dealer or Dealer Locator, then fill in the information and click Locate My Dealer.
Call 1-800-OKI-DATA (1-800-654-3282) for the location of the nearest Authorized OKI
Service Dealer. Please have your zip code (U.S.) or area code (Canada) ready.
Repair under Warranty
Important! Proof of purchase is required for warranty work. Be sure to retain your
purchase documents.
Call your service dealer to schedule an on-site visit.
Note: Ask about available Oki Data Service Enhancement Programs.
Repairs after Your Warranty Expires
OKI Regional Service Depots: 1-800-OKI-DATA (1-800-654-3282)
Before shipping your product, call 1-800-OKI-DATA (1-800-654-3282) for a return authorization
number. Select the "service" option.
After receiving your return authorization number, you will be given directions for shipping your
product to one of our depot repair facilities.
Allow 10 days for round trip shipping repair via a depot.
Carry-in repairs (if available) must be called in first to schedule service.
Oki Data Service Depot Information: U.S. & Canada
371
United States
Canada
Oki Data Americas, Inc.
Oki Data Americas, Inc.
Phone: 1-800-654-3282
Phone: 1-800-654-3282
Fax: 1-856-222-5247
Fax: 1-905-238-4427
Repacking the Printer for Shipment
If you need to ship your printer to a service center, repack it in the original packing materials. If
the original packaging is not available, you can obtain shipping instructions by contacting your
dealer or by contacting:
Oki Data Americas, Inc., in the U.S. and Canada, at 1-800-OKI-DATA (1-800-654-3282)
Oki Data de Mexico, S.A. de C.V. at (525) 263-8780
Oki Data do Brasil, Ltda., at 55 11-3444-3500
Prepare the Printer
1. Turn the printer off and remove all cords from the printer.
2. If you have a 6020e pocket print server installed, remove it as well.
3. Open Tray 1 and remove any print media.
4. Close Tray 1.
5. Remove any print media from the Multi-Purpose Tray.
372
6. Close the Multi-Purpose Tray.
7. Pull up on the handle and open the cover.
8. Install the LED printhead shipping restraint.
373
9. Move the fuser roller lock lever to the right (away from the open cover) and put the
orange transport lock in the fuser.
10. Lift out the drum/toner assemblies and place each set in one of the black plastic bags
provided with the printer. Store them in a cool, dry place until the printer is returned.
374
11. Close the cover.
12. Tape the cover and the Multi-Purpose Tray closed.
Pack the Printer for Shipment
1. Wrap the printer in the plastic shipping bag provided with the printer.
Caution! The printer weights 160 lbs. (72 kg).
Use at least two people to lift the printer.
Use proper lifting techniques.
To balance the weight of the printer when lifting it, grasp the printer with one
hand on the side of the unit and the other in the cutout on the back of the unit.
2. Lower the printer into the base unit on the skid.
375
3. Place the Styrofoam packing pieces on the printer.
4. Place the accessory tray on top.
5. Put the shipping box down over the printer.
376
Note: The box must be oriented properly. If the holes in the box do not line up with the
holes in the base unit, lift the box off, rotate it 180° and try again.
6. Install the handle inserts on the shipping box.
7. Secure the box to the skid.
Supplies & Accessories
Purchasing Supplies & Accessories
Consult the dealer where you purchased your printer.
Consult an Oki Data Authorized Sales or Service Dealer.
U.S & Canada: Call 1-800-OKI-DATA for the nearest Authorized Sales and Service
location. Have your ZIP code ready for our Customer Support Representatives.
Brazil: call Oki Data do Brasil, Ltda., 5511-3444-3500.
Latin America: call Oki Data de Mexico, S.A. de C.V., (525) 263-8780.
U.S., Puerto Rico, Guam, and U.S. Virgin Islands only: Order on the Internet (go to
http://www.okidata.com and click Buy Online).
U.S. only: Order toll-free by phone at 1-800-OKI-DATA (1-800-654-3282), using VISA,
MasterCard or American Express. $10.00 minimum purchase required.
Canada only: call 888-309-4570 to order parts: VISA and American Express are accepted.
Check office supply catalogs or your local stationery store. Most carry OKI brand supplies.
377
Consumable & Replacement Part Order Numbers
Toner Cartridges
For information on purchasing Toner Cartridges, see "Purchasing Supplies & Accessories."
Color
OKI Part No.
Black
41515208
Cyan
41515207
Magenta
41515206
Yellow
41515205
Image Drums
For information on purchasing Image Drums, see "Purchasing Supplies & Accessories."
Color
OKI Part No.
Black
41514708
Cyan
41514707
Magenta
41514706
Yellow
41514705
Fusers
378
For information on purchasing Fusers, see "Purchasing Supplies & Accessories."
Voltage
OKI Part No.
120 volts
41531401
230 volts
41531403
Transfer Belt
For information on purchasing a Transfer Belt, see "Purchasing Supplies & Accessories."
Item
OKI Part No.
Transfer Belt
41531501
Accessory Order Numbers
General
Item
OKI Part No.
379
Auxiliary Tray
(up to two can be installed)
41529701
High Capacity Feeder
41529801
Hard Disk Drive
70037301
Duplex Unit
70037101
Memory: RAM Upgrades
380
Capacity
OKI Part No.
64 MB
70037401
128 MB
70037501
256 MB
70037601
Network Print Servers
Model
OKI Part No.
6200e
70036701
6020e
70036001
Interface Cables
Cable
OKI Part No.
Parallel, 6 ft. (1.8 m)
70000803
USB, 10 ft. (3 m)
70037901
381
Accessories
Memory DIMMS
64 MB, OKI P/N 70037401
128 MB, OKI P/N 70037501
256 MB, OKI P/N 70037601
Installing Memory DIMMs
The printers have four sockets for memory DIMMs.
Depending on your model, your printer comes with 128 to 320 MB of memory installed:
Model
Memory Installed
C9200
128 MB
C9200n
128 MB
C9200dxn
192 MB (64 + 128 MB)
C9400dxn
320 MB (64 + 256MB)
The maximum amount of memory available from DIMMs is nominal 1 GB. In order to achieve
this maximum, you must have four 256-MB DIMMs installed.
382
To install additional DIMMs:
Caution! Circuit boards can be damaged by static electricity and rough handling. Keep
board in packaging until you're ready to install it. DIMMs are sensitive to static
electricity. To avoid damage, ground yourself before handling DIMMs.
Step 1: Prepare The Printer
Back
Right
Left
(MP Tray)
(Straight-Through
Paper Path)
Front
1. Turn the printer off and unplug the power cord.
2. Detach the interface cable from the left side of the printer.
3. Remove and save the thumbscrew at the top and bottom which hold the control board in
place.
383
4. Grasp the control board and loosen it by wiggling it back and forth, then slide it out of the
printer.
Step 2: Install the DIMM(s)
1. Locate the DIMM sockets on the control board:
384
DIMM Sockets
Important! DIMMs must be installed in the slots in the following sequence: 1 - 3 2 - 4. The slot numbers are printed to the right of the DIMM sockets.
2. Push out the white lock tabs at either end of the DIMM socket.
Note: To swap out an existing DIMM board for a new one, push out the white tabs at
either end of the board to be replaced, then lift it out.
Caution! Circuit boards can be damaged by static electricity and rough handling.
To avoid damage, ground yourself before handling DIMMs.
3. Remove the DIMM from its shipping package.
4. Align the DIMM with the narrow strip on its metallic contact edge to the right (toward the
slot identifier numbers ) of the control board.
385
Narrow Strip
5. Carefully insert the DIMM in the socket, placing either end into the slot in the lock tabs.
Press down firmly, making sure you feel the board engage the connector, then make
sure the white tabs come up to lock the DIMM in place.
6. Repeat steps 2 through 6 for each DIMM being installed.
Step 3: Complete the Installation
1. Align the bottom of the control board with the track in the printer and slide it back into
place.
2. Reinstall the thumbscrews at the top and bottom of the board.
386
3. Reattach the interface cable.
4. Plug the power cord into the power outlet and turn the printer on.
Step 4: Check for Proper Installation
Check the MenuMap printout to be sure that the DIMMs are properly installed:
1. On the printer control panel, press MENU once or twice until INFORMATION MENU
appears on the display.
2. Press SELECT.
PRINT MENU MAP
appears on the display.
3. Press SELECT.
The MenuMap prints.
4. Check the top of the MenuMap printout to verify that the DIMMs you installed are listed.
Note: If the DIMM is not listed at the top of the MenuMap printout, open the printer back up
and make sure the memory board is firmly in place, then print the MenuMap out again.
Step 5: Change the Memory Setting in the Drivers
Windows PostScript Driver
1. Click Start → Settings → Printers.
2. Right click the OKI C9200 or C9400 PostScript driver icon, then click Properties.
3. Select the added memory:
Windows 2000 and NT 4.0
a. Click the Device Settings tab.
b. Scroll down to Installable Options and click Memory Configuration.
c. Under Change 'Memory Configuration' Setting, click the total memory installed
(original plus memory you just installed).
Windows Me, 98 and 95
a. Click the Device Options tab.
b. Click Memory Configuration.
c. Under Change setting for: Memory Configuration, click the total memory installed
(original plus memory you just installed).
387
4. Click OK, then close the Printers dialog box.
Macintosh PostScript Driver
1. Activate Chooser from the Apple menu.
2. Select LaserWriter 8.
3. Click Printer → Setup.
4. Click Configure.
5. Change the Memory Configuration setting to match the total DIMM memory installed
(original plus new additional memory).
6. Click OK twice.
7. Close Chooser.
Print Servers
Model 6200e, OKI P/N 70036701
For information on purchasing the 6200e Print Server, see "Purchasing Supplies &
Accessories."
®
Installing the OkiLAN 6200e Print Server
1. Record the Ethernet address number (EN) located on the print server label.
2. Turn the printer off and unplug the power cord.
388
3. Remove any connector cables.
4. Loosen the two screws from the bottom option slot, then remove the slot cover.
5. Insert the OkiLAN 6200e into the slot, pushing it in firmly until you feel it plug into the
connector.
6. Tighten the two screws to secure it in place, then plug the RJ45 connector into the
Ethernet port on the print server.
389
7. Plug the opposite end of the cable into the network.
8. Plug the power cord in and turn on the printer.
9. Press the test button on the OkiLAN 6200e to print a configuration sheet. You will need
the information from this sheet when setting up your printer on the network.
For details on setting up the 6200e, see the on-line Network User's Guide.
Model 6020e, OKI P/N 70036001
Note: Not recommended for use with Macintosh systems.
For information on purchasing the 6020e Print Server, see "Purchasing Supplies &
Accessories."
390
Installing the OkiLAN® 6020e Print Server
1. Turn off the printer.
2. Attach the OkiLAN 6020e to the parallel port on the printer and secure it with the wire
clips.
3. Plug the power adapter wire into the power jack on the OkiLAN 6020e.
4. Plug the power adapter into a 120-volt wall outlet.
5. Attach an Ethernet cable to the 10/100 BaseT port on the back of the OkiLAN 6020e.
6. Attach the other end of the cable to the network.
7. Turn the printer on.
The red and green lights on the OkiLAN 6020e blink during the self-test. When the selftest completes successfully, the red indicator goes off and the green indicator stays on.
8. Press the test button on the front of the OkiLAN 6020e to print a configuration sheet.
You will need the information from this sheet when setting up your printer on the
network.
Note: The content of the configuration sheet will vary depending on your printer and
system setup.
Hard Disk Drive, OKI P/N 70037301
391
Installing the Internal Hard Disk Drive
Step 1: Prepare The Printer
Back
Right
Left
(MP Tray)
(Straight-Through
Paper Path)
Front
1. Turn the printer off and unplug the power cord.
2. Detach the interface cable from the printer.
3. Remove and save the thumbscrew at the top and bottom which hold the control board in
place.
392
4. Grasp the control board and loosen it by wiggling it back and forth, then slide it out of the
printer.
Step 2: Install the Hard Disk Drive (HDD)
1. Locate the drive connector on the control board:
393
Hard Disk Drive Connector
2. Remove the HDD from its shipping package.
3. Lift the handle on the HDD and lower it onto the control board.
4. Insert the board firmly into the connector and press down on the handle to lock it in
place.
Step 3: Complete the Installation
1. Align the bottom of the control board with the track in the printer and slide it back into
394
place.
2. Reinstall the screws at the top and bottom of the board.
3. Reattach the interface cable.
4. Plug the power cord into the power outlet and turn the printer on.
Step 4: Check for Proper Installation
Check the MenuMap printout to be sure that the HDD is properly installed:
395
1. On the printer control panel, press MENU repeatedly until INFORMATION MENU
appears on the display.
2. Press SELECT.
PRINT MENU M
appears on the display.
3. Press SELECT.
The MenuMap prints.
4. Check the MenuMap printout:
• At the top of the printout you should see a line HDD:5.00 GB
• In the right column you should see a new menu section DISK MAINTENANCE
5. If you do not see these, remove the control board, lift the hard drive handle and check to
be sure that the hard drive is firmly inserted in the connector. Then reinstall the control
board and print the Menu Map again.
Step 5: Activate the Hard Disk in the Printer Driver
Windows PCL Driver
1. Click Start → Settings → Printers.
2. Right click the OKI C9200 or C9400 PCL driver icon, then click Printing Preferences,
Properties or Document Defaults, depending on the Windows operating system.
3. In the Paper tab, click Device options.
4. Click Printer hard disk to select it, then click OK.
5. Click OK, then close the Printers dialog box.
Windows PostScript Driver
1. Click Start → Settings → Printers.
2. Right click the OKI C9200 or C9400 PostScript driver icon, then click Properties.
3. Activate the hard disk drive:
Windows 2000 and NT 4.0:
a. Click the Device Settings tab.
b. Scroll down to Installable Options and click Hard Disk.
c. Under Change 'Hard Disk' Setting, click Installed.
Windows Me, 98 and 95:
a. Click the Device Options tab.
b. Click Hard Disk.
c. Under Change setting for: Hard Disk, click Installed.
4. Click OK, then close the Printers dialog box.
Duplex Unit, OKI P/N 70037101
396
Note: If you will be using the duplex unit to print complex documents, you also need to
purchase and install 64 MB of additional memory (OKI # 70037401).
For information on paper usable with the duplex unit, see "Duplex Unit Specifications."
For information on purchasing the duplex unit, see "Purchasing Supplies & Accessories."
Installing the Duplex Unit
Note: If you will be using the duplex unit to print complex documents, you also need to
purchase and install 64 MB of additional memory (OKI # 70037401).
Back
397
Right
Left
(MP Tray)
(Straight-Through
Paper Path)
Front
Step 1: Install the Duplex Unit
1. Unpack the duplex unit and remove any shipping materials.
2. Turn the printer off and unplug the power cable.
3. Pull out Tray 1, then remove it from the printer.
4. Remove the front cover section: grasp it at both ends, then lift and pull it off.
Note: Be sure to store the front cover section. If the duplex unit is ever removed, the
front cover section must be reinstalled.
5. Place the duplex unit on top of Tray 1, carefully aligning it with the tray.
398
6. Open the small cover on the duplex unit and gently pull the blue handle until the duplex
unit and tray are locked together.
7. Slide the tray/duplex unit back into the printer.
8. Plug the power cable back in and turn the printer on.
Step 2: Activate the Duplex Unit in the Menu
399
1. Press MENU repeatedly until PRINT MENU appears on the display.
2. Press ITEM + repeatedly until DUPLEX appears on the display.
3. Press VALUE + once to change the setting from OFF to ON.
4. Press SELECT to engage the new setting.
An asterisk will appear at the end of the second line.
5. Press ON LINE to save the setting and exit the menu.
Step 3: Activate the Duplex Unit in the Driver
Windows PCL Driver
1. Click Start → Settings → Printers.
2. Right click the OKI C9200 or C9400 PCL driver icon, then click Printing Preferences
(Windows 2000), Properties (Windows Me, 98, 95) or Document Defaults (Windows NT
4.0).
3. In the Paper tab, click Device options.
4. Click Duplex option unit to select it, then click OK.
5. Click OK, then close the Printers dialog box.
Windows PostScript Driver
1. Click Start → Settings → Printers.
2. Right click the OKI C9200 or C9400 PostScript driver icon, then click Properties.
3. To engage the duplex unit:
Windows 2000 and NT 4.0:
a. Click the Device Settings tab.
b. Scroll down to Installable Options and click Duplex.
c. Under Change 'Duplex' Setting, click Installed.
Windows Me, 98 and 95:
a. Click the Device Options tab.
b. Click Duplex.
c. Under Change setting for: Duplex, click Installed.
4. Click OK, then close the Printers dialog box.
Macintosh Driver
1. Activate Chooser from the Apple menu.
400
2. Select LaserWriter 8.
3. Click Printer → Setup.
4. Click Configure.
5. Change the Duplex setting to Installed.
6. Click OK twice.
7. Close Chooser.
Auxiliary Paper Trays, OKI P/N 41529701
For media specifications, see "Print Media Specifications: Auxiliary Trays."
For information on purchasing auxiliary paper trays, see "Purchasing Supplies &
Accessories."
Installing the Auxiliary Paper Trays
Note: You can install up to two auxiliary paper trays on the printer.
Caution! The printer weighs 160 lbs. (72 kg).
Use at least two people to lift the printer.
Use proper lifting techniques.
401
Step 1: Install the Tray(s)
Back
Right
Left
(MP Tray)
(Straight-Through
Paper Path)
Front
1. Unpack the auxiliary tray(s) and remove the shipping materials.
2. Turn the printer off and unplug the power cord.
3. Remove the interface cable.
4. Move the printer aside.
5. Move the auxiliary tray into position (paper tray facing front). Note the location of the pins
and connector on the tray.
Pins
Connector
6. If you are installing two trays, place the first tray on top of the second one, aligning the
holes and plug in the bottom of the upper tray with the pins and socket on the lower tray.
402
7. Lower the printer onto the auxiliary tray(s), aligning the printer with the tray and lowering
the holes/plug in the bottom of the printer onto the pins/socket on the tray.
8. Reattach the interface cable.
9. Open the cover and reinstall the fuser and drums/toners, then reinstall the paper tray.
10. Plug the power cord in and turn the printer on.
Step 2: Load Print Media
1. Pull the auxiliary paper tray out.
2. If necessary, lift out the media indicator at the right end of the tray and reposition it to
correspond with the media you will normally use in that tray.
3. Position the paper guides in the tray.
403
For legal size and larger, position the corner supports:
4. If loading paper, fan the paper.
5. Place the print media in the tray, being sure to keep it below the PAPER FULL mark.
404
Paper Full Mark
6. Push the paper tray back in.
7. Enter the printer menu, go to the MEDIA MENU section and set the paper size, media
type and weight you will be using in the auxiliary tray(s) [Tray 2 and Tray 3].
Step 3: Activate the Auxiliary Tray(s) in the Printer Driver
Windows PCL Driver
1. Click Start → Settings → Printers.
2. Right click the OKI C9200 or C9400 PCL printer icon, then click Printing Preferences
(Windows 2000), Properties (Windows Me, 98, 95) or Document Defaults (Windows NT
4.0).
3. In the Paper tab, click Device options.
4. Under Paper tray installed:, set the total number of trays installed (Tray1 + auxiliary
trays), then click OK.
5. Click OK, then close the Printers dialog box.
Windows PostScript Driver
1. Click Start → Settings → Printers.
2. Right click the OKI C9200 or C9400 PostScript printer icon, then click Properties.
3. Click the Device Settings (Windows 2000 and NT 4.0) or Device Options (Windows Me,
98,95) tab.
4. Under Installable Options, click Additional Input Trays. and select the number of auxiliary
trays installed.
5. Click OK, then close the Printers dialog box.
Macintosh PostScript Driver
1. Activate Chooser from the Apple menu.
2. Select LaserWriter 8.
3. Click Printer → Setup.
4. Click Configure.
5. Change the Additional Input Trays setting to match the number of auxiliary trays
installed.
6. Click OK twice.
7. Close Chooser.
405
High Capacity Feeder, OKI P/N 41529801
For paper specifications, see " Print Media Specifications: High Capacity Feeder."
For information on purchasing the high capacity feeder, see " Purchasing Supplies &
Accessories."
Installing the High Capacity Feeder
The High Capacity Feeder (HCF) consists of three paper trays in a single housing mounted on
casters. Each tray takes up to 550 sheets of 20-lb. paper. The High Capacity Feeder can be
combined with one Auxiliary Paper Tray to provide a total capacity of 2650 sheets of 20-lb.
paper.
Note: Only one Auxiliary Paper Tray can be used with the High Capacity Feeder.
Back
Right
Left
(MP Tray)
(Straight-Through
Paper Path)
Front
406
1. Turn the printer off and unplug the power cable.
2. Unplug the printer interface cable.
Caution! The printer weighs 160 lbs. (72 kg).
Use at least two people to lift the printer.
Use proper lifting techniques.
3. Unpack the High Capacity Feeder (HCF) and remove any shipping materials.
4. To prevent toner spillage and to reduce the weight of the printer, making it easier to
place on the feeder, open the top cover and remove the image drums/toner cartridges,
covering them to protect them from light while they are outside the printer.
5. Move the printer aside.
6. Move the HCF into position. Note the location of the pins and connector.
Pins
Connector
7. If you are also installing an Auxiliary Paper Tray, place the tray on top of the HCF,
aligning the holes and plug in the bottom of the tray with the pins and connector on the
HCF.
407
8. Lower the printer onto the HCF (or HCF/Auxiliary Tray), lowering the holes/plug in the
bottom of the printer onto the pins/connector on the HCF (or HCF/Auxiliary Tray).
9. Reattach the interface cable.
10. Open the top cover and reinstall the image drums/toner cartridges, then close the cover.
11. Plug the power cord in and turn the printer on.
408
Step 2: Load Paper
For each tray:
1. Pull the tray out.
2. If necessary, lift out the media indicator at the right end of the tray and reposition it to
correspond with the size paper you will normally use in that tray.
3. Position the paper guides in the tray.
For legal size and larger, position the corner supports:
409
4. Fan the paper.
5. Place the paper in the tray, being sure to keep it below the PAPER FULL mark.
Paper Full Mark
6. Push the tray back in.
7. Enter the printer menu, go to the MEDIA MENU section and set the paper size, media
type and weight you will be using in the HCF tray(s) [Trays 2 /3/4 (HCF only) or 3/4/5
(HCF with auxiliary paper tray also installed].
410
Fonts
Selecting Fonts
The printer's default font is 10 cpi Courier.
The easiest way to select fonts is through your software program. Refer to your software
documentation for information on selecting fonts.
PCL® fonts can also be selected using the printer's control panel. However, if a different font is
selected in your software, it will override the font selected in the printer menu.
To print out font samples, see:
"Printing a PCL Font List"
"Printing a PostScript Typeface List"
PCL Fonts
Resident Bitmap PCL Fonts
Note: To see samples of the bitmap PCL fonts, print out the PCL Font List (see "Printing a
PCL Font List").
Font #
Font
Pitch
Points
080
Line Printer
16.67
8.5
081
OCR-A
10.00
12.0
082
OCR-B
10.00
12.0
083
USPS PostNet
Proportional
64.8
Resident Fixed Scalable PCL Fonts
Note: To see samples of these fonts, print out the PCL Font List (see "Printing a PCL Font
List").
Font # / Font
Font # / Font
Courier:
Times New:
000
001
002
003
039
040
041
042
Roman
Bold
Italic
Bold Italic
Roman
Bold
Italic
Bold Italic
411
CG Times:
ITC Avant Garde Gothic:
004
005
007
007
043
044
045
046
Roman
Bold
Italic
Bold Italic
Book
Demi
Book Oblique
Demi Oblique
CG Omega:
ITC Bookman:
008
009
010
011
047
048
049
050
Roman
Bold
Italic
Bold Italic
012 Coronet
CourierPS:
051
052
053
054
013 Clarendon Condensed
Light
Demi
Light Italic
Demi Italic
Roman
Bold
Oblique
Bold Oblique
Helvetica:
055
056
057
058
Roman
Bold
Oblique
Bold Oblique
Univers:
Helvetica Narrow:
014
015
016
017
059
060
061
062
Medium
Bold
Medium Italic
Bold Italic
Roman
Bold
Oblique
Bold Oblique
Univers Condensed:
New Century Schoolbook:
018
019
020
021
063
064
065
066
Medium
Bold
Medium Italic
Bold Italic
Roman
Bold
Italic
Bold Italic
Antique Olive®:
Palatino:
022 Roman
023 Bold
024 Italic
067
068
069
070
Garamond®:
Times:
025
026
027
028
071
072
073
074
Antique
Halbfett
Kursiv
Kursiv Halbfett
029 Marigold
Roman
Bold
Italic
Bold Italic
Roman
Bold
Italic
Bold Italic
ITC Zapf Chancery:
075 Medium Italic
Albertus®:
030 Medium
031 Extra Bold
412
076 Symbol
077 Symbol PS
Letter Gothic®:
078 Wingdings
032 Roman
033 Bold
034 Italic
Arial®:
035
036
037
038
079 ITC Zapf Dingbats
Roman
Bold
Italic
Bold Italic
Resident Proportional Scalable PCL Fonts
Font #
Font
4
CG Times
5
CG Times Bold
6
CG Times Italic
7
CG Times Bold Italic
8
CG Omega
9
CG Omega Bold
10
CG Omega Italic
11
CG Omega Bold Italic
12
Coronet
13
Clarendon Condensed
14
Univers Medium
15
Univers Bold
16
Univers Medium Italic
17
Univers Bold Italic
18
Univers Medium Condensed
19
Univers Bold Condensed
20
Univers Medium Condensed Italic
21
Univers Bold Condensed Italic
22
Antique Olive®
23
Antique Olive Bold
24
Antique Olive Italic
25
Garamond® Antique
26
Garamond Halbfett
27
Garamond Kursiv
28
Garamond Kursiv Halbfett
29
Marigold
413
30
Albertus® Medium
31
Albertus Extra Bold
35
Arial®
36
Arial Bold
37
Arial Italic
38
Arial Bold Italic
39
Times New®
40
Times New Bold
41
Times New Italic
42
Times New Bold Italic
43
ITC Avant Garde Gothic Book
44
ITC Avant Garde Gothic Demi
45
ITC Avant Garde Gothic Book Oblique
46
ITC Avant Garde Gothic Demi Oblique
47
ITC Bookman Light
48
ITC Bookman Demi
49
ITC Bookman Light Italic
50
ITC Bookman Demi Italic
55
Helvetica
56
Helvetica Bold
57
Helvetica Oblique
58
Helvetica Bold Oblique
59
Helvetica Narrow
60
Helvetica Narrow Bold
61
Helvetica Narrow Oblique
62
Helvetica Narrow Bold Oblique
63
New Century Schoolbook Roman
64
New Century Schoolbook Bold
65
New Century Schoolbook Italic
66
New Century Schoolbook Bold Italic
67
Palatino Roman
68
Palatino Bold
69
Palatino Italic
70
Palatino Bold Italic
71
Times Roman
72
Times Bold
73
Times Italic
414
74
Times Bold Italic
75
ITC Zapf Chancery Medium Italic
76
Symbol
77
Symbol PS
78
Wingdings
79
ITC Zapf Dingbats
PCL Font Symbol Sets
Symbol Set
Printer Display
Bulgarian
Bulgarian
CWI Hungarian
CWI Hung
Desk Top
Desk Top
ECMA-94 Latin 1
ISO L1
Greek 437
Greek-437
Greek 437 Cyprus
Greek-437 Cy
Greek 928
Greek-928
Hebrew NC (862)
Hebrew NC
Hebrew OC
Hebrew OC
HP German
German
HP Spanish
Spanish
HP ZIP Code
HP ZIP
IBM Code Page 437
IBM-437
IBM Code Page 850
IBM-850
IBM Code Page 860
IBM-860
IBM Code Page 863
IBM-863
IBM Code Page 865
IBM-865
ISO 8859/10 Latin 6
ISO L6
ISO 8859/15 Latin 9
ISO L9
ISO 8859/2 Latin 2 (ECMA-94)
ISO L2
ISO 8859/9 Latin 5 (ECMA-128)
ISO L5
ISO Dutch
ISO Dutch
ISO Swedish 1
ISO Swedish1
ISO Swedish 2
ISO Swedish2
ISO Swedish 3
ISO Swedish3
ISO-10 Swedish/Finnish
ISO-10 S/F
ISO-11 Swedish: names
ISO-11 Swe
415
ISO-14 JIS ASCII
ISO-14 JASC
ISO-15 Italian
ISO-15 Ita
ISO-16 Portuguese
ISO-16 Por
ISO-17 Spanish
ISO-17 Spa
ISO-2 IRV
ISO-2 IRV
ISO-21 German
ISO-21 Ger
ISO-25 French
ISO-25 Fre
ISO-4 UK
ISO-4 UK
ISO-57 Chinese
ISO-57 Chi
ISO-6 US ASCII
ISO-6 ASC
ISO-60 Norwegian v1
ISO-60 Nor
ISO-61 Norwegian v2
ISO-61 Nor
ISO-69 French
ISO-69 Fre
ISO-84 Portuguese
ISO-84 Por
ISO-85 Spanish
ISO-85 Spa
ITC Zapf Dingbats MS
Dingbats MS
Kamenicky (MJK)
Kamenicky
Legal
Legal
Math-8
Math-8
MC Text
MC Text
MS Publishing
MS Publish
OCR-A
OCR-A
OCR-B
OCR-B
PC Extension D/N
PC Ext D/N
PC Extension US
PC Ext US
PC Set 1
PC Set1
PC Set 2 D/N
PC Set2 D/N
PC Set 2 US
PC Set2 US
PC 1004
PC-1004
PC 775
PC-775
PC-8
PC-8
PC-8 Danish/Norwegian
PC-8 Dan/Nor
PC-850
PC-850
PC-852 (East Europe Code Page 852)
PC-852
PC-855 (Cyrillic 1 Code Page 855)
PC-855
PC-857 (Turkish Code Page 857)
PC-857 TK
PC-858
PC-858
416
PC-866 (Cyrillic 2 Code Page 866)
PC-866
PC-869 (Greek Code Page 869)
PC-869
Pi Font
Pi Font
Polska Mazovia
Plska Mazvia
PS Math
PS Math
PS Text
PS Text
Roman Ext
Roman Ext
Roman-8
Roman-8
Roman-9
Roman-9
Serbo Croatic I
Serbo Croat1
Serbo Croatic II
Serbo Croat2
Symbol Font
Symbol
Turkish PC-8 (PC Turkish)
PC-8 TK
Ukrainian
Ukrainian
USPS FIM Bars
USPSFIM
USPS Stamp Here
USPSSTP
USPS ZIP Code
USPSZIP
Ventura International
VN Int'l
Ventura Math
VN Math
Ventura US
VN US
Windows 3.0 Latin 1
Win 3.0 L1
Windows 3.1 Cyrillic
Win 3.1 Cyr
Windows 3.1 Greek
Win 3.1 Grk
Windows 3.1 Hebrew
Win 3.1 Heb
Windows 3.1 Latin 1
Win 3.1 L1
Windows 3.1 Latin 2
(East Europe Windows 3.1)
Win 3.1 L2
Windows 3.1 Latin 5
Win 3.1 L5
Windows 3.1 Baltic
Win 3.1 Blt
Wingdings Font
Wingdings
PostScript
Resident Fixed PostScript Fonts
Note: To see samples of fixed resident PostScript fonts, print out a PostScript Typeface List
(see " Printing a PostScript Typeface List ").
417
Fixed Type-14 Resident PostScript Fonts
Courier
Courier Oblique
Courier Bold
Courier Bold Oblique
Letter Gothic®
Letter Gothic Bold
Letter Gothic Slanted
Letter Gothic Bold Slanted
Resident Proportional PostScript Fonts
Note: To see samples of each font, print out a PostScript Typeface List (see " Printing a
PostScript Typeface List ").
Type 2 Fonts
Font #
Font
1
Albertus MT®
2
Albertus MT Italic
3
Albertus MT Light
8
Apple-Chancery®
27
Carta®
32
Cooper Black®
33
Cooper Black Italic
34
Copperplate® Thirty Three BC
35
Copperplate Thirty Two BC
36
Coronet Regular
49
Gill Sans® Bold Italic
55
Goudy®
56
Goudy Bold
57
Goudy Bold Italic
58
Goudy Extra Bold
59
Goudy Italic
75
Hoefler Text Ornaments
77
Joanna® MT
88
LubalinGraph Demi Oblique
91
Mona Lisa Recut
95
New CenturySchoolbook Roman
418
101
Oxford
110
Symbol
111
Tekton®
134
Wingdings Regular
135
Zapf Chancery Medium Italic
136
Zapf Dingbats
Type 14 Fonts
Font #
Font
4
Antique Olive® Bold
5
Antique Olive Compact
6
Antique Olive Italic
7
Antique Olive Roman
9
Arial® Bold Italic MT
10
Arial Bold MT
11
Arial Italic MT
12
Arial MT
13
Avant Garde Book
14
Avant Garde Book Oblique
15
Avant Garde Demi
16
Avant Garde Demi Oblique
17
Bodoni
18
Bodoni Bold
19
Bodoni Bold Italic
20
Bodoni Italic
21
Bodoni Poster
22
Bodoni Poster Compressed
23
Bookman Demi
24
Bookman Demi Italic
25
Bookman Light
26
Bookman Light Italic
28
Chicago
29
Clarendon
30
Clarendon Bold
31
Clarendon Light
41
Eurostile
419
42
Eurostile Bold
43
Eurostile Bold Extended Two
44
Eurostile Extended Two
45
Geneva®
46
Gill Sans®
47
Gill Sans Bold
48
Gill Sans Bold Condensed
50
Gill Sans Condensed
51
Gill Sans Extra Bold
52
Gill Sans Italic
53
Gill Sans Light
54
Gill Sans Light Italic
60
Helvetica
61
Helvetica Bold
62
Helvetica Bold Oblique
63
Helvetica Condensed
64
Helvetica Condensed Bold
65
Helvetica Condensed Bold Oblique
66
Helvetica Condensed Oblique
67
Helvetica Narrow
68
Helvetica Narrow Bold
69
Helvetica Narrow Bold Oblique
70
Helvetica Narrow Oblique
71
Helvetica Oblique
72
Hoefler Text Black
73
Hoefler Text Black Italic
74
Hoefler Text Italic
76
Hoefler Text Regular
78
Joanna® MT Bold
79
Joanna MT Bold Italic
80
Joanna MT Italic
81
Letter Gothic®
82
Letter Gothic Bold
83
Letter Gothic Bold Slanted
84
Letter Gothic Slanted
85
LubalinGraph Book
86
LubalinGraph Book Oblique
420
87
LubalinGraph Demi
89
Marigold
90
Monaco®
92
New Century Schoolbook Bold
93
New Century Schoolbook Bold Italic
94
New Century Schoolbook Italic
96
New York
97
Optima
98
Optima Bold
99
Optima Bold Italic
100
Optima Italic
102
Palatino Bold
103
Palatino Bold Italic
104
Palatino Italic
105
Palatino Roman
106
Stempel Garamond Bold
107
Stempel Garamond Bold Italic
108
Stempel Garamond Italic
109
Stempel Garamond Roman
112
Times Bold
113
Times Bold Italic
114
Times Italic
115
Times Roman
116
Times New Roman® PS Bold Italic MT
117
Times New Roman PS Bold MT
118
Times New Roman PS Italic MT
119
Times New Roman PS MT
120
Univers
121
Univers Bold
122
Univers Bold Extended
123
Univers Bold Extended Oblique
124
Univers Bold Oblique
125
Univers Condensed
126
Univers-Condensed Bold
127
Univers Condensed Bold Oblique
128
Univers Condensed Oblique
129
Univers Extended
421
130
Univers Extended Oblique
131
Univers Light
132
Univers Light Oblique
133
Univers Oblique
Font Management for the Macintosh
Adobe® Type Manager® (ATM®)
The OKI® C9000 Series CD contains Adobe Type Manager Light 4.6 for the Macintosh®, located
under \PsFont\ATM\ATM 4.6 Installer.
Fonts Downloader Program
The OKI C9000 Series CD also includes a program which allows you to transfer fonts to the
printer's RAM or to its internal Hard Disk Drive (standard on all models except C9200).
Installing the Downloader Program
To install the Downloader program:
1. Put the OKI C9000 Series CD in your CD-ROM drive.
2. Double-click the OKI CD icon that appears on the desktop.
3. Open the MAC folder (MAC\PSDRV\ENGLISH\Mac Installer).
4. Double-click the Mac Installer icon, then click Continue.
5. Select Custom Install from the drop-down list.
6. Click Fonts Downloader, then click Install and follow the on-screen instructions.
7. When the installation is complete, the Downloader utility folder will automatically open.
Using the Downloader Program
422
To use the Downloader program, double-click the Downloader icon on the desktop.
423
Warranties, Certifications, etc.
Warranties
Limited Warranty
United States & Canada
Oki Data Americas, Inc. (Oki Data) warrants this printer to be free from defects in material and
workmanship and will remedy any such defect according to the terms of this Limited Warranty.
Oki Data will repair (or at its option, replace) at no charge, any defective component(s) of the
Printer for one (1) year from the date of purchase except for the printhead (LED imaging array),
which is warranted for a period of five (5) years from date of purchase. This Limited Warranty
extends to the original purchaser only. This Limited Warranty does not extend to consumable
items.
On-Site Repair
Note: On-Site Repair is available in the United States and Canada only. On-Site Repair does
not include the replacement or repair of product consumables or supplies.
Oki Data will, for a period of one (1) year from the date of original purchase, repair or replace (at
Oki Data’s option) on-site at the original purchaser’s facility and without charge, any defective
component(s) of the printer, provided that the warranty service is performed by an Oki Data
authorized service provider. The printheads (LED imaging arrays) have a 5-year parts only
warranty from date of original purchase. Following the first year of warranty coverage, the
printheads will be replaced by an authorized Oki Data service provider at Oki Data’s then
current labor rates. Oki Data reserves the right to use new and/or refurbished parts in the
warranty repair process.
To make request or claim for service under this Limited Warranty contact your local Oki Data
authorized service center or Oki Data at 1-800-OKI-DATA (1-800-654-3282).
A written receipt for the product, showing the date of purchase, dealer’s name, and both the
model and serial numbers of this printer must accompany any request or claim for work to be
performed under this Limited Warranty.
This Limited Warranty shall not apply if the product has been damaged due to abuse, misuse,
misapplication, accident, or as a result of service or modification by any other than an
authorized Oki Data service center.
THERE ARE NO EXPRESS WARRANTIES OTHER THAN THOSE ON THE FACE HEREOF
AND DESCRIBED ABOVE. NO WARRANTIES WHETHER EXPRESS OR IMPLIED,
INCLUDING, BUT NOT LIMITED TO, ANY IMPLIED WARRANTIES OF MERCHANTABILITY
424
OR FITNESS FOR A PARTICULAR PURPOSE, SHALL EXTEND BEYOND THE
RESPECTIVE WARRANTY PERIOD DESCRIBED ABOVE. Some states do not allow
limitations on how long an implied warranty lasts, so the above limitation may not apply to you.
OKI DATA SHALL NOT BE RESPONSIBLE OR LIABLE FOR ANY SPECIAL, INCIDENTAL OR
CONSEQUENTIAL DAMAGES OR LOSS ARISING FROM THE USE OF THIS PRODUCT.
Some states do not allow the exclusion or limitation of incidental or consequential damages, so
the above exclusion may not apply to you.
Additional information on obtaining service under this Limited Warranty is available by
contacting the Oki Data dealer from whom the product was purchased, by contacting Oki Data
directly at 1-800-OKI-DATA (U.S. and Canada, English only) or at 1-856-222-7496 (Spanish
only), or by contacting one of the service locations listed below.
Oki Data Service Center Information
United States
Canada
Oki Data Americas, Inc.
Tel: 1-800-654-3282
Fax: 1-856-222-5247
Oki Data Americas, Inc.
Tel: 1-800-654-3282
Fax: 1-905-238-4427
Mexico
Brazil
Oki Data de Mexico, S.A. de C.V.
Tel: (525) 263-8780
Fax: (525) 263-8785
Oki Data do Brasil, Ltda.
Tel: 55 11-3444-3500
Fax: 55 11-3444-3501
This Limited Warranty applies to this printer. However, the procedure for obtaining service may
vary outside the continental United States. Contact your Oki Data dealer for such warranty
service information.
This warranty gives you specific legal rights, and you may also have other rights which vary
from state to state.
Options Limited Warranty: US & Canada
Oki Data Americas, Inc. (Oki Data) warrants this OPTION to be free from defect in material and
workmanship and will remedy any such defect according to the terms of this Limited Warranty.
Oki Data will repair (or at its option, replace) at no charge, any defective part(s) of the OPTION
for one (1) year from the date of purchase. This Limited Warranty extends to the original
purchaser only.
To make request or claim for service under this Limited Warranty the original purchaser must
return the Oki Data product, shipping prepaid, in the original shipping container or equivalent, to
Oki Data or an authorized Oki Data service center and assume the risk of loss or damage in
transit. A written receipt for the product, showing the date of purchase, dealer's name, and item
purchased must accompany any request or claim for work to be performed under this Limited
Warranty.
This Limited Warranty shall not apply if the product has been damaged due to abuse, misuse,
misapplication, accident, or as a result of service or modification by any other than an
authorized Oki Data service center.
THERE ARE NO EXPRESS WARRANTIES OTHER THAN THOSE ON THE FACE HEREOF
AND DESCRIBED ABOVE. NO WARRANTIES WHETHER EXPRESS OR IMPLIED,
INCLUDING, BUT NOT LIMITED TO, ANY IMPLIED WARRANTIES OF MERCHANTABILITY
425
OR FITNESS FOR A PARTICULAR PURPOSE, SHALL EXTEND BEYOND THE
RESPECTIVE WARRANTY PERIOD DESCRIBED ABOVE OF ONE (1) YEAR. Some states do
not allow limitations on how long an implied warranty lasts, so the above limitation may not
apply to you.
OKI DATA SHALL NOT BE RESPONSIBLE OR LIABLE FOR ANY SPECIAL, INCIDENTAL OR
CONSEQUENTIAL DAMAGES OR LOSS ARISING FROM THE USE OF THIS PRODUCT.
Some states do not allow the exclusion or limitation of incidental or consequential damages, so
the above exclusion may not apply to you.
Additional information on obtaining service under this Limited Warranty is available by
contacting the Oki Data dealer from whom the product was purchased, by contacting Oki Data
directly at 1-800-OKI-DATA (U.S. and Canada, English only) or at 1-856-222-7496 (Spanish
only), or by contacting one of the service locations listed below.
This Limited Warranty gives you specific legal rights, and you may also have other rights which
vary from state to state.
For the most up-to-date listing of Oki Data authorized Service Centers, call 1-800-OKI-DATA (1800-654-3282).
Oki Data Service Centers
United States
Canada
Oki Data Americas, Inc.
Tel: 1-800-654-3282
Fax: 1-856-222-5247
Oki Data Americas, Inc.
Tel: 1-800-654-3282
Fax: 1-905-238-4427
Mexico
Brazil
Oki Data de Mexico, S.A. de C.V.
Tel: (525) 263-8780
Fax: (525) 263-8785
Oki Data do Brasil, Ltda.
Tel: 55 11-3444-3500
Fax: 55 11-3444-3501
Consumables Limited Warranty
Oki Data Americas, Inc. (Oki Data) warrants this Consumable item (hereinafter Consumable) to
be free from defects in material and workmanship under normal and proper use, provided
however, that it is properly stored and maintained in the original packaging. This Limited
Warranty is subject to the conditions set forth herein and shall remain in effect for a period of
ninety (90) days from the date of purchase by the end user.
Should a Consumable which has been properly stored and maintained in the original packaging
be determined by Oki Data to be defective, it will be repaired or replaced, at Oki Data's option,
at no charge to the end user.
To make claim under this Limited Warranty, the original purchaser must return this product to
the place of original purchase or to Oki Data. Consumables returned to Oki Data are to be
returned in the original package or equivalent, shipper to bear cost of shipping and risk of loss in
transit and must be accompanied by a written receipt for the product, showing the date of
purchase, dealer's name and item purchased.
THIS LIMITED WARRANTY IS THE SOLE AND EXCLUSIVE WARRANTY OFFERED ON
THIS CONSUMABLE ITEM, AND OKI DATA OFFERS NO OTHER WARRANTIES, EXPRESS
OR IMPLIED, INCLUDING BUT NOT LIMITED TO ANY IMPLIED WARRANTIES OF
MERCHANTABILITY OR FITNESS FOR A PARTICULAR USE.
Oki Data shall not be responsible or liable for any special, incidental or consequential damages
or loss arising from the use of this product.
426
Additional information on obtaining service under this Limited Warranty is available by
contacting the Oki Data dealer from whom the product was purchased, by contacting Oki Data
directly at 1-800-OKI-DATA (U.S. and Canada, English only) or at 1-856-222-7496 (Spanish
only), or by contacting one of the service locations listed below.
Oki Data Service Centers
United States
Canada
Oki Data Americas, Inc.
Tel: 1-800-654-3282
Fax: 1-856-222-5247
Oki Data Americas, Inc.
Tel: 1-800-654-3282
Fax: 1-905-238-4427
Mexico
Brazil
Oki Data de Mexico, S.A. de C.V.
Tel: (525) 263-8780
Fax: (525) 263-8785
Oki Data do Brasil, Ltda.
Tel: 55 11-3444-3500
Fax: 55 11-3444-3501
For the most comprehensive, up-to-date information on service center locations, call 1-800-OKIDATA (1-800-654-3282).
This Limited Warranty gives you specific legal rights, and you may also have other rights which
vary from state to state.
Safety Information
Your OKI® printer has been carefully designed to give you years of safe, reliable performance.
As with all electrical equipment, there are a few basic precautions you should take to avoid
hurting yourself or damaging the printer.
Carefully read the provided setup and operating instructions.
Save all provided documentation for future reference.
Read and follow all warning and instruction labels on the printer itself.
Unplug the printer before you clean it. Use only a damp cloth; do not use liquid or aerosol
cleaners.
Place your printer on a firm, solid surface. If you put it on something unsteady, it may fall
and be damaged. If you place it on a soft surface, such as a rug, sofa, or cushion, the
vents may be blocked, causing the printer to overheat.
Protect your printer from overheating. Make sure no obstructions block the openings of the
printer. Do not put the printer on or near a heat source (such as a radiator or heat register).
Keep the printer out of direct sunlight. Allow enough room around the printer for adequate
ventilation and easy access to the paper trays. If you put the printer in any kind of
enclosure, make sure the enclosure is properly ventilated.
Do not use your printer near water. Do not spill liquid of any kind into it.
Be certain that your power source matches the rating listed on the back of the printer. If
you are not sure, check with your dealer or with your local power company.
Your printer has a grounded, three-prong plug as a safety feature. This plug only fits into a
grounded outlet. If the plug does not fit, the outlet may be an older, non-grounded type.
Contact an electrician to have the outlet replaced. Do not use an adapter to defeat the
grounding.
427
Install the printer near an easily accessed power outlet.
Avoid damaging the power cord. Do not put anything on it or place it where it will be walked
on. If the cord becomes damaged or frayed, replace it immediately.
If you are using an extension cord or power strip with the printer, make sure that the total of
the amperes required by all the equipment on the extension is less than the extension’s
rating. The total ratings of all equipment plugged into the outlet should not exceed 15
amperes.
Do not poke anything into the ventilation slots of the printer. You could get an electrical
shock or cause hazardous electrical arcing, which could cause a fire.
Aside from the routine maintenance described in the documentation, do not try to service
the printer yourself. Removing the cover may expose you to shocks or other hazards.
Do not make any adjustments other than those outlined in the documentation. You may
cause damage that will require extensive repair work. The provided documentation
explains how to get your printer serviced by qualified Oki Data technicians.
If anything happens that indicates that your printer is not working properly or has been
damaged, unplug it immediately and follow the procedures in the provided documentation for
having your printer serviced.
Here are some of the things to look for.
The power cord or plug is frayed or damaged.
Liquid has been spilled into the printer, or the printer has been exposed to water.
The printer has been dropped, or the cabinet is damaged.
The printer does not function normally when you are following the operating instructions.
Federal Communications Commission (FCC)
Statements
Federal Communications Commission Declarations of
Conformity for 120 Volt Models
1. Product Identification
Product Name: C9200, C9400 and Duplex Option
Model No.: N31060A, N31061A and N31090A
2. Statement
This device complies with Part 15 of the FCC Rules. Operation is subject to the following
two conditions: (1) This device may not cause harmful interference, and (2) this device
must accept any interference received, including interference that may cause undesired
operation.
3. Responsible Party
Oki Data Americas, Inc.
2000 Bishops Gate Boulevard
Mt. Laurel, NJ 08054-4620
1-800-654-3282 (1-800-OKI-DATA)
Federal Communications Commission Radio Frequency
428
Interference Statement for 120-Volt Models
This equipment has been tested and found to comply with the limits for a Class B digital device,
pursuant to Part 15 of the FCC Rules. These limits are designed to provide reasonable
protection against harmful interference in a residential installation. This equipment generates,
uses and can radiate radio frequency energy and, if not installed and used in accordance with
the instructions, may cause harmful interference to radio communications. However, there is no
guarantee that interference will not occur in a particular installation. If this equipment does
cause harmful interference to radio or television reception, which can be determined by turning
the equipment off and on, the user is encouraged to try to correct the interference by one or
more of the following measures:
Reorient or relocate the receiving antenna.
Increase the separation between the equipment and the receiver.
Plug the unit into an outlet on a circuit different from that to which the receiver is
connected.
Consult the dealer or an experienced radio/television technician for help.
It is the responsibility of the user to obtain the required shielded cable in order to ensure
compliance of this equipment with FCC regulations.
Changes or modifications not expressly approved by Oki Data may void your authority to
operate this device.
Federal Communications Commission Radio Frequency
Interference Statement for 230/240-Volt Models and 120-Volt
Models Equipped with Auxiliary Tray(s) and/or Network Print
Server Option
WARNING: This equipment has been tested and found to comply with the limits for a Class A
digital device, pursuant to Part 15 of the FCC rules. These limits are designed to provide
reasonable protection against harmful interference in a commercial environment. This
equipment generates, uses, and can radiate radio frequency energy and, if not installed and
used in accordance with the instructions, may cause harmful interference to radio
communications. Operation of this equipment in a residential area is likely to cause harmful
interference in which case the user will be required to correct the interference at his own
expense.
It is the responsibility of the user to obtain the required shielded cable in order to ensure
compliance of this equipment with FCC regulations.
Changes or modifications not expressly approved by Oki Data may void your authority to
operate this device.
Industry Canada Radio Interference
Statements
For 120-Volt Models
This Oki Data apparatus complies with the Class B limits for radio interference as specified in
the Industry Canada Radio Interference Regulations.
429
For 230/240-Volt Models and 120-Volt Models with Auxiliary
Paper Tray(s) and/or Network Print Server Option
This Oki Data apparatus complies with the Class A limits for radio interference as specified in
the Industry Canada Radio Interference Regulations.
ENERGY STAR
As an ENERGY STAR® Partner, Oki Data has determined that this product meets the ENERGY
STAR guidelines for energy efficiency.
Year 2000 Compliance
All products currently sold by Oki Data are Year 2000 Compliant. Each product contains
information technology that accurately processes date and time data between the years 1999
and 2000, and carries no issue for the September 9, 1999 (9999) programming concern. These
products, when used in combination with products purchased from other manufacturers, whose
products properly exchange data and time information, will accurately process the date and
time. All future products are committed to meeting the same Year 2000 compliance.
European Union Council of the European
Communities Statement of Electromagnetic
Conformance for 230/240-Volt Models
This product complies with the requirements of the council Directive 89/336/EEC on the
approximation of the laws of the member states relating to electromagnetic compatibility.
European Union Council of the European
Communities Statement of Safety
Conformance, 230/240V Models
This product is in conformity with Directive 73/23/EEC on the harmonization of the laws of
Member States relating to electrical equipment designed for use within certain voltage limits.
430
Drivers / Connections
Uninstalling the Printer Software
Windows 2000, Me, 98, 95 & NT 4.0
1. USB Drivers only: turn off the printer before uninstalling the driver!
2. To remove the Color Swatch Utility and/or the OKI Storage Device Manager software:
a. Click Start → Settings → Control Panel.
b. Double-click Add/Remove Programs.
c. To uninstall the Color Swatch Utility, select OKI C Series Software in the box, then
click Add/Remove and click Yes to confirm the removal.
d. To uninstall the OKI Storage Device Manager software, select OKI Storage Device
Manager in the box, then click Add/Remove and click Yes to confirm the removal
3. When the removal process is finished, click OK.
4. Close the Control Panel window.
5. Click Start → Settings → Printers.
6. For each OKI C series printer icon: click the icon, then click File → Delete → Yes.
7. Close the Printers dialog box.
Macintosh
To uninstall the Macintosh PostScript driver, drag the desktop printer to the Trash icon.
Parallel Interface
Connecting the Parallel Port
1. Turn the computer and printer off.
2. Attach a standard IEEE-1284 parallel cable (not supplied) to the parallel port on the
printer, securing it with the spring clips.
431
3. Attach the other end of the cable to the parallel port on the computer and secure it in
place with the screws.
Parallel Cable Requirements
FCC: To comply with FCC regulations, the cable must be shielded with twisted pair
conductors, and must be UL and CSA approved.
Length: Maximum length for standard bidirectional cable is 6 feet (1.8 meters). The
standard parallel cables available at computer stores should work fine. For extended
distances, higher quality IEEE 1284-compliant cables are available.
Connector: Printer connector is IEEE 1284-B receptacle (36 pins, 0.085" center line).
Port: Port supports bidirectional IEEE 1284 communications (compatibility, nibble, and
ECP modes).
Standard Parallel Port Menu Settings
Item
432
Default Setting
PARALLEL
ENABLE
BI-DIRECTION
ENABLE
ECP
ENABLE
ACK WIDTH
NARROW
ACK/BUSY TIMING
ACK IN BUSY
I-PRIME
DISABLE
Changing Parallel Port Menu Settings
To change parallel port menu settings:
1. Press MENU repeatedly until PARALLEL MENU appears on the display.
2. Press ITEM (+ or -) repeatedly until the parameter you wish to change appears on the
display (e.g., BI-DIRECTION).
3. Press VALUE (+ or -) repeatedly until the setting you wish to engage appears on the
display (e.g., DISABLE).
4. Press SELECT to engage that setting (an Asterisk will appear next to the new setting).
5. Press ON LINE to save the setting and exit the menu.
ECP Mode
The parallel port supports IEEE-1284 bidirectional mode and ECP mode. If your computer's
parallel port is not compatible with one of these modes, the printer may not print at all or it may
print corrupted data.
To correct for this, enter the printer's Parallel Menu and change the ECP setting to Disable.
Changing the ECP Menu Setting
To change ECP setting:
433
1. Press MENU repeatedly until PARALLEL MENU appears on the display.
2. Press ITEM (+ or -) repeatedly until ECP appears on the display.
3. Press VALUE + to change the setting (DISABLE/ENABLE toggle back and forth on the
display).
4. Press SELECT to engage the setting. An asterisk will appear next to the new setting.
5. Press ON LINE to save the setting and exit the printer menu.
Pin Assignments
Parallel Interface Pin Assignments: Compatible Mode
Pin
Signal Name
Direction
Compatible
1
Data Strobe
to printer
nStrobe
2-9
Data Bit n
to printer
Data 1 (LSB) to 8
(MSB)
10
Acknowledge
from printer
nAck
11
Busy
from printer
Busy
12
Paper End
from printer
Perror
13
Select
from printer
Select
14
Auto Feed
to printer
nAutoFd
15
[not used]
—
—
16
0V
—
Logic Ground
17
Chassis Ground
—
Chassis Ground
18
+5V
from printer
Peripheral Logic High
19
0V
—
Chassis Ground
20-27
0V
—
Signal Ground
(nStrobe)
28
0V
—
Signal Ground (Data
1-8)
29
0V
—
Signal Ground (Perror,
Select, nAck)
434
30
0V
—
Signal Ground
(nAutoFd, nSelectln,
nInit)
31
Input Prime
to printer
nInit
32
Fault
from printer
nFault
33
0V
—
—
34
[NOT USED]
—
—
35
—
from printer
Pulled up to +5V
through 3.3 Kohm
36
Sel In
to printer
nSelectIn
Parallel Interface Pin Assignments: ECP Mode
Pin
Signal Name
Direction
ECP
1
Data Strobe
to printer
HostClk
2-9
Data Bit n
to printer
Data 1 (LSB) to 8
(MSB)
10
Acknowledge
from printer
PeriphClk
11
Busy
from printer
PeriphAck
12
Paper End
from printer
nAckReverse
13
Select
from printer
Xflag
14
Auto Feed
to printer
HostAck
15
[not used]
—
—
16
0V
—
Logic Ground
17
Chassis Ground
—
Chassis Ground
18
+5V
from printer
Peripheral Logic High
19
0V
—
Chassis Ground
20-27
0V
—
Signal Ground
(nStrobe)
28
0V
—
Signal Ground (Data 18)
29
0V
—
Signal Ground (Perror,
Select, nAck)
30
0V
—
Signal Ground
(nAutoFd, nSelectIn,
nInit)
31
Input Prime
to printer
nReverseRequest
32
Fault
from printer
nPeriphRequest
33
0V
—
—
435
34
[NOT USED]
—
—
35
—
from printer
Pulled up to +5V
through 3.3 Kohm
36
Sel In
to printer
1284 Active
Parallel Interface Pin Assignments: Nibble Mode
Pin
Signal Name
Direction
Nibble
1
Data Strobe
to printer
Host Clk
2-9
Data Bit n
to printer
Data 1 (LSB) to 8
(MSB)
10
Acknowledge
from printer
Ptrclk
11
Busy
from printer
PtrBusy
12
Paper End
from printer
AckDataReq
13
Select
from printer
Xflag
14
Auto Feed
to printer
HostBusy
15
[not used]
—
—
16
0V
—
Logic Ground
17
Chassis Ground
—
Chassis Ground
18
+5V
from printer
Peripheral Logic High
19
0V
—
Chassis Ground
20-27
0V
—
Signal Ground
(nStrobe)
28
0V
—
Signal Ground (Data 18)
29
0V
—
Signal Ground (Perror,
Select, nAck)
30
0V
—
Signal Ground
(nAutoFd, nSelectIn,
nInit)
31
Input Prime
to printer
nInit
32
Fault
from printer
nDataAvail
33
0V
—
—
34
[NOT USED]
—
—
35
—
from printer
Pulled up to +5V
through 3.3 Kohm
36
Sel In
to printer
1284 Active
USB Interface
436
Connecting the USB Port
1. Turn the computer and printer off.
2. Connect the USB cable to the USB port on the computer.
3. Connect the other end of the cable to the USB port on the printer.
Standard USB Port Menu Settings
Item
Default Setting
USB
ENABLE
SOFT RESET
DISABLE
Changing USB Port Menu Settings
437
To change the USB port menu settings:
1. Press MENU repeatedly until USB MENU appears on the display.
2. Press ITEM + repeatedly until the parameter you wish to change appears on the display
(e.g., SOFT RESET).
3. Press VALUE + to change the setting on the display (e.g., ENABLE).
4. Press SELECT to engage that setting (an Asterisk will appear next to the new setting).
5. Press ON LINE to save the setting and exit the menu.
USB Cable Requirements
The USB cable used with the printer must conform to the following specifications:
Compliance: Universal Serial Bus Revision 1.1, UL/CM/CSA approved
Plugs: Type "B" plug for connection to printer, Type "A" for connection to computer.
Approvals: UL, CM, CSA
Length: Maximum 16.5 ft. (5 m)
Network Interface
Network Interface
A 10/100 Base-T network print server is included as standard equipment on the OKI® Models
C9200n, C9200dxn and C9400dxn. For Model C9200, the network print server is an option that
can be added at a later date.
For details on supported operating systems, network protocols, and other print server
information, please refer to the on-line Network User's Guide for the OkiLAN® 6200e print
server.
438
Network Cable Requirements
Windows Systems
Requires Ethernet® cable with two twisted wire pairs and an RJ45 plug at the printer end.
Macintosh Systems
Requires Ethernet cable with RJ45 connectors at either end. If the printer is directly connected
to a network port, a crossover cable is required.
Connecting the Network Server
Note: You must supply your own Ethernet® cable for connection to the printer.
1. Turn the printer off.
2. Connect your Ethernet cable to the network port on the print server.
3. Connect the other end of the cable to the network port.
4. Turn the printer on.
439
Portrait versus Landscape
Portrait
Landscape
440
Index
1
10/100 Base-T network interface ................................................................................................... 438
A
Accessories.................................................................................................................... 379, 382, 388
auxiliary paper trays.................................................................................................................... 401
duplex unit ................................................................................................................................. 397
high capacity feeder ................................................................................................................. 406
memory DIMMs........................................................................................................................ 382
order numbers.......................................................................................................................... 379
print servers ....................................................................................................................... 388, 391
print serverw............................................................................................................................. 388
purchasing.................................................................................................................................. 377
Additive versus subtractive ........................................................................................................... 333
Adjustments, color..................................................................................................................... 334
Administrative password, OKI Storage Device Manager....................................................... 266
Adobe PostScript emulation, setting ....................................................................................... 111
Adobe Type Manager, Macintosh............................................................................................. 422
Arrays, LED................................................................................................................................. 315
ATTENTION light ........................................................................................................................ 105
Automatic tray switching ................................................................................................................ 73
Auxiliary paper trays .................................................................................................................... 401
changing media settings ............................................................................................................ 84
installing .................................................................................................................................... 401
loading media............................................................................................................................... 59
print media................................................................................................................................... 27
B
Balance, color............................................................................................................................. 109
Belt, transfer, replacing............................................................................................................... 320
Bitmap fonts
PCL .......................................................................................................................................... 411
Black light..................................................................................................................................... 338
Booklets, printing ........................................................................................................ 165, 184, 204
Buttons, control panel ............................................................................................................... 101
C
Cable requirements....................................................................................................... 432, 438, 439
network..................................................................................................................................... 439
parallel port................................................................................................................................ 432
USB .......................................................................................................................................... 438
CANCEL button ........................................................................................................................... 101
Cartridges, toner
life............................................................................................................................................. 308
replacing .................................................................................................................................... 305
CE statements ............................................................................................................................... 430
Cleaning LED arrays .................................................................................................................. 315
CMS ............................................................................................................................................. 345
Code page symbol sets ............................................................................................................. 415
Collating
Macintosh .................................................................................................141, 148, 167, 186, 206
441
Windows 2000 ........................................................................................................................... 148
Windows 98/95 .......................................................................................................................... 186
Windows Me.............................................................................................................................. 167
Color............................................................................................................................................. 345
additive versus subtractive........................................................................................................... 333
adjustments ................................................................................................................................ 334
balance ...................................................................................................................................... 109
color menu ................................................................................................................................. 115
color swatch utility .................................................................................................................... 342
dithering .................................................................................................................................... 337
electromagnetic spectrum ............................................................................................................ 338
gamut ........................................................................................................................................ 339
glossary .................................................................................................................................... 328
halftones .................................................................................................................................... 337
management systems................................................................................................................... 345
models ....................................................................................................................................... 340
perception .................................................................................................................................. 335
problems using ........................................................................................................................... 339
registration ................................................................................................................................. 336
setting.................................................................................................................................... 324
specifying .................................................................................................................................. 340
wheel......................................................................................................................................... 336
Color management..................................................................................................................... 345
Windows ICM .......................................................................................................................... 343
Color menu ................................................................................................................................... 115
Colors ........................................................................................................................................... 339
neutral ....................................................................................................................................... 339
primary ...................................................................................................................................... 339
secondary................................................................................................................................... 339
Compatible mode pin assignments ................................................................................................ 434
Confidential documents ................................................................................................................ 235
Configurations............................................................................................................................ 363
Consumables.............................................................................................................................. 378
order numbers.......................................................................................................................... 378
warranty..................................................................................................................................... 426
Control panel ................................................................................................................................ 105
automatic tray switching................................................................................................................ 73
buttons....................................................................................................................................... 101
default exit path.......................................................................................................................... 80
display language ......................................................................................................................... 113
ECP setting ................................................................................................................................ 433
how to use.................................................................................................................................. 114
lights ......................................................................................................................................... 105
media settings, changing ..................................................................................................... 84, 85
messages
error...................................................................................................................................... 292
status.................................................................................................................................... 298
parallel port menu settings........................................................................................................... 433
printing demo pages................................................................................................................. 105
printing font lists ........................................................................................................................ 106
resetting to factory defaults.......................................................................................................... 114
setting emulation ........................................................................................................................ 111
setting power save mode.............................................................................................................. 110
turning duplex unit on ................................................................................................................. 112
USB menu settings ..................................................................................................................... 438
Copyright........................................................................................................................................ 23
Custom page sizes
Macintosh .................................................................................................................................. 142
Windows 2000 ........................................................................................................................... 150
442
Windows 98/95 .......................................................................................................................... 188
Windows Me.............................................................................................................................. 169
Windows NT 4.0 ........................................................................................................................ 208
D
Defaults ....................................................................................................................................... 114
exit path...................................................................................................................................... 80
font............................................................................................................................................ 411
resetting ..................................................................................................................................... 114
Delete forms.................................................................................................................................. 273
Demo page .................................................................................................................................. 105
Digital LED technology.............................................................................................................. 365
Dimensions................................................................................................................................. 364
DIMMS ......................................................................................................................................... 382
installing .................................................................................................................................... 382
Disk drive, spooler ..................................................................................................................... 272
Disk maintenance menu ................................................................................................................ 116
Display language ........................................................................................................................... 113
Display messages .............................................................................................................. 292, 298
error ......................................................................................................................................... 292
status....................................................................................................................................... 298
Dithering....................................................................................................................................... 337
Documents, confidential ........................................................................................................... 235
Drivers.......................................................................................................................................... 111
engaging the duplex unit.............................................................................................................. 397
uninstalling ............................................................................................................................... 431
Drums, image
life............................................................................................................................................. 315
precautions................................................................................................................................. 315
replacing .................................................................................................................................... 309
Duplex printing.............................................................................................144, 155, 174, 193, 215
Macintosh ................................................................................................................................. 145
Windows 2000.......................................................................................................................... 156
Windows 98/95......................................................................................................................... 193
Windows Me............................................................................................................................. 174
Windows NT 4.0....................................................................................................................... 215
Duplex unit.................................................................................................................................. 397
engaging in menu ....................................................................................................................... 112
installing .................................................................................................................................... 397
specifications......................................................................................27, 144, 155, 174, 193, 215
E
ECP mode..................................................................................................................................... 433
changing setting.......................................................................................................................... 433
pin assignments .......................................................................................................................... 435
Electrical specificatipns ............................................................................................................ 364
Electromagnetic conformity statements......................................................................................... 430
Electromagnetic spectrum............................................................................................................. 338
Emulations, setting a specific .................................................................................................. 111
Energy Star statement................................................................................................................... 430
Engaging the duplex unit in the driver .......................................................................................... 397
Error messages .......................................................................................................................... 292
EtherNet .............................................................................................................................. 388, 438
cable requirements................................................................................................................... 439
print servers ............................................................................................................................. 388
Exit paths, default, changing ...................................................................................................... 80
443
F
Factory defaults, resetting ........................................................................................................ 114
Faint print.................................................................................................................................... 290
FCC statements............................................................................................................................. 428
Federal Communications Commission statements......................................................................... 428
Feed paths....................................................................................................................................... 65
automatic switching ...................................................................................................................... 73
Feeder
high capacity .............................................................................................................................. 406
changing media settings ............................................................................................................ 85
installing ................................................................................................................................ 406
File list
printing ...................................................................................................................................... 108
Flash memory............................................................................................................................. 363
Font lists, printing...................................................................................................................... 106
Fonts
ATM for Macintosh ................................................................................................................... 422
PCL .................................................................................................................................. 411, 413
PostScript ......................................................................................................................... 417, 418
selecting..................................................................................................................................... 411
Fonts downloader, Macintosh .................................................................................................. 422
Forms .......................................................................................................................................... 247
delete......................................................................................................................................... 273
overlays .................................................................................................................................... 247
PCL .......................................................................................................................................... 269
PostScript ............................................................................................................................... 267
Fuser unit, replacing.................................................................................................................. 317
G
Gamut........................................................................................................................................... 339
Glossary ...................................................................................................................................... 328
H
Halftones....................................................................................................................................... 337
Hard disk drive spooler ............................................................................................................. 272
Hardware problems.................................................................................................................... 287
HDD spooler ............................................................................................................................... 272
High capacity feeder ..................................................................................................................... 406
installing .................................................................................................................................... 406
loading print media ....................................................................................................................... 59
media settings............................................................................................................................... 85
print media................................................................................................................................... 28
How digital LED technology works .......................................................................................... 365
HSL model.................................................................................................................................... 340
I
IC statements.............................................................................................................................. 429
ICM, Windows .............................................................................................................................. 343
Image drums
life............................................................................................................................................. 315
precautions................................................................................................................................. 315
replacing .................................................................................................................................... 309
Index weight settings................................................................................................................... 24
Industry Canada statements ..................................................................................................... 429
Information menu ......................................................................................................................... 116
Interfaces ...................................................................................................................................... 438
network...................................................................................................................................... 438
ISO symbol sets ......................................................................................................................... 415
444
ITEM button................................................................................................................................. 101
L
Language, control panel............................................................................................................ 113
LED .............................................................................................................................................. 365
arrays, cleaning........................................................................................................................ 315
technology, how it works .......................................................................................................... 365
Life ....................................................................................................................................... 308, 315
image drums............................................................................................................................... 315
toner cartridges........................................................................................................................... 308
Light, electromagnetic spectrum ............................................................................................. 338
Lights, control panel.................................................................................................................. 105
Limited warranties
consumables............................................................................................................................... 426
oprions....................................................................................................................................... 425
printer ....................................................................................................................................... 424
Loading print media ................................................................................................................. 59, 62
auxiliary trays............................................................................................................................... 59
high capacity feeder ...................................................................................................................... 59
MP tray........................................................................................................................................ 62
tray 1 ........................................................................................................................................... 59
Logos (overlays) ........................................................................................................................ 247
Long edge printing.......................................................................................................................... 28
M
Macintosh
Adobe Type Manager............................................................................................................... 422
collating ....................................................................................................141, 148, 167, 186, 206
color management....................................................................................................................... 346
custom page sizes ....................................................................................................................... 142
duplex printing.......................................................................................................................... 145
network cable requirements ..................................................................................................... 439
print resolution ........................................................................................................................... 147
problem solving ........................................................................................................................ 300
uninstalling software................................................................................................................. 431
Macros, PCL ............................................................................................................................... 269
Maintenance
fuser unit.................................................................................................................................... 317
image drums............................................................................................................................... 309
menu ......................................................................................................................................... 118
toner cartridges........................................................................................................................... 305
transfer belt ................................................................................................................................ 320
Management systems, color ..................................................................................................... 345
Manual registration, color menu .............................................................................................. 115
Media
auxiliary trays............................................................................................................................... 27
high capacity feeder ...................................................................................................................... 28
loading................................................................................................................................... 59, 62
menu ......................................................................................................................................... 119
weight settings ........................................................................................................................... 24
Media settings
auxiliary trays ............................................................................................................................. 84
high capacity feeder ...................................................................................................................... 85
Memory DIMMs........................................................................................................................... 382
installing .................................................................................................................................... 382
Memory menu............................................................................................................................... 121
Memory SIMMs ........................................................................................................................... 382
MENU button ............................................................................................................................... 101
MenuMap, 116
445
printing ...................................................................................................................................... 107
Menus
color menu ................................................................................................................................. 115
disk maintenance ........................................................................................................................ 116
how to use.................................................................................................................................. 114
information menu ....................................................................................................................... 116
maintenance ............................................................................................................................... 118
media......................................................................................................................................... 119
memory ..................................................................................................................................... 121
network..................................................................................................................................... 123
parallel....................................................................................................................................... 125
PCL emulation ........................................................................................................................... 126
print........................................................................................................................................... 129
printing out current settings ......................................................................................................... 107
resetting to factory defaults.......................................................................................................... 114
system adjust.............................................................................................................................. 132
system configuration ................................................................................................................... 135
usage ......................................................................................................................................... 137
USB .......................................................................................................................................... 140
Messages ............................................................................................................................ 292, 298
error.......................................................................................................................................... 292
status........................................................................................................................................ 298
Metric weight settings ................................................................................................................. 24
Models, color .............................................................................................................................. 340
Multi-Purpose tray
loading......................................................................................................................................... 62
print media.................................................................................................................................. 25
N
Network ........................................................................................................................................ 438
cable requirements................................................................................................................... 439
interface..................................................................................................................................... 438
server, connecting.................................................................................................................... 439
Network menu ............................................................................................................................ 123
Network servers ......................................................................................................................... 388
Neutral colors ............................................................................................................................... 339
Nibble mode pin assignments ........................................................................................................ 436
O
Oki Storage Device Manager......................................................................................................... 264
general information .................................................................................................................. 264
opening..................................................................................................................................... 265
PCL macros ............................................................................................................................. 269
PostScript forms....................................................................................................................... 267
printing the file list .................................................................................................................... 108
spooler...................................................................................................................................... 272
ON LINE button ........................................................................................................................... 101
Options ......................................................................................................................... 379, 382, 388
auxiliary paper trays.................................................................................................................... 401
duplex unit ................................................................................................................................. 397
high capacity feeder ................................................................................................................. 406
memory DIMMS ....................................................................................................................... 382
order numbers.......................................................................................................................... 379
print servers ..................................................................................................................... 388, 391
purchasing.................................................................................................................................. 377
warranty..................................................................................................................................... 425
Overlays ...................................................................................................................................... 247
446
P
Paper
curls.......................................................................................................................................... 287
feeder, high capacity ................................................................................................................ 406
jams, frequent .......................................................................................................................... 287
multiple sheet feed ................................................................................................................... 287
storing ......................................................................................................................................... 32
Paper trays ................................................................................................................................... 401
auxiliary..................................................................................................................................... 401
installing auxiliary trays .............................................................................................................. 401
Parallel menu................................................................................................................................ 125
Parallel port
cable requirements ...................................................................................................................... 432
ECP mode.................................................................................................................................. 433
ECP setting ................................................................................................................................ 433
menu ......................................................................................................................................... 125
menu settings ............................................................................................................................. 432
changing ................................................................................................................................ 433
pin assignments .......................................................................................................... 434, 435, 436
Password, administrative.......................................................................................................... 266
Paths............................................................................................................................................... 65
feed ............................................................................................................................................. 65
PC symbol sets .......................................................................................................................... 415
PCL .............................................................................................................................................. 126
emulation, setting ..................................................................................................................... 111
fonts
printing a list .......................................................................................................................... 106
resident bitmap..................................................................................................................... 411
resident................................................................................................................................. 411
scalable ................................................................................................................................ 411
symbol sets .......................................................................................................................... 415
macros (forms) ......................................................................................................................... 269
Perception, color........................................................................................................................ 335
Ports ............................................................................................................................................. 438
Ethernet ..................................................................................................................................... 438
parallel....................................................................................................................................... 433
USB .......................................................................................................................................... 437
PostNet font................................................................................................................................ 411
PostScript
emulation, setting ..................................................................................................................... 111
fonts
proportional .......................................................................................................................... 418
resident................................................................................................................................. 418
resident fixed ........................................................................................................................ 417
forms ........................................................................................................................................ 267
typeface list................................................................................................................................ 106
Power save mode, setting ......................................................................................................... 110
Power specifications ................................................................................................................. 364
Precautions, image drums ........................................................................................................ 315
Primary Colors ............................................................................................................................. 339
Print ............................................................................................................................................. 290
method ..................................................................................................................................... 363
resolution.................................................................................................................................. 363
speed........................................................................................................................................ 363
Print media
high capacity feeder ...................................................................................................................... 28
loading................................................................................................................................... 59, 62
multi-purpose tray ...................................................................................................................... 25
447
weight settings ........................................................................................................................... 24
Print memory specifications ..................................................................................................... 363
Print menu.................................................................................................................................... 129
Print quality problems ............................................................................................................... 290
Print resolution .............................................................................................147, 159, 178, 198, 219
Macintosh .................................................................................................................................. 147
Windows 2000.................................................................................................. 159, 178, 198, 219
Print servers ............................................................................................................................... 388
6200e......................................................................................................................................... 388
cable requirements................................................................................................................... 439
connecting .............................................................................................................................. 439
installing ............................................................................................................................ 388, 391
interface..................................................................................................................................... 438
Printer configurations................................................................................................................ 363
Printer menus
color .......................................................................................................................................... 115
disk maintenance ........................................................................................................................ 116
how to use.................................................................................................................................. 114
information menu ....................................................................................................................... 116
maintenance ............................................................................................................................... 118
media......................................................................................................................................... 119
memory ..................................................................................................................................... 121
network..................................................................................................................................... 123
parallel....................................................................................................................................... 125
PCL emulation ........................................................................................................................... 126
print menu.................................................................................................................................. 129
printing out current settings ......................................................................................................... 107
system adjust.............................................................................................................................. 132
system configuration ................................................................................................................... 135
usage ......................................................................................................................................... 137
USB .......................................................................................................................................... 140
Printer noises, troubleshooting................................................................................................ 287
Printer warranty.......................................................................................................................... 424
Printing
booklets .................................................................................................................... 165, 184, 204
current menu settings .................................................................................................................. 107
demo pages ............................................................................................................................. 105
duplex.......................................................................................................144, 155, 174, 193, 215
file list ....................................................................................................................................... 108
font lists..................................................................................................................................... 106
long edge vs short edge ................................................................................................................. 28
watermarks............................................................................................................................... 441
Printing on both sides ...................................................................................144, 155, 174, 193, 215
Problem solving ......................................................................................................................... 287
color problems............................................................................................................................ 339
error messages ...................................................................................................................... 292
hardware .................................................................................................................................. 287
Macintosh systems................................................................................................................... 300
print quality............................................................................................................................... 290
Windows systems .................................................................................................................... 301
Problems using color..................................................................................................................... 339
Proof & Print ............................................................................................................................... 224
spooler....................................................................................................................................... 272
Proportional fonts .............................................................................................................. 413, 418
Purchasing supplies & accessories................................................................................................. 377
R
RAM specifications .................................................................................................................... 363
READY light ................................................................................................................................ 105
448
Registration
color .......................................................................................................................................... 336
setting.................................................................................................................................... 324
Repacking for shipment ................................................................................................................ 372
Replacement ................................................................................................................................. 378
fuser ......................................................................................................................................... 378
parts
order numbers ...................................................................................................................... 378
purchasing.............................................................................................................................. 377
transfer belt .............................................................................................................................. 378
Replacing ...................................................................................................................................... 305
fuser unit.................................................................................................................................... 317
image drums............................................................................................................................... 309
toner cartridges........................................................................................................................... 305
transfer belt ................................................................................................................................ 320
Resetting factory defaults.............................................................................................................. 114
Resident fonts ............................................................................................................................ 411
PCL .................................................................................................................................. 411, 413
PostScript ......................................................................................................................... 417, 418
Resolution .....................................................................................................147, 159, 178, 198, 219
Macintosh .................................................................................................................................. 147
print ..........................................................................................................147, 159, 178, 198, 219
specifications............................................................................................................................ 363
RGB model ................................................................................................................................... 340
S
Safety information ........................................................................................................................ 427
Scalable fonts, PCL............................................................................................................ 411, 413
Secondary colors ........................................................................................................................... 339
Secure documents ......................................................................................................................... 235
spooler....................................................................................................................................... 272
SELECT button ............................................................................................................................ 101
Selecting fonts ............................................................................................................................... 411
Service & Support
accessory order numbers......................................................................................................... 379
belt/fuser order numbers .......................................................................................................... 378
consumables order numbers.................................................................................................... 378
repacking for shipment................................................................................................................ 372
Shipping the printer...................................................................................................................... 372
Short edge printing ......................................................................................................................... 28
Signature printing ...................................................................................................... 165, 184, 204
Size .............................................................................................................................................. 364
Software, uninstalling................................................................................................................ 431
Specifications
dimensions ............................................................................................................................... 364
duplex unit.................................................................................................................................. 27
electrical ................................................................................................................................... 364
flash memory............................................................................................................................ 363
general ..................................................................................................................................... 363
interface.................................................................................................................................... 364
print media
auxiliary trays........................................................................................................................... 27
high capacity feeder .................................................................................................................. 28
multi-purpose tray .................................................................................................................. 25
tray q ...................................................................................................................................... 25
print method ............................................................................................................................. 363
print speed ............................................................................................................................... 363
RAM ......................................................................................................................................... 363
resolution.................................................................................................................................. 363
449
weight ....................................................................................................................................... 364
Specifying color............................................................................................................................. 340
Speed, print ................................................................................................................................ 363
Spooler.......................................................................................................................................... 272
Standby mode, setting............................................................................................................... 110
Statements .................................................................................................................................... 430
CE............................................................................................................................................. 430
copyright...................................................................................................................................... 23
energy star ................................................................................................................................. 430
FCC........................................................................................................................................... 428
IC.............................................................................................................................................. 429
safety......................................................................................................................................... 427
warranties
consumables........................................................................................................................... 426
options................................................................................................................................... 425
printer ................................................................................................................................... 424
Y2000........................................................................................................................................ 430
Status messages........................................................................................................................ 298
Storing paper .................................................................................................................................. 32
Subtractive versus additive ........................................................................................................... 333
Swatch, color.............................................................................................................................. 342
Symbol sets, PCL....................................................................................................................... 415
System adjust menu ...................................................................................................................... 132
System configuration menu ........................................................................................................... 135
Systems, color management .................................................................................................... 345
T
Time to print, setting.................................................................................................................. 110
Toner cartridges
life............................................................................................................................................. 308
replacing .................................................................................................................................... 305
Trademarks .................................................................................................................................... 23
Transfer belt, replacing ............................................................................................................. 320
Tray 1
loading media............................................................................................................................... 59
media specifications................................................................................................................... 25
Tray switching, automatic ........................................................................................................... 73
Trays, auxiliary paper ................................................................................................................ 401
Troubleshooting
color problems............................................................................................................................ 339
error messages ........................................................................................................................ 292
hardware .................................................................................................................................. 287
Macintosh systems................................................................................................................... 300
print quality............................................................................................................................... 290
Windows systems .................................................................................................................... 301
Turning duplex unit on ................................................................................................................. 112
Typeface list
PostScript................................................................................................................................... 106
U
Uninstalling software................................................................................................................. 431
US Bond weight settings............................................................................................................. 24
Usage menu................................................................................................................................... 137
USB
cable requirements ...................................................................................................................... 438
connection.................................................................................................................................. 437
menu ......................................................................................................................................... 140
menu settings................................................................................................................... 437, 438
changing ................................................................................................................................ 438
450
USPS PostNet font ..................................................................................................................... 411
Utility
color swatch ........................................................................................................................... 342
V
VALUE button.............................................................................................................................. 101
Visible ligh .................................................................................................................................... 338
Voltage specifications ............................................................................................................... 364
W
Warranties
consumables............................................................................................................................... 426
options....................................................................................................................................... 425
printer ....................................................................................................................................... 424
Watermarks.................................................................................................................................. 441
Windows 2000 ........................................................................................................................... 162
Windows NT 4.0....................................................................................................................... 222
Weight ......................................................................................................................................... 364
settings, media ........................................................................................................................... 24
Wheel, color ................................................................................................................................ 336
White light .................................................................................................................................... 338
Windows 2000
collating .................................................................................................................................... 148
color management ................................................................................................................... 347
custom page sizes ................................................................................................................... 150
duplex printing.......................................................................................................................... 156
n-up .......................................................................................................................................... 158
overlays .................................................................................................................................... 247
print resolution.................................................................................................. 159, 178, 198, 219
Proof & Print............................................................................................................................. 224
secure documents.................................................................................................................... 235
watermarks............................................................................................................................... 162
Windows 98/95
collating .................................................................................................................................... 186
color management ................................................................................................................... 355
custom page sizes ................................................................................................................... 188
duplex printing.......................................................................................................................... 193
n-up .......................................................................................................................................... 196
overlays .................................................................................................................................... 254
Windows ICM .............................................................................................................................. 343
Windows Me
booklets .................................................................................................................... 165, 184, 204
collating .................................................................................................................................... 167
color management ................................................................................................................... 351
custom page sizes ................................................................................................................... 169
duplex printing.......................................................................................................................... 174
n-up .......................................................................................................................................... 176
overlays.................................................................................................................................... 249
Windows NT 4.0
collating..................................................................................................................................... 206
custom page sizes ................................................................................................................... 208
duplex printing.......................................................................................................................... 215
n-up .......................................................................................................................................... 218
Watermarks .............................................................................................................................. 222
Y
Y2000 statement............................................................................................................................ 430
451
452