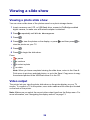
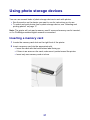
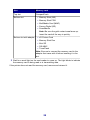
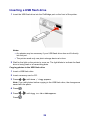
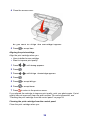
1
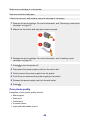
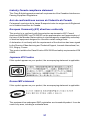
450 Series Memory Maker
User's Guide
August 2005
www.lexmark.com
Lexmark and Lexmark with diamond design are trademarks of Lexmark International, Inc.,
registered in the United States and/or other countries.
© 2005 Lexmark International, Inc.
All rights reserved.
740 West New Circle Road
Lexington, Kentucky 40550
Edition: August 2005
The following paragraph does not apply to any country where such provisions are inconsistent with
local law: LEXMARK INTERNATIONAL, INC., PROVIDES THIS PUBLICATION "AS IS" WITHOUT
WARRANTY OF ANY KIND, EITHER EXPRESS OR IMPLIED, INCLUDING, BUT NOT LIMITED TO, THE
IMPLIED WARRANTIES OF MERCHANTABILITY OR FITNESS FOR A PARTICULAR PURPOSE. Some
states do not allow disclaimer of express or implied warranties in certain transactions; therefore, this statement
may not apply to you.
This publication could include technical inaccuracies or typographical errors. Changes are periodically made
to the information herein; these changes will be incorporated in later editions. Improvements or changes in
the products or the programs described may be made at any time.
Comments about this publication may be addressed to Lexmark International, Inc., Department F95/032-2,
740 West New Circle Road, Lexington, Kentucky 40550, U.S.A. In the United Kingdom and Eire, send to
Lexmark International Ltd., Marketing and Services Department, Westhorpe House, Westhorpe, Marlow
Bucks SL7 3RQ. Lexmark may use or distribute any of the information you supply in any way it believes
appropriate without incurring any obligation to you. You can purchase additional copies of publications related
to this product by calling 1-800-553-9727. In the United Kingdom and Eire, call +44 (0)8704 440 044. In other
countries, contact your point of purchase.
References in this publication to products, programs, or services do not imply that the manufacturer intends
to make these available in all countries in which it operates. Any reference to a product, program, or service
is not intended to state or imply that only that product, program, or service may be used. Any functionally
equivalent product, program, or service that does not infringe any existing intellectual property right may be
used instead. Evaluation and verification of operation in conjunction with other products, programs, or
services, except those expressly designated by the manufacturer, are the user’s responsibility.
© 2005 Lexmark International, Inc.
All rights reserved.
UNITED STATES GOVERNMENT RIGHTS
This software and any accompanying documentation provided under this agreement are commercial
computer software and documentation developed exclusively at private expense.
Contents
Safety and other information..........................................................5
Things you should know before getting started................................................6
Finding information about the printer................................................................7
Understanding the printer...............................................................9
Printer parts......................................................................................................9
Using the control panel...................................................................................11
Navigating the display menus.........................................................................13
Loading paper into the printer......................................................15
Loading paper.................................................................................................15
Selecting the paper size.................................................................................16
Selecting the paper type.................................................................................16
Getting started printing photos....................................................17
Previewing photos..........................................................................................17
Selecting and printing photos.........................................................................17
Printing an index page....................................................................................17
Printing all photos from a photo storage device..............................................19
Printing multiple copies of a photo..................................................................19
Changing the print quality...............................................................................19
Selecting and editing photos........................................................21
Adjusting the print area...................................................................................21
Adjusting the appearance of photos ..............................................................22
Using Color Effects.........................................................................................24
Viewing a slide show.....................................................................26
Viewing a photo slide show............................................................................26
Video output....................................................................................................26
3
Using photo storage devices........................................................27
Inserting a memory card.................................................................................27
Inserting a USB flash drive.............................................................................29
Using the CD drive..........................................................................................30
Printing directly from digital cameras, mobile phones,
and PDAs........................................................................................32
Printing from mobile phones...........................................................................32
Bluetooth wireless support..............................................................................32
Using a PictBridge-enabled digital camera to control printing photos............34
Printing a DPOF selection..............................................................................34
Maintaining the printer..................................................................36
Maintaining the cartridge................................................................................36
Refilling the print cartridge..............................................................................42
Troubleshooting.............................................................................43
General troubleshooting.................................................................................43
Photo storage device troubleshooting............................................................47
Error messages..............................................................................................48
Notices............................................................................................50
Index................................................................................................54
4
Safety and other information
Refer to this section for safety information and other general warnings and notes
related to this product.
Safety information
• Use only the power supply and power cord provided with this product or the
manufacturer's authorized replacement power supply and power cord.
• Connect the power supply cord to an electrical outlet that is near the product and
easily accessible.
• Refer service or repairs, other than those described in the user documentation,
to a professional service person.
CAUTION: Do not set up this product or make any electrical or cabling connections,
such as the power cord or telephone, during a lightning storm.
Conventions
Note: A note identifies something that could help you.
CAUTION: A caution identifies something that could cause you harm.
Warning: A warning identifies something that could damage your product hardware
or software.
Copyright advisory
It may be illegal to copy certain materials without permission or license, including
documents, images, and currency. If you are not sure whether you have permission,
seek legal advice.
Trademarks
Lexmark and Lexmark with diamond design are trademarks of Lexmark
International, Inc., registered in the United States and/or other countries.
Other trademarks are the property of their respective owners.
5
Things you should know before getting started
General warnings
Warning: Do not remove cables, photo storage devices, or touch the printer in the
area shown while the light is blinking.
General notes
Notes:
• If you want to print a photo while using the control panel, a photo storage device
must be inserted in, or connected to, the printer.
• The printer will not read a memory card if a second memory card or a USB flash
drive is inserted, if a PictBridge-enabled digital camera is connected, or a camera
phone is detected.
Memory card
• Insert the card with brand name label facing up.
• If there is an arrow on the card, make sure it points toward the printer.
• Insert only one memory card at a time.
Bluetooth adapters
• An adapter is not included with the printer.
• Consult the Lexmark Web site at www.lexmark.com for late-breaking
information about supported Bluetooth adapters.
• Follow the instructions provided with your Bluetooth-enabled device to view and
print photos.
CD
• Insert only one CD into the drive at a time.
• Consult the Lexmark Web site at www.lexmark.com for late-breaking
information about supported CDs.
6
USB flash drive
• An adapter may be necessary if your USB flash drive does not fit directly into
the PictBridge port.
• Consult the Lexmark Web site at www.lexmark.com for late-breaking
information about supported USB flash drives.
PictBridge enabled digital cameras or camera phones
• Make sure the PictBridge-enabled digital camera or camera phone is set to the
correct USB mode. For more information, see the camera or camera phone
documentation.
• Follow the instructions provided with your camera or camera phone to operate
the printer.
Finding information about the printer
Setup sheet
Description
Where to find
The Setup sheet gives you instructions for You can find this document in the
setting up hardware.
printer box or on the Lexmark Web site.
User's Guide
Description
Where to find
The User's Guide gives you instructions for
using the printer and other information such
as:
You can find this document in the
printer box or on the Lexmark Web
site.
• Maintenance
• Troubleshooting
• Safety
7
Web site
Description
Where to find
Our Web site contains a variety of
information.
Visit our Web site at www.lexmark.com.
Note: All paths for the Web site are
subject to change.
1 Go to the Web site.
2 Select a language from the drop-down
list in the upper-right corner of the page.
3 Select the link for the information you
need.
Record the following information (located on the store receipt and the back of the
printer), and have it ready when you contact us so that we may serve you faster:
Machine Type number:
Serial number:
Date purchased:
Store where purchased:
8
Understanding the printer
This compact printer is a standalone device that can be used to:
• View
• Print
• Save
photos.
Printer parts
Use the
To
1
Paper support
Load paper.
2
Access cover
Access the print cartridge.
3
Memory card slots
Insert memory cards.
4
Paper exit tray
Stack paper as it exits.
5
CD drive
Insert a CD in the CD drive.
9
Use the
To
6
PictBridge port
Connect a PictBridge-enabled digital camera or
USB flash drive to the printer.
7
Power button
Turn the printer on and off.
Use
to turn the printer on and off.
Note: .After the printer is idle for five minutes,
the ink level screen appears.
8
Control panel
Operate the printer. Before attempting to use
the control panel, be sure
printer is on.
9
Display
on the front of the
• Raise the display to access the control
panel buttons.
• Adjust the angle of the screen for viewing.
• View menus, settings, messages, and
photos.
• Use the buttons on the control panel to
select options.
10
Use the
To
1
Power connector
Connect the printer to a power
source.
2
Video output port
Connect a TV to the printer using a
super video cable.
3
Bluetooth port
Connect a Bluetooth adapter (only) to
the printer.
Using the control panel
If you want to print a photo while using the control panel, a photo storage device
must be inserted in or connected to the printer.
Note: The availability of some of these functions depends on your place within the
menu you have selected.
11
Press
Right
To
• Scroll through menus or menu options.
• Change settings on a submenu item.
• Display the previous or next picture.
or
Left
Select
• Select a menu or menu option.
• Select or clear a photo from the list to be printed.
• Apply a photo-editing feature.
Note: This button is only lit when available.
Return
Return to the previous or beginning screen.
Note: This button has no effect when you are on the opening
screen of a menu.
Edit
• Edit photos, such as cropping, enhancing the image, and
removing red-eye.
• Change the number of copies.
Note: This button has no effect when you are on the opening
screen of a menu.
Start/Print
• Start printing.
• Start a slideshow.
• Start copying to a CD or USB flash drive.
Note: This button has no effect when you are on the opening
screen of a menu.
12
Navigating the display menus
1 Insert a memory card, CD, or USB flash drive.
2 Press
or
to choose one of the available options.
Use
To
1
Setup
Select printer settings and options,
and perform maintenance tasks
2
Print All / Index
Print all photos or an index page.
3
View & Print
Select, edit, and print photos.
4
Save / Copy
Copy photos onto a CD or USB
flash drive.
5
Slide Show
View a photo slide show on the
display or TV screen.
3 Press
.
4 Press
.
5 Press
or
6 Press
.
until the option you want appears.
7 Follow the instructions on the display.
13
Selecting Setup printer options
Setup features let you select options for printer operation. Some of the available
options include:
•
•
•
•
•
•
Language
Power Save
Clear Settings
Restore Defaults
Bluetooth Mode
Video Output Format
1 Insert a memory card, CD, or USB flash drive; connect a PictBridge-enabled
digital camera; or make sure a Bluetooth adapter is attached.
2 Press
or
until Setup appears.
3 Press
or
until the option you want appears.
4 Press
.
5 Follow the instructions on the display.
14
Loading paper into the printer
Using supported paper types
• Card stock—postcards, index cards, greeting cards, Hagaki cards
• Photo paper—glossy, Lexmark Everyday Photo, Lexmark Premium Photo
Using supported paper types
•
•
•
•
•
4 x 6 in
A6
10 x 15 cm
L
Hagaki
Before loading paper
Make sure:
• The paper is not used or damaged.
• You do not force paper into the printer. Do not attempt to overload the paper
support.
Loading paper
1 Move the paper guide (located inside the paper support) to the left.
2 Place the paper against the right side of the paper support.
15
Selecting the paper size
1 From the main screen, press
2 Press
.
3 Press
or
4 Press
.
5 Press
or
6 Press
.
or
until Setup appears.
until Paper Size appears.
until the paper size you want appears.
Selecting the paper type
1 From the main screen, press
2 Press
.
3 Press
or
4 Press
.
5 Press
or
6 Press
.
or
until Setup appears.
until Paper Type appears.
until the paper type you want appears.
16
Getting started printing photos
This chapter contains basic information about printing photos using the printer
operator panel. For information about printing from specific photo storage devices,
see “Using photo storage devices” on page 27.
Previewing photos
1 Insert a memory card, CD, or USB flash drive.
2 Press
or
3 Press
.
4 Press
.
5 Press
or
6 Press
to return to the previous display.
until View & Print appears.
to view the photos.
Selecting and printing photos
You can select specific photos to print from a photo storage device.
1 Insert a memory card, CD, or USB flash drive.
2 Press
or
3 Press
twice.
4 Press
or
5 Press
to select a photo.
until View & Print appears.
to browse the photos.
You can select multiple photos before you press
to print them.
Printing an index page
Print an index page showing all of the photos on a photo storage device. When
copying your photos to a CD, store the index with the CD.
17
Note: Digital Print Order Format (DPOF) is a feature available on some digital
cameras and camera phones. Index print is not available if the photo storage device
contains a DPOF file.
1 Insert a memory card, CD, or USB flash drive.
2 Press
until Print All / Index appears.
3 Press
.
If there is no DPOF information on the photo storage device, the following
message appears on the display: Would you like to print one photo
per page, or an index page with thumbnails?
4 Press
to choose Index Page.
5 Press
.
6 Press
to begin printing.
18
Printing all photos from a photo storage device
1 Insert a memory card, CD, or USB flash drive.
2 Press
until Print All / Index appears.
3 Press
.
4 Press
to print each photo on its own page.
5 Press
to begin printing.
Printing multiple copies of a photo
You can print from one to ten copies of each image.
1 Insert a memory card, CD, or USB flash drive.
2 Press
or
3 Press
.
4 Press
or
5 Press
to select a photo.
6 Press
until View & Print appears.
to browse the photos.
.
7 Press
or
8 Press
.
9 Press
or
10 Press
.
11 Press
.
until Copies appears.
to change the number of copies.
You can select multiple photos and adjust the number of copies for each photo before
you press
to print them.
Changing the print quality
1 From the main screen, press
2 Press
or
until Setup appears.
.
19
3 Press
or
4 Press
.
5 Press
or
6 Press
.
7 Press
to return to the previous display.
until Print Quality appears.
until the quality you want appears.
20
Selecting and editing photos
You can choose from any of the available editing options, such as zooming in on a
particular area in the photo, adjusting the brightness, removing red eye, or other color
effects to edit the photos before printing or saving. All photos selected remain
selected until you deselect them or remove the camera card, USB flash drive, or CD.
when the photo you
You can also select photos during a slide show by pressing
want appears on the screen. When the slide show is complete, return to the View &
Print menu to print them or to the Save / Copy menu to copy them to a CD or a USB
flash drive.
Note: The changes you make to the photos will only appear on your prints. They are
not saved to the original image file. To save your changes, copy the photo from your
camera card to a writable photo storage device, such as a CD or USB flash drive,
once changes have been made.
Adjusting the print area
You can adjust the area of your finished prints.
Notes:
• Make sure a photo storage device is inserted in the printer. For more information,
see “Using photo storage devices” on page 27.
• The changes you make for the prints are not automatically saved after printing.
Use writable photo storage devices, such as a CD or USB flash drive, to save
any changes to the images.
Cropping, moving, rotating, or zooming the print area
1 Insert a memory card, CD, or USB flash drive.
2 Press
or
3 Press
.
until View & Print appears.
A menu of options appears.
4 Press
.
5 Press
or
6 Press
to select a photo.
repeatedly until the photo you want to adjust appears.
21
7 Press
.
Crop & Zoom appears.
8 Press
.
9 Press repeatedly to select one of the following:
• Rotate to change the photo from portrait to landscape
• Zoom-In/Zoom-Out to enlarge or reduce part of the photo
• Left/Right to horizontally change part of the photo
• Up/Down to vertically change part of the photo
10 Press
or
to change the print area.
11 Repeat steps 8 and 9 until the print area appears as you want it.
12 Press
.
13 Press
.
Note: You can edit more photos before printing.
Adjusting the appearance of photos
You can adjust the appearance of your photos to remove red-eye, change
brightness, and make other changes before printing.
1 Insert a memory card, CD, or USB flash drive.
2 Press
or
3 Press
twice.
4 Press
or
5 Press
.
6 Press
until View & Print appears.
repeatedly until the photo you want to adjust appears.
.
7 Press
or
8 Press
.
9 Press
or
until the option you want appears.
until the option you want appears, or follow the prompts on the
display.
22
10 Press
.
11 Press
to return to the previous display.
12 Continue to select and edit all of the photos you want to print.
13 Press
to print.
Note: You can change multiple photos before printing.
Enhancing photos
To enhance the details or adjust the brightness of a picture in one step:
1 Insert a memory card, CD, or USB flash drive.
2 Press
or
3 Press
twice.
4 Press
or
5 Press
.
6 Press
until View & Print appears.
repeatedly until the photo you want to adjust appears.
.
7 Press
or
8 Press
.
9 Press
or
until Image Enhance appears.
until On, Off, or Manual appears.
If you select Manual, press
or
to move the slider and adjust the brightness.
10 Press
.
11 Press
to return to the previous display.
12 Press
to print your photos.
Removing Red Eye
1 Insert a memory card, CD, or USB flash drive.
2 Press
or
3 Press
twice.
4 Press
or
until View & Print appears.
repeatedly until the photo you want to adjust appears.
23
5 Press
6 Press
.
.
7 Press
or
8 Press
.
9 Press
or
until Red Eye appears.
until On appears.
10 Press
.
11 Press
to return to the previous display.
12 Press
to print your photos.
Using Color Effects
The Color Effects feature lets you print in tones of Sepia, Antique Brown, Antique
Gray, or black and white (B/W).
Note: This setting remains in effect only for the current printing process.
1 Insert a memory card, CD, or USB flash drive.
2 Press
or
3 Press
twice.
4 Press
or
5 Press
to choose a photo.
6 Press
until View & Print appears.
repeatedly until the photo you want to adjust appears.
.
7 Press
until Color Effects appears.
8 Press
.
9 Press
or
until the option you want appears: Off, B/W, Sepia Tone
Print, Antique Brown, or Antique Gray.
10 Press
.
24
11 Press
to return to the previous display.
12 Press
to begin printing.
Note: You can select and edit more photos before printing.
25
Viewing a slide show
Viewing a photo slide show
You can view a slide show of the photos saved on a photo storage device.
1 Insert a memory card, CD, or USB flash drive; connect a PictBridge-enabled
digital camera; or make sure a Bluetooth adapter is attached.
2 Press
repeatedly until Slide Show appears.
3 Press
.
4 Press
to view the photos on the display, or press
view the photos on your TV.
5 Press
.
6 Press
to begin the slide show.
, and then press
to
Press
•
•
to pause
•
to select a photo
•
to continue
to rotate
Note: When you have completed viewing the slide show, return to the View &
Print menu to print any selected photos, or go to the Save / Copy menu to copy
the selected photos to the USB flash drive or to the CD.
Video output
The printer lets you view the photo slide show on the printer display on your TV
screen. To connect a TV to the printer, use a video cable and the video port located
on the back of the printer.
Note: Make sure you select the correct video output type from the Setup menu. For
more information, see “Navigating the display menus” on page 13.
26
Using photo storage devices
You can use several kinds of photo storage devices to work with photos.
• See the section on the device you want to use for instructions on its use.
• To select and print photos from a photo storage device, see “Selecting and
printing photos” on page 17.
Note: The printer will not read a memory card if a second memory card is inserted,
or if a PictBridge-enabled digital camera is connected.
Inserting a memory card
1 Locate the memory card slots on the right front of the printer.
2 Insert a memory card into the appropriate slot.
• Insert the card with the brand name label facing up.
• If there is an arrow on the card, make sure it points toward the printer.
• Insert only one memory card at a time.
27
Slot
Memory card
Top slot
CompactFlash
Bottom slot
•
•
•
•
•
Memory Stick (MS)
Memory Stick PRO
MultiMedia Card (MMC)
Secure Digital (SD)
SmartMedia
Note: Be sure the gold contact area faces up.
Insert the card all the way in quickly.
Bottom slot with adapter
•
•
•
•
•
xD Picture Card
Memory Stick Duo
Mini SD
RS-MMC
TransFlash
Note: Be sure to connect the memory card to the
adapter that came with it before inserting it in the
slot.
3 Wait for a small light on the card reader to come on. The light blinks to indicate
the memory card is being read or is transmitting data.
If the printer does not read the memory card, remove and reinsert it.
28
Inserting a USB flash drive
1 Insert the USB flash drive into the PictBridge port on the front of the printer.
Notes:
• An adapter may be necessary if your USB flash drive does not fit directly
into the port.
• The printer reads only one photo storage device at a time.
2 Wait for the light on the printer to come on. The light blinks to indicate the flash
drive is being read or is transmitting data.
Copying photos to the USB flash drive
1 Insert a USB flash drive.
2 Insert a memory card or CD.
3 Press
or
until Save / Copy appears.
Note: If you edit photos before copying to the USB flash drive, the changes are
saved with the photo.
4 Press
.
5 Press
or
Press
until Copy to CD or USB appears.
.
29
6 To copy all photos, press
.
To copy selected photos, press
copy by pressing
7 Press
, and then select all the photos you want to
.
.
Ready to Copy? appears.
8 Press
.
The photos are copied to the USB flash drive.
9 Press
to select Finished.
Using the CD drive
You can print photos from a CD, save photos to a CD, and view photos stored on a
CD. You can use a CD as a source for a slide show.
Your printer has been designed to work with standard high quality CD-R media. Look
for the following symbol when purchasing CDs for use with this printer:
Inserting a CD into the CD drive
1 Press the button on the front of the CD drive to open it.
2 Insert a CD.
3 Gently push the CD drawer toward the printer to close it.
A light flashes to indicate that the CD is being read.
30
Copying photos to the CD
1 Insert a CD.
2 Insert a memory card or USB flash drive.
3 Select Yes when asked begin using USB?.
4 Press
or
until Save / Copy appears.
Note: If you edit photos before copying to the CD, the changes are saved with
the photo.
5 Press
.
6 Press
.
7 Press
or
8 Press
.
to choose Copy All # Photos or Select Photos.
Ready to Copy? appears.
9 Press
.
The photos are copied to the CD.
10 Press
or
11 Press
twice.
12 Press
.
to choose Copy to Another or Finished.
Print an index page to store with your CD. For more information, see “Printing
an index page” on page 17.
31
Printing directly from digital cameras,
mobile phones, and PDAs
With direct printing, photos are selected on the display of the camera, mobile phone,
or PDA. The printer is operated from the camera, phone, or PDA. The operator panel
of the printer is not needed.
When printing from mobile phones and PDAs, it is sometimes necessary to select a
printer type. If prompted, select HP 995C.
Printing from mobile phones
This Mobile Printing Ready product is designed to provide easy printing from mobile
phones. This product follows Mobile Imaging and Printing Consortium (MIPC)
Implementation Guidelines for Home Printing with Terminals, Version 1.0, for
Bluetooth, PictBridge, and memory cards.
See the documentation that came with your mobile phone for printing instructions.
Bluetooth wireless support
Insert a USB Bluetooth adapter into the USB port located on the rear of the printer.
Note: An adapter is not included with the printer.
Turning Bluetooth Mode On or Off
This option lets you choose whether “Bluetooth Mode” is on.
32
1 Press
or
2 Press
.
3 Press
until Bluetooth Mode appears.
4 Press
.
5 Press
or
until Setup appears.
until Non-Discoverable or Discoverable appears.
Notes:
• Off means that Bluetooth is off.
• Discoverable means that Bluetooth is on. The printer looks for other units
and can be found by other units.
• Non-Discoverable means that Bluetooth is on. The printer looks for other
units but cannot be found by other units.
6 Press
.
7 Press
to exit the Setup menu.
Locating the Device Name and Universally Administered Address (UAA)
This option lets you view the Device Name and UAA number automatically assigned
for Bluetooth devices. You may do this to determine the factory assigned name or
UAA number to assign to it for your mobile phone or personal digital assistant (PDA).
Some mobile devices display the UAA number instead of a name.
Note: The device name and UAA number cannot be changed.
1 Press
or
2 Press
.
3 Press
until Bluetooth Mode appears.
until Setup appears.
The printer device name appears.
4 Press
to exit the Setup menu.
33
Using a PictBridge-enabled digital camera to control
printing photos
Connect a PictBridge-enabled digital camera to the printer, and use the buttons on
the camera to operate the printer.
1 Insert one end of the USB cable into the camera.
Note: Use only the USB cable that came with the digital camera.
2 Insert the other end of the cable into the PictBridge port on the front of the printer.
Note: Make sure the PictBridge-enabled digital camera is set to the correct USB
mode. For more information, see the camera documentation.
3 Follow the instructions in the camera documentation to select and print photos.
Printing a DPOF selection
Digital Print Order Format (DPOF) is a feature available on some digital cameras
and camera phones. If your digital camera supports DPOF, you can specify which
photos to print, and how many of each, while the memory card is still in the camera.
The printer recognizes these settings when you insert the memory card into the
printer.
Note: Be sure the size of the paper loaded is not smaller than the size you specified
in the DPOF selection.
1 Make sure the printer is turned on.
2 Load paper. For best results, use photo paper with the coated side facing you.
For more information, see “Loading paper” on page 15.
34
3 Insert a DPOF-enabled photo storage device.
For more information, see “Inserting a memory card” on page 27.
If a DPOF file is found on the memory card, the message Print All–or–
Print DPOF appears.
4 Press
.
5 Press
or
6 Press
.
7 Press
.
until Print DPOF appears.
35
Maintaining the printer
Maintenance features are available to keep the printer functioning smoothly. These
include:
• Ink Level, for more information, see “Checking the ink level” on page 36.
• Align Cartridge, for more information, see “Aligning the print cartridge” on
page 39.
• Clean Cartridge, for more information, see “Cleaning the print cartridge from the
control panel” on page 39.
• Print Test Page, for more information, see “Printing a test page” on page 41.
Maintaining the cartridge
Checking the ink level
1 From the main screen, press
2 Press
.
3 Press
or
4 Press
.
or
until Setup appears.
until Ink Level appears.
5 Press
to accept Done.
6 Press
to return to the previous menu.
Ordering supplies
To order supplies or to locate a dealer near you, visit our Web site at
www.lexmark.com.
Item
Part number
Color cartridge
33 or 35
Note: Photo paper and other supplies are also available on the Web site.
36
Removing a used print cartridge
1 Make sure the printer is on.
2 Lift the access cover.
The print cartridge carrier moves and stops at the loading position, unless the
printer is busy.
3 Press down on the cartridge lever to raise the cartridge lid.
4 Remove the used print cartridge.
37
Installing a print cartridge
1 Remove the sticker and tape from the back and bottom of the cartridge.
Warning: Do not touch the gold contact area on the back or the metal nozzles
on the bottom of the cartridge.
2 Insert the cartridge in the carrier.
3 Snap the lid closed.
38
4 Close the access cover.
Do you want to align the cartridge? appears.
5 Press
to accept Yes.
Aligning the print cartridge
Align the print cartridge when you:
• Have installed a new cartridge
• Want to improve print quality
1 Press
or
2 Press
.
3 Press
or
4 Press
.
5 Press
to accept Align.
6 Press
to accept Done.
7 Press
to return to the previous menu.
until Setup appears.
until Align Cartridge appears.
If you aligned the cartridge to improve print quality, print your photo again. If print
quality has not improved, clean the print nozzles. For more information, see
“Cleaning the print cartridge from the control panel” on page 39.
Cleaning the print cartridge from the control panel
Clean the print cartridge when you:
39
• Notice blank or faint areas in the printing
• Want to improve print quality
1 Press
or
2 Press
.
3 Press
or
4 Press
.
5 Press
to accept Clean.
6 Press
to accept Done.
until Setup appears.
until Clean Cartridge appears.
7 Print your photo again.
If print quality has not improved, continue with the following procedure.
Wiping the print cartridge nozzles and contacts
Wipe the print cartridge nozzles and contacts when you:
• Notice blank or faint areas in the printing
• Want to improve print quality
1 Remove the print cartridge. For more information, see “Removing a used print
cartridge” on page 37.
2 Dampen a clean, lint-free cloth with water.
3 Gently hold the cloth against the nozzles for about three seconds, and then wipe
in the direction shown.
40
4 Using another clean section of the cloth, gently hold the cloth against the
contacts for about three seconds, and then wipe in the direction shown.
5 With another clean section of the cloth, repeat step 3 and step 4.
6 Let the nozzles and contacts dry completely.
7 Reinsert the print cartridge.
8 Close the access cover.
9 Clean the cartridge by selecting Clean Cartridge from the control panel. For
more information, see “Cleaning the print cartridge from the control panel” on
page 39.
10 Print the photo again.
Notes:
• If the print quality does not improve, repeat step 3 and step 4 on page 41 up to
two more times.
• If print quality is not satisfactory after cleaning, replace the print cartridge.
Printing a test page
1 Press
or
2 Press
.
3 Press
until Print Test Page appears.
4 Press
twice.
5 Press
to return to the Setup menu.
until Setup appears.
Using a genuine Lexmark print cartridge
When you install a print cartridge, one of the following messages appears:
• Lexmark recommends genuine ink.
• Non-Lexmark cartridge detected. See user guide for details.
• Thank you for using genuine Lexmark supplies.
41
If you believe you purchased a genuine Lexmark print cartridge, but a non-Lexmark
print cartridge message appears:
• Contact us at our Web site: www.lexmark.com/recycle, or
• Call the Customer Support Center for your country or region.
Lexmark’s warranty does not cover damage caused by non-Lexmark print cartridges.
Refilling the print cartridge
The warranty does not cover repair of failures or damage caused by a refilled
cartridge. Lexmark does not recommend use of a refilled cartridge. Refilling a
cartridge can affect print quality and may cause damage to the printer. For best
results, use Lexmark supplies.
Recycling Lexmark products
To return Lexmark products to Lexmark for recycling:
1 Visit our Web site at www.lexmark.com/recycle.
2 Follow the instructions on the computer screen.
42
Troubleshooting
General troubleshooting
•
•
•
•
•
•
•
•
“Power button is not lit” on page 43
“Incorrect language appears on the display” on page 44
“Page does not print or printer does not respond” on page 44
“Poor photo quality” on page 45
“Poor quality at the edges of the page” on page 46
“Paper jam” on page 46
“Paper misfeeds” on page 46
“Printer does not feed paper” on page 46
Power button is not lit
1 Disconnect the power supply cord from the wall outlet and then from the printer.
2 Plug the cord all the way into the printer.
43
3 Plug the cord into an electrical outlet that other electrical devices have been
using.
4 If the power button light is not on, press
.
Incorrect language appears on the display
Note: You choose the language the first time you turn on the printer, but you can
change it at any time.
1 Press
to turn the printer off.
2 Press
to turn the printer on.
3 From the control panel, press
4 Press
.
5 Press
ten times.
6 Press
.
7 Press
or
8 Press
.
twice.
until the language you want appears.
Page does not print or printer does not respond
If an error message appears, see “Error messages on display” on page 47.
If the Power button light is not on, see “Power button is not lit” on page 43.
44
Make sure a cartridge is in the printer.
Remove and then load paper.
Check the ink level, and install a new print cartridge if necessary.
1 Remove the print cartridge. For more information, see “Removing a used print
cartridge” on page 37.
2 Make sure the sticker and tape have been removed.
3 Reinsert the print cartridge. For more information, see “Installing a print
cartridge” on page 38.
1 Press
to turn the printer off.
2 Disconnect the power supply cord from the wall outlet.
3 Gently remove the power supply from the printer.
4 Push firmly to reconnect the power supply to the printer.
5 Reinsert the power supply cord into the wall outlet.
6 Press
.
Poor photo quality
Examples of poor photo quality include:
•
•
•
•
•
Blank pages
Dark print
Faded print
Incorrect colors
Light and dark bands in print
45
•
•
•
•
Skewed lines
Smudges
Streaks
White lines in print
Check the ink level, and install a new print cartridge if necessary.
Use a different brand of paper. Each paper brand accepts ink differently and prints
with color variations.
Use only new, unwrinkled paper.
Poor quality at the edges of the page
Be sure the paper size you are using is the same as the paper size you have selected
from the control panel. For more information, see “Selecting the paper size” on
page 16.
Paper jam
1 Press
to turn off the printer.
2 Firmly grasp the paper, and gently pull it out.
3 Press
to turn the printer back on.
Paper misfeeds
If paper misfeeds or skews, or multiple sheets feed or stick together, try the following
solutions.
Load a smaller amount of paper into the printer.
Load paper with the print side facing you.
Remove each page as it exits, and let it dry completely before stacking.
Use only new, unwrinkled paper.
Printer does not feed paper
Check for a paper jam. For more information, see “Paper jam” on page 46.
46
Try loading one sheet at a time.
Photo storage device troubleshooting
•
•
•
•
•
“Memory card cannot be inserted” on page 47
“Nothing happens when a memory card is inserted” on page 47
“Error messages on display” on page 47
“PictBridge-enabled device not recognized” on page 47
“Cannot print from PictBridge-enabled devices” on page 48
Memory card cannot be inserted
Make sure that the type of memory card you are using can be used in the printer.
For more information, see “Inserting a memory card” on page 27.
Nothing happens when a memory card is inserted
Remove and reinsert the memory card.
Make sure that the type of memory card you are using can be used in the printer.
For more information, see “Inserting a memory card” on page 27.
See “Inserting a memory card” on page 27 to determine which slot accommodates
your memory card and to see instructions on how to insert it.
Check that there is no obvious damage to the memory card or slots on the printer.
Insert only one memory device at a time.
Disconnect the PictBridge-enabled digital camera from the printer.
Error messages on display
If an error message is displayed, follow the instructions on the display, or see “Error
messages” on page 48.
PictBridge-enabled device not recognized
Connect a PictBridge-enabled device to the PictBridge port. See the documentation
that came with your device to determine whether it is PictBridge-enabled.
47
Cannot print from PictBridge-enabled devices
Enable PictBridge printing on the device by selecting the correct USB mode. For
more information, see the documentation that came with the device.
1 Disconnect the device.
2 Connect a PictBridge-enabled device to the PictBridge port. See the
documentation that came with your device to determine whether it is PictBridgeenabled.
Use only the USB cable that came with the camera.
Remove the memory card from the printer.
Error messages
• “Start errors” on page 48
• “Run errors” on page 48
Start errors
The printer was unable to start.
This includes the following errors:
•
•
•
•
•
0000
0001
0002
0003
1102
1 Press
to turn the printer off.
2 Press
to turn the printer on.
Run errors
This includes the following errors:
•
•
•
•
1003
0200
1201
1202
48
•
•
•
•
•
•
1203
1204
1206
1207
2301
4301
Press
.
1 Press
to turn the printer off.
2 Disconnect the power supply cord from the wall outlet.
3 Gently remove the power supply from the printer.
4 Push firmly to reconnect the power supply to the printer.
5 Reinsert the power supply cord into the wall outlet.
6 Press
.
Contact Lexmark Customer Support.
49
Notices
Electronic emission notices
Federal Communications Commission (FCC) compliance
information statement
The LexmarkTM P450, type 4350 has been tested and found to comply with the limits
for a Class B digital device, pursuant to Part 15 of the FCC Rules. Operation is
subject to the following two conditions: (1) this device may not cause harmful
interference, and (2) this device must accept any interference received, including
interference that may cause undesired operation.
The FCC Class B limits are designed to provide reasonable protection against
harmful interference when the equipment is operated in a residential installation. This
equipment generates, uses, and can radiate radio frequency energy and, if not
installed and used in accordance with the instructions, may cause harmful
interference to radio communications. However, there is no guarantee that
interference will not occur in a particular installation. If this equipment does cause
harmful interference to radio or television reception, which can be determined by
turning the equipment off and on, the user is encouraged to try to correct the
interference by one or more of the following measures:
• Reorient or relocate the receiving antenna.
• Increase the separation between the equipment and receiver.
• Connect the equipment into an outlet on a circuit different from that to which the
receiver is connected.
• Consult your point of purchase or service representative for additional
suggestions.
The manufacturer is not responsible for radio or television interference caused by
using other than recommended cables or by unauthorized changes or modifications
to this equipment. Unauthorized changes or modifications could void the user's
authority to operate this equipment.
Any questions regarding this compliance information statement should be directed
to:
Director of Lexmark Technology & Services
Lexmark International, Inc.
740 West New Circle Road
Lexington, KY 40550
(859) 232–3000
50
Industry Canada compliance statement
This Class B digital apparatus meets all requirements of the Canadian InterferenceCausing Equipment Regulations.
Avis de conformité aux normes de l’industrie du Canada
Cet appareil numérique de la classe B respecte toutes les exigences du Règlement
sur le matériel brouilleur du Canada.
European Community (EC) directives conformity
This product is in conformity with the protection requirements of EC Council
directives 89/336/EEC and 73/23/EEC on the approximation and harmonization of
the laws of the Member States relating to electromagnetic compatibility and safety
of electrical equipment designed for use within certain voltage limits.
A declaration of conformity with the requirements of the directives has been signed
by the Director of Manufacturing and Technical Support, Lexmark International, Inc.,
S.A., Boigny, France.
This product satisfies the Class B limits of EN 55022 and safety requirements of EN
60950.
Japanese VCCI notice
If this symbol appears on your product, the accompanying statement is applicable.
Korean MIC statement
If this symbol appears on your product, the accompanying statement is applicable.
This equipment has undergone EMC registration as a household product. It can be
used in any area, including a residential area.
51
Noise emission levels
The following measurement was made in accordance with ISO 7779 and reported
in conformance with ISO 9296.
1-meter average sound pressure, dBA
Printing
44 dBA
Waste from Electrical and Electronic Equipment
(WEEE) directive
The WEEE logo signifies specific recycling programs and procedures for electronic
products in countries of the European Union. We encourage the recycling of our
products. If you have further questions about recycling options, visit the Lexmark
Web site at www.lexmark.com for your local sales office phone number.
Power consumption
The following table documents the power consumption characteristics of the product.
Mode
Description
Power consumption
Printing
Product is generating hard copy output
10 W
Ready
Product is waiting for a print job
7W
Power Saver
Product is in energy saving mode
5W
The power consumption levels listed in the previous table represent time-averaged
measurements. Instantaneous power draws may be substantially higher than the
average.
52
Power Saver
This product is designed with an energy-saving mode called Power Saver. The
Power Saver Mode saves energy by lowering power consumption during extended
periods of inactivity.
The Power Saver Mode is automatically engaged after this product is not used for a
specified period of time, called the Power Saver Timeout. The factory default Power
Saver Timeout for this product is 20 minutes.
By using the printer configuration menus, the Power Saver Timeout can be modified
between 10 minutes and 30 minutes. Setting the Power Saver Timeout to a low value
reduces energy consumption, but may increase the response time of the product.
Setting the Power Saver Timeout to a high value maintains a fast response, but uses
more energy.
Total energy usage
It is sometimes helpful to calculate the total product energy usage. Since power
consumption claims are provided in power units of Watts, the power consumption
should be multiplied by the time the product spends in each mode in order to
calculate energy usage. The total product energy usage is the sum of each mode's
energy usage.
53
Index
A
access cover 9
adjusting print area 21
Align Cartridge feature 39
aligning print cartridge
from the control panel 39
all photos
printing 19
Antique Brown 24
Antique Gray 24
B
B/W (black and white) 24
black and white
printing 24
Bluetooth 32
Mode 32
UAA 32
brightness, adjusting 23
buttons 11
C
camera
phone 32
cannot print
from digital camera 48
from PictBridge 48
cards
memory 27
CD drive 9
using 30
Clean Cartridge feature 39
cleaning print nozzles
using control panel 39
Color Effects feature 24
control panel 9
display 9
using 11
Copies setting 19
Copy Photos 13
cropping photos 21
digital camera
cannot print 48
digital camera (PictBridge-enabled) 34
display, control panel 9
DPOF settings 34
E
emission notices 50
enhancing an image 23
error message
1102 48
error messages
troubleshooting 48
F
FCC notices 50
finding
information 7
publications 7
Web site 8
flash drives
see USB flash drives
G
general troubleshooting 43
I
Image Enhance feature 23
incorrect language appears on display 44
index page 17
information
finding 7
Ink Level feature 36
ink level, checking 36
inserting
USB flash drives 29
installing print cartridge 38
J
jam, paper 46
D
L
Device Name 32
language
incorrect 44
54
light
CD drive 30
memory card 30
loading
paper 15
M
memory card
CompactFlash Type 28
inserting 27
Memory Stick (MS) 28
Memory Stick Duo 28
Memory Stick PRO 28
Mini Secure Digital 28
MultiMedia Card (MMC) 28
Secure Digital (SD) 28
SmartMedia 28
xD Picture Card 28
memory card cannot be inserted 47
memory card is inserted
nothing happens 47
memory card slots 9
menus
Copy Photos 13
Print All / Index 13
Setup 13
Slide Show 13
View & Print 13
menus, display
navigating 13
misfeeds, paper 46
moving print area 21
multiple copies, printing 19
N
nothing happens when memory card is
inserted 47
notices 50, 52
O
ordering supplies 36
P
page does not print 44
paper
loading 15
sizes 15
paper exit tray 9
paper jam 46
paper misfeeds 46
paper size
selecting 16
Paper Size setting 16
paper support 9
Paper Type setting 16
part number
cartridge 36
personal digital assistant
32
phone
camera 32
photo storage device troubleshooting 47
photos
adjusting print area 21
cropping 21
editing 21
previewing 17
printing from PictBridge-enabled camera 34
rotating 21
selecting 17
viewing slide show 26
zooming 21
PictBridge
cannot print 48
PictBridge port 9
PictBridge-enabled camera
printing photos 34
poor edge quality 46
poor graphic quality 45
poor quality 45
power button 9
power button not lit 43
power connector 11
previewing photos 17
print
page does not 44
Print All / Index 13
print area
adjusting 21
moving 21
print cartridge
aligning 39
cleaning 39
installing 38
removing 37
wiping 40
print quality
selecting 19
Print Quality setting 19
printer does not feed paper 46
55
printing
all photos 19
black and white 24
index page 17
multiple copies 19
photos from PictBridge-enabled camera 34
test page 41
using DPOF settings 34
publications
finding 7
Q
quality
poor 45
R
recycling Lexmark products 42
red eye, removing 23
Remove Red-Eye feature 23
removing print cartridge 37
rotating photos 21
U
USB flash drives
inserting 29
USB port 11
using
CD drive 30
V
video output 26
video output port 26
View & Print 13
W
Web site
finding 8
Z
zooming photos 21
S
safety information 5
selecting
paper size 16
photos 17
print quality 19
selecting paper types 16
Sepia Tone Print 24
Setup 13
Slide Show 13
slide show, viewing 26
supplies, ordering 36
T
Test Page feature 41
test page, printing 41
troubleshooting
general 43
photo storage device 47
troubleshooting error messages
0000-0003 48
0200 48
1003 48
1102 48
1200-1207 48
2301 48
4301 48
56