Download LeapFrog 32610 Tablet User Manual
Transcript
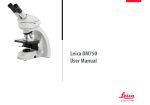
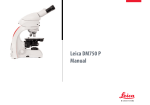
Leica DM750 Manual Manufacturer information Published in November 2010 by: Leica Microsystems (Schweiz) AG Industry Division Max Schmidheiny Strasse 201 CH-9435 Heerbrugg (Switzerland) Responsible for contents: Dietmar Gnass (Product Compliance) Vincent Vaccarelli (Product Management) In case of questions, please contact the hotline: [email protected] Leica DM750 Manual 2 Chapter overview Safety regulations 5 The Leica DM750 17 Ready!20 Set!30 Go!43 Care of the Microscope 45 Troubleshooting48 Dimensions51 Leica DM750 Manual 3 Contents Safety regulations Safety concept Symbols used in this instruction manual Important Notes Intended Purpose of the Microscope Instructions on use Health risks and dangers of use Information for the person responsible for the instrument Care instructions Accessories, maintenance and repair Electrical data and ambient conditions 5 6 7 8 9 10 12 13 14 15 16 The Leica DM750 17 Introduction18 Unpacking19 Ready!20 Substage Illumination 21 Attaching the viewing Tubes 22 Leica EZ Viewing Tube – integrated eyepieces 23 Leica Standard Viewing Tube – separated eyepieces 25 Eyecups26 Installing Objectives 27 Installing the Substage Condenser 28 Leica DM750 Set!30 Turning on the microscope 31 Complete Condenser Centering 32 Using the Condenser 33 Prepare to View a Specimen Slide 34 Focusing35 Viewing Tube Adjustment 36 Koehler Configuration 38 Oil Immersion Technique 40 Time Delay Shutoff 42 Go!43 Ready! Set! Go! 44 Care of the Microscope General maintenance 45 46 Troubleshooting48 Troubleshooting49 Dimensions51 Manual 4 Safety regulations Leica DM750 Manual 5 Safety concept The individual modules of the Leica DM microscopy series include an interactive CD-ROM with all relevant user manuals in several languages. Keep it in a safe place, and readily accessible to the user. User manuals and updates are also available for you to download and print from our web site at www.leica-microsystems.com. Before installing, operating or using the instruments, read the user manuals listed above. In particular, please observe all safety instructions. To maintain the unit in its original condition and to ensure safe operation, the user must follow the instructions and warnings contained in these user manuals. This user manual describes the special functions of the individual modules of the Leica DM microscopy series and contains important instructions for their operational safety, maintenance, and accessories. The "Safety concept" booklet contains additional safety information regarding the service work, requirements and the handling of microscope, accessories and electrical accessories as well as general safety instructions. You can combine individual system articles with articles from external suppliers. Please read the user manual and the safety requirements of the supplier. Leica DM750 Manual 6 Symbols used in this instruction manual Warning of a danger This symbol indicates especially important information that is mandatory to read and observe. Failure to comply can cause the following: ϘϘ Hazards to personnel ϘϘ Functional disturbances or damaged instruments Warning of hazardous electrical voltage This symbol indicates especially important information that is mandatory to read and observe. Failure to comply can cause the following: ϘϘ Hazards to personnel ϘϘ Danger due to hot surface. This symbol warns against touching accessible hot surfaces, e.g. those of light bulbs. Important information This symbol indicates additional information or explanations that intend to provide clarity. Explanatory notes ϐϐ This symbol within the text points to additional information and explanations. Instructions for disposing of the instrument, accessory components, and consumables. Functional disturbances or damaged instruments Leica DM750 Manual 7 Important Notes Description The Leica DM750 microscope meets today's state of the art of technology. Nevertheless, hazards may still arise during operation. The potential risks are described below. Before installing, operating or using the instrument, it is mandatory to read this user manual. In particular, please observe all safety instructions. User Manual This user manual includes important instructions related to operating safety, maintenance and accessories, with an interactive CD-ROM with all Your Leica DM750 microscope comes relevant user manuals. Keep it in a safe place, and readily accessible to the user. User manuals and updates are also available for you to download and print from our website at www.leica-microsystems.com. Original condition To maintain the unit in its original condition and to ensure safe operation, the user must follow the instructions and warnings contained in these user manuals. Legal requirements Adhere to general and local regulations relating to accident prevention and environmental protection. Contact address Leica Microsystems (Schweiz) AG Industry Division Max Schmidheiny Strasse 201 CH-9435 Heerbrugg (Switzerland) Leica DM750 Accessories from third-party suppliers You can combine individual system articles with articles from external suppliers. Please read the user manual and the safety requirements of the supplier. EC Declaration of Conformity Electrically operated accessories are constructed based on the state of the art of technology and are provided with an EC Declaration of Conformity. Manual 8 Intended Purpose of the Microscope this instruction manual has been writ- The Leica DM750 microscope, for which ten, is intended for biological routine and research applications. This includes examining specimens taken from the human body for the purpose of gaining information about physiological or pathological conditions or inborn anomalies, or testing for safety and compatibility for potential recipients, or for monitoring therapeutic measures. Caution! The manufacturer assumes no liability for any noncompliant use or use outside of the specifications from Leica Microsystems CMS GmbH as well as any risks that may arise from such use. In such cases, the Declaration of Conformity shall be invalid. Caution! This (IVD) instrument is not intended for use in a patient environment as defined by DIN VDE 0100-710. It is also not intended to be combined with medical devices as defined by EN 60601-1. If a microscope is electrically connected to a medical instrument in accordance with EN 60601-1, the requirements defined in EN 60601-1-1 shall apply. Not suitable for examining potentially infectious specimens. The above-named microscope complies with the Council Directive 98/79/EEC concerning in vitro diagnostics. Caution! The Leica DM750 microscope is not intended for use with biologically hazardous materials. Leica DM750 Manual 9 Instructions on use The Leica DM750 microscope may be used only in closed rooms and must be placed on a solid substrate. The Leica DM750 microscope can be used in clean rooms without any problems. Always position the Leica DM750 microscope so that you can disconnect it from the power supply at any time. The power cable must remain accessible at all times, because it is intended as a power disconnect device. Place of use Only use the instruments in closed, dust free rooms and between +10°C and +40°C. Protect the devices from oil, chemicals and extreme humidity. If using the devices outdoors, protect them from dust and moisture. Never use electrical devices outdoors. Install electrical devices at least 10 cm from the wall and away from flammable substances. Non-intended use Never install any other plug (NEMA 5-15P) or unscrew any mechanical components unless expressly instructed to do so in the instructions. this instruction manual have been tested The devices and accessories described in for safety and potential hazards. Avoid large temperature fluctuations, direct sunlight and vibrations. These conditions can distort measurements and micrographic images. the In warm and warm-damp climatic zones, individual components require special care in order to prevent the build-up of fungus. Leica DM750 Manual 10 Instructions on use (continued) The responsible Leica affiliate must be consulted whenever the instrument is altered, modified or used in conjunction with non-Leica components that are outside of the scope of this manual! Unauthorized alterations to the instrument or noncompliant use shall void all rights to any warranty claims. Transport If at all possible, use the original packaging for shipping or transporting individual modules. Disposal Once the product has reached the end of its service life, please contact Leica Service or Sales about disposal. Please observe and ensure compliance with the national laws and regulations that implement, for example, the EC Directive WEEE. Integration in third-party products When installing Leica products into third-party products, the manufacturer of the complete system or its dealer is responsible for following all applicable safety instructions, laws and guidelines. Like all electronic devices, this instrument, its accessory components and consumables must never be disposed of with general household waste. Disposal must comply with locally applicable laws and regulations. In order to prevent damage from vibrations, disassemble all moving parts that (according to the user manual) can be assembled and disassembled by the customer and pack them separately. Leica DM750 Manual 11 Health risks and dangers of use Health risks Workplaces with microscopes facilitate and improve the viewing task, but they also impose high demands on the eyes and holding muscles of the user. Depending on the duration of uninterrupted work, asthenopia and musculoskeletal problems may occur. For this reason, appropriate measures for reduction of the workload must be taken: The ergonomic design and construction of the Leica microscopy series are intended to reduce the exertion of the user to a minimum. Dangers during use ϘϘ The Leica DM750 microscope may only be connected to a grounded socket. Danger of infection Direct contact with eyepieces is a potential transmission method for bacterial and viral infections of the eye. ϘϘ using personal eyepieces for each indiviThe risk can be kept to a minimum by ϘϘ Optimum workplace layout ϘϘ Frequent changes of activity ϘϘ Thorough training of the personnel, giving consideration to ergonomic and organizational aspects dual or detachable eyecups. The Leica DM750 microscope may not be operated unless it is in proper functioning condition. LED Klasse 1 /LED 1 Laser Product The illumination meets laser class 1 requirements in accordance with IEC 60825-1 "Safety of Laser devices". Caution: Hazardous radiation may occur if controls, adjustment jigs, or procedures other than those outlined in this User Manual are used! Class 1 LED Product Leica DM750 Manual LED class 1 12 Information for the person responsible for the instrument Information for the person responsible for the instrument ϘϘ Ensure that the Leica DM750 microscope is used only by qualified personnel. ϘϘ Ensure that this user manual is always available at the Leica DM750 microscope. ϘϘ Carry out regular inspections to make certain that the authorized users are adhering to safety requirements. ϘϘ ϘϘ ϘϘ Do not use the Leica DM750 microscope unless it is in perfect condition. ϘϘ Only original Leica replacement parts may be used in servicing the product. ϘϘ Inform your Leica representative or Leica Microsystems (Schweiz) AG, Industry Division, 9435 Heerbrugg, Switzerland, immediately of any product defect that could potentially cause injury or harm. ϘϘ After service work or technical modifications, the unit must be reconfigured with observance to our technical requirements. ϘϘ If the unit is modified or serviced by unauthorized persons, is improperly maintained (as long as maintenance was not carried out by us), or is handled improperly, Leica will not accept any liability. ϘϘ The electric installation in the building must conform to the national standard, e.g. current-operated ground leakage protection (fault-current protection) is suggested. ϘϘ When instructing new users, do so thoroughly and explain the meanings of the warning signs and messages. Assign individual responsibilities for starting, operating and servicing the instrument and monitor the observance of these responsibilities. Leica DM750 ϘϘ If you use accessories made by third-party manufacturers with the Leica DM750 microscope, be sure that each such manufacturer confirms the safety-engineering, harmless usability of the product and observe the product's user manual. Modifications and maintenance of the Leica DM750 microscope may only be performed by professionals expressly authorized by Leica. Manual 13 Care instructions General instructions ϘϘ Protect the Leica DM750 microscope against damp, vapors, acids, alkalis, and corrosive substances. Do not store chemicals in the vicinity. ϘϘ Protect the Leica DM750 microscope from oil and grease. Never grease or oil mechanical parts or sliding surfaces. Cleaning coated parts and plastic parts ϘϘ Dust and dirt particles should be removed with a soft brush or lint-free cotton cloth. ϘϘ ϘϘ Remove coarse debris with a moistened disposable cloth. ϘϘ Remove dirt using a clean cloth that has been moistened with distilled water. Clinging dirt can be removed using petroleum ether or alcohol ϘϘ Remove tough dirt using alcohol or petroleum ether. ϘϘ Follow the instructions of the disinfectant manufacturer. ϘϘ Acetone, xylene or nitro-containing thinners must NOT be used. ϘϘ It is advisable to enter a service agreement with Leica Service. ϘϘ Never use chemicals to clean colored surfaces or accessories with rubberized parts. This could damage the surfaces, and specimens could be contaminated by abraded particles. Leica DM750 Cleaning glass surfaces ϘϘ Remove dust using a dry and grease-free brush made from hair, by blowing with bellows, or by using a vacuum. Manual 14 Accessories, maintenance and repair Accessories Only the following accessories may be used with the Leica DM750 microscope: ϘϘ The Leica accessories described in this user manual. ϘϘ Other accessories, provided that these have been expressly approved by Leica as being technically safe in this context. Leica DM750 Maintenance ϘϘ The Leica DM750 microscope is basically maintenance-free. To ensure that it always operates safely and reliably, we recommend that you take the precaution of contacting the responsible service organization. or, if appropriate, conclude a mainte- You can arrange for periodic inspections Repairs and service work ϘϘ Only original Leica Microsystems spare parts may be used. ϘϘ Before opening the instruments, switch off the power and unplug the power cable. ϘϘ Avoid contact with powered electrical circuits, which can lead to injury. nance contract with them. ϘϘ It is advisable to enter a service agreement with Leica Service. ϘϘ For maintenance and repair, only OEM spare parts may be used. Manual Service address In case of problems, please contact us as follows: Leica Microsystems (Schweiz) AG Industry Division Max Schmidheiny Strasse 201 CH-9435 Heerbrugg (Switzerland) Phone +41 71 726 33 28 15 Electrical data and ambient conditions Fuse Replacement Unplug the instrument before changing any fuses. The Leica DM750 has two fuses, which are located behind the power cord receptacle. Only use the following fuse types: 5×20 mm, 1 A/250V, fast-acting fuse (# 13RFAG30003) Electrical data Input: 100-240 V, 50/60 Hz, 5 W (3 W LED) General safety notes This instrument of safety class 1 has been built and tested in accordance with the following safety requirements for electrical equipment for measurement, control, and laboratory use: EN 61010-1: 2002-08 EN 61010-2-101: 2008-06 IEC 61010-1: 2010-06 EN 61326-1: 2006-10 EN 61326-2-6: 2006-10 Leica DM750 EN 55011: 2007+A2: 2010-05 EN 60825-1: 2008-05 IEC 60825-1: 2007-03 LED Class 1 In order to maintain this condition and to ensure safe operation, the user must follow the instructions and warnings contained in this instruction manual. Environment Temperature for use +10 °C … +40 °C Storage temperature -20 °C … +52 °C +50 °F to +104 °F Manipulation shock 25 mm on 50 mm hard wood Transport shock (unpacked) 100 g / 6 ms Transport shock (packed) 800 mm free fall Transport vibrations (unpacked) 5–200 Hz / 1.5 g Air pressure during use and storage: 500–1060 mbar Humidity during use and storage: 20–90% Installation Category II (Overvoltage Category) Pollution degree 2 Manual 16 The Leica DM750 Leica DM750 Manual 17 Introduction Thank you for purchasing the Leica DM750 Compound Microscope from Leica Microsystems. This model’s exclusive design features and full range of accessories make it a truly versatile, high quality-instrument for educational and routine clinical applications. The instrument is to be used only as described. Hazards to personnel may result if used improperly. Leica DM750 Manual 18 Unpacking ϘϘ Carefully remove the microscope and any components from the packing carton. ϘϘ Verify that all components are intact. ϘϘ Check the components against the planned configuration. ϘϘ Optional items such as contrast accessories, camera adapters, cameras, and carrying cases are not shipped as part of the standard equipment. These items are delivered in separate packages. ϘϘ Please do not discard any of the packing materials. They should be used for safely storing and transporting the instrument should the need arise. Leica DM750 Manual 19 Ready! Leica DM750 Manual 20 Substage Illumination Substage Illumination The Leica DM750 is available with two types of Substage Illumination. Identify which type of Illumination you have, as this will be important to know later. Leica DM750 Type 1: Standard illumination Adjustable condenser centering with provided tool. Manual Type 2: Koehler illumination Adjustable condenser centering with thumbscrews and adjustable Koehler field diaphragm. 21 Attaching the viewing Tubes Tools used ϘϘ Allen key Identify which viewing tube you have: There are two types of viewing tube. Type 1: Leica EZ Viewing Tube with integrated eyepieces. 1. Loosen the setscrew (on top of the stand) using the Allen key provided. 2. Set the dovetail into the tripod mount and tighten the setscrew carefully (without using excessive force). This precisely positions the viewing tube onto the optical axis of the microscope, regardless of the selected rotation. Type 2: Standard viewing tube with separate eyepieces Leica DM750 Manual 22 Leica EZ Viewing Tube – integrated eyepieces 1. In order to use the captive wingscrew, remove the setscrew that was delivered with the stand. 2. Reinstall the Leica EZ Viewing Tube onto the stand. Leica EZ viewing tube with integrated eyepieces. either loosen the set screw on the stand To rotate the Leica EZ viewing tube, or replace the set screw with the (optional) captive thumbscrew. Leica DM750 Make sure that the wingscrew part of the captive wingscrew has been completely separated before you use the stand: Manual 3. Tighten the captive wingscrew using the wrench included in the delivery package. 23 Leica EZ Viewing Tube – integrated eyepieces (cont.) viewing tube by loosening the captive You can now safely rotate the Leica EZ thumbscrew, rotating the viewing tube, and tightening the captive thumbscrew again. Leica EZ Viewing Tube and preset; thereThe eyepieces are integrated into the fore, there is no need to adjust or install the eyepieces. Continue with the "Eyecups" section on page 26. Leica DM750 Manual 24 Leica Standard Viewing Tube – separated eyepieces 1. Insert the eyepieces into the tubes. 2. Secure the eyepieces in the tubes by tightening the silver screws at the bottom of the tubes using a standard Phillips screwdriver (not included in the delivery package). Standard viewing tubes; tubes do not include eyepieces yet table dovetail. Therefore, you can now The standard viewing tube has a rota- rotate the standard viewing tube freely in any orientation. will be captive in the eyetubes. The eyepieces will still rotate, but they Leica DM750 Manual 25 Eyecups viewing, keep the rubber eyecups folded microscope If you wear eyeglasses for microscope If you have purchased a standard configuration, you will notice that the objectives are already installed on the nosepiece and the substage condenser is already installed on the stand. In this case, go to section "Operation" on page 30. If you purchased your Leica DM750 in the form of individual components rather than the standard configuration, please continue with the "Installing Objectives" section on page 27. down. If you do not wear eyeglasses, you may find it useful to unfold the rubber eyecups in order to help block out ambient room light. Leica DM750 Manual 26 Installing Objectives Installing Objectives When rotating the objective nosepiece, always use the knurled ring on the objective nosepiece. As you rotate the nosepiece clockwise, attach the objectives by screwing them into the nosepiece holes starting with the lowest magnification and advancing to the highest magnification. Leica DM750 Manual 27 Installing the Substage Condenser Substage Condenser The Leica DM750 has an open substage condenser mount, therefore the condenser needs to be installed. The substage condenser mount is open Leica DM750 1. Move the specimen stage upwards as far as it will go by using the coarse focusing knob on the side of the microscope. 3. Unscrew the two setscrews (or wingscrews for Koehler stands) on the condenser holder. 2. Move the condenser holder into the lowest position by using the condenser focusing knob on the left side of the stage mount. Manual 28 Installing the Substage Condenser (cont.) 4. Push the substage condenser under the specimen stage into the holder by aligning the locating pin on the bottom of the condenser with the slot on the rear side of the fork. 5. Move the condenser into the highest position by using the condenser focusing knob on the left side of the stage mount. 6. Tighten the two setscrews using the tool included in the delivery package (or, for a Koehler stand, tighten the two wingscrews) so that the upper lens of the condenser is centered under the objective in working position and the substage condenser is thus roughly centered. rately when you get to the "Complete You will center the condenser more accu- Condenser Centering" section on page 32. Leica DM750 Manual 29 Set! Leica DM750 Manual 30 Turning on the microscope Work Surface Always use your microscope on a hard, stable surface. Power Cord If the power cord is not already attached, attach it securely to the back of the microscope. Leica DM750 Setting the Illumination Intensity Set the illumination to the lowest setting to start with, using the controller on the bottom left of the stand. The illumination control knob allows you to adjust the intensity of light produced by the illumination system. Manual Plug in and Turn on the Microscope 1. Plug the power cable of the microscope into a corresponding grounded socket. A grounded 3-wire cord is provided. 2. Switch on the microscope using the switch at the bottom right of the microscope stand. 31 Complete Condenser Centering DM750 configuration, the condenser has If you have purchased a standard Leica already been pre-centered by Leica Microsystems. 2. Write an "X" on a piece of paper in the size of a business card and place it onto the light output of the microscope stand in such a way that the "X" is centered over the illumination. 1. Open the condenser aperture by rotating the knurled ring on the condenser to the right. Make sure that the condenser is in the highest position. Leica DM750 Not centered 3. Look at the X through the eyepieces and center it in the field of view by tightening the setscrews with the tool included in the delivery package (or, for a Leica DM750 with Koehler illumination, tighten the knurled screws). Manual Centered 32 Using the Condenser Using the Condenser The condenser is furnished with an iris diaphragm, which can be adjusted to match the effective numerical aperture of the objective 1. To open and close this diaphragm, simply turn the knurled ring on the condenser to the right or left so that the line on the ring is aligned with the objective magnification used. 2. Open the iris diaphragm of the condenser completely at first by turning the condenser ring all the way to the right. Match the line of the rotating ring with the objective magnification in use. Leica DM750 Manual 33 Prepare to View a Specimen Slide 1. Position a specimen slide on the specimen stage by sliding it under the slide grips. 2. Using the X/Y-stage control, position the specimen slide such that a part of the specimen is under the objective used. Slide grips hold the slide in place. Slide grips Leica DM750 Manual 34 Focusing 1. Rotate the objective nosepiece (using the knurled ring) in such a way that the objective with the lowest magnification level is rotated into the working position. 2. Move the specimen stage upwards by turning the coarse focusing knob as far as it will go to the maximum position. 3. Look into the eyepieces and adjust the illumination intensity to a level that is comfortable for your eyes. The stand of the Leica DM750 has been calibrated at the factory so that the focus can be found from this position within 1.5 rotations of the fine focus. 4. Bring the specimen into focus using the fine focusing knob. Coarse focus adjustment knob Leica DM750 Manual 35 Viewing Tube Adjustment Adjust the eyetubes 1. Adjust the tubes to your interpupillary distance. Fold or unfold the eyetubes to decrease or increase the distance between the eyepieces until you see one illuminated circle. Leica EZ Viewing Tube ϘϘ If you are using a Leica EZ viewing tube, which has the eyepieces integrated with the eyetubes, no additional adjustments are necessary. Be sure you are wearing your eyeglasses or contact lenses. ϘϘ ϘϘ If you have a Leica DM750 with standard illumination (without Koehler field diaphragm), continue with the "Oil Immersion Technique" section on page 40. If you have a Leica DM750 with Koehler field diaphragm, continue with the "Koehler Configuration" section on page 38. ϘϘ If you have a Leica DM750 with standard illumination (without Koehler field diaphragm), continue with the "Oil Immersion Technique" section on page 40. ϘϘ If you have a Leica DM750 with Koehler field diaphragm, continue with the "Koehler Configuration" section on page 38. Standard Viewing Tube with One or Two Focusing Eyepieces If you are using a standard viewing tube with one or two focusing eyepieces, you need to make some adjustments. 1. Set the focusing eyepieces to "0". The viewing tubes maintain a constant tube length for all interpupillary settings. This means that a change of interpupillary distance does not affect parfocality, magnification, or calibrations that depend on magnification. Leica DM750 Standard Viewing Tube with Two Fixed Eyepieces ϘϘ If you are using a standard viewing tube with two fixed eyepieces (no focusing eyepieces), no additional adjustments necessary. Be sure you are wearing your eyeglasses or contact lenses. Manual 36 Viewing Tube Adjustment (cont.) corrective vision differences between your right eye and left eye. If you are comfortable wearing your lenses (contact lenses or eyeglasses) for microscope viewing, leave them on and your adjustments will be minimal. 2. Using the fine focus adjusting knob, focus on the specimen while looking through only one of the eyepieces (when using one eyepiece that is focusable and one that is not focusable, look through the one that is not focusable). To help focus, cover or close the other eye. 5. Now, switch to an objective with a high magnification level (no oil objective) and bring the microscope into focus while looking through the eyepieces with both eyes. The higher magnifications have a shallo- 3. Now look with the other eye just through the other eyepiece (focusing eyepiece). This time, focus the specimen by using the focusing capability in the focusing eyepiece. When doing so, do not change the height of the specimen stage. Leica DM750 wer depth of field. Therefore, after focus- 4. Grip the knurled ring on the focusing eyepiece with one hand and rotate the top of the eyepiece with the other hand until the specimen is in focus for this eye and this focusing eyepiece. This corrects for any Manual ing with a high magnification, you will find that when you change to lower magnifications, you only have to adjust the fine focus slightly, if at all. ϘϘ If you use a DM750 with standard illumination, continue with the "Oil Immersion Technique" section on page 40. ϘϘ If your DM750 has a Koehler configuration, please continue with the next section, "Koehler Configuration", on page 38. 37 Koehler Configuration mination, use the following procedure to assure condenser centeIf your Leica DM750 is fitted with a field diaphragm for Koehler Illu- 2. Focus the leaves of the field diaphragm using the condenser focusing knob on the left side of the stage mount. ring and focus. 1. Connect the Koehler field diaphragm to the base of the microscope so that the diaphragm leaves are in the field of view when you look through the eyepieces. Condenser focusing knob Close the Koehler field diaphragm Leica DM750 Leaves are in sharp focus Close the Koehler field diaphragm Manual 38 Koehler Configuration (cont.) 3. Turn the condenser centering wingscrews simultaneously to center the image of the field diaphragm. Leica DM750 4. Open the field diaphragm until the diaphragm leaves are just outside of the field of view. Manual 39 Oil Immersion Technique 1. Search for the area on the specimen slide that you want to study. 3. Add a drop of immersion oil from Leica to the area of the specimen slide you are studying. 4. Rotate the oil immersion objective (the objective labeled "OIL") to the working position. 2. Move the specimen stage down to the lowest position using the coarse adjustment knob. Leica DM750 Manual 40 Oil Immersion Technique (cont.) 5. Slowly move the specimen stage upwards using the coarse adjustment knob until the oil drop on the slide comes into direct contact with the lens of the oil immersion objective. 7. Look through the microscope and slowly rotate the fine adjustment knob, so that the specimen stage moves upwards until the specimen is in focus. 8. If you are finished working with the oil immersion objective, clean the front side of the objective, the specimen slide, and all other surfaces that have come into contact with the oil, following the instructions in the "Care of the Microscope" section on page 46. 6. Hold the knurled ring on the objective turret and swing the objective back and forth to eliminate air bubbles. Then bring the oil objective into the final position, so that the oil drop is between the front lens of the objective and the specimen slide. Leica DM750 Manual 41 Time Delay Shutoff delay shutoff capability, which automati- The Leica DM750 is equipped with a time cally turns the illumination off after 2 hours of no changes in the intensity control. ϘϘ ϘϘ All four-position nosepiece stands have the time delay shutoff enabled as a default (mostly educational applications). All five-position nosepiece stands have the time delay shutoff disabled as a default (mostly clinical applications). Changing the status of the time delay shutoff 1. Rotate the intensity regulator to the lowest level. ϘϘ The LED Illumination will flash to indicate the time delay shutoff status was changed. ϘϘ The LED Illumination will flash two times slowly then stay on when you disable the Time Delay Shutoff. ϘϘ The LED Illumination will flash three times quickly then stay on when you enable the Time Delay Shutoff. 2. Switch on the instrument. 3. Rotate the intensity regulator to the highest level and then back to the lowest level within five seconds. turn the power on again, the system will When you turn the power off and then be in the last Time Delay Shutoff status (Enabled or Disabled) and you will not see any blinking. Leica DM750 Manual 42 Go! Leica DM750 Manual 43 Ready! Set! Go! Now all you need to do is change objectives, set the condenser aperture (and field diaphragm if you have a DM750 Koehler Stand) appropriately for the objective magnification you are using, and enjoy the view! Leica DM750 Manual 44 Care of the Microscope Leica DM750 Manual 45 General maintenance Storage and handling Always use both hands to carry the microscope. There is a handle on the back of the microscope and an undercut in the front for this purpose. Leica DM750 ϘϘ The cord wrap allows you to wrap the cord in such a way that only the length you need is extended. ϘϘ Keep all optical components clean. Cleanliness is important for maintaining good optical performance. ϘϘ The microscope should always be covered with the plastic dust cover (provided with the instrument) when it is not in use. Instructions for cleaning ϘϘ If any optical surface becomes coated with dust or dirt, clean the surface by blowing it off with a syringe or brushing it off with a camel hair brush before attempting to wipe the surface clean. ϘϘ Optical surfaces should be cleaned using a lint-free cloth, lens cloth or cotton swab moistened with a commercially available glass cleaner. ϘϘ It is very important to avoid the excessive use of solvents, so use them sparingly. The lint-free cloth, lens tissue or cotton swab should be moistened with solvent, but not be wet enough for the solvent to seep around the lens. Manual 46 General maintenance (cont.) ϘϘ No part of the microscope is quite so vulnerable to collecting dirt, dust, and oil as the front lens of the objective. Whenever you encounter lack of contrast, cloudiness or poor definition, carefully check the condition of the front lens with a magnifier. ϘϘ The lower magnification objectives have fairly large front lenses and can be cleaned with a cloth or lens tissue wrapped around a finger and moistened with methanol. ϘϘ Cleaning 40× and 100× objectives requires more care. Note: To attain the typical flatness for objectives with higher magnification, the objective has a small concave front lens with a very small radius and slight curvature. The surface of this front lens can be readily cleaned with a toothpick covered with a cotton tip, or with a small cotton swab. Soak the cotton with isopropanol and squeeze it out until it is almost dry again. Wipe the front lens lightly without applying undue force or scrubbing action. Leica DM750 Make sure that the cotton tip contacts the concave lens surface. Check the objective with a magnifier after cleaning. ϘϘ Illumination ϘϘ The Leica DM750 uses LED illumination. Therefore, no lamp changing is required for the life of the microscope. If you need to remove the microscope’s viewing body, be careful not to accidentally touch the outer lens surface (located on the underside of the body). Fingerprints on this surface will reduce image clarity. This lens can be cleaned in the same manner as objectives and eyepieces. Mechanical Maintenance ϘϘ Use the dust cover. It is the most important way to keep the microscope in good mechanical and physical condition. ϘϘ The Leica DM750 has a durable finish. All non-optical parts of the instrument can be cleaned with isopropanol or soap and water. Avoid the use of all other organic solvents when cleaning the instrument. Manual 47 Troubleshooting Leica DM750 Manual 48 Troubleshooting Stand The microscope does not respond. Make sure that the socket has voltage. Check the cable connections. Make sure that the stand is connected to the power supply. Check whether the fuse is defective and replace it if necessary (see page 16). Focus The specimen cannot be brought into focus. Use the correct immersion medium. Lay the specimen with the cover glass toward the top. Make sure that the cover slip thickness is correct and that it meets the specifications on the objective. Dark field No definite DF contrast is possible. The image is not uniformly illuminated. Unwanted stray light. Polarization Leica DM750 Make sure that a DF objective is being used. The objective aperture is too high (maximum 0.75/ 1.10); if necessary, reduce the objective aperture through the iris diaphragm on the objective. Check the condenser centering. Open the aperture diaphragm completely. The objective magnification is too weak. Use a higher magnification. Clean the specimen and neighboring lens surfaces. Manual 49 Troubleshooting (continued) Polarization contrast cannot be adjusted. Bring the polarizer and analyzer into cross position until they reach maximum darkness (without specimen). Phase contrast Phase contrast cannot be adjusted. The specimen is too thick, too thin, or too brightly stained. Refractive indexes of the mounting medium and specimen are identical, so that there is no phase jump. The cover glass is not placed uniformly. Check that the correct light ring is positioned. Check the centering of the light rings. Check the condenser centering. Open the aperture diaphragm completely. Specimen Stage Positioning range of the stage in the x-direction decreases after working a long time. Leica DM750 Move the mechanical stage with coaxial drive all the way to the left. Manually press the screw that holds the mechanical stage even farther to the left, as far as it will go. Then move the mechanical stage with coaxial drive all the way to the right. Manually press the screw that holds the mechanical stage even farther to the right, as far as it will go. Manual 50 Dimensions Leica DM750 Manual 51 Leica DM750 Manual 52 Leica DM750 Manual 53 Leica DM750 Manual 54


