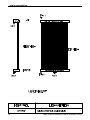
1
S246-0149-03
6400
Line Matrix Printer
Coax/Twinax
Multi–Platform Interface Feature
Operation Guide
Note!
Before using the information and the product it works with, ensure that you
read the general information under "Notices" on page vi.
February 1998
This manual may contain references to, or information about, IBM products
that are not announced in your country. Such references or information must
not be construed to mean that IBM intends to announce such IBM product,
programming or services in your country.
Information contained in this documentation is subject to change from time to
time. Changes will be reflected in the following revisions.
Reader comments may be sent by fax to 1-800-524-1519 or by e-mail to
[email protected] or by regular mail to:
Department H7FE Building 003G
The IBM Printing Systems Company
Information Development
P.O. Box 1900
Boulder, CO 80301-9191
U.S.A.
IBM may use or distribute any of the information you supply in any way it
believes suitable without incurring any obligation whatever. You may, of
course, continue to use the information you supply.
© Copyright International Business Machines Corporation 1995, 1996, 1997.
All rights reserved.
Note to U.S. Government Users – Documentation related to restricted rights –
Use, duplication or disclosure is subject to restrictions set forth in GSA ADP
Schedule Contract with IBM Corp.
Table of Contents
About this setup guide
Related Publications . . . . . . . . . . . . . . . . . . . . . . . . . . . . . . . . . . . . . . . . . . xii
CONFIGURATION
Preparing for Configuration . .
Configuring MPI . . . . . . . . . .
Configuring the Printer . . . . . .
Configuring for port switching
.
.
.
.
.
.
.
.
.
.
.
.
.
.
.
.
.
.
.
.
.
.
.
.
.
.
.
.
.
.
.
.
.
.
.
.
.
.
.
.
.
.
.
.
.
.
.
.
.
.
.
.
.
.
.
.
.
.
.
.
.
.
.
.
.
.
.
.
.
.
.
.
.
.
.
.
.
.
.
.
.
.
.
.
.
.
.
.
.
.
.
.
.
.
.
.
.
.
.
.
.
.
.
.
.
.
.
.
.
.
.
.
.
.
.
.
.
.
.
.
.
.
.
.
.
.
.
.
.
.
.
.
.
.
.
.
.
.
.
.
. 2
. 4
. 9
12
.
.
.
.
.
.
.
.
.
.
.
.
.
.
.
.
.
.
.
.
.
.
.
.
.
.
.
.
.
.
.
.
.
.
.
.
.
.
.
.
.
.
.
.
.
.
.
.
.
.
.
.
.
.
.
.
.
.
.
.
.
.
.
.
.
.
.
.
.
.
.
.
.
.
.
.
.
.
.
.
.
.
.
.
.
.
.
.
.
.
.
.
.
.
.
.
.
.
.
.
.
.
.
.
.
.
.
.
.
.
.
.
.
.
.
.
.
.
.
.
.
.
.
.
.
.
.
.
.
.
.
.
.
.
.
.
.
.
.
.
.
.
.
.
.
.
.
.
.
.
14
16
17
19
22
.
.
.
.
.
.
.
.
.
.
.
.
.
.
.
.
.
.
.
.
.
.
.
.
.
.
.
.
.
.
.
.
.
.
.
.
.
.
.
.
.
.
.
.
.
.
.
.
.
.
.
.
.
.
.
.
.
.
.
.
.
.
.
.
.
.
.
.
.
.
.
.
.
.
.
.
.
.
.
.
.
.
.
.
.
.
.
.
.
.
.
.
.
.
.
.
.
.
.
.
.
.
.
.
.
.
.
.
.
.
.
.
29
34
37
40
Using Coax with the MPI
Coax Connection . . . . . . . .
Coax Buffer Size . . . . . . . .
Coax Code Dump Mode . . .
Coax Command Interpreter
Coax Code Maps . . . . . . . .
.
.
.
.
.
.
.
.
.
.
.
.
.
.
.
.
.
.
.
.
.
.
.
.
.
.
.
.
.
.
.
.
.
.
.
Using Twinax with the MPI
Twinax Connection . . . . . . .
Twinax Code Maps . . . . . . .
Code Dump Mode . . . . . . . .
Twinax Command Interpreter
.
.
.
.
.
.
.
.
.
.
.
.
.
.
.
.
.
.
.
.
.
.
.
.
.
.
.
.
.
.
.
.
Using PC Parallel with MPI
Introduction . . . . . . . . . . . . . . . . . . . . . . . . . . . . . . . . . . . . . . . . . . . . . . . . . 44
Connection . . . . . . . . . . . . . . . . . . . . . . . . . . . . . . . . . . . . . . . . . . . . . . . . . 45
Setting time outs on the Parallel Host . . . . . . . . . . . . . . . . . . . . . . . . . . . . . 46
TROUBLESHOOTING
Diagnostics . . . . . . . . . . . . . . . . . . . . . . . . . . . . . . . . . . . . . . . . . . . . . . . . . 48
Troubleshooting your Host Printer Operation . . . . . . . . . . . . . . . . . . . . . . . . 52
Compatibility Issues . . . . . . . . . . . . . . . . . . . . . . . . . . . . . . . . . . . . . . . . . . . 54
Appendix A: Defining a Printer in S/370-S/390
Environments
Overview . . . . . . . . . . . . . . . . . . . . . . . . . . . . . . . . . . . . . . . . . . . . . . . . . . . 58
6400-LU1-SCS-Local SNA 3174 Control Unit . . . . . . . . . . . . . . . . . . . . . . . . 59
6400-LU1-SCS-Remote SNA 3174 Control Unit . . . . . . . . . . . . . . . . . . . . . . 61
i
6400-LU3-DSE-Local SNA 3174 Control Unit . . . . . . . . . . . . . . . . . . . . . . . . 63
6400-LU3-DSE-Remote SNA 3174 Control Unit . . . . . . . . . . . . . . . . . . . . . . 65
6400-LU0-DSC-Local Non-SNA 3174 Control Unit . . . . . . . . . . . . . . . . . . . . 67
Appendix B: Describing Custom Set 8
Printer Configuration . . . . . . . . . . . . . . . . . . . . . . . . . . . . . . . . . . . . . . . . . . 70
Appendix C: Illustrated Parts List
Hardware Assemblies . . . . . . . . . . . . . . . . . . . . . . . . . . . . . . . . . . . . . . . . . 75
Cable Assemblies . . . . . . . . . . . . . . . . . . . . . . . . . . . . . . . . . . . . . . . . . . . . 76
Appendix D: Installing the MPI on the Printer
Introduction . . . . . . . . . . . . . . . . . . . . . .
Accessing the card-cage . . . . . . . . . . . .
Preparing the printer for MPI Installation
Installing the MPI Card in the Printer . . .
Checking the MPI Installation . . . . . . . . .
.
.
.
.
.
.
.
.
.
.
.
.
.
.
.
.
.
.
.
.
.
.
.
.
.
.
.
.
.
.
.
.
.
.
.
.
.
.
.
.
.
.
.
.
.
.
.
.
.
.
.
.
.
.
.
.
.
.
.
.
.
.
.
.
.
.
.
.
.
.
.
.
.
.
.
.
.
.
.
.
.
.
.
.
.
.
.
.
.
.
.
.
.
.
.
.
.
.
.
.
.
.
.
.
.
.
.
.
.
.
.
.
.
.
.
.
.
.
.
.
.
.
.
.
.
.
.
.
.
.
.
.
.
.
.
80
81
82
83
85
Appendix E: Host Character Sets
Twinax Character Sets . . . . . . . . . . . . . . . . . . . . . . . . . . . . . . . . . . . . . . . . . 87
Coax Character Sets . . . . . . . . . . . . . . . . . . . . . . . . . . . . . . . . . . . . . . . . . . 91
ii
List of Tables in this Manual
—
—
—
—
—
—
—
—
—
—
—
Table 1 Sample Configuration Printout (Twinax) .
Table 2 Sample Configuration Printout (Coax) . . .
Table 3 Printer Configuration . . . . . . . . . . . . . . . .
Table 4 Buffer Size Selections . . . . . . . . . . . . . . .
Table 5 Coax Command Interpreter commands . .
Table 6 Twinax Command Interpreter Commands
Table 7 Coax Diagnostic Tests . . . . . . . . . . . . . . .
Table 8 Twinax Diagnostic Tests . . . . . . . . . . . . .
Table 9 Twinax Error Messages . . . . . . . . . . . . . .
Table 9 Twinax Error Messages . . . . . . . . . . . . . .
Table 10
Coax Error Messages . . . . . . . . . . . .
.
.
.
.
.
.
.
.
.
.
.
.
.
.
.
.
.
.
.
.
.
.
.
.
.
.
.
.
.
.
.
.
.
.
.
.
.
.
.
.
.
.
.
.
.
.
.
.
.
.
.
.
.
.
.
.
.
.
.
.
.
.
.
.
.
.
.
.
.
.
.
.
.
.
.
.
.
.
.
.
.
.
.
.
.
.
.
.
.
.
.
.
.
.
.
.
.
.
.
.
.
.
.
.
.
.
.
.
.
.
.
.
.
.
.
.
.
.
.
.
.
.
.
.
.
.
.
.
.
.
.
.
.
.
.
.
.
.
.
.
.
.
.
.
.
.
.
.
.
.
.
.
.
.
.
.
.
.
.
.
.
.
.
.
.
.
.
.
.
.
.
.
.
.
.
.
. 6
. 7
10
16
20
41
49
50
55
55
55
iii
Notices
References in this publication to IBM products, programs, or services do not
imply that IBM intends to make these available in all countries in which IBM
operates. Any reference to an IBM product, program, or service is not
intended to state or imply that only IBM’s product, program, or service may be
used. Any functionally equivalent product, program, or service that does not
infringe any of the intellectual property rights of IBM may be used instead of
the IBM product, program, or service. The evaluation and verification of
operation in conjunction with other products, except those expressly
designated by IBM, are the responsibility of the user.
IBM may have patents or pending patent applications covering subject matter
in this document. The furnishing of this document does not give you any
license to use these patents. You can send license inquiries, in writing, to the
IBM Director of Commercial Relations, IBM Corporation, Purchase, NY
10577, U.S.A.
Electronics Emission Notices
Federal Communications Commission (FCC) Statement
Note: This equipment has been tested and found to comply with the limits for
a Class A digital device, pursuant to Part 15 of the FCC Rules. These limits
are designed to provide reasonable protection against harmful interference
when the equipment is operated in a commercial environment. This
equipment generates, uses, and can radiate radio frequency energy and, if
not installed and used in accordance with the instruction manual, may cause
harmful interference to radio communications. Operation of this equipment in
a residential area is likely to cause harmful interference, in which case the
user will be required to correct the interference at his own expense.
Properly shielded and grounded cables and connectors must be used in order
to meet FCC emission limits. IBM is not responsible for any radio or television
interference caused by using other than recommended cables and
connectors or by unauthorized changes or modifications to this equipment.
Unauthorized changes or modifications could void the user’s authority to
operate the equipment.
iv
This device complies with Part 15 of the FCC Rules. Operation is subject to
the following two conditions (1) this device may not cause harmful
interference, and (2) this device must accept any interference received,
including interference that may cause undesired operation.
Canadian Department of Communications Compliance
Statement
This equipment does not exceed Class A limits per radio noise emission for
digital apparatus, set out in the Radio Interference Regulation of the Canadian
Department of Communications. Operating in a residential area may caused
unacceptable interference to radio and TV reception requiring the owner or
operator to take whatever steps are necessary to correct the interference.
Avis de confomité aux normes du ministère des
Communications du Canada.
Cet équipment ne dépasse pas les limites de Classe A d’émission de bruits
radioélectriques pour les appareils numériques, telles que prescites par le
Réglement sur brouillage radiélectrique étabil par le ministére de
Communications de Canada. Léxploitation faite en milieu résidential peut
entraîner le brouillage des réceptions radio et télé, ce qui obligerait le
propriétaire ou l’opérateur à prendre les dispositions nécessaires pour en
éliminer les causes.
New Zealand Compliance Statement
This is a Class A computing device and shall not be located at a distance
closer than 20 meters from the boundary of a residential property.
v
Trademarks and Service Marks
The following terms, denoted by an asterisk (*) in this publication, are
trademarks of the IBM Corporation in the United State or other countries or
both.
IBM
SCS
AS/400
The following terms, denoted by a double asterisk (**) in this publication, are
trademarks of other companies:
Creative Controllers, Inc.
Centronics
vi
Printronix, Inc.
QMS
Safety Notices
DANGER
Disconnect the AC power cord before cleaning the
printer.
WARNING
Before powering on the printer, make sure it is plugged
into the appropriate power source.
Refer to the "Select a Site" section in Chapter 2 of the
Setup Guide for information on proper power sources.
Sikkerhedsinstrukioner
FARE
Tag stikket ud af kontakten inden De gør printeren ren.
FORSIGTIG
Forvis Dem om, at printeren er tilsluttet den korrekte
type strøm, inden De tænder for den.
Korrekt strømtype er specificeret i afsnittet
Anbringelse af printeren (Select a Site) i Kapitel 2 i
Klargøringsvejledning (Setup Guide).
vii
Huomautuksia Turvallisuudesta
VAARA
Irrota vaihtovirtajohto ennen kirjoittimen puhdistusta.
VAROITUS
Ennen virran kytkemistä kirjoittimeen on
varmistettava, että kirjoitin on liitetty sopivaan
virtalähteeseen.
Asennusoppaan (Setup Guide) luvussa 2, kohdassa
Asennuspaikan valinta (Select Site), on tietoja
virtalähteen valinnasta.
Normas de Segurança
PERIGO
Desligue o fio de corrente alternada antes de limpar a
impressora.
ATENÇÃO
Antes de ligar a impressora, certifique–se que esta
está ligada ao tipo de corrente apropriado.
Consulte a secção Escolha de local (Select a Site), do
capítulo 2 do Guia de Instalação (Setup Guide), para
mais informações sobre os tipos de corrente
apropriados para esta impressora.
viii
Säkerhetsföreskrifter
FARA
Koppla los nätkabeln innan du rengör skrivaren.
VARNING
Innan du kopplar på strömmen till skrivaren ska du
kontrollera att den är ansluten till rätt
strömförsörjning.
I avsnittet Val av uppställningsplats (Select a Site) i
kapitel 2 av Installationsanvisningar (Setup Guide)
finns information om rätt strömförsörjning.
Sikkerhetsinformasjon
ADVARSEL
Trekk ut strømledningens støpsel fra stikkontakten før
skriveren rengjøres.
OBS!
Kontroller at skriveren er tilknyttet riktig strømkilde før
du slår den på.
Du finner nærmere opplysninger om egnede
strømkilder under avsnittet Valg av egnet sted for
skriveren (Select a Site) i kapittel 2 i
Installasjonshåndboken (Setup Guide).
ix
x
About this setup guide
This manual covers the configuration and
operation of the Coax/Twinax Multi-Platform
Interface (MPI) feature for the IBM 6400
Line Matrix Printers.
The MPI feature enables either coax
attachment of the 6400 printer to, for
example, a S/370 or S/390 host, or twinax
attachment of the printer in an AS/400 or
Systems 3X environment.
In addition, the parallel port of the printer is
available for attachment to a PC, Network
Print Server, or other device attaching
through the PC parallel port.
What does the MPI feature do? The MPI
acts as a protocol converter, taking coax or
twinax data streams and translating them
into an ASCII data stream that the 6400
printer parallel ASCII port is set up to
handle. As you install and configure the
MPI, you are defining the translation that is
performed.
The MPI feature will normally already be
installed in the printer. If it is not, then
follow the hardware installation instructions
found in Appendix D.
IBM 6400 Printer
Once the MPI feature is installed, begin its
configuration with the instructions on page
2.
Switching between Serial ASCII and Parallel ASCII
To switch between Serial ASCII and
Parallel ASCII, the operator must
reconfigure the printer interface selection
from the operator panel by selecting a
custom set that uses the correct ASCII
interfaces. This is because the MPI
interface communicates through the
Parallel ASCII port.
xi
Related Publications
The following are publications referred to in
this manual.
Related Publications
xii
Publication Title
Document Number
6400 Line Matrix Printer
Setup Guide
S246-0116
6400 Line Matrix Printer
Operators Guide
S246-0115
6400 IGP User’s Guide
S246-0151
6400 Code V User’s Guide
S246-0150
CONFIGURATION
—
Preparing for Configuration
2
—
Configuring the Printer
9
—
Configuring for port switching
Multi–Platform Interface Feature Operation Guide
12
1
Preparing for Configuration
With the MPI feature installed, the following
steps must be performed before it will be
fully operational. The MPI feature must be
configured, the printer must be configured
for correct operation with the feature, and
the printer must be defined to the twinax or
coax host. In addition, if the parallel port
will be used to attach another host, then that
configuration must be performed.
Pre-Configuration Checklist
Before configuring the MPI and printer, you
should review the following checklist and
answer each question. Answering these
questions will help you to configure both the
MPI and the printer.
! Will you attach the printer to the host
with coax or twinax?
! What coax or twinax printer do you
want the MPI to emulate?
Your choices for coax are:
IBM 3287 and 3262
Your choices for twinax are:
IBM 4214, 5225, 5256, and 4234
! Will there be a host device attached
through the parallel port? If so, what
ASCII emulation will this host device
use?
Your choices are:
Epson, P-Series, and Serial Matrix
!
Is either Code V or IGP graphics
feature installed in the printer?
Now that you understand the environment,
proceed with the MPI configuration.
2
Multi–Platform Interface Feature Operation Guide
Quick Path
These are the basic steps you need to
complete to configure the MPI and the
printer:
!
!
!
!
Set the MPI dip switches (Page 5)
Set the printer configuration (Page 9)
If configuring for coax, set the coax
buffer size using the rotary switch (see
Using Coax with the MPI)
If configuring the MPI for twinax, set the
twinax address using the rotary switch
(see Using Twinax with the MPI)
Multi–Platform Interface Feature Operation Guide
3
Configuring MPI
To configure the Multi–Platform Interface
Feature, you use the twelve (12) dip
switches and the rotary switch located on
the Interface I/O (See Figure 1 ).
The MPI is configured differently when
connected with twinax or coax cabling. You
must know whether you are attaching via
twinax or coax.
important
The MPI is set to coax or twinax
communications depending upon which
cable is attached to the MPI. The default
value is Twinax. If the coax BNC adapter
cable, part number 08H7968, is attached to
the MPI, then coax is the default. If the
twinax auto-termination cable, part number
14H5335, is attached to the MPI, twinax is
the default. Therefore, if you want to
configure the MPI for coax, the coax BNC
adapter cable must be attached to the MPI
The dip switches allow you to select the
emulation of the printer, character sets, IGP
options, etc. If you do not know the type of
printer to be emulated, consult your Data
Processing department.
The rotary address switch is used to select
the coax buffer size or twinax address. For
both coax and twinax it is used to select
diagnostics.
Table 1 and Table 2 show the different
configurations possible. The selected value
is indicated, as shown on the Diagnostic
Test 7 Printout, by '=>>'.
To get a printout of the current interface
configuration, run Diagnostic 7. See the
section starting on page 48 for complete
details.
4
Multi–Platform Interface Feature Operation Guide
configuring MPI
Configure the MPI by putting the dip
switches in the position that matches the
desired selection.
In the sample printout and the diagnostics,
the following convention is used.
0 = OFF or OPEN
1 = ON or CLOSED
note
After making MPI switch or cable changes,
the printer must be powered off, wait 15
seconds and then power on the printer in
order for those changes to take effect.
Figure 1
Location of Configuration Switches.
Multi–Platform Interface Feature Operation Guide
5
configuring MPI
Table 1 Sample Configuration Printout (Twinax)
=>>
=>>
=>>
SW1-2
0
0
1
1
SW1-1 EMULATION SELECTED
0
4214
1
5225
0
5256
1
4234
SW1-4
0
0
1
1
SW1-3 DEFAULT CHARACTER SET
0
MULTINATIONAL
1
USA
0
AUSTRIA/GERMANY
1
FRENCH CANADIAN
SW1-6
0
0
1
1
SW1-5 IGP OPTIONS
0
NO IGP INSTALLED
1
IGP-PGL INSTALLED*
0
IGP-VGL INSTALLED**
1
RESERVED
=>>
SW1-7
0
1
PRINTER TYPE
6400-PRINTRONIX
6400-EPSON
=>>
SW1-8
0
1
PRINTER EMULATION (6400-PRINTRONIX)
P-SERIES COMPATIBLE
SERIAL MATRIX
=>>
SW2-1
0
1
DEFAULT IGP SFCC
^ CARET (5Eh, 94d)
~ TILDE (7Eh, 126d)
=>>
=>>
SW2-3
0
0
1
1
SW2-4
0
1
SW2-2 PANEL AND SYSTEM CONTROL
0
SYSTEM CONTROLS CPI AND PRINT QUALITY
1
SYSTEM CONTROLS CPI, PANEL CONTROLS PRINT QUALITY
0
PANEL CONTROLS CPI, SYSTEM CONTROLS PRINT QUALITY
1
PANEL CONTROLS CPI, PRINT QUALITY, AND LPI
MULTIPLEXER TIMEOUT
SHORT (15 SEC)
LONG (45 SEC)
note
If you are replacing an existing Printronix PSeries printer, SW1-7 and SW1-8 should be
set to the Open (Off) state. This will provide
compatibility with existing jobs. Also, if you
will be port switching, you should set SW1-7
and SW1-8 to be compatible with the
alternate host. See page 12 for more
information. If you set SW1-7 to 6400
Printronix (Open), you must set SW1-8. If
you set SW1-7 to 6400-Epson (Closed), you
do not need to set SW1-8 and you can
leave SW1-8 to the factory default.
note
* indicates IGP Feature installed.
** indicates Code V Feature installed.
6
Multi–Platform Interface Feature Operation Guide
configuring MPI
Table 2 Sample Configuration Printout (Coax)
=>>
SW1-1
0
1
IBM EMULATION SELECTED
3287
3262
=>>
SW1-2
0
1
Character Set Selected
UNITED STATES
UNITED KINGDOM
=>>
SW1-3
0
1
DEFAULT MPP
132
NONE
=>>
SW1-4
0
1
DEFAULT MPL
NONE
66
=>>
SW1-6
0
0
1
1
SW1-5
0
1
0
1
IGP OPTIONS
NO IGP INSTALLED
IGP-PGL INSTALLED*
IGP-VGL INSTALLED**
RESERVED
=>>
SW1-7
0
1
PRINTER TYPE
6400-PRINTRONIX
6400-EPSON
=>>
SW1-8
0
1
PRINTER EMULATION (6400-PRINTRONIX)
P-SERIES COMPATIBLE
SERIAL MATRIX
=>>
SW2-1
0
1
DEFAULT IGP SFCC
^ CARET (5Eh, 94d)
~ TILDE (7Eh, 126d)
=>>
SW2-2
0
1
AUTO FORM FEED
ENABLE AFTER OPERATOR INITIATED LOCAL COPY
DISABLE AFTER OPERATOR INITIATED LOCAL COPY
=>>
SW2-3
0
1
PAPER ERROR REPORTING
NEVER REPORT PAPER ERRORS
REPORT PAPER ERRORS
=>>
SW2-4
0
1
MULTIPLEXER TIMEOUT
SHORT (15 SECONDS)
LONG (45 SECONDS)
note
If you are replacing an existing Printronix PSeries printer, SW1-7 and SW 1-8 should be
set to the Open (Off) state. This will provide
compatibility with existing jobs.
Also, if you will be port switching, you should
set the SW1-7 and SW1-8 to be compatible
with the alternate host. See page 12 for
more information. If you set SW1-7 to 6400
Printronix (Open), you must set SW1-8. If
you set SW1-7 to 6400-Epson (Closed), you
do not need to set SW1-8 and you can
leave SW1-8 to the factory default.
Multi–Platform Interface Feature Operation Guide
7
configuring MPI
note
* indicates IGP Feature installed.
** indicates Code V Feature installed.
note
MPP means Maximum Print Position
MPL means Maximum Page Length
8
Multi–Platform Interface Feature Operation Guide
Configuring the Printer
In order for the Multi–Platform Interface
Feature to operate correctly with the 6400,
the printer must be properly configured.
The settings of Custom Set 8 provide
default values that work correctly with the
MPI feature to emulate a P-Series printer.
For other MPI ASCII printer emulations,
such as an Epson, you will need to change
the Custom Set 8 ASCII emulation.
Power-on the printer. If the power-on printer
configuration is not set to Custom Set 8, do
so now. Table 3 shows the most important
values: shuttle time out, latch data on, and
prime signal. If these printer configuration
values are set incorrectly, it may cause
erratic behavior. For a complete listing of
Custom Set 8, see Appendix B.
note
For proper printer operation, the ASCII
emulation in the 6400 must match the ASCII
emulation chosen for the MPI feature.
Check that these match and change as
needed.
See coax code map on page 22 and twinax
code map on page 34 to determine how the
coax or twinax host characters are
translated to ASCII characters.
note
Consult the printer's Setup Guide for a
complete description on how to setup your
printer.
Multi–Platform Interface Feature Operation Guide
9
configuring the printer
Table 3 Printer Configuration
PRINTER CONTROL
SHUTTLE TIMEOUT . . . . . . . .
PARALLEL INTERFACE
INTERFACE TYPE
. . . . . .
PC PARALLEL
DATA BIT 8
. . . . . . .
DATA POLARITY . . . . . .
STROBE POLARITY . . . . .
RESPONSE POLARITY . . . .
BUSY ON STROBE
. . . . .
LATCH DATA ON . . . . . .
PRIME SIGNAL
. . . . . .
TOF ACTION AT PRIME SIGNAL
20 SECONDS
. .
PC PARALLEL
.
.
.
.
.
.
.
ENABLE
STANDARD
STANDARD
STANDARD
ENABLE
TRAILING EDGE
DISABLE
NO ACTION
.
.
.
.
.
.
.
.
note
In Table 3 , only the values for Shuttle
Timeout, Latch Data On, and Prime Signal
need to be changed. For all other
configuration items, the default values can
be used. If the values shown in bold in Table
3 are not set as shown, erratic operation of
the printer might occur.
10
Multi–Platform Interface Feature Operation Guide
configuring the printer
Configuring MPI for Either IGP or Code V Graphic Feature
Those printers using an IGP or Code V
Graphics Feature must have the feature
installed and the printer properly configured.
Check the sample printouts of Table 2 and
Table 1 to see how to configure the MPI
when these two features are being used.
Further changes to Custom Set 8 values for
Code V or IGP emulation may have to be
made to support your host applications.
Refer to the Code V or IGP Programmer's
Reference manuals listed in Related
Publications on page xii.
Multi–Platform Interface Feature Operation Guide
11
Configuring for port switching
If you will be port switching with the MPI,
you must set the printer emulation used by
the PC application to match the emulation
you have set in the printer.
For example, when you have set the printer
emulation to 6400-Epson, your host ASCII
application, should use a standard Epson
print driver.
When you have set the printer emulation to
the P-Series emulation, your application
should use a standard P-Series printer
driver.
12
Multi–Platform Interface Feature Operation Guide
Using Coax with the MPI
—
Coax Connection
14
—
Coax Buffer Size
16
—
Coax Code Dump Mode
17
—
Coax Command Interpreter
19
—
Coax Code Maps
22
Multi–Platform Interface Feature Operation Guide
13
Coax Connection
To connect the coax line from the cluster
controller to the IBM 6400 printer, you must
use the supplied BNC Adapter (P/N#
08H7968).
Connect the BNC Adapter to the "HOST"
connector port on the Multi–Platform
Interface Feature I/O. (See Figure 2 )
Once you have securely connected the
adapter, connect the coax line to the coax
connector on the end of the adapter.
Before powering on the printer, it must be
defined to the host. For additional
information on defining the printer in the
S/370 and S/390 environments, refer to
Appendix A of this manual.
Power on the printer. At this point, the
SYNC LED indicating line activity will be on
if there is activity on the coax line. (See
page 75 for the location of the SYNC LED)
Figure 2
BNC adapter
attachment
Send the printer a screen dump from a
terminal. If successful, send the printer a
print job from the host. In some systems,
the printer may not be configured for local
screen dumps. When the printer receives a
job from the host, the SYS LED will light
indicating a job in progress.
important
The printer uses the 3270 data stream
format when connected via coax through the
MPI. The MPI supports LU0 (DSC), LU1
(SCS) and LU3 (DSE) types only.
14
Multi–Platform Interface Feature Operation Guide
note
Remember! If you make any changes to
cables, switch settings or the configuration
you must power the printer off, wait 15
seconds and then power the printer on
again.
LED Indicators
The Multi-Platform Interface I/O has two
LEDs labeled SYNC and SYS (see page
75). These can be used to determine line
connection status and host
acknowledgment.
When the coax cable is first attached to the
BNC Adapter, the SYNC LED will light,
showing that active line connection has
been made. If the LED fails to light, the line
you are connected to may be faulty.
When the interface receives data from the
host system, the SYS LED will light
indicating a job is in progress.
Multi–Platform Interface Feature Operation Guide
15
Coax Buffer Size
While connected to the coax line, the IBM
6400 Multi–Platform Interface Feature has a
built in buffer. The size of this buffer is user
configured by setting the Address switch
(see page 75 for location on I/O) on the MPI
I/O to a specified setting. Table 4 shows
the buffer size for each setting.
Table 4 Buffer Size Selections
ADDRESS
SETTING
Display Screen Size, Print Buffer Size
0
1920 Screen, 2K Buffer
1
1920 Screen, 4K Buffer
2
2560 Screen, 2K Buffer
3
2560 Screen, 4K Buffer
4
3440 Screen, 4K Buffer
5
3564 Screen, 4K Buffer
6
960 Screen, 2K Buffer
7
Sets the interface to Code Dump mode
8
1920 Screen, 4K Buffer
9
1920 Screen, 4K Buffer
note
When using this printer with IBM compatible
controllers (e.g. 3174), use the maximum
buffer size (Address 5).
16
Multi–Platform Interface Feature Operation Guide
Coax Code Dump Mode
The code dump mode allows you to print all
or S/390 system in a hexadecimal format.
This can be useful when debugging your
Entering Code Dump mode
To enter the Code Dump mode:
Power off the printer.
2
3
Power on the printer and place it on-
Once the Configuration Printout has printed,
the controller will be in Code Dump mode.
In order to use the "Code Dump Mode", the
MPI must be receiving data from the host
Multi–Platform Interface Feature Operation Guide
coax code dump mode
Exiting Code Dump Mode
To exit Code Dump mode:
1
Power off the printer.
2
Reset the buffer size by setting the
ADDRESS switch to the desired
address 0-6, or 8-9.
3
Power on the printer and place it online.
18
Multi–Platform Interface Feature Operation Guide
Coax Command Interpreter
To gain access to some printer features not
available on the host system, a Command
Interpreter has been built into the
Multi–Platform Interface Feature.
By using special control codes, you can
pass the hexadecimal codes to the printer
that access the ASCII features of the printer.
These codes allow you to transparently pass
any character or sequence of characters to
the printer.
These codes are Hexadecimal ASCII
commands and must match ones supported
by the printer and MPI ASCII emulation
selected.
The commands are initiated by use of the
logical not (¬) character. You can access
this character by pressing the Shift and 6
keys on your terminal’s keyboard.
Multi–Platform Interface Feature Operation Guide
19
coax command interpreter
Commands
The command interpreter is enabled after
the ¬ONN command is received.
The command interpreter is disabled by
sending a ¬OFF command. The default
power up state of the command interpreter
is disabled.
Table 5 gives an explanation of all the
commands available.
Table 5 Coax Command Interpreter commands
COMMAND
20
ACTION
¬ONN
Enable the command interpreter. Ignored if already on.
¬OFF
Disable the command interpreter - Default, power up
state. Ignored if already off.
¬HEX
Hexadecimal pass-thru mode. Data following this
command is packed into hexadecimal pairs and sent to
the printer. The command may be terminated by sending
the "@" character. Any non-hexadecimal characters
(except the "@") are ignored.
Terminate Hex mode by sending an at sign "@".
¬FLS
Forms Length Switch. This command is accepted only in
LU3 (DSE) mode. It will set the forms length (in lines) to
the value of the three digit number immediately following
the command. Top of form will be set to the current
physical line. The value must be in the range 000 - 127.
There may NOT be any other characters embedded and
the forms length MUST be three digits long.
Sending the FLS command causes the MPI to load the
printers VFU and set the Top Of Form to the present
line.
¬L03 or
¬L04 or
¬L06 or
¬L08
Lines Per Inch. This command is accepted in LU3 (DSE)
mode only. It will set the line spacing to 3, 4, 6 or 8 lines
per inch.
Multi–Platform Interface Feature Operation Guide
¬ONN - turns on command interpreter.
¬ONN¬HEX 0C 0C 0C @ - send three
¬ONN¬HEX 41 42 43 @ - send ABC in
ASCII to printer.
¬OFF¬HEX 0C 0C 0C @ ¬ONN¬HEX 0C
0C 0C @¬OFF printer then feed three sheets of paper.
¬ONN¬FLS058¬OFF
Multi–Platform Interface Feature Operation Guide
21
Coax Code Maps
Data sent from the S/370 or S/390 host
computer to the Multi–Platform Interface
Feature is translated into the correct form
for the 6400 printer to understand. The
following sections show the maps used by
the interface to translate the various kinds of
host data into the ASCII printer language.
To translate the coax host character to
ASCII character, use the coax hex value as
the coordinates (grey column and row) on
the map. At that cell, is the ASCII translation
(ASCII hex value and character).
For example, a coax DSE hex value of 35
would be translated to ASCII hex 2B and is
the ASCII "+" character.
These maps illustrate the translation from
host code page United States to ASCII code
page PC850. Translation maps for other
code pages, such as United Kingdom, are
not shown. See Appendix E for Supported
Host Character sets.
Translating Host Code Page to ASCII Code Pages
Set the active printer ASCII printer
emulation as follows to correctly map host
code pages to ASCII code pages:
! Epson Emulation
Character Set=0850 PC MULTINATIONAL
!
P-Series Emulation
Character set = IBM PC
Print Language/IBM PC/Select Subset Primary = ASCII (USA)
Print Language/IBM PC/Select Subset Extended = 0850 PC
Multilingual
Alternate Set 80-90F = Printable
!
Serial Matrix Emulation
Character set = IBM PC
Print Language/IBM PC/Select Subset Primary = ASCII (USA)
Print Language/IBM PC/Select Subset Extended = 0850 PC
Multilingual
Alternate Set 80-90F = Printable
22
Multi–Platform Interface Feature Operation Guide
coax code maps
Internal 3270 (DSE/DSC) to ASCII Character Map
0
1
2
3
4
5
6
7
20
0
30
&
26
nc
nc
nc
nc
0
NUL
1
EM
=
3D
1
31
2D
nc
nc
nc
nc
2
FF
'
27
2
32
.
2E
nc
nc
nc
nc
3
NL
"
22
3
33
,
2C
nc
nc
nc
nc
4
nc
/
2F
4
34
:
3A
nc
nc
nc
nc
5
CR
\
5C
5
35
+
2B
nc
nc
nc
nc
6
nc
|
7C
6
36
LN
nc
nc
nc
nc
7
nc
|
7C
7
37
nc
nc
nc
nc
nc
8
>
3E
?
3F
8
38
nc
nc
nc
nc
nc
9
<
3C
!
21
9
39
nc
nc
nc
nc
nc
A
[
5B
$
24
nc
ˆ
5E
nc
nc
nc
nc
B
]
5D
nc
nc
~
7E
nc
nc
nc
nc
C
)
29
nc
#
23
nc
nc
nc
nc
nc
D
(
28
nc
@
40
´
60
nc
nc
nc
nc
E
}
7D
nc
%
25
'
27
nc
nc
nc
nc
F
LSB
{
7B
nc
_
5F
nc
nc
nc
nc
nc
The following control codes are supported:
NUL = NULL
OF MESSAGE
FF = FORM FEED
LINE
CR = CARRIAGE RETURN
ATTRIBUTES
EM = END
NL = NEW
ATT =
Multi–Platform Interface Feature Operation Guide
23
coax code maps
Internal 3270 (DSE/DSC) to ASCII Character Map
8
9
A
B
C
D
E
F MSB
0
a
61
q
71
A
41
Q
51
ATT
ATT
ATT
ATT
1
b
62
r
72
B
42
R
52
ATT
ATT
ATT
ATT
2
c
63
s
73
C
43
S
53
ATT
ATT
ATT
ATT
3
d
64
t
74
D
44
T
54
ATT
ATT
ATT
ATT
4
e
65
u
75
E
45
U
55
ATT
ATT
ATT
ATT
5
f
66
v
76
F
46
V
56
ATT
ATT
ATT
ATT
6
g
67
w
77
G
47
W
57
ATT
ATT
ATT
ATT
7
h
68
x
78
H
48
X
58
ATT
ATT
ATT
ATT
8
i
69
y
79
I
49
Y
59
ATT
ATT
ATT
ATT
9
j
6A
z
7A
J
4A
Z
5A
ATT
ATT
ATT
ATT
A
k
6B
nc
K
4B
nc
ATT
ATT
ATT
ATT
B
l
6C
nc
L
4C
nc
ATT
ATT
ATT
ATT
C
m
6D
nc
M
4D
nc
ATT
ATT
ATT
ATT
D
n
6E
nc
N
4E
nc
ATT
ATT
ATT
ATT
E
o
6A
nc
O
4A
;
3A
ATT
ATT
ATT
ATT
F
LSB
p
70
nc
P
50
*
2E
ATT
ATT
ATT
NUL
LN = LOGICAL NOT prints as an ASCII caret "^"
(5E)
nc = NO CODE AVAILABLE printed as an ASCII
space (20th)
24
Multi–Platform Interface Feature Operation Guide
coax code maps
EBCDIC (SCS) to ASCII Character Map
0
1
2
3
4
5
6
7
8
9
A
B
C
D
E
F
LSB
0
1
2
3
NUL
nf
nf
nf
4
5
6
7
&
26
2D
nc
20
nf
nf
nf
nf
nc
nc
/
2F
nc
nf
nf
nf
nf
nc
nc
nc
nc
nf
nf
nf
nf
nc
nc
nc
nc
VCS
ENP
INP
nf
nc
nc
nc
nc
HT
NL
LF
TRN
nc
nc
nc
nc
nf
BS
nf
nf
nc
nc
nc
nc
nf
nf
nf
nf
nc
nc
nc
nc
GE
nf
SA
nf
nc
nc
nc
nc
nf
nf
nf
nf
nc
nc
nc
`
60
nf
nf
nf
nf
nc
!
21
|
7C
:
3A
VT
nf
FMT
nf
.
2E
$
24
,
2C
#
23
FF
nf
nf
nf
<
3C
*
2e
%
25
@
40
CR
nf
nf
nf
(
28
)
29
_
5F
'
27
nf
IRS
nf
nf
+
2B
;
3a
>
3E
=
3D
nf
nf
BEL
07
nf
|
7C
LN
?
3F
"
22
LN = LOGICAL NOT prints as "1" or "^" (ACH or 5EH)
EO = EO control code not supported, prints as a space
(20th)
nf = NO FUNCTION supported prints as a space (20th)
nc = NO CODE AVAILABLE printed as an ASCII hyphen
(2DH)
Multi–Platform Interface Feature Operation Guide
25
coax code maps
EBCDIC (SCS) to ASCII Character Map
8
9
A
B
C
D
E
F
nc
nc
nc
nc
{
7B
}
7D
\
5C
0
30
1
a
61
j
6A
~
7E
nc
A
41
J
4A
nc
1
31
2
b
62
k
6B
s
73
nc
B
42
K
4B
S
53
2
32
3
c
63
l
6C
t
74
nc
C
43
L
4C
T
54
3
33
4
d
64
m
6D
u
75
nc
D
44
M
4D
U
55
4
34
5
e
65
n
6E
v
76
nc
E
45
N
4E
V
56
5
35
6
f
66
o
6a
w
77
nc
F
46
O
4a
W
57
6
36
7
g
67
p
70
x
78
nc
G
47
P
50
X
58
7
37
8
h
68
q
71
y
79
nc
H
48
Q
51
Y
59
8
38
9
i
69
r
72
z
7A
nc
I
49
R
52
Z
5A
9
39
nc
nc
nc
nc
nc
nc
nc
nc
nc
nc
nc
nc
nc
nc
nc
nc
nc
nc
nc
nc
nc
nc
nc
nc
nc
nc
nc
nc
nc
nc
nc
nc
nc
nc
nc
nc
nc
nc
nc
nc
nc
nc
nc
nc
nc
nc
nc
EO
0
A
B
C
D
E
F
LSB
The following control codes are supported.
NUL = Null
VT = Vertical Tab
BS = Back space
LF = Line Feed
FF = Form Feed
GE = Graphic Escape
ENP = Enable presentation
HT = Horizontal Tab
VCS = Vertical Channel Select
NL = New Line
26
MSB
TRN = Transparent
CR = Carriage Return
IRS = Interchange Record
Separator
Multi–Platform Interface Feature Operation Guide
coax code maps
The following Format (FMT) control codes are supported
in LU1 (SCS):
SHF = "2BC1..." SET HORIZONTAL FORMAT. (any MPP
valid)
SVF = "2BC2..." SET VERTICAL FORMAT. (any Line
Density valid)
SLD = "2BC6..." SET LINE DENSITY. (00H, 09H, 12H,
18H AND 24H valid "6, 8, 6, 4, and 3
LPI"
Multi–Platform Interface Feature Operation Guide
27
Using Twinax with the MPI
28
—
Twinax Connection
29
—
Twinax Code Maps
34
—
Code Dump Mode
37
—
Twinax Command Interpreter
40
Multi–Platform Interface Feature Operation Guide
twinax connection
Twinax Connection
Before installing the printer into the twinax
environment, you should run the built-in
diagnostics. See page 48 for instructions
on running the diagnostics.
After the Multi–Platform Interface Feature
is running the built-in diagnostics you are
ready to connect the printer to the AS/400,
System 36 or other twinax host system.
Active jobs/devices
If there are any active devices on the
twinax line that the printer is going to be on:
1
Terminate the device immediately up
cable of the printer, on the twinax line.
2
Place on Hold any devices down cable
of the printer with active jobs.
3
SIGN OFF any active terminals and
terminal type devices down cable of
the printer.
note
"UP CABLE" describes any device that is
physically located closer to the Host System
on the twinax line. "DOWN CABLE"
describes a device physically located more
distant from the Host System on the twinax
line. For example, if this printer is the third
device on the line, the immediate "UP
CABLE" device would be the second device
on this line.
Multi–Platform Interface Feature Operation Guide
29
twinax connection
Power off
The printer's POWER switch should be in
the "OFF" position.
"Smart T" attachment
Connect the supplied "Smart T" (twinax
auto-termination cable, part number
14H5335) to the 15-pin connector on the
printer’s MPI interface. (See Figure 3 )
Termination/cable thru is automatically
accomplished by the "Smart T". The
"Smart T" has no IN or OUT specific
connectors.
Figure 3
30
"Smart T"
Attachment
Multi–Platform Interface Feature Operation Guide
twinax connection
Attach twinax cables
Attach the twinax cable from the host
computer to the "Smart T" connected to
the printer earlier.
1
If there is an up cable device
connected to the twinax cable (from
the host), the twinax cable must
originate from the "OUT" connector of
that device. The other end of this cable
attaches to either side of the "Smart T"
connected to the printer.
2
If this printer is the last or only device
on the twinax line, the twinax cable
attaches to either side of the "Smart T"
connected to the printer.
3
If there is a down cable device,
connect the other twinax cable to
either side of the "Smart T".
Address switch
Before testing, do the following:
1
Verify that the printer address matches
the one set up on your host system.
The I/O address should be unique on
the twinax line. BE CERTAIN THAT
NO ADDRESS ON THE LINE IS
DUPLICATED!!!
To set the printer address, rotate the
address switch, on the I/O, to the
number that corresponds to the
address setting for your environment.
This address should be some number
between 0 and 6.
2
Verify that the address matches the
one set up on your host system
configuration.
Multi–Platform Interface Feature Operation Guide
31
twinax connection
Power On Printer
At this point, once the cable connection
and the address settings have been
verified, you should power on the printer.
LED Indicators
The Multi-Platform Interface I/O has two
LEDs labeled SYNC and SYS (see page
75). These can be used to determine line
connection status and host
acknowledgment.
When the twinax cable is first attached to
the Smart T, the SYNC LED will light,
showing that active line connection has
been made. If the LED fails to light, the line
you are connected to may be faulty.
When the interface receives data from the
host system, the SYS LED will light
indicating a job is in progress.
32
Multi–Platform Interface Feature Operation Guide
twinax connection
Printer verification test
Power on the printer.
Access the terminal's SIGN ON SCREEN.
If this terminal is a 3180 or 3190, press the
"ALT, TEST" keys; otherwise, press the
"CMD, BACKSPACE" keys to access the
"Prime Option" menu.
From the "Prime Option" menu, run a
printer verification test by:
1
Select option "2" on the PRIME
OPTION MENU, "Work Station Printer
Verification", to run the IBM printer
verification test.
2
Select this printer's ID number to run
the test on this printer.
3
Select the number of times that you
wish to print the WORK STATION
VERIFICATION TEST. Possible
selections are:
a.
b.
c.
d.
PRINT TEST 1 TIME
PRINT TEST 2 TIMES
PRINT TEST 5 TIMES
PRINT TEST CONTINUOUSLY
4
Select option "C" on the WORK
STATION PRINTER VERIFICATION
menu, when you have finished printing
the test. You will be returned to the
"Prime Option Menu".
5
Select option "C" on the PRIME
OPTION MENU, "End", to EXIT the
"Prime Option Menu".
Should you have any problems while
running the Printer Verification test, see
Troubleshooting the Host Printer
Operation on page 52.
Multi–Platform Interface Feature Operation Guide
33
twinax code maps
Twinax Code Maps
Data sent from the host computer to the
Multi–Platform Interface Feature is
translated into the correct form for the
6400 printer to understand.
This map illustrate the translation from
host code page USA to ASCII code page
PC850. Translation maps for other code
pages, such as Multinational, are not
shown. See Appendix E for supported host
character sets.
Translating Host Code Page to ASCII Code Pages
Set the active printer ASCII printer
emulation as follows to correctly map host
code pages to ASCII code pages:
! Epson Emulation
Character Set=0850 PC MULTINATIONAL
! P-Series Emulation
Character set = IBM PC
Print Language/IBM PC/Select Subset Primary = ASCII (USA)
Print Language/IBM PC/Select Subset Extended = 0850 PC
Multilingual
Alternate Set 80-90F = Printable
! Serial Matrix Emulation
Character set = IBM PC
Print Language/IBM PC/Select Subset Primary = ASCII (USA)
Print Language/IBM PC/Select Subset Extended = 0850 PC
Multilingual
Alternate Set 80-90F = Printable
34
Multi–Platform Interface Feature Operation Guide
twinax code maps
EBCDIC (SCS) TO ASCII CHARACTER MAP
0
1
2
3
4
5
6
7
8
9
A
B
C
D
E
F
LSB
0
1
2
3
NULL
nf
nf
nf
4
5
6
7
20
&
26
2D
ø
9B
nf
nf
nf
nf
nc
é
82
/
2F
É
90
nf
nf
nf
nf
â
83
ê
88
Â
B6
Ê
D2
ATR
N
nf
nf
nf
ä
84
ë
89
Ä
8E
Ë
D3
nf
nf
nf
PP
ä
A0
è
8A
À
B7
È
D4
nf
NL
LF
ETR
N
à
85
í
A1
Á
B5
Í
D6
nf
BS
nf
nf
ã
C6
î
8C
Ã
C7
Î
D7
nf
nf
nf
nf
å
86
ï
8B
Å
8F
Ï
D8
nf
nf
nf
nf
ç
87
ì
8D
Ç
80
Ì
DE
nf
nf
nf
nf
ñ
A4
ß
E1
Ñ
A5
`
60
nf
nf
nf
nf
[
5B
]
5D
|
7C
:
3A
nf
nf
FMT
nf
.
2E
$
24
,
2C
#
23
FF
nf
nf
nf
<
3C
*
2A
%
25
@
40
CR
nf
nf
nf
(
28
)
29
_
5F
'
27
nf
IRS
nf
nf
+
2B
;
3B
>
3E
=
3D
nf
nf
BEL
nf
!
21
^
5E
?
3F
"
22
Multi–Platform Interface Feature Operation Guide
35
twinax code maps
EBCDIC (SCS) TO ASCII CHARACTER MAP
8
9
A
B
C
D
E
F
0
Ø
9D
°
F8
µ
E6
¢
BD
{
7B
}
7D
\
5C
0
30
1
a
61
j
6A
~
7E
£
9C
A
41
J
4A
nc
1
31
2
b
62
k
6B
s
73
¥
BE
B
42
K
4B
S
53
2
32
3
c
63
l
6C
t
74
•
FA
C
43
L
4C
T
54
3
33
4
d
64
m
6D
u
75
ƒ
9F
D
44
M
4D
U
55
4
34
5
e
65
n
6E
v
76
§
F5
E
45
N
4E
V
56
5
35
6
f
66
o
6F
w
77
¶
F4
F
46
O
4F
W
57
6
36
7
g
67
p
70
x
78
¼
AC
G
47
P
50
X
58
7
37
8
h
68
q
71
y
79
½
AB
H
48
Q
51
Y
59
8
38
9
i
69
r
72
z
7A
¾
F3
I
49
R
52
Z
5A
9
39
A
*
AE
ª
A6
¡
AD
^
5E
F0
¹
FB
²
FD
³
FC
B
+
AF
º
A7
¿
A8
|
B3
ô
93
û
96
Ô
E2
Û
EA
C
ð
D0
æ
91
Ð
D1
¯
EE
ö
94
ü
81
Ö
99
Ü
9A
D
ý
EC
¸
F7
Ý
ED
¨
F9
ò
95
ù
97
Ò
E3
Ù
EB
E
þ
E7
Æ
92
Þ
E8
´
EF
ó
A2
ú
A3
Ó
E0
Û
E9
MSB
F
±
¤
®
=
õ
ÿ
Õ
–
LSB
F1
CF
A9
3D
E4
98
E5
FF
The following control codes are supported.
NULL = Null
IRS = Interchange Record Separator
ATRN = ASCII Transparent
LF = Line Feed
FF = Form Feed
BEL=Bell Code (Not sent)
CR = Carriage Return
PP = Print Position Commands
NL = New Line
ETRN=EBCDIC Transparency
BS = Back space
36
Multi–Platform Interface Feature Operation Guide
twinax code dump mode
Code Dump Mode
The code dump mode allows you to print
all the data the controller receives from the
IBM system in a hexadecimal format.
Entering Code Dump mode
To access the Code Dump mode provided
by the controller:
1
Power off the printer.
2
Set the ADDRESS switch to address
7.
3
Power on the printer. After the MPI
configuration has printed, set the
ADDRESS switch on the interface I/O
to the device’s current address (0-6)
on the host system.
note
In order to use the "Code Dump Mode", the
MPI must be receiving data from the host
computer.
Multi–Platform Interface Feature Operation Guide
37
twinax code dump mode
Exiting Code Dump Mode
To exit Code Dump mode:
1
Power off the printer.
2
Set the ADDRESS switch on the MPI
to the device’s current address (0-6)
on the host system.
3
Power on the printer and place it online.
38
Multi–Platform Interface Feature Operation Guide
twinax code dump mode
Code Dump Header
The "Code Dump" header is identical to
the "Diagnostic" self-test header, except
for the test identification in the first line.
Following the header, the received data is
printed in a structured field dump format
(See Figure 4 ). This shows the data as
received from the host system with each
SCS command on a separate line. Data is
presented in a standard Hex Dump format.
Figure 4
Multi–Platform Interface Feature Operation Guide
An example of a
Structured Field
Dump
39
Twinax Command Interpreter
To gain access to some features not
available on the AS/400, System 36 or
other twinax host system, a Command
Interpreter has been built into the
Multi–Platform Interface Feature.
By using special control codes, you can
pass the ASCII hexadecimal codes to the
printer that access the features of the
printer. These codes allow you to
transparently pass any character or
sequence of characters to the printer.
These codes are hexadecimal ASCII
commands and must match ones
supported by the printer and MPI ASCII
emulation selected.
The commands are initiated by use of the
logical not (¬) character. You can access
this character by pressing the Shift and 6
keys on your terminal’s keyboard.
40
Multi–Platform Interface Feature Operation Guide
twinax command interpreter
Commands
Preface each of the commands in the
following list with a single logical-not
character as shown in this document by the
"¬" character.
Table 6 Gives an explanation of all the
available commands.
Table 6 Twinax Command Interpreter Commands
COMMAND
ACTION
¬ONN
Enable the command interpreter. Ignored if already
on.
¬OFF
Disable the command interpreter - Default, power up
state. Ignored if already off.
¬HEX
Pack valid Hexadecimal characters two to a byte and
send to the printer. Invalid Hexadecimal characters will
be skipped - all SNA commands will be passed out.
Terminate Hex mode by sending an at sign "@".
Multi–Platform Interface Feature Operation Guide
41
twinax command interpreter
Example
To send a carriage return, line feed, ABC
followed by a form feed you would send
the following:
¬ONN¬HEX 0D 0A 41 42 43 0C @
or
¬ONN¬HEX 0D 0A @ABC ¬HEX 0C @
In either case, once the Command
Interpreter is enabled, you need not reenable it until the controller is powered down
or following a ¬OFF.
42
Multi–Platform Interface Feature Operation Guide
Using PC Parallel with MPI
—
Introduction
44
—
Connection
45
—
Setting time outs on the Parallel Host
46
Multi–Platform Interface Feature Operation Guide
43
Introduction
The Multi–Platform Interface Feature has
the ability to connect to two different
operating systems at once. One of these
connections is the twinax or coax
connection already discussed.
In addition, the MPI supports the use of a
Centronics** "D" connector to connect to
systems that support devices attached via a
parallel port.
When connected to two host systems, the
interface will switch to the other port once
the port currently printing is idle for a preset
period of time.
When the MPI senses data at one of its
input ports, it switches to that input port until
the print job is complete. The time between
switching from one port to the other after a
print job has finished is a user configured
parameter. This is defined by the multiplexer
timeout (See pages 6 and 7) selections:
which are short (15 seconds) or long (45
seconds).
44
Multi–Platform Interface Feature Operation Guide
Connection
Before powering on your parallel host
system, the printer cable from the system
must be plugged into the PC parallel
connector on the printer.
Select a time out configuration (either short
or long) to match your system's needs.
note
1)
2)
The printer will feed a blank page when
data host inputs are switched.
When switching host inputs, the printer
configuration is not preserved by the
printer's memory. Should any of your
PC or network jobs change the printer
configuration, it may be necessary for
you to reset the printer configuration.
Figure 5
Multi–Platform Interface Feature Operation Guide
PC parallel cable
attachment
45
Setting time outs on the Parallel Host
DOS
If you are using the printer attached to a
host PC system using the DOS operating
system, use the following configuration for
the retry value. The command MODE LPTn:
RETRY=P (issued from the command
prompt, or in a batch file) will set the parallel
port timeout to "infinite retry". DOS will
continue to try to print a file until it is
completed, or removed from the print queue
with a PRINT /T command.
OS/2
If you are using the interface attached to a
host PC system using the OS/2 operating
system, the retry value for the parallel port
must be set high enough to allow a host
print job to complete, plus the multiplexer
timeout value. This value is set in the
Parallel Port Setting - LPTn: screen.
46
Multi–Platform Interface Feature Operation Guide
TROUBLESHOOTING
—
Diagnostics
48
—
Troubleshooting your Host Printer Operation
52
—
Compatibility Issues
54
Multi–Platform Interface Feature Operation Guide
47
Diagnostics
The Multi–Platform Interface Feature has its
own built-in diagnostics programs to help
you verify that the printer and the MPI are
operating properly.
Diagnostic Header
Each diagnostic test prints a header that
displays the firmware part number, revision
level, and the controller board option switch
settings. For example:
IBM 6400 Multi-Platform Interface
ROM=CI-1717 CHECKSUM - 7108 PREDICTED, 7108 ACTUAL
COPYRIGHT 1995
note
Wait several seconds after powering on for
the selected diagnostic to start.
48
Multi–Platform Interface Feature Operation Guide
diagnostics
Coax Operation
Dialing the diagnostic test number into the
“ADDRESS” (Address 7) switch selects the
diagnostic routine. Powering up the printer
executes them. (See Table 7 )
Table 7 Coax Diagnostic Tests
ADDRESS
SELECTION
DIAGNOSTIC TEST RESULTS
7
Selects Configuration printout and Code Dump Mode
All other address settings for the coax diagnostic mode are invalid.
note
The Coax adapter must be attached to the
MPI I/O for operating the Coax Diagnostics.
Multi–Platform Interface Feature Operation Guide
49
diagnostics
Twinax Operation
Dialing the diagnostic test number into the
“ADDRESS” switch selects the diagnostic
routines. Powering up the printer executes
them. (See NOTE).
You may change the "ADDRESS" switch
while the diagnostic is running (printing) to
step to another diagnostic. (See Table 8 )
Table 8 Twinax Diagnostic Tests
ADDRESS
SELECTION
0-6
DIAGNOSTIC TEST RESULTS
Code Dump Mode (if selected after test 7)
7
Configuration Printout
8
Prints one full page in a floating pattern.
9
Continuously sends data to itself (loop back test)
and monitors the received data for any errors. Prints
"LOOP TEST PASSED" or "LOOP TEST FAILED"
at approximately ten second intervals. (SEE
CAUTION BEFORE RUNNING DIAGNOSTIC 9.)
caution
Make sure the host twinax cable is not
attached to the "Smart T" twinax autotermination cable, while running
diagnostic 9. This will result in system
errors and possibly cause a proc-check
on your system.
note
The "Smart T" supplied with the MPI feature
must be attached to the MPI for all twinax
diagnostics. Remember, it must not be
attached to the host System when running
diagnostic 9.
50
Multi–Platform Interface Feature Operation Guide
diagnostics
Checklist
If the controller's built-in diagnostic tests do
not perform according to Table 7 (coax) on
page 49 and Table 8 (twinax) on page 50.
1
Run each diagnostic and save the
diagnostic printout.
2
Check all of the installation
connections.
3
Verify that the printer’s configuration is
set according to Table 3 on page 10.
When diagnostics are complete:
1
Power off the printer and wait 15
seconds
2
Set the address switch back to the
original position
3
Power on the printer and resume
normal operation
Multi–Platform Interface Feature Operation Guide
51
Troubleshooting your Host Printer Operation
If any problems occur while running the
Printer Verification Test in either twinax or
coax host system check the following:
1
Verify that you have assigned the
correct address setting to the printer.
(Twinax Only)
2
Verify that the address in the system
configuration matches the address
setting on the printer. (Twinax Only)
3
Verify that the device type in the system
configuration is correct for the type of
printer that is being emulated. This
emulation is set using the interface
configuration switches SW1-1 and
SW1-2. Your emulation options for
twinax mode are 4214, 4234, 5225 or
5256. In the coax operating mode, 3287
or 3262 are available.
4
Verify that the cable to the device
immediately "up cable" on the twinax
line is correctly connected. That is, if
there is an "up cable" device, does the
cable from that device originate at the
"OUT" connection. (Twinax Only)
5
Verify that the device immediately "up
cable" is functioning properly. (Twinax
only)
6
Verify that the device immediately
"down cable" is functioning properly.
(Twinax Only)
7
Verify that the I/O switch settings on the
last device on this line has been set to
the "TERM" position. (Twinax Only)
8
Verify that the printer is properly
configured (see page 10).
52
Multi–Platform Interface Feature Operation Guide
9
Verify that the Multi–Platform
Interface’s configuration switch settings
are correct (See Table 1 on page 6
(twinax) or See Table 2 on page 7
(coax)).
10 Put the MPI in coax or twinax code
dump mode and print the job in
hexadecimal format. Use this printout to
verify data from the host.
11 With the MPI not in code dump mode,
set the printer configuration to Hex Print
Mode and print the job. Use the printout
to verify the hexadecimal output of the
MPI going to the printer.
12 With no host cable attached, the LEDs
will light briefly (about 1 second) when
the MPI has completed initialization. If
the LEDs do not do this, the MPI's
power connection may be faulty.
Multi–Platform Interface Feature Operation Guide
53
Compatibility Issues
The following are issues that may arise
when implementing the printer in the host
environment.
Cancel Key
When the user presses the printer's
CANCEL key, nothing is reported to the
host application. The MPI does not send a
message to the host application to cancel
the print job.
Coax PA Keys
The MPI does not have coax PA1 or PA2
device response capability.
54
Multi–Platform Interface Feature Operation Guide
compatibility issues
Error Messages
The following tables show error messages
as reported to the host system and the
causes of those messages. These are the
only error messages the MPI reports to the
Twinax or Coax host.
Table 9 Twinax Error Messages
Error Reported
Cause
Unit Not Available
Printer Offline
Unit Not Available, End of Forms
Paper Error
Exception Status Codes
Invalid Activate
Invalid Command
Overrun
Power On Transition
Twinax Protocol Error
Twinax Protocol Error
Twinax Protocol Error
Power On Transition
Invalid SCS Control Code
Invalid Control Code
Invalid SCS Parameter
Invalid Parameter
Graphic Check
Unprintable character detected
after receipt of a “set graphic
exception action”
Table 10
Coax Error Messages
Error Reported
Cause
Intervention Required
Paper Out (if enabled, after
timeout)
Order Reject
Invalid Order Detected
Invalid Parameter
Invalid Parameter in SCS data
stream
Multi–Platform Interface Feature Operation Guide
55
compatibility issues
Switching between Serial ASCII and Parallel ASCII
To switch between Serial ASCII and
Parallel ASCII, the operator must
reconfigure the printer interface selection
from the operator panel by selecting a
custom set that used the correct ASCII
interfaces. This is because the MPI
interface communicates through the
Parallel ASCII port.
56
Multi–Platform Interface Feature Operation Guide
Appendix A: Defining a Printer in S/370-S/390
Environments
—
Overview . . . . . . . . . . . . . . . . . . . . . . . . . . . . . . . . . 58
—
6400-LU1-SCS-Local SNA 3174 Control Unit . . . . . . 59
—
6400-LU1-SCS-Remote SNA 3174 Control Unit . . . . 61
—
6400-LU3-DSE-Local SNA 3174 Control Unit . . . . . . 63
—
6400-LU3-DSE-Remote SNA 3174 Control Unit . . . . 65
—
6400-LU0-DSC-Local Non-SNA 3174 Control Unit . . 67
Multi–Platform Interface Feature Operation Guide
57
Overview
It is necessary to define a printer in the
S/370-S/390 environment to VTAM, JES2,
POWER, PSF, VPS, JES328X Print Facility,
NCP, VM, VSE, MVS, and/or other software
depending upon your operating environment
and printing requirements. The following are
examples of the type of setups that are
required.
58
Multi–Platform Interface Feature Operation Guide
6400-LU1-SCS-Local SNA 3174 Control Unit
LU1-SCS mode is utilized when neither PSF
support nor IPDS is required to accomplish
the print function desired. An existing local
3174 SNA-connected control unit is
assumed. The steps required to install a
local LU1-SCS printer for host definitions
are as follows:
1.
2.
3.
4.
Define to VTAM by adding logmode
entry to VTAM Logmode Table
Define to JES2 (not required but
recommended. See details below)
Define to CICS or another Application
Program such as VPS or JES328X
products.
Select the options on the printer that
are appropriate for the environment.
Step 1 – VTAM Definition
The following should be added to the Local
Major Node VTAM definition. The printer will
be attached as an LU1-SCS capable printer.
LOC3174 VBUILD TYPE=LOCAL
LOCPU74 PU
CUADDR=nnn...
LOC64XX LU
LOCADDR=n,MODETAB=MYMODETB,DLOGMODE=64XXSCSL,
ISTATUS=ACTIVE
The following entry should be placed in the
VTAM MODE TABLE specified above or
another of your choice.
64XXSCSL MODEENT LOGMODE=64XXSCSL,
FMPROF=X'03',TSPROF=X'03',PRIPROT=X'B1'
SECPROT=X'90',COMPROT=X'3080',RUSIZES=X'8787',
PSERVIC=X'01000000E100000000000000',
PSNDPAC=X'02',SRCVPAC=X'02',SSNDPAC=X'00'
Multi–Platform Interface Feature Operation Guide
59
Step2 – JES2 Definition (SYS1.PARMLIB)
RMT1
R1.PR1
DESTID
LUTYPE1,BUFSIZE=3840,LINE=1,NUMRD=0,NUMPR=1,NOCOMP,
NOCMPCT,SETUPHDR,CONSOLE
CLASS=A,NOSEP,PRWIDTH=132,NOFCBLOD,WS=(W,R,Q,PMD,LIM,
F,T/C,P),CKTPAGE=30
NAME=LOC64XX,DEST=R1
Step 3 – Define to CICS or another
application program
An application program must provide the
SCS commands to control the printer. CICS,
VPS, and other applications support SCS as
well as numerous application programs,
both customer written and vendor supplied.
Refer to the vendor documentation for
defining an SCS printer to the program for
its use. If there is no specific information on
the 64XX you may use the IBM 4234 for
reference.
60
Multi–Platform Interface Feature Operation Guide
6400-LU1-SCS-Remote SNA 3174 Control Unit
LU1-SCS mode is utilized when neither
IPDS nor PSF is needed to accomplish the
print function desired. An existing remote
3174 SNA-connected control unit is
assumed. The steps required to install a
remote LU1-SCS printer for host definitions
are as follows:
1.
2.
3.
4.
5.
Define to NCP, point to LU1 Logmode
entry defined below
Define to VTAM by adding logmode
entry to VTAM Logmode Table
Define to JES2 (May not be required if
VPS. See details below)
Define to JES328X Print Facility, VPS,
or equivalent product.
Select the options on the printer that
are appropriate for the environment.
Step 1 – NCP Definition
XYZ
GROUP TYPE=NCP,...
LINK ADDRESS=(032),...
REMPU74 PU
ADDR=C1,...
REM64XX LU
LOCADDR=#, (# replaced by port on control
unit)
DLOGMOD=64XXSCSR,(Default LOGMODE ENTRY NAME)
MODETAB=MYTABLE (Table name containing MODEENT)
*
Step 2 – VTAM Definition
* The following entry should be placed in
the VTAM MODE TABLE specified above
or another of your choice.
64XXSCSR MODEENT LOGMODE=64XXSCSR,
FMPROF=X'03',TSPROF=X'03',PRIPROT=X'B1'
SECPROT=X'90',COMPROT=X'3080',RUSIZES=X'87C6',
PSERVIC=X'01000000E100000000000000',
PSNDPAC=X'01',SRCVPAC=X'01'
Multi–Platform Interface Feature Operation Guide
61
Step 3 – JES2 Definition
This definition is not required if you are
using VPS and using U1-U9999 as the
printer ID.
RMT1
R1.PR1
DESTID
LUTYPE1,BUFSIZE=3840,LINE=1,NUMRD=0,NUMPR=1,NOCOMP,
NOCMPCT,SETUPHDR,CONSOLE (SETUPHDR=PDIR JES2 V3)
CLASS=A,NOSEP,PRWIDTH=132,NOFCBLOD,WS=(W,R,Q,PMD,LIM,
F,T/C,P),CKPTPAGE=30
NAME=P64XX,DEST=R1
Step 4 – Define to CICS or another
application program
An application program must provide the
SCS commands to control the printer. CICS,
VPS, and other applications support SCS as
well as numerous application programs,
both customer written and vendor supplied.
Refer to the vendor documentation for
defining an SCS printer to the program for
its use. If there is no specific information on
the 64XX you may use the IBM 4234 for
reference.
62
Multi–Platform Interface Feature Operation Guide
6400-LU3-DSE-Local SNA 3174 Control Unit
LU3-DSE mode is utilized when no host
printing controls are required to accomplish
the print function desired. The printer
settings will be used and cannot be
overridden by the host system. An existing
local 3174 SNA-connected control unit is
assumed. The steps required to install an
LU3-DSE printer for host definitions are as
follows:
1.
2.
3.
4.
Define to VTAM by adding logmode
entry to VTAM Logmode Table
Define to JES2 (Not required but
recommended. See details below)
Define to CICS or another Application
Program such as VPS or JES328X
products.
Select the options on the printer that
are appropriate for the environment.
Step 1 – VTAM Definition
The following should be added to the Local
Major Node VTAM definition.
LOC3174 VBUILD TYPE=LOCAL
LOCPU74 PU
CUADDR=nnn...
LOC64XX LU
LOCADDR=n,MODETAB=MYMODETB,
DLOGMODE=64XXDSEL,ISTATUS=ACTIVE
The following entry should be placed in the
VTAM MODE TABLE specified above or
another of your choice.
64XXDSEL MODEENT LOGMODE=64XXDSEL,
FMPROF=X'03',TSPROF=X'03',PRIPROT=X'B1'
SECPROT=X'20',COMPROT=X'3080',RUSIZES=X'C7C7,
PSERVIC=X'038000000000185018507F00',
PSNDPAC=X'00',SRCVPAC=X'00',SSNDPAC=X'00'
Multi–Platform Interface Feature Operation Guide
63
Step2 – JES2 Definition (SYS1.PARMLIB)
RMT1
R1.PR1
DESTID
LUTYPE3,BUFSIZE=3840,LINE=1,NUMRD=0,NUMPR=1,NOCOMP,
NOCMPCT,SETUPHDR,CONSOLE
CLASS=A,NOSEP,PRWIDTH=132,NOFCBLOD,WS=(W,R,Q,PMD,LIM,
F,T/C,P),CKTPAGE=30
NAME=LOC64XX,DEST=R1
Step 3 – Define to CICS or another
application program
Refer to the vendor documentation for
defining a DSE printer to the program for its
use. Host system commands to change
printer setting are not supported in DSE
mode.
Step 4 – Printer Settings
In LU3 mode the printer settings control the
CPI, LPI and all other aspects of the printed
output. Therefore, you must set the printer
settings to match the characteristics of the
job you are printing. Host controls are not
supported in this mode, except for the coax
Command Interpreter commands on page
19.
64
Multi–Platform Interface Feature Operation Guide
6400-LU3-DSE-Remote SNA 3174 Control Unit
LU3-DSE mode is utilized when host
controls are not needed to accomplish the
print function desired. An existing remote
3174 SNA-connected control unit is
assumed. The steps required to install a
local LU3-DSE printer for host definitions
are as follows:
1.
2.
3.
4.
5.
Define to NCP point to LU3 default
logmode entry defined below
Define to VTAM by adding logmode
entry to VTAM Logmode Table
Define to JES2 (May not be required if
VPS. See details below)
Define to JES328X Print Facility, VPS,
or equivalent product.
Select the options on the printer that
are appropriate for the environment.
Step 1 – NCP Definition
XYZ
GROUP TYPE=NCP,...
LINK ADDRESS=(032),...
PU
ADDR=C1,...
&luname LU
LOCADDR=#,
(# replaced by port on control
unit)
DLOGMOD=64XXDSER,(Default LOGMODE ENTRY NAME)
MODETAB=MYTABLE (Table name containing MODEENT)
*
Step 2 – VTAM Definition
* The following entry should be placed in
the VTAM MODE TABLE specified above
or another of your choice.
64XXDSER MODEENT LOGMODE=64XXDSER,
FMPROF=X'03',TSPROF=X'03',PRIPROT=X'B1'
SECPROT=X'90',COMPROT=X'3080',RUSIZES=X'87C6',
PSERVIC=X'038000000000185018507F00',
PSNDPAC=X'01',SRCVPAC=X'01'
Step 3 – JES2 Definition
This definition is not required if you are
using VPS and using U1-U9999 as the
Multi–Platform Interface Feature Operation Guide
65
printer ID.
RMT1
R1.PR1
DESTID
LUTYPE3,BUFSIZE=3840,LINE=1,NUMRD=0,NUMPR=1,NOCOMP,
NOCMPCT,SETUPHDR,CONSOLE (SETUPHDR=PDIR JES2 V3)
CLASS=A,NOSEP,PRWIDTH=132,NOFCBLOD,WS=(W,R,Q,PMD,LIM,
F,T/C,P),CKPTPAGE=30
NAME=P64XX,DEST=R1
Step 4 – Define to CICS or another
application program
Refer to the vendor documentation for
defining a DSE printer to the program for its
use. Host system commands to change
printer settings are not supported in DSE
mode.
Step 5 – Printer Settings
Since the host controls are not supported,
the printer settings for CPI, LPI, and others
should be set at the printer. (See User’s
Guide beginning on page 8-14)
66
Multi–Platform Interface Feature Operation Guide
6400-LU0-DSC-Local Non-SNA 3174 Control Unit
LU0-DSC mode is utilized when host
controls are not needed to accomplish the
print function desired and the control unit is
attached by a VTAM-Controlled NON-SNA
Control Unit. An existing local 3174 NONSNA-connected control unit is assumed.
The steps required to install a local LU0DSC printer for host definitions are as
follows:
1.
2.
3.
4.
Define to VTAM by adding logmode
entry to VTAM Logmode Table
Define to JES2 (NOT required but
recommended. See details below)
Define to CICS or another Application
Program such as VPS or JES328X
products.
Select the options on the printer that
are appropriate for the environment.
Step 1 – VTAM Definition
The following should be added to the Local
Major Node VTAM definition.
LOC3174 VBUILD TYPE=LOCAL
LOCPU74 PU
CUADDR=nnn...
LOC64XX LU
LOCADDR=n,MODETAB=MYMODTB,DLOGMODE=64XXDSCL,
ISTATUS=ACTIVE
The following entry should be placed in the
VTAM MODE TABLE specified above or
another of your choice.
64XXDSCL MODEENT LOGMODE=64XXDSCL,
FMPROF=X'02',TSPROF=X'02',PRIPROT=X'60'
SECPROT=X'40',COMPROT=X'0000',RUSIZES=X'C7C7',
PSERVIC=X'000000000000185018507F00',
PSNDPAC=X'80',SRCVPAC=X'00',SSNDPAC=X'00'
Multi–Platform Interface Feature Operation Guide
67
Step2 – JES2 Definition (SYS1.PARMLIB)
RMT1
R1.PR1
DESTID
LUTYPE0,BUFSIZE=3840,LINE=1,NUMRD=0,NUMPR=1,NOCOMP,
NOCMPCT,SETUPHDR,CONSOLE
CLASS=A,NOSEP,PRWIDTH=132,NOFCBLOD,WS=(W,R,Q,PMD,LIM,
F,T/C,P),CKPTAGE=30
NAME=LOC64XX,DEST=R1
Step 3 – Define to CICS or another
application program
Host commands for changing printer
settings are not supported in this mode.
Refer to the vendor documentation for
defining an DSC printer to the program for
its use.
Step 4 – Printer Settings
In LU0 mode the printer settings control the
CPI, LPI and all other aspects of the printed
output. Therefore, you must set the printer
settings to match the characteristics of the
job you are printing. Host controls are not
supported in this mode, except for the coax
Command Interpreter commands on page
19.
68
Multi–Platform Interface Feature Operation Guide
Appendix B: Describing Custom Set 8
—
Printer Configuration . . . . . . . . . . . . . . . . . . . . . . . . . 70
Multi–Platform Interface Feature Operation Guide
69
printer configuration
Printer Configuration
The following is a listing of the values stored
in Custom Set 8. If you are experiencing
problems printing jobs, you may need to
change values contained in Custom Set 8.
Detailed descriptions of the values
contained in Custom Set 8 (and all custom
sets) are provided in the IBM Line Matrix
Printer, 6400 Setup Guide, S246-0116.
70
Multi–Platform Interface Feature Operation Guide
printer configuration
Custom Set 8 (partial)
PRINTER CONTROL
INTERFACE SELECTION
PARALLEL
DISPLAY LANGUAGE
ENGLISH
ALARM CONTROL
ALARM ENABLE
PRINT DIRECTION
BIDIRECTIONAL
HEX PRINT MODE
DISABLE
POWER ON STATE
READY
PAPER JAM DETECTION
ENABLE
FORMS SPEED
NORMAL SPEED
SET PLATEN AT BOTTOM OF FORM
DISABLE
SHUTTLE TIMEOUT
20 SECONDS
ENERGY SAVER TIMER
15 MINUTES
OCR FONT DENSITY
120 DOTS PER INCH
EJECT/RESTORE
STANDARD
CONFIGURATION MANAGEMENT
RECALL CUSTOM SET
FACTORY DEFAULT
SAVE CURRENT VALUES
1
DELETE CUSTOM SET
1
CHANGE POWER ON SET
FACTORY DEFAULT
PROTECT CUSTOM SETS
DISABLE
PRINT CUSTOM SET VALUES
CUSTOM/PRELOADED SET 8
PARALLEL INTERFACE
INTERFACE TYPE
PC PARALLEL
PC PARALLEL
DATABIT 8
ENABLE
DATA POLARITY
STANDARD
STROBE POLARITY
STANDARD
RESPONSE POLARITY
STANDARD
BUSY ON STROBE
ENABLE
LATCH DATA ON
TRAILING EDGE
PRIME SIGNAL
DISABLE
TOF ACTION AT PRIME SIGNAL
FORM FEED AT RESET
BUFFER SIZE IN KILOBYTES
1
DATAPRODUCTS
DATABIT 8
ENABLE
PI IGNORED
ENABLE
DATA POLARITY
STANDARD
DATA REQUEST POLARITY
STANDARD
STROBE POLARITY
STANDARD
SERIAL INTERFACE
INTERFACE TYPE
RS 232
DATA PROTOCOL
XON/XOFF
BAUD RATE
9600 BAUD
DATA BITS
8
STOP BITS
1
PARITY
NONE
DATA TERMINAL READY
READY AND BUFFER NOT FULL
REQUEST TO SEND
READY AND BUFFER NOT FULL
BUFFER SIZE IN KILOBYTES
1
POLL CHARACTER
00 HEX
ONE CHAR ENQUIRY
DISABLE
EMULATION CONFIGURATION
ASCII PRINTER EMULATION
P-SERIES EMULATION
PRINTER EMULATION CONFIGURATIONS
Multi–Platform Interface Feature Operation Guide
71
printer configuration
PROPRINTER III XL EMULATION
PRINT LANGUAGE
ALTERNATE CHARACTER SET
DEFINE CR CODE
AUTO LF
DEFINE LF CODE
FF VALID AT TOF
20 CPI CONDENSED
EPSON EMULATION
CHARACTER SETS
EPSON PRINT LANGUAGE
DEFINE CR CODE
AUTO LF
DEFINE LF CODE
PRINTER SELECT
20 CPI CONDENSED
P-SERIES EMULATION
CHARACTER SETS
PRINT LANGUAGE
IBM PC
SELECT SUBSET PRIMARY
SELECT SUBSET EXTENDED
MULTINATIONAL
ECMA LATIN 1
SELECT SUBSET PRIMARY
SELECT SUBSET EXTENDED
DEC MULTINATIONAL
CONTROL CODE 06
CONTROL CODE 08
DEFINE CR CODE
AUTO LF
OVERSTRIKE
DEFINE LF CODE
SELECT SFCC
EVFU SELECT
ALTERNATE SET 80-9F
P-SERIES XQ EMULATION
CONTROL CODE 06
DEFINE CR CODE
AUTO LF
DEFINE LF CODE
COMPRESSED PRINT
ELONG/ALT. FONT
HIGH SPEED PRINT MODE
EVFU SELECT
UPPER CASE SELECT
SLEW RELATIVE
SERIAL MATRIX EMULATION
CHARACTER SETS
PRINT LANGUAGE
IBM PC
SELECT SUBSET PRIMARY
SELECT SUBSET EXTENDED
MULTINATIONAL
ECMA LATIN 1
SELECT SUBSET PRIMARY
72
0437 PC CHARACTER SET
PC CHARACTER SET 1
CR = CR
ENABLE
LF = LF
ENABLE
ENABLE
0850 PC MULTILINGUAL
ASCII (USA)
CR = CR
DISABLE
LF = LF
DISABLE
ENABLE
IBM PC
ASCII (USA)
0850 PC MULTILINGUAL
ASCII (USA)
ASCII (USA)
MULTINATIONAL
ASCII (USA)
8.0 LPI
ELONGATED
CR = CR
DISABLE
ENABLE
LF = CR + LF
1
ENABLE
PRINTABLE
8.0 LPI
CR=CR
DISABLE
LF = CR + LF
CHAR 01 SOH
ELNG =BS FONT =SO
CHAR 02 STX
ENABLE
DISABLE
1 TO 16 LINES
IBM PC
ASCII (USA)
0850 PC MULTI-LINGUAL
ASCII (USA)
ASCII (USA)
Multi–Platform Interface Feature Operation Guide
printer configuration
SELECT SUBSET EXTENDED
DEC MULTINATIONAL
CONTROL CODE 06
DEFINE CR CODE
AUTO LF
OVERSTRIKE
DEFINE LF CODE
PRINTER SELECT
ALTERNATE SET 80-9F
PRINT FORMAT
CHARACTERS PER INCH
LINES PER INCH
FORMS WIDTH
FORMS WIDTH IN INCHES
FORMS WIDTH IN MM
FORMS WIDTH IN CHARACTERS
FORMS LENGTH
FORMS LENGTH IN INCHES
FORMS LENGTH IN MM
FORMS LENGTH IN LINES
PRINT QUALITY
PRINT CHARACTER TABLE
PRINT ATTRIBUTES
PROPORTIONAL SPACING
ITALIC PRINT
SLASHED ZERO
MARGINS
LEFT MARGIN
RIGHT MARGIN
BOTTOM MARGIN
PERFORATION SKIP
RESET COMMAND
OPERATOR PRINT TESTS
Multi–Platform Interface Feature Operation Guide
MULTINATIONAL
ASCII (USA)
8.0 LPI
CR = CR
DISABLE
ENABLE
LF = LF
DISABLE
PRINTABLE
10.0 CHARACTERS PER INCH
6.0 LINES PER INCH
13.2 INCHES
335.3 MM
132 CHARACTERS
11.0 INCHES
279.4 MM
66 LINES
DP QUALITY
DISABLE
DISABLE
DISABLE
0 CHARACTERS
0 CHARACTERS
0 LINES
DISABLE
LOAD FACTORY
PRINTER DEMONSTRATION
73
Appendix C: Illustrated Parts List
74
—
Hardware Assemblies . . . . . . . . . . . . . . . . . . . . . . . 75
—
Cable Assemblies . . . . . . . . . . . . . . . . . . . . . . . . . . 76
Multi–Platform Interface Feature Operation Guide
hardware assemblies
Hardware Assemblies
Multi–Platform Interface Feature Operation Guide
75
cable assemblies
Cable Assemblies
76
Multi–Platform Interface Feature Operation Guide
cable assemblies
Multi–Platform Interface Feature Operation Guide
77
Length: 39"
cable assemblies
Part No.
14H5335
78
Description
Cable Assembly, Twinax Auto-termination
Multi–Platform Interface Feature Operation Guide
Appendix D: Installing the MPI on the Printer
—
Introduction . . . . . . . . . . . . . . . . . . . . . . . . . . . . . . . 80
—
Accessing the card-cage . . . . . . . . . . . . . . . . . . . . . 81
—
Preparing the printer for MPI Installation . . . . . . . . . 82
—
Installing the MPI Card in the Printer . . . . . . . . . . . . 83
—
Attaching the MPI Label . . . . . . . . . . . . . . . . . . . . . . 84
—
Checking the MPI Installation . . . . . . . . . . . . . . . . . . 85
Multi–Platform Interface Feature Operation Guide
79
Introduction
In most cases the MPI Feature will already
be installed on the printer. If it is not,
contact IBM service to have this feature
installed by IBM service personnel. The
following instructions are for trained service
personnel only.
Before installing the card, print the 6400
configuration and graphics option
configuration. Retain these for possible
reference.
To complete this installation you will need:
!
!
!
!
!
A standard screwdriver (flat blade)
A Phillips screwdriver
¼ inch wrench
5
/16 inch wrench
An Electro-Static Discharge (ESD) strap
danger
Disconnect the printer from power
before proceeding with any installation.
80
Multi–Platform Interface Feature Operation Guide
hardware installation
Accessing the card-cage
danger
Disconnect the printer from any and all
power before proceeding with any
installation.
To access the Card–Cage:
1
Open the Printer Cover. Unload any
paper.
2
Loosen the hold-down screws.
3
Lift slightly the right end and slide the
Paper Guide Assembly to the left. Lift
the paper guide assembly off the card
cage. (See Figure 6 )
Figure 6
Put the paper guide assembly to the side
for later re-installation.
Multi–Platform Interface Feature Operation Guide
Paper guide
removal
81
hardware installation
Preparing the printer for MPI Installation
The next step in installing the
Multi-Platform Interface Feature into the
printer is to disconnect the PC parallel
connector that is currently installed in the
printer and open the interface expansion
slot
To remove the interface:
1
With the printer’s rear cabinet door
open, remove the interface expansion
slot cover panel. The cover is held
down by two screws located at the
bottom of the cover; loosen these
screws.
warning
Use ESD strap or discharge static
electricity before touching the controller
board.
Figure 7
2
82
Disconnect the data cable coming
from the Centronics port from
connector J112 on the printer’s
Controller Board.
PC parallel connector
and interface expansion
slot.
Multi–Platform Interface Feature Operation Guide
hardware installation
Installing the MPI Card in the Printer
The next step is to install the MPI card as
described below.
danger
Disconnect the printer from power
before proceeding with any installation.
1
Install supplied standoff into the
mounting hole next to connector J111
on the printer’s Controller Board.
2
Connect MPI data cable connector
P112 to J112 on the printer’s
Controller Board. This connector is
keyed to prevent incorrect connection.
(See Figure 8 )
3
To supply power to the Multi–Platform
Interface, you must connect the
interface PCBA to connector J111 of
the printer's Controller Board using the
supplied 60-pin connection header.
Figure 8
PCBA Installation
Multi–Platform Interface Feature Operation Guide
83
hardware installation
4
Using two of the supplied Phillips
screws, mount the controller I/O
assembly in the area formerly
occupied by the printer's interface
expansion slot cover.
Use the third Phillips screw to mount
the Multi-Platform PCBA to the
standoff, installed earlier, located on
the printer’s mother board next to
connector J111. (See Figure 8 )
5
Connect the printer’s Centronics data
cable to the connector P3 on the MultiPlatform Interface PCBA. This will
supply connection to the PC
environment.
Make certain that none of the cables are Figure 9
pinched by the installation of the MPI card.
Printer interface area
after installing the
Multi-Platform
Interface
Attaching the MPI Label
Attach the MPI Label, part number
145594, on the printer, near the MPI. This
label provides information about the MPI
connections and is needed, if service is
required.
84
Multi–Platform Interface Feature Operation Guide
hardware installation
Checking the MPI Installation
Once you have verified that the connectors
and boards are securely connected, reinstall the Paper Guide Assembly to the
card cage.
Reconnect the AC power cord and run the
built-in diagnostics as described in the
Troubleshooting section of this manual.
Multi–Platform Interface Feature Operation Guide
85
Appendix E: Host Character Sets
86
—
Twinax Character Sets . . . . . . . . . . . . . . . . . . . . . . . 87
—
Coax Character Sets . . . . . . . . . . . . . . . . . . . . . . . . 91
Multi–Platform Interface Feature Operation Guide
twinax character sets
Twinax Character Sets
Multinational EBCDIC Character Set
0
1
2
3
4
5
6
7
8
9
A
B
C
D
E
F
&
-
ø
Ø
°
µ
¢
{
}
\
0
é
/
É
a
j
~
£
A
J
â
ê
Â
Ê
b
k
s
¥
B
K
S
2
á
ë
Ä
Ë
c
l
t
•
C
L
T
3
ä
è
À
È
d
m
u
ƒ
D
M
U
4
à
í
Á
Í
e
n
v
§
E
N
V
5
ã
î
Ã
Î
f
o
w
¶
F
O W
6
å
ï
Å
Ï
g
p
x
¼
G
P
X
7
ç
ì
Ç
Ì
h
q
y
½
H
Q
Y
8
ñ
ß
Ñ
`
i
r
z
¾
I
R
Z
9
[
]
|
:
*
ª
¡
^
-
¹
²
³
.
$
,
#
+
º
¿
|
ô
û
Ô
Û
<
*
% @
ð
æ
Ð
¯
ö
ü
Ö
Ü
(
)
_
'
ý
¸
Ý
¨
ò
ù
Ò
Ù
+
;
>
=
þ Æ
Þ
´
ó
ú
Ó
Û
!
^
?
"
±
®
=
õ
ÿ
Õ
–
0
1
2
3
4
5
6
7
8
9
A
B
C
D
E
F
Multi–Platform Interface Feature Operation Guide
¤
1
87
twinax character sets
USA EBCDIC Character Set
0
1
2
3
4
5
6
7
8
9
A
B
C
D
E
F
&
-
ø
Ø
°
µ
^
{
}
\
0
é
/
É
a
j
~
£
A
J
â
ê
Â
Ê
b
k
s
¥
B
K
S
2
á
ë
Ä
Ë
c
l
t
•
C
L
T
3
ä
è
À
È
d
m
u
ƒ
D
M
U
4
à
í
Á
Í
e
n
v
§
E
N
V
5
ã
î
Ã
Î
f
o
w
¶
F
O W
6
7
å
ï
Å
Ï
g
p
x
¼
G
P
X
7
8
ç
ì
Ç
Ì
h
q
y
½
H
Q
Y
8
9
ñ
ß
Ñ
`
i
r
z
¾
I
R
Z
9
A
¢
!
|
:
*
ª
¡
[
-
¹
²
³
B
.
$
,
#
+
º
¿
]
ô
û
Ô
Û
C
<
*
% @
ð
æ
Ð
¯
ö
ü
Ö
Ü
D
(
)
_
'
ý
¸
Ý
¨
ò
ù
Ò
Ù
E
+
;
>
=
þ Æ
Þ
´
ó
ú
Ó
Û
F
|
^
?
"
±
®
=
õ
ÿ
Õ
–
0
1
2
3
4
5
6
88
¤
1
Multi–Platform Interface Feature Operation Guide
twinax character sets
Austria/Germany EBCDIC Character Set
0
1
2
3
4
5
6
7
8
9
A
B
C
D
E
F
&
-
ø
Ø
°
µ
¢
ä
ü
ö
0
{
/
É
a
j
¯
£
A
J
â
ê
Â
Ê
b
k
s
¥
B
K
S
2
{
ë
Ä
Ë
c
l
t
•
C
L
T
3
ä
}
À
È
d
m
u
ƒ
D
M
U
4
à
í
Á
Í
e
n
v @
E
N
V
5
ã
î
Ã
Î
f
o
w
¶
F
O W
6
7
å
ï
Å
Ï
g
p
x
¼
G
P
X
7
8
ç
ì
Ç
Ì
h
q
y
½
H
Q
Y
8
9
ñ
ß
Ñ
`
i
r
z
¾
I
R
Z
9
A
á
'
ù
:
*
ª
¡
^
-
¹
²
³
B
.
$
,
#
+
º
¿
|
ô
û
Ô
Û
C
<
*
%
§
ð
æ
Ð
¯
|
}
\
]
D
(
)
_
'
ý
¸
Ý
~
ò
ù
ò
Ù
E
+
;
>
=
þ Æ
Þ
]
ó
ú
Ó
Û
F
!
^
?
"
±
®
=
õ
ÿ
Õ
–
0
1
2
3
4
5
6
Multi–Platform Interface Feature Operation Guide
¤
1
89
twinax character sets
French Canadian EBCDIC Character Set
0
1
2
3
4
5
6
7
8
9
A
B
C
D
E
F
&
-
ø
Ø
°
µ
¢
é
è
¸
0
é
/
É
a
j
~
£
A
J
â
ê
Â
Ê
b
k
s
¥
B
K
S
2
ä
ë
Ä
Ë
c
l
t
•
C
L
T
3
[
è
À
È
d
m
u
ƒ
D
M
U
4
à
í
Á
Í
e
n
v
§
E
N
V
5
ã
î
Ã
Î
f
o
w
¶
F
O W
6
7
å
ï
Å
Ï
g
p
x
¼
G
P
X
7
8
ç
ì
Ç
Ì
h
q
y
½
H
Q
Y
8
9
ñ
ß
Ñ
`
i
r
z
¾
I
R
Z
9
A
[
]
|
:
*
ª
¡
^
-
¹
²
³
B
.
$
,
#
+
º
¿
|
ô
û
Ô
Û
C
<
*
% @
ð
æ
Ð
¯
ö
ü
Ö
Ü
D
(
)
_
'
ý
¸
Ý
¨
ò
|
Ò
Ù
E
+
;
>
=
þ Æ
Þ
´
ó
ú
Ó
Û
F
!
^
?
"
±
®
=
õ
ÿ
Õ
–
0
1
2
3
4
5
6
90
¤
1
Multi–Platform Interface Feature Operation Guide
coax character sets
Coax Character Sets
USA Internal 3270 Character Set
0
1
0
2
3
4
5
6
7
8
9
A
B
0
&
à
ä
À
Ä
a
q
A Q
1
=
1
-
è
ë
È
Ë
b
r
B
R
2
'
2
.
ì
ï
Ì
Ï
c
s
C
S
3
"
3
,
ò
ö Ò
Ö
d
t
D
T
4
/
4
:
ù
ü
Ù
Ü
e
u
E
U
5
\
5
+
ã
â
Ã
Â
f
v
F
V
6
|
6
^
ð
ê Õ
Ê
g
w G W
7
|
7
¯
&
î
Y
Î
h
x
H
X
°
á
ô
A Ô
i
y
I
Y
é
û
E
Û
j
z
J
Z
8
>
?
8
9
<
!
9
A
[
$
ß
ˆ
è
á
E
Á
k æ
K Æ
B
]
¢
§
~
í
é
I
É
l
L Ø
C
)
£
#
¨
ó
í
O
D
(
¥ @
´
ù
ó
U Ó
E
}
¤ %
'
ü
ú
Y
F
{
¤
ç
ñ
C
_
Í m
ø
å M
Å
n
ç
N
Ç
Ú
o
;
O
;
Ñ
p
*
P
*
Multi–Platform Interface Feature Operation Guide
C
D
E
F
91
coax character sets
USA EBCDIC Character Set
0
1
2
3
4
0
5
6
&
/
8
9
A
B
C
D
E
F
{
}
\
0
a
j
~
A
J
2
b
k
s
B
K
S
2
3
c
l
t
C
L
T
3
4
d m
u
D M
U
4
5
e
n
v
E
N
V
5
6
f
o
w
F
O W
6
7
g
p
x
G
P
X
7
8
h
q
y
H Q
Y
8
i
r
z
Z
9
1
`
9
92
7
A
¢
!
|
:
B
.
$
,
#
C
<
* % @
D
(
)
_
'
E
+
;
>
=
F
|
^
?
"
I
R
1
Multi–Platform Interface Feature Operation Guide
coax character sets
UK Internal 3270 Character Set
0
1
0
2
3
4
5
6
7
8
9
A
B
0
&
à
ä
À
Ä
a
q
A Q
1
=
1
-
è
ë
È
Ë
b
r
B
R
2
'
2
.
ì
ï
Ì
Ï
c
s
C
S
3
"
3
,
ò
ö Ò
Ö
d
t
D
T
4
/
4
:
ù
ü
Ù
Ü
e
u
E
U
5
\
5
+
ã
â
Ã
Â
f
v
F
V
6
|
6
^
ð
ê Õ
Ê
g
w G W
7
|
7
¯
&
î
Y
Î
h
x
H
X
°
á
ô
A Ô
i
y
I
Y
é
û
E
Û
j
z
J
Z
8
>
?
8
9
<
!
9
A
[
$
ß
ˆ
è
á
E
Á
k æ
K Æ
B
]
¢
§
~
í
é
I
É
l
L Ø
C
)
£
#
¨
ó
í
O
D
(
¥ @
´
ù
ó
U Ó
E
}
¤ %
'
ü
ú
Y
F
{
¤
ç
ñ
C
_
Í m
ø
å M
Å
n
ç
N
Ç
Ú
o
;
O
;
Ñ
p
*
P
*
Multi–Platform Interface Feature Operation Guide
C
D
E
F
93
coax character sets
UK EBCDIC Character Set
0
1
2
3
4
0
5
6
&
/
8
9
A
B
C
D
E
F
{
}
\
0
a
j
~
A
J
2
b
k
s
B
K
S
2
3
c
l
t
C
L
T
3
4
d m
u
D M
U
4
5
e
n
v
E
N
V
5
6
f
o
w
F
O W
6
7
g
p
x
G
P
X
7
8
h
q
y
H Q
Y
8
i
r
z
Z
9
1
`
9
94
7
A
$
!
|
:
B
.
£
,
#
C
<
* % @
D
(
)
_
'
E
+
;
>
=
F
|
^
?
"
I
R
1
Multi–Platform Interface Feature Operation Guide
coax character sets
Multi–Platform Interface Feature Operation Guide
95
coax character sets
96
Multi–Platform Interface Feature Operation Guide